
1. Floating Corner Desk With Hidden Cable Spine
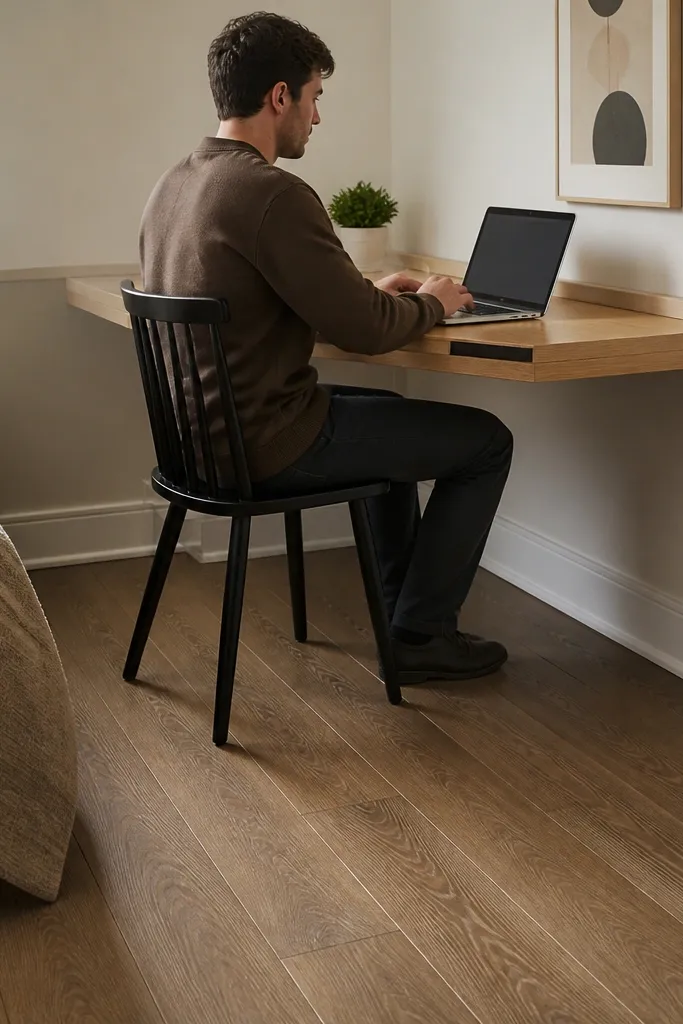
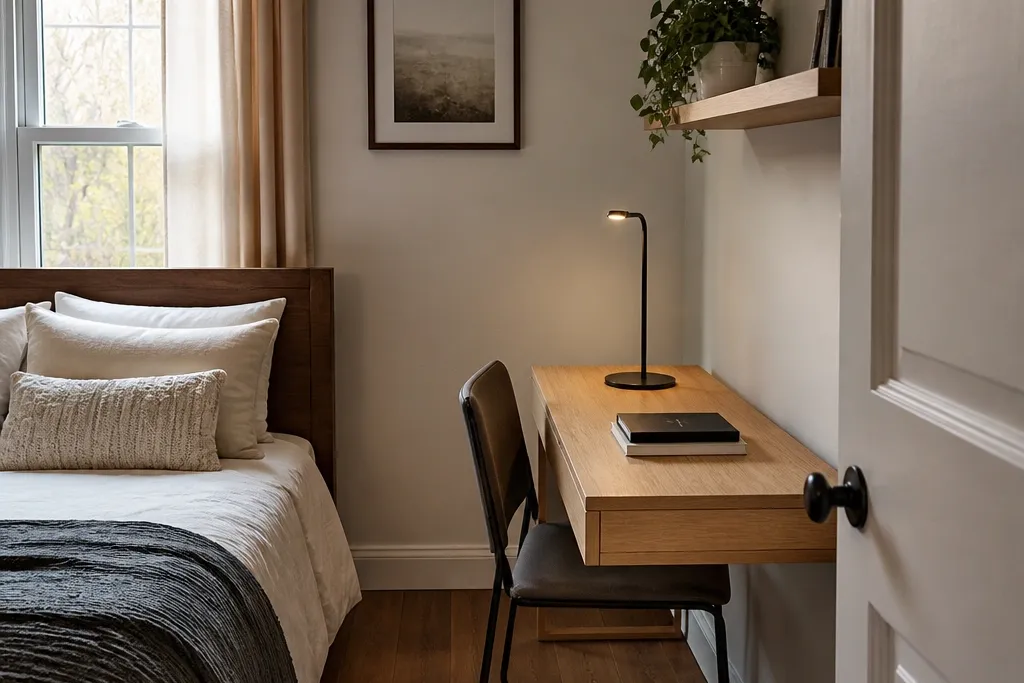
This is the cleanest way to get a real desk without eating floor space. The tabletop floats over a corner, so you keep a wider walking path and the room feels larger. A hidden cable spine under the top makes cords disappear instead of draping down the wall. Use a light wood top with a satin clear coat and a slim painted support frame so it reads airy, not bulky. It’s beginner-friendly because you’re building a simple top and attaching a sturdy frame with proper anchors.
Start by cutting a tabletop from 3/4 in plywood or MDF with a 1/2 in overhang on both sides of the corner. Build a rectangular support frame using 2x2 lumber or 1x3 boards, then attach it to studs with 3 in wood screws and washers. Route a 1 in wide cable channel along the inner face of the frame, then add a small power strip mount on the back. Finish by sanding edges smooth, applying satin clear coat or matte paint, and screwing the tabletop down with countersunk screws.
Pre-drill every screw hole and use a stud finder — corner desks fail when the supports only hit drywall.
Don’t mount the desk to drywall alone; it will sag and wobble within weeks.
2. Lift-Top Desk Bench for Bedside Study Zones
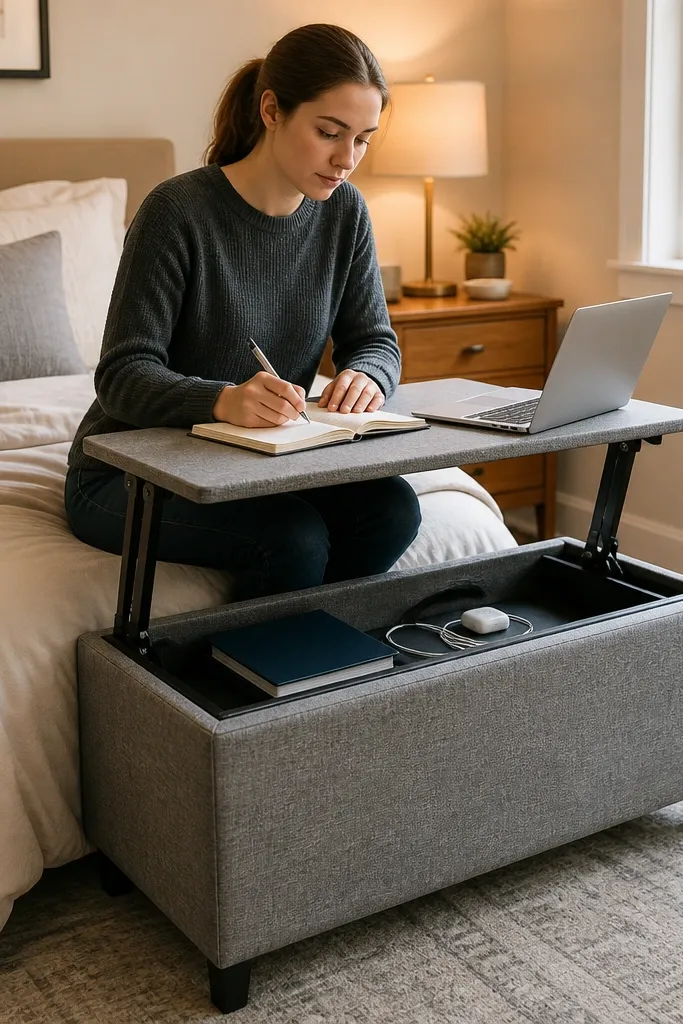
If your bedroom needs both seating and a desk, this is the smartest visual trade. The bench silhouette looks intentional, and the lift-top turns it into a study surface only when you need it. Inside storage keeps paper, chargers, and notebooks out of sight, so the bench stays tidy in photos. Choose a neutral fabric cushion on top or a painted wood lid so it matches your bed frame. This project is beginner-friendly if you’re comfortable with basic box building and installing hinges safely.
Build a simple bench box with 3/4 in plywood: a fixed base, a back panel, and a top lid sized to close flush. Add a hinge system on the back edge of the lid (piano hinge is easiest), then install a lid support method like a gas strut or a simple prop stick. Cut a thin plywood insert for the lid surface if you want a smoother writing feel, then attach it to the lid. Sand all edges, paint or stain, and seal with a satin topcoat so it wipes clean.
Use a foam strip gasket where the lid meets the frame to stop rattles and protect the finish.
Skip heavy hinges without a lid support; an unsupported lid hits the front edge and dents.
3. Narrow Wall-Mounted Desk With Fold-Down Legs
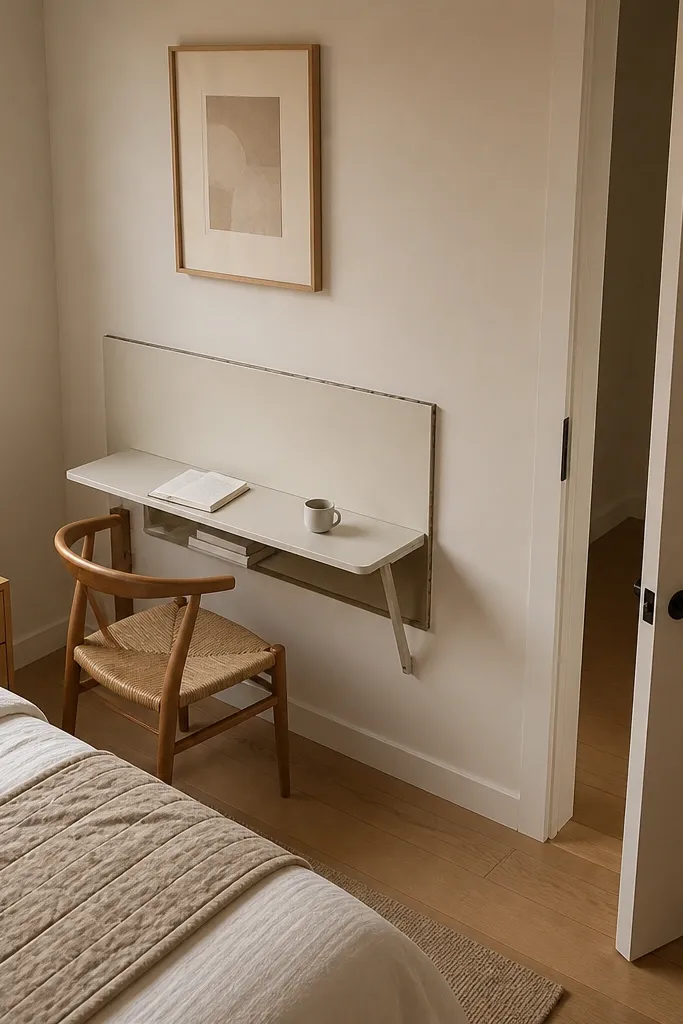
This is the fix for tiny bedrooms where you can’t spare even a few square feet of floor. The desk folds down when you need it and disappears when you don’t, so the wall looks clean. For aesthetics, keep the top edge flush with a slim wall rail and paint everything the same color as the wall. Pair it with a small under-shelf for a lamp or books so the desk doesn’t look empty. It’s beginner-friendly because you’re using pre-made leg hardware and building a simple top and rail.
Mount a horizontal ledger rail into studs at your chosen height (measure from floor to your elbow when seated). Attach the desk top to the rail using a piano hinge or heavy-duty cabinet hinge so it folds down. Install fold-down legs on the underside with the correct bracket plates, then add a small lip or stop block so the top locks flat. Finish by sanding edges, sealing the top, and adding an under-shelf from 1x3 boards for visual balance.
Check leg alignment by testing with the top empty first; misaligned legs cause a wobble you can’t hide.
Don’t mount it too high; a desk that forces your shoulders up looks wrong and feels worse.
4. Corner L-Shaped Desk Using Two Matching Shelves
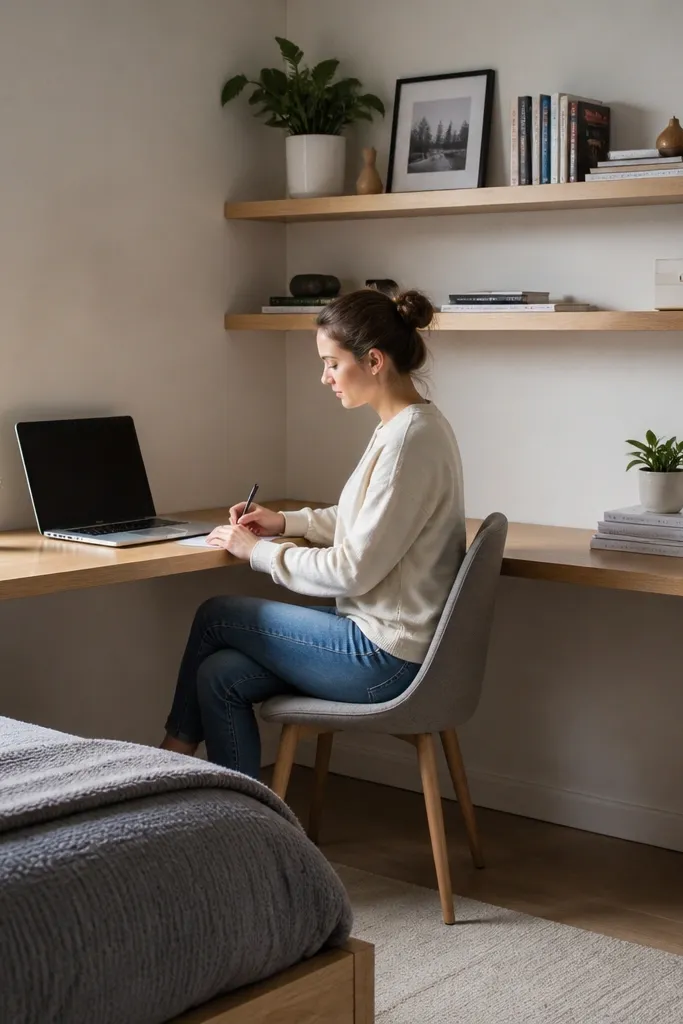
Pick two wall-mounted shelves with matching depth (24 in works well for most rooms) and install them into studs with a level. Cut a desktop panel that spans the two shelf tops, then support it with two front cleats so it doesn’t flex. Add a corner brace or triangular support under the inside corner for rigidity. Seal the desktop with satin clear coat, then attach a small back cable clip strip along the wall side.
An L-shape gives you separate zones: writing on one side and a laptop/books area on the other. It looks intentional and balanced because both arms are the same style and finish. The corner also hides awkward cable clutter and makes the desk feel like part of the room, not an add-on. For a photogenic look, keep the shelves at the same height and use one color for brackets. This is beginner-friendly because you can build it with shelf construction and a simple desktop panel.
Skip thisAvoid mismatched shelf depths; it makes the L look accidental and throws off your layout.
Editor's noteUse a 2x2 cleat at the front edge; it stiffens the desktop and makes the whole thing feel solid.
5. Console Table Desk With Removable Laptop Tray
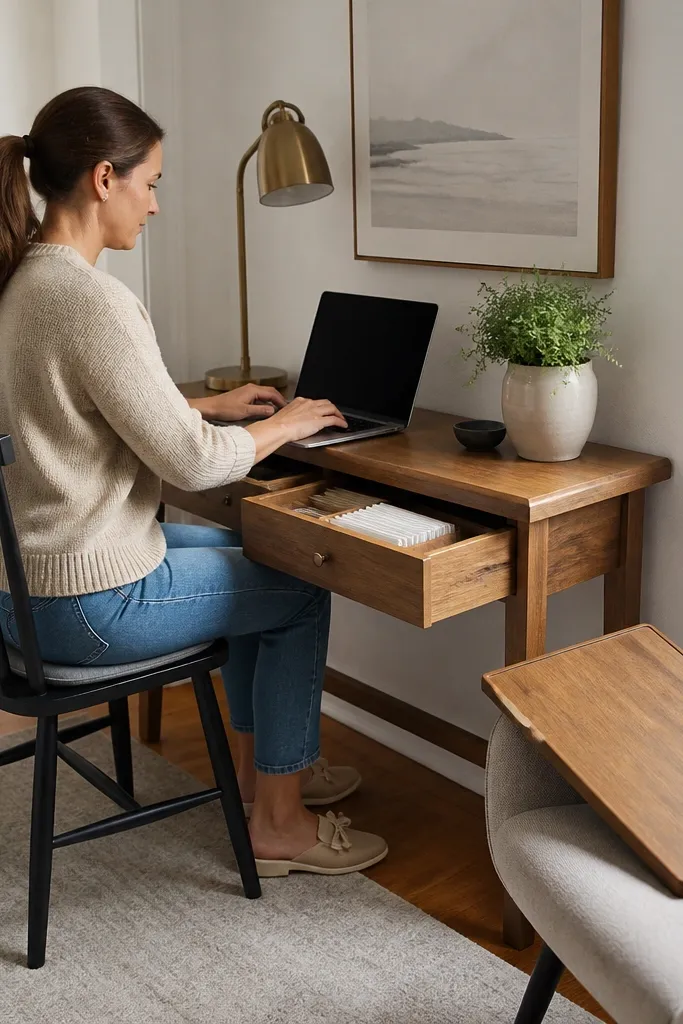
Buy or find a console table with a sturdy top and at least one drawer, then measure the top and choose a laptop tray size (around 18x24 in). Create the tray from 3/4 in plywood with a 1 in lip so it doesn’t slide off. Mount two metal slides or simple stop brackets under the console top so the tray pulls out smoothly. Add a small grommet hole for the charger cord and finish the tray with satin clear coat.
Console tables already look like furniture, so turning one into a study desk avoids the “temporary” vibe. The removable tray keeps the writing surface clean and lets you store the tray when guests visit. A drawer below gives quick paper control without turning the top into a junk shelf. Choose a console table with a drawer and a top width around 30 in — wide enough for a laptop and notebook but not too deep. This is beginner-friendly because you’re modifying an existing piece with a tray and cable management.
Skip thisDon’t drill the tray without checking clearance for drawer handles and the console’s internal frame.
Editor's noteAdd felt pads under the tray lip so it doesn’t scratch the console finish.
6. Bedside Under-Shelf Desk for a Reading Nook

This idea uses vertical space so the desk stays out of the way. A shelf above acts like a visual frame, while the desk surface below gives you a compact place to write. It’s great for people who study sitting close to the bed and want less furniture clutter. For aesthetics, match the shelf and desk color and keep the underside clean with a cable hole. Beginner-friendly because it’s mostly built from standard boards and hinges or cleats.
Install an upper shelf into studs at a comfortable reach height, then add two side cleats for the lower desk surface. Cut a desk panel from 3/4 in plywood sized to fit under the shelf with 2-3 in clearance on each side. Mount the desk panel using cleats and screws, then add a back ledge so notebooks don’t slide off. Drill a 1 in grommet hole near the back edge for charging cables.
Use a matte paint on the underside; it hides scuffs from elbows and book edges.
Don’t place the desk too low under the shelf; your knees need space if you’re using a chair.
7. Modular Rolling Drawer Desk With Flip-Top Surface

Build a drawer tower from 1/2 in plywood panels or use a pre-made drawer unit, then mount drawer slides aligned and square. Attach a flip-top lid using a heavy-duty hinge along the back edge, and add a magnetic latch to keep it closed. Cut the tabletop from 3/4 in plywood and round the front edge slightly for comfort. Add a small handle or pull tab and seal the top with satin polyurethane.
This gives you desk functionality without committing to a permanent full-size table. The rolling unit keeps storage in a single block, and the flip-top creates a flat surface when you need it. The look is tidy because drawers hide supplies and the top flips down to keep the room calm. Pick a compact width around 16-20 in so it fits next to a bed or in a narrow corner. It’s beginner-friendly if you’re comfortable assembling drawer slides and a simple top hinge.
Skip thisDon’t overload drawers before testing the slides; misalignment shows up fast under weight.
Editor's noteDry-fit the lid before final screws — hinge placement controls how flat the top sits.
8. Tall Storage Hutch Desk With Pull-Out Writing Panel

If your bedroom has too many books and not enough desk space, this solves it with a vertical look. The hutch makes the room feel styled, and the pull-out writing panel gives you a dedicated surface without a big footprint. You can keep notebooks upright and visible while still hiding cords and clutter. The best visual trick is using matching shelves and a clean panel finish so it reads like one piece of furniture. Beginner-friendly because the writing panel is just a framed board on rails.
Build a tall cabinet frame using 3/4 in plywood and divide it into shelves with 10-12 in spacing for books. Install two side rails in the cabinet for a pull-out writing panel, keeping the rails level. Cut a writing panel from 3/4 in plywood and add a front lip so paper doesn’t slide. Seal the panel and add a small cord grommet at the back edge.
Use full-extension drawer slides for the writing panel so it reaches comfortably without straining.
Skip weak rail brackets; a pull-out desk needs side support to avoid wobble.
9. Desk Top on Adjustable Frame for Different Chairs

Buy or build an adjustable desk frame and confirm the height range meets your seated elbow level. Attach a 3/4 in thick tabletop (plywood with a veneer or laminate) using the frame’s mounting plates. Add a cable tray under the top to stop cords from hanging in view. Seal or finish the top, then test stability by pushing lightly on each corner.
This is the practical choice when your chair height changes or you want to avoid a too-tall desk. A stable adjustable frame under a simple top lets you dial in comfort and keeps the look modern. It’s visually clean because you can match the frame color and keep the desktop minimal. Use a thick tabletop for a premium feel and so it doesn’t flex. Beginner-friendly because it’s a straightforward assembly with fewer woodworking steps.
Skip thisDon’t use a thin 1/2 in desktop; it flexes and makes the whole build feel cheap.
Editor's noteChoose a tabletop at least 26 in deep if you’ll use a laptop plus notebook; shallow tops look cramped.
10. DIY Slat-Board Desk Backdrop With Shelf-Ledges

Mount a slat-board panel to the wall on studs, using a backing sheet if you want it perfectly flat. Install a desk surface below using two cleats or a small floating frame, then add two ledges at different heights for supplies. Add a pen rail or cable clips along the slat lines so cords don’t cross the workspace. Finish by sealing the slats and edges, then wipe down before hanging accessories.
A slat-board backdrop makes the desk look designed even when the desk itself is simple. Ledges give you tidy places for pens, a small lamp, and books, which keeps the writing area clean. This is a great choice for students because it turns “where do I put this?” into a visible system. For aesthetics, stain the slats medium oak and use black metal hooks for contrast. Beginner-friendly because you can mount slats to plywood and screw ledges into the framework.
Skip thisDon’t mount shelves without a level line; ledges that slope make the whole setup look messy.
Editor's noteUse 1/4 in spacing between slats so hooks don’t crowd and you can move them later.
11. Reclaimed Door Desk With Bracketed Legs and Cable Hole
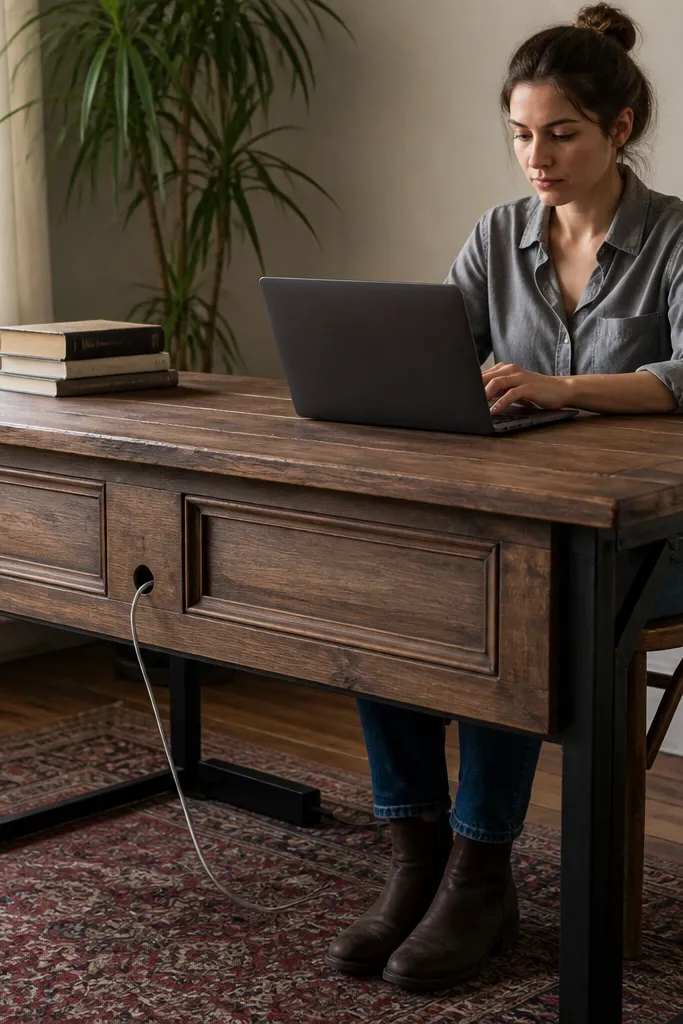
Sand and clean the door, then remove any hardware and fill gaps with wood filler. Cut off a section if needed to reach a comfortable depth around 28 in. Install two metal angle brackets or sturdy hairpin legs at the appropriate positions, then attach a cross brace between legs if the door is wide. Drill a 1 in cable grommet hole near the back edge, then seal the top with stain and satin clear coat.
This one looks instantly styled because the door already has character, panels, and a natural “frame” shape. Bracketed legs keep it strong and give you a sturdy writing surface for a laptop and books. The cable hole keeps chargers from turning into a visible mess. If you match the finish to your room — matte black legs with a warm wood top — it photographs really well. Beginner-friendly if you’re comfortable cleaning a door and attaching legs with heavy brackets.
Skip thisDon’t skip sealing; raw wood grain catches stains and scuffs fast.
Editor's noteUse furniture-grade brackets and add a back brace — door tops twist when legs are just screwed to the surface.
12. Bookcase Desk Hybrid With Flip-Down Panel
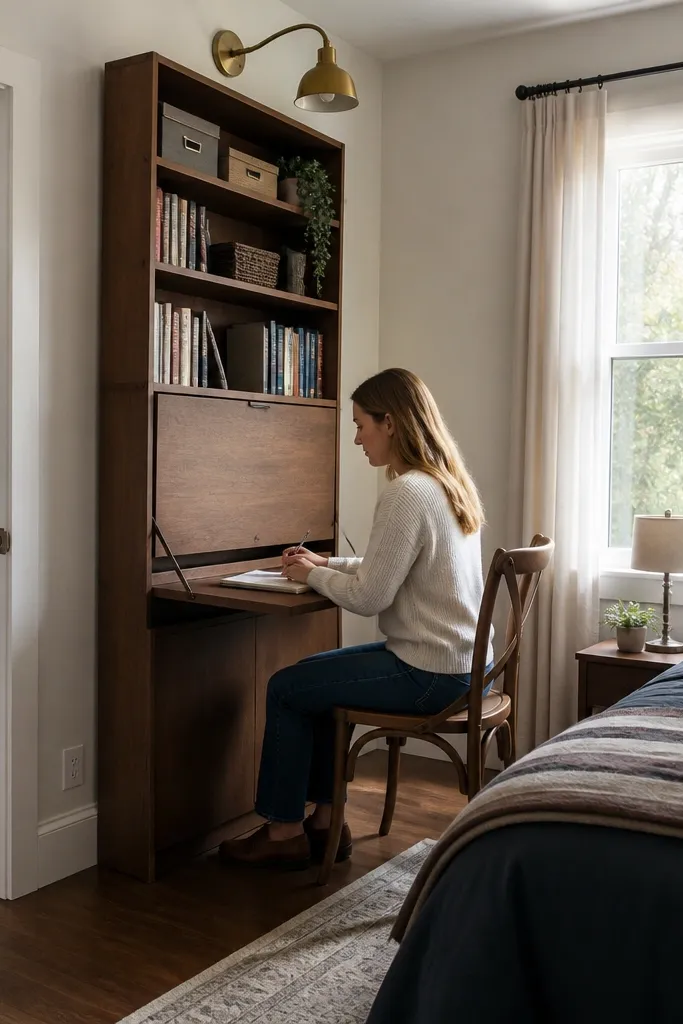
This hybrid gives you storage that looks like furniture and a desk that appears when you need it. The flip-down panel keeps the front clean and lets you store books upright and visible. It’s great for small bedrooms where a full desk blocks sightlines and makes the room feel cramped. Choose a finish that matches your bookshelf or bed frame so the desk blends in. Beginner-friendly because the flip-down panel is a simple board on hinges with a latch.
Build or buy a narrow bookcase with at least 12 in depth, then decide where the desk panel will fold. Cut a desk panel from 3/4 in plywood and attach it to the side or underside using heavy hinges. Add a support leg or a swing arm so the panel locks flat when down. Install a small back stop and drill a cable grommet near the hinge side for power cords.
Use a magnetic catch plus a mechanical stop so the panel doesn’t drift over time.
Don’t make the panel too narrow; a 16 in width feels cramped for writing.
13. Painted MDF Desk With Built-In Cable Drawer

Cut a desk top from 3/4 in MDF, then build a simple frame from 1x3 and 2x2 boards sized to your space. Add a small drawer box under the top using 1/2 in plywood sides and install drawer slides aligned to keep it smooth. Route a shallow channel in the back of the desk top for the charger cord, then create a grommet opening into the drawer. Prime, paint with a satin finish, and seal the top surface with a clear satin coat.
If you want the cleanest look in a small bedroom, this is the one. The cable drawer keeps charging bricks hidden and reduces the visual clutter that makes desks look messy. A painted MDF surface also hides tiny scratches better than glossy finishes. You get a smooth writing top without complex joinery, which is why it’s beginner-friendly. This setup is best for students who keep a laptop and need quick access to power.
Skip thisDon’t skip sealing MDF edges; they drink paint and look patchy.
Editor's noteUse satin paint on the sides and clear satin on the top; it resists scuffs from book corners.
14. Round Corner Desk Table With Rounded Shelf Edge
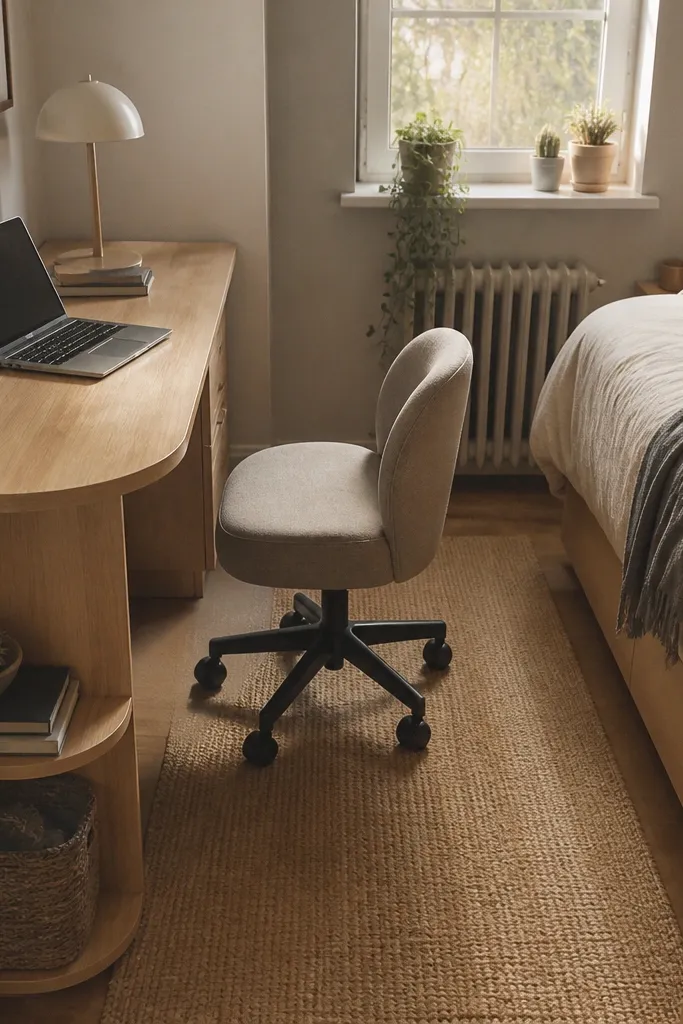
Sharp desk corners look harsh in small rooms, and they also bump into legs when you’re moving fast. Rounding the corner makes the workspace feel softer and more designer-looking. The matching rounded shelf edge keeps the visual line consistent, so it photographs cleaner. This is a great option if your room has kids, pets, or you just hate accidental hits. Beginner-friendly because rounding is simple with a template and sandpaper, not complex woodworking.
Cut a rectangular tabletop and mark a radius curve on one corner using a bowl or a large jar as a template. Cut the rounded corner with a jigsaw, sand smooth, and apply edge sealant before finishing. Build a simple base frame from 2x2 lumber, then attach the tabletop with countersunk screws. Add a low shelf or book ledge with a matching curve, then finish everything with satin paint or clear coat.
Sand the rounded edge to 220 grit so it feels smooth and doesn’t snag fabric or sleeves.
Don’t leave the corner unfinished; raw edges chip and look messy quickly.
15. Pegboard Desk Panel With Slide-Out Keyboard Tray
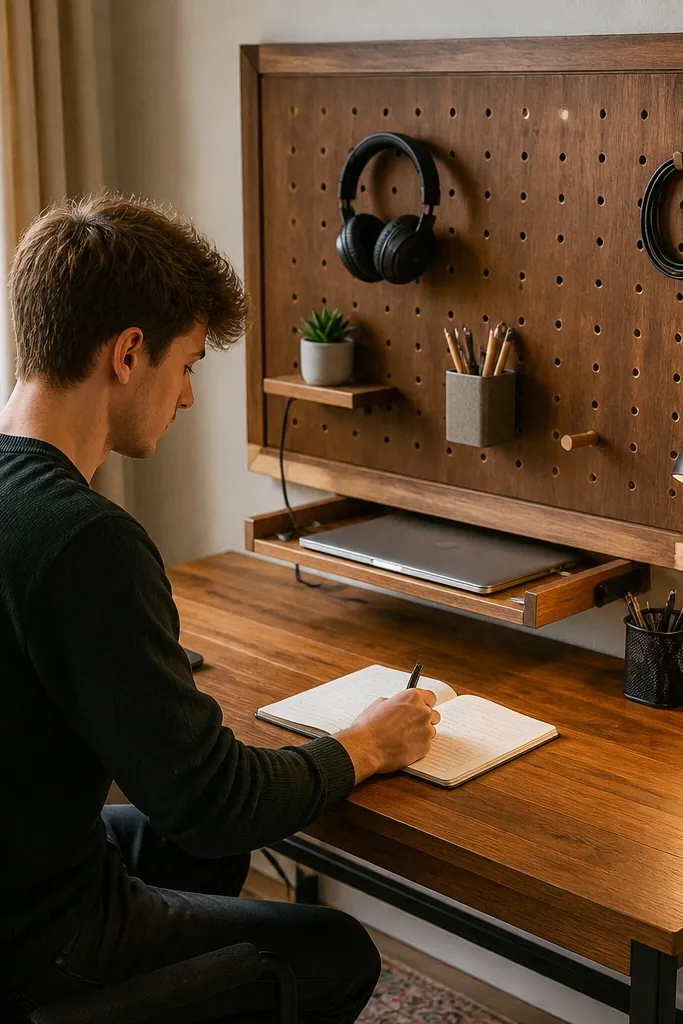
A pegboard panel makes your desk look organized even when you’re mid-study. The slide-out keyboard tray keeps your laptop or keyboard tucked away so the surface stays clear for writing. Pegboard hooks also give you a clean place for headphones, cables, and small tools. It’s beginner-friendly because the pegboard is mounted to a frame and the tray is a straightforward sliding installation. This is a good choice for a bedroom where you need both a work zone and a visual system for supplies.
Build a flat frame from 1x2 boards, mount pegboard to the frame, then anchor the frame to studs at the correct height behind the desk. Install a keyboard tray under the tabletop using drawer slides, aligned so it slides in and out smoothly. Cut a tabletop panel and mount it on a simple base, then drill a cable pass-through hole near the back. Finish by sealing the tabletop and using cord hooks on the pegboard to keep cables off the desk surface.
Use a tray depth that leaves at least 3 in of space behind your wrists when pulled out.
Don’t drill pegboard holes randomly; mark a grid so hooks line up and look intentional.



