
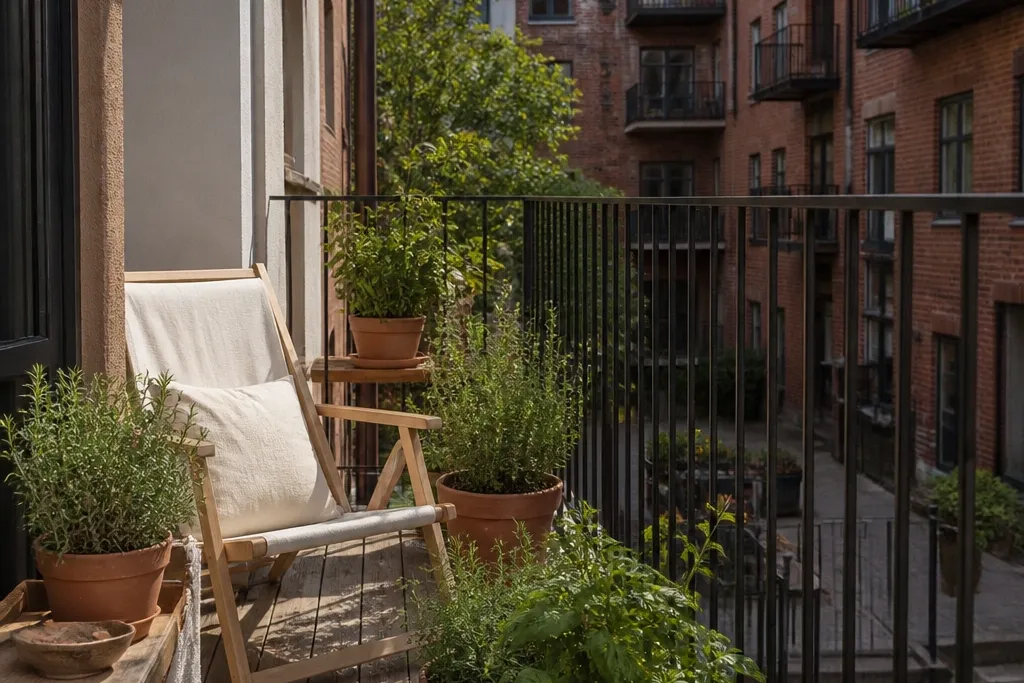
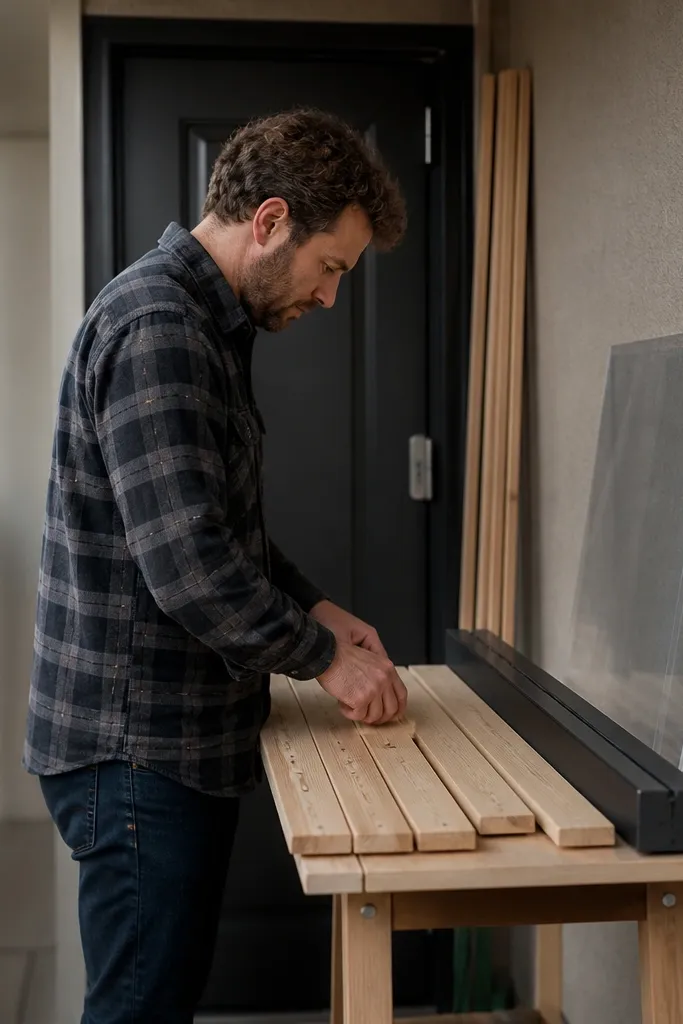
1. Matte black vertical bar infill with clear spacing
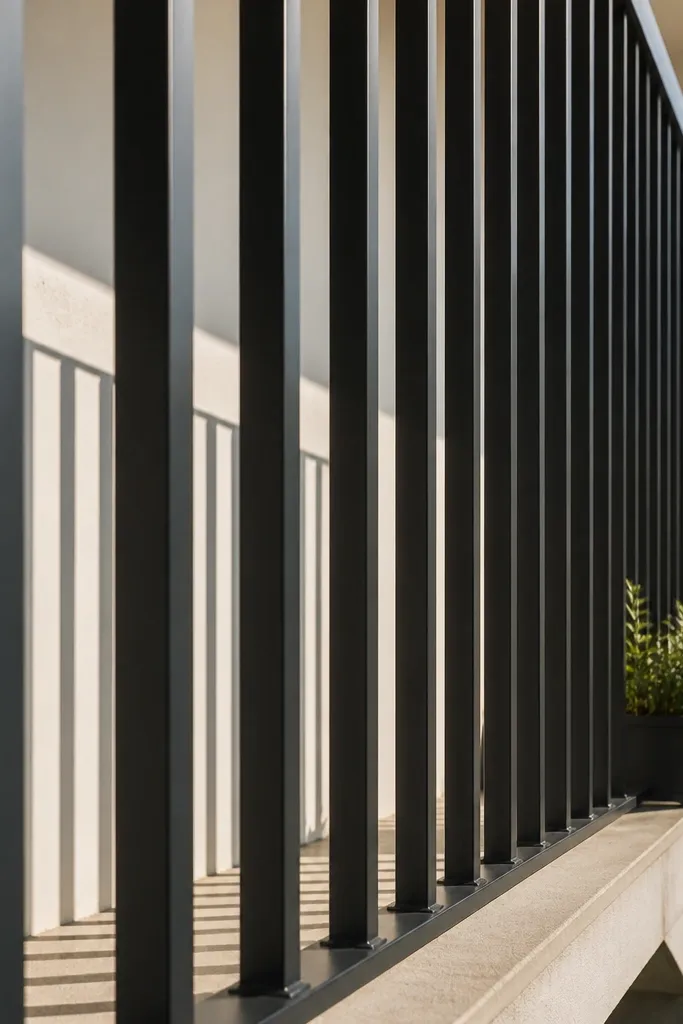
This design keeps the railing visually light by using straight vertical bars and a matte finish that doesn’t reflect the street. The look is crisp, modern, and it lets you see through the railing instead of around it. It’s a strong match for beginner-friendly balcony railing design for small flats because you’re not building a complicated lattice — you’re repeating a simple bar pattern. Choose bar spacing that blocks climbing and keeps the view open, then align the bars so they read straight from both angles.
Start by measuring your railing length and the clear height between top rail and floor edge. Then install vertical infill bars onto an existing top rail using predrilled brackets or a compatible clamp system, keeping consistent spacing with a spacer block. Finish by sanding any sharp edges, then spray with matte black metal primer and a matte top coat rated for outdoor use.
Editor's noteUse a laser level or a long straightedge to align the first two bars, then copy the spacing for the rest.
Skip thisDon’t use glossy paint — it creates glare and makes the railing look heavier in daylight.
2. Warm walnut wood slats with matte steel top rail
Wood slats add warmth and soften the look of a tight outdoor space. Pairing them with a matte steel top rail keeps it clean and prevents the “all wood” look from warping or feeling bulky. The slat pattern creates vertical rhythm that makes the balcony feel taller and more open. For beginner-friendly balcony railing design for small flats, this is one of the easiest to customize because you can cut slats to fit and keep the spacing uniform.
Cut cedar or outdoor-rated hardwood slats to the measured infill height, then sand edges smooth. Install vertical posts or use your existing posts, and attach slats using stainless angle brackets or hidden screws through the top rail. Seal the wood with an outdoor penetrating sealer, then finish with a matte outdoor clear coat so it handles rain without turning shiny.
Editor's noteLeave a small drainage gap under the bottom of each slat so water doesn’t sit in the bottom line.
Skip thisDon’t skip stainless fasteners — regular screws will rust and stain the wood.
3. Clear acrylic or polycarbonate panel with slim frame
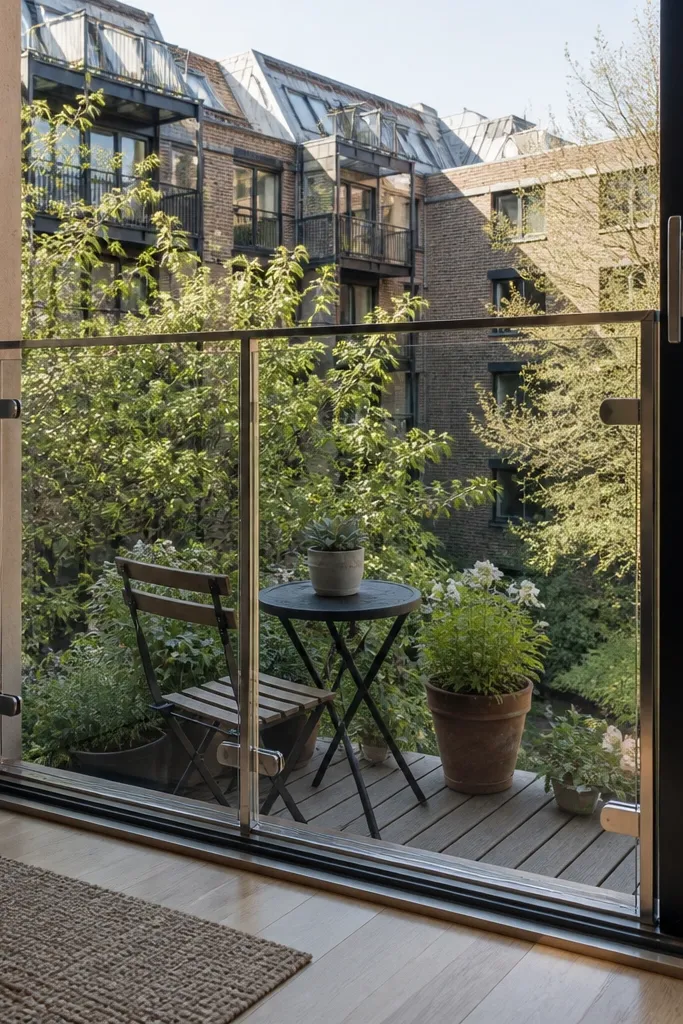
A clear panel is the fastest way to make a small balcony feel bigger because it disappears visually. A slim frame matters — thick framing reads heavy and blocks your sightlines. This works especially well if your view is the selling point, like a courtyard or skyline. It’s also beginner-friendly because you’re installing panels with brackets rather than crafting a full custom metal railing.
Measure the opening width and height, then cut UV-stabilized polycarbonate sheets or acrylic panels to size with a fine-tooth blade. Use a thin aluminum or powder-coated steel frame with rubber gaskets, then fasten the panel through the frame using manufacturer-approved clips to avoid cracking. Seal the edges with the correct tape or sealant kit and check that the panel can expand without buckling.
Editor's noteUse rubber gaskets — they prevent vibration and stop the panel from rubbing the frame.
Skip thisDon’t drill freehand holes in acrylic without the right bit and clearance; it can crack under stress.
4. Textured bronze wire mesh with a clean black border
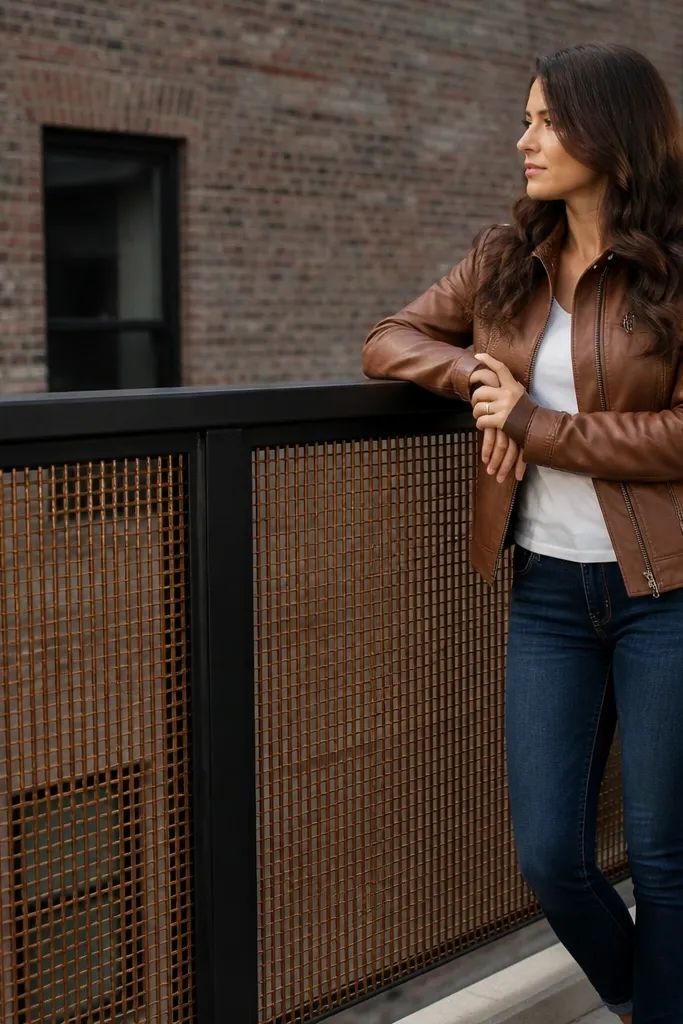
Wire mesh gives you that airy look like metal screen doors, but it still blocks hands and climbing. The textured pattern adds visual interest without creating big solid blocks that shrink the balcony. A black border makes it feel intentional and tidy, even from street level. This is a great beginner-friendly balcony railing design for small flats because mesh panels are available in sheets and you’re basically measuring, cutting, and fastening.
Choose outdoor-rated steel or aluminum mesh with a tight opening, then cut it to fit using tin snips or a metal blade. Install a border frame around your existing railing — thin square tubing looks best — and attach mesh with stainless clamps or screws through edge channels. Finish by powder-coating the frame or painting it matte, then inspect all edges for sharp points.
Editor's noteWear gloves and use edge caps on the border — it keeps the look sharp and prevents cuts.
Skip thisDon’t leave raw mesh edges exposed; they fray and look messy after a season.
5. Minimalist cable railing look with tension cables
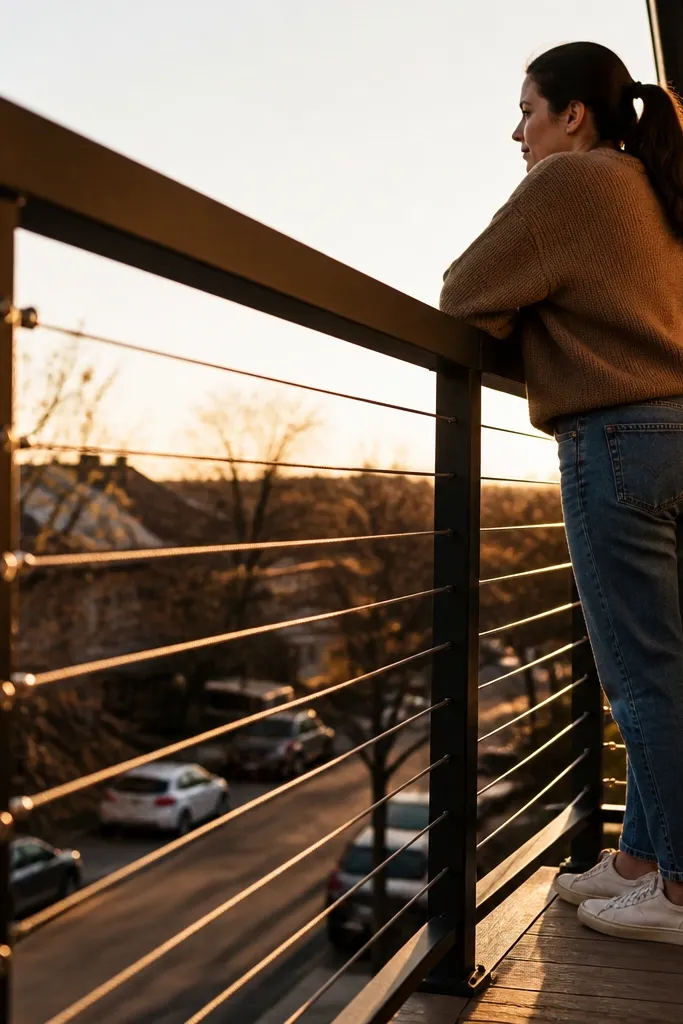
Cable railing reads light because the lines are thin and the gaps stay open. It also keeps the design modern without adding visual clutter. For small flats, the cable look helps the balcony feel less boxed-in, especially if you choose a matte black top rail. The downside is it needs proper tensioning, but the look is worth it when done cleanly and straight.
Install a top rail and bottom anchor points using a cable railing kit so you get the right turnbuckles and end fittings. Thread stainless cables through the posts, then set spacing with a jig or measuring tape from post center to post center. Tension the cables evenly, trim ends, and apply end caps so nothing sharp is exposed.
Editor's noteMark cable positions with painter’s tape on the top rail before threading — alignment is everything for the look.
Skip thisDon’t mix cable thicknesses or fittings; the tension won’t match and the lines won’t look straight.
6. Whitewashed vertical pickets with a black post frame
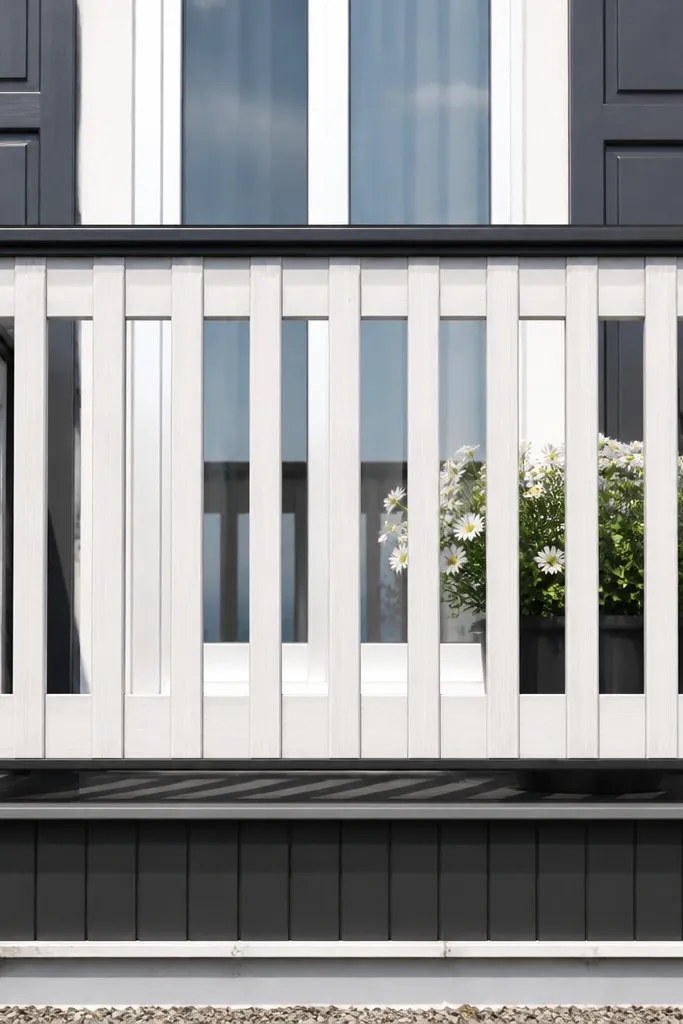
Whitewashing makes wood read brighter and helps small balconies feel less enclosed. Keep the posts black so the pickets don’t blur into the wall behind them. The vertical picket pattern gives you classic curb appeal and clean photo lines. This is beginner-friendly because you can source pre-cut pickets, paint, and install with simple brackets.
Sand pickets smooth, then apply a white wood stain or whitewash paint diluted with water for a natural grain look. Mount black posts or paint existing posts first, then attach pickets with exterior wood screws through predrilled holes to prevent splitting. Leave consistent gaps for the pattern and finish with a matte outdoor clear coat for weather resistance.
Editor's noteUse a spacer block to keep gaps even — uneven spacing shows immediately in photos.
Skip thisDon’t paint directly over wet wood; it will peel and look patchy fast.
7. Stacked lattice panels with large square openings
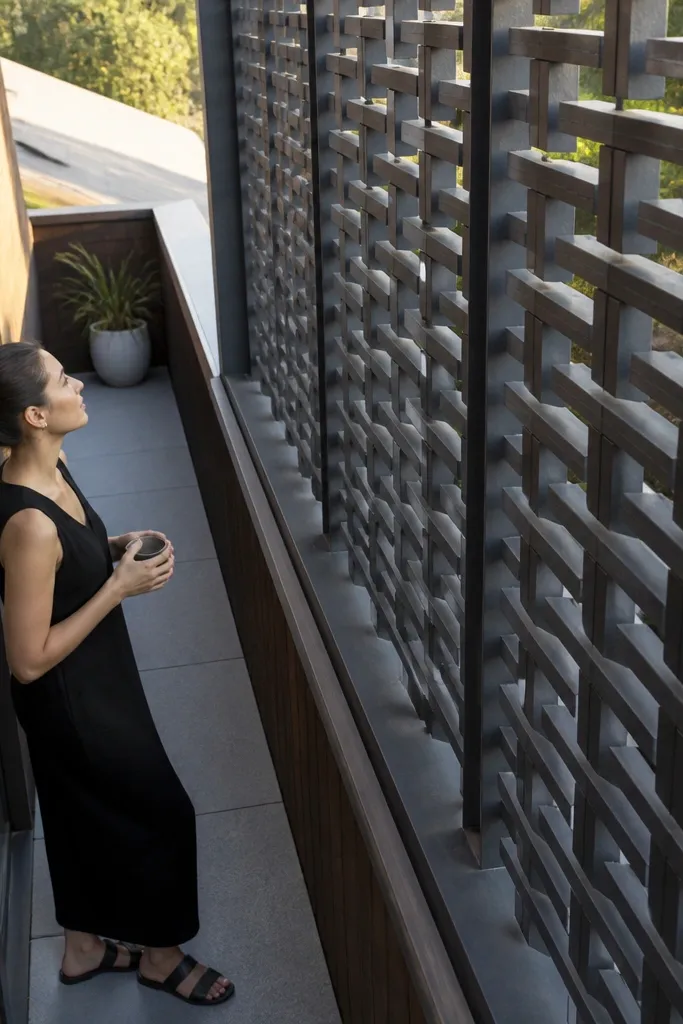
Lattice can look heavy if the squares are tiny, but large square openings keep it airy. The stacked panel method creates a layered look that’s photogenic without feeling crowded. It also gives you privacy from casual line-of-sight while keeping the balcony open. For a beginner-friendly balcony railing design for small flats, this is a great mid-level option because you can prebuild sections and attach them as panels.
Buy outdoor lattice sheets and cut them into railing-height panels, then test-fit each panel between posts. Attach panels to a simple backing frame — thin wood or aluminum — so the lattice stays square and doesn’t sag. Seal all cut edges with exterior wood sealer, then paint or stain the frame and lattice for a uniform finish.
Pre-stain before assembly — it reaches the tricky edges and looks cleaner after installation.
Don’t use indoor lattice; it warps and pulls the pattern out of alignment.
8. Herringbone wood infill with slim vertical posts
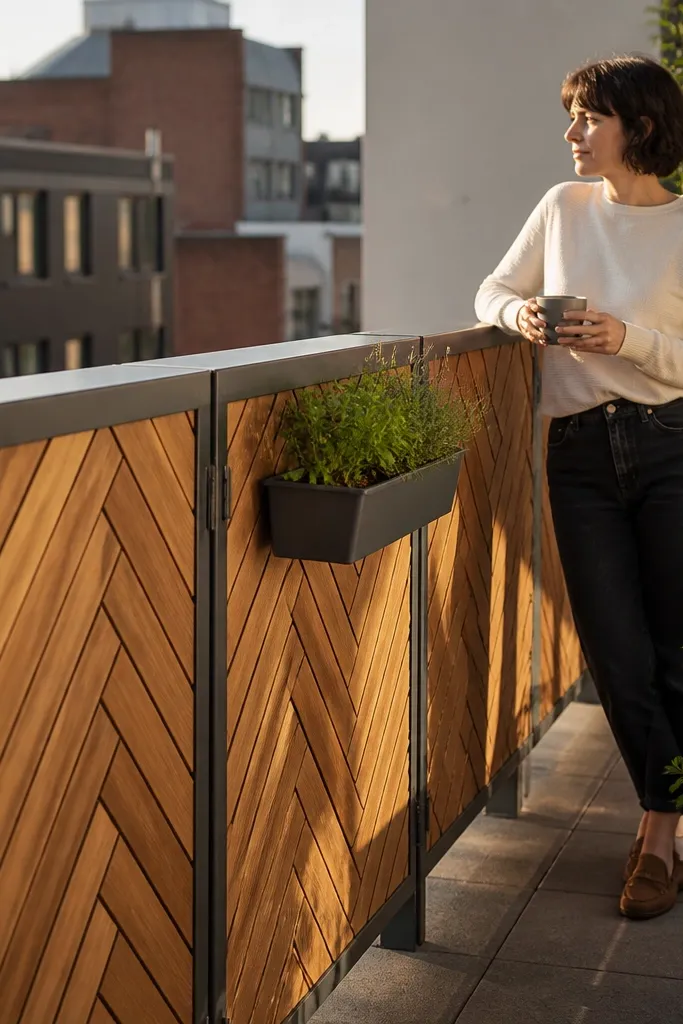
A herringbone pattern adds movement and makes a small railing look designed, not improvised. The trick is keeping the posts slim and the infill lines tight so the pattern reads crisp instead of bulky. It’s visually strong from both inside and outside, which matters for balconies that face streets or shared corridors. This is still beginner-friendly if you build in sections — you’re cutting a repeat pattern, not wrestling a whole railing at once.
Plan your herringbone grid first by marking a centerline on the railing and choosing a consistent angle, like 45 degrees. Cut narrow wood strips, then build a backing frame panel on a flat surface so the pattern stays square. Attach the finished infill panel to slim posts, then seal with outdoor clear coat and add stainless screws to lock everything down.
Editor's noteCut a few strips with the exact same length tolerance and label them; herringbone gaps show every mismatch.
Skip thisDon’t skip a flat build surface; a warped panel makes the pattern look off instantly.
9. Matte white paneling with vertical slits

Matte white makes the railing disappear into bright walls and keeps your balcony from feeling boxed. Vertical slits prevent the look from becoming a solid wall and keep the view moving through. This works well on small flats where the balcony shares a wall color with the railing — you get a cleaner, brighter frame. It’s beginner-friendly because you’re essentially installing lightweight panels and cutting slits with a guide.
Use exterior-rated PVC sheet or thin composite paneling and mark slit lines with a ruler and level. Cut slits with a jigsaw using a fine blade, then deburr edges. Mount the panel to your railing frame with screws and spacers, then paint or finish with matte exterior paint rated for outdoor exposure.
Editor's noteUse painter’s tape along cut lines to reduce chipping and keep edges crisp.
Skip thisDon’t use glossy paint; it highlights every cut edge and scuffs.
10. Terracotta terraced tiles on a metal grid
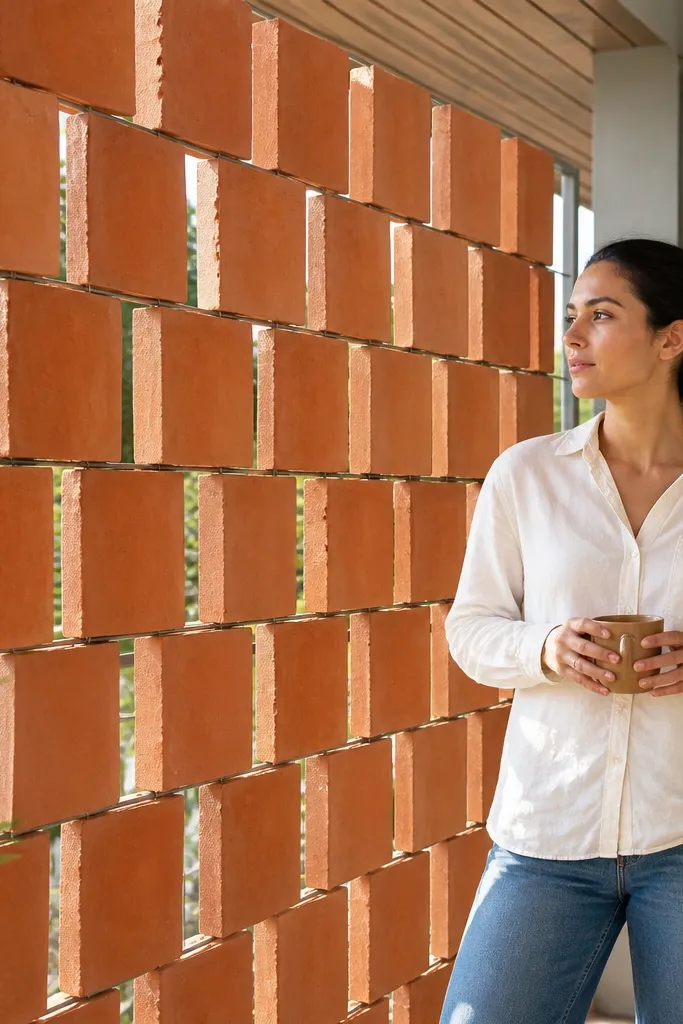
Tile infill looks handmade and adds warmth, which makes a small balcony feel like a destination instead of a narrow concrete box. The key is using a metal grid backing so you don’t create a thick, heavy-looking wall. Terracotta tones also hide minor wear and grime better than bright whites. This is beginner-friendly if you use small tiles and a pre-measured grid — you’re building a mosaic that looks intentional.
Build or buy a metal grid panel that fits your railing infill area, then clean it and apply a tile-friendly primer. Use outdoor thinset mortar to set small terracotta or glazed ceramic tiles, keeping grout lines consistent with spacers. Let it cure fully, grout with a cement grout suitable for outdoor use, then seal the grout to resist rain and balcony cleaning products.
Choose glazed tiles if your balcony gets lots of sun; they resist fading better.
Don’t skip sealing grout; balcony grime will stain porous grout quickly.
11. Reclaimed wood frame with clear window film infill
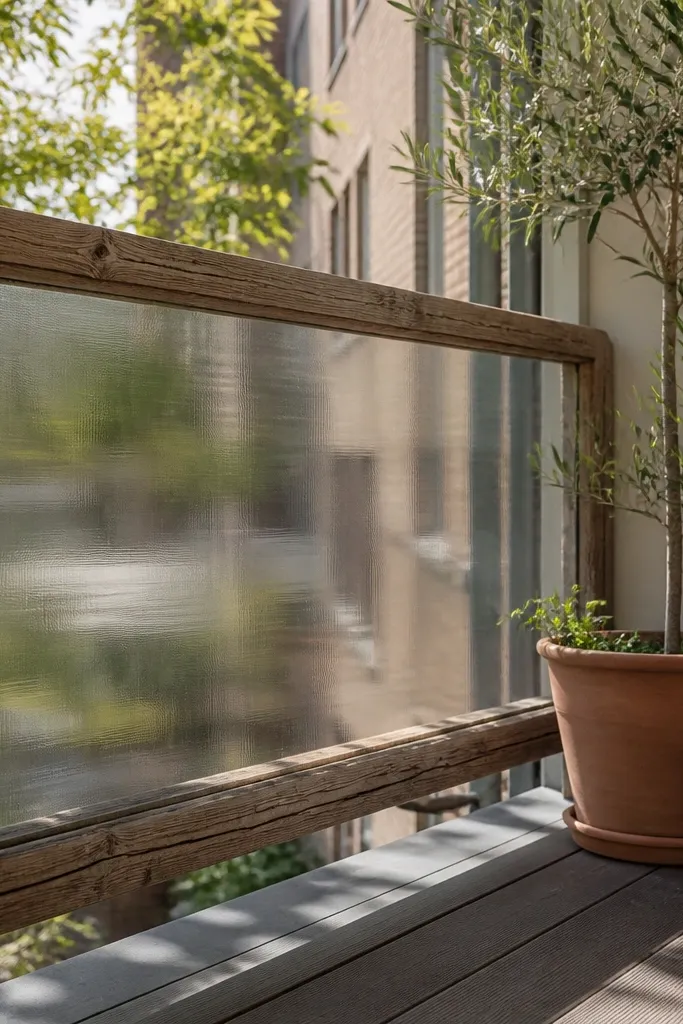
This one looks layered and soft without blocking the light. The reclaimed wood frame gives character, while the clear infill keeps sightlines open. If you want privacy without a heavy wall, you can swap clear film for a subtle frosted or patterned film. It’s beginner-friendly because you’re building a frame and applying film, not installing glass.
Cut reclaimed wood into a simple rectangle frame sized to your railing section, then sand down splinters. Attach the frame to posts with exterior screws, then stretch or apply clear window film inside the frame using a squeegee. Trim edges cleanly and seal the film edges with a thin clear outdoor sealant so wind and rain don’t peel it.
Editor's noteUse a heat gun lightly to smooth film wrinkles before the final trim.
Skip thisDon’t apply film over dusty wood; it traps grit and creates visible bubbles.
12. Stained cedar vertical slats with top cap rail
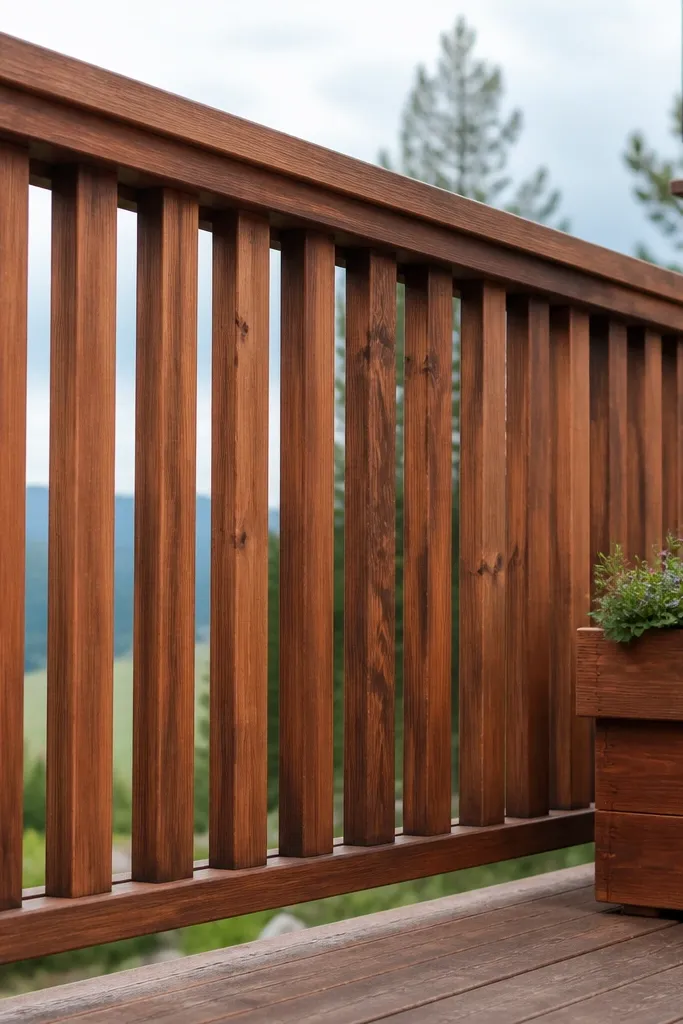
Cedar slats look natural and age nicely, and the top cap rail keeps the structure from looking unfinished. The vertical lines make a small balcony feel taller, and the warm tone hides minor scuffs from daily use. This is the kind of beginner-friendly balcony railing design for small flats that looks good even if you’re not a pro at metalwork because wood slats are forgiving. It’s also easy to refresh with a re-coat instead of replacing panels.
Cut cedar to railing height, then drill pilot holes for screws so the slats don’t split. Mount slats to your existing frame or new posts using stainless screws and a consistent spacer for gaps. Stain with an exterior cedar stain, let it dry, then apply an outdoor clear top coat in a matte sheen for a clean look.
Seal the ends of each slat — those edges soak up water and fade first.
Don’t use pressure-treated lumber without sealing; it can bleed stains and discolor the finish.
13. Black steel angle grid with open rectangles
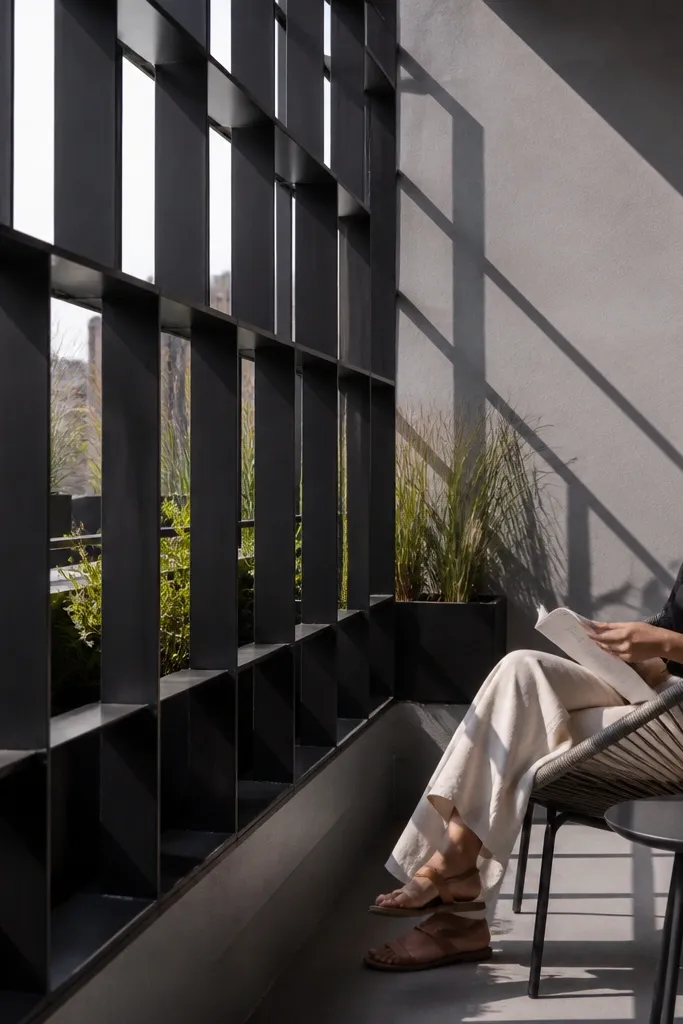
Angle steel grids look architectural and sharp, especially when the openings are large rectangles instead of tiny boxes. The open geometry keeps the balcony from feeling crowded, and the matte black finish makes it read clean and modern. It’s photogenic because the grid lines catch light at different angles without glare. Beginner-friendly? Yes — if you build it as infill panels that bolt on, not as a full custom railing.
Measure infill openings and cut angle steel pieces to frame a panel, then tack the grid on a flat surface to keep it square. Assemble the grid with outdoor-rated bolts or weld if you have the tools, then prime and paint matte black. Bolt the finished panels to your railing posts using brackets, and verify the panel is level before tightening all fasteners.
Editor's noteUse a chalk line or string line to set level on the first panel — everything else aligns off that.
Skip thisDon’t over-tighten bolts into thin metal — it can warp and create a crooked grid.
14. Clear glass look using framed acrylic with rounded corners
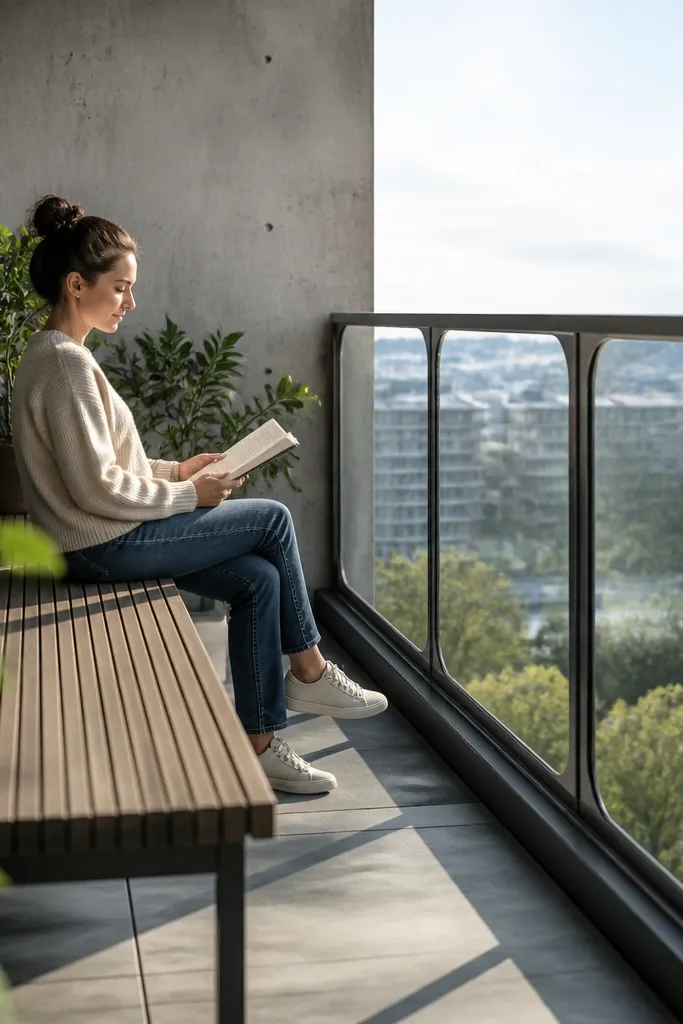
If you want the clean glass look but don’t want the weight and cost, this is the compromise that still looks high-end. Rounded corners soften the overall shape and make the railing feel less harsh on a small balcony. The slim metal frame keeps it airy, and the panel reads like a continuous barrier without heavy balusters. It’s beginner-friendly because panels mount into a frame with clips and gaskets rather than complex fabrication.
Build a slim frame from aluminum or steel tubing, then cut acrylic panels and round edges carefully with sandpaper and a polishing pad. Install rubber gaskets around the frame, then clip the panel in place using manufacturer-approved fasteners. Seal the frame joints, then do a final check for movement so the panel doesn’t rub or rattle in wind.
Editor's noteRound edges slightly more than you think — it makes the whole railing look calmer in photos.
Skip thisDon’t use cheap acrylic without UV protection; it clouds and turns yellow.
15. Macramé-style outdoor rope tension infill
Rope infill looks playful and soft, and it can add privacy without blocking light. The rope pattern also breaks up the harsh lines of concrete and makes small balconies feel less industrial. This is a beginner-friendly balcony railing design for small flats when you use outdoor-rated rope and tension hardware — you’re not weaving a giant net, you’re installing a repeat pattern in sections. Choose a neutral rope color like sand or natural and keep knots consistent for a clean look.
Install eye bolts or small hooks on the top rail and bottom anchors at even intervals, using a tape measure to keep spacing uniform. Thread outdoor rope between anchors in a grid pattern, then tie knots tightly and finish by trimming ends neatly. Add a tensioning step with turnbuckles if needed, then treat rope with an outdoor rope sealer so it stays crisp and doesn’t fuzz.
Editor's noteDo a full dry-fit and count rows before tying — rope lattices look “off” when one row is short.
Skip thisDon’t use indoor cotton rope; it sags and degrades fast in sun and rain.
16. White metal grid with scalloped top rail edge
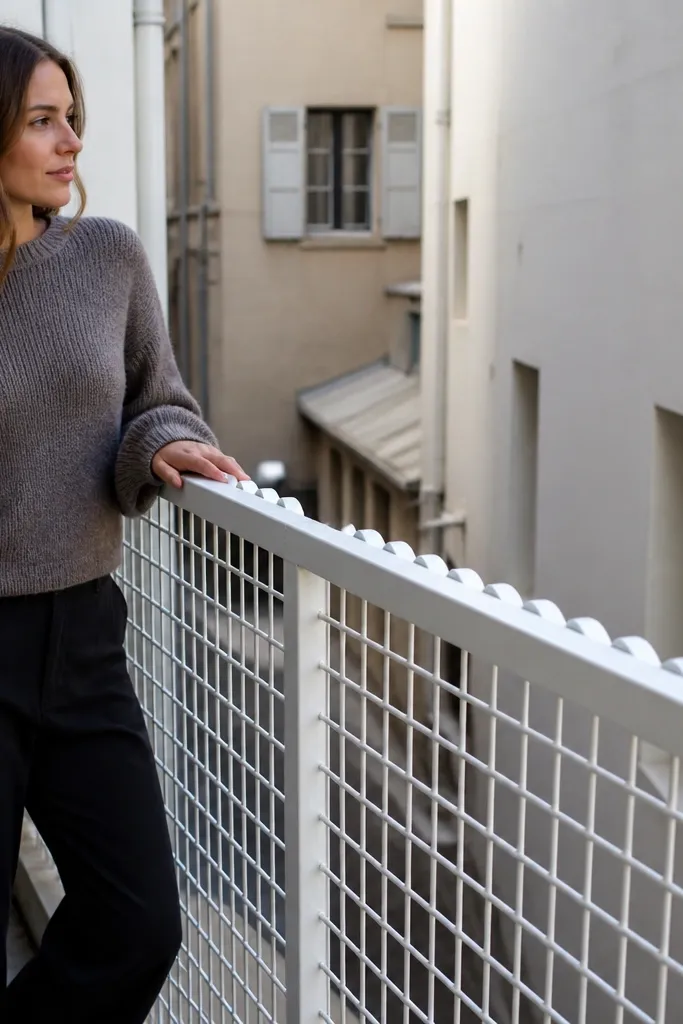
A white grid keeps the railing light, and the scalloped top edge adds a decorative touch without adding bulk. This combo works when your balcony feels too plain and you want something photogenic that still reads airy. The grid pattern prevents a flat wall look and keeps sightlines moving. For beginner-friendly balcony railing design for small flats, you can buy a pre-formed decorative top rail or replicate the scallop with a template and metal strip.
Pick a grid panel size that fits your infill area, then attach it to posts with exterior screws and brackets. Build or buy the scalloped top rail, then fasten it to the grid frame so the scallops line up. Prime and paint with exterior metal primer and a durable outdoor top coat, and let it cure fully before placing planters nearby.
Editor's noteMask off the grid lines before painting so the openings stay crisp and don’t clog with paint.
Skip thisDon’t paint over rust; you’ll get bubbling and a patchy scallop edge.
17. Horizontal timber slats with a clear screen backing
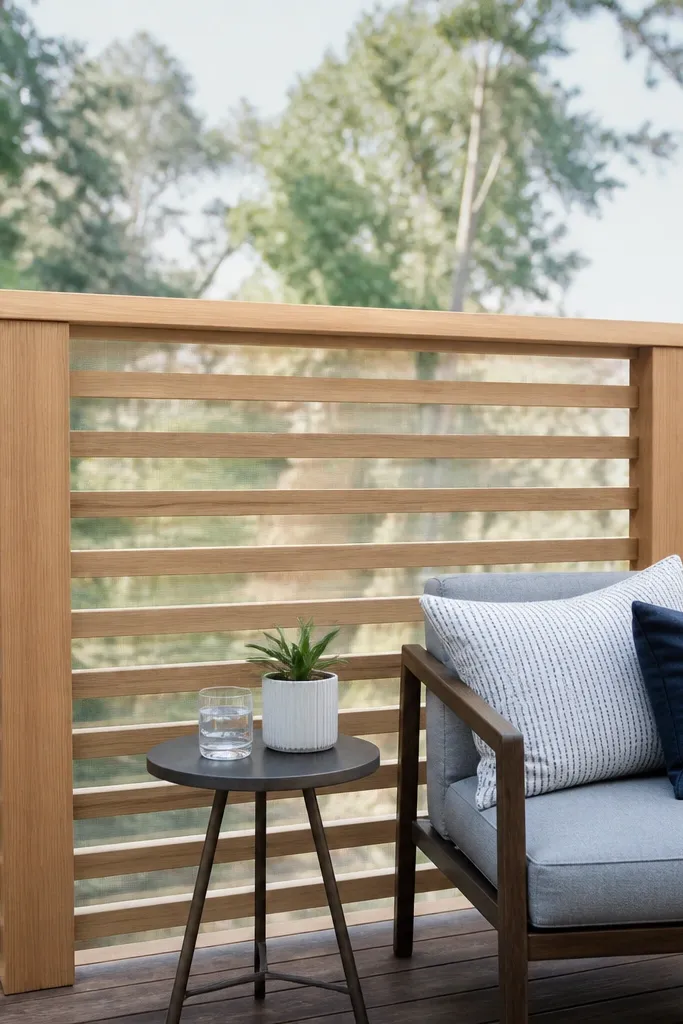
Horizontal slats can look great, but on small balconies they need a trick to stay light. Add a clear screen backing behind the slats so the view stays open and the railing doesn’t become a thick band. The combo gives you privacy from certain angles and a layered look that reads modern. It’s beginner-friendly because you can mount slats onto a frame and keep the clear screen as a simple infill sheet.
Cut slats to the width of your railing section and space them evenly across a backing frame. Install the clear screen sheet first using a gasketed frame, then attach slats in front of it so water can still drain behind. Seal wood slats with an exterior stain and matte top coat, then check that the screen edges are protected from direct water splashes.
Editor's noteUse spacers to keep slat gaps consistent; uneven spacing makes the whole railing look homemade.
Skip thisDon’t lock the clear screen too tight — leave expansion room so it won’t warp.
18. Stone-look composite panels with vertical shadow gaps
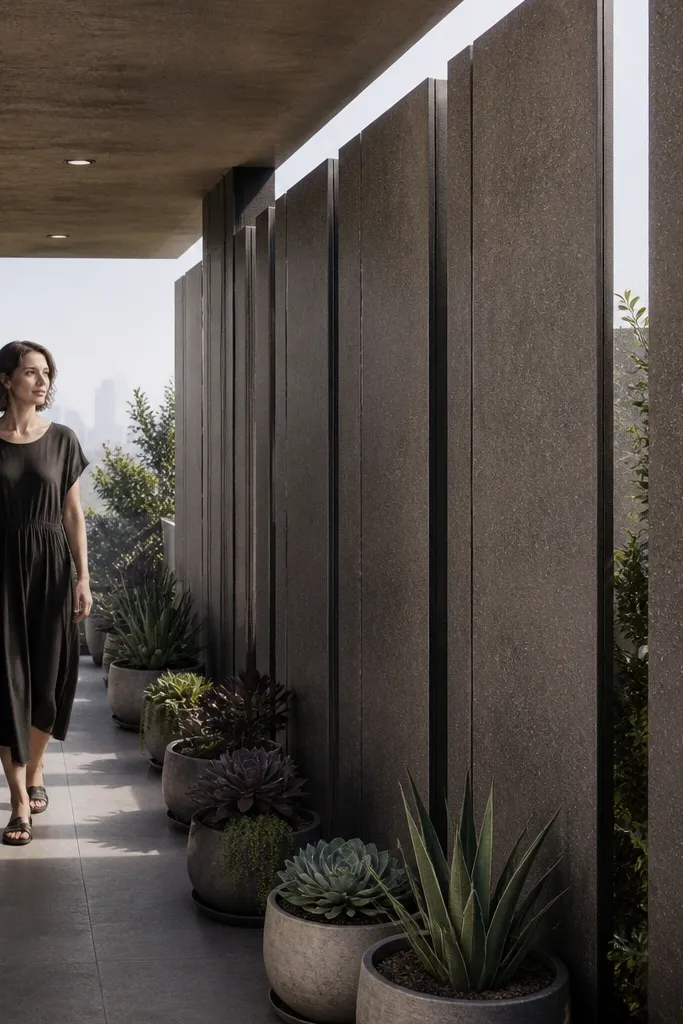
Stone-look composite infill makes a small balcony feel more solid and upscale, but you need shadow gaps to keep it from looking like a wall. Vertical gaps break up the panel and let light pass through. This works well on balconies that face glare, because matte composite hides reflections better than glossy stone patterns. Beginner-friendly? Yes, because composite panels are cut-and-install with screws and proper edge sealing.
Choose composite panels with a matte finish and mark vertical gap lines to match your spacing preference. Cut to size with a fine-tooth blade and seal cut edges with the manufacturer’s edge sealant. Mount panels to your existing posts with exterior screws through mounting rails, then add a top cap trim piece to keep the look clean and weatherproof.
Use corner trim — it makes the panel edges look finished instead of DIY.
Don’t skip edge sealing; cut edges soak up moisture and swell over time.
19. Sea-glass green glass panel with bronze frame
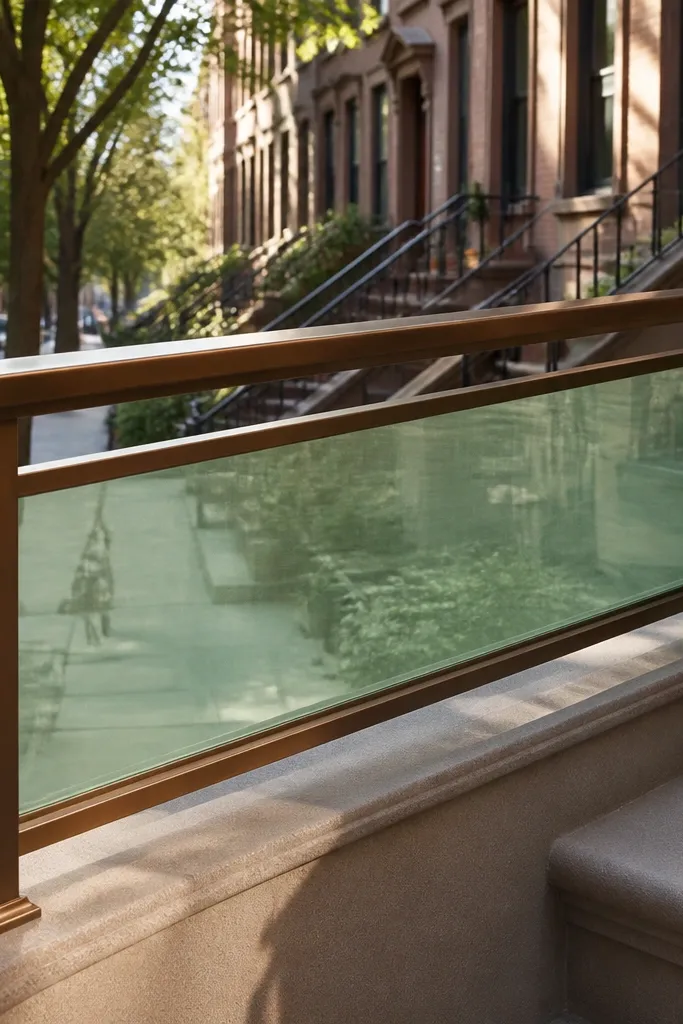
Tinted panels add color without shrinking the space, especially when you use a soft sea-glass green instead of dark tinted black. The bronze frame keeps the warmth and makes the tint look intentional. This design is photogenic because the panel color changes slightly with daylight, but the overall railing stays slim. It’s beginner-friendly if you choose pre-cut panels and install with clips and gaskets rather than custom glass cutting.
Select a sea-glass tint acrylic or polycarbonate panel and cut it to opening size with the right blade and blade speed. Build a bronze powder-coated frame with thin rails and install rubber gaskets along all edges. Clip or fasten the panel into place, then apply edge sealant where the frame meets moisture-prone areas.
Editor's noteMatch the frame color to your balcony hardware — even small details tie the look together.
Skip thisDon’t choose a very dark tint; it turns the balcony into a dim box.
20. Recessed metal mesh panels with a thin perimeter frame
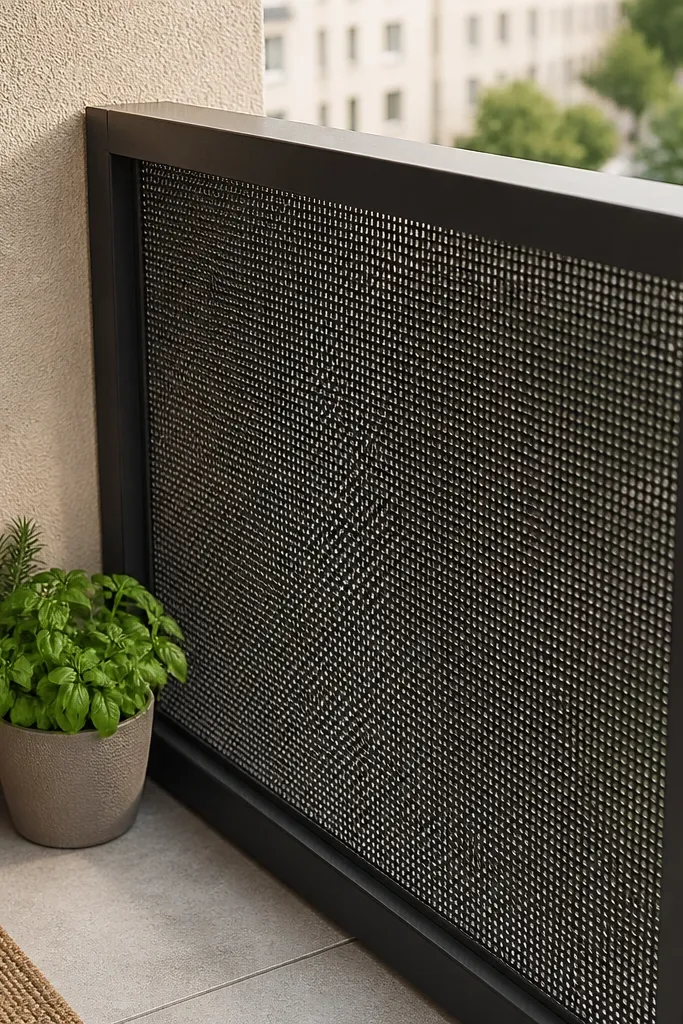
Recessing the mesh makes the railing look built-in instead of attached. The thin perimeter frame keeps the design crisp, and the mesh texture adds depth that shows well in daylight. This option is great for small flats because it keeps the silhouette light — the mesh sits inside the outline rather than jutting out. It also works as a beginner-friendly balcony railing design because mesh panels are easier to cut and mount than glass.
Install a thin perimeter frame around your infill area, then cut mesh panels to fit inside the frame opening. Fasten mesh using small screws through edge channels so the mesh stays taut. Prime and paint the frame matte, then check tension so the mesh doesn’t sag in the middle.
Editor's noteTaut mesh reads cleaner; pull it tight before you lock the last screws.
Skip thisDon’t mount mesh directly to rough metal edges; it will deform and snag.
21. Smoked polycarbonate panels with vertical mounting bars
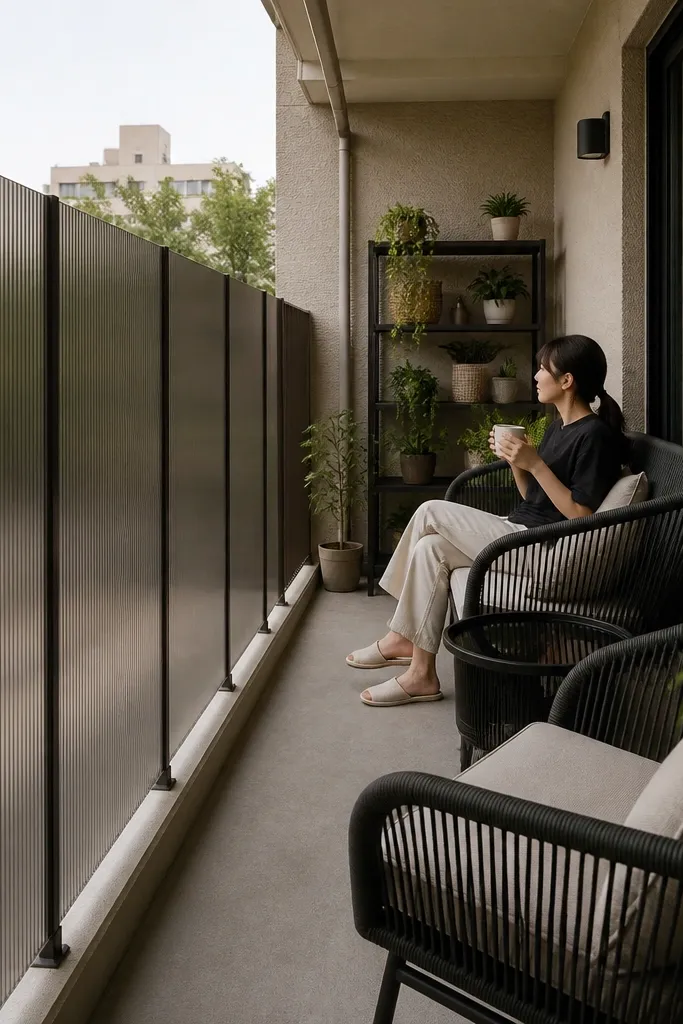
Smoked panels add privacy and a sleek look, but the design stays small-flat friendly when you keep the frame slim and use vertical mounting bars instead of thick horizontal rails. The smoked tone hides clutter behind the railing and gives the balcony a calmer, curated feel in photos. It’s also beginner-friendly because you’re installing a panel system that mounts to existing posts. Use a lighter smoke shade if your balcony gets limited daylight.
Measure the infill opening and cut smoked polycarbonate to size, leaving a small expansion gap at all sides. Install vertical mounting bars first, then mount the panel using clips that allow slight movement. Seal or gasket the edges and apply a final coat on any exposed metal frame parts.
Editor's noteChoose a smoke shade that still lets you see light through — it keeps the balcony from feeling closed in.
Skip thisDon’t overtighten clips; polycarbonate needs room to expand.
22. Patterned privacy screen vinyl strips on metal frame
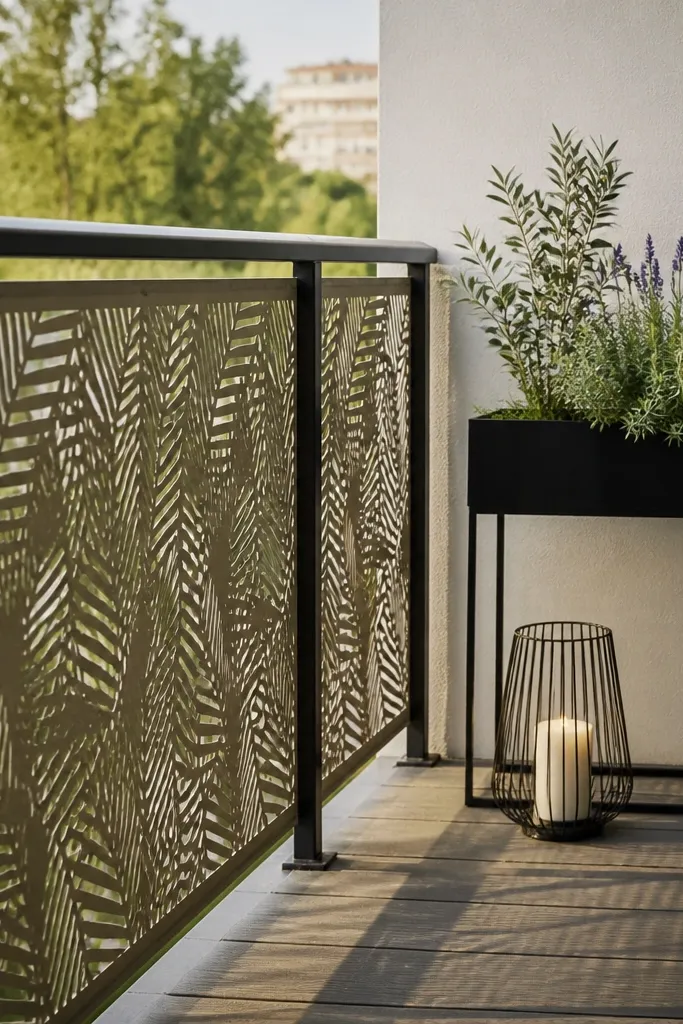
If you want privacy and style without building a full infill, patterned privacy screen strips are a smart move. They create a repeating texture that looks intentional and helps hide the balcony contents from casual viewing. Keep the frame minimal and use strips with a matte finish so they don’t glare. This is beginner-friendly because installation is mostly measuring, clipping, and trimming — no woodworking skills required.
Build a thin metal frame or use your existing railing and attach clip rails along the sides. Cut privacy strips to height, then clip them onto the rails in a consistent pattern, starting from one corner and working across. Trim the ends with a sharp utility blade, then check for loose edges that can lift in wind.
Use a grid template on masking tape so strip placement stays straight.
Don’t install in wind; strips catch air and you’ll end up with uneven rows.
23. Two-tone railing: natural wood posts with matte black bars
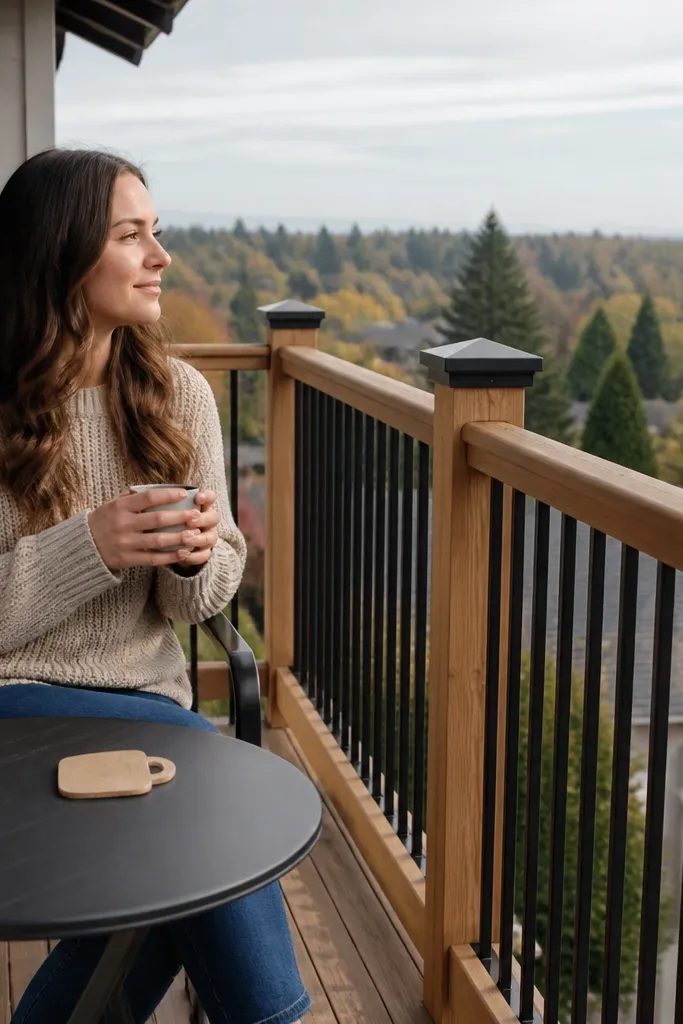
Two-tone railings look designer because they separate the structure from the infill. Natural wood posts add warmth, while matte black bars keep the look modern and clean. The contrast helps the balcony read as intentional design, not a basic railing. For beginner-friendly balcony railing design for small flats, this is a reliable formula because each material has a clear job: wood for warmth, black for structure lines.
Sand and seal wood posts first so they handle moisture, then install or paint the metal bars matte black. Attach bars to the posts using brackets that allow you to keep spacing even. Finish by sealing all metal touchpoints and re-checking alignment after the first day because temperature changes can slightly shift materials.
Match your wood stain tone to your balcony flooring or planters for a cohesive look.
Don’t use one glossy material; shiny highlights make the railing look heavier.
24. Vertical bamboo-style panels with outdoor seal
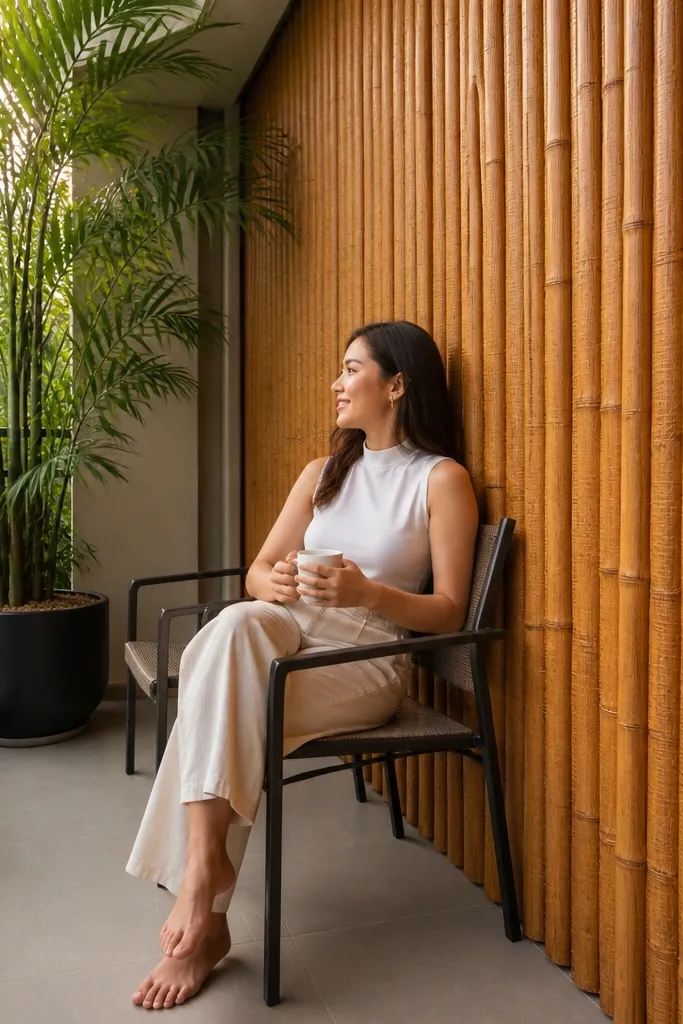
Bamboo-style panels bring a spa-like vibe and cover the railing enough to feel private, while still keeping vertical lines that look tall and open. The key is using outdoor-rated panels, not indoor bamboo mats that fall apart. This design is beginner-friendly because you can install panels as sheet sections onto your posts. It’s also photogenic because the vertical texture shows nicely against concrete and light walls.
Choose outdoor-rated bamboo-style panels or slatted screens and cut them to infill height. Install mounting rails on your posts, then screw the panels into place using exterior screws and washers to prevent splitting. Seal the panel with an outdoor clear sealer and check that edges are protected from rain and splash.
Editor's noteUse washers — they spread load and prevent cracks around screw holes.
Skip thisDon’t skip sealing — unsealed panels fade and get brittle fast.
25. Thin stainless balusters with brushed finish
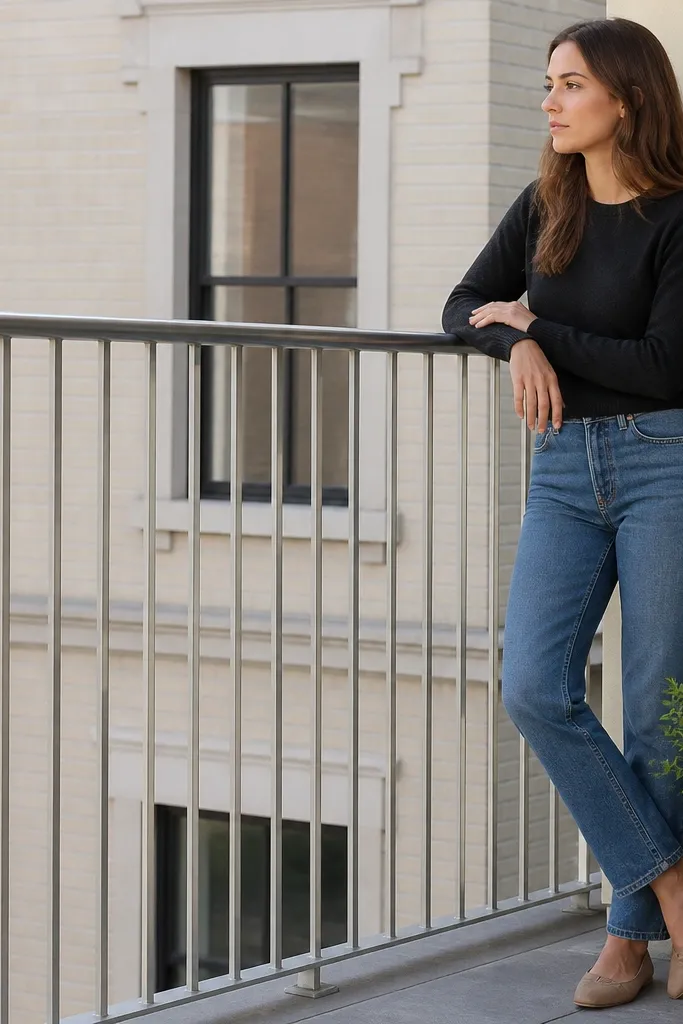
Thin stainless balusters look sleek and clean because they keep the structure lines narrow. A brushed finish reduces glare compared to mirror chrome, which matters on balconies in direct sun. This is a good option when you want a modern look that still feels airy. It’s beginner-friendly if you’re replacing existing balusters with a kit or premeasured set, since you’re not designing the whole frame from scratch.
Measure the spacing between your existing top rail and lower anchor points, then choose balusters sized for that gap. Install brackets or sleeves at consistent intervals, then attach each baluster with the kit’s hardware. Finish by polishing the brushed areas lightly and confirming there’s no wobble at hand height.
Keep balusters perfectly parallel — slight angles show up immediately with thin metal lines.
Don’t use mirror-polished stainless; it throws bright reflections that overpower the balcony.



