

1. Black vertical pickets with 3-inch gap
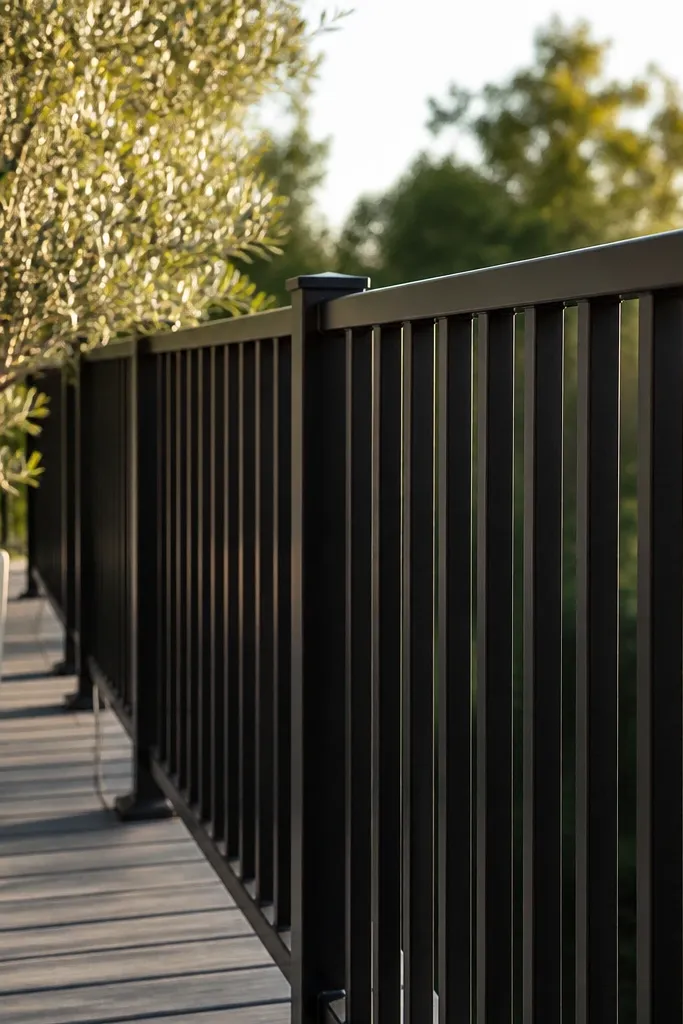
This is the cleanest beginner-friendly balcony railing design because it reads as one long line. Vertical pickets create strong height and make the balcony feel taller, which is exactly what you want on smaller decks. Use a matte black powder-coated finish for the most forgiving look; it hides minor scratches better than glossy paint. The look also photographs well because the negative space between bars stays consistent. Plan on a straightforward build — posts, top rail, then repetitive infill — so you’re not fighting angles.
1) Measure the clear opening between posts and install your top rail level, using a string line to confirm it’s straight. 2) Cut or buy vertical pickets sized so the gap between centers stays at about 3 inches; dry-fit one bay first to confirm the math. 3) Clamp a spacing jig to the posts, then fasten each picket with exterior-rated screws or welded brackets, keeping ends aligned. Finish by checking the whole run for twist — sight down the line from one corner and adjust before the final tightening.
Editor's noteMake a cardboard spacing guide for your first bay. Once you like the look, reuse it for the rest of the railing.
Skip thisSkip mixing different picket widths — it makes the pattern look accidental.
2. Warm cedar frame infill with black posts
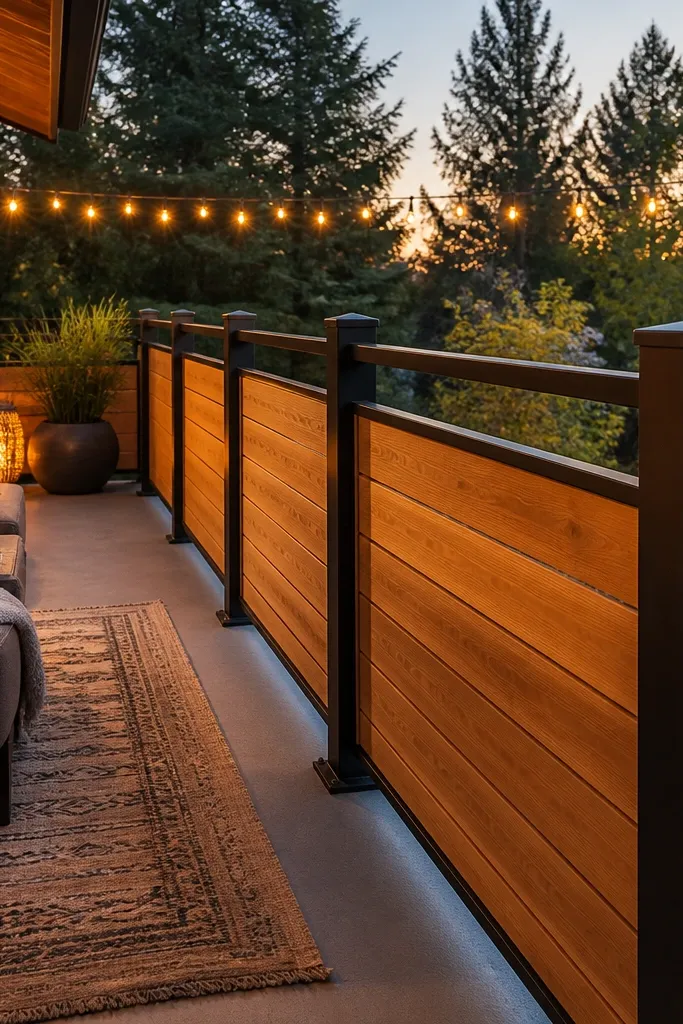
Two-tone railings look designed because the frame creates a border and the cedar adds warmth. Black posts ground the look, while cedar infill makes the balcony feel more like a patio than a construction site. This style is great if you want a modern-but-cozy vibe without complex metalwork. The rectangular frames also hide slight unevenness because the eye reads the frame edges. It’s beginner-friendly if you treat the cedar as modular panels that slide or screw into the metal posts.
1) Install black powder-coated posts and a top rail, then measure the inside opening for your cedar frames. 2) Build cedar rectangles with exterior screws and exterior wood glue, using a simple butt-joint frame or pocket-screw joinery; keep the frame thickness consistent. 3) Attach the frames to the posts using metal brackets or pre-drilled screw plates so you can remove one panel later. Seal the cedar with a two-coat exterior finish — one coat for soak-in, second coat for color uniformity.
Editor's notePre-drill cedar to prevent splitting, and countersink screw holes so you can fill and sand smooth before sealing.
Skip thisDon’t leave cedar end grain raw — seal the ends first or they’ll darken unevenly.
3. Square grid panels with 4-inch spacing
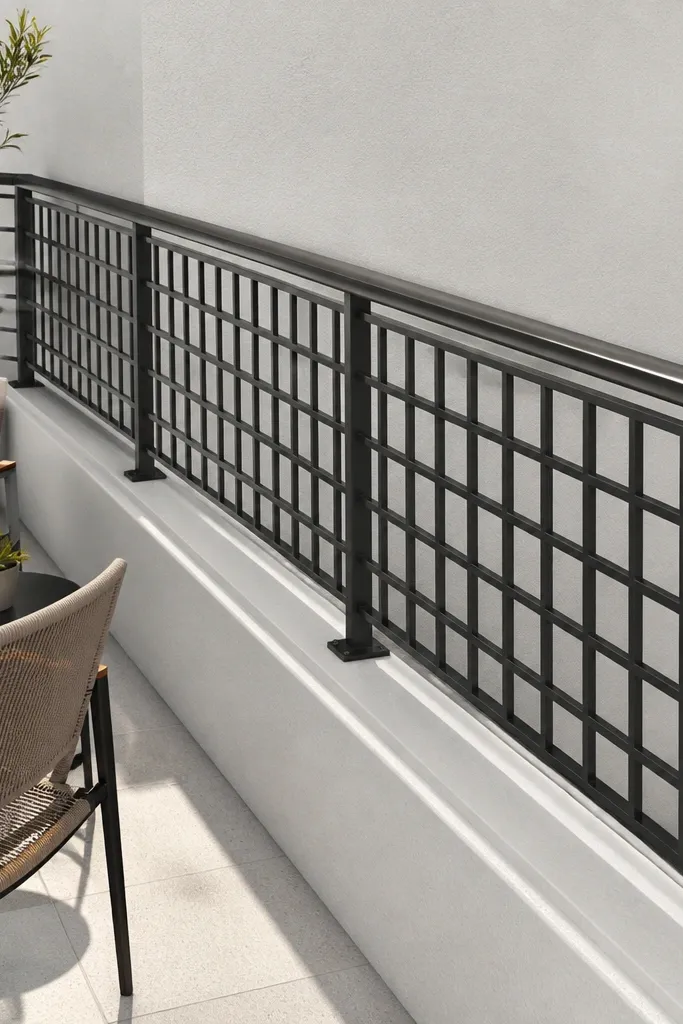
A square grid is one of the most photogenic beginner-friendly balcony railing designs because it looks like architecture, not craft. The repeating squares create a calm pattern that balances busy balconies and makes outdoor furniture look sharper. Use 4-inch grid spacing for a modern feel; it’s open enough to keep sightlines but structured enough to look intentional. If you build this as panels, installation becomes “hang and fasten,” which is easier than setting dozens of individual pieces. Finish in matte black or dark bronze for a crisp, low-glare look.
1) Decide your grid size and convert it to panel dimensions based on your post-to-post span and the space under the top rail. 2) Build or assemble a grid frame using square tubing or welded wire-like metal strips, then attach the panel to posts with brackets that allow minor leveling. 3) Check level across the whole run, then fasten all corners. Paint or powder-coat touch-up areas after any drilling so you don’t get rust spots.
Editor's noteUse a single reference square (a scrap 4-inch frame) as your alignment tool while assembling the grid.
Skip thisAvoid a grid with mixed line thickness — it looks DIY because the pattern feels inconsistent.
4. Diagonal brace pattern in oil-rubbed bronze
Diagonal braces add movement and hide flaws in the underlying structure. When the diagonals repeat in a consistent direction, the railing looks custom, not patched. Oil-rubbed bronze is forgiving — it looks good even with minor texture differences because the finish has depth. This design works especially well on corner balconies because the diagonals catch light and frame views. It’s still beginner-friendly if you use pre-cut diagonal sections and attach them to a simple rectangular frame.
1) Build a basic rectangle between posts with top rail and bottom rail, then mark diagonal lines so each bay forms a consistent X or V pattern. 2) Cut diagonal brace pieces to length, then tack them in place with clamps before final fastening. 3) Attach braces using welded tabs or exterior metal brackets, then fill small gaps with exterior-rated metal filler if needed. Finish with bronze paint or powder-coat and touch up all drilled points.
Dry-fit one bay and photograph it from two angles. If the diagonals feel too tight or too wide, adjust before you cut everything.
Don’t rotate diagonals randomly between bays — it creates visual noise.
5. Horizontal slat railing with staggered seams
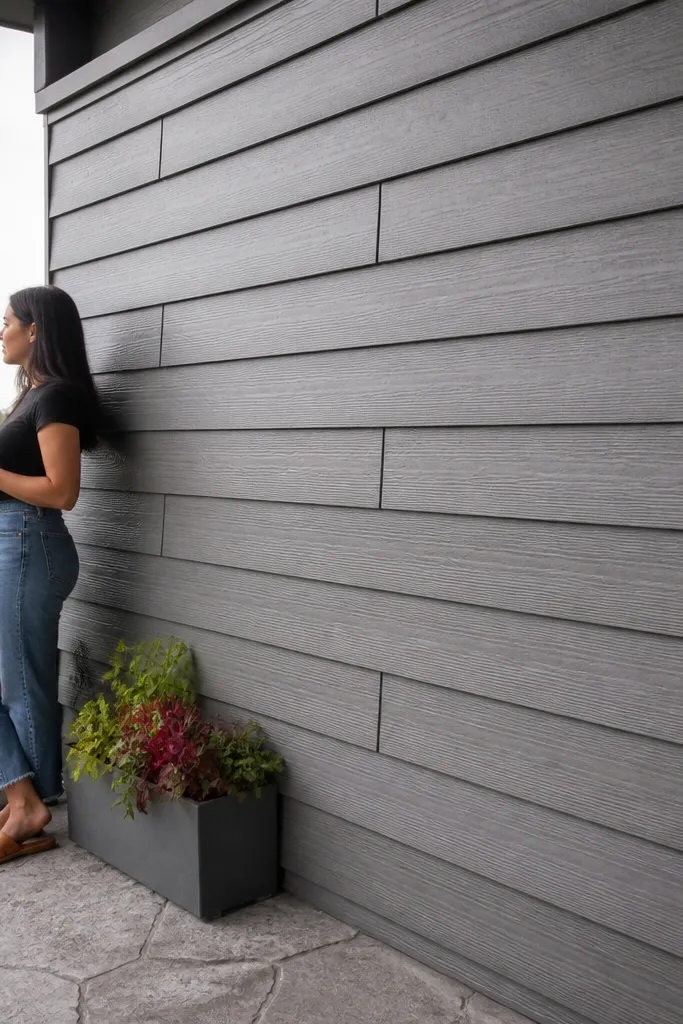
Horizontal slats are a strong visual move because they create a sleek, low-profile look. Staggered seams make it look more like a designed system than a stack of boards. This is a great beginner-friendly balcony railing design when you want to soften the look without going fully decorative. Use exterior composite or cedar slats for straightness and weather resistance. The stagger also helps hide minor length differences between slats, which is where beginners usually struggle.
1) Build a simple frame with posts and a top rail, then decide your slat spacing and overlap so gaps stay even. 2) Cut slats to consistent length and pre-drill screw holes; offset each seam by one slat width every other row. 3) Fasten slats to rails with hidden brackets or screws through pre-drilled holes, keeping each row level. Seal or stain all faces and edges, then do a final check for uniform color across slat ends.
Editor's noteUse a spacer block to keep every slat gap identical. It’s faster than measuring each one.
Skip thisSkip sealing the underside edges — those are the first parts to warp and look uneven.
6. Clear acrylic panels with slim metal framing
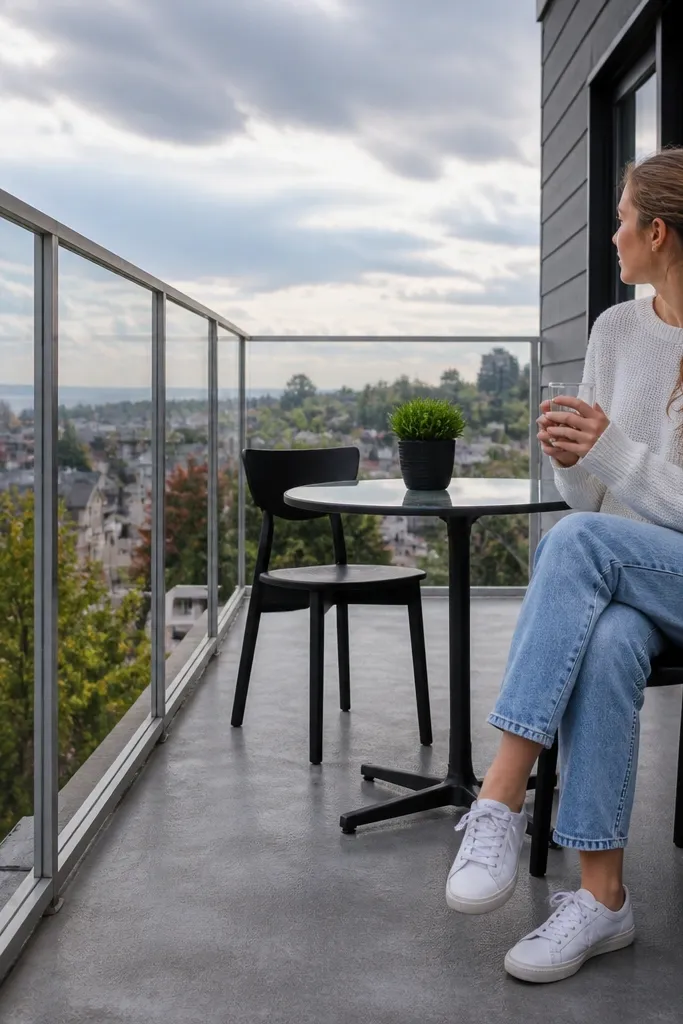
If your balcony already has a great view, clear panels make the railing disappear without looking flimsy. Slim metal framing keeps lines crisp and makes the whole thing look intentional. This design is beginner-friendly because it uses fewer moving parts than patterned metal, and you can install panels as one piece per bay. Choose UV-stabilized exterior acrylic and a dark frame to prevent yellowing against sky light. It looks modern and clean in photos because the eye reads the view, not the structure.
1) Install slim posts and a top rail, then measure the exact panel opening for each bay with the frame installed. 2) Cut UV-stabilized acrylic to size with a fine-tooth blade or router bit, then leave a small expansion gap around edges. 3) Mount acrylic using gasket strips and mechanical fasteners through the frame, not directly through the acrylic. Use a clear weather sealant at frame corners only where needed, then remove any protective film after installation.
Editor's noteLeave a 1/8-inch gap around acrylic edges so temperature changes don’t cause stress cracking.
Skip thisDon’t overtighten the frame hardware — acrylic needs breathing room.
7. Whitewashed wood railing with black iron accents
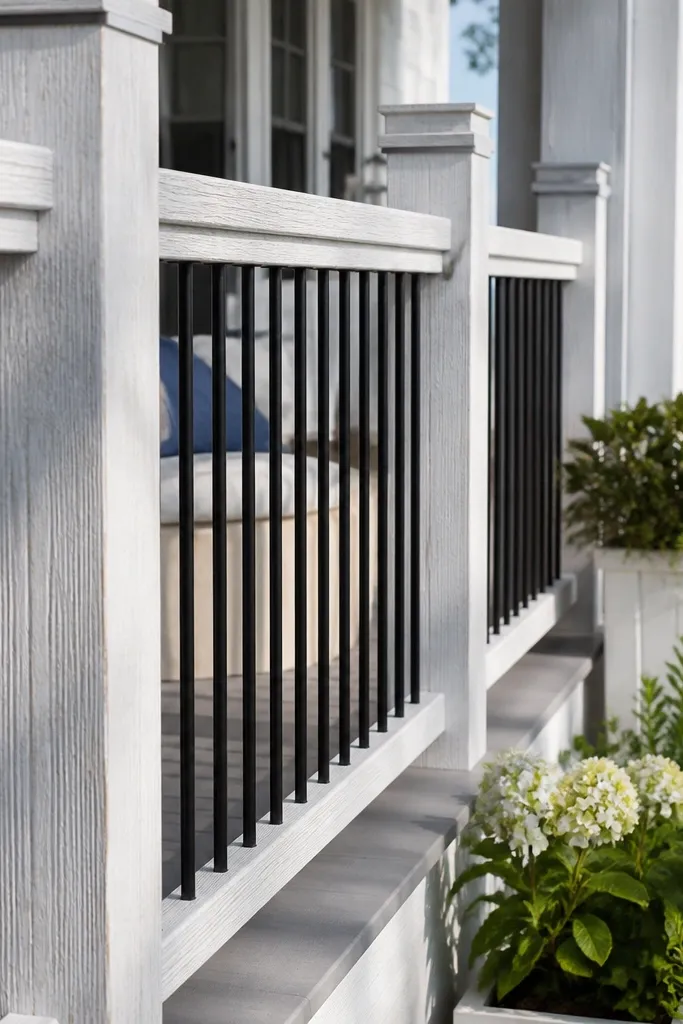
This one looks coastal and styled without needing expensive hardware. Whitewashed wood gives a light, airy look that photographs well, while black iron accents add contrast and make the railing feel “finished.” The key is keeping the iron accents consistent — same thickness and spacing — so it reads like a pattern rather than random decoration. Beginner-friendly balcony railing design works here because the wood is easy to cut and the decorative iron pieces are the only complex part. Use it on balconies with light walls or outdoor rugs so the color story stays cohesive.
1) Build a wood top rail and posts from exterior-rated lumber, then sand smooth and apply a whitewash stain in thin coats. 2) Add black iron vertical accents using pre-drilled mounting plates so you don’t have to weld. Space accents evenly between posts, then mark screw locations with a template. 3) Seal everything with an exterior clear coat so the whitewash doesn’t streak. Finish by checking the railing height and line straightness with a level.
Use a foam brush for whitewash to prevent lap marks on flat boards.
Don’t skip a clear topcoat — whitewashed wood fades unevenly in sun.
8. Steel cable railing with horizontal tension line
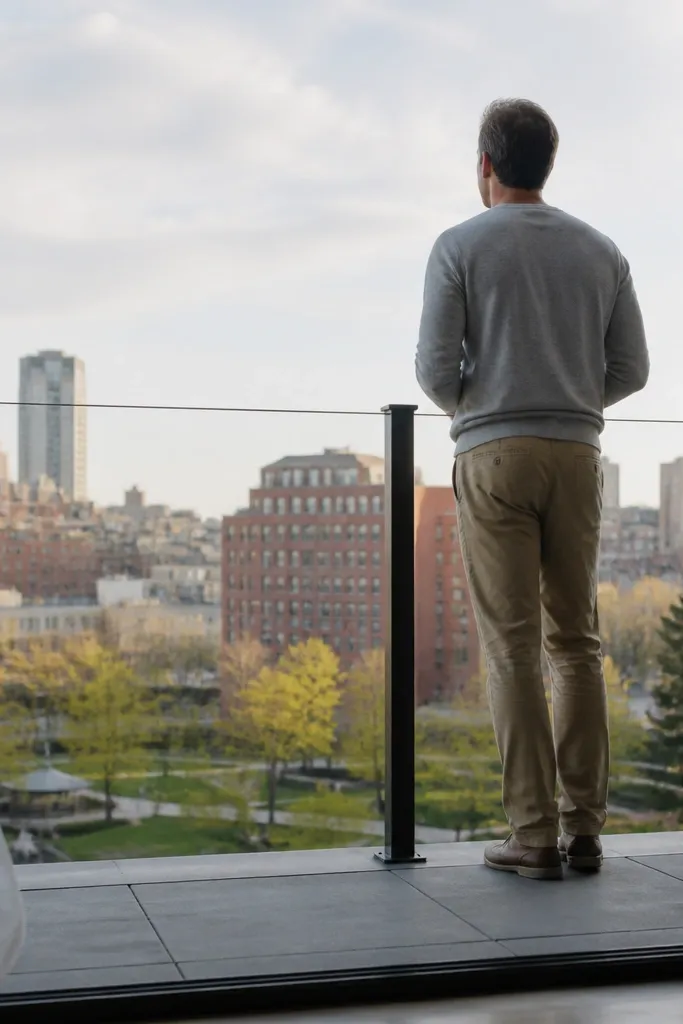
Cable railings look sleek because they create thin lines and open sightlines. This style works great if you want a modern, low-visual-bulk railing that doesn’t block views. The “beginner-friendly” part is choosing a system with pre-sized kits and hardware that’s designed for tensioning. With cables, the spacing needs to be consistent so it looks intentional and doesn’t sag. Finish the posts and top rail in matte black for a clean, non-glossy look that photographs well.
1) Install posts and a solid top rail, then mark cable holes at consistent heights using a measurement guide. 2) Thread cables through posts and attach cable ends with tension hardware from the kit, leaving slack for adjustment. 3) Tension each cable evenly, then cut excess and crimp or cap ends as directed by the hardware. Check cable straightness by sighting along the railing and re-tension if any line dips.
Use painter’s tape as a temporary marker on cables so you can see movement while tensioning.
Don’t guess cable spacing — use a jig or template so the gaps look even.
9. Mosaic metal infill made from 2-inch squares
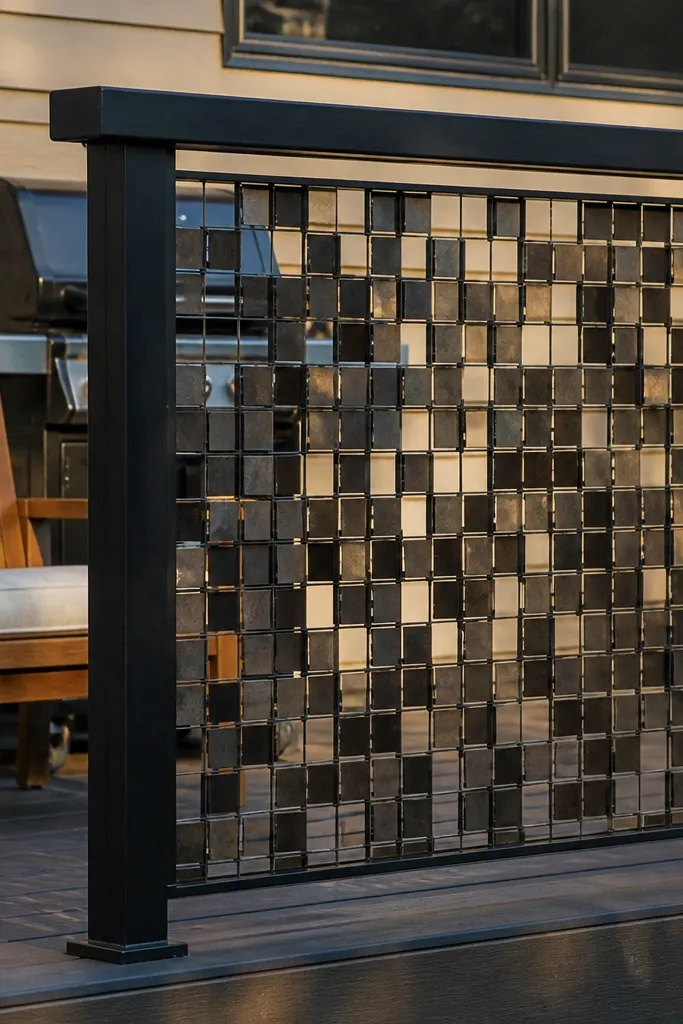
A mosaic pattern adds texture without getting too ornate. Small 2-inch squares create a pixel-like rhythm that looks great in photos and hides minor unevenness in DIY builds. This style is best when you keep the rest of the railing simple — dark posts, one top rail, and only the infill does the work. It’s beginner-friendly if you buy pre-cut square metal pieces or use a metal mesh panel system. The look reads modern and slightly artsy, without needing complex joinery.
1) Build a rectangular frame between posts, then decide the infill grid size and spacing. 2) Attach square pieces to the frame using spot welding tabs, rivets, or exterior screws with washers; keep each square aligned with a spacer. 3) Once the infill is complete, apply a metal primer and paint or powder-coat to unify the finish. Let it cure fully before touching the surface to avoid scuffs.
Make a quick “mosaic board” from scrap plywood with marked grid lines. It speeds up placement and keeps everything straight.
Don’t leave sharp edges exposed — deburr and file every cut piece.
10. Slatted privacy panel with 45-degree louvers
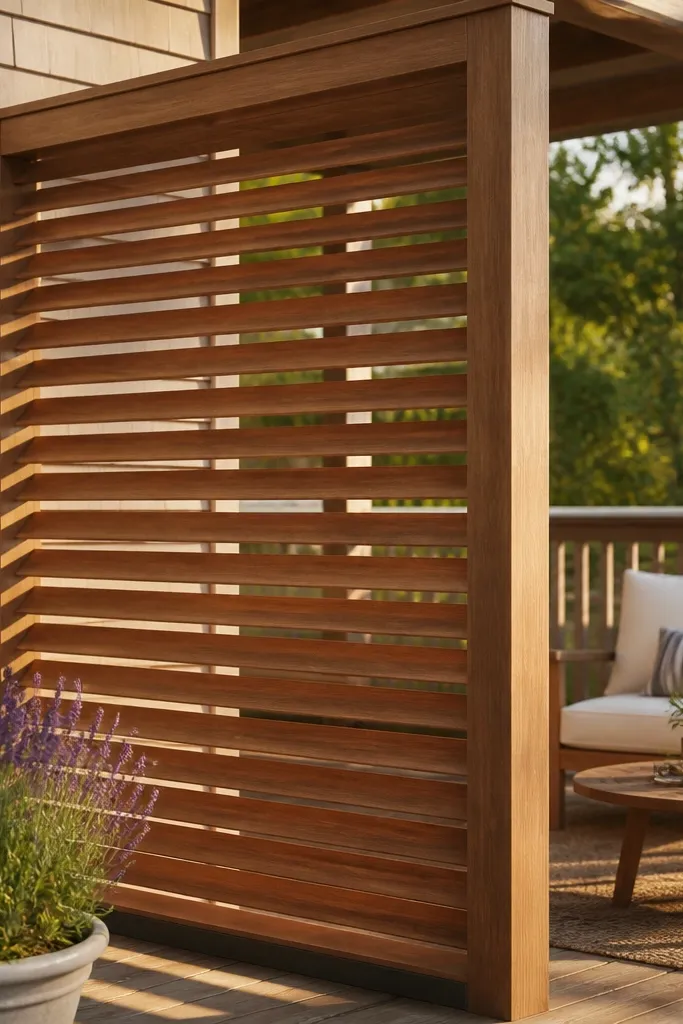
Angled louvers look stylish and solve a real problem: privacy without a full wall. The 45-degree slat angle filters light and gives a softer look than straight pickets. This is beginner-friendly if you build a panel system: one louver frame per bay instead of dozens of individual pieces. Choose cedar or composite slats, then paint or stain the frame to match. In photos, the slat shadows create depth, which makes the railing look more expensive.
1) Build a louver frame between posts and cut slats to a consistent length with uniform spacing for the gaps. 2) Mount slats at a fixed 45-degree angle using a simple jig: one spacer block sets the tilt, and one guide line sets the gap. 3) Attach the panel to posts with removable brackets so you can replace slats if one gets damaged. Finish by sealing all sides, especially the cut ends.
Stagger slats by half the gap every other row to make the shadow pattern look intentional.
Avoid random slat angles — it turns the shadow pattern into a messy blur.
11. Geometric diamond screen in matte bronze
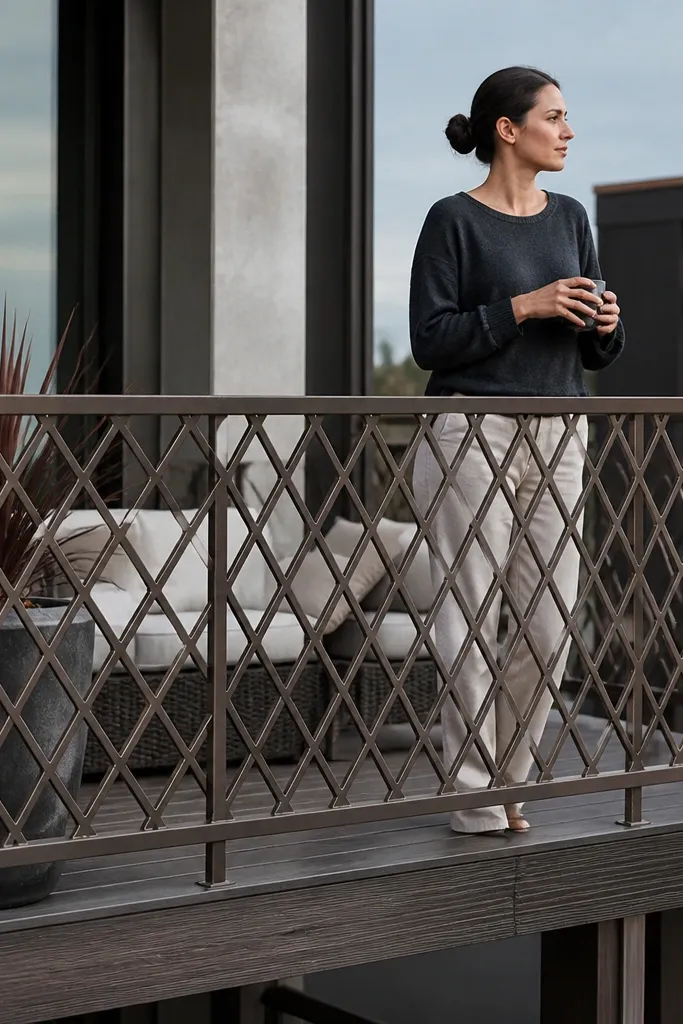
Diamonds are a great way to make a railing look designed while keeping the build structured. The pattern is visually active, but it stays orderly if the diamond size and spacing are consistent. Matte bronze adds warmth and hides small surface imperfections. This is beginner-friendly when you use a pre-fabricated diamond grid sheet or build a diamond frame from strips. The result looks great from street level because the pattern catches light and creates depth.
1) Measure each bay and cut the diamond sheet or build a diamond frame so it fits inside your posts and under the top rail. 2) Attach the infill using brackets around the perimeter — four points per corner is enough if the frame is stiff. 3) Seal or paint any cut edges on metal pieces to prevent corrosion. Install the panel level and tighten all mounting points after you confirm the top rail is straight.
Editor's noteUse a perimeter frame even if you have a diamond sheet. It makes the whole thing look intentional and cleaner in photos.
Skip thisDon’t skip edge protection on cut metal — it will show rust through the finish.
12. Two-tone vertical slats with alternating widths
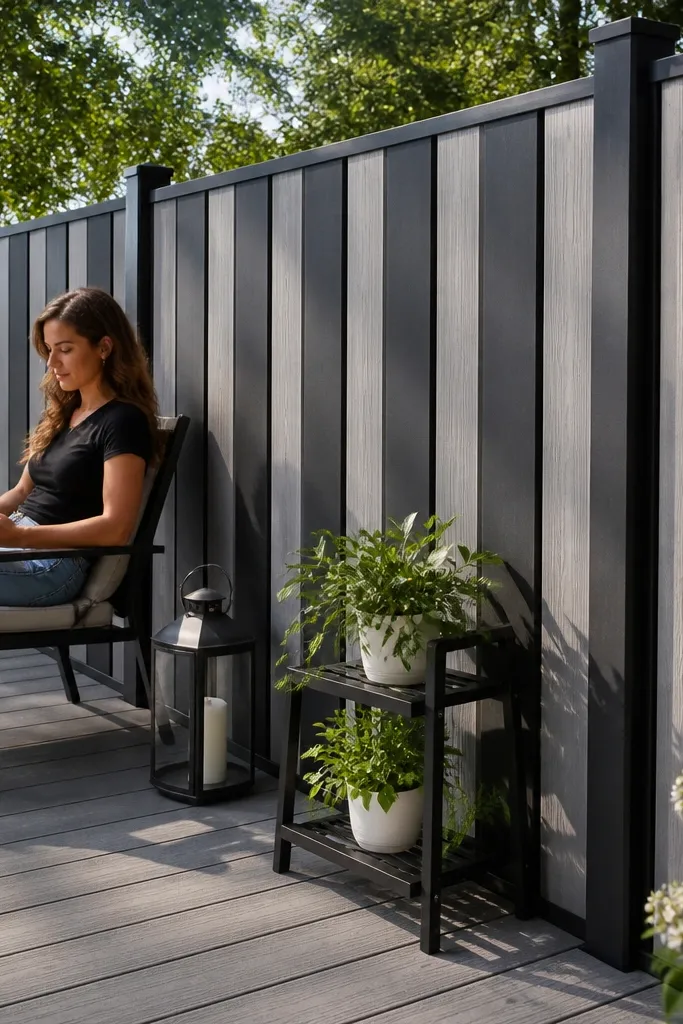
Alternating slat widths creates rhythm without clutter. Pair it with two-tone color — like dark posts with medium-gray slats — and the railing looks like a design system. This is beginner-friendly because you’re still working with vertical lines, but you’re adding interest through repeatable dimensions. Keep the number of widths consistent across the entire run so it doesn’t feel random. The look is especially good on balconies with simple furniture because the railing becomes the visual anchor.
1) Choose your two slat widths (for example, 1-inch and 2-inch) and mark a repeating sequence on the frame before you cut everything. 2) Cut slats from exterior-rated wood or composite, sand edges smooth, and pre-drill screw holes. 3) Install the wide slats first for alignment, then fill in the narrow slats using a spacer that matches the gap you want. Finish with two coats of exterior stain or paint, keeping slat colors consistent.
Editor's noteLabel slats by width as you cut. It prevents sequencing mistakes that are hard to spot until the railing is installed.
Skip thisAvoid mixing wood species or colors without matching stain depth — the two-tone effect turns patchy.
13. Round balusters with dark stain and brass caps
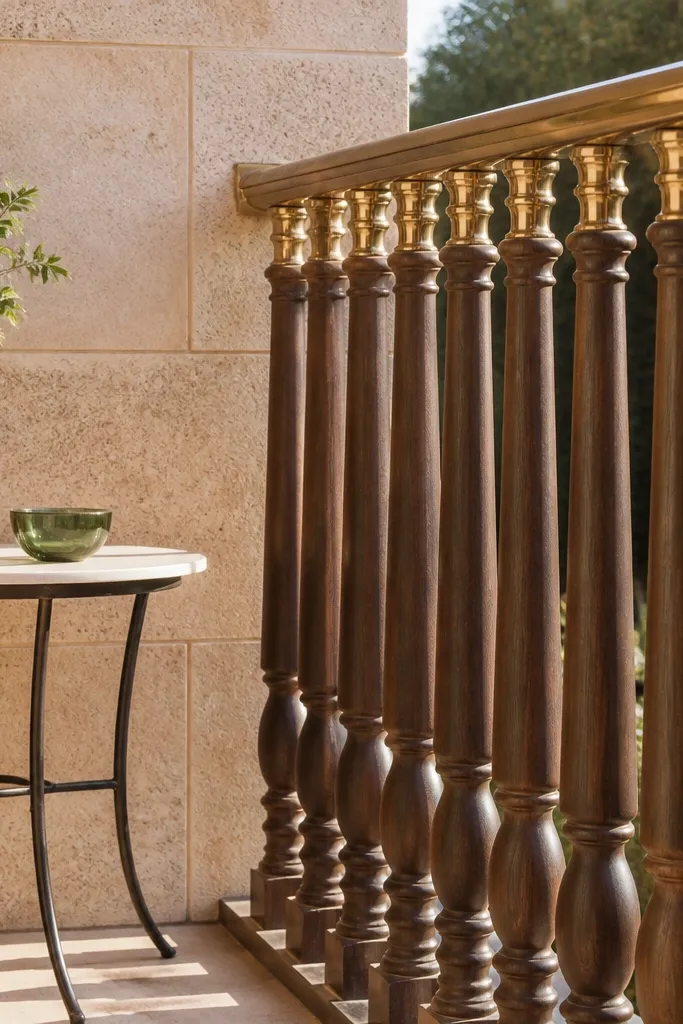
Round balusters soften the look and make the railing feel more custom. Adding brass caps at the top of each baluster gives you that “designer detail” that reads clearly in close-up photos. This is beginner-friendly balcony railing design when you buy pre-made round balusters and just plan the spacing and top rail mounting. Dark stain keeps it modern; brass gives the warmth and contrast. Use this on balconies with wood decking, light siding, or modern outdoor seating.
1) Install posts and a top rail, then mark baluster locations with a straight spacing template. 2) Drill mounting holes or use baluster mounting brackets designed for round balusters so you don’t fight alignment. 3) Attach each baluster, then add brass caps using threaded inserts or small screws. Stain the wood balusters before assembly if possible so the color is even; seal with exterior clear coat after caps are installed.
Test your brass color against your siding by holding a cap near the wall in daylight. It keeps the contrast from going muddy.
Skip staining before assembly if you can — touch-up spots around brackets show up in photos.
14. Open lattice panel with shadow-gap spacing
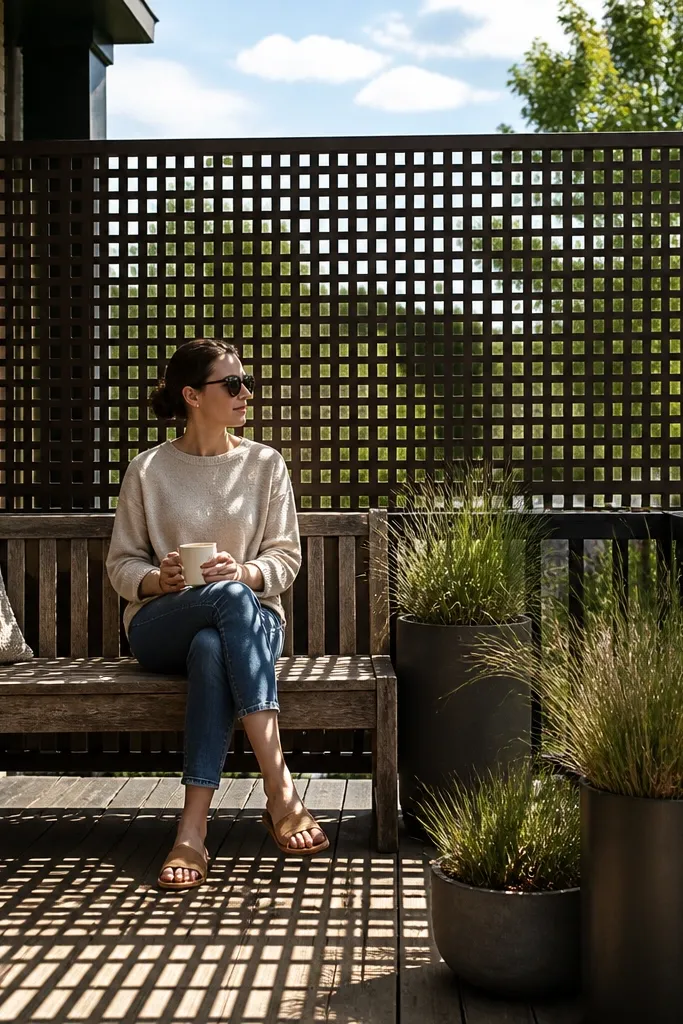
Lattice looks good because it creates shadows — the design is as much about light as it is about material. The key to making it look premium on a balcony is shadow-gap spacing: leave a small consistent gap so pieces don’t look like one flat sheet. This beginner-friendly balcony railing design is manageable because lattice can be built as a panel and mounted between posts. Use exterior lattice strips and seal thoroughly so the pattern stays crisp. In photos, the lattice reads as airy and architectural, not heavy.
1) Build a rectangular lattice panel with crisscross strips, using a spacer strip to keep a consistent gap at intersections. 2) Mount the lattice panel between posts with a perimeter frame so the edges look clean. 3) Sand all contact points, then seal all surfaces and edges with an exterior clear finish. Install the panel level and check for bow; add a diagonal brace behind the lattice if it feels flexible.
Use a 1/8-inch spacer at intersections. It’s small enough to look delicate but large enough to create visible shadow lines.
Don’t glue every intersection. The panel needs slight movement outdoors or it can warp and pull apart.
15. Clear polycarbonate with horizontal wood cap
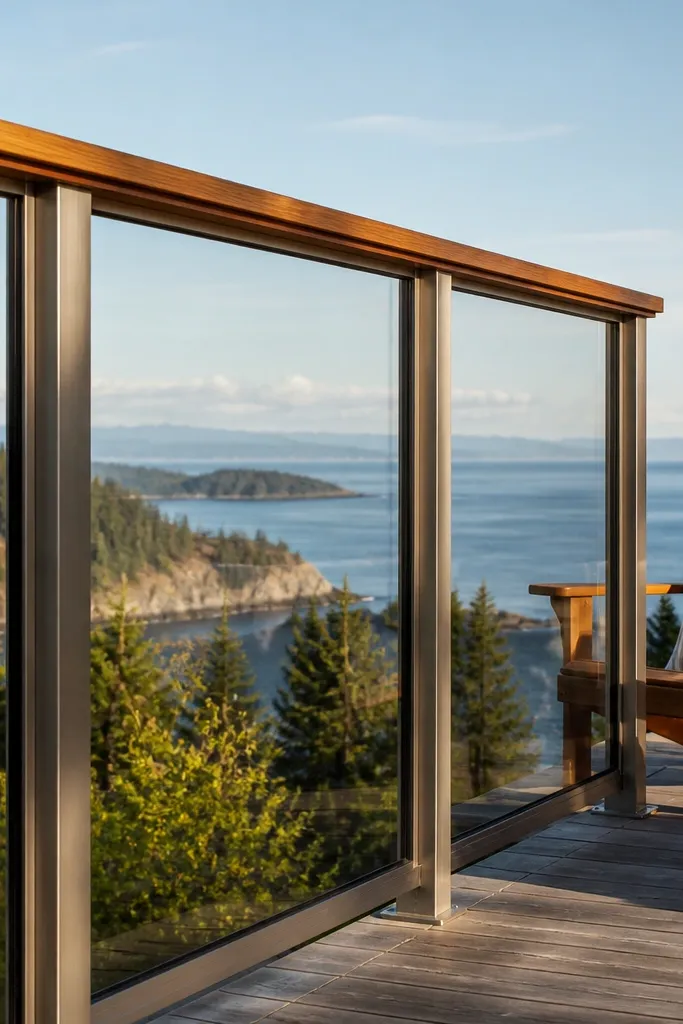
This design keeps the view open while giving you a warm top rail that looks intentional. Clear polycarbonate panels are tougher than acrylic for many outdoor setups, and they catch less glare than glossy glass. The warm wood cap adds contrast and makes the railing look “finished” even from a distance. It’s beginner-friendly because you can mount panels with simple frame rails and gasket strips. Choose a wood cap profile that’s slightly thicker so it reads as a real top rail, not a thin trim strip.
1) Build or install a frame with posts and a horizontal top rail, then measure each bay for polycarbonate panel size with expansion gaps. 2) Cut polycarbonate and drill mounting holes using the proper bit size so you don’t crack it; use gaskets between panel and frame. 3) Install panels, then cap the top with a sealed wood rail. Seal the wood cap with exterior finish and fasten it with stainless screws.
Use stainless hardware and keep all fasteners below the top cap line to reduce water exposure on screw heads.
Don’t mount polycarbonate directly without gaskets — it can squeak and stress-crack.
16. Wrought-style scrolls on a simple black frame
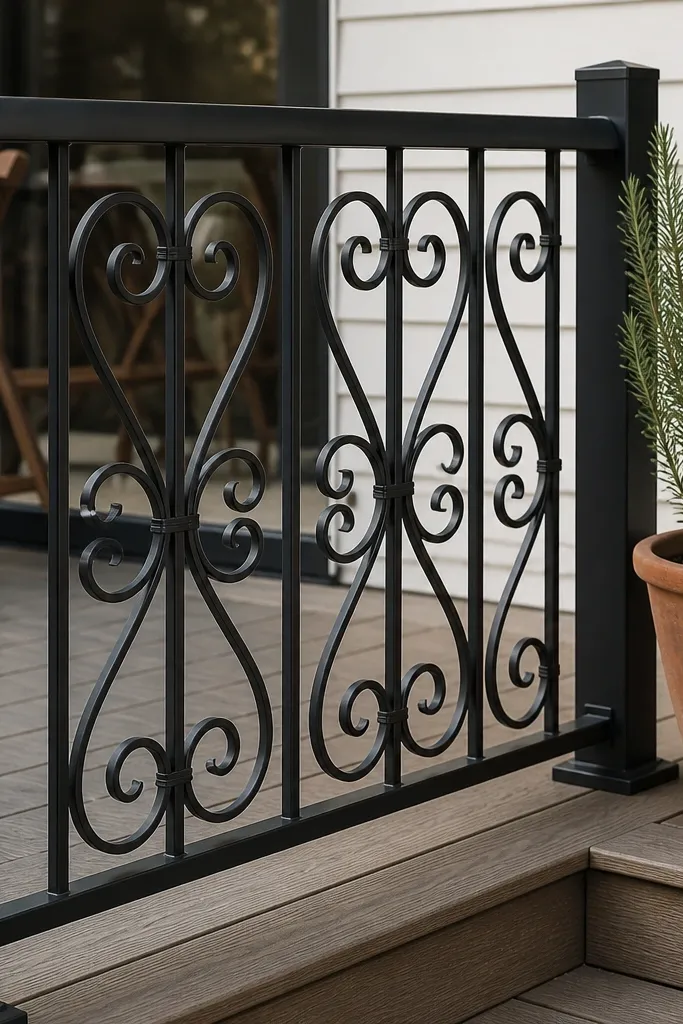
Scroll details can look expensive without building a fully ornate structure. The trick is to keep the base frame simple: black metal posts, a flat top rail, and evenly spaced scroll inserts. This makes the decorative element feel controlled instead of cluttered. Beginner-friendly balcony railing design works here because the scrolls come as pre-made pieces that you attach to the frame with brackets or bolts. The result looks classic and photogenic, especially when the scrolls cast small shadows on the wall behind.
1) Install posts and top rail, then mark scroll positions using a template so spacing is consistent across bays. 2) Attach scroll pieces to the frame with mounting plates; drill pilot holes so you don’t deform the metal. 3) Add a bottom rail for stiffness and align the scrolls vertically. Prime any bare metal spots after drilling, then paint or powder-coat to unify the finish.
Choose scrolls with a consistent footprint size so the pattern doesn’t “grow” visually from one bay to the next.
Avoid mixing scroll sizes — it reads random and less intentional.
17. Rustic reclaimed wood rails with steel side supports
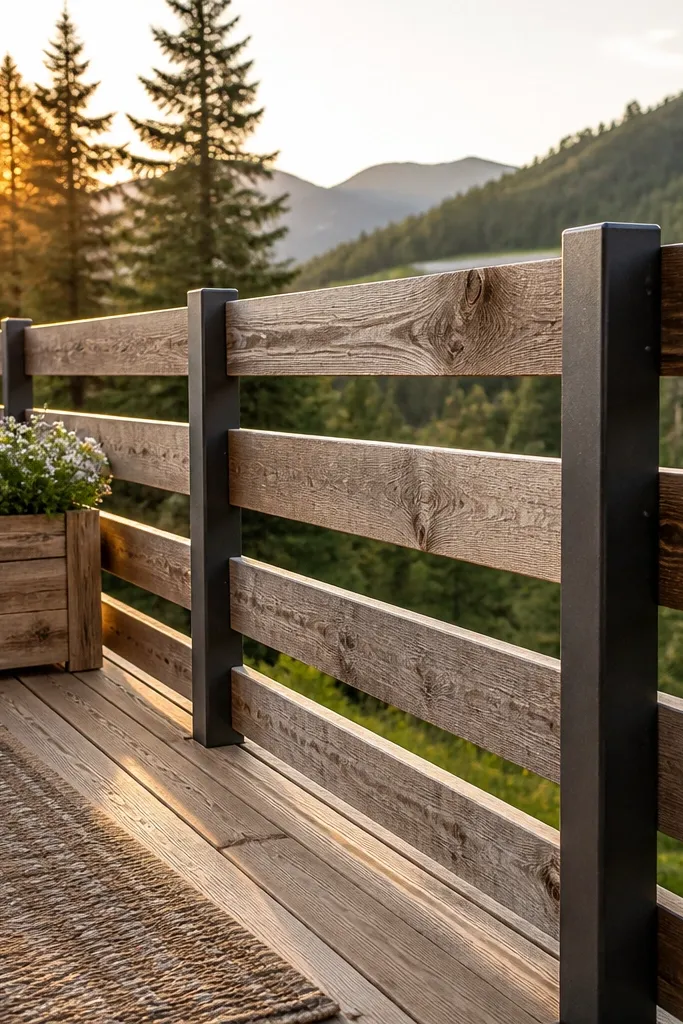
Reclaimed wood gives immediate character, and steel side supports keep the structure straight. This style looks stunning because the wood grain and knots create natural variation that the eye loves, while the steel gives it a modern edge. It’s beginner-friendly balcony railing design if you plan the wood as a few large rails, not a dozen skinny pieces. The steel supports hold everything together and make installation simpler than building a full wood frame. Seal the reclaimed wood properly so it doesn’t turn blotchy or weather too fast.
1) Clean and prep reclaimed wood, then cut it into a consistent top rail and one or two mid rails; sand edges smooth. 2) Install steel posts and side supports, then attach wood rails using exterior brackets or through-bolts with washers. 3) Seal with a UV-stable exterior finish in two coats, and cover end grain with extra product. Check alignment by sighting along the top rail — wood can look straight even when it’s slightly twisted, so confirm with a level.
Editor's noteIf the wood is uneven in thickness, shim under brackets so the rail stays straight instead of forcing it.
Skip thisDon’t skip end-grain sealing — reclaimed pieces show failures there first.
18. Minimalist flat-bar railing with brushed steel finish
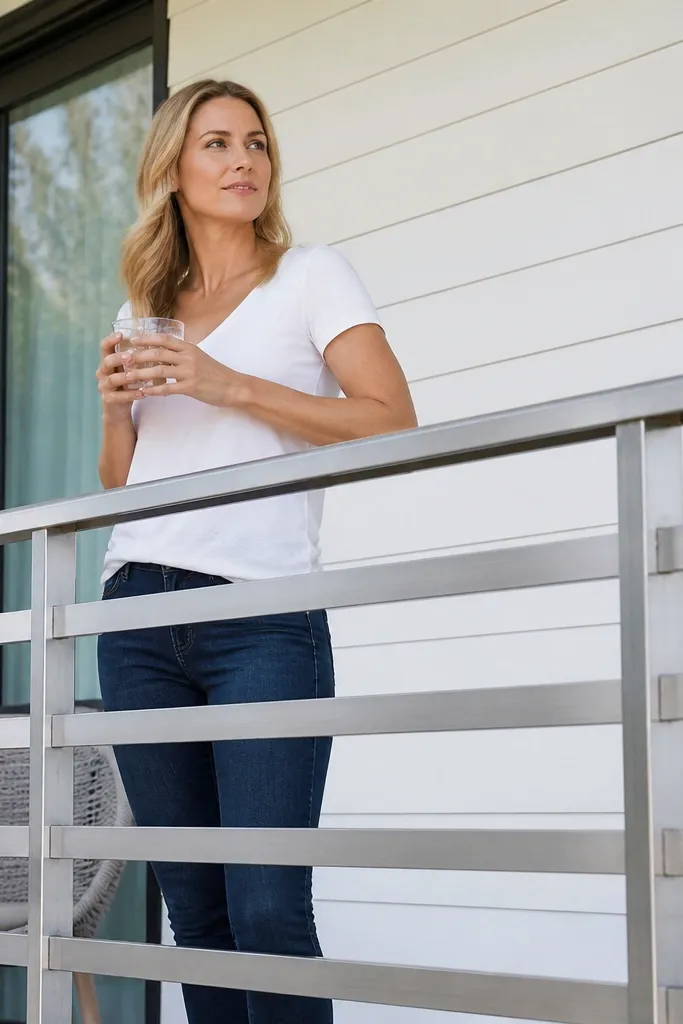
Minimal flat-bar railings look modern because they keep the visual noise low. Wide spacing makes the balcony feel open, and brushed steel gives subtle texture that looks good in natural light. This is beginner-friendly balcony railing design because you’re working with fewer parts: posts, top rail, and a small number of horizontal or vertical bars. Use a consistent bar thickness so the railing reads uniform. It’s also a smart choice if your balcony already has decorative elements and you don’t want the railing to compete.
1) Install posts and a straight top rail, then mark bar positions with a template so spacing is consistent from bay to bay. 2) Cut flat bars to length, deburr edges, and attach with brackets or welded tabs; keep bar alignment with a straightedge. 3) Finish with a brushed metal treatment or a clear protective coating if you’re using stainless. Tighten all hardware and wipe down to remove metal dust before coating.
Editor's noteDeburr edges with a file and then lightly sand. Clean edges make brushed steel look intentional instead of rough.
Skip thisAvoid mixing brushed and painted surfaces randomly — it reads patchy.
19. Matte black vertical slats with steel mesh bottom panel
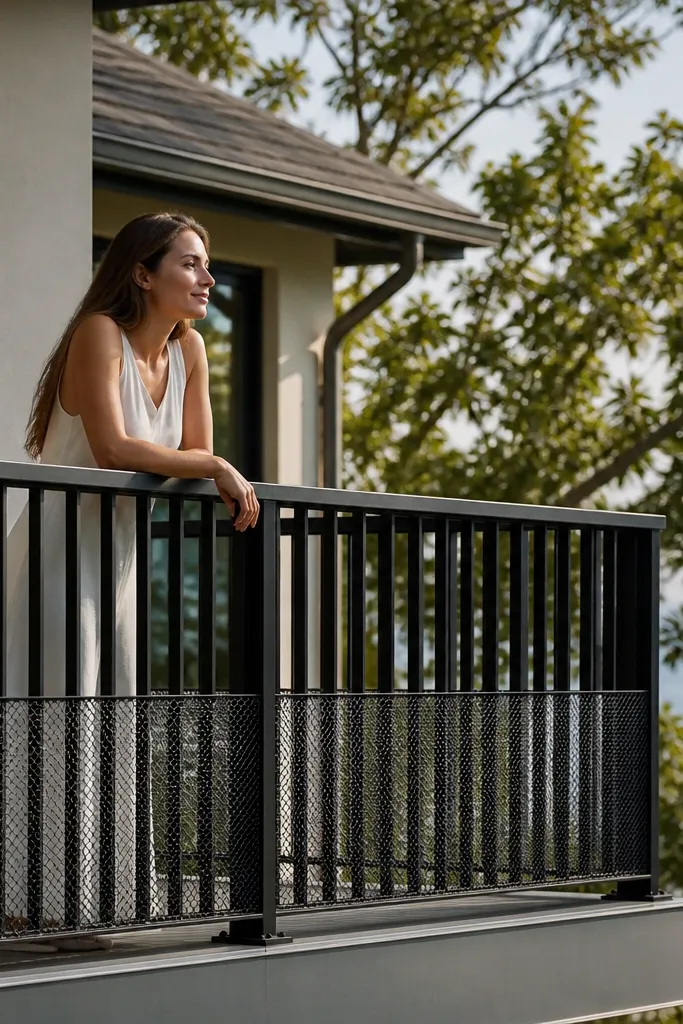
This design handles a common balcony problem: small items or clutter falling through. Vertical slats keep the top section open and stylish, while a mesh bottom panel gives extra protection without turning the whole railing into a solid wall. It’s beginner-friendly because it combines two build types: slats are repetitive and easy, and mesh panels are fast to cut and attach. The look is photogenic because the slats create a clean pattern and the mesh adds a subtle texture band.
1) Build your posts and install vertical slats between the top rail and a chosen “mesh start” height. 2) Cut galvanized steel mesh or a powder-coated mesh panel to fit the remaining lower opening, then attach with perimeter brackets. 3) Ensure everything is level and square, then coat or paint any cut edges on mesh. Finish by checking that the mesh doesn’t sag; add a horizontal support bar if needed.
Choose mesh with a consistent wire thickness so the bottom texture looks even in photos.
Don’t skip a bottom support bar — sagging mesh looks sloppy quickly.
20. Staggered vertical slats with a curved top rail
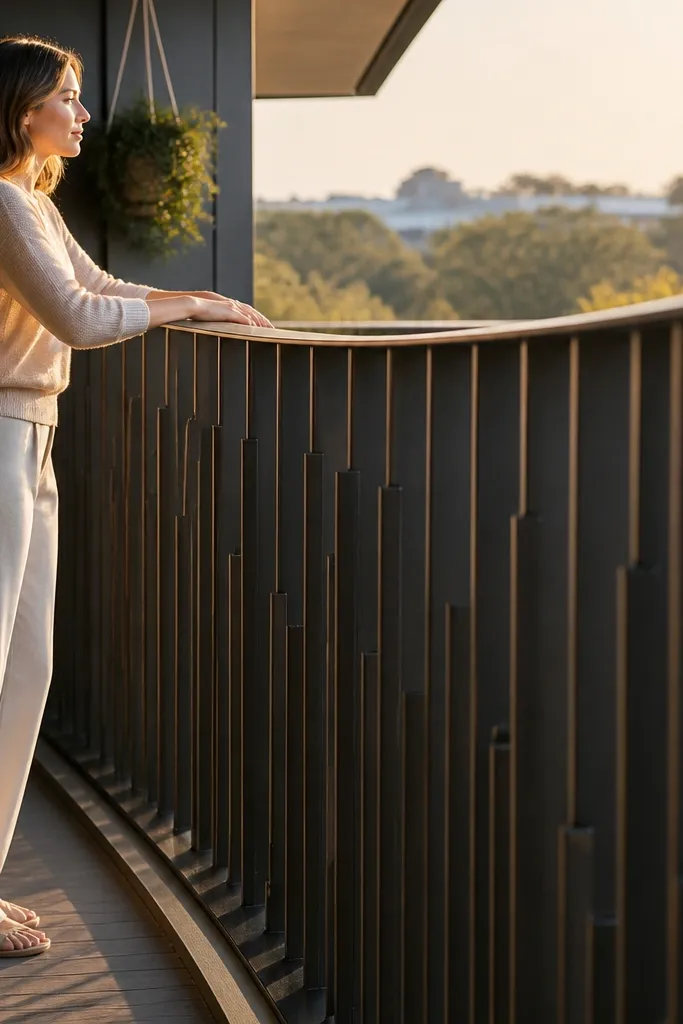
A curved top rail makes a railing look custom even with simple infill. Pair it with staggered vertical slats and you get a soft, modern silhouette that photographs beautifully from the side. This is beginner-friendly if you buy a pre-bent top rail or use a curved metal profile kit; bending your own metal is where beginners get stuck. The staggered slats add depth and reduce the “one-note” look that plain verticals can have. Choose a matte finish so the curve doesn’t show glare.
1) Install posts and the curved top rail using a bent rail kit or pre-bent profile, then confirm the curve is smooth with a long level. 2) Mark slat spacing and install slats in a repeating stagger pattern, keeping each slat plumb. 3) Add a bottom rail or cross support so the slats don’t flex. Seal wood slats or use powder-coated slats if you’re mixing materials.
Editor's noteUse a laser level or long string line to keep slats vertical — curves hide horizontal mistakes but not vertical errors.
Skip thisAvoid trying to curve a wood top rail without proper lamination — it warps.
21. Large square openings with thick border frame
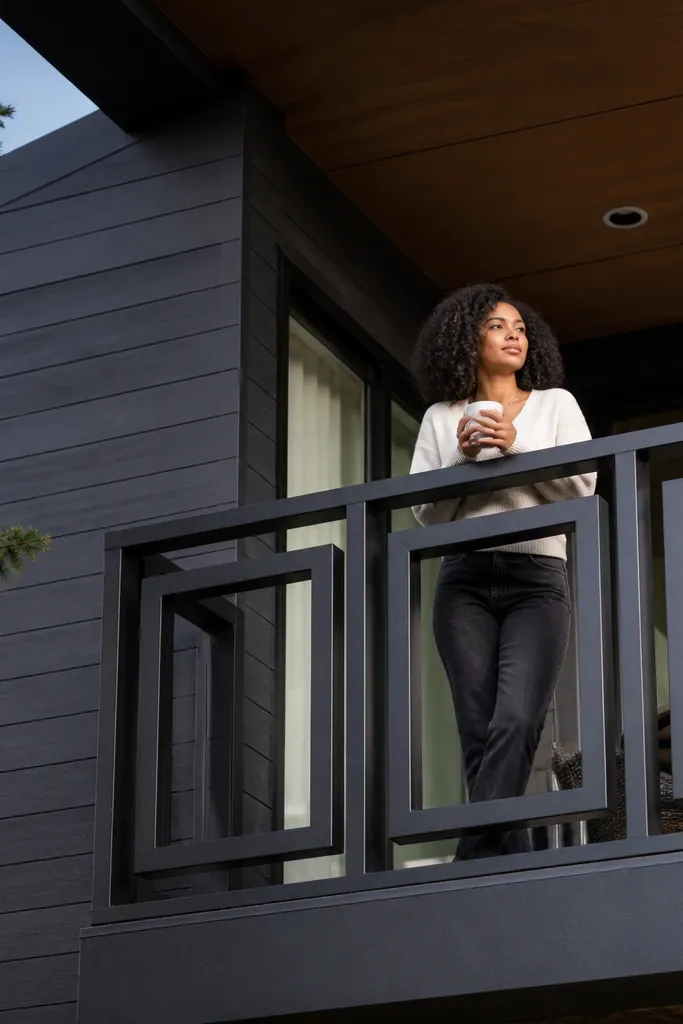
Large square openings look bold and clean because the negative space is big and the border is thick. That thickness matters — it makes the squares feel intentional instead of flimsy. This beginner-friendly balcony railing design works well when your balcony has modern siding lines or when you want the railing to match a contemporary outdoor table. Build it as a frame system with one panel per bay so you don’t spend hours aligning tiny pieces. Finish in black or dark bronze for crisp contrast against most exterior colors.
1) Create a thick perimeter frame between posts and set your square opening size based on your bay width; keep the border thickness consistent across the run. 2) Install internal square dividers to form each opening, using spacers to keep the sizes equal. 3) Mount the panel to posts with brackets that let you adjust alignment by a few millimeters. After installation, touch up drilled points and check the whole run for level at the top rail.
Editor's noteMake one test panel bay on the ground. Measure it against your opening before you build the full run.
Skip thisDon’t make the internal dividers too thin — the squares start to look weak.
22. Vertical slats with inset lighting channel look

Lighting channels make a railing look high-end because the detail shows up after dark. This design keeps the main pattern simple — vertical slats — and adds a hidden or shallow inset channel along the top rail. Even if you don’t install lights, painting or finishing the channel line the same color as the rail makes it look like an intentional system. For photos at golden hour, the channel casts a thin shadow that reads as depth. Beginner-friendly balcony railing design works best here when you use a pre-made LED channel strip and mount it to the rail before final exterior finishing.
1) Build your basic slat railing with consistent spacing and a sturdy top rail profile that has room for an inset channel. 2) Install an aluminum LED channel strip inside the rail or on the underside of the top rail, then run low-voltage wiring through conduit. 3) Cover with a diffuser strip and seal all outdoor connections with weather-rated connectors. Finish the rail with exterior paint or stain, then test the lights before you close panels.
Editor's noteUse warm white LEDs around 2700K so the wood or bronze tones look natural instead of blue.
Skip thisAvoid cheap wiring exposed to the weather — route through conduit or a sealed channel.
23. Textured powder coat with simple vertical bars
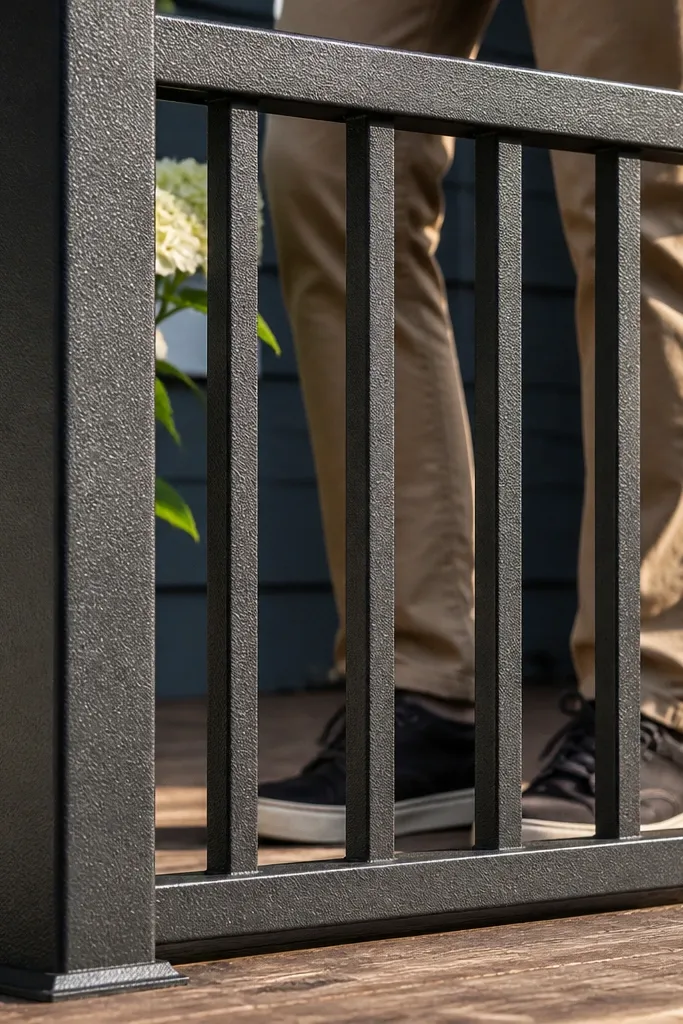
Texture is the shortcut to making a basic railing look premium. Simple vertical bars are straightforward, but a textured powder coat — like a matte “hammer” or fine-grain finish — makes the surface look deep and expensive in daylight. This beginner-friendly balcony railing design is great if your goal is aesthetic consistency without complicated pattern work. It also hides minor dents or sanding marks better than smooth paint. Pair with clean, straight bars and you get a modern, rugged look that still photographs well.
1) Build the railing with posts, top rail, and evenly spaced vertical bars. 2) Prep metal surfaces thoroughly: degrease, sand, and apply a proper metal primer if your coating system requires it. 3) Use textured outdoor-rated powder coat or a textured exterior paint system, then let it cure fully. Recheck spacing and straightness after coating because thicker texture can make tiny alignment issues easier to see.
Editor's noteChoose one texture level and stick to it — mixing smooth and textured sections looks unfinished.
Skip thisDon’t skip surface prep. Texture coating hides flaws poorly if the metal wasn’t cleaned.
24. Limewashed wood slats with black shadow-line trim
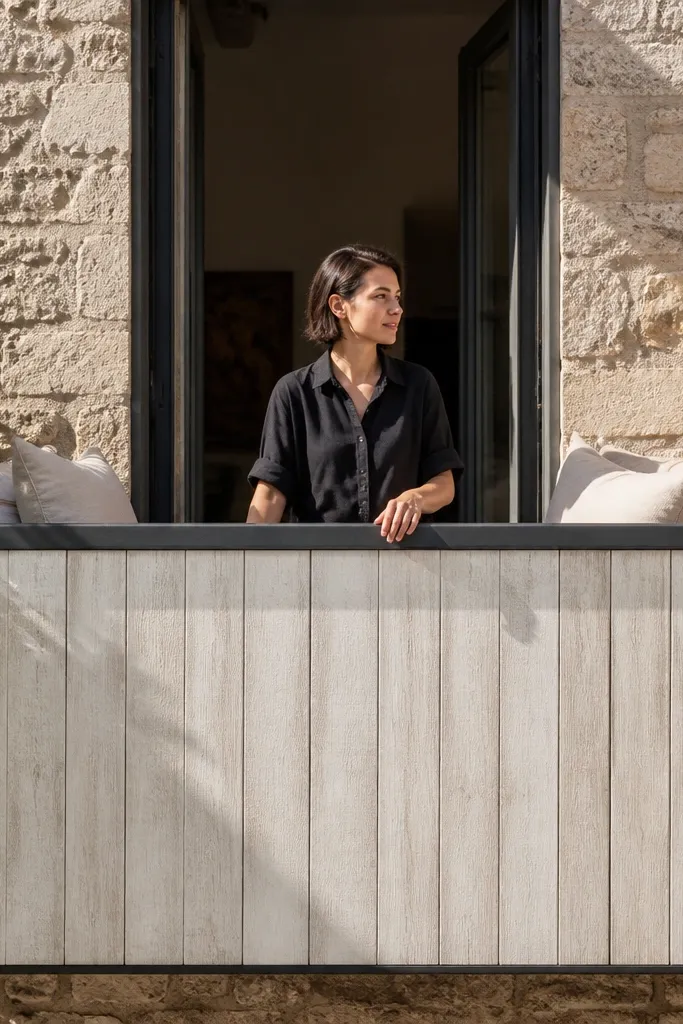
This design looks light and airy but still reads bold from the street because the slats are pale, and the trim is crisp. The limewash finish gives you that uneven, hand-brushed texture that photographs well without needing stained wood or complicated metalwork. Use 1x3 slats spaced evenly and add a thin black trim strip between each slat line to create a shadow-gap effect that makes the pattern pop. It fixes the common problem of “plain wood railings” that look flat in daylight. Beginner-friendly balcony railing design — you can build it with basic carpentry tools, and most of the work is measuring, cutting, and sealing, not metal fabrication. Plan on one long weekend for a small balcony section, plus drying time for the wash and topcoat.
Step 1: Build a simple rectangular frame from pressure-treated 2x2 or 2x3 lumber, then cut 1x3 slats to match the opening height minus 1/2 inch for clearance. Space slats at 1-1/4 inches on center using a scrap spacer, and keep the top and bottom edges square with a speed square. Step 2: Stain-seal lightly first (one thin coat of exterior wood sealer), then apply limewash in two coats with a rag brush, letting the first coat dry before the second. Step 3: Add black shadow-line trim using 1/2-inch PVC trim strips or thin metal angle strips, screwed through the frame so fasteners don’t show on the slat faces. Finish with two coats of exterior clear spar urethane, sanding lightly between coats so the limewash doesn’t get gummy.
Editor's noteMake a long “spacing stick” from scrap to mark every slat line fast — it keeps the gaps identical across the whole run.
Skip thisDon’t skip exterior sealer under limewash or the texture will blotch and fade unevenly.
25. Powder-coated steel picture-frame panels with clear poly inserts
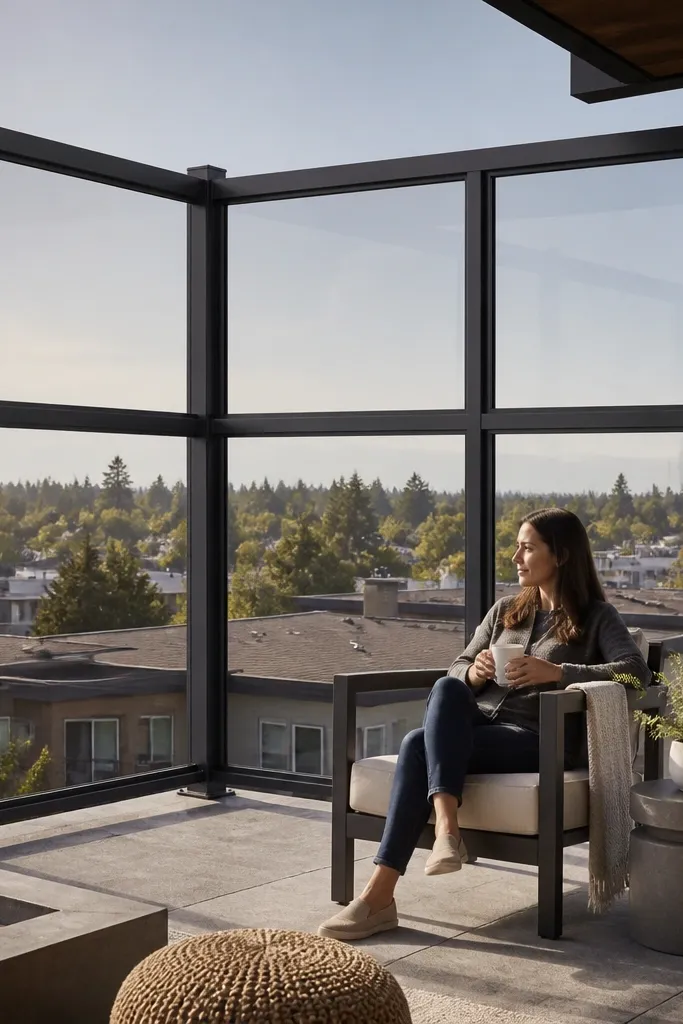
This one looks like modern balcony glass without the full glass system. The steel picture-frame grid gives you strong geometry, and the clear poly inserts keep the view open so the railing doesn’t feel heavy. It’s a great fix for balconies where wind hits hard — the poly reduces gusts while still looking clean and photogenic. The finish matters: a matte powder coat on the steel reads crisp in photos, and clear poly adds that glossy highlight along the panel edges. This is beginner-friendly balcony railing design only if you stick to pre-cut steel frame kits or simple straight runs; you’ll mostly be drilling, aligning, and fastening, not welding. Expect 1-2 weekends depending on how many panels you’re installing and how quickly you can secure the frame to your existing posts.
Step 1: Measure each section bay between posts and build or buy picture-frame frames sized so the clear inserts sit with a 1/8-inch reveal on all sides. Use 1 inch x 1 inch square steel tubing or 1-1/2 inch flat bar for the outer frame, with a 2-1/2 to 3 inch inner grid spacing for a clean look. Step 2: Cut clear polycarbonate sheets to fit the inner openings, leaving 1/8 inch expansion space so the panels don’t bow in heat. Smooth edges with a fine file, then drill mounting holes 1/2 inch in from the poly edge and fasten with polycarbonate-compatible screws plus rubber washers. Step 3: Install frames first, then set poly inserts last — tighten just enough to seat the washers, and run a thin exterior silicone bead only at the frame corners if you need extra water resistance.
Editor's noteOrder polycarbonate with UV-protective coating on the same side every time and mark it during cutting so the “good side” faces outward.
Skip thisDon’t overtighten the screws — polycarbonate cracks when it’s clamped too hard.



