
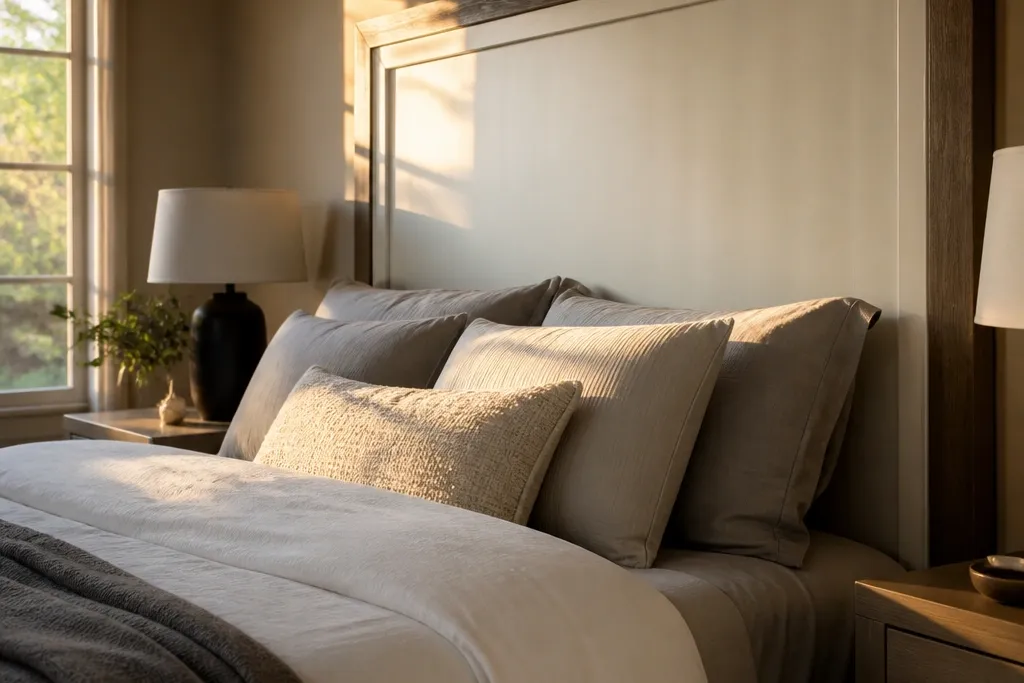
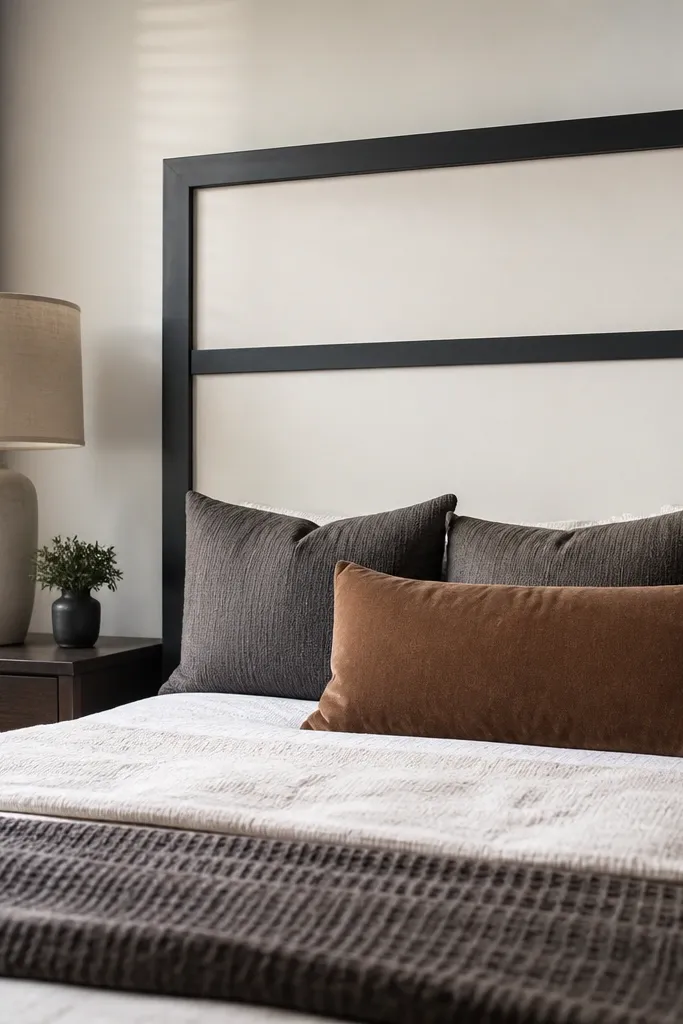
1. Tall framed panel headboard with "shopfront" trim
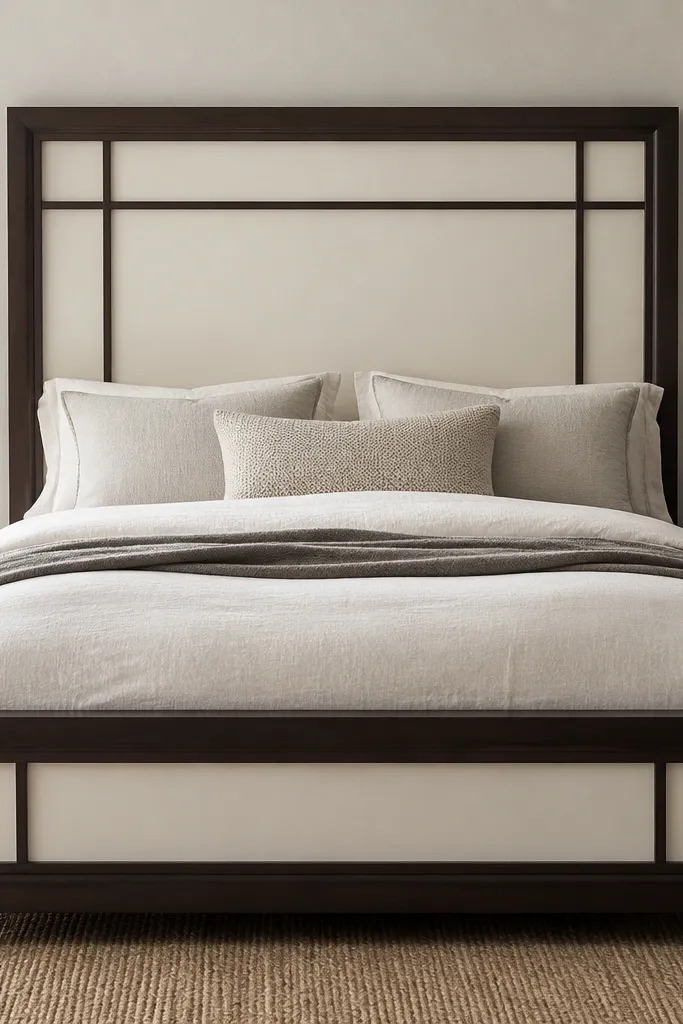
This is the headboard that tricks people into thinking you bought custom millwork. The secret is the frame line: a thicker outer border with thinner inner rails makes the surface look built-in, not DIY. Use a light main panel color (cream or warm white) and a darker trim color (walnut stain or charcoal paint) so the edges catch the light. It also photographs well because the insets create shadow lines, which read as depth even if the build is only a couple inches thick. It suits beds with simple bedding because the headboard becomes the focal point without needing heavy pattern.
Start by cutting one 4x8 sheet of MDF or plywood into a tall rectangle for the main face, then cut an outer frame from 1x2 boards (or MDF strips) to match the thickness you want. Build a flat backer first, screw the frame on the edges, and add two or three inset panel sections by attaching thinner strips inside to create the “rails.” Sand the whole face, fill seams, then paint the main panel a matte or eggshell cream and the frame a satin walnut-toned finish. Finally, attach the headboard to your bed using cleats on the back so the top stays level and doesn’t wobble.
Editor's noteUse painter’s tape as a straight edge guide around every frame line before you paint, then pull it while the paint is still slightly tacky.
Skip thisSkipping seam filling around the frame edges makes the join lines look like cheap patchwork.
2. Faux cane webbing headboard with a painted "rattan" pattern
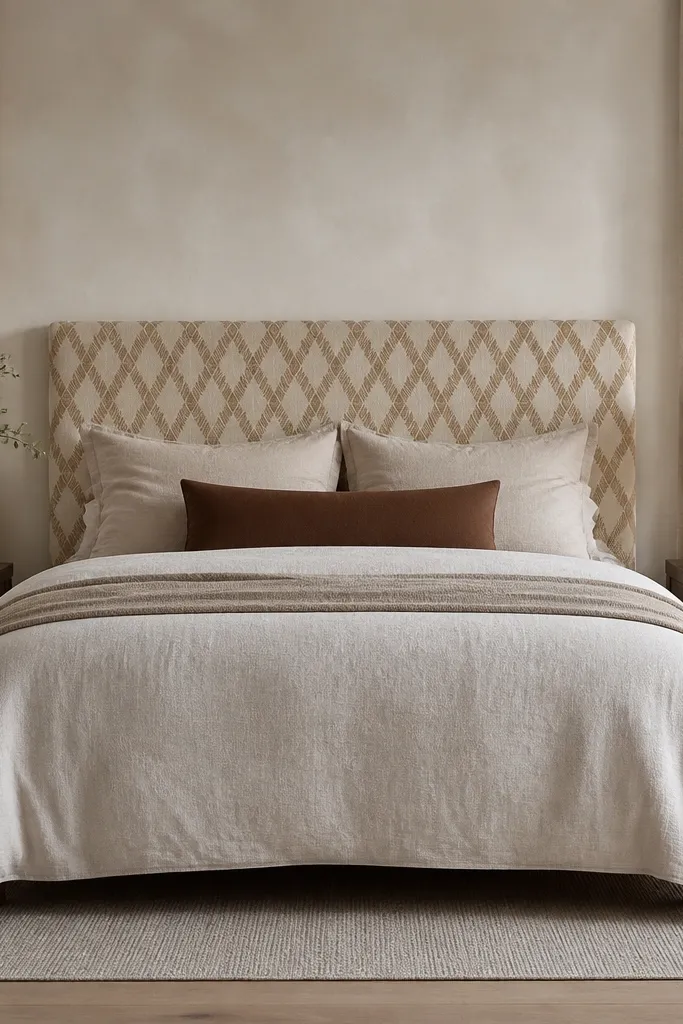
If you like the look of expensive cane furniture, this gives you that airy pattern without hunting for real cane sheets. The diamond grid creates movement and shadow, so it reads high-end in photos even when the room lighting is plain. Keep the base light (chalky ivory) and do the pattern in a warm brown glaze so it looks like stained material rather than flat printed lines. This is a great option for small rooms because the pattern visually “opens up” the space. It also works with modern or farmhouse bedding because the design is neutral and graphic.
Start with a smooth plywood or MDF board sized to your bed width, then paint the entire face ivory and let it cure for a full day if you can. Mark a diamond grid using a ruler and pencil, then tape the grid lines one direction at a time so you get crisp intersections. Paint the diamond lines in warm brown, then glaze over lightly with a damp rag to soften any overly perfect edges. Finish by adding a thin painted border frame, and mount the headboard with rear cleats or brackets for stability.
Draw the grid with a light pencil first, then test one row on scrap — the spacing is what makes it look like real cane.
Freehanding the diamonds without a taped grid makes the pattern look messy and cheap fast.
3. Channel tufted look using foam strips and fabric bands
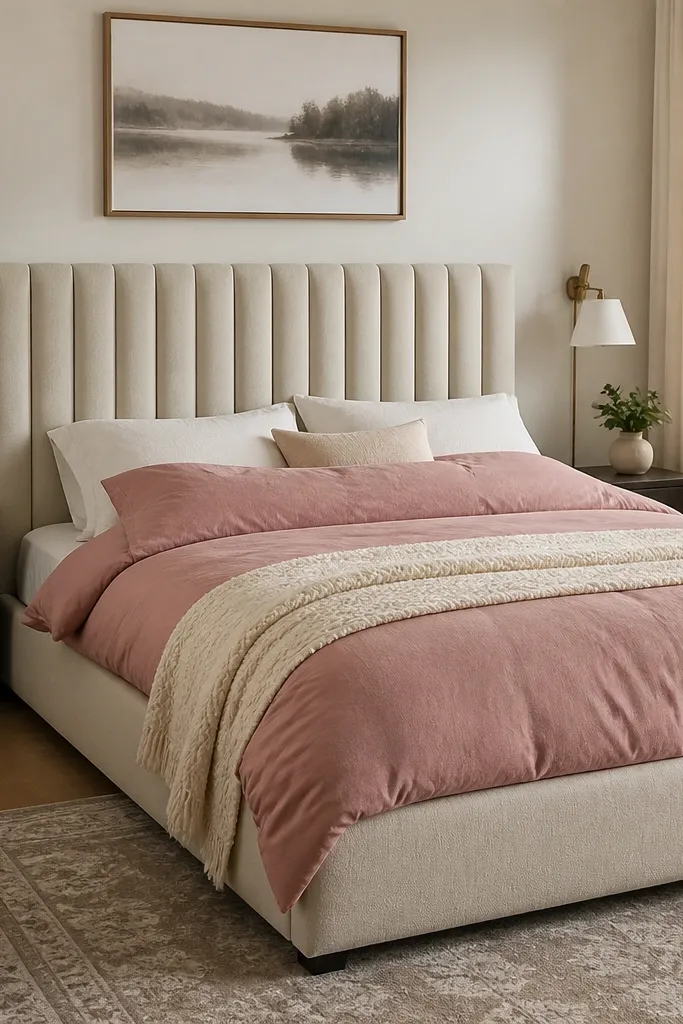
This delivers the structured, tailored look of channel tufting without buying a full upholstery kit. The channels create a vertical rhythm that makes the headboard look expensive and intentional, especially with a solid-colored duvet. You’re using the same visual cues as real tufting: repeated lines, tight spacing, and a smooth face that doesn’t sag. Choose a medium-gray or deep navy fabric so shadows show in the channels. It fits bedrooms that want a calm, hotel-style vibe without heavy decoration.
Cut a headboard base from plywood, then staple a layer of high-density foam batting on top. Mark your channel lines vertically, and apply thin foam strips along each marked line so they form raised channels rather than flat seams. Stretch your fabric over the foam, pull it tight, and staple at the back, keeping the face taut so you don’t get wrinkles. Add fabric bands or bias strips across the channels to create the “tuft” look, then trim the perimeter with a simple fabric-wrapped border and mount with sturdy brackets.
Press a straightedge along each channel band while tightening the fabric so you lock in crisp edges.
Using thin, squishy foam makes the channels collapse and look like random bumps.
4. Oversized DIY nailhead border with faux leather panels

This is for the look of expensive upholstered headboards without paying upholstery prices. The nailhead border is what sells it: it frames the whole piece and catches light like real hardware. Use faux leather or vinyl in black, deep espresso, or oxblood so the surface looks sleek instead of flat fabric. Add simple panel rectangles inside (even just two big insets) so it looks designed, not like a single sheet stretched on. This headboard looks best with warm lighting and simple bedding so the brass details pop.
Build a plywood base sized to your bed, then wrap the front with foam batting and faux leather using a staple gun. Make two or three interior panel rectangles by attaching thin foam strips underneath or by adding stitched-looking seams with fabric strips on the face. Install nailhead trim along the outer border by placing each stud carefully on a chalk line, then tapping it through with a rubber mallet if your nailheads require it. Finish by trimming the back edges cleanly and mounting with metal brackets so the weight doesn’t sag.
Dust the faux leather lightly before attaching the nailheads; debris under the studs makes them sit crooked.
Skipping a perimeter border means the nailheads float on a bare edge and the whole thing reads unfinished.
5. Vertical slat headboard with stained oak-look finish
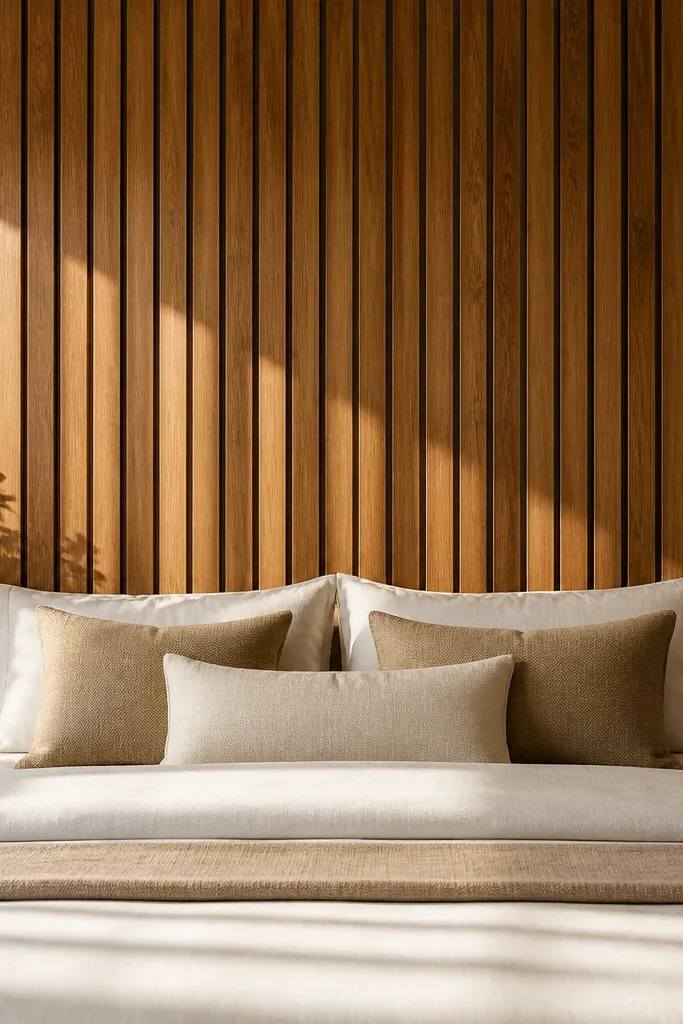
Vertical slats are the easiest “looks pricey” move because they create shadow depth and a clean architectural rhythm. To keep it affordable, use inexpensive boards for the slats and focus your money on the finish that makes them look like oak. A warm stain with a clear topcoat gives the realistic grain effect, and the repeating lines make the headboard feel taller and more expensive. This works in nearly every bedroom style because you’re not committing to a pattern; you’re creating texture. The slats also make the headboard look deliberate even if your bedding is plain.
Cut a plywood base to the width and height you want, then attach a frame around it with 1x2 material to hold everything square. Cut slim slats (about 1x2 or ripped 1-inch wide strips depending on your look) and space them evenly with spacers, then screw or glue each slat into the base. Sand all slats flush at the top edges, then stain with a warm oak tone and seal with a satin clear coat. Mount using two sturdy hangers or cleats so the slat face stays straight and doesn’t twist.
Use a spacer strip that’s the exact gap width you want, and mark alignment points on the base to speed up spacing.
Leaving uneven slat heights makes the whole headboard look crooked in photos.
6. Geometric hex panel headboard with bold paint contrast
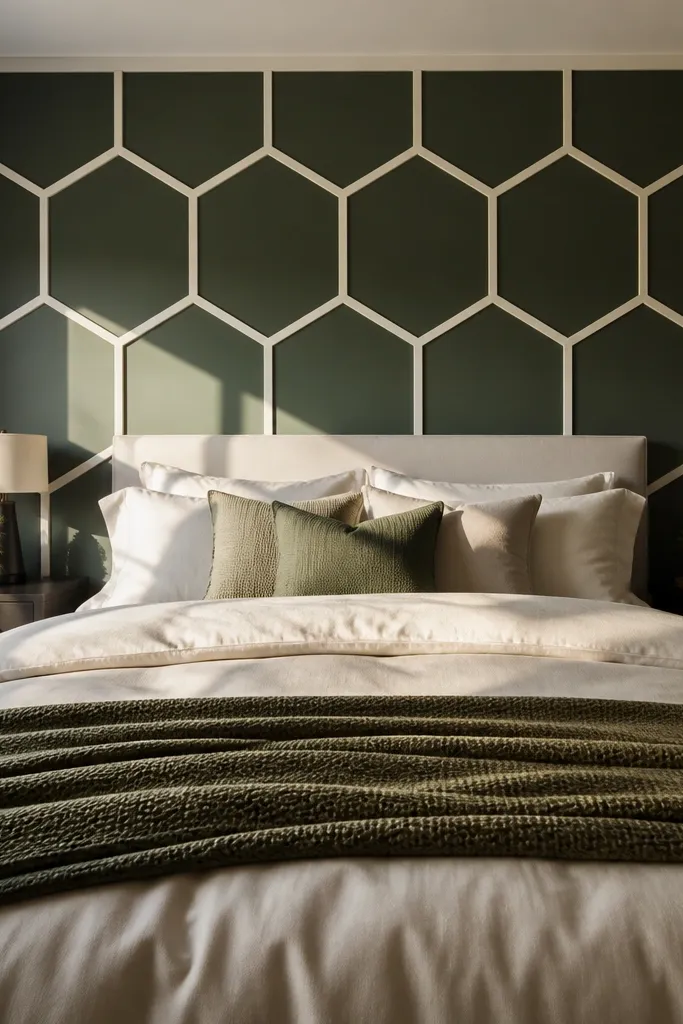
This is a statement headboard that looks custom because the pattern has structure, not randomness. Hexagons give you that designer geometry, and the contrast paint makes the shapes read instantly from across the room. Keep one color warm white and the other in matte black or deep green so the edges look crisp. It’s photogenic because every seam casts a tiny shadow, which shows up even in low light. Great for modern bedrooms, rental apartments, and anyone who wants visual punch without adding clutter.
Start with a flat base of MDF, then decide your hex size (around 4 to 5 inches across looks best on standard bed widths). Create a cardboard hex template, trace patterns onto the MDF, and cut out the lines with a jigsaw or router for shallow channels. Paint the base warm white, then tape and paint the hex interiors black, pulling tape carefully for sharp edges. Seal with a clear matte topcoat and mount using cleats so the pattern stays perfectly level.
If you want ultra-clean lines, do the white first, then tape and paint the black, then remove tape immediately after the black is applied.
Using glossy paint makes every tiny brush mark show — stick to matte or eggshell for a pricey finish.
7. Faux wainscot headboard using picture-frame molding
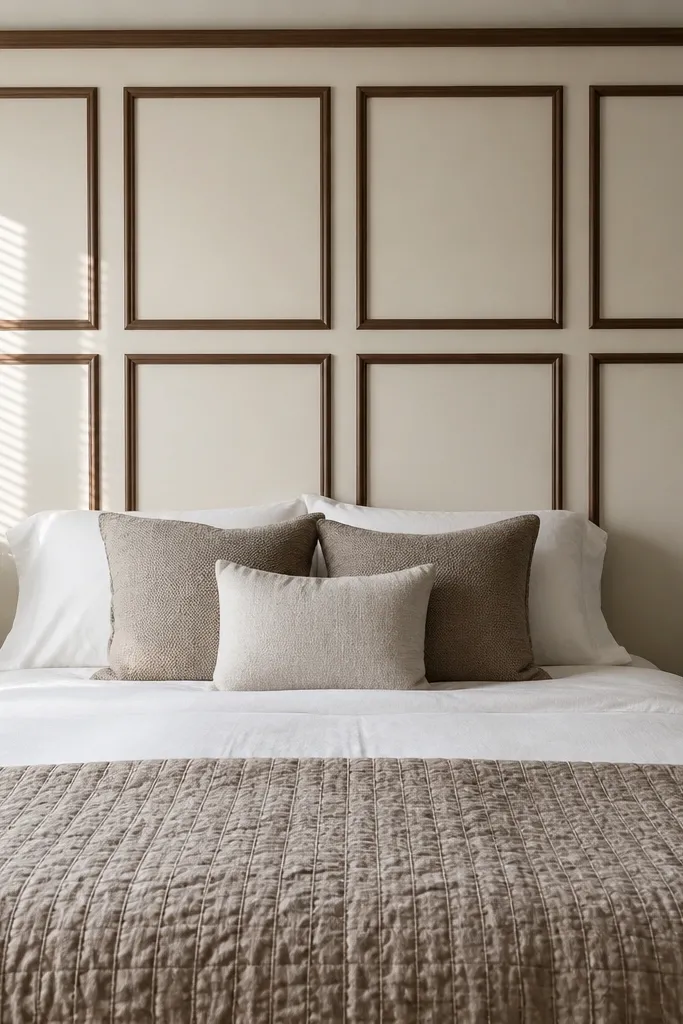
Wainscot style looks expensive because it imitates traditional wall millwork. This version is a headboard, so you get the same framed-panel drama without doing an entire room. The layout is easy to make photogenic: two or three stacked rows of squares with a darker trim color around each. Pick a creamy base and paint the molding in satin espresso or muted black so the panel edges pop. It works in bedrooms with classic bedding, but it also looks good in modern spaces if you keep the colors simple.
Cut your base from plywood or MDF, then attach a perimeter border using picture-frame molding strips. Mark a grid for your squares, and install the inner dividers with small brad nails so the pattern stays straight. Fill nail holes, sand smooth, and paint the base first, then paint the molding trim in a contrasting color after masking. Once dry, mount with a back cleat and two brackets so it doesn’t rock. If you want extra dimension, add a thin caulk line between base and molding before paint.
Editor's noteUse a caulk bead where molding meets the base; it hides tiny gaps and makes it look like carved millwork.
Skip thisSkipping sanding between paint layers causes raised edges and a DIY texture on the molding.
8. Fabric-wrapped oversized ruffled edge headboard
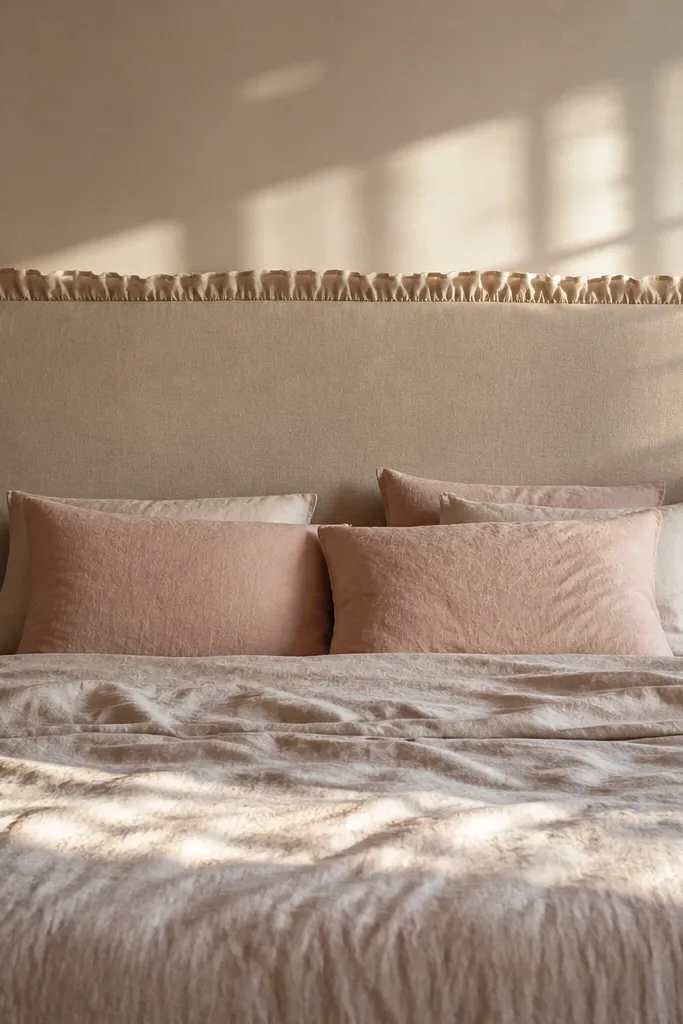
This headboard looks pricey because the edge treatment is doing the heavy lifting. A thick wrapped border plus a soft ruffle gives you that boutique bedding feel without building deep padding everywhere. Choose a solid blush, dusty rose, or warm sand fabric that drapes well, not stiff upholstery cloth. The ruffle creates a shadow line that shows up in photos and makes the headboard look more dimensional than it is. It’s best for bedrooms that already have soft textures like knit throws or linen curtains.
Build a plywood base, then wrap it in batting and fabric, stapling cleanly to the back. For the ruffled edge, create a separate strip that’s gathered into a thick border and attach it to the front perimeter with a hidden stitch or adhesive fabric glue, then cover the seam with a second fabric strip. Keep the ruffle thickness consistent around the whole perimeter so it reads intentional. Trim the bottom edge straight, then mount using brackets that can handle the extra fabric bulk.
Steam the fabric before attaching the ruffle so the gathers fall evenly and don’t look lumpy.
Using thin fabric for the ruffle makes it collapse flat and lose that boutique volume.
9. Crisp faux leather frame with inset fabric center
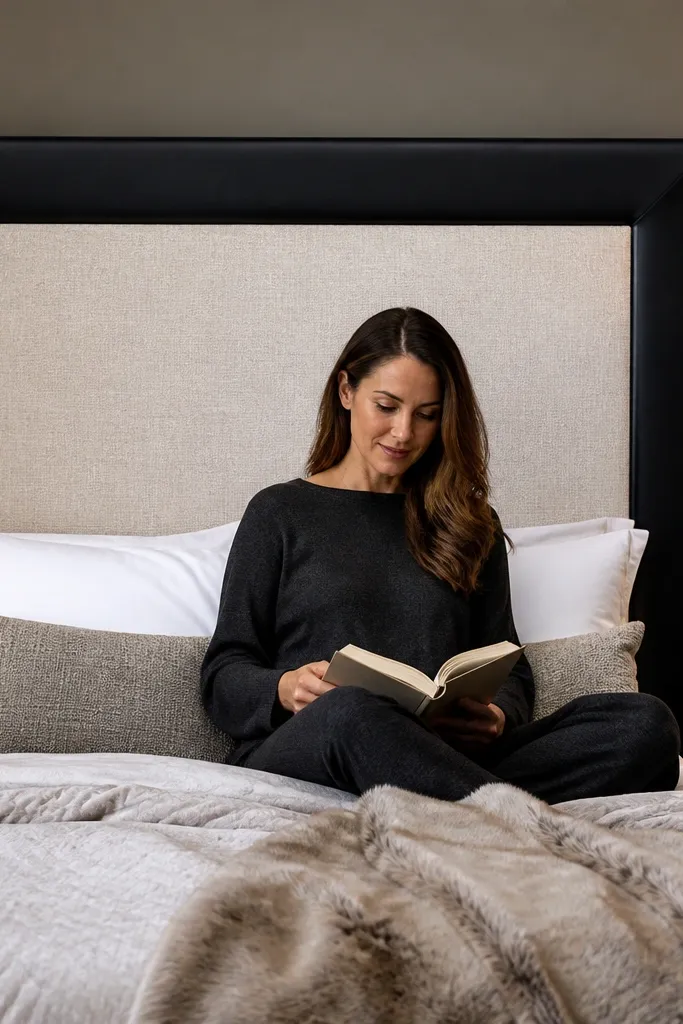
This one looks expensive because it uses two materials in a clean, framed layout. The faux leather frame reads structured and high-end, while the inset fabric keeps the center cozy and soft. The contrast makes the headboard feel custom even if the build is just a base panel with wrapped edges. Choose a textured fabric for the inset like linen-look or woven tweed-style so it catches light differently than the frame. This suits bedrooms with a mix of warm wood and neutral bedding because the colors can stay grounded.
Cut a plywood base, then decide frame thickness (around 2 inches looks right). Wrap the entire front first with batting, then attach faux leather to cover the outer frame area, keeping the edges tight and crisp. Create a center insert from a thinner fabric panel by cutting it to fit inside the frame opening, then staple it behind for a clean edge. Add a thin border strip over the seam between frame and insert, then mount with two rear cleats for stability.
Editor's noteUse a sharp utility blade and replace it often while trimming faux leather so your edges look factory-clean.
Skip thisOverstuffing the center insert causes puckers where the frame meets the fabric.
10. Painted "woven" panel illusion using slats and glaze
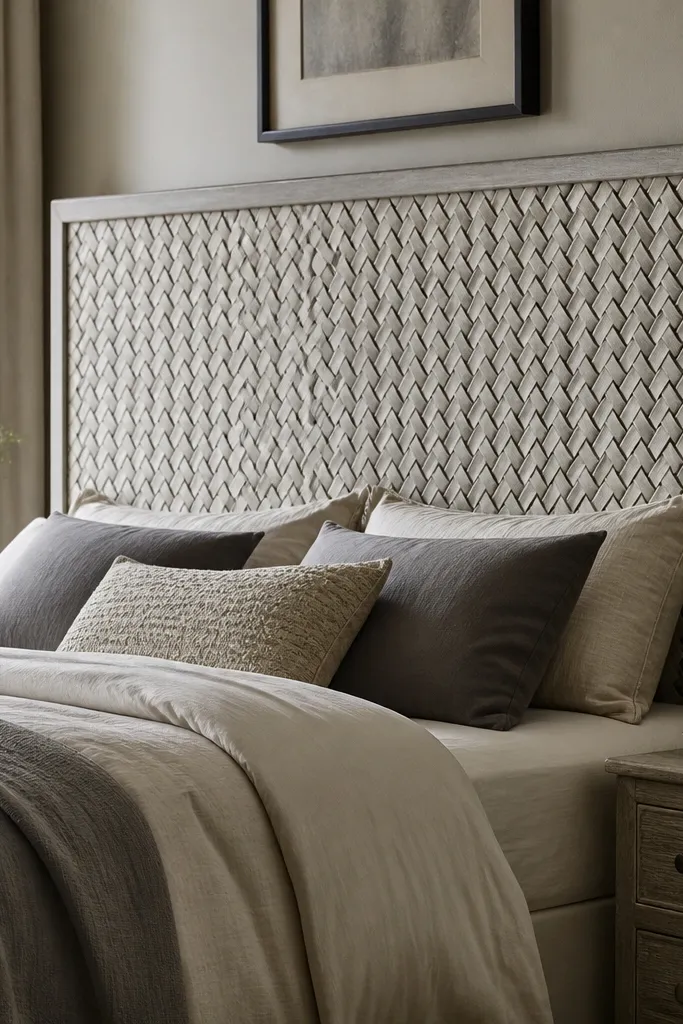
This gives you woven texture without real weaving tools. The effect comes from painting over thin slats or shallow grooves to create crisscross highlights, then glazing to soften the pattern. It looks pricey because the surface has depth and subtle variation, not flat stripes. Choose two close neutrals like warm gray and charcoal so it reads sophisticated instead of high-contrast graphic. This one is great if you want an elegant headboard but your bedroom already has patterns elsewhere.
Start with a smooth MDF base and install thin strips (like 1/4-inch) vertically, spacing them evenly. Paint the whole surface a base neutral, then apply a second color for the horizontal “weave” lines by taping across the vertical strips. After the paint dries, lightly glaze the entire face with a darker tint and wipe it back so it settles into the grooves. Seal with a matte clear coat to keep it soft-looking, then mount with cleats.
Do the glaze in small sections and wipe immediately — slow glazing makes streaks that show up in photos.
Leaving raw pencil marks or dust on the grooves makes the glaze look dirty.
11. Modern slatted headboard with backlit LED strip channel
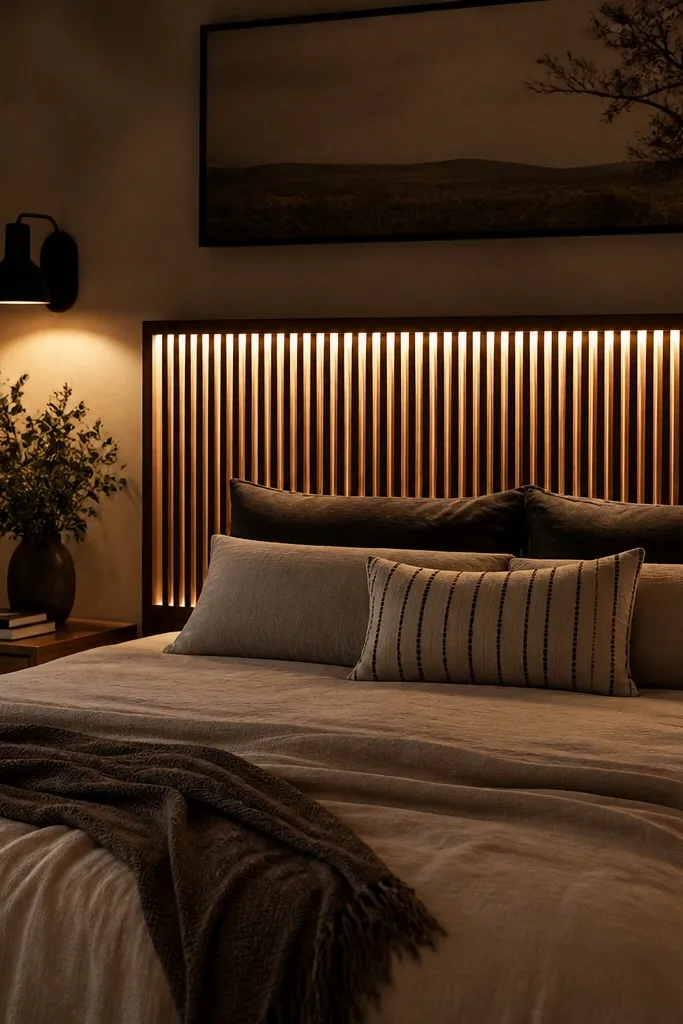
Lighting is the fastest way to make a DIY headboard look expensive. This design uses thin slats and a hidden LED channel behind them so the glow outlines each opening. Choose warm white LEDs for a cozy bedroom feel, not blue daylight. The slats create a clean pattern and the light makes the texture visible from across the room. It suits bedrooms where you want a calm, modern look and you’re okay with doing a little wiring work.
Build a plywood base, then install a slat frame with gaps wide enough for light to show (about 1/2 inch works well). On the back side, add a shallow channel or mounting board where the LED strip will sit, and route the cord to a power point. Test the LED before closing anything up. Attach a diffuser strip if you want softer light, then stain or finish the slats in walnut tone and mount with sturdy brackets.
Editor's noteUse a dimmable LED driver so you can dial the glow down for daytime and keep it cozy at night.
Skip thisSkipping a diffuser makes visible LED dots, which looks DIY instead of designer.
12. Linen-look tufted panel using dowels and rope trim

This is a softer, tailored alternative to deep button tufting. Rope trim creates the “stitched” look, and dowel-guided channels give you clean vertical lines that look intentional. It’s photogenic because rope trim catches light along its curve, and the repeated vertical elements make the headboard feel tall. Choose natural linen-look fabric in sand or oat and pair it with off-white rope trim. It works beautifully in farmhouse, coastal, and Scandinavian bedrooms.
Cut a plywood base and stretch batting and linen-look fabric over it, stapling tightly at the back. Mark three or five vertical lines where you want the tuft effect, then attach small dowels behind the fabric along each line so the rope has something to sit on. Stitch or glue rope trim along those lines on the face, keeping spacing even. Add a simple perimeter border trim and mount with brackets so the face stays flat.
Editor's notePre-measure rope length with extra slack, then trim after the rope is fixed so corners don’t pull.
Skip thisTrying to “pin” rope trim without dowel support makes it sag and look uneven.
13. Reclaimed look headboard with faux board-and-batten panels

Reclaimed wood style looks pricey because the surface has variation and the board-and-batten structure reads as craftsmanship. You don’t need real reclaimed boards to get the vibe. Use inexpensive primed boards or MDF panels, then create faux distressing with layered paint and sanding to mimic worn edges. A light top trim makes it feel taller and cleaner, which helps it photograph well. This suits bedrooms with vintage bedding, neutral walls, and wood floors because the headboard blends into the room instead of fighting it.
Start with a base sheet of plywood, then create a board-and-batten grid using thin strips spaced evenly (around 6 inches between battens looks good on a queen bed). Paint the whole thing a mid-gray, then sponge on a lighter gray layer. Sand edges and corners after drying to expose the darker layer underneath, and seal with a matte clear coat. Add a simple top cap trim, then mount with a back cleat for alignment.
Distress in small clusters instead of evenly all over; random wear looks more realistic than uniform sanding.
Over-sanding the entire face turns it from “aged” to “damaged,” which reads cheap.
14. Oversized upholstered headboard with removable cover panels

This is the “looks expensive” build because it has that soft, padded front and a tailored perimeter. The removable cover panel idea keeps the build practical: if you spill or want a new color later, you don’t have to redo the whole structure. Use foam thickness that holds shape (at least 1.5 inches in the center area) so it doesn’t flatten. Choose a medium-warm neutral like cream or oatmeal and add a contrasting piping or simple trim. It’s great for bedrooms where you want comfort and a hotel-style front view.
Build a sturdy plywood frame with an internal grid so foam has support, then glue down 1.5-inch foam and cover with a thin batting layer. Wrap with fabric and staple on the back, then add a perimeter trim. For removable panels, cut the front cover into two or three sections and attach with hidden magnets or hook-and-loop on the back so it snaps into place. Mount the frame with brackets, making sure the cover panel edges sit flush with the perimeter trim.
Use contact cement on foam to prevent shifting before you staple the fabric.
Using thin foam makes the headboard look like a cushion stuck to a board instead of a shaped piece.
15. Paper-mache faux plaster headboard using spackle texture

Plaster finishes look high-end because they have tiny irregularities that catch light and make the surface feel sculpted. This design uses spackle texture over a board, then paint in a warm off-white. Add a dark border or thin frame to give it a finished edge; that contrast is what makes it look like a designer piece rather than a textured wall panel. It works especially well in bedrooms with white walls because the texture becomes the visual interest. It’s also easy to update later by repainting.
Start with a smooth plywood base and seal it with primer so spackle doesn’t soak unevenly. Apply spackle in thin layers using a putty knife, then drag a stippling brush or crumpled plastic to create controlled texture. Let it dry fully, then sand only the highest ridges lightly so you keep the texture. Paint with an off-white eggshell or satin, then add a thin dark frame around the perimeter and mount with cleats.
Editor's notePrime first and don’t rush sanding — uneven primer makes blotchy paint that looks cheap in sunlight.
Skip thisSkipping the frame border makes textured surfaces look unfinished and flat from the front.
16. Mirror-framed headboard using acrylic sheets and painted backing

A framed mirror center instantly makes a headboard look expensive because it adds depth and light reflection. The DIY version keeps it safe and affordable by using acrylic mirror sheet, not fragile glass. Paint the back with a warm tone (bronze, champagne, or deep taupe) so the reflection looks warm instead of gray. The mirror also makes the bed look larger in photos, which is what you want if you’re going for “looked pricey” on a budget. This works best when your room has at least one light source facing the bed so the reflection shows.
Build a simple rectangular frame from wood strips and attach it to a plywood backer. Cut an acrylic mirror sheet to fit the opening, then secure it with a thin gasket or frame trim so it doesn’t flex. Paint the back of the mirror backing area with a warm metallic or warm taupe paint, then seal it. Add corner caps or a thin trim edge for a clean look, then mount using sturdy brackets designed for the weight of the frame.
Use a microfiber cloth and gentle cleaner; scratches show up fast on acrylic mirror surfaces.
Using a flimsy frame makes the acrylic flex and distort the reflection.
17. Ladderback headboard with stained dowel grid and iron brackets
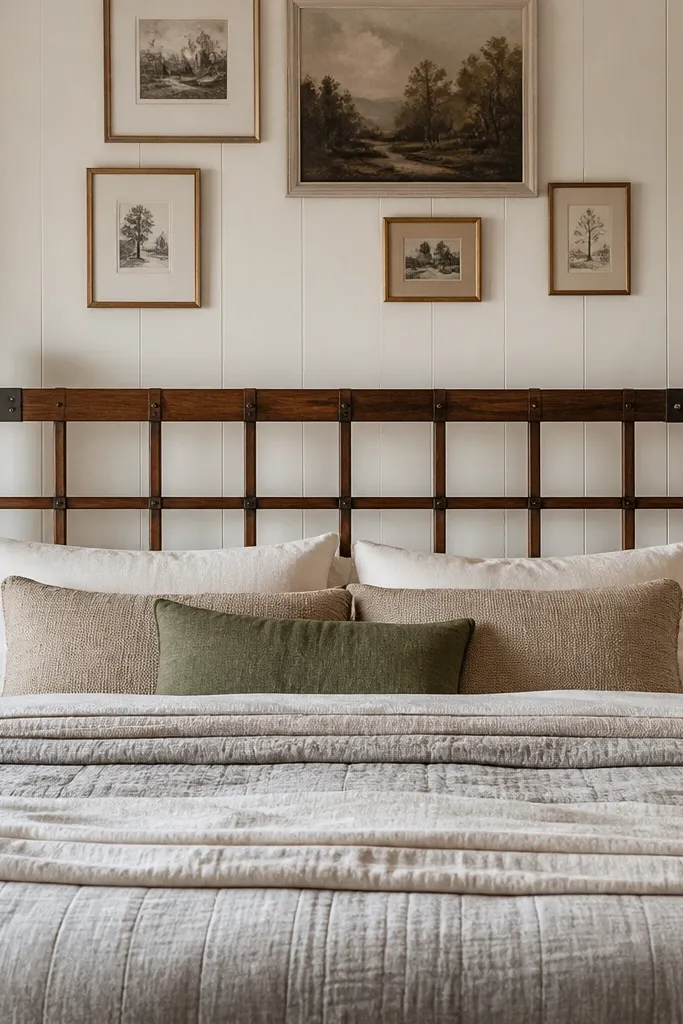
This one reads expensive because it looks like furniture meant for a porch swing — clean wood grid, dark hardware, and tight spacing. The trick is making the dowels look intentional, not “crafty”: evenly spaced, same diameter, and finished like real joinery. Use a darker stain on the dowels and a matte black base so the whole piece photographs crisp and high-end. It’s a strong fit for farmhouse, modern farmhouse, and any bedroom that needs texture without big upholstery. Skill level is beginner-friendly if you’re comfortable measuring and drilling straight holes; plan on a full weekend for cutting, test-fitting, and finishing.
Cut two side rails from 1x3 pine (or poplar) at your bed width minus about 1/2 inch total so it doesn’t overhang too far. Build a grid by drilling 3/4 inch deep holes in the rails for 3/4 inch dowels — spacing at 2 1/2 inches center-to-center for a chunky, pricey look. Dry-fit everything, then add a center horizontal rail (also 1x3) so the headboard doesn’t rack when you lean on it. Attach the whole assembly to a 1x4 backer frame with 1 1/4 inch wood screws, then mount black iron angle brackets at the top corners and along the back for support. Stain the dowels and rails with a gel stain in a medium-dark shade, wipe off evenly, then seal with two coats of matte polyurethane.
Editor's noteDrill your dowel holes with a drill press if you have one; if not, clamp a fence to your drill guide so every hole hits the same depth.
Skip thisDon’t freestyle the dowel spacing — uneven gaps make it look handmade fast.
18. Oversized faux rattan cane panel using mesh + stain glaze
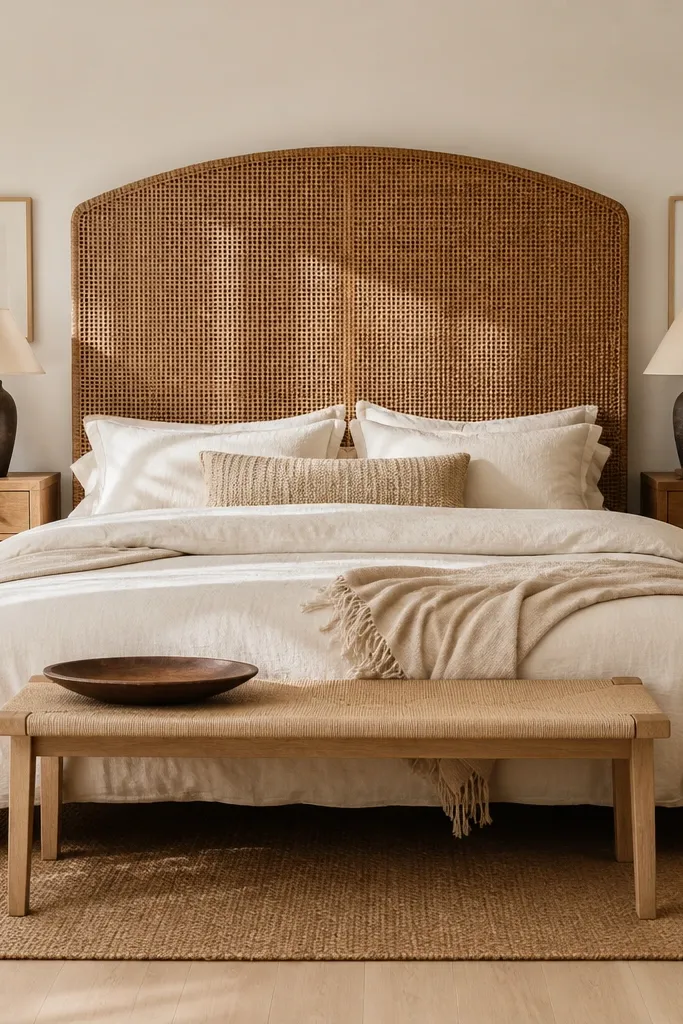
This gives you the “expensive rattan headboard” look without using real cane. The depth comes from building a real shadow pattern: a tight mesh grid behind a thin, flexible top layer, then staining in a way that leaves darker grooves. It photographs like texture even in flat daylight because the faux cane has highlights and low spots. You get a warm, airy vibe for small rooms, but it still looks structured thanks to the thick frame. It’s moderate DIY because you’re working with adhesives and keeping the pattern straight, but the build is simpler than it sounds.
Frame the headboard with 1x4 lumber for a 1 1/2 inch thick border look, using a simple rectangle with a backer board. Cut a sheet of plastic or metal mesh with a square grid (about 1/4 inch squares) to fit inside the inner opening, and attach it to the backer with a staple gun and wood glue. Apply a thin layer of flexible filler or thin craft putty over the mesh in strips following the grid, then pull a comb tool lightly across it to create consistent cane-like channels. Once dry, stain with a light caramel base, then wipe a darker stain into the channels so the grooves stay darker than the ridges. Seal with a satin clear coat that doesn’t go too glossy, and mount to your wall or bed frame using hidden brackets.
Do a small test panel first and adjust stain wipe timing; the difference between “golden” and “muddy” is usually 2-3 minutes.
Don’t use thick filler all at once — it cracks and looks like lumpy spackle instead of cane.
19. Board-and-batten headboard with picture-frame bevel and limewash effect
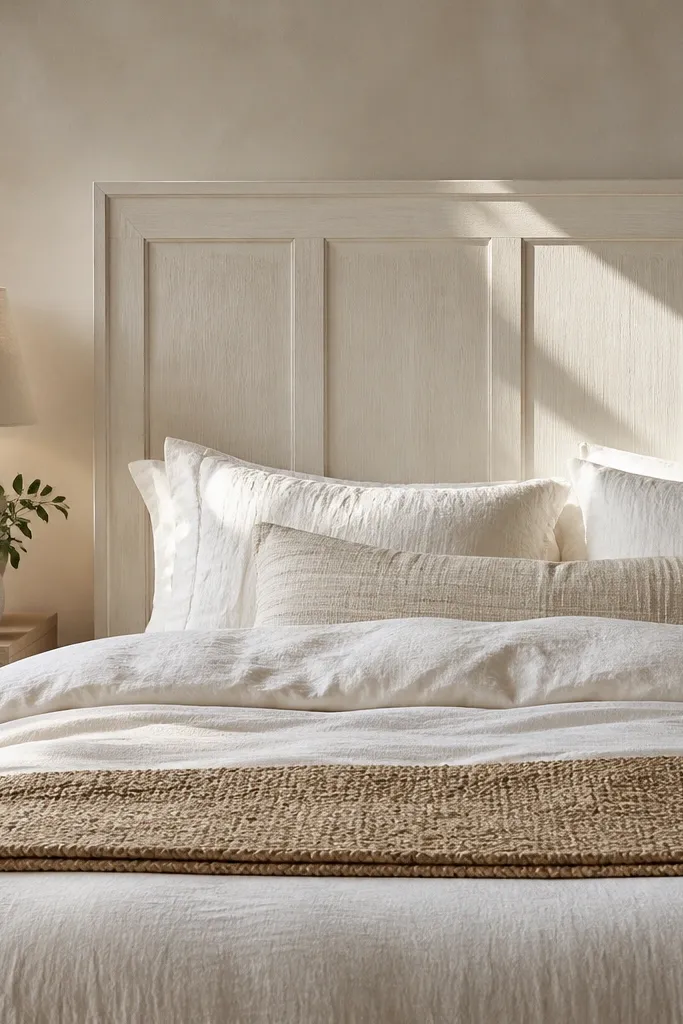
This looks pricey because the bevel lines make it read like custom millwork, not a flat painted board. The board-and-batten pattern adds rhythm, and the limewash-style finish keeps it soft and expensive-looking in photos. You can make it feel modern or traditional by choosing the frame proportions and the wash color. It’s also great if your room has plain walls and you want a headboard that adds dimension without upholstery. Skill level is intermediate only because you need straight cuts and clean caulk lines; it’s still a weekend-friendly project.
Build a rectangular frame from 1x4 boards and add an inner picture-frame border using 1x2 strips set back about 1/2 inch so you get a crisp “shadow gap.” Fill the inside with vertical battens: rip 1x2 into 1 inch strips, then space them 3 inches apart center-to-center for a bold, gallery look. Glue and nail the battens to the backer, then add small corner blocks so the frame corners look solid. For the finish, base coat with a white eggshell, then apply a gray-tinted limewash (or limewash-style paint) with a wide brush and wipe back quickly so the texture shows. Seal lightly with a wax or clear topcoat that won’t erase the mottled look, then mount using two sturdy French cleats or bed bracket hardware.
Editor's noteUse painter’s tape as a caulk dam along the inner frame edge; pull it while the caulk is still soft for razor-clean lines.
Skip thisDon’t skip priming the wood — unprimed battens drink paint and end up patchy.
20. Faux stone plaster headboard with concrete pigments and trowel ridges
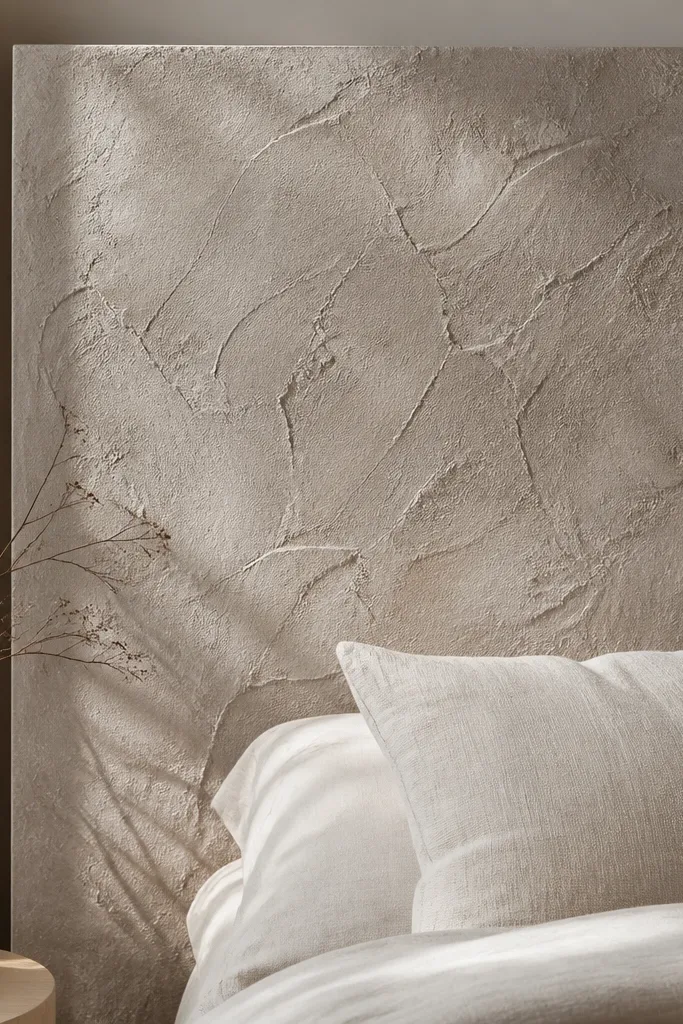
This reads high-end because it looks like a designer plaster wall panel, not DIY paint. The “pricey” part is the finish: controlled trowel ridges, subtle speckling, and a stone-like color mix that doesn’t look flat. You’re creating a surface that catches light differently across the whole piece, so it looks good even when the room lighting is mediocre. It fits modern bedrooms, industrial spaces, and any room that needs a bold statement without adding fabric weight. Skill level is medium; you need a steady hand with a trowel, but you can get great results with practice on scrap.
Start with a flat substrate like 3/4 inch plywood cut to your headboard size, then skim-coat it with a thin plaster base using a drywall knife. Mix a plaster topping with concrete pigment in a light gray and spread it in irregular passes, keeping ridges about 1/16 to 1/8 inch tall. While it’s still slightly damp, drag a flat trowel lightly in one direction to create consistent movement, then dab a darker pigment wash (very diluted) into the ridges for depth. For speckling, flick a tiny amount of diluted darker pigment from a toothbrush over the surface from 10-12 inches away. Let cure fully, then seal with a matte plaster sealer so the surface doesn’t rub off and remains easy to wipe.
Work in sections and keep a wet edge; stopping mid-panel creates a band line that’s hard to hide once sealed.
Don’t use thick plaster on top of bare plywood — it shrinks and makes cracks that look cheap instead of stone-like.



