
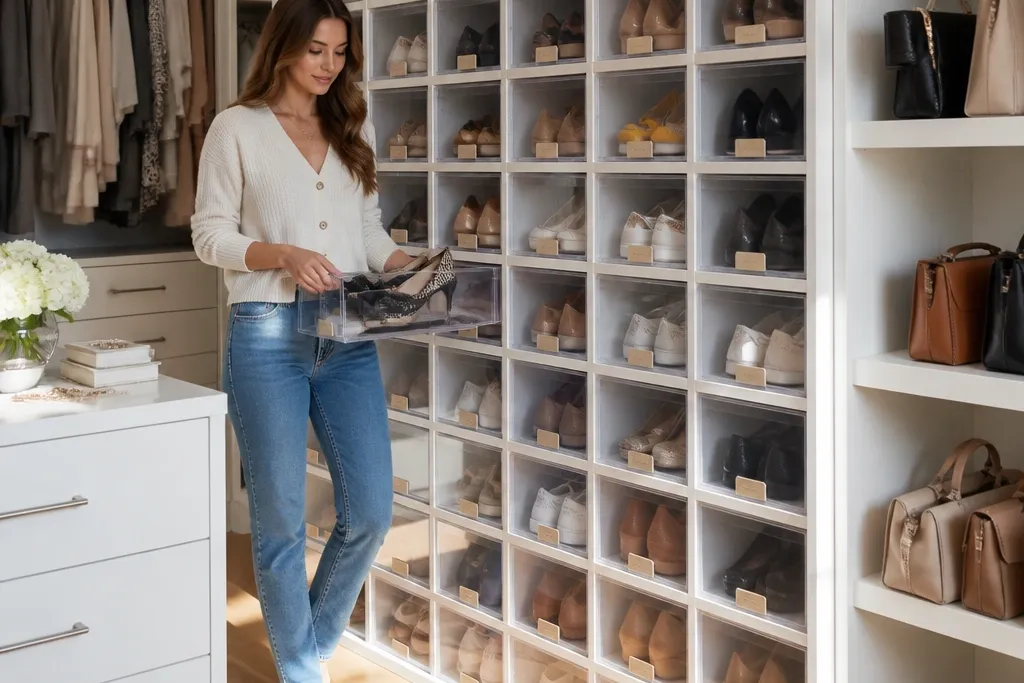
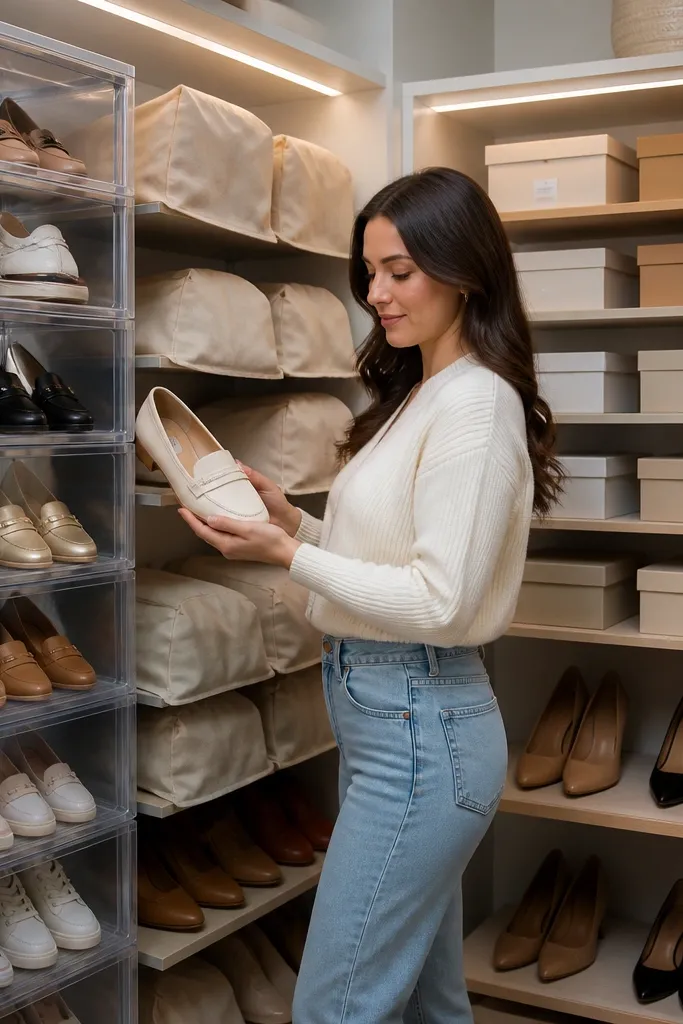
1. Clear lid shoe bins with color-matched labels
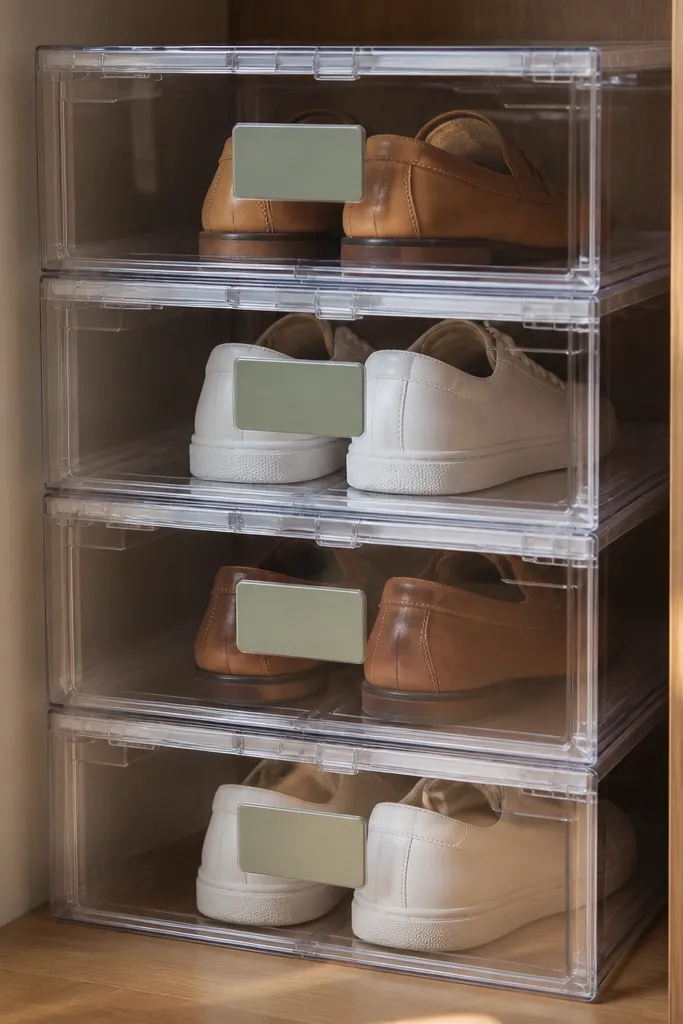
This is the fastest way to get closet calm without losing the pretty factor. Clear lids let you see the shoes at a glance, so you stop opening every container like it’s a mystery box. Use bins that are the same height so the tops line up, and keep labels consistent (same font, same label color). It looks clean because the front face becomes a grid, not a jumble. For best results, store only pairs you rotate often, and keep occasional shoes in the back so the view stays tidy.
Start by measuring your closet shelf depth and width, then buy bins that match those dimensions closely so there’s minimal wasted space. Label each bin with shoe type and size (example: “Sneakers 8.5”) and apply the label centered on the front. Stack bins in rows with a 1.5-2 inch gap between adjacent pairs inside the bin using dividers or folded tissue paper as a spacer. Finally, place the bins on the same shelf level and align the label strips so the front grid looks intentional.
Editor's noteUse label tape and a small label maker, then add a clear tape strip over the label so it doesn’t peel from shoe dust.
Skip thisDon’t mix bin sizes — uneven heights make the whole closet look messy even if the shoes are organized.
2. Pegboard shoe wall with acrylic hooks
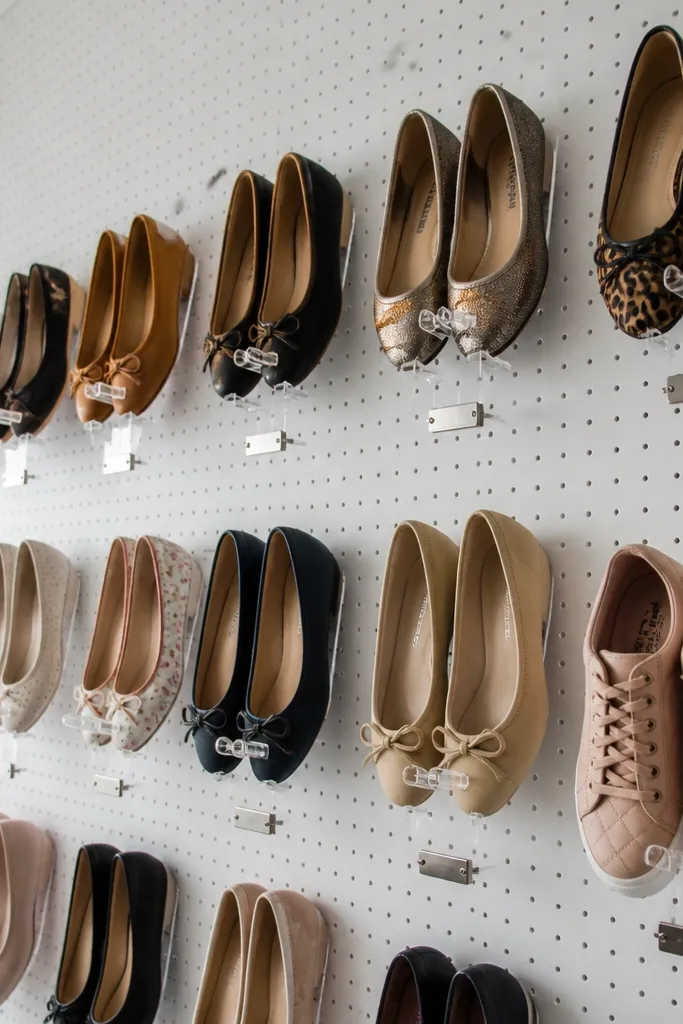
A pegboard shoe wall turns storage into display, which is why it looks good even when you’re using it daily. Acrylic hooks keep straps and small shoes from sliding, and the pegboard gives you flexible spacing so every pair gets the same “row” placement. It also lets you group by category — sneakers on one section, flats on another — which makes the closet feel curated without using fancy decor. The look stays clean because you’re not fighting for shelf space. This works best in a closet that has wall access or a shallow entry area where you can mount the board securely.
Measure the wall and mark stud locations, then mount pegboard using screws into studs for real hold. Install acrylic hooks in a grid pattern, spacing hooks so each pair fits without touching the next pair. Add a couple of horizontal support pegs near the bottom for bulkier shoes like boots or bulky sneakers. Paint the pegboard or choose a pre-finished one, then wipe it clean before loading shoes.
Editor's noteBefore mounting, lay out your shoe categories on the floor and map hook spacing so you don’t end up with empty holes you can’t use.
Skip thisAvoid hanging heavy boots by the shaft only — use hooks that support the sole area so weight isn’t pulling straps.
3. Angled shoe display shelves with lip stops
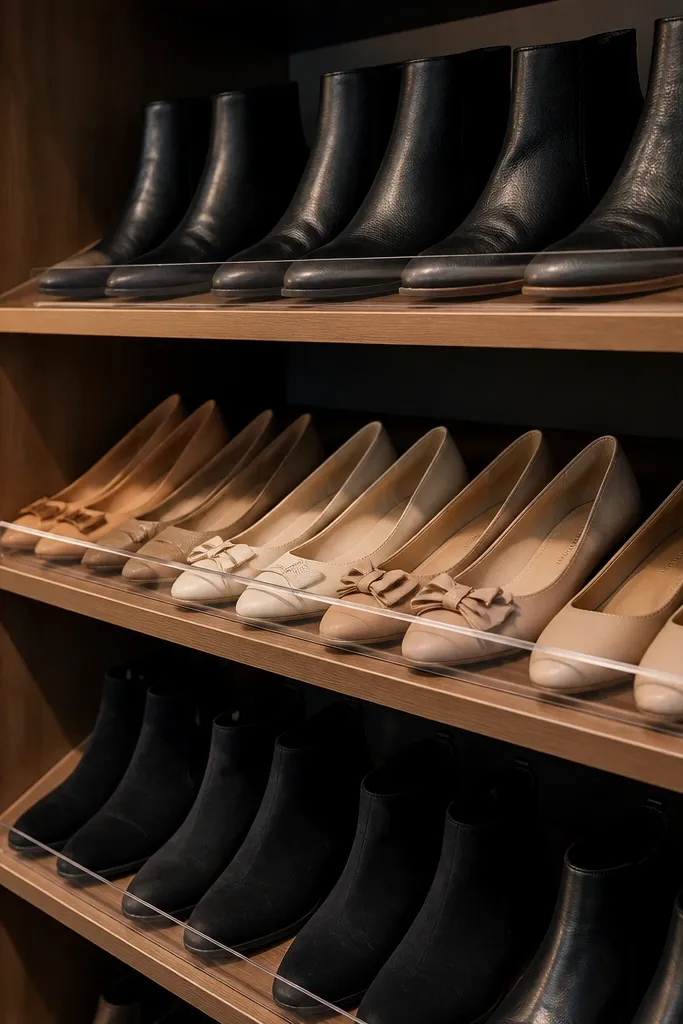
Angled shelves make shoes look like they’re part of a boutique display, not stored in a closet. The angle improves visibility, so you can grab the right pair without digging. A front lip stop keeps toes aligned and prevents shoes from sliding forward when you open the closet door. This is one of the best aesthetic shoe storage ideas for flats, sneakers, and even low heels because the toe shape stays neat. The shelves also hide the bottom mess because you can keep each pair tucked behind the lip.
Cut shelf boards and side supports so the shelf sits at about a 15-20 degree angle. Install a lip stop strip along the front edge using screws through the side supports, then sand and seal everything with a matte clear coat. Mount the shelves at consistent heights, using a level and marking brackets at the same distance apart. Place shoes with toes facing the same direction and adjust the lip height so the shoes sit snugly without forcing them.
Editor's noteUse a matte finish instead of glossy — it hides scuffs and fingerprints from daily use.
Skip thisDon’t make the shelves too shallow — if there’s less than about 9 inches of usable depth, shoes will slide or hang over.
4. Woven baskets on a painted shoe rail
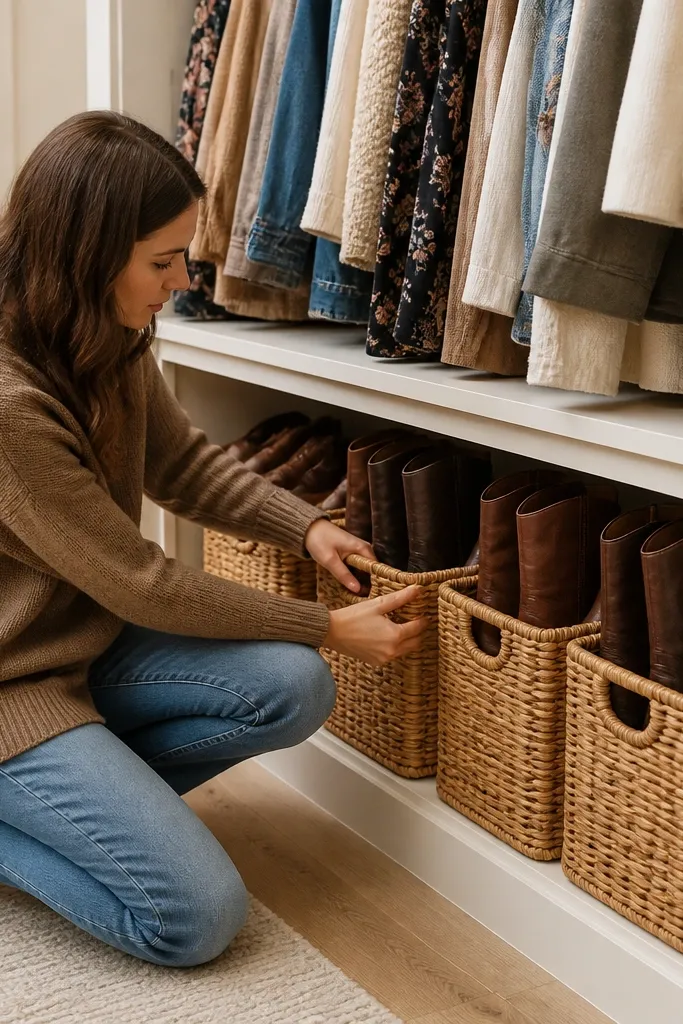
Woven baskets look warm and intentional, and painting the rail gives you that clean, designed look. This setup is great for boots and seasonal shoes because you can tuck them in while still keeping the closet visually light. The basket texture helps hide minor scuffs, so the space looks better even when you’re not perfectly manicuring each pair. Choose baskets with open fronts or removable lids so you don’t trap moisture. It’s a strong option if your closet feels cold or utilitarian and you want it to look more like furniture.
Install a wall-mounted rail system or a simple metal shelf rail inside the closet at the height you want. Paint the rail with a durable enamel and let it cure fully before adding baskets. Slide woven baskets onto the rail so the front edge stays even; use small rubber pads under baskets to prevent wobble. Add a label tag to each basket front for sneaker type, boot type, or seasonal rotation.
Editor's noteAdd a thin vent strip or leave the basket top open; closed baskets hold odor longer.
Skip thisAvoid baskets with no airflow if you store sweaty shoes — you’ll end up with a closet smell.
5. DIY faux-stone cubby fronts with peg inserts
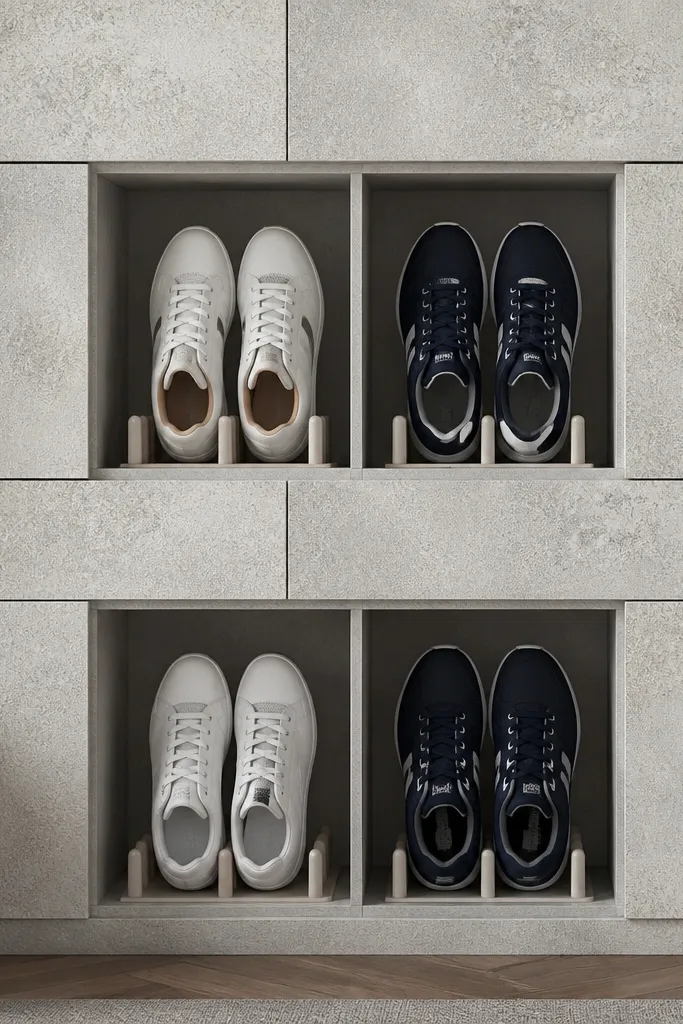
This is for when you want shoe storage to look like decor, not storage. The faux-stone front finish hides the “utility” vibe and makes the cubbies look like a built-in feature. Peg inserts keep shoes from collapsing into each other, so each pair stays separated and aligned. You get the photogenic grid look, but you still have airflow because the pegs break up flat contact. This works best in a closet wall where you can mount cubbies securely and where you want a statement panel that still stays functional.
Build a set of cubby boxes with plywood or MDF to fit your shoe sizes, then sand edges and apply a primer. Create the faux-stone look with a textured finish product or a stone-effect paint system, following the manufacturer’s cure times. Install peg strips inside each cubby at the back so shoes hang slightly without bearing weight on straps. Seal the outer faces so the textured finish wipes clean.
Editor's noteUse one consistent shoe size category per cubby row so the interior spacing stays clean visually.
Skip thisDon’t skip sealing the textured finish — unsealed texture grabs dust and looks dull fast.
6. Clear acrylic vertical shoe dividers
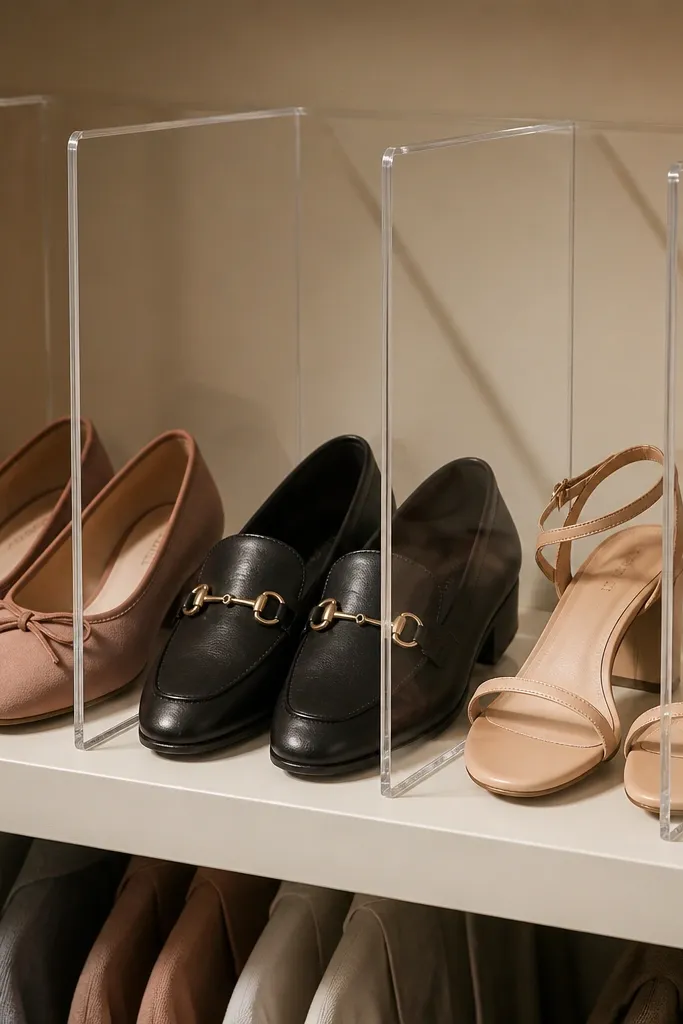
Vertical dividers make an ordinary shelf look like a shoe showroom. The acrylic stays visually light, and the dividers keep pairs separated so you don’t get that messy “toe pile.” Because each lane is defined, you can arrange shoes by color or style and the closet looks curated. This works especially well for flats, loafers, and low-top sneakers where you can stand them upright or angled. It’s also a good fix if you already have shelves but your shoes slide and touch.
Measure the inside width of your shelf and choose acrylic divider thickness that won’t flex under shoe weight. Cut or order dividers to create lanes sized to each shoe category; leave about 1 inch of air space between lanes. Mount dividers with strong adhesive pads or screws with countersunk heads so the shelf surface stays smooth. Place shoes by lane and keep toes pointing the same direction across the row.
Editor's noteWipe acrylic with an alcohol-based cleaner before installing so the adhesive actually bonds.
Skip thisAvoid dividers that are too tall without support — they bow and the lanes lose their neat lines.
7. Hinged closet door shoe organizer with open-front pockets
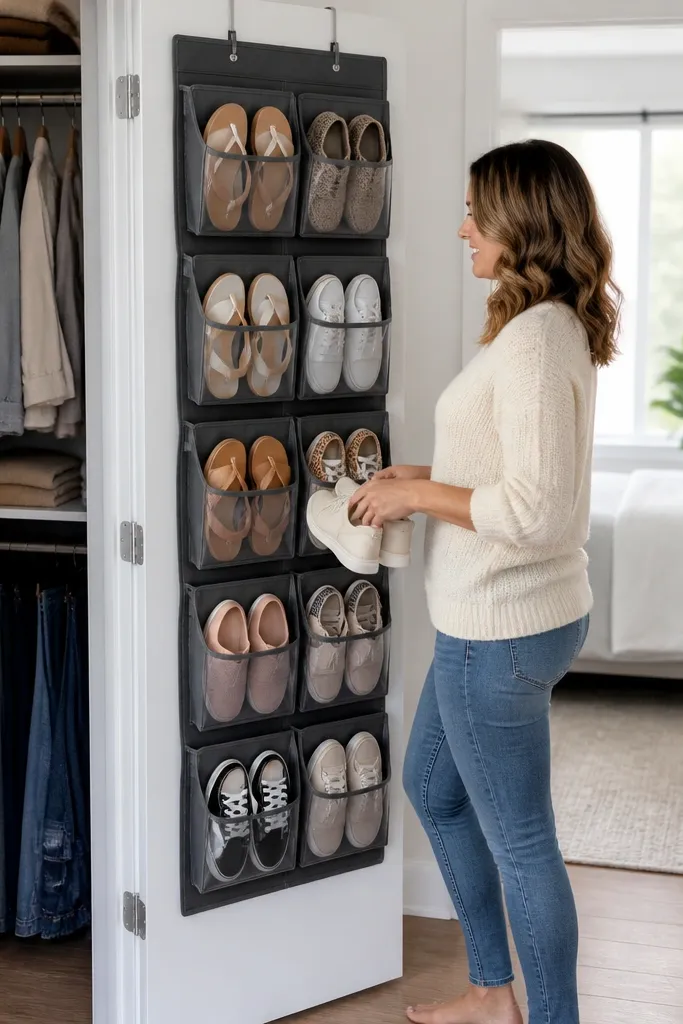
If your closet floor is chaos, use the door. An open-front pocket organizer keeps shoes visible and prevents the “stacked pile” look, and the door placement frees up shelf space. Choose a model that has rigid top edges so pockets hold their shape and look crisp in photos. This is best for flats, sandals, and low sneakers because open pockets don’t support heavy boots well. The look stays tidy because each pair sits in its own pocket with a consistent silhouette.
Select an organizer sized to your door width and confirm the pocket depth fits your shoe height. Attach the organizer using the included mounting hardware, aligning the top edge level so the pocket rows look straight. Add small foam inserts or foldable cardboard strips inside pockets for shoes that slump. Arrange shoes by height, then label the pocket rows with a simple strip of tape.
Editor's noteUse fabric shoe protectors or a thin liner at the bottom of pockets to reduce scuff transfer.
Skip thisDon’t cram oversized boots into shallow pockets — they’ll deform and the organizer will look sloppy.
8. Boot bench with slatted lid and labeled cubbies
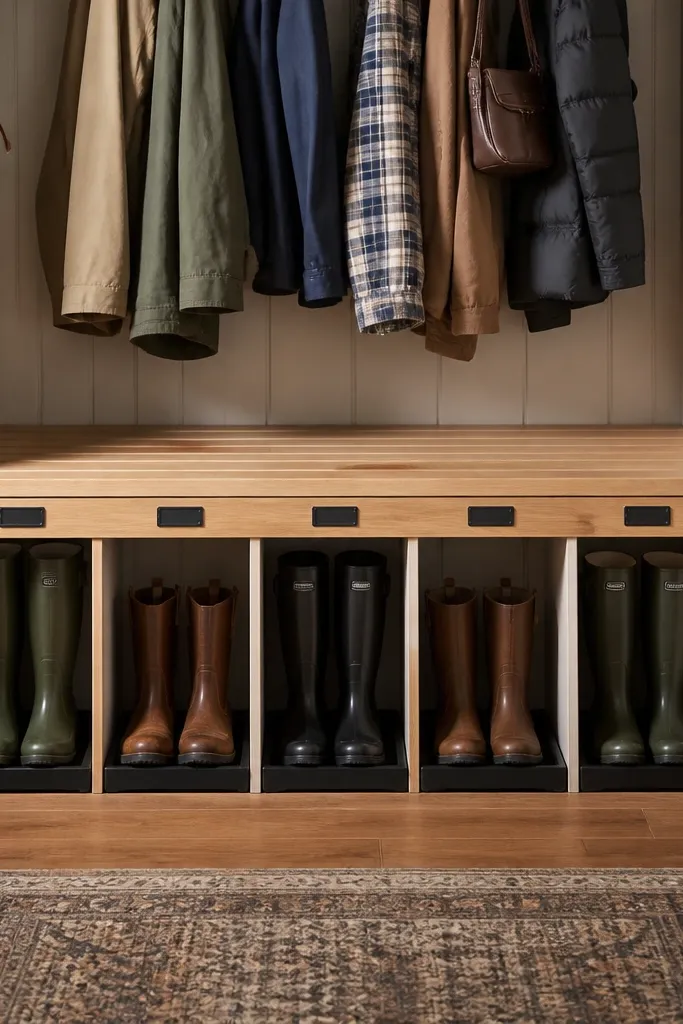
Boot storage can look bulky unless you give it a furniture-style container. A boot bench with a slatted lid keeps boots upright while letting air move so dampness escapes. The lid also hides the messy interior, which keeps the closet look clean when the door is open. Labeling cubbies makes the whole setup easier to use, and the bench format gives you a neat, photogenic row of compartments. This works well in mudroom-style closets or entry closets where shoes get used every day.
Build a bench frame from 2x2 lumber or sturdy plywood and add slats across the lid with gaps for airflow. Install individual cubby dividers sized to boot shaft width, then add a simple boot support dowel or side pegs inside each cubby. Sand and paint the exterior in a matte finish, then attach the slatted lid with hinges. Label each cubby front with a small tag so boots go back to the same slot.
Editor's noteLeave a small gap between cubby dividers and the lid so air can circulate when boots are still drying.
Skip thisAvoid solid, sealed lids — closed storage traps moisture and makes boots smell.
9. Stackable shoe drawers with clear fronts
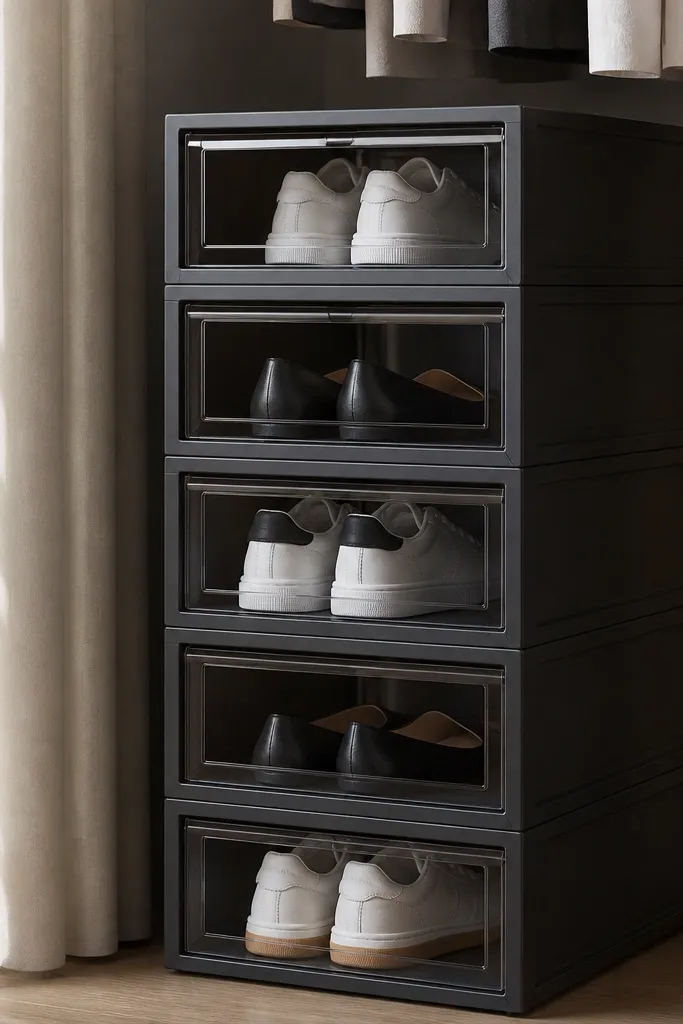
Stackable drawers are the cleanest look if you want the closet to look like built-in furniture. Clear fronts let you see pairs without opening drawers, so the closet stays tidy because you don’t rummage. The drawer format also keeps dust off shoes, which means the storage area looks cleaner longer. Use them for flats, sneakers, and dress shoes that fit neatly in a drawer footprint. This is a good option when you care about aesthetics first but still want real function.
Pick drawer units with clear front panels or add clear acrylic to existing drawer fronts. Install or assemble drawers to match your closet wall height, leaving a small top gap for ventilation. Add internal dividers so each pair sits in one corner with toes pointing the same direction. Label each drawer front with a short type/size label and keep drawer handles aligned for a uniform grid look.
Editor's noteAdd felt pads under dividers — it prevents scraping and keeps the drawer quieter.
Skip thisDon’t store shoes loose inside drawers — they’ll shift and the neat look disappears fast.
10. Pegboard + shelf combo for boots and sneakers
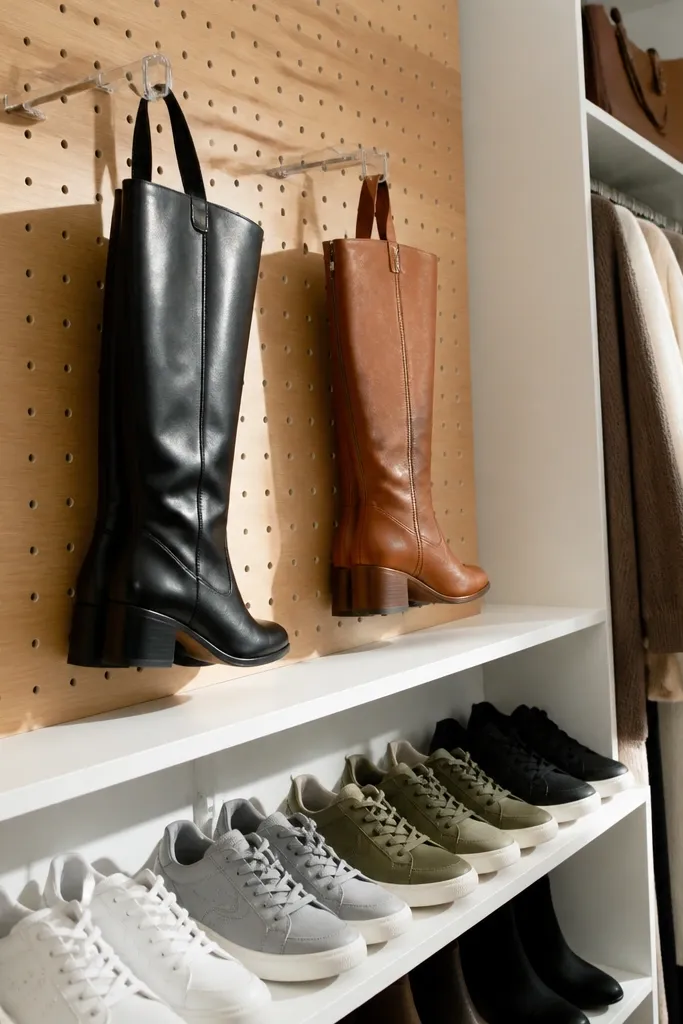
This combo fixes the one storage problem most people hit — shelves look great until boots take over. Use pegboard hooks for boots and high-top shoes, then shelves for sneakers and flats. The mix keeps everything visible and aligned, and it stops boots from eating the shelf space. It also makes the closet look designed because you get two textures and a clear layout grid. If your closet has a long wall, this is one of the most visually satisfying setups to build.
Mount pegboard on the upper half of the wall, anchored into studs, then install a shelf rail or individual shelves beneath it. Place boot hooks so the sole rests on the hook area while the shaft hangs supported. Keep shelves at a consistent height for sneakers and flats, with dividers that create lanes. Paint or finish everything in the same color so the pegboard and shelf read as one system.
Editor's noteUse two hook heights: one for shorter boots and one for taller shafts so the row stays visually even.
Skip thisAvoid random hook spacing — uneven rows make the whole wall look chaotic.
11. Ladder-style shoe rack with matching stain
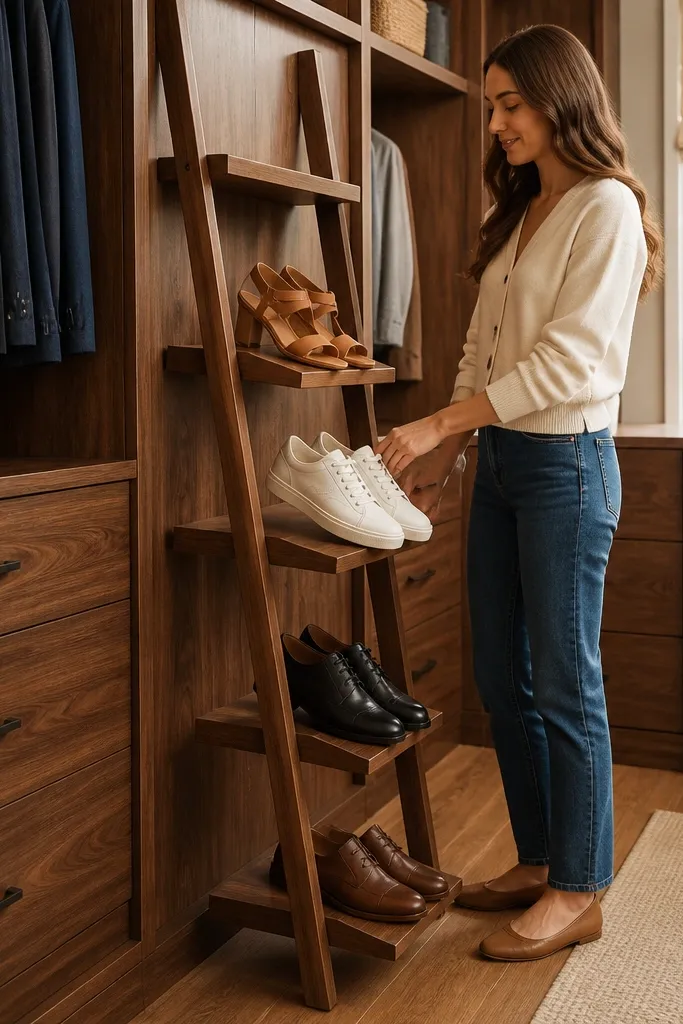
A ladder rack looks stylish because it’s sculptural. The open sides make the closet feel airy, and the stepped shelves give you a neat, diagonal rhythm that reads well in photos. This is best for sneakers, sandals, and small dress shoes where each shelf can hold a pair without crowding. Staining it to match your closet wood or trim makes it look built-in instead of like a freestanding organizer. It also makes your top pairs easy to reach since the rack is visible.
Choose a ladder rack frame that’s narrow enough for your closet width, then sand and stain or paint it to match your closet trim. Add shelf liners like cork or felt to prevent toe scuffs and reduce sliding. Arrange shoes by weight: heavier pairs on lower shelves, lighter pairs on top shelves. Keep each shelf to one pair so the rack stays visually clean rather than overcrowded.
Add small rubber feet under the rack so it doesn’t scrape the closet floor and shift over time.
Don’t overload shelves — if shoes touch, the rack looks messy instantly.
12. Fabric shoe sleeves on a curtain rod
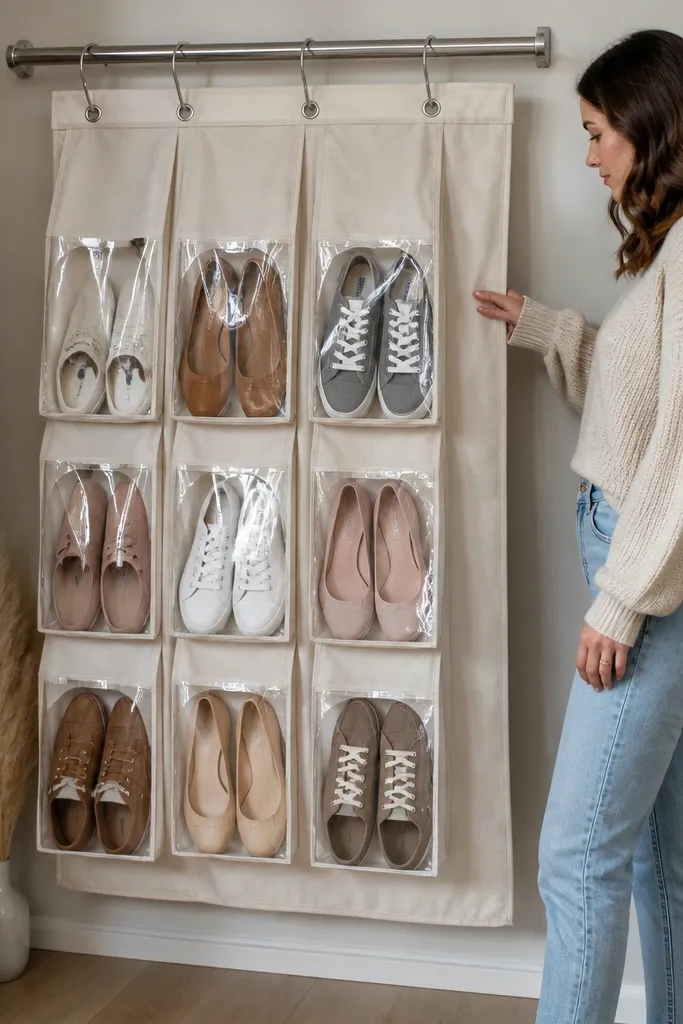
Fabric sleeves give you a soft, airy look compared to rigid bins, and a curtain rod makes installation simple. If you pick sleeves with clear windows, you get the visibility you need for aesthetic shoe storage ideas without turning everything into plastic. This setup works best for sneakers, flats, and sandals where shoes can sit upright without needing hard support. It also hides the mess because fabric creates a clean silhouette when the closet door is closed. Choose neutral fabric like white, oatmeal, or light gray so the closet doesn’t look cluttered.
Install a curtain rod inside the closet at the height that keeps sleeves from dragging on the floor. Hang the fabric sleeves so the bottom edges clear the floor by about 1 inch. If the sleeves don’t have built-in structure, add thin cardboard inserts into each pocket to keep them upright. Add a label card to the top of each sleeve section for shoe type.
Editor's noteUse a fabric-safe stain guard spray if your closet gets dusty — it helps keep the sleeves looking fresh.
Skip thisAvoid sleeves with fully closed fabric if your shoes are damp — odor builds up in enclosed pockets.
13. Folded-over leather shoe straps for pairs on hooks
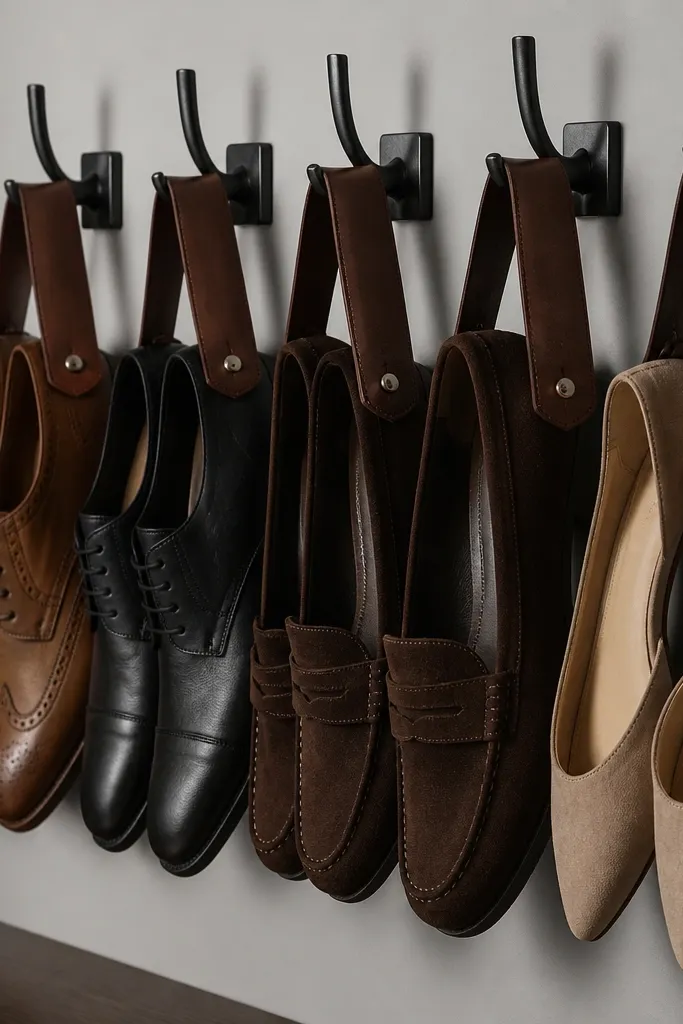
This is for people who like the clean, designer look of pairs held in place. Leather straps prevent shoes from slumping or rubbing, and they visually separate each pair so the closet looks organized even from a distance. It’s especially good for dress shoes and flats where you want toe shape to stay crisp. The straps also make it easy to grab a pair because everything is aligned. It looks intentional because the straps repeat across the wall like a system, not random hooks.
Mount a line of sturdy hooks or a metal rail into studs, spaced so each hook holds one pair’s strap width. Use leather straps cut to length and fold-over so they create a loop that supports the shoe without crushing. Attach the strap ends to the hook, then adjust so the toe points in the same direction for every pair. Wipe leather with a conditioner occasionally so it stays clean and doesn’t crack.
Editor's noteAdd small felt pads where straps touch the shoe to prevent scuffs.
Skip thisDon’t strap shoes by delicate straps or thin uppers — use support points under the sole area.
14. Clear shoe box wall with removable dividers
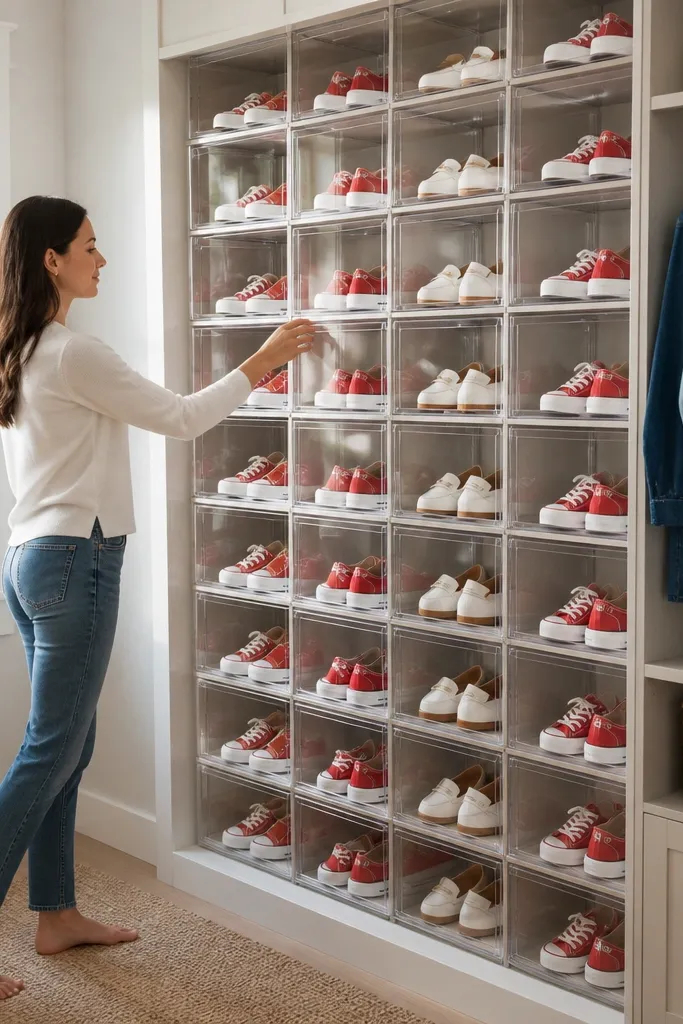
A clear box wall reads like a product display and makes your closet look high-end. Removable dividers mean you can reconfigure lanes when shoe sizes change or you rotate seasonal pairs. The clear fronts keep everything visible, so the closet doesn’t turn into a guessing game. This works best when you want to organize by color or style and keep the visual rhythm consistent. It’s also great for small spaces because the vertical layout uses height instead of floor.
Build or buy a grid of clear-front boxes sized to fit your closet wall, then anchor them level. Install removable dividers inside each box using tracks or simple clips so you can adjust lane width. Keep each box dedicated to one category like “sneakers” or “heels” for easier searching. Label the box corners with small tags so the front stays clean and readable.
Editor's noteUse frosted labels rather than glossy — it reduces glare in bright closets.
Skip thisAvoid storing loose shoes in large open boxes — they’ll tip and the neat display collapses.
15. Magnetic strip for metal shoe tags and mini labels
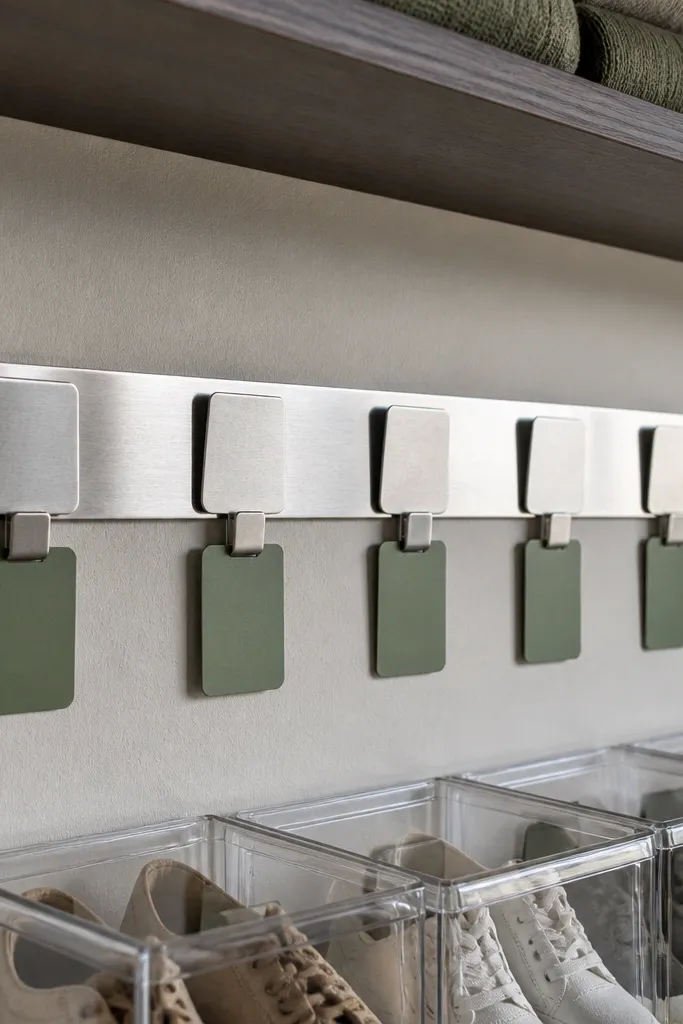
This one is a trick that makes everything look better because it removes clutter. Instead of paper labels falling off or tape residue on bins, use a magnetic strip and metal label tags. The closet looks cleaner because label placement stays consistent and you can swap tags when you rotate shoes. It also helps if you use multiple storage styles in the same closet — you get one labeling system. This idea pairs with any storage you choose, but it’s especially good for clear bins, cubbies, and drawers.
Mount a magnetic strip to the inside wall of your closet at eye level. Create or buy small metal label tags and write category names and sizes with permanent marker or label printer. For each storage unit, keep one label position aligned so everything looks uniform. When you swap shoes seasonally, remove the old tag and clip on the new one.
Editor's noteUse a strip width that fits your label tags snugly so they don’t slide when you open the closet door.
Skip thisAvoid paper-only labels on clear plastic — they peel and the front looks messy fast.
16. Corner shoe ladder with fabric shoe pockets
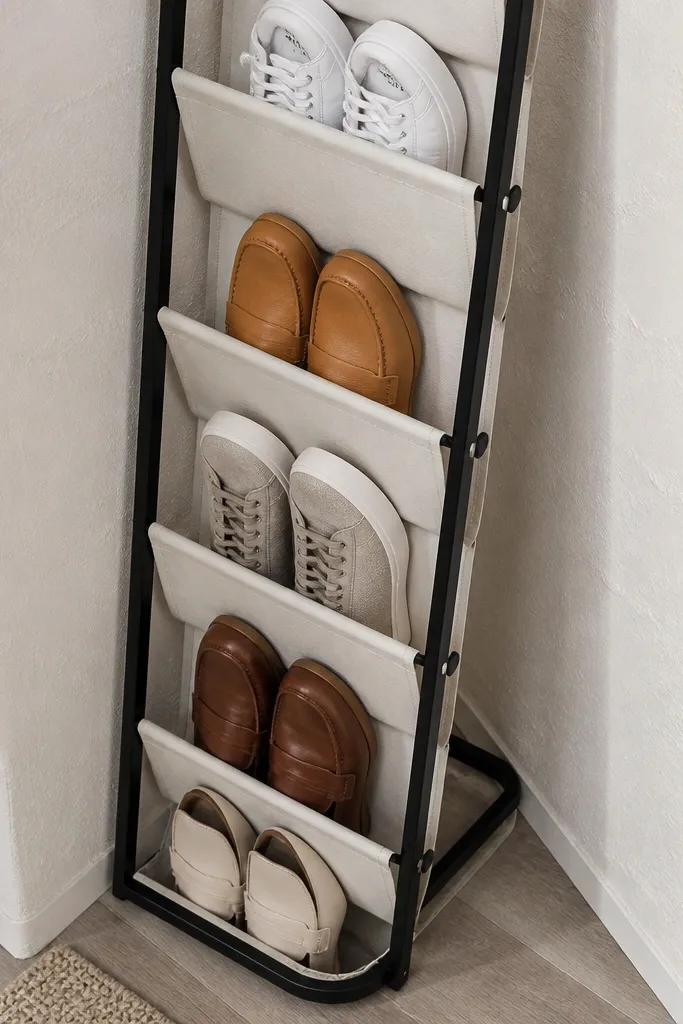
Corners are wasted space unless you give them structure. A corner shoe ladder with fabric pockets uses the awkward angle and turns it into a neat display line. The ladder frame keeps the pockets aligned, so shoes don’t spill out or droop. This is perfect for small closets where you can’t build long shelves. The look stays aesthetic because the ladder shape is visible and the pockets create a repeating pattern.
Choose a corner ladder rack or build one with two angled side rails and crossbars at pocket heights. Attach fabric pockets to the crossbars using clips or sewn loops so pocket tops stay level. Add a simple non-slip base pad so the unit doesn’t shift. Load lighter shoes on upper pockets and bulkier pairs on lower pockets so the fabric keeps shape.
Editor's noteUse neutral pockets and keep pocket labels minimal — the ladder already creates the visual interest.
Skip thisDon’t hang heavy boots in fabric pockets — the fabric stretches and the look goes uneven.
17. DIY acrylic risers for sneakers and flats
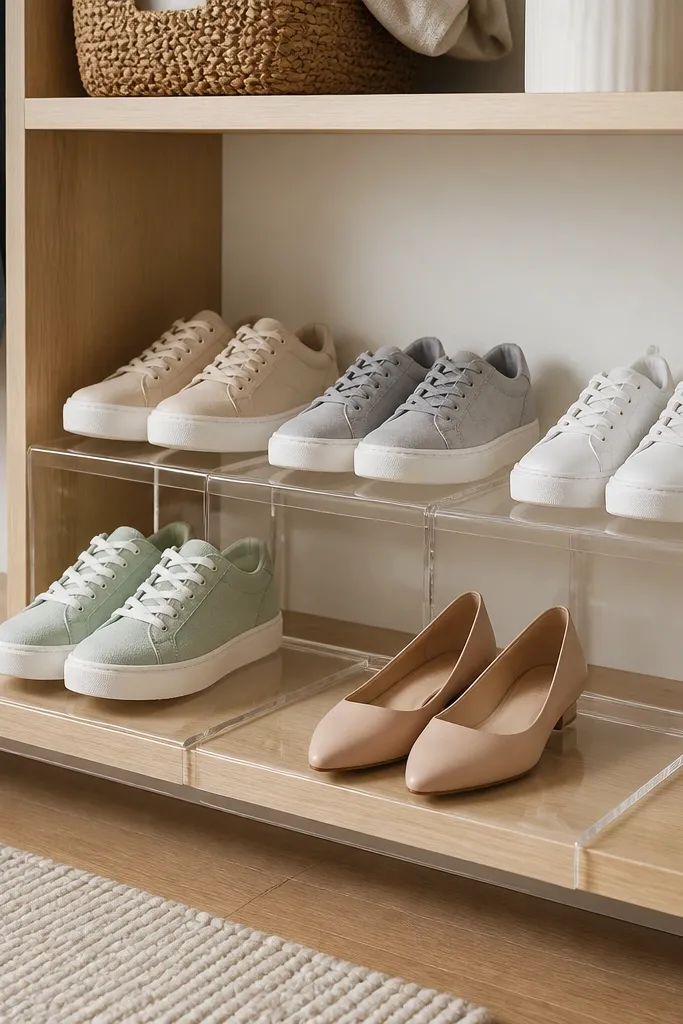
Risers let you store more shoes in the same footprint while keeping the front row visible. Clear acrylic makes the closet feel lighter, and the step layout keeps pairs from collapsing into each other. This is one of the best aesthetic shoe storage ideas for sneakers, flats, and low-profile shoes because they stack neatly when aligned. The look stays clean because each pair sits on a defined platform. It also helps with airflow because shoes aren’t trapped flat on top of each other.
Buy or cut acrylic risers at widths that match your most common shoe sizes. Clean the acrylic thoroughly so adhesive or mounting hardware bonds well. Place risers on a shelf and set the bottom pair directly on the shelf, then align the top pair with the same toe direction. Add thin anti-slip pads under each riser foot to prevent sliding when you move shoes.
Editor's noteKeep riser stack height consistent so the closet has one repeating silhouette instead of random stacks.
Skip thisAvoid stacking shoes that are too bulky for the riser footprint — toes will tilt and the row looks messy.
18. Pegboard pull-out shoe tray for the bottom shelf
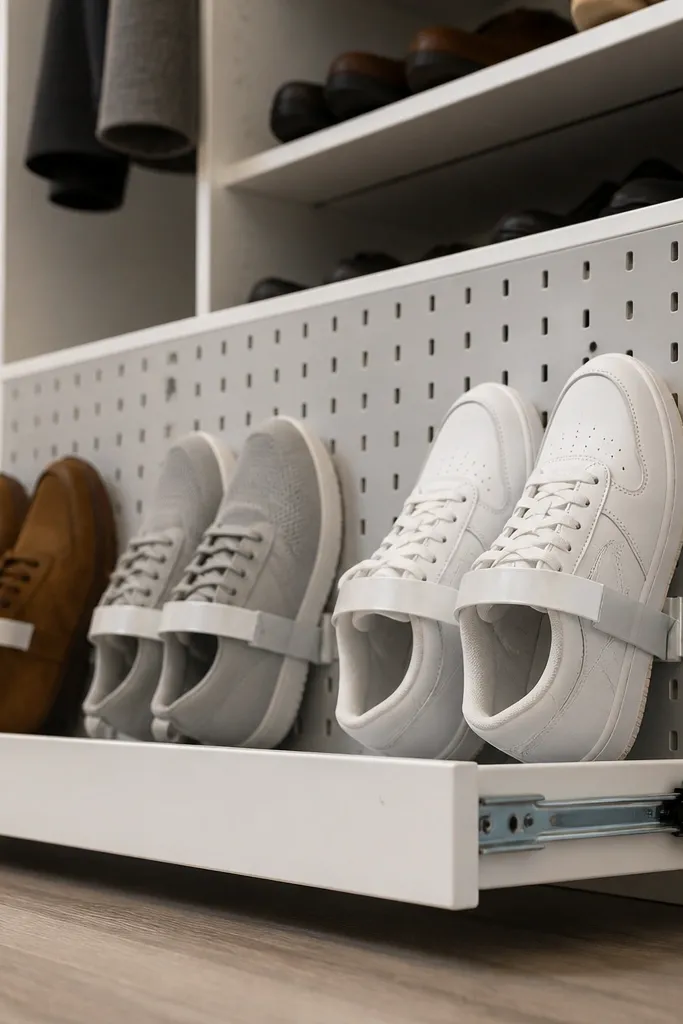
Bottom shelves are where closets go to die — shoes get shoved in and forgotten. A pull-out tray with a pegboard backing makes the shoes easy to access and visually organized when you slide it out. The pegboard backing gives you anchor points for straps, and it also adds airflow behind the shoes. This setup looks tidy because you’re not seeing a messy pile; you’re seeing a controlled row. It works best for sneakers, sandals, and flats that you want to grab quickly.
Build a shallow tray frame with plywood and attach a pegboard sheet to the back. Install drawer slides to the closet shelf so the tray pulls out smoothly. Add small hooks or pegs on the tray backing so straps and heels don’t flop. Sand and seal the tray surfaces, then mount it flush so the front edge lines up with the closet shelf.
Editor's noteUse low-profile drawer slides rated for the tray weight so it feels solid, not wobbly.
Skip thisAvoid a tray that’s too deep — if you can’t see the back row, you’re back to rummaging.
19. Painted wood cubbies with fabric dust covers
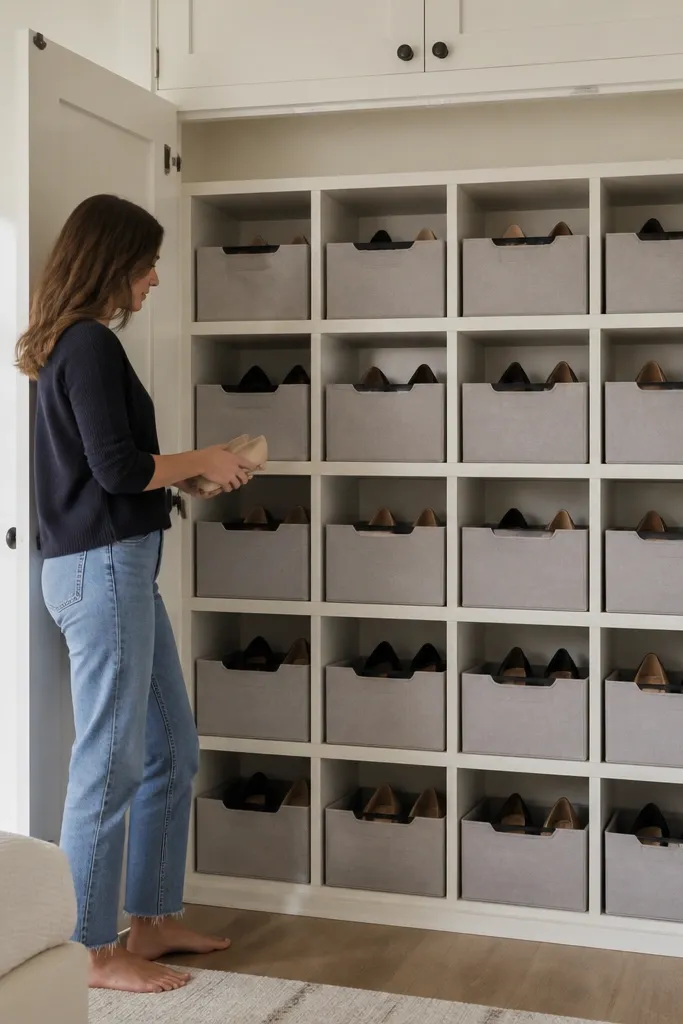
Wood cubbies look warm and built-in, and fabric dust covers keep the shoes from looking cluttered when you close the door. The trick is to use covers that are consistent in color and shape so the cubby face stays uniform. This is great for heels and dress shoes that you want to protect from dust but still display the category. It’s also good for seasonal boots if you don’t want them exposed all the time. The aesthetic comes from the repeated cubby grid and the tidy fabric folds.
Build cubbies with uniform spacing and paint them in a matte color that matches your closet trim. Cut fabric dust covers sized to each cubby opening and add a simple hem so the edges look crisp. Store the shoes inside with dividers for toe separation, then fold covers up when you’re putting shoes away. Add small fabric ties or Velcro tabs so covers land in the same position every time.
Editor's noteUse cotton or canvas for the covers; it holds its shape better than thin polyester.
Skip thisAvoid covers that drag on the floor — they pick up dirt and make the cubbies look worn.
20. Shoe storage with color-blocked shelf liners
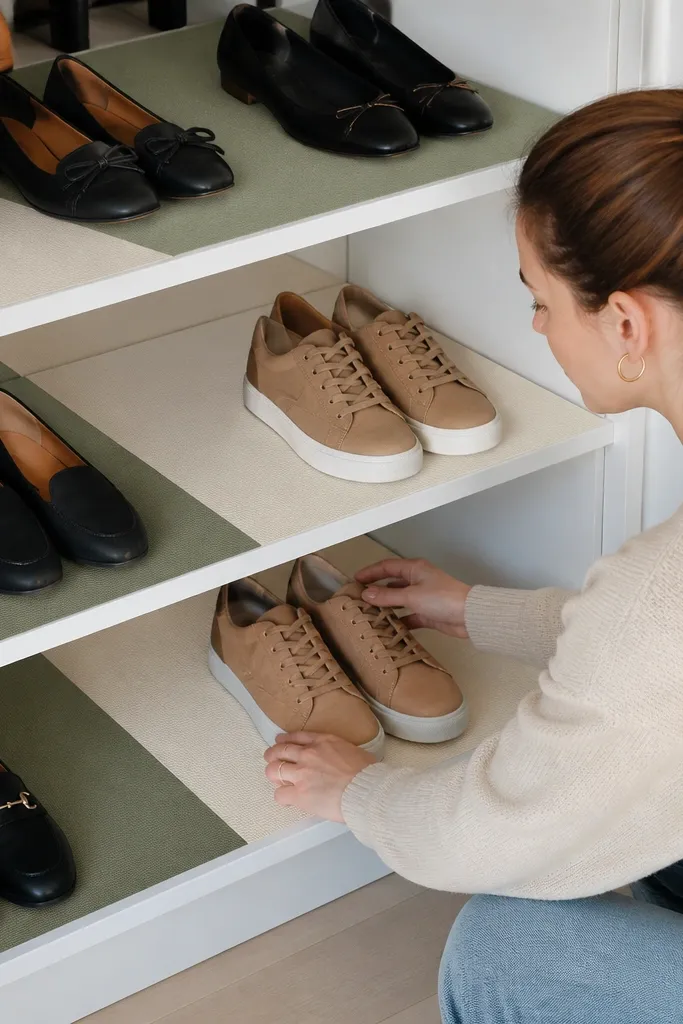
Shelf liners are the easiest way to make shoe storage look designed. Color-blocking creates a visual rhythm, and it also makes it easier to keep pairs aligned because the liner edges act like a boundary. This approach looks best when you organize shoes by type or color families, then match each zone to a liner color. It’s especially photogenic for sneakers and flats because the shoes pop against the liner. You get a cleaner look without building anything complicated.
Measure your closet shelves and cut shelf liners to fit with a clean, straight edge. Pick two to three liner colors and assign them to shoe categories, like “sneakers” on one color and “flats” on another. Arrange pairs so toes point the same direction across each color zone. If shoes slide, add thin non-slip underlay under the liner or use grip mats where needed.
Editor's noteUse a liner with a matte texture — glossy liners show smudges and look messy fast.
Skip thisAvoid too many liner colors — the closet starts looking like a craft project.
21. Under-shelf pull-out bins with clear fronts
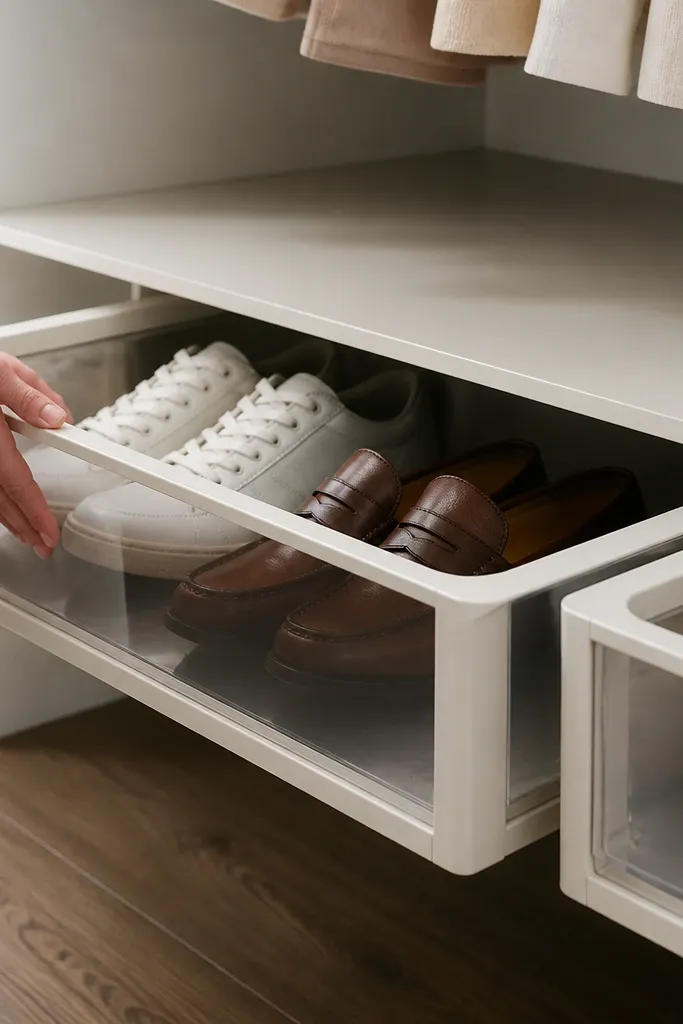
If your closet has shelves but you hate the dead space underneath, pull-out bins turn it into useful storage. Clear fronts keep shoes visible, so you don’t forget what’s stored below. This also keeps the top shelf looking clean because the shoes aren’t piled higher where you see them immediately. The pull-out format makes it feel smooth and furniture-like instead of “stuff shoved under.” Use this for flats, sandals, and smaller sneakers that fit the bin dimensions.
Install a secondary rail under your existing shelf using shelf standards or sturdy brackets. Mount pull-out slides to the rail so the bins roll smoothly without scraping. Use clear bins with lids or clear fronts, and add small dividers inside to keep pairs separated. Label the bin fronts and keep toe direction consistent for each bin row.
Editor's noteAdd a soft-close feature if your slides support it — less banging keeps the closet looking sharp.
Skip thisDon’t choose bins taller than the clearance — you’ll trap the door track or create a scraping problem.
22. Shoe shadow box wall with side-mounted soles
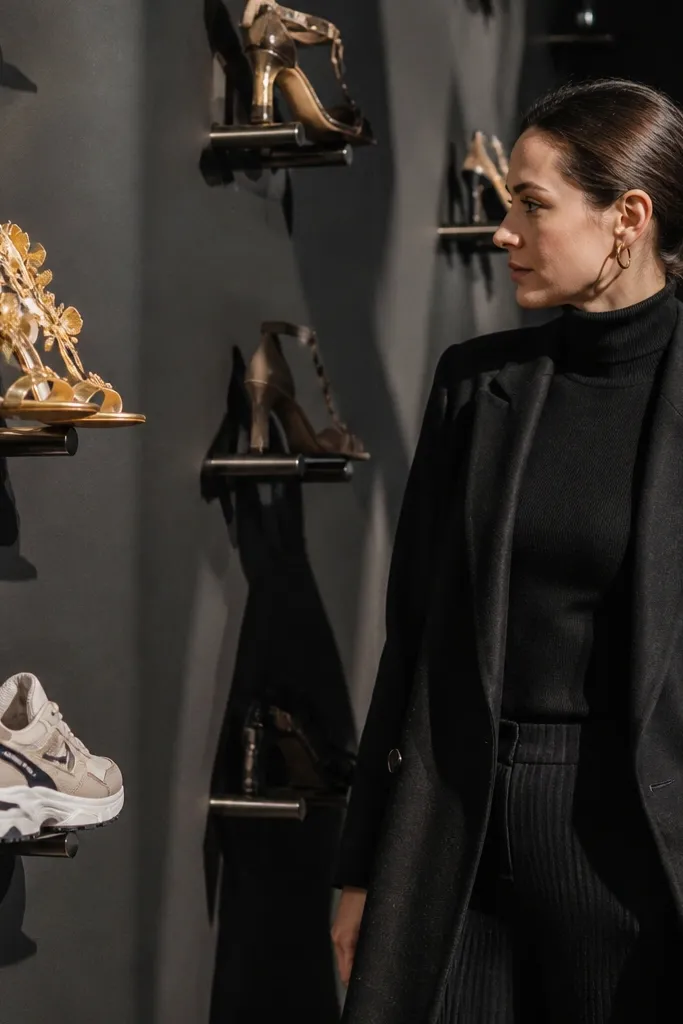
Shadow-box storage is for people who want shoes to look like art. Mounting shoes with side-mounted soles keeps them supported while keeping the toe and side profile visible, so the storage looks intentional. This works best for statement pairs like dress shoes, special sneakers, and heels that you want to show off. The frames create a consistent border, which instantly makes the closet look styled. It’s also a great way to store shoes you don’t wear weekly without turning them into a hidden pile.
Build or buy frame boxes with a clear front and open backing, sized to your shoe type. Use foam supports or custom-cut EVA pads to hold the shoe in place without crushing it. Mount the frame units to studs and keep the border alignment consistent across the wall. Add a label under each frame with shoe type and the year you bought it or the season you rotate it.
Editor's noteUse acid-free backing materials and avoid direct adhesive on delicate leather uppers.
Skip thisAvoid storing shoes in a shadow box if they’re actively damp — sealed displays trap moisture.
23. Stacked clear shoe cube with airflow vents
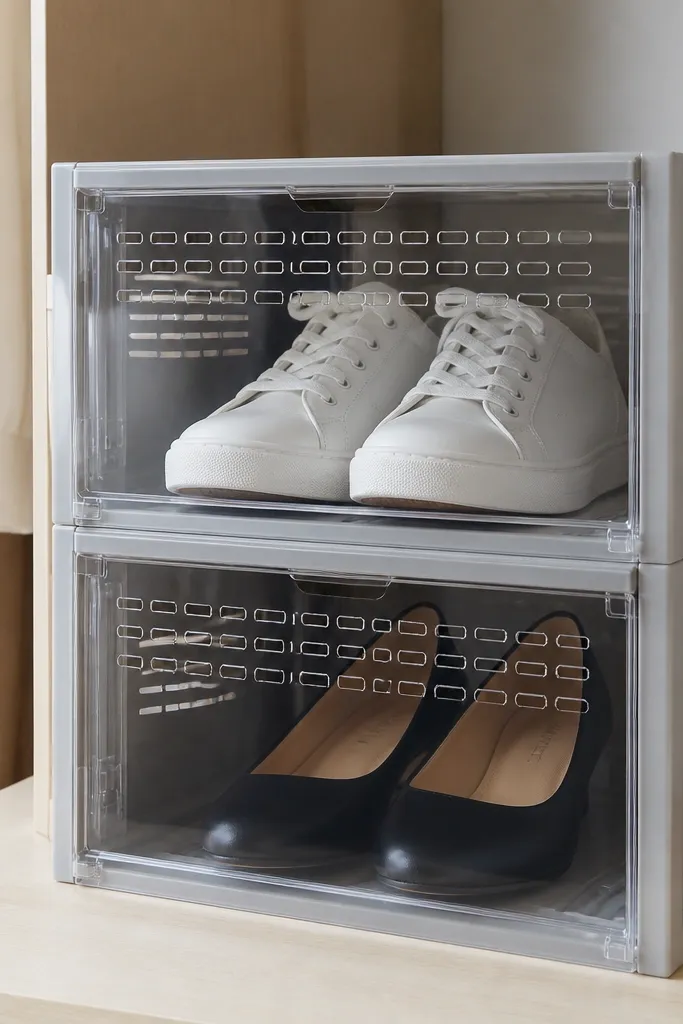
A clear cube system looks crisp and modern, and adding vents makes it practical. The cube layout keeps shoes visible and separated, so you don’t get the “where’s the pair” chaos. Vented cubes also help shoes dry out between wears, which keeps the closet from developing a smell. This works well for sneakers, flats, and casual shoes that can sit upright. The aesthetic comes from the repeated cube grid and the uniform front alignment.
Choose cube units with built-in vent holes or drill evenly spaced vent holes in the sides near the back. Stack cubes to a height that doesn’t block your view too much, then anchor the stack to the wall. Insert dividers so each pair sits in its own cube compartment with a consistent toe direction. Label the cube fronts with small stickers or label cards and keep the same label position across all cubes.
Editor's noteDrill vents near the back edge — you get airflow without showing the holes as an obvious design feature.
Skip thisAvoid cubes with zero ventilation — clear storage can trap humidity quickly.
24. Matching shoe trees in a drawer-style cabinet
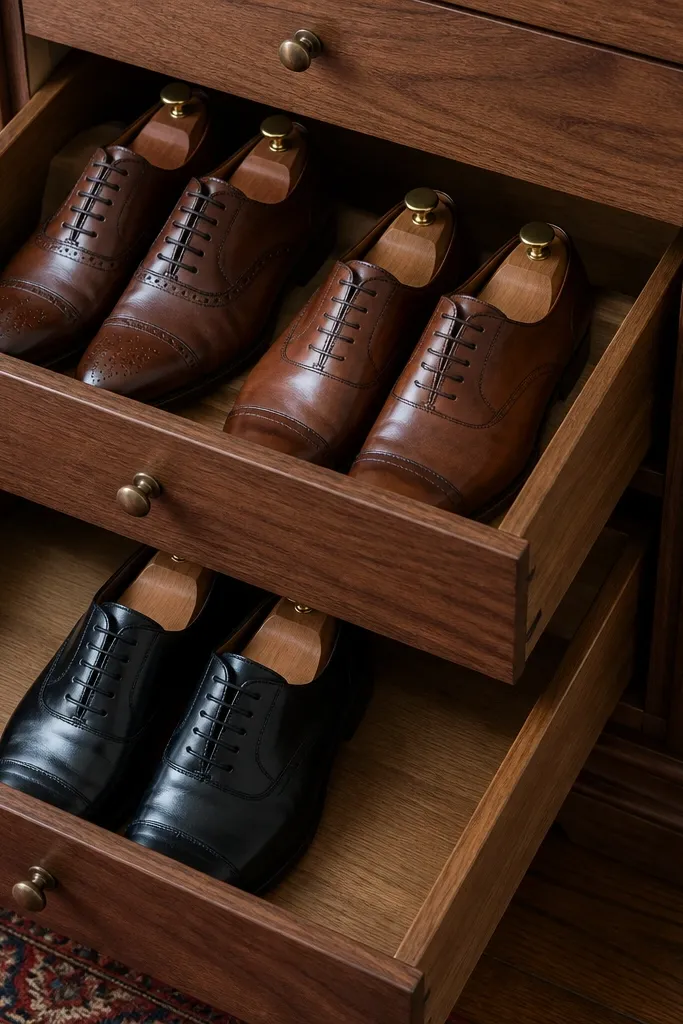
If you care about shape, drawer-style storage with shoe trees looks sharp and keeps pairs from getting crushed. The idea is simple: each pair gets its own space and support, so the closet stays photogenic even after repeated use. Use this mainly for dress shoes and heels because they benefit from form retention. A drawer front hides the clutter, while the interior layout stays neat and aligned. This is the best aesthetic shoe storage idea for people who hate seeing wrinkled toes or bent heels.
Build or buy a cabinet with shallow drawers sized for your dress shoe categories. Add a bottom layer of thin foam or felt, then place the shoe tree base so it sits solidly inside the drawer. Store one pair per drawer section and keep the shoe tree supports centered to avoid leaning. Add a small label on the drawer front and use a divider strip to stop adjacent pairs from touching.
Use cedar shoe trees or shoe-tree models with ventilation — they help with odor control without sprays.
Don’t skip shoe trees for dress shoes — without support, the look degrades quickly.
25. Magnetic shoe labels on a chalkboard strip
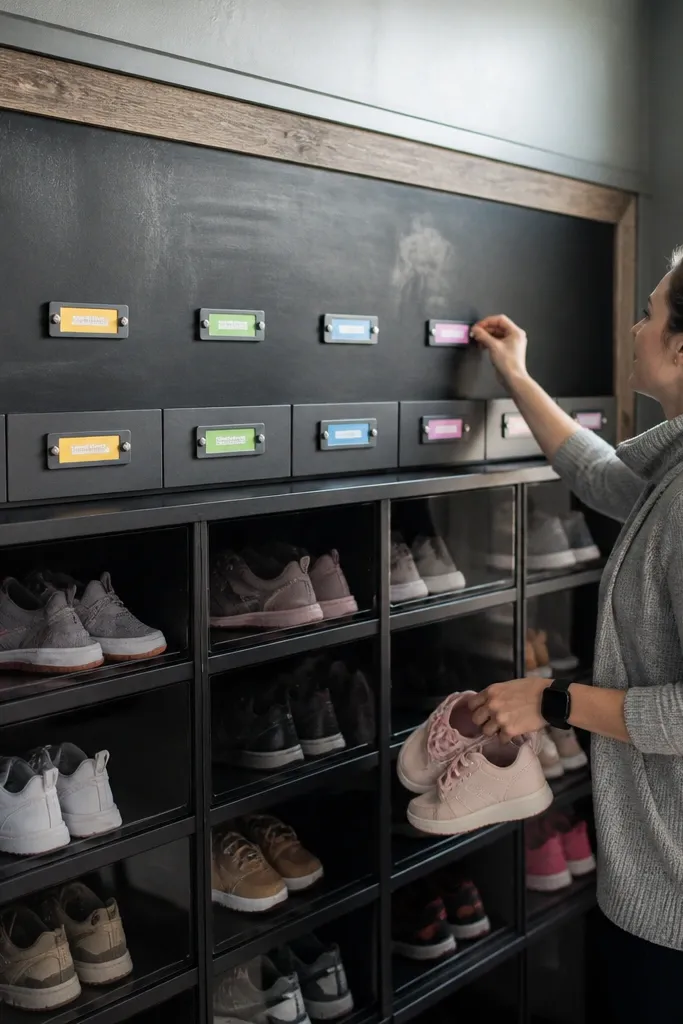
A chalkboard strip makes the closet feel like a command center, but still clean. Magnetic labels keep the info readable and removable, and you can change the layout when you rotate seasonal shoes. This is a strong aesthetic choice when you want your shoe storage to look organized, not industrial. Use it above cubbies, bins, or drawers so the label line becomes a consistent visual anchor. It’s also helpful for households because everyone can put shoes back in the same labeled spot.
Mount a chalkboard strip at eye level inside the closet, secured into studs or with heavy-duty anchors. Create magnetic label cards and write category labels in a consistent style. Place each storage unit under a label zone so you don’t have to hunt for what goes where. Keep the chalk writing minimal and update it only when you change the shoe rotation.
Editor's noteUse erasable chalk markers for cleaner lines than chalk dust.
Skip thisAvoid tiny labels — if you squint, the system fails and shoes get tossed in the nearest spot.



