
1. Slim Vertical Rails with Thin Border Frame
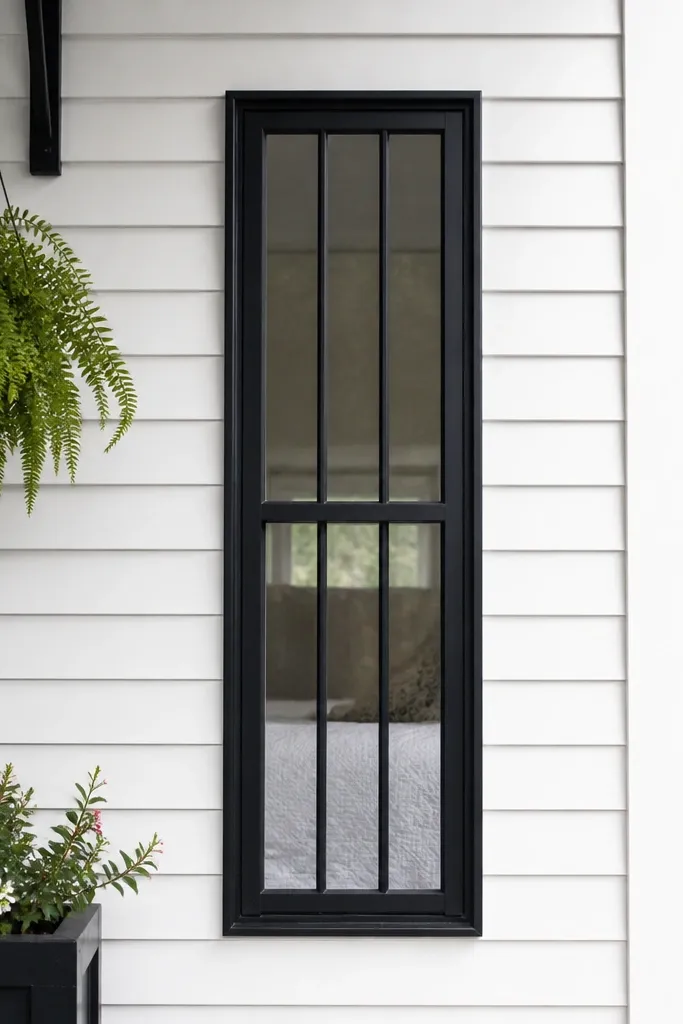
This design is the cleanest entry point to an aesthetic modern window grill design because it reads like a single graphic rectangle. Slim vertical rails create height and keep the window from looking boxed in. Use a thin outer border so the pattern feels light, not industrial. It works especially well on narrow windows, tall doors, and stair landing windows where you want privacy without blocking light.
Editor's noteUse a spacing jig made from scrap bar stock so every vertical rail lands at the same center distance.
Start by measuring the visible window opening and cut a rectangular frame from 25x25 mm square steel for the border. Install vertical bars from 12x12 mm square stock and set them center-to-center at 95-105 mm across the width. Tack everything square on a flat surface, then weld fully at corners and along each bar contact. Prime, then paint or powder-coat the entire assembly in one finish pass, and mount using four corner brackets or anchor plates.
Skip thisDon’t use thick bars with a thin border — it looks top-heavy and dated.
2. Matte Black Grid with Wider Center Columns
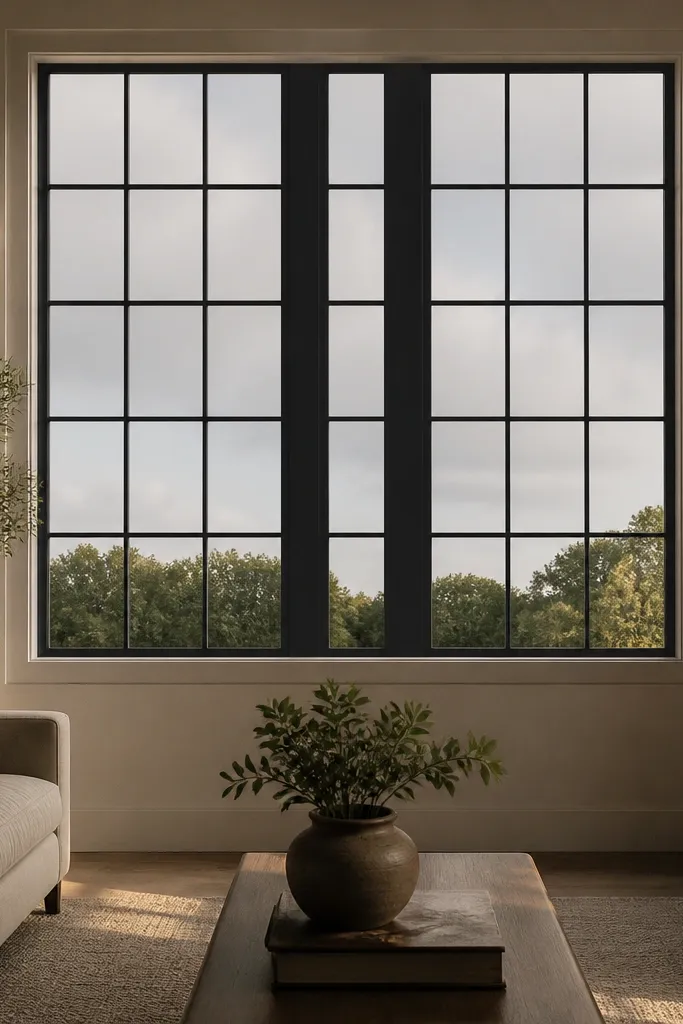
This pattern gives you a modern “architectural” look by changing bar weight in one place. Wider center columns pull focus to the middle of the window, while the outer grid stays delicate so the whole thing doesn’t feel heavy. It photographs well because the shadows land consistently in the grid. Great for medium-width windows where a pure grid would look flat or too repetitive.
Editor's noteGrind visible welds smooth before priming so you don’t get shiny weld bumps under daylight.
Build a frame from 30x30 mm square steel. Fill with a grid made from 10x10 mm bars, but replace the center vertical column(s) with 14x14 mm bars. For a balanced look, keep spacing uniform from the center outward rather than spacing everything by eye. Weld, grind the welds flush on the visible face, then prime and matte-finish paint to reduce glare.
Skip thisAvoid uneven grid spacing — even one off-center line makes the design look DIY.
3. Diagonal Cross Angles in a Rectangle
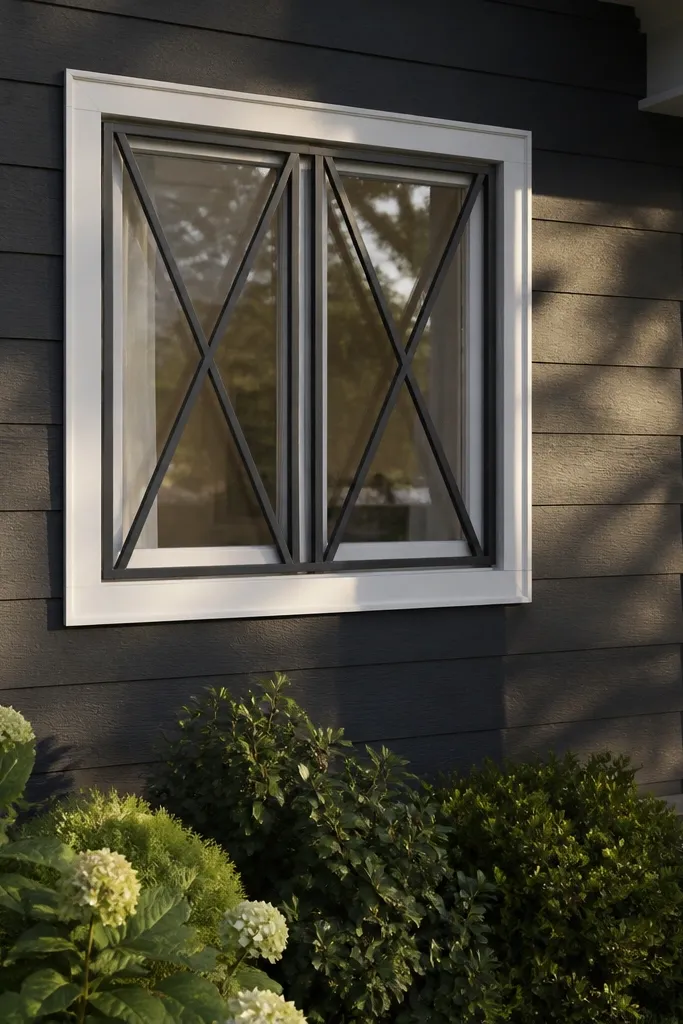
Diagonal crosses make a window grill look intentional and modern because the geometry creates movement instead of a static grid. The rectangle border keeps it clean and controlled, like a framed graphic. This is a strong choice for front-facing windows where you want the grill to read from the street without covering the whole view. It also works well on both square and rectangular windows.
Editor's noteUse a cardboard template for the diagonals so both sides match exactly before you weld.
Cut a frame from 30x20 mm rectangular steel so it looks slimmer than a full square. Use 12x12 mm bars for the diagonals and form an X that touches the inner corners of the frame. Measure diagonal lengths carefully — cut each diagonal slightly long, then trim for a tight fit. Tack, check symmetry, weld, then finish with powder coating or a two-coat system for consistent coverage.
Skip thisDon’t let the diagonals float — gaps at corners ruin the crisp modern look.
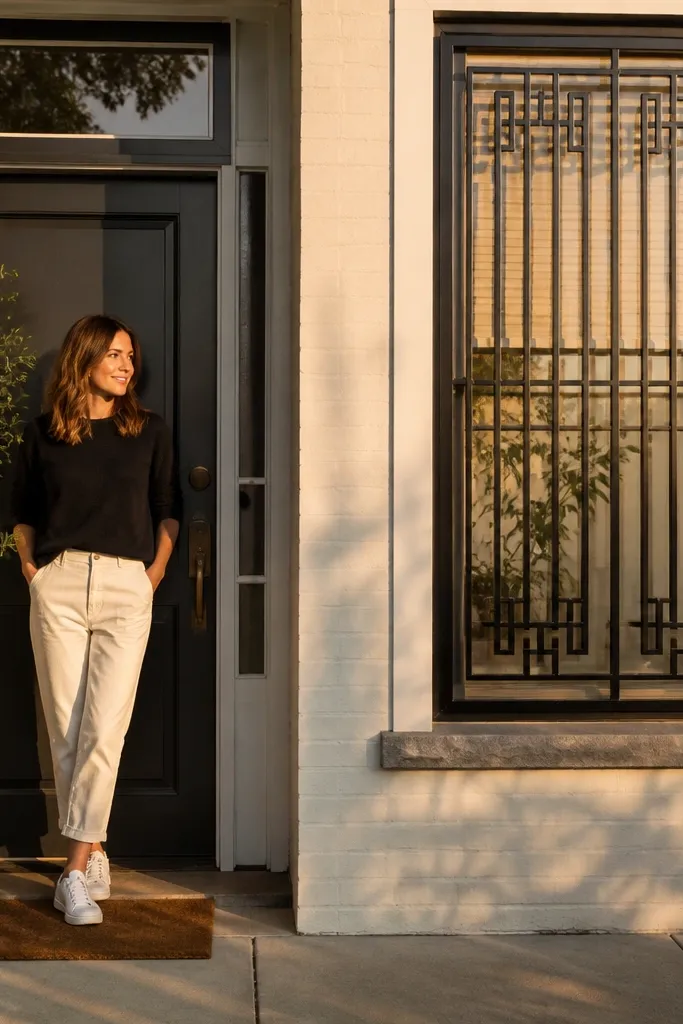
4. Offset Square Lattice with Negative Space
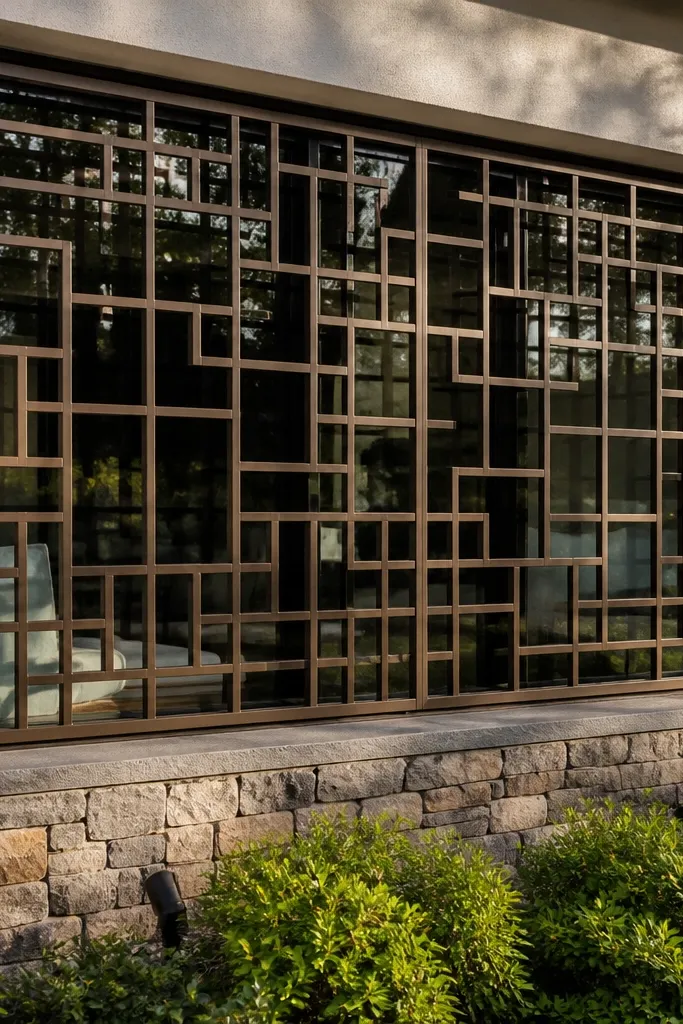
Square lattice designs look modern when the squares are offset and the negative space stays open. Instead of a full grid, you get a pattern that feels airy, so the window still looks bright. Bronze or warm dark bronze finishes add depth and make the squares pop without looking harsh. Perfect for larger windows where you want privacy but not heavy coverage.
Editor's noteKeep square size consistent; measure from center-to-center for every bar crossing.
Use a 25x25 mm outer frame and build an internal lattice from 10x10 mm square bars. Mark a repeating square size of about 110-120 mm, then offset every other square by half that size so the pattern shifts. Weld intersections on the inner face, then grind spatter on the front. Prime and topcoat in a warm dark bronze color to avoid the flat look of pure black.
Skip thisAvoid tiny squares with thick bars — they look like a fence panel.
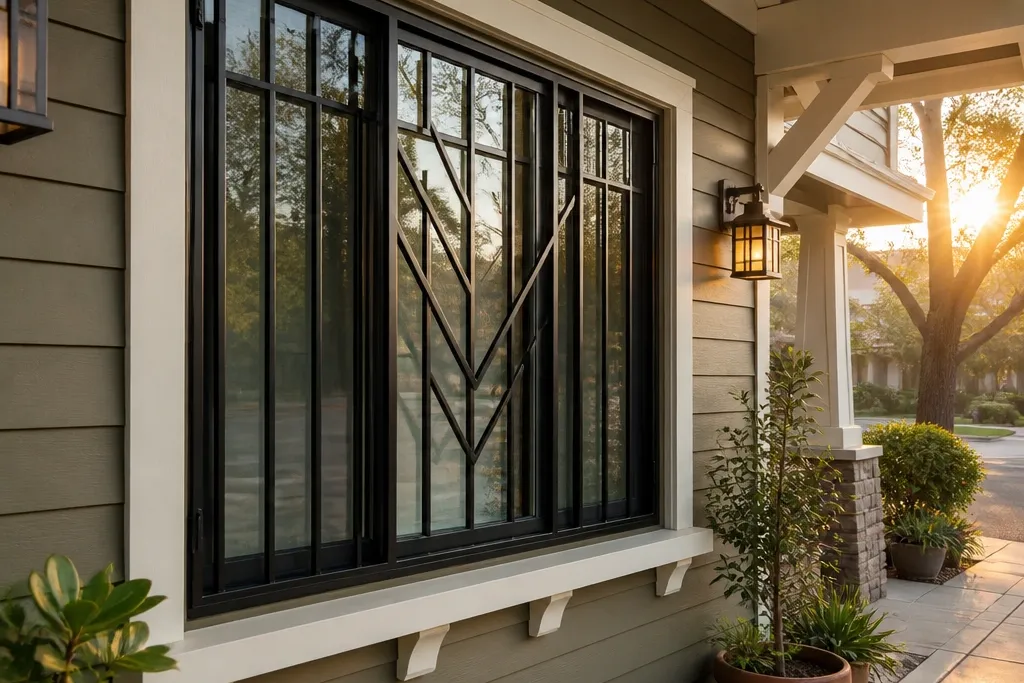
5. Two-Row Vertical Slats with Center Chevron
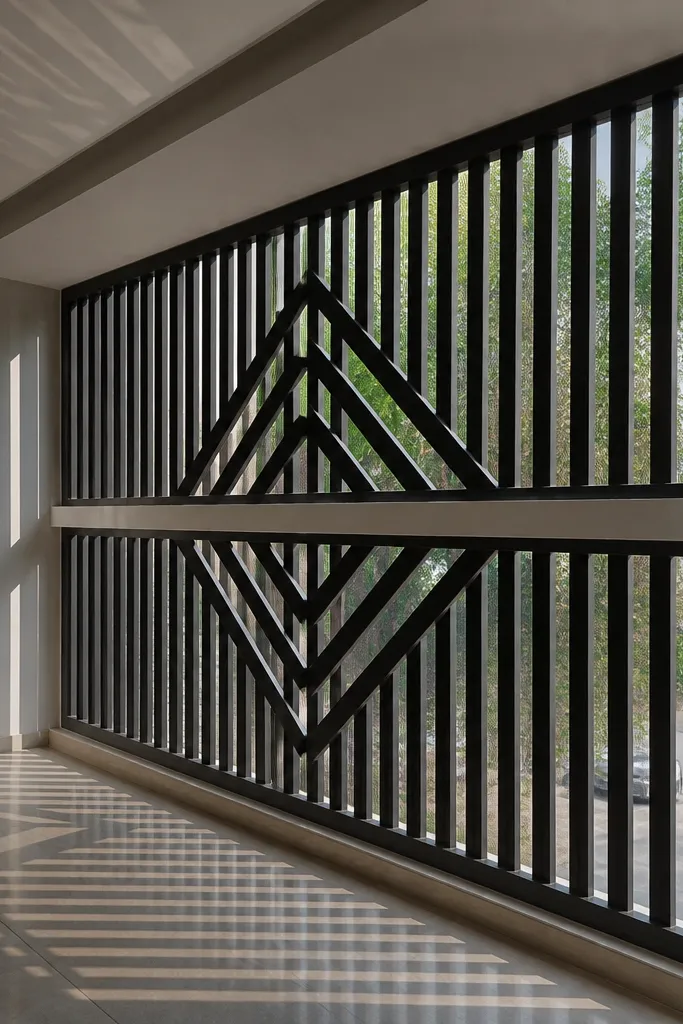
This design is modern because it uses one clear accent shape. Two-row vertical slats set the base rhythm, and the center chevron gives you that clean “graphic” feel. It looks great on windows with a clear horizontal midpoint, like bedroom windows. It’s also friendly for beginners because the base grid is simple and the chevron is easy to measure.
Editor's noteMark the chevron peak location with a chalk line so it lands exactly in the center of the frame.
Frame the window with 30x20 mm rectangular steel. Install vertical slats using 10x10 mm bars at 100 mm spacing across the width. Then build a chevron from two 12x12 mm bars meeting at the center at the midpoint of the window height, forming a V that stops before the frame. Weld the chevron to the slats lightly for alignment, then fully weld at contact points and finish with powder coating.
Skip thisDon’t overbuild the chevron — too many extra lines makes it look busy, not modern.
6. Horizontal Band with Vertical Drop Bars
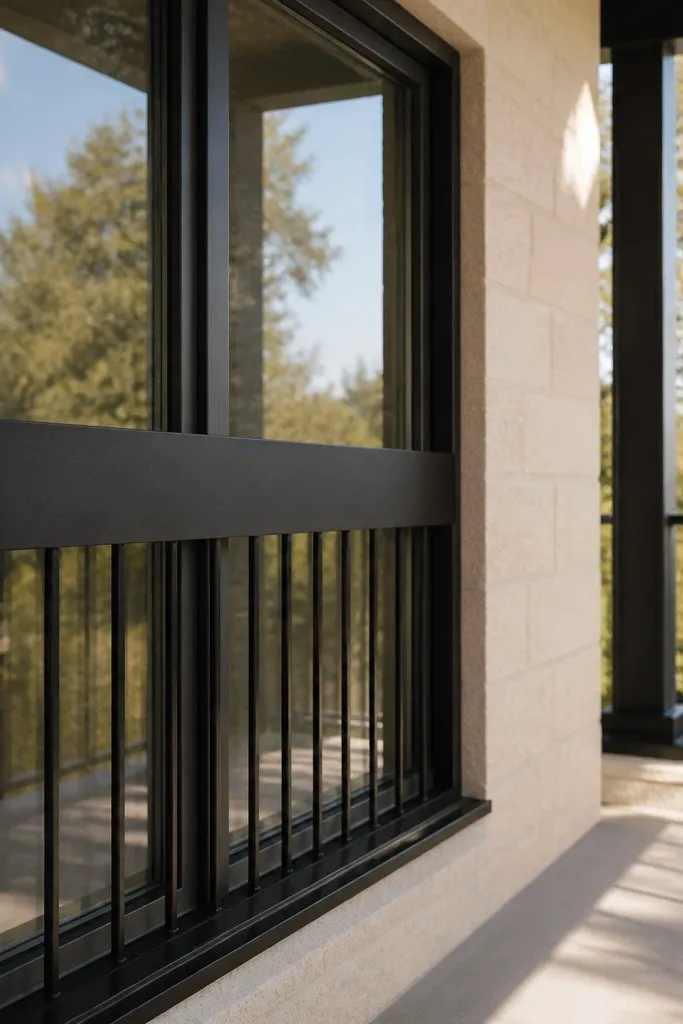
Horizontal bands make the window feel grounded and modern, while vertical drop bars add structure. This is a great option if your window sits near a balcony or if you want the grill to echo a horizontal architectural line. The band also helps visually separate the top and bottom halves so the design doesn’t look random. Works best for medium-height windows.
Editor's noteUse flat bar for the band and keep it perfectly level; a slightly tilted band screams DIY.
Cut a rectangular outer frame from 30x30 mm square steel. Add a horizontal band using 40x10 mm flat bar placed about 40% down from the top of the frame. Install vertical drop bars from 10x10 mm square stock from the band to the bottom frame at 90-100 mm spacing. Weld, grind, then prime and paint in a dark gray color that matches your hardware.
Skip thisAvoid thin wire-like verticals — they make the grill feel flimsy.
7. Half-Moon Corner Arcs with Straight Bars
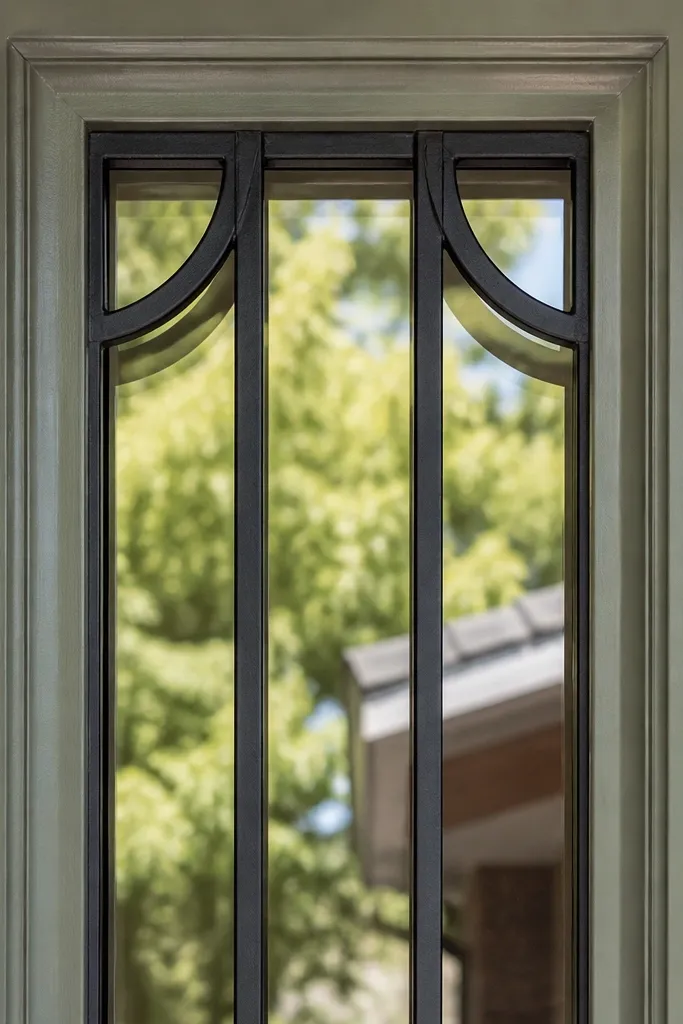
Rounded arcs soften the hard lines of modern grills without turning them into decorative scrollwork. Half-moon arcs in the corners look clean and intentional, especially with straight vertical bars. This is the kind of design that looks good on front doors and sidelights where you want security but a softer visual tone. It’s also easier than full circular patterns because you’re only shaping small arcs.
Editor's noteTest-fit arc segments on the floor first so you don’t discover gaps after everything is welded.
Build a frame from 30x20 mm rectangular steel. Fill the center with 10x10 mm vertical bars at 95-105 mm spacing. For the corner arcs, cut and weld short arc segments (about 80-120 mm radius) from 12x12 mm stock so each arc sits snug in its corner. Weld carefully, then sand smooth at the arc transitions before priming and painting.
Skip thisDon’t use big decorative scroll curves — corner arcs should be subtle and geometric.
8. Modern Rectangle-Mesh with Cross Braces
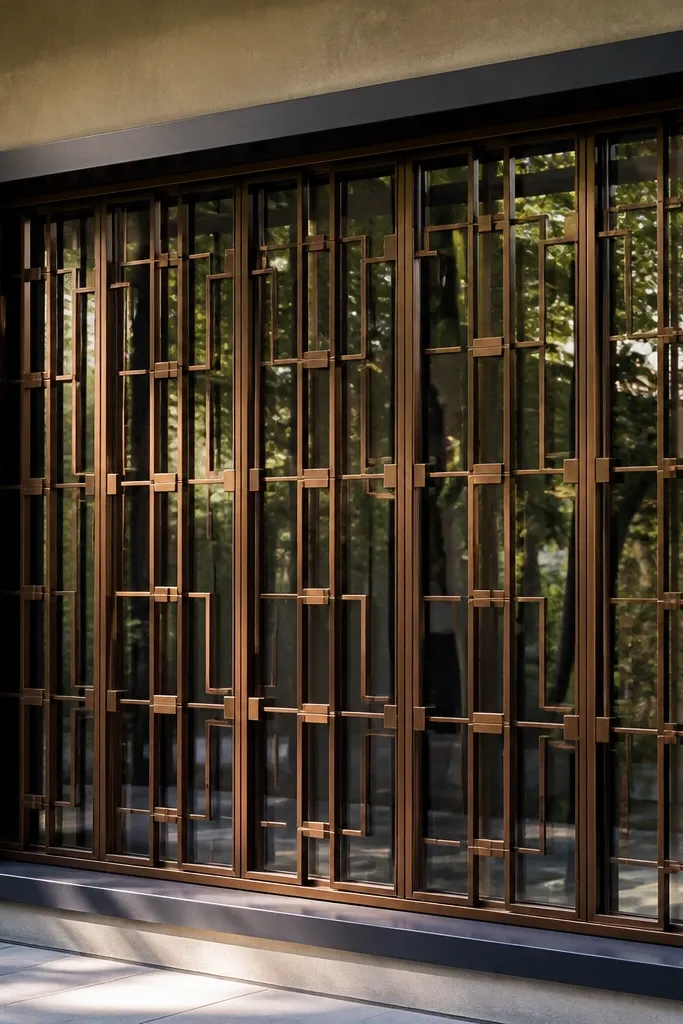
A rectangle-mesh pattern looks modern when it’s built with crisp rectangles and reinforced at key points. Cross braces keep the frame from looking like a flimsy sheet, and they add a strong visual rhythm. Bronze finishes make the small rectangles look dimensional. This design fits wide windows and large openings where you want coverage that still feels light.
Use a 35x25 mm outer frame. Cut 10x20 mm flat bars for the rectangle mesh and weld them into a repeating pattern with 120-140 mm rectangle widths. Add cross braces at the midpoints using 12x12 mm square stock so the mesh doesn’t sag. Prime fully, then topcoat with bronze powder or a durable exterior enamel.
Keep welds consistent at every intersection; uneven welds create wavy shadows.
Avoid long unsupported spans of mesh — it makes the whole grill look like it will bend.
9. Black Frame with Two Vertical Open Windows
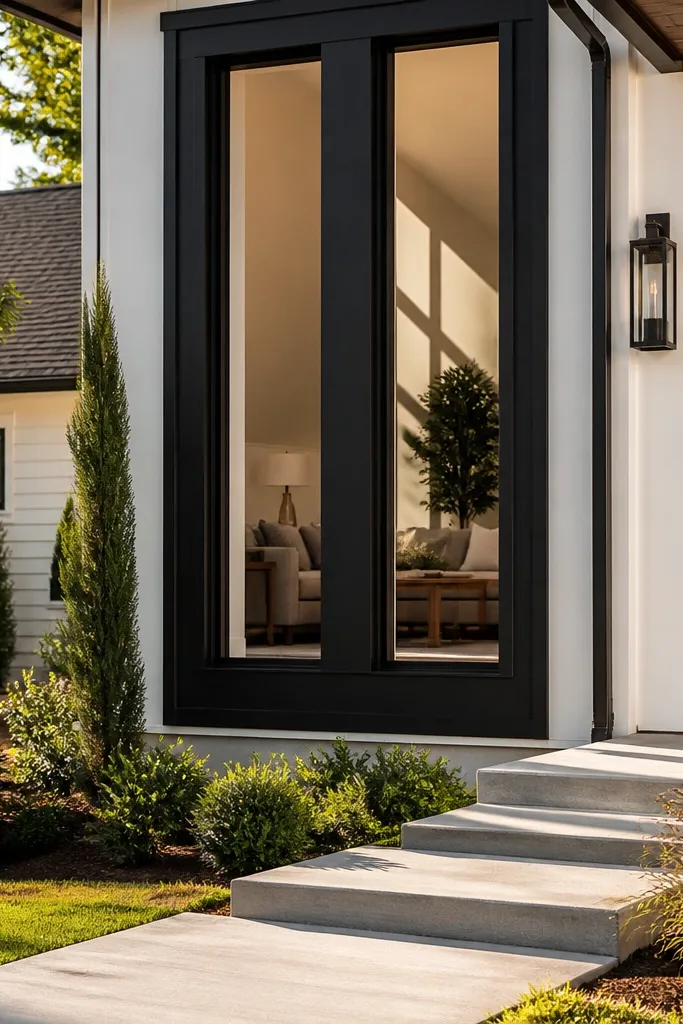
This design is modern because it uses open “windows” inside the grill, not just bars. Two tall open rectangles create a clean composition and reduce the boxed-in feeling. It looks sharp on windows that already have strong vertical lines, like tall living room windows. It’s also great for smaller windows because it doesn’t crowd the view.
Editor's noteDraw the inner rectangles on paper to scale before you cut metal so the open areas look balanced.
Frame the entire grill with 30x20 mm rectangular steel. Inside, install vertical bars so they create two tall open rectangles side-by-side, each roughly 35-45% of the inner width. Use 10x10 mm square bars for the dividers and keep all bars flush to the frame. Weld, grind front welds, and finish with a matte black coating for the crispest look.
Skip thisDon’t add extra bars to “fill space” — the open rectangles are the whole point.
10. Geometric Diamond Field with Thin Border
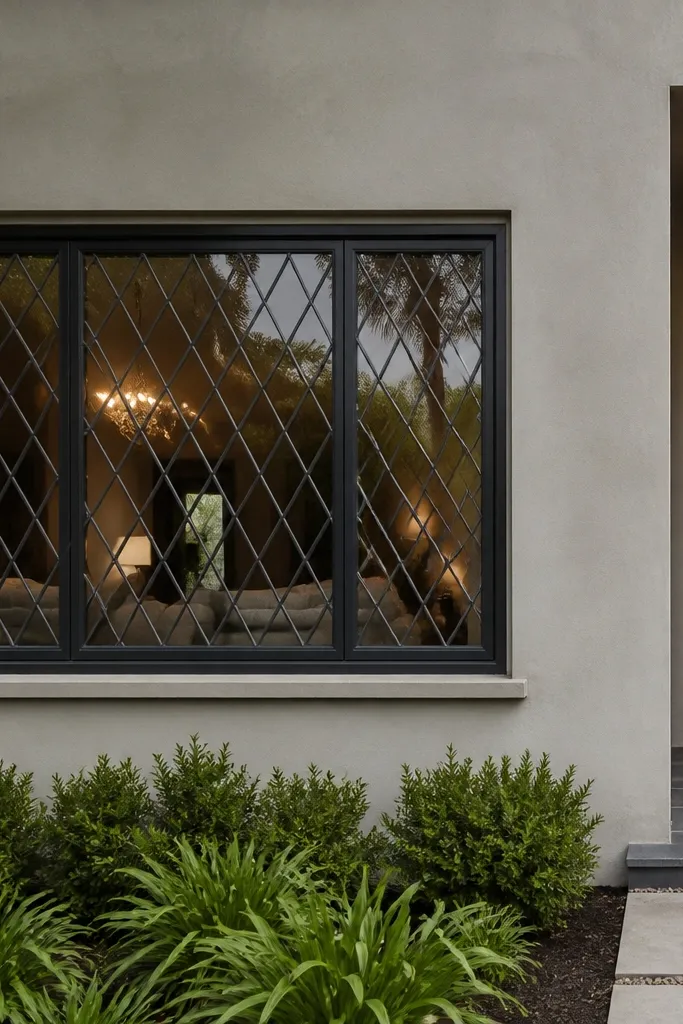
Diamonds look modern when the border stays thin and the diamond bars are consistent thickness. This gives you a repeating geometry that’s visually interesting but not busy. Charcoal works better than pure black here because it softens the contrast and keeps the pattern readable. Great for wide windows and rooms where you want privacy without a solid wall effect.
Editor's noteUse a diagonal spacing jig so every diamond corner lands at the same distance.
Use a 25x25 mm square frame. Build a diamond field using 10x10 mm square bars cut and welded into a repeating pattern with 100-120 mm diamond sizes. Keep the diamonds aligned to the center of the frame and stop cleanly at the inner border. Weld, grind, then apply primer plus a satin or matte topcoat so diamonds don’t glare in sun.
Skip thisAvoid mixed bar thicknesses inside the diamond field — it makes the pattern look sloppy.
11. Staggered Vertical Bars with Center Cutout
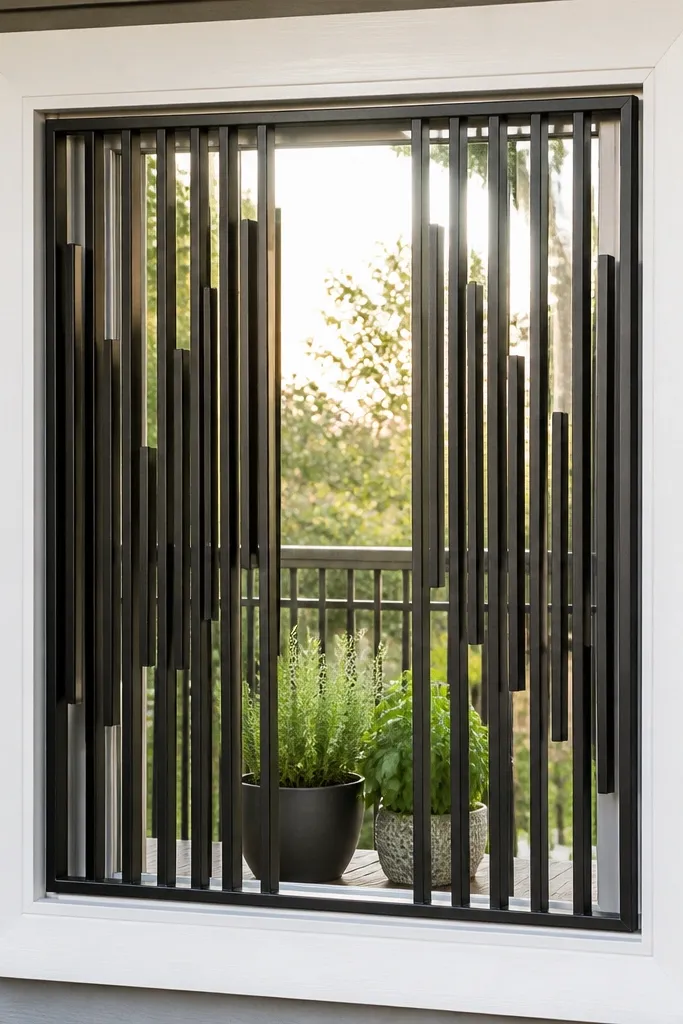
Staggering vertical bars adds motion, while a center cutout makes the design feel lighter. This is a modern trick: you create negative space in the middle where the eye wants calm. It suits windows where you want privacy but also a clean, airy look. It also works well with interior mounting because the cutout keeps it from feeling heavy.
Editor's noteMark bar offsets on the floor with tape lines so you can repeat the spacing without measuring every piece.
Build a frame from 30x20 mm rectangular steel. Install vertical bars in two staggered rows by offsetting every other bar by 15-20 mm so they don’t line up perfectly. Leave a center cutout rectangle by skipping bars in the middle section, sized about 25-35% of the frame width and 35-45% of frame height. Weld all bars, check alignment, then prime and paint.
Skip thisDon’t offset by random amounts — keep the offset consistent for a clean modern rhythm.
12. Stainless Look Vertical Slats with Black Edges
A two-tone finish instantly makes a grill look modern. Silver slats read light and clean, while black edges anchor the design so it doesn’t look like a hardware store rack. This is a great choice if your window frame or trim has black accents. It also photographs beautifully because the two metals create crisp separation.
Use a black powder-coated frame from 30x20 mm steel. For slats, use 10x10 mm square steel with a silver finish (powder-coated or durable exterior paint in a brushed-silver look). Weld slats inside the black frame, keeping their ends flush. Prime bare areas before the silver coat if you’re painting, then apply topcoat evenly on the slats and a final coat on the frame.
Mask the frame edges with painter’s tape before spraying slats so lines stay sharp.
Avoid using bright chrome polish — it glares and looks cheap outdoors.
13. Minimal Square Grid with Thick Corner Posts
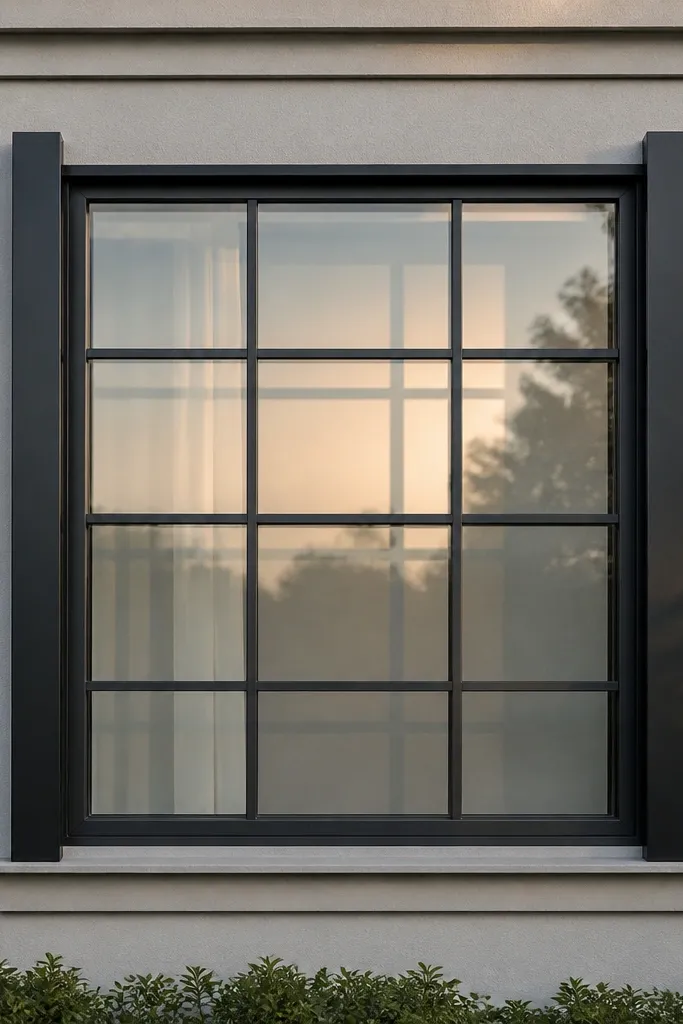
Thick corner posts make the grid feel designed instead of assembled. Keep the internal bars thin, and the whole piece looks modern and structured. This style works on almost any window because it reads as a minimal framework around the glass. It’s also a good option if you’re trying to match a modern fence or gate where corner posts are prominent.
Editor's noteMark corner post positions first, then build inward; it keeps the grid square even if the window is slightly off-level.
Cut a frame with thicker corner posts using 40x40 mm steel for the corners and 25x25 mm for the sides. Fill the middle with a square grid using 10x10 mm bars. Keep square cells around 110 mm so the pattern stays airy. Weld the grid to the inner faces of the frame, grind visible welds, then prime and finish with matte black paint.
Skip thisDon’t make the entire frame thick — it defeats the minimal look.
14. Floating Frame Look with Side Shadow Gap
The floating frame look is modern because it creates a shadow line between the grill and the wall. That tiny gap makes the design look like a built-in architectural feature instead of a surface-mounted panel. It’s perfect for exterior mounting where you want a clean finish around the window. You’ll need to plan standoffs carefully, but the result is very photogenic.
Editor's noteUse longer screws with washers and lock nuts so vibration doesn’t loosen the mount over time.
Build the grill frame as normal, then mount it using standoff brackets or spacers that create a 10-15 mm shadow gap from the wall. Use 30x20 mm frame steel and 10x10 mm inner bars. Before welding, attach corner mounting plates to the back of the frame so you don’t struggle with alignment later. After powder coating, install with anchors sized for your wall type and check the grill is level before tightening fully.
Skip thisAvoid mounting hard against the wall — you lose the shadow line and it looks flat.
15. Quarter-Circle Center Motif with Vertical Bars
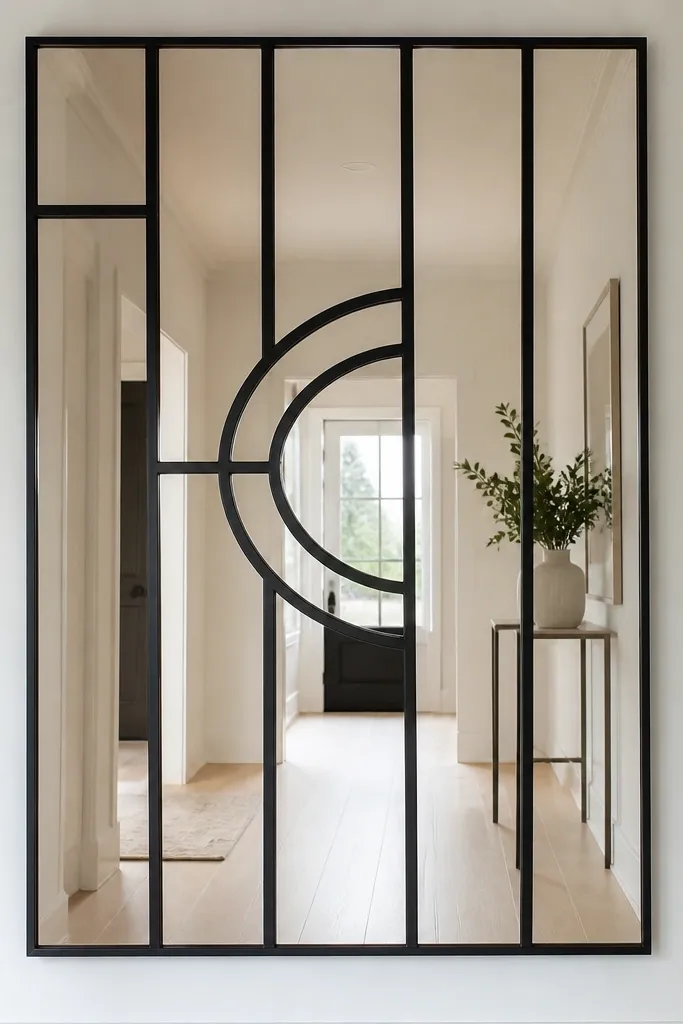
A quarter-circle motif in the middle gives you a modern focal point without the complexity of full circles. Pair it with vertical bars so the base stays structured. This design works on wide windows because the center arc helps the eye read the window as a single balanced unit. It also looks great in foyers where you want a statement but still keep a clean grid feel.
Editor's noteCut arc segments using a template of the radius so the curve doesn’t wobble.
Use a 30x20 mm outer frame and fill with 10x10 mm vertical bars at 95-105 mm spacing. For the center motif, weld two arc segments to create a quarter circle that spans about 45-60% of the window height, centered horizontally. Keep arc bar thickness the same as the verticals for a consistent look. Weld, grind, prime, then apply a satin black topcoat so the arc shadows stay defined.
Skip thisDon’t make the arc too thick — it will look decorative instead of modern.
16. Sunburst Lines from a Center Point
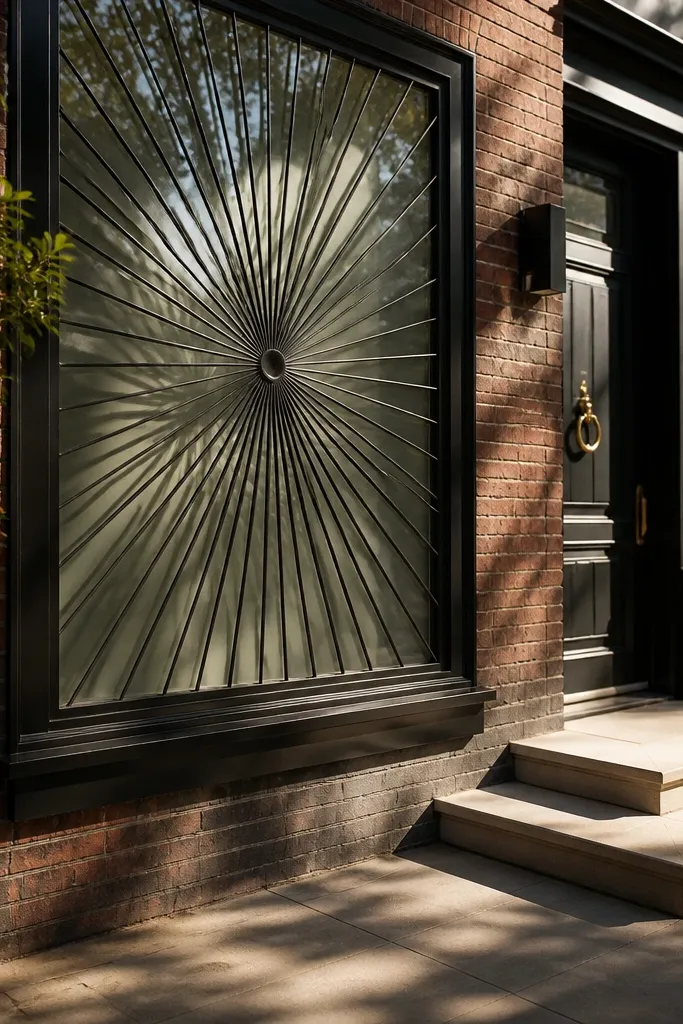
Sunburst geometry looks modern when you keep the rays thin and the frame simple. It creates a strong centerpiece and turns a plain window into a focal design. This is best for windows that are visible from the street or entryway. Choose matte black so the rays cast clean shadows and don’t reflect harshly.
Frame the grill with 30x20 mm rectangular steel. Add a base grid of 10x10 mm vertical bars only if you need extra rigidity — otherwise keep it minimal. Weld 12-15 rays from 8x8 mm square stock or 12 mm flat bar, starting from a center point on the inner face and ending at the inner frame edges. Ensure each ray angle matches by dividing the inner width and using a degree-marked jig. Prime and powder coat.
Make a paper or cardboard protractor template for the angles before you cut metal.
Avoid thick rays — they make the sunburst look like a firework poster, not a modern grill.
17. Offset Rectangle Frames Inside a Frame
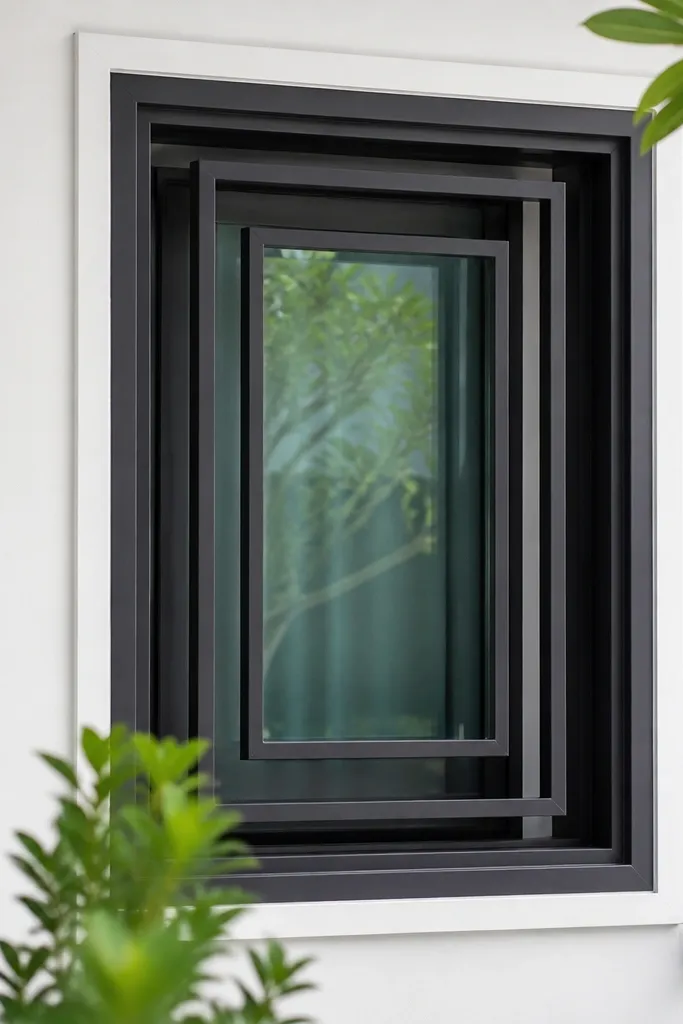
This is a modern trick: you build frames inside frames. The inner rectangle creates depth and makes the grill look like a designed panel, not a bar grid. It’s also a good choice if you want something minimal but still interesting up close. Works especially well on windows with a flat, clean trim line where the inner rectangle can echo that geometry.
Editor's noteUse spacers to set the exact offset so the inner rectangle looks centered and symmetrical.
Construct an outer frame from 30x20 mm rectangular steel. Add an inner rectangle using 15x15 mm square bars, offset inward by 40-60 mm on all sides. Connect the inner rectangle to the outer frame with four short vertical supports at the corners. Weld everything square, grind visible welds, then prime and paint with matte black or dark bronze.
Skip thisDon’t use random offsets — the inner rectangle must be evenly spaced all around.
18. Vertical Bars with a Horizontal Slat Crown
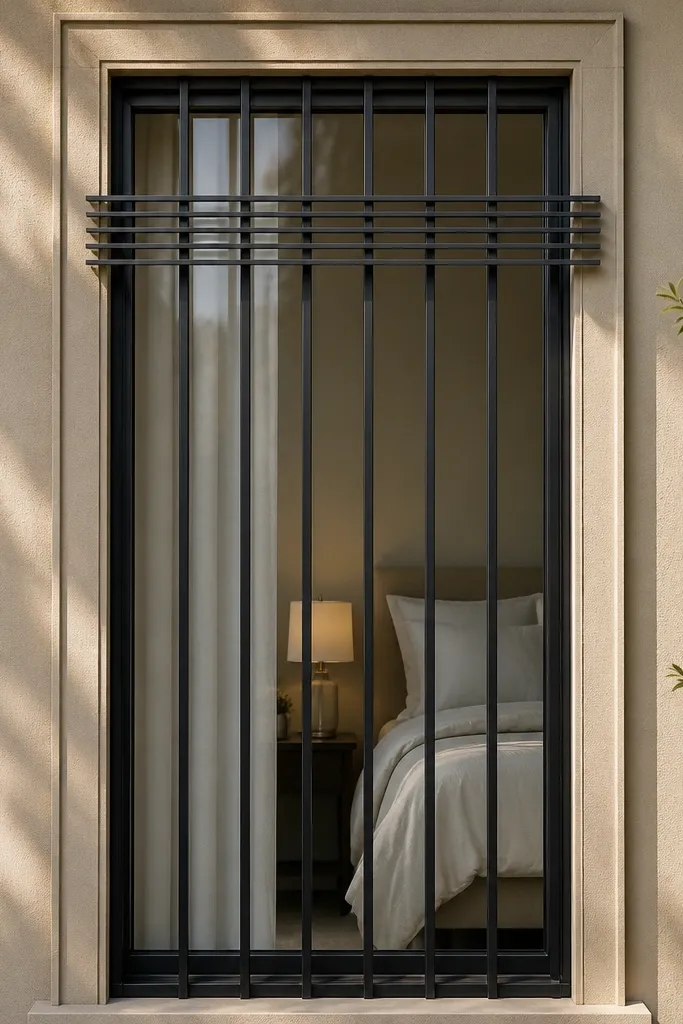
A crown-like horizontal slat near the top gives the grill a modern “cap” look. It also helps visually balance tall windows so they don’t feel top-heavy. The design is simple, but the crown line makes it look considered. Great for bedrooms and hallways where you want privacy while still keeping the window readable.
Frame with 30x20 mm rectangular steel. Install vertical bars from 10x10 mm stock at 95-105 mm spacing. Add a single horizontal crown using 40x10 mm flat bar across the full width, positioned about 20-25% down from the top of the frame. Weld the crown to each vertical bar contact point, then finish with primer and exterior paint.
Keep the crown perfectly level; check with a spirit level across the full width before welding.
Avoid multiple crowns — two or three lines turns it into a decorative railing.
19. Corner Box Frames with Center H-Pattern
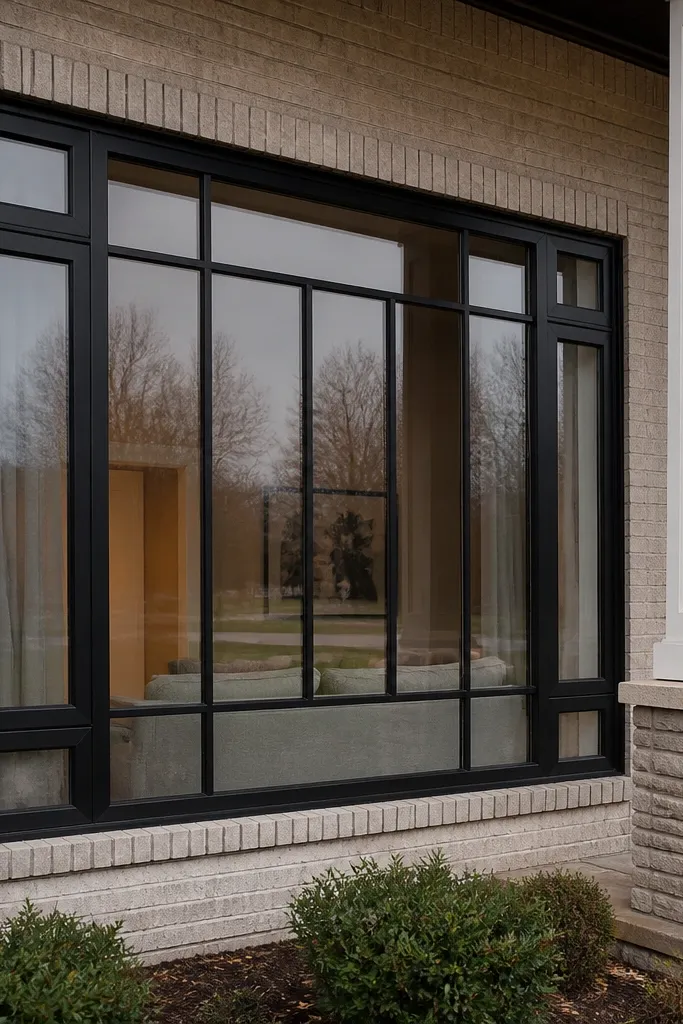
This design uses boxes in the corners and an H pattern in the center to create a structured, modern composition. The corners give it a framed look, while the H keeps the middle from feeling empty. It’s visually strong without being busy, so it works well for larger windows. Best for homes that already have boxy architectural details.
Build an outer frame from 35x25 mm steel. Create two corner boxes using 12x12 mm bars, each box about 120x120 mm inside the frame corners. In the center, build an H by adding two vertical bars and one connecting horizontal bar, sized to span the middle third of the window. Weld, grind, prime, and powder coat in matte black.
Snap chalk lines for the H centerline so the pattern stays symmetrical even if the window opening is slightly uneven.
Avoid placing the center H too high or too low — it should sit in the middle third.
20. Lattice Panels with One Bold Vertical Divider
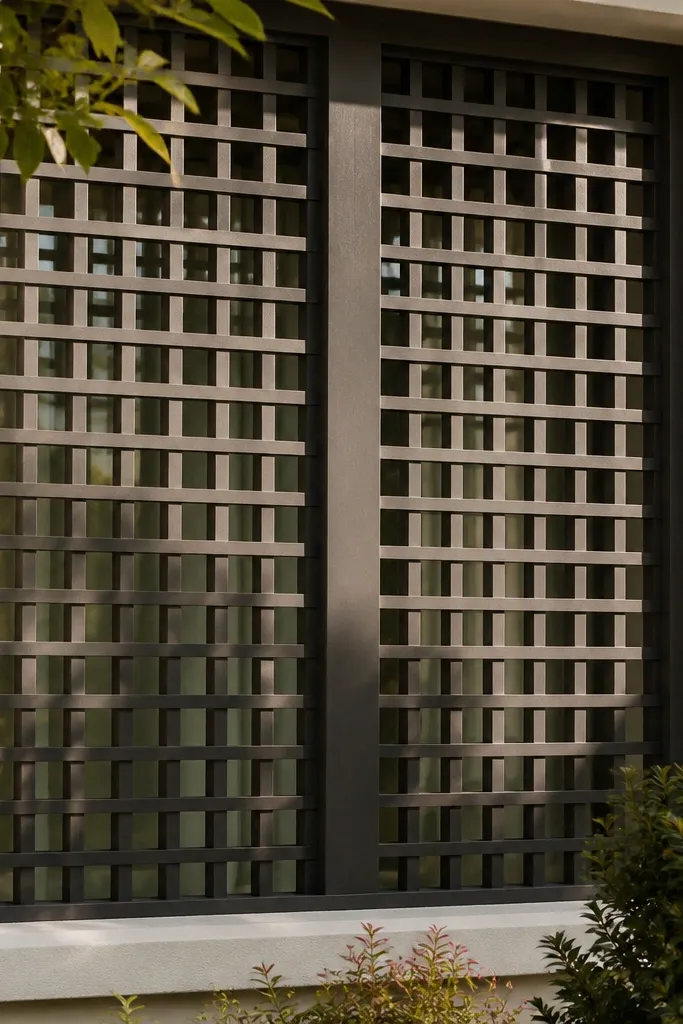
This design keeps the lattice airy but adds one bold divider so the grill looks modern and composed. The bold divider acts like a visual anchor and reduces the “endless grid” feel. Charcoal makes the lattice shadows softer than pure black. Great for windows that are close to doors or walls where you want the grill to look crisp, not flat.
Editor's noteKeep the lattice pattern aligned on both sides of the divider so the symmetry reads from the street.
Frame with 30x20 mm steel. Build a lattice using 10x10 mm bars to form 100-120 mm diamond or rectangle shapes across both halves. Add one bold vertical divider using 14x14 mm stock running full height inside the frame centerline. Weld lattice to the divider and frame, grind front welds, then prime and paint in charcoal exterior paint.
Skip thisDon’t choose a divider size that’s only slightly thicker — it needs to be clearly stronger.
21. Minimal Roman Arch Top with Straight Sides
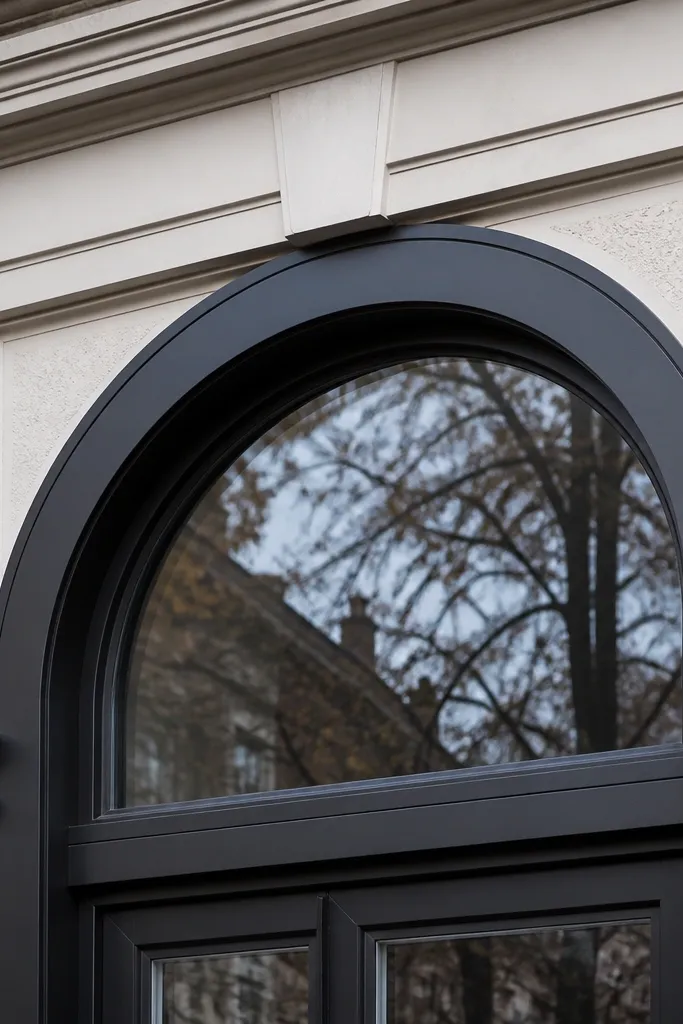
A minimal arched top gives you a modern nod to classic shapes without going ornate. Keep the arch as a clean curve built from straight stock bent or pieced into a smooth arc. Straight vertical bars on the sides keep the design grounded. This is a great option for windows above entries or older homes that want a modern update.
Editor's noteIf you’re assembling the arch from segments, sand each joint flush so the curve reads smooth.
Create the outer frame with 30x20 mm steel, using straight sides and a curved top section made from segmented arc pieces. Use 10x10 mm vertical bars spaced at 95-105 mm from the bottom frame to the start of the arch curve. Keep the inner opening consistent by trimming bars so they meet the arch smoothly. Weld, grind, prime, and use powder coating for a smooth, durable finish on the curve.
Skip thisDon’t use ornate scroll elements — modern means simple geometry, not decoration.
22. Open Center Frame with Four Corner Squares
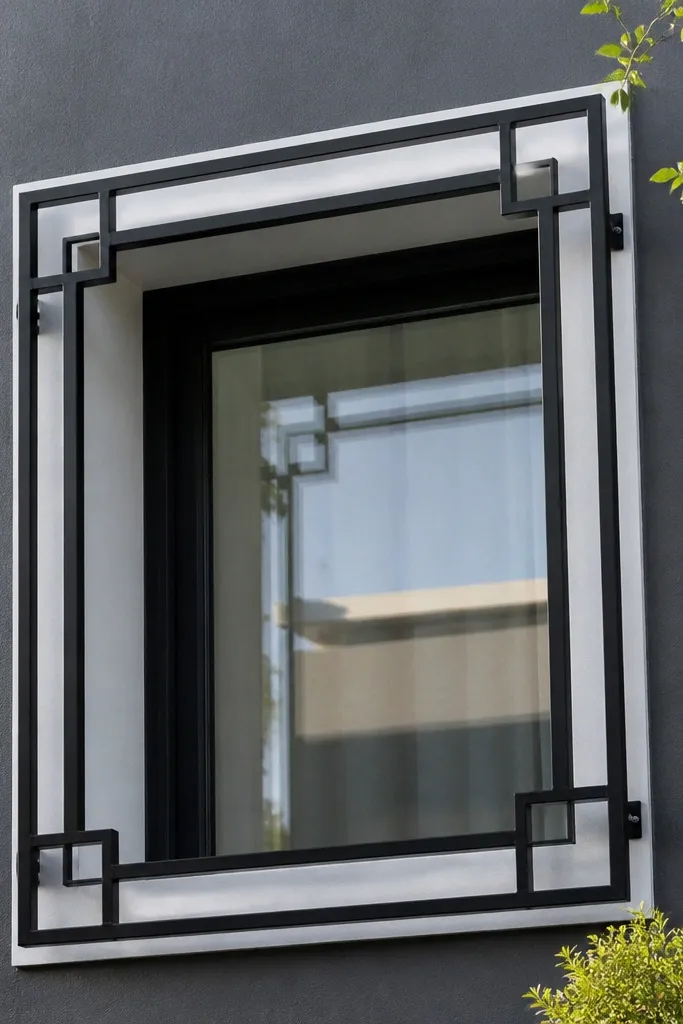
This one is all about negative space. Four corner squares and an outer frame create a modern, minimal look that keeps the window bright. It’s not as “secure-feeling” as dense grids, so it’s best where you also have solid window locks and you’re prioritizing aesthetics. It looks amazing on modern facades with clean lines.
Editor's noteMake the corner squares same size and same distance from the edges so it reads balanced.
Use a 30x20 mm outer frame. Add four corner squares using 12x12 mm bars, each square about 100-140 mm from the corner, leaving the middle completely open. Add a few diagonal stiffeners only if needed for rigidity, using 8x8 mm stock. Weld carefully, then paint with matte black exterior coating to keep it looking sharp.
Skip thisAvoid this design on high-risk ground-floor areas without strong window locks.
23. Rounded Rectangle Inner Frame with Vertical Bars
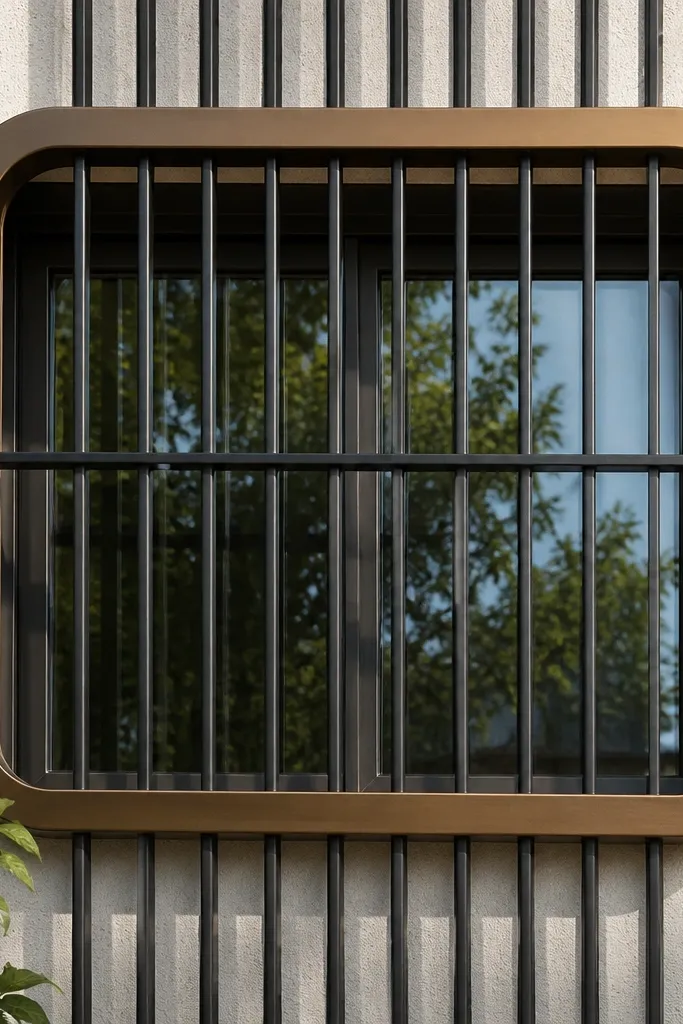
Rounded corners inside a grill feel modern and softer than sharp rectangles. The inner rounded rectangle gives you a clean highlight, while vertical bars keep the structure straightforward. Bronze makes the rounded geometry look warm and dimensional. This works best on larger windows where the inner shape can be clearly seen without crowding.
Editor's notePick one radius (like 60 mm) and stick to it across all corners so the curve looks intentional.
Frame with 30x20 mm steel. Build vertical bars with 10x10 mm stock at 95-105 mm spacing across the inner width. For the rounded inner rectangle, use flat bar segments with cut angles at the corners or weld short curved segments to create consistent radii. Position the rounded inner rectangle about 50 mm in from the outer frame, then weld supports to hold it square. Prime and finish in bronze for a modern warmth.
Skip thisDon’t mix rounded and sharp inner corners — it looks like a half-finished template.
24. Vertical Bars with Top-to-Bottom Center Oval
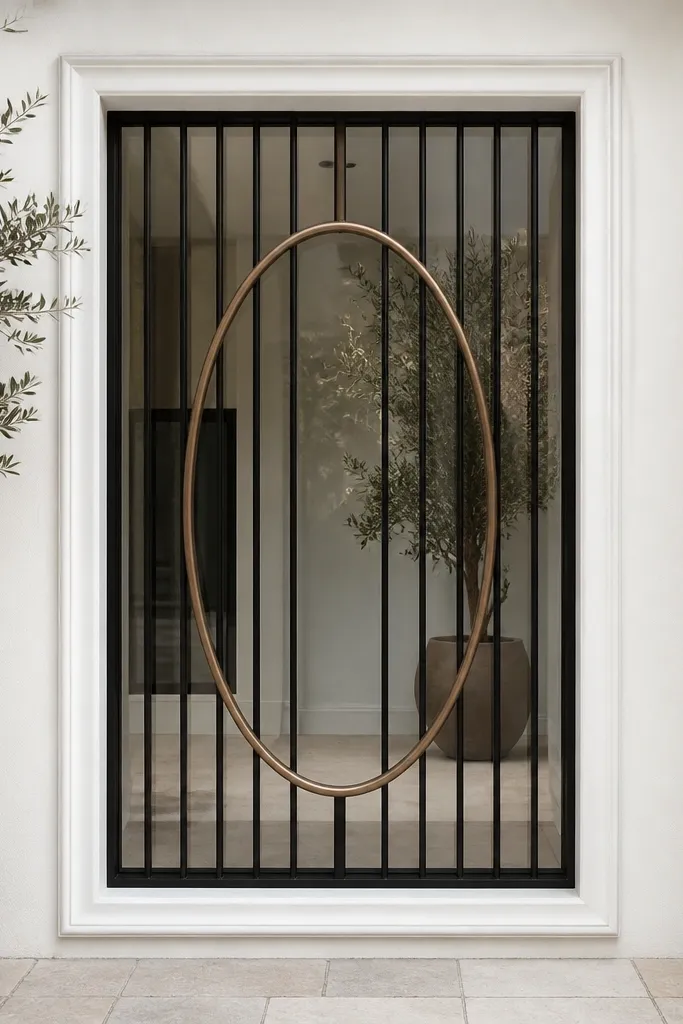
An oval outline in the center makes a window grill feel custom and modern without adding clutter. The oval reads as one continuous shape, and the vertical bars keep it structured. This is great for windows where you want a focal graphic but not a full decorative pattern. It also photographs well because the oval creates a clean highlight line.
Editor's noteUse a cardboard oval template and clamp the metal to it while you tack the first contact points.
Build an outer frame from 30x20 mm steel. Install vertical bars using 10x10 mm stock at 100 mm spacing. Weld an oval outline using 12x12 mm square stock or flat bar, sized to run top-to-bottom within the inner frame with 40-60 mm margins. Weld the oval outline to the vertical bars at two or three contact points so it stays rigid. Prime and paint with satin or matte black.
Skip thisAvoid an oval that’s too small — it becomes a random decoration instead of a focal shape.
25. Split-Grid with a Center Vertical Bar Column
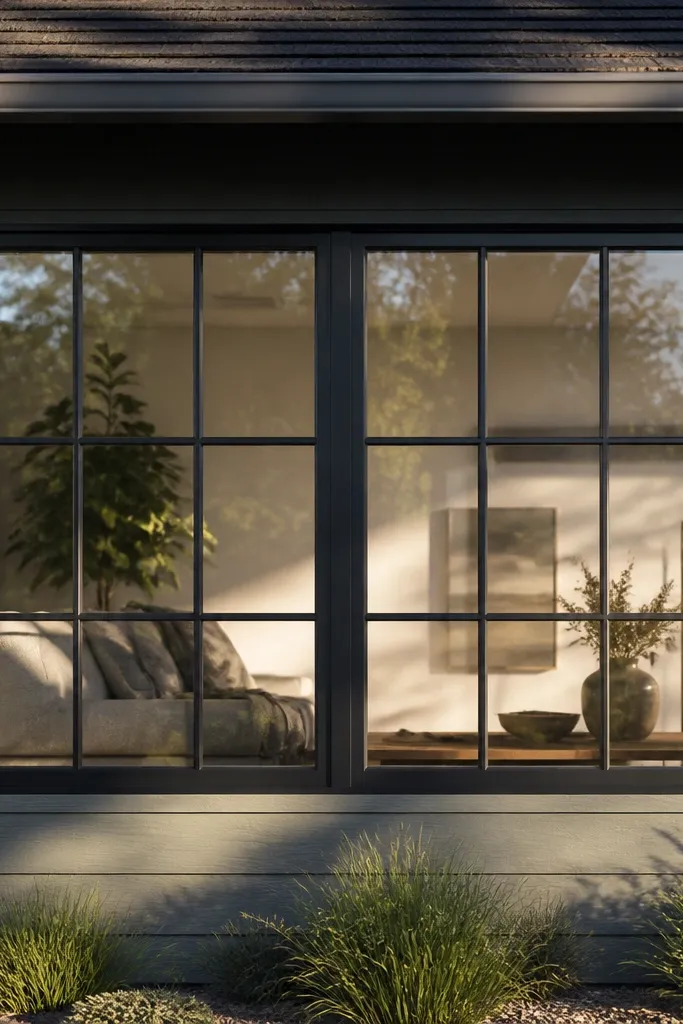
Split-grid designs look modern when the split is intentional and the center column is clearly defined. This pattern creates a strong vertical line down the middle, while the two halves feel balanced. Charcoal keeps shadows soft and makes the grid look premium. It suits medium-to-large windows where you want structure but not a heavy cage feel.
Frame with 35x25 mm steel. Create a grid using 10x10 mm bars to form rectangles around 110 mm wide. Add a centered thick vertical column using 14x14 mm stock running the full internal height. Weld the grid to the column so both halves align perfectly. Grind visible welds, prime, then powder coat or paint in charcoal exterior finish.
Check squareness by measuring diagonals across the frame before you weld the grid in.
Don’t let the two halves drift — alignment errors show up instantly.
26. Minimal Crossbars with Vertical Accent Rail
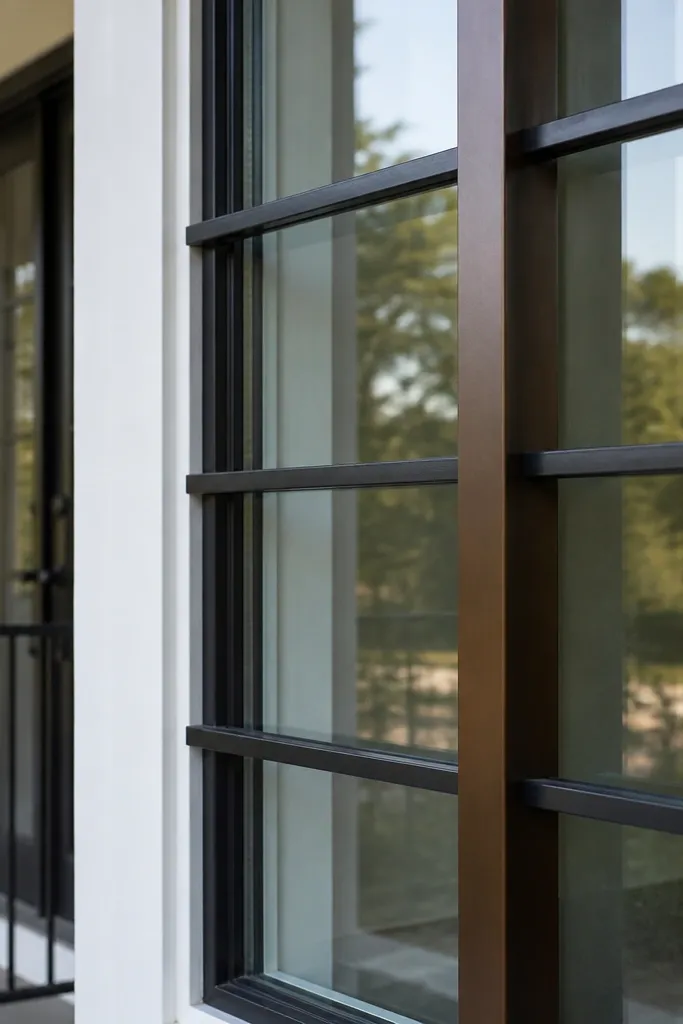
This is a modern “less metal” design that still looks intentional. Minimal crossbars keep the window airy, while one vertical accent rail adds the visual structure your eye expects. It works well for wide windows where full grids feel too heavy. Choose black or dark bronze so the accent rail reads cleanly against the glass.
Editor's noteKeep the number of horizontal bars low — spacing is what makes it modern, not adding more lines.
Use a 30x20 mm outer frame. Install vertical bars only at the edges and add one accent vertical rail in the center using 14x14 mm stock. Add two to three horizontal crossbars using 10x20 mm flat bar spaced at 180-220 mm apart. Weld everything square, then prime and paint in a matte finish for consistent shadow lines.
Skip thisAvoid thin accent rails if you’re using matte paint; they disappear and look unfinished.
27. Interlocking Square Frames Across the Window
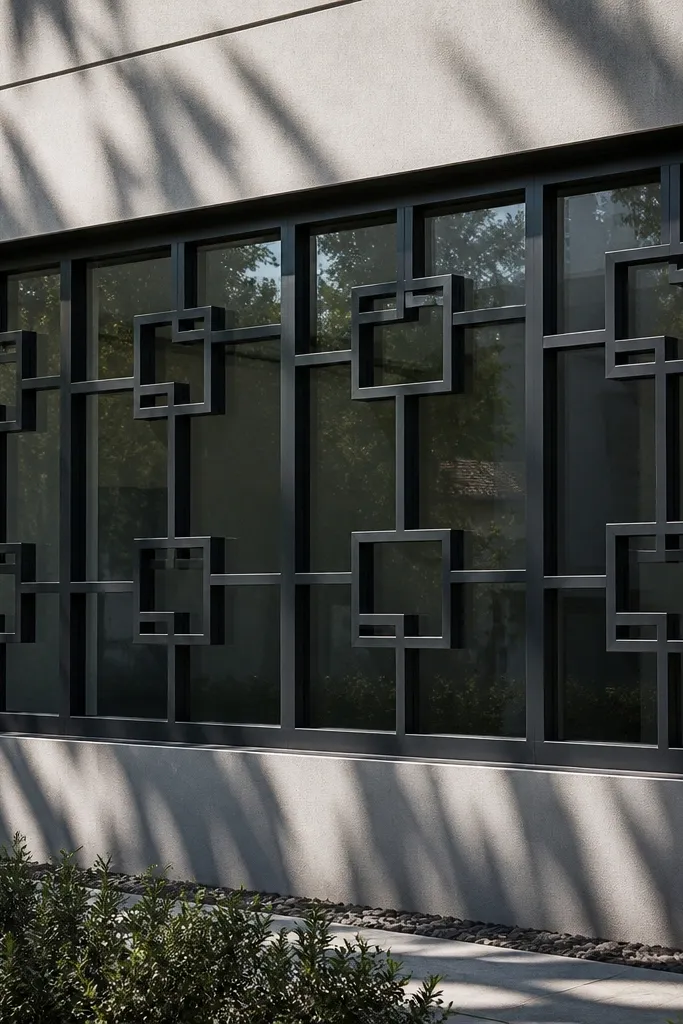
Interlocking square frames create a modern pattern that looks like it was designed by someone with a plan. The repeated squares create rhythm, and the interlock points add visual complexity without turning decorative. It’s a good pick for large windows because the pattern has room to breathe. Matte black makes the interlocks read as clean geometry.
Editor's noteDry-fit the squares on a flat surface and mark interlock order before welding.
Frame with 30x20 mm steel. Build repeating square frames using 10x10 mm bars, sized around 120-140 mm, and interlock them by overlapping one side length so they connect at shared edges. Weld the interlock points carefully and keep the pattern aligned to a grid. After welding, grind only the visible side, then prime and powder coat so the finish is even across overlapping sections.
Skip thisAvoid random square sizes — interlocking patterns only look good when they’re consistent.
28. Horizontal Slat Stack with Vertical Side Posts
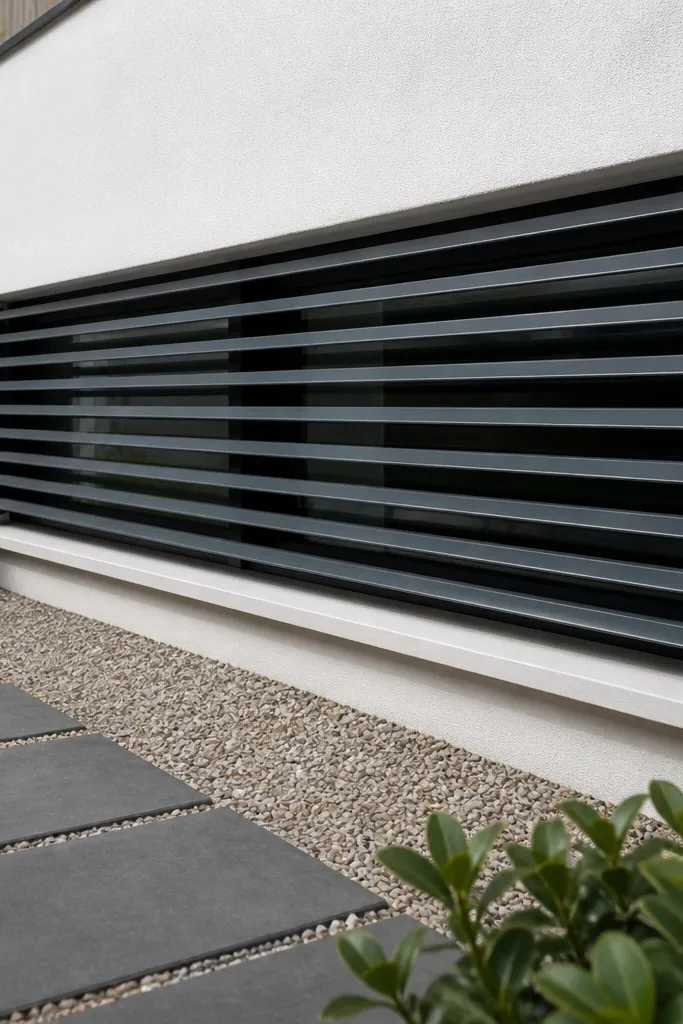
This grill looks modern because it swaps the usual vertical dominance for horizontal slats. The side posts keep the structure crisp and frame-like. It’s especially good on windows that are wide and low, where a vertical grid would feel awkward. Choose dark gray or black so the slats cast clean, narrow shadows.
Build an outer frame from 35x25 mm steel. Add two vertical side posts with 25x25 mm stock and fill the interior with horizontal slats made from 10x20 mm flat bar. Space slats at 90-110 mm center-to-center and keep them level across the width. Weld each slat to the side posts and grind front welds, then prime and paint with an exterior enamel or powder coat.
Clamp a straight guide along the bottom edge so every slat starts at the same height.
Avoid uneven slat spacing — the whole look depends on the rhythm.
29. Checker Panel with Thick Border and Thin Inner Bars
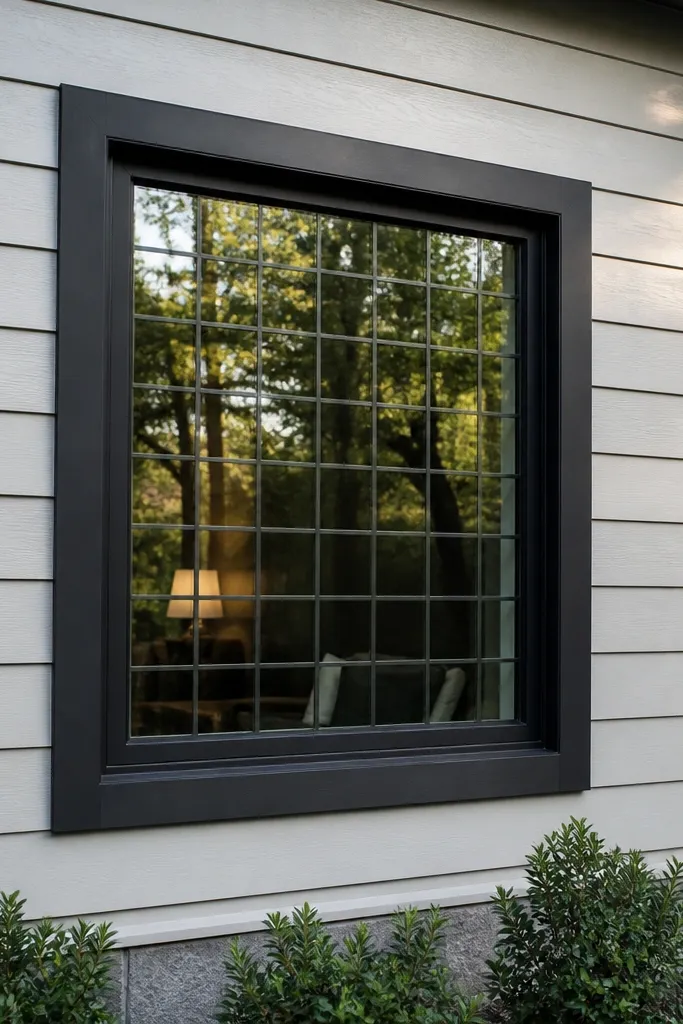
A checker panel reads modern when the inner pattern is thin and the border is thicker. The thick border gives you a strong outline, while the thin inner bars keep the checker effect airy instead of heavy. Charcoal makes the pattern look subtle and upscale. Works well for medium windows where you want a bit of pattern without going full lattice.
Editor's noteMark a grid on the work surface and place bars directly on the lines before tacking.
Use a 35x25 mm outer frame. Create the checker panel using 10x10 mm bars arranged to form alternating filled and open squares, with square sizes around 100-120 mm. Keep thickness consistent for the inner bars and use weld points that don’t create lumps on the front. Prime and paint in charcoal with two coats so the thin bars don’t show primer spots.
Skip thisAvoid a thin border with thick inner bars — it looks unbalanced.
30. Arc Segments Along the Bottom with Vertical Rails
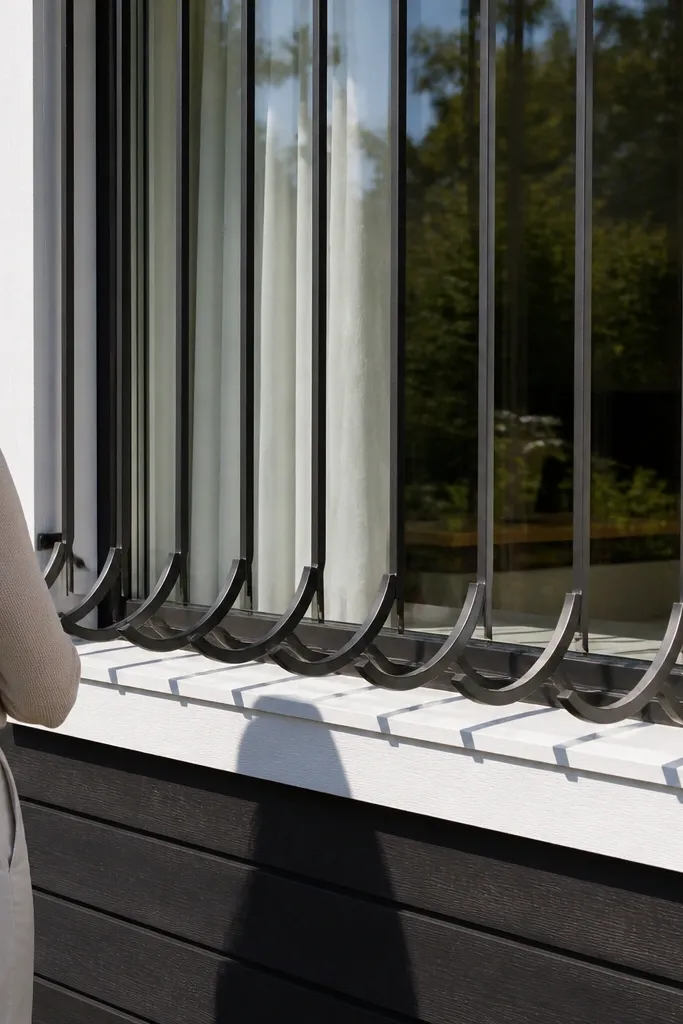
Arc segments only along the bottom edge make a grill feel modern without adding visual clutter across the whole window. Vertical rails above keep it structured and secure-looking. The bottom arc detail adds a soft edge that stands out in daylight. Great for windows where you want the design to feel lighter and more decorative just at the bottom.
Frame with 30x20 mm steel. Install vertical rails from 10x10 mm at 95-105 mm spacing up to a horizontal line about 25% from the bottom. Along the bottom, create arc segments using 12x12 mm stock cut into repeating half-arc shapes with a consistent radius, welding them to the bottom inner frame. Weld, grind, prime, and finish in matte black for clean shadow definition.
Count your arc segments and keep equal widths so the pattern feels symmetrical.
Don’t make the arcs random sizes — repeating geometry is the modern look.



