
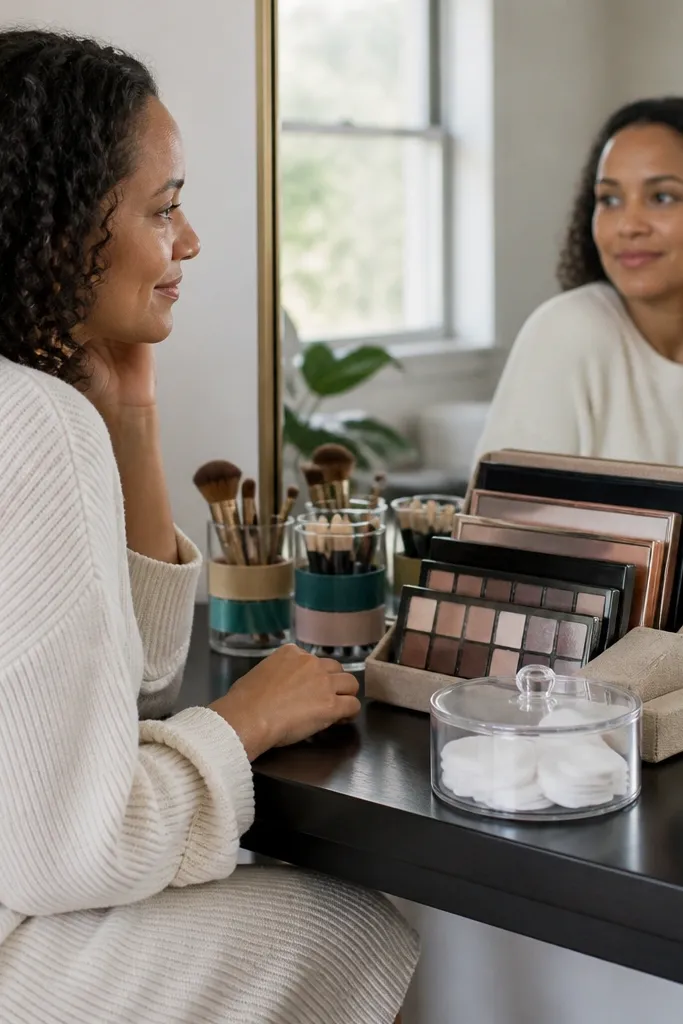
1. 3-Tier Acrylic Tray for Daily Face Steps
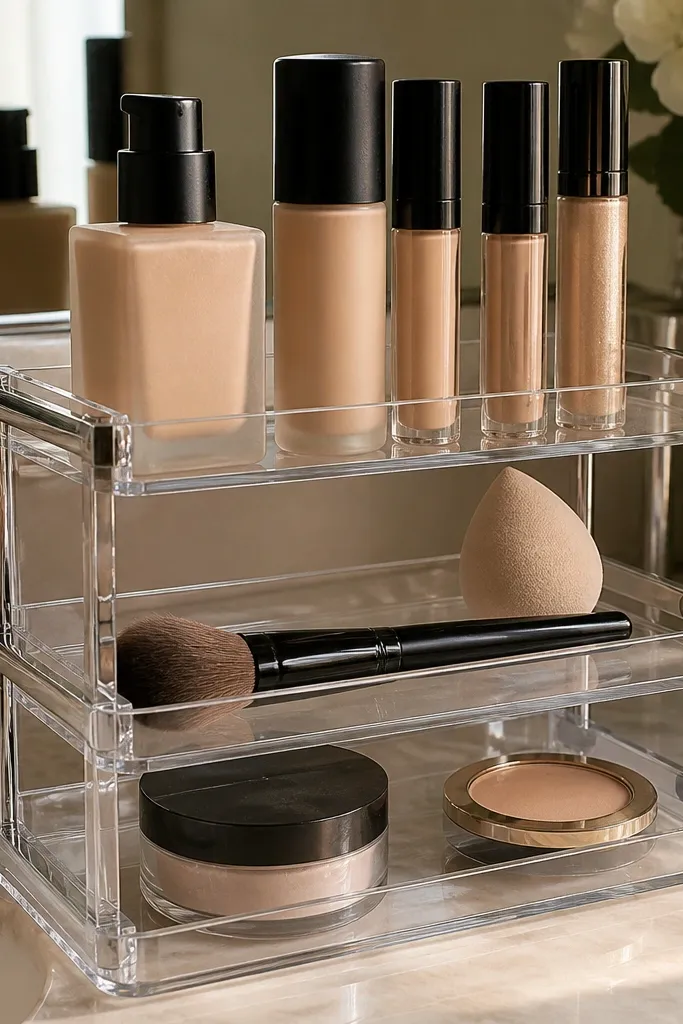
This is the fastest way to make your Aesthetic makeup vanity organization look styled instead of busy. A three-tier tray creates a natural visual hierarchy: base products on top, tools in the middle, and finishing items on the bottom. Because everything sits upright in separate trays, bottles don’t slump and colors don’t smear across the surface. Clear acrylic keeps the vanity airy, and the repeating shapes read neat in photos. It also reduces rummaging since your eye lands on the exact tier you need.
Editor's noteWipe acrylic with microfiber only, then buff dry to avoid streaks that show up under vanity bulbs.
Start by measuring your vanity footprint and choosing a tray set that fits with a 1-inch border on each side. Place the top tier for foundation and concealer, the middle for brushes or sponges in a cup, and the bottom for powder and setting tools. Add thin felt pads under tubes so they don’t slide and so you don’t scratch the acrylic. Finish by arranging items by height — tallest bottles at the back, shorter in front — so the front edge stays clean.
Skip thisDon’t mix loose palettes and random tools on the same tier or the whole look turns chaotic.
2. Faux-Leather Catchall with Magnetic Strip for Metal Tools
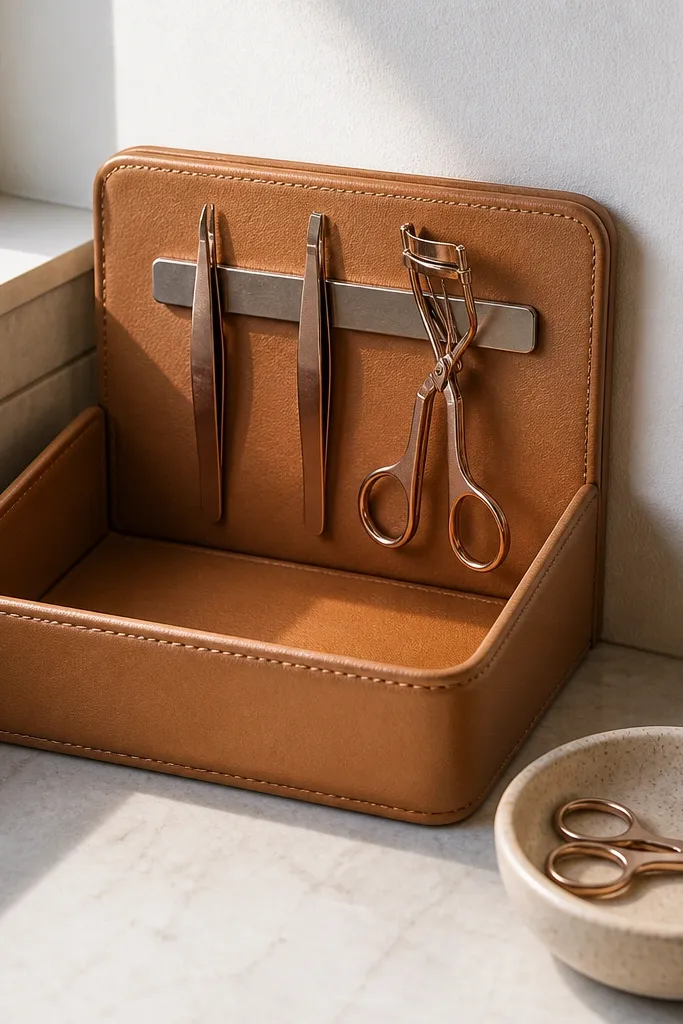
If your vanity always has stray tools, this setup makes them look intentionally placed. A faux-leather catchall gives you a smooth, warm background that photographs cleanly, while a magnetic strip keeps metal tools from clattering and spreading out. The result is a tidy “tool zone” that stays consistent every day. Because the strip sits under or behind the tools, you don’t see a hardware mess. You also get faster access to tweezers, lash curlers, and small metal accessories.
Editor's noteUse low-foam adhesive so the leather stays flat; bubbles show up under bright light.
Cut faux leather to your tray size and glue it down with contact cement or strong craft glue, keeping edges tight. Install a small magnetic strip along the back edge inside the tray so tools snap into place. Place the catchall at the corner of your vanity where you naturally start your routine. Add a second small compartment or a folded liner for non-metal items like cotton pads so everything stays separated.
Skip thisAvoid putting plastic tools on the magnet strip since they won’t hold and they’ll look messy.
3. Clear Cup Brush Wall with Color-Coded Handles

This idea turns brush storage into a visual pattern, which is exactly what Aesthetic makeup vanity organization needs. Clear cups stack in a neat row, and color-coded bands on handles make your brush lineup look coordinated. When brushes are grouped by use — face, eyes, lips — you also cut down on decision time. The look is clean because brush handles create repeating vertical lines instead of random shapes. It’s also durable: clear cups are easy to wipe and the open design prevents dusty “mystery brush” piles.
Choose three to five clear cups with the same diameter so they line up visually. Sort brushes into groups and place face brushes in the center, eye brushes on the sides, and lip brushes at the far end. Add color bands by wrapping thin craft tape or heat-safe ribbon around each handle and sealing with a tiny dot of glue at the end. Secure the cups on a small tray or a wall-mounted strip so they don’t tip.
If your vanity is glossy, put a felt pad under each cup to prevent micro-sliding when you grab a brush.
Don’t leave brushes loose in cups without spacing — they tangle and the line stops looking intentional.
4. Drawer Divider Grid for Base Products
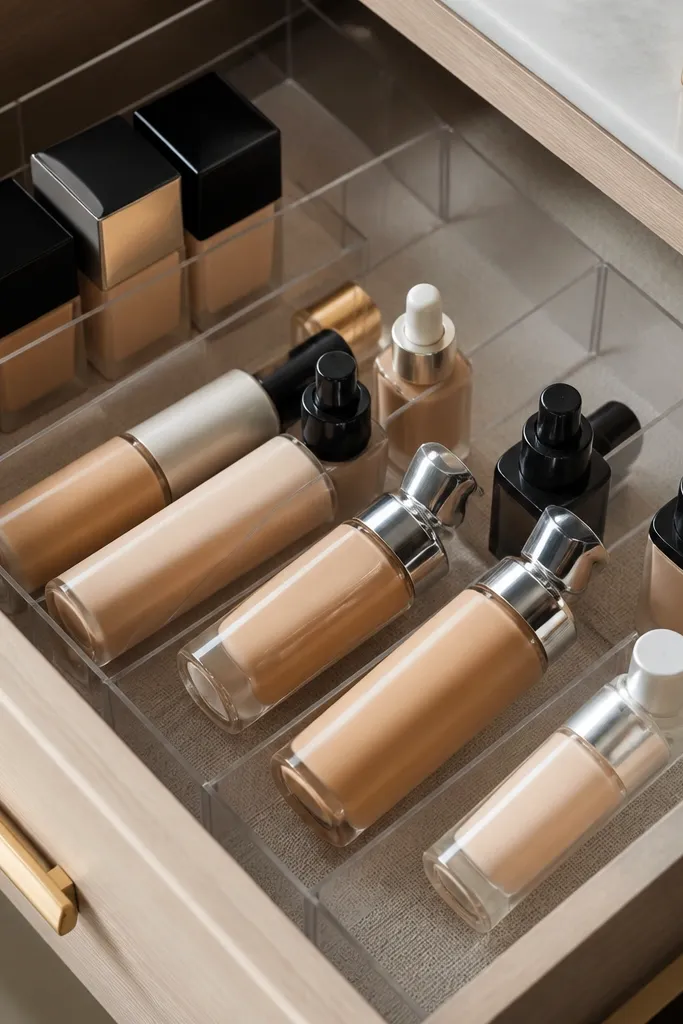
A calm vanity is a calm drawer too, and this divider grid makes base products look orderly. Instead of letting bottles roll around, each item gets a fixed lane, so labels face the same direction. That consistency makes the drawer feel “finished” even when it’s closed. You also protect delicate items like glass bottles from bumping. The grid works especially well for people who keep foundation, concealer, powder, and tools in the same drawer and want it to look styled.
Measure your drawer width and depth, then choose modular dividers that lock in place. Lay out a grid: two narrow lanes for foundation and concealer, one wider lane for powder compacts, and one corner lane for sponges or a brush tray. Keep all labels facing forward and place taller items at the back edge. Add a non-slip liner under the dividers so the whole grid doesn’t shift.
Use matte drawer liners in light neutrals; glossy liners reflect vanity lights and can look messy in photos.
Don’t cram full-size bottles next to compacts if their heights differ a lot — the drawer becomes visually uneven.
5. Stacked Lip Organizer with Acrylic Slats

Lip storage is where vanity aesthetics usually fall apart. Acrylic slats let you show shade variety while keeping tubes vertical and evenly spaced. The slat grid creates a clean checker of colors, so your vanity looks like a curated display instead of a bin of products. This setup also makes it easy to pick your shade because you can scan rows fast. It’s perfect for daily calm if you use multiple lip options and hate hunting through a drawer.
Editor's noteLabel the back of the organizer with a tiny strip of painter’s tape so you can re-shelve shades without visual clutter.
Decide your lipstick count first, then build or buy acrylic slats sized for that number of columns. Mount the slats to a base tray so each slot is slightly wider than the widest tube you own. Arrange by color family — nudes in one row, pinks in another, reds in another — so your scan is quick. Add a small lip balm cup at the side so it doesn’t roll into the grid.
Skip thisAvoid mixing full-size lipsticks with mini tubes in the same slot width — minis will tip and break the clean grid.
6. Linen-Backed Palette Stand for Eyeshadow
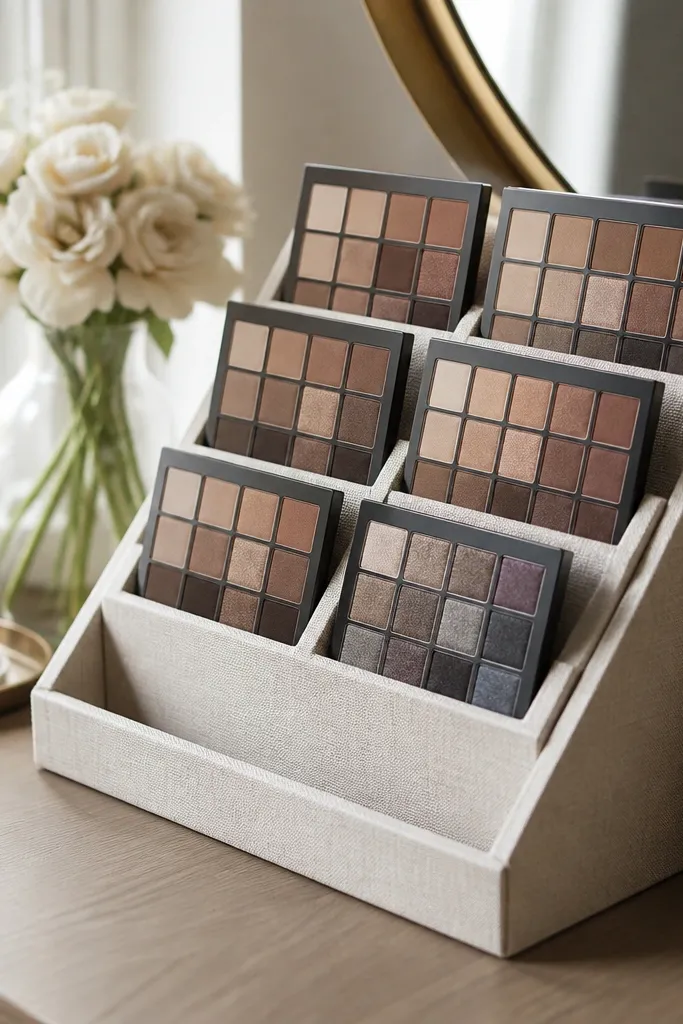
A palette stand makes eyeshadow storage look intentional, especially when you keep only the palettes you actually use out. The linen backing softens the whole scene — it hides scuffs and dust spots better than bare plastic. With palettes propped at a consistent angle, your vanity looks like a mini makeup studio instead of a storage shelf. This works best for small spaces because it uses vertical space and keeps the top surface from becoming cluttered. It also keeps your eyes products together so your routine flows.
Editor's noteUse a matte fabric spray lightly on the linen to reduce dust cling and keep it looking clean under lights.
Cut linen to the size of a shallow board and staple or glue it taut, smoothing wrinkles. Attach small angled supports (wood blocks or acrylic wedges) so palettes sit open without slipping. Choose an angle where you can see shade names but palettes don’t block the rest of your setup. Place the stand near your mirror and keep only 2-3 palettes on it; store extra palettes flat in a drawer.
Skip thisDon’t prop palettes with uneven supports or the angles will look sloppy even if the rest is organized.
7. Marble-Effect Lazy Susan for Countertop Rotation
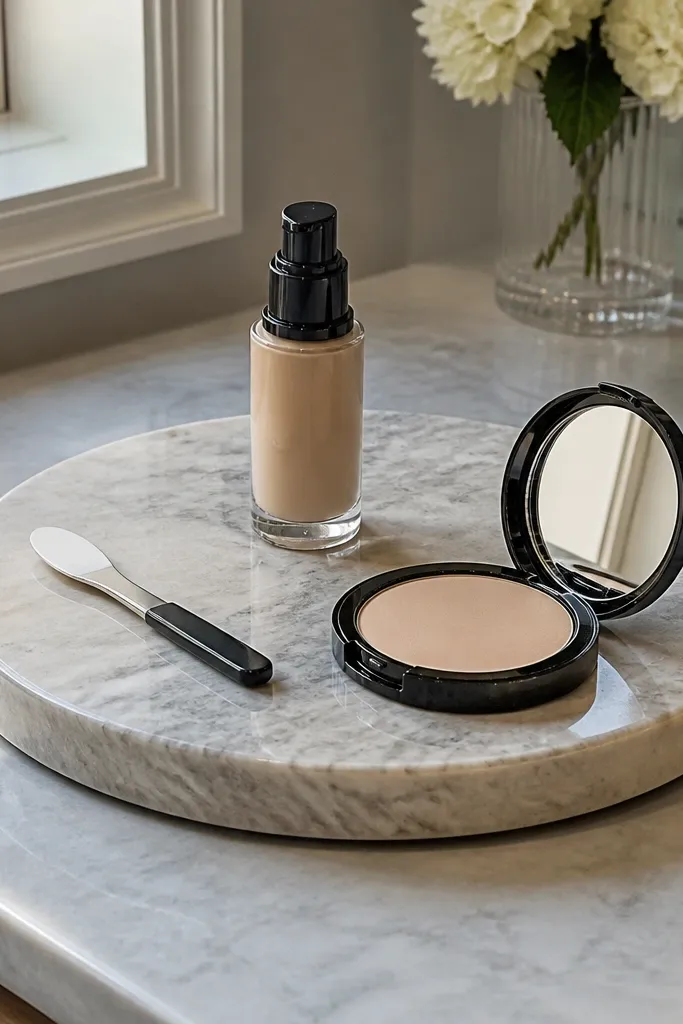
A rotating tray is the simplest way to reduce countertop chaos, and marble-effect finishes photograph beautifully. Put everything you touch in one routine on the turntable so you can spin to find what you need without moving random items. The look stays calm because the tray has a single boundary line — nothing spreads across the countertop. It’s especially good for people who do skincare then makeup in the same spot. If you keep it limited to a handful of bottles, it stays neat and doesn’t become a second dumping ground.
Editor's noteSet a “one ring only” rule: if you can’t fit everything without going to three rings, remove items until it looks clean.
Buy or make a small turntable tray with a non-slip base, ideally 10-12 inches wide. Group items into two rings: outer ring for bottles and inner ring for tools like cotton rounds or mini sponges. Keep bottle labels facing out by rotating each item to the same direction before you set the tray down. Wipe the top surface and add a thin liner to keep it from scratching and to hide minor scuffs.
Skip thisDon’t put loose mascara wands or open compacts on a rotating tray — they tip and smear.
8. Pegboard Vanity Organizer with Painted Hooks
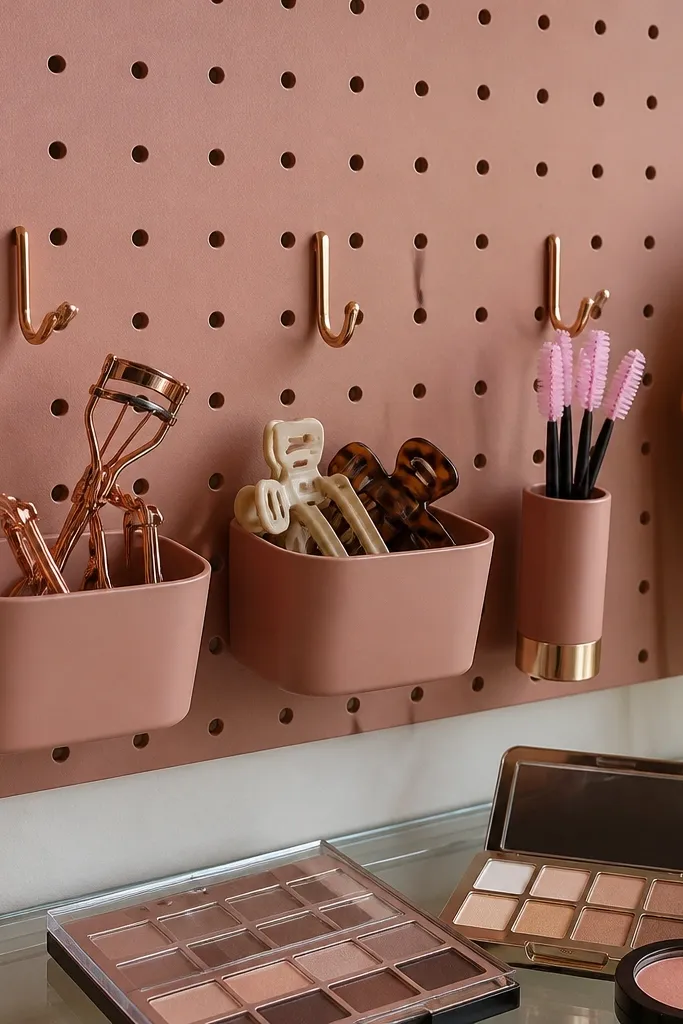
Pegboard turns wall space into an organized surface, and it looks sharp when the hardware matches your palette. You can hang hair clips, lash curlers, and small caddies so the countertop stays clear. When your makeup vanity organization includes vertical storage, your daily routine looks less cluttered even if you own a lot. Paint the pegboard and hooks in one consistent color family to make it look designed. This is great for bathrooms or bedrooms where you want the vanity to feel light and open instead of crowded.
Editor's noteUse a level and mark stud locations before drilling; a slightly crooked pegboard ruins the clean look.
Measure the vanity wall area and mount a pegboard board so the bottom edge sits above your sink splash line. Sand lightly, then prime and paint the board and hooks in one color for cohesion. Hang small clear acrylic bins or metal cups in a repeating pattern by routine: eyes tools on one row, lip tools on another. Add a small shelf for sprays, and keep spray bottles upright with a lip around the bin opening.
Skip thisAvoid mixing hook colors and bin colors — it turns into a hardware store wall instead of an aesthetic setup.
9. Corner Brush Tray with Sliding Sponge Cup
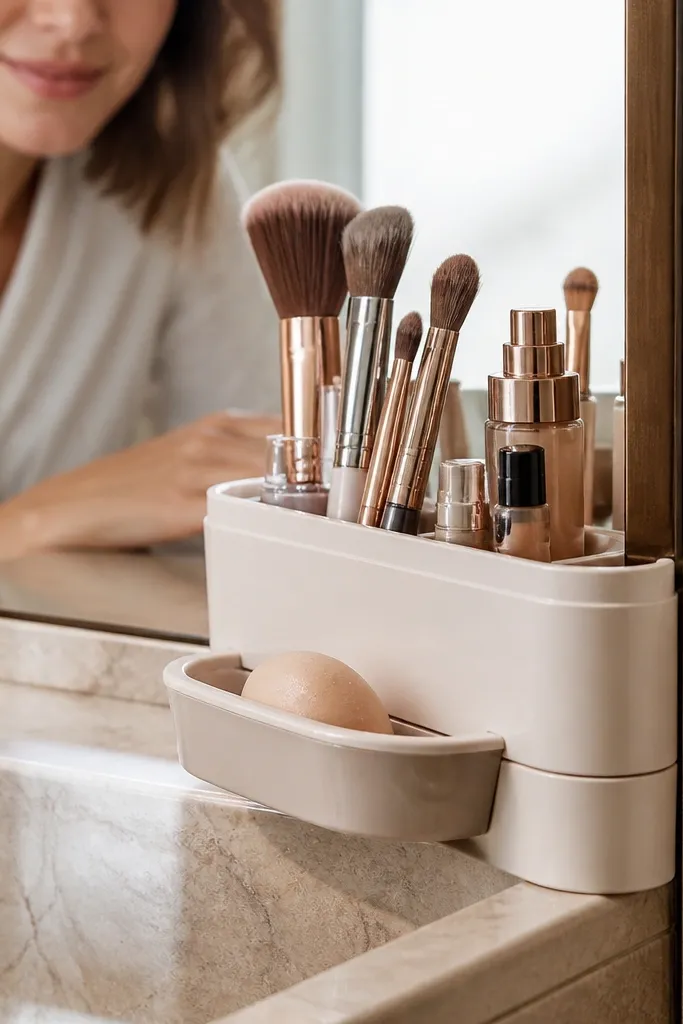
Corners are where clutter hides, so this corner tray makes your mess look intentional. A sliding sponge cup keeps wet or freshly washed tools from sitting loose in the open. The tray boundary gives you a clean “zone” for makeup prep, which matters for daily calm because you stop spreading tools across the surface. Keeping sponges corralled also reduces stains and makes cleanup quicker. The look is photogenic because the corner setup has a clear shape and consistent materials.
Editor's noteIf you use damp sponges, add a small drainage hole to a secondary insert tray under the cup.
Use a shallow tray sized for your corner gap, then add a small inner divider to separate brushes from sponges. Create a cup insert from acrylic or ceramic with a slightly smaller base so it slides in cleanly. Add a non-slip liner to the tray bottom so the cup doesn’t slide when you place a damp sponge. Place the tray in your mirror-side corner, and keep only one sponge cup in there at a time.
Skip thisDon’t store wet sponges in a sealed container — it looks gross and can stain everything around it.
10. Matte Black Bottle Organizer with Label Bands
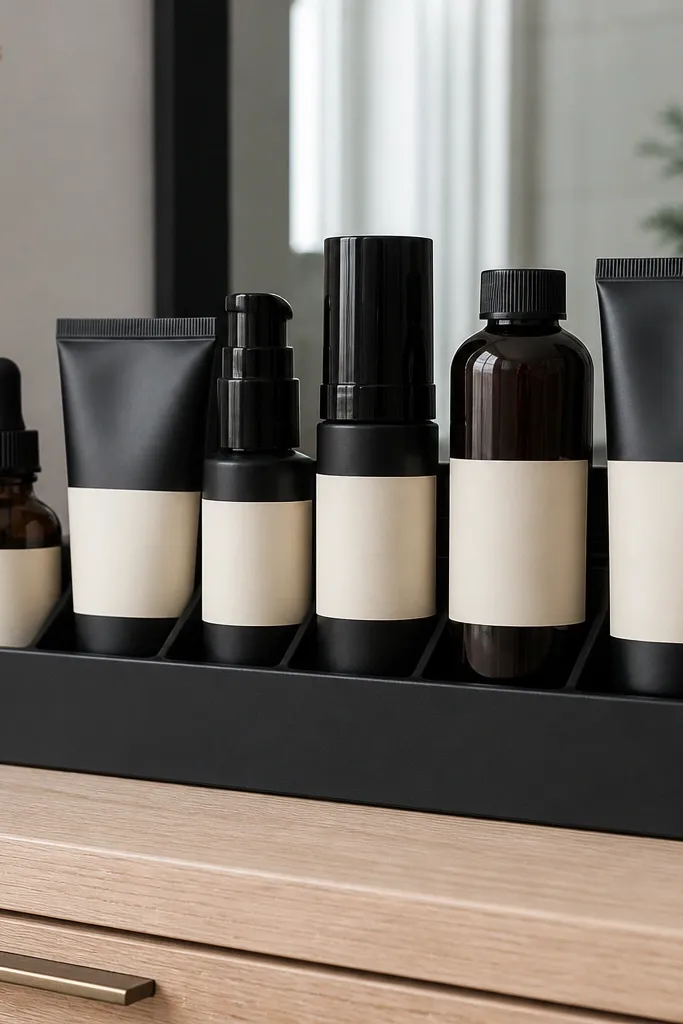
Matte black looks sleek and makes your vanity feel more intentional, especially when you’re working with lots of bottles. The key is consistency: label bands help you place every bottle the same way so the top surface doesn’t look random. Label bands also help when you rotate products — you can swap without ruining the visual rhythm. This setup is best when your vanity has bright bulbs or a reflective mirror, because matte finishes reduce glare. It’s a strong choice for daily calm when you want fewer visual distractions.
Editor's noteUse a white gel pen on tape for clean, readable labels under vanity lighting.
Pick an organizer system with straight sides so bottles line up, like a matte black stackable tray or vertical slots. Measure the tallest bottle you own and leave 1/2 inch clearance so lids don’t hit the shelf. Apply label bands on a strip of painter’s tape to each bottle neck area, writing in a consistent style. Arrange bottles in a single row with labels facing the front, then add a small tray for caps and pumps.
Skip thisAvoid clear tape labels that catch light — they glare and look messy.
11. Clear Lid Container for Cotton Rounds and Swabs
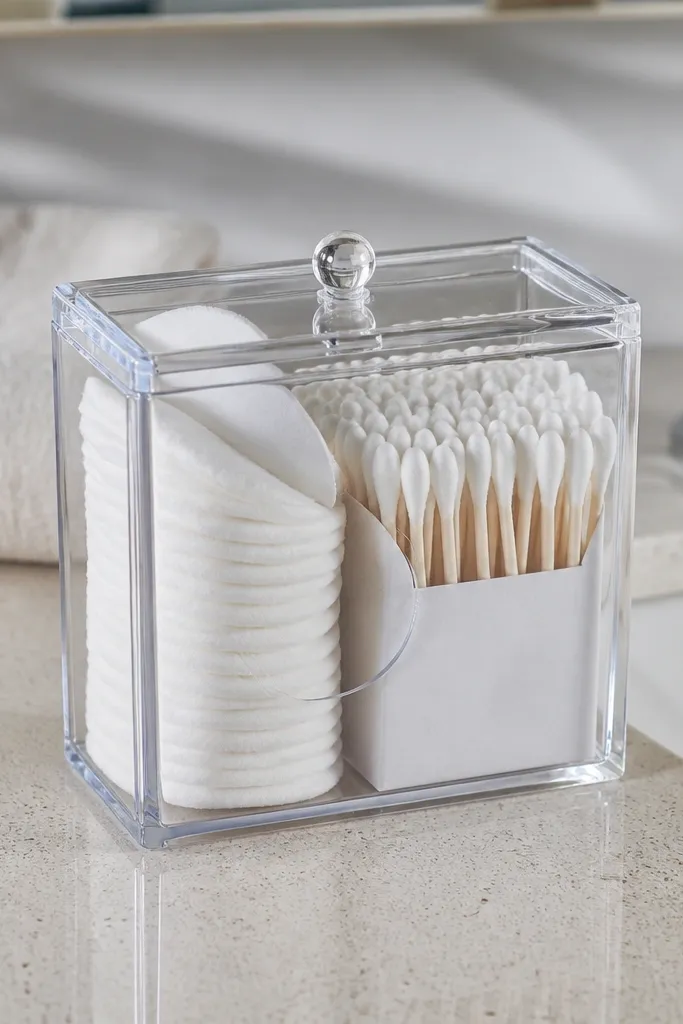
Cotton rounds and swabs are the silent clutter makers. A clear-lid container keeps them visible but contained, so your vanity stays calm even when you keep backups. The clear walls show the remaining amount, which means fewer late-night searches. Add a fabric or paper insert so swabs stay upright and don’t slump. The look is clean because the container gives you a uniform shape and stops random bags from creeping onto the counter.
Choose a lidded clear container wide enough for cotton rounds laid flat. Add an insert made from foam board or stiff cardstock cut to keep swabs upright in one section. Fill cotton rounds first, then place swabs in the insert section. Position it near your mirror so cleanup and touch-ups are one grab away.
Wipe the container with a vinegar-water mix and dry fully to remove the haze that makes clear plastic look dull.
Don’t store swabs loose in a cotton rounds container — they sink and look messy fast.
12. Vintage Tray with Removable Mini Cups for Brushes
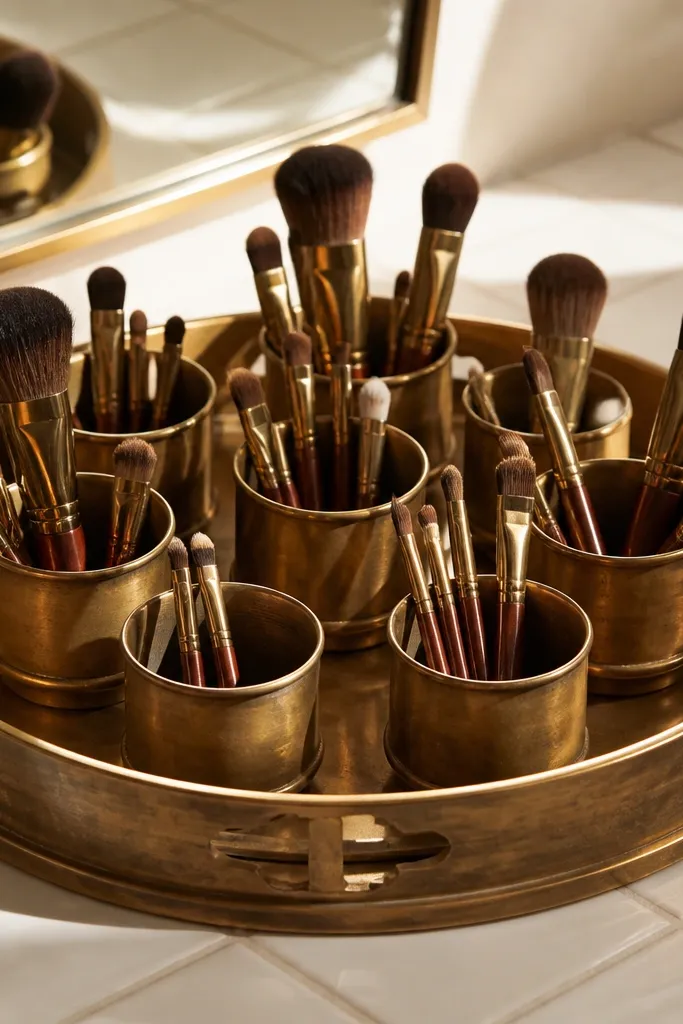
This is for people who want their vanity to look like decor, not a storage unit. A vintage-style tray gives you a single anchor shape, and mini cups create repeating circles that look good in photos. Because cups are removable, you can lift them to clean without dumping everything. The layout also makes it easy to keep daily tools together: brush cups in one section, lip balm and small tools in another. It’s a strong aesthetic choice because you can match cup colors to your room palette.
Find a shallow tray that fits your vanity surface with at least 2 inches of breathing room on each side. Place four mini cups for brushes and one small cup for lip balm or tools, keeping spacing even. Use a non-slip pad under each cup so they don’t shift when you grab brushes. Fill cups with brushes by routine so the front row is face tools and the back row is eye tools.
If the tray is wood, seal it with matte polyurethane so it doesn’t pick up makeup stains.
Avoid mixing cup heights — uneven cups create visual clutter even when contents are tidy.
13. Magnetic Palette Organizer for Fridge-Style Metal Sheets
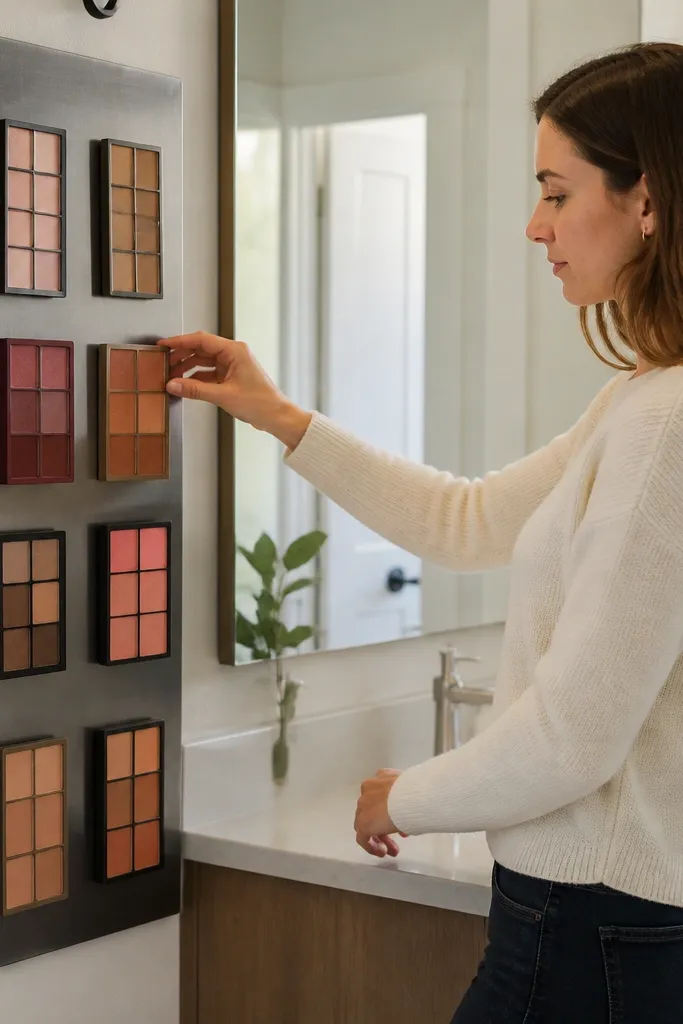
If you have too many palettes and they keep stacking into a messy pile, magnets fix the problem fast. A metal sheet lets palettes hang flat and visible, so your Aesthetic makeup vanity organization becomes a clean display. The palettes look crisp because they’re aligned in a vertical grid. This setup also saves counter space, which is where daily calm usually breaks. It’s especially good for small vanities where drawers are already full of bottles.
Cut a sheet of thin metal to fit inside a cabinet door panel or mount it on a wall near the vanity. Cover the metal with a thin sheet of fabric or contact paper for a softer look. Attach magnetic strips or magnetic backings to the palette case so they stick firmly. Arrange palettes with consistent spacing and keep only your daily palettes out, storing the rest in a drawer.
Test magnet strength by lightly shaking the palette; you want it secure even when the door swings.
Don’t mount palettes too high — you’ll stop using them and they’ll pile up on the counter.
14. Glass Jar Set for Cotton Tips and Mascara Wands
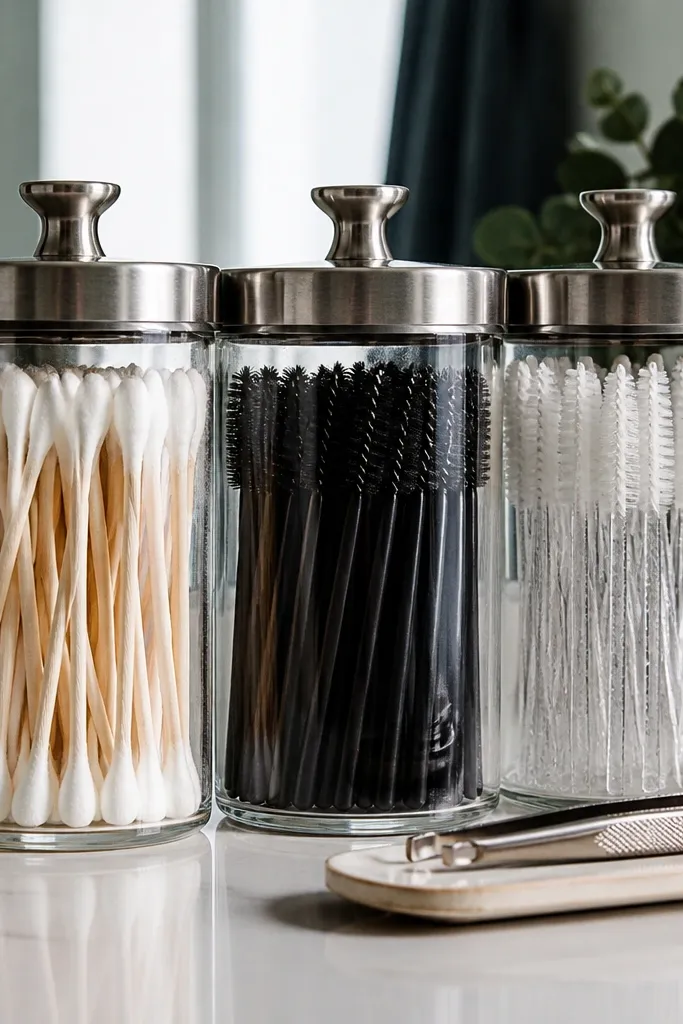
Glass jars look clean and elevated, and they help your vanity feel more like a dressing station. Keep cotton tips, mini spoolies, and wand cleaners in matching jars so the counter stays tidy. The clear glass makes it easy to see when you’re out, which prevents last-minute rummaging. This set also makes cleanup easier because you can pull the jars and wipe the surface underneath. For daily calm, this works best when you limit it to one or two jars so the look stays intentional.
Pick two to three matching glass jars with lids or heavy bases so they don’t tip. Add a small foam insert or folded paper divider inside to keep items separated by type. Place jars on a tray with a neutral liner and keep them near your mirror. Fill jars with cotton tips and spoolies so they stand upright, then add a small jar for wand cleaner if you use it.
Use a lint roller on the jar bottoms before you set them down — dust shows on glass.
Avoid mixing wet and dry tools in the same jar.
15. Matte Linen Drawer Liner with Tool Slots
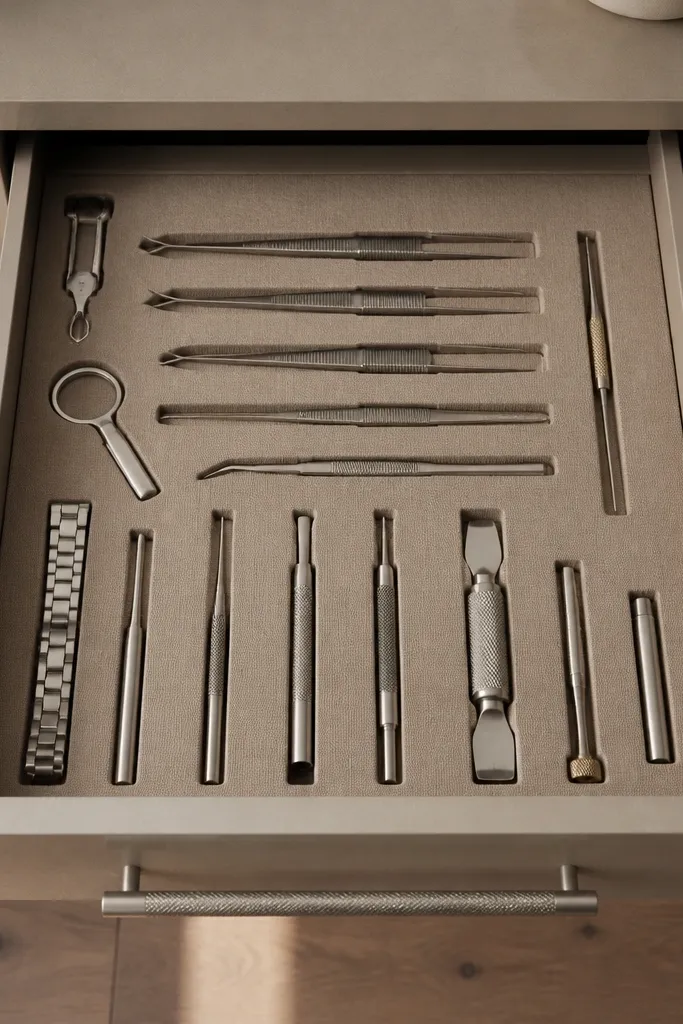
This idea is about making your storage feel calm even when the drawer is opened. A matte linen liner hides tiny scuffs and makeup smudges better than shiny plastic, and it looks soft and expensive. Add custom slots for metal tools so they lie flat and don’t scrape against each other. When everything has a slot, your drawer stops becoming a “dump drawer.” It’s perfect for daily calm because your tools are always ready and you don’t have to dig.
Cut linen to drawer size and anchor it with spray adhesive or double-sided fabric tape so it doesn’t slide. Make tool slots using thin foam board or EVA sheets cut to the shape of your tweezers and small scissors. Glue the foam slots onto the liner, then test fit by placing each tool and checking clearance. Place the drawer near your daily use items so you open it once and finish your routine.
Use a fabric-safe matte sealant on linen if your bathroom gets humid.
Avoid leaving the liner loose — wrinkles and shifting look messy even if the drawer is organized.
16. Tiered Wooden Stand for Skincare and Perfume

Skincare bottles on a vanity can look cluttered fast, especially when pump tops and caps vary in height. A tiered wooden stand creates a clean stage: taller bottles go on the back tier, shorter ones in front. The wood adds warmth and looks good with almost any makeup palette, so your setup reads cohesive. It also keeps your most-used skincare within reach, which reduces the urge to scatter products across the counter. This works well when you want daily calm without hiding everything away.
Editor's noteUse felt pads under each bottle to prevent micro-scratches and to reduce sliding on smooth vanity surfaces.
Build a simple two-tier stand using sanded plywood or hardwood, keeping each tier level and consistent in depth. Seal with matte polyurethane so it wipes clean and doesn’t stain from skincare. Add small raised lips or blocks on the edges so bottles can’t slide forward. Arrange bottles by routine and height, then keep only 6-10 items on the stand; the rest stays in a drawer.
Skip thisDon’t overload the stand — once you add too many bottles, it stops looking like a curated display.
17. Beveled Mirror Tray for Lipstick, Eyeliner, and Tools
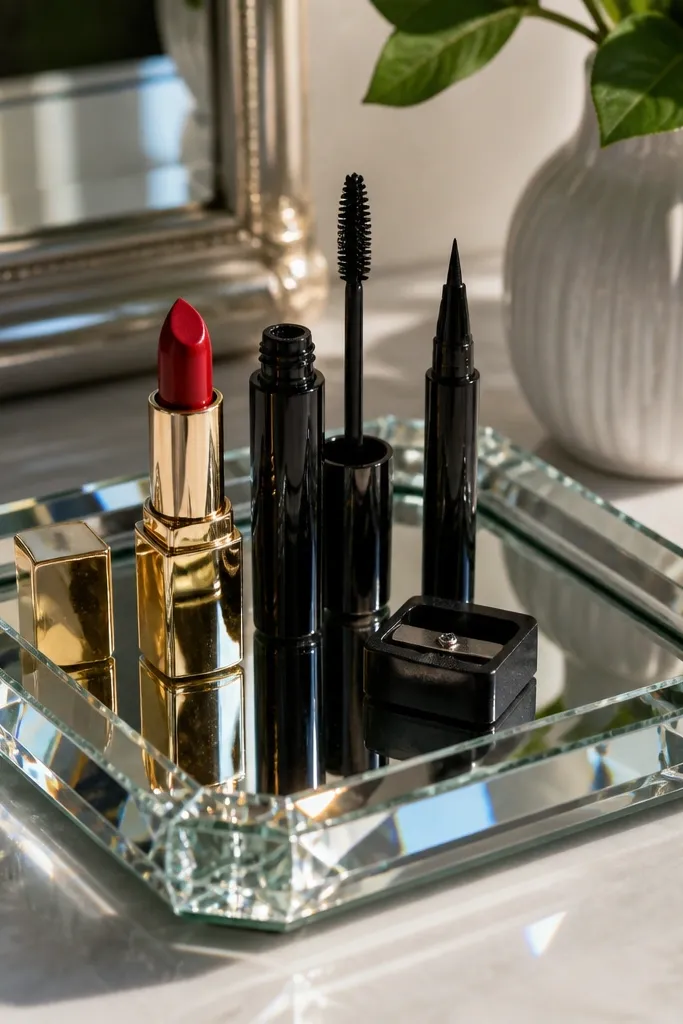
A mirror tray makes your vanity look instantly finished because it adds a reflective frame around your daily items. The trick is to keep the tray content tight and consistent, so the reflection doesn’t multiply clutter. Use it for your daily pick: lipstick, eyeliner, mascara, and a small tool like a sharpener. The mirror surface looks glam without needing extra decor. This is a great choice when your vanity is plain and you want a photogenic focal point.
Editor's noteUse matte or satin finishes on the products inside the tray so gloss reflections don’t look chaotic.
Choose a small beveled mirror tray with a raised edge so items don’t slide off. Place lip products together and line eyeliner and mascara next to them, keeping label fronts facing the same direction. Add a thin foam board insert under items if your tray is too glossy and causes slipping. Wipe the mirror tray with glass cleaner and dry fully to prevent streaks.
Skip thisDon’t use a mirror tray for loose powders or broken compacts — spills look obvious in reflections.
18. Clear Acrylic Drawer Organizer with Brush-Through Slots
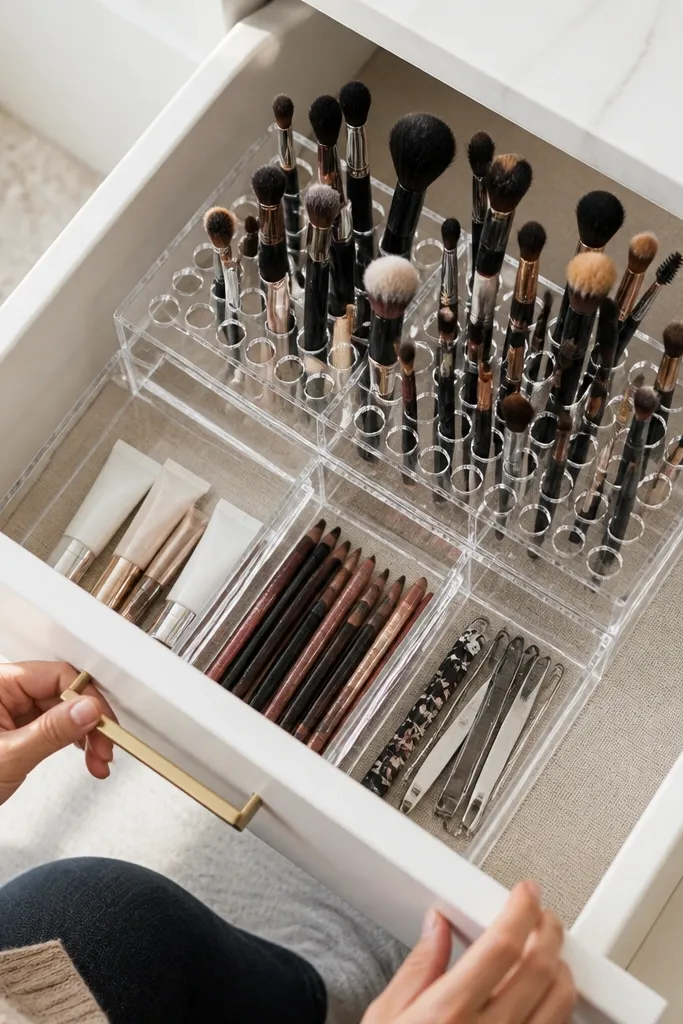
Clear drawer organizers give you the calm look even when the drawer is closed, because you can see where everything sits. Brush-through slots keep handles upright and prevent the “brush pile” effect. Small open compartments work for primers, lip liners, and tiny tools, so you don’t mix everything in one bin. This setup is visually clean because each slot has a defined boundary. It’s also practical: you can grab a brush without pulling half the drawer out.
Measure your drawer inside dimensions and buy or build an acrylic organizer that fits without gaps. Assign vertical slots for brushes and angled slots for smaller items like lip liners so they don’t roll. Place taller brushes in the back and shorter ones in front for a tidy front edge. Add a thin liner under the organizer and avoid overfilling so acrylic stays clear and uncluttered.
If your acrylic looks scratched, replace it rather than trying to polish — deep scratches catch light and ruin the clean look.
Avoid storing wet brushes in clear slots — the residue inside acrylic looks dirty quickly.
19. Color-Block Storage for Eyeshadow Pans Using Foam Board
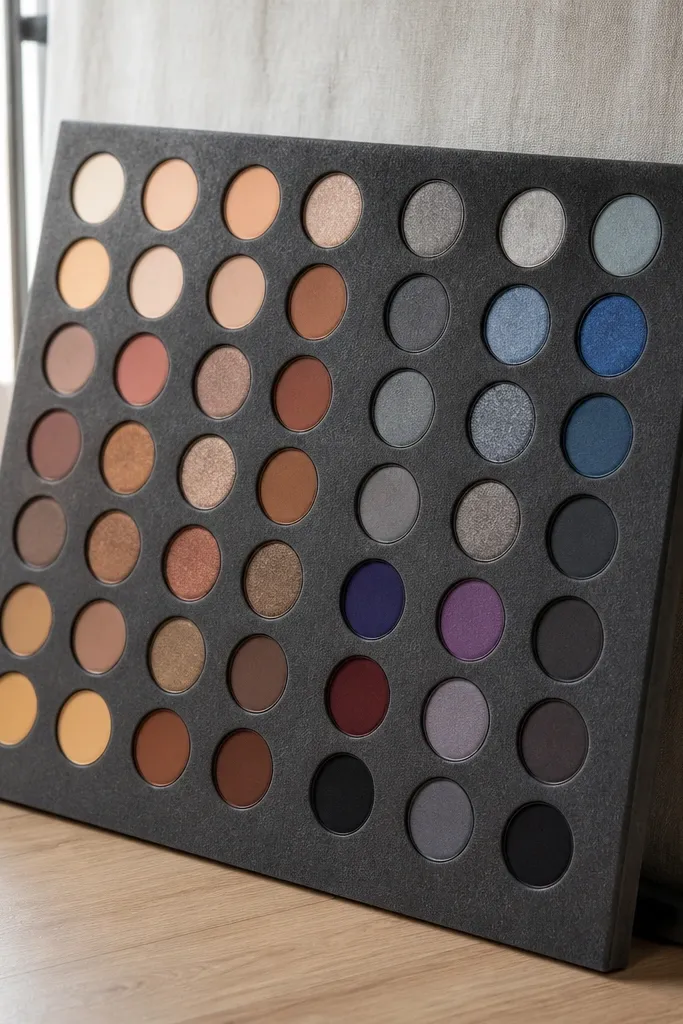
This is a “make it look like a palette wall” storage idea, but for pans and small refills. Foam board wells let each pan sit flat and evenly spaced, so your vanity looks like it has a designer display. Color-blocking your shades creates a calm scan — warm tones group together, cool tones group together. It’s especially good for people who use single pans or magnetic palettes and want them visible without turning into a messy pile. Because foam wells are stable, pans don’t slide and smear.
Cut foam board to your tray size and cover it with felt or thin fabric so pans don’t scratch. Mark a grid, then cut shallow wells using a craft knife — stop before you cut through the foam. Arrange pans in color blocks and glue a small strip of painter’s tape labels on the back edge for quick reshelving. Place the board in a tray so the edges stay neat and wipeable.
Use a ruler and tape guides when cutting wells; uneven wells make the whole grid look off.
Avoid storing full palettes flat on top of this — it breaks the crisp grid look.
20. Under-Shelf Mini Bins for Hair Accessories
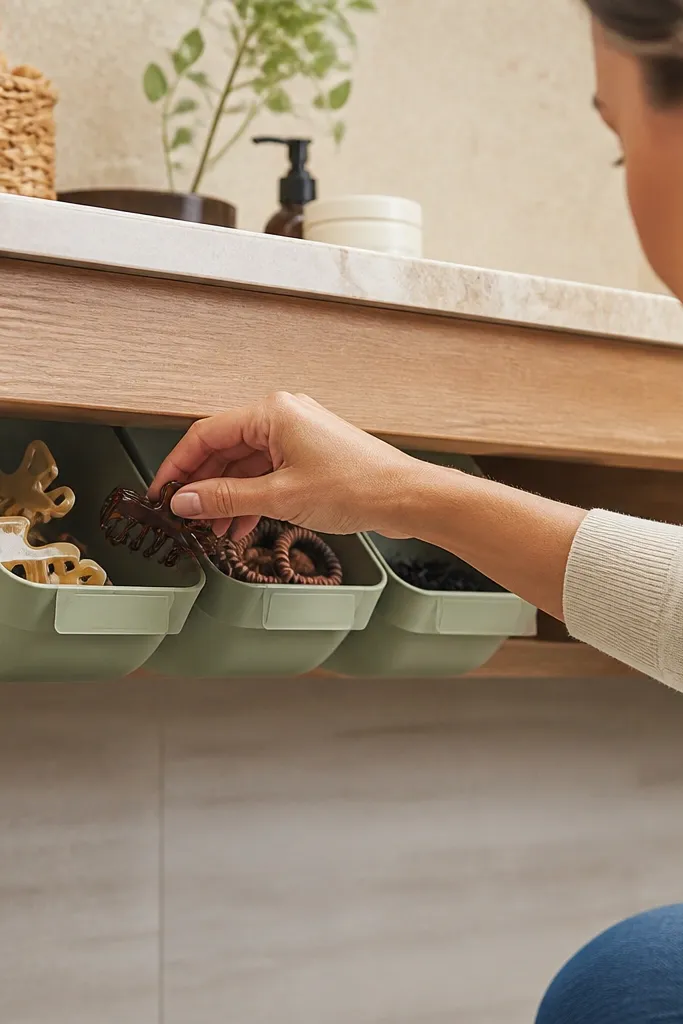
Hair accessories are the reason many vanities look messy even when makeup is organized. Under-shelf bins hide the chaos while keeping the accessories close to the mirror. This creates daily calm because you stop seeing random elastics and clips on the counter. Choose bins in a matching color family so they don’t stand out as an eyesore. The aesthetic comes from clean edges and consistent spacing, not from hiding everything in opaque darkness.
Editor's noteUse a label maker on the underside of bins so labels don’t show when you look at the vanity.
Measure the underside of your shelf and choose slim bins that fit without hitting light fixtures or drawer pulls. Attach the bins using screws or strong adhesive brackets, keeping them level. Sort accessories into two groups: daily (clips you grab) and backup (extra elastics), and place daily items in the easiest-to-reach bins. Add a small fabric liner to reduce tangling and to keep the bins looking neat.
Skip thisAvoid bins that are too wide — wasted space turns into clutter.
21. Acrylic Organizer for Nail Polish with Diagonal Color Racks
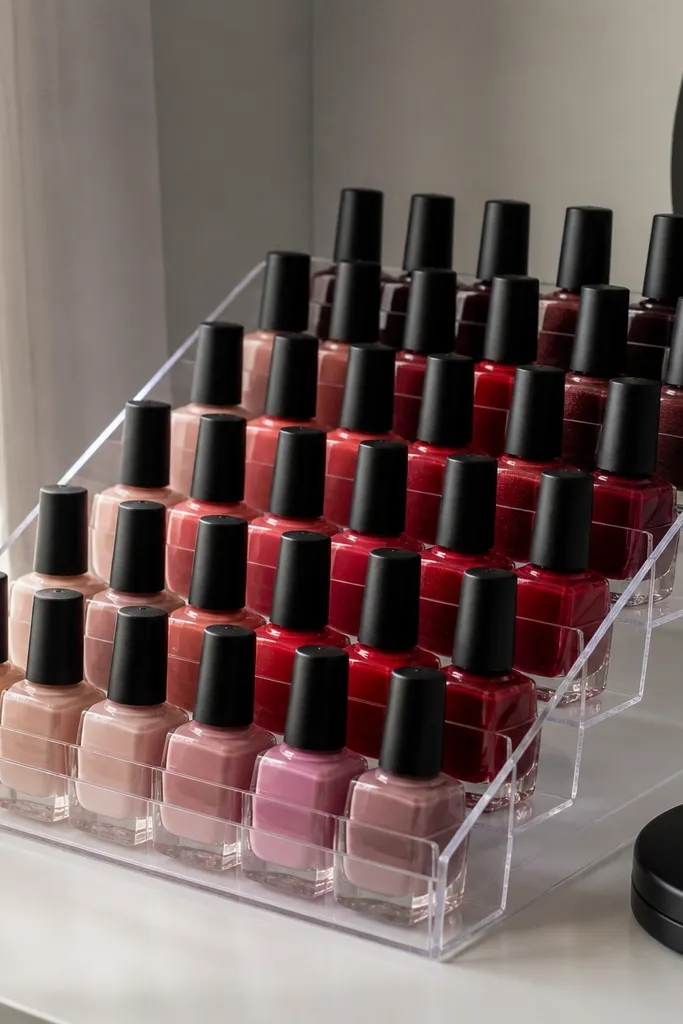
If you keep nail polish near your vanity, it can ruin the makeup aesthetic by looking like a random bottle collection. A diagonal rack arrangement solves that by turning bottles into a color pattern. Acrylic keeps everything crisp and light, and diagonal placement adds visual interest without looking messy. This setup is great for daily calm because you can grab a polish quickly for touch-ups without digging through a drawer. It also protects bottles from rolling and chipping.
Editor's noteAdd a strip of soft adhesive felt along divider edges so bottles don’t click and scratch.
Build or buy a clear acrylic rack with angled compartments or create it by attaching acrylic dividers to a base board. Set compartments so bottles sit with caps facing out and labels visible. Arrange by color — neutrals in one segment, brights in another — and keep the number of bottles on display limited to what you actually use. Place the rack on a tray with a liner so it stays stable.
Skip thisAvoid mixing glitter topcoats with regular polishes in the same slot tightness — they catch and make the rack look uneven.
22. Stacked Clear Lidded Boxes for Backup Makeup
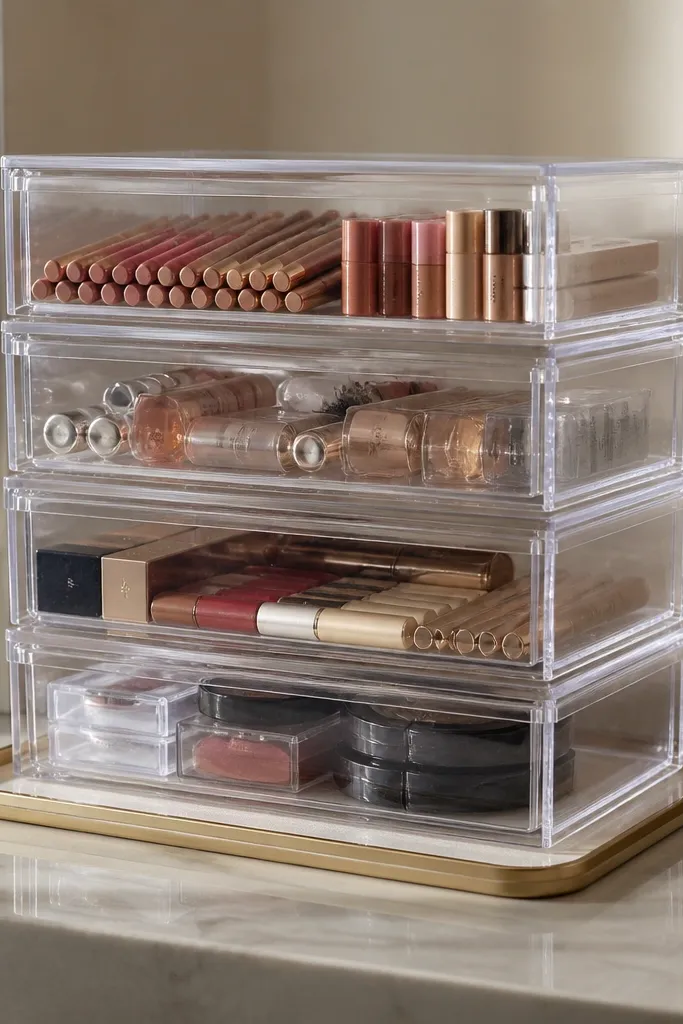
Daily calm needs a “background” system, not just a pretty front. Clear lidded boxes keep backups out of sight but still visually organized, so you don’t forget what you have. Use them for backups like extra lip liners, travel minis, and unopened backups. Clear lids make it easier to see what’s inside without opening everything. The look stays clean because box edges create consistent lines across a shelf or inside a cabinet.
Editor's noteUse matte labels on clear lids; glossy label tape reflects light and looks sloppy.
Measure your shelf or cabinet and choose box sizes that stack without gaps. Label each box on the side with a simple category like “backup lips” or “travel face” using a small label strip. Put frequently used backups in the top box, and store rarely used items in the bottom. Add a slim divider inside each box so items don’t shift when you move the stack.
Skip thisAvoid storing half-open powders and loose items in clear boxes — they scatter and the look deteriorates fast.
23. Pegboard Mini Shelf with Rotating Product Stoppers

A tiny shelf with stoppers makes your vanity products line up like a display case. Stoppers prevent bottles from sliding forward, so your arrangement stays neat even after daily use. Pegboard makes it easy to reposition as your routine changes, and the shelf keeps countertop space open. This idea looks good because every bottle sits in the same plane, creating a calm visual rhythm. It’s ideal for people who hate drawer organization because they want daily items visible but controlled.
Mount a small shelf to pegboard at mirror height or slightly above your typical eye line. Add product stoppers using small L-shaped acrylic pieces or foam bumpers so bottles stay in place. Place your daily liquids together: primer, foundation, concealer, and setting spray, all with labels facing out. Add one small tray for tools on the shelf so the top surface stays tidy.
Use the same bottle orientation for every product so labels don’t rotate and look random over time.
Avoid leaving gaps between stoppers — uneven spacing makes the shelf look cluttered.
24. Fold-Out Vanity Caddy with Magnetic Lid
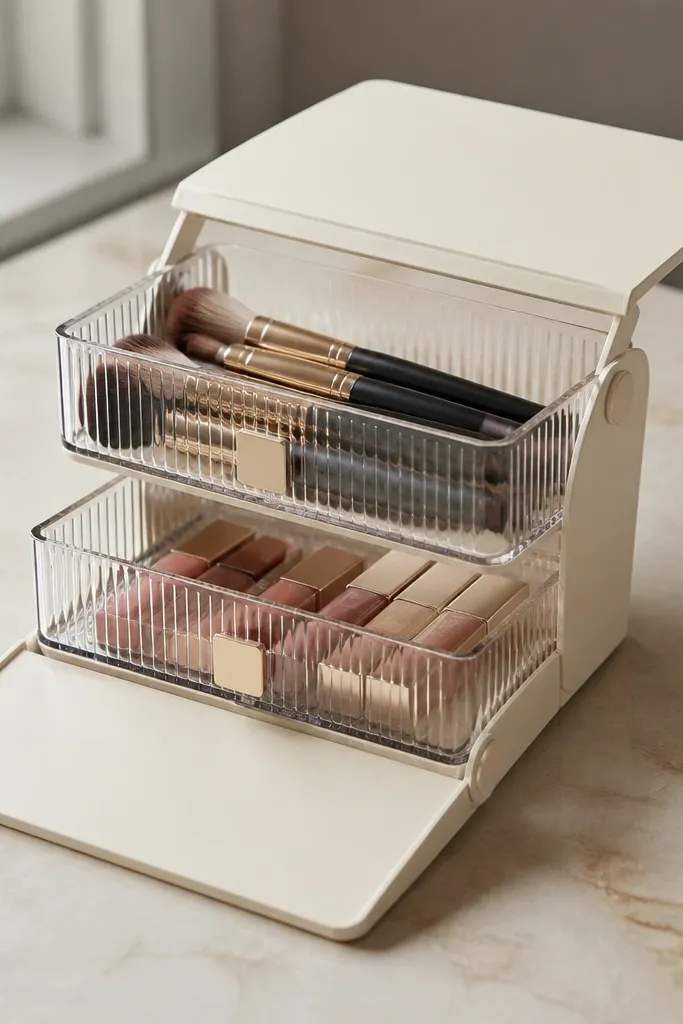
A fold-out caddy keeps your daily routine contained and travel-ready without turning your counter into a storage zone. The magnetic lid keeps brushes, lip items, and small tools from spilling when you open it. Visually, it’s clean because everything sits inside one structured unit, and you only “reveal” products when you’re using them. This is a smart choice for small bathrooms where the vanity has limited counter space. It gives you daily calm because the surface stays clear the moment you close the caddy.
Editor's noteUse a soft felt liner on the bottom so bottles don’t clack and so the lid stays quiet.
Build a shallow box caddy from plywood or sturdy plastic and add a hinged lid. Install small magnets on the lid edge so it closes tightly and doesn’t drift open. Inside, add dividers using thin wood strips or acrylic sheets to create sections for face tools, eyes, and lips. Finish by adding a removable insert liner so you can wipe spills without scrubbing the whole caddy.
Skip thisAvoid deep compartments for small items — they sink and you’ll start rummaging.
25. Magnetic Strip for Eyeliner and Brow Pencils
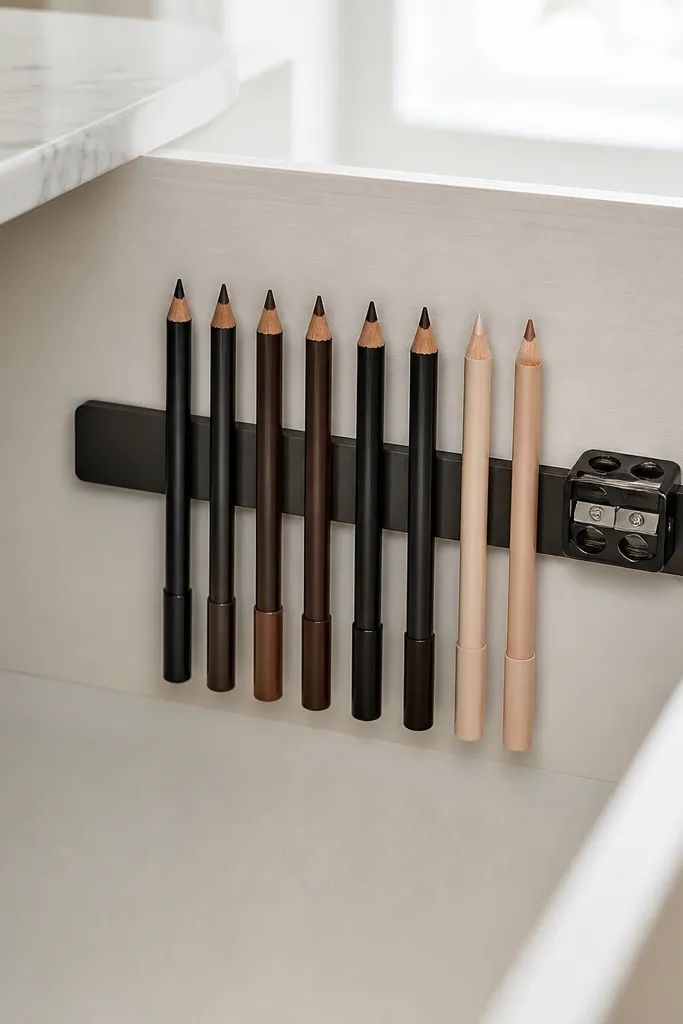
Pencils are the worst for rolling around, and they instantly make a vanity look messy. A magnetic strip holds eyeliner and brow pencils upright in a straight line, which makes your vanity look deliberate. It also keeps sharpeners and caps from getting lost because they sit in the same zone. The look is clean because all pencils align, and you can scan quickly for the exact shade or finish. This idea is perfect for daily calm if you use multiple pencils and hate digging through a cup.
Editor's noteUse small felt pads under the strip mounts to reduce vibration and rattling.
Mount a magnetic strip under a shelf or inside a drawer lid so it’s out of the way but still visible when you need it. Stick magnetic tape to the back of pencil cases or add small magnetic dots under the labels if your pencils have metal. Arrange pencils by routine order — brows first, then liner, then finishing pencil. Use a small tray beside the strip for caps and sharpeners so they don’t scatter.
Skip thisAvoid placing the strip on a location that gets bumped — pencils will pop off and you’ll lose the clean line.



