
1. Brass-Style Rail Turntable for "See-It" Jewelry
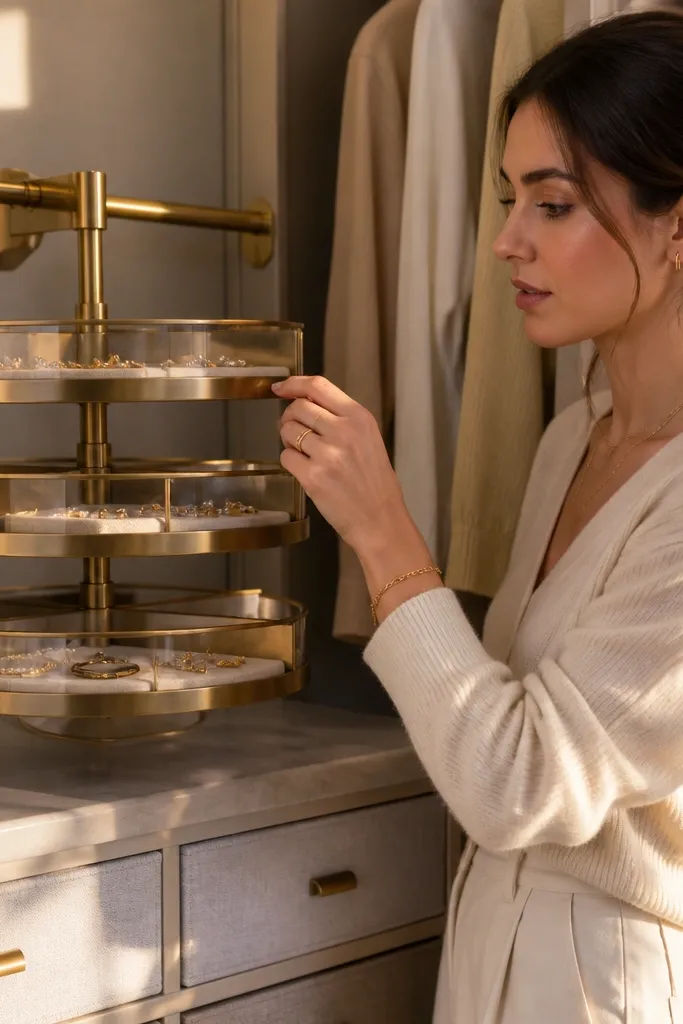
This is one of the fastest ways to make a closet look styled instead of stored. A turntable keeps small jewelry from turning into a drawer mess, and it creates a neat circle of matching metals that reads luxe. Use it for the pieces you actually wear so your closet stays functional, not just pretty. The look comes from the consistent finish (gold or brushed brass) and the fact that everything is visible without being scattered.
Start by choosing a shallow rotating tray with a raised rim so items don’t slide off. Mount a single metal rail or small shelf bracket above or beside it using screws into studs or strong anchors. Place the tray centered under your rail, then set jewelry into small compartments or foldable inserts so the shapes repeat. Finish by adding one slim catch-all dish for rings so the top surface stays tidy.
Use felt dots under the tray so it doesn’t scratch the shelf and stays quiet when you spin it.
Don’t mix silver and gold finishes on the same tray — the mess shows up instantly.
2. Two-Tone Hanger Wall with 2 Heights
This idea makes your closet look designer because it turns hanging clothes into a visual grid. The trick is two hang heights: one for everyday items and one for bulkier pieces that need more clearance. When hangers match and the spacing is consistent, your closet reads clean even if the contents change weekly. Choose a two-tone hanger palette that matches your room neutrals — it’s more interesting than one flat color.
Editor's noteUse a strip of painter’s tape on the wall as a temporary level guide before you drill.
Remove one rod section at a time so you can measure without losing the whole system. Mark and install hang height so shirts and light layers hang around 2 inches above where hems want to fall, and heavier coats get a second line about 6-8 inches higher. Hang only one type at first (like tops) to confirm the sightline, then repeat with the second category. Swap everything to matching hangers, including belts if you use hanger hooks.
Skip thisDon’t keep mixed hanger styles — wire, wood, and plastic all break the look.
3. Fabric Drawer Inserts for the "Folded Front" Shelf
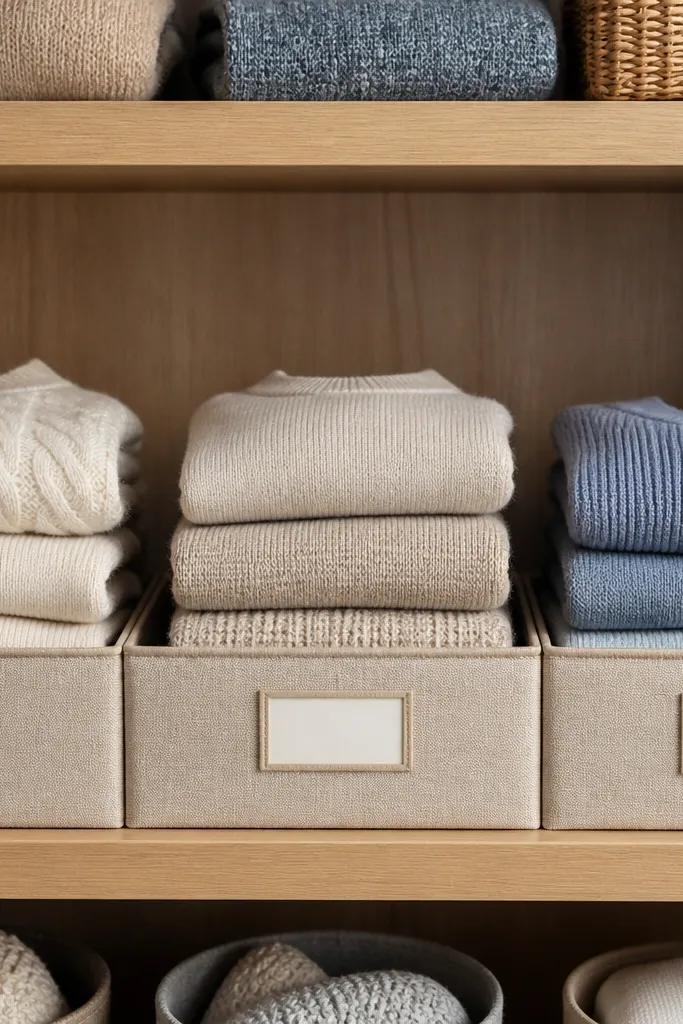
A shelf becomes luxe when the folded items look intentional and repeatable. Fabric drawer inserts help you keep folded stacks at the same height and prevent the “top shelf collapse” where everything slides forward. The aesthetic comes from a soft, uniform front edge and label cards aligned in the same row. This works especially well for closets where you can’t install more drawers but you want the look of drawers.
Editor's noteAdd a thin non-slip liner under each insert so it doesn’t drift when you pull it out.
Measure the shelf depth and width, then buy or cut inserts that leave a 1/4 inch gap on each side for smooth sliding. Choose inserts with a firm backing so folds stay crisp. Fold items into a consistent size using a simple folder board or by marking a 10-inch fold width with tape on a table. Label the insert fronts with a label maker or neat printed cards, then stack only one category per insert to keep the front face clean.
Skip thisDon’t overstuff — if the insert bulges, the front edge looks messy.
4. Clear-Front Shoe Cubes with Fabric Base
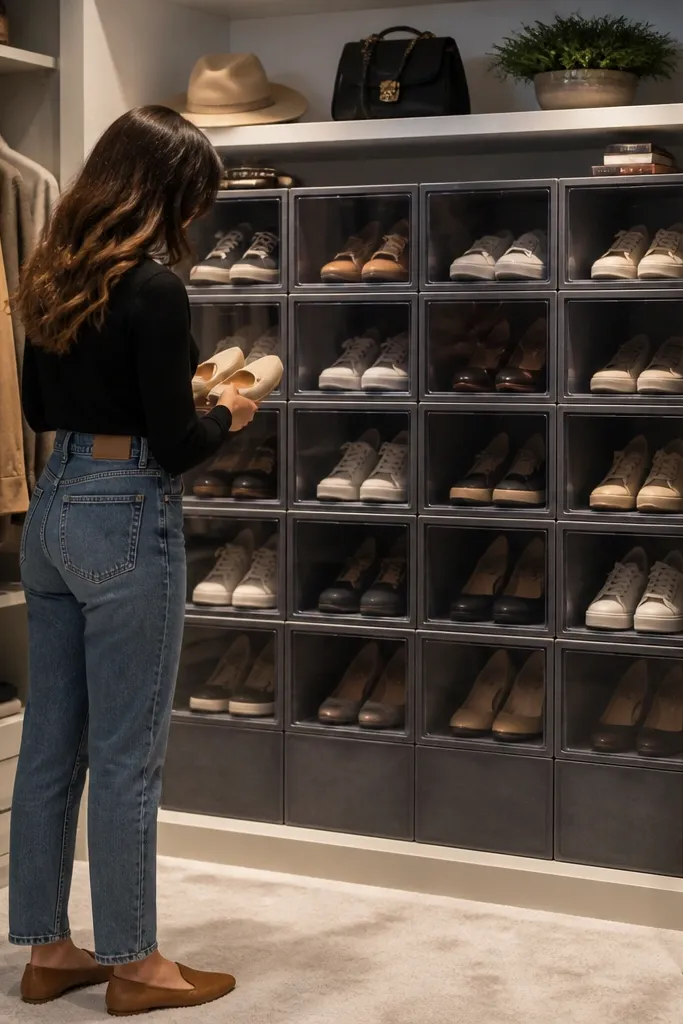
Closed storage can still look luxe if the front is clean and consistent. Clear-front shoe cubes let you find pairs fast while keeping the shelf wall looking uniform. The fabric base hides dust and softens the overall look, so it doesn’t feel like a warehouse. This is a great upgrade for walk-in closets because it turns the shoe zone into a neat design element.
Editor's noteUse the same shoe position for every pair — toes forward makes the wall look aligned.
Measure the shoe shelf width and choose cube sizes that leave 1/2 inch breathing room so doors or fronts don’t jam. Install a simple shelf lip or add a thin ledge strip so cubes don’t slide forward. Place shoes so toes face forward in the same direction, then insert a small piece of tissue or a shoe shaper so the silhouette stays neat. Finish by adding a label card at the bottom corner of each cube for size or type.
Skip thisDon’t stack boots in cube systems meant for sneakers — the uneven heights ruin the grid.
5. Roll-Out Pant Drawer with Soft-Roll Dividers
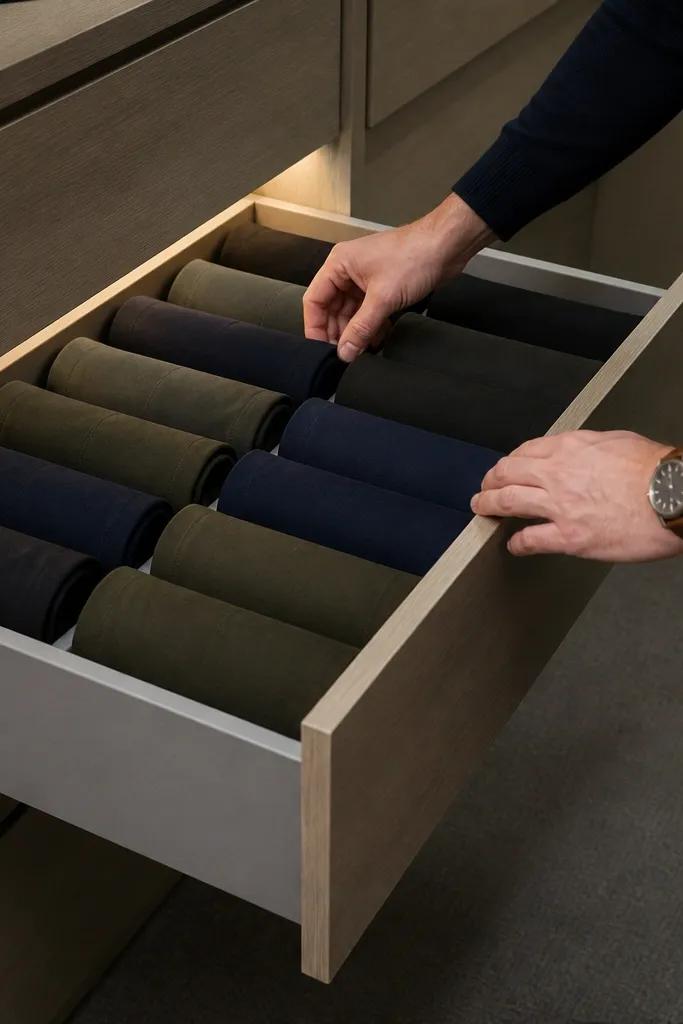
Rolled pants look crisp when they’re separated and kept at the same height. This setup gives you a clean “drawer face” and makes pants easy to pull without rummaging. Soft-roll dividers keep fabric from snagging while holding each roll in place. The luxe read comes from the uniform cylinder shape and the fact that the drawer front stays visually calm.
Editor's noteAdd a thin anti-slip mat under the dividers so rolls don’t shift when you open the drawer.
Choose a drawer insert system with flexible dividers or build one using foam board wrapped in fabric. Measure the drawer interior and set divider widths so each roll has a little space but doesn’t tip. Roll pants to the same diameter by folding the waistband in the same spot every time, then rolling from the hem to the waistband. Label categories on the drawer front edge: jeans, trousers, and active pants.
Skip thisDon’t use dividers that are too tall — they create gaps that look uneven in photos.
6. Cabinet-Style Label System with Matching Font Cards
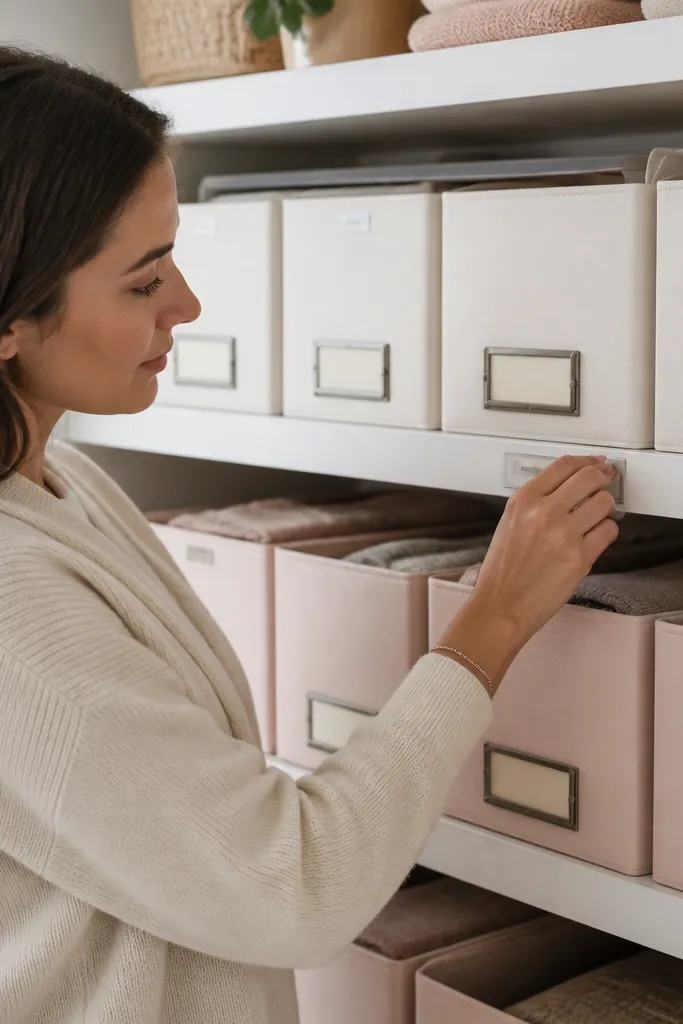
Labels are where “organized” becomes “designed.” If your labels are all different sizes, rotated at random angles, or written in multiple handwriting styles, your closet looks improvised. A cabinet-style label system makes your bins look like part of built-in cabinetry. The luxe look comes from consistent placement, consistent font, and label cards that match the bin fronts.
Pick one label size and one color scheme (black text on white, or white text on black). Place labels consistently at the same corner on every bin, usually top-left or bottom-right. Use a label maker for crisp text, then print label cards on cardstock and slide them into small label holders or clear tape covers. Create categories that match how you store: “Tops,” “Pajamas,” “Belts,” and “Seasonal.”
Keep labels short. Aim for 1-2 words per bin so the closet stays visually light.
Don’t label every single item container — label only the storage units you open.
7. Hidden Cable Tie Back for Closet Lights
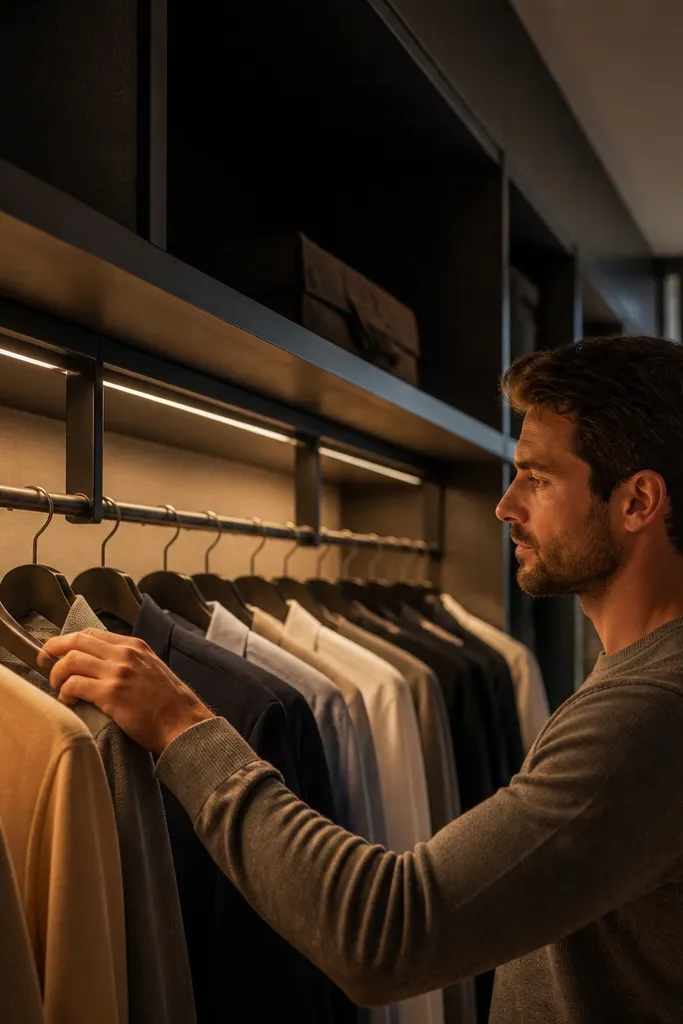
Lighting makes closets feel luxe, but sloppy wires can undo the whole look. When cables hang or loop in view, your eye reads “unfinished.” A hidden tie-back system keeps cords tight, straight, and out of sight behind a rail or inside a slim channel. The result is a clean ceiling line and better photos because the light source looks intentional.
Editor's noteUse warm white (around 2700K) for a flattering closet look — daylight tones can make fabrics look dull.
Decide where the light strips or fixtures run, then install a slim cable channel or adhesive-backed raceway along the back rail. Use zip ties or fabric cable ties every 6-8 inches to keep slack controlled. Route the wire to a single access point for the switch or plug so you don’t create extra visible loops. Test the lighting brightness and color temperature before you fully close the channel.
Skip thisDon’t run cords across the front of shelving or hang zones.
8. Lighting Strip Under Shelves with Diffuser Covers
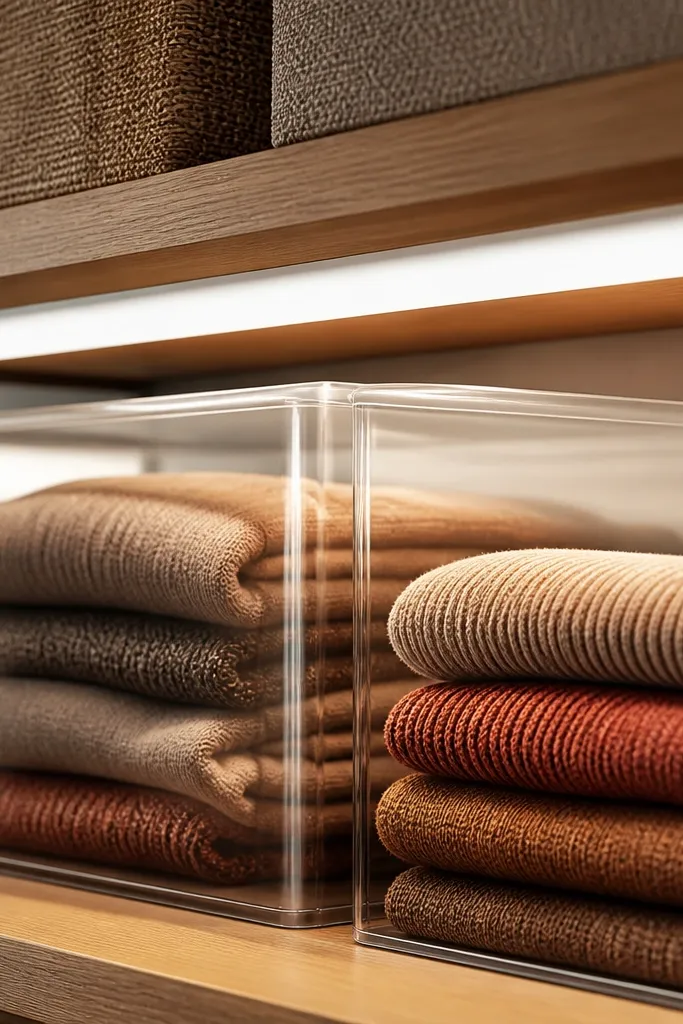
Under-shelf lighting instantly makes storage look higher-end because it reduces shadows and makes labels readable. Without a diffuser, strips show bright dots and create harsh glare on clear bins. With a diffuser cover, the light spreads evenly and makes fabrics look smoother. This is one of the best “photo effect” upgrades because the closet looks staged even when it’s just functional.
Editor's noteHide the power connector behind a side panel so you don’t see a lump of plastic.
Measure the shelf span and buy LED strip kits with a diffuser cover sized to your run. Clean the underside with rubbing alcohol, then mount using the strip’s adhesive backing only after the surface is dry. Place the switch access where you can reach it without pulling out bins. Add a dimmer if your kit supports it so you can soften the look in the evening.
Skip thisDon’t skip the diffuser — dot glare kills the luxe look.
9. Back-of-Door Organizer with Matching Fabric Pockets
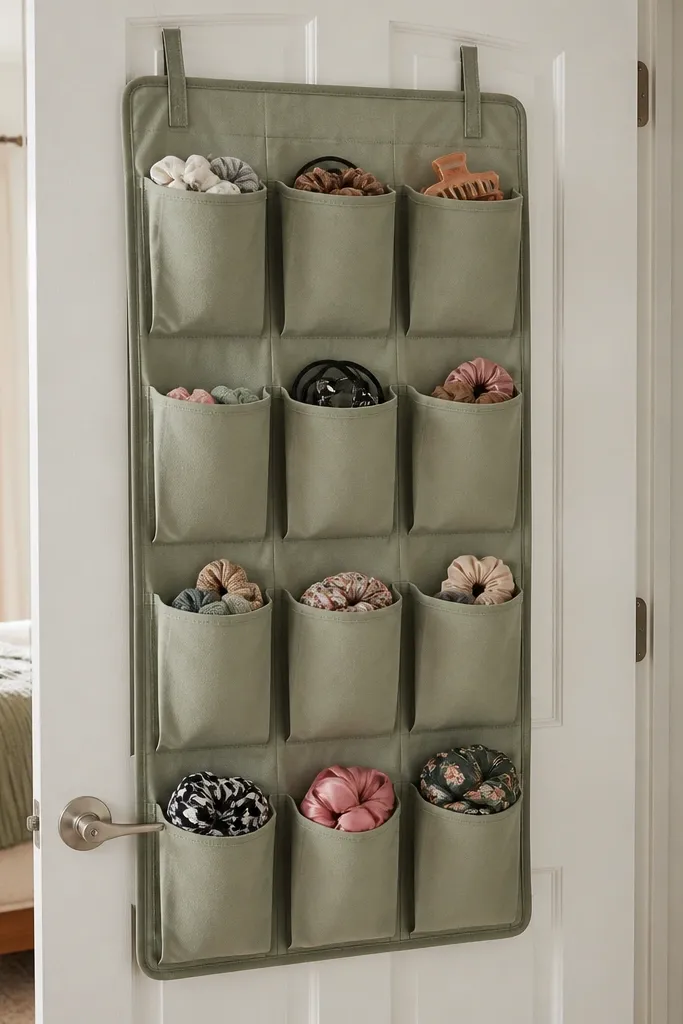
Door space is where closets get messy fast. A fabric pocket organizer keeps small items off the floor and makes the door look tidy and intentional. Match the fabric color to your closet palette so it blends instead of looking like an add-on. The luxe part is the consistent pocket height and the fact that the items stay flat, not piled.
Editor's noteUse the door only for small items you grab daily — sunglasses, scarves, and hair tools — not for random overflow.
Measure the door width and height where you want the organizer, then choose a pocket organizer with enough pockets for your categories. Install using hooks or a tension rod system so you don’t drill into the door if you don’t have to. Fill pockets in one direction: keep items stacked flat and avoid bulky shapes that bow pockets. Add a small label card at the top edge of each pocket row.
Skip thisDon’t use a pocket organizer with mixed pocket sizes if you want the clean look.
10. Fold-and-Slide Linen Closet Shelf Trays
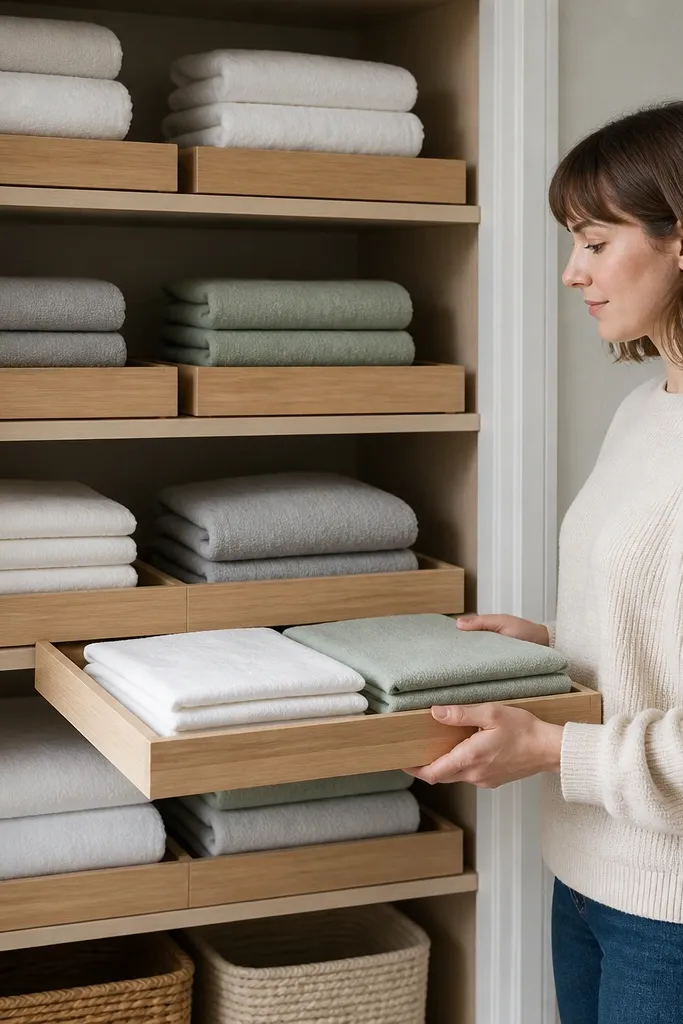
This one turns a shelf into a drawer-like surface. Trays keep folded linens from shifting, and they create a clean front edge that looks built-in. If you use trays with the same lip height across your closet, the whole system looks cohesive. It’s ideal for walk-ins where shelves are deep and items drift forward.
Editor's noteRound the corners of labels slightly with scissors so they don’t look sharp and cheap.
Measure shelf depth and choose tray sizes that leave 1 inch clearance for sliding. Line the shelf with a thin non-slip mat so trays don’t creep. Fold linens to a consistent size, then slide each tray in so the front lip aligns with the shelf edge. Label tray fronts by category so you don’t open everything to find what you need.
Skip thisDon’t use open baskets for linens if you want the luxe, clean-front look.
11. Woven Basket + Tray Combo for "Floor-Look" Storage
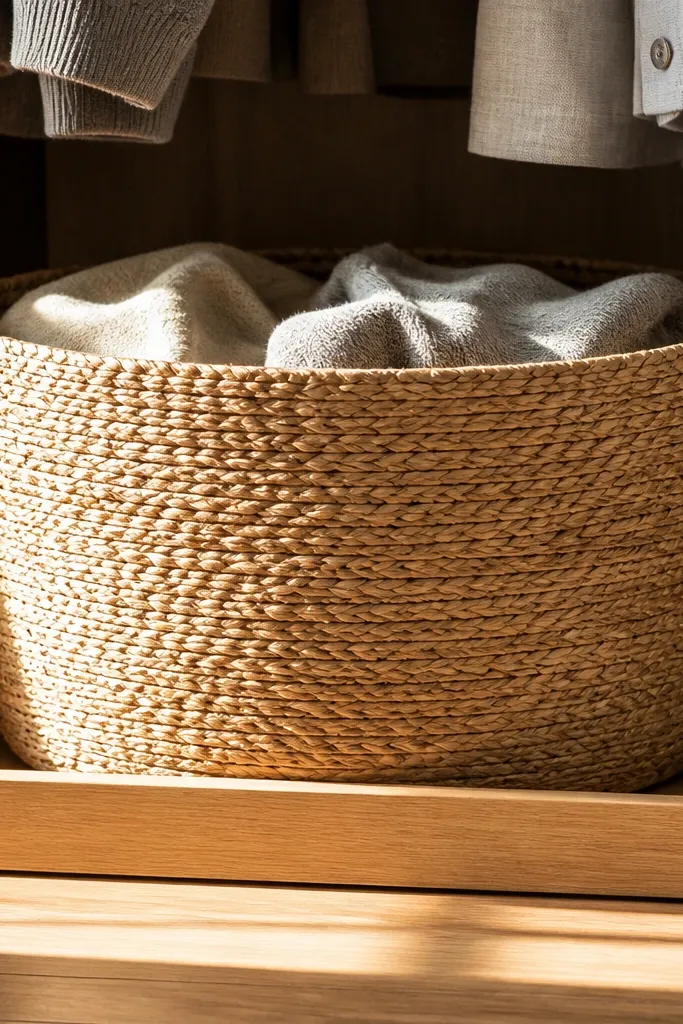
Floor storage is where your closet either looks styled or like a catch-all. A woven basket on a matching tray creates a tidy boundary line and keeps the basket from looking like it’s sitting loose. The look feels luxe because the basket texture looks intentional, not random. This combo also helps you keep the floor level visually even if you store different shoe heights.
Editor's notePick baskets in natural tones like walnut or sand to avoid clashing with most closet paint colors.
Choose baskets that are all the same height and weave pattern. Put each basket on a shallow tray or a flat wood board cut to the same size, then place the set at consistent intervals on the floor. Store shoes or accessories inside the basket, then add a small fabric insert so items don’t slump. Wipe the tray edges regularly so dust doesn’t dull the finish.
Skip thisDon’t mix basket sizes in the same row — the floor line becomes uneven.
12. Clear Acrylic Drawer Fronts for Small Accessories
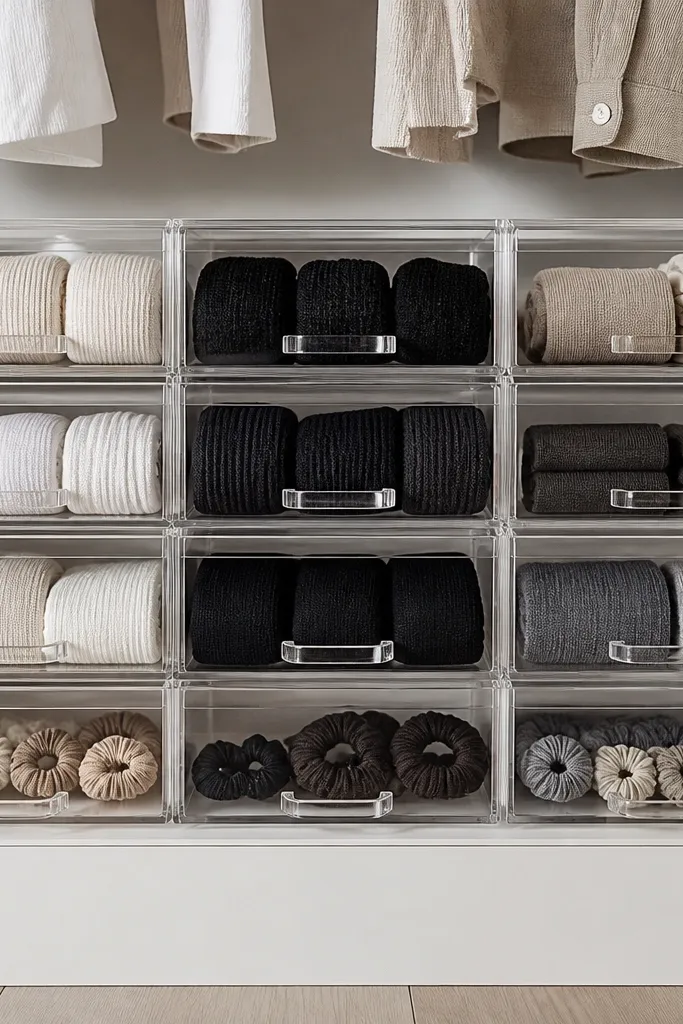
Clear acrylic makes small accessories look curated because you can see exactly what’s inside. It works best for items that are already color-coordinated, like hair ties, socks, or small bags. The luxe look comes from the smooth, glossy drawer face and the clean grid of compartments. If your accessories are currently dumped into random pouches, acrylic turns it into display storage.
Editor's noteWipe acrylic with microfiber and a tiny bit of glass cleaner so fingerprints don’t ruin the look.
Select a small drawer unit with a flat top front or build a shallow frame using acrylic sheets and a plywood base. Install removable dividers inside so categories stay separate. Sort accessories by color or type, then place them in compartments so you don’t stack uneven piles. Add a label strip on the side or bottom so it stays readable without covering the clear front.
Skip thisDon’t put chaotic mixes inside — clear plastic makes mess look worse.
13. Matte Black Hardware Swap for Rods and Hooks
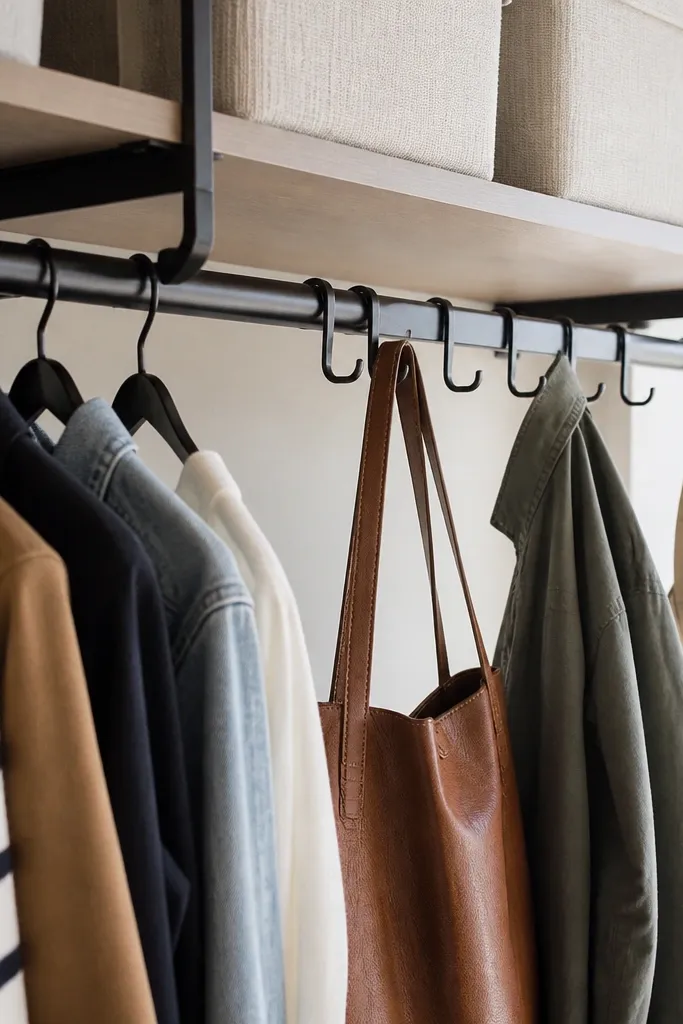
Hardware is the closet’s jewelry. If your rods and hooks are shiny chrome while your bins are matte, the whole space looks unfinished. A matte black or matte bronze swap makes the closet feel intentional because it unifies the visible metal points. It also photographs well because matte finishes avoid glare and show cleaner edges. This is a high-impact change that doesn’t require reorganizing everything.
Measure rod diameter and hook spacing, then choose hardware that matches those sizes. Remove one section at a time so you can keep clothes on a temporary stand. Install new brackets at the same screw holes if possible; if not, use wall anchors rated for the rod’s load. Hang items after the hardware is secure so you can verify clearances for sleeves and hangers.
Use a small level on each bracket so the rod line stays straight in the photos.
Don’t mix finishes within the same closet zone — pick one metal tone.
14. Pegboard Shelf Dividers for Belt, Scarf, and Tie Lines
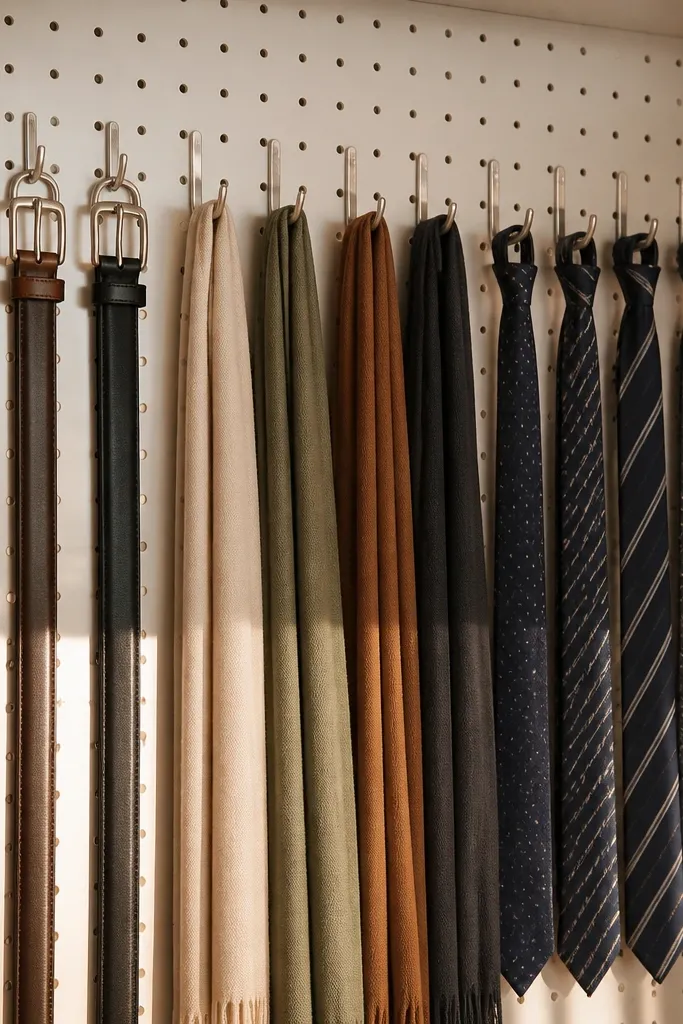
Pegboard turns flat storage into organized display without bulky cabinets. You get repeating rows of hooks, which makes belts and scarves look neat instead of tangled. It’s especially good for walk-in closets because you can mount it on the back wall and use it as a vertical sorting system. The luxe look comes from consistent spacing and the fact that each item hangs with its shape intact.
Editor's noteUse hooks with the same profile across categories so the wall looks uniform.
Mount a pegboard panel on the closet wall, then sand and paint it to match your closet color. Mark a grid with a pencil and level, then install hooks at consistent heights for belts, scarves, and ties. Hang items with the same orientation so the lines stay straight. Add a small tray at the bottom for loose accessories and keep it the same color as the pegboard.
Skip thisDon’t overcrowd — leave at least 1 inch between items so they don’t tangle.
15. Built-Like Drawer Fronts with Fabric-Wrapped Foam Liners
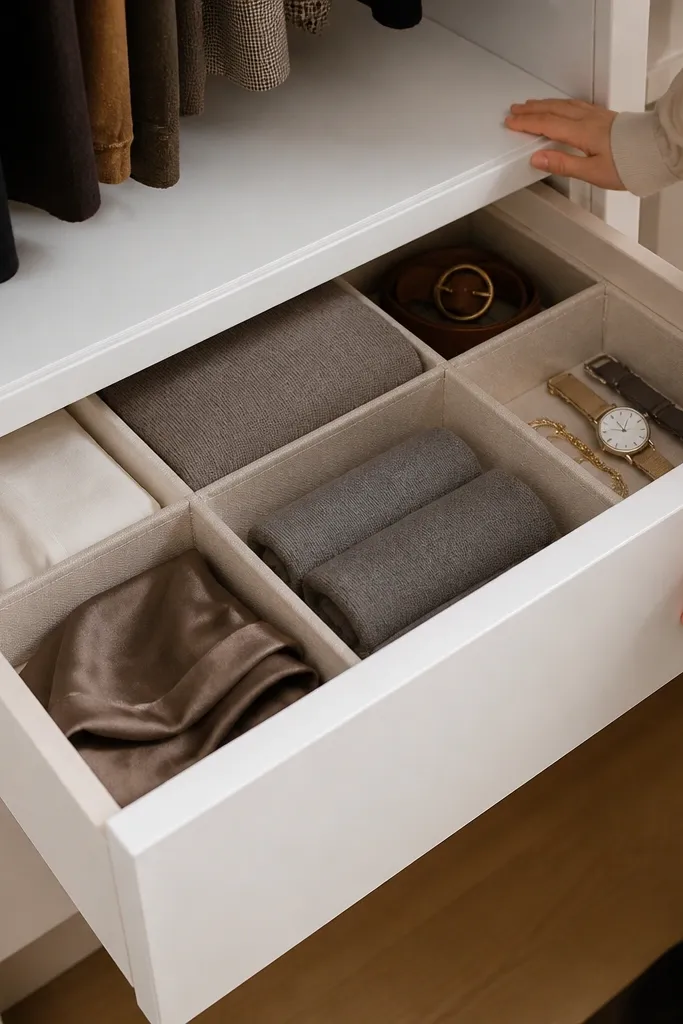
Even if you don’t build custom drawers, you can fake that built-in look. Fabric-wrapped foam liners create a smooth, premium interior finish that makes the drawer feel designed. The visual upgrade is the clean front edge plus the tidy compartments inside. This works great for closets with basic plastic drawers that look temporary.
Editor's noteChoose a cotton canvas fabric — it grips gently and doesn’t look shiny like satin.
Remove your drawer and measure the interior base. Cut foam sheets to size and wrap them in fabric, then glue fabric to the underside so edges stay hidden. Add dividers using thin wood strips or modular drawer dividers so each category has a block. Label the drawer front with a single label card centered on the face for a cabinet-style look.
Skip thisDon’t use glossy fabric — it reflects light and makes the drawer look cheap.
16. Color-Coded Shelf Face with Matching Tray Sizes
If you want an aesthetic closet, color order is the easiest way to make it look luxe. This setup uses matching tray sizes so the shelf face stays uniform while you organize by color or category. Your closet looks styled because the eye sees a clean block of tones instead of scattered stacks. It also helps you put things back fast because each tray has a clear job.
Editor's noteUse two neutrals as separators (like white and black trays) so the color blocks don’t blend together.
Pick tray dimensions that fit your shelf depth and keep a 1 inch gap from the back wall for airflow. Sort items into categories, then choose a color order you like and stick to it across shelves. Place trays in a single row with label cards at the same corner. Adjust your tray spacing so the shelf face looks even from the doorway — use painter’s tape to mark alignment before you place them.
Skip thisDon’t mix tray sizes — different heights create a messy shelf face.
17. Seasonal Rotation Bin Wall with Hidden Pull-Outs
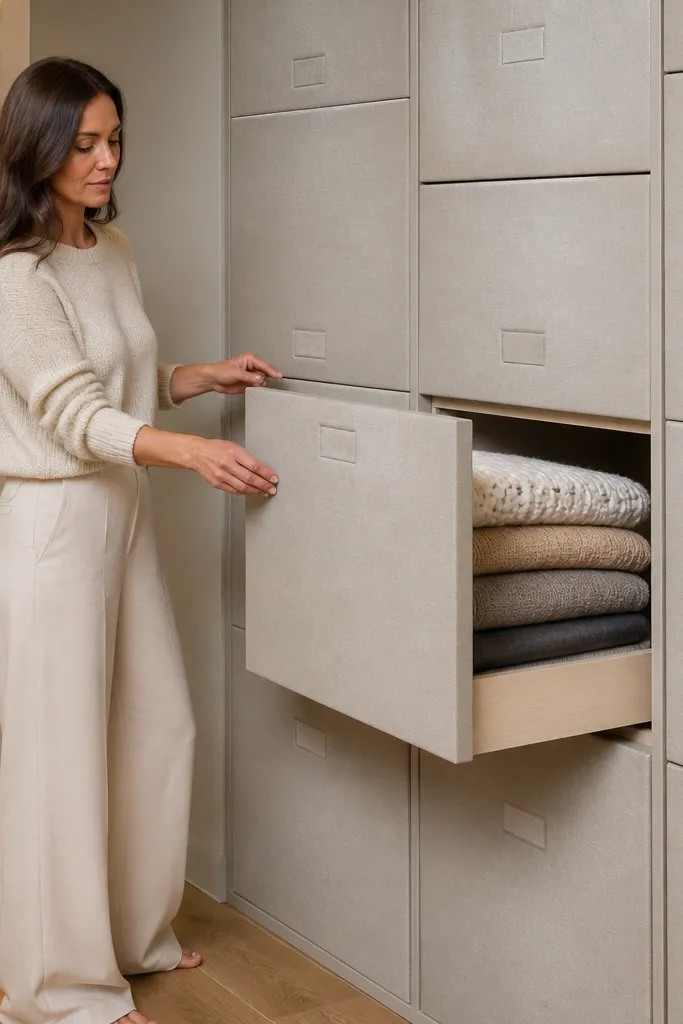
Seasonal clutter is what makes closets look messy even when you’re organized. A pull-out bin wall keeps seasonal items out of sight while keeping the system accessible. The luxe look comes from closed fronts, consistent bin style, and labels that tell you what’s inside without opening everything. This is a smart way to keep your walk-in looking “ready” year-round.
Choose bins with flat sides that slide smoothly into brackets or shallow drawer slides. Install a rail or track system inside your closet so bins pull forward but stay aligned. Label each bin with a season and category, like “Winter — Sweaters” and “Summer — Tees.” Store off-season items by folding to a consistent size so the bins don’t bulge and warp the front line.
Use a single folding method across all seasonal items so the bin fill stays even.
Don’t store seasonal items loosely — lumps make the bin fronts look sloppy.
18. Shoe Boot Stand with Vertical Alignment Feet
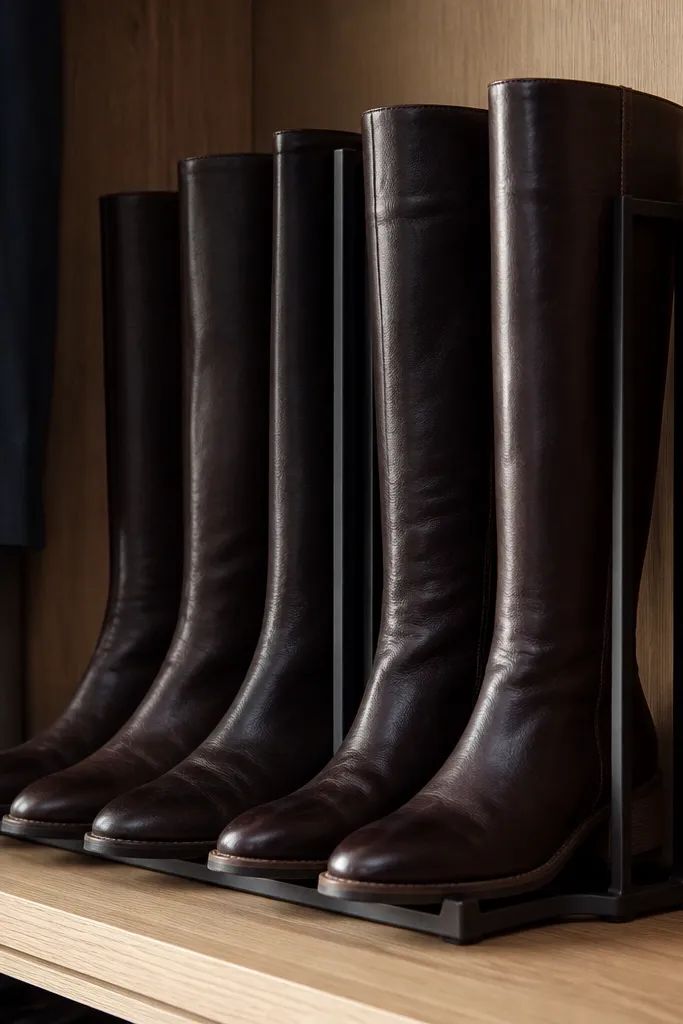
Boots ruin closet aesthetics when they slump or overlap. A vertical boot stand keeps shafts aligned and prevents scuffs, which makes the shoe zone look intentional. The luxe look comes from the repeated vertical lines and the fact that the boots don’t take over the shelf space. This is best for walk-ins with enough floor clearance for upright storage.
Editor's noteUse boot trees or simple inserts to keep the shape while boots sit upright.
Choose a boot stand system with a stable base and adjustable internal supports. Place the stand on a smooth surface, then adjust the internal supports so the boot shaft stands straight without stretching. Keep one boot per stand so spacing stays consistent. Add a small shelf or tray nearby for boot accessories like cream and brushes, then label it so it looks like a set.
Skip thisDon’t store boots leaning against the wall — the angles look messy fast.
19. Curtain-Front Wardrobe Divider for "Behind-the-Rod" Storage
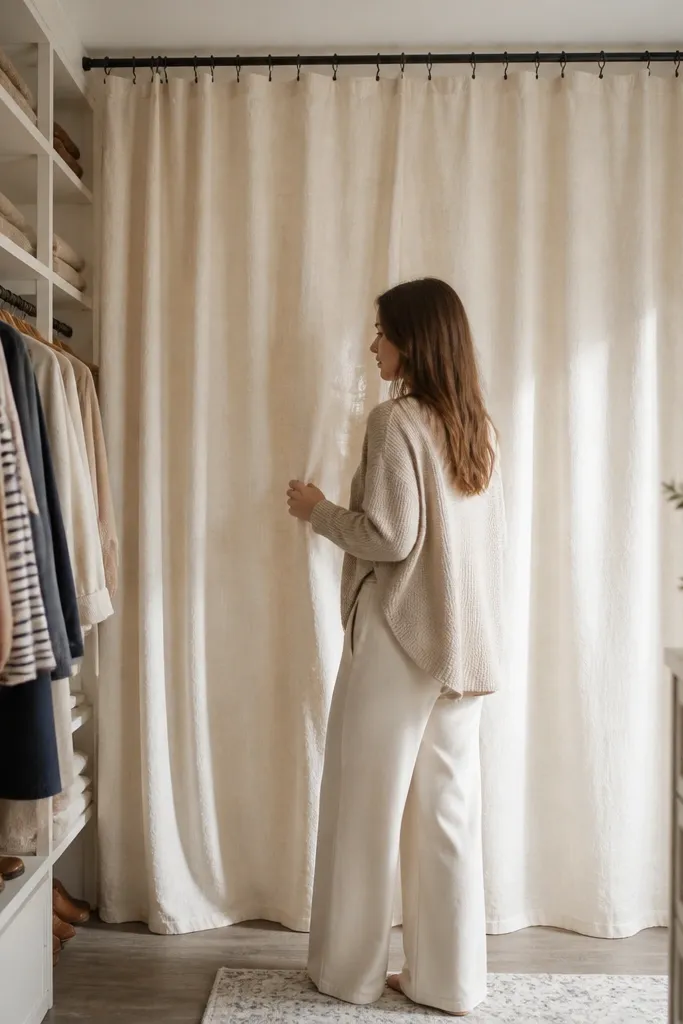
When the back of your closet is functional chaos, a curtain divider makes it disappear. It’s a softer, more luxe solution than leaving open shelves or hanging random bins. The look comes from a clean line where the curtain meets the rod or track, plus the way the fabric hides clutter while still letting light pass. This works well in walk-ins where you have one zone for hanging and another for stuff you don’t want to display.
Install a ceiling or top-mounted curtain track above the storage area, then choose a fabric curtain in a solid neutral. Hang the curtain so it overlaps the opening by at least 6 inches on both sides. Use small curtain rings or clips so the curtain hangs flat, then set the storage items behind it in matching bins. Keep the bins aligned so the curtain falls smoothly without bumps.
Pick a medium-weight curtain that doesn’t cling — it looks cleaner when closed.
Don’t use a thin see-through fabric — the clutter will show.
20. Glass-Front Cabinet for Perfume and Skincare Sets
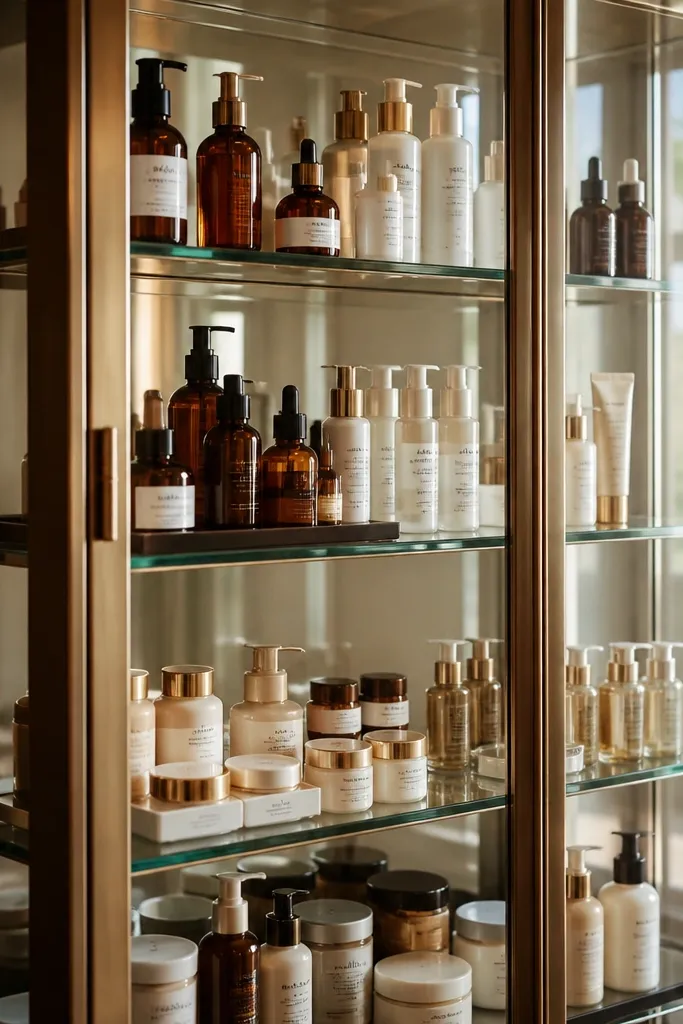
A tiny glass-front cabinet turns personal-care items into a display. It’s luxe because glass reflects light and makes bottle shapes look intentional, not like random clutter on shelves. Group products by routine (AM, PM, body) so the shelves look organized even when you add new items. This idea works best for walk-ins that have a wall shelf or a small corner that feels blank.
Editor's noteUse a tray to catch spills — it keeps the shelf looking perfect even if a cap leaks.
Choose a small cabinet with glass doors or open shelving with a glass cover. Add slim shelf risers or acrylic stands inside so bottle heights stay consistent. Group items by routine and wipe bottles before placing them so the glass and labels look clean. Add a label strip at the bottom edge of the cabinet so you know what’s where without digging.
Skip thisDon’t cram bottles. Leave 1/2 inch between rows so labels stay readable.
21. Monochrome Hamper Station with Matching Lid Color
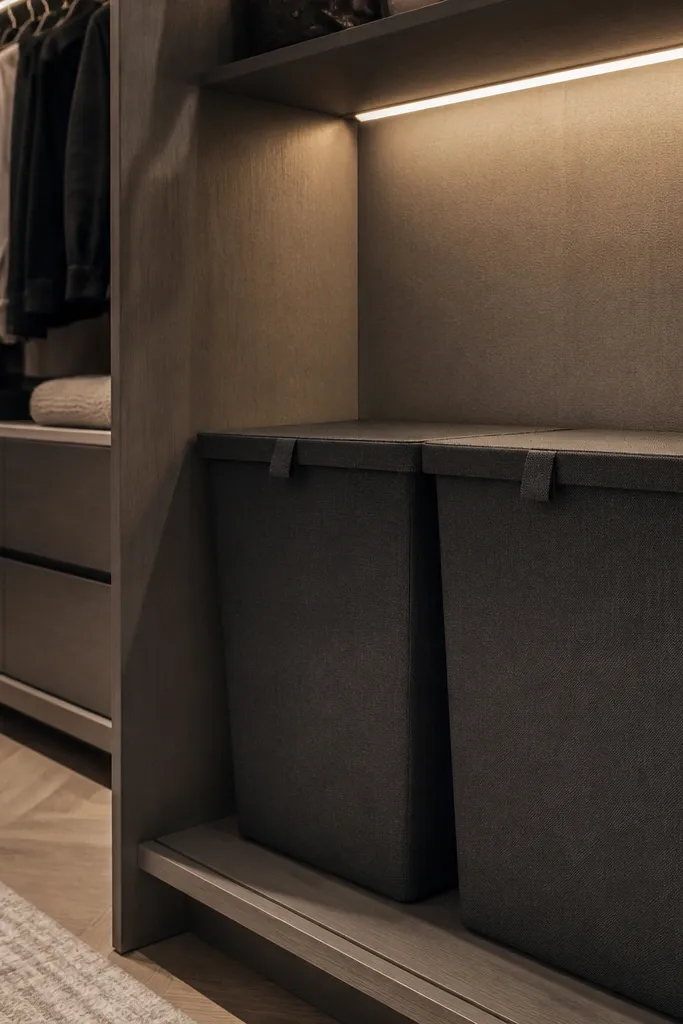
Laundry overflow is the silent closet killer. A hamper station that matches the closet palette makes that corner look intentional instead of chaotic. Choose hampers with lids and consistent color so the top line stays clean. The luxe look is in the uniformity: same bin size, same lid style, and a tidy placement that keeps the closet floor clear.
Measure the closet corner where you want the station and pick hampers that fit with at least 2 inches of clearance from doors. Position them side-by-side or stacked with a single tray shelf above if you need storage for detergent. Add a small label strip on the front for “Dark” and “Light” or “Wash” and “Dry Clean.” Keep hamper liners removable so you can pull and wash without moving the whole setup.
Choose hampers with smooth lids that wipe clean — textured lids trap lint.
Don’t put hampers in random spots behind furniture. Put them where you can keep the floor line clean.
22. Under-Rod Shelf for Flat Lay Layers
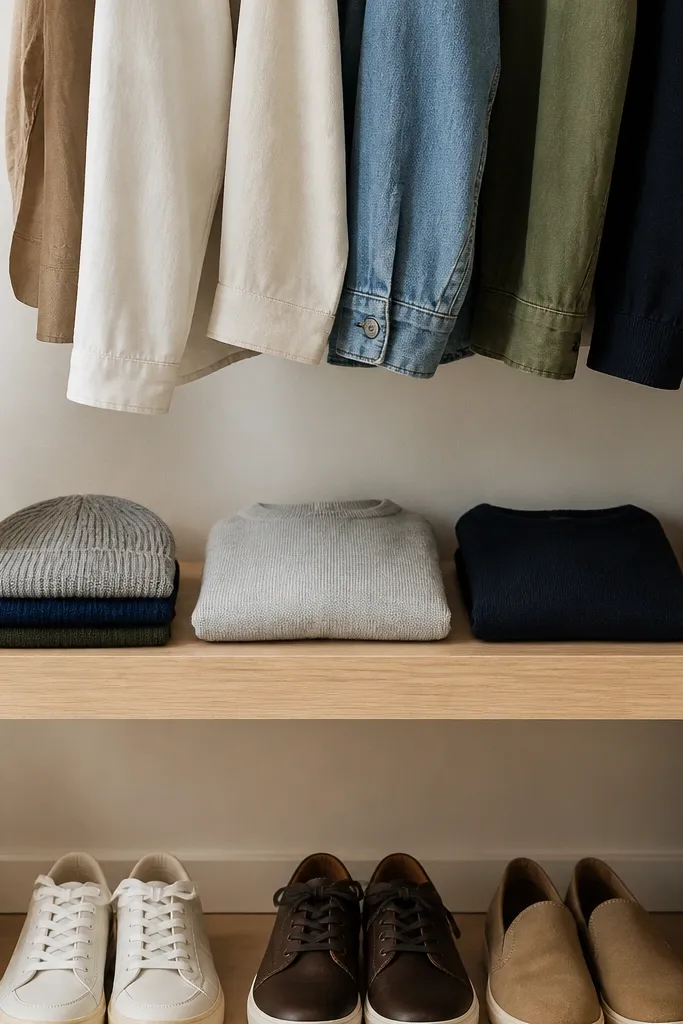
This is a storage hack that looks built-in because it uses space under the hanging area. Flat-lay folded items like hoodies, sweaters, or beanies stay visible and organized without taking shelf depth elsewhere. The luxe read comes from a slim shelf line that matches the rod height and keeps clutter from spilling out at the bottom. It also improves daily life because you grab layers without opening multiple bins.
Install a slim shelf bracket system under the rod, leaving at least 2 inches clearance so hangers don’t hit the shelf. Use a shelf depth around 10-12 inches so folded items sit flat without overhang. Place a fabric runner or thin non-slip mat on the shelf to keep knits from sliding. Fold items into a consistent size and stack in a single row so the shelf face stays tidy.
Use a light-colored mat if you want the shelf to read clean in photos.
Don’t cram too many stacks — the shelf should look like a neat row, not a tower.
23. Mirrored Accent Panel for Closet Depth and Clean Lines
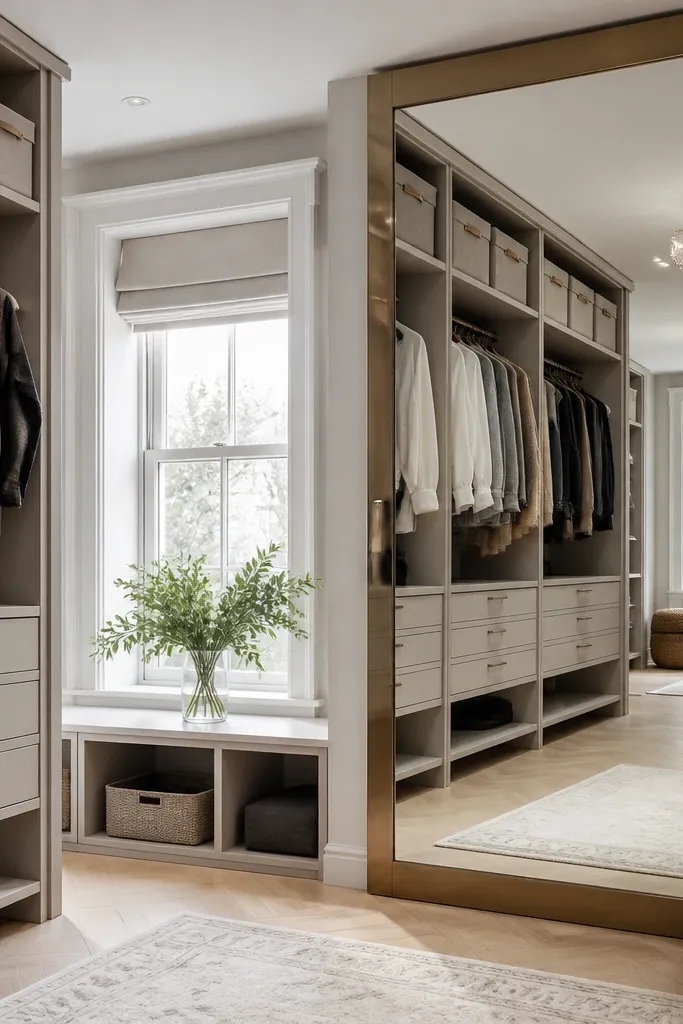
A mirrored accent panel makes a walk-in feel bigger and brighter, which automatically makes everything look more luxe. The real win is that it doubles the visible organization: if your bins and hangers are aligned, the mirror turns that alignment into a feature. Keep the mirror simple and framed in a metal tone that matches your rods. This is a visual upgrade, not a storage change, but it makes your organization look better every day.
Editor's noteUse a thin black or brushed brass frame if your closet has matte black hardware.
Choose a wall mirror sized to fit your closet wall without blocking doors or swinging panels. Mount it using mirror-safe clips or proper anchors so it sits flat and level. Clean the surrounding area and align your nearest shelves or hanging section because the mirror will show any mess. Add one accent light source near the mirror to avoid dark corners.
Skip thisDon’t place the mirror where it reflects the floor hampers and piles — it will amplify mess.
24. Washi-Label Color Bands for Easy Closet Put-Back
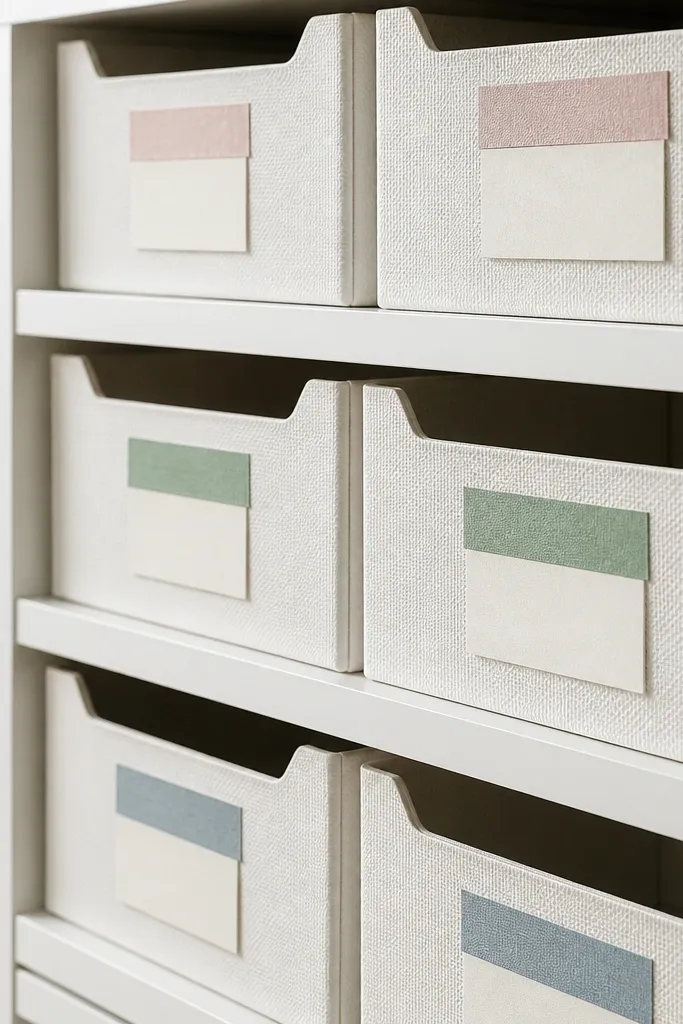
This is a small detail that makes the whole system look curated. Color bands on labels turn storage into a quick visual map: you can see where things go without reading long words. Use washi tape bands because they add softness and match the aesthetic without looking industrial. The luxe feel is the consistency — same tape width, same label placement, same color order across bins.
Editor's noteUse matte label tape or a clear label cover so the washi doesn’t peel from condensation or dust.
Pick 4 label colors max and assign them to categories like Tops, Bottoms, Shoes, and Accessories. Print short labels and apply a washi tape band above or below the text, using the same side for every bin. Stick labels to the same corner on each container so the closet face stays uniform. Keep the tape colors muted (sage, taupe, charcoal) so it doesn’t look childish.
Skip thisDon’t add too many label colors — the band system stops reading as clean.
25. Cloth Garment Bags for Wedding-Ready Pieces on a Separate Rod
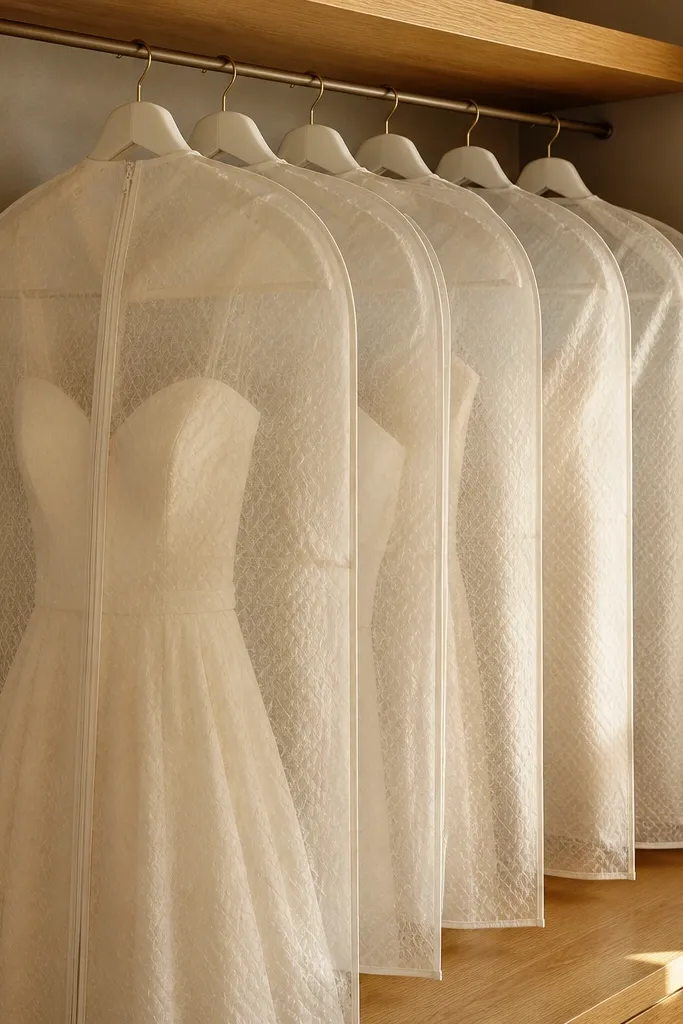
A dedicated rod for “special pieces” keeps your closet from looking crowded and stressed. Cloth garment bags look softer than plastic covers and they protect fabrics while still looking clean and intentional. The luxe look comes from the uniform bag fronts and the fact that they hang at the same spacing as your regular clothes. If your walk-in has a corner that feels cluttered with dust covers, this fixes it.
Editor's noteChoose breathable garment bags with a smooth face so the closet doesn’t look wrinkled.
Install a separate rod section or a second rail at the same height as your hanging system so the bags align. Use matching wooden or metal hangers inside the bags so the shape stays neat. Hang only items you don’t rotate weekly so the rod doesn’t become a storage dump. Add a small label on each bag front for garment type and season.
Skip thisDon’t hang heavy coats inside garment bags — they can create creases and bulk.



