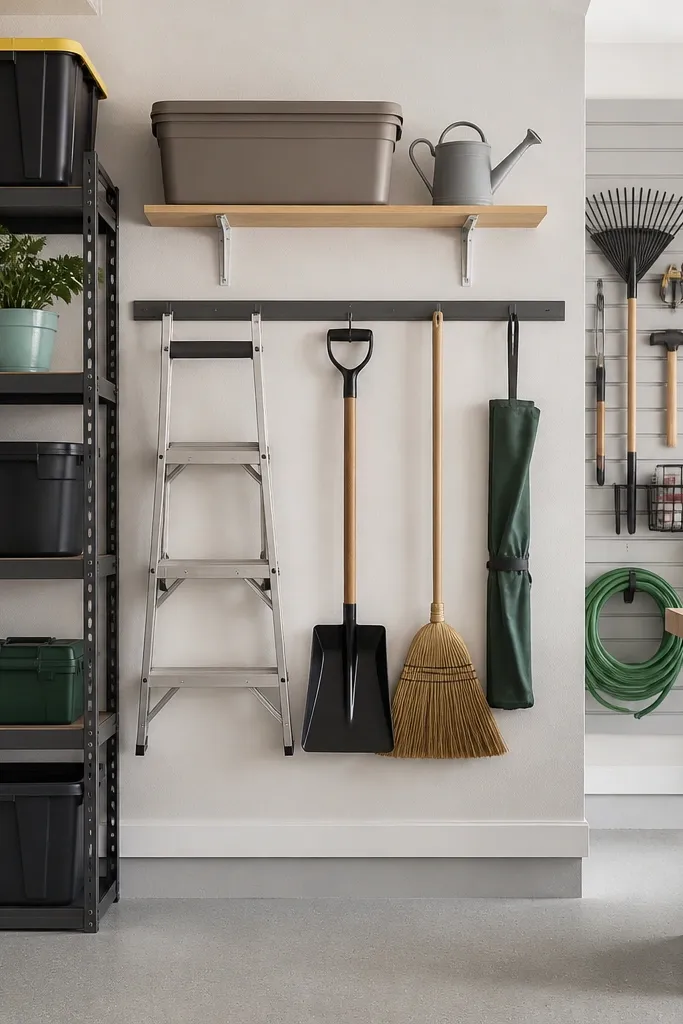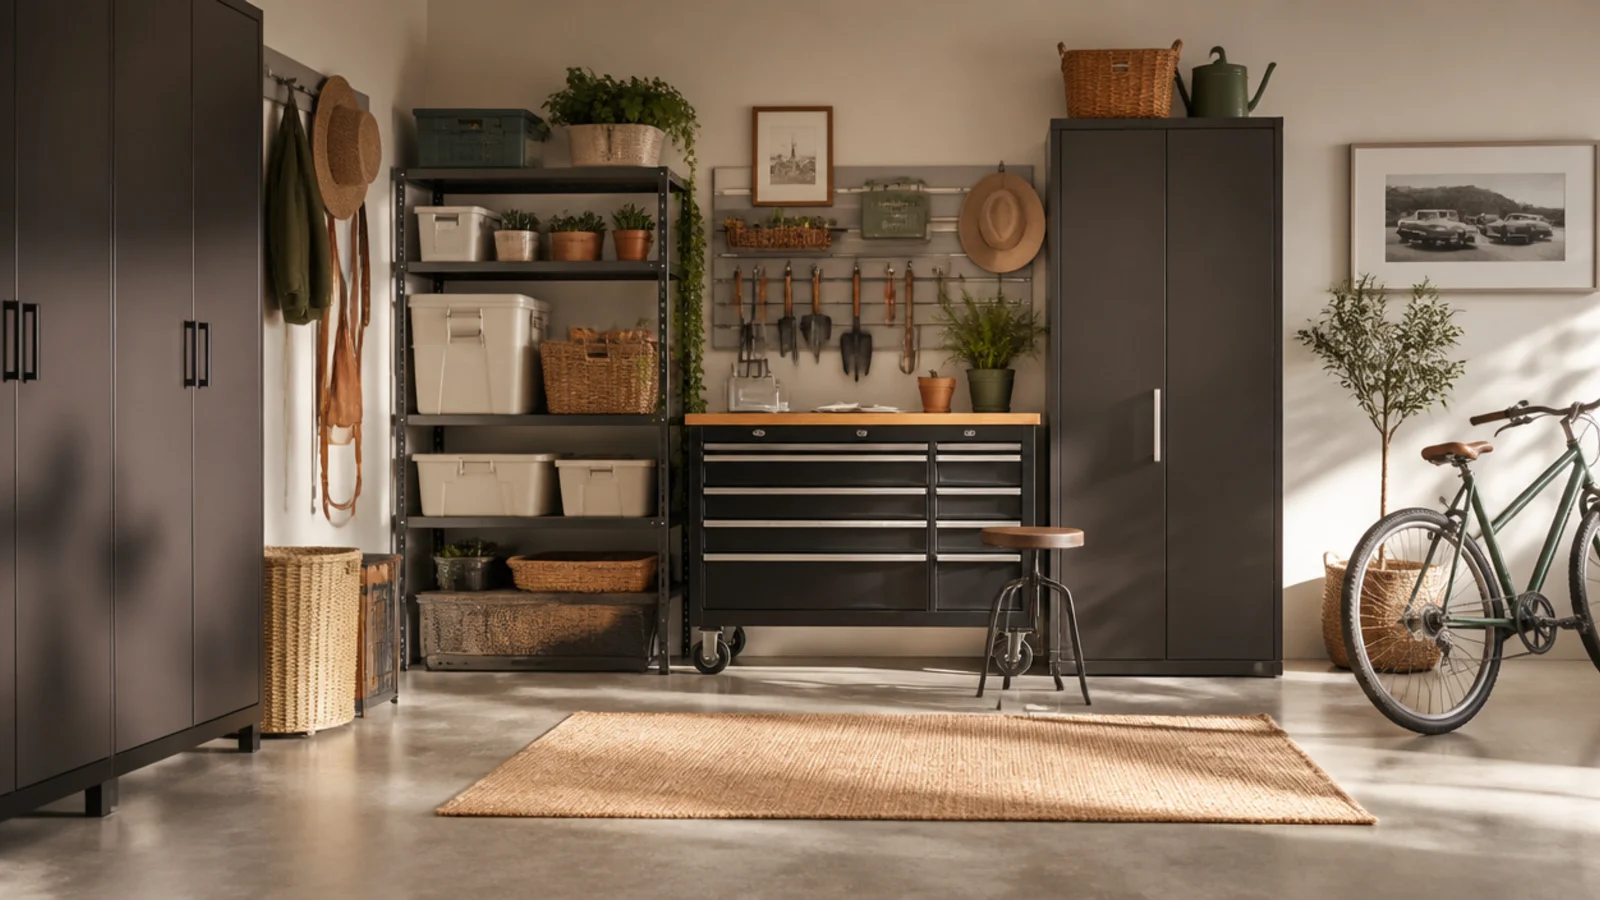
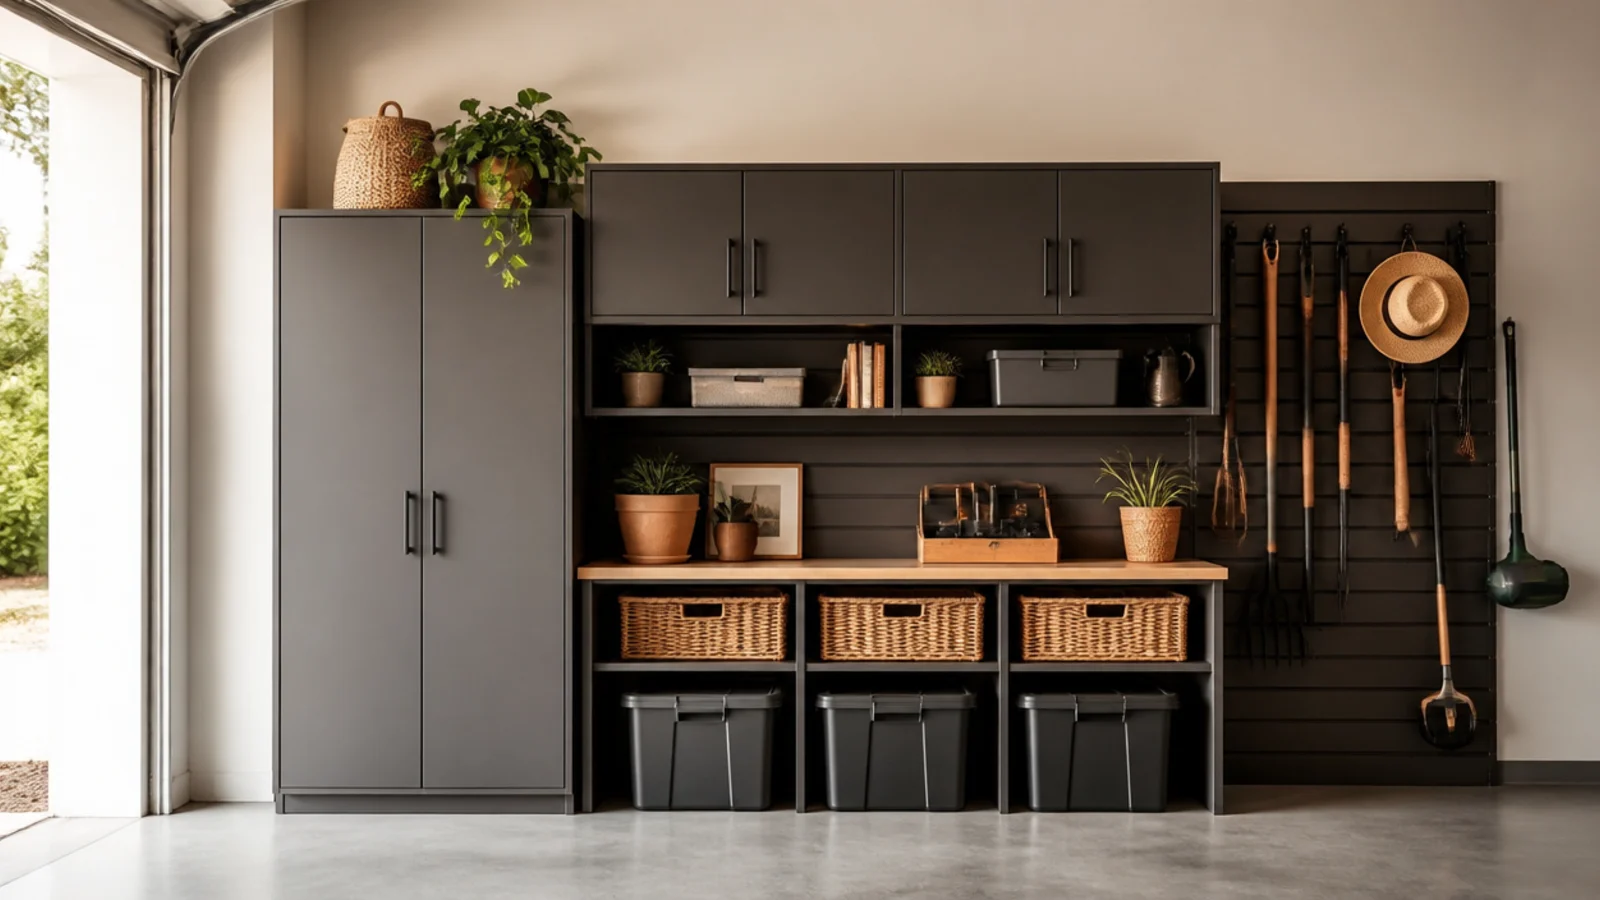
1. Floor-to-Ceiling Wall Shelving
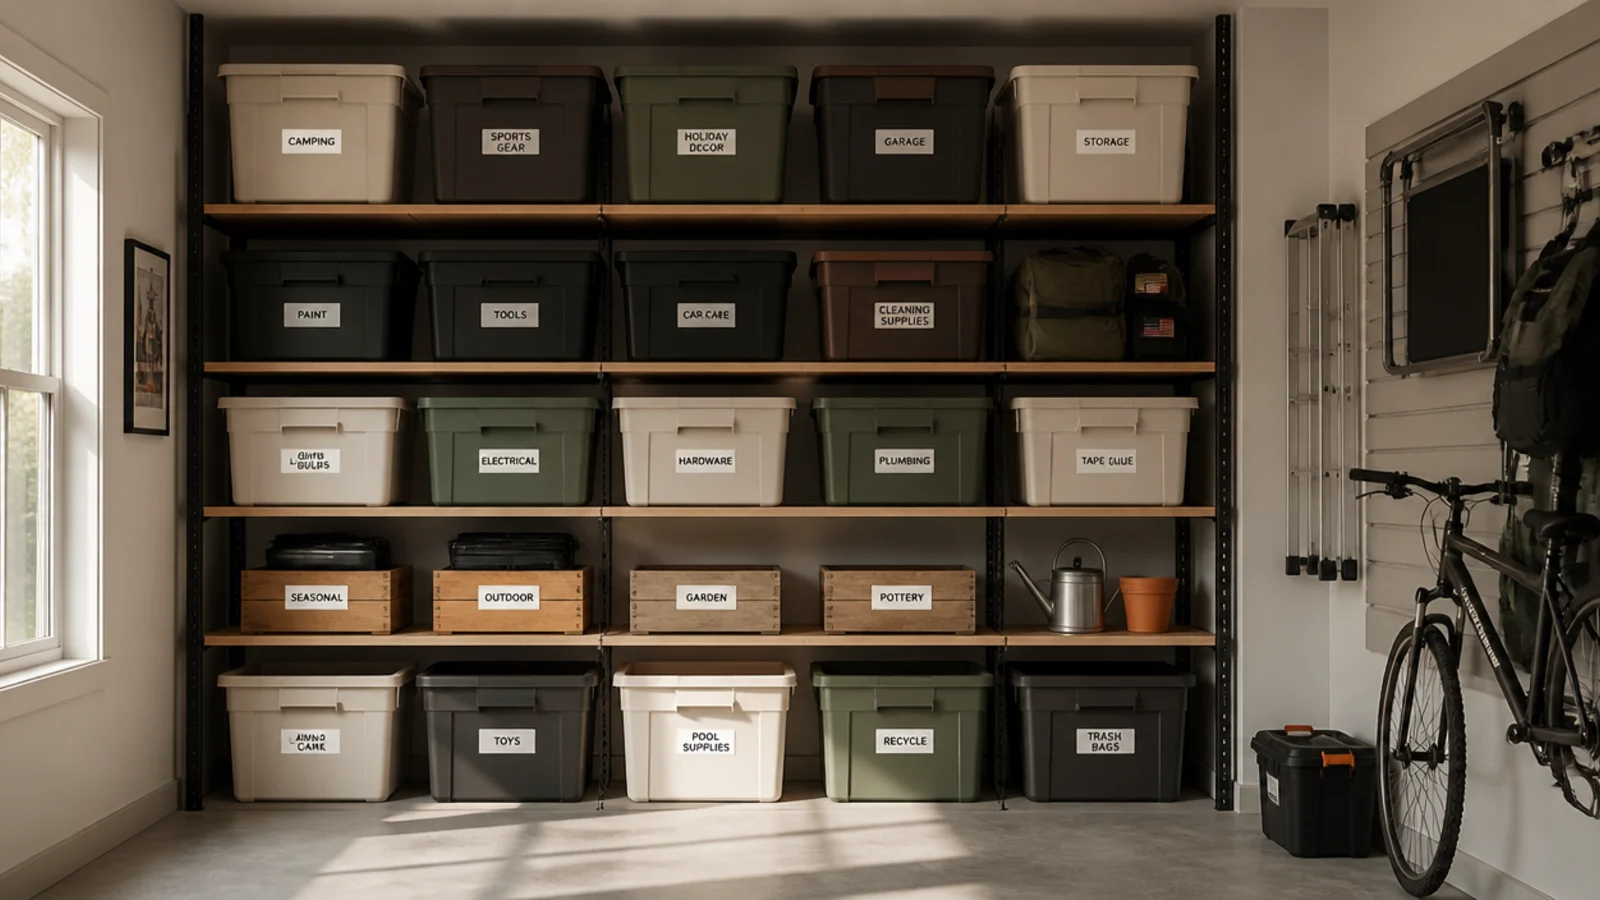
Tall shelving that runs floor to ceiling is the single best move in a small garage because it multiplies storage without taking more floor. One narrow footprint holds five or six tiers. It’s the easiest first step for anyone whose garage floor is buried.
Choose or build shelving as tall as your ceiling allows and only as deep as you need — shallow shelves keep the floor clear. Set the bottom shelf a few inches up to clear water and sweep under it. Load daily items in the reachable middle, heavy items low, and light seasonal bins up top. Anchor the unit to a wall stud with an L-bracket so it can’t tip.
Editor's noteKeep the shelves shallow — deep shelves eat floor space and bury items at the back where you never see them.
Skip thisDon’t leave a tall unit unanchored in a small garage; brushing past it or pulling a high bin can tip it over.
2. Vertical Wall Bike Hooks
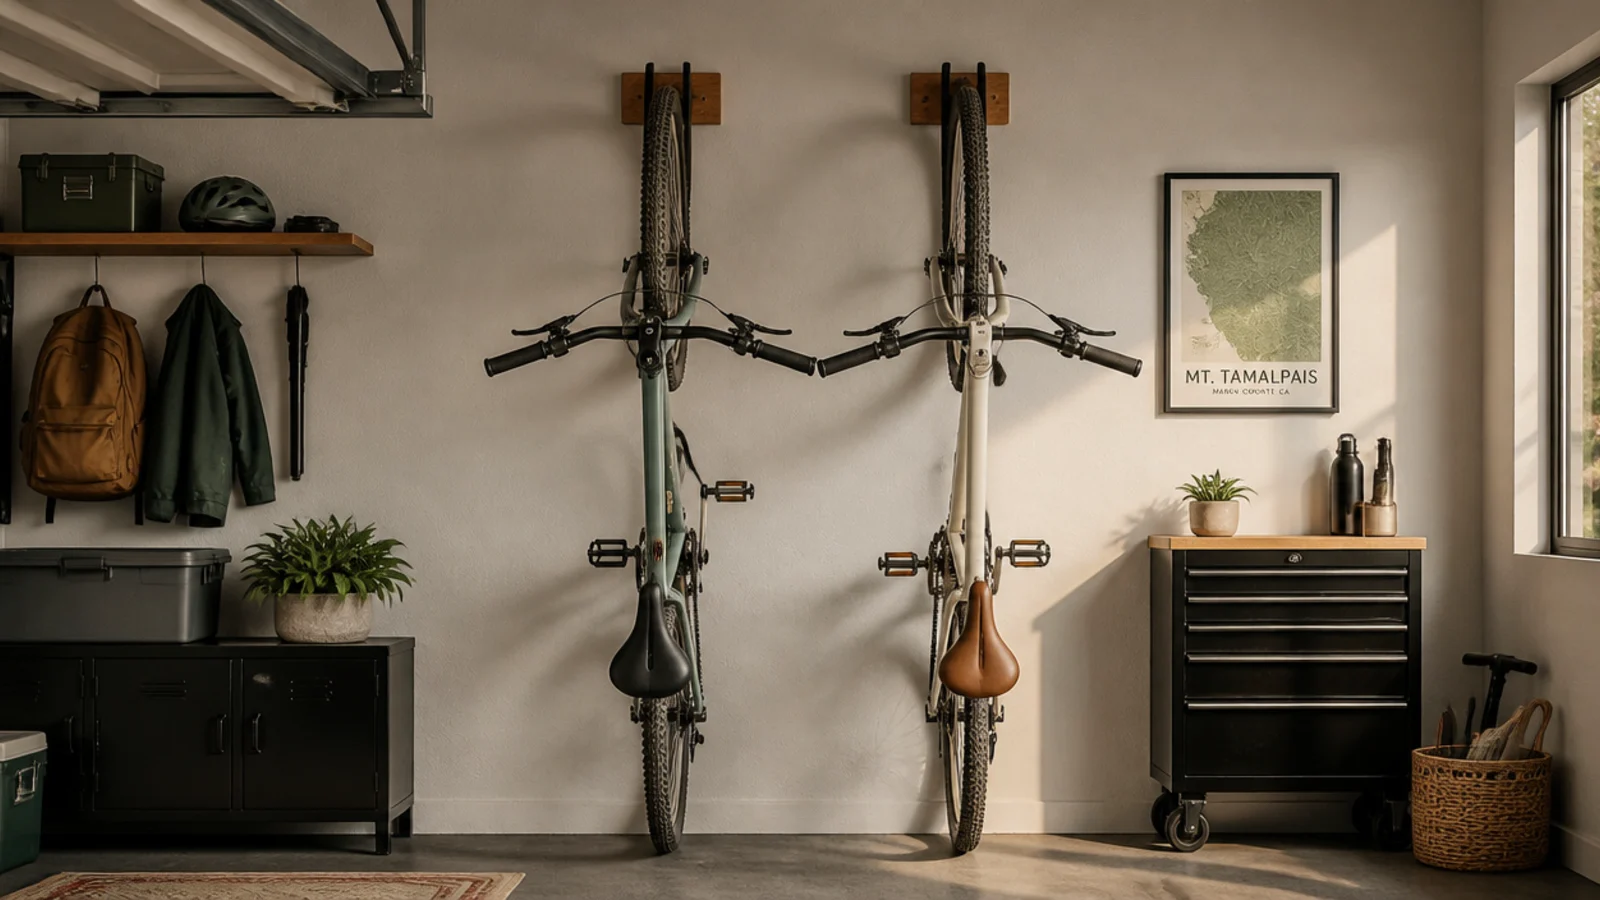
Vertical bike hooks hang bikes by one wheel flat against the wall in the smallest possible footprint. Bikes go from floor-hogs to a slim wall feature. Essential in any small garage with more than one bike.
Screw heavy-duty vertical bike hooks into wall studs at a height where the bottom wheel clears the floor. Hang each bike by its front wheel so it sits flat and narrow against the wall. Stagger multiple bikes at slightly different heights so handlebars and pedals don’t collide. Add a wall bumper or hook for helmets below each bike.
Editor's noteStagger the mounting heights of side-by-side bikes so their handlebars nest instead of banging into each other.
Skip thisDon’t hang bikes on drywall hooks; a bike’s weight needs each hook screwed into a stud to stay put.
3. Fold-Down Wall Workbench
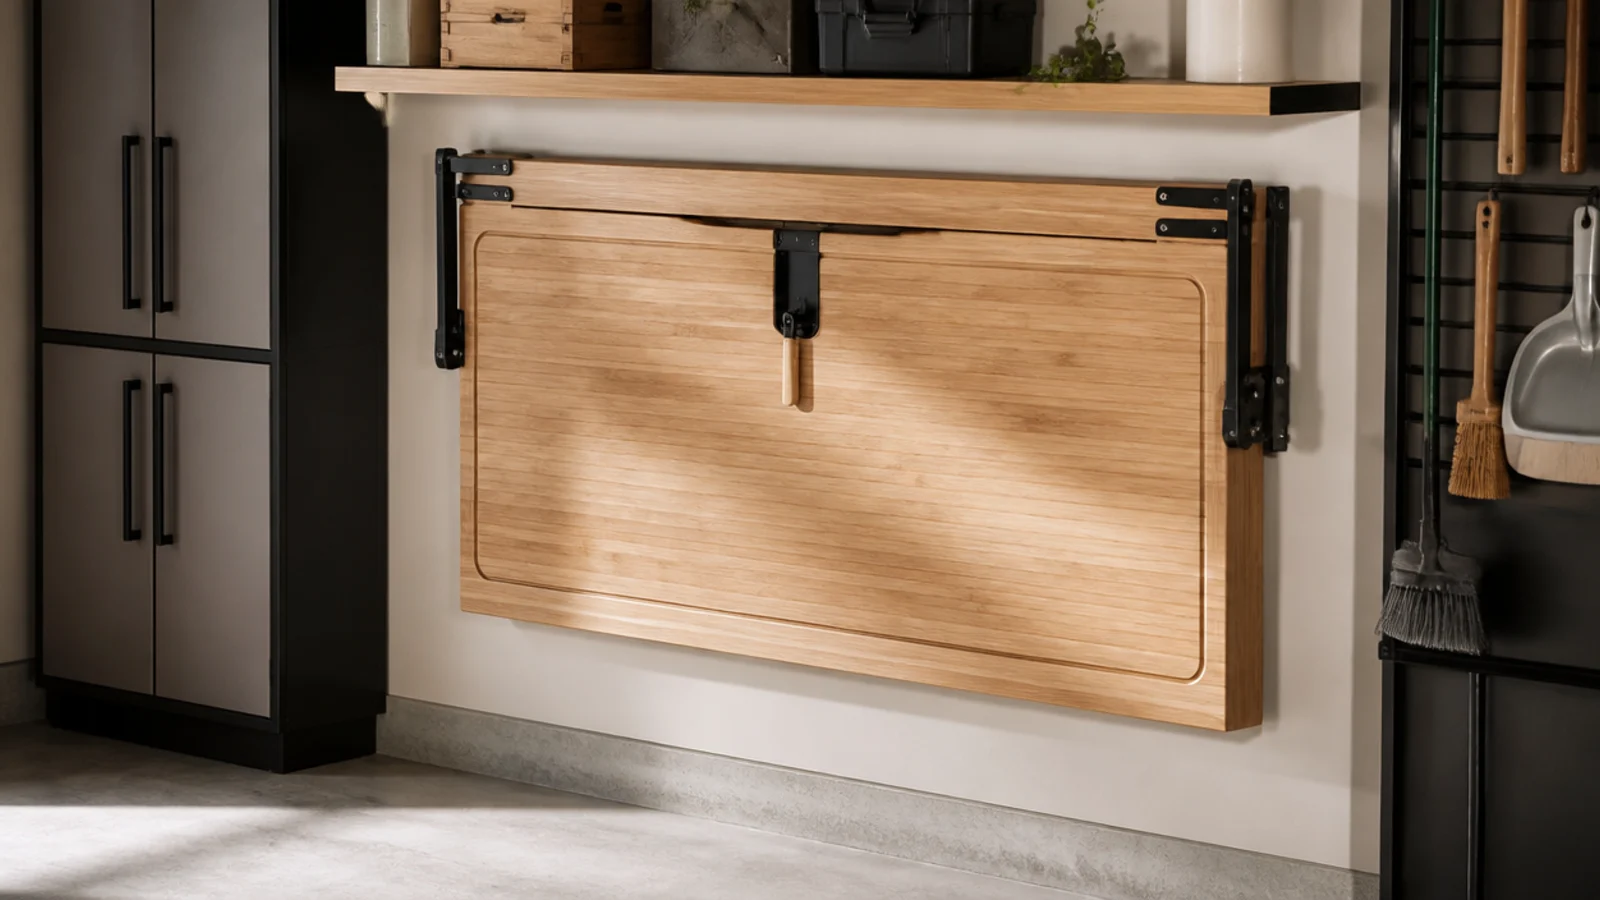
A fold-down bench gives you a full work surface that collapses flat against the wall, reclaiming the floor when you’re done. It’s the space-saving bench for tight garages. Ideal where a permanent bench would block the car.
Mount a hinged bench top and folding support brackets to a ledger board screwed into the wall studs at counter height. The top swings down and the brackets lock to hold it; fold it flat when finished. Keep a small pegboard or tool rail above for bench tools. Confirm the brackets are rated for your working load before relying on them.
Editor's noteStore your go-to bench tools on the wall above the folded top so you can set up in seconds when it drops down.
Skip thisDon’t mount the ledger into drywall alone; a working bench takes real downward force and must hit studs.
4. Overhead Rack Above the Door
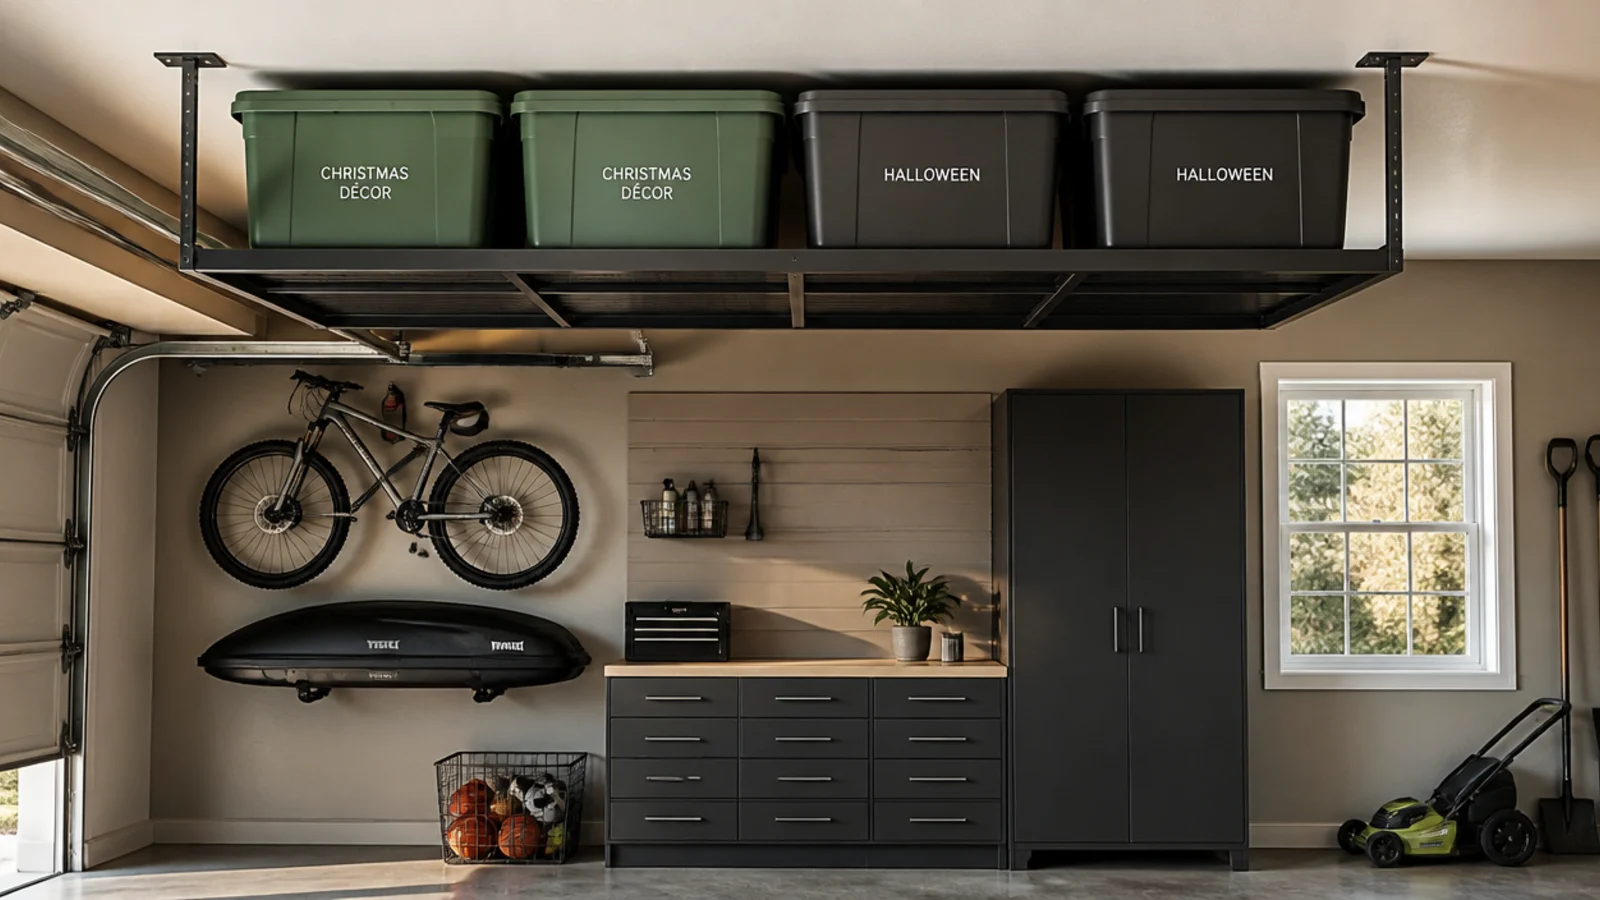
The ceiling above the garage door track is dead space in almost every small garage, and a low-profile rack there stores flat seasonal items. It’s storage you never knew you had. Best for light, thin bins and seasonal gear.
Confirm the space above the open garage door’s path stays clear, then lag a low-profile rack or thin plywood shelf into the ceiling joists there. Keep the drop minimal so it clears the raised door. Load only light, flat totes — wrapping paper, seasonal linens, flattened boxes. Slide bins in from the side and keep the load balanced.
Editor's noteMeasure with the garage door fully open first; the door’s raised track is the clearance you must not block.
Skip thisDon’t hang a deep rack here; anything below the door’s open path stops the door from opening fully.
5. Compact Pegboard Tool Wall
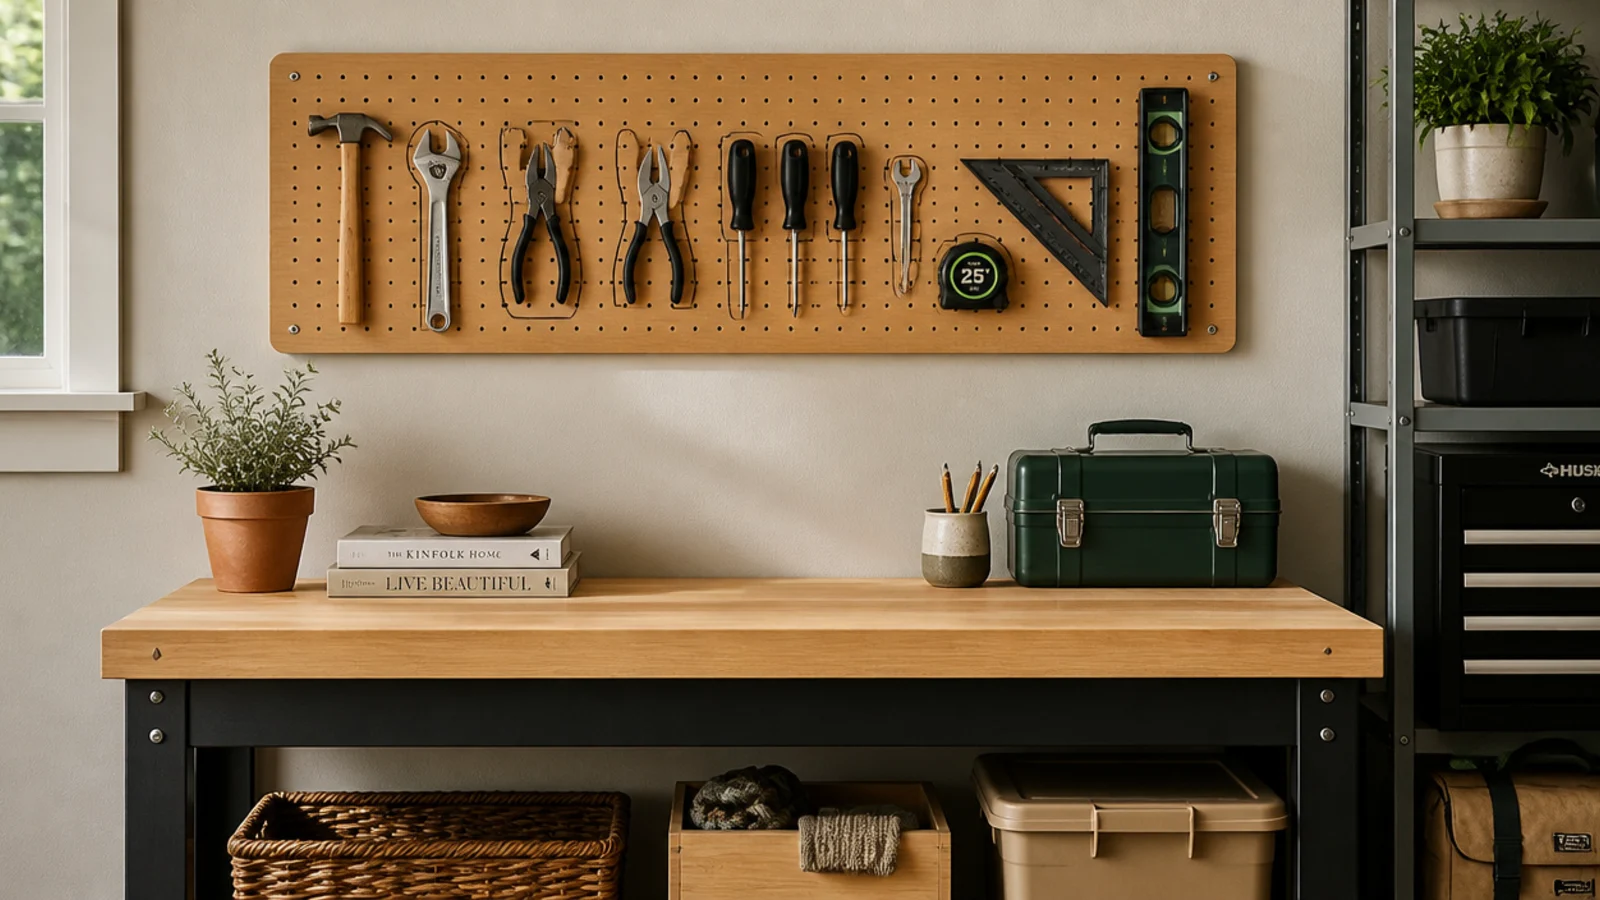
A pegboard panel keeps hand tools on the wall and off the limited counter and floor. Even a small board holds dozens of tools. Perfect for squeezing full tool storage onto one modest wall area.
Screw furring strips to the studs, then mount a tempered pegboard sheet with washers behind the screws so hooks can seat. Snap in assorted hooks and hang tools with heaviest near the studs. Trace outlines so every tool has a home. In a small garage, mount it right above the bench so the vertical space does double duty.
Put the board directly above your work zone so tools hang exactly where you use them and free the bench top.
Don’t screw pegboard flat to the wall; without the furring gap the hooks won’t seat and the board is useless.
6. Slim Rolling Gap Cart
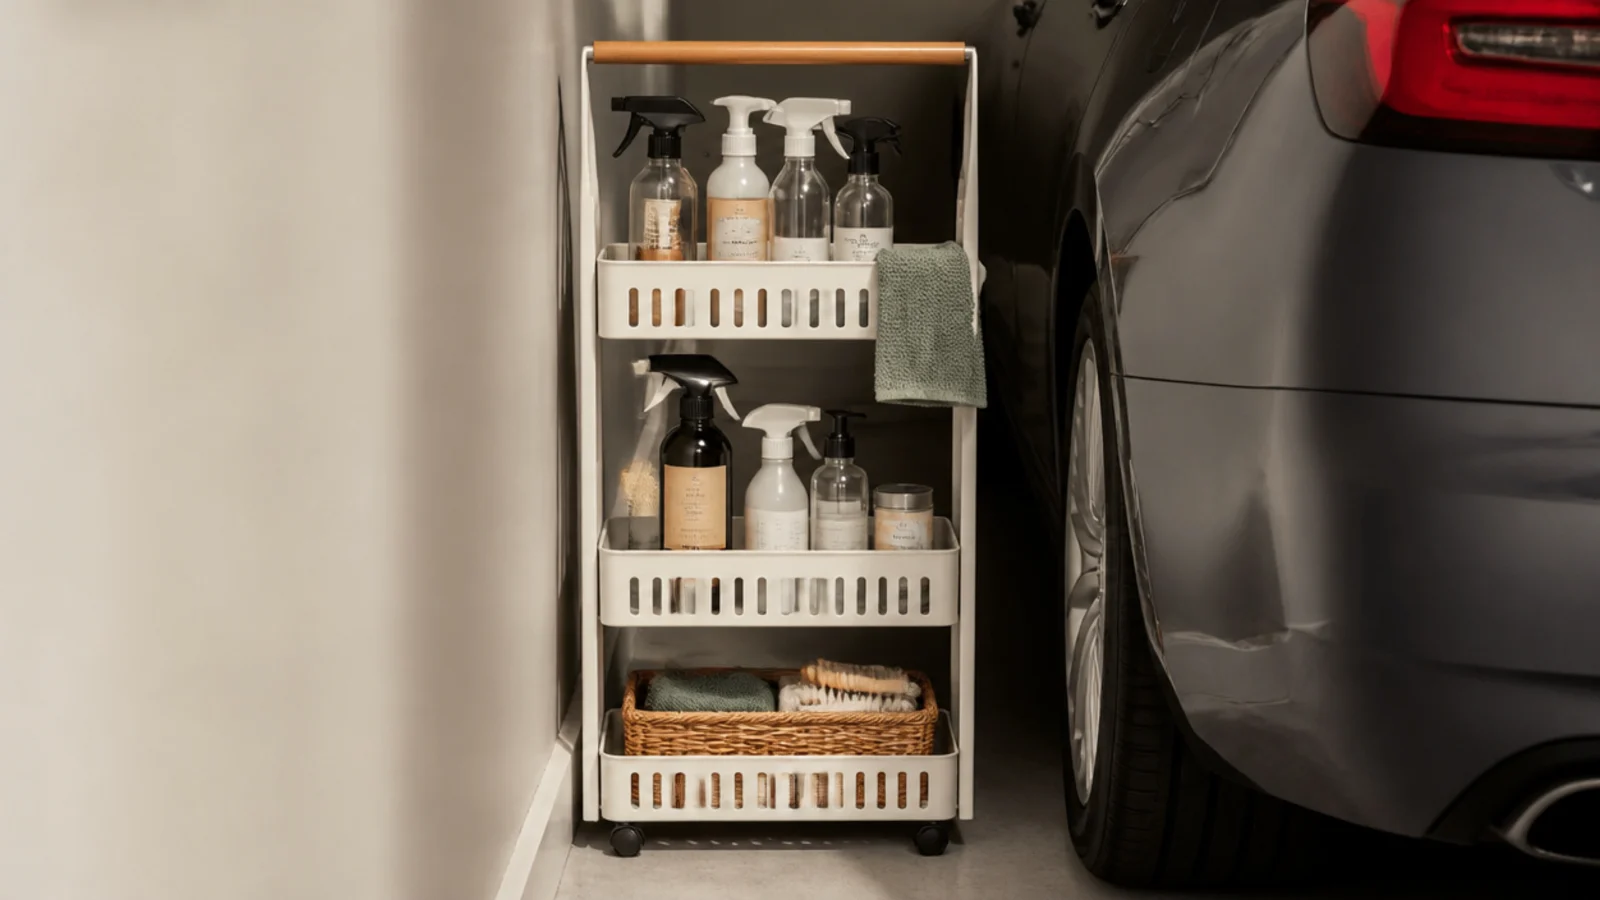
A slim rolling cart fits the narrow gap beside the car that nothing else can use. It rolls out for access and tucks back flush. Ideal for reclaiming those wasted few inches in a single-car garage.
Measure the gap’s width, depth, and height, then buy or build a slim cart on casters to fit with a little clearance. Fit it with shelves sized to spray bottles and slim supplies. Add a handle to the front and lock the casters when parked. Roll it out to reach both sides, then push it back flush against the wall.
Leave a finger of clearance on each side so the cart rolls out smoothly without scraping the car or wall.
Don’t build it taller than it is stable; a very tall, narrow cart tips when pulled fully out and loaded.
7. Corner Shelf Tower
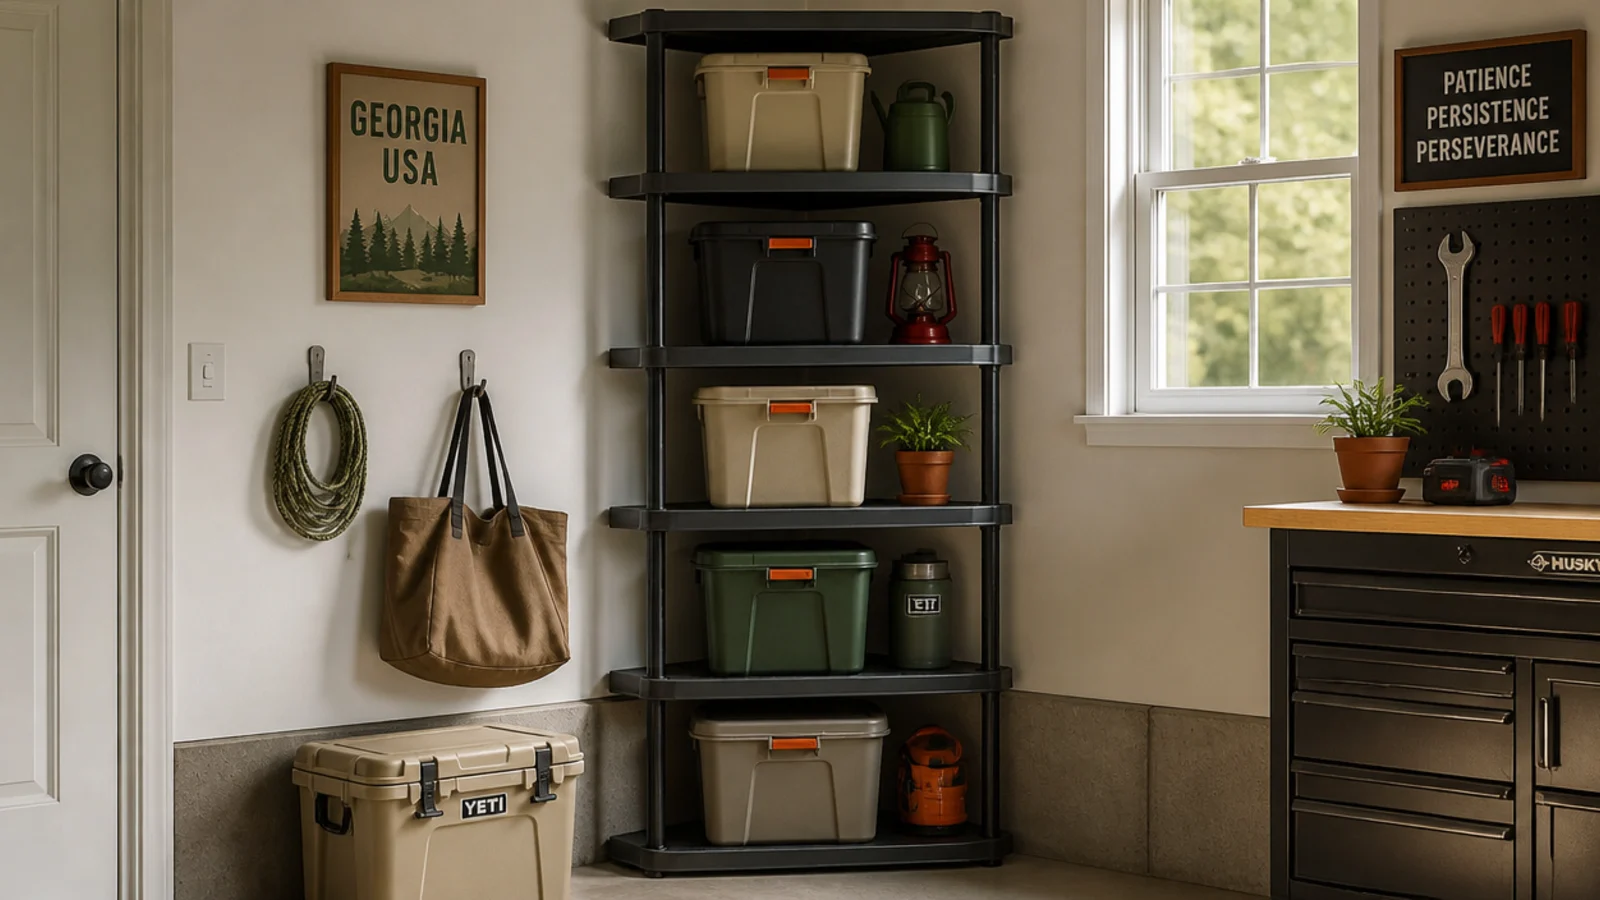
A corner tower claims the awkward corner most small garages waste, adding a full column of storage in almost no floor space. Angled shelves fit where a straight unit can’t. Great for turning a dead corner into real storage.
Fit a corner shelving unit or two shallow units meeting at 90 degrees into the corner, leveling the feet on the concrete. Store occasional-use items, keeping heavy loads low. Use round or angled bins to fill the point instead of leaving dead space. Anchor a tall tower to a stud so it can’t tip.
Editor's noteAdd a lazy-Susan turntable on a corner shelf so back items spin forward instead of getting lost around the bend.
Skip thisDon’t force a square bin into the angled corner; shape the container to the shelf or you waste the space you gained.
8. Over-the-Door Pocket Organizer
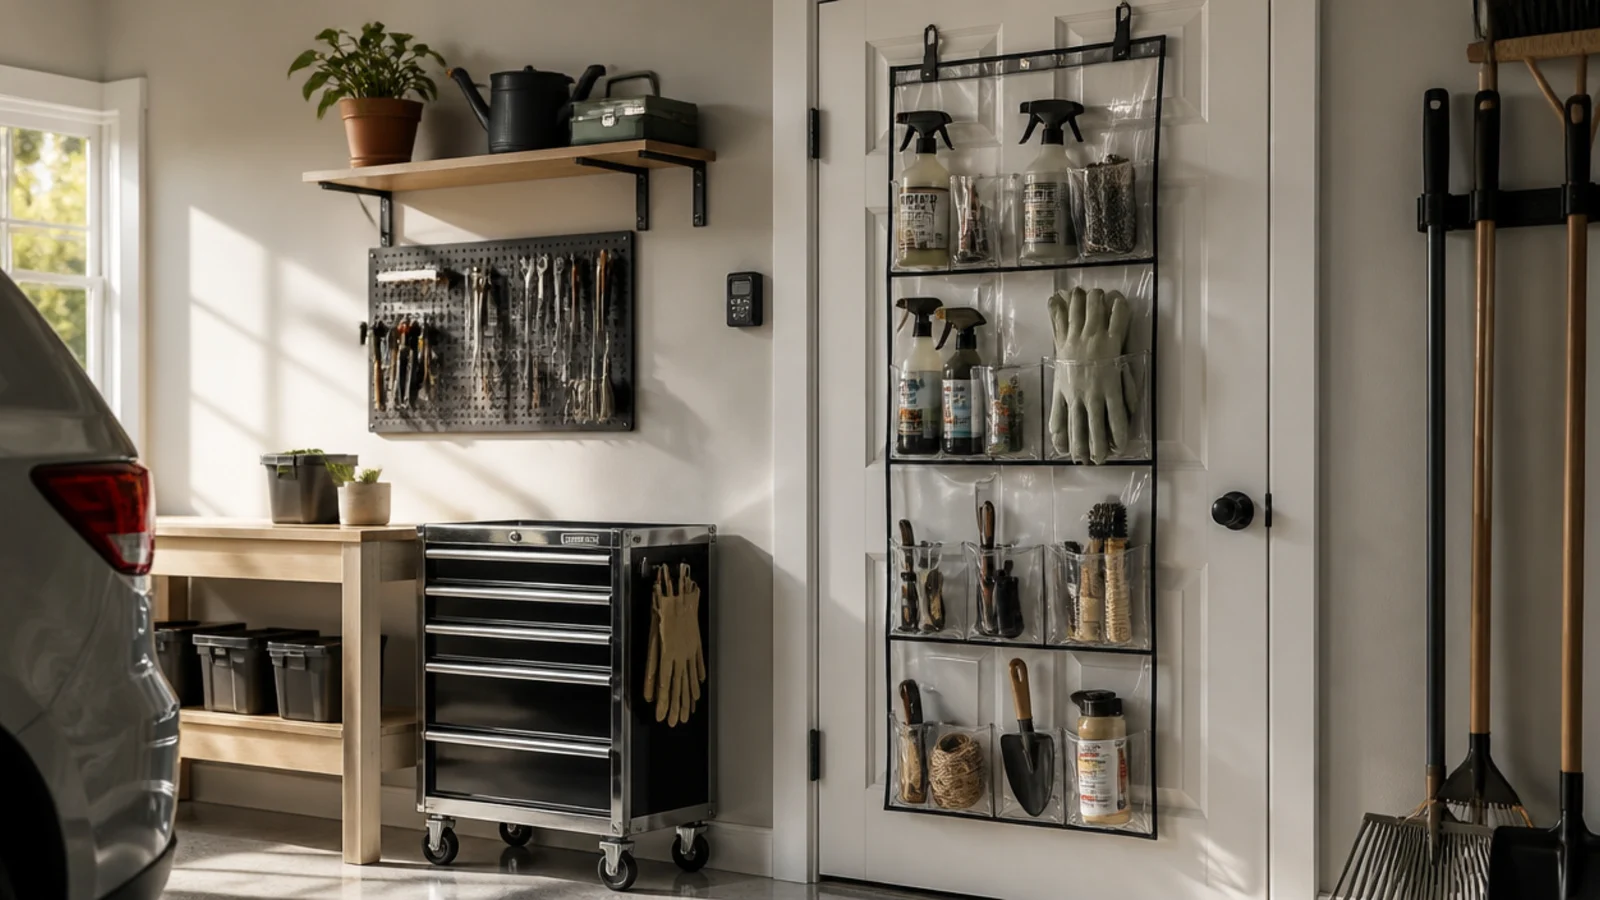
The back of the garage’s side door is free vertical space, and a pocket organizer turns it into storage for small items. Clear pockets keep everything visible. One of the cheapest ways to add storage in a tight garage.
Hang an over-the-door organizer on the side door or screw it to the end of a shelf unit. Fill the clear pockets by category — sprays, gloves, twine, hand tools. Put heavier items in the bottom rows so it hangs stable. Label rows if pockets look alike. Make sure the door still closes with the organizer loaded.
Editor's noteChoose the clear-pocket version so you spot contents instantly instead of patting down every pocket.
Skip thisDon’t overload the top rows with heavy cans; a top-heavy organizer sags and pulls its hooks off the door.
9. Single-Rail Wall Track
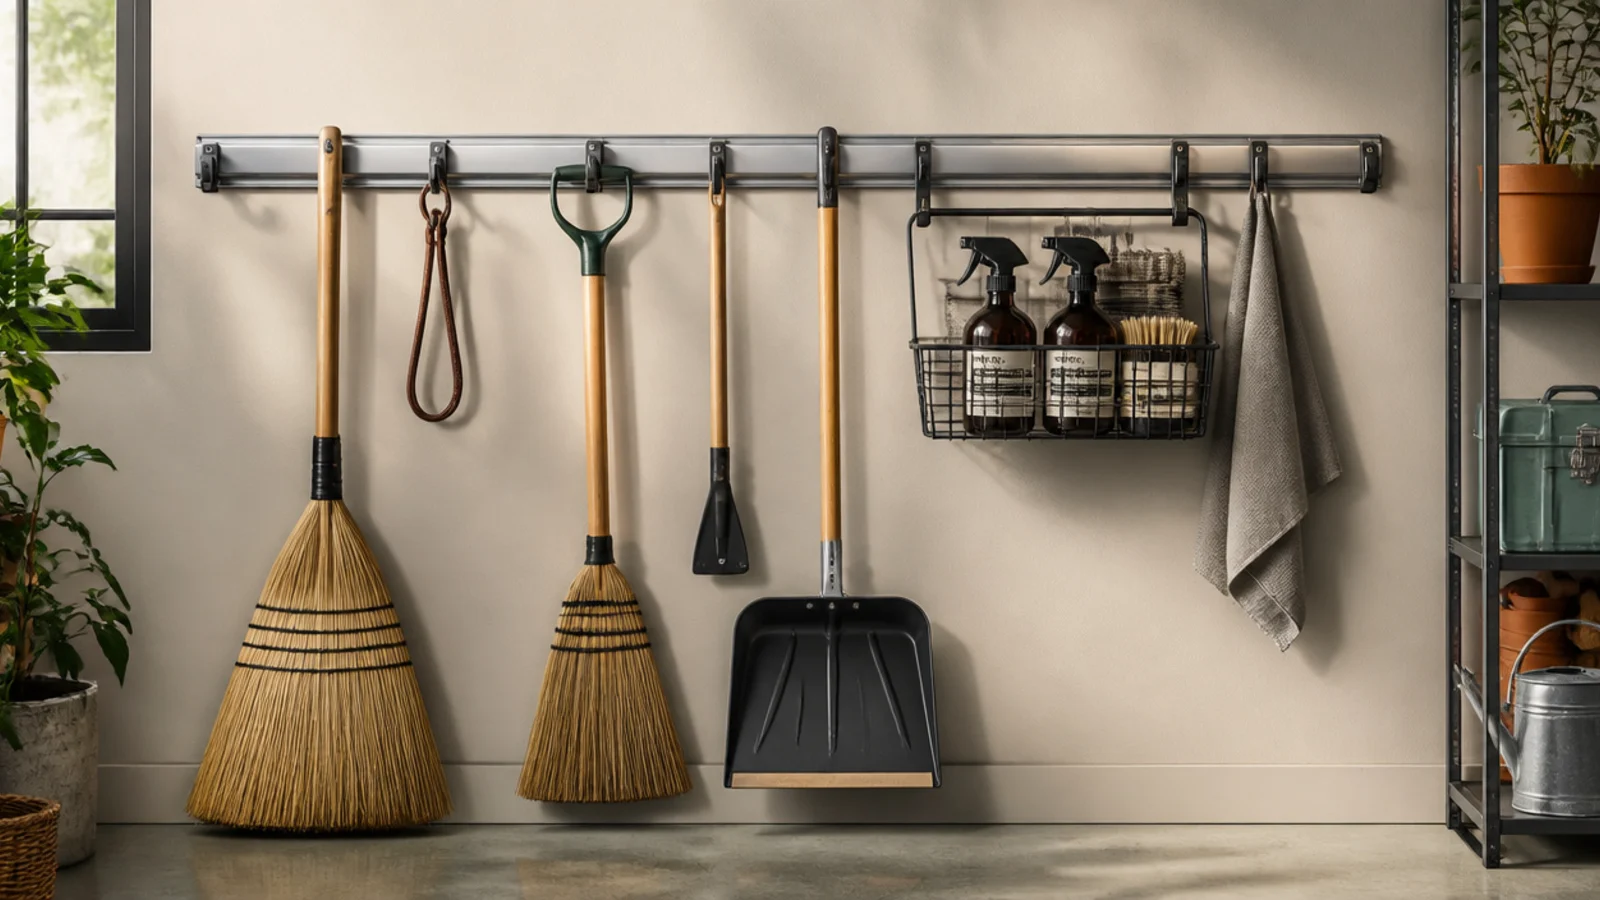
A single steel wall rail hangs a whole row of tools and baskets from one mounted track, using minimal wall for maximum storage. Everything clips on and slides. Ideal when you have only one usable strip of wall.
Screw the steel rail into every stud along your available wall at shoulder height. Clip on hooks for long-handled tools, a basket or two for bottles and gloves, and a small bracket shelf if it fits. The rail carries the load, so accessories just hook on and slide to rearrange. Keep the heaviest items near the mounting screws.
Editor's noteOne rail plus a mix of hooks and baskets replaces a whole cabinet’s worth of storage on a sliver of wall.
Skip thisDon’t anchor the rail into only one or two studs; a partially fixed rail sags under a full row of tools.
10. Magnetic Tool Strip
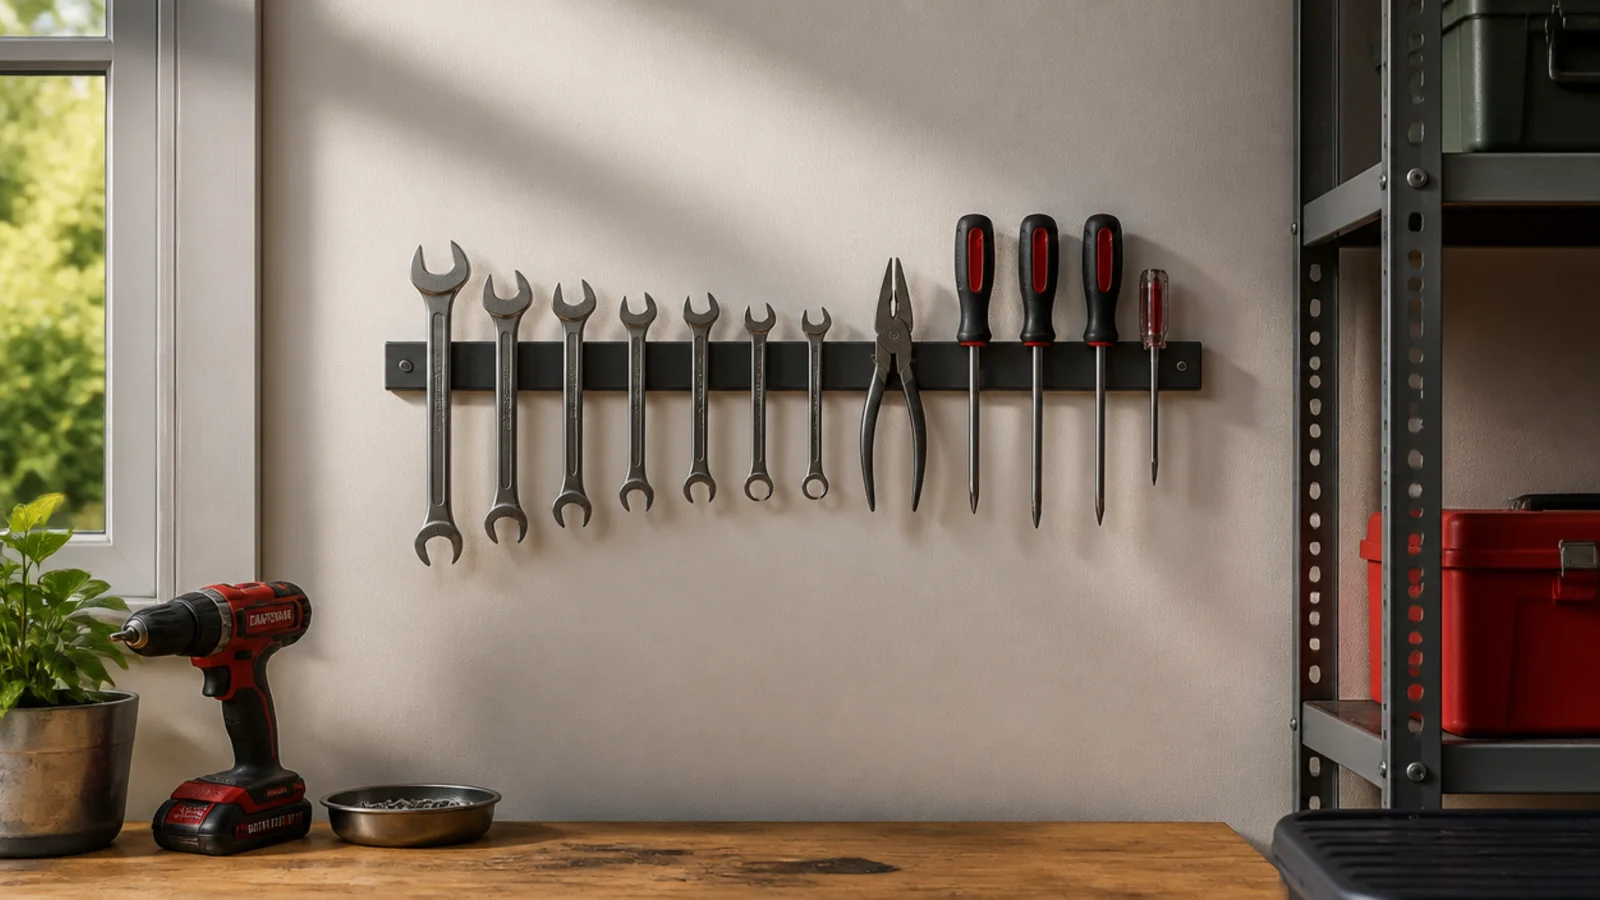
A magnetic strip holds metal hand tools flat on the wall in a strip of space too small for anything else. Tools grab and return with one hand. Great for squeezing tool storage into a sliver above a bench.
Screw a magnetic knife bar or tool strip into a wall stud at reach height above the bench. Stick your most-used metal tools to it, heaviest near the screws where the hold is strongest. Wipe the bar occasionally so grit doesn’t weaken the grip. Keep power tools off it and test each tool’s hold before trusting it.
Mount it in the narrow strip right above the bench where a shelf wouldn’t fit but tools are exactly where you need them.
Don’t trust a light strip with heavy tools; test each one, and never hang cordless power tools on it.
11. Stackable Nesting Bins
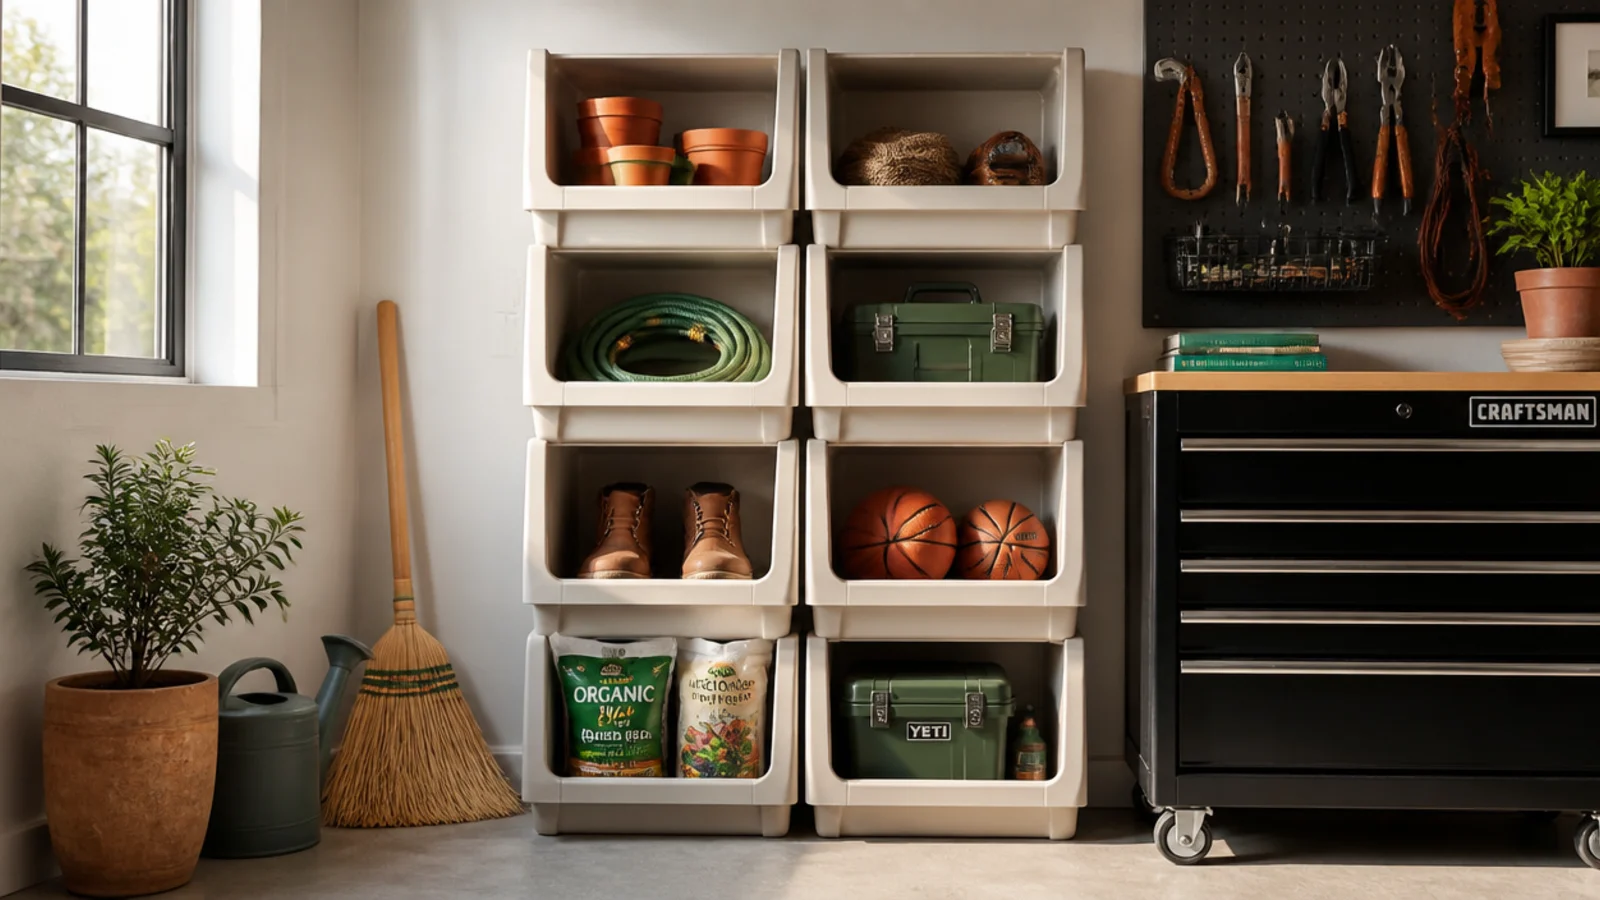
Stackable bins with open fronts build a tall column of storage in a small footprint and nest inside each other when empty. They stack up, not out. Perfect for small parts and supplies in a tight corner.
Buy interlocking stackable bins that lock together vertically. Sort supplies by category, one per bin, and stack them into a column against the wall. Keep the open fronts facing out for grab-in access. Label each bin’s front. Nest the empties inside each other when not in use to save space, and strap a tall stack to the wall.
Editor's noteStack them against a wall and strap the top to a hook so a tall column can’t topple when you pull a low bin.
Skip thisDon’t stack them too high to reach safely; a tower you need a ladder for daily is a fall waiting to happen.
12. Retractable Hose and Cord Reels
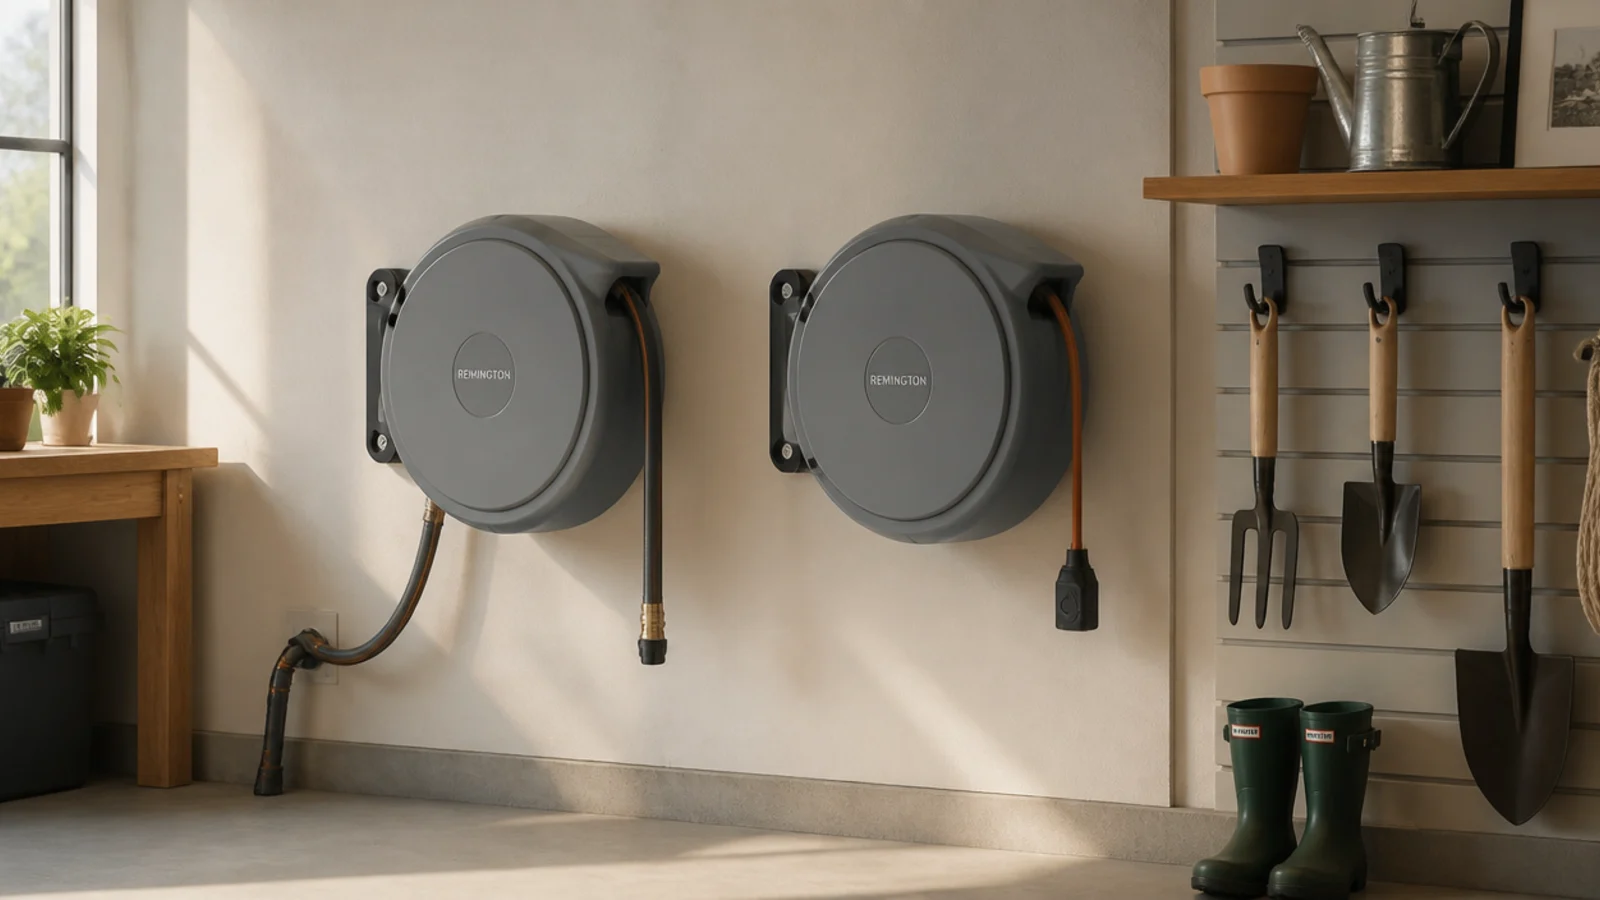
Retractable reels wind the hose and cords fully into a compact housing on the wall, ending the sprawling coils that eat floor space. A tug pulls them out; they snap back in. Ideal for a small garage where a loose hose is a tripping hazard.
Mount retractable hose and cord reels into wall studs near the tap and an outlet at a comfortable height. Feed the hose or cord onto the reel per the instructions and connect the lead. Pull out only what you need and let it retract fully after use. Mount them out of the car’s path so they never get bumped.
Mount reels just inside the door nearest the tap and outlet so pulling out a hose or cord is a two-second job.
Don’t mount a loaded reel on drywall anchors; a full hose reel is heavy and must anchor into studs.
13. Fold-Flat Sawhorse Table
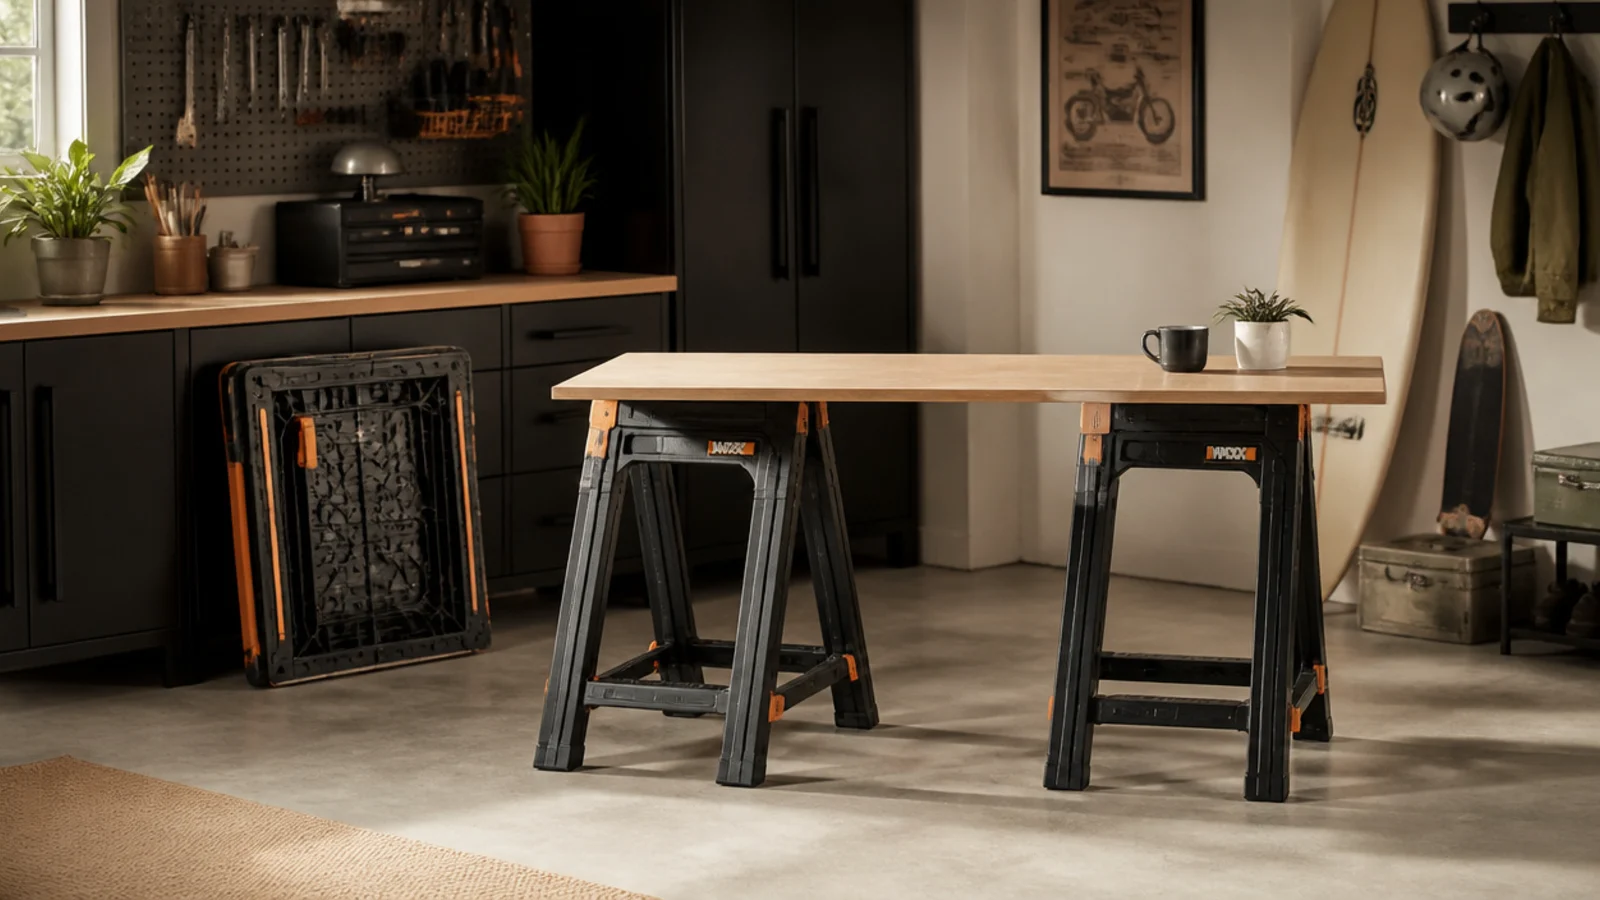
Folding sawhorses plus a plywood top make an instant work table that collapses flat and hangs on the wall between uses. You get a big surface only when you need it. Perfect for a garage with no room for a permanent bench.
Buy folding sawhorses and cut a plywood sheet to a manageable top size. Set the horses up, lay the top across, and clamp or screw it down for a stable table. When done, remove the top, fold the horses flat, and hang all three on wall hooks. Store the plywood top against the wall or on a rail. Level the horses on the concrete before loading.
Editor's noteHang the folded horses and the plywood top on wall hooks so your whole work table stores flat against the wall.
Skip thisDon’t work on an unclamped top; a loose plywood sheet slides off the horses the moment you lean or cut on it.
14. Drop-Leaf Wall Shelf
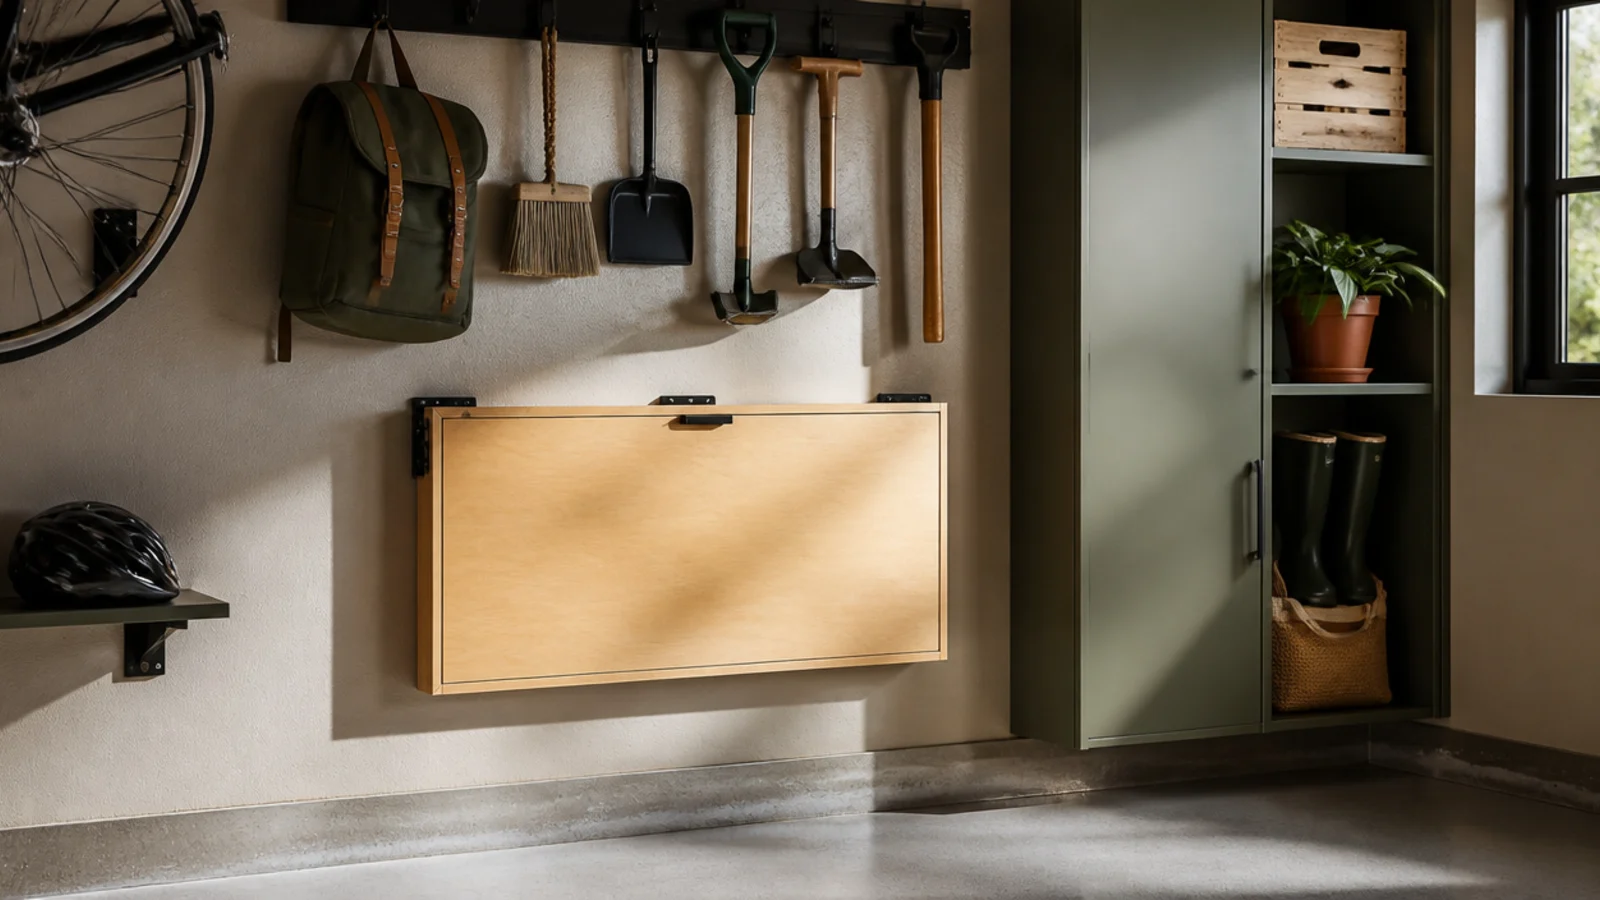
A hinged drop-leaf shelf gives you a small ledge for potting, repairs, or setting things down, then folds flat to the wall. It’s a mini work surface for a garage too tight for a bench. Great for quick tasks in a small space.
Mount a hinged shelf with a folding bracket to a ledger board screwed into the studs. Drop it down and lock the bracket for a stable ledge; fold it up flat when done. Keep it near the door or the potting zone. Confirm the bracket holds your intended load, and keep it modest since a drop-leaf carries less than a full bench.
Mount it near the side door as a landing ledge for setting down bags and packages on the way in.
Don’t overload a drop-leaf shelf like a workbench; its single bracket suits light tasks, not heavy pounding.
15. Ceiling-Hung Wire Baskets
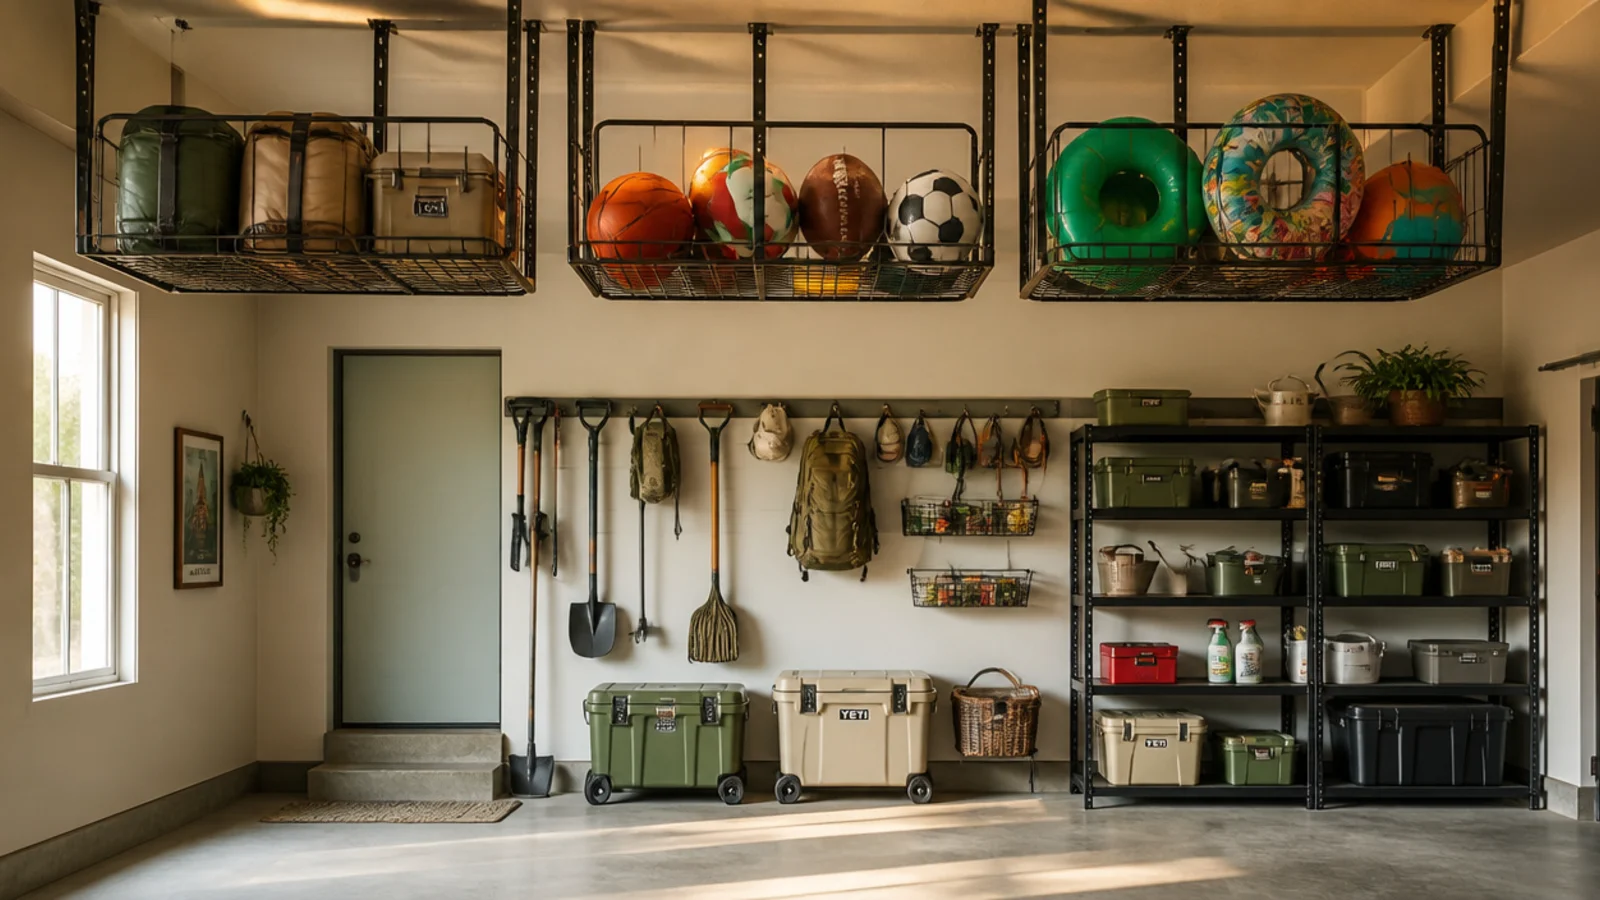
Wire baskets hung from the ceiling store light, bulky items in the air where nothing else lives. They keep balls and floats off the floor and shelves. Ideal for lightweight gear in a garage short on floor and wall.
Screw ceiling hooks or a small rack into the joists and hang wire baskets or a cargo net from them. Fill with light, bulky items — balls, pool floats, camping foam. Keep the baskets above head height but reachable with a step stool, and clear of the car and door path. Keep contents light since these hang from hooks.
Editor's noteReserve ceiling baskets for the lightest bulky stuff — foam, floats, empty bags — that eats space but weighs nothing.
Skip thisDon’t hang heavy items in ceiling baskets; keep loads light and always clear of where the car and door move.
16. Hanging Bin Rail
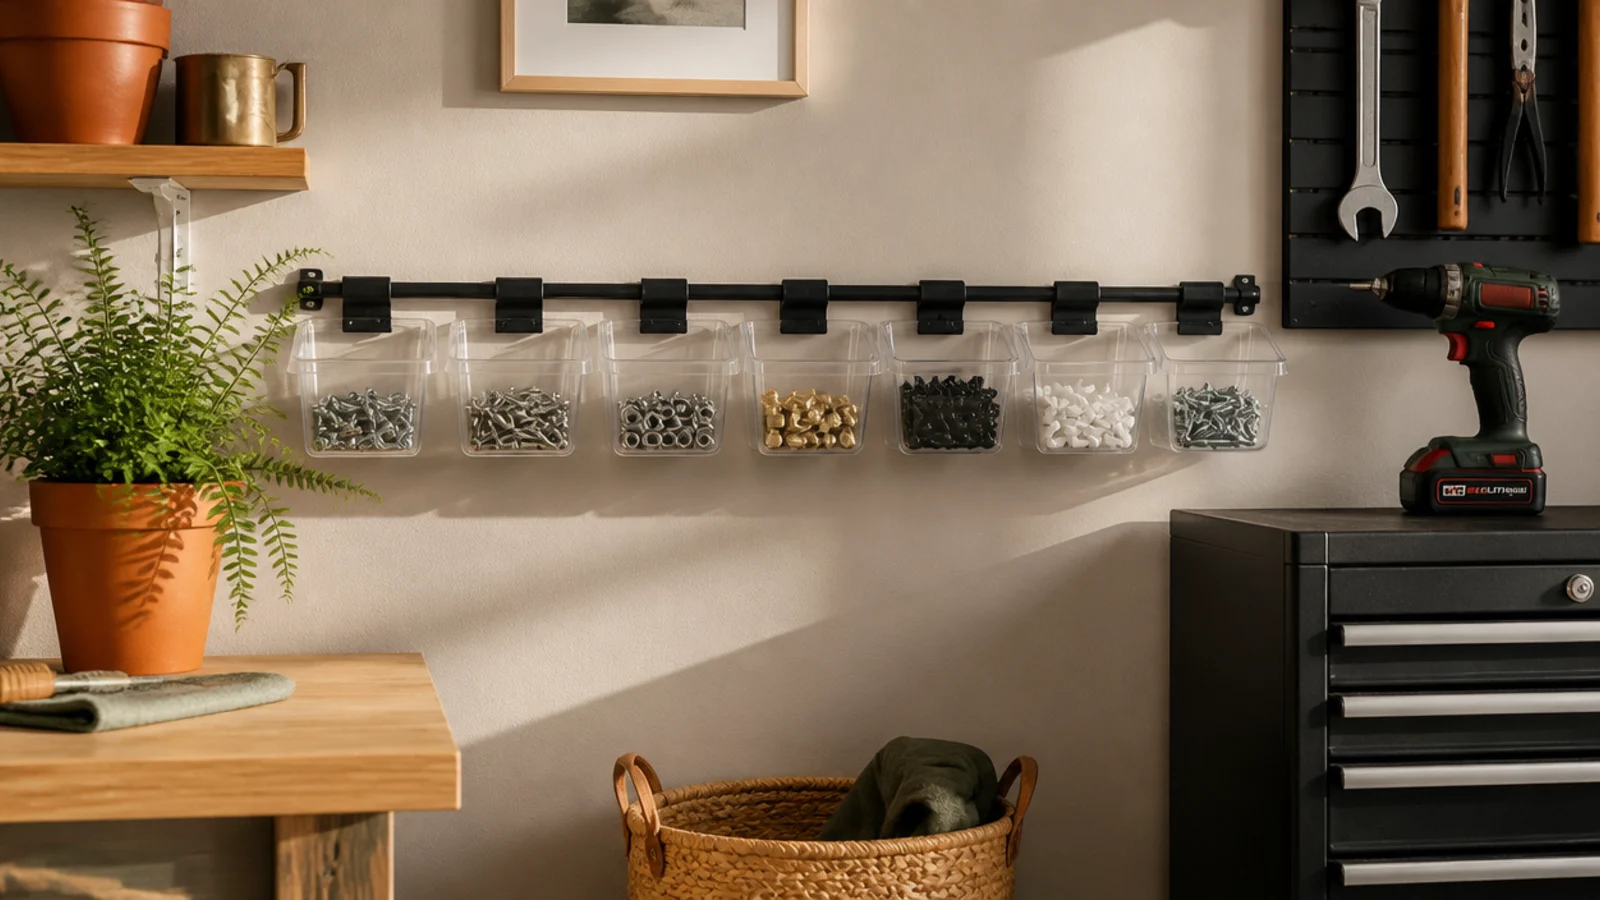
A bin rail hangs small parts bins on the wall in a row, sorting hardware without using a shelf or drawer. Bins clip on and lift off. Perfect for keeping fasteners organized in a garage with no spare surfaces.
Mount a louvered bin rail or a cleat into the wall studs. Hang open-front parts bins along it, sorted by hardware type and size. Keep the most-used sizes at eye level. Add a small label to each bin’s front. Lift a bin off to carry it to the work, then hook it back. Choose a few bin sizes for different parts.
Hang the rail right beside the bench so parts bins are an arm’s reach away without taking any bench space.
Don’t overfill hanging bins past the lip; parts spill out the front every time you lift one off the rail.
17. Under-Shelf Pull-Out Drawers
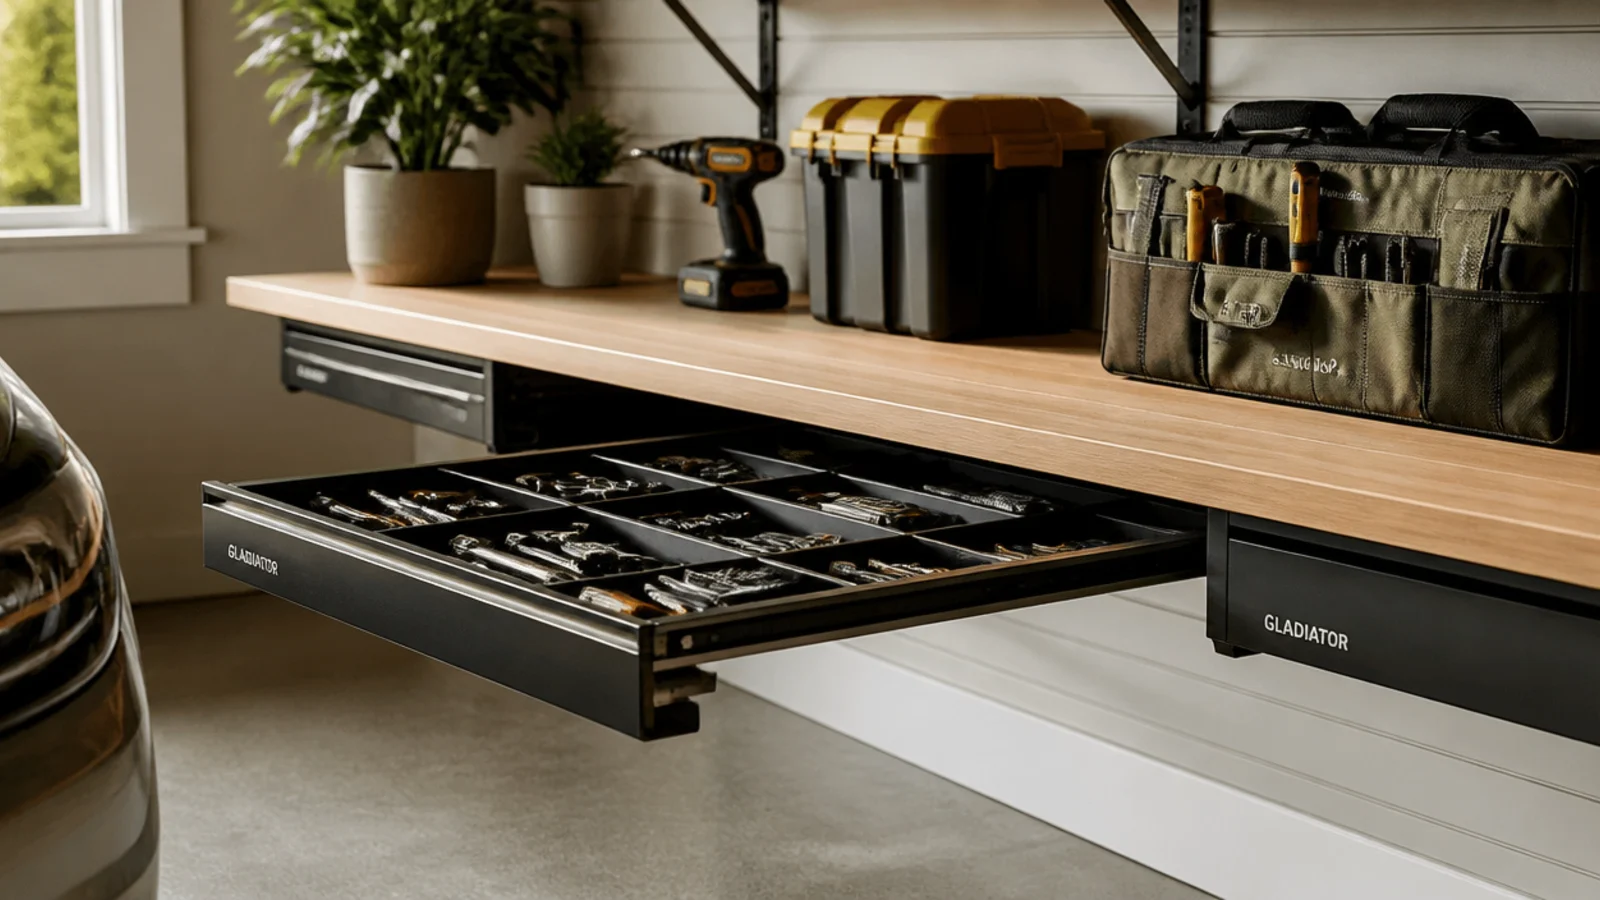
Sliding drawers mounted under a fixed shelf use the dead space beneath it for pull-out storage. You reclaim the gap between shelf and the items below. Great for adding hidden drawers without more floor space.
Screw drawer slides or under-shelf sliding baskets to the underside of a sturdy fixed shelf. Fit shallow bins or trays that pull out like drawers. Sort small tools and supplies into them and label the fronts. Keep the loads light enough for the slides. Pull a drawer out to use it, then slide it back under the shelf.
Editor's noteUse the under-shelf gap for flat items — sandpaper, gloves, tape — that would otherwise waste a whole shelf.
Skip thisDon’t hang heavy loads from lightweight under-shelf slides; they sag and jam — keep the contents light.
18. Bulky Tool Wall Hooks
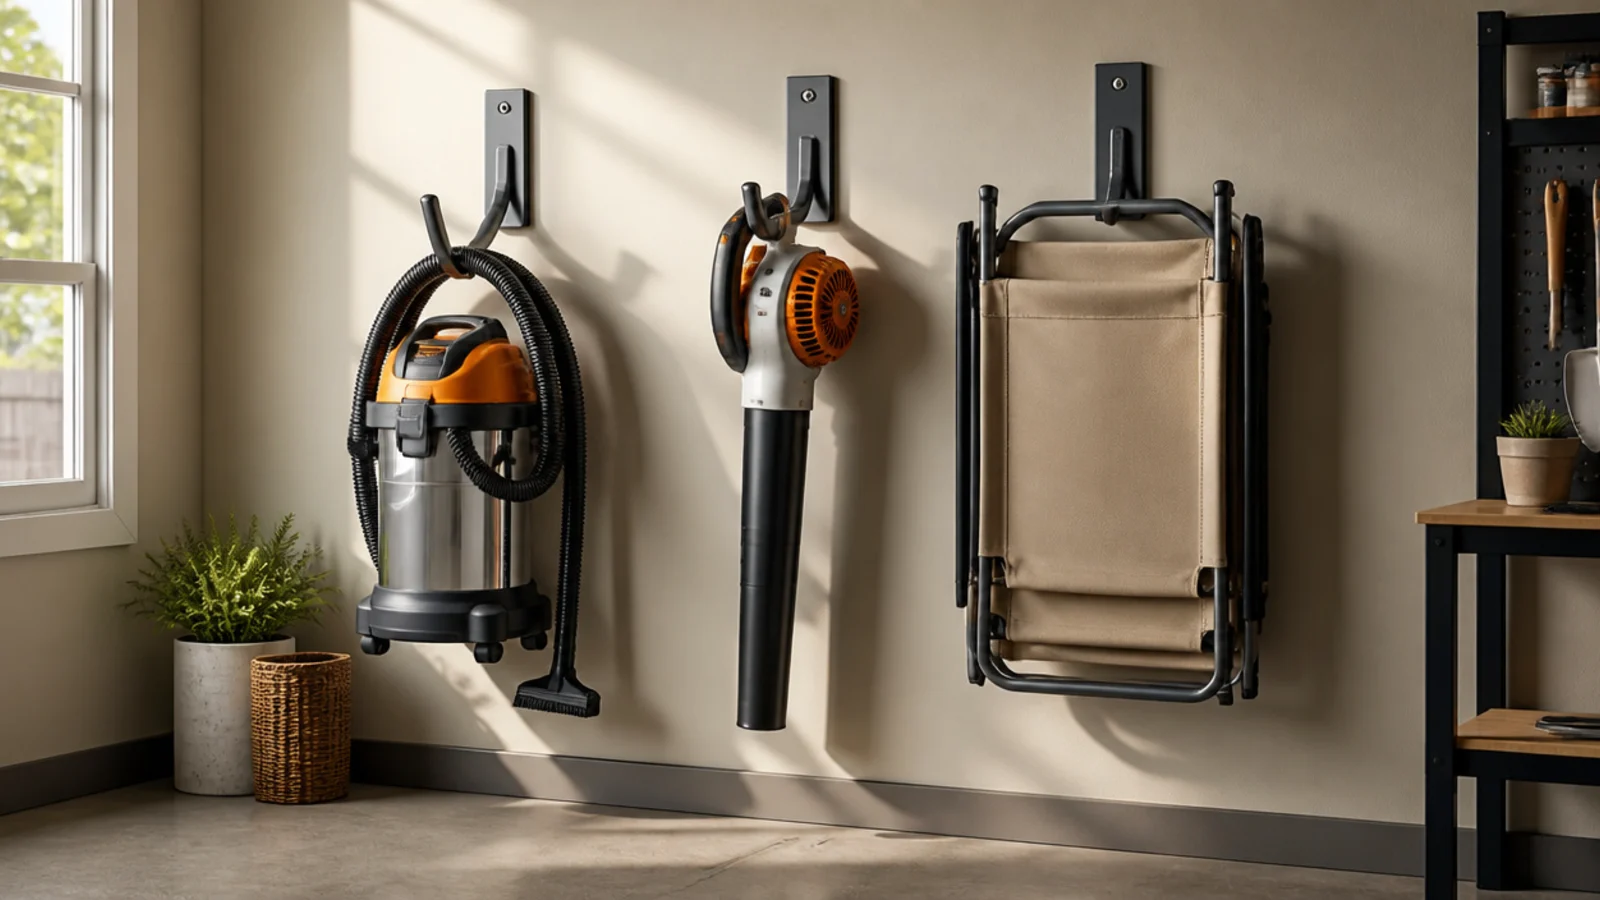
Big dedicated hooks get the bulkiest floor-hoggers — shop vac, blower, folding chairs — up onto the wall. These items eat the most floor space, so hanging them frees the most. Best for the few large tools that clutter a small garage.
Screw heavy-duty hooks into the wall studs at heights matched to each bulky item. Hang the shop vac by its handle, the blower by its grip, and folding chairs by their frames. Put the heaviest items closest to the studs. Leave the floor clear beneath so you can walk and sweep. Use hooks rated well above each item’s weight.
Editor's noteTrace your bulky gear against the wall first so each hook is the right size and height for the exact item.
Skip thisDon’t hang heavy equipment on light hooks; use hooks rated above each item’s weight or they bend and drop.
19. Tiered Small-Parts Shelf
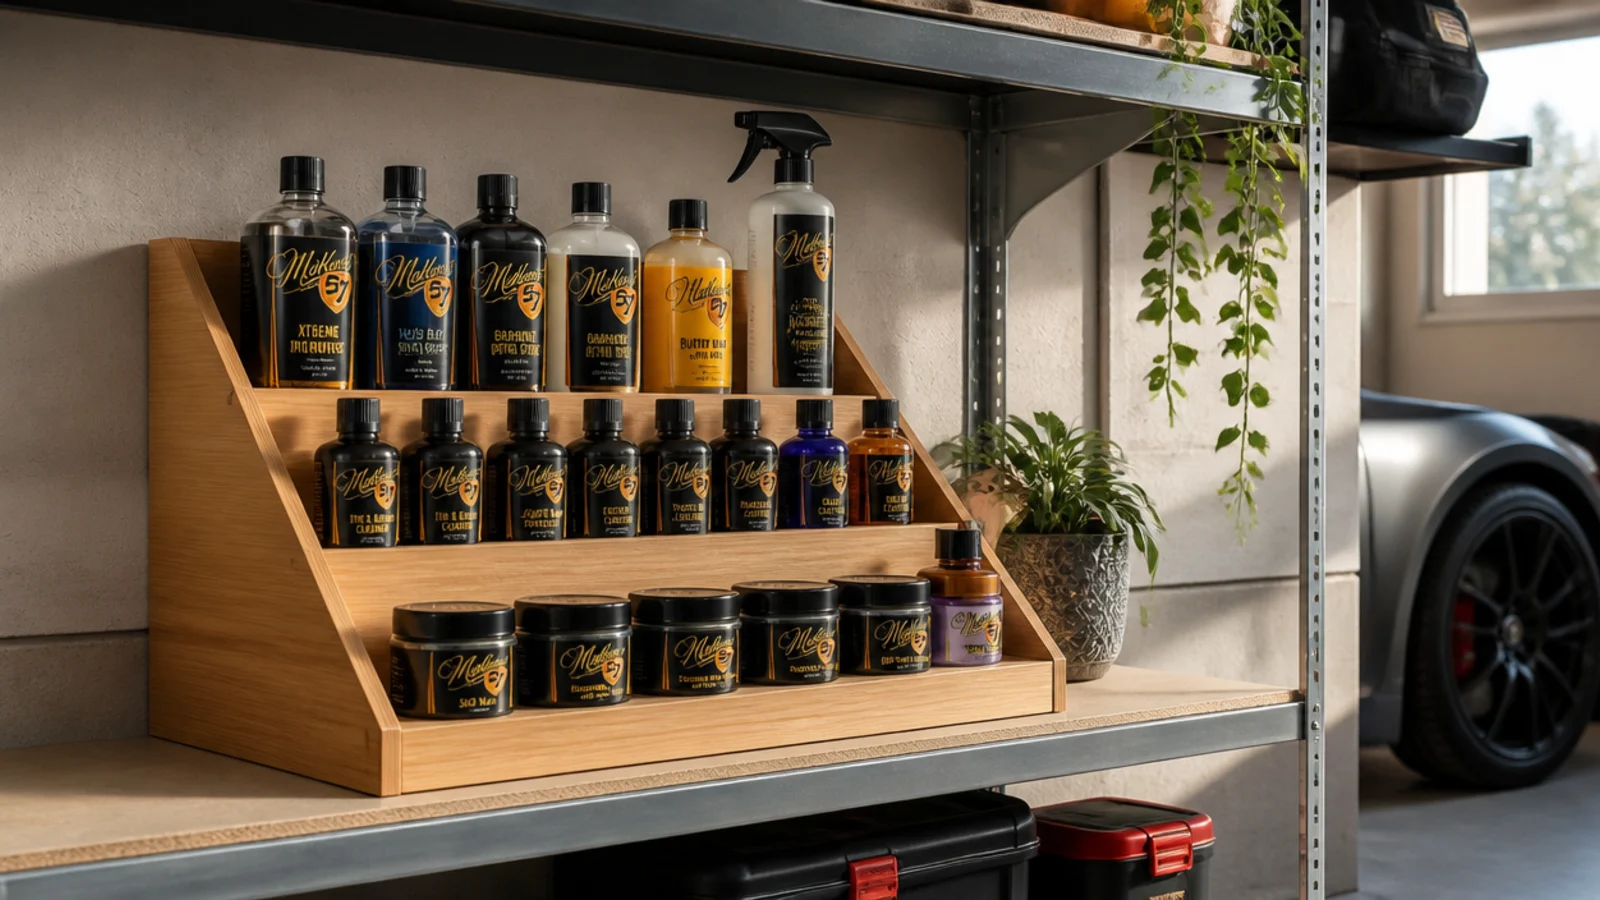
A tiered riser turns one shelf into stepped rows so every small bottle and jar is visible instead of hidden behind the front row. You see the whole collection at once. Perfect for small containers on a limited shelf.
Set a stepped shelf riser (like a spice-rack tier) on an existing shelf. Arrange small bottles, jars, and cans on the steps so each row sits higher than the one in front. Group by type and turn labels out. This doubles the usable capacity of a single shelf without adding another. Keep heavy items on the bottom step.
Use a tiered riser on your busiest supply shelf so you never again knock over the front row to reach the back.
Don’t pile items flat on a deep shelf; the back row vanishes, and you buy duplicates of what you already own.
20. Behind-the-Door Narrow Shelf
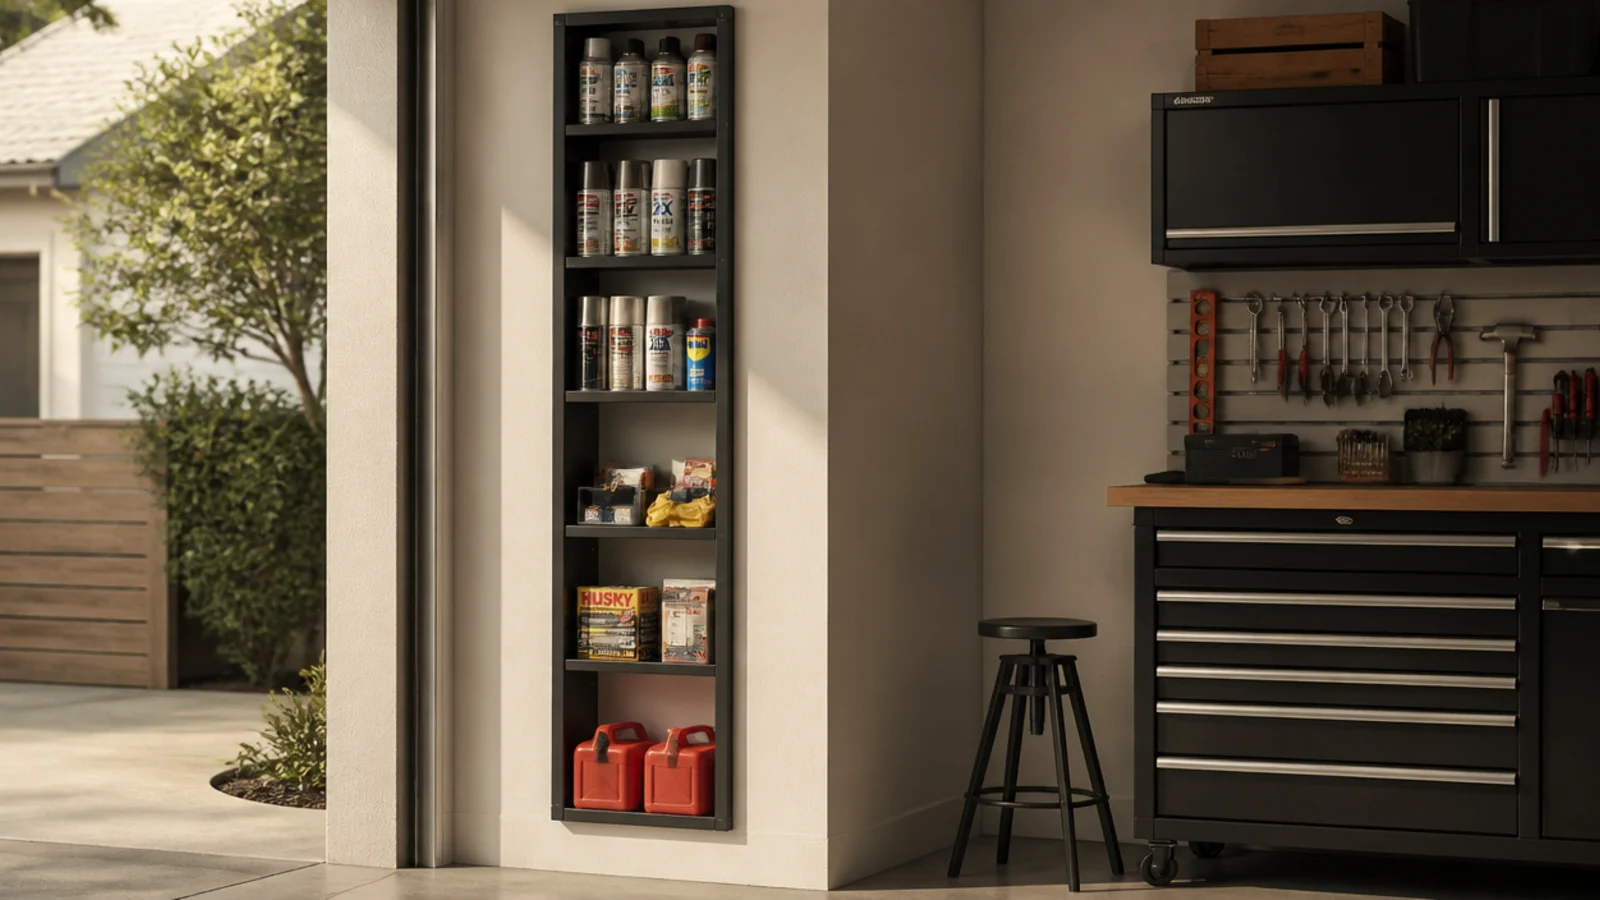
The wall behind a swinging door is dead space in most small garages, and a shallow shelf there stores small supplies out of the way. The door hides it when open. Great for squeezing storage into a spot you forgot you had.
Measure the wall behind the door swing and mount a shallow shelf or narrow cabinet that the open door clears. Anchor it into the studs. Store small, light supplies — sprays, rags, small parts — since the shelf is shallow. Confirm the door still opens fully without hitting the shelf or its contents.
Keep the shelf shallower than the door’s clearance so the door always swings open freely past it.
Don’t mount anything the open door will hit; measure the swing carefully or you jam the door on your new shelf.