1. Rainbow Fortune Cookie Note
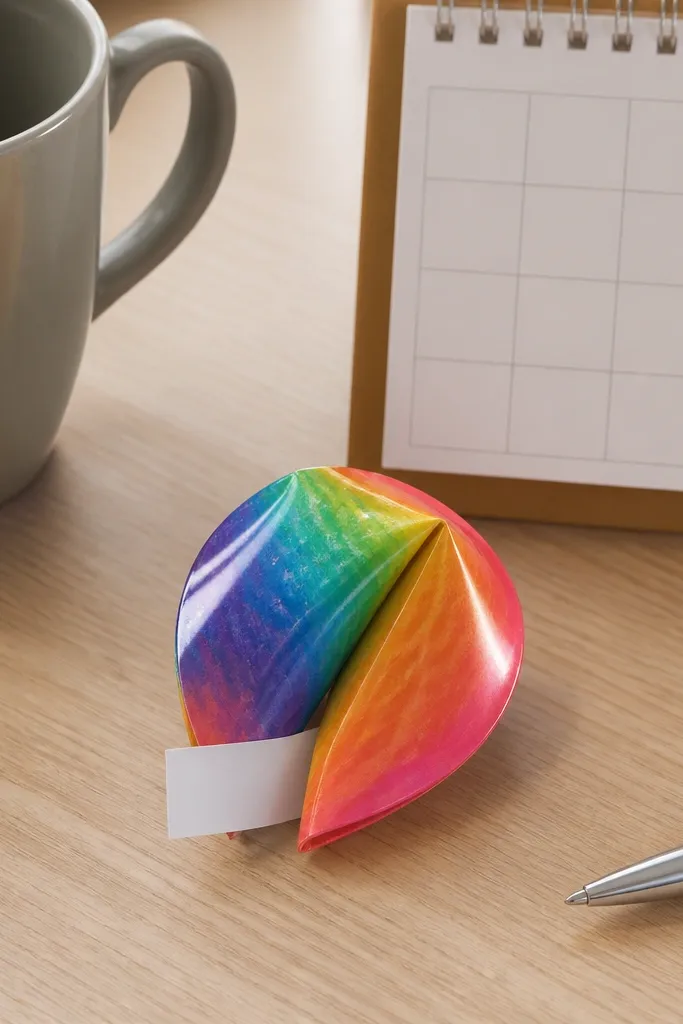
Start with a square sheet and fold it into a triangle, then fold the triangle in half again so you get a thick, crease-friendly base. Open it slightly and fold the corners toward the center to form the cookie-like top, then tuck the last flap under the nearest layer. Finish by pressing the edges so the outline stays rounded, not sharp-cornered. Slide a small strip of paper into the opening before you present it.
This one looks like a tiny snack package, but it’s really a note holder. The folded “cookie” shape gives you a glossy, photo-ready curve, and the rainbow paper makes it pop even with simple folds. It’s beginner-friendly because you only need basic creases and one careful tuck to lock the shape. Use it for desk notes, party favors, or a kid’s “secret message” game where they write one sentence and slide it inside.
Skip thisDon’t use thick cardstock for this one — it makes the tuck fight back and the opening won’t stay clean.
Editor's noteCut a note strip that’s 1/2 inch shorter than the opening so it slides in smoothly without tearing.
2. Stars That Stand Up 3D
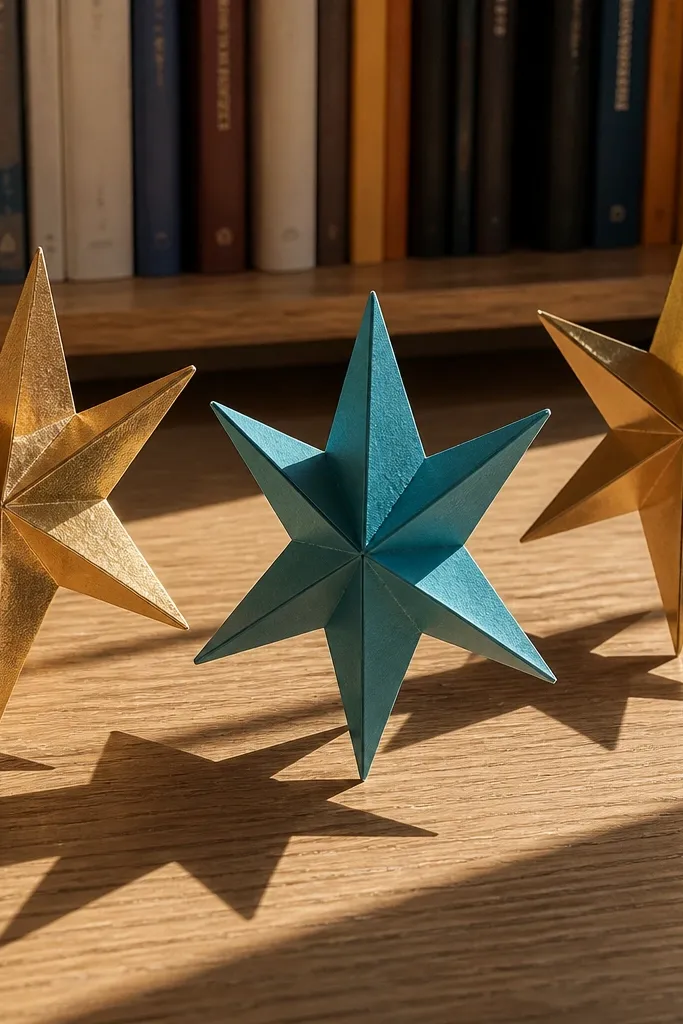
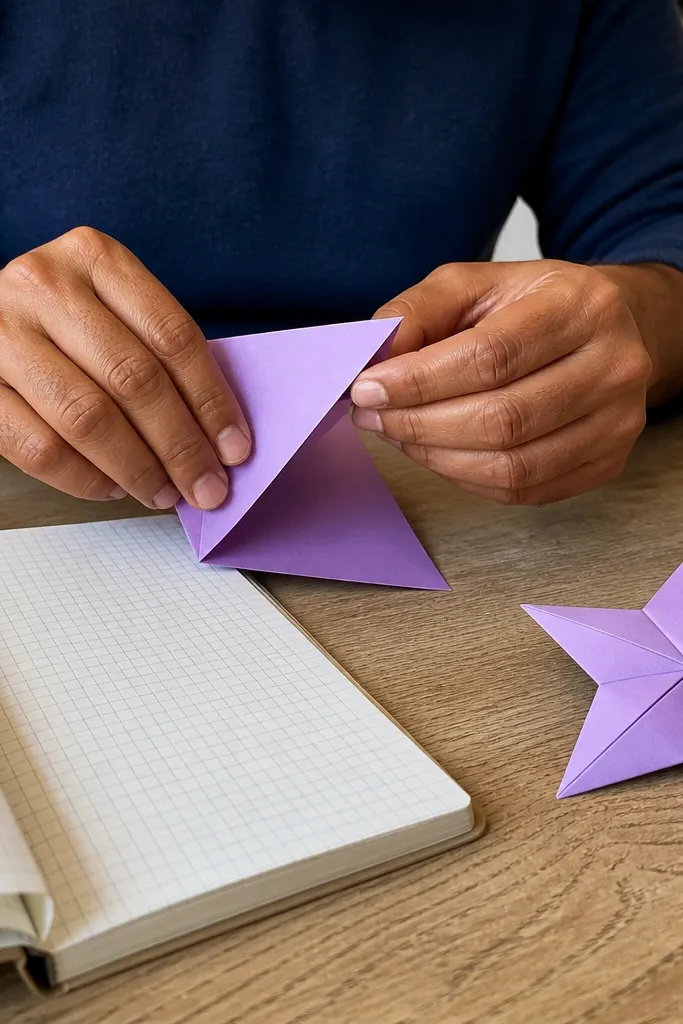
Fold a square into a basic kite shape, then fold each side toward the center to create a smaller, thicker kite. Repeat the fold on the opposite side so the star has defined layers. Bring the point edges together and tuck the last flap into the pocket you created with the earlier folds. Press along each point with a ruler edge so it holds its 3D stance.
A flat star looks fine, but a star that stands upright looks like decor. This beginner-friendly Origami Easy model creates a small 3D form using repeated folds that give each point a crisp edge. It’s the kind of project that makes kids proud because it doesn’t collapse when you set it down. Make a few in different colors and line them up on a windowsill or around a birthday centerpiece.
Skip thisSkip rushing the point presses — if points aren’t sharpened, the star looks flat and messy.
Editor's noteChoose paper with one solid color side and one patterned side for an extra “designed” look from the shadows.
3. Paper Heart with a Clean Center Fold
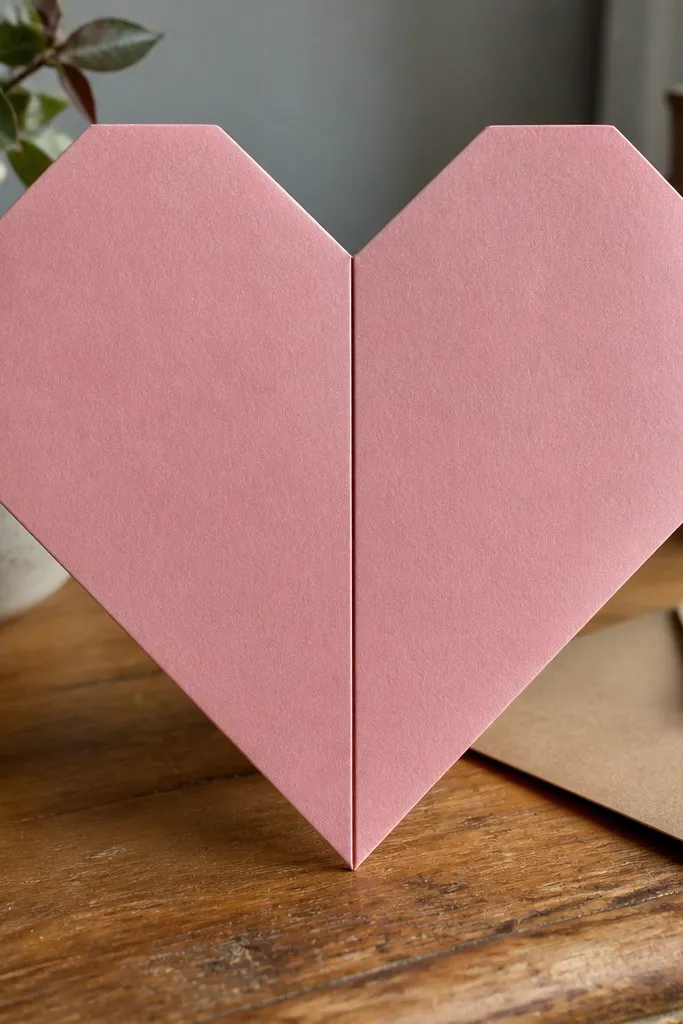
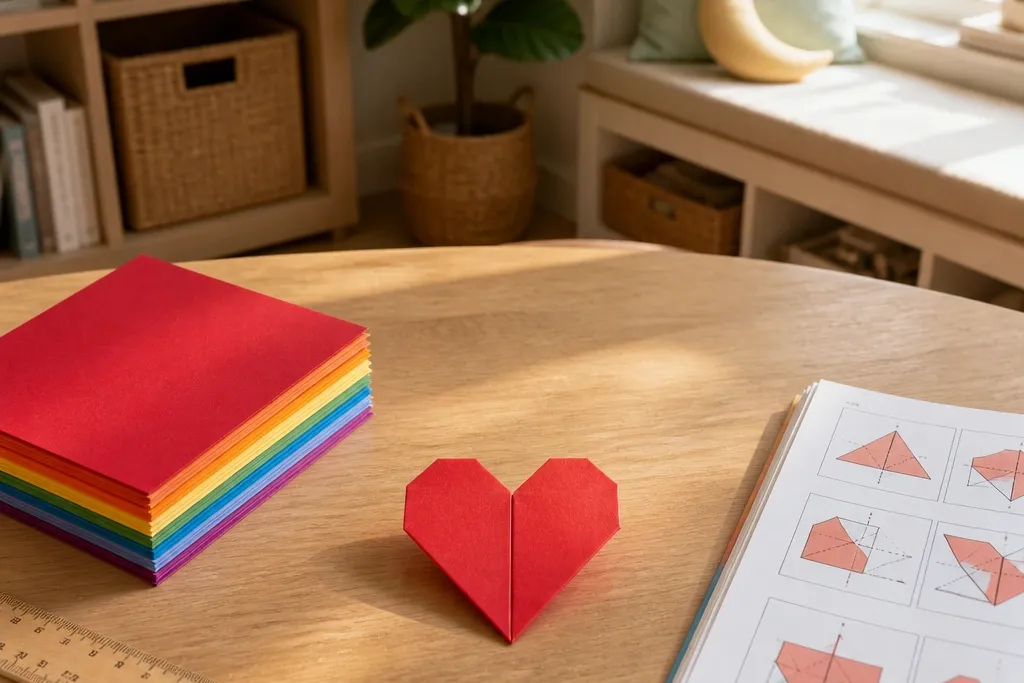
This is the heart kids actually want to give because it looks balanced and reads clearly from across the room. The trick is making a strong center crease and mirroring both halves so the heart outline stays smooth. It’s beginner-friendly because it uses simple folds and doesn’t require tiny sculpting. Use it as a card topper, a classroom decoration, or a quick Valentine gift that doesn’t need glue.
Start with a square and fold it diagonally to make a triangle, then fold the triangle in half. Fold the bottom corner up toward the center crease to shape one half of the heart, then repeat on the other side. Open it just enough to shape the top curves and press the edges firmly. Finish by pinching the lower “V” point so it stays sharp.
Use red or pink paper that’s slightly textured — it hides minor fold lines and still looks crisp.
Don’t fold with the paper twisted; even a small twist breaks the symmetry and the heart looks lopsided.
4. Mini Paper Crown for Photo Booth Fun

A crown is one of the most satisfying beginner models because it’s instantly recognizable and looks cute in photos. This crown uses a folded band and pointed top sections so it stands up without extra support. The look is bold and graphic, especially in metallic gold or bold primary colors. Kids can wear it for a 5-minute photo session, then store it flat.
Cut a strip from square paper (or start with a rectangle) and fold it into a band by rolling the edges inward. Create the crown points by folding small triangles along the top edge at even intervals, then crease each one hard. Fold the band ends together to secure the fit, then press the top points so they keep their shape. If it’s for wear, measure the band against the head before locking the last flap.
Add a tiny piece of tape only at the inside seam so it opens and refolds cleanly for storage.
Don’t make points too thin; narrow points bend and the crown looks droopy.
5. Paper Butterfly with Patterned Wings
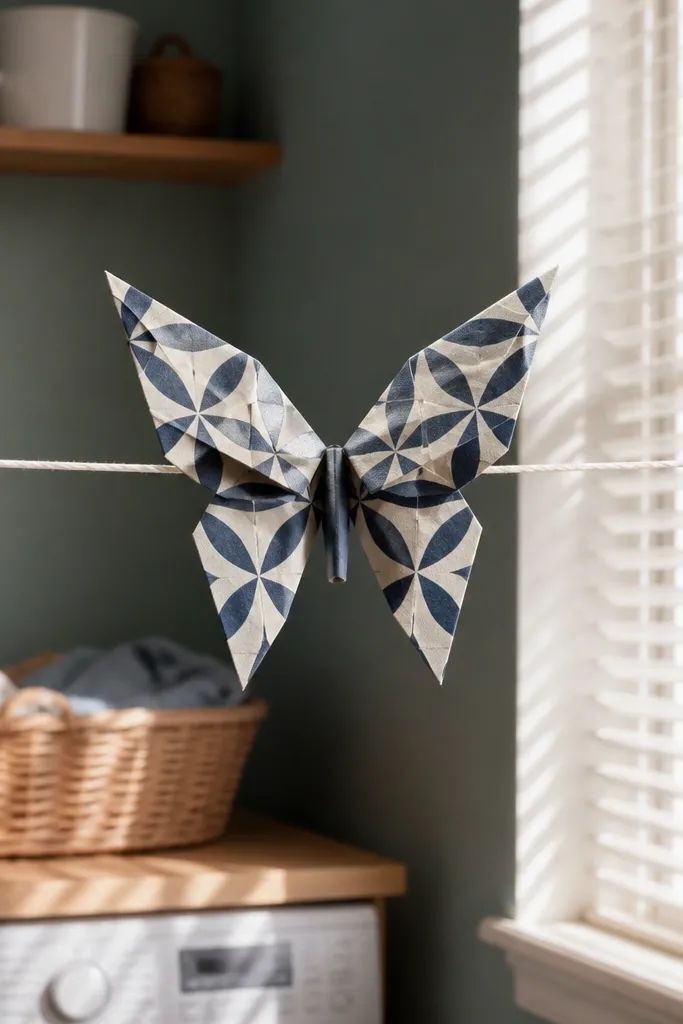
Start with a square and fold it into a triangle, then fold it again so you have a compact base. Fold the outer edges outward to form wing panels, then repeat so both sides mirror. Create the body by folding the center section inward and then flattening slightly so the butterfly can sit. Press the wing edges with a ruler edge so the pattern shows crisp borders.
This butterfly looks like a real craft project because the wings are layered and symmetrical. Patterned paper turns simple folds into a “wow” effect when the wings open. It’s beginner-friendly Origami Easy because the body is a basic fold and the wing shaping comes from careful edge alignment. Hang it on string, tape it to a wall, or use it as a gift tag.
Skip thisDon’t over-open the wings — if you stretch the folds, the butterfly loses its crisp shape.
Editor's noteUse paper that’s patterned on both sides so the wings still look good when they catch light from different angles.
6. Angry Starburst Pinwheel
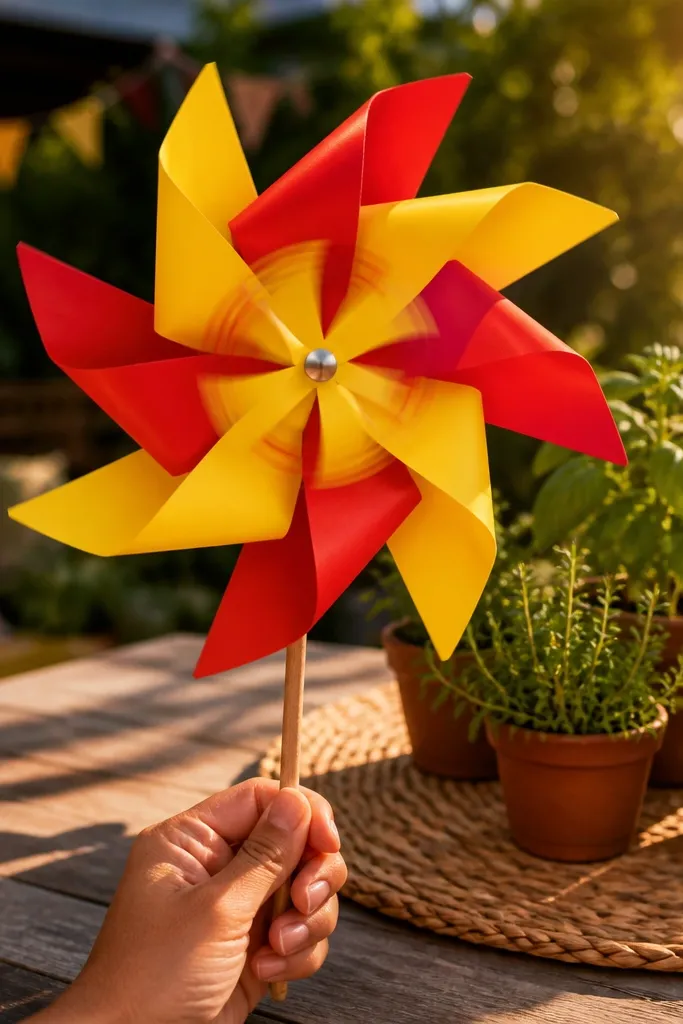
If you want something that looks energetic and graphic, go for a starburst pinwheel. The folded rays create a spiky outline that reads instantly in photos, and kids love spinning it. It’s beginner-friendly because the folds repeat at each edge — you’re basically making a consistent “ray” shape. Use it at parties, as a desk fidget, or taped to a stick for a quick “wow” decoration.
Cut a square and fold it into a smaller square, then fold diagonally to set up crease guides. Fold each side corner toward the center to form repeating rays, then unfold slightly to create the pinwheel structure. Punch a hole through the center, then attach a brad or paper fastener so it spins freely. Press the ray folds flat again so the starburst outline stays sharp.
Make the rays slightly thicker by not flattening the folds completely — that gives better “snap” when it spins.
Don’t skip the center hole alignment; if it’s off, the pinwheel spins unevenly and looks crooked.
7. Paper Rocket Bookmark
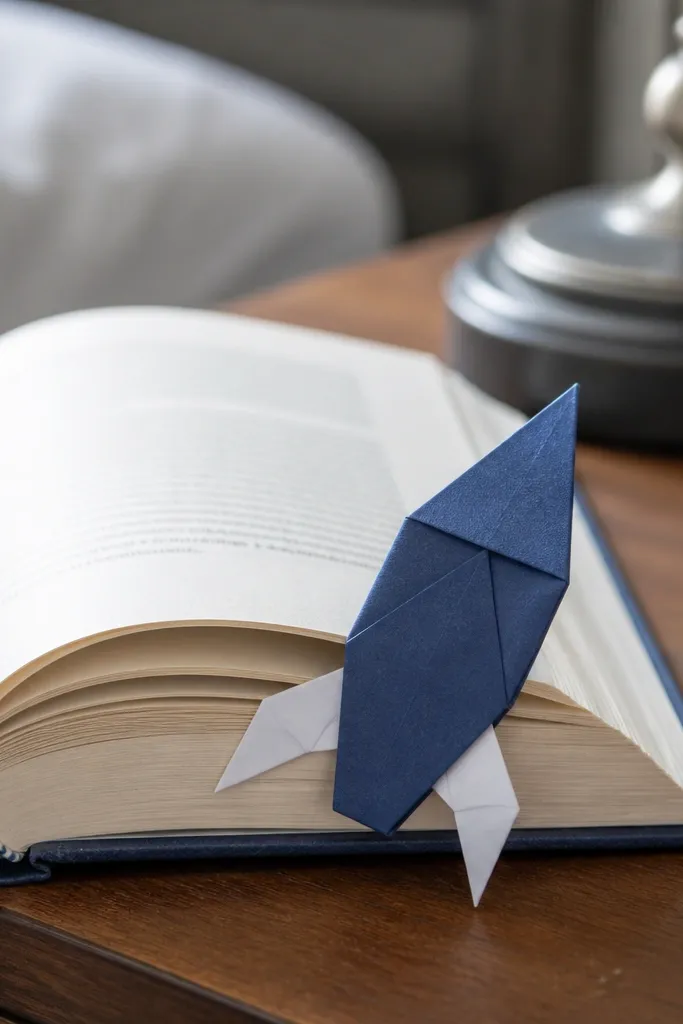
Start with a rectangle, fold it in half lengthwise to create a crease, then fold the top corner down to form the nose cone. Create the fins by folding two side triangles outward along marked lines, then crease hard. Fold the bottom into a small tab that grips the page, and press the tab edges flat. Keep the rocket silhouette centered by aligning the nose crease with the center fold.
A bookmark has a practical job, but you’re making it photogenic by giving it a rocket silhouette. This model uses simple folds to create a pointed nose and visible fins, so it looks like a little spaceship even on a bookshelf photo. It’s beginner-friendly because the shape is forgiving and the rocket body is one main fold with two side fins. Kids can also use it as a “story launch” prop.
Skip thisDon’t make the tab too short; if it’s under 1 inch, it slips out and ruins the look.
Editor's noteUse thicker craft paper for bookmarks so the tab doesn’t soften and bend after repeated use.
8. Origami Envelope for Tiny Treats
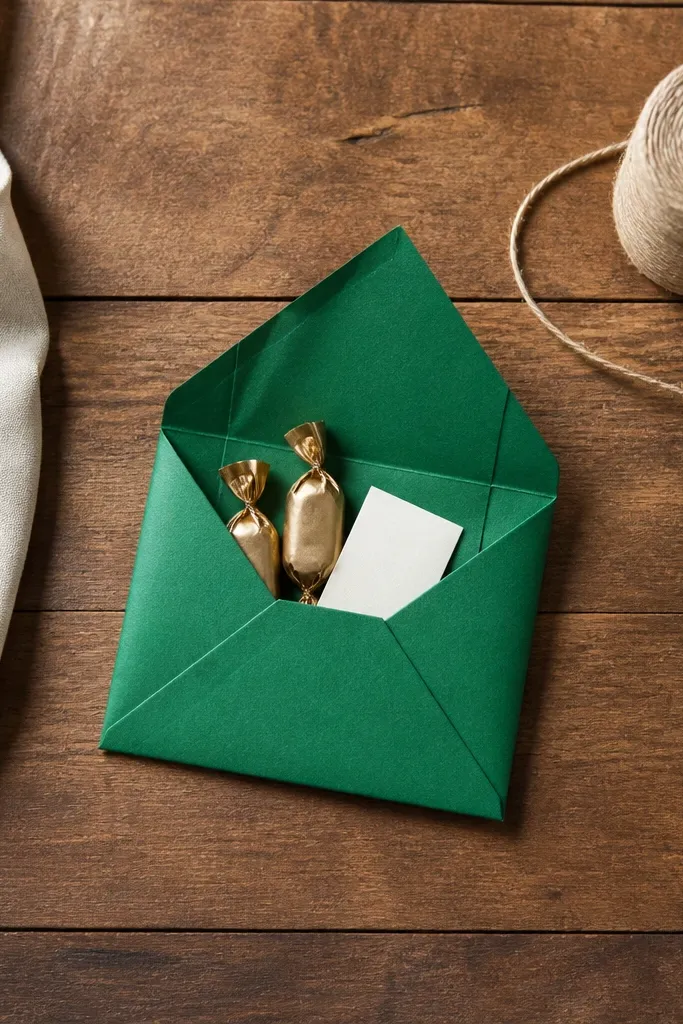
Start with a square and fold it in half to make a guide crease, then fold the corners toward the center to form a smaller square. Fold the bottom up, then fold the top flap down so it lands neatly over the pocket opening. Press all edges with a ruler edge for crisp lines. If you want a tighter closure, fold a small lip on the top flap and tuck it under the bottom layer.
This envelope is a classic, but it looks modern when you use bold color paper and keep the folds sharp. It’s beginner-friendly Origami Easy because the structure is big and easy to check: corners meet, flap closes, done. The pocket holds small candies, a folded note, or a mini sticker sheet. It also looks great as a set — make five in matching colors and stack them for a clean shelf shot.
Skip thisDon’t rely on finger creases; soft creases make the envelope look wrinkled.
Editor's noteUse patterned paper so the inside shows a different color when the flap opens.
9. Sitting Cat Paper Figure
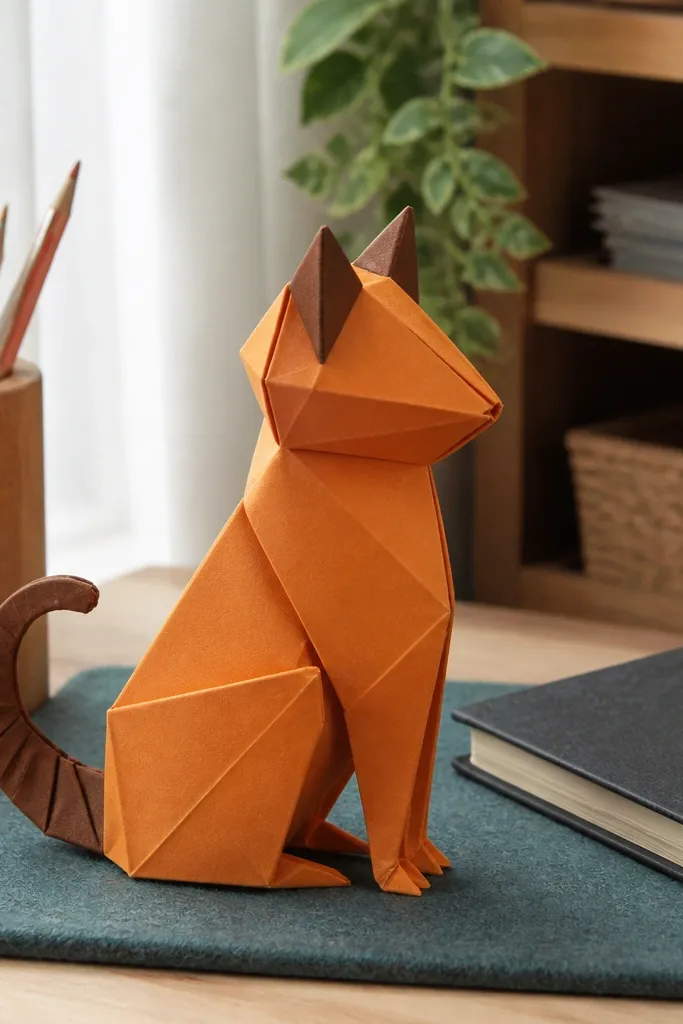
Fold a square into a triangle base, then fold the bottom corner up to form the cat’s body thickness. Create ears by folding two small triangles on the top edge, then crease firmly. Shape the tail by folding one side corner outward and under to lock it in place. Press the body edges so the cat sits flat without wobbling.
This sitting cat is photogenic because the silhouette reads clearly: ears up, body compact, tail curled. It’s beginner-friendly Origami Easy because it uses big folds and you’re not carving details — the shape comes from the angle of corners. Kids love animals, and this one holds its form well on a table. Make it in black paper for a graphic look or use gray with a lighter belly paper for contrast.
Skip thisDon’t choose paper that’s too shiny; glare hides the folds and makes the silhouette look messy.
Editor's noteIf your cat tips forward, press the bottom fold again and add a tiny pinch crease at the body center.
10. Paper Fish That Swims in Photos

Start with a square and fold it into a triangle, then fold the triangle into a slimmer shape. Create the tail by folding the back corner outward and creasing so it curves. Shape the body by folding the sides inward to form a gentle taper toward the front. Add a small mouth crease by folding the front corner down slightly, then press.
A fish is always cute, but this one looks like it’s “moving” because the tail is shaped to curve upward. The eye and mouth folds are simple enough for beginners, and the overall outline is clean. Use bright blue or teal paper for instant underwater vibes, or go monochrome for a graphic classroom look. It’s also great for a themed wall — clip several fish to string at different lengths.
Skip thisDon’t over-fold the tail; if it creases too hard, it looks kinked instead of curved.
Editor's noteCut a tiny circle eye from black paper and glue it on only after the folds are finished so you don’t mis-measure the placement.
11. Origami Tulip with Petal Layers
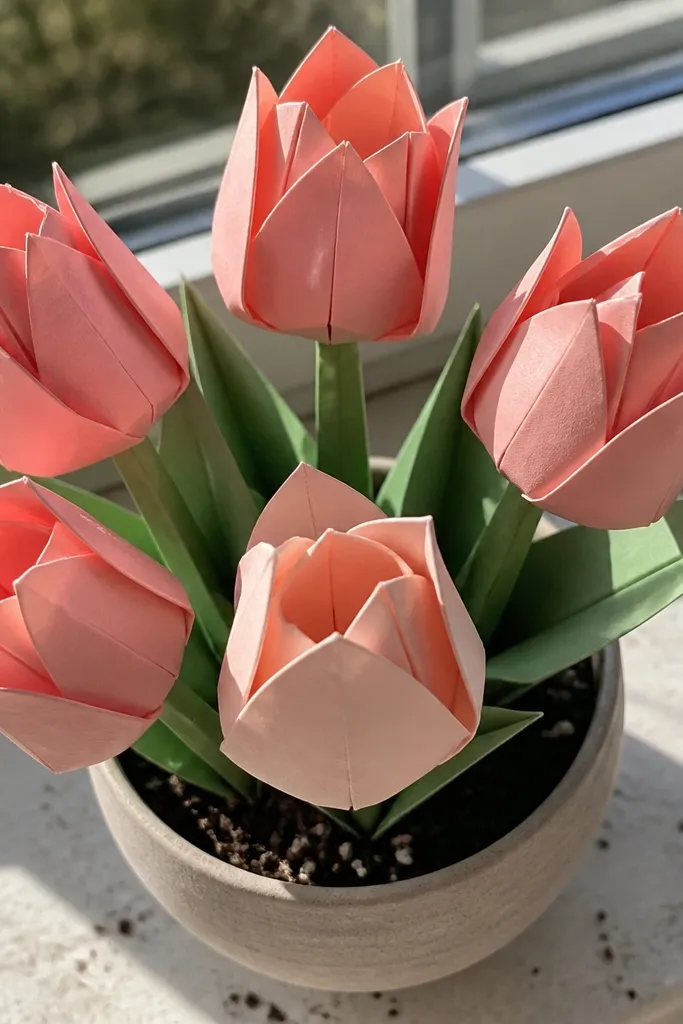
Start with a square for the flower head and fold it into a kite shape. Fold the top flaps down and crease sharply to create petal layers, then tuck the edges to lock the shape. For the stem, use green paper folded into a simple strip and attach it under the flower base by tucking or sliding. Press the petal folds open just enough so they show layered depth.
Tulips photograph beautifully because their petal folds create shadows. This beginner-friendly Origami Easy version focuses on big layers so you get a flower look without tiny precision. It looks great as a bouquet when you do 5-7 in matching tones. Use green paper for the base so the stem area reads cleanly even if you don’t add leaves.
Skip thisDon’t make the petals too flat; if you flatten them completely, the tulip loses its 3D shadow effect.
Editor's noteUse slightly thicker paper for the flower head so the petals keep their shape when handled.
12. Paper Sailboat with Folded Mast
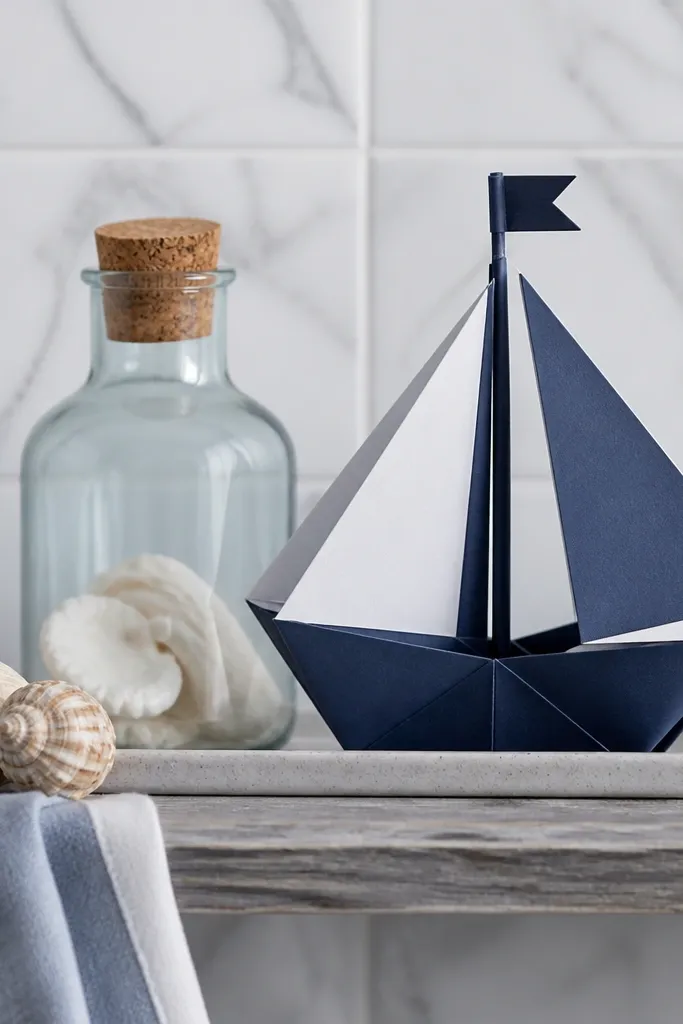
Start with a square and fold it into a triangle base, then fold the base up slightly to form the hull. Create the sail by folding the top layer so it stands at an angle, then press the crease. Fold a small strip for the mast and insert it into the sail base pocket. Adjust the sail angle by bending at the crease and pressing it into place.
A sailboat is instantly recognizable and looks great against a plain background. The folded mast gives it that “classic drawing” silhouette, while the sail is crisp enough to hold its angle. It’s beginner-friendly Origami Easy because you’re working with a simple base and one sail fold. Make it in navy paper with white sail paper for a clean contrast look.
Skip thisDon’t skip the hull crease press; soft hull folds make the boat look droopy.
Editor's noteUse two-tone paper for the sail: one side white, the other color, so it looks dimensional in photos.
13. Paper Snowflake That Actually Looks Like One
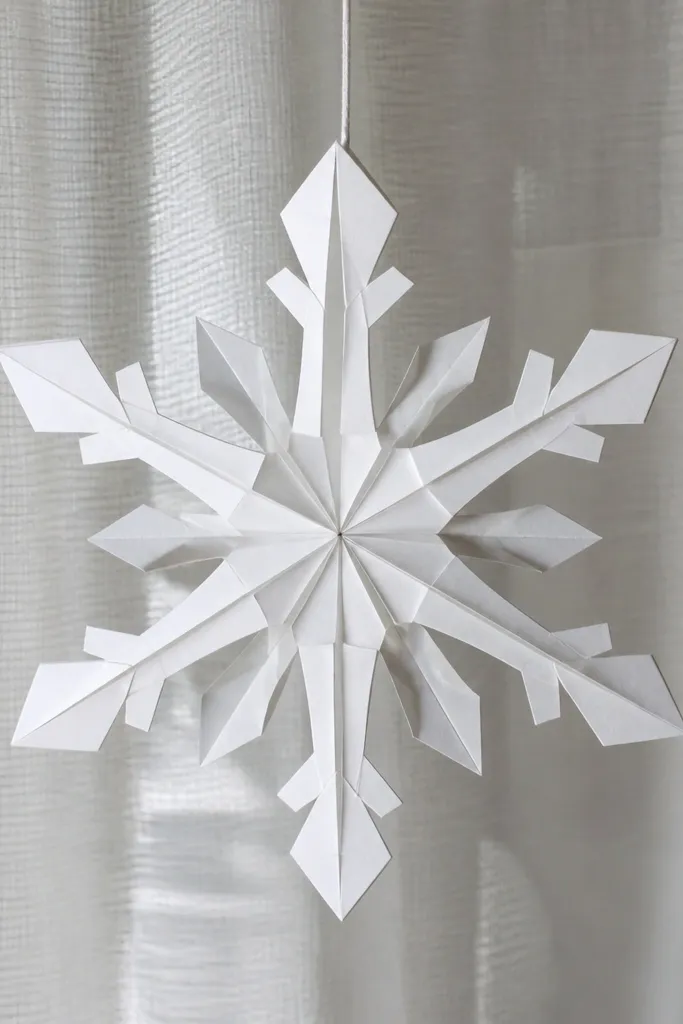
Fold a square into a triangle, then fold again into a smaller triangle to create a compact base. Fold the edges in to form a pointed arm shape, then crease hard along the folds. Repeat the arm shaping around the base by keeping symmetry guides aligned. Unfold to reveal the snowflake pattern and press each point so it stays defined.
Snowflakes can go wrong fast because the cut lines don’t translate into a clear shape. This folded snowflake looks like a snowflake because each arm is created with repeatable folds, not random snips. It’s beginner-friendly Origami Easy because you’re building a structured arm shape, then repeating it. Hang it in windows or tape it to winter gift bags for a clean holiday look.
Skip thisDon’t use thin tissue paper; it collapses and the snowflake looks like a blob.
Editor's noteUse white paper with a slight sheen so the arms show crisp highlights.
14. Origami Water Drop Bookmark
Use a square and fold diagonally to make a triangle, then fold the triangle in half. Shape the droplet by folding the two outer corners inward toward the center line, then crease sharply. Fold the bottom to create a page-grip tab and press it flat. Adjust the tip by pinching lightly so it stays pointy.
This is a bookmark that looks like a design object. The droplet silhouette reads clearly, and the folded layers create a subtle 3D shine even with plain paper. It’s beginner-friendly Origami Easy because the form is simple: a fold structure that narrows to a point. Kids like it because it feels like a “magic drop” you can slide into books.
Skip thisDon’t make the page tab too deep or it will catch on pages and look bulky.
Editor's noteColor the inside with a different paper color; the inside shows when the bookmark bends slightly.
15. Paper Hexagon Box for Small Spares
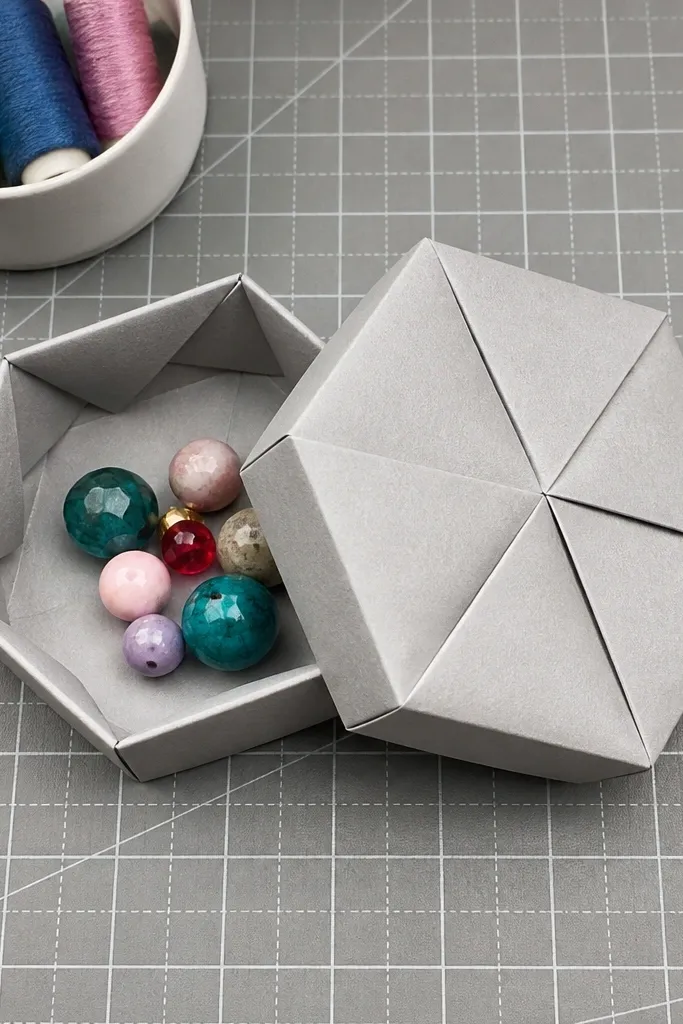
Start with an 8x8 inch square and fold it into a grid using two diagonal folds and one central crease. Fold panels up toward the center to create the hexagon walls, then fold tabs to lock corners. Create a lid by repeating the panel fold on a slightly smaller square (or a thinner layer) so it slips over the base. Press all edges with a ruler edge so corners stay crisp.
This small hexagon box looks way more advanced than it is. The shape is photogenic from overhead because the edges form a neat honeycomb outline. It’s beginner-friendly Origami Easy because you’re folding panels into a box structure with clear edges and minimal tiny flaps. Use it for craft supplies, beads, or a kid’s “treasure corner” on the desk.
Skip thisDon’t skip test fitting; a box that’s even a few millimeters off won’t close cleanly.
Editor's noteIf your lid is too tight, trim 1/8 inch off one side before folding again.
16. Paper Rose with a Big Petal Curl
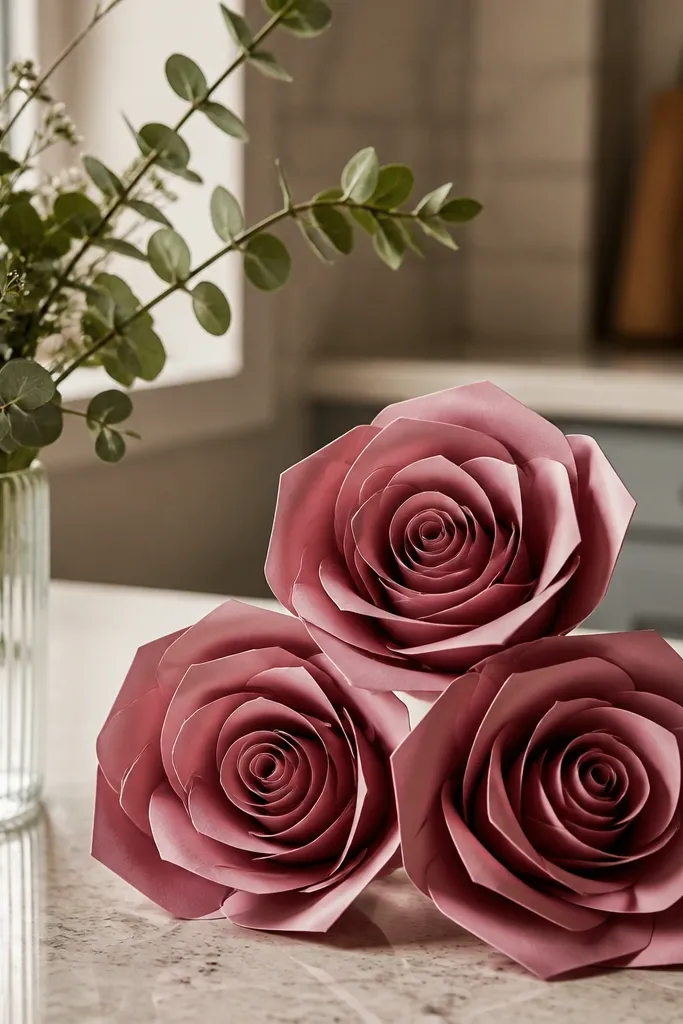
Start with a square and fold it into a triangle, then fold the triangle into a narrow shape. Create petal layers by folding the top corner down in small increments, then pressing each fold. Roll the folded strip inward to form the spiral center and tuck the end under to lock. Shape the outer petals by gently pulling edges outward and pressing to set the curl.
Roses can look messy when petals are tiny. This beginner-friendly Origami Easy rose keeps petals large, so you get a clear spiral center and a curled edge that looks like a real bloom. It’s worth doing because it turns plain paper into something that looks like a gift flower. Make 3 in one color and place them in a small cup for a shelf shot.
Skip thisDon’t over-roll the strip; if it’s too tight, the rose looks like a paper ball.
Editor's noteUse slightly thicker paper for the outer petals so the curl holds instead of springing flat.
17. Paper Bookmark Dragon Tail
Start with a rectangle and fold it in half to create a center crease. Shape the tail by folding the bottom end into a triangle and creasing hard, then fold the sides inward to taper. Create the page tab by folding the top down into a small pocket. Press the outline so the point stays sharp and the bookmark lays flat.
This bookmark turns a simple reading accessory into a character. The dragon-tail silhouette is easy to see in photos, and the fold gives it a fun pointed end that looks like a fin. It’s beginner-friendly Origami Easy because the base is just a folded rectangle with a couple of corner shapes. Kids will actually use it because it feels like a toy.
Skip thisDon’t leave the page tab uncreased; weak tabs slide out and make the bookmark look unfinished.
Editor's noteUse matte paper so the folds show clearly under classroom lighting.
18. Origami Paper Penguin with Fluffy Belly Look
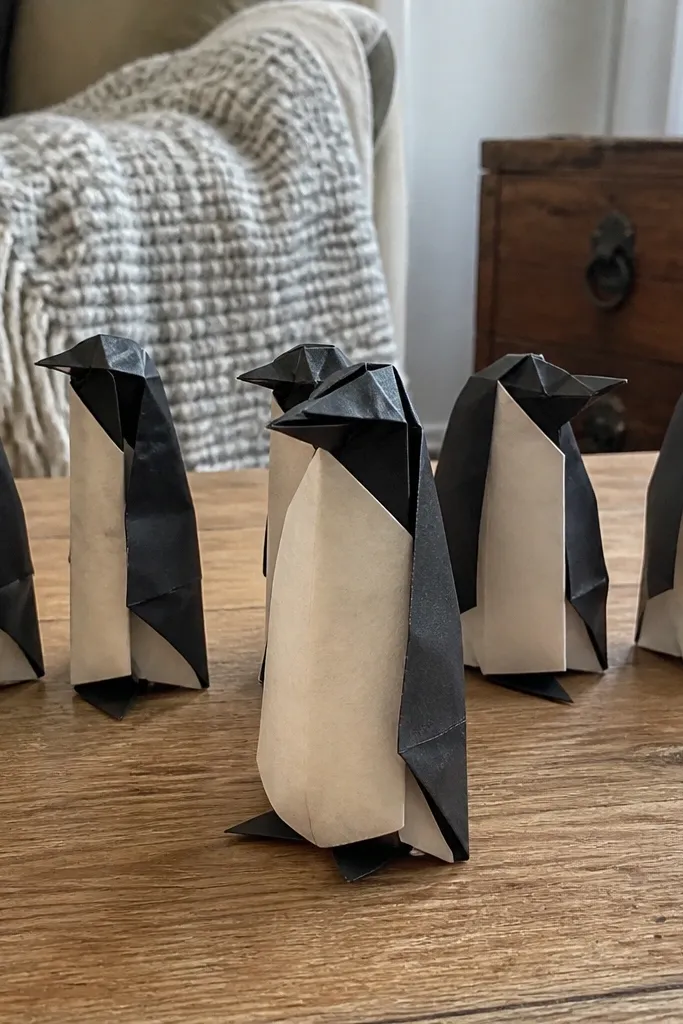
Use a square with black on one side and white on the other, then fold into a basic triangle base. Fold the top corners down to shape the head and crease a small beak line by folding the tip slightly. Create the belly by folding the white side up into a rounded panel, then press around the edges. Fold two small corners at the bottom outward for feet and keep them symmetrical.
Penguins are a beginner win because you can make them cute with a few bold shapes. This model uses contrast paper or a two-tone approach so the belly reads instantly. It’s beginner-friendly Origami Easy because the body is a simple fold and the feet are created by folding corners outward. It looks great in a row on a table, like a mini winter lineup.
Skip thisDon’t make the feet too wide; wide feet flatten the penguin and kill the silhouette.
Editor's noteIf you’re using single-color paper, add a belly patch after folding with a white scrap so the contrast still looks intentional.
19. Paper Envelope Star Tag
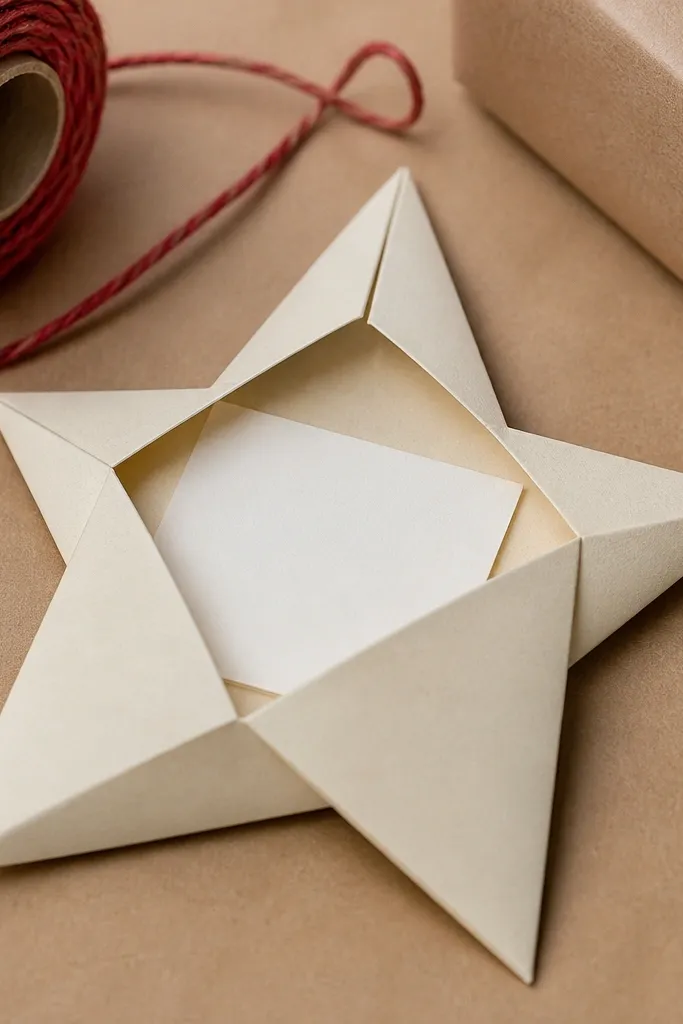
Start with a square and fold it into a star base using repeated corner folds toward the center. Once the star outline is set, fold a small flap behind one point to create the pocket. Press all points so they stay crisp and stand out. Insert a tiny note strip, then fold the back flap over to close. If you want it to hang, punch a hole near the top point before final closure.
This is a gift tag that folds into a little envelope, and it looks like a star from every angle. The envelope pocket keeps it functional for small notes or candy, while the star points make it photogenic against wrapping paper. It’s beginner-friendly Origami Easy because the star shape is bold and the pocket fold is straightforward. Use it on birthday presents, thank-you notes, or teacher gifts.
Skip thisDon’t skip the point pressing; soft star points blend into the background.
Editor's noteUse metallic paper for the star and plain paper for the pocket so the tag looks expensive without extra steps.
20. Origami Panda Face that Pops
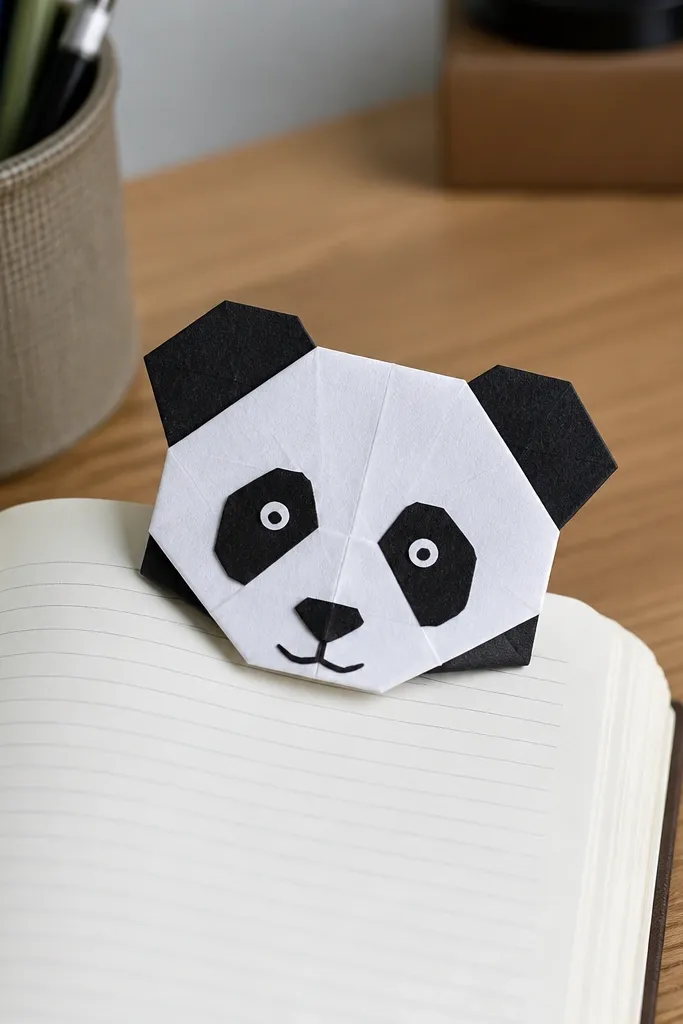
This panda face looks cute and clean because you’re building a strong mask shape with contrast. The folded ears and eye patches read clearly, even when the model is small. It’s beginner-friendly Origami Easy because you don’t need perfect curves; sharp creases create the cartoon look. Use it as a bookmark topper, a classroom desk marker, or a party favor card.
Start with a square and fold diagonally to create a triangle, then fold the triangle so the top corner becomes the head. Fold small ear triangles down on both sides and crease hard. Create the eye mask by folding a strip down from the center so it forms a white panel, then press around the edges. Add a tiny nose crease by folding the bottom tip up slightly.
Use black paper for the outer layer and white for the face panel so the mask stays crisp without drawing.
Don’t try to draw eyes before folding; the face panel shifts and your placement will be off.
21. Paper Turtle with a Shell Panel
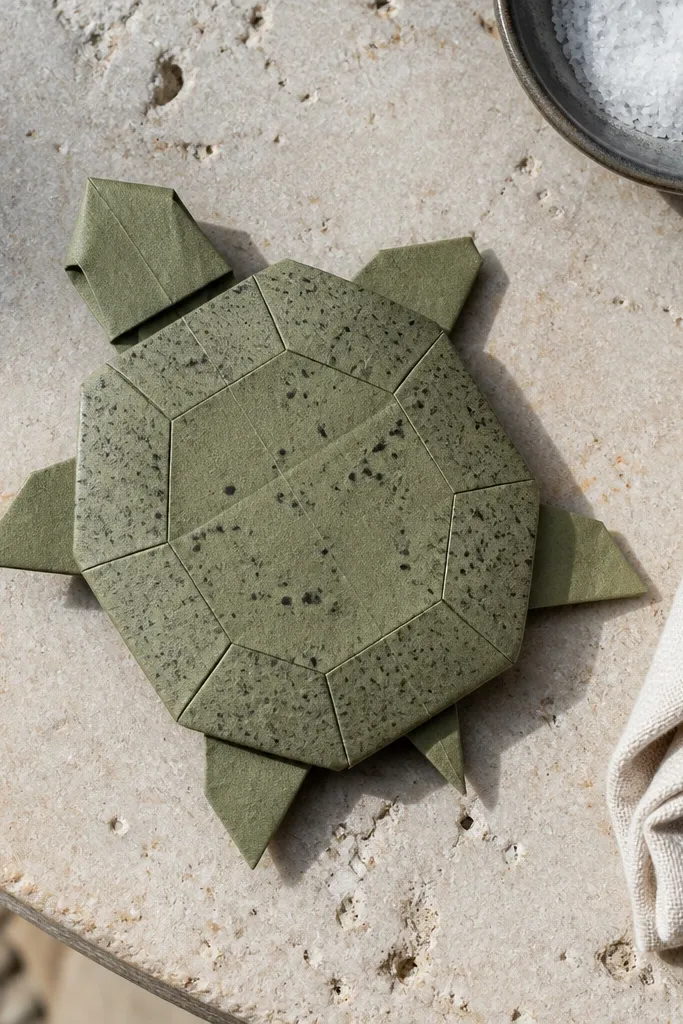
Start with a square and fold it into a basic base shape, then fold corners inward to form a shell outline. Fold a patterned panel into the center by bringing a flap up and creasing so it looks like a shell segment. Shape the head and legs by folding small corners outward and pressing. Keep the shell flat by pressing the bottom edges with a ruler.
A turtle looks adorable because it has a recognizable shell shape. This model uses a shell panel fold that creates a strong center pattern, which makes it look intentional and not like random paper. It’s beginner-friendly Origami Easy because the shell is the main structure and the head is just a corner fold. Place it on a tray or tape it to a wall as a slow-motion “underwater” theme.
Skip thisDon’t overwork the legs; too many folds make them limp and the turtle loses its silhouette.
Editor's notePatterned paper for the shell makes the turtle look finished even if the folds aren’t perfect.
22. Paper Snowy Owl Perch Fold
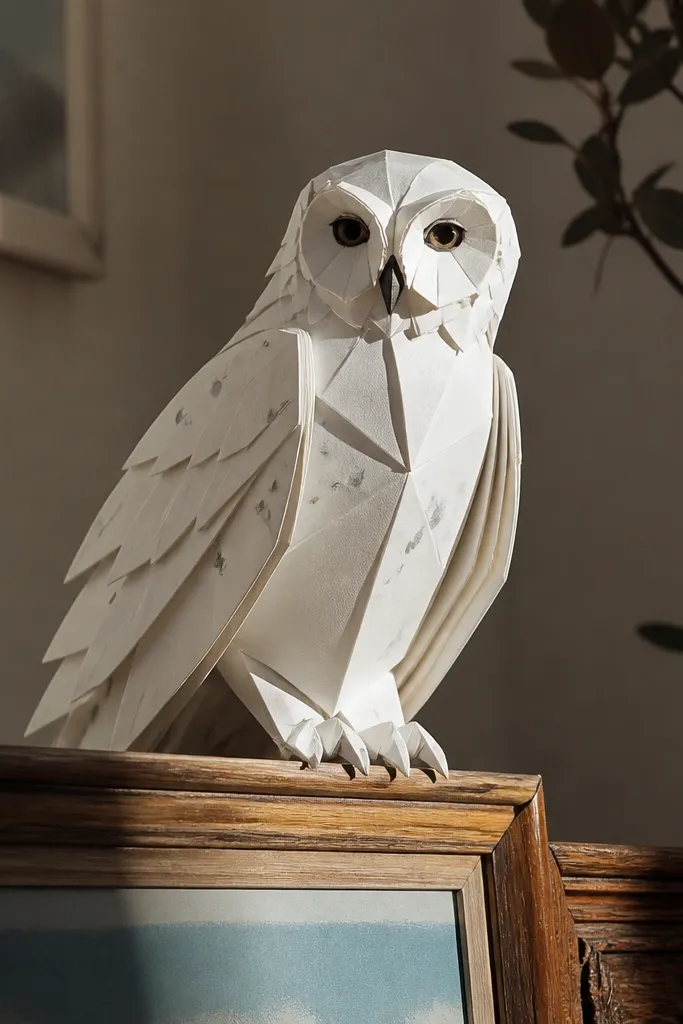
Start with a square and fold into a base that creates a standing bottom edge. Fold two side panels inward to form wings and crease them so they curve slightly. Create the head by folding the top corners into small ear shapes and pressing the center. Build the perch by folding a small rectangular strip and tucking it under the body so the owl sits upright.
This owl looks good because it has a perch and rounded wing panels, so it reads as a character, not a flat shape. The perch gives it height, which makes photos look more interesting than a flat ornament. It’s beginner-friendly Origami Easy because the body is a simple fold and the wing shape is created by folding corners in. Use it for winter crafts or desk decor.
Skip thisDon’t skip the bottom crease; without it, the owl won’t stand.
Editor's noteMake the perch from sturdier paper so the owl doesn’t lean over.
23. Origami Paper Heart Bookmark with Ribbon Tab
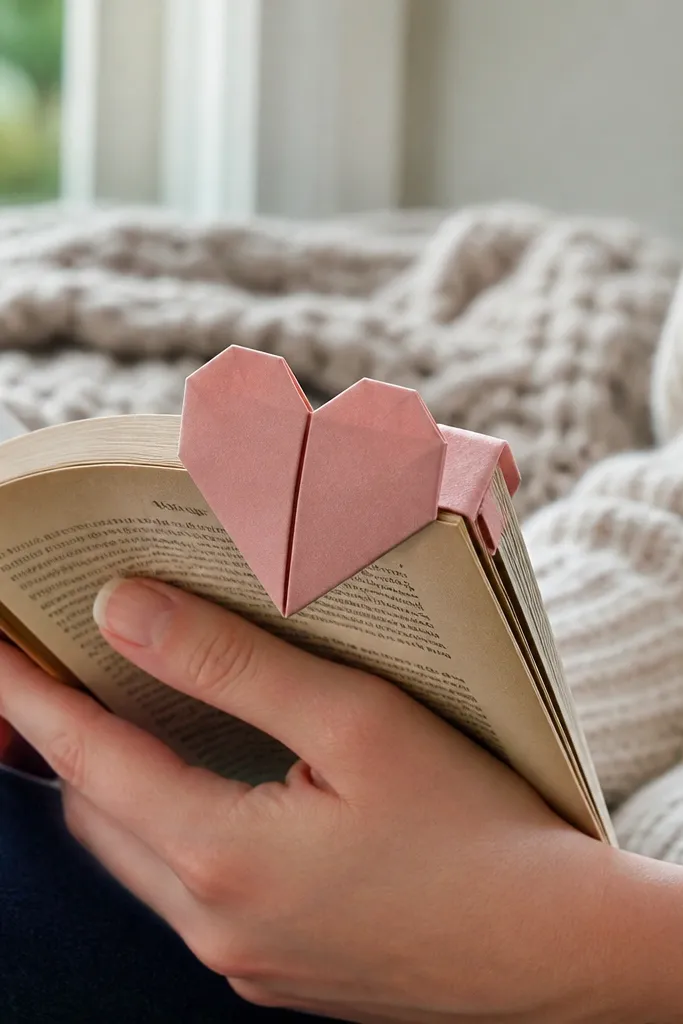
Fold a square into a heart outline using diagonal and corner folds, then press the center crease hard. Create the page grip by folding the bottom point into a flat tab and tucking it behind the heart layer. If you want a ribbon look, cut a narrow strip from scrap paper and fold it into a small loop that sits at the top. Glue only the loop ends so the heart stays movable.
This is a heart bookmark that looks sweet and stays functional. The heart outline is clean, and the ribbon-like tab holds the page without bulky layers. It’s beginner-friendly Origami Easy because it uses a heart fold plus one simple tab fold. Great for kids' reading lists or as a Valentine gift that doesn’t need printing.
Skip thisDon’t make the tab too thick or it will bend the heart and ruin the shape.
Editor's noteUse a ruler edge to press the heart’s top curve so it stays smooth, not jagged.
24. Paper Butterfly Double-Layer Fan
Start with a rectangular sheet and fold it into an accordion fan, then fold the fan in half so it becomes symmetrical. Use the center crease to attach or shape the body by folding a small strip around it. Create wing edges by pinching the accordion folds into defined corners, then press. Add a small center fold so the wings stay open and don’t collapse when you hang it.
This butterfly looks more complex because the wings have two visible layers. That layered look creates depth and makes the wings look like a fan in photos. It’s beginner-friendly Origami Easy because the folds are big and you repeat the same wing shaping on both sides. Use it to decorate a wall or to make a mobile by hanging several from string at different heights.
Skip thisDon’t pack the accordion folds too tight; overly tight folds make the butterfly look crumpled.
Editor's noteUse two different colors for the two fan halves so the wing layers show clearly from multiple angles.
25. Paper Cupcake Wrapper Box
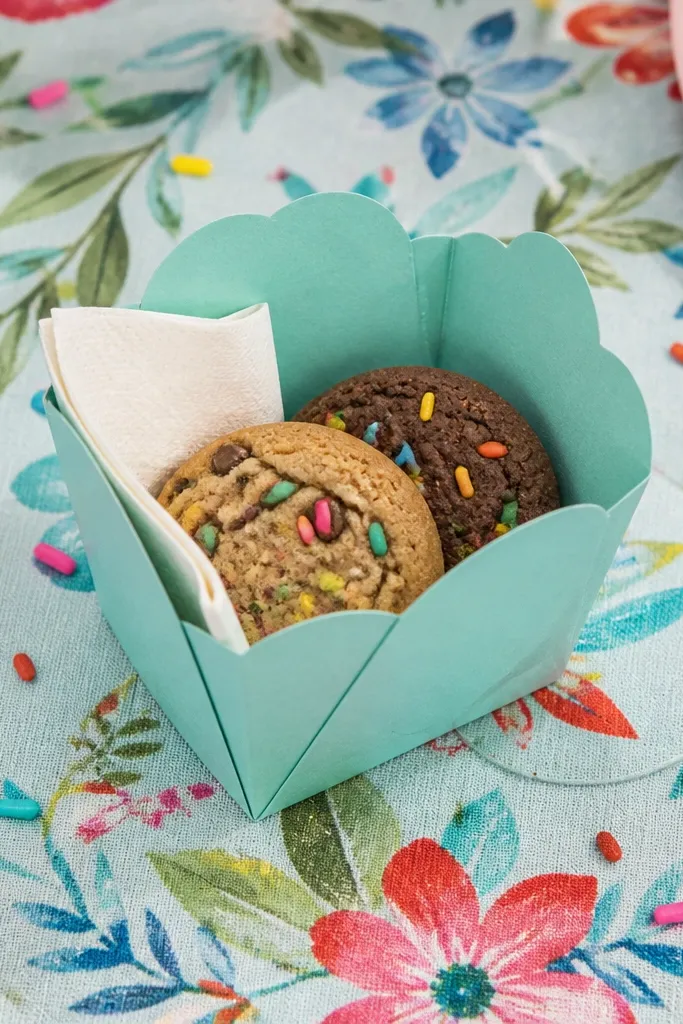
Start with a square and fold it into a triangle, then fold the triangle into a smaller wedge. Create the wrapper flare by folding the sides outward in panel sections, then crease each panel so it angles out. Lock the shape by tucking the final flap under the nearest layer. If you want a lid, fold a second similar piece and slip it over the top edges.
This one is a dessert-shaped container that looks adorable on a table. The flared wrapper top makes it photogenic, and it’s sturdy enough to hold small treats without sagging. It’s beginner-friendly Origami Easy because the wrapper form is created by folding panels outward and then locking edges. Use it for party snacks, tiny gifts, or a craft where kids write one word on the label and tuck it inside.
Skip thisDon’t use overly glossy paper; it slides during folding and the wrapper flare won’t stay sharp.
Editor's noteMake the wrapper in patterned paper, and the base in plain paper so the top reads first in photos.
26. Origami Paper Cat Ear Bow
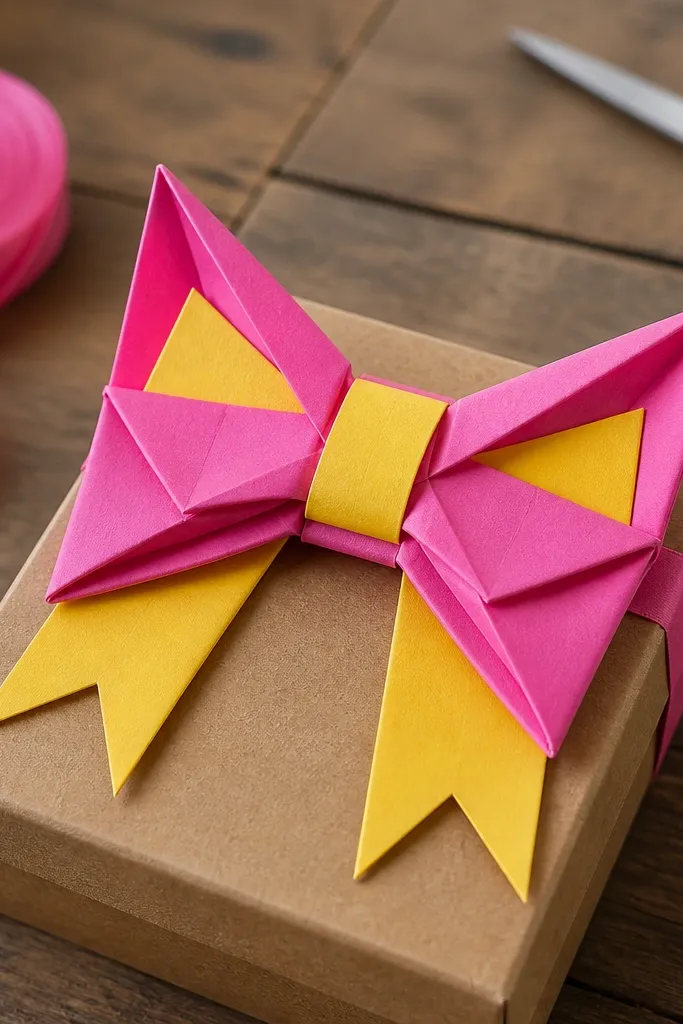
Cut or start with a rectangle and fold it into a narrow strip, then fold the strip back and forth to create a bow loop shape. Make two cat ears by folding the top corners into triangles and creasing hard. Pinch the center and fold the center wrap around to lock the bow shape. Attach it to a string or clip it to a gift tag using a small brad or tape at the back.
This bow looks like a hair accessory even though it’s paper. The cat-ear points make it playful and photogenic, and you can make it in bright colors for a birthday theme. It’s beginner-friendly Origami Easy because it’s built from a few repeating folds that create the bow loops. Use it as a gift topper, a bookmark decoration, or a kid craft that doubles as a party prop.
Skip thisDon’t skip pinching the center; without it, the bow spreads and looks flat.
Editor's noteUse a lighter paper for the loops and a slightly thicker scrap for the center wrap so it holds its shape.
27. Paper Flower with Rolled Center Dot
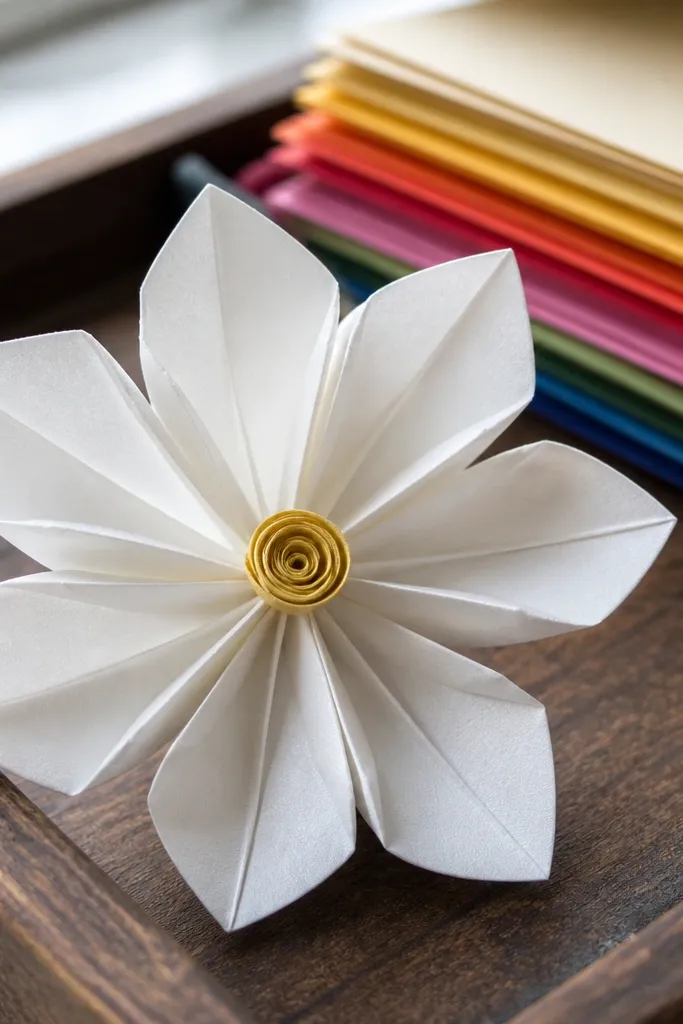
Start with a square and fold it into a base that creates petal sections by folding corners inward. Open slightly and fold each petal edge to stand up, then crease firmly. Cut a thin strip and roll it into a tight center dot. Tuck the strip end behind the flower center and press so it stays.
This flower looks like it took longer because the center is rolled into a dot that catches light. The petal folds are simple, but the rolled center gives it a finished, layered look. It’s beginner-friendly Origami Easy because you’re basically making petal segments and then rolling one strip. Great for a kids craft table — quick to repeat, and each one looks different with different paper patterns.
Skip thisDon’t roll too loose; a loose center makes the flower look like a lopsided rosette.
Editor's noteRoll the center strip around a pencil for a perfectly tight circle, then remove and press it flat at the base.
28. Paper Letter Fold Name Tag

Start with a square and fold it into a rectangle, then fold it again to create a thick base. Fold one side inward to form a letter-like angled edge, then crease hard. Open the back layer slightly so the front panel sits up like a sign, then tuck the corners behind to lock. Write the name on the front panel using a thick marker so it reads in photos.
A name tag made with origami folds looks way more intentional than a printed label. This model creates a crisp letter-like shape with a folded edge that frames the name area. It’s beginner-friendly Origami Easy because the structure is a simple fold-within-fold that you repeat for each letter style. Use it at birthday parties, sleepovers, or classroom desks for a tidy, photogenic setup.
Skip thisDon’t write before you finish folding — marker ink can smear if you handle the paper too much.
Editor's noteChoose a marker with a chisel tip for bold edges that look clean on paper folds.
29. Origami Paper Monster Face
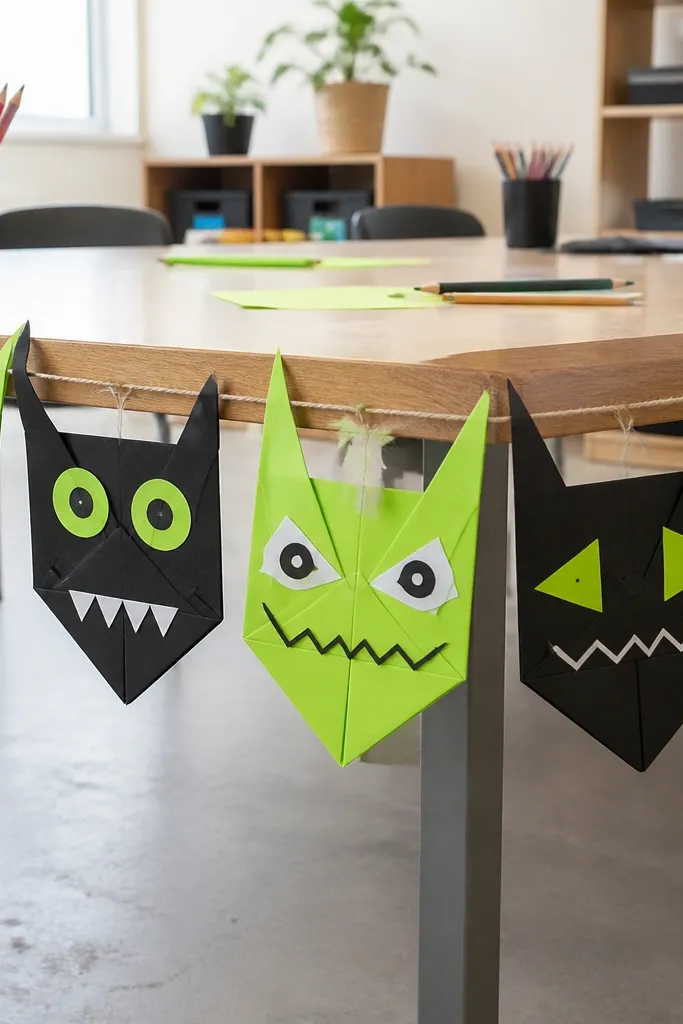
Start with a square and fold it into a triangle base, then fold the triangle into a compact shape. Create the mouth by folding the bottom edge into a zigzag pattern using two small creases. Fold the top corners outward to form pointy eyes and press them so they stick up. Add a small crease for cheeks by folding the side panels in slightly, then press flat.
Monsters are pure fun, and this one looks good because the mouth crease makes a clear grin. The paper folds create a zigzag effect without complicated cutting, so it stays beginner-friendly Origami Easy. Kids can make a whole “monster squad” in different colors and hang them from string. It also works as a quick classroom activity because it finishes fast and looks like a character.
Skip thisDon’t overdo the zigzag; too many teeth make it look messy instead of cute.
Editor's noteUse googly eyes if you want extra sparkle, but glue them only after the folds so the face stays symmetrical.
30. Paper Origami Envelope Rocket
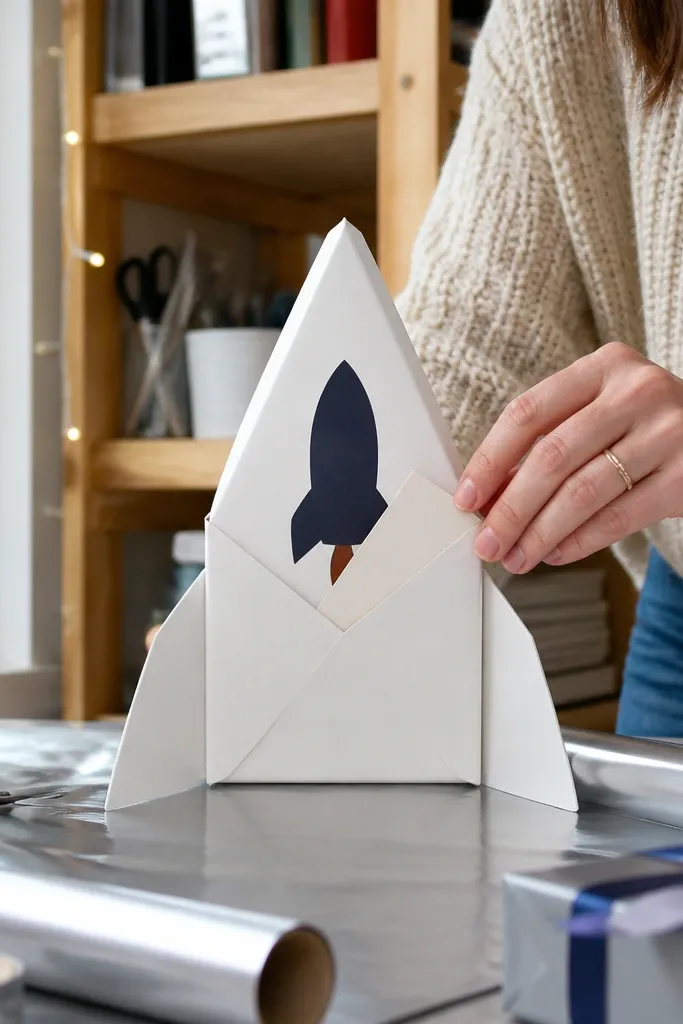
This is a rocket that also holds a note, so it’s two crafts in one. The envelope pocket keeps the message hidden, and the rocket silhouette makes it instantly recognizable in photos. It’s beginner-friendly Origami Easy because the rocket form uses big folds and only a couple of corner tucks. Great for birthday cards, surprise notes, or a “send a message” wall in kids' rooms.
Start with a square and fold it into a triangle to set a strong crease line. Fold corners inward to create the rocket body and then fold one side out to make a fin, repeating on the other side. Create the pocket by folding the back flap under the front layer so it holds paper inside. Finish by shaping the nose point and pressing the edges so the rocket stays crisp.
Use a contrasting paper for the fin panels so the rocket reads clearly even from overhead.
Don’t make the pocket too shallow or the note slips out and looks unfinished.