1. Pegboard Wall
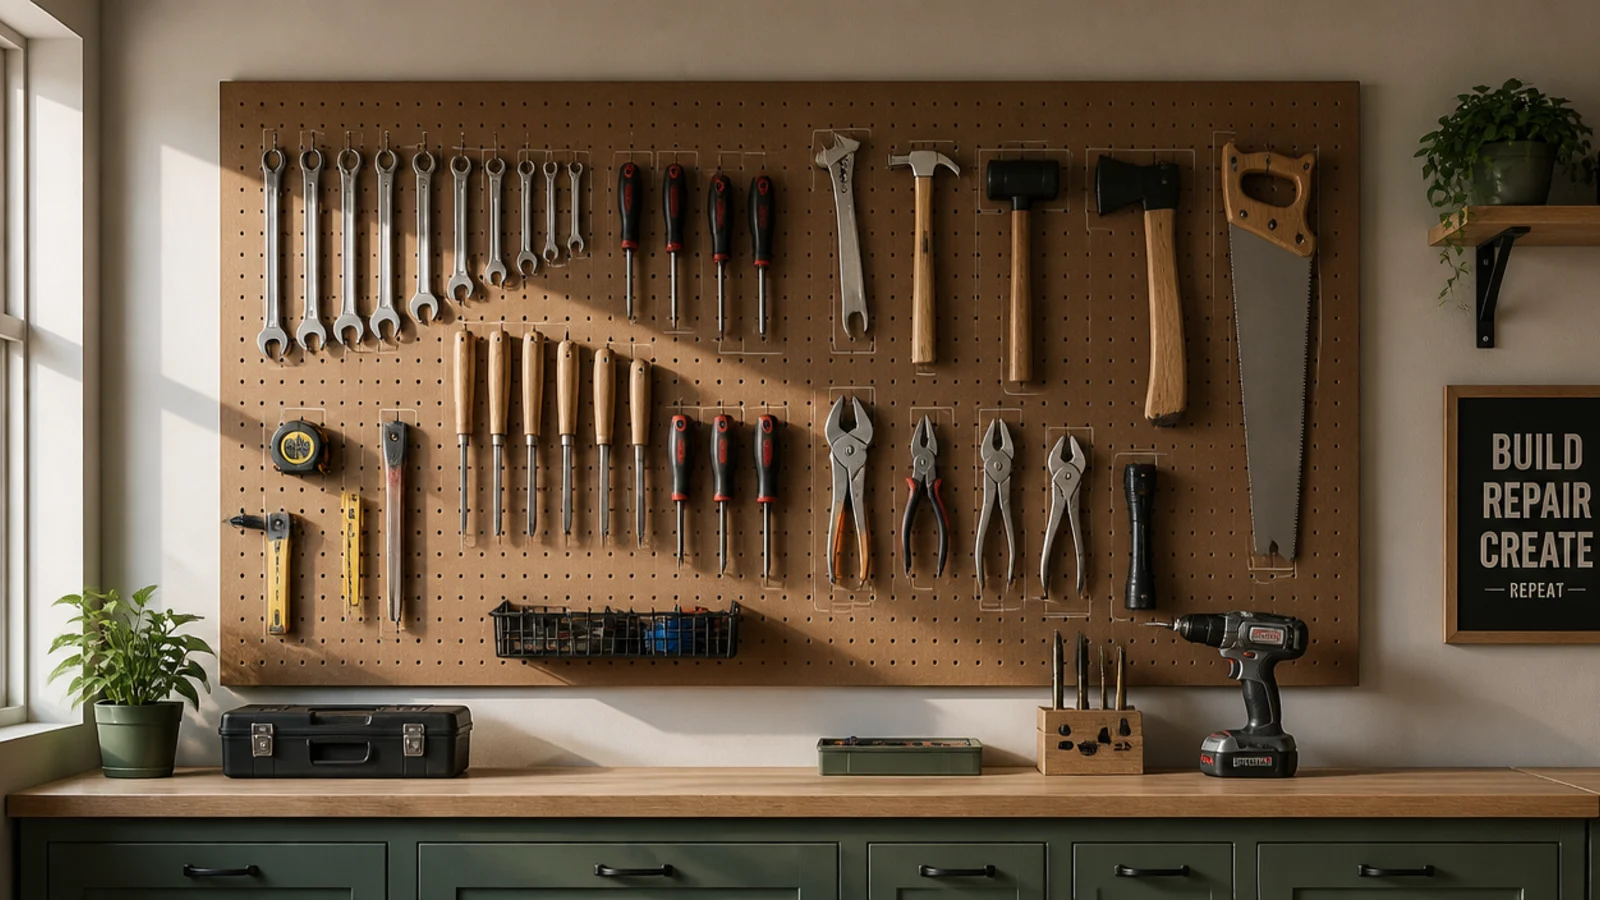
Screw 1x2 furring strips to the studs, then mount a tempered pegboard sheet with washers behind the screws so hooks can seat in the gap. Snap in assorted hooks and hang tools, heaviest near the studs. Trace each tool’s outline so an empty spot shows what’s missing. Group tools by type in zones and keep daily ones at eye level.
Pegboard is the easiest, cheapest way to turn a blank wall into hand-tool storage. Tools hang in the open where you see the whole kit. It’s the beginner-friendly first wall system for any garage.
Skip thisDon’t screw pegboard flat to the wall; without the furring-strip gap the hooks can’t seat and the board is useless.
Editor's noteOutline every tool so an empty silhouette reminds you to put the tool back instead of leaving it on the bench.
2. Slatwall Panels
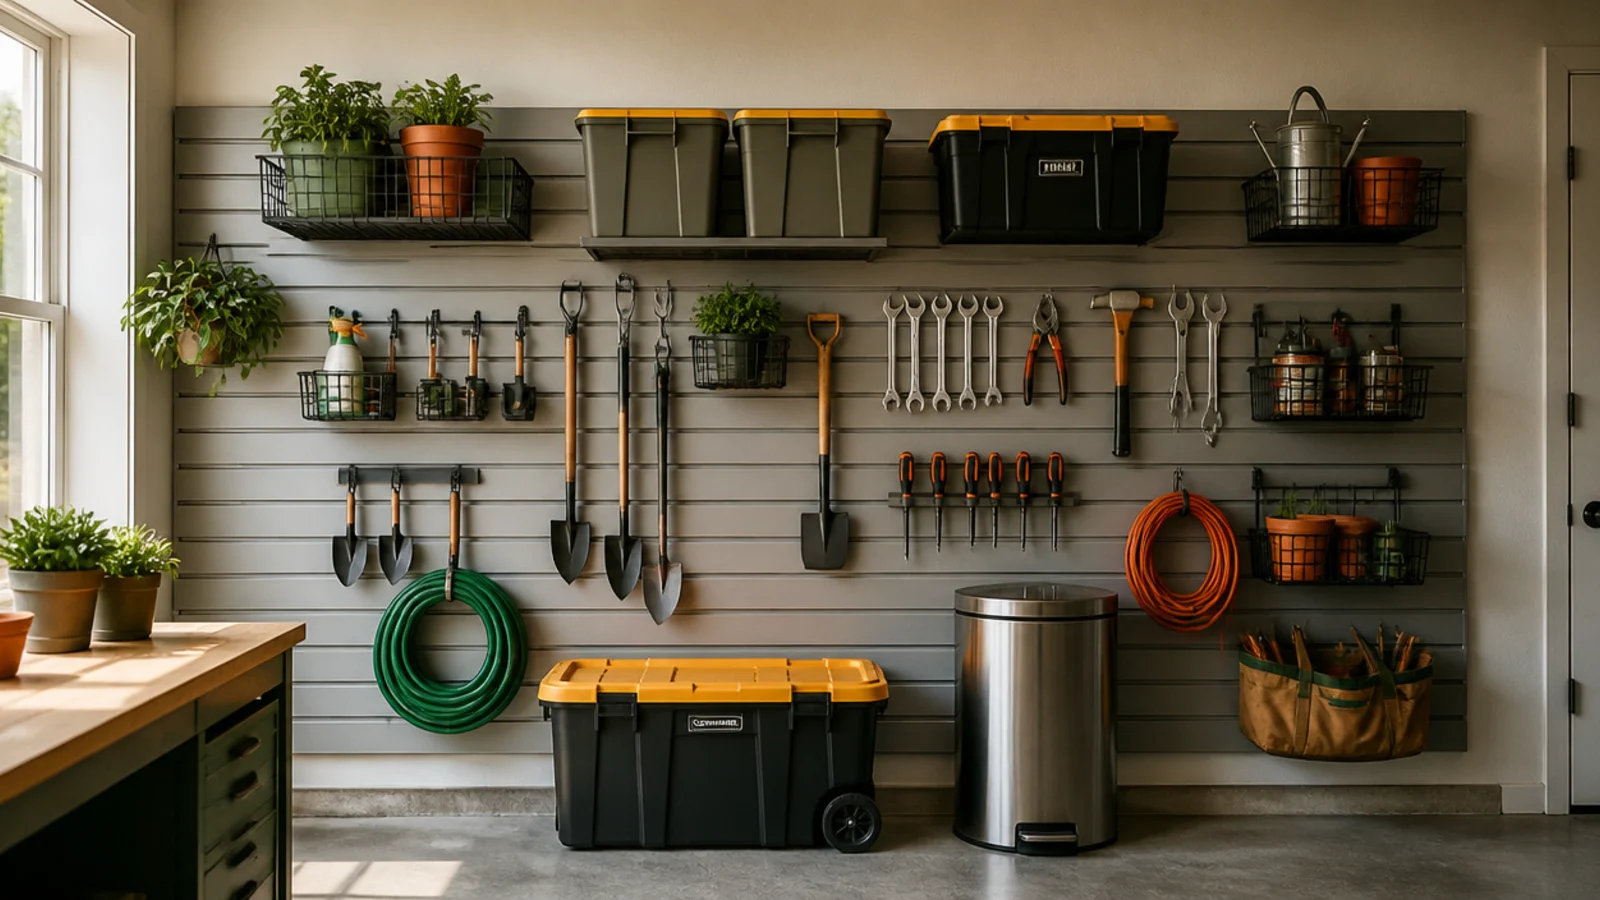
Screw slatwall panels into every stud, level, from floor to near-ceiling. Lock in matching hooks, wire baskets, and bracket shelves. Start daily tools at eye level, add baskets for cans and bottles, and put heavy accessories nearest the studs. Slide accessories along the grooves to rearrange anytime. Cover the whole wall for the built-in look.
Slatwall covers a wall in grooves that hooks, baskets, and shelves lock into, holding heavier accessories than pegboard and staying put when bumped. It’s the sturdier, cleaner wall system. Best for a tool wall that carries real weight.
Skip thisDon’t hang slatwall on drywall between studs; loaded panels are heavy and must screw into framing.
Editor's noteBuy accessories from the same slatwall line so hooks, baskets, and shelves all lock in and share one look.
3. Steel Wall Track
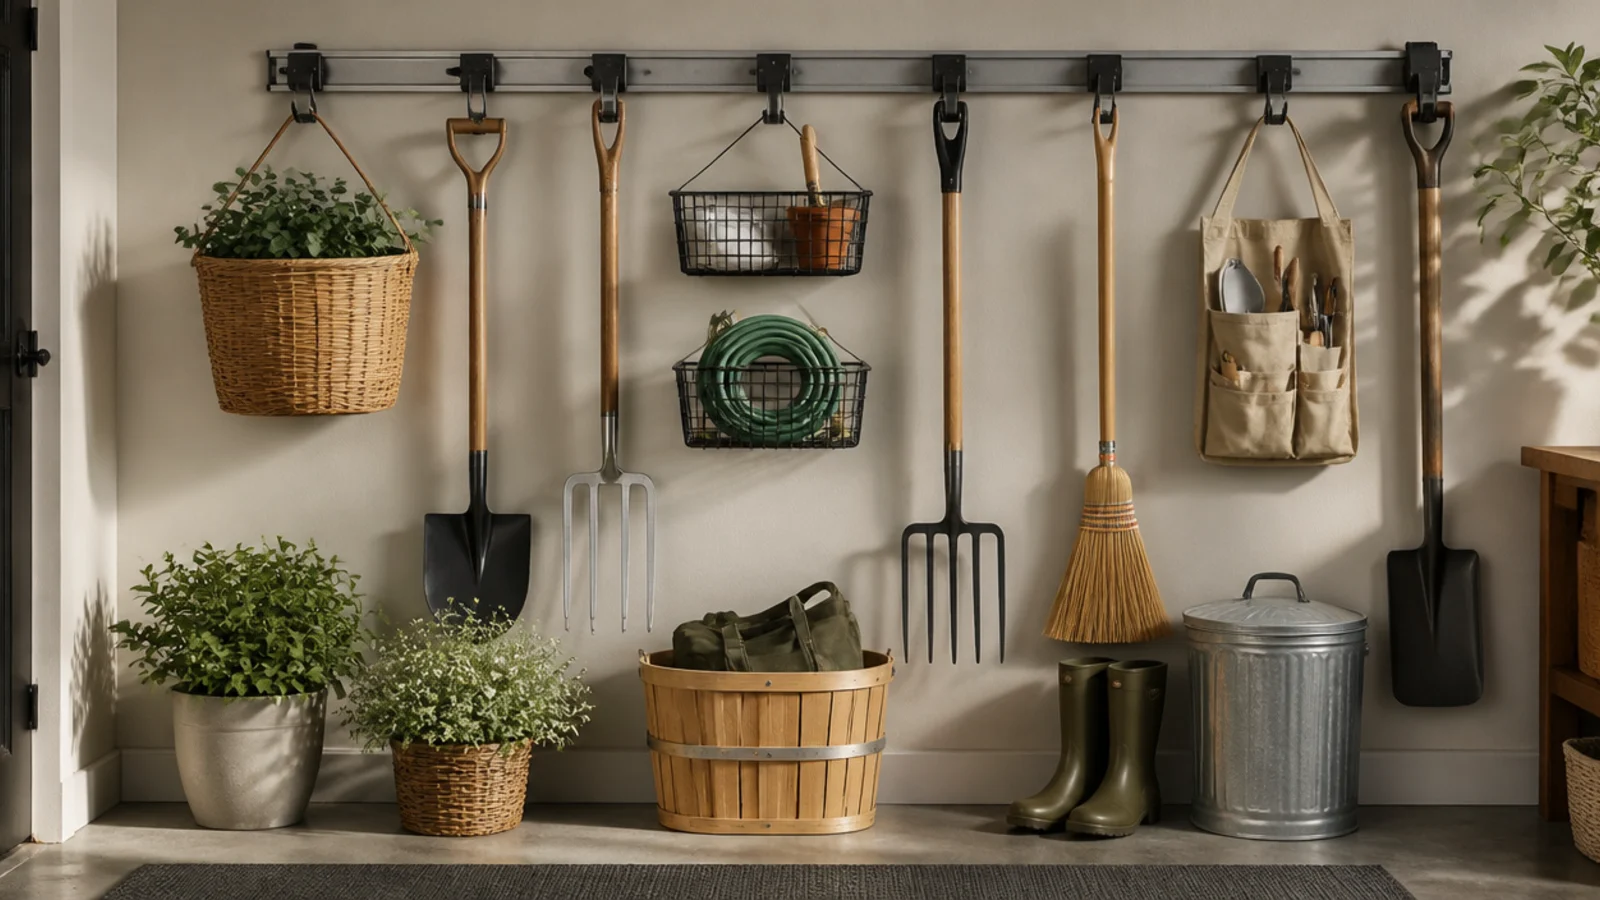
Screw the steel rail (Rubbermaid FastTrack, Gladiator, or similar) into every stud at shoulder height with the included lag screws. Hang rail-compatible hooks for long-handled tools, wire baskets for bottles and balls, and a bracket shelf for bins. The rail carries the load, so accessories just clip on and slide. Keep the heaviest items near the studs.
A steel wall track mounts one heavy rail into the studs, and every hook and basket hangs from it, carrying hundreds of pounds. It’s the strongest single-rail system. Ideal for a heavy garden or equipment wall.
Skip thisDon’t anchor the rail into only one or two studs; a partially fixed rail sags under a full load of gear.
Editor's noteMount the rail high enough that long tools hang clear of the floor but low enough to lift them off easily.
4. French Cleat Wall
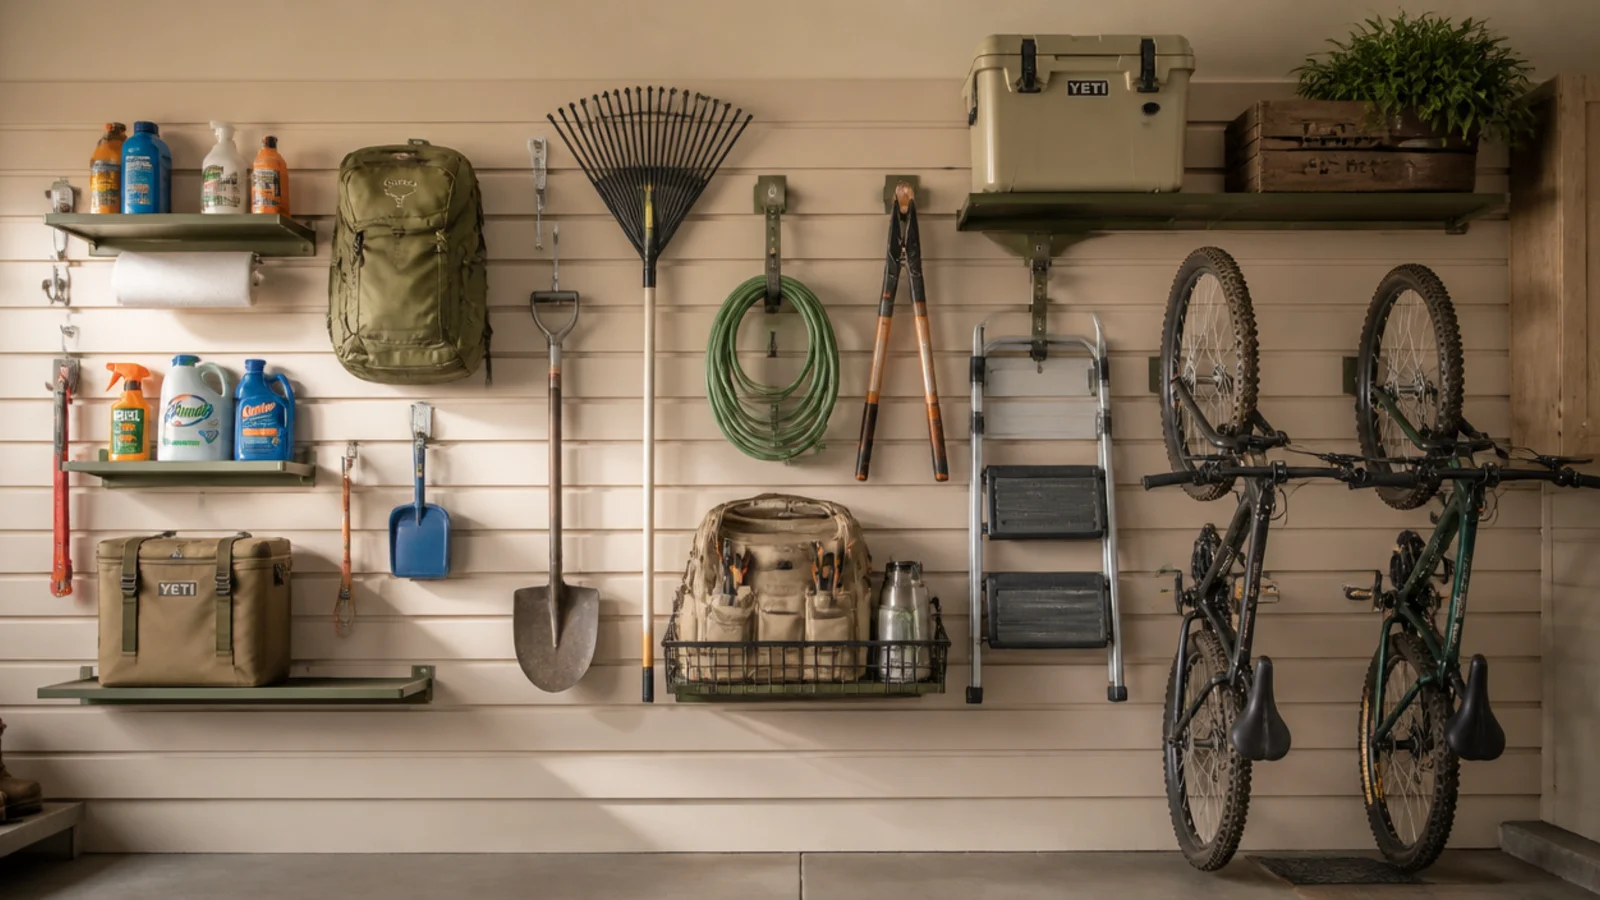
Rip cleat stock at a 45-degree bevel and screw the wall cleats into every stud, bevel up and out, spaced 6 to 8 inches apart. Build or buy cleat-backed holders — tool racks, shelves, bins — and hook them over any rail. Slide holders to rearrange. Cover a big wall area with rails first, then add holders over time as needs come up.
A French cleat wall is a run of angled rails that custom holders hook onto and move anytime, so the whole wall rearranges without new holes. It’s the most flexible wall system. Best for a setup that keeps evolving.
Skip thisDon’t cut the wall cleat’s bevel facing down; the angle must point up and out or holders lift off the wall.
Editor's noteRun cleat rails across a whole wall first; the rail is the reusable system and you build holders for it as you go.
5. Wall-Mounted Cabinets
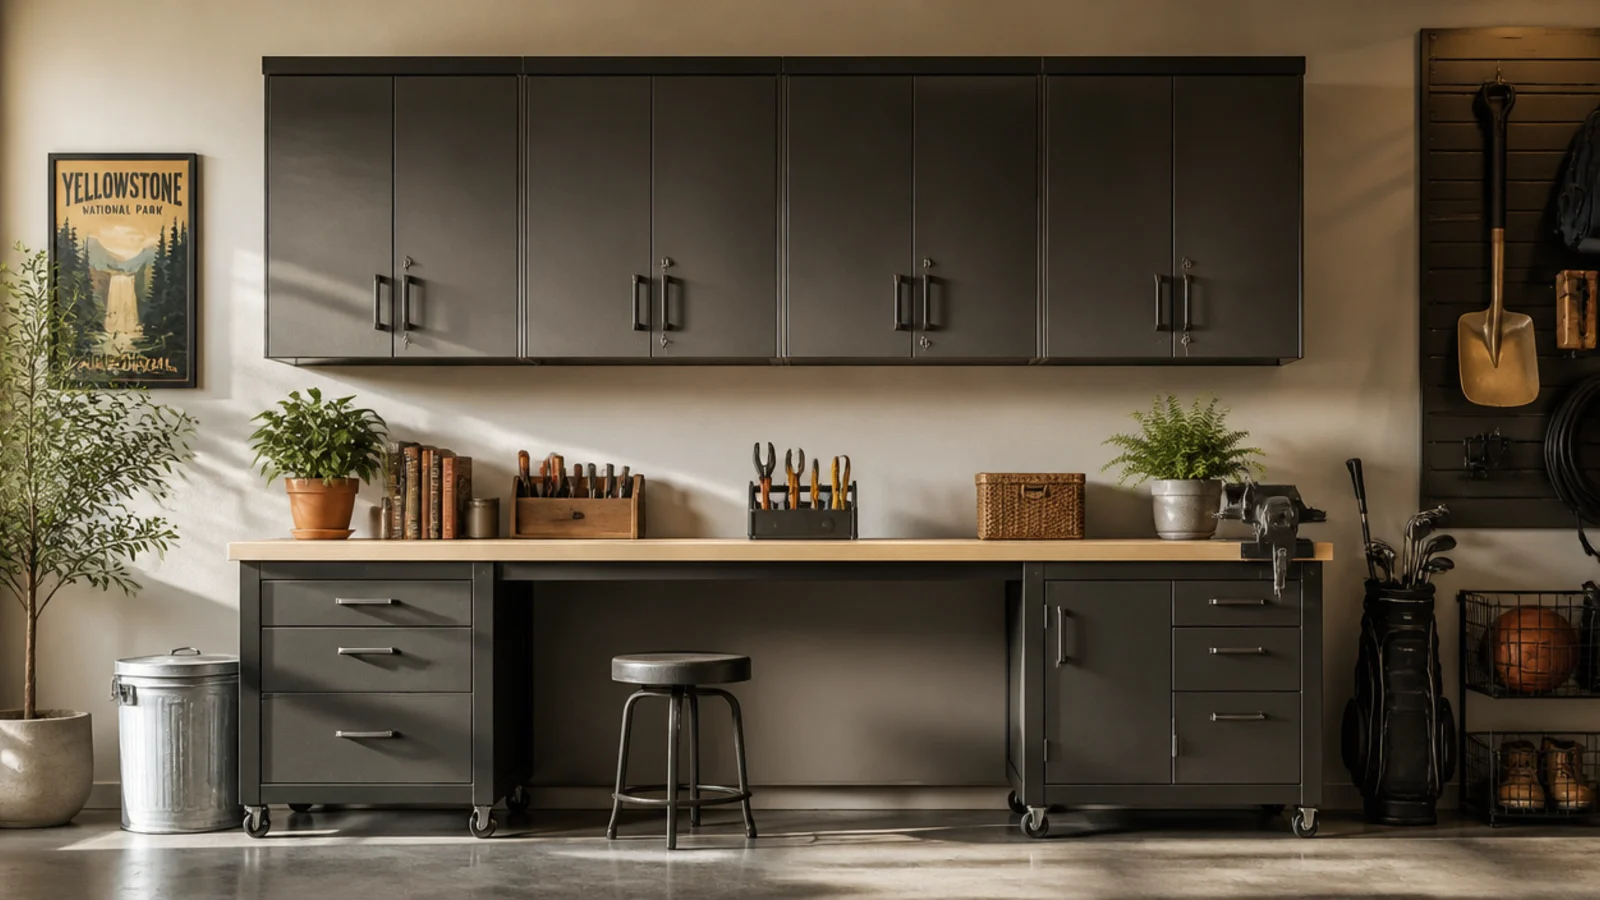
Wall cabinets hide clutter and keep dust off contents while freeing the floor and counter below. They give the wall a finished, closed look. Best for supplies you don’t want on display or within reach of kids.
Mount cabinets by screwing through the back rail into at least two studs with 3-inch screws, checking level across a run. Organize contents by category behind each door and label the interior shelves. Keep chemicals and sharp tools in a high or locking cabinet. Leave the counter below clear as workspace. Anchor firmly, since loaded cabinets are heavy.
Adjust the interior shelves to your tallest items first, then space the rest, so no cabinet space is wasted.
Don’t hang cabinets on drywall anchors alone; loaded cabinets are heavy and need stud screws to stay up.
6. Bracket Shelf Boards
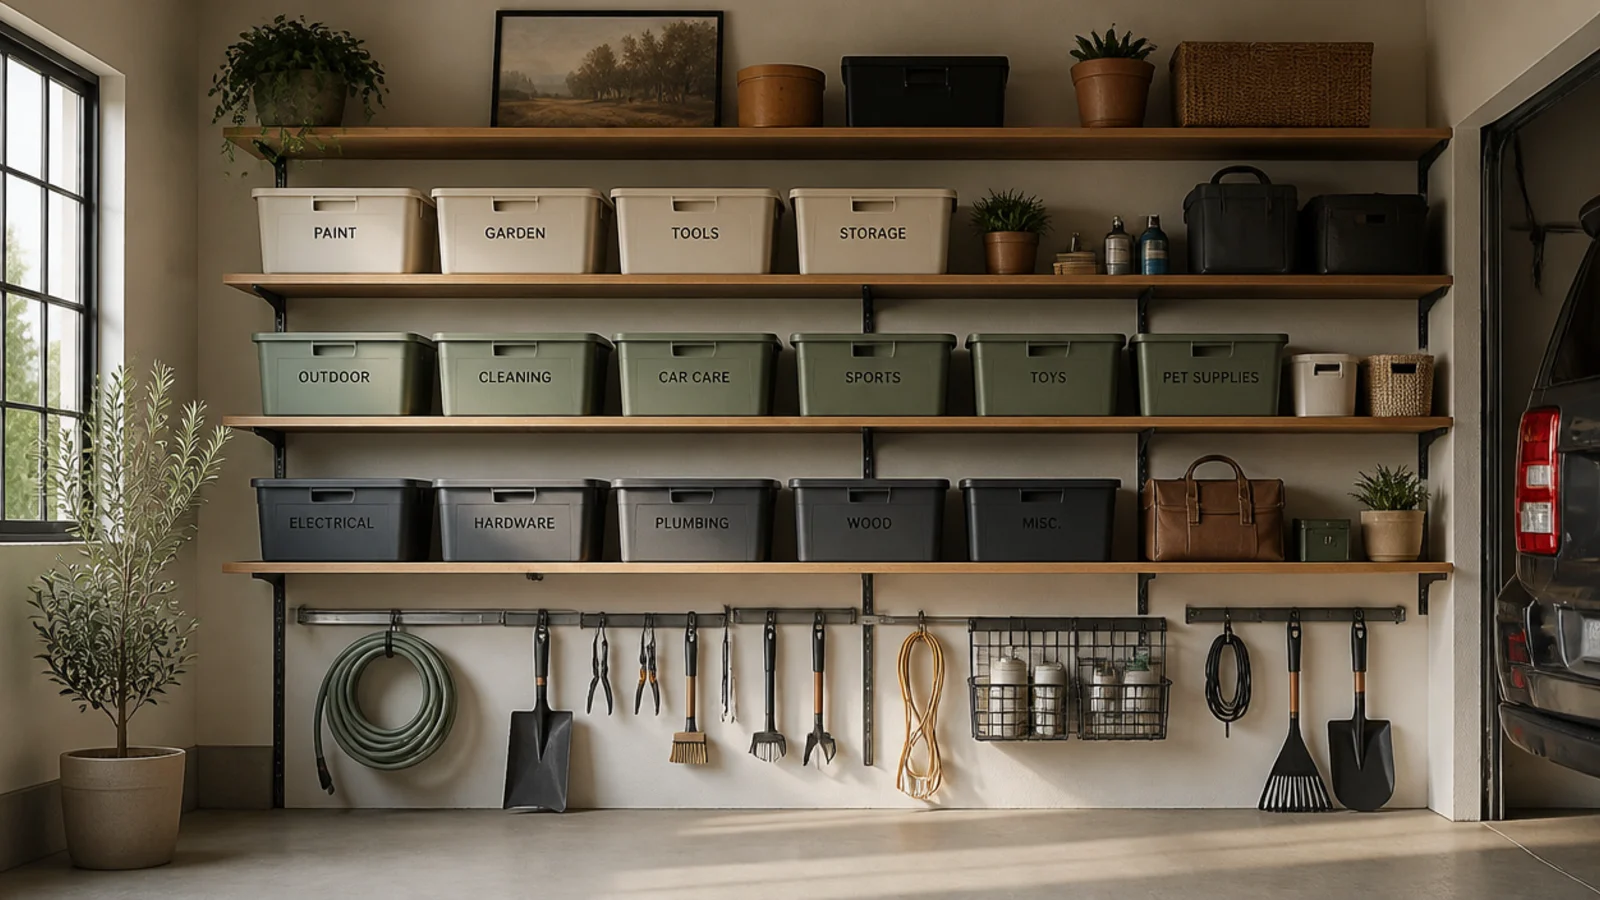
Screw metal L-brackets into the studs, level, spaced under 32 inches apart so the shelf won’t sag. Lay a 3/4-inch board or plywood across them and screw it down. Load labeled bins and supplies, heavy items low. Stack several shelves up the wall. For extra strength on long spans, add a bracket into a middle stud.
Simple boards on L-brackets give you open shelving up a wall for almost nothing. Brackets into studs carry the load; boards hold bins. It’s the most straightforward way to add wall shelves.
Skip thisDon’t span a long shelf on just two end brackets; without a middle support the board sags under load.
Editor's noteKeep bracket spacing under 32 inches and add a middle bracket on long shelves so the board never bows in the center.
7. Magnetic Tool Bar
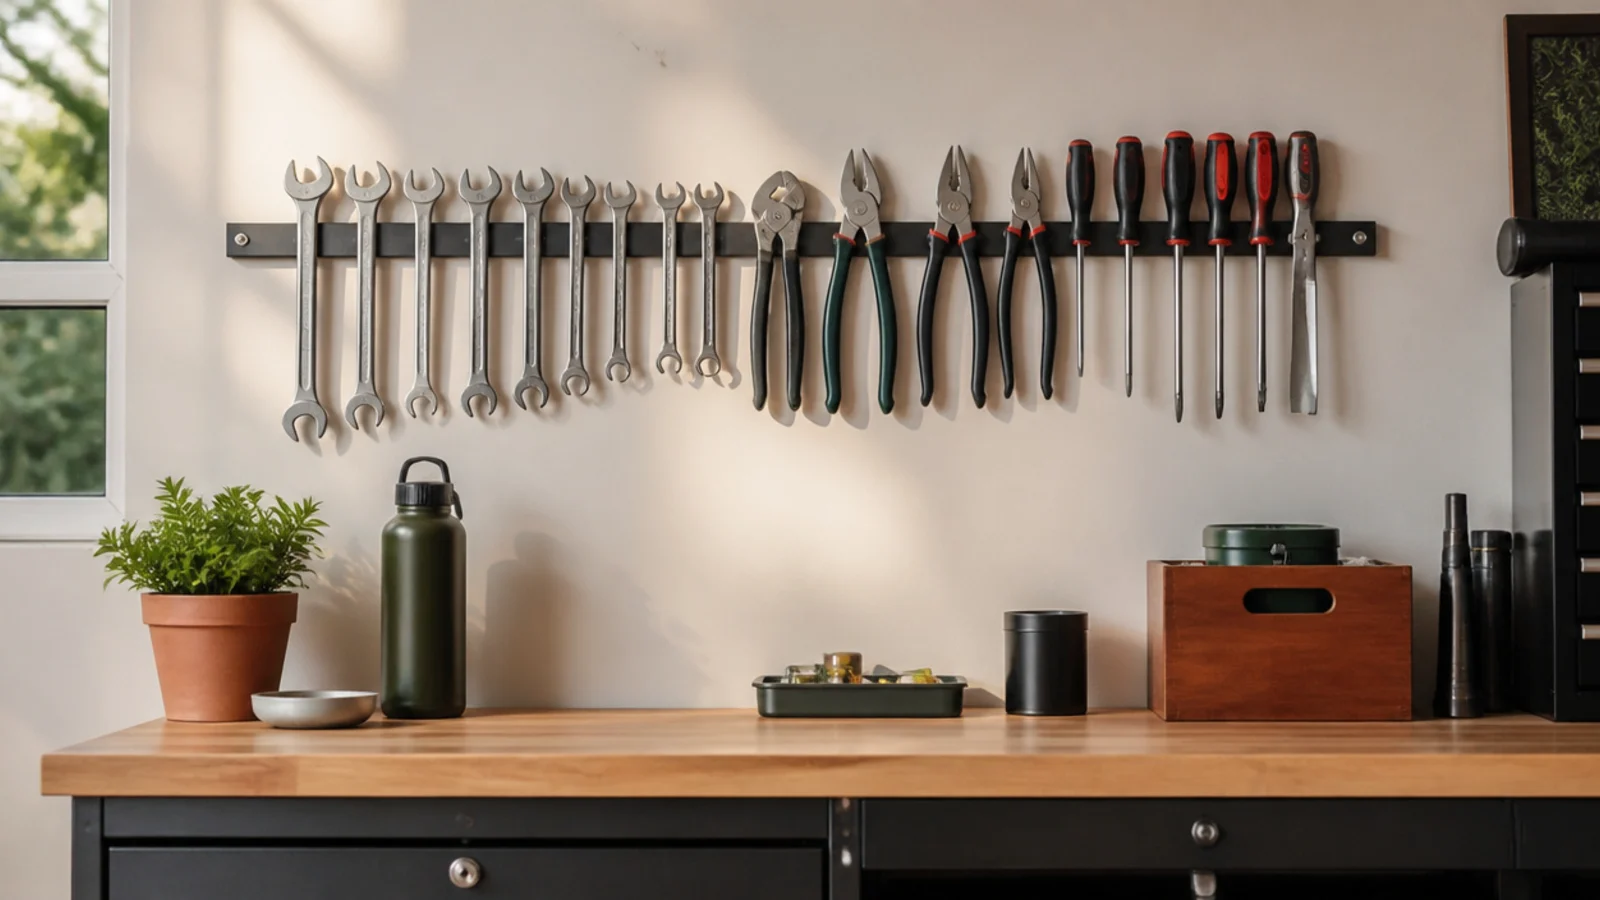
Screw a magnetic tool bar into a stud at reach height above the bench. Stick your most-used metal tools to it, heaviest near the mounting screws. Keep a magnetic tray beside it for loose bits mid-project. Wipe the bar occasionally so grit doesn’t weaken the grip. Test each tool’s hold before trusting it, and keep power tools off.
A magnetic bar holds metal hand tools flat on the wall for one-handed grab-and-go, using a strip of space too small for anything else. Tools return with a slap. Great above the bench for your most-used metal tools.
Skip thisDon’t trust a light bar with heavy tools; test each one and never hang cordless power tools on it.
Editor's noteMount it right above the bench so tools go back with a single motion instead of a walk across the garage.
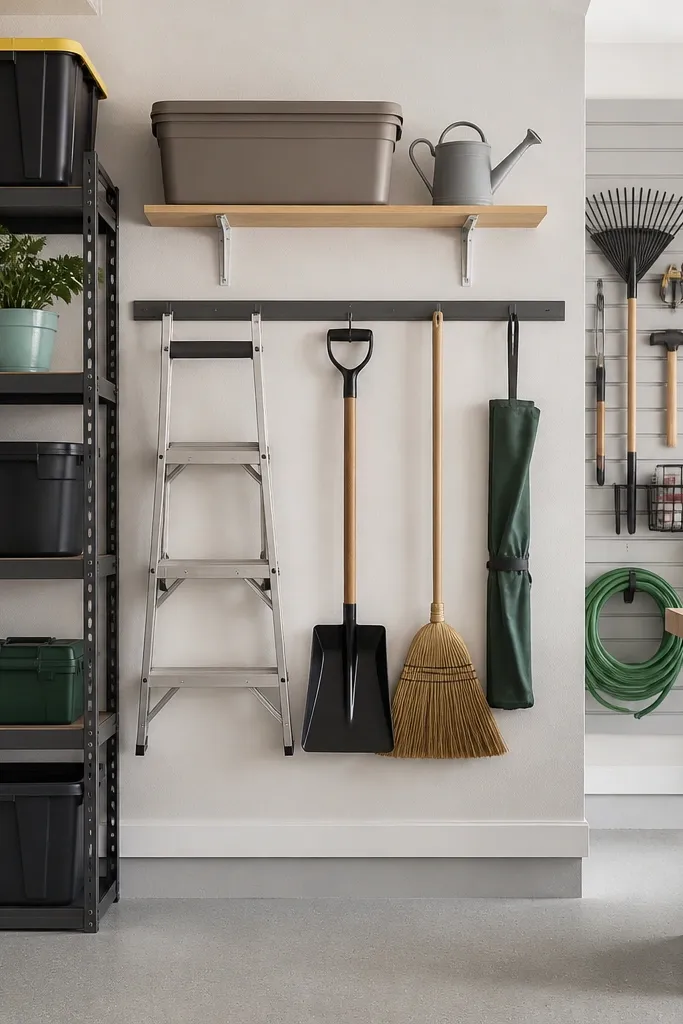
8. Long-Item Wall Hooks
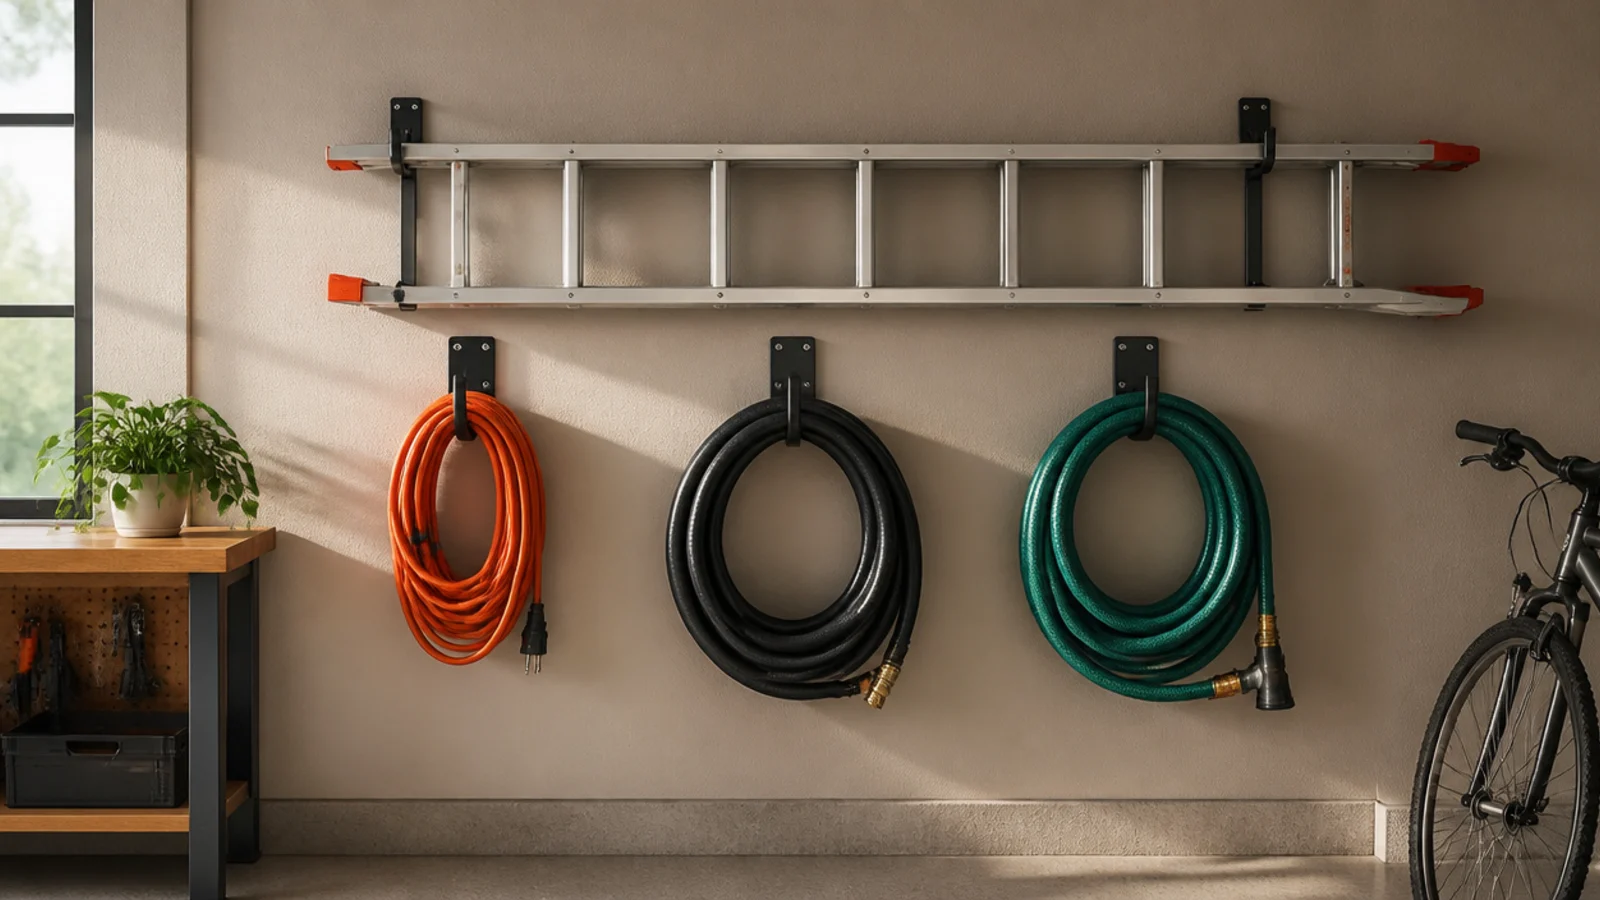
Heavy-duty hooks get the bulky, awkward long items — ladders, hoses, cords — up off the floor and onto the wall. These are the biggest floor-hoggers, so hanging them frees the most space. Ideal for a garden or equipment wall.
Screw heavy-duty hooks into the studs at heights matched to each item. Hang a ladder flat across two or three hooks, coil hoses and cords over utility hooks, and hang the wheelbarrow by its edge. Put the heaviest items closest to the studs. Leave the floor clear beneath. Use hooks rated well above each item’s weight.
Trace your bulky gear against the wall first so each hook is the right size and height for the exact item.
Don’t hang heavy equipment on light hooks or drywall; use rated hooks into studs or they bend and drop.
9. Wall Bin Rail
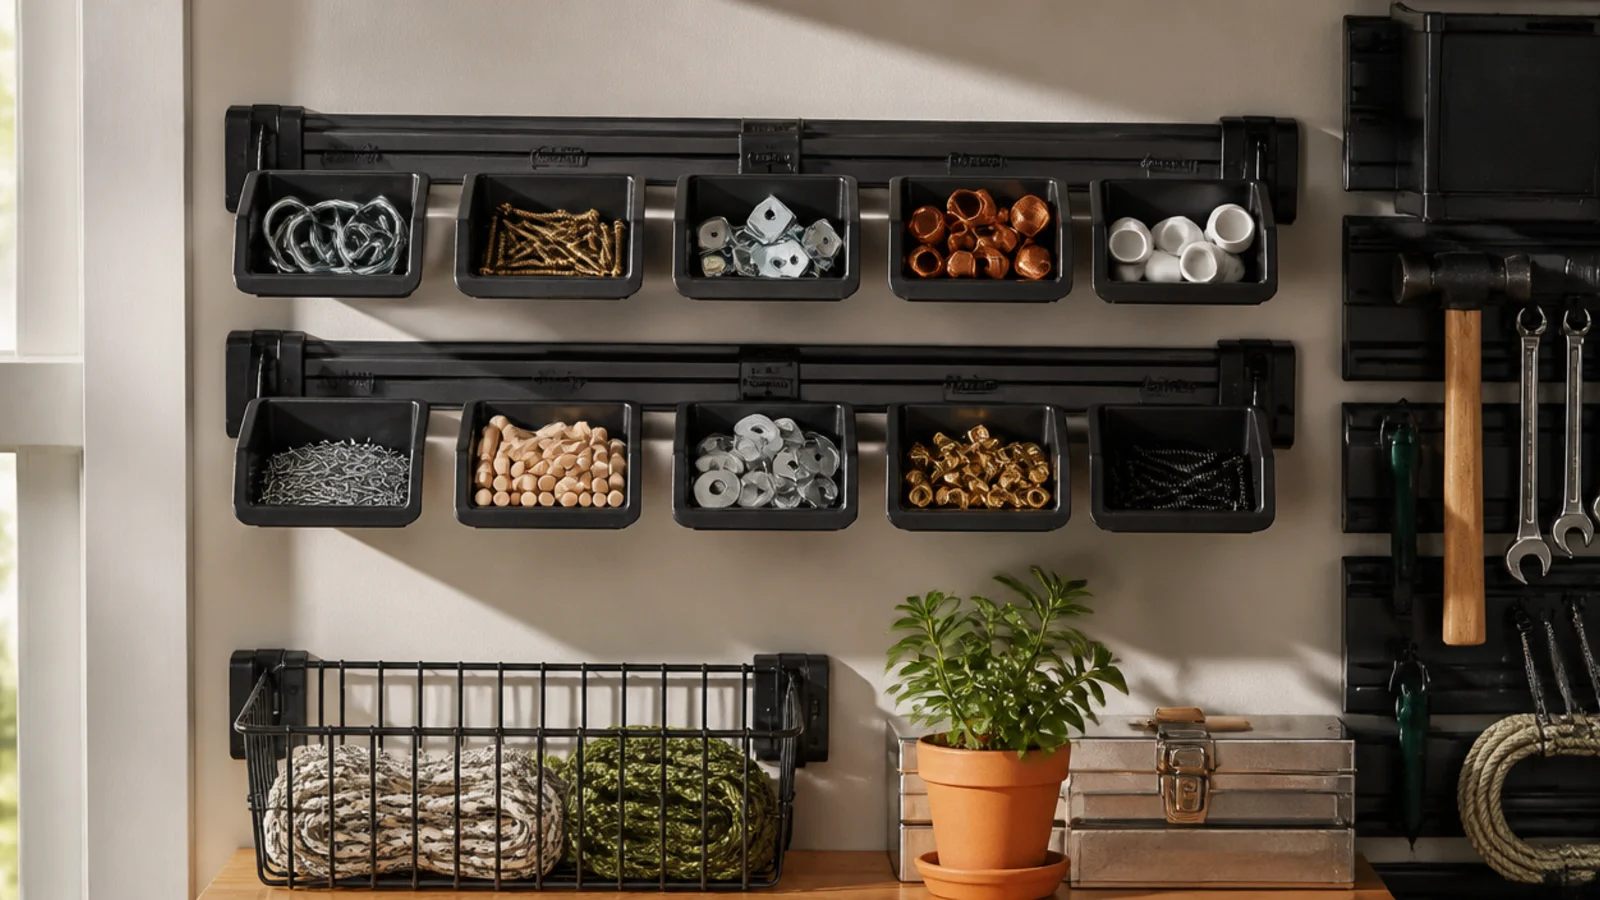
A bin rail hangs small parts bins on the wall in rows, sorting fasteners without using a shelf or drawer. Bins clip on and lift off. Perfect for keeping hardware organized and off the bench.
Mount a louvered bin rail or a cleat into the studs. Hang open-front parts bins along it, sorted by hardware type and size, with the most-used sizes at eye level. Label each bin’s front. Lift a bin off to carry it to the work, then hook it back. Use a few bin sizes so small and large parts each get the right depth.
Hang the rail beside the bench so parts bins are an arm’s reach away without taking any bench space.
Don’t overfill hanging bins past the lip; parts spill out the front every time you lift one off the rail.
10. Wire Grid Panel
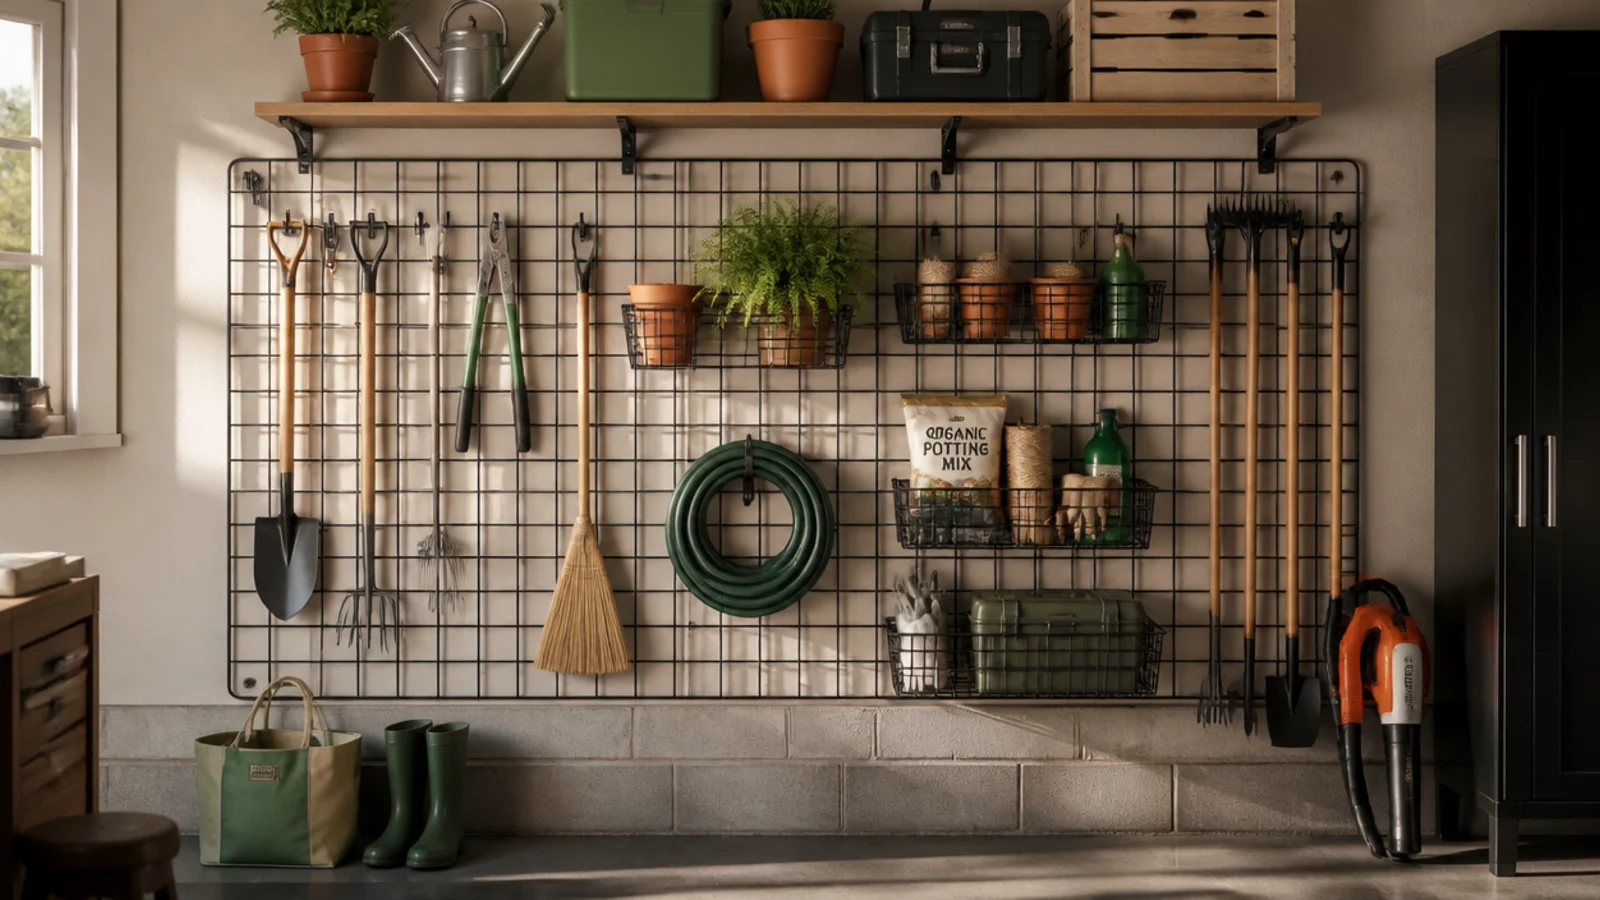
Mount wire grid panels to the studs with standoff brackets so hooks can clip behind the wires. Add S-hooks, cup hooks, and small wire baskets anywhere on the grid. Hang light tools, gloves, and supplies. Rearrange hooks freely as needs change. Keep loads light to moderate since the grid suits lighter gear than slatwall.
A wire grid panel lets you hang hooks and baskets anywhere on the mesh, offering flexible, airy wall storage. Hooks clip on at any point. Great for a lightweight, adaptable tool and supply wall.
Skip thisDon’t load a wire grid with heavy power tools; it’s built for light gear, so use slatwall or track for heavy items.
Editor's noteUse the grid for the light, changeable stuff you rehang often; you can move a hook anywhere without new holes.
11. Fold-Down Wall Bench
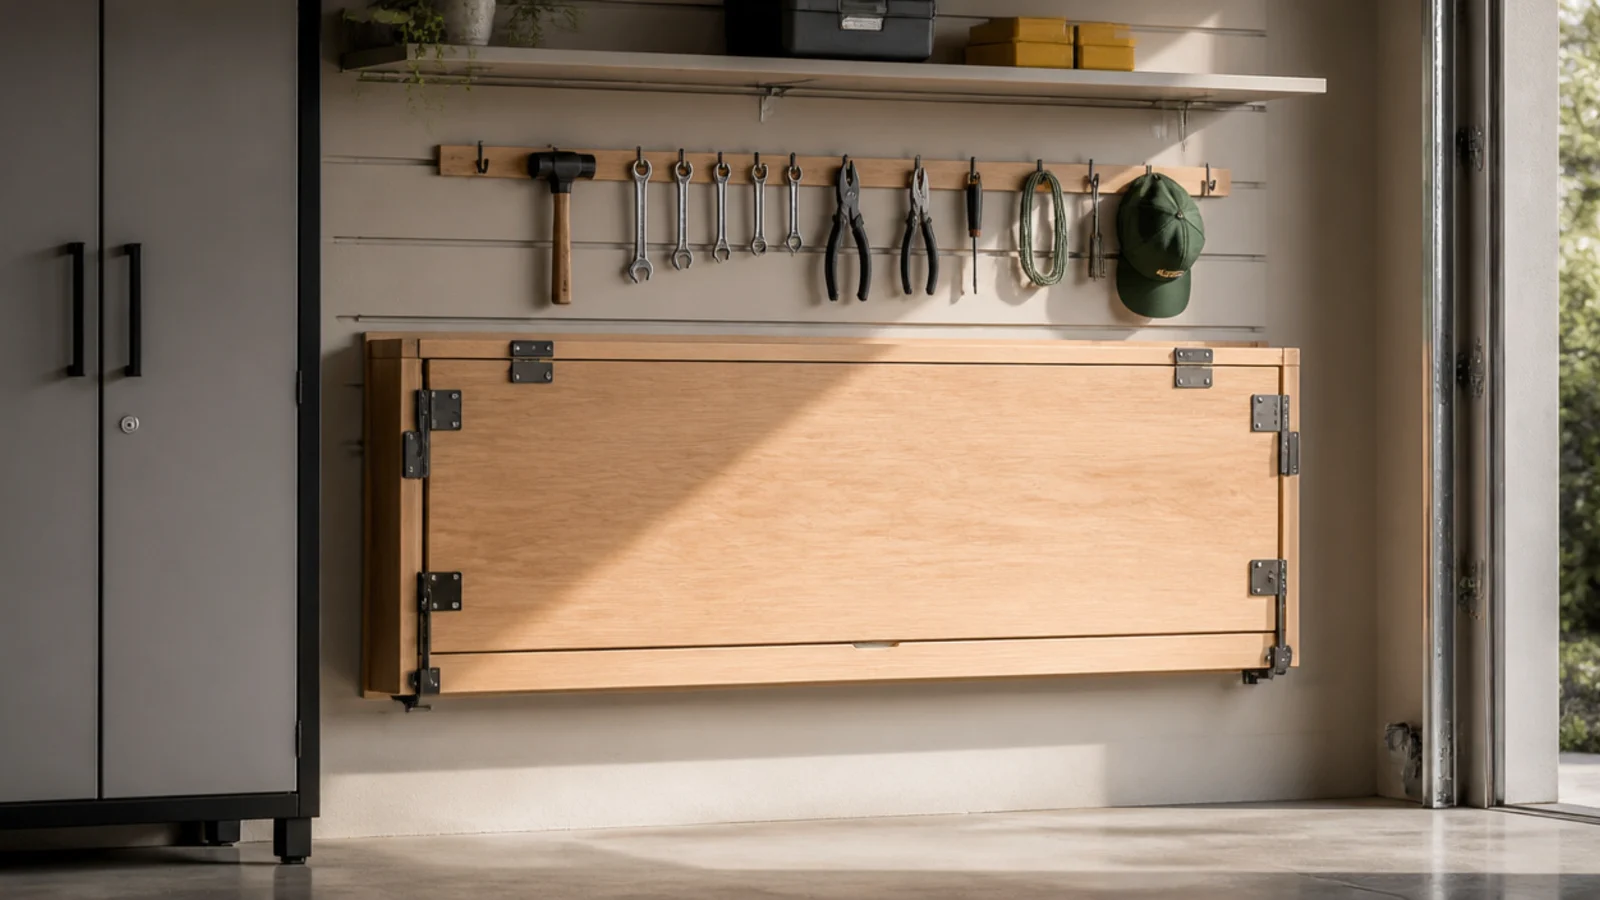
A fold-down bench mounts a full work surface to the wall that collapses flat when you’re done, reclaiming the floor. It’s wall-mounted workspace on demand. Ideal where a permanent bench would block the space.
Mount a hinged bench top and folding brackets to a ledger board screwed into the studs at counter height. The top swings down and the brackets lock to support it; fold it flat when finished. Add a small tool rail above for bench tools. Confirm the brackets are rated for your working load before relying on the bench.
Store your go-to bench tools on the wall above the folded top so setup is instant when it drops down.
Don’t mount the ledger into drywall; a working bench takes downward force and must anchor into studs.
12. Wall Garden Tool Rack
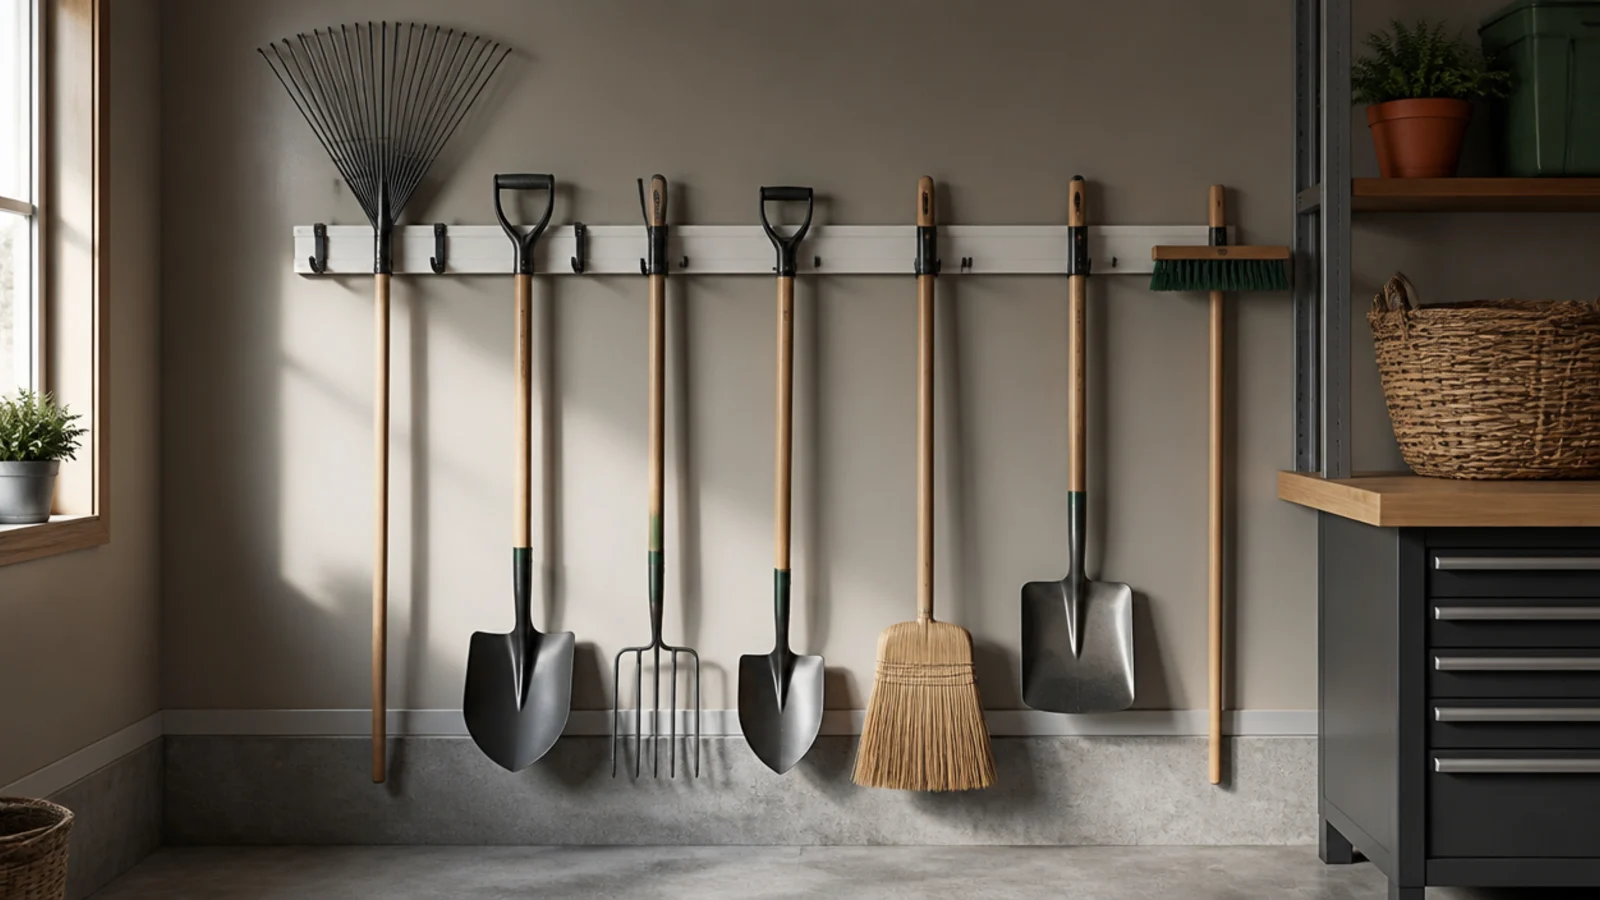
A dedicated garden tool rack holds rakes, shovels, and brooms upright in slots or clips so they stop falling over in a corner. Each tool has its own spot. Perfect for a garden wall of long-handled tools.
Mount a slotted or clip-style tool rack into the studs at chest height. Slot each long-handled tool into its own holder, heads up or down per the rack design, grouped by type. Add hooks alongside for hand tools and gloves. Leave the floor clear beneath. Space the holders so tool heads don’t tangle when you pull one out.
Group like tools together — all rakes, all shovels — so grabbing the right one is instant and putting it back is obvious.
Don’t space the holders too close; crowded tool heads tangle and you knock several loose grabbing one.
13. Wall-Mounted Hose Reel
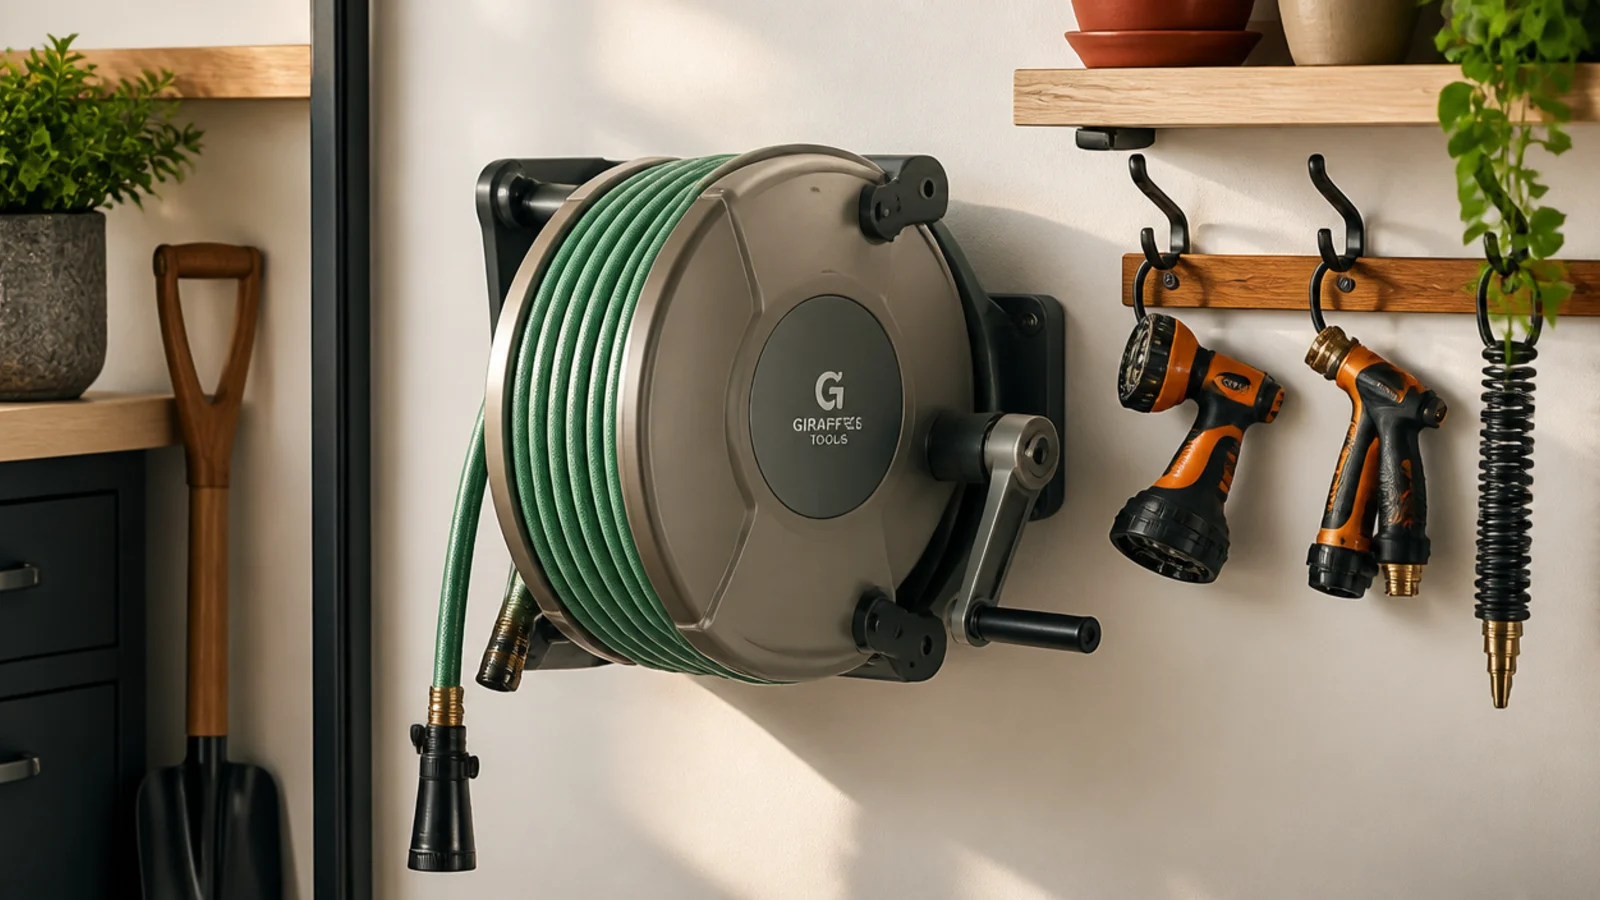
A wall hose reel winds the garden hose neatly onto the wall, ending the tangled heap by the door. A crank winds it up after each use. Ideal for anyone who drags a hose out weekly.
Mount the reel into the studs near the hose bib at a comfortable cranking height. Feed the hose onto the reel and connect the lead hose to the tap. Hang nozzles and sprinklers on nearby hooks. Crank to wind the hose fully after each use so it doesn’t drag on the floor or kink. Choose a reel rated for your hose length.
Mount it just inside the door nearest the tap so winding up the hose is a two-second job, not a chore you skip.
Don’t mount a loaded hose reel on drywall anchors; a full hose is heavy and the mount must hit studs.
14. Wall Charging Shelf
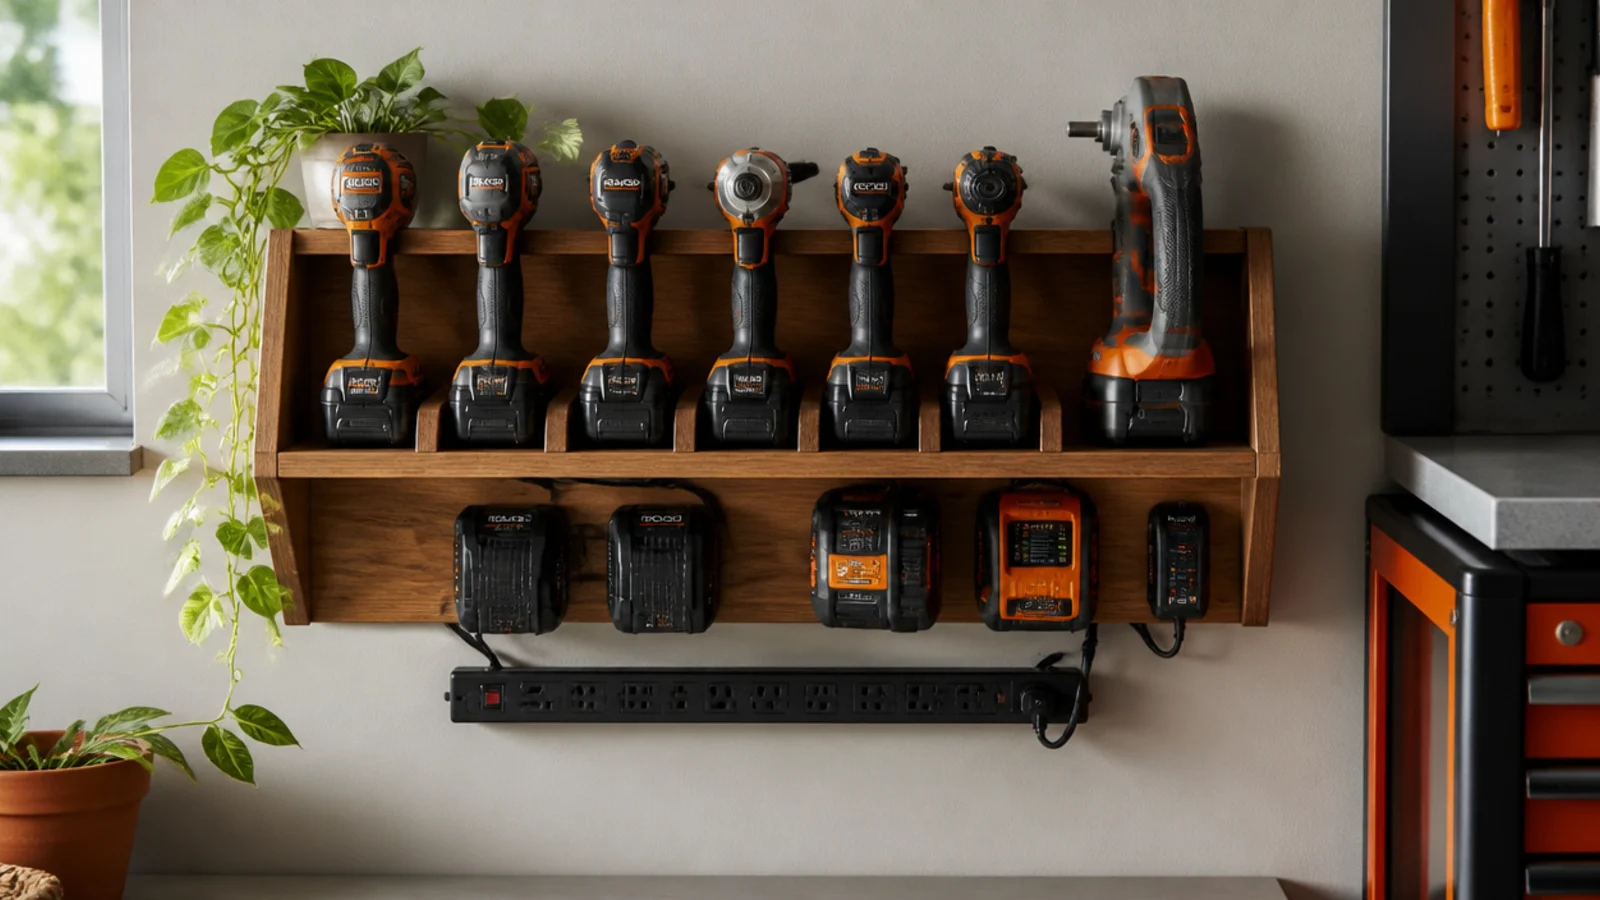
Mount a shelf into the studs with cradles or slots for the tools and a spot below for the chargers, fed by a power strip screwed alongside. Slot each tool and pair it with its charger and battery, labeled. Leave airflow around the chargers. Run the power cord to an outlet. Keep it near the bench so grabbing a charged tool is one motion.
A wall-mounted charging shelf puts cordless tools, batteries, and chargers on the wall in one powered spot, off the bench. Tools slot in; batteries charge in place. Essential for keeping cordless tools ready and off the counter.
Skip thisDon’t box the chargers in with no airflow; leave a gap above and behind so they don’t overheat.
Editor's noteWire the chargers to one switched power strip so you can cut power to all of them once everything’s topped up.
15. Lattice Basket Wall
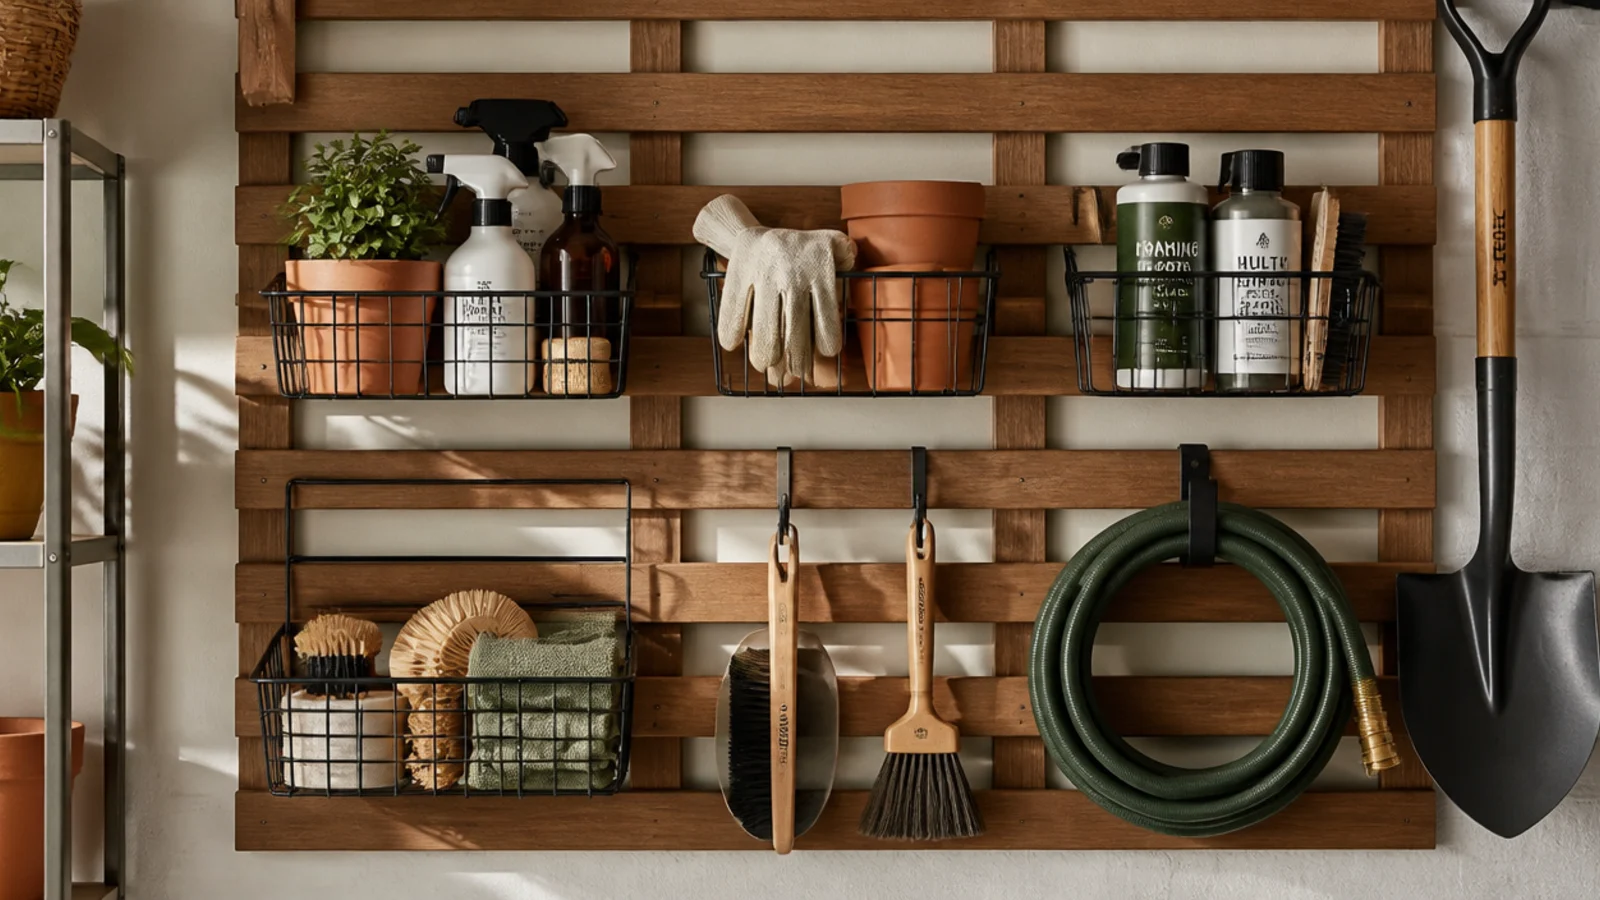
Mount a wood or metal lattice panel to the studs. Hook wire baskets and S-hooks onto the lattice to hold gloves, sprays, twine, and small supplies. Rearrange baskets freely across the panel. Keep loads light since lattice suits lighter gear. Seal a wood lattice against garage moisture. Group supplies by task in the baskets.
A lattice or trellis panel on the wall holds hanging baskets and hooks for light supplies, with an open, airy look. Baskets hook onto the lattice anywhere. Great for a lighter-duty supply or potting wall.
Skip thisDon’t hang heavy tools on a lattice panel; it’s for light baskets and supplies, not power tools or heavy gear.
Editor's noteUse the lattice wall for the light potting and cleaning supplies you rehang often, moving baskets around as needs change.