1. Hardware-Store Pegboard Wall
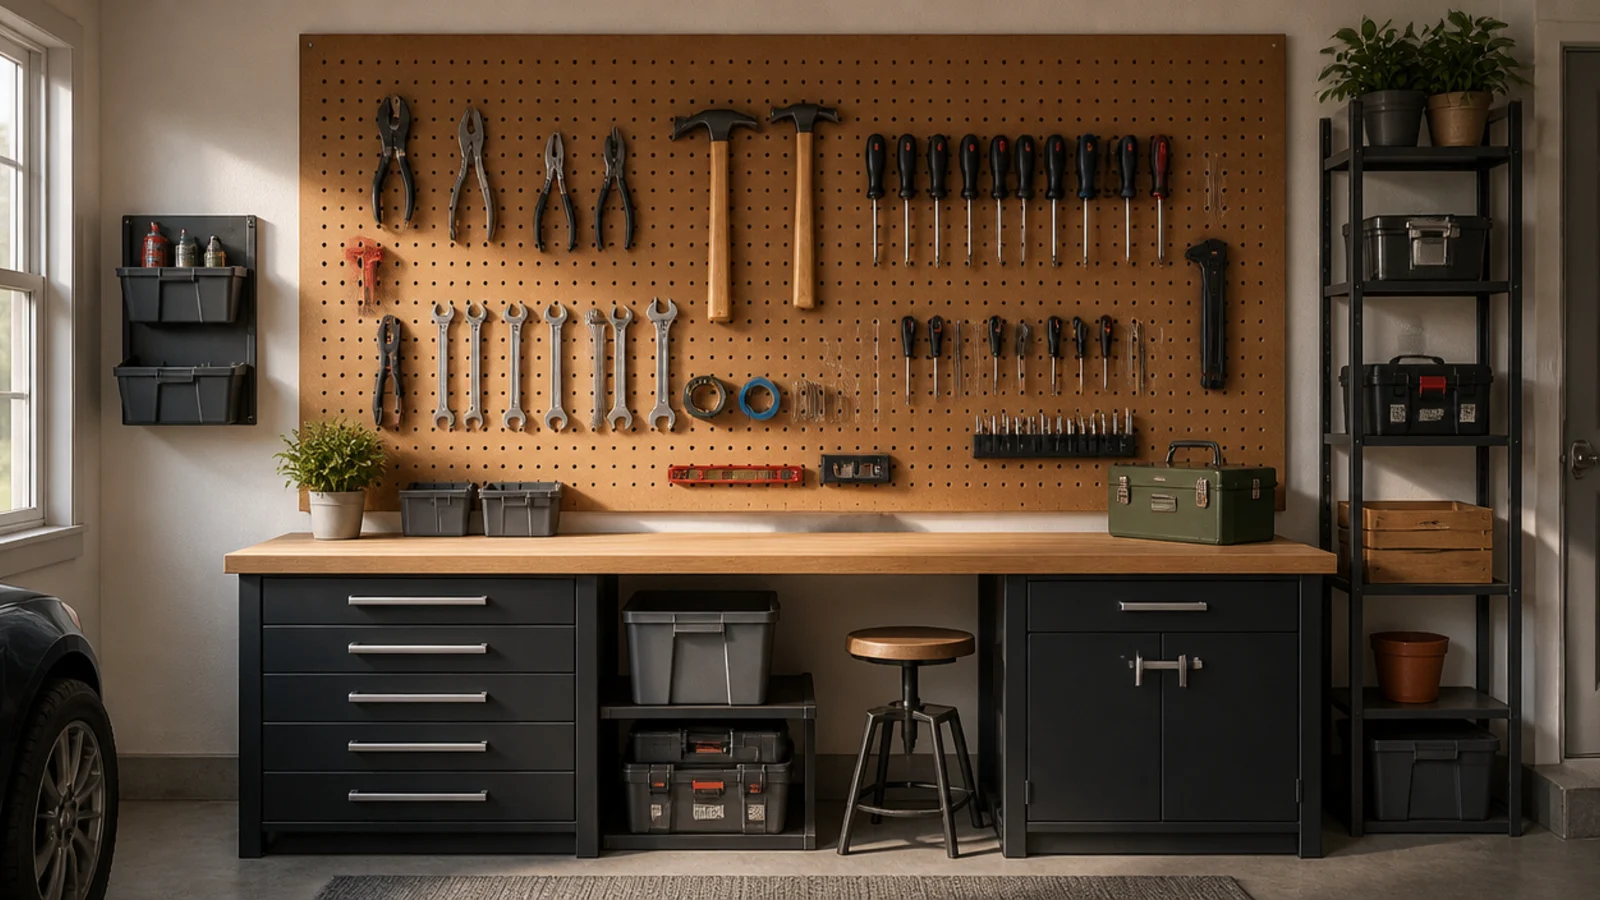
A single pegboard sheet is the best first move in any budget garage because it turns one flat wall into storage for dozens of hand tools. It’s beginner-proof — you screw it up, hang hooks, and adjust anytime. A standard 2x4-foot tempered hardboard sheet runs about $12-$15 and holds an astonishing amount for the price.
Screw furring strips (thin 1x2s) to the wall studs first so the pegboard sits about half an inch off the wall — hooks need that gap to seat. Level and screw the pegboard sheet to the furring strips with washers behind the screw heads. Snap in assorted hooks, then trace each tool’s outline with a marker so everything has a labeled home. Hang heaviest tools nearest the studs.
Buy the multi-pack of assorted hooks rather than singles — you always need more shapes than you expect, and singles cost far more each.
Don’t screw pegboard flat against the wall; without the furring-strip gap the hooks can’t hook, and the whole board is useless.
2. Five-Gallon Bucket Tool Caddy
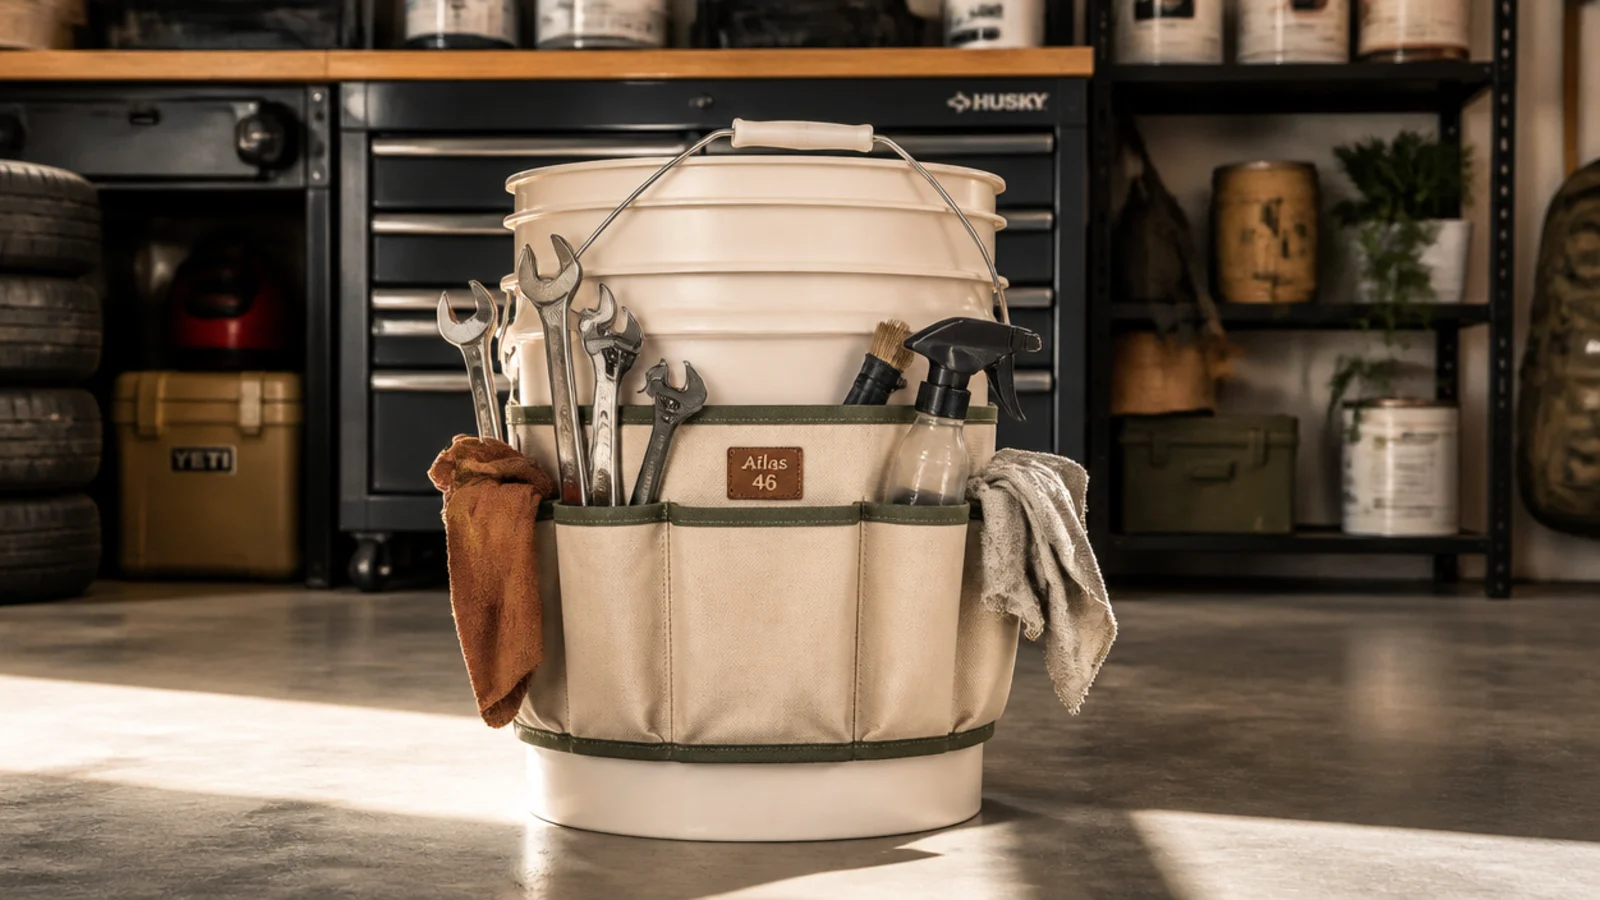
A bucket with a fabric tool apron becomes a grab-and-go caddy for whatever project you’re mid-way through. It’s ideal for renters and anyone who works in different spots, since it moves with you. A used bucket is often free from a bakery or hardware store, and the canvas apron runs about $8.
Wash a clean five-gallon bucket and slip a bucket-organizer apron over the rim so the pockets hang outside. Load the outer pockets with frequently used hand tools and the deep center with cordless tools or paint supplies. Label the bucket by project — 'plumbing', 'painting' — with tape on the side. Stack empty buckets to save floor space between jobs.
Keep one bucket permanently loaded as your 'quick fix' kit so household repairs don’t mean hunting through the whole garage.
Don’t overload the center with heavy tools while pockets are full — a top-heavy bucket tips; keep weight low and balanced.
3. PVC Pipe Long-Handle Holders
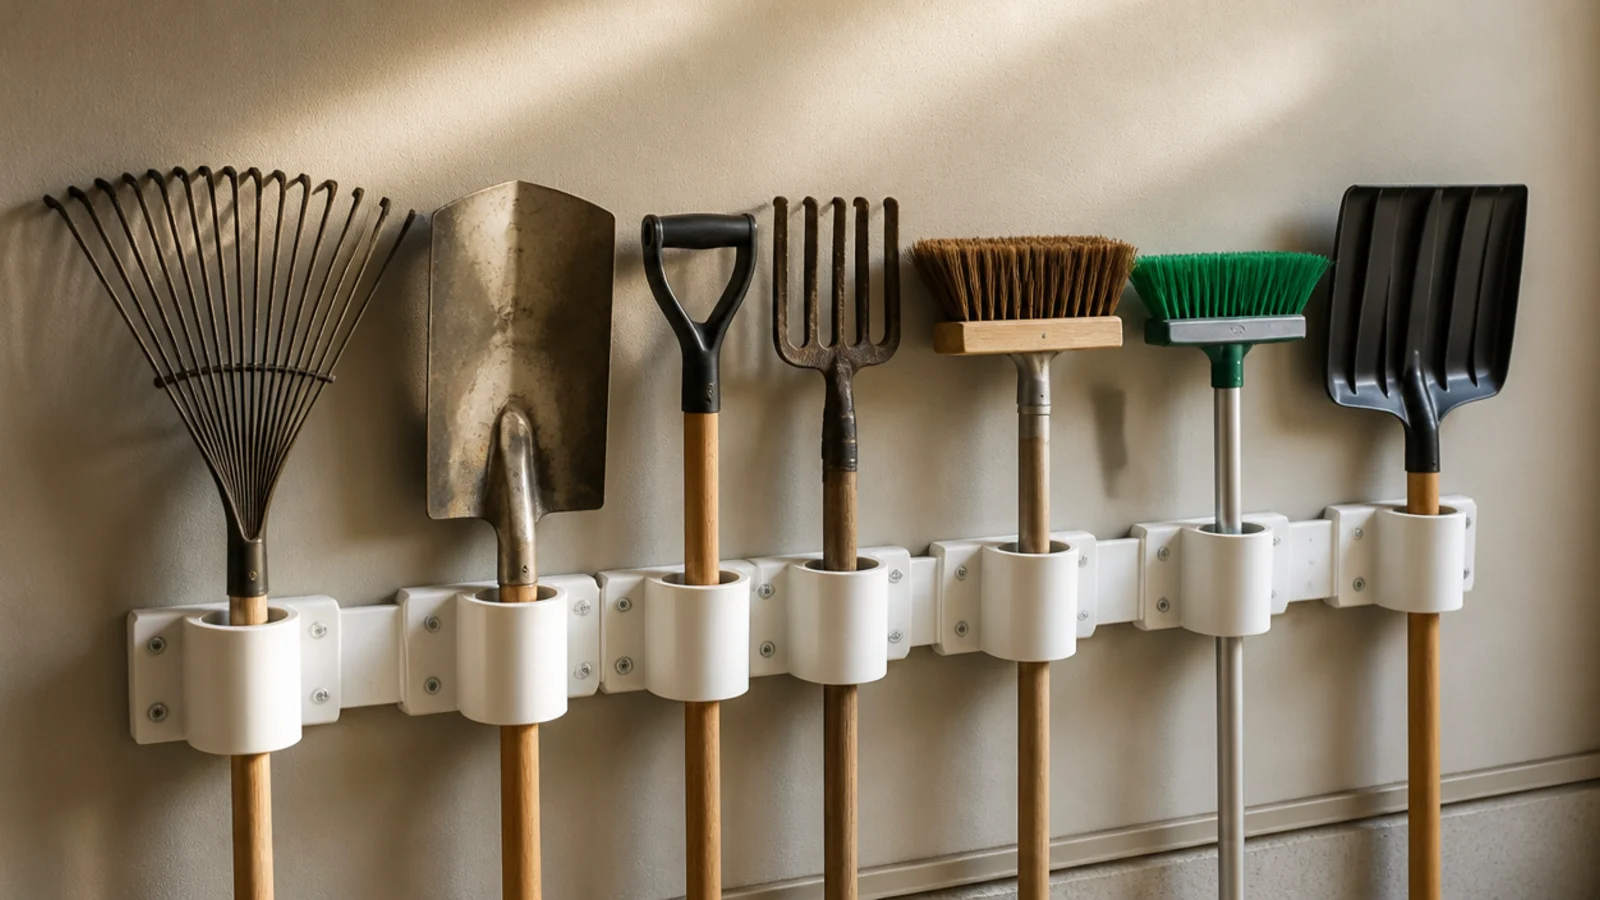
Short lengths of PVC pipe screwed to the wall hold rakes, shovels, and brooms upright so they stop falling over in a corner. It’s one of the cheapest fixes there is — a single 2-inch PVC pipe cuts into many holders. Great for anyone with a pile of garden tools and no rack.
Cut 2-inch-diameter PVC into 4-inch sections with a hacksaw, sanding the cut edges smooth. Drill two holes through the back of each section, then screw them to a wall stud or a mounted 1x4 board at a slight downward-tilt so handles drop in and stay. Space them a hand-width apart. Slide each long-handled tool handle-down into its own pipe.
Editor's noteMount the holders about chest height and let the tool heads rest on the floor — the pipe only needs to keep the handle from tipping.
Skip thisDon’t mount pipes too close together; tool heads tangle and you can’t pull one out without knocking the others loose.
4. Mason Jar Hardware Storage
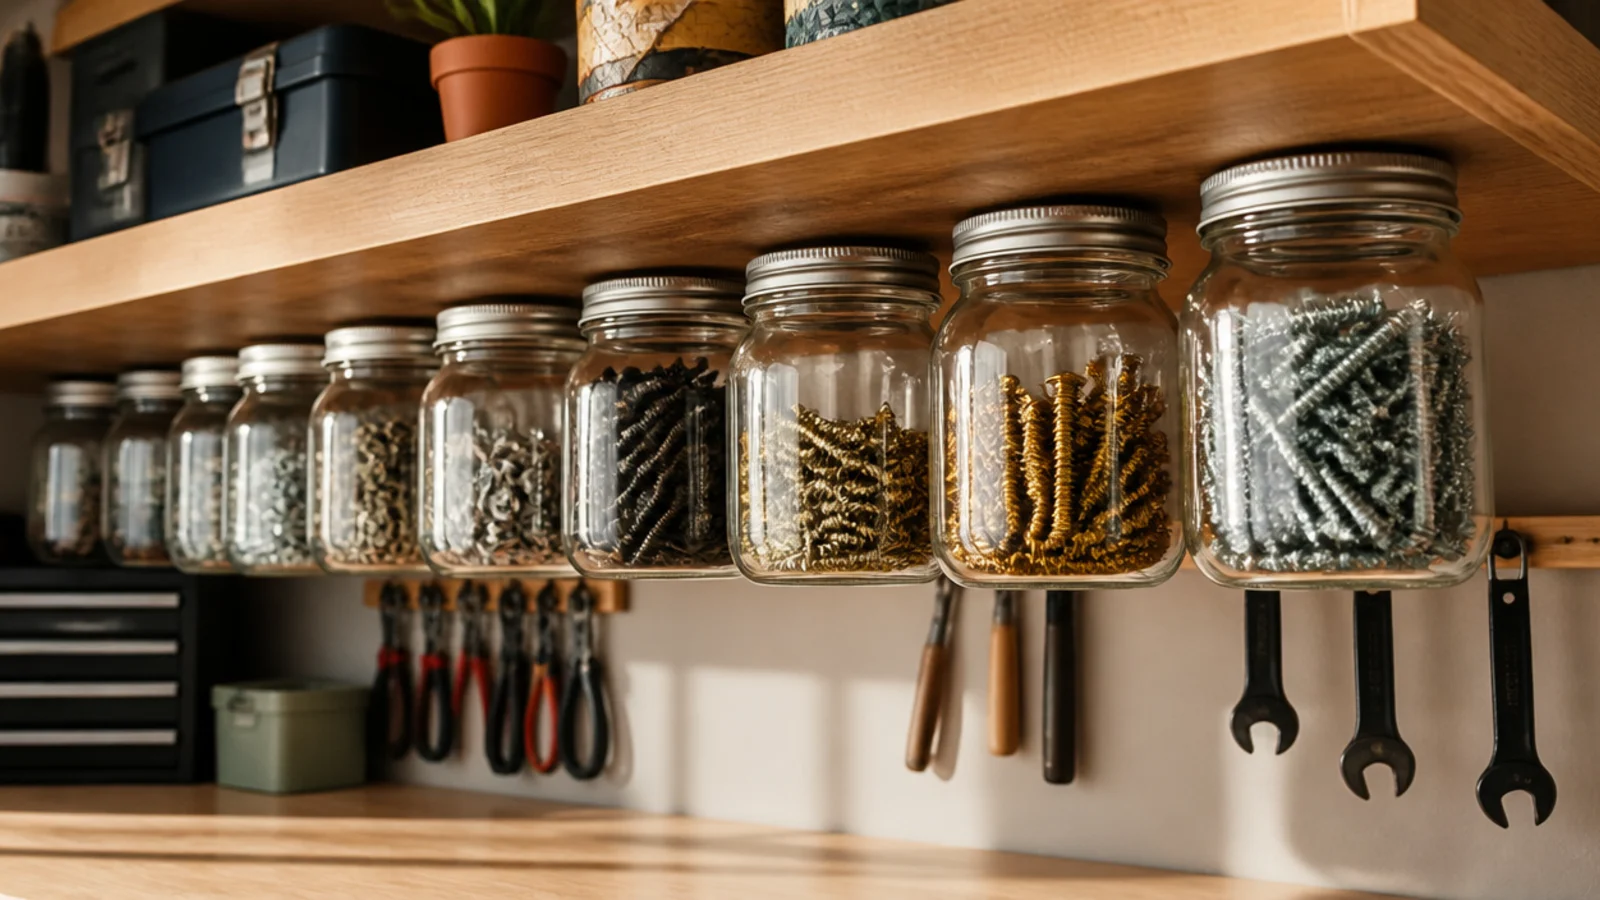
Jars mounted by their lids under a shelf keep screws, nails, and small parts visible and sorted without buying a drawer unit. You reuse jars you already have, so it’s essentially free. It suits anyone with a coffee-can jumble of loose hardware they can never sort through.
Screw each jar’s metal lid to the underside of a wooden shelf with one short screw through the center. Sort your loose hardware by type into the jars, then twist each jar up into its mounted lid. Group by category — wood screws, drywall screws, anchors — so you can spot the size you need. Add a paper label facing out.
Editor's noteUse jars of the same size in a straight row so they screw and unscrew without knocking into each other.
Skip thisDon’t mount heavy glass jars under a flimsy shelf; use a solid wood shelf or the weight will pull the screws out over time.
5. Reclaimed Pallet Vertical Storage
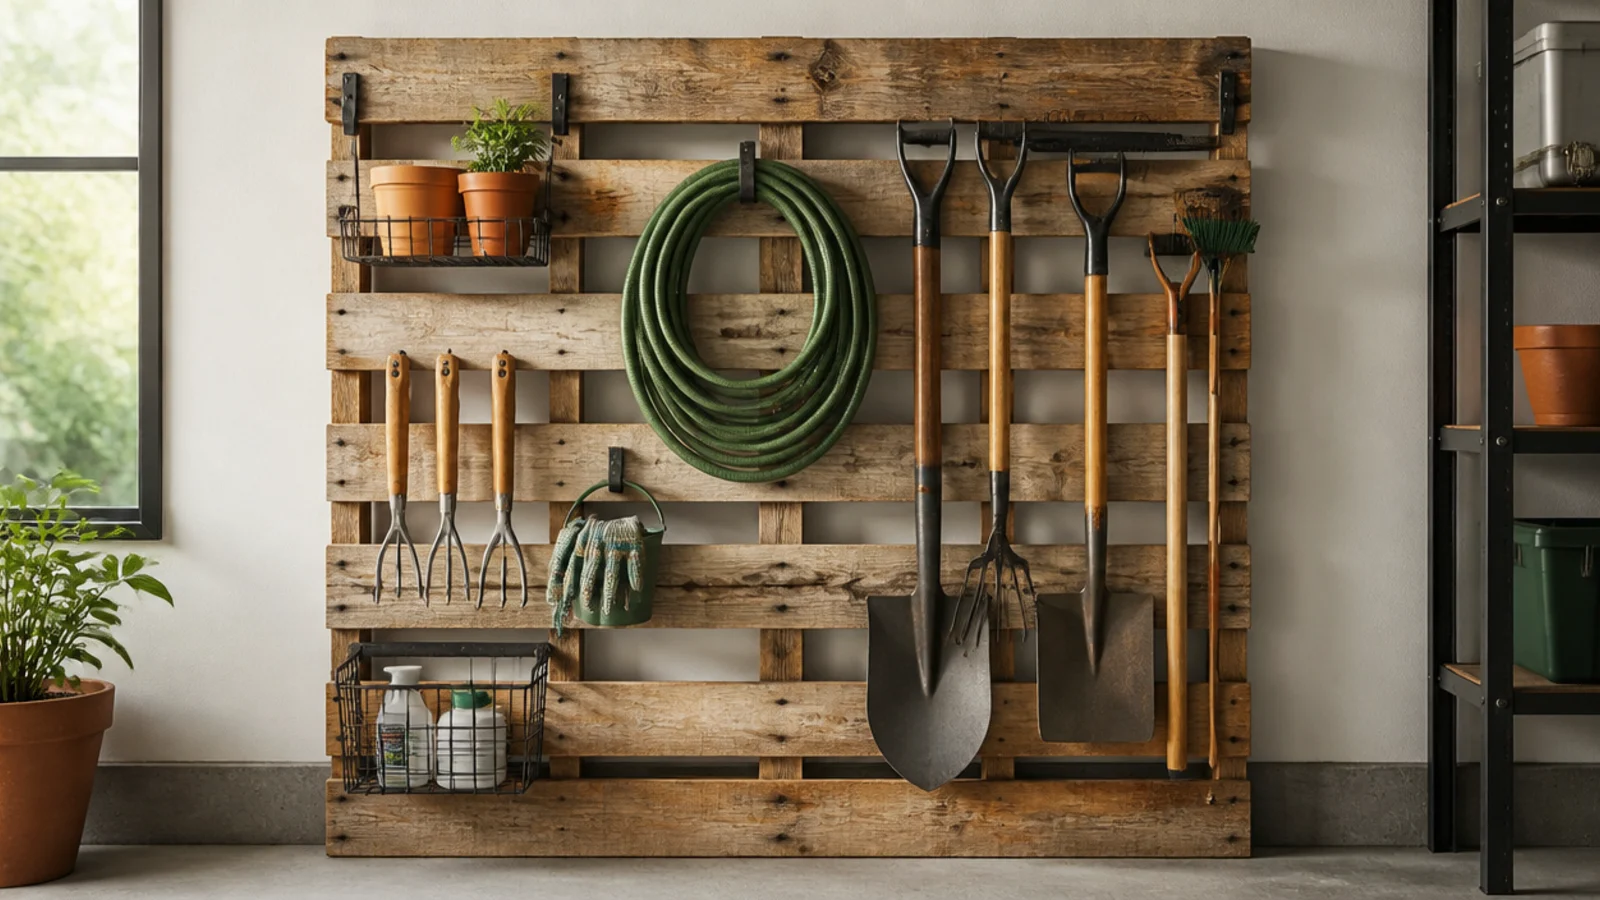
A free shipping pallet mounted upright becomes instant slotted storage for garden tools and supplies. The gaps between slats naturally hold handles, and you can add hooks or small shelves. It’s the ultimate budget win because the main material costs nothing.
Find a clean, heat-treated pallet (stamped 'HT', never 'MB'), sand it, and screw it flat to two wall studs with 3-inch screws through the thick back blocks. Slot long-handled tools between the front slats. Add cup hooks for hand tools and screw a small shelf or a couple of jars to the bottom slats for gloves and twine. Seal with a cheap clear coat if you like.
Editor's noteChoose a pallet with tight slat spacing for tools and a wider one if you want to add bins — check the gaps before you haul it home.
Skip thisDon’t use pallets stamped 'MB' (methyl bromide) — they’re chemically treated; only heat-treated 'HT' pallets are safe indoors.
6. Tension Rod Spray-Bottle Rail
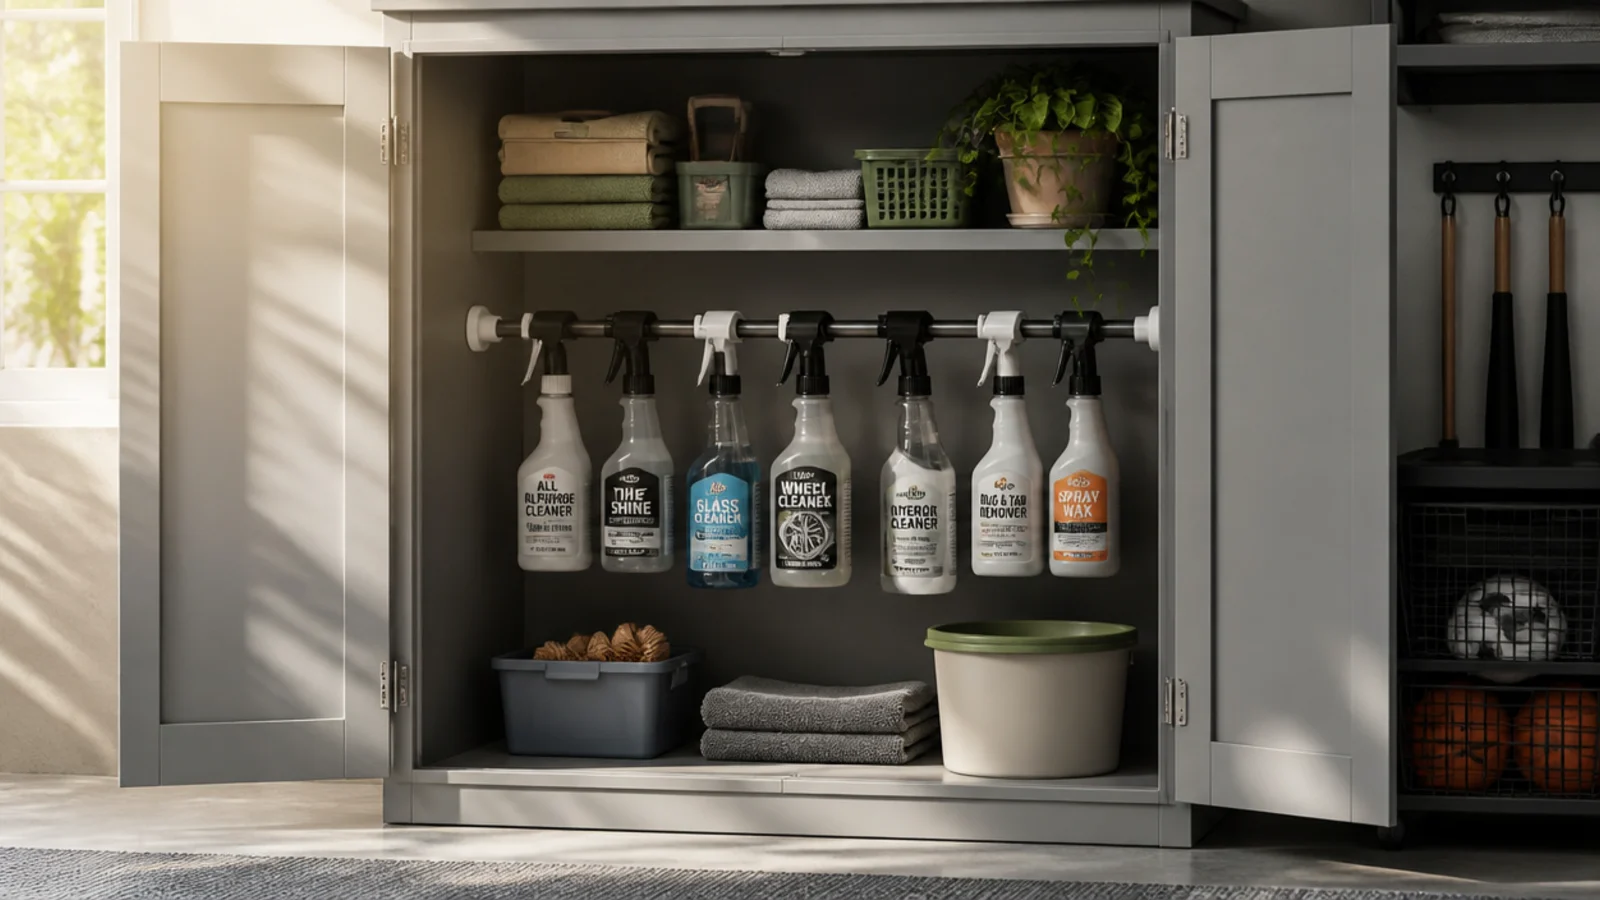
A cheap spring tension rod turns the dead space at the top of a cabinet or shelf into hanging storage for spray bottles. The trigger handles hook right over the rod, freeing the shelf below. It’s perfect for renters since it needs no drilling at all.
Wedge a spring tension rod horizontally across the inside of a cabinet or between two shelf uprights, a few inches down from the top. Hang spray bottles — cleaners, lubricants, weed killer — by their trigger handles so they dangle. Use the freed shelf space below for flat items. Test the rod holds by tugging before you load it fully.
Editor's noteGroup like bottles together and turn labels forward so you grab the right cleaner without lifting each one down.
Skip thisDon’t hang more bottles than the rod is rated for; an overloaded tension rod slips down at the worst moment.
7. Magnetic Tool Strip
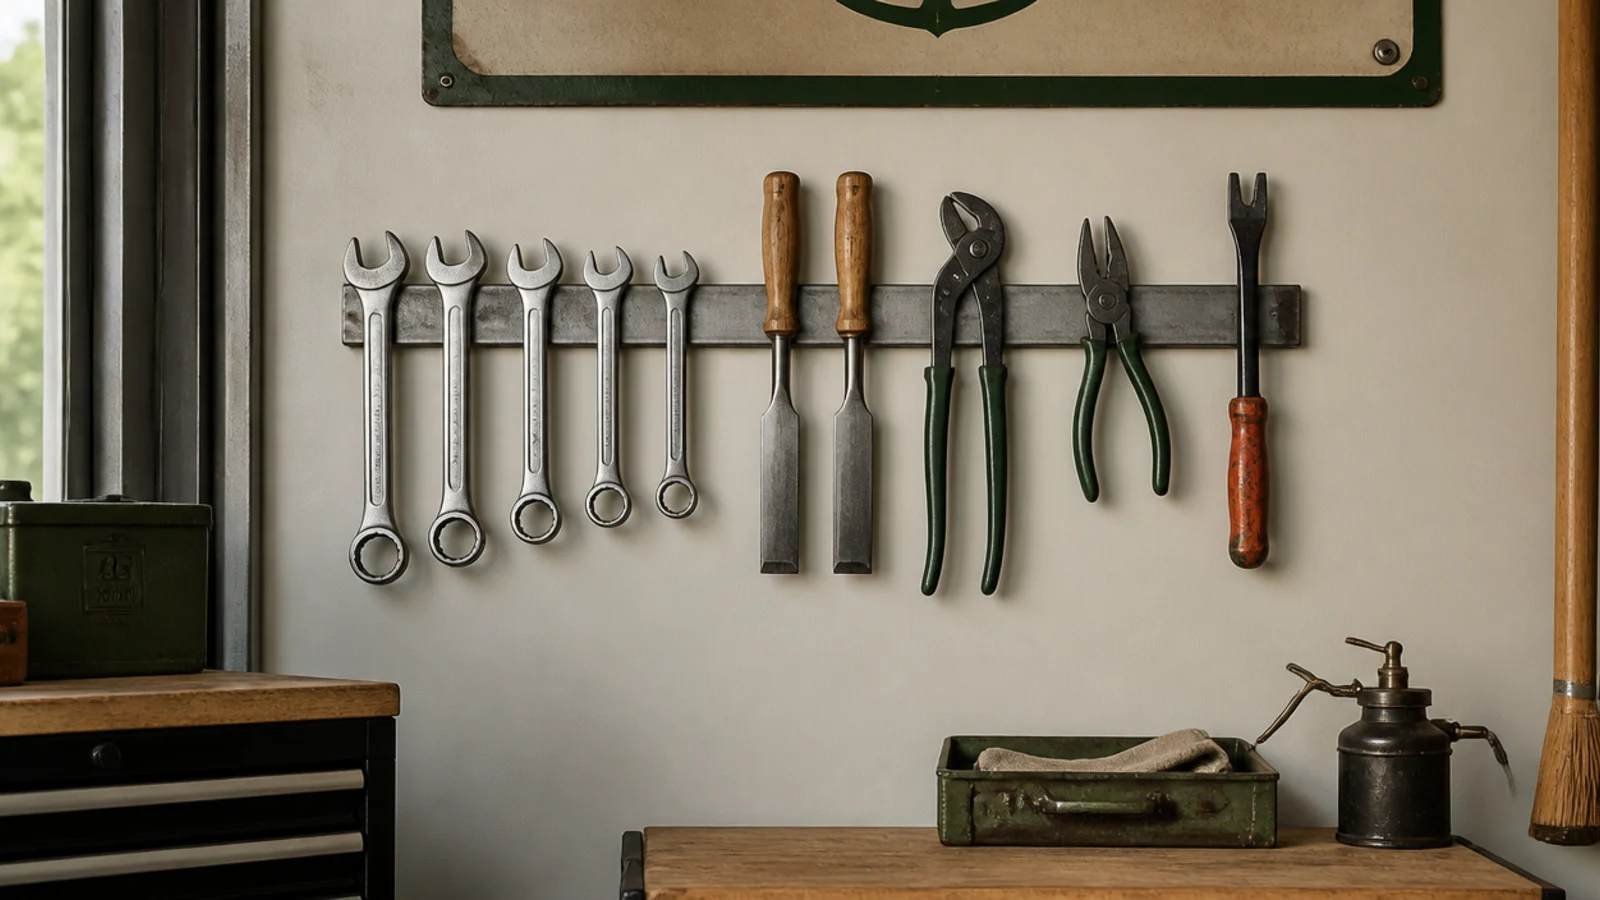
A magnetic strip holds metal hand tools flat against the wall where you can grab them one-handed. It’s faster than a drawer and keeps your most-used wrenches and pliers in sight. A magnetic knife bar from the kitchen aisle works perfectly and costs a few dollars.
Screw a magnetic knife strip or magnetic tool bar into a wall stud at a comfortable reach height. Stick your most-used metal tools to it — wrenches, chisels, pliers, screwdrivers with metal shafts. Keep the heaviest tools near the mounting screws where the hold is strongest. Wipe the bar occasionally so grit doesn’t weaken the grip.
Mount it right above your workbench so tools go back with a slap instead of a walk across the garage.
Don’t trust a light magnetic strip with heavy tools; test each tool’s hold first, and keep power tools off it entirely.
8. Secondhand Kitchen Cabinets
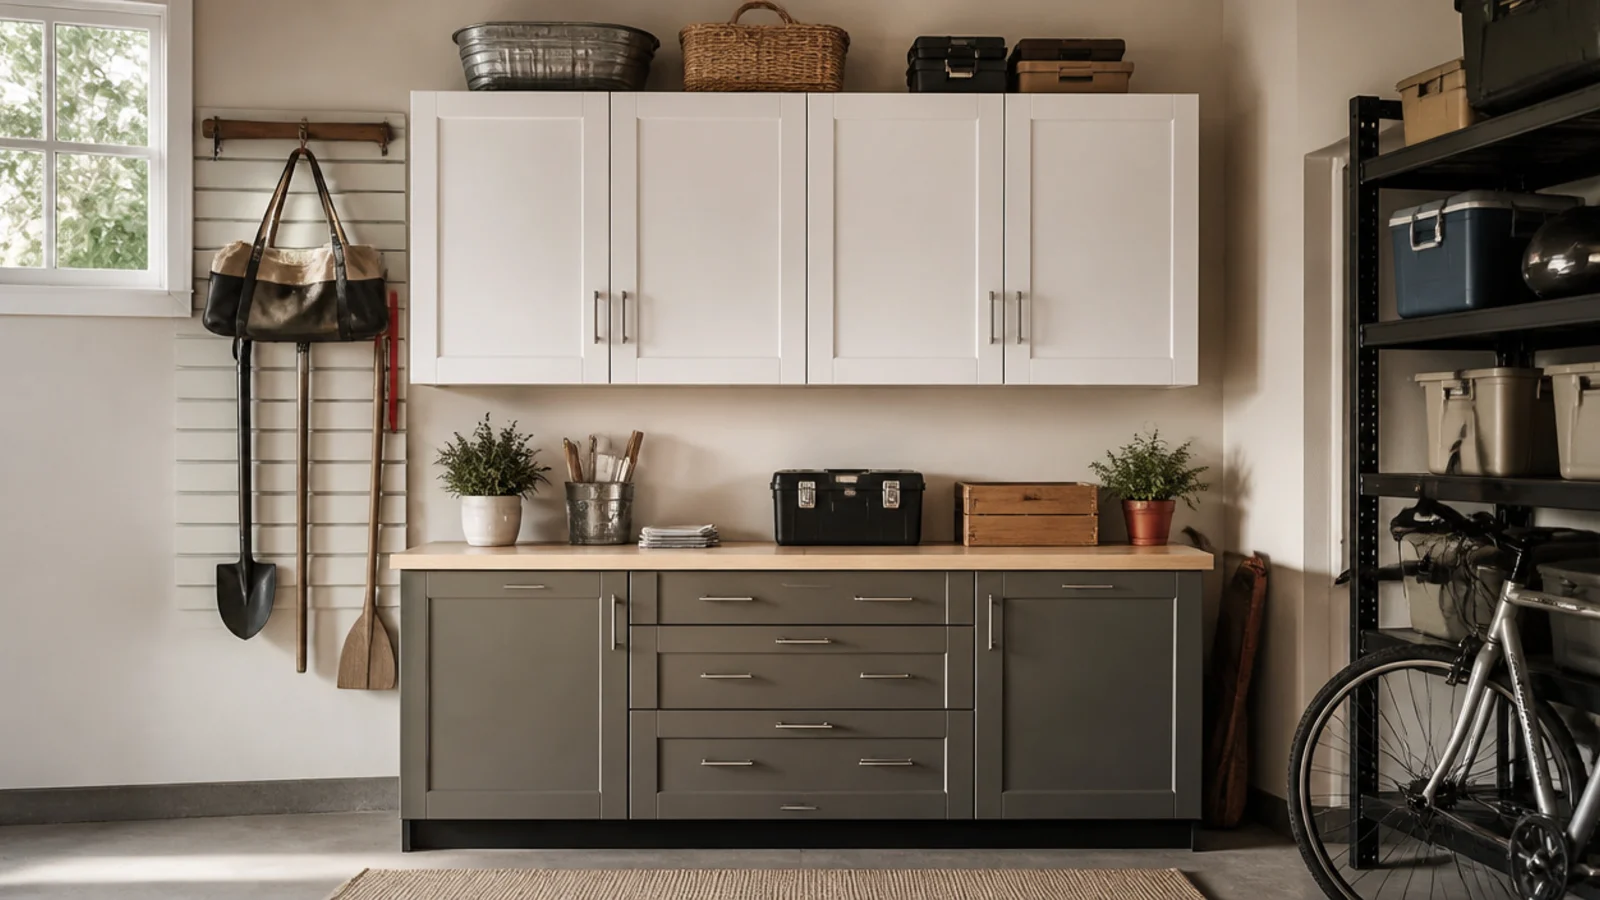
Salvaged kitchen cabinets give you closed, dust-free storage for a fraction of new garage cabinet prices. Uppers mount on the wall; base units sit on the floor as a workbench. Check habitat-for-humanity resale stores and marketplace listings, where kitchen tear-outs sell cheap or free.
For wall uppers, locate studs and screw through the cabinet’s back rail into at least two studs with 3-inch screws, checking level as you go. Set base cabinets on the floor and top them with a sheet of plywood for an instant workbench. Hide clutter behind the doors and label shelves inside. A coat of leftover paint unifies mismatched units.
Bring your wall measurements and a stud location when you shop so you buy cabinets that actually fit between the door and the corner.
Don’t hang uppers on drywall anchors alone; loaded cabinets are heavy, and only stud screws will hold them safely.
9. Dollar-Store Bin and Label System
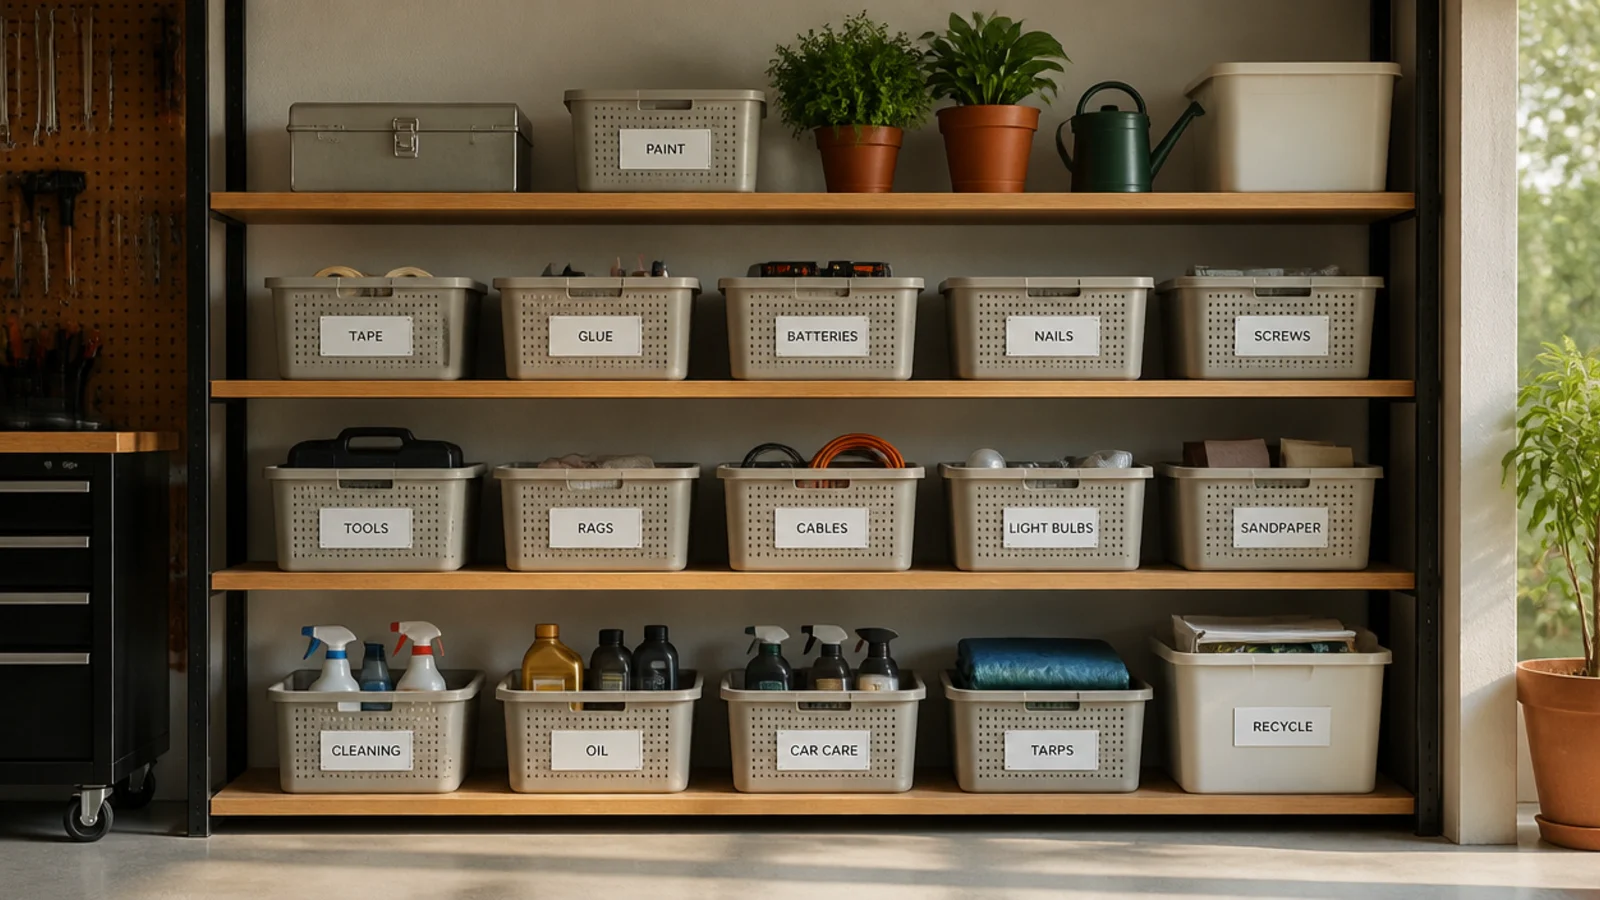
Inexpensive dollar-store bins with a consistent label make a shelf of small odds and ends look intentional and stay usable. The magic is the labels, not the bins — matching text is what reads as organized. It’s ideal for corralling the small stuff that never has a home.
Buy identical small bins from the dollar store and group loose items by category — adhesives, batteries, electrical, painting. Print or hand-write labels on white tape in the same style and place each label in the same spot on every bin. Line the bins along a shelf with labels facing out. Keep one 'misc' bin so nothing lands loose.
Label the shelf edge too, so an empty returning bin has an obvious slot and the shelf never drifts out of order.
Don’t mix bin sizes and shapes on one shelf; uneven bins waste space and kill the tidy look labels give you.
10. Freestanding Wire Shelving Unit
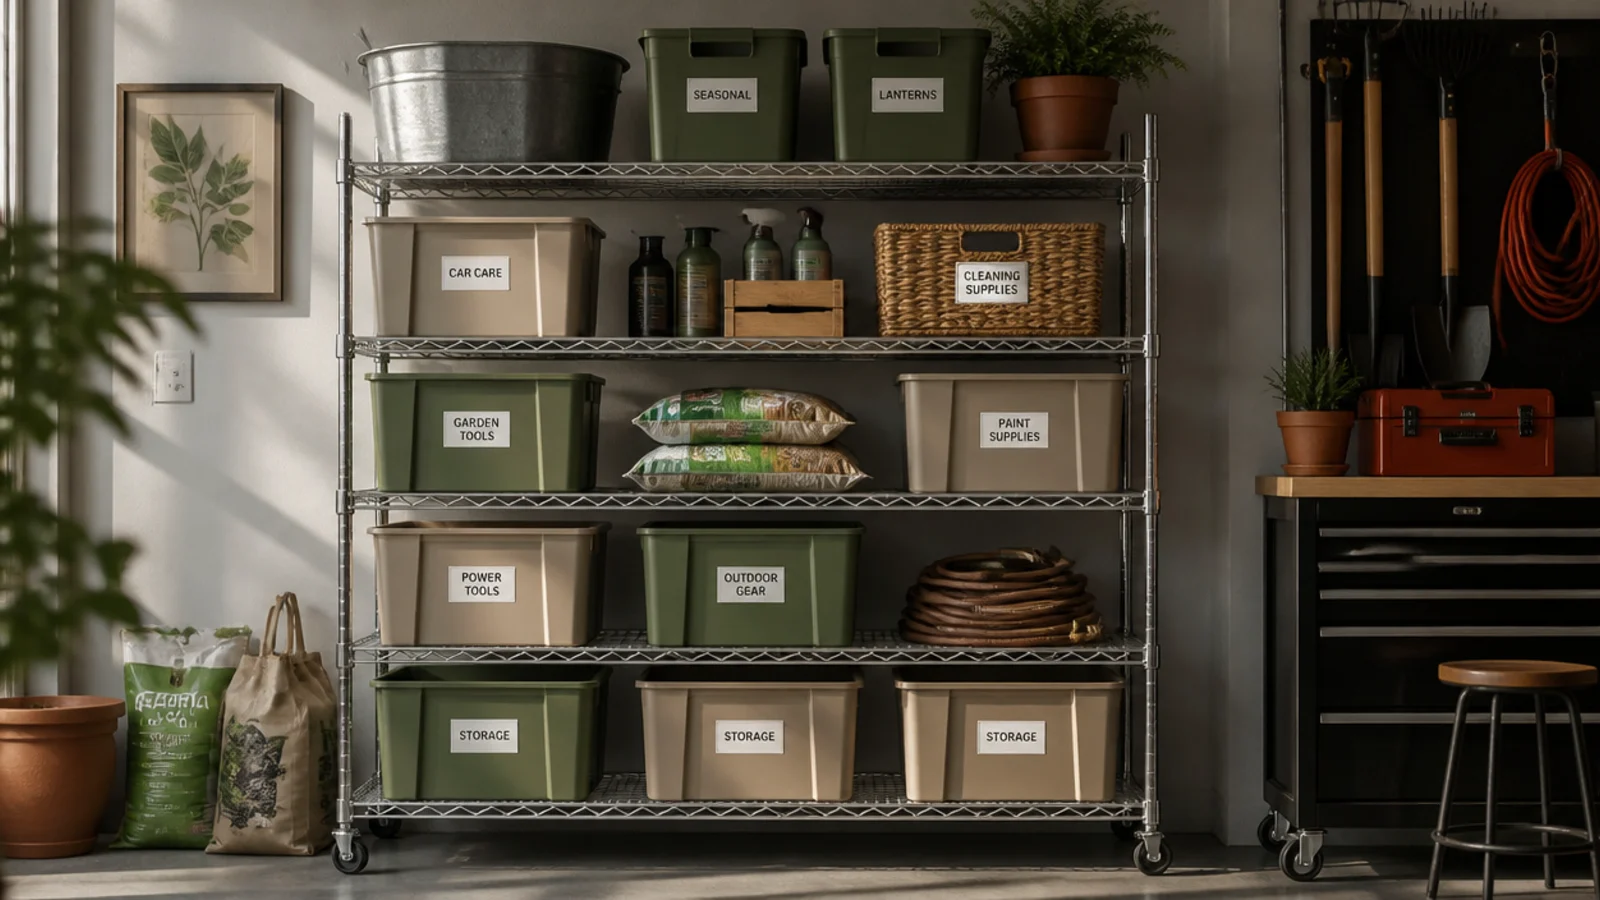
A chrome wire shelving unit is the best no-drill way to add serious storage fast. It assembles in minutes, holds a lot per shelf, and moves if you rearrange. At $30-$50 for a five-tier unit, it’s the cheapest square-footage of shelving you can buy.
Assemble the unit per the instructions and set the bottom shelf a few inches off the floor to clear water and let you sweep under it. Put heavy items on lower shelves for stability and light, seasonal items up top. Load labeled totes so the open wire shelves stay tidy. Anchor tall units to a stud with an L-bracket if kids are around.
Add snap-on shelf liners or a sheet of cardboard so small items don’t tip through the wire grid.
Don’t top-load a tall wire unit with the heaviest bins; a top-heavy rack tips forward when you pull a bin out.
11. Coffee Can Drawer Organizers
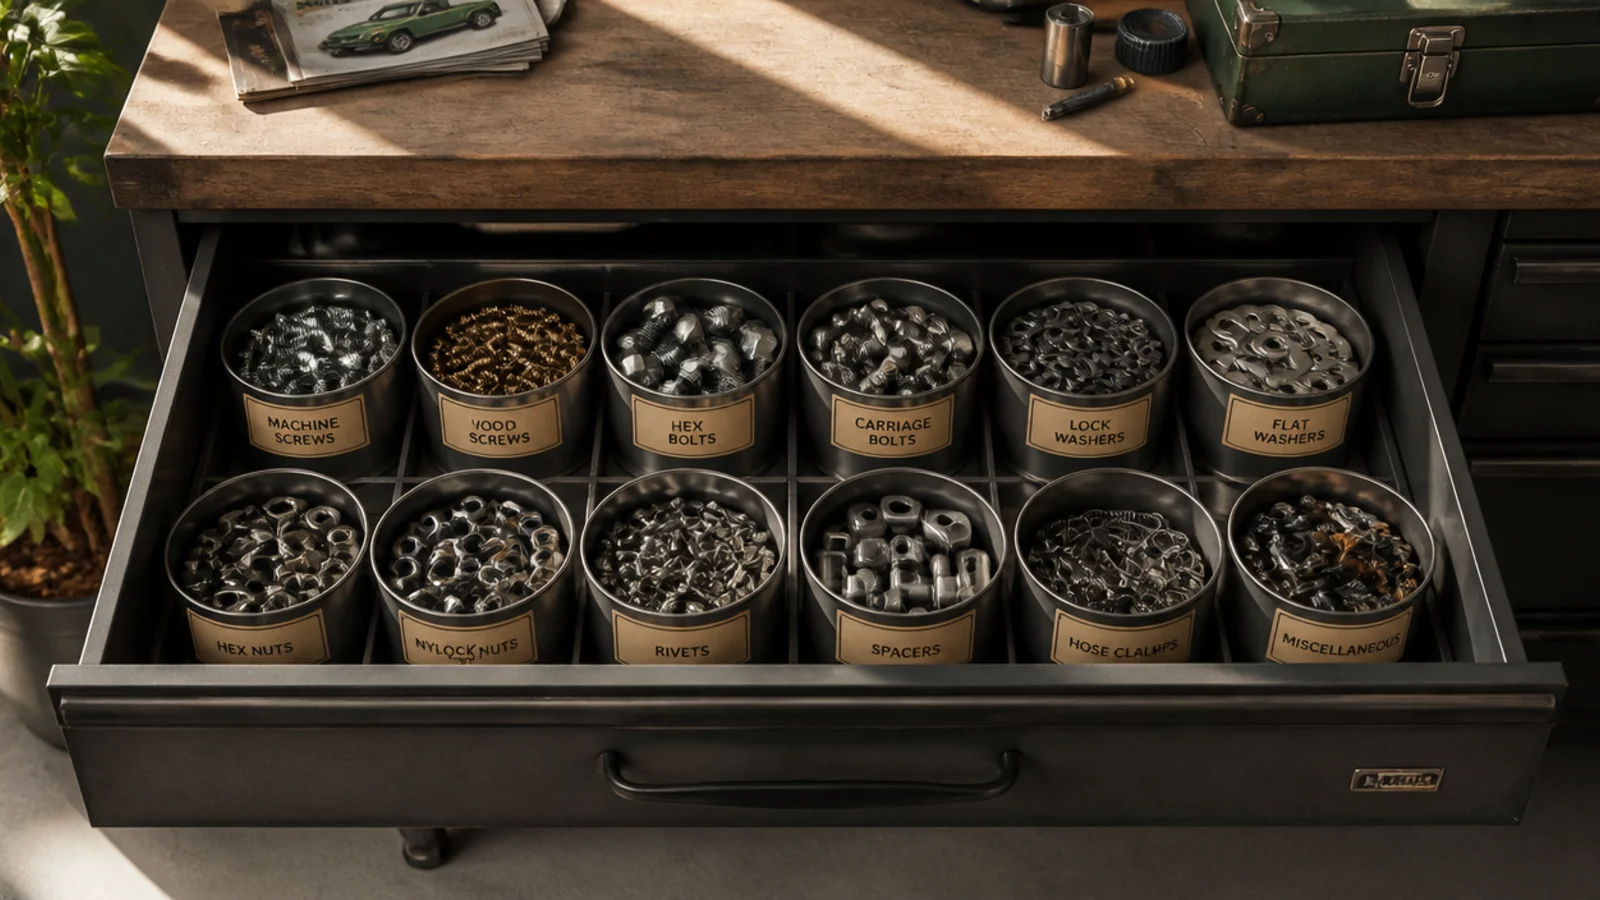
Clean cans dropped into a drawer instantly divide it into sorted compartments for free. They keep small parts from sliding into one jumbled pile every time you open the drawer. Perfect for anyone who has a junk drawer masquerading as tool storage.
Wash and dry coffee, soup, or formula cans and sand any sharp rims or cover them with tape. Stand them in a workbench drawer, fitting the sizes together to fill the space. Sort small parts by type into each can — fuses, zip ties, picture hooks. Add a paper label inside the rim of each can so you can read it from above.
Editor's noteCut cans to different heights with tin snips so shorter items stay reachable and taller ones don’t hide behind them.
Skip thisDon’t skip taping sharp can edges; a raw cut rim in a drawer you reach into blindly is an easy way to get nicked.
12. Bungee-Cord Ball Corral
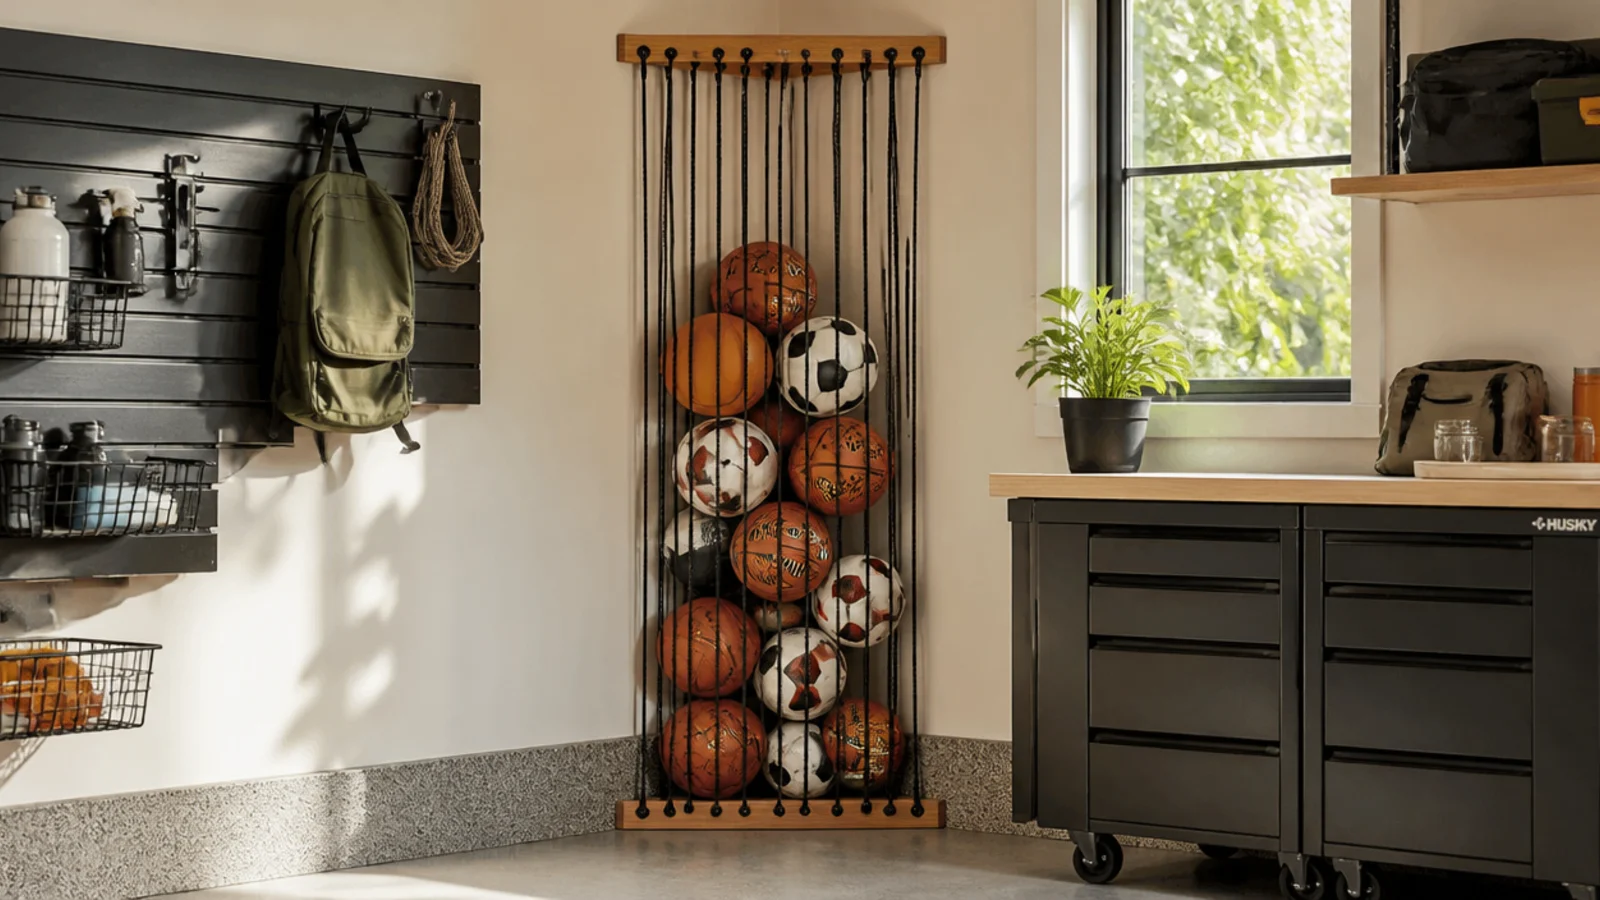
A cage of vertical bungee cords in a corner keeps balls and round sports gear contained without rolling everywhere. You drop balls in from the top and stretch the cords to pull them out. It’s a cheap fix for families drowning in loose sports equipment.
Screw a horizontal board across a corner near the ceiling and another near the floor, about a foot out from the walls. Run vertical bungee cords between the two boards, hooking each into eye screws a few inches apart. Drop balls in over the top; the stretchy cords hold them and flex to let you grab one. Space cords so the smallest balls can’t slip through.
Use the corner walls as two sides of the corral so you only need to bungee the open front and side — less cord, more strength.
Don’t space the cords too far apart; if small balls fall through, you’ve built a rack that only holds basketballs.
13. Hanging Shoe Organizer for Cans
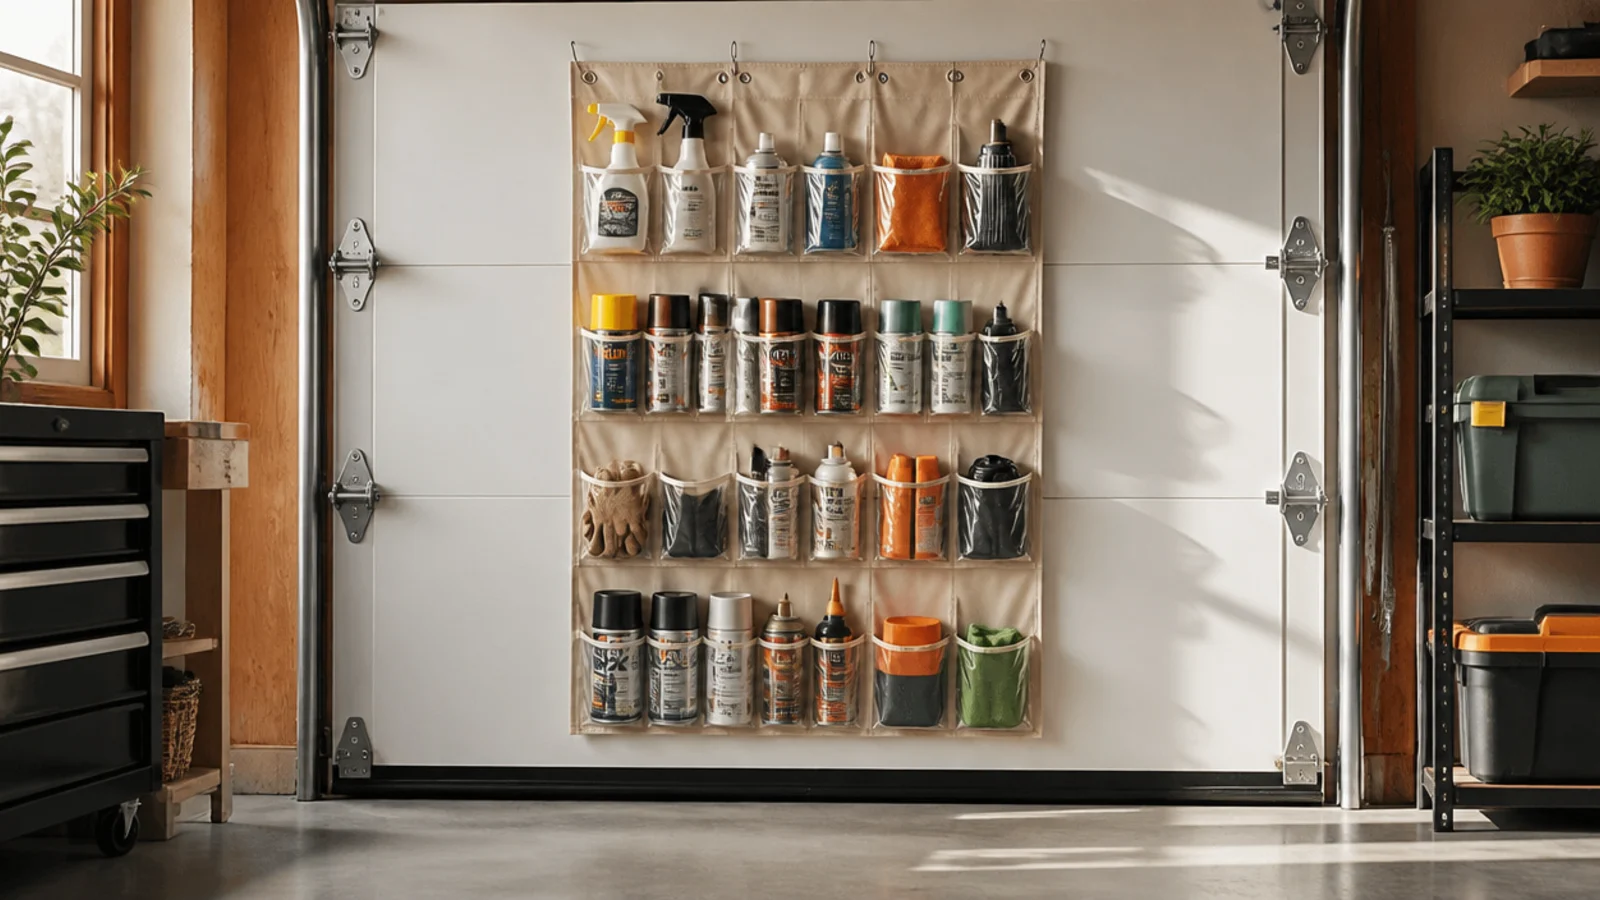
A hanging shoe organizer turns the back of a door or the side of a shelf into pocketed storage for spray cans, gloves, and small bottles. The clear pockets keep everything visible. It’s one of the cheapest ways to reclaim a whole vertical surface.
Hang an over-the-door shoe organizer on the garage’s side door or screw it to the end of a shelf unit. Fill the clear pockets with spray paint, lubricants, work gloves, twine, and hand tools by category. Put heavier cans in the bottom rows so it hangs stable. Label rows with tape if pockets look alike.
Editor's noteChoose the clear-pocket version over fabric so you can see contents at a glance instead of digging pocket by pocket.
Skip thisDon’t overload a lightweight organizer with heavy cans up high; it sags and pulls its hooks off the door.
14. Dowel Extension-Cord Rack
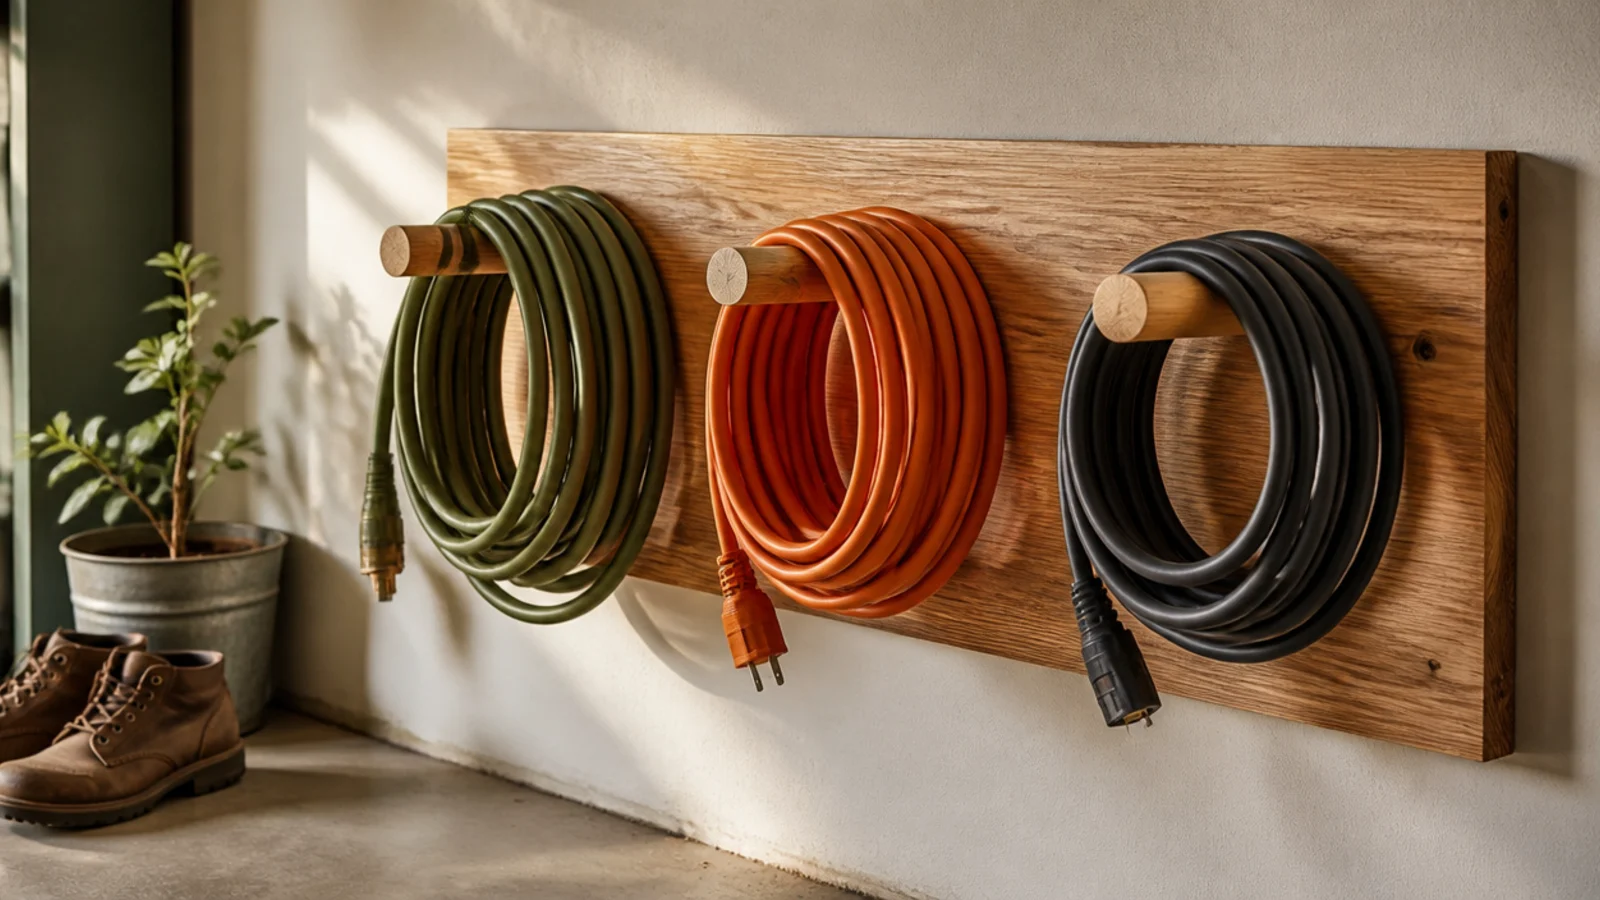
A few thick dowels in a board give coiled cords and hoses a home so they stop tangling in a heap. You loop each coil over its own peg. It’s a five-dollar project that ends the daily fight with knotted extension cords.
Drill angled holes into a 1x6 board and glue in 5-inch lengths of 1-inch dowel, tilted slightly upward so coils don’t slip off. Screw the board to two wall studs. Coil each cord or hose and hang it over its own dowel. Space the pegs far enough apart that full coils don’t overlap and snag.
Wrap cords in a figure-eight over the dowel rather than a tight circle — they uncoil without kinks when you grab them.
Don’t set the dowels dead level; without an upward tilt, heavy coils slide right off the ends.
15. Scrap-Wood French Cleat Rail
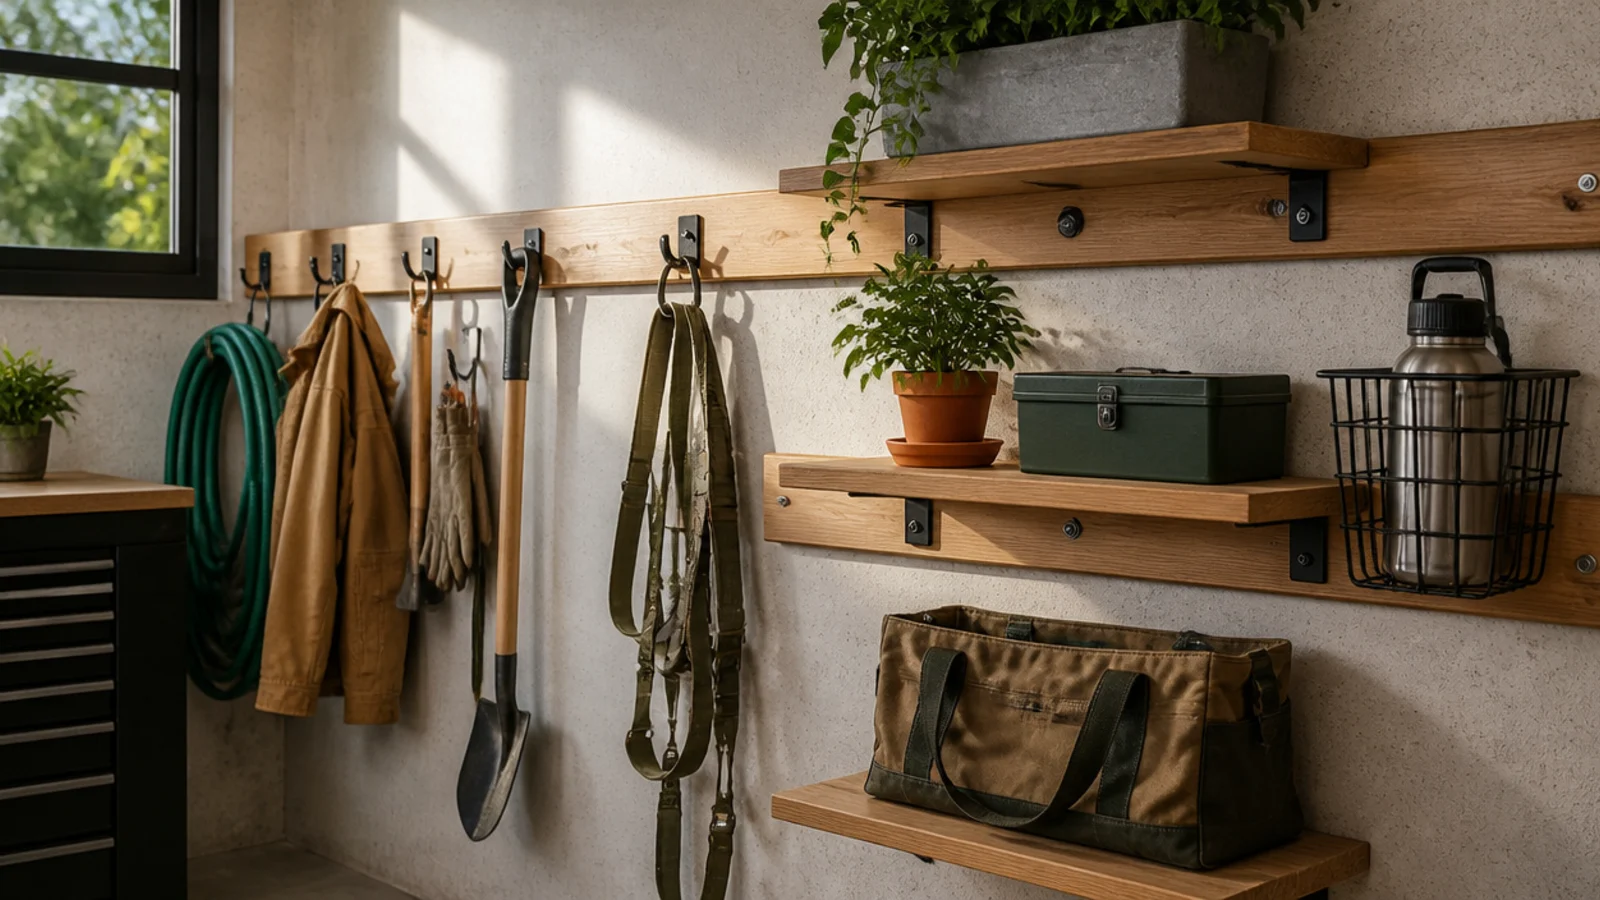
A French cleat is a beveled strip on the wall that matching hooks and holders lock onto, so you can rearrange storage endlessly. It sounds advanced but it’s two boards cut at 45 degrees. Built from scrap plywood, it’s nearly free and endlessly flexible.
Rip a strip of plywood at a 45-degree angle down the middle to make two mating cleats. Screw one strip to the wall studs, bevel facing up and out. On the backs of small holders, tool racks, or shelves, screw the matching cleat so they hook over the wall strip. Add or move holders anytime without new holes.
Editor's noteMake a long run of wall cleat first, then build cleat-backed holders over time — the wall rail is the reusable part.
Skip thisDon’t cut the bevels facing the wrong way; the wall cleat’s angle must point up and out so holders can’t lift off.
16. Overhead Joist Storage Platform
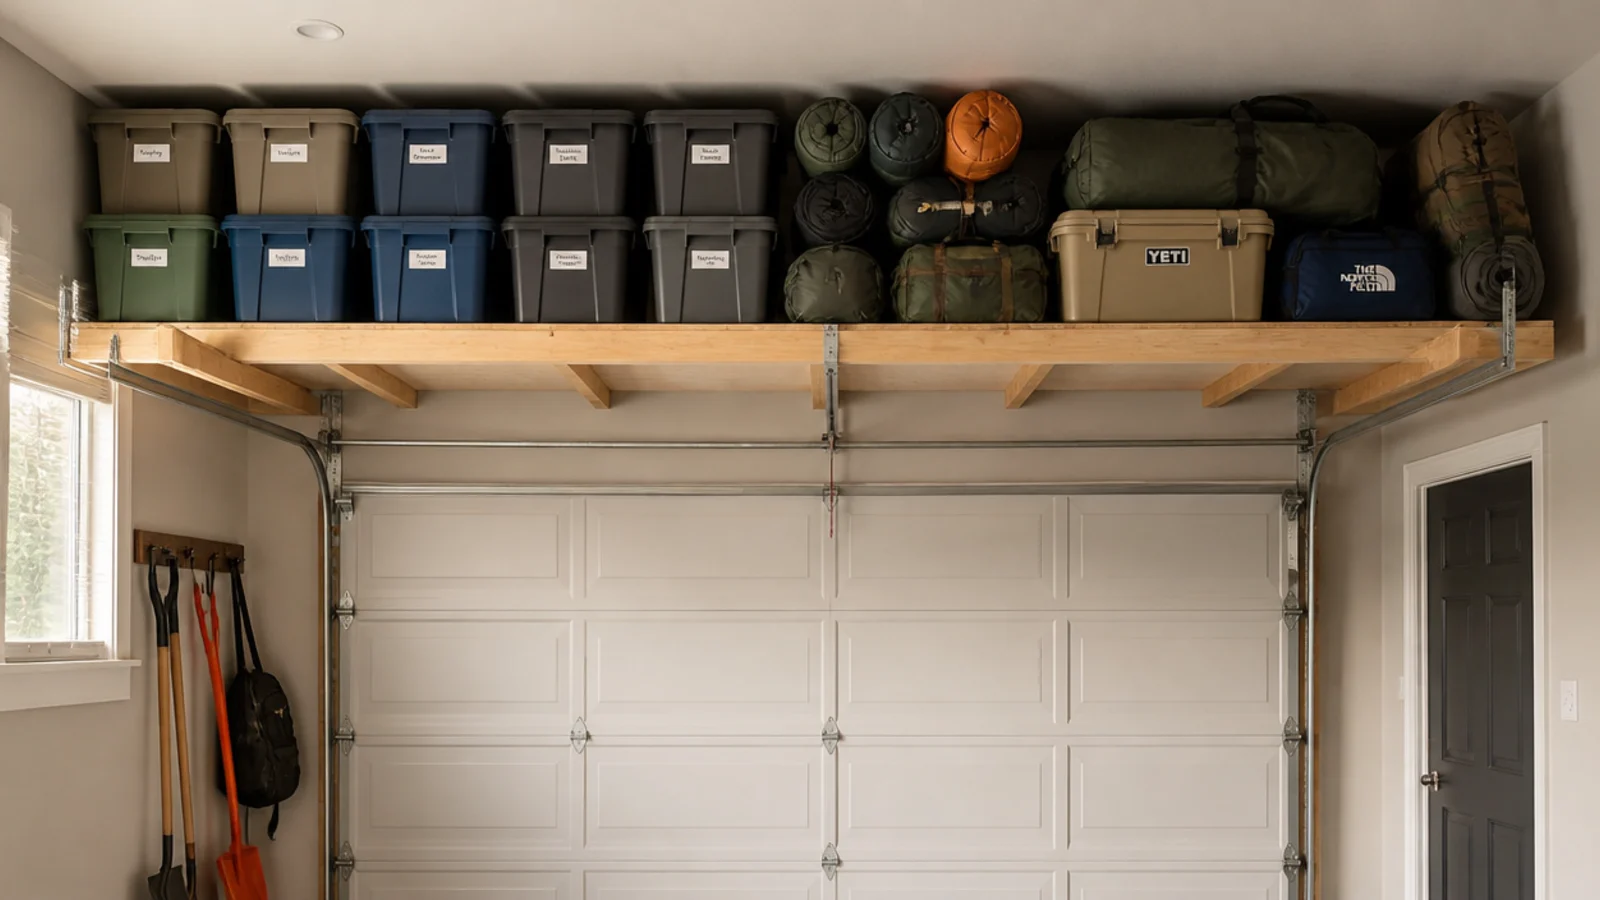
A plywood platform laid across the ceiling joists uses the dead air above your head for light, seasonal storage. That space above the garage door track is almost always wasted. It costs one sheet of plywood and holds a summer’s worth of bins.
Confirm your ceiling joists can carry the load (open joists in a single-story garage usually can for light items). Cut a sheet of plywood to span at least three joists and screw it down with 3-inch screws into each joist. Load only light, seasonal totes — holiday decor, camping gear, empty luggage. Keep a sturdy step stool nearby for access.
Position the platform above the open garage door’s path so the parked car and daily traffic stay clear underneath.
Don’t store heavy or frequently used items overhead; reserve it strictly for light seasonal bins you touch a few times a year.
17. Jar-Lid Ceiling Screw Storage
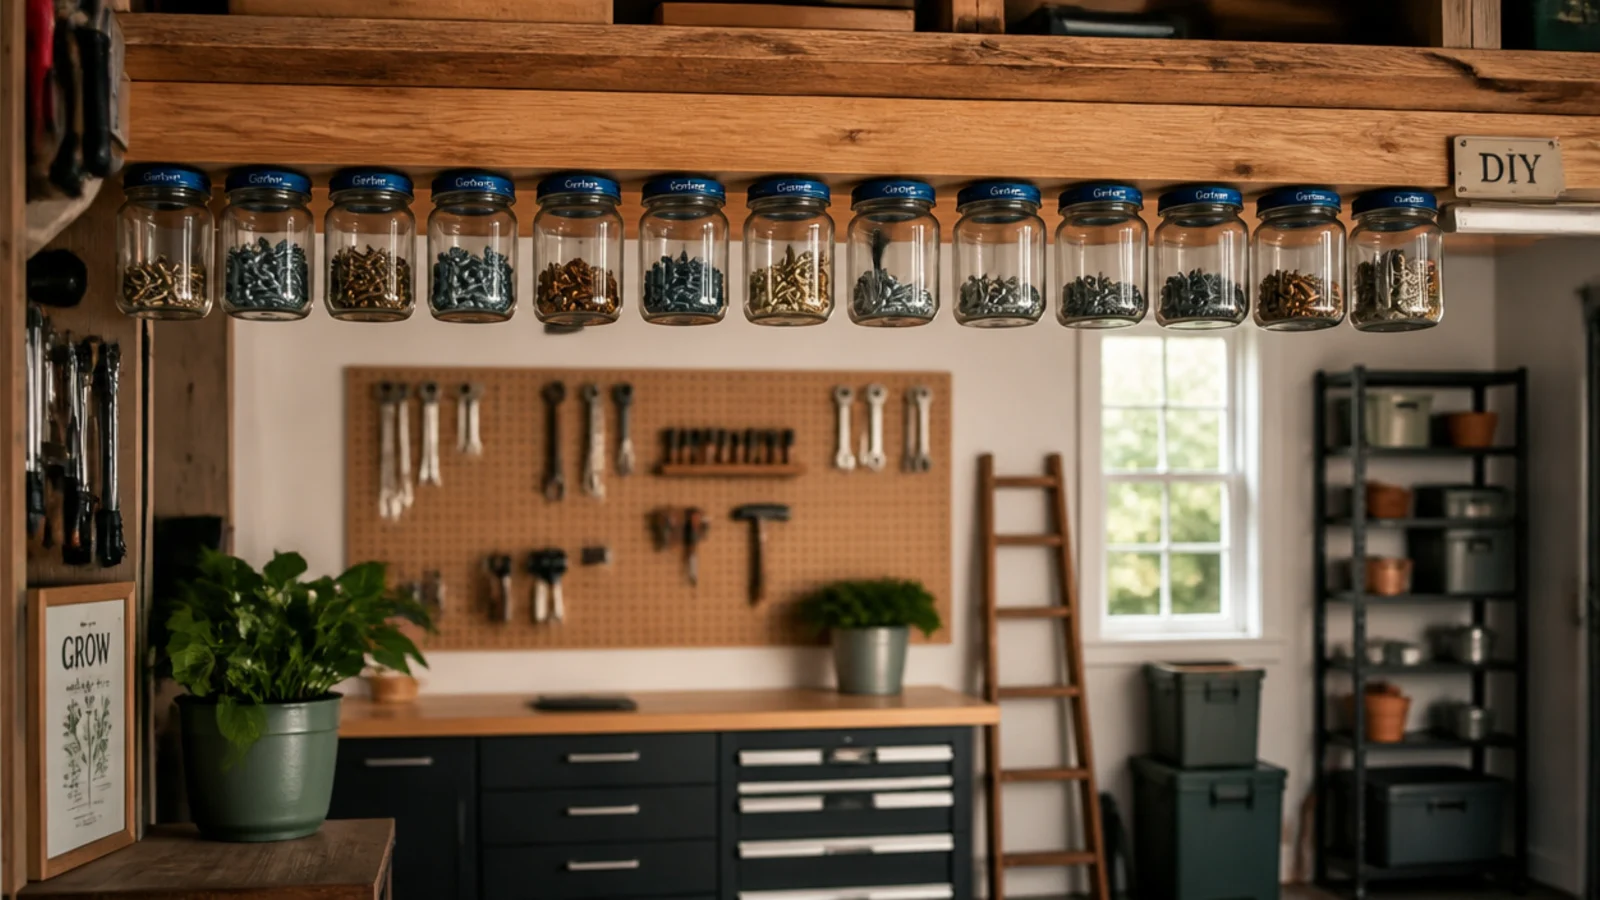
Screwing jar lids to a floor joist overhead turns unused ceiling space into a see-through parts store. You twist each jar up into its lid and it hangs out of the way. It’s the classic free-hardware-storage trick for small parts you rarely need.
Screw small jar lids to the underside of an exposed ceiling joist or a mounted board, spaced so jars don’t touch. Sort tiny hardware — grommets, cotter pins, spare buttons — into the jars. Twist each jar up into its mounted lid. Keep this above a workbench so you can reach the jars without a ladder.
Reserve this for lightweight small parts only — big jars of heavy bolts overhead are a hazard, not a hack.
Don’t mount it over a walkway or car; if a jar unscrews it should fall onto a bench, not onto someone.
18. Repurposed Bookshelf Bin Station
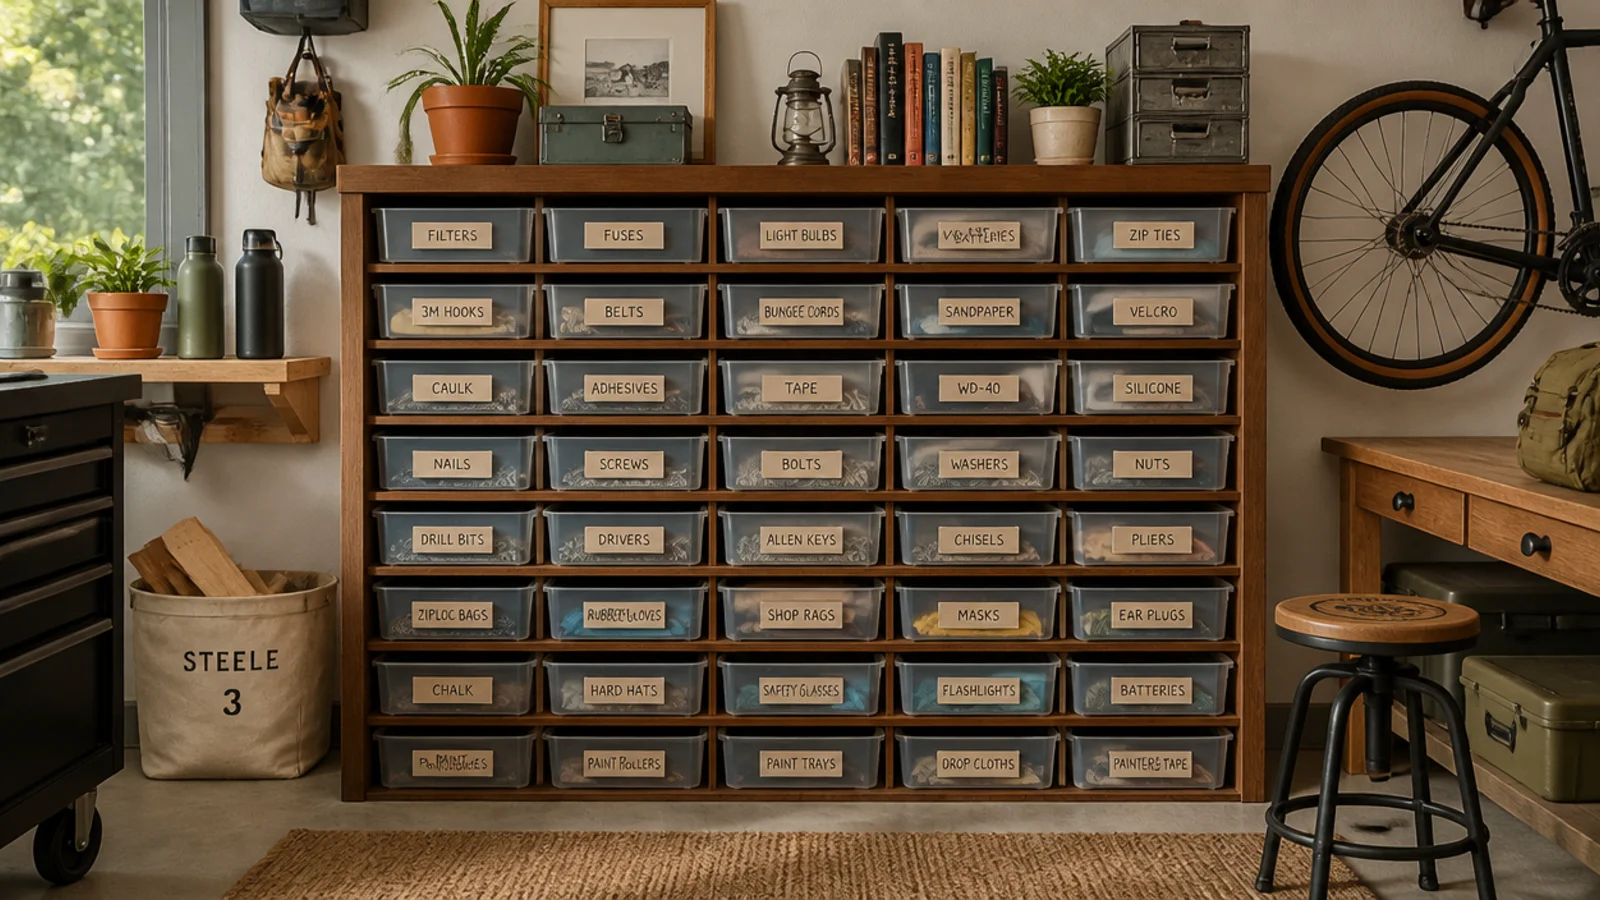
An old bookshelf plus a set of bins becomes a wall of pull-out drawers for supplies. The shelves size the bins; the bins do the sorting. It’s a great use for a cast-off bookshelf you’d otherwise donate.
Measure your bookshelf’s shelf height and buy shallow bins that slide in and out like drawers. Adjust shelves to fit the bins snugly with a little clearance above. Sort supplies by category into labeled bins — fasteners, tapes, adhesives, auto. Anchor a tall bookshelf to a stud so it can’t tip. Pull a bin out like a drawer to use it.
Leave one open shelf at the top without a bin for oversized items that won’t fit a standard drawer bin.
Don’t jam bins in so tightly they stick; leave a finger of clearance so they slide out without wrestling the whole shelf.
19. Zone Chart Clipboard
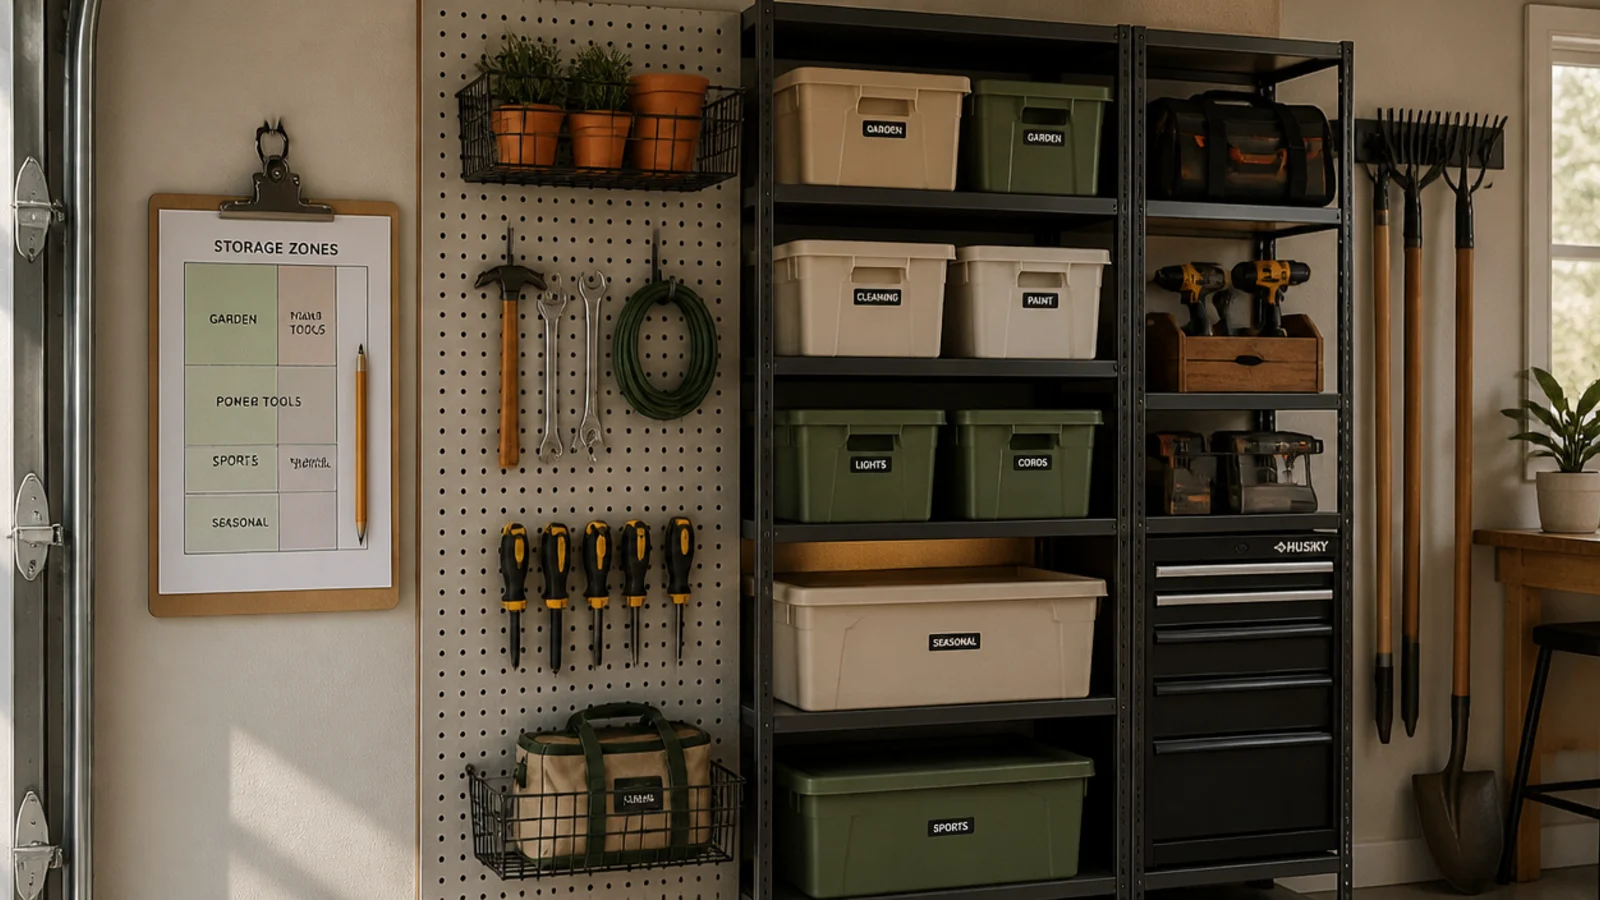
A simple clipboard by the door holding a zone map keeps the whole family putting things back where they belong. It’s the cheapest 'system' there is — a piece of paper — but it’s what makes organization stick. Ideal for shared garages where everyone loses everything.
Sketch a quick map of your garage zones — garden, auto, sports, tools, seasonal — on paper and clip it to a clipboard by the entry door. Add a short 'borrowed' list where anyone taking a tool jots it down. Hang the clipboard on a single screw hook. Update the map when you reorganize a zone.
Editor's noteKeep the map dead simple — four or five labeled zones, not a detailed inventory — so people actually glance at it.
Skip thisDon’t make it a giant spreadsheet; an over-complicated chart gets ignored and the garage drifts back to chaos.
20. Pool-Noodle Shelf Dividers
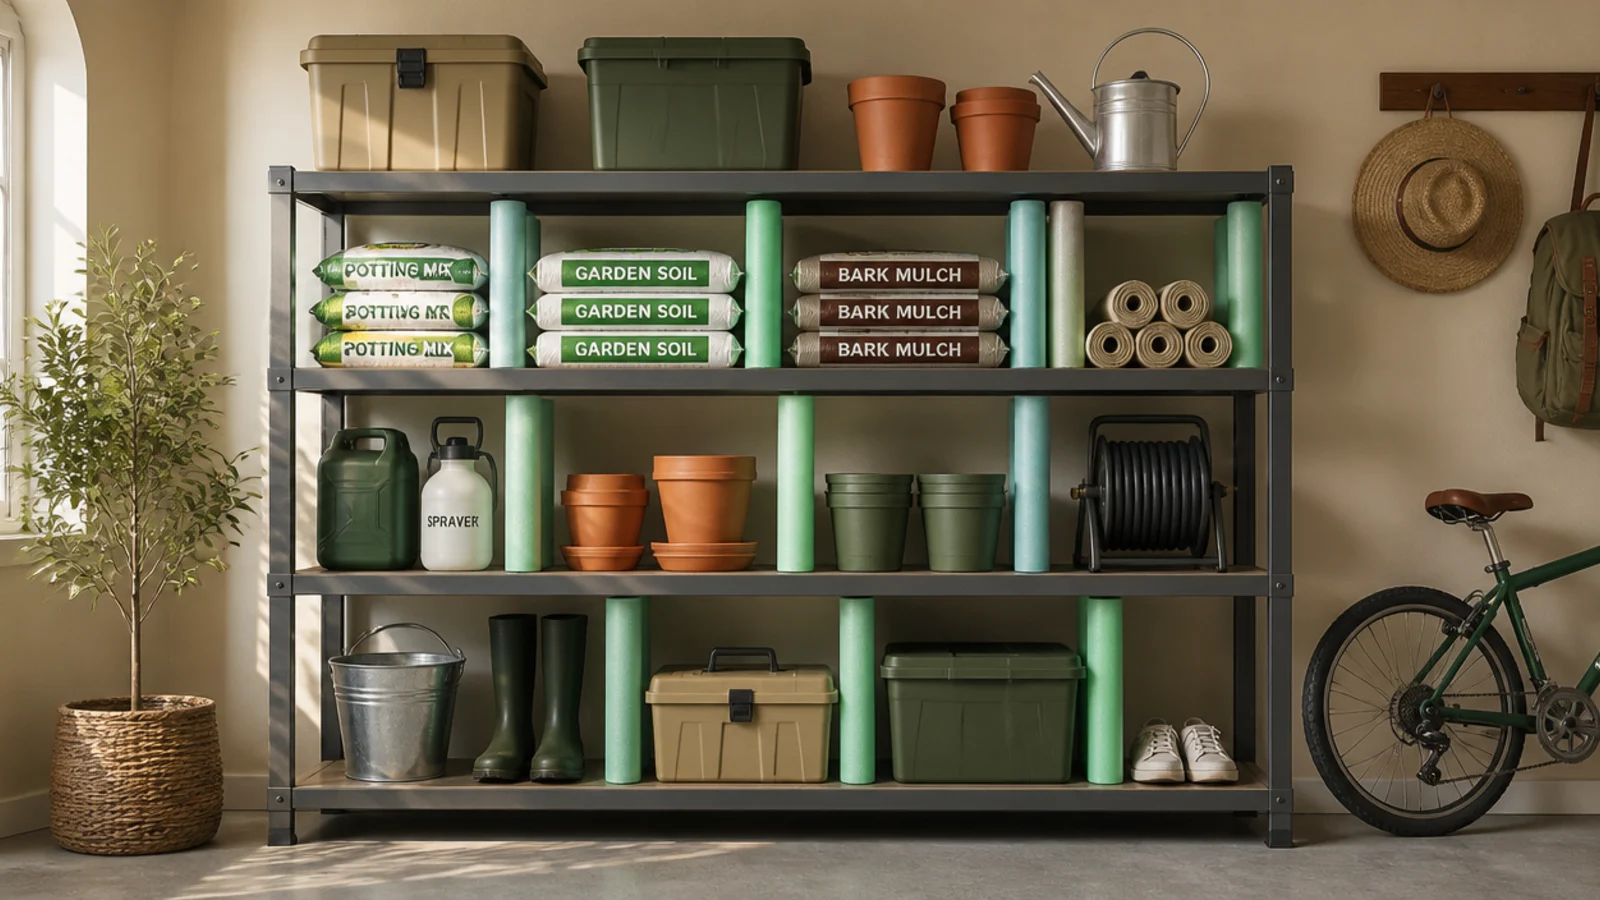
Cut pool noodles make soft, free dividers that keep floppy bags, rolls, and boxes standing upright on a shelf. They stop the domino-slide of items every time you pull one out. A dollar-store noodle divides several shelves.
Cut a pool noodle into sections a bit shorter than your shelf depth. Stand them upright between groups of items — rolls of tape, bags of soil, spare cardboard — to wall off sections. For a permanent version, thread a noodle onto a dowel and mount it. Reposition anytime by just moving a noodle piece.
Editor's noteSlit the noodle lengthwise and slip it over a shelf’s front lip as a bumper so small parts don’t roll off the edge.
Skip thisDon’t rely on noodles to hold real weight; they corral and separate light items, they don’t support heavy loads.