
1. Old-Fashioned Sunburst Label (Brown Ink)
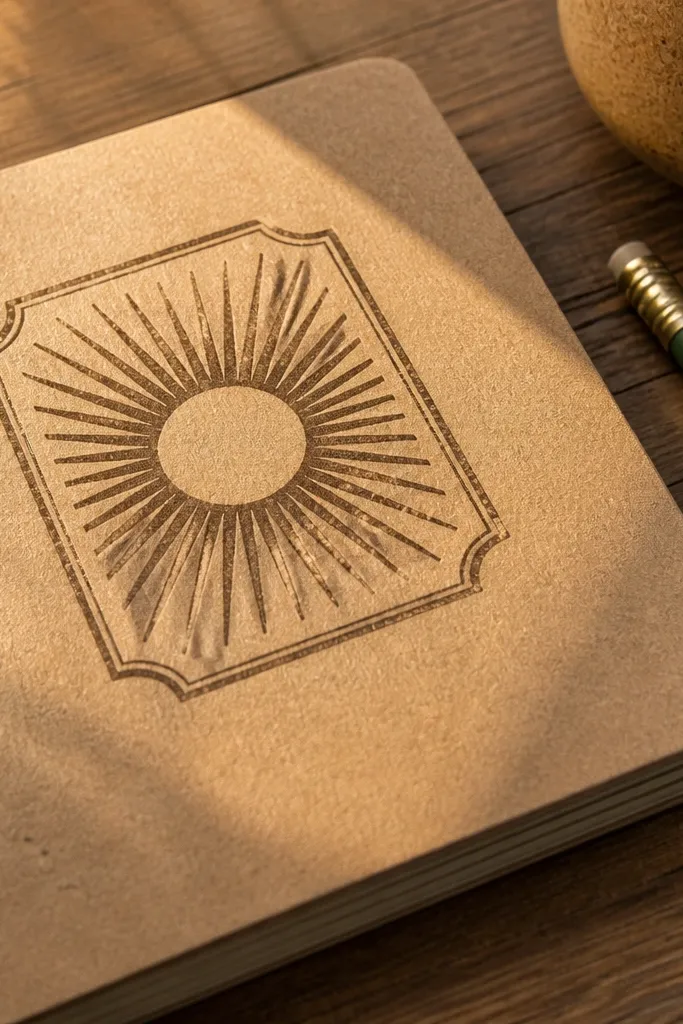
This one looks like it came from a thrifted pantry jar, with warm brown ink and a sunburst shape that frames any space it lands on. It’s photogenic because the rays create a strong silhouette even after kids cut it. Use it on notebooks, lunch bags, and binder tabs where you want a vintage “badge” look without writing. It’s also beginner-friendly because the main shape is big and the cut line is obvious. Time-wise, expect about 2-3 minutes per sticker once you’re set up.
Editor's noteAfter printing, wait 10 minutes before cutting so the ink doesn’t smear under pressure.
Print the design at 100% on matte sticker paper. Cut around the outer sunburst using a paper trimmer for straight edges and scissors for the corners. Punch out the center banner area only if you want a “see-through label” effect; otherwise leave it solid so the sticker stays sturdy.
Skip thisDon’t resize the file to “fit to page” — the rays get thin and harder to cut.
2. French Market Ticket Stub
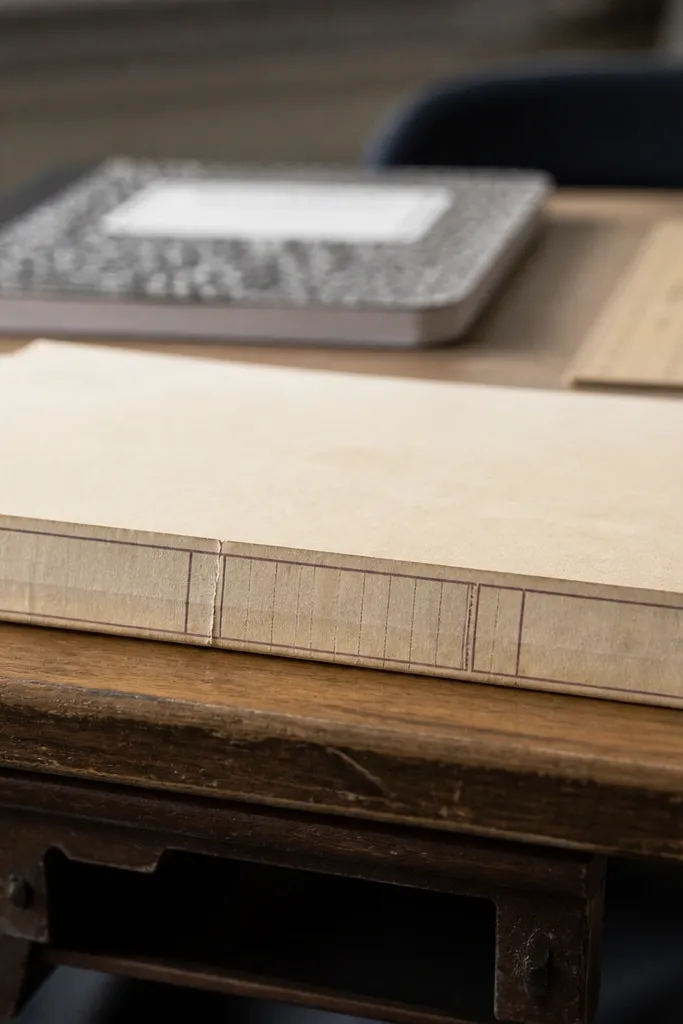
Ticket stubs read instantly as vintage because they have that dated, paper-cut vibe. This design is long and narrow, so it’s perfect for decorating the spine of a notebook, the side of a folder, or the edge of a kid’s art portfolio. The faded border lines give it dimension and make it look authentic even on a simple surface. It’s beginner-friendly because you can cut the whole rectangle cleanly and skip micro-detail trimming. It’s also a smart choice if you want stickers that don’t require perfect precision.
Editor's noteUse a ruler and craft blade only for the final notch edges; keep the bulk cut with scissors.
Print on matte sticker paper or regular paper. If using regular paper, apply a thin layer of clear packing tape over the front after cutting, then trim the tape edges. Cut to a clean rectangle first, then use scissors to tidy the notches at the corners if the file includes them.
Skip thisAvoid cutting tiny internal text lines — they tear easier than the outer border.
3. Antique Bicycle Club Emblem
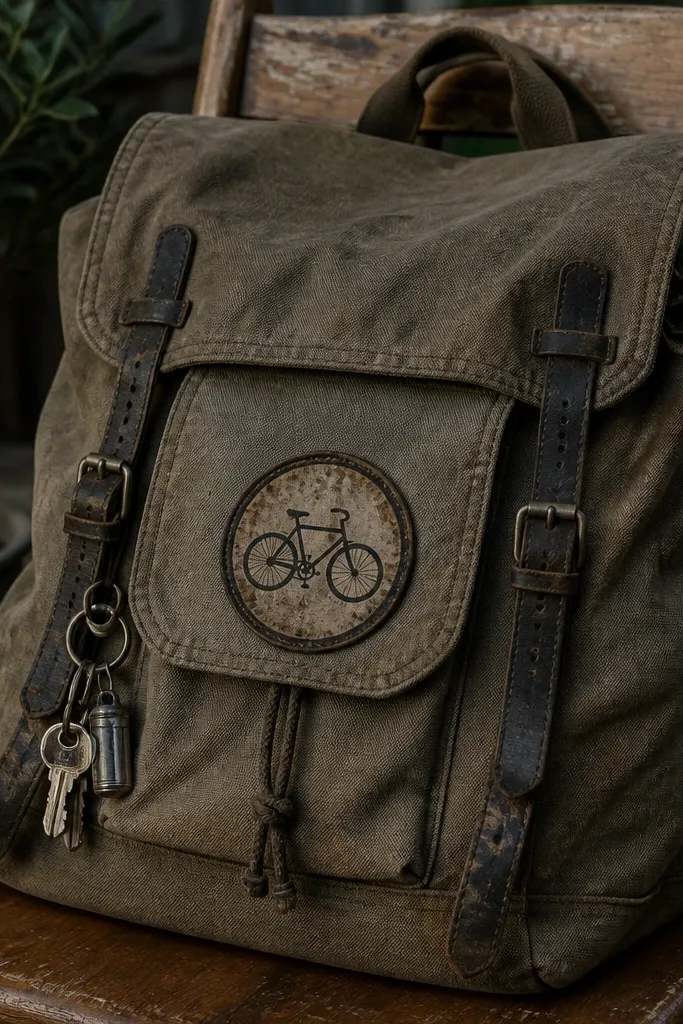
A round emblem is one of the easiest vintage sticker shapes to make look intentional. The bicycle silhouette gives it that old club-patch feeling, and the outer ring makes the sticker look like a badge even from a distance. It works great for kids' water bottles, helmets (if you’re using a sealant), and backpack tags. This design is beginner-friendly because the cut is a simple circle — you’re not wrestling with detailed corners. It also looks good with a slight matte finish, which matte sticker paper naturally provides.
Print on matte sticker paper for the cleanest edge. Cut the circle with a circle cutter or scissors; if you’re doing scissors, rotate the paper slowly for a smooth curve. Seal with clear packing tape only if the sticker will be rubbed a lot, like on a backpack.
If you have a circle punch, use it. The edge will look way more “store-bought.”
Don’t leave the circle too close to the border — a 1-2 mm white margin hides small printer misalignments.
4. Weathered Postcard Outline
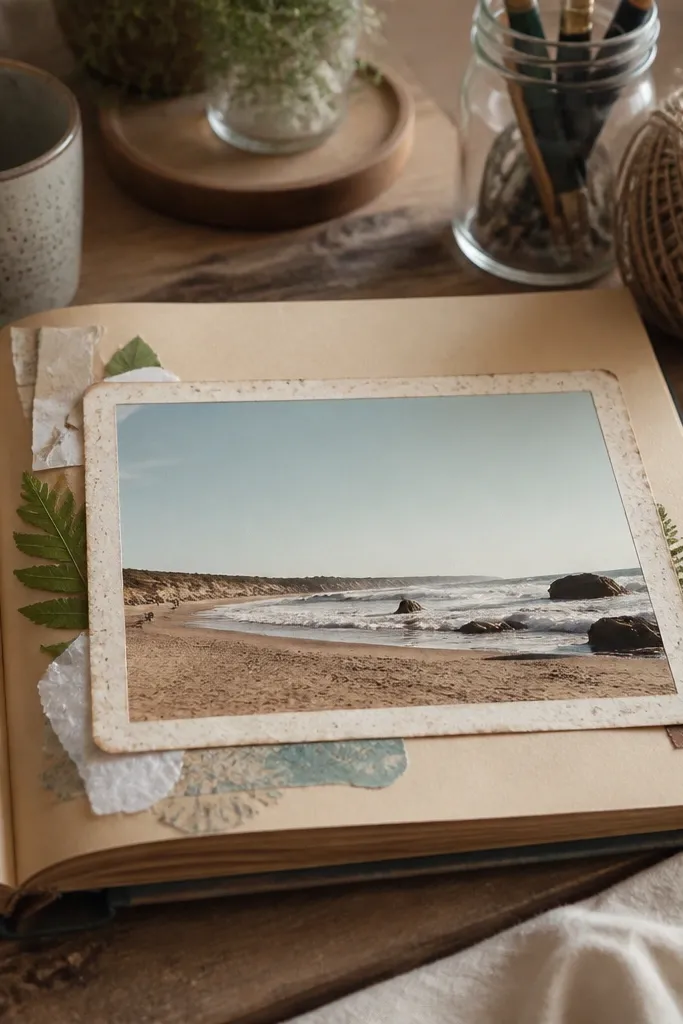
This postcard frame gives you a vintage look without needing tiny illustrations. The distressed border reads like aged paper, so even a simple background photo or notebook page underneath looks perfect. It’s great for scrapbooks, kids' journals, and craft boxes because it “frames” what’s already there. The outline shape is rectangular with soft corners, so cutting is beginner-friendly. You can also add a name label inside later with a marker.
Print at 100% on matte sticker paper. Cut the outer rectangle first, then trim the corners to match the rounded edges in the design. If you want extra durability, brush a thin layer of clear matte sealant over the sticker after it’s cut and fully dry.
Let the sealant cure for at least 30 minutes before letting kids touch it.
Avoid glossy paper — the distressed ink can look too shiny and fake.
5. Botanical Herbarium Corner (Green Ink)
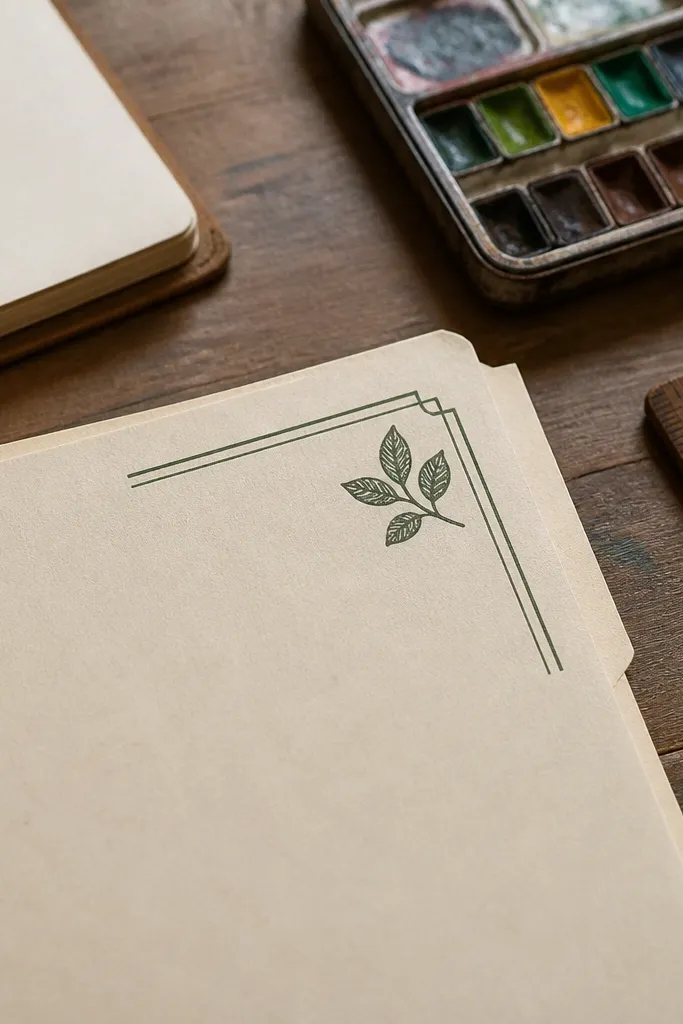
Corner labels look high-end because they sit like a page detail instead of a full sticker. This herbarium corner uses green ink and a small leaf illustration, giving that vintage catalog feel. Use it on the corner of a kid’s folder, the edge of a sketchbook cover, or the top corner of a poster board. Beginner-friendly matters here because the sticker shape is a clean right-angle corner. You’ll cut faster, and it still looks “designed,” not random.
Editor's noteUse a cutting mat and a metal ruler if you want the corner edges sharp.
Print on matte sticker paper and place the sheet so the corner label sits near the edge for easier trimming. Cut along the two outer sides of the corner shape first. Finish by trimming the small inner edge so it matches the design’s boundary line.
Skip thisDon’t peel before sealing if the sticker paper is thick — corners can lift at the tip.
6. Vintage Rose Apothecary Mark
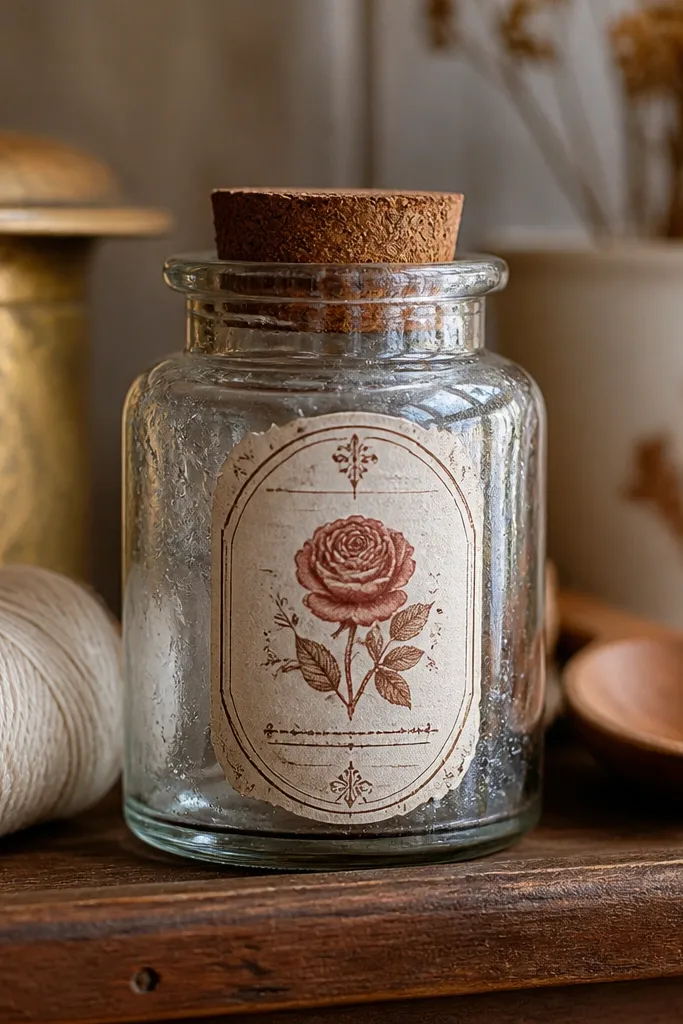
Apothecary marks look charming on kids' craft items because they feel like “real labels,” not generic stickers. The rose icon is the focal point, while the surrounding lines add that old pharmacy vibe. This is a good beginner-friendly choice when you want a smaller sticker that still looks detailed. Cut it carefully, but the shape is straightforward — usually a circle or oval. It looks especially good on white notebooks, kraft paper bags, and plain binders.
Editor's noteUse a craft knife only for the last 2-3 tricky cuts around the rose outline if needed.
Print on matte sticker paper. Cut close to the outer border, leaving about 1 mm of margin. If the file includes a thin ring, don’t try to cut inside it; keep the cut on the outermost line so you don’t shred the ring.
Skip thisAvoid leaving a big white halo around the label — it kills the vintage look.
7. Old Library Card Rectangle
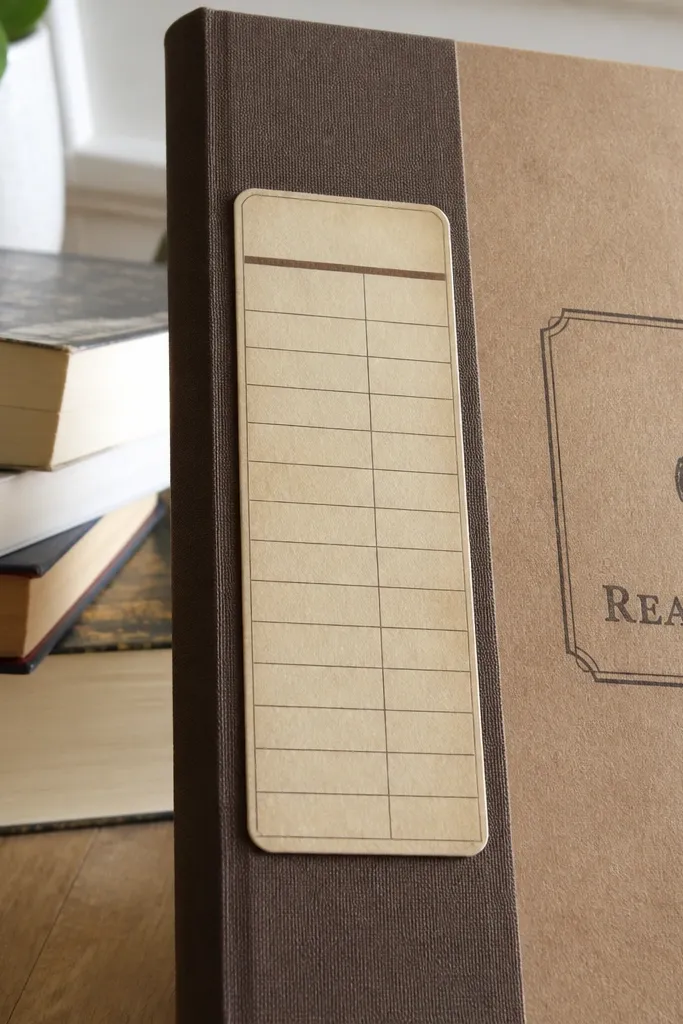
Library cards are vintage 101, and this rectangle format makes them easy to use right away. You can place it horizontally on a notebook cover, or vertically on the side of a folder. The border and “date field” blocks create a satisfying paper texture look. Beginner-friendly is the key here: you’re cutting a rectangle with straight edges, not chasing tiny shapes. It also photographs well because the card layout has clear lines and strong contrast.
Print on matte sticker paper at 100% scale. Cut with a paper trimmer for crisp edges, then use scissors only for any tiny corner marks. Peel and apply to clean, dry surfaces; press for 10 seconds to help the adhesive grip.
If the sticker paper curls after printing, weigh the sheet with a flat book for 5 minutes before cutting.
Don’t apply to dusty surfaces — the edges lift fast.
8. Travel Compass Rose

A compass rose reads like vintage travel gear instantly. The radial ticks and outer ring make it look detailed without requiring tiny cut pieces. This sticker looks great on children’s travel journals, school folders, and pencil cases. It’s beginner-friendly because the outer circle is the main cut line, and the inner details stay intact. If you like a “theme” look, these pair well with ticket stubs, postcards, and map corners.
Editor's noteUse matte sticker paper so the compass ink doesn’t glare on camera.
Print on matte sticker paper and let it dry fully. Cut the circle with a circle punch or scissors, following the outer ring line. For extra durability, add a thin layer of clear packing tape over the entire sticker after cutting and trim the tape edges.
Skip thisAvoid glossy laminate sticker paper — it reflects light and hides the distressed texture.
9. Vintage Script Nameplate Banner
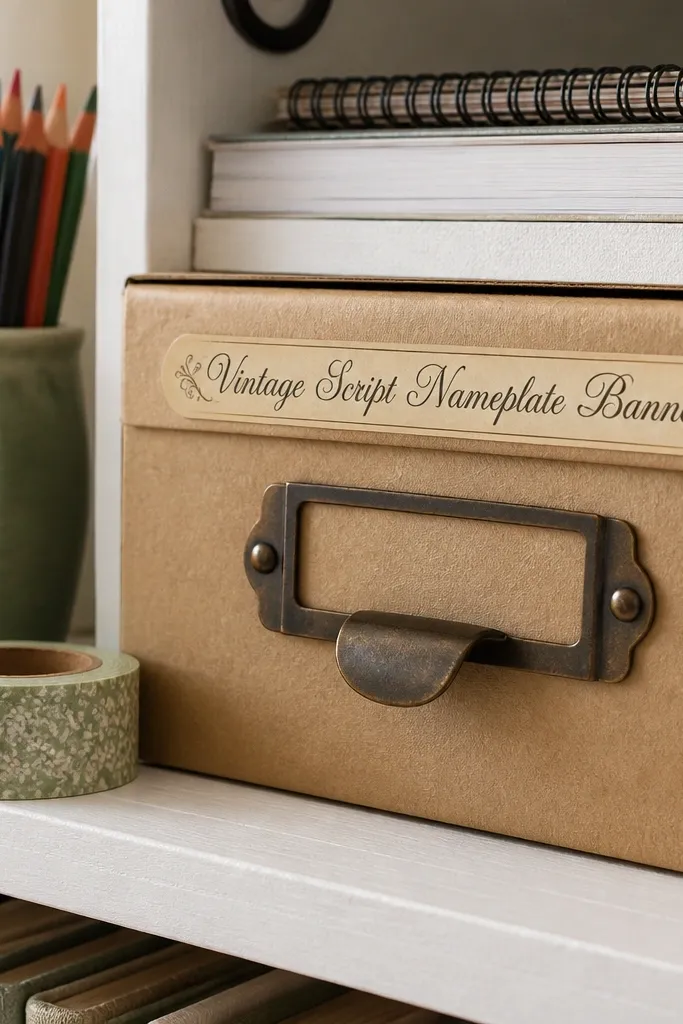
Nameplates look amazing on kids' supplies because they make everything feel organized and special. This script banner is built for a readable label area, with flourishes that give that old-school sign vibe. It’s beginner-friendly because the banner is one clean strip — you cut it like a rectangle with rounded ends. Use it on pencil boxes, craft bins, and storage drawers. The warm brown ink works on both white and kraft backgrounds, so it’s forgiving.
Editor's noteAdd the child’s name with a fine-tip marker after sticking, not before. Ink won’t smear through the print layer.
Print on matte sticker paper. Cut the banner outline with scissors, then use a craft knife to tidy the rounded ends if your scissors leave jagged edges. Press down firmly along the flourishes last, since thin ink areas can lift if you rush.
Skip thisDon’t cut too close to decorative swirls — leave 1 mm margin so the flourishes don’t break off.
10. Aged Train Window Frame
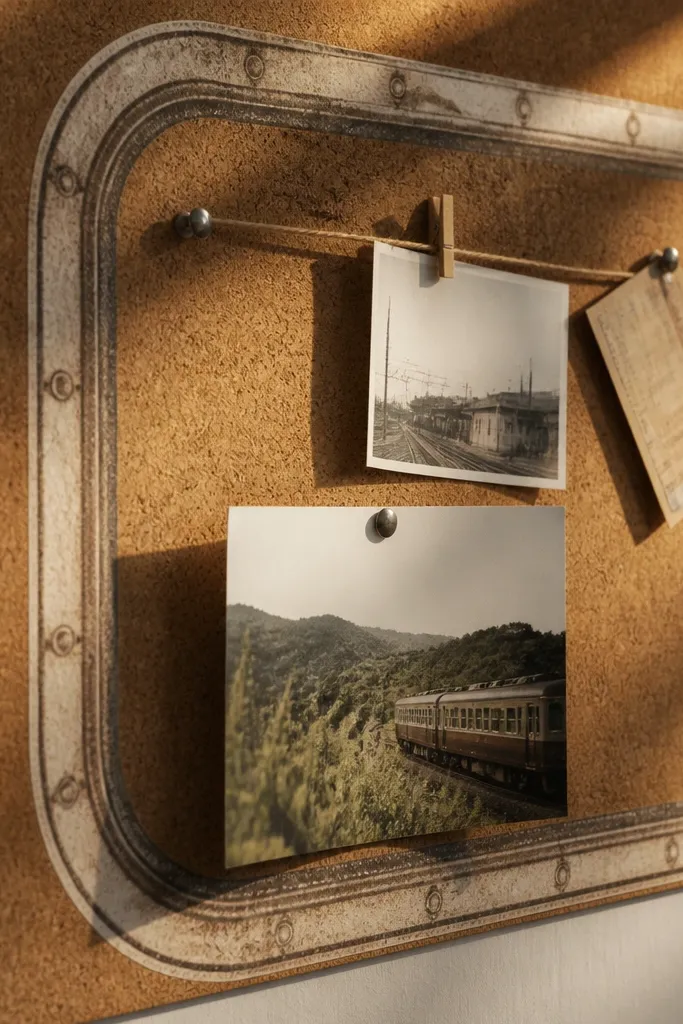
This sticker looks like a piece of a vintage train timetable board. The frame with rivet dots makes it feel industrial, and the aged border gives it that “found object” look. It’s photogenic because the frame creates a clear boundary on whatever surface you place it on. Beginner-friendly is the shape: a rectangle window with a thick border line. It’s also a good option for kids who like transportation themes without cutting tiny illustration details.
Print on matte sticker paper. Cut the outer frame rectangle first, keeping the border intact. If the design includes an inner window, leave it as part of the sticker — don’t try to cut out the middle unless you have a die cutter.
Use a ruler to keep the cuts straight — crooked train frames look off fast.
Avoid peeling and re-sticking — adhesive weakens and the border will curl.
11. Victorian Scroll Corner Label
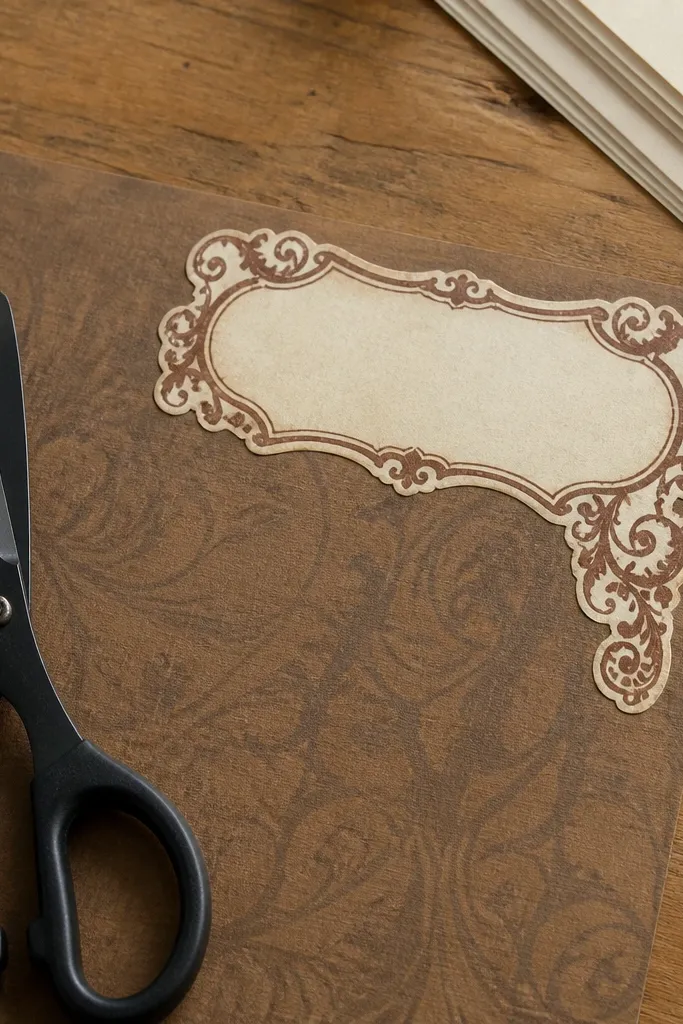
Scroll corners are a simple way to make plain craft paper look like a vintage page layout. This one uses cream and brown tones with ornate curls, so it reads as decorative even when the rest of the project is minimal. It’s beginner-friendly because the cut shape is compact and you’re placing it like an accent. Use it on the corner of a drawing sheet, the edge of a folder, or the front of a kids' art journal. It also looks great under soft light because the cream background keeps the ink from blending.
Editor's noteIf you’re using it on paper that flexes, seal the top with a thin tape layer afterward.
Print on matte sticker paper for less glare. Cut close around the outer curl line, leaving a thin margin so the curls don’t detach. Apply to a flat surface and press along the tips last to prevent lifting.
Skip thisDon’t place it on textured fabric — the curls will trap air and peel.
12. Old Map Grid Square
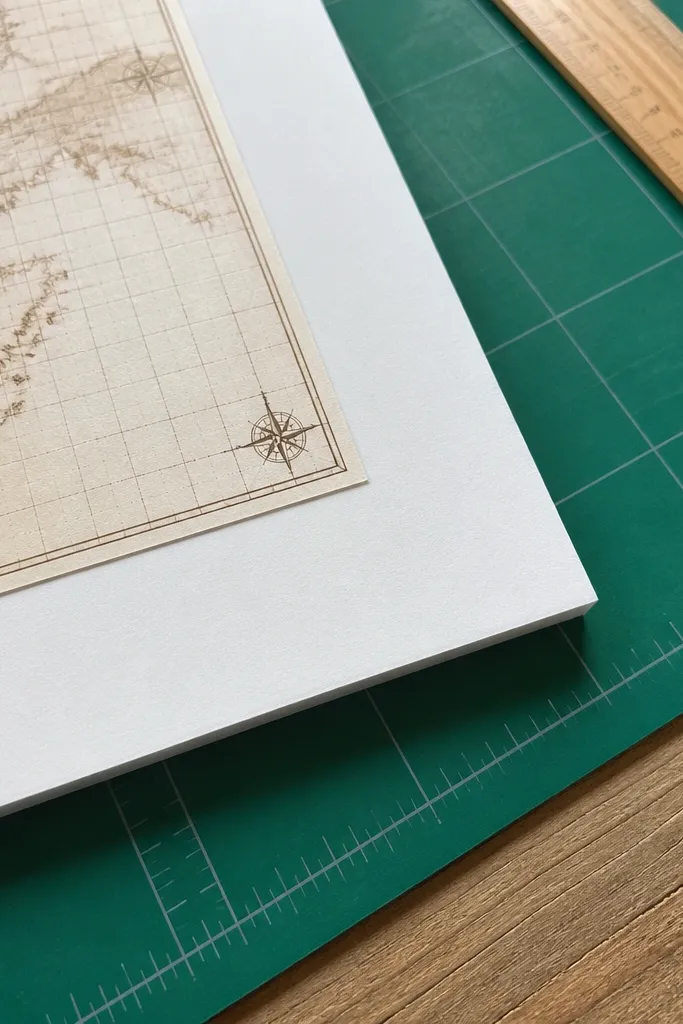
Map grid squares give you that travel-craft vibe without needing a full map scene. The grid lines and tiny compass marks make it look authentic, and the square format is easy to place. It’s beginner-friendly because you can cut it straight and keep the edges clean. Use it on sticker collages, the corners of posters, or as labels on craft bins. The look is photogenic because grids create a crisp pattern that reads even at small sizes.
Print on matte sticker paper. Cut a square using a paper trimmer if you can, or use scissors and a ruler for straight lines. Apply to a dry, smooth surface and press for 10 seconds, especially on the corners.
Keep these smaller — about 1.5 to 2.5 inches — so the grid stays sharp.
Avoid enlarging the square too much; the grid lines get soft and look printed-on.
13. Antique Bottle Tag (Brown Label)
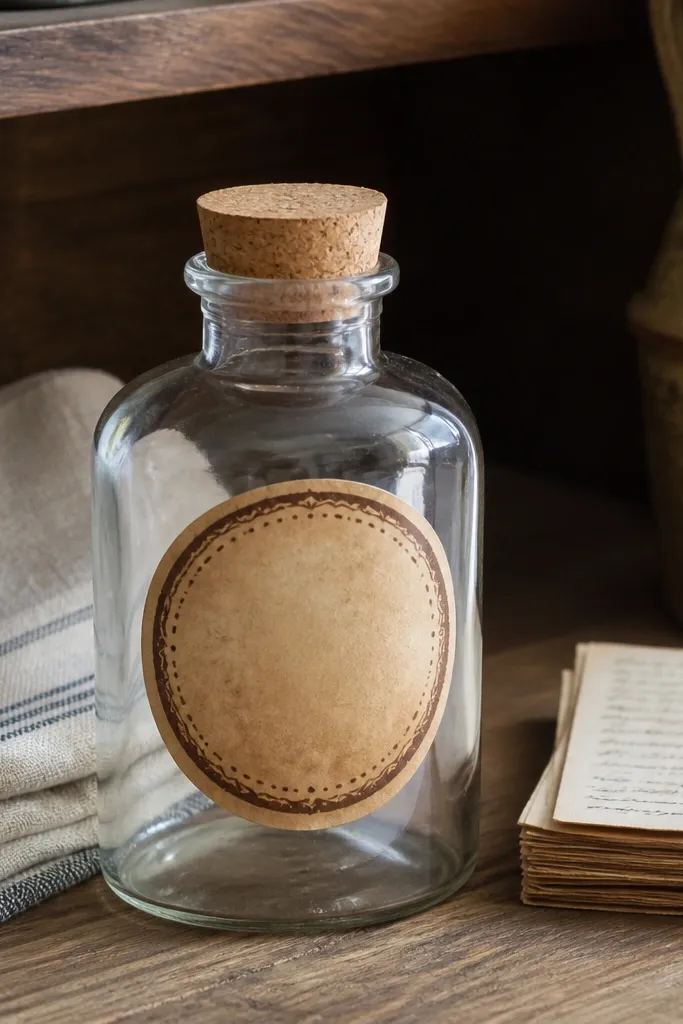
Bottle tags look adorable on kids' craft bottles, juice pouches, and storage containers. This oval label has a distressed border that makes it feel like aged paper, not a modern print. Beginner-friendly is the cut: an oval outline with thick edge contrast. It’s great for making a consistent set of labels — one per container — and it looks good in photos because the shape stands out. If you want a theme, pair with sunbursts and apothecary marks.
Editor's noteFor bottles, apply after the surface is fully dry and grease-free.
Print on matte sticker paper. Cut the oval carefully, leaving about 1 mm margin around the distressed edge. Seal with clear tape if the container gets wet or wiped often, and trim tape edges to match the oval.
Skip thisDon’t stick on glossy plastic without cleaning — the label will lift.
14. Vintage Film Strip Frame
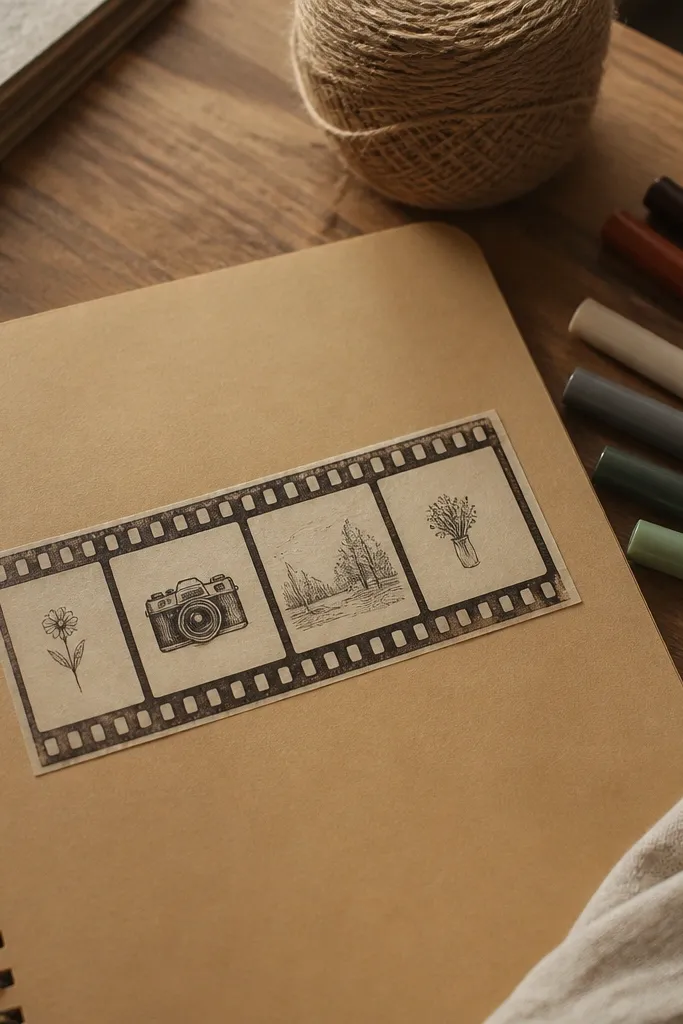
Film strips have that instant retro feel, and this frame style makes it perfect for kids who want to add photos or drawings. The perforation holes create a clear pattern, and the frame boxes give you a “story strip” look. Beginner-friendly because it’s a long rectangle with repeated hole shapes — you can cut it as one piece and place it straight. Use it on notebooks, scrapbooks, and craft calendars. It also looks great when you put it near other vintage labels.
Editor's noteUse a ruler to align the strip before pressing down; crooked film strips stand out.
Print on matte sticker paper. Cut the film strip outer shape first. If the design includes inner frames, leave them intact and just cut the outer strip so you keep durability and avoid tearing.
Skip thisAvoid tiny scissors snips along the perforations — you’ll weaken the strip.
15. Old Coffee Roaster Round Stamp
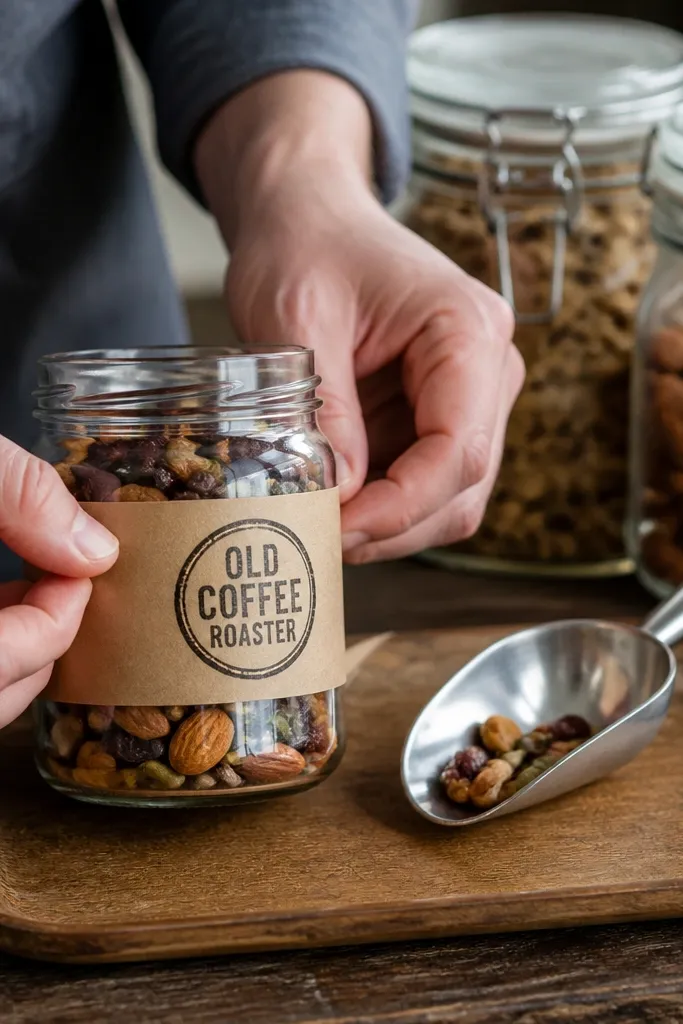
This stamp-style sticker looks like it came off a vintage coffee bag, with a thick ring and distressed text that reads as real ink. The round shape is easy to cut and still looks detailed. It’s perfect for labeling snack jars, decorating lunch boxes, and adding a “menu” feel to craft tables. Beginner-friendly because the sticker has one main cut line and no delicate edges. It photographs well because the distressed ring catches light.
Editor's noteIf you see white ink gaps after printing, switch your printer to high quality mode.
Print on matte sticker paper. Cut along the outer ring with scissors, rotating to keep the curve smooth. Press firmly across the center last, since that’s where kids tend to miss pressure.
Skip thisDon’t use gel pens to color over the distressed areas — ink can smear.
16. Victorian Rose Envelope Seal
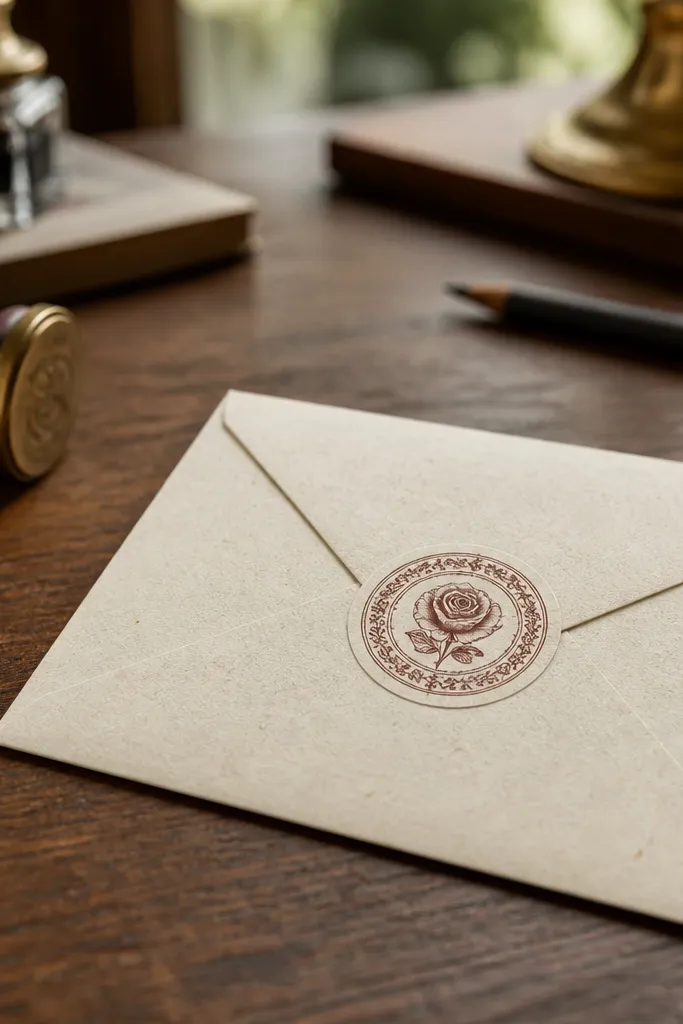
Envelope seals are tiny but they look special, like you’re sealing a letter. This rose seal uses a compact layout with an ornate ring, so it reads vintage even at small sizes. It’s beginner-friendly because you can cut it like a simple circle. Use it on thank-you notes, kids' cards, scrapbook corners, and party favor bags. The look is photogenic because seals add a focal point without taking over the page.
Editor's noteKeep these small — around 1.25-1.75 inches — so the rose stays crisp.
Print on matte sticker paper and let it dry. Use a small circle punch or carefully cut with scissors along the outer border. Apply with light pressure first, then press around the ring to lock the edges.
Skip thisAvoid cutting too thin around the border; distressed rings need a margin.
17. Vintage Bicycle Rider Silhouette Badge
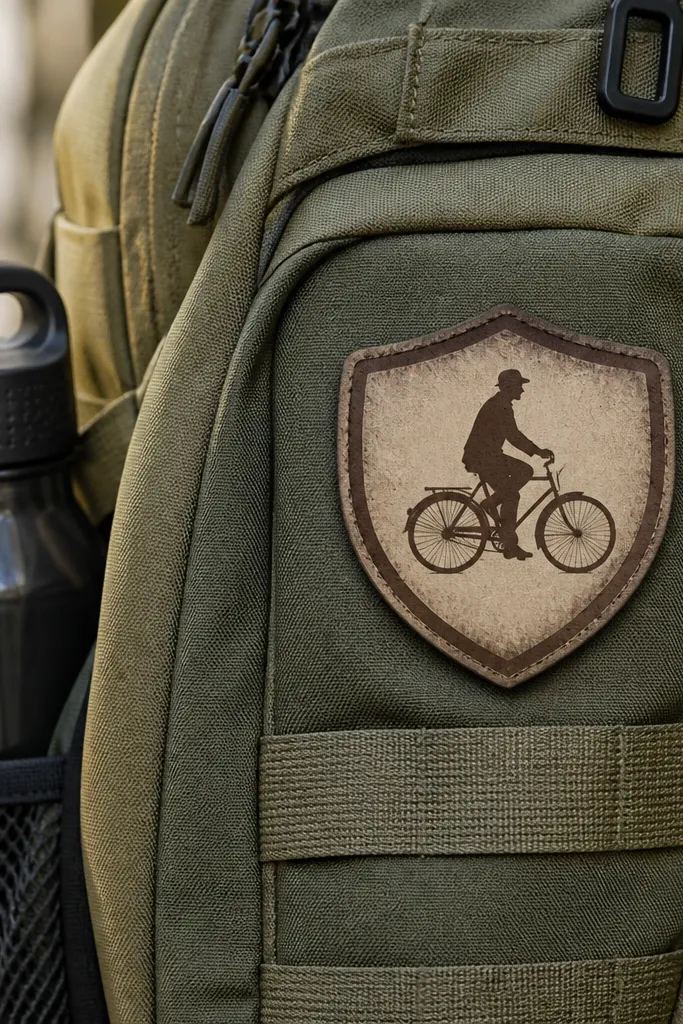
This shield badge gives you a sporty vintage look with a bigger silhouette and fewer micro-details. It’s ideal for kids because the cutting is mostly perimeter work, not fiddly internal trimming. The aged border makes the sticker feel like a patch, and the silhouette makes it read clearly from across a room. Beginner-friendly because the outer shield shape has thick lines and a clear boundary. Great for school binders, lunch bags, and craft storage.
Editor's noteIf you’re placing it on a fabric-covered binder, seal over the sticker with clear tape to stop peeling.
Print on matte sticker paper. Cut around the outer shield outline with scissors, then tidy any straight edges with a trimmer if you have one. Apply to a smooth surface and press along the corners last so they don’t lift.
Skip thisDon’t try to cut the internal silhouette edge out — leave it as part of the sticker.
18. Aged Post Office Box Label
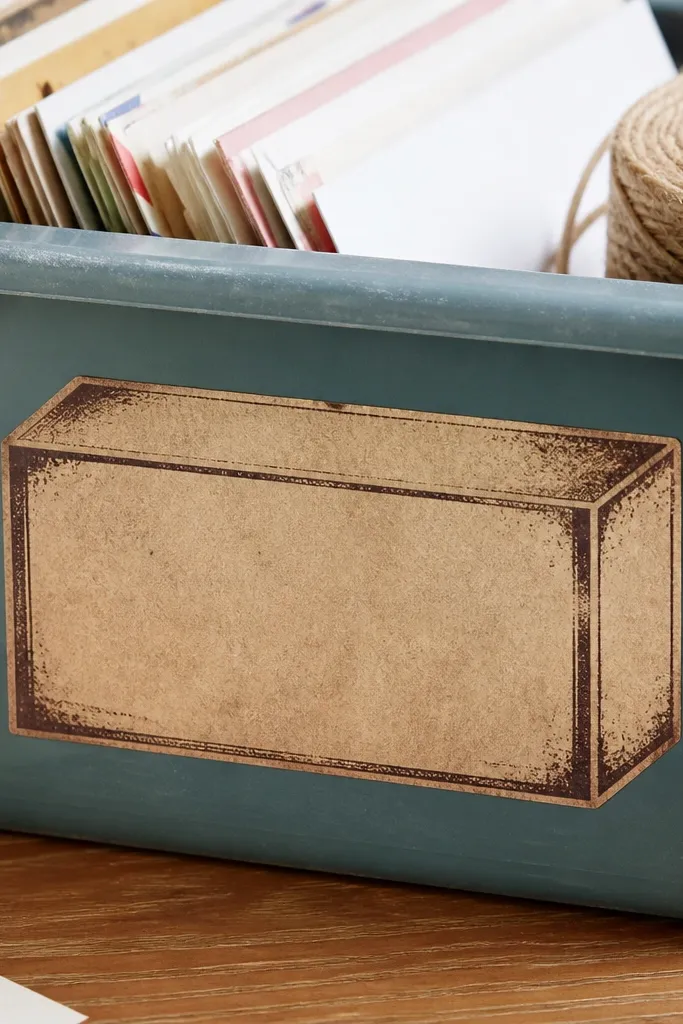
Mailbox and post office motifs scream vintage because they connect to old signage and paper systems. This label is shaped like a small box, with distressed edges that feel printed on aged card stock. It’s beginner-friendly because the silhouette is obvious and the cut is mostly perimeter. Use it on kids' craft bins, mail-themed journals, and hallway organizers. The look is photogenic because the shape creates a strong shadow line on the surface.
Print on matte sticker paper. Cut carefully around the outer mailbox shape. If the sticker includes small side tabs, cut them last with a craft knife while you’re watching closely.
Use a light grip when pressing so you don’t squish the distressed ink texture.
Avoid placing on glossy surfaces; the adhesive can slip until it fully sets.
19. Vintage Ticket Roll Corner Mark
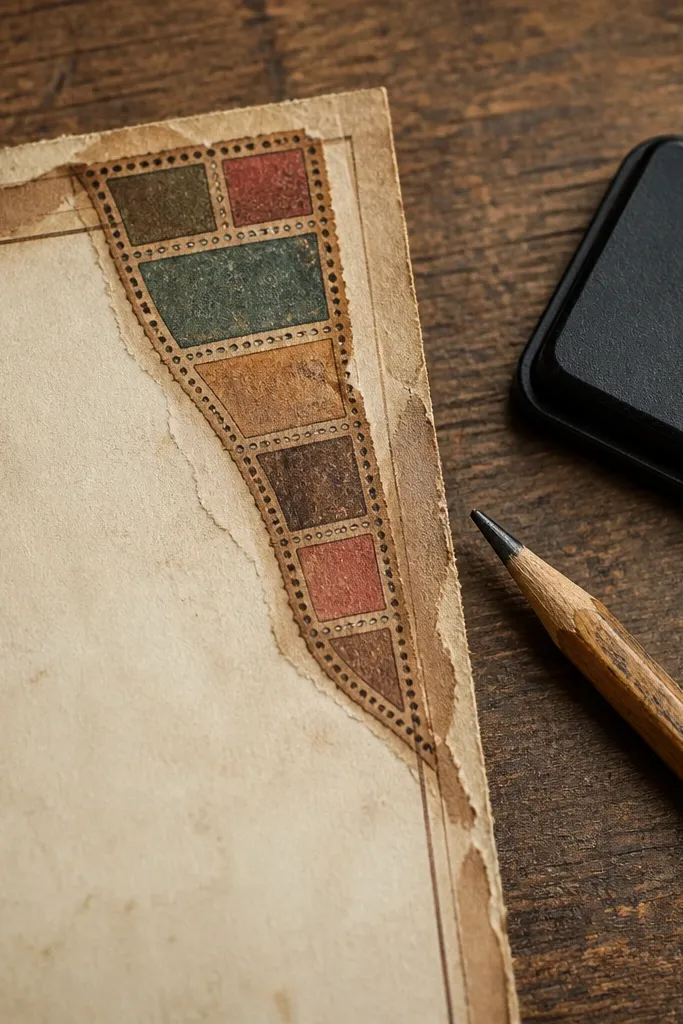
Corner marks are a cheat code for a “designed” look. This ticket roll corner has torn paper edges and a vintage border, so it blends into scrapbook pages instead of sitting on top like a modern sticker. Beginner-friendly because it’s a small accent with a simple cut outline. Use it on the corner of drawings, scrapbook pages, and kids' poster boards to create a cohesive vintage theme. It’s also great for covering small mistakes because it hides messy edges.
Editor's noteIf the corner lifts later, add a tiny square of clear tape on the underside edge.
Print on matte sticker paper. Cut the corner accent using scissors first, then trim the outer edge with a blade for the straight parts. Peel and apply to the corner, pressing from the center outward to avoid bubbles.
Skip thisDon’t over-saturate with glue or liquid sealant; it can wrinkle the sticker paper.
20. Antique Key Tag (Bronze Look)
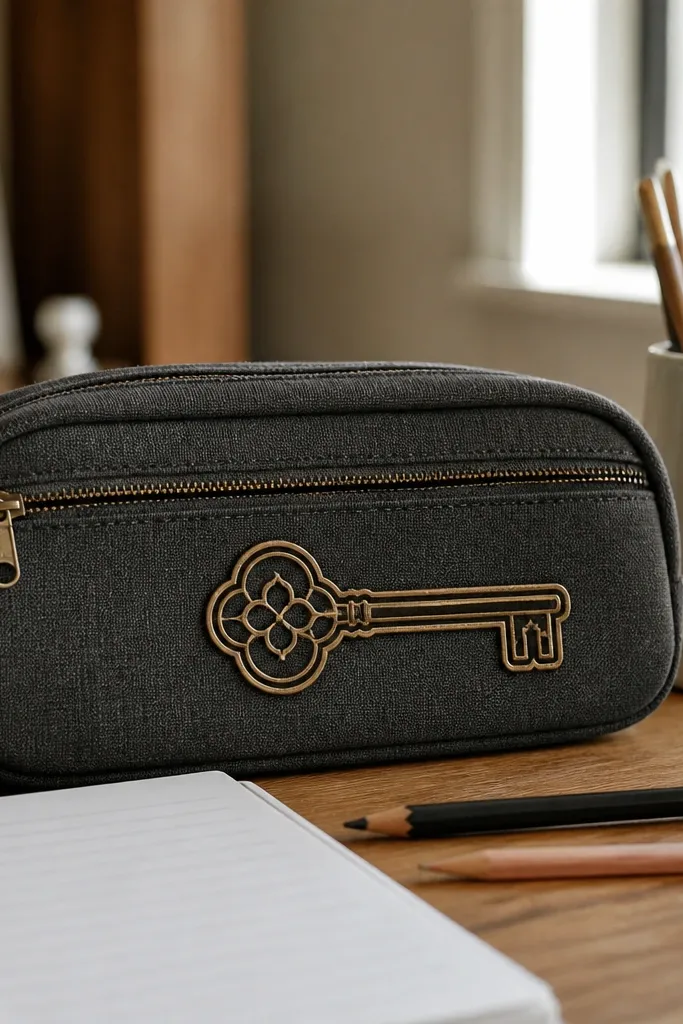
Key tags look so good because they’re instantly recognizable and the silhouette is iconic. This one has a distressed bronze border that makes it feel like an old hardware label. Beginner-friendly because you cut along a single key-shaped outline without tiny internal cuts. Use it on pencil cases, lock-themed craft boxes, and scavenger hunt envelopes. In photos, the key shape reads clearly and adds a playful vintage vibe.
Editor's noteUse a new blade if you’re using a craft knife; dull blades fray sticker paper.
Print on matte sticker paper and let it dry. Cut the key outline slowly, especially around the bow and teeth. Apply to a flat surface and press firmly along the thin tip areas where edges lift first.
Skip thisAvoid placing on curved surfaces without sealing; thin key tips peel faster.
21. Vintage Library Stamp Square
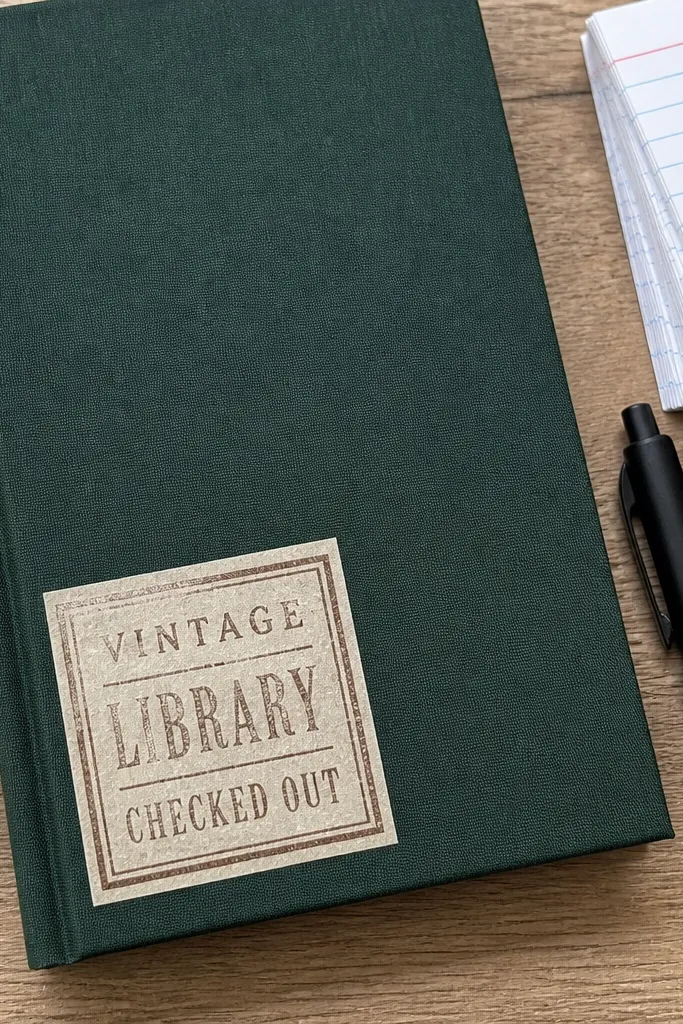
A stamp square gives you that “book was checked out” look, and squares are easy to place straight. This design has a thick border and distressed lettering, so it looks authentic even with basic cutting. Beginner-friendly because the cut is a square with clean edges. Use it on school notebooks, reading journals, and craft logs where you want a vintage label on every page. It’s also a good choice for kids who want a repeatable pattern.
Print on matte sticker paper at 100% scale. Cut with a trimmer for straight edges, then touch up corners with scissors if needed. Apply and press for 10 seconds, then check that all border edges lie flat.
If your trimmer tends to leave a burr, make a second light pass instead of forcing it.
Don’t cut while the ink is still wet; edges will smear and look gray.
22. Old World Map Compass Coordinates
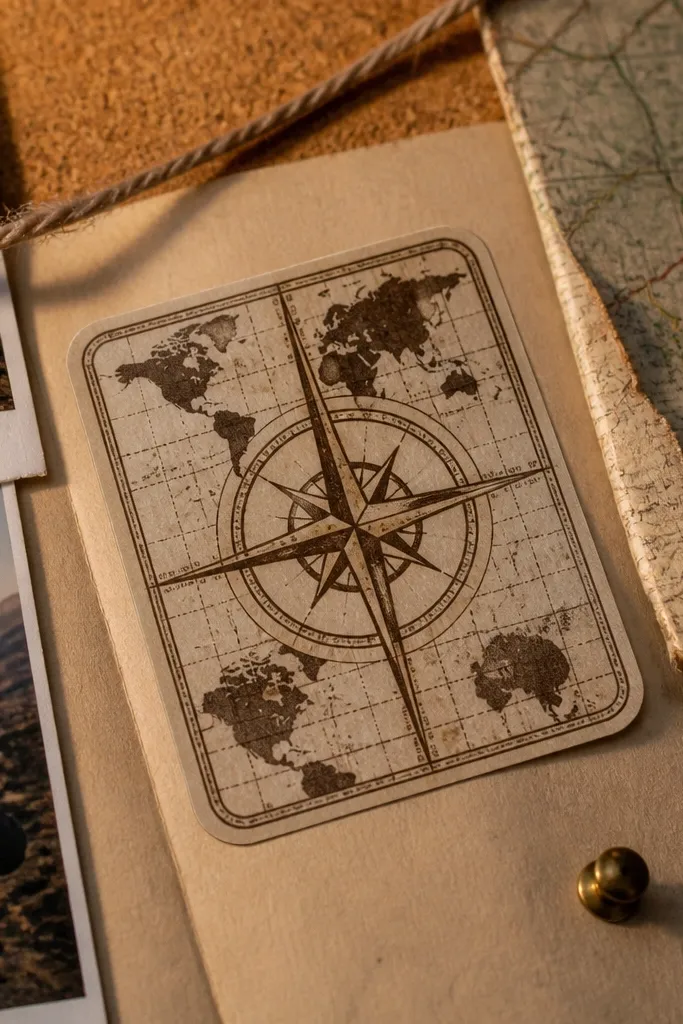
This coordinates label looks like something you’d find on a vintage explorer map. The compass rose adds the focal point, while the coordinates-style blocks keep it feeling real. Beginner-friendly because the sticker has a clear frame and the cut is mostly perimeter. Use it on journals, map-themed craft boards, and travel notebooks. The look is photogenic because the compass rose creates a strong center that stands out on busy backgrounds too.
Print on matte sticker paper and dry fully. Cut along the outer frame line, leaving a narrow margin. If you want it extra durable, seal with clear tape over the top and trim the tape to match the border.
Place it on kraft paper or off-white cardstock for the most authentic contrast.
Avoid dark backgrounds; the vintage ink can disappear.
23. Vintage Tea Cup Apothecary Label
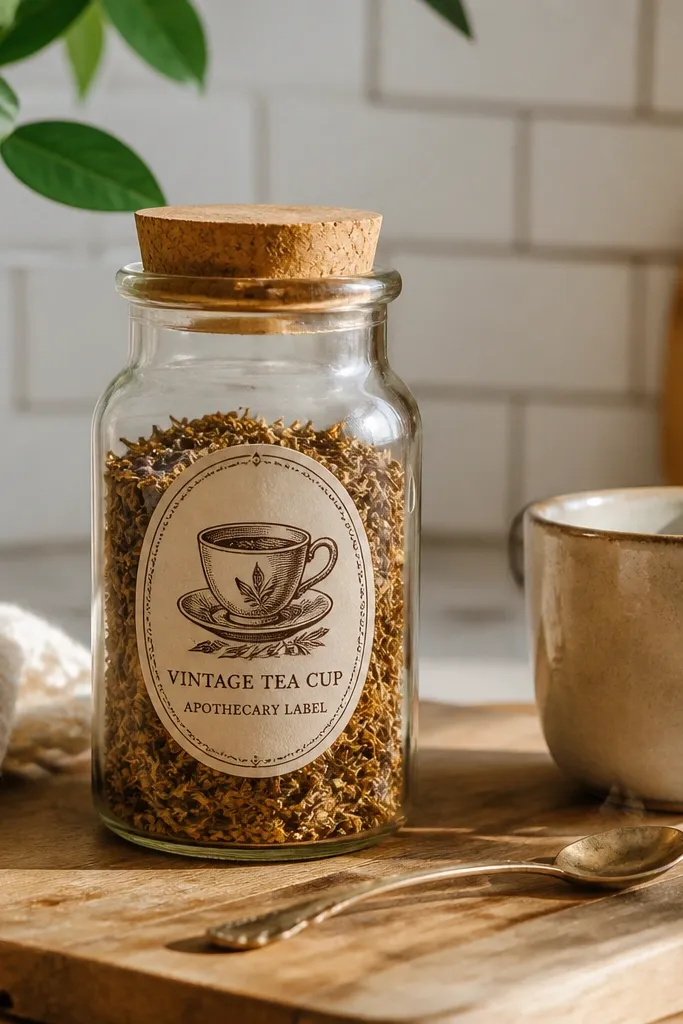
Tea cup labels feel vintage and cozy, and the apothecary layout makes it look like a real product label. This sticker is small, so it’s beginner-friendly for kids who struggle with big cuts. The icon is bold enough that it stays readable even if the sticker is handled. Use it on craft snack jars, tea-themed party favors, and classroom craft boxes. It photographs well because the icon sits in the center with decorative framing.
Editor's noteIf you’re using it on glass, clean with rubbing alcohol first and let it dry fully.
Print on matte sticker paper. Cut the outer border closely but leave 1 mm margin around the tea cup icon. Apply to a clean surface and press from the center out to prevent trapped air around the icon.
Skip thisDon’t laminate before cutting; lamination causes peeling edges.
24. Antique Camera Photo Frame
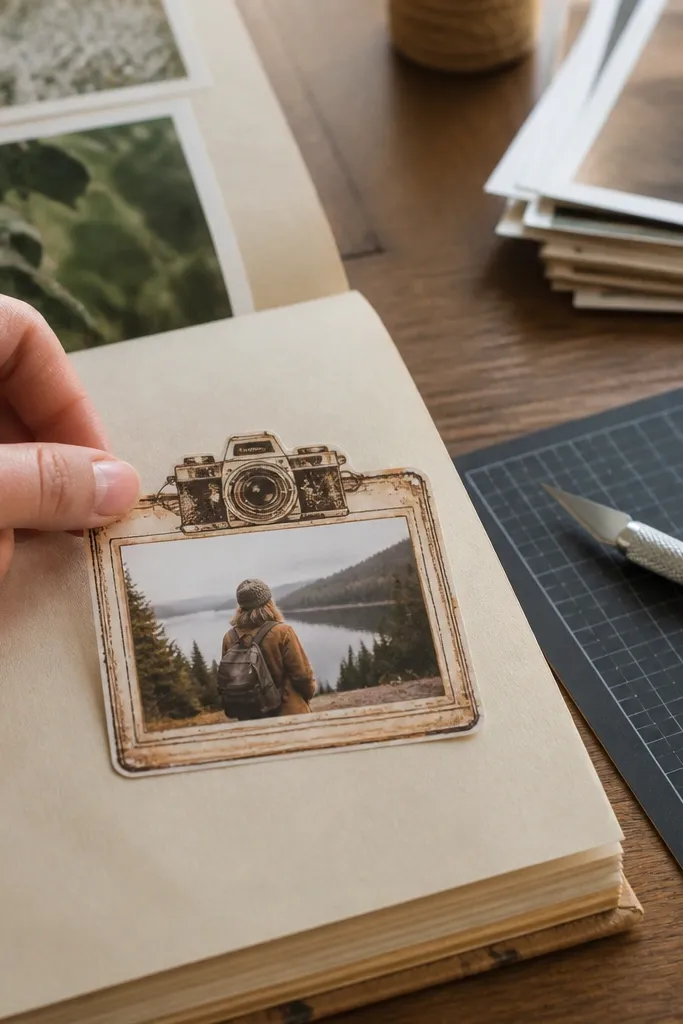
A camera frame gives kids a way to label their drawings like they’re documenting something. The vintage camera icon adds personality, and the frame border makes it look like a photo moment. Beginner-friendly because the cut is a rectangle frame with a clear outer boundary. Use it on scrapbook pages, photo albums, and craft posters where you want a “memory” theme. The look is photogenic because the camera icon pulls focus and the border gives clean structure.
Print on matte sticker paper. Cut the outer rectangle with a trimmer for straight sides. Leave the inner details intact; don’t cut out the camera shape inside — it weakens the sticker and tears.
Use a fine-tip marker to add a date under the icon so it looks like a real caption.
Avoid cutting out the inner frame window unless you have a die cutter.
25. Vintage Feather Quill Divider Label
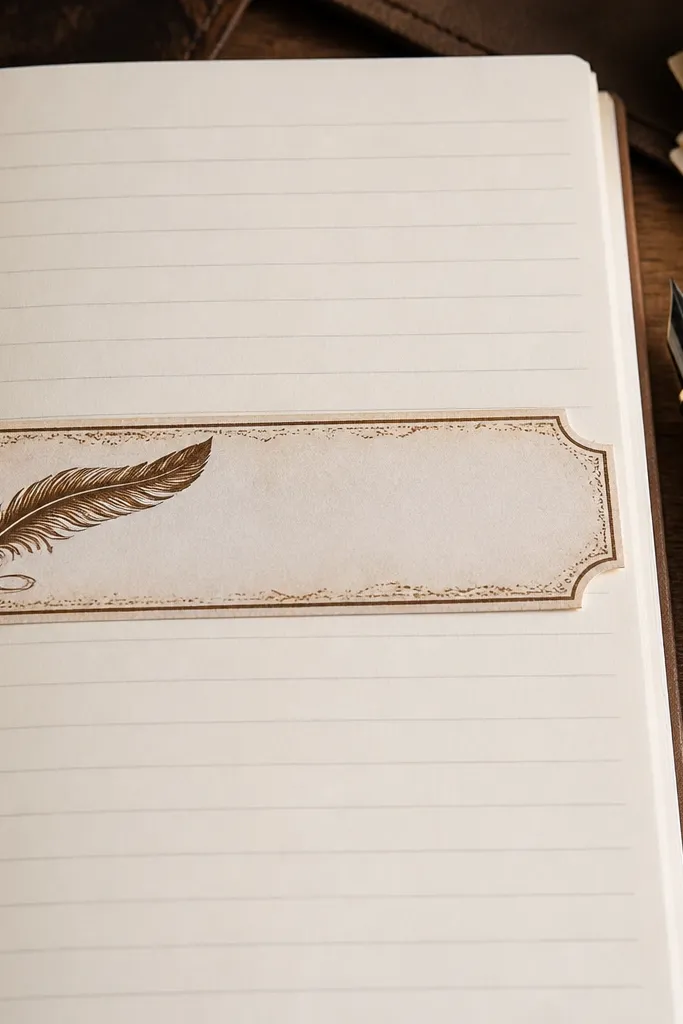
Quill and feather dividers look great on journals because they separate sections like an old book. This design has a quill shape with a distressed border, so it feels paper-like instead of plastic. Beginner-friendly because the cut line is mostly the outline of a single feather motif. Use it on reading journals, writing notebooks, and craft organizers. In photos, the feather adds movement and the distressed ink gives texture without needing extra decoration.
Editor's noteIf you can, cut on a mat — it keeps the feather edge clean and prevents slip.
Print on matte sticker paper. Cut around the outer feather outline slowly, using scissors for the curve and a blade only for the narrow tip if needed. Apply to paper that’s flat and dry; press along the tip area last so it sticks evenly.
Skip thisDon’t rush the narrow tip; tearing there ruins the whole silhouette.
26. Aged Rope Border Label Strip
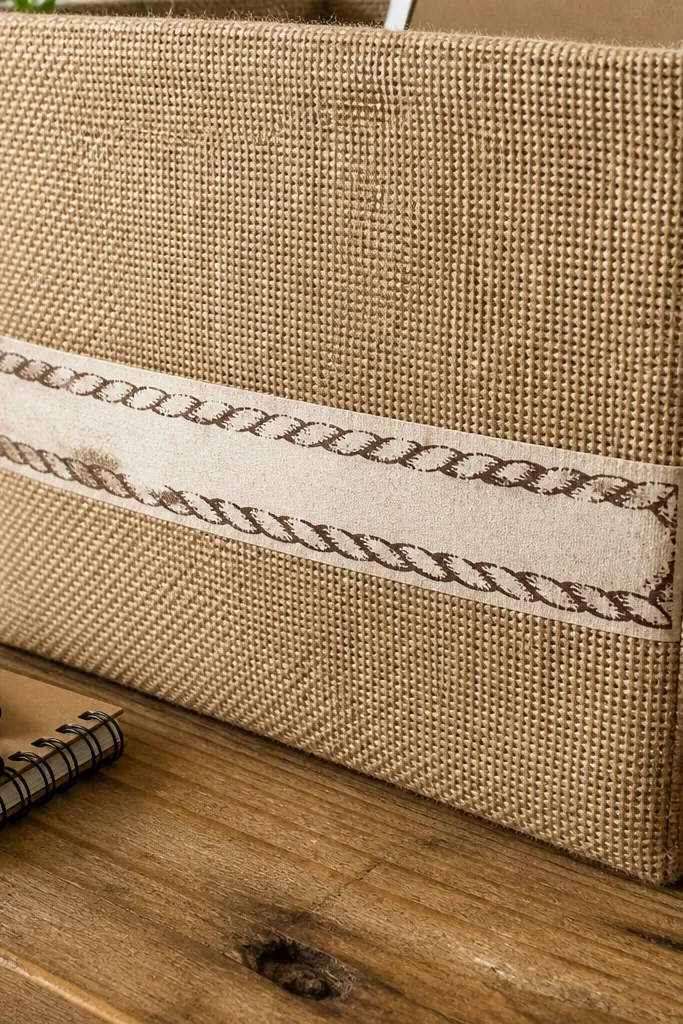
Rope borders make vintage labels feel nautical and handmade. This strip format works well on storage bins, craft tables, and binder edges because it reads like trim. Beginner-friendly because you’re cutting a long rectangle strip, not a complicated shape. The rope border creates a strong visual frame that looks good even when placed slightly off-center. Use it for themed sets: pair with compass roses and map squares for a full look.
Editor's noteIf kids handle the items, seal the strip with clear tape over the top before it gets wet or rubbed.
Print on matte sticker paper. Cut the strip to the outer border line with a trimmer for straight edges. Apply and press along the rope border first, then smooth the center area to prevent lifting.
Skip thisAvoid using scissors for the entire strip; uneven edges make the rope look warped.
27. Vintage Rose Stamp Circle (Large)
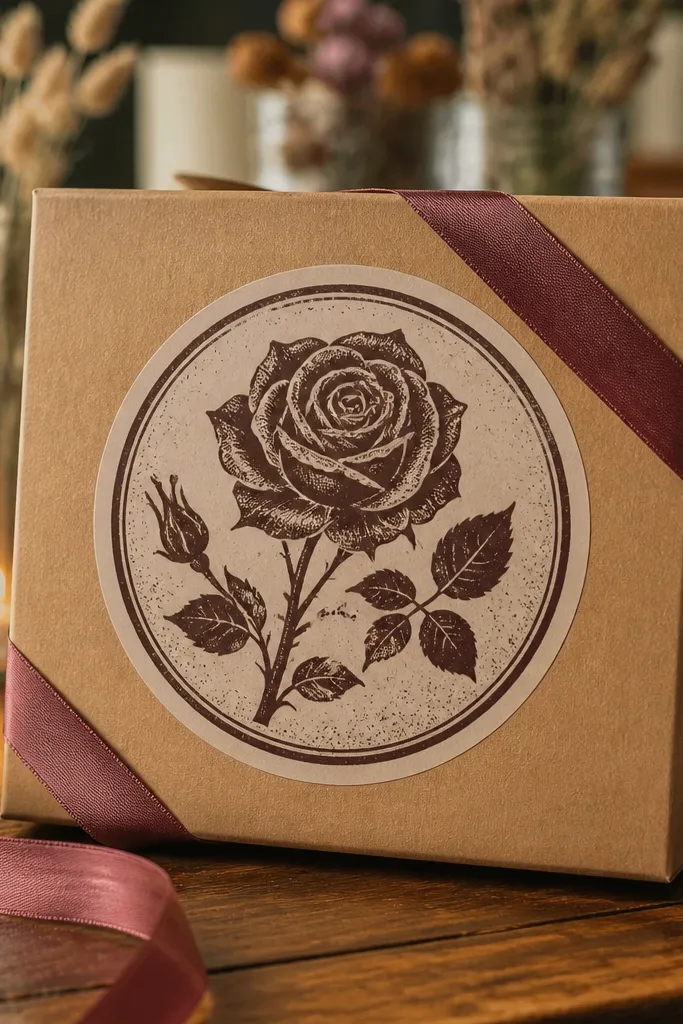
A larger stamp circle makes the biggest visual impact without extra work. This rose stamp is bold enough to look vintage from across the room, and the distressing adds texture that shows up in photos. Beginner-friendly because it’s one big circle — easier to cut than small labels. Use it as a cover accent, a centerpiece on craft boards, or a main label on a storage box. It’s also a great first sticker for kids because the shape is forgiving.
Editor's noteUse slightly heavier paper if your printer paper curls; sticker paper keeps the circle flatter while cutting.
Print on matte sticker paper and let it dry completely. Cut with a circle punch or carefully with scissors along the outer border. If you want extra durability, apply clear packing tape over the top after cutting and trim the tape to the circle.
Skip thisAvoid cutting too late after printing; ink that’s still tacky will smear at the edges.
28. Old Book Spine Label (Cream + Brown)
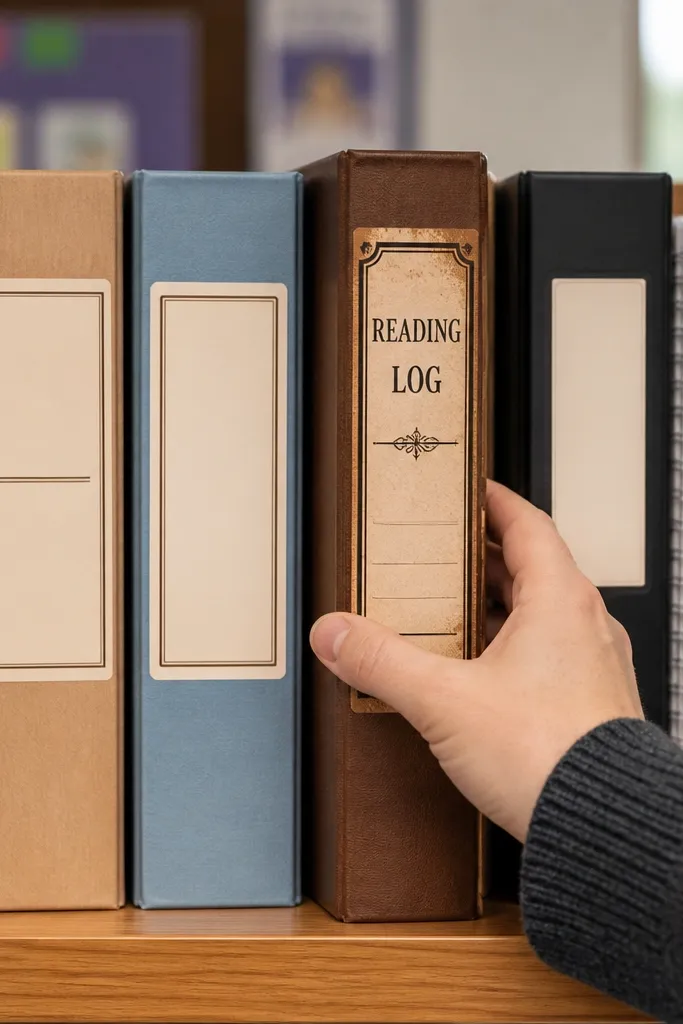
Book spine labels look clean and intentional, especially on kids' classroom binders and reading logs. This design is vertical, with cream and brown tones that mimic aged book cloth. Beginner-friendly because the shape is a rectangle with straightforward edges. It’s also photogenic because it lines up with the natural orientation of binders. Use it for library-themed shelves, craft storage drawers, or organizing by reading level.
Editor's noteMeasure the binder spine width and scale the sticker so it covers without wrapping around the edge.
Print on matte sticker paper. Cut the rectangle and keep the edges straight using a trimmer if possible. Apply to the binder spine and press from top to bottom to prevent bubbles.
Skip thisDon’t stick over thick seams; the label will crease and lift.
29. Vintage Leaf Frame Sticker (Two-Tone Green)
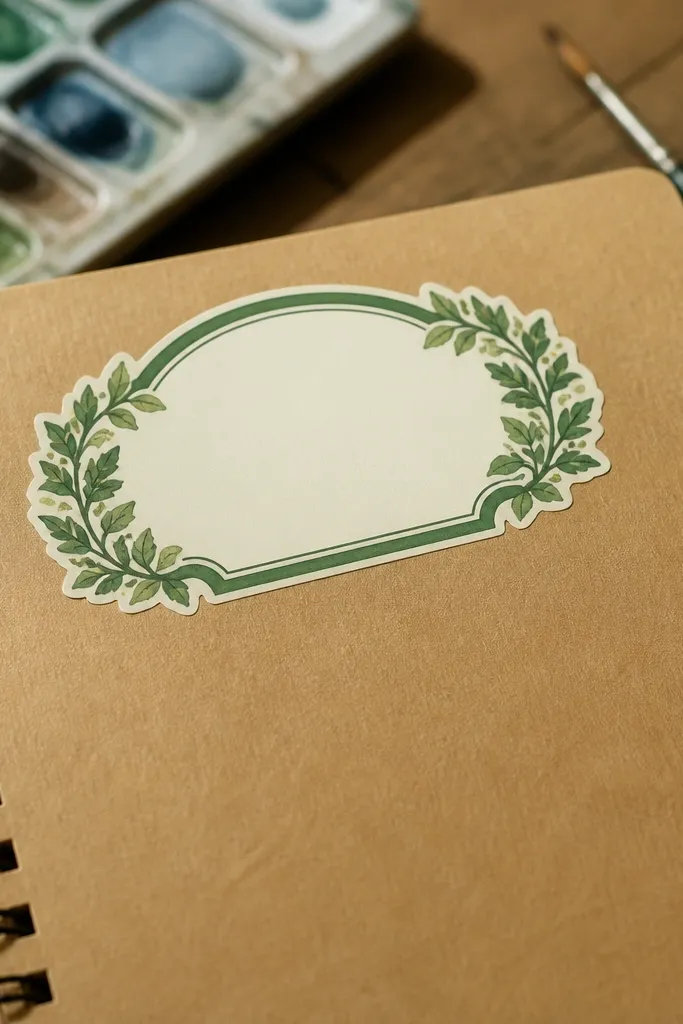
Leaf frames give you that botanical vintage look with a clean structure. The two-tone green border makes it stand out on white, kraft, and light paper, while the blank center gives you room for a name, date, or little drawing. Beginner-friendly because you cut one frame shape and you’re done. Use it on kids' art pages, craft jars, and label tags for plants or herb starters. It photographs well because frames create a clear boundary and the leaf border has texture.
Print on matte sticker paper. Cut around the outer frame shape first. If you plan to write in the center, apply the sticker and then add marker after it’s stuck so the ink doesn’t smear through the print layer.
Use a water-based pigment marker for the center so it stays crisp on matte surfaces.
Avoid gel ink pens; they smear when the sticker surface isn’t glossy.
30. Aged Ticket Badge with Scalloped Edge
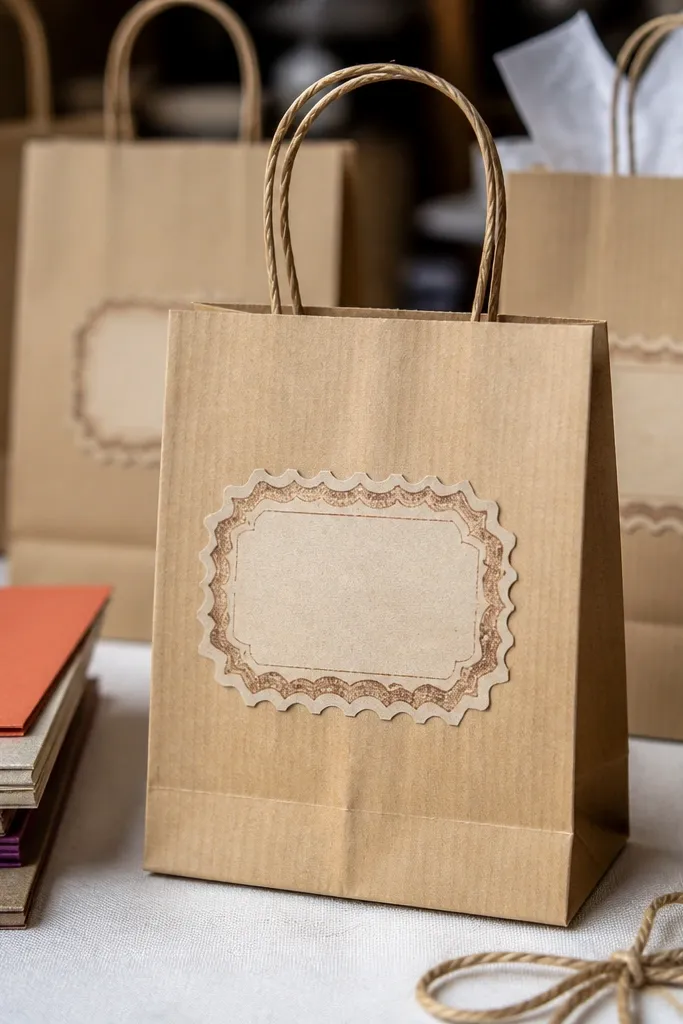
Scalloped edges scream vintage crafts because they mimic real paper ticket cuts. This badge shape is a fun focal point on kids' scrapbooks and gift bags. Beginner-friendly because the silhouette is clear and the scallops guide your cutting. Use it as a label on treat bags, party crafts, or “achievement” cards. The look is photogenic because scallops create a soft, repeating edge that shows up in close-up photos.
Print on matte sticker paper. Cut around the scalloped perimeter with scissors, rotating the sheet for smooth curves. If the scallops are too small for your scissors, trim close to the outline and leave the tiniest scallops uncut rather than tearing the border.
Keep a scrap paper backing under the sticker sheet so the scissors don’t slip.
Don’t try to cut perfect scallops with dull blades — the edges will look ragged.