
1. Tri-Fold Wallet Bill
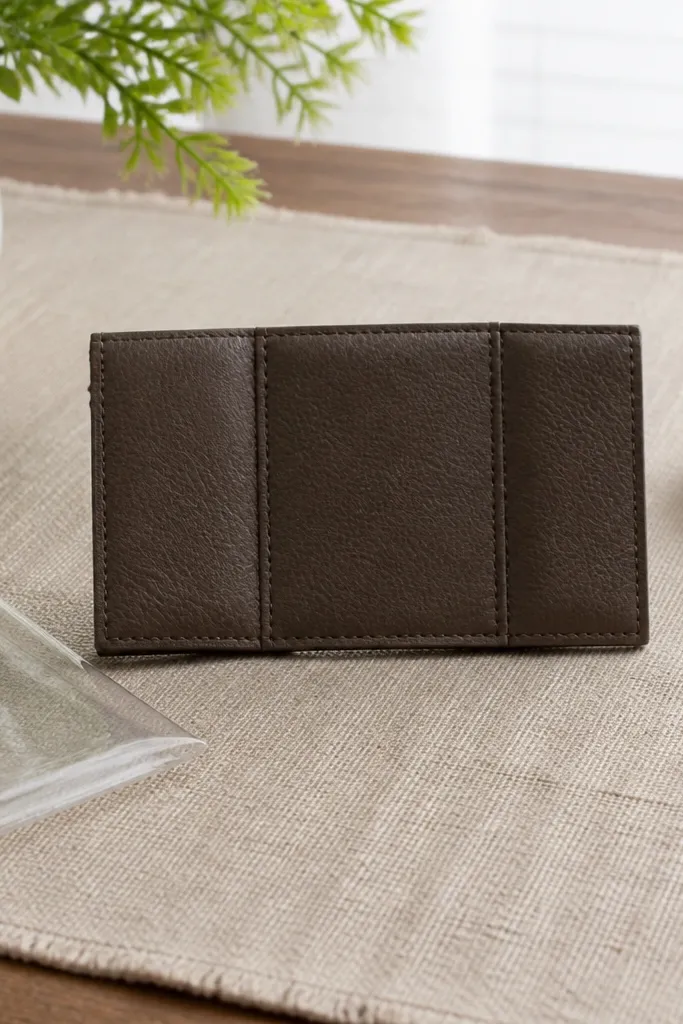
This is the quickest “real object” fold that still looks intentional. The tri-panel layout gives you clean straight edges, and the front flap makes it look like a tiny wallet instead of a random paper trick. It’s great for kids because it finishes fast and you can slide it into a card or tape it to a gift bag. The look stays sharp because each panel has a clear fold line and the flap covers the raw edges.
Editor's noteRun the bone folder along the crease three passes — light pressure the first time, firmer on the second, then final hard press.
Start by folding the bill in half lengthwise, then crease hard with a ruler. Fold it again into three equal-ish panels, keeping the edges aligned so the lines look straight. Finish by tucking the front flap behind the top fold to create a tidy pocket shape. Press the seams flat for 10 seconds on each side so the tuck holds.
Skip thisDon’t skip squaring the corners before you tuck — crooked edges make the wallet look off in photos.
2. Mini Envelope Bill Pocket
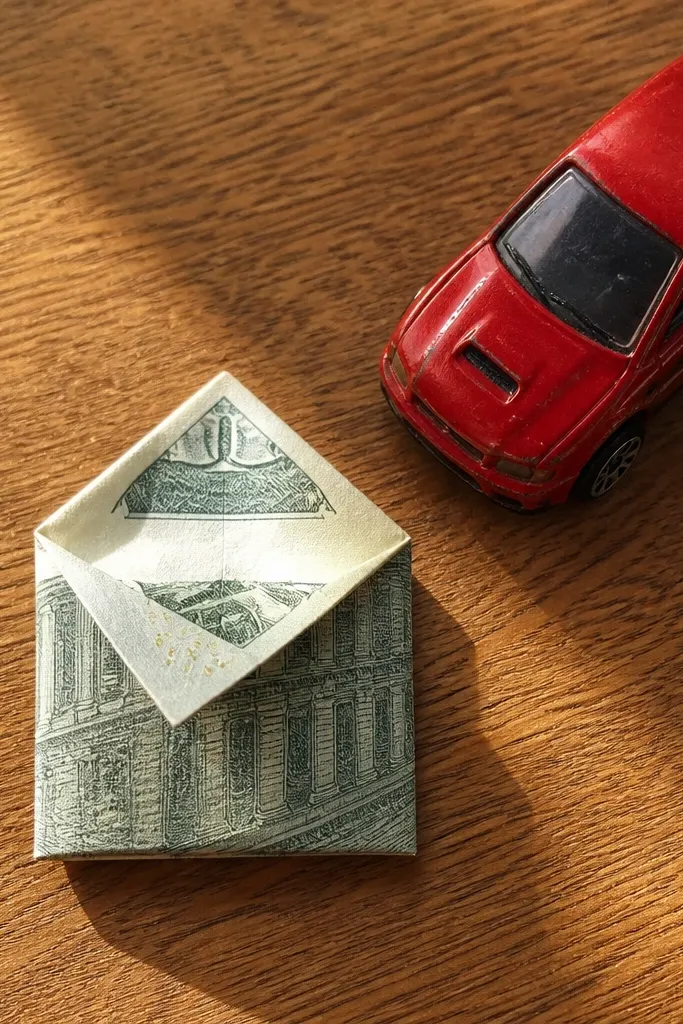
This fold makes the bill look like a tiny letter, which reads instantly in photos and on a card. The pocket holds the top flap down, so it stays shaped even if a kid picks it up and turns it around. It’s a good choice when you want a “gift note” vibe without cutting anything. The pointed top edge gives it a crisp silhouette and a clean front.
Editor's noteMark the center with a light crease before you start corner folds — it speeds up alignment.
Fold the bill into thirds like a letter, then unfold once to reveal a center guide. Bring the two bottom corners up toward the center crease to form a triangle base. Fold the top down to create the envelope flap, then tuck the tip behind the triangle pocket. Press the envelope seams flat so the pocket keeps its shape.
Skip thisDon’t over-crumple the bill when forming the triangle — smooth folds look better than crushed ones.
3. Corner Bookmark Bill

A bookmark fold is practical and photogenic because it has a clear, recognizable shape. The triangular pocket grabs the page corner and keeps the bill from sliding. For kids, it’s a fun “reading accessory” craft that looks like a real item, not just a one-time trick. The sharp diagonal crease lines also make it look neat in close-up shots on a book.
Editor's noteUse a ruler to press only along the fold lines — pressing the whole surface can create glare and wrinkles.
Start with the bill oriented landscape, then fold one corner diagonally to form a triangle. Fold the remaining rectangle back behind the triangle so it wraps like a sleeve. Tuck the triangle tip into the back fold to create a pocket that holds the page corner. Finish by pressing the outer edges along a ruler for crisp angles.
Skip thisAvoid making the pocket too tight — the bookmark should slide onto a page corner without tearing.
4. Starburst Bill Pinwheel
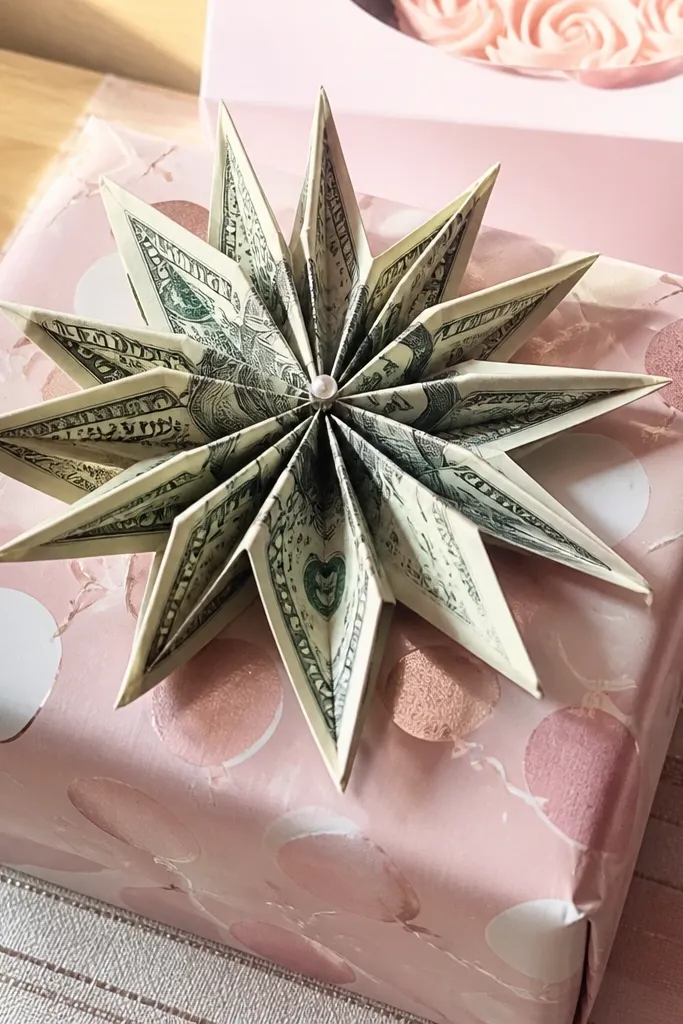
This one looks dramatic for something that’s still quick. The starburst points create a layered look that catches light, so it photographs well even on a plain background. It’s perfect for a birthday table decoration or for sticking onto a gift box with a pin or tape at the center. Kids like the “spiky” silhouette, and the layered folds keep the shape from collapsing.
Editor's noteAfter you fold each corner in, rotate the bill and press the new crease from both sides for a stronger hold.
Fold the bill into quarters, then unfold to find the center. Bring each corner toward the center and crease hard, creating four triangle flaps. Then fold each triangle flap back outward slightly to form the points — keep the folds even. Press the center together so the starburst holds its shape.
Skip thisDon’t let one point lag behind — uneven points make the starburst look lopsided.
5. Rocket Pocket Bill
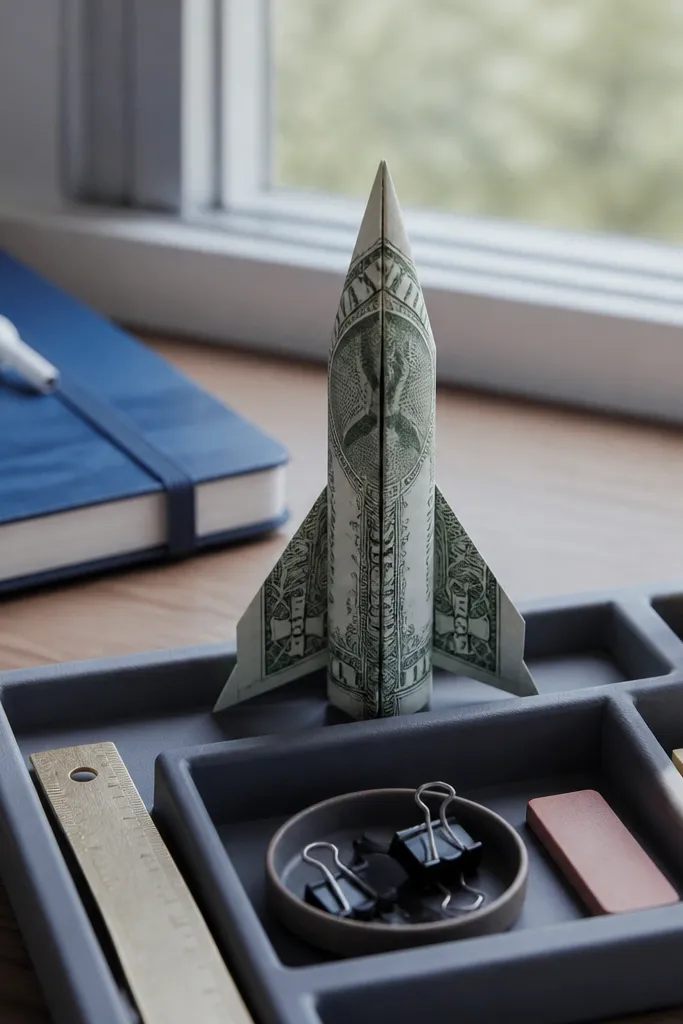
This fold turns a bill into a toy-like rocket silhouette without needing tiny paper parts. The nose fold gives the front a clean point, and the side folds form simple fins that are easy for kids to recognize. It’s great for desk play because it stands with a clear front. In photos, the rocket shape reads fast, and the pocket keeps it from falling apart.
Editor's noteIf the rocket won’t stand, add a firmer press on the bottom seam and slightly tighten the fin tuck.
Fold the bill in half lengthwise and crease sharply. Fold both short ends toward the center to form a pointed nose, then fold the top layer down to lock the point. Create two side fins by folding the lower corners outward and tucking them under the main fold. Press along the edges so the fins look crisp and symmetrical.
Skip thisDon’t make the nose too flat — a shallow point makes it look like a wedge instead of a rocket.
6. Heart Twist Bill

A heart fold is instantly giftable, and this one looks sweet without being fussy. The rounded lobes come from simple corner folds, so you don’t need special paper or templates. Kids can handle it because the shape locks through the twist and tuck at the bottom. For photos, place it on a contrasting surface so the heart outline pops.
Editor's noteUse softer pressure for the lobes, then harder pressure for the bottom tuck seam.
Fold the bill in half, then fold the top corners down toward the center to form two lobes. Fold the bottom up slightly to create a small heart point. Twist the lower section gently and tuck it under the lobes so the heart doesn’t spring open. Press the top lobes with a ruler edge to keep the curves crisp.
Skip thisAvoid twisting too much — it distorts the lobes and the heart outline looks messy.
7. Bow Tie Bill Knot
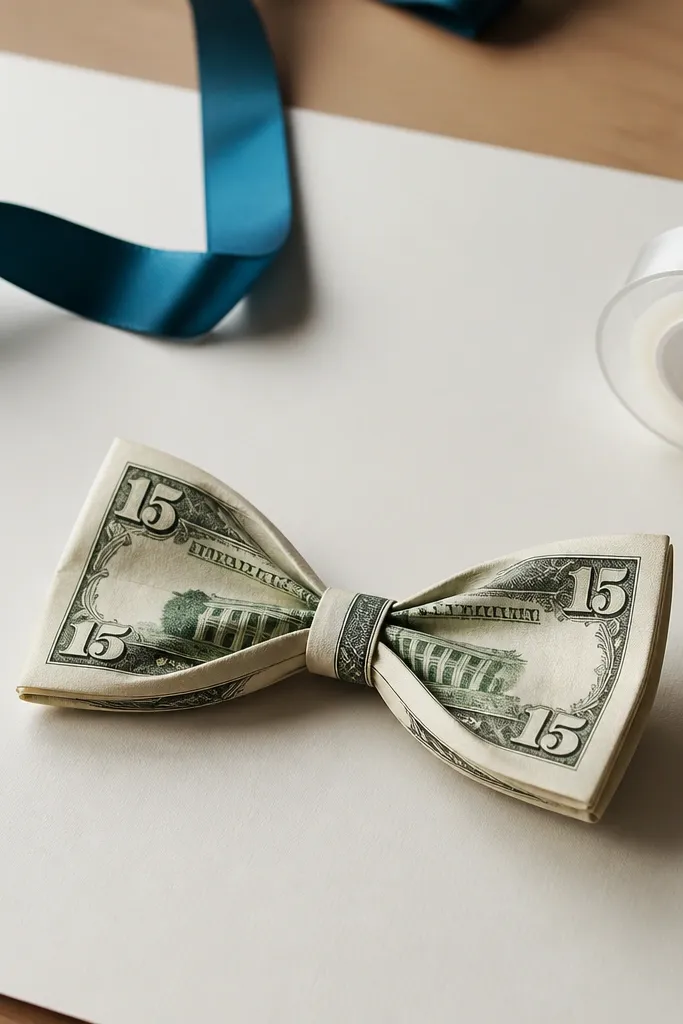
This makes the bill look like a fancy accessory. The symmetry is what makes it photogenic: two loops on either side and a defined center pinch. It’s a great add-on for a kid’s birthday card or a gift wrap detail because it sits flat enough to tape down. The folds hold because you create loop creases, then lock the center with a tuck.
Editor's noteMeasure symmetry by comparing the left and right loop widths — even 2-3 mm off shows in photos.
Fold the bill in half, then fold each side inward to meet at the center crease. Create the loops by folding the left and right sections back outward, using the center as your reference. Pinch the middle tight and fold the small flap down behind the center pinch. Press hard along the center crease so the bow tie keeps its shape.
Skip thisDon’t skip the center lock fold — a loose center makes the bow look like a ribbon, not a knot.
8. Paper Fan Bill Accordion
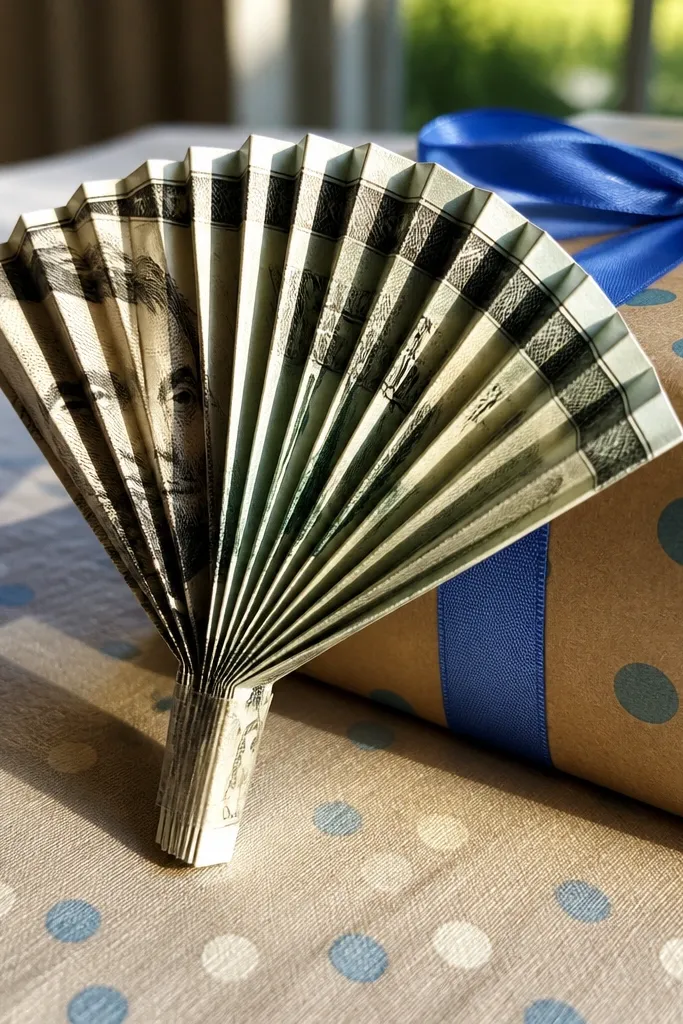
Accordion folds are the easiest way to get a “wow” look from one bill. The fan layers create a striped texture that shows up clearly in photos and on a gift table. It also holds its form because the folds stack cleanly. Kids can make it quickly, and you can attach it to a wall or gift with tape at the folded spine.
Editor's noteUse a ruler to guide the pleat width — 1 cm looks crisp; 1.5 cm looks chunkier.
Fold the bill back and forth in small accordion pleats, about 1 cm each. Keep the pleats tight and aligned so the stripes look even. When you reach the end, fold the whole accordion in half and crease at the spine. Tuck the last pleat under the folded edge to lock the fan.
Skip thisDon’t let pleats drift — drifting pleats make the fan uneven and it looks sloppy fast.
9. Dollar Bill Butterfly
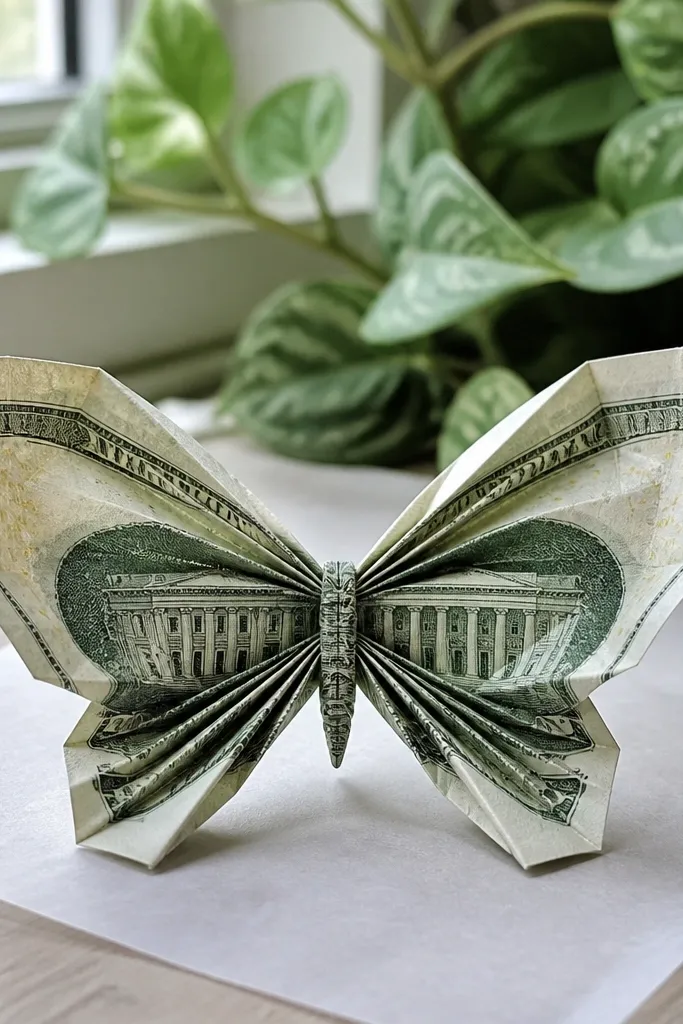
Butterflies are always a hit for kids, and this one uses folding lines that create a clean wing shape. The body pinch makes it look like it’s mid-flutter, even though it’s flat enough to display. It’s photogenic because the wings are broad and symmetrical, with a defined center. It’s also a good choice for window decor because you can tape the body point to hold it in place.
Editor's notePress the wing edges with the ruler before you tuck — it keeps the butterfly from collapsing.
Fold the bill in half, then fold the top corners down toward the center to form wing bases. Create the wings by folding each side outward and creasing along the wing edges. Pinch the middle tightly and tuck the bottom flap under the body to lock it. Press the wing corners so they hold their angles.
Skip thisAvoid making the wings too narrow — narrow wings look like triangles instead of butterfly wings.
10. Pocket Square Bill Swoop
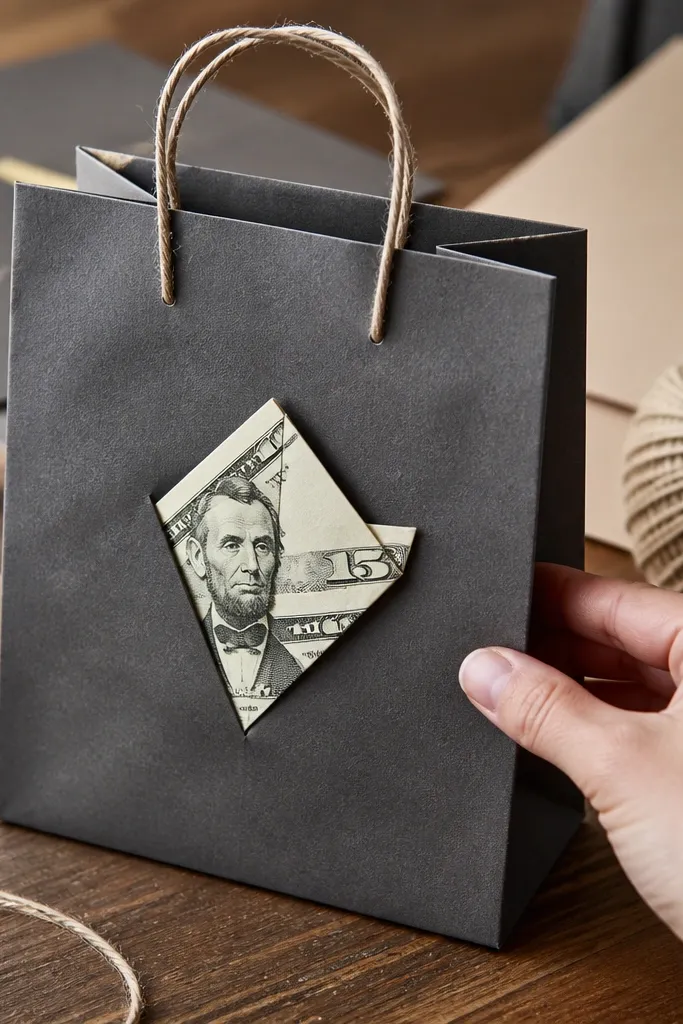
This fold makes a bill look like a designer pocket square. The front has sharp corners and a smooth face, so it reads as tidy and intentional in pictures. It’s a fun craft for kids who like “fashion” stuff, and it’s simple enough to redo if a corner goes crooked. Use it as a gift wrap accent or tape it to a homemade card as a decorative panel.
Editor's noteWork on a firm table and press each tuck seam for 8-10 seconds to prevent spring-back.
Fold the bill into a smaller rectangle by bringing short ends inward. Fold the rectangle diagonally so you get a triangle, then fold the triangle corners down to form a neat square. Tuck the loose edges under the top layer to create a clean front face. Press the corners flat and align them so the edges look crisp.
Skip thisDon’t leave the tucks bulky — a thick tuck ruins the clean pocket-square look.
11. Accordion Bow Gift Tag
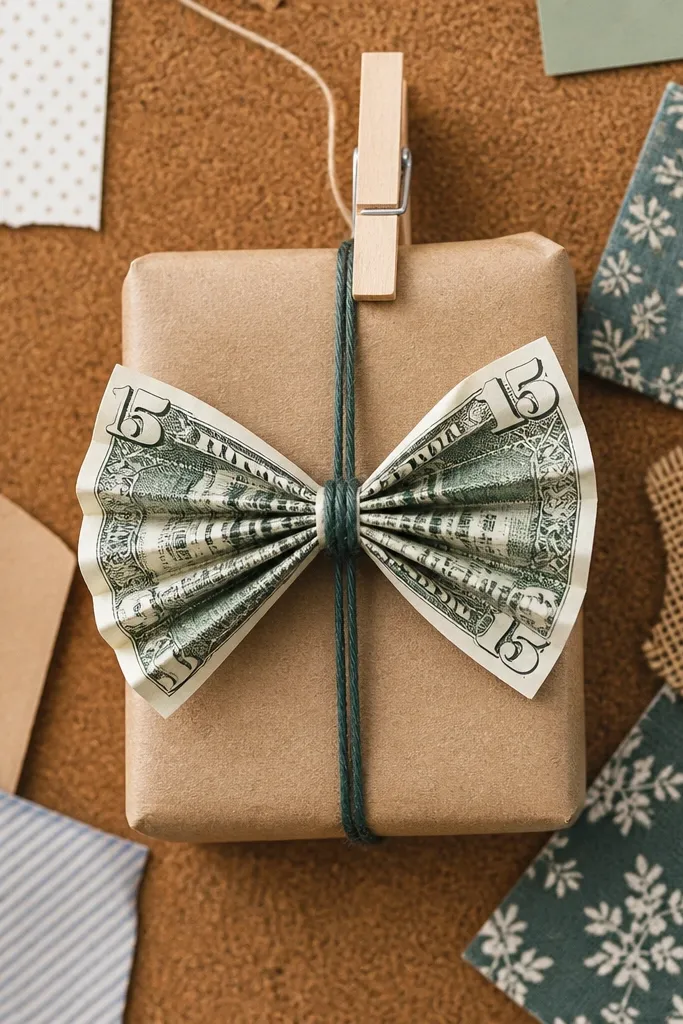
This is the kind of fold that makes a simple gift look styled. The accordion creates texture, and the bow shape gives it a clear top and bottom silhouette. It’s quick because you’re repeating pleats, and it’s sturdy because the center tie locks everything. Kids can hold it like a tag, and it photographs well against wrapping paper.
Editor's noteIf the pleats are too tight, loosen them slightly before locking — tight pleats buckle in photos.
Fold the bill into accordion pleats about 8-10 mm wide, pressing each crease firmly. Fold the accordion in half and pinch the center to create a bow shape. Wrap a small strip from the remaining edge under the center pinch if you have extra paper length, or fold a small flap from one end to lock it. Press the bow ends flat so they fan outward evenly.
Skip thisAvoid locking the center before the pleats are evenly spaced — you can’t fix uneven spacing after it’s tied.
12. Crisp Triangle Flag Bill
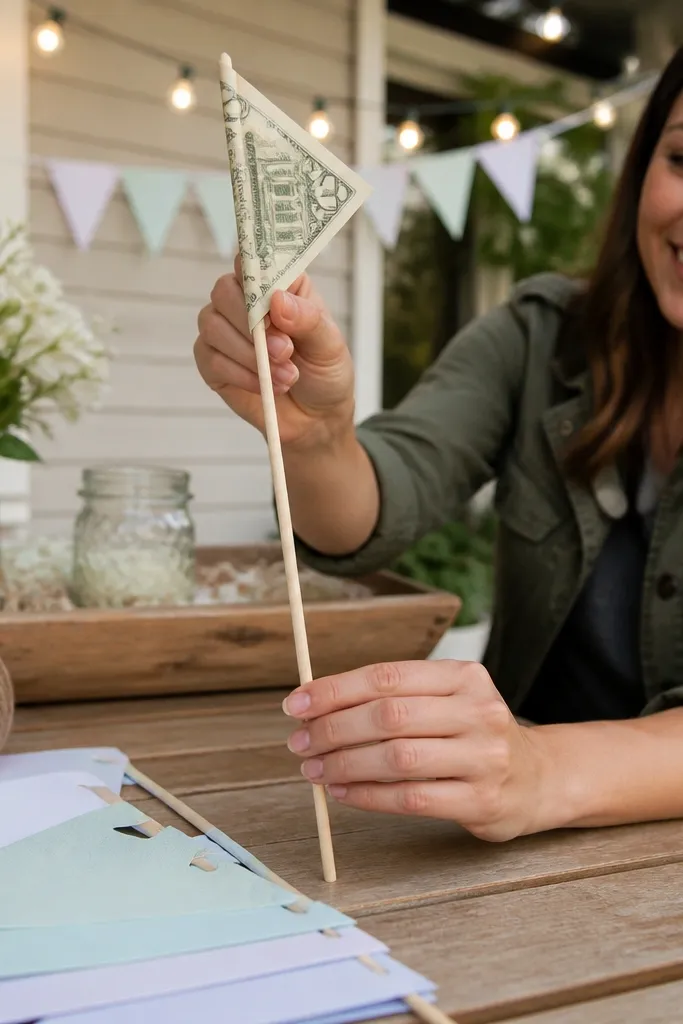
Triangle flags look playful and graphic. This fold makes a bold, simple shape that’s easy to tape to a stick, hang from a string, or attach to a party banner. The crisp edges come from triangle geometry, and the “pole” fold keeps it from flopping. It’s quick and easy Origami Easy because you’re only doing a few main folds.
Fold the bill into a long rectangle by bringing one short end over the other. Fold one long edge to make a slim “pole” strip, crease hard, then fold the remaining section into a triangle by bringing corners together. Tuck one layer into the pole fold to lock the triangle. Press the triangle edges so the flag outline stays sharp.
Use the ruler to sharpen the triangle corners — those corners are what make the flag look crisp.
Don’t make the pole strip too thick — thick poles make the flag look bulky.
13. Origami Easy Water Drop Bill
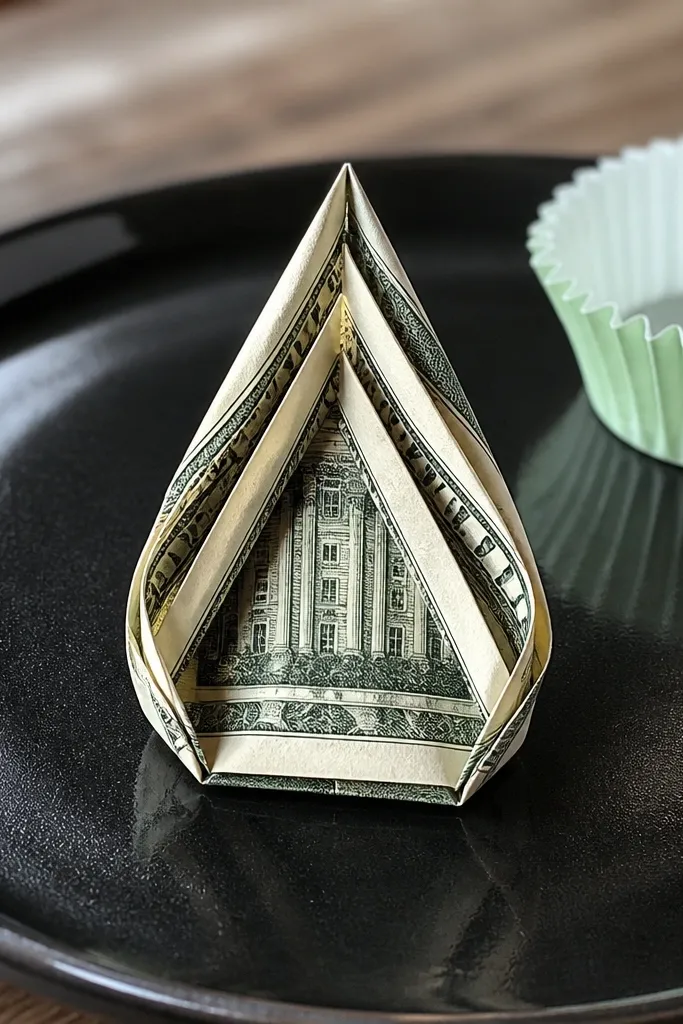
The water drop shape is a clean, glossy-looking silhouette that reads well in close photos. It has a smooth curve from layered folds, and a flat base so it can sit on a table. Kids like it because it looks like a jewel shape. The result holds because the bottom fold tucks and the teardrop outline stays defined.
Editor's noteKeep your folds symmetrical — the teardrop looks best when both sides mirror each other.
Fold the bill in half lengthwise, then unfold slightly so you keep a center guide. Fold both top corners down toward the center to create a pointed top, then fold the sides inward to shape the teardrop body. Fold the bottom up and tuck it behind the teardrop layers to create a flat base. Press the edges along the curve so the shape stays smooth.
Skip thisAvoid rushing the curve presses — the curve needs firm creases to look smooth, not crumpled.
14. Standing Fan Lantern Bill
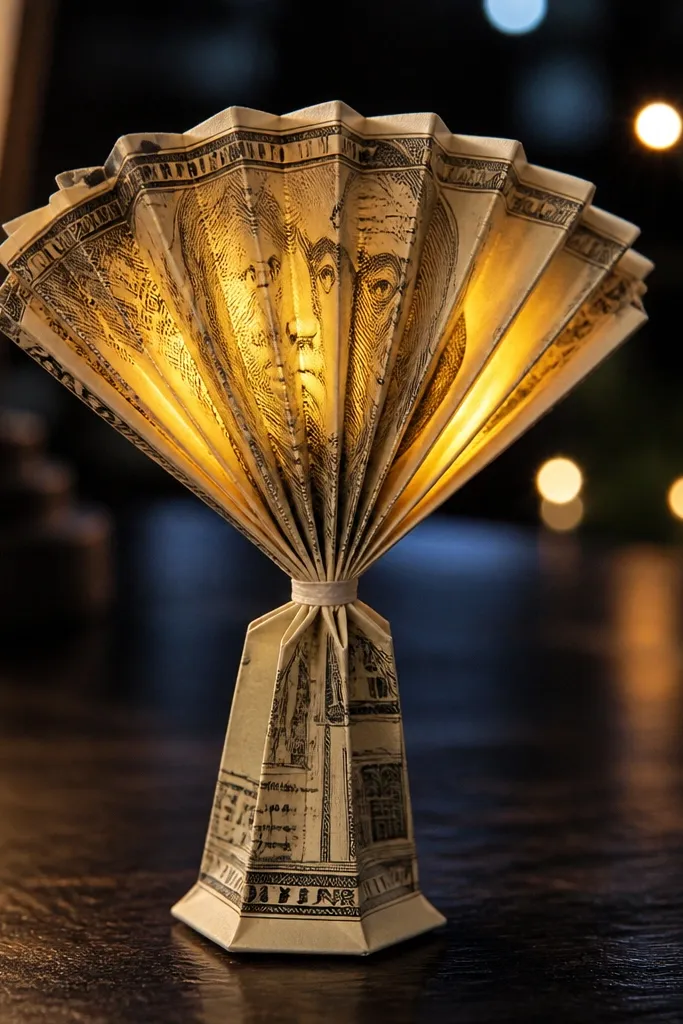
This is a desk-friendly decor fold that stands up and looks intentional. The layered sides give it a lantern feel, and the top fold makes it look complete instead of unfinished. It’s also kid-friendly because it holds shape once you lock the base. In photos, it looks best when you place it on a dark background so the fold lines show.
Editor's noteIf it won’t stand, flatten the bottom crease more and re-tuck the locking flap tighter.
Create accordion pleats across the bill, about 1 cm each, then fold the entire pleated strip in half. Shape the lantern by pulling the pleated sides outward so it stands, then crease the bottom edge flat. Tuck a small flap from one side into the base crease to lock the standing form. Press the top edge so it doesn’t collapse inward.
Skip thisDon’t skip the base lock — a lantern that only relies on friction will slump.
15. Mini Crown Bill
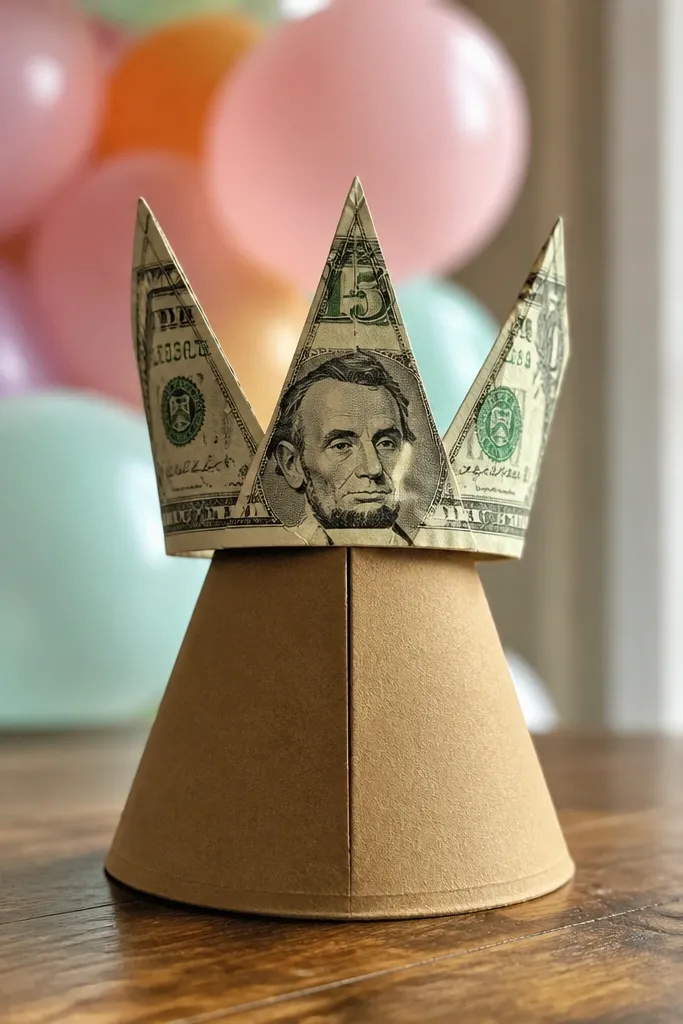
A crown is pure kid appeal, and it’s also one of the cleanest shapes to photograph because it has a clear top outline. This crown uses simple fold peaks so you get three points without complicated extra steps. It’s sturdy enough for short play because you lock the base fold. Use it as a birthday centerpiece topper or a cute card decoration.
Fold the bill in half, then unfold once to locate the center crease. Fold the top edge down, then create three peaks by folding the left and right top corners toward the center and shaping the middle peak with a small reverse fold. Fold the bottom edge up to form the crown band. Tuck the band edge under the peaks to lock the crown shape.
Press each peak crease with the ruler edge so the points stay sharp.
Avoid making the middle peak too low — it flattens the crown silhouette.



