
1. Clear Pencil Trays on a Slide-Out Letter Organizer
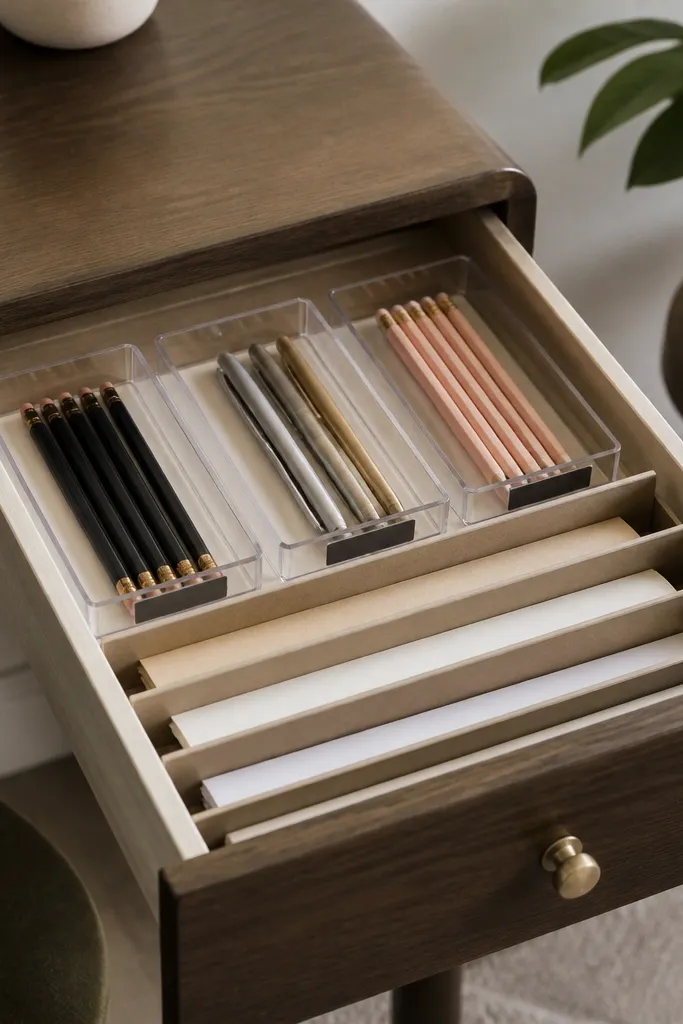
I love this because it turns a normal drawer into a visible tool bar. Clear trays let you spot dry-erase markers, broken crayons, and spare clips instantly. The black label tape keeps the look clean even when the contents change weekly. It also stops the classic "everything falls to the back of the drawer" problem.
Find a letter organizer that slides into your drawer with at least 1 cm clearance on each side. Use shallow clear trays that sit flush - aim for tray heights under 2.5 inches so you don't lose drawer space. Label the tray fronts with label tape and a fine-tip marker so the text stays crisp in close-up photos.
Pro tipIf your drawer sticks, add felt tape pads under the letter organizer feet so it glides without scraping.
AvoidAvoid stacking trays too high - it makes kids dump everything to reach the back.
2. Command Hook Cable Loop Wall Grid
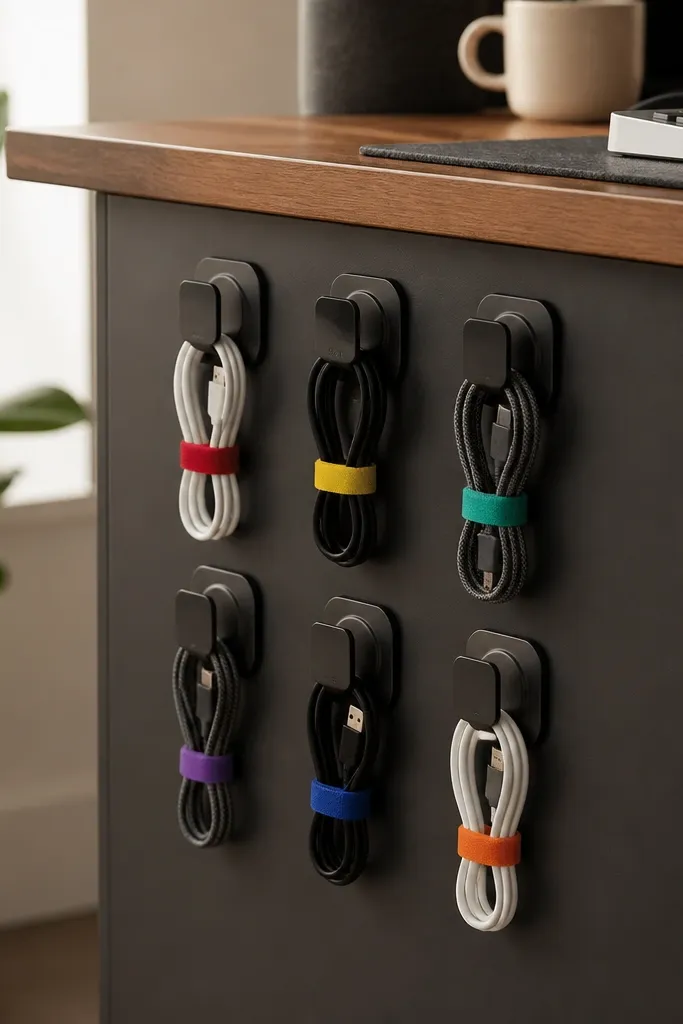
This is cheap budget desk organization that fixes the cable jungle without buying a single fancy product. The hooks keep cords off the desk surface, and the loops stop tangles from forming when kids tug. Color twist ties make it obvious which cord belongs to which device. The grid looks intentional instead of random hook spam.
Use two rows of command hooks spaced about 2.5 inches apart. Route each cable into a U-shape loop so it hangs with slack - not tight. Add a small label tape tag on the hook, not on the cord, so it stays readable even after moving devices.
Pro tipWrap slack length with a 1-inch Velcro strap so the cable loop stays the same size every day.
AvoidDon't mount hooks directly above where kids swing chairs - cords will get yanked.
3. Fabric Bin Shelf Under Desk With a Matching Front Lip
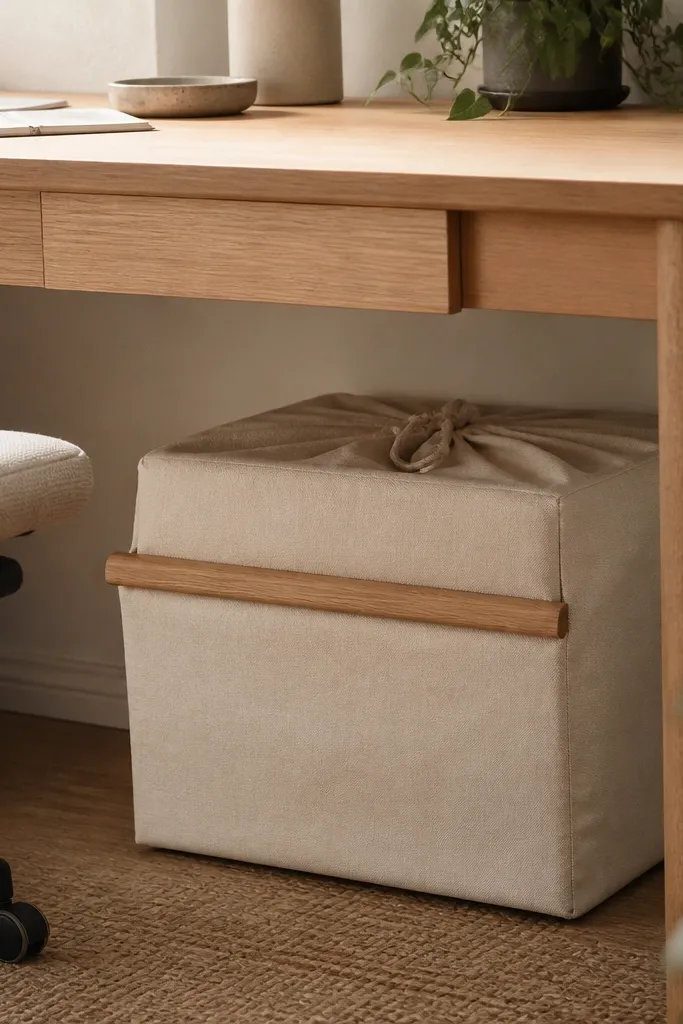
Under-desk storage looks tidy when it has a visual boundary. The matching front lip hides the messy top edge of fabric bins and makes everything look finished. Fabric also muffles noise when kids pull things out. It's a practical spot for homework folders, extra paper, and bulky art supplies.
Cut a strip of scrap wood or a thin MDF piece to the bin width and attach it to the underside of the desk using small L-brackets. Choose fabric bins that fit under the desk with at least 1 inch clearance for the lip. Use a drawstring or a hinged flap so the bin doesn't spill when someone reaches in fast.
Pro tipPaint the lip with a semi-gloss white or the same stain as your desk legs so it reads like part of the desk.
AvoidSkip flimsy bins with saggy bottoms - they look collapsed even when "organized."
4. Thrifted Shoeboxes With Wallpapered Tops
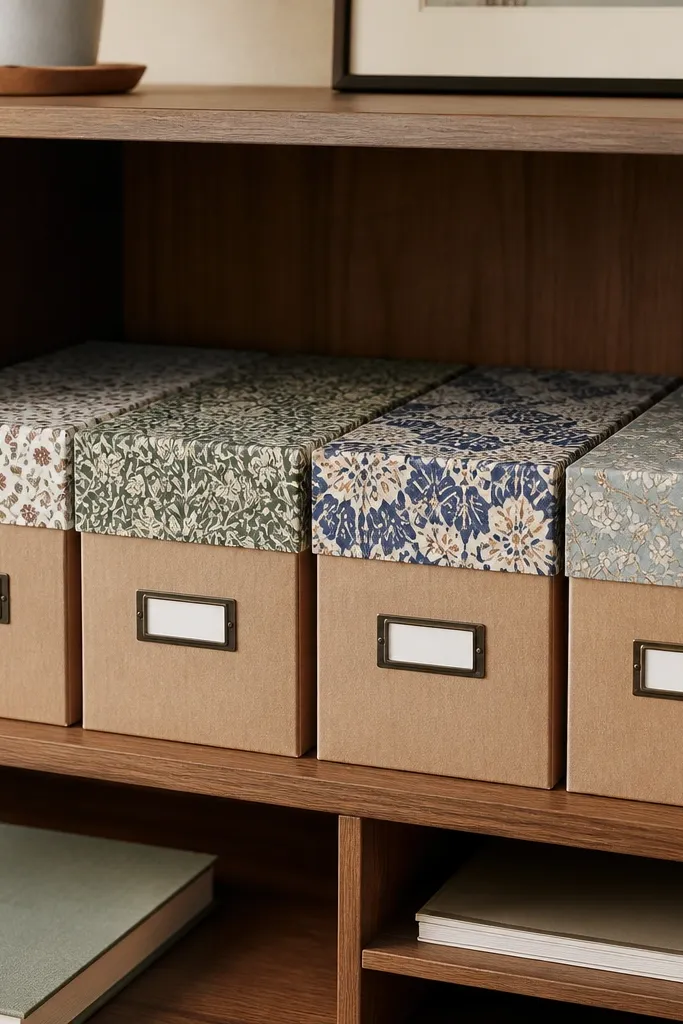
This makes cheap boxes look designed. Wallpaper on the lid gives you a color pop at desk height, while the kraft sides keep it calm and neutral. Kids can open and close without smearing the pattern because the side stays simple. The whole setup looks cohesive in photos because the "pattern zone" is consistent.
Use shoeboxes or storage boxes with lids you can lift easily. Glue wallpaper only to the lid top and wrap it over the edge by about 1/4 inch. Add labels on the front edge of the lid so the text stays visible when boxes are stacked.
Pro tipPick one wallpaper pattern and repeat it across all boxes - mixing prints makes the desk look busy fast.
AvoidDon't cover the entire box in pattern - it turns into visual clutter when supplies pile up.
5. Desk-Lip Tray for Sticky Notes and Clips

This is a tiny organizer that changes daily workflow. Keeping sticky notes and paper clips in a dedicated tray means you stop scattering them across the desk mat. The raised lip stops items sliding when the desk shakes. It looks neat because everything is in one shape and one location.
Build it from a scrap wood board 12 inches wide and 3 inches deep, then add a 1/2-inch front lip. Paint it with satin paint - white, sage, or charcoal all look clean. Use a mini cup (plastic or ceramic) inside for clips and a small tray divider to hold sticky notes upright.
Pro tipSeal the paint with a clear water-based poly so sticky note ink doesn't stain the wood.
AvoidAvoid using an unsealed wood surface - it marks from pens and tape.
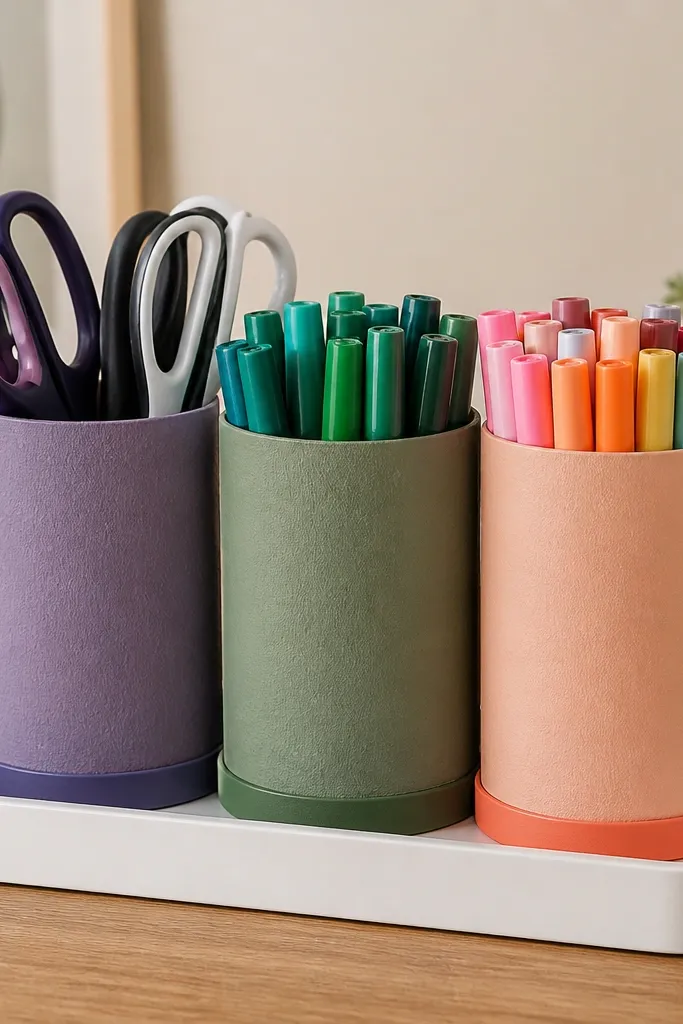
6. Mason Jar Pencil Cups With Paint-Pen Color Rings
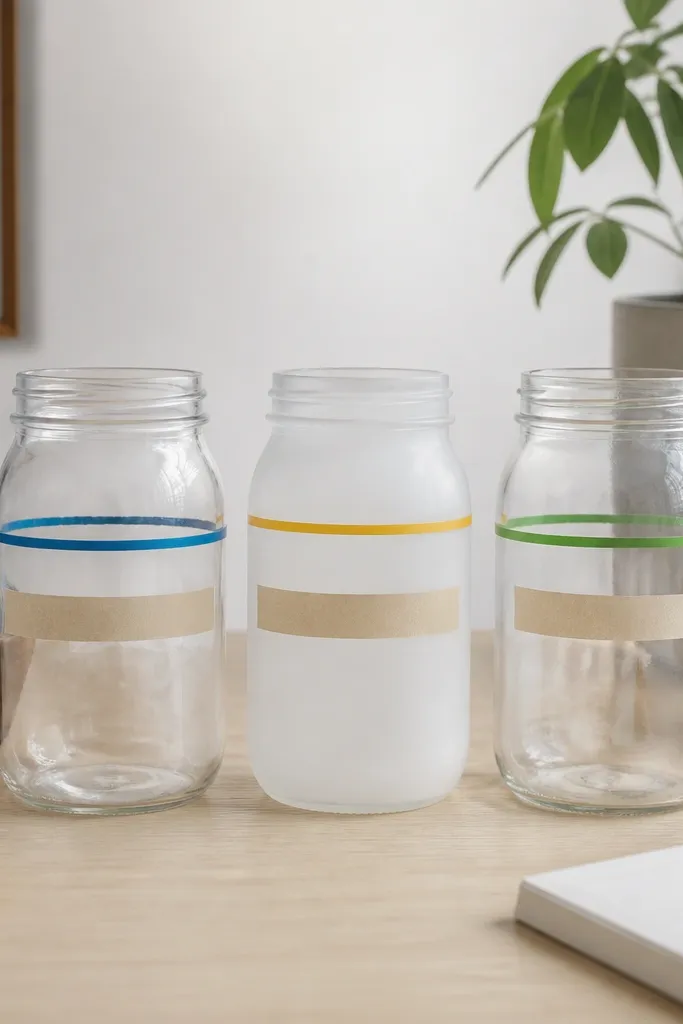
Mason jars are cheap, but the color rings make them look like a set. The rings help kids grab the correct jar without reading every label. Clear glass shows when supplies run low. It's also easy to swap out contents and keep the desk aesthetic consistent.
Use 8 oz mason jars and clean them with rubbing alcohol before painting. Add one paint-pen ring around each jar at about 1 inch from the bottom, then apply label tape above the ring. For a softer look, lightly frost one jar with spray paint in 2 thin coats from 10-12 inches away.
Pro tipLet paint-pen dry overnight, then add a second ring if your first pass looks uneven.
AvoidDon't use messy labels - if the tape curls, it screams "temporary."
7. Over-the-Back-Chair Paper Holder With Folder Slots
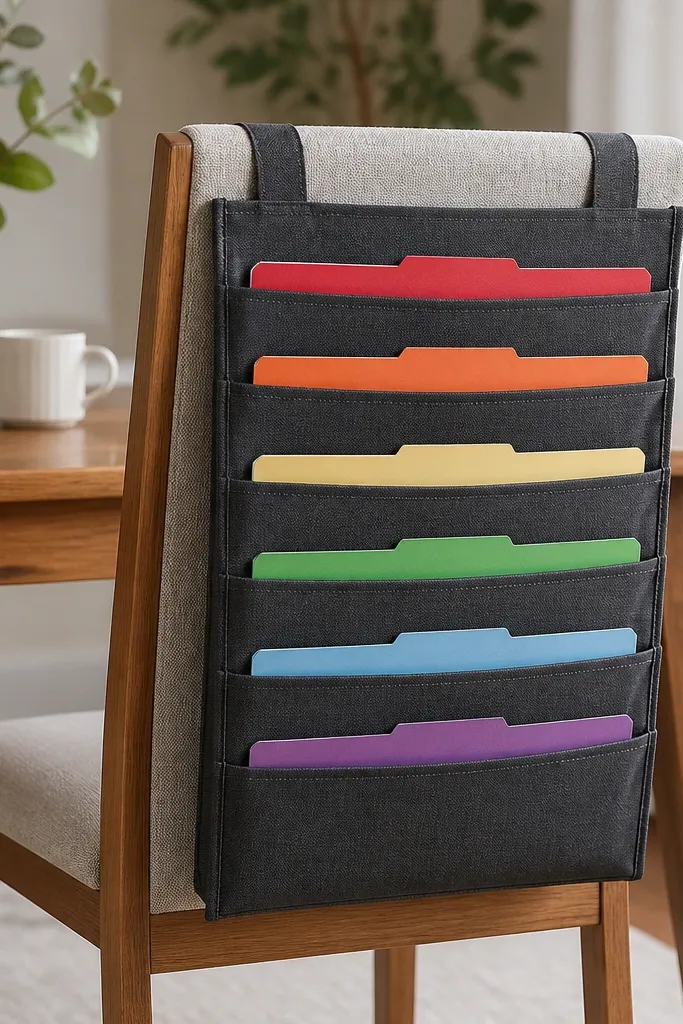
Paper chaos is usually a distance problem. When kids have to set homework down on the desk and then hunt for it later, clutter builds. A chair-mounted holder keeps paper upright and accessible while staying off the desk surface. The vertical slots also make it easier to separate "needs grading" from "needs to be filed."
Use a fabric hanging organizer or make one from a thrifted canvas shoe organizer by sewing or tying additional divider strips. Mount it so the bottom slot is at least 2 inches above the floor. Use thin manila folders and label them with tape - one per subject or per task status.
Pro tipPut the "in progress" folder on the top slot and the "finished" folder on the bottom slot so kids can't mix them.
AvoidAvoid placing it too low - it drags on backpacks and gets bent corners.
8. Cardboard Drawer Inserts With Tape-Sealed Edges
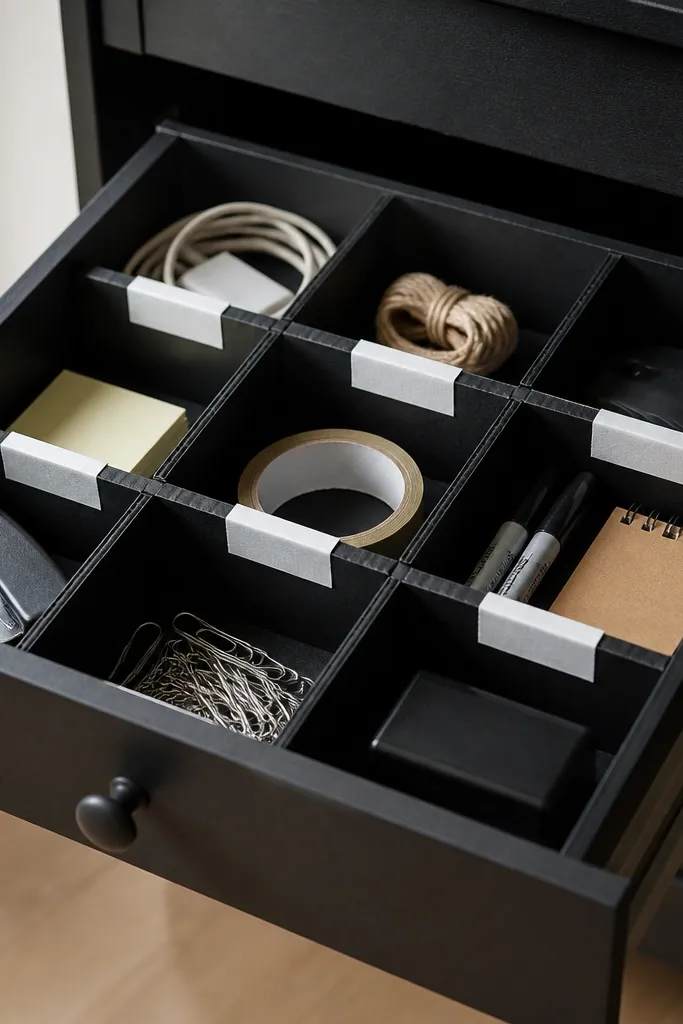
Cardboard inserts are cheap budget desk organization that looks intentional when the edges are finished. Tape-sealed edges keep the cardboard from fraying and make the compartments feel sturdy. This is perfect for small items like erasers, staplers, extra batteries, and kid-safe scissors. The compartments stop "small stuff" from merging into one ugly pile.
Use cereal-box thickness or a single layer of thicker shipping cardboard. Cut dividers to fit your drawer snugly with 1-2 mm gaps so they don't scrape. Cover the edges with matte black tape and cover the top faces with contact paper in a solid color if you want a cleaner look.
Pro tipMake one compartment slightly wider than the others for the stapler or tape dispenser so it's easy to grab one-handed.
AvoidDon't leave raw cardboard corners - they curl and look messy fast.
9. Magnetic Spice-Tin Wall for Office Bits
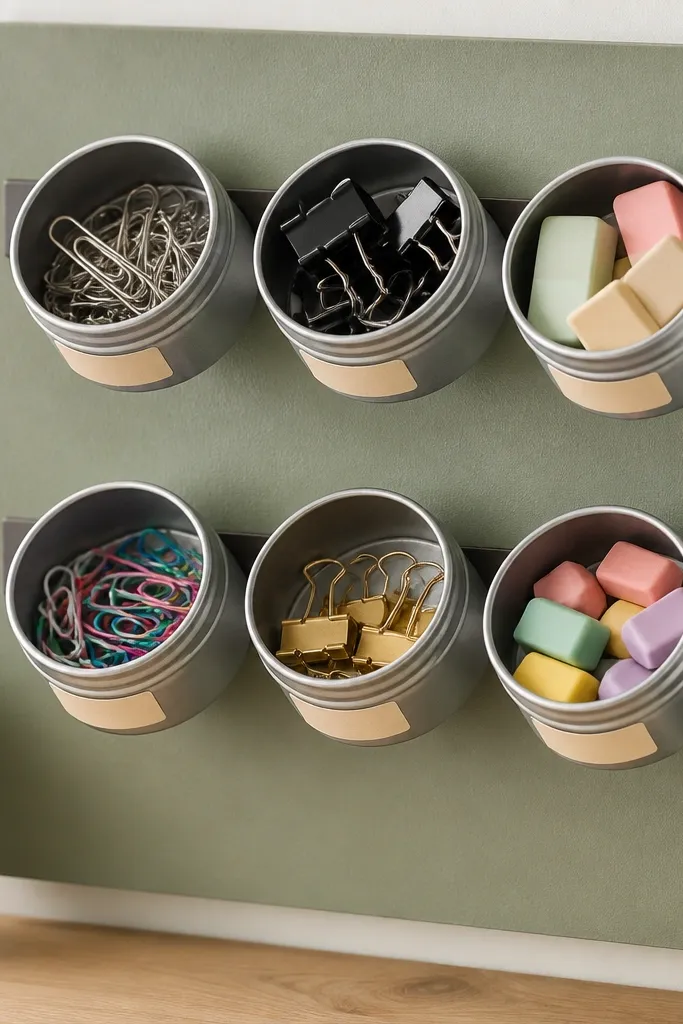
This setup is clean because the tins are metal and the board makes the whole thing look like one unit. Magnetic mounting keeps the tins aligned, and the labels stay visible. It's great for desk organization where you need quick reach and a tidy wall view. Kids can grab a tin and put it back without flipping through drawers.
Remove spice tins lids or keep them for pouring. Glue a magnetic strip or stick-on magnet sheet to the back of the tins, then mount them on a thin plywood board with a simple wall-hanging method. Paint the board a matte off-white or matching desk color so it doesn't steal attention.
Pro tipUse a strip of painter's tape to line up tin placement before you stick magnets - it saves you from crooked rows.
AvoidAvoid glossy boards - glare makes labels harder to read.
10. Pegboard Mini Desk Station With Paint-Stick Shelves
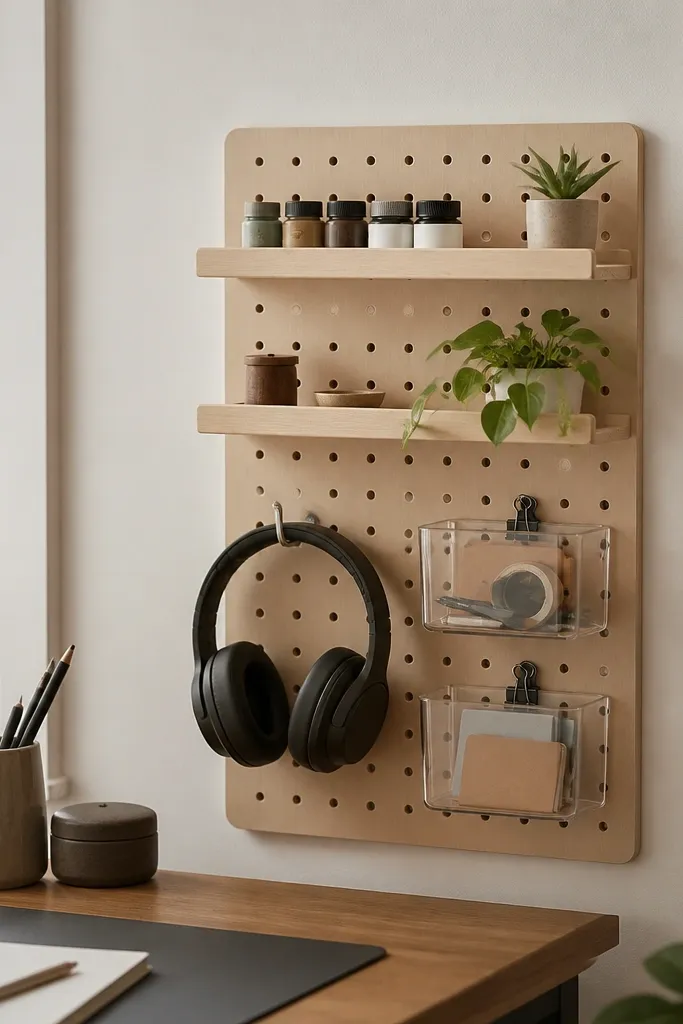
Pegboard makes cheap budget desk organization look like a real system because everything has a spot and a consistent grid. Paint-stick shelves add a rustic shelf line that looks good even when materials are basic. I use it for headphones, extra cords, scissors, and small bins. The peg grid also keeps your "grab-now" items off the desk surface.
Cut pegboard to size, then sand edges and paint it with primer + satin paint. Make shelves from paint stir sticks or cut scrap 1x2 wood to 3-4 inches deep. Attach hooks and small bin clips so bins hang at kid eye level.
Pro tipHang your most-used items on the lowest row so kids don't push everything down when they reach.
AvoidDon't overload the pegboard - empty space makes the system look designed.
11. Laminated Place Mat as a Cable Landing Pad
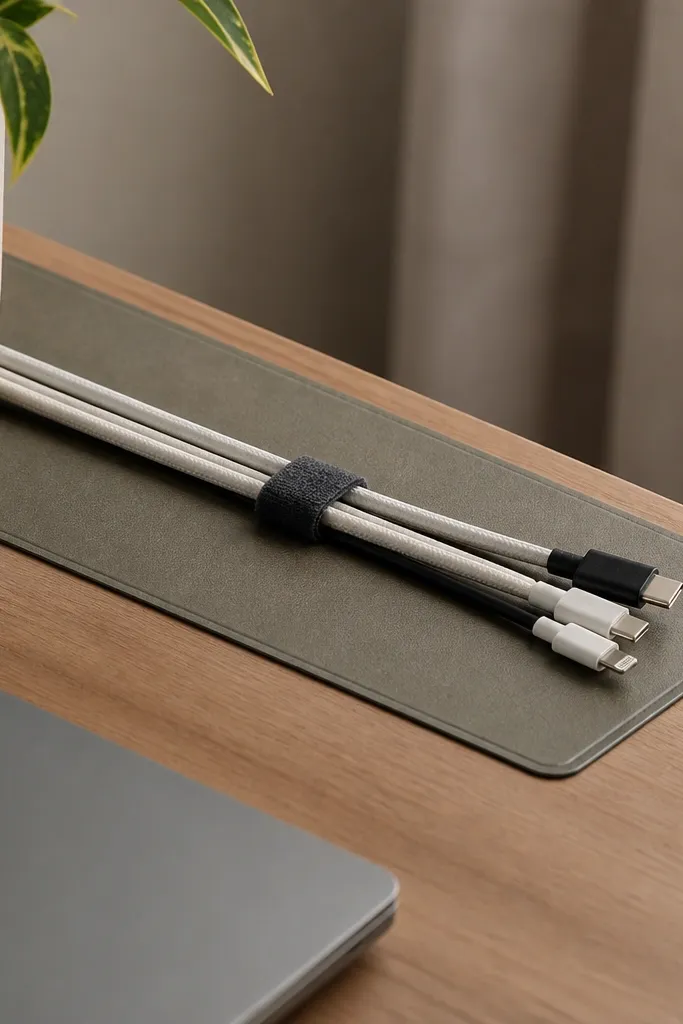
A cable landing pad stops cords from sliding onto the main work area. The laminated surface wipes clean, and it gives you a distinct boundary for "cables live here." This is one of the easiest ways to make a desk look tidy without buying storage boxes. It also reduces wear on desk surfaces from repeated cable movement.
Use a laminated placemat from a discount store or cut a piece of rigid plastic and laminate it. Place it behind the keyboard area where you route cables. Add a Velcro strap or a simple tie loop so cables coil neatly and stay in the same footprint.
Pro tipChoose a mat with a subtle pattern so tiny scuffs don't show.
AvoidAvoid placing it in the center of the desk - it should look like a "zone," not clutter.
12. Wall-Mounted File Folder Mail Sorter
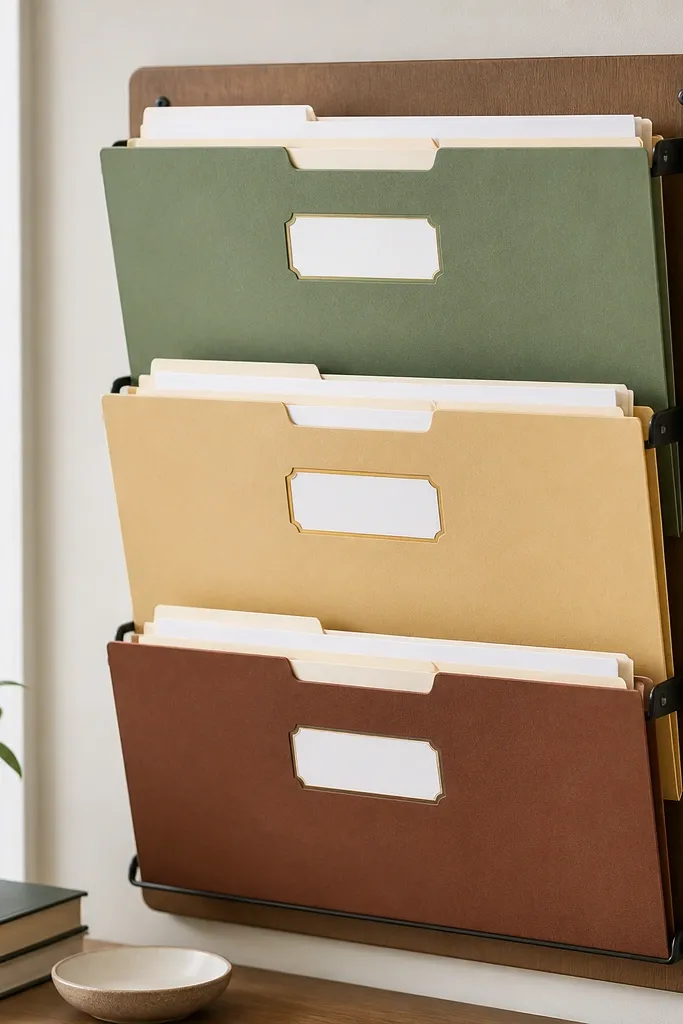
Paper piles grow because there's no decision point. A wall-mounted folder sorter forces a quick choice and keeps mail away from the keyboard. It looks clean because folders are the same shape and aligned. For kids, it also works for graded papers and permission slips.
Use three letter-size file folders and mount them on a board with small screws through the folder tabs or use a hanging rail. Keep the board at arm height. Label with tape and a fine black marker so the text matches the rest of your desk labels.
Pro tipPut "To Reply" at eye level and "To File" lower - it changes behavior fast.
AvoidAvoid mixing folder sizes - mismatched sizes look messy even when contents are correct.
13. DIY Desk Risers From Crates and a Shelf Liner
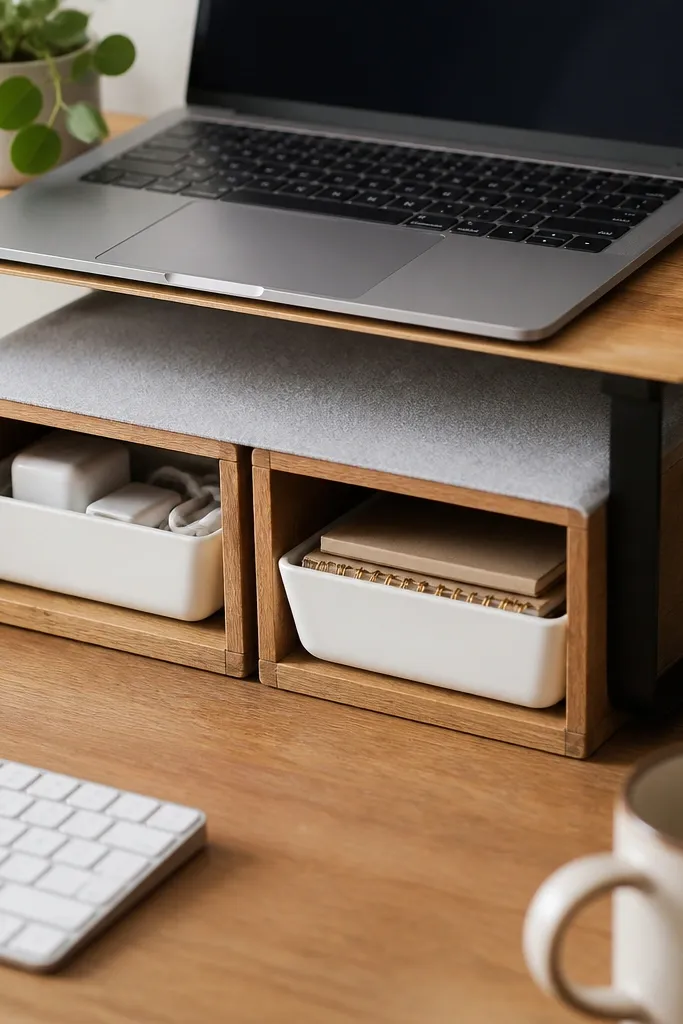
Raising the laptop or monitor creates vertical storage you can use without cluttering the desk surface. The crates give you defined compartments, and the shelf liner keeps items from sliding. This makes cheap budget desk organization feel intentional because you're using height, not adding random containers. It's also great for kids because notebooks stay upright.
Use shallow wooden crates about 10x10 inches or build from scrap wood. Add a cut piece of shelf liner inside each crate. Place bins inside for chargers and extra paper, then keep the top surface for the laptop only.
Pro tipMeasure your monitor base width so it sits centered and doesn't wobble.
AvoidSkip wobbly crates - if the top shifts, you'll stop using the system.
14. Pegboard Clips for Clear Homework Bins
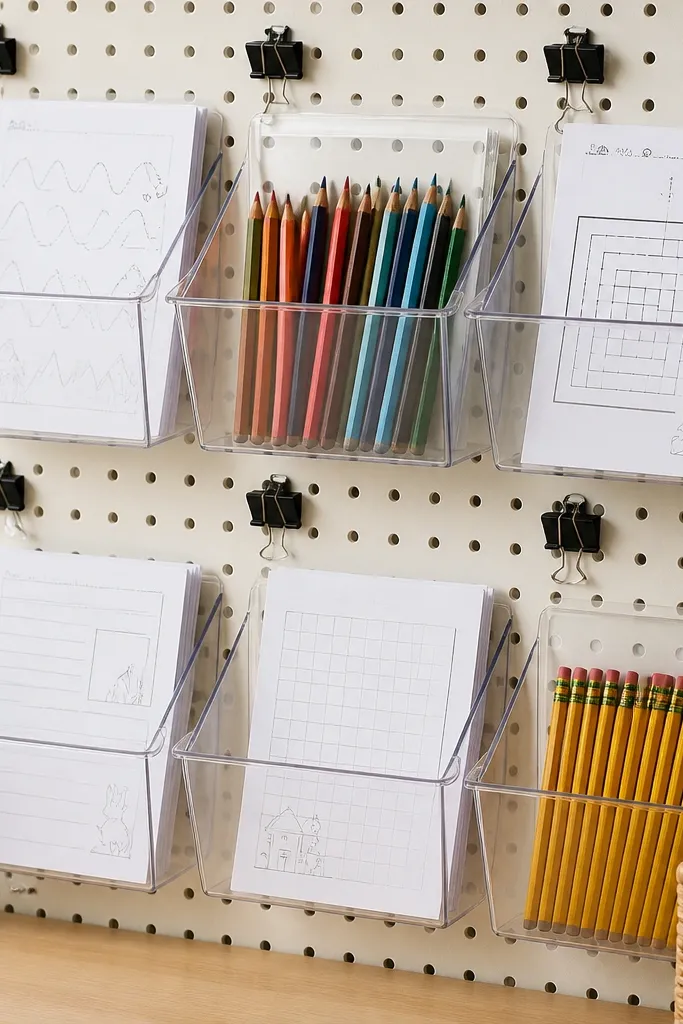
Clear bins on a pegboard create a desk wall that looks neat even when kids are adding papers. The pegboard grid makes bins line up, so it's not a random wall of containers. It's also easy to resize - move clips and swap bins when the school year changes. Labels keep the system from turning into a catch-all.
Use clear plastic food storage bins with flat backs or add small adhesive strips to attach binder clips. Clip them to pegboard using strong binder clips or pegboard bin hooks. Keep bin depth shallow so papers don't bend.
Pro tipUse one color for labels across all bins - I use white tape with black text for contrast.
AvoidDon't use deep bins - bent corners make the desk look sloppy.
15. Book Spine Labeling for Standing Reference Books
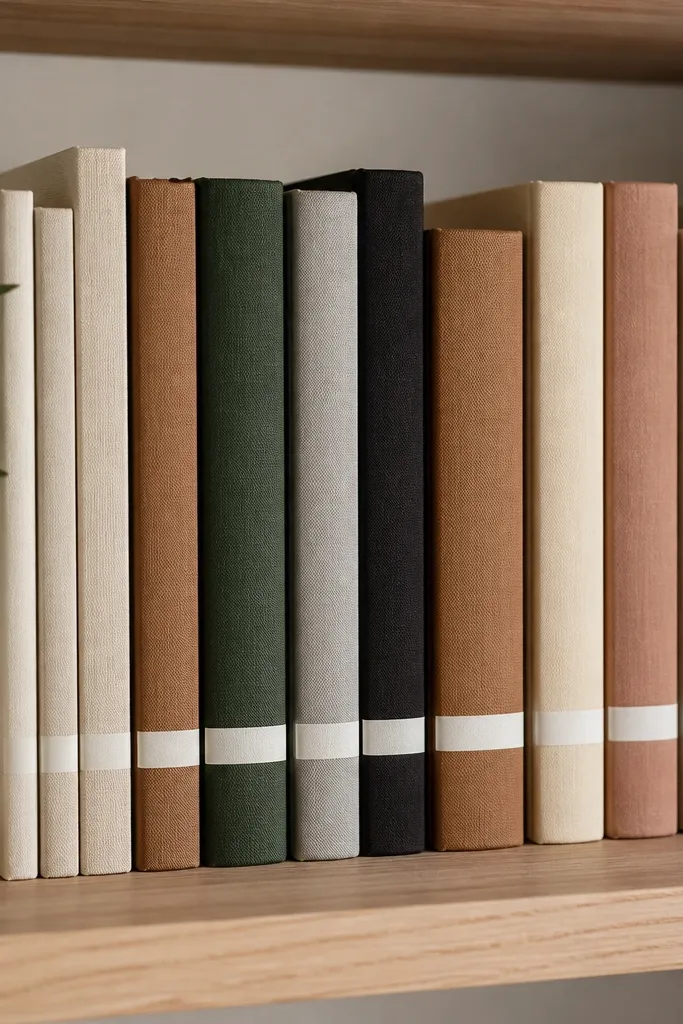
When reference books sit flat, they turn into a pile. Standing them upright with consistent spine labels makes them look like a set and keeps them easy to grab. For a kid desk, this helps them find math practice books and science cards without asking. It also frees up horizontal space that gets used for clutter.
Use a small book ledge or a magazine holder to keep them upright. Cut label tape strips and apply them to spines at the same height. Choose a label set format like Subject - Status, for example "Math - Practice" or "Science - Cards."
Pro tipKeep one "return" label style so kids know what goes back in the stand.
AvoidAvoid handwritten labels that wander - crooked text looks messy at a glance.
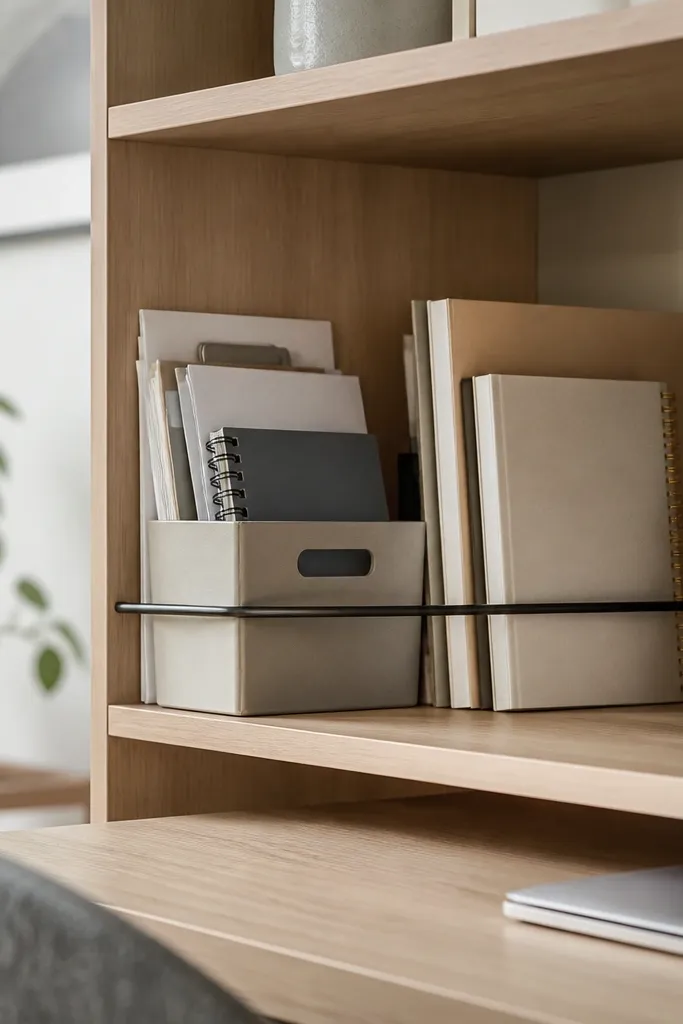
16. Magazine File Box With a Fabric Cover Front
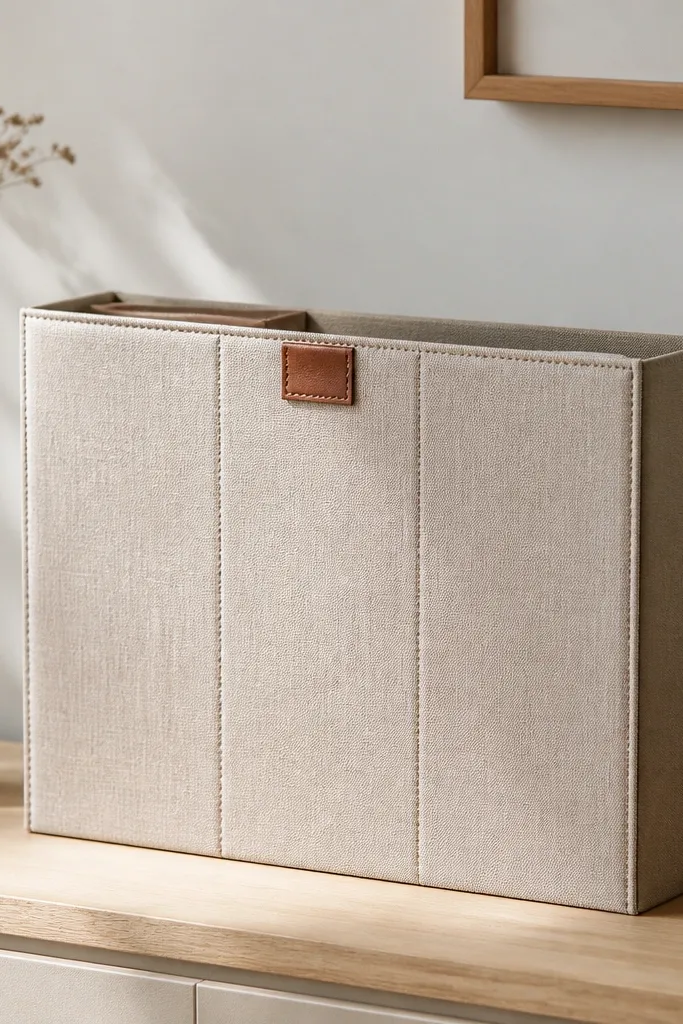
This gives you covered storage without losing the quick access of a box. The fabric front hides the "mess texture" that makes desks look cluttered. The box structure keeps papers from folding. It's a great compromise for kids who can't handle closed drawers but need the desk to look calm.
Use a hard plastic or wood magazine holder sized for letter papers. Cut fabric to cover only the front panel area and attach with Velcro strips so you can remove it to wash. Add a label tag on the fabric front using fabric-safe ink or a sewn-on patch.
Pro tipPick fabric with a tight weave like cotton canvas - it holds shape better than thin quilting cotton.
AvoidDon't use stretchy knit fabric - it sags and looks sloppy.
17. Under-Desk Shelf for Scissors and Tape Refill
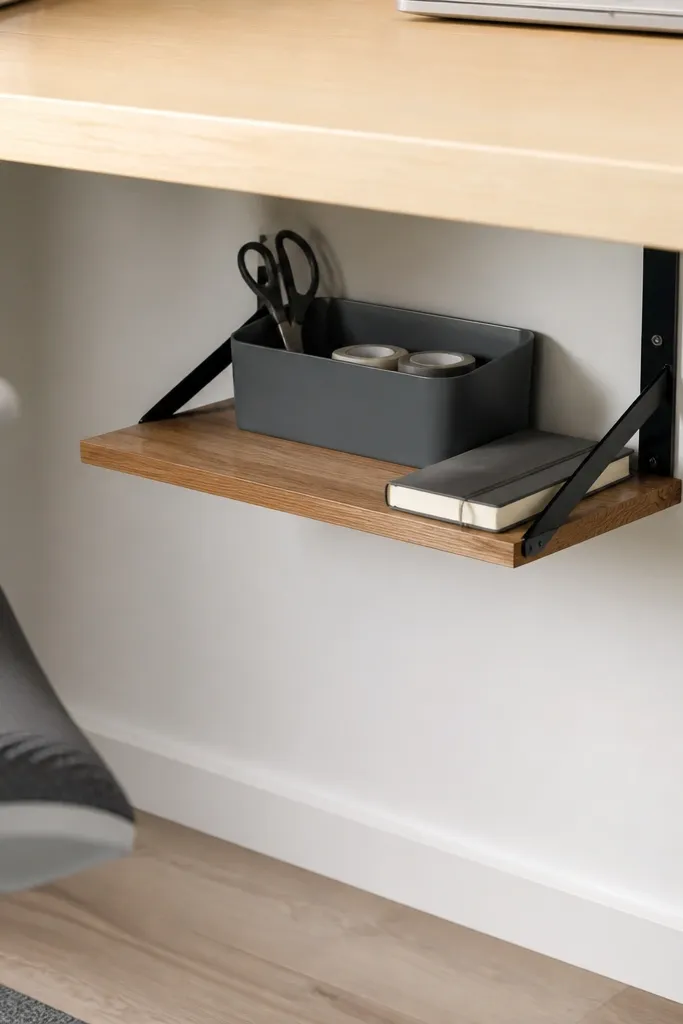
Tape refills and scissors are always "somewhere," and that's how desk clutter grows. An under-desk shelf keeps them in a consistent, easy-to-reach spot. It also keeps these items away from the main writing area where kids drop them mid-task. The shelf looks tidy because it's aligned and doesn't sprawl.
Use L-brackets and a board around 10-14 inches wide. Install it so the bin sits about 6-8 inches above the floor. Choose a bin with a lid or at least a straight wall so scissors don't poke out.
Pro tipAttach a small strip of non-slip shelf liner under the bin so it doesn't slide when pulled.
AvoidSkip shelves that are too deep - they steal leg space and get ignored.
18. Paint-Stick Organizer for Rulers and Long Tools
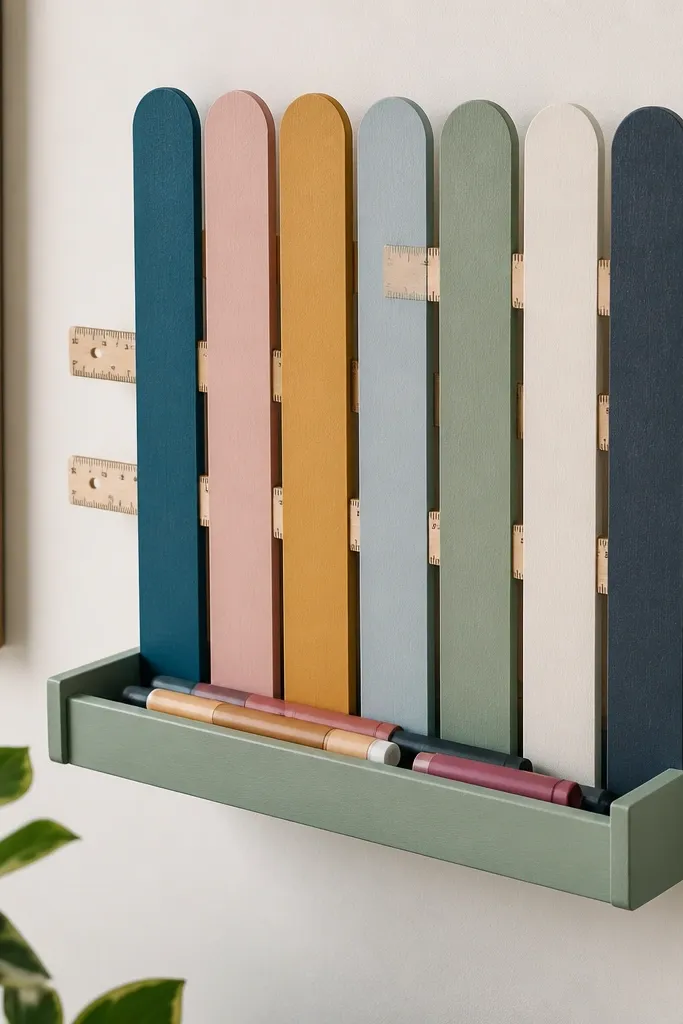
Long tools are the worst because they don't fit into regular bins. A paint-stick comb organizer holds rulers, straight edges, and measuring tapes upright without bending them. The gaps also let you see what's available. It makes your desk look orderly even when kids are mid-project.
Space paint sticks about 1 inch apart so rulers slide in with a snug fit. Mount the comb to a board using screws, then paint everything satin white or your desk color. Add a small lip tray under the comb for markers and highlighters so they don't roll away.
Pro tipSand the paint-stick edges so rulers glide in without scraping paint.
AvoidDon't mount it too high - kids won't put rulers back if they have to reach.
19. Clear Over-Cabinet Door Pockets for Homework Sheets
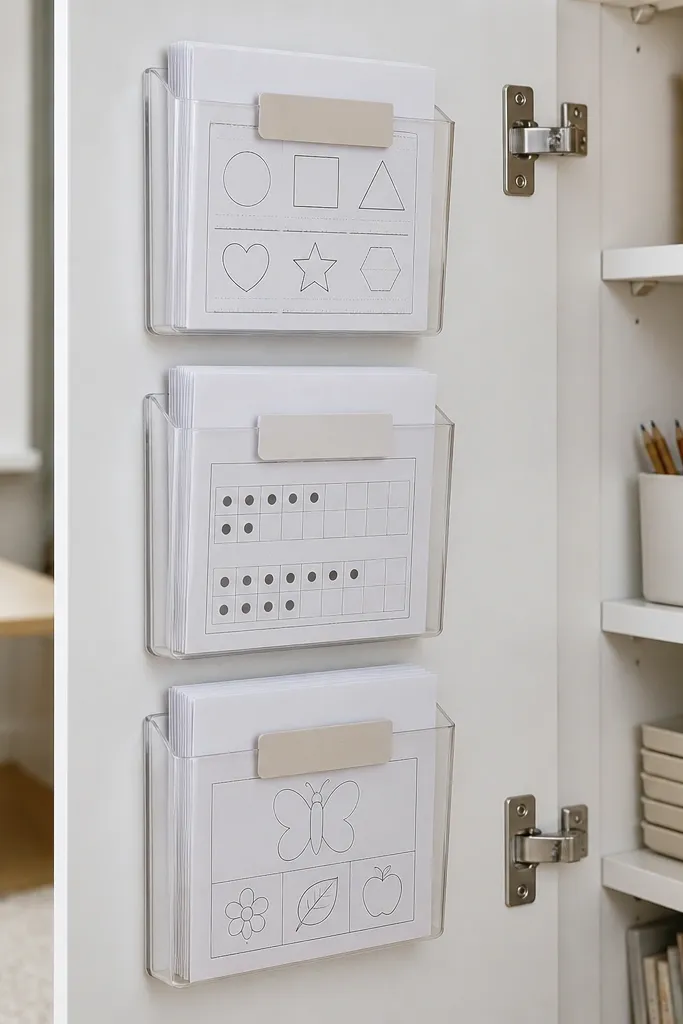
Door pockets turn wasted space into instant paper storage. Since it's clear, kids can see what's inside without opening anything. It also keeps homework off the desk when you need the surface clear for laptops or dinner crafts. The look stays clean because pockets line up in a consistent row.
Use adhesive clear pockets or screw-in pockets rated for light paper weight. Put the pockets inside the cabinet door near desk height. Label with label tape on the pocket top: "Today," "Next," "Finished."
Pro tipUse a single stack size rule - keep each pocket to one-inch thick stacks so it doesn't bulge.
AvoidAvoid overstuffing - stretched pockets look cheap and fall off.
20. DIY Desk Tray From a Cookie Sheet and Drawer Liner
A metal tray gives you a flat, stable landing zone for tools. The drawer liner adds grip so items don't slide when kids bump the desk. This looks sharp because the tray is one solid shape, not a bunch of mismatched containers. It's also easy to clean - wipe it with a damp cloth.
Find a cheap cookie sheet with shallow sides and paint the underside if you want a matte look. Cut drawer liner to fit the tray base and press it in place. Use small cups or a divided organizer inside for pens, scissors, and tape.
Pro tipRound the corners of the liner with scissors so it sits smoothly and doesn't lift.
AvoidAvoid slick liners - if it's too slippery, the tray defeats the purpose.
21. Mini Label System With Color Bands by Subject
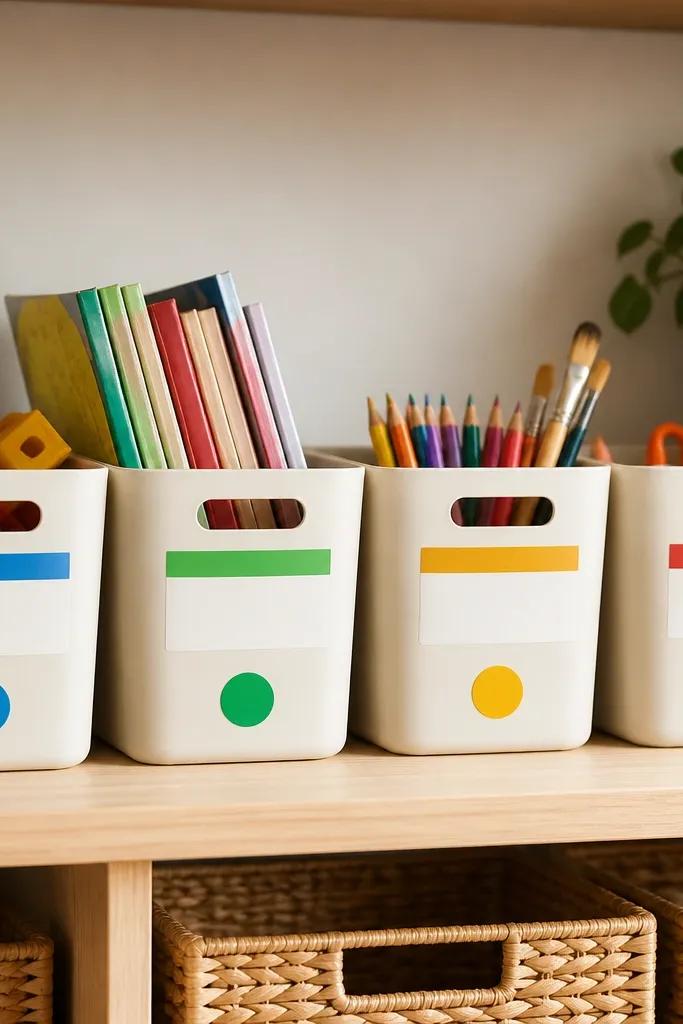
Aesthetic organization is mostly labeling. Color bands by subject help kids grab the right bin without reading every word. When the desk looks good, it also feels easier to keep it that way. The color system makes quick resets possible after school.
Use label tape for the main text and add a 1/2-inch color band at the start. Pick a consistent color for each category and stick to it all year. Place labels at the same height on every bin face so the whole desk looks aligned.
Pro tipUse the same colors on folder tabs so the paper and storage match.
AvoidAvoid making a new color every week - it turns into a rainbow mess.
22. Felt Desk Mat Letters Box for Small Erasers
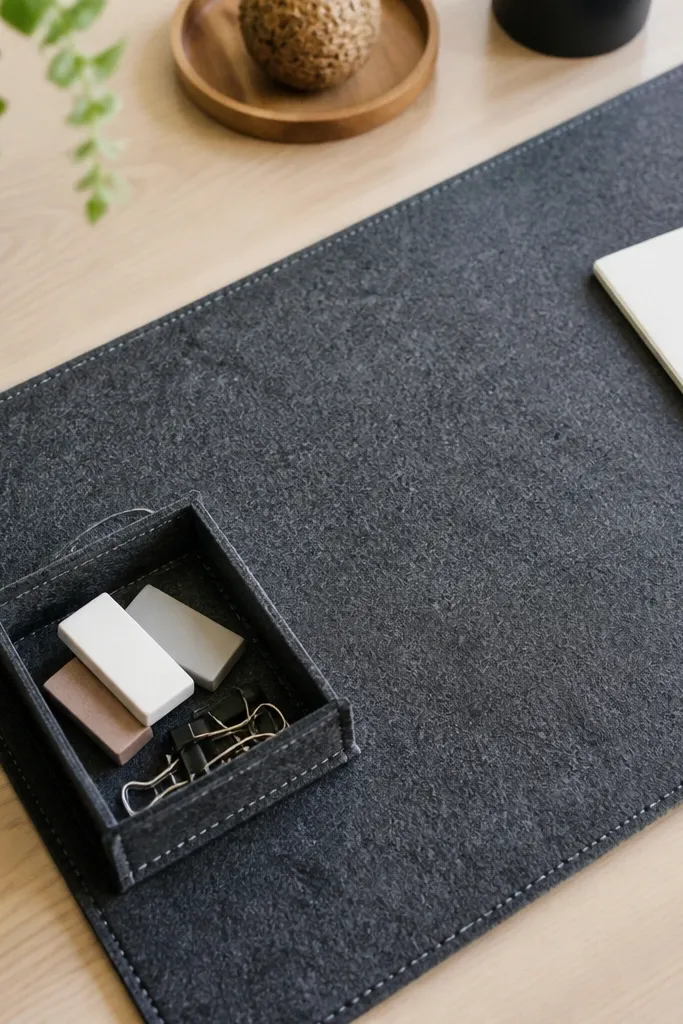
This is for the tiny stuff that disappears - erasers, sharpener bits, and small eraser caps. A stitched felt compartment keeps those items in the same place as the writing surface. The felt also hides micro-scratches and pen marks better than bare plastic mats. It's a soft, kid-friendly organizer that looks intentional.
Cut felt to match your existing desk mat size and sew a small compartment using straight stitch around the sides. Make the compartment about 4x6 inches for erasers and small supplies. Add a label patch on the mat corner using fabric glue for a clean finish.
Pro tipUse thick craft felt, not thin felt - it holds shape and won't sag.
AvoidDon't attach compartments with only glue - they peel under daily grabbing.
23. Stackable Clear Sticker Storage on a Desk Shelf
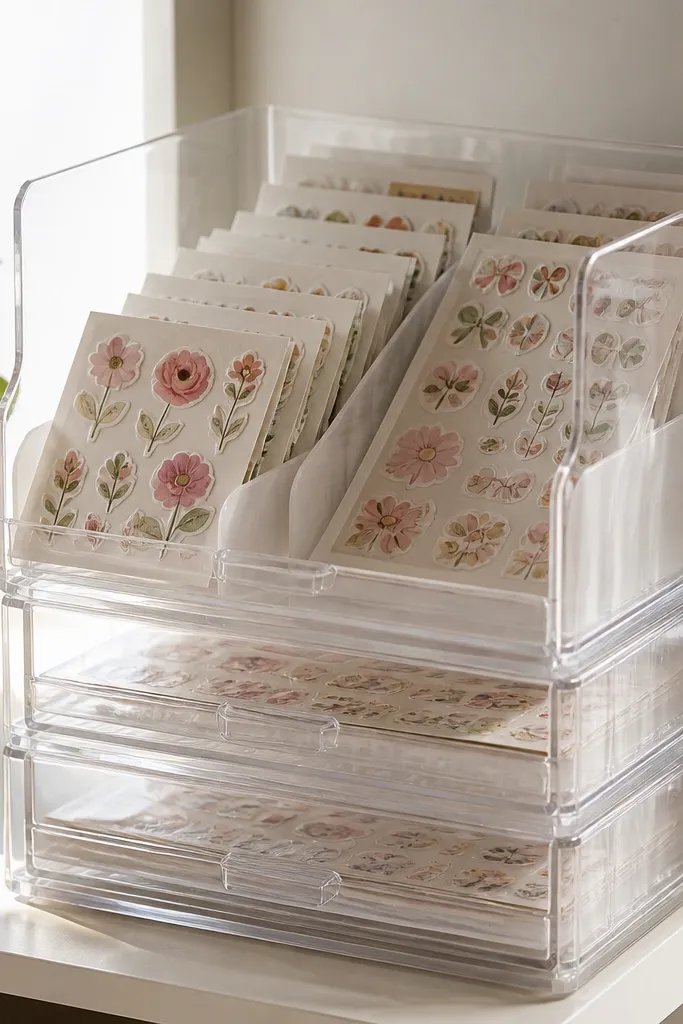
Sticker storage is a sneaky desk clutter source because it spreads everywhere. Stackable clear containers keep sticker sheets upright and visible, so kids pick what they need instead of digging. The shelf divider keeps the stack straight and prevents tipping. This creates a neat look even when the contents are playful.
Use clear stackable craft containers with removable lids. Add a vertical divider strip in the shelf area so the stack sits centered. Label each container by theme: "Stars," "Animals," "School Rewards."
Pro tipKeep one open-faced container for the current activity and store the rest stacked behind it.
AvoidAvoid mixing sticker sizes in one bin - small ones slide and make a messy pile.
24. Bookend + Folder Clamp for Standing Paper Stack
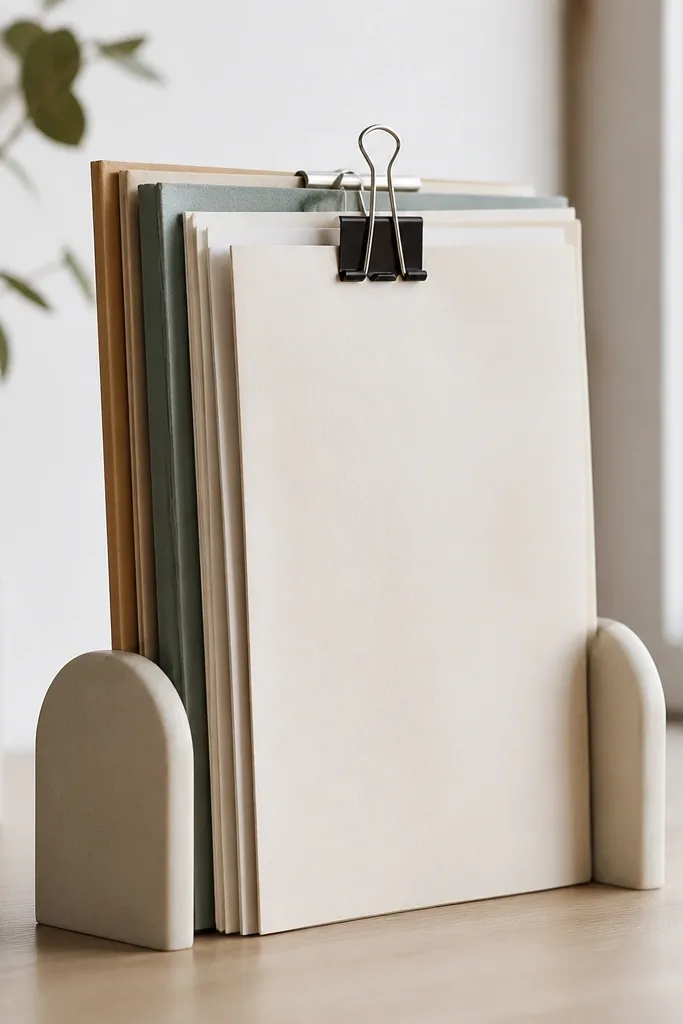
This works when your desk needs a "current stack" that doesn't collapse. The bookends hold the stack upright, and the binder clip keeps loose worksheets from sliding. It looks clean because the stack stays straight instead of fanning out. For kids, it also reduces the habit of cramming papers into drawers and forgetting them.
Use two bookends or a magazine holder with a strong base. Place the stack between them and clamp the top with a binder clip. Add tape labels to the front folder edge so kids know which stack is for today's work.
Pro tipUse a clip-on folder divider for "Need Parent Sign" so it doesn't get mixed in.
AvoidAvoid overfilling the stack - when it bends, it looks messy immediately.
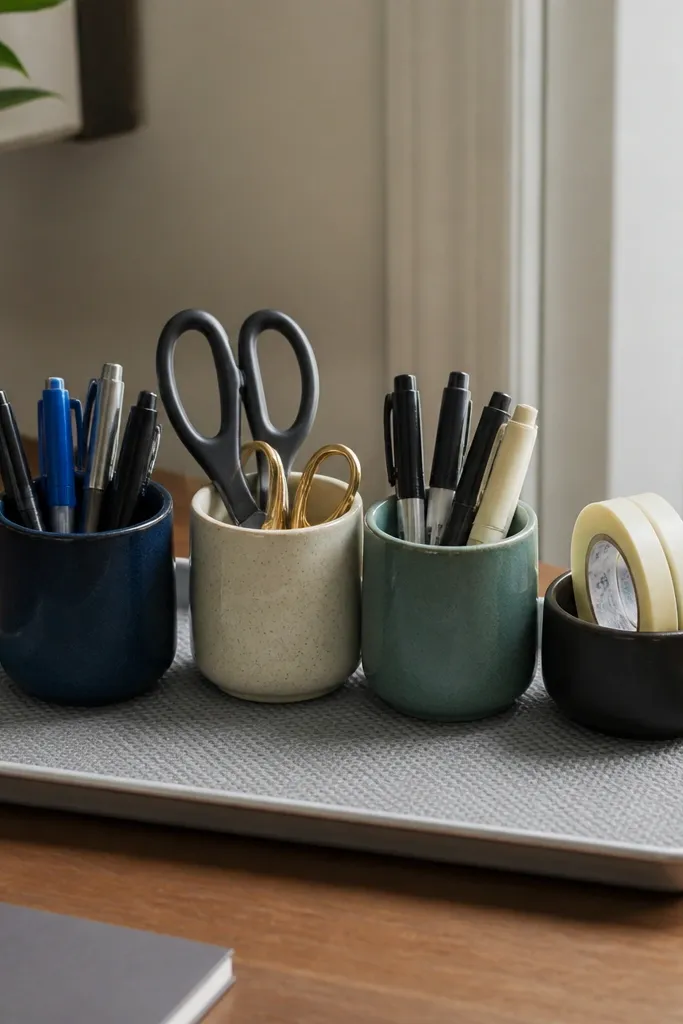
25. Thrifted Serving Tray for Desk Top Organization
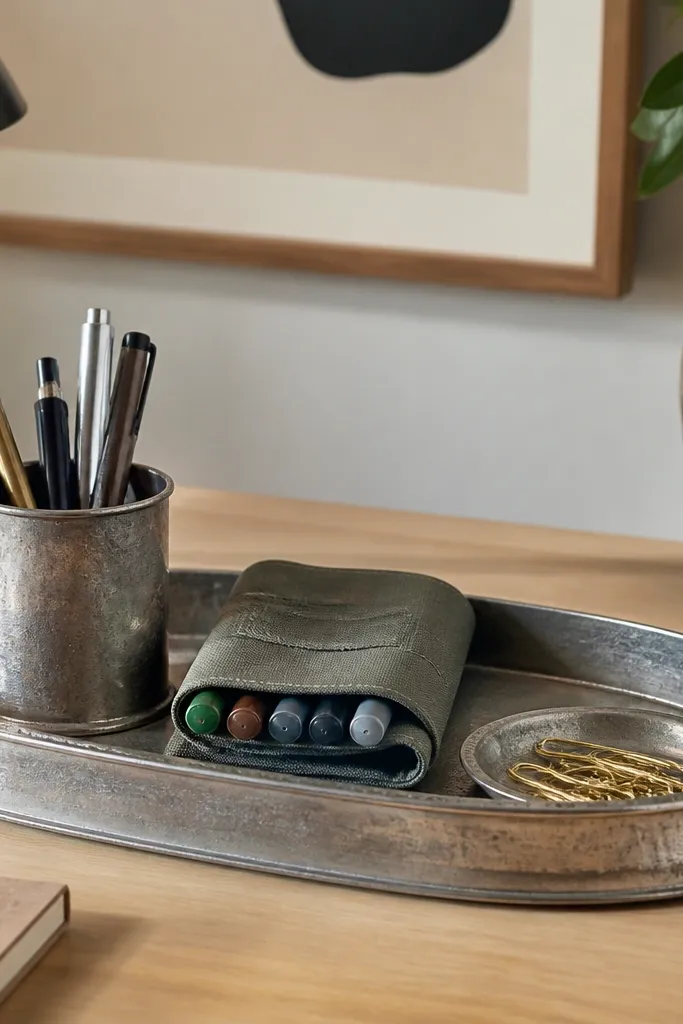
A tray is one of the easiest ways to make desk clutter look intentional. You get a defined boundary, and everything inside looks like part of the same setup. I've used thrifted trays because they already have a shape and finish that looks "designed" even when you only add cheap inserts. For kids, it's also faster to reset - pick up the tray and you're done.
Choose a tray that fits within 2-3 inches of your desk mat edges so it doesn't crowd the workspace. Add one cup for pens, one shallow dish for clips, and one fabric pouch for markers. Use label tape on the pouch and dish so it stays organized even after a busy day.
Pro tipWipe the tray with rubbing alcohol first so adhesive labels stick cleanly.
AvoidAvoid trays with sharp decorative cutouts - tiny bits collect dust and look grimy.
26. Drawer Dividers From Cutting Boards With Contact Paper Faces
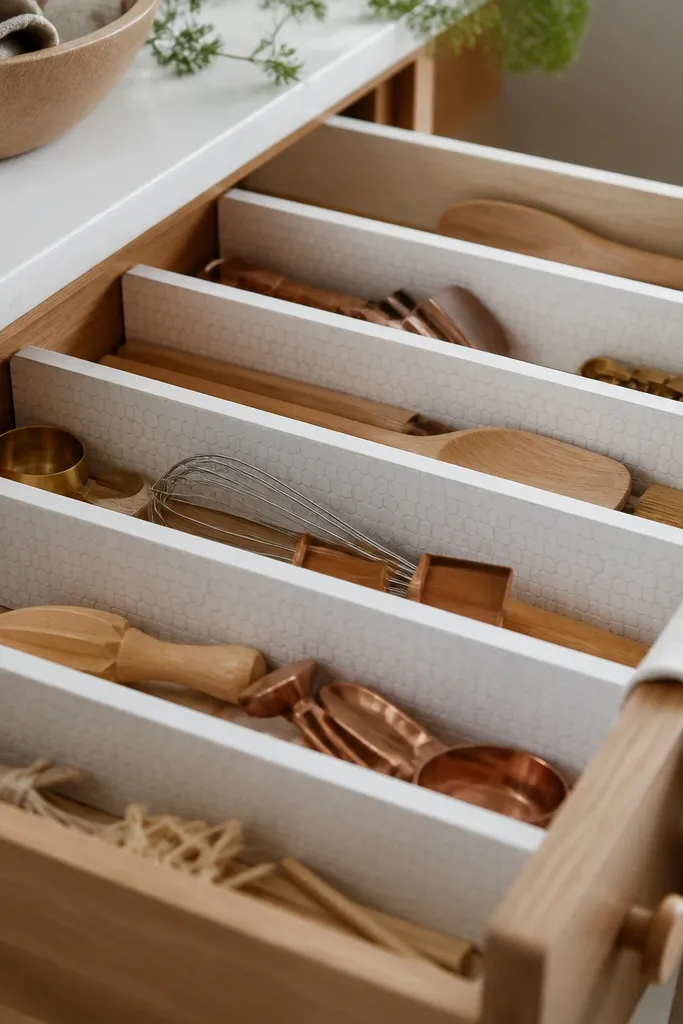
Cutting boards are sturdy, so they make dividers that actually hold up to kid use. The contact paper face makes the dividers look uniform and clean. This is a good budget upgrade when cardboard dividers get bent or crushed. You also get a smooth surface for things like tape dispensers and small scissors.
Cut a small cutting board into strips about 1.5 inches wide to match your drawer compartments. Add contact paper to the visible face only, leaving the side edges plain. Press dividers into place snugly so they don't slide - add a small strip of non-slip shelf liner under the base if needed.
Pro tipUse the drawer's width to plan divider sizes so you don't end up with wasted gaps.
AvoidDon't use glossy contact paper - it reflects light and makes labels harder to read.
27. Paper Towel Roll Organizer for Scissors and Marker Caps
Paper towel rolls are the cheapest desk organizer material I know, and painting them makes them look like real storage. The round shape naturally holds cylindrical items like markers and glue sticks. When you line them up in a tray, it looks tidy instead of DIY-chaos. Kids can also see what's missing because the tops are open.
Cut rolls to different heights: 2.5 inches for marker caps, 4 inches for pens, 5 inches for scissors. Paint with matte acrylic and let it dry fully. Glue a foam circle to the bottom so items don't scratch the tray and the roll stays stable.
Pro tipAdd a small label tape strip on each roll at the same height for a cleaner look.
AvoidAvoid leaving rolls unpainted - brown cardboard edges make the whole desk look unfinished.
28. DIY Desk Shelf Divider From Shower Curtain Rod Scrap
A divider rod stops paper and notebooks from sliding off the edge when kids shove backpacks or books back onto the shelf. It's a simple physical barrier, so it's reliable even when motivation drops. The rod also keeps long items aligned, which makes the desk look more orderly. It's one of those fixes that looks small but changes daily behavior.
Use a scrap shower curtain rod or a thin metal dowel and mount it with small brackets to the shelf side. Position it 1-2 inches from the front edge so items can be accessed but not pushed off. Hang or slide bins behind the rod if you need extra catch-all storage.
Pro tipWrap the rod ends with electrical tape so nothing scratches when bags hit it.
AvoidAvoid placing the rod too close to the front edge - it blocks access and kids stop using it.
29. Small Tray for Coins, Receipts, and Permission Slips
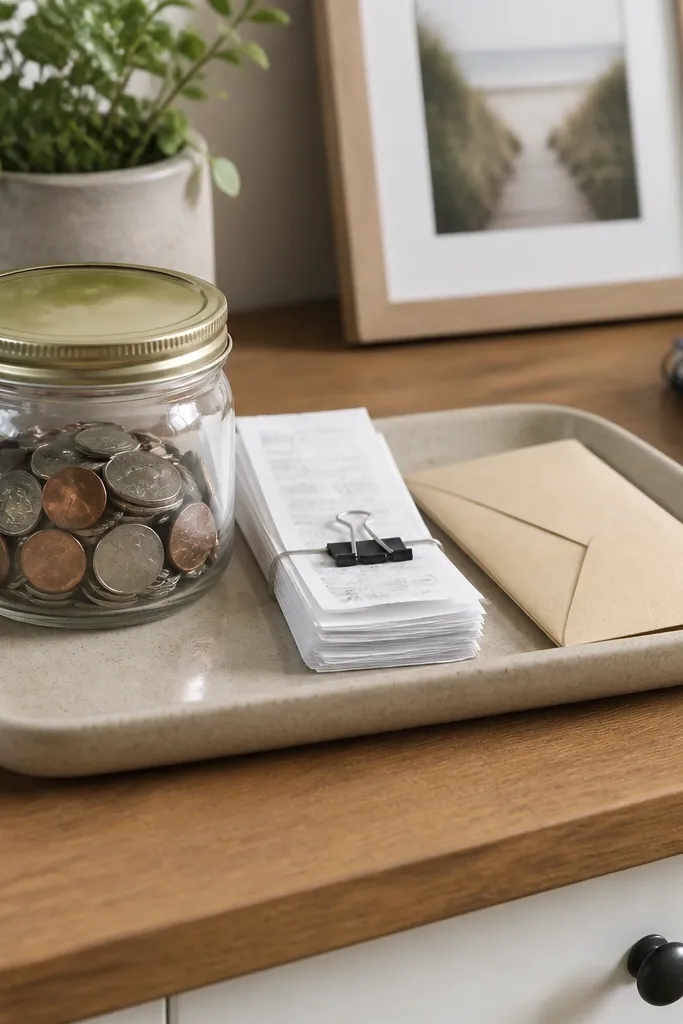
This is where desk clutter hides: coins, receipts, and "sign this" papers. When they share one small tray, the desk stays clean even when life gets busy. The labeled envelope keeps permission slips from being lost in a drawer. For kids, it also creates a predictable place for things that require adult attention.
Use a shallow tray and add three elements: a small jar for coins, an envelope for permission slips, and a simple rubber band stack for receipts. Label each with label tape so it's obvious what goes where. Place the tray in a corner that's easy to reach but not in the main work zone.
Pro tipEmpty the tray at a set time - I do it right after dinner - so it never overflows.
AvoidDon't mix random small items in the tray - one category per compartment looks intentional.
30. Magazine Rack Turned Into Vertical Dry-Erase Storage
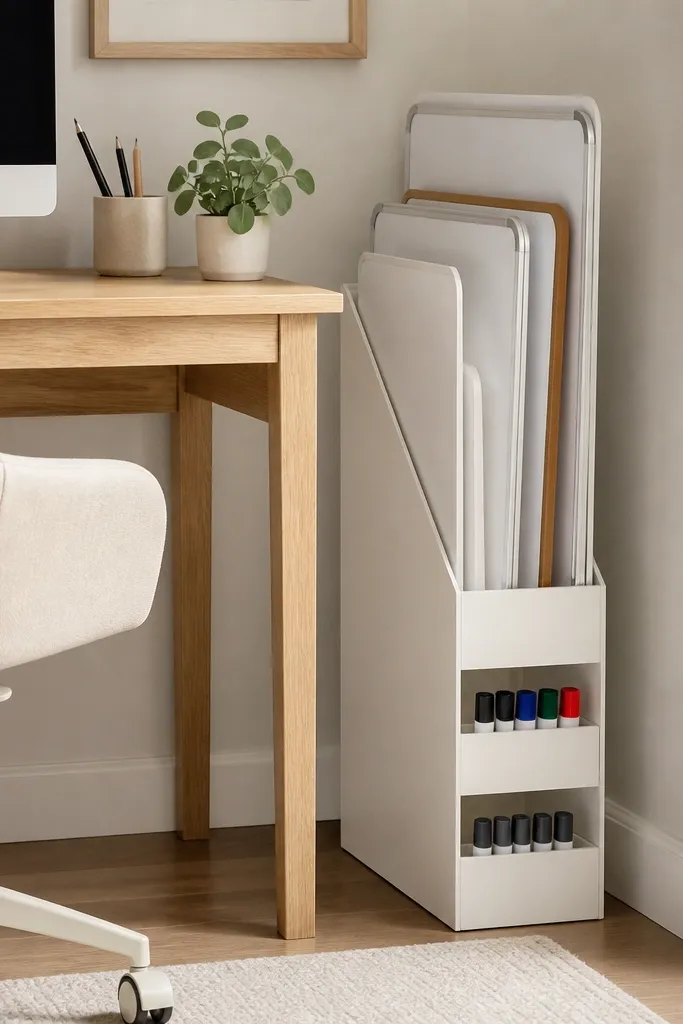
Dry-erase boards and marker sets take up weird space and end up piled on the desk. A slim magazine rack holds them upright and keeps them from getting bent. Painting the rack to match the desk makes it look like furniture, not a craft hack. This is also great for kids because they can grab a board without dumping other supplies.
Pick a narrow magazine rack that fits the side of your desk without blocking chair movement. Paint it with satin white or the same color as your desk frame. Add a small bin at the bottom for marker caps and eraser sponges.
Pro tipStore one "daily" board in the front slot and the rest behind it for faster grabbing.
AvoidAvoid leaving marker sets loose - capless markers dry out and stain the rack.