
1. Neon Folded Star Burst
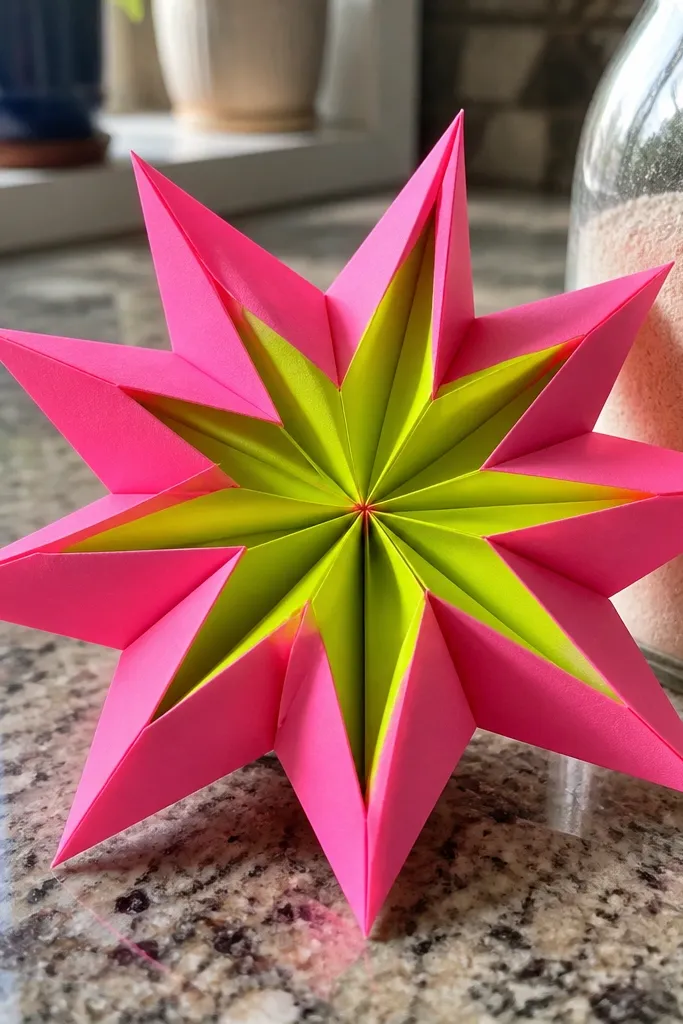
This one looks like a mini fireworks burst because the points are evenly spaced and the base crease creates a clean, glowing outline. Use two-tone paper so each fold line shows — kids love that “hidden color” effect when the star opens. It’s modern because the shape is graphic, not fluffy, and the tips look good even when the star is small. Make it as a set for a shelf or birthday table, and it still looks tidy after being moved around.
Start with square paper in two contrasting colors. Fold diagonals both ways, then fold the paper in half horizontally and vertically to create an easy crease grid. Use the diagonal creases to bring each corner toward the center, one at a time, then pinch the center to lock. Finish by folding each protruding triangle outward slightly so the star points stand up, not flat.
Press the center pinch hard with a ruler edge, then open each point just a few millimeters for symmetry.
Don’t skip reinforcing the center crease — weak centers make tips droop.
2. Mini Modular Paper Cube Stack
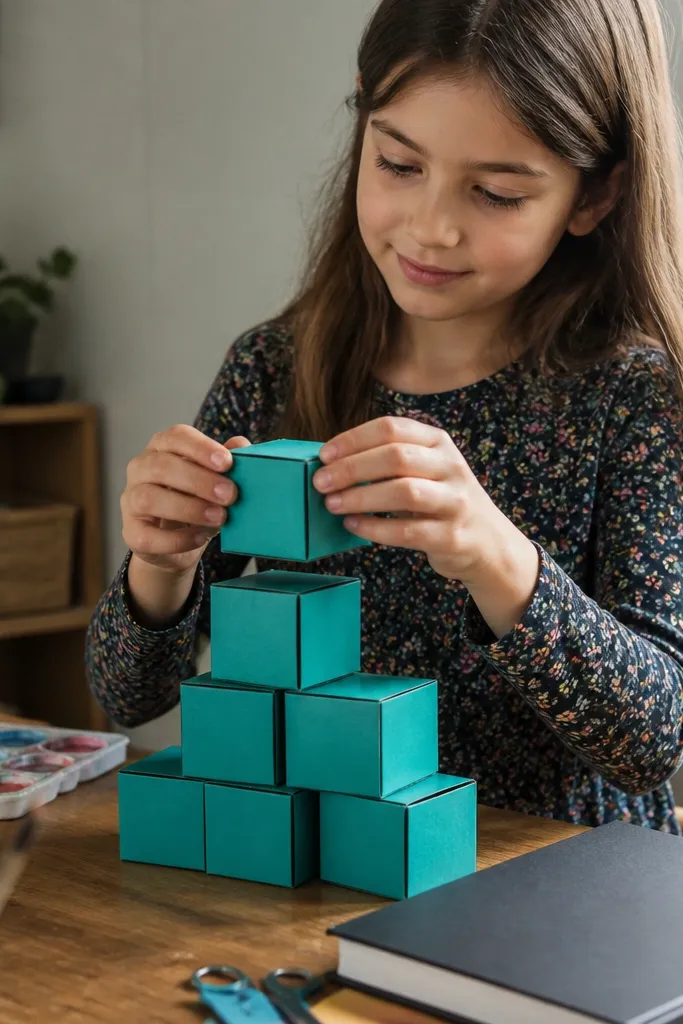
A cube looks modern because it’s all straight lines and sharp corners. This project is perfect for kids who want something they can keep building — each cube stacks cleanly and looks intentional instead of messy. Use solid color paper so the cube reads as a single shape, then choose a second color for the inside folds to add that “designer” contrast. It also photographs well from above because the edges create a neat grid.
Editor's noteUse a slightly thicker craft paper for cleaner corners and less edge warping.
Cut squares that are all the same size, like 6 cm or 7 cm, and keep them consistent. Fold each square in half, then in half again, then unfold so you have a cross crease. Bring all four corners to the center point, then fold the resulting smaller square in half so the corners tuck in. Repeat for multiple cubes and stack them by sliding one into the next.
Skip thisDon’t vary square sizes — mis-matched cubes look crooked when stacked.
3. Candy Wrapper Heart Envelope
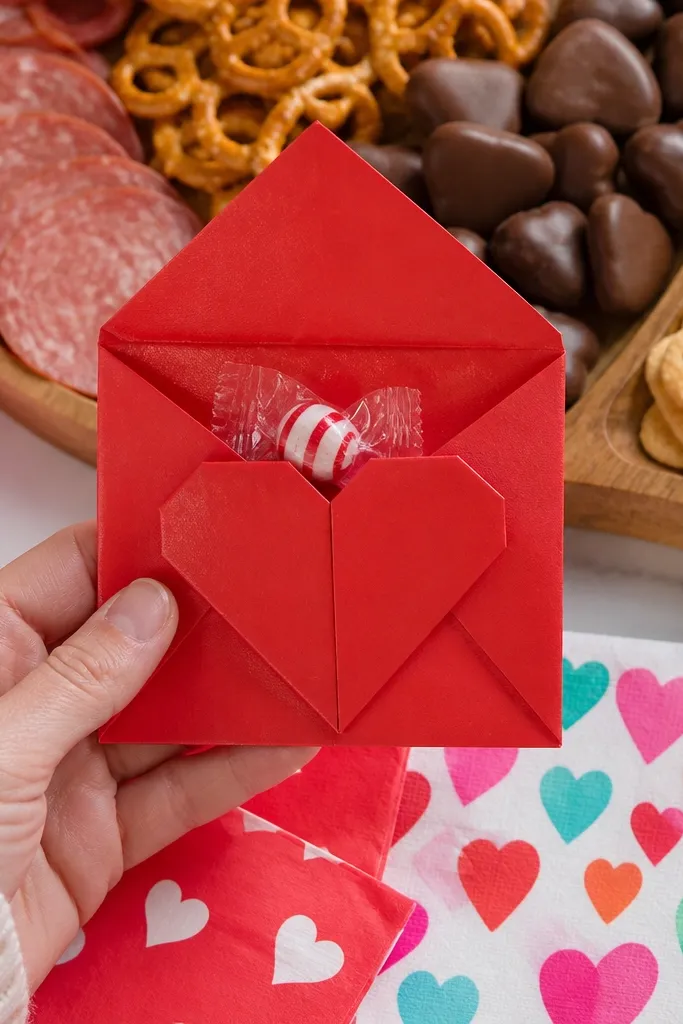
This is the kind of origami that looks like packaging, which makes it feel modern and cute at the same time. The heart shape is photogenic because it has a clear outline, and the envelope flap makes it functional for small notes or candy. You get a clean front panel with folded edges that look crisp even on busy party tables. It’s also a great “easy win” project for kids because the steps guide the shape without tiny parts.
Editor's noteUse red or pink paper with a contrasting inside color so the folds pop when the flap opens.
Start with a square sheet and fold it in half, then unfold. Fold the top corners toward the center crease to form a triangle peak, then fold the bottom corners up to match. Rotate and fold a heart-like shape by bringing the left and right edges toward the center until the silhouette looks even. Finish by folding the top section down as a flap and tuck the point to hold it closed.
Skip thisDon’t overstuff — thick inserts make the heart buckle.
4. Geometric Paper Rose Rosebud
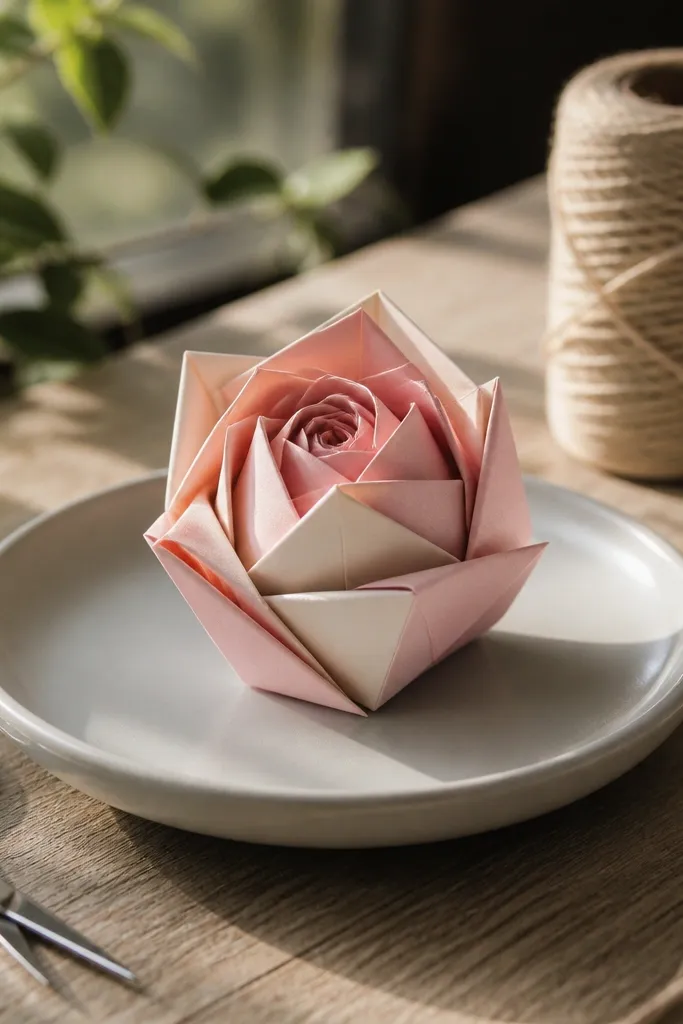
This rosebud looks modern because it’s built from clean geometric folds, not soft curled paper. The layered points catch light and create depth, which is what makes it look “real” in photos. It’s small enough for desk decor, yet detailed enough that kids feel proud showing it off. Choose paper with a matte finish so the creases don’t glare under indoor lights.
Use a square sheet and pre-fold it by marking diagonals and one vertical center crease. Fold the square into a smaller square, then fold the corners to meet the center to create a petal base. Shape the petals by pulling each corner outward slightly so they form rounded points. Add a tiny roll at the top by bending one edge inward to make the rosebud tip.
Cut a slightly smaller square for the bud and keep folds tight for a sharper silhouette.
Don’t use shiny foil paper — it makes creases look messy and highlights uneven folding.
5. Kawaii Paper Bunny Face Mask
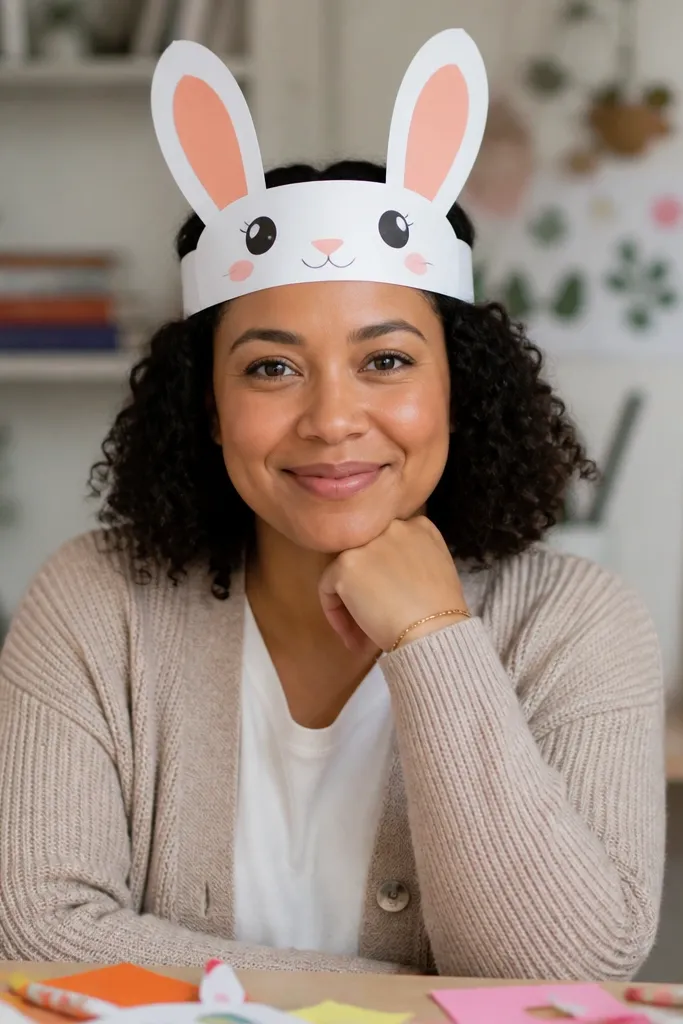
A bunny face mask is instantly cute, and the origami part makes it feel modern rather than just a drawing. The folded ears create a strong shape, and the face is easy to customize with marker details. It’s photogenic because it’s bold and graphic — kids can pose with it, and the paper structure keeps the ears upright. Make it in pastel colors for a soft look or in high-contrast colors for a street-art vibe.
Editor's noteReinforce ear bases with tape on the inside so ears don’t collapse after a few wears.
Start with a rectangle base and fold it to create a headband-like strip. Add ear sections by folding two triangles upward from the top edge and creasing hard at the base. Fold the bottom edge up slightly to form a chin line, then crease the face panel flat. Attach elastic or string through two small holes on the sides, then draw eyes and whisker lines.
Skip thisDon’t skip hole placement — off-center holes twist the mask.
6. Folded Paper Butterfly with Color-Edge Wings
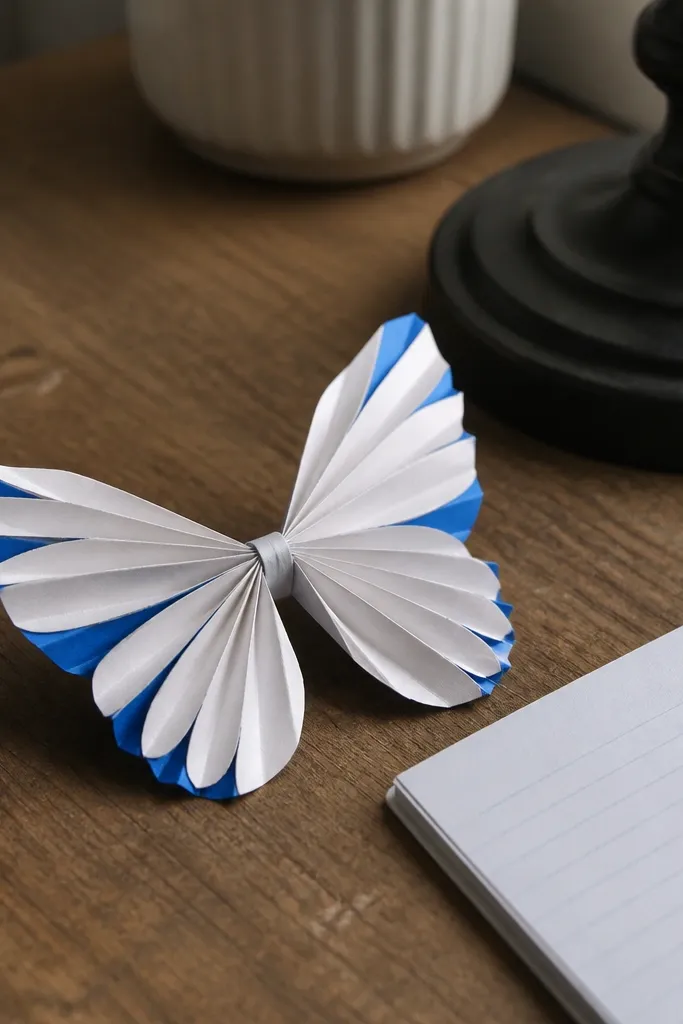
Butterflies photograph well because wings create natural symmetry and movement. This modern version relies on color-edge contrast: the inside color shows along the folded ribs, so the wings look patterned even with simple paper. It also stands up nicely on a desk because the fold structure gives it a slight 3D lift. Make several and clip them to a string for a quick, clean decoration.
Editor's noteChoose paper with a matte finish so wing ribs look crisp instead of glossy smudgy.
Use a square with two-tone sides and fold diagonals both ways. Fold the paper into a kite shape by bringing corners toward the center and creasing the center ridge. Split the top layer to make two wing sections, then fold each wing along the existing crease lines. Finish by shaping the body with a small pinch at the center and tucking a tiny paper strip underneath for stability.
Skip thisDon’t leave the body loose — a floppy center makes wings look uneven.
7. Minimal Paper Bookmark with Corner Pocket
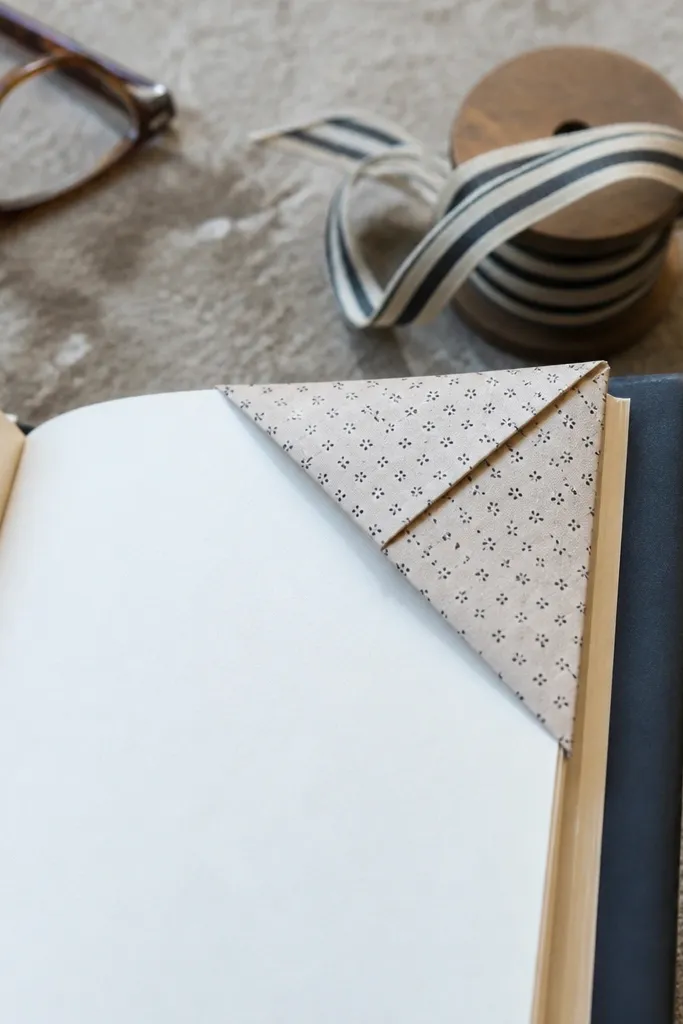
A bookmark is modern because it’s practical and clean-looking, and the corner pocket makes it feel engineered. This design has a sharp edge silhouette that looks neat on any book spine. Kids can make them fast, and the pocket holds pages without tearing. Use patterned paper to make the fold lines look like design details rather than craft leftovers.
Editor's noteRound the top tip with scissors — it looks cleaner and catches less on pages.
Cut a rectangle, like 5 cm by 18 cm, and fold a thin strip along one long edge. Create the corner pocket by folding one end into a triangle, then tucking the triangle under a second fold. Reinforce the pocket edge with a quick press along a ruler. Finish by trimming any uneven edges so the bookmark sits flat.
Skip thisDon’t use flimsy paper — the pocket will collapse after repeated page pulls.
8. Paper Airplane with Folded Wing Ribs
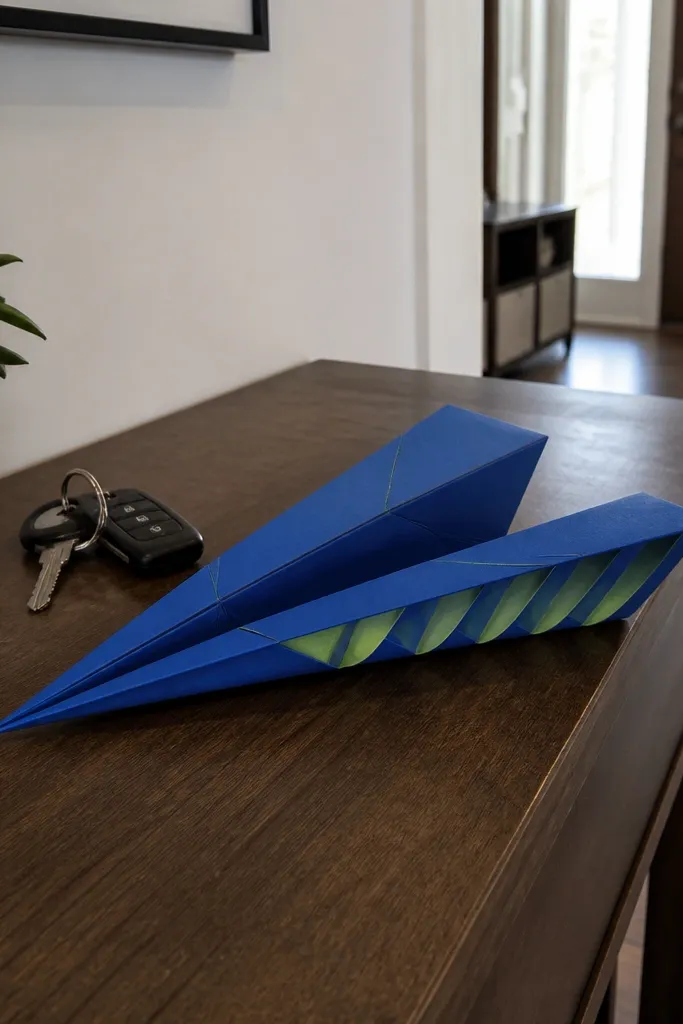
This is a modern origami airplane that looks sharp on a shelf because the wing ribs are visible and the nose is crisp. It flies fine for kids, but the real win is the graphic look — you can make it in matching colors for a coordinated set. The rib folds create a clean texture that reads well in photos. It’s also a great rainy-day activity because it’s quick and forgiving.
Start with a rectangle, fold it in half lengthwise, then unfold. Fold the top corners toward the center crease to make a pointed nose section, crease hard. Create wing ribs by folding small triangles along the wing line, then press them flat so they stay defined. Fold the wings down and crease the trailing edge so the airplane keeps its shape.
Use a light spray of clear matte fixative on the ribs if the paper frays easily.
Don’t crease too lightly — weak ribs blur the modern look.
9. Star Lantern Tealight Holder
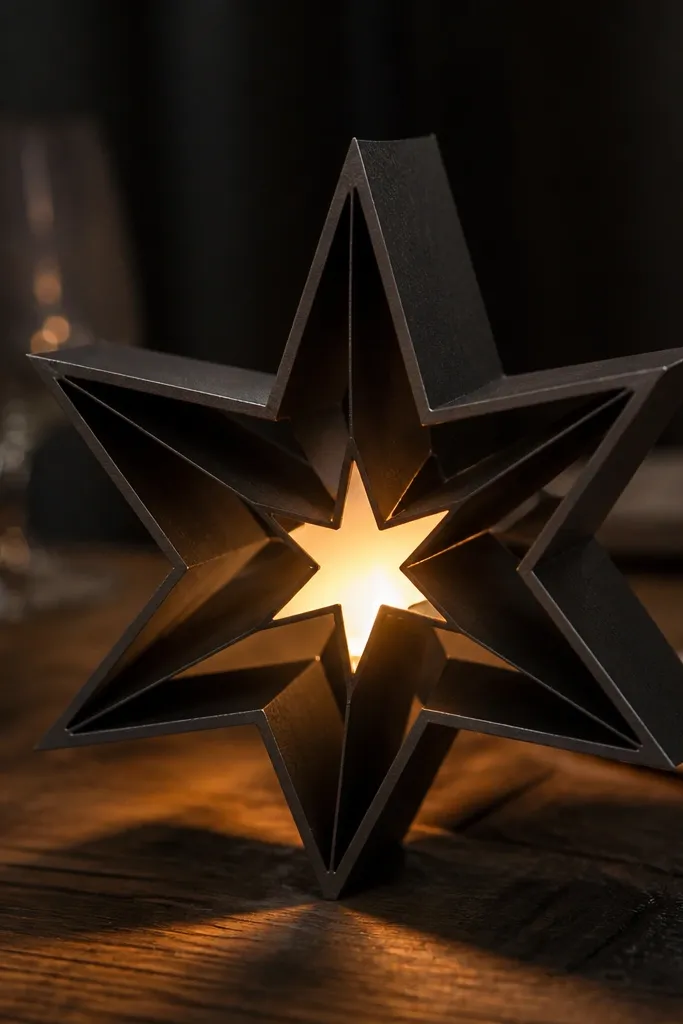
A star lantern is modern because it turns folded paper into a graphic light pattern. When a small light sits inside, the folded points cast a crisp silhouette that looks expensive. Kids can make the paper shape, but you should supervise the light setup. Use thicker paper so the star stands open and doesn’t sag. The result looks great on a table or as a nightlight corner decoration.
Editor's noteUse LED candles — paper lantern heat is the only thing you don’t want to gamble with.
Fold a star shape from a single sheet or assemble pre-folded star panels into a ring. Add cut-out gaps along the star points so light passes through. Create a base rim by folding a strip into a shallow ring and attaching it inside the star. Place a tealight holder insert or LED candle inside for safe use, and check that the top edges stay open.
Skip thisDon’t skip test-fitting the insert — if it’s tight, the star edges buckle.
10. Geometric Paper Snowflake with Thick Creases
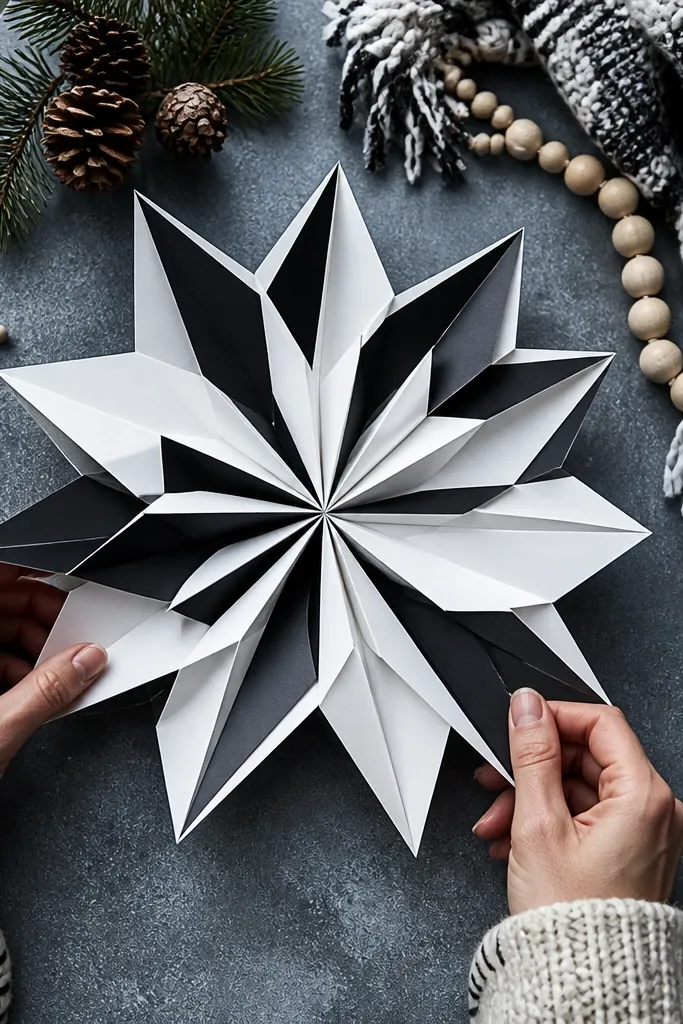
Snowflakes look modern when the arms are bold and the creases are deep, not delicate and lacey. This design uses folded panels so each arm has a crisp edge that holds shape. It also looks great year-round because the geometry reads like a starburst, not just winter decor. Make it in black and white for a graphic look, or in pastel tones for softer photos.
Editor's noteCut with a sharp craft knife or crisp scissors for clean edges on thick paper.
Start with square paper and fold it into a smaller triangle packet, then fold again to create a compact wedge. Mark and cut simple shapes along the folded edge, keeping cuts thick enough to survive unfolding. Unfold carefully and press creases flat so arms spread evenly. If the snowflake collapses, re-fold the center crease slightly tighter and repeat the pressing step.
Skip thisDon’t make tiny slits — they tear when kids open the snowflake.
11. Paper Envelope Phone Stand
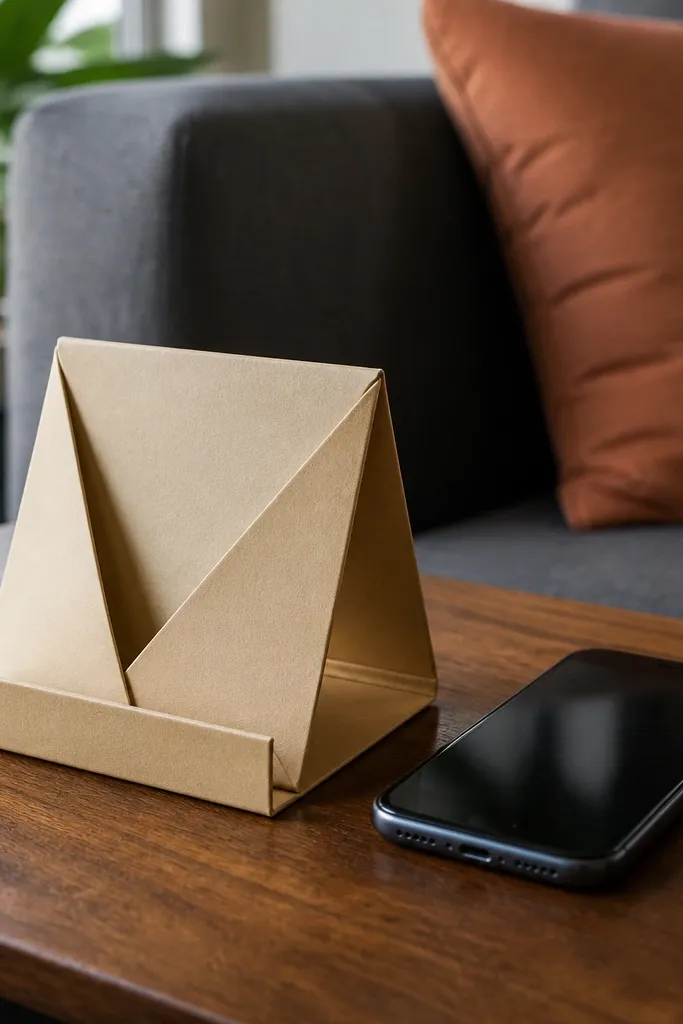
This one solves a real kid problem — the phone or tablet always ends up face-down or kicked off the table. The origami build creates a stable stand with a modern, minimal look. It’s photogenic because it’s clean and flat when closed, then becomes a structured triangle when opened. Use sturdy paper so the stand holds its angle without sagging.
Start with a rectangle sheet and fold it in half lengthwise. Create the base by folding the bottom third up, then fold it again to form a double-thick lip. Fold the top down to create a viewing angle, then tuck side flaps inward to lock the triangle. Test the angle with the device, then reinforce the fold lines with extra pressing.
Use thicker cardstock for the stand and add a strip of tape inside the base fold.
Don’t rely on one thin crease — double-thickness folds keep it stable.
12. Paper Cupcake Wrapper Bow
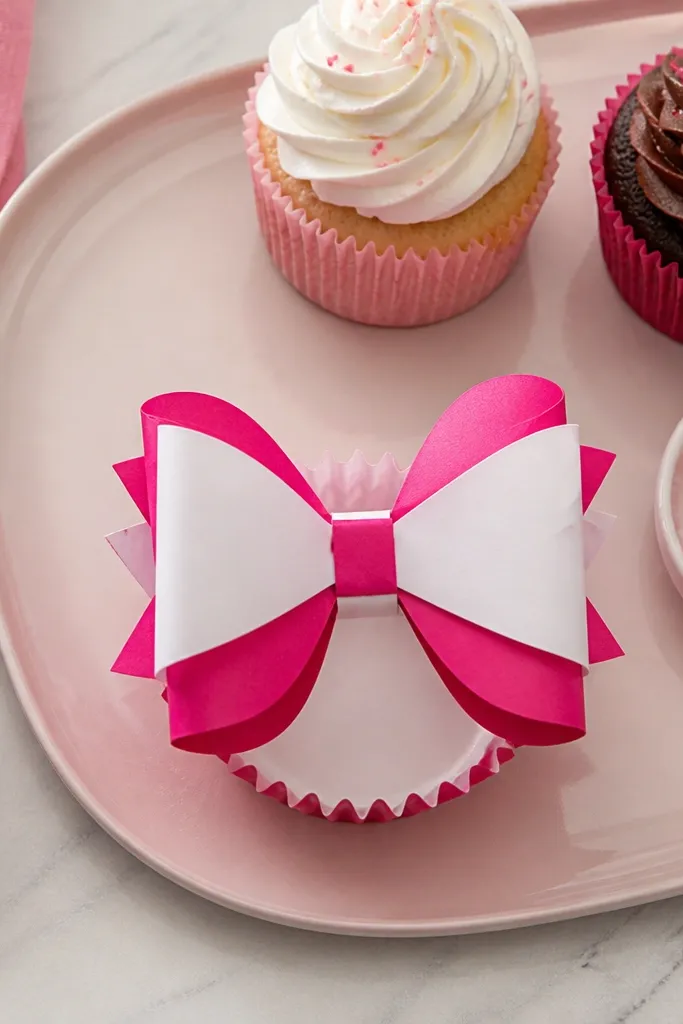
A bow shape reads instantly cute in photos, and folded loops look more modern than flat ribbon. This project is great for kids' parties because it turns cupcake liners into a structured decoration without glue mess. Pick two colors and make the loops oversized so they show up in pictures from across the table. It also works on gift bags when you skip the cupcake part.
Editor's noteAccordion-fold on a ruler for even pleats — uneven pleats make the bow look lopsided.
Cut two rectangles from coordinating paper and fold each into a long pleated strip by accordion-folding. Pinch the pleats at the center to form a loop shape, then fold a small strip around the pinch to secure it. Make a second loop piece slightly larger for layered volume. Attach loops together by tucking the secured centers and pressing the back flat.
Skip thisDon’t use too-wide paper strips — the bow becomes bulky and won’t sit flat.
13. Square Origami House with Tiny Door
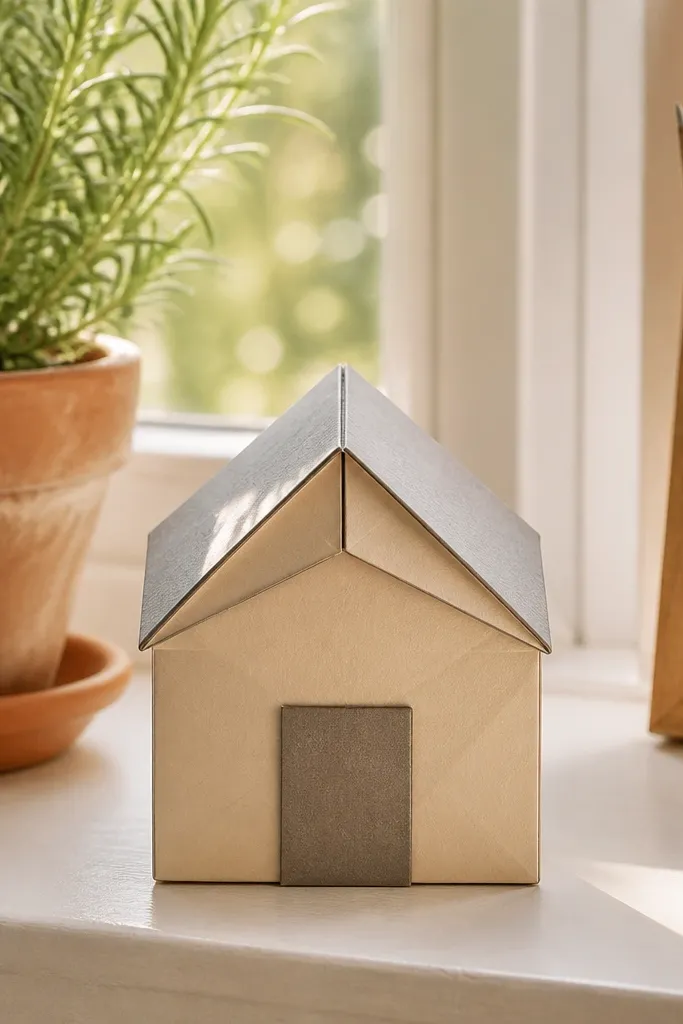
A house model is modern when it’s clean and architectural. This one has a crisp roof line and a tiny door panel that kids can decorate, so the craft looks like a miniature building. It’s photogenic because it has strong straight edges and a centered front. Use light gray or warm beige paper for a modern “mini architecture” look.
Start with a square and fold in half to create a center line, then unfold. Fold left and right edges toward the center, then fold the top down to form a roof peak. Create the front door by folding a small rectangle flap from the lower section and creasing it sharply. Stand the house up by folding the bottom corners inward so the base becomes a flat platform.
Use a contrasting door color — the fold makes it look like a real door detail.
Don’t leave the roof tip too floppy — press the roof crease with a bone folder.
14. Paper Star Bookmark with Layered Fringe
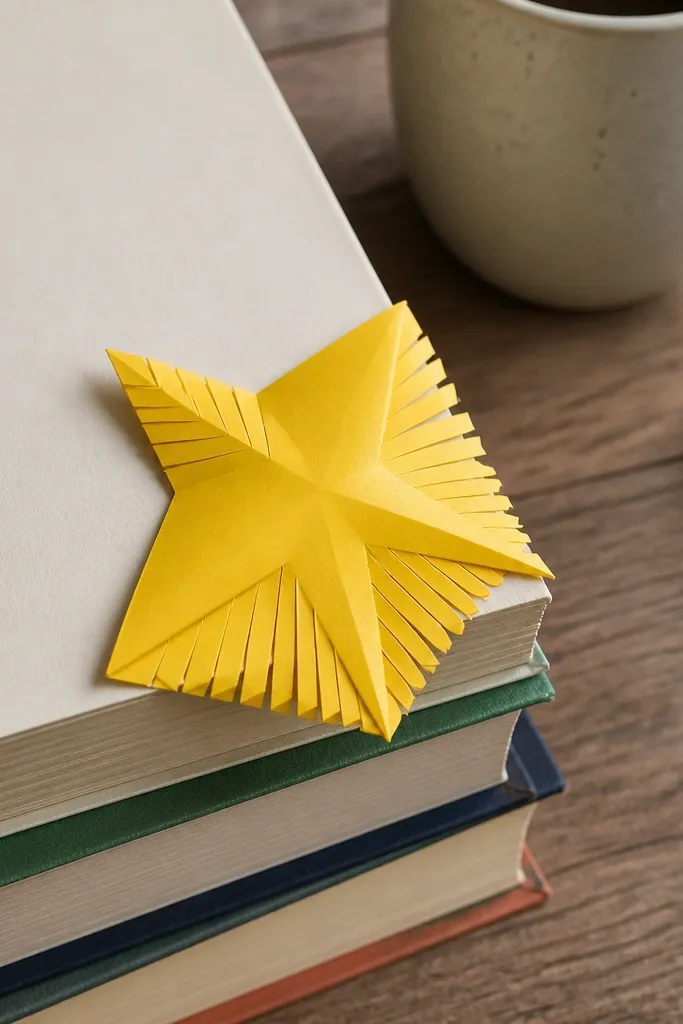
This bookmark looks like a tiny sculpture. The folded star points create a layered fringe effect that catches light and makes the bookmark look more expensive than it is. It’s also easy for kids because the star shape guides alignment. Use bright solid paper so the points read clearly. It’s a great gift craft because it feels special without requiring advanced folding.
Cut a square and fold it into a star base by folding corners to the center in a consistent pattern. Shape each point by folding the outer triangle back slightly to create layers. Trim the bottom into a straight edge so it fits easily in a book without snagging. Finish by adding a thin tab on the back that slides into the first page crease.
Trace the final star outline lightly before cutting so symmetry stays tight.
Don’t cut the star too thin — thin points bend and look messy.
15. Origami Money-Style Envelope for Small Gifts
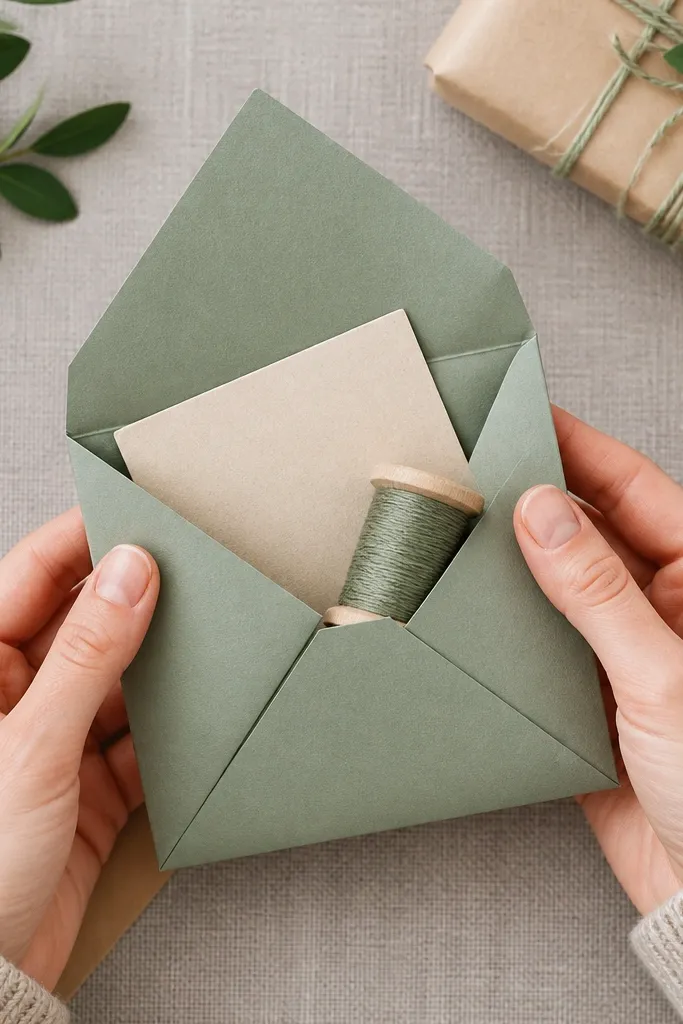
This envelope looks modern because it has the crisp, cash-envelope silhouette with a clean front panel. It’s perfect for small rewards, gift cards, or tiny art supplies. The folds create a structured shape that holds its form better than many simple envelopes. Use matte paper so the edges look sharp instead of shiny and smeary in photos.
Cut paper into a rectangle and fold it in half lengthwise. Fold the ends inward to create a centered panel, then crease sharply. Create the front flap by folding the top down and tucking the sides under the base folds. Press all edges flat and check that the insert slides in smoothly before decorating.
Add a tiny strip of double-sided tape under the flap to keep it closed without a visible glue line.
Don’t make the folds too tight at the corners — it can prevent the insert from sliding.
16. Paper Dragon Scale Fan
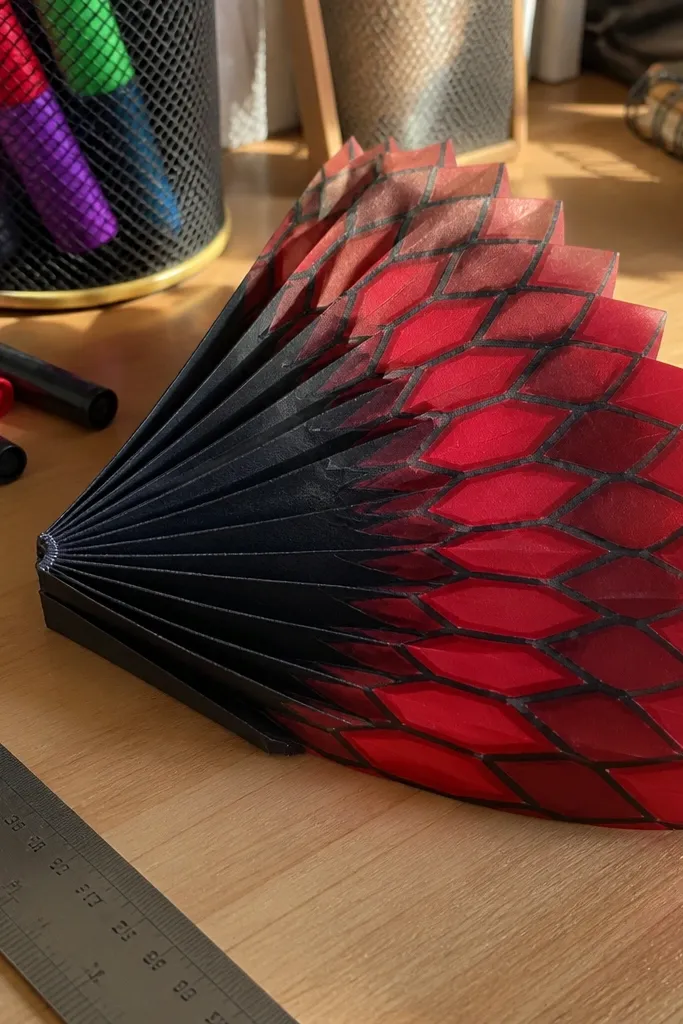
A scale fan looks like modern armor and it photographs like a pattern. The repeated diamond segments create a graphic rhythm, and kids can make it in bright colors for a playful look. It also works as a sensory craft because the folding is repetitive and satisfying. Use two-tone paper so each “scale” looks outlined.
Editor's noteUse a ruler for fold spacing — consistent diamonds look like design, not craft chaos.
Cut a strip of paper and accordion-fold it into small sections, like 1 cm wide folds. Turn the strip and fold each section edge to edge to form diamond shapes along the fan. Create the fan handle by leaving one end unshaped and folding it into a small tab. Secure the fan by folding the last segment back and pressing the edge flat.
Skip thisDon’t let the accordion folds twist — twist ruins the scale pattern.
17. Minimal Paper Rocket with Star Window
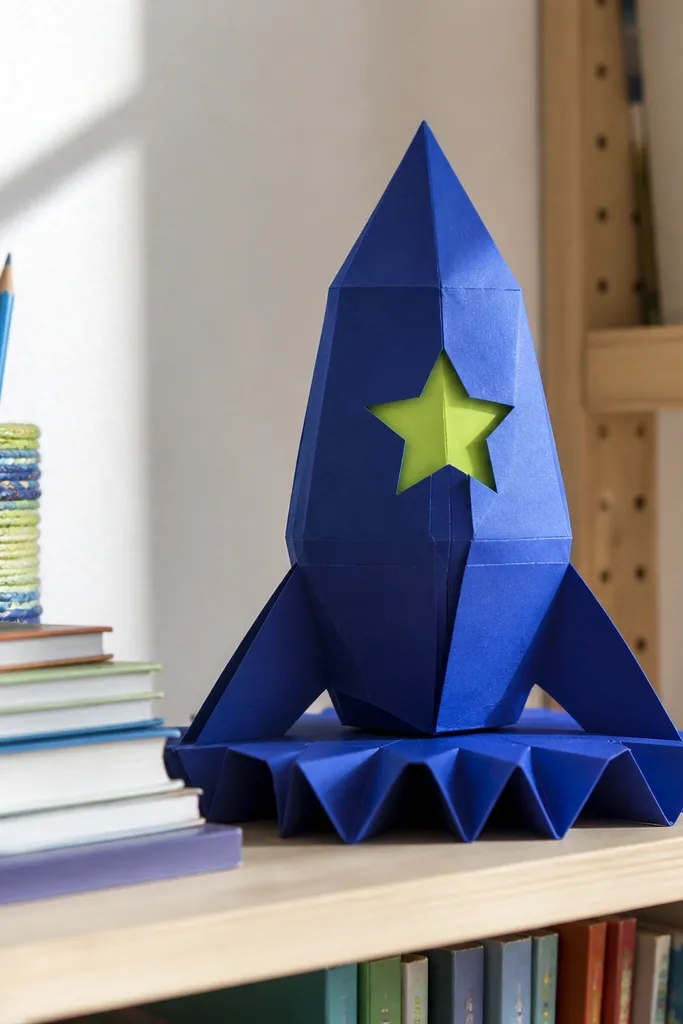
This rocket looks modern because it has a clean body and a single highlight detail — a star window cut from folded paper. Kids get a fun character, but the structure keeps it looking crisp and graphic. It also stands up if you fold the base into a stable platform. Make it in bold colors like cobalt blue or lime green for strong contrast against a neutral background.
Editor's noteUse a light cardstock for the body so the window stays flat and the rocket doesn’t collapse.
Use a rectangle sheet and fold it into a tube-like body by rolling one edge over the other and creasing hard. Create fins by folding two small triangles on the sides and pressing them flat. Add the star window by cutting a star shape from a separate small paper piece and gluing or tucking it under a folded flap. Fold the bottom into a flat stand by bending a small section outward and creasing firmly.
Skip thisDon’t overcut the star — thin points tear when kids handle it.
18. Origami Water Drop Ornament with Twist Tail
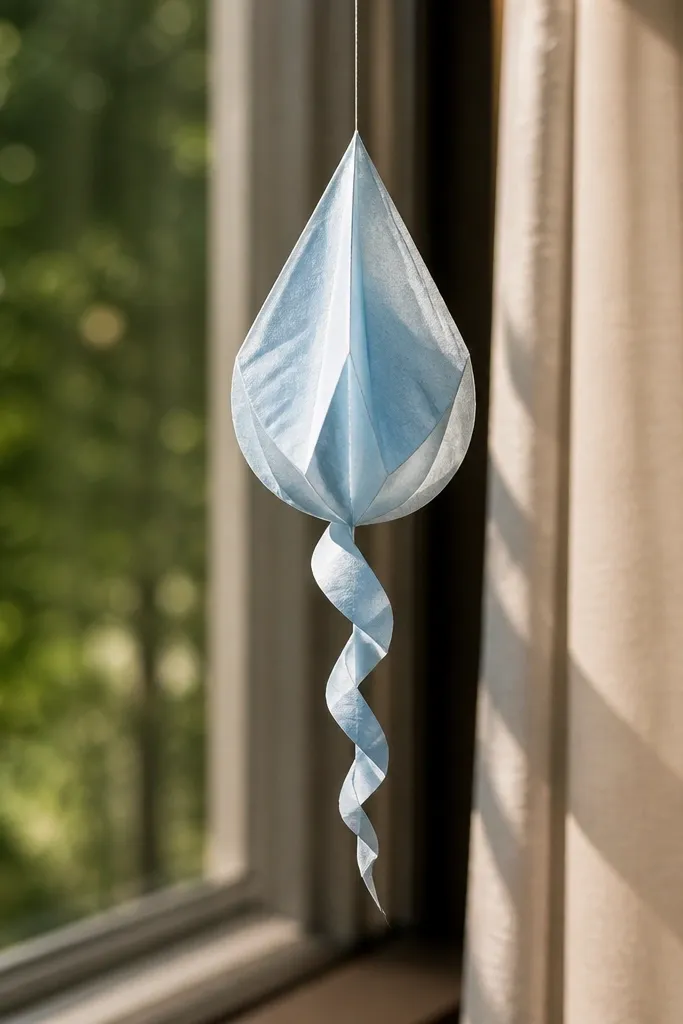
Water-drop ornaments look sleek and modern because they have a smooth teardrop silhouette. This one also has a twist tail that makes it feel more dynamic than a flat shape. Hang it from a string and it catches light as it sways, which makes photos look lively without being complicated. Use translucent vellum-look paper for a soft glow effect.
Editor's noteIf the tail won’t hold, add one tiny piece of tape inside the twist — hidden, clean, durable.
Start with a square and fold diagonals to establish a center line. Fold the corners to form a tight teardrop base, then pinch the top to create a narrow neck. Twist the tail by folding the remaining flap into a spiral-like ridge — just two or three tight folds are enough for shape. Reinforce the twist by pressing with a bone folder and then secure with a small tuck at the bottom.
Skip thisDon’t use super-thin paper — the teardrop collapses and the twist flattens.
19. Paper Planet with Folded Ring Band
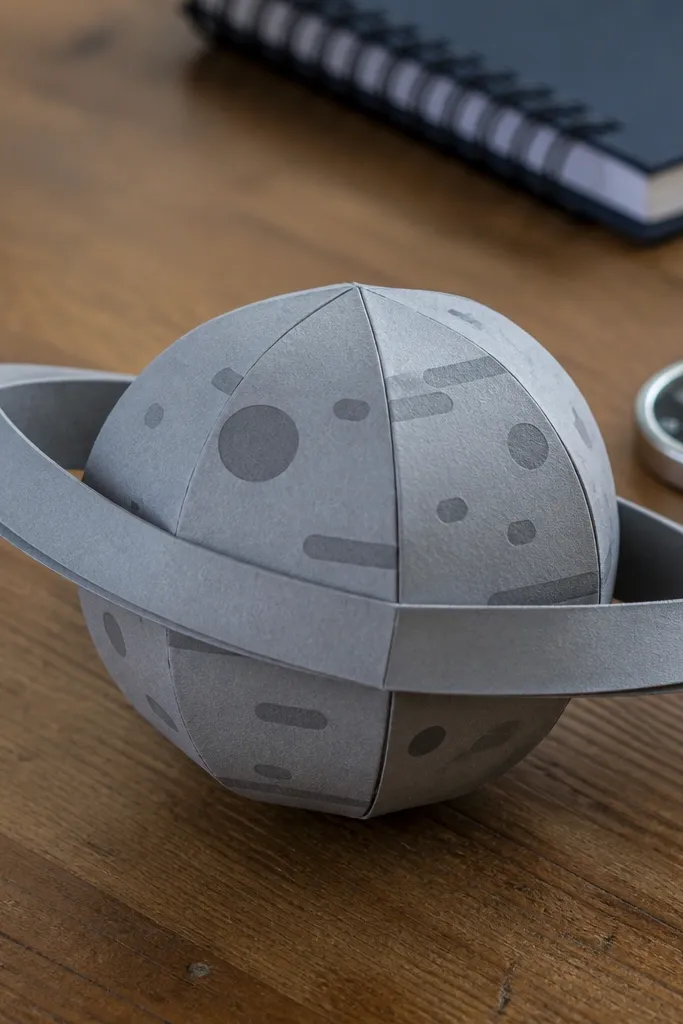
Planets are modern because the shape is simple and the detail is graphic. This model has a round-looking body and a ring band that’s folded so it looks like a real orbit. It’s great for kids because it’s fun to decorate — add craters with dots or stripes. The ring makes it photogenic from the side, not just front-on.
Editor's noteUse thick paper for the ring band so it stays circular and doesn’t sag.
Use a circle template or start with a square and fold it into a circle-ish base by shaping corners inward. Create the ring by folding a strip into a loop and using two small tabs to lock it. Attach the ring around the planet body by sliding the tabs into the folded edges. Press everything flat and add texture with marker dots or short lines.
Skip thisDon’t glue the ring all the way around — leaving a small gap keeps the ring looking dimensional.
20. Crisp Origami Tulip with Flattened Petals
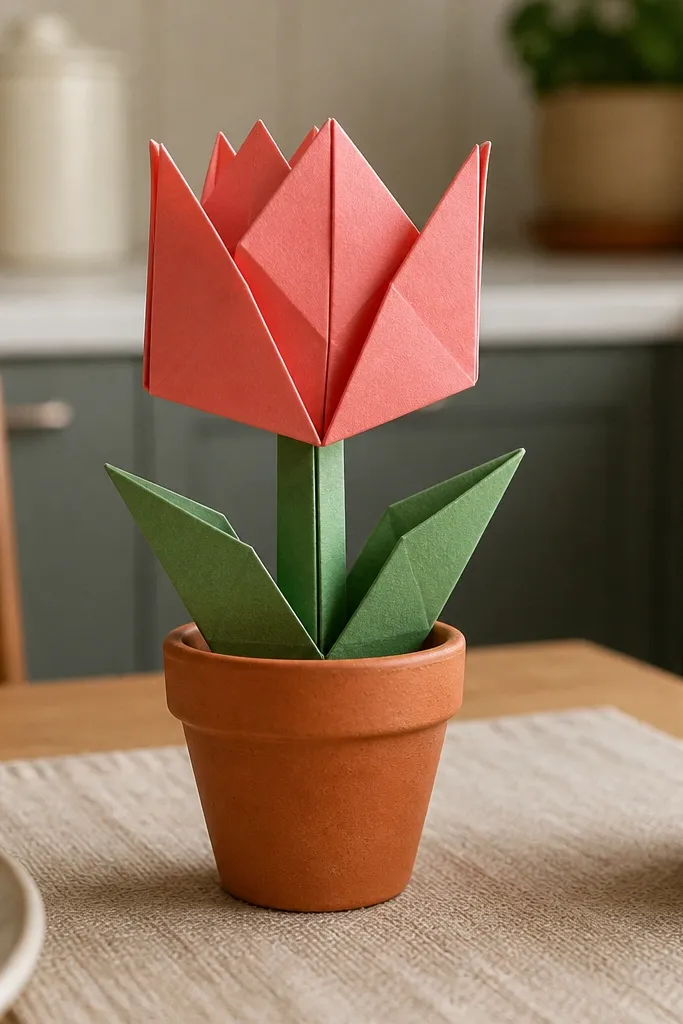
Tulips look modern when the petals are flat and graphic, not super rounded. This version uses flattened folds so the petal edges create clean lines. It’s photogenic because the top looks like a geometric crown, and the stem base can be made in a matching green. It also makes a nice desk craft that doesn’t droop.
Editor's noteUse slightly matte green paper for the stem so it doesn’t reflect harsh light in photos.
Start with a square and fold it into a base with a clear center ridge. Fold the top layers down to form two petal halves, then fold the sides inward to sharpen the silhouette. Create a small stem by rolling a narrow strip tightly and tucking it into the bottom fold pocket. Press the petal edges with a bone folder so they stay crisp.
Skip thisDon’t over-round the folds — rounded petals lose the modern geometric look.
21. Origami Cup Coaster with Patterned Rim

Coasters are modern because they’re functional and clean-looking on a table. This one has a patterned rim created by fold layers, so it looks like a geometric design even when it’s empty. It’s also a great budget craft because one sheet makes a coaster and the build is quick. Use it as a desk accessory or for parties.
Start with a square sheet and fold it into a grid by folding and unfolding in half both directions. Bring corners toward the center to form a layered square top. Fold the top layers outward to create a rim ring, then press flat. Trim the edges so the coaster sits evenly and doesn’t rock.
Seal the rim with a thin layer of clear matte tape on the underside for extra durability.
Don’t leave sharp corners — they scratch surfaces and look sloppy when handled.
22. Paper Bow Tie Badge for Kids
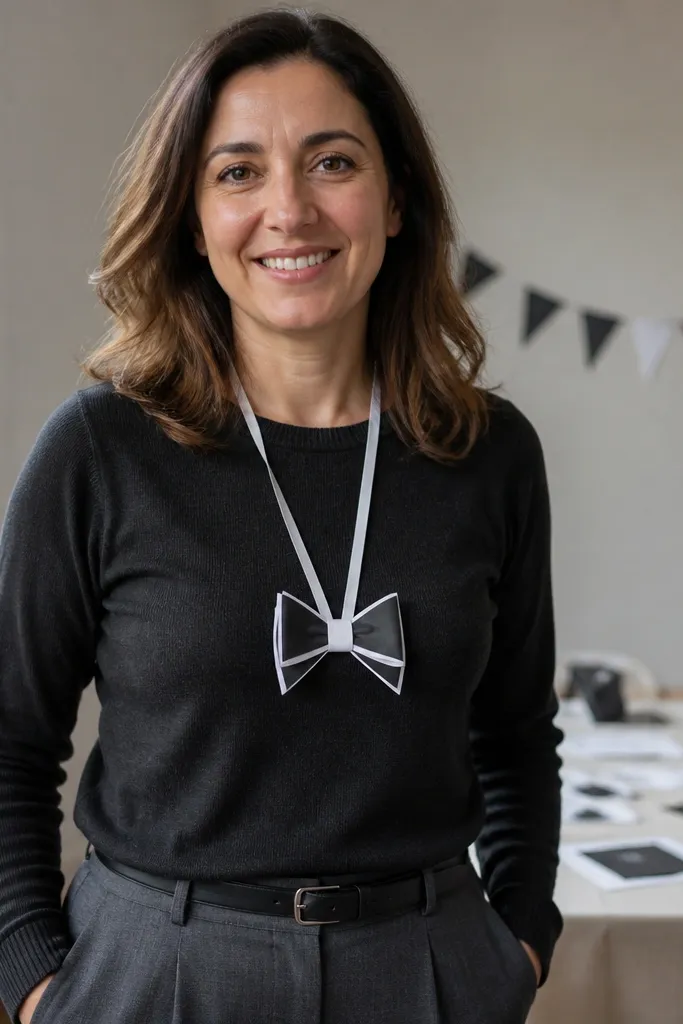
A bow tie badge is a modern, cute craft because it reads like a costume accessory. The folded knot and two pointed ends create a strong shape that stands out in photos. Kids can wear it on a lanyard or pin it to a shirt with supervision. Make it in black and white for classic modern, or use bright colors for party energy.
Editor's noteMake the center knot slightly thicker than the ends — it keeps the bow looking balanced.
Cut two identical rectangles and fold each into a narrow strip by accordion-folding or repeated half folds. Shape each strip into a bow side by folding the ends inward to meet at the center crease. Create the center knot by wrapping a small strip around the middle and tucking the ends. Attach to a badge backing with tape on the underside or string through two holes at the back.
Skip thisDon’t use too-slick paper — it won’t hold the bow folds when worn.
23. Origami Desk Organizer Tray from a Single Sheet
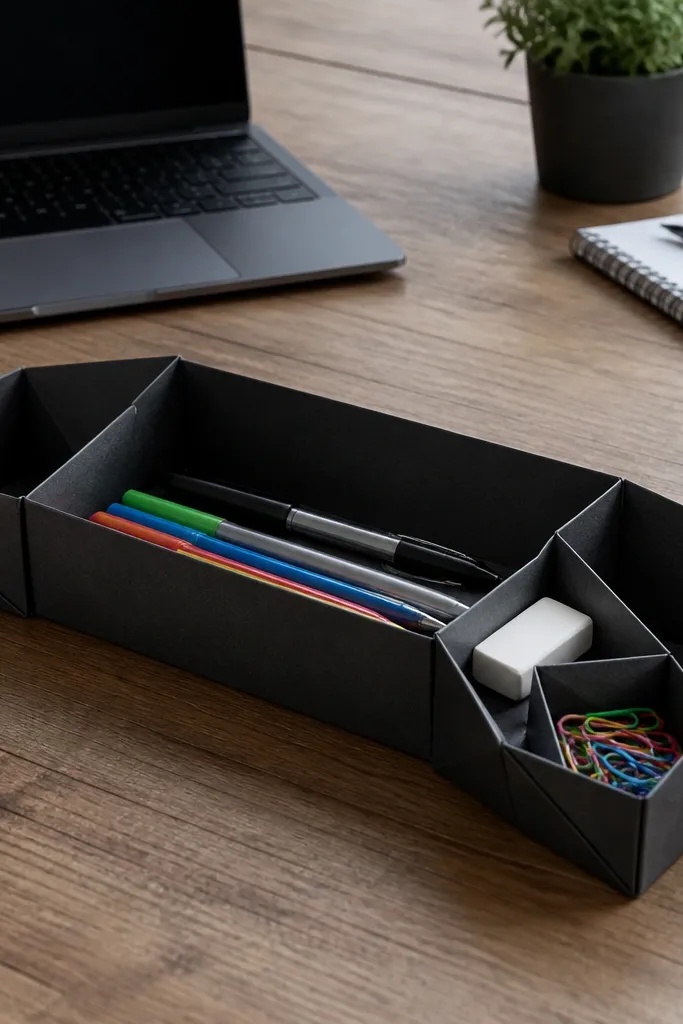
This tray looks modern because it has straight walls and a clean, boxy shape. It’s great for kids because it holds markers, erasers, or tiny toys without turning into a pile. The compartments come from folded edges that keep items from sliding off. It photographs well on a desk because the geometry looks intentional, not handmade-random.
Editor's noteReinforce the bottom fold with masking tape on the underside so it stays flat.
Use a sturdy rectangular sheet, like 20 cm by 30 cm, and fold it in half lengthwise. Create the base by folding the bottom third up, then fold the top down to form walls. Add compartments by folding two inner ridges from the sides toward the center, then pressing them hard. Finish by tucking the top edge into the base pocket so the tray holds its shape.
Skip thisDon’t pick flimsy paper — the walls bow and the tray loses the clean look.
24. Paper Jellyfish with Accordion Tentacles
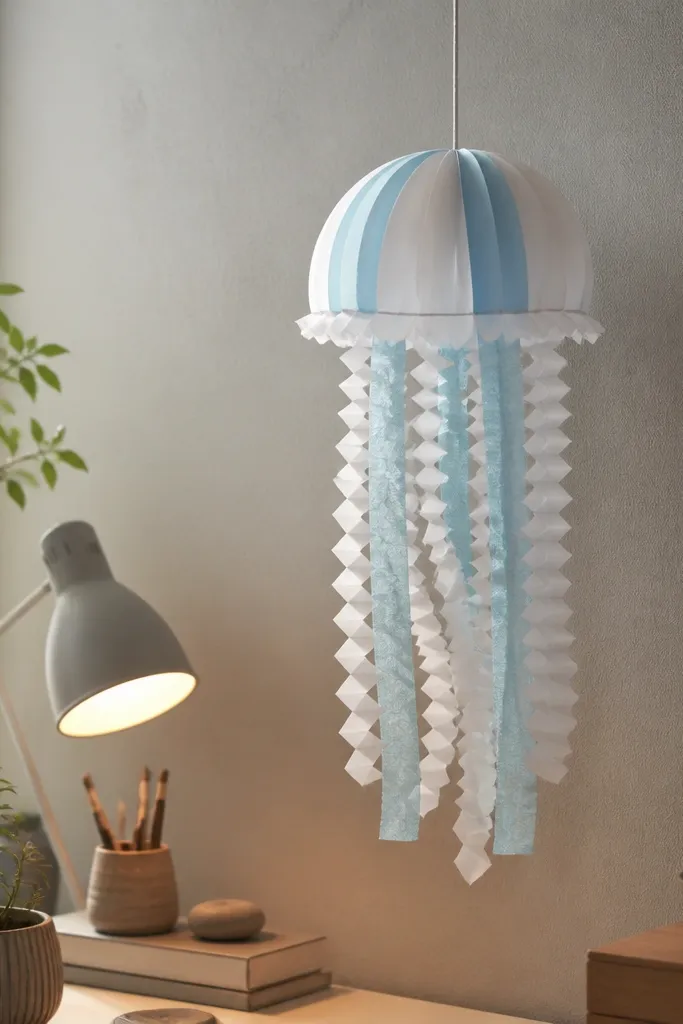
Jellyfish look modern in a craft because the silhouette is soft, but the tentacles are graphic. This version uses accordion folds so each tentacle has a neat segment look, which makes it photogenic. Hang it from a string or tape it to a wall — it looks great against a plain background. The build is simple enough for kids, and the final shape is visually interesting even from a distance.
Start with an oval-like body base by folding a rectangle into a rounded shape using creases along the sides. Make tentacles by accordion-folding a long strip, then cutting one end into thin “fingers” while keeping the fold intact. Attach tentacles to the bottom of the body by folding the tentacle strip’s top edge into a tab. Shape the body by gently bending the sides inward and pressing the folds.
Use two-tone paper so the tentacle segments show contrast along the folds.
Don’t cut all the way through tentacle bases — the craft will detach.
25. Origami Bunny Ear Bookmark with Pocket
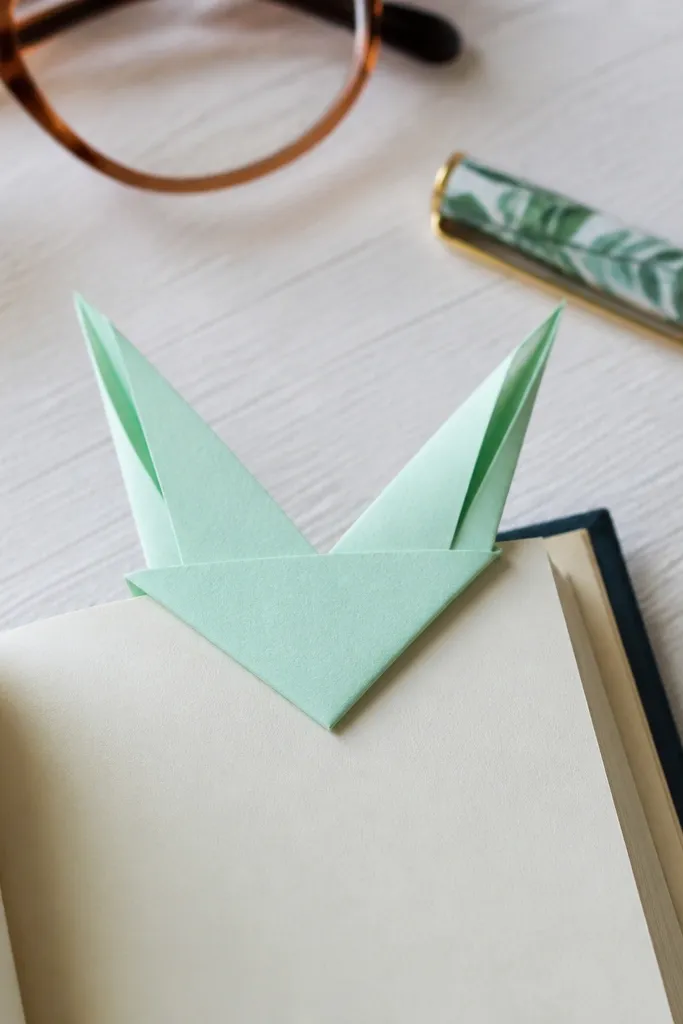
This bookmark is modern cute because the bunny ears are sharp origami folds, not fuzzy decorations. The pocket makes it functional, and the ear shape frames the top so it looks good in photos. It’s also quick: kids can make multiple and trade them. Use solid color paper for a clean graphic look, then add a few marker dots for eyes.
Editor's noteUse a bone folder on the pocket crease — it keeps the pocket open and easy to slide onto pages.
Cut a rectangle bookmark base and fold the top into two ear triangles by pinching corners upward and pressing the crease. Create the page pocket by folding the bottom edge up and tucking a small triangle flap behind it. Reinforce the pocket fold with a firm press so it grips the page. Trim edges so the ears and sides are symmetrical.
Skip thisDon’t make the pocket too shallow — it won’t hold thick pages.
26. Paper Heart Star Confetti Clip
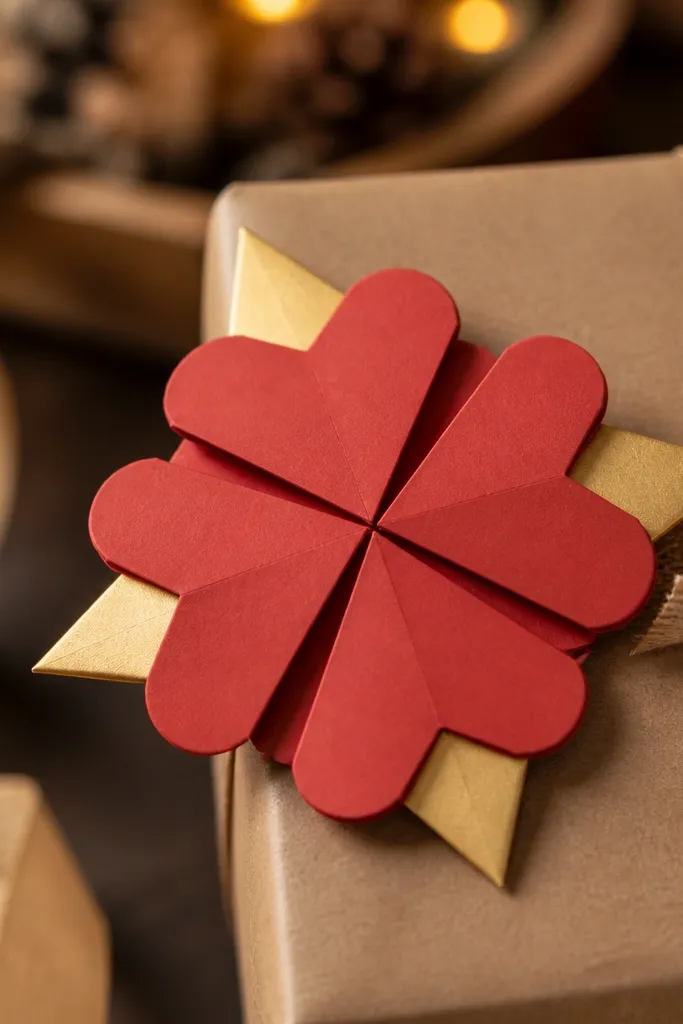
Confetti shapes look modern when they’re crisp and geometric. This clip-style craft uses folded hearts and stars that sit flat and snap into place, so kids can attach them to bags or gift wrap. The mix of heart and star gives a playful modern vibe without making it childish. It’s also great for photos because the shapes are simple and high-contrast.
Fold small star and heart shapes from separate squares, then crease them sharply so they hold their outline. Punch a small hole at one point on each shape using a hole punch. Thread a thin string or twist tie through both holes, then twist tight so the shapes sit side-by-side. Finish by trimming the string ends and pressing the folds once more.
Use a metal hole punch — it makes cleaner holes through folded paper than scissors.
Don’t leave holes ragged — torn edges look messy in close-up photos.
27. Origami Panda Face with Angled Eyebrows
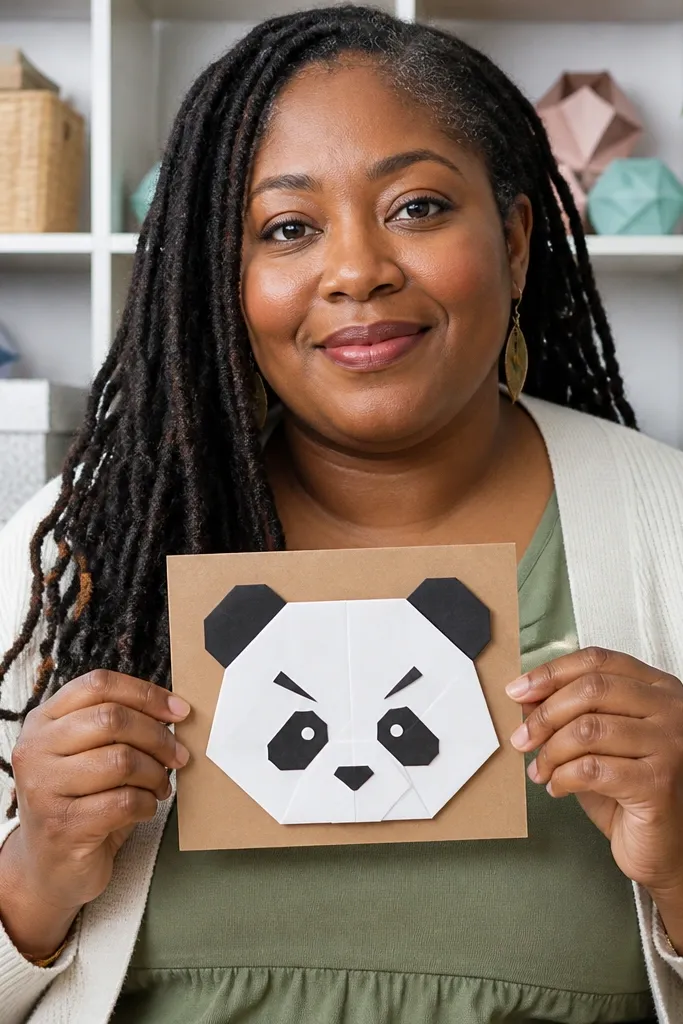
Panda faces look modern because the contrast is built in: black eye patches and clean white space. This origami uses folded ear shapes and angled “brow” creases so the face reads clearly even at small size. It’s photogenic from the front, and you can mount it on a card as a desk decoration. Choose black-and-white paper for the cleanest effect.
Start with a square in black-and-white two-tone. Fold to create a base with a center crease, then fold the top corners into pointed ears. Shape the eye patches by folding small side flaps inward and pressing along the crease lines. Add the muzzle by folding a small section downward from the center and flattening it. Draw or add details using a marker for clean outlines.
Use a fine-tip black marker for eyes so the face stays graphic, not smudgy.
Don’t use gray paper — it dulls the panda contrast.
28. Paper Cactus Pot with Folded Ridges
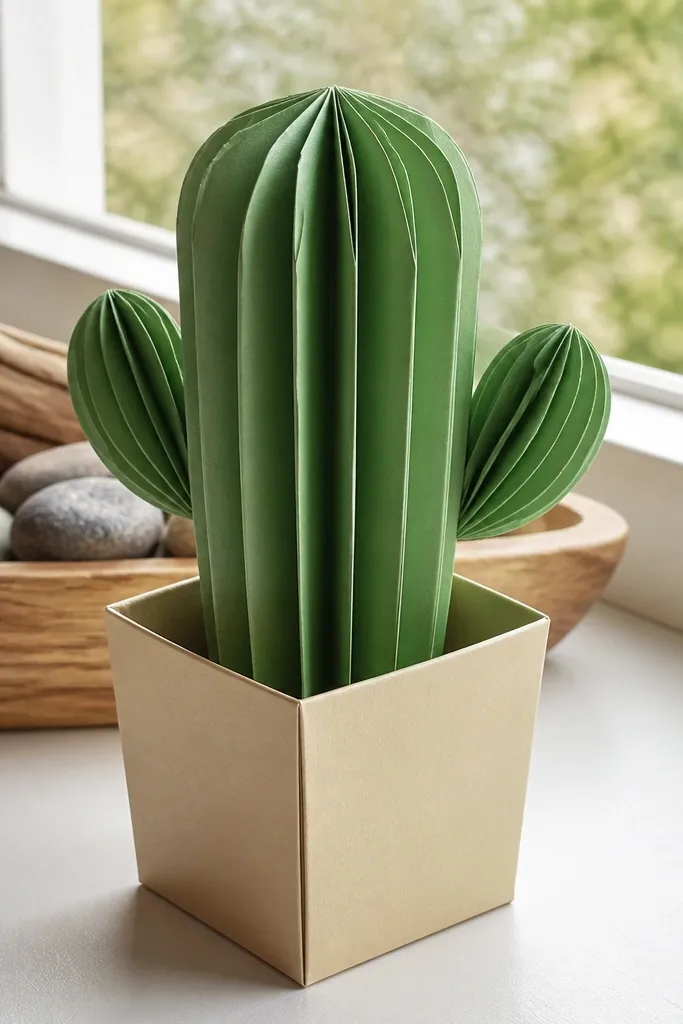
Cactus crafts look modern because they’re graphic and structured. This one has folded ridges on the cactus body, so it reads like a stylized plant even without fancy details. The pot adds a grounded base, and the whole model stands up on a desk. Use green paper with a slightly darker green for the ridges so the folds show clearly.
Editor's noteMake pleat spacing consistent (about 1 cm) so ridges look intentional.
Fold a rectangle into a ridged cactus body by making alternating pleats along the sides. Create the pot by folding a square into a shallow box shape with a flat rim. Attach the cactus to the pot by tucking the bottom edge into the pot opening. Press all edges flat so the ridges keep their shape and the pot sits evenly.
Skip thisDon’t skip flattening — ridges that spring back look uneven.
29. Origami Envelope Bookmark with Folded Seal Dot
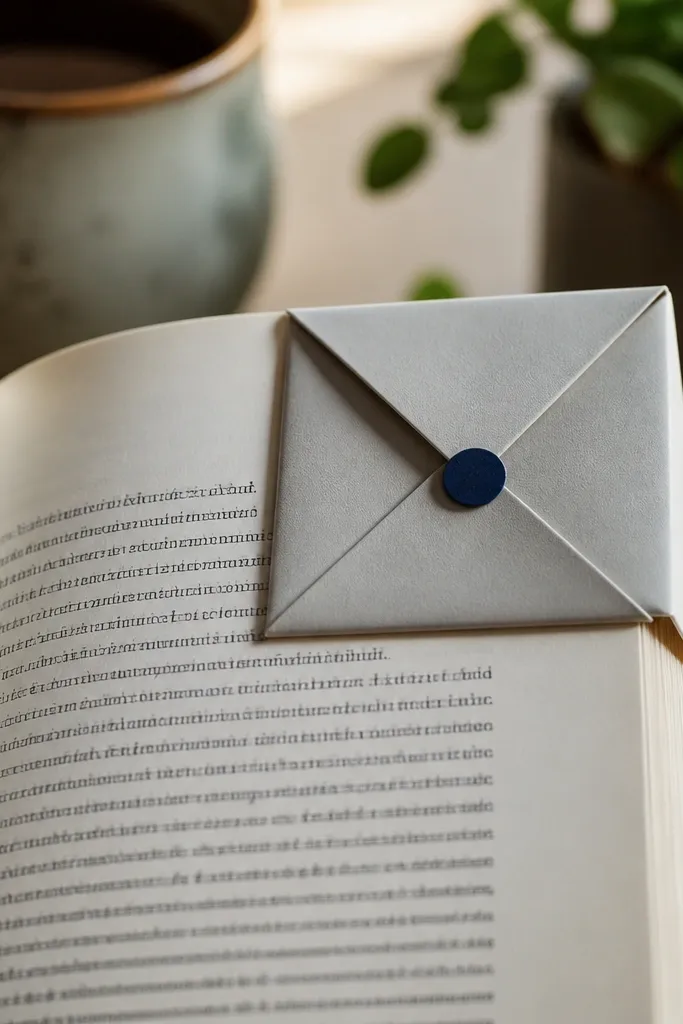
This bookmark looks modern because it mimics a tiny mail envelope with a seal detail. The folded seal dot makes it feel designed rather than plain paper. Kids like it because it’s fun to decorate, and it’s functional because the pocket grips pages. It also photographs well because the envelope shape has a clear top point and neat edges.
Editor's noteUse contrasting paper for the flap underside so the seal pops in photos.
Cut a rectangle and fold the top down to create a flap look. Build the pocket by folding one side inward, then folding the bottom edge up so it tucks under the flap. Add the seal by folding a small square into a tight triangle and pressing it onto the flap front. Press the final lines with a bone folder for crisp edges.
Skip thisDon’t skip the final press — loose flaps make the bookmark look unfinished.
30. Paper Snowman with Paper-Clip Scarf
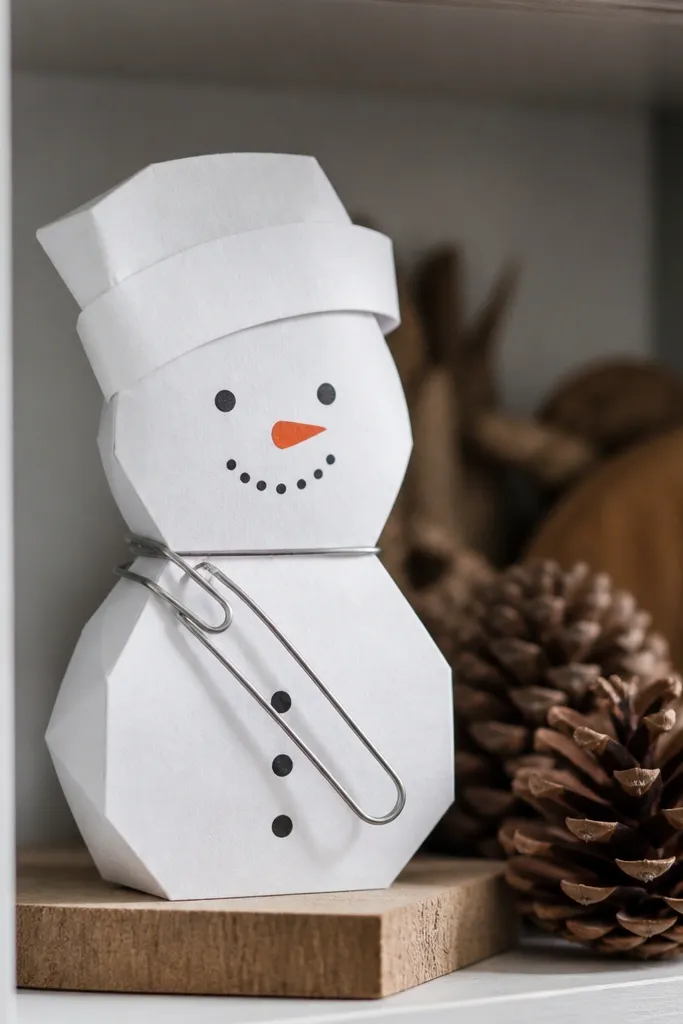
Snowmen can look modern when the shapes are geometric and the details are graphic. This one has a clean body silhouette and a scarf detail that uses a paper clip for structure, so it hangs and looks intentional. It’s photogenic because the scarf gives a strong diagonal line, and the snowman face can be simple and bold. Make it in monochrome for a sleek winter look or use bright accents for fun.
Editor's noteUse thicker paper for the body so it doesn’t crease into weird wrinkles when you attach the scarf.
Fold two paper circles or oval-like shapes using folded rings, then flatten them to form a stacked body. Create the head-to-body connection by tucking a small tab into the lower piece. Add a scarf by bending a paper clip into a loop and sliding it around the neck area. Fold small arms from thin paper strips and insert them into side slits.
Skip thisDon’t use tiny face details — they smear and lose contrast.



