
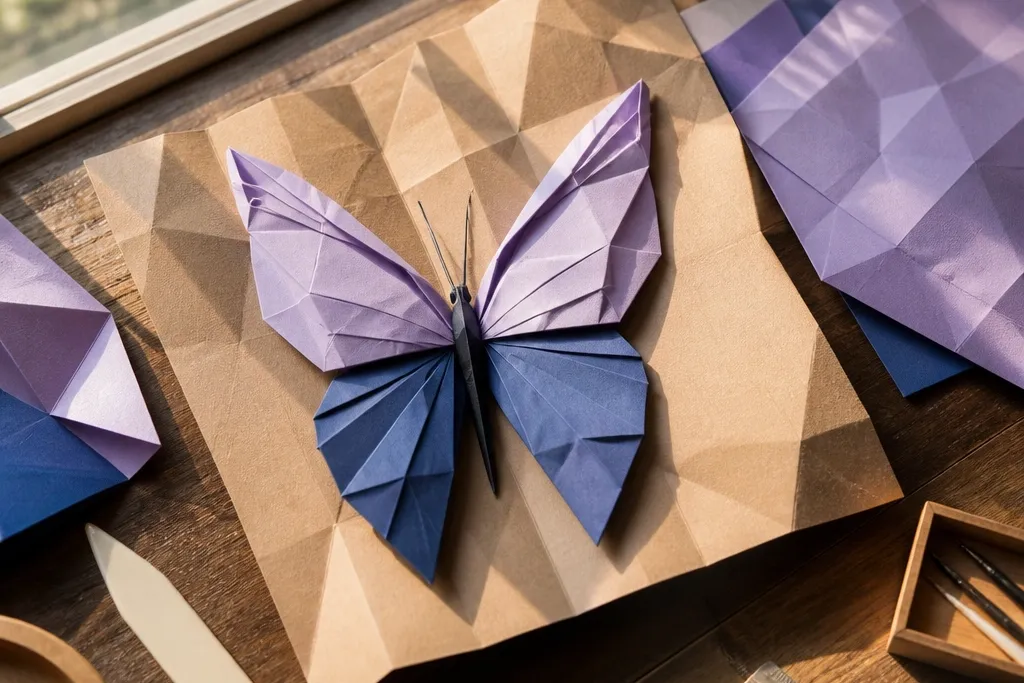
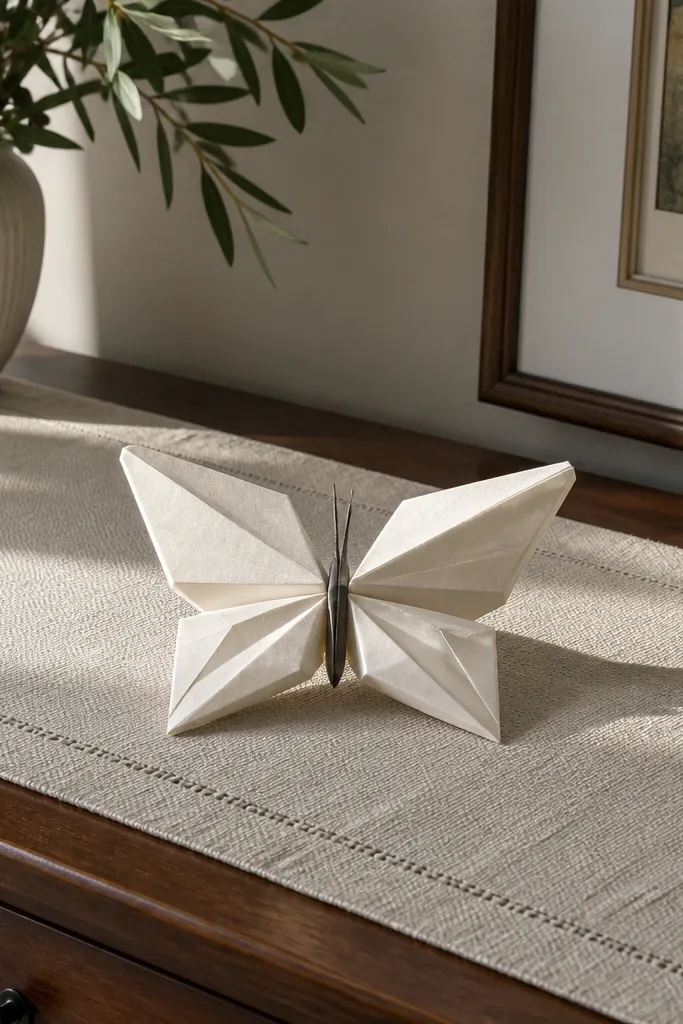
1. Stained-Glass Double Wing Butterfly
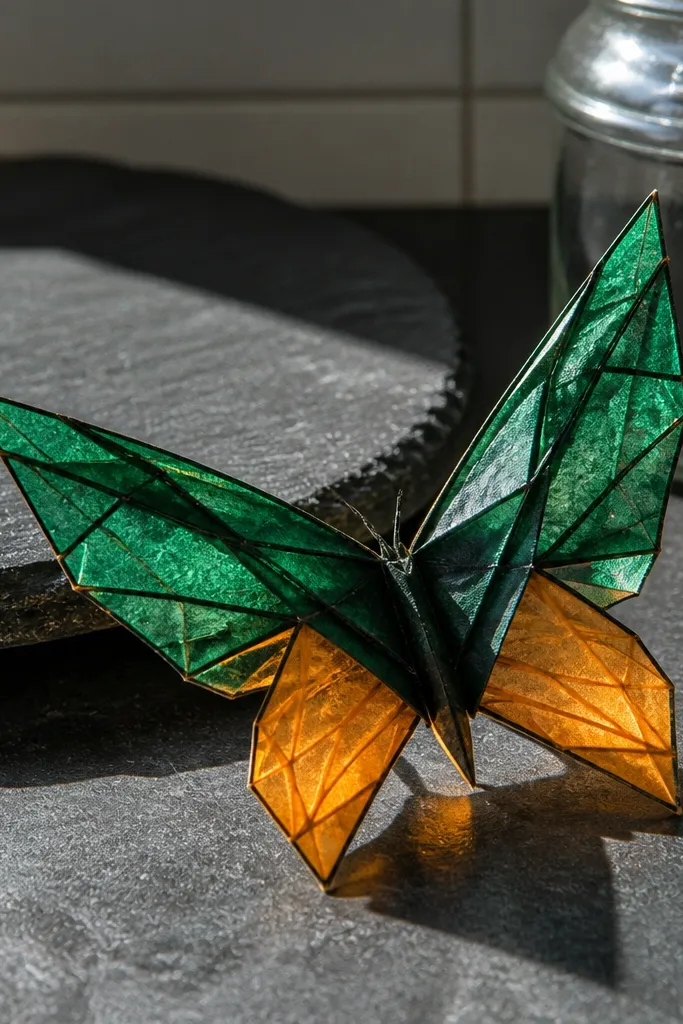
This one looks high-end because the wings read like separate stained-glass panels instead of one flat sheet. Use paper with a strong color difference on each side so the wing edges catch light when they lift. The body is slim and dark, which makes the wings look wider and more dramatic. It stays easy because the structure is basically a standard butterfly outline with wing layering, not lots of tiny detail folds. It’s a great pick for room decor and classroom displays since it lays flat and still looks dimensional.
Start with a 20 cm square paper in two tones, colored side A facing up. Fold to form a classic butterfly base with a central crease, then do the first reverse folds to create slightly raised wing edges. Next, fold each wing corner inward and then back outward so you get a layered “panel” look on both sides. Finish by pinching the center lightly to shape the body, then run a bone folder along every crease you want to stay sharp.
Press creases with a bone folder for 10 seconds per fold — it keeps the wing layers from springing open.
Don’t skip the reverse fold step; flat wings make the whole piece look cheap.
2. Pearl-Edge Minimal Butterfly (Clean Symmetry)
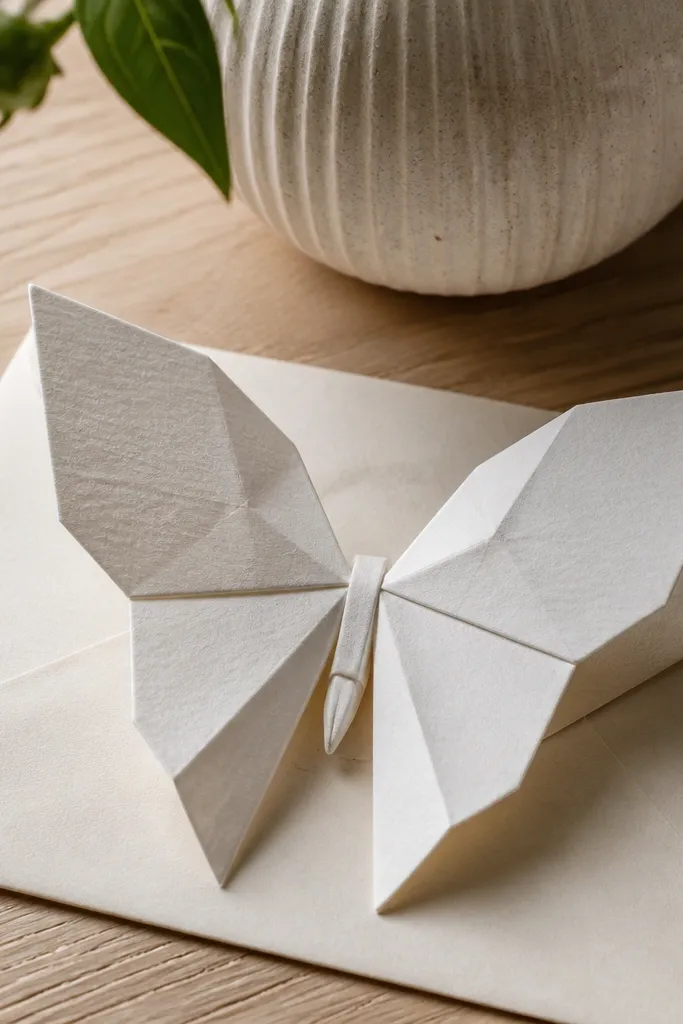
This is for people who want high-end without loud color. The look comes from super-clean edges and a tight center body that makes the wings appear perfectly balanced. Use matte white or light cream paper so the folds show texture and shadows. Because the design avoids busy layering, it’s forgiving for kids while still reading polished in a photo. It works best as a set of matching butterflies on a plain wall or on gift tags.
Use 15 cm square matte paper. Fold diagonally both ways to set creases, then fold the paper into a simple kite shape centered on the vertical crease. Create the butterfly wings by folding the left and right sections outward and then doing a small reverse fold near each wing tip for lift. Finish by compressing the center into a narrow body and smoothing the edges with your fingernail and a bone folder.
Use matte paper instead of glossy; glossy hides creases and makes the butterfly look flat.
Don’t over-flatten the wings after shaping — a little lift is what creates the “pearl edge” shadow.
3. Gradient Fade Butterfly with Raised Tips
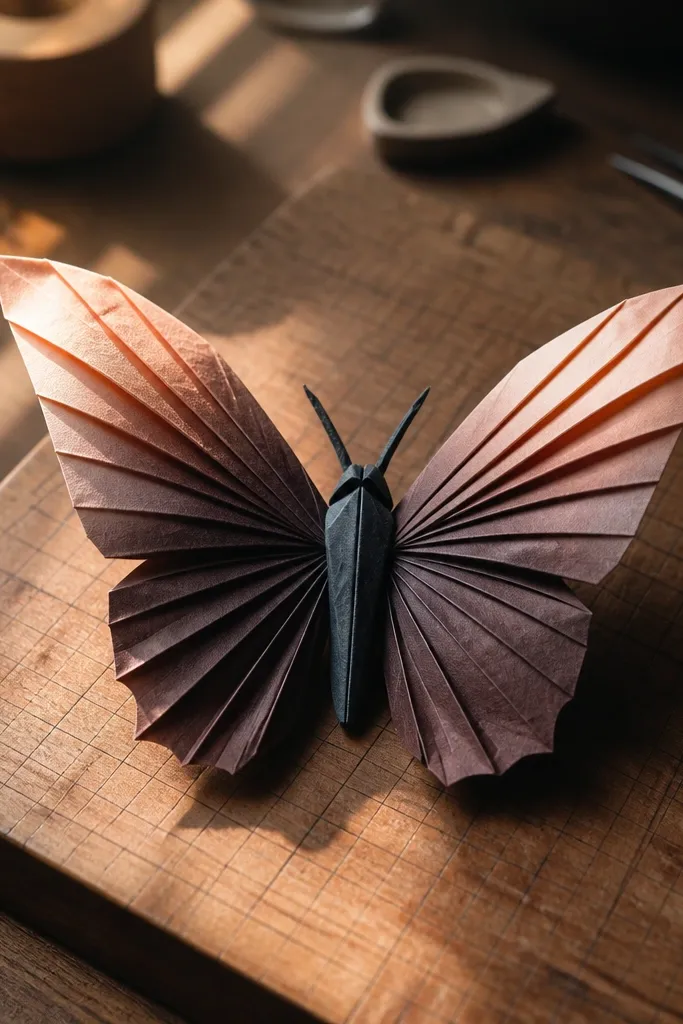
Gradient paper makes this butterfly look expensive fast because the wing folds create a natural light-to-dark sweep. Raised tips add a crisp silhouette, so the design reads clearly even at small sizes. The body stays darker, which gives you a strong focal point in photos. This stays easy because the wing lift comes from a couple of reverse folds, not intricate sculpting. It’s perfect for spring decor, cards, and phone-case charm size projects.
Start with 12 cm square gradient paper, darker side toward the center idea. Fold into a butterfly base and keep the central crease sharp. Use reverse folds on each wing tip so the tips curve slightly upward instead of lying flat. Shape the body by pinching the center and then pressing the wing edges outward a few millimeters to show the gradient transition.
Cut a tiny scrap test and fold it once — you’ll see which side should face inward for the strongest fade.
Don’t use a paper that’s too thin for the gradient; it will crease weakly and look washed out.
4. Black Lace Butterfly with Paper-Edge Contrast
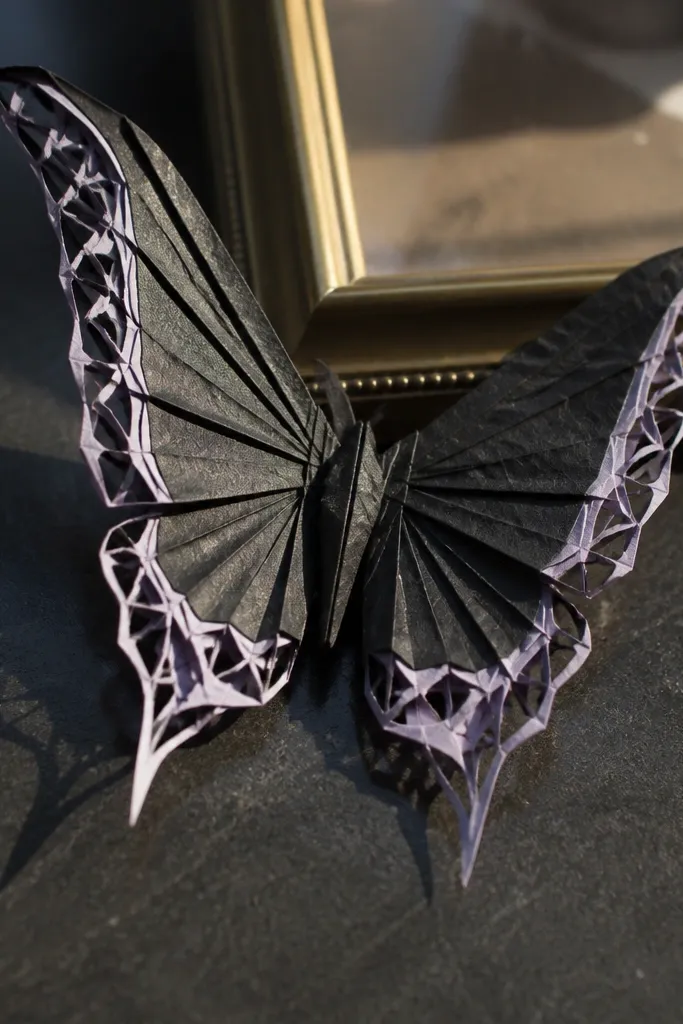
This one looks like lace even though it’s easy because the wing folds create a repeating edge pattern. The trick is using black paper with a lighter underside or thin border so the folded edges show contrast. The butterfly silhouette is sharp, and the wing layers cast small shadows that read as “lace.” It’s a strong pick for Halloween, goth-style decor, and monochrome craft rooms. You’ll get a high-end result without cutting delicate holes.
Use 15 cm square black paper with a lighter back or a contrasting border. Fold the base and then create wing panels by folding each wing section into a shallow accordion. Add reverse folds at the outer wing edges so the panels lift. Finish by tightening the center pinch and pressing the wing edges so the accordion pattern stays visible.
Editor's noteUse a ruler to press the accordion folds evenly so the “lace” rhythm looks intentional.
Skip thisDon’t rush the accordion pressure; uneven folds make the wing pattern look accidental.
5. 3D Pop-Up Butterfly on a Folded Card
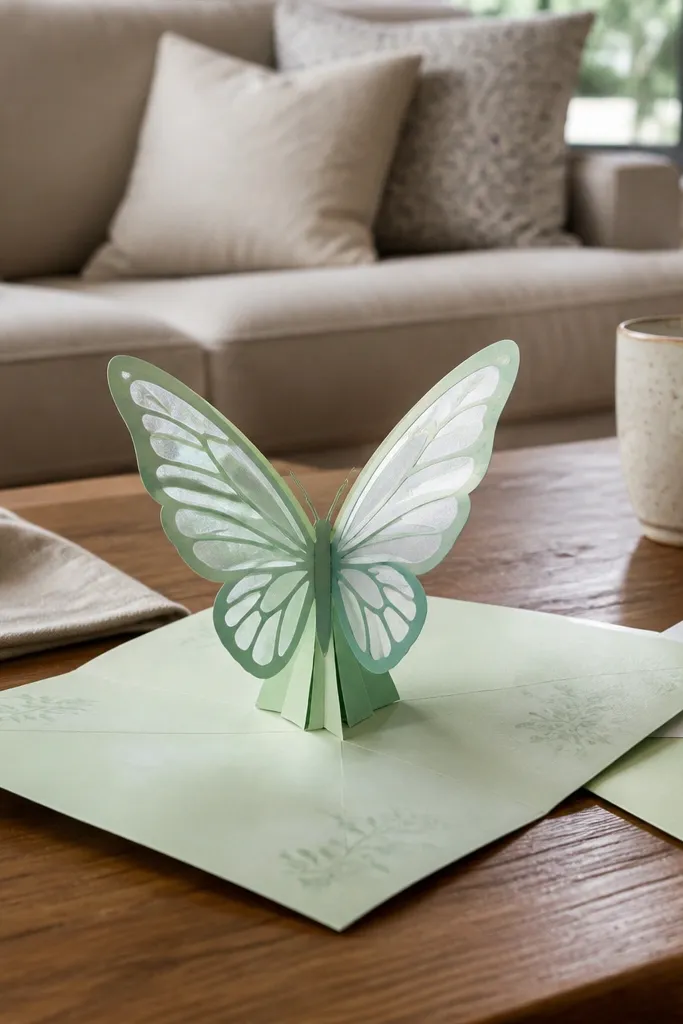
This is high-end because it has depth, not just shape. The butterfly sits above the card surface, and the wing edges catch light as the viewer moves. It’s still easy because the “3D” comes from the card fold and a few internal supports, not from complex sculpting. Use it for invitations and kid-friendly party cards where you want wow without fragile parts. The result photographs better than flat cutouts because the wings cast real shadows.
Fold a greeting card base, then mark a center point where the butterfly will attach. Make a simple butterfly base and keep the wings lifted using reverse folds. Attach the butterfly to the inside of the card using a small strip of double-sided tape on the body area only. Fold the card closed to set the shape, then reinforce the creases by pressing the card fold and the butterfly attachment point.
Editor's noteUse foam tape under the body strip for extra lift — it keeps the wings from flattening.
Skip thisDon’t tape the wings down; only attach the body so the wings stay dimensional.
6. Corner-Tuck Butterfly with Crisp Wing Architecture
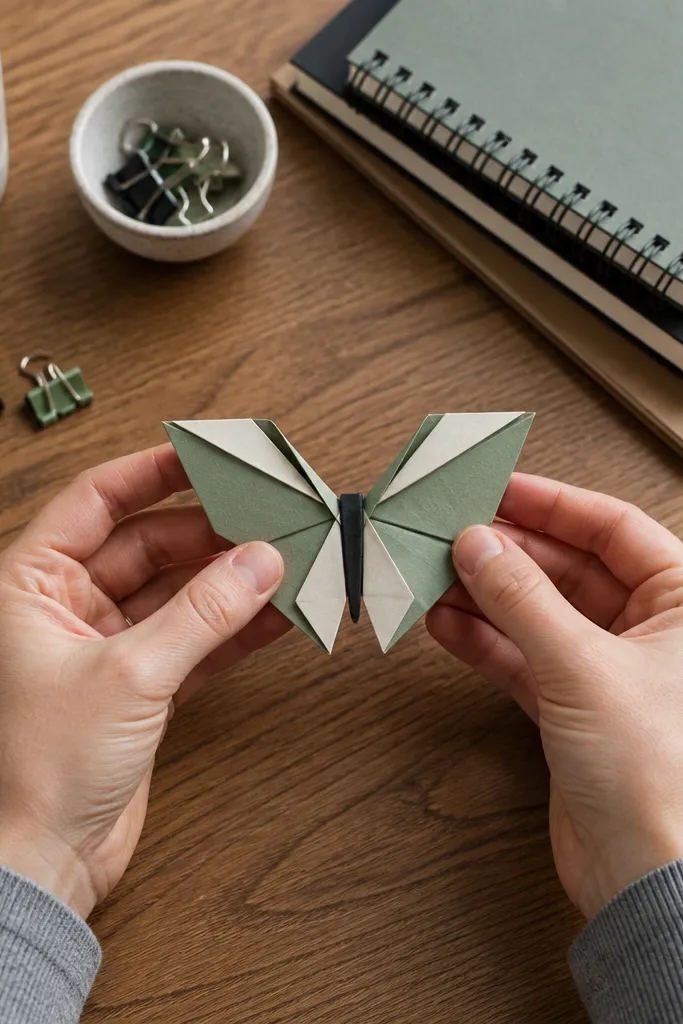
This butterfly looks like it was made with a design template. The wing corners are tucked into neat angles that create an engineered, high-end silhouette. It’s easy because it uses repeatable corner folds rather than tiny adjustment folds. The result holds up well for display because the wing edges keep their shape. Great for minimalist wall art and for kids who like structure.
Use 20 cm square paper and fold to a standard butterfly outline with a central crease. For each wing, bring the outer corner inward to form a tight triangle tuck, then fold it back slightly to create a crisp edge. Repeat on the other wing so the angles match. Finish by pressing the wing corners firmly and pinching the body to keep the architecture from collapsing.
Editor's noteMark tiny pencil dots on each wing corner before folding — it makes the angles match fast.
Skip thisDon’t make the tuck too deep; deep tucks shrink the wings and kill the photo silhouette.
7. Origami Butterfly Bookmark with Wing Flare
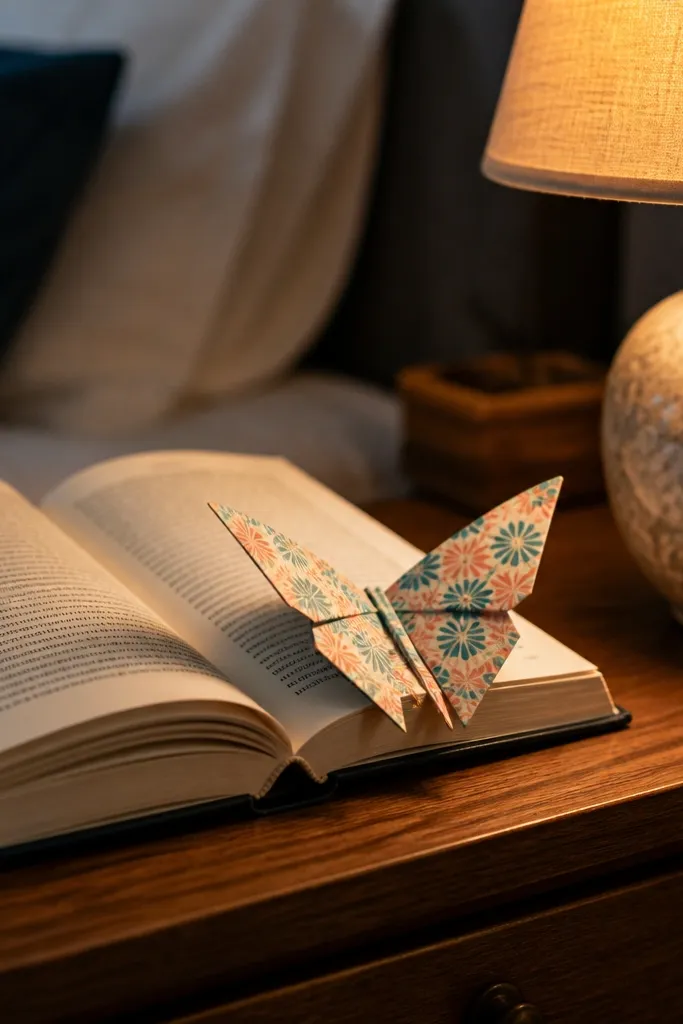
This one wins because it’s both pretty and useful, and the wing flare looks fancy when it’s attached to a page. The wings lift away from the bookmark strip so the silhouette looks airy. It’s easy because the base is a simple butterfly with a built-in strip that slides into a book. Use strong patterned paper so the wings show contrast against the page. It’s perfect for kids' reading rewards because it’s durable and doesn’t rely on delicate parts.
Start with 15 cm square paper, then design a long body tab by folding the bottom section upward to form a strip. Build a butterfly wing structure on the top half using reverse folds for lift. Tuck the body tab into a simple pocket fold so it grips a book page. Press the creases with a bone folder and trim only the very end of the tab so it doesn’t snag.
Editor's noteUse thicker paper like 160-200 gsm for bookmarks so the wings don’t droop.
Skip thisAvoid thin craft paper; it bends and makes the wing flare look sloppy.
8. Metallic Edge Butterfly with Foil Side Out
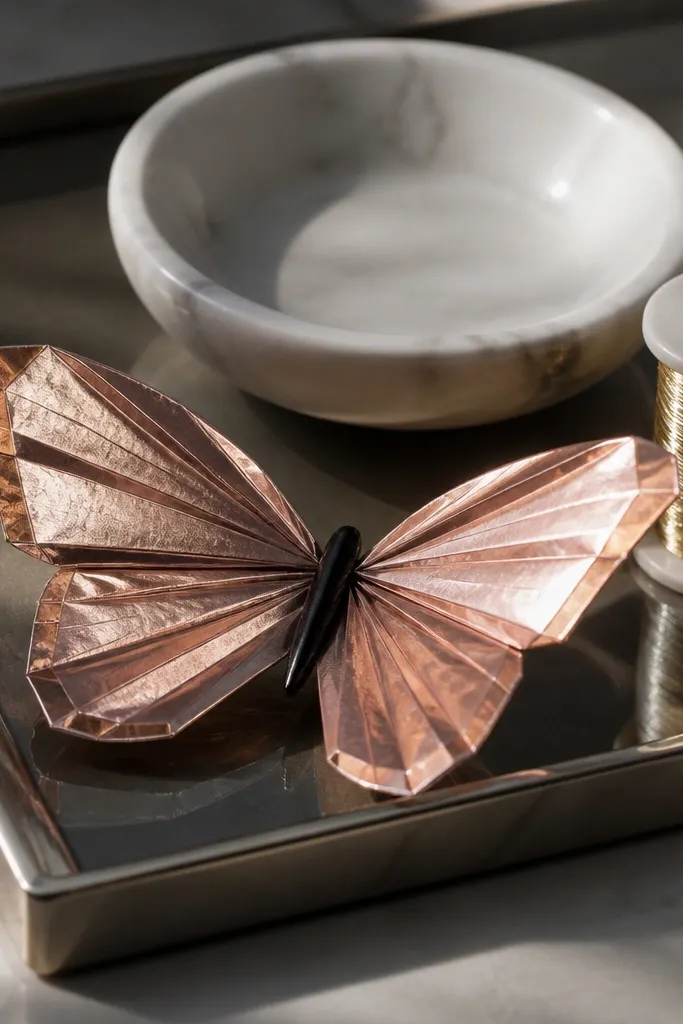
Metallic paper instantly reads high-end because the folded edges sparkle. Put the metallic side on the outside so each crease catches light. Keep the body dark or matte so the wings don’t blend into the background. This is easy because you’re not adding extra structure; you’re just using the fold geometry to create shine. It’s great for party decor, hanging ornaments, and photo props.
Use 12 cm or 15 cm square paper with metallic on one side. Fold the butterfly base and do reverse folds to lift the wing edges. Make sure the metallic side ends up on the outer wing surfaces after shaping. Press along every crease with a bone folder, then lightly curve the wing tips upward by pinching and releasing.
Editor's noteIf your metallic paper cracks, fold slower and press less hard on the first crease — it flexes better.
Skip thisDon’t use metallic on both sides; you lose the contrast that makes the wings look layered.
9. Two-Layer Butterfly with Paper-Stack Wings
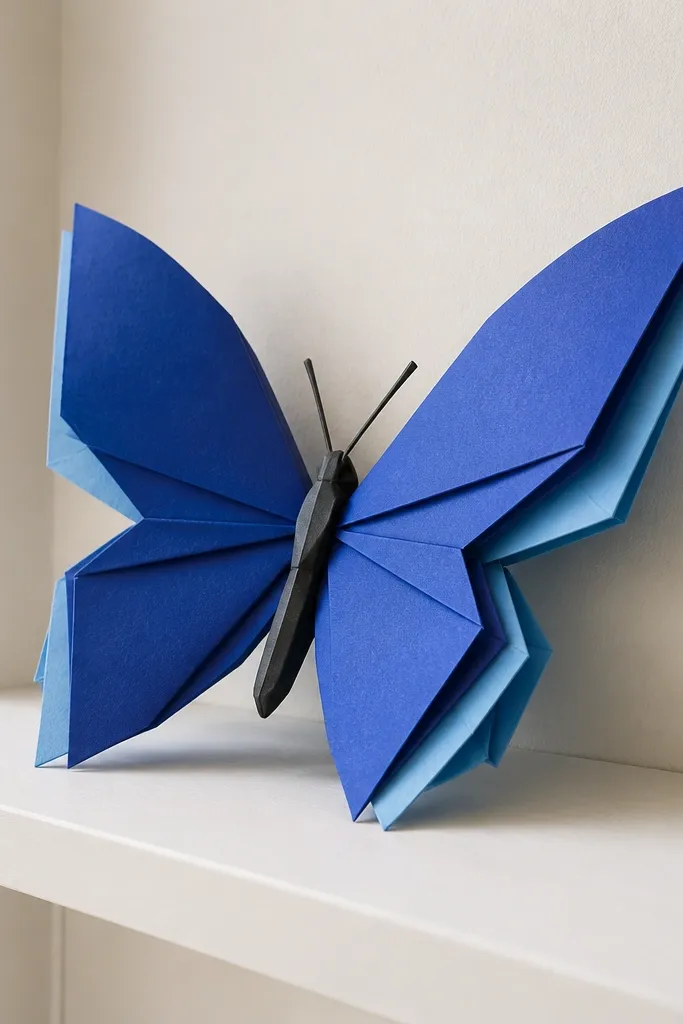
Stacked wings look expensive because you get visible depth and a layered silhouette. The top layer shapes the wing outline while the bottom layer peeks out like a shadow. This design stays easy because each layer is a simpler butterfly base rather than one complicated build. The color pairing is what makes it look premium — think navy with light blue, or coral with cream. It’s ideal for wall clusters and scrapbooks.
Make two simple butterfly bases from different colored paper, using the same fold pattern and size. Slightly trim the second layer so it sits behind and shows a border. Attach them by taping only the center body area, leaving the wings free. Press the center so the layers align, then adjust wing tips until the top layer sits centered.
Editor's noteTrim the back layer by 2-3 mm all around so the border shows evenly in photos.
Skip thisDon’t glue the layers at the wing tips; that flattens the depth you’re paying for visually.
10. Gingham Picnic Butterfly with Pleated Wings
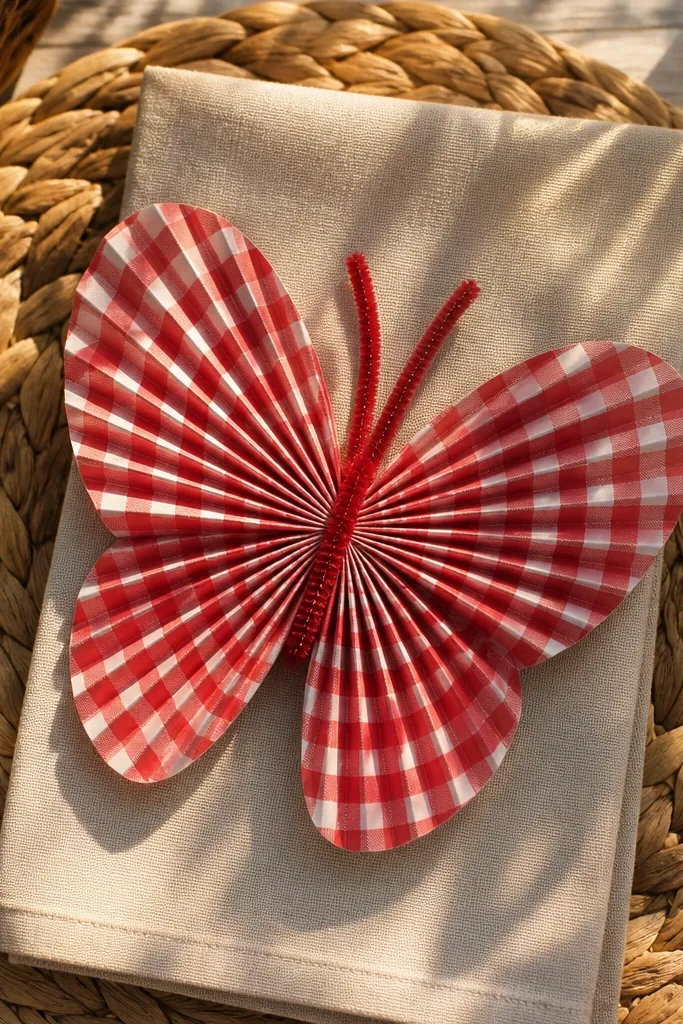
Pleated wings look high-end because they create a repeating texture pattern. Gingham or check paper makes the pleats visually crisp, like tiny pleated fabric. This is easy because the pleats come from a controlled fold back-and-forth rather than delicate corner work. The result is super photogenic on a neutral table or in a craft corner because the pattern lines up across the wings. Kids love it because it feels like making a tiny fan.
Use 15 cm square gingham paper, check pattern facing up. Fold a basic butterfly outline, then create each wing pleat by folding the wing edge into a shallow accordion of 3-4 ridges. Keep pleats parallel to the wing’s outer edge for symmetry. Reverse fold the outer edge once so the wing lifts, then pinch the center body tight and press creases with a bone folder.
Editor's noteAim for 4 pleats per wing; fewer looks flat, more gets messy for easy builds.
Skip thisAvoid random pleat spacing; uneven ridges make the butterfly look homemade in a bad way.
11. Koi-Scale Butterfly with Mini Fold Texture
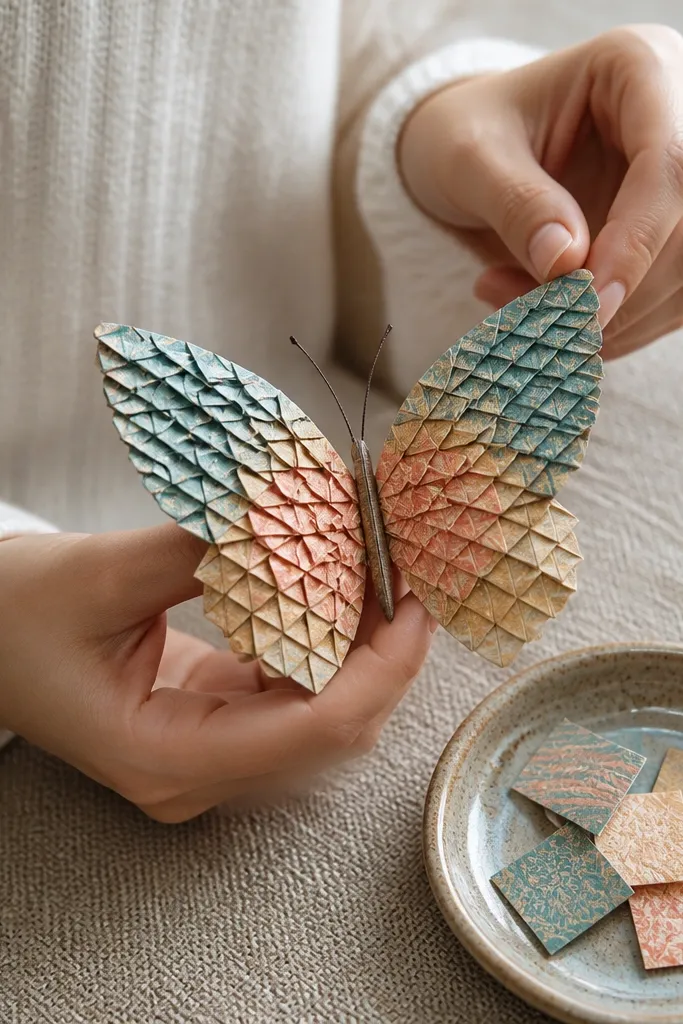
Scale texture makes butterflies look hand-designed. This one uses small layered folds along the wing surface so it reads like koi scales or fish scales in the light. It’s still easy because the texture is made from repeating one simple fold action, not lots of unique steps. Choose patterned paper with subtle texture or gradient so the folds look dimensional. It’s a standout for spring crafts and for kids who like repetitive patterns.
Start with 20 cm square paper in a gradient or patterned sheet that works with layering. Fold the butterfly base and keep wings lifted with reverse folds. Along each wing, make 4-5 small “scale” folds by tucking a thin strip upward in the same direction, then pressing each fold. Finish by smoothing the center body and checking that the scale direction matches on both wings.
Editor's noteUse thin ruler edges to press each scale fold — it keeps them identical.
Skip thisDon’t make the scales too wide; wide scales turn into bulky lumps and kill the silhouette.
12. Paper Fan Butterfly with Wide Wing Spread
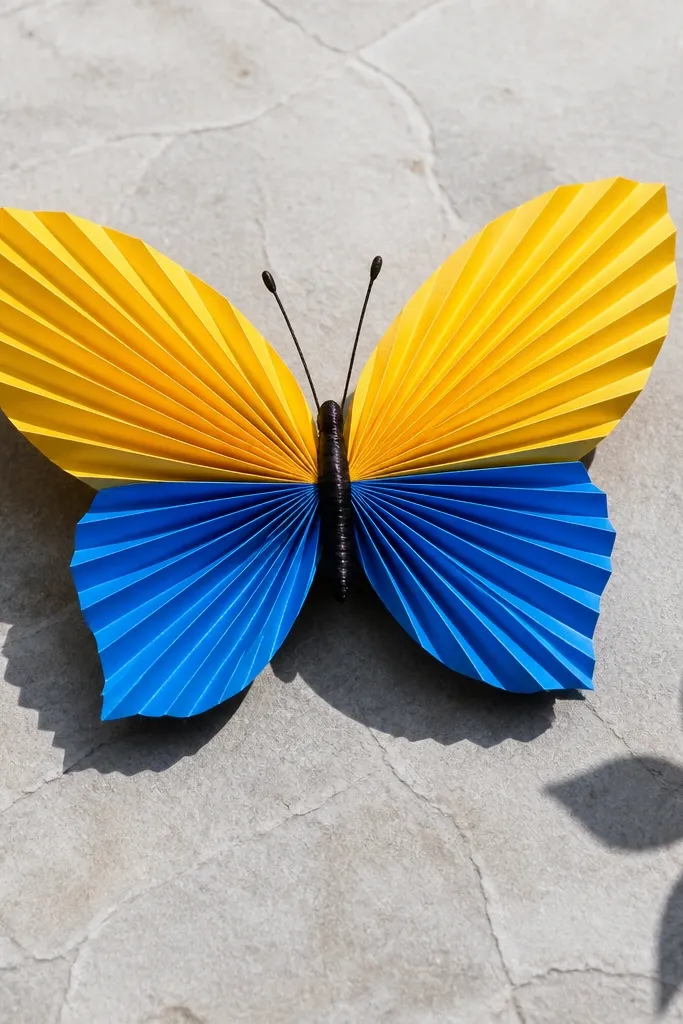
If you want a butterfly that looks like it’s mid-flutter, this fan-wing shape is the answer. The wings flare outward and create a dramatic spread that photographs well from above. It stays easy because the wing shape comes from folding into a fan, then releasing to open into a curved wing. Use bold color paper so the fan segments show clearly. Great for wall art and party hanging pieces where you want visible wing spread.
Use 20 cm square paper and fold into a butterfly base with a strong center crease. For each wing, create a fan by folding the wing section into 5-6 accordion ridges, then fold it back to lock the shape. Open the wing slightly so the fan spreads outward. Pinch the body and press the wing base so the fan stays lifted without flopping.
After folding the fan, hold it in place for 15 seconds before opening — it sets the curve.
Don’t over-open the fan; too much spread makes the body look off-center.
13. Origami Butterfly with Velvet-Black Body and Soft Gray Wings
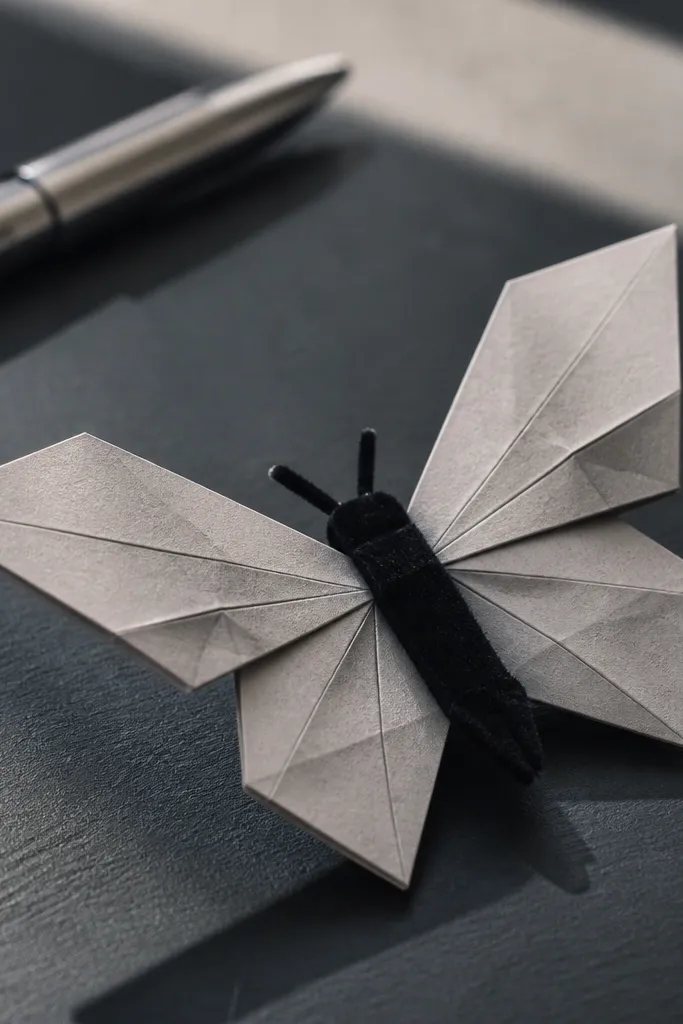
This design looks expensive because it uses contrast like clothing: soft gray wings with a dark, velvety body. The body reads as a separate element, so the butterfly feels more dimensional and intentional. It’s easy because it relies on clean folding and a strong central pinch, not on extra wing layers. Matte gray paper makes the wing folds look like fabric, and the body stays crisp. Works well for calm decor, nursery crafts, and monochrome photo sets.
Use 15 cm square gray paper for wings and black paper for a narrow body strip. Fold the gray paper into a butterfly base and shape wings with reverse folds for slight lift. Create the body by folding a thin black strip and taping it across the center seam. Press everything down gently with a bone folder so the wings keep their shape but the body stays centered.
Editor's noteUse matte black paper for the body; glossy black reflects and breaks the “velvet” look.
Skip thisDon’t make the body strip too thick; it hides the wing folds and makes the butterfly look chunky.
14. Rainbow Pinwheel Butterfly with Side-Color Wings
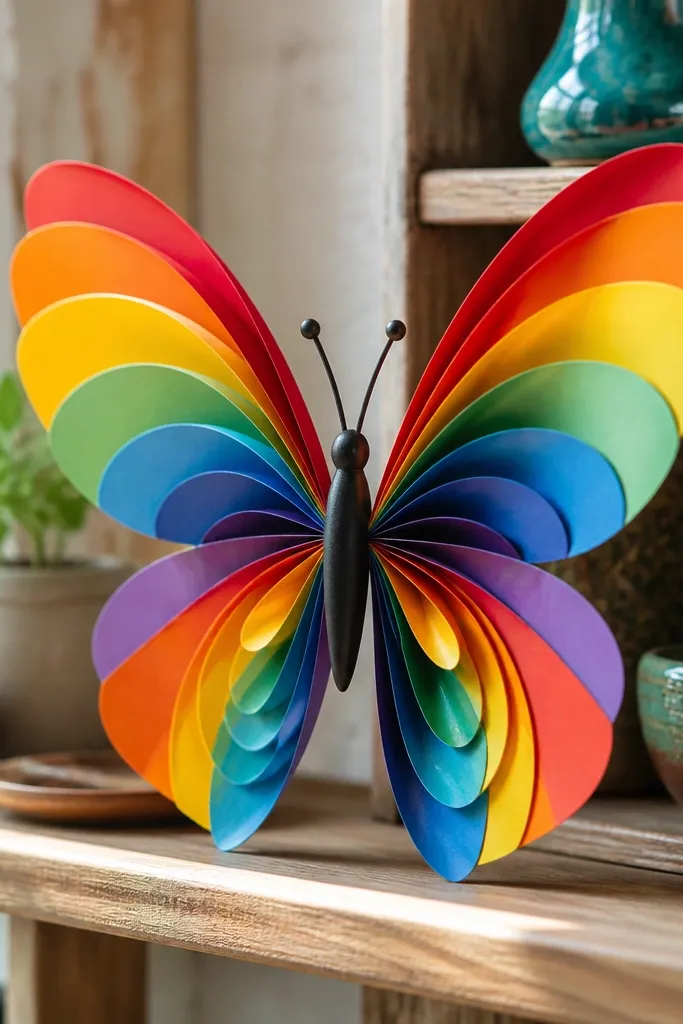
Pinwheel-style wing panels look high-end because they create a sense of motion and layered rotation. The look comes from side-color paper so each wing facet shows a different band of color. This is easy because you’re building wing panels with repeated corner folds that snap into place. It’s extremely photogenic on a bright background because the colors don’t blend. Great for kids since it feels like making a tiny toy that still looks like real origami art.
Use 20 cm square rainbow paper with color bands on one side. Fold a butterfly base with a strong central crease. On each wing, fold and tuck corners inward to form 3-4 pinwheel facets, then reverse fold the outer edge for lift. Align the facets so the rainbow bands mirror across the center. Finish by pinching the body and pressing creases with a bone folder so the facets hold their angle.
If your paper banding is uneven, rotate the paper 90 degrees before folding so the center body lands in the darkest band.
Don’t mash the facets flat; the pinwheel look needs space between folds.
15. Mini Butterfly Set with Matching Wing Borders
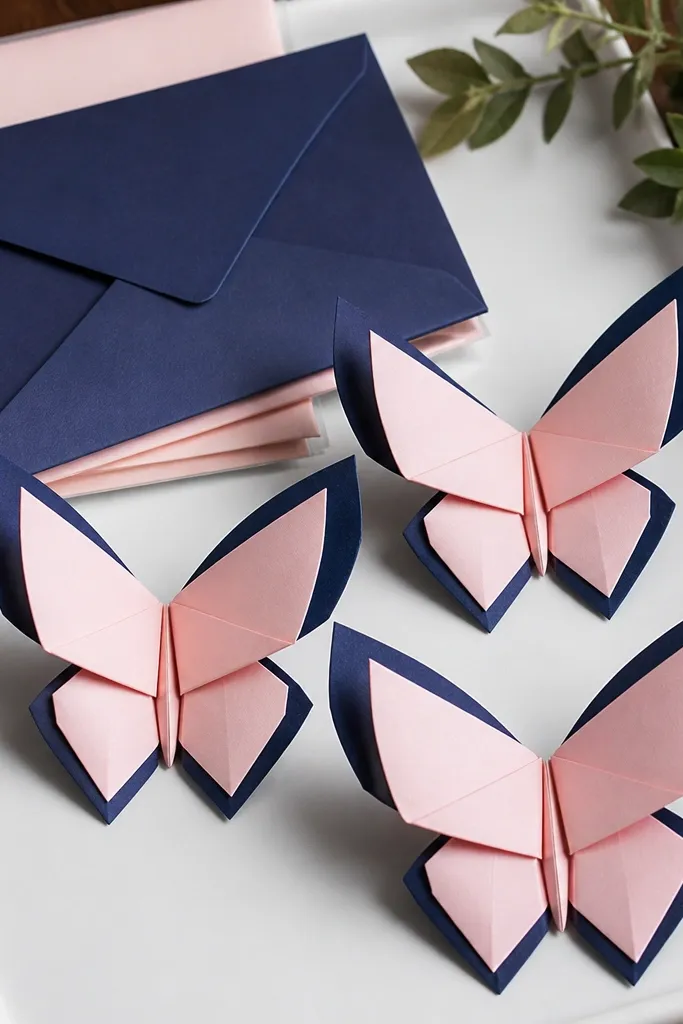
A set is what makes this look high-end. When you repeat the same border width and the same wing shape, the whole display reads intentional, not random. Use small 10-12 cm squares and a contrasting border color so the wing edges pop. This is easy because each butterfly is simple, and the “work” is in consistency, not complexity. It’s perfect if you want a polished craft outcome for a party wall, gift wrap, or a kid’s bedroom shelf.
Choose 10 cm square paper and fold a simple butterfly base with reverse folds for wing lift. Add border contrast by using paper with a colored edge or by gluing a thin strip border to the paper before folding. Make each butterfly with the same wing angle by counting wing folds and pressing the same crease points. Display them in a cluster so the repeated edges create a uniform look.
Make one butterfly first, measure the wing tip angle, then match it on the rest by sighting against a ruler.
Don’t mix random paper sizes in one cluster; inconsistent scale kills the “designed” look.
16. Textured Watercolor Butterfly with Wet-Look Creases
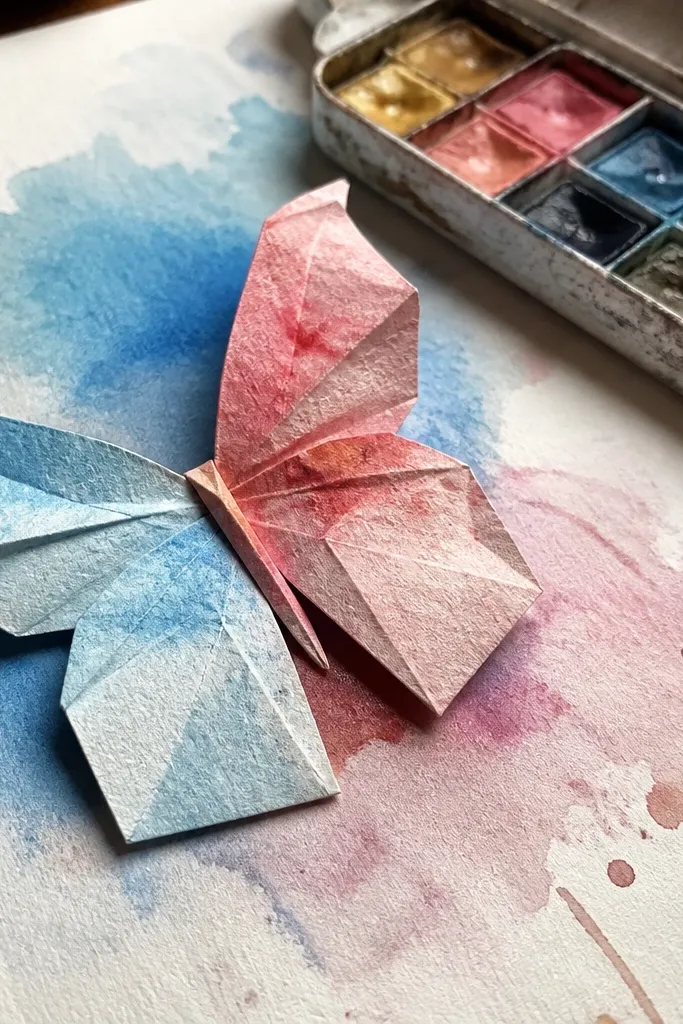
Watercolor paper can look high-end when the folds create crisp lines over soft color. This butterfly uses textured or watercolor-style paper so the wing surfaces look like paint, while the reverse folds add structure. It’s easy because you’re not drawing details — the paper does the color work. The key is to keep the creases sharp without over-crushing the texture. Great for artsy kids and for cards where you want a handmade feel that still looks clean.
Use 15 cm square watercolor-texture paper. Fold a butterfly base and use reverse folds for lifted wing edges. Press creases lightly first, then strengthen only the key folds with a bone folder — center pinch and wing base. Shape wing tips by gently curving outward with your fingers, then let it sit flat for 1-2 minutes so the paper relaxes into the shape.
Press less on the watercolor surface, more on the edges and center crease to avoid cracking texture.
Avoid heavy pressure on the first fold; watercolor paper can tear and turn blotchy.
17. Pearl-Trim Butterfly Ornament with Hanging Loop
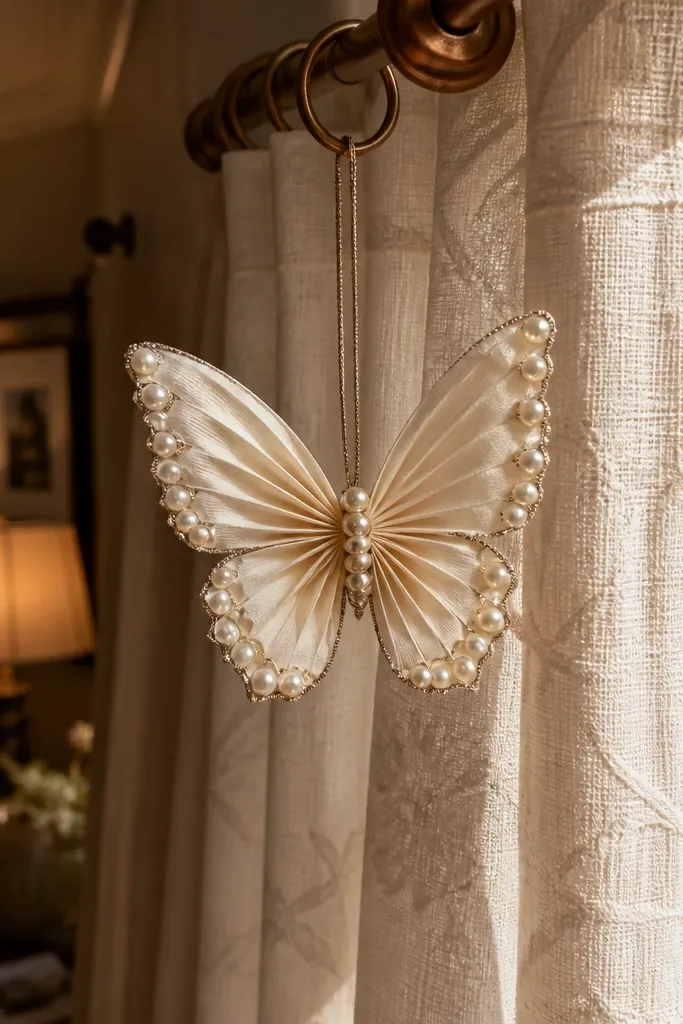
This looks high-end because it’s turned into an ornament, not just a paper butterfly. The hanging loop makes it float slightly, and the wing edges look finished. Add a tiny trim detail like a thin metallic thread or micro bead along the wing edges for sparkle. It’s still easy because it uses a basic butterfly form plus a simple attachment method. Perfect for birthdays, holiday trees, or a kid’s craft window display.
Use 12 cm square paper and fold a butterfly base with reverse folds for lifted wings. Create a hanging loop by threading a thin string through a small paper punch hole at the center top of the body area. Add trim by lightly gluing a thin line of metallic thread along the wing outer edge, then press with a clothespin for 20-30 seconds. Let it dry flat so the wings don’t stick together, then test the hang height.
Editor's noteUse a needle to thread the string — it prevents twisting the paper body.
Skip thisDon’t glue the string to the wing tips; it weighs the wings down and ruins the lift.
18. Paper Quilling-Look Butterfly Without Quilling
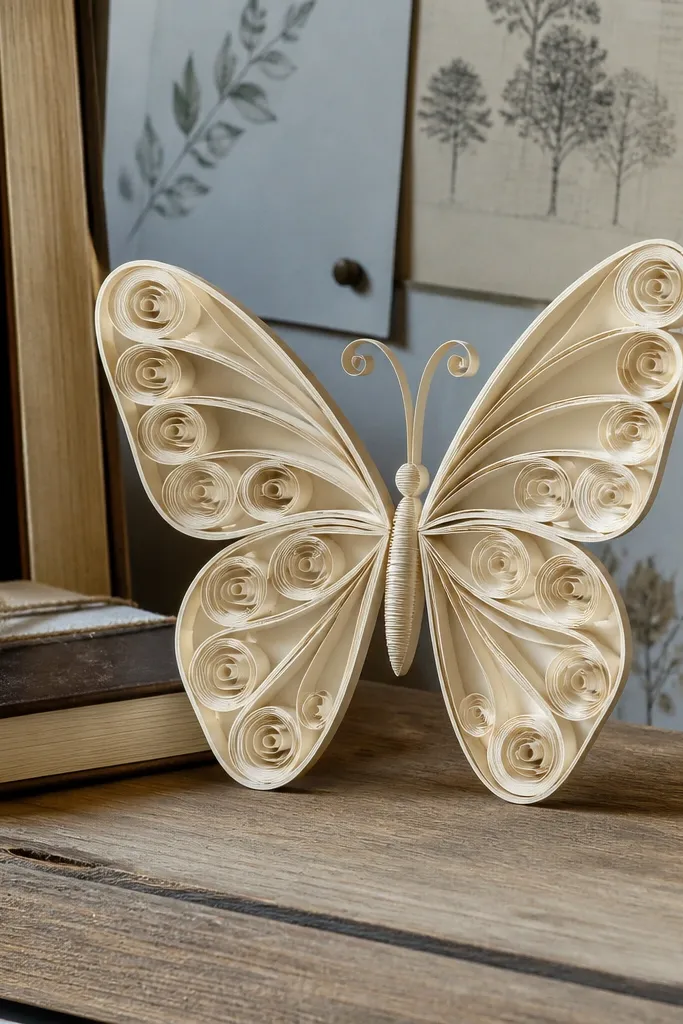
Quilling looks fancy but takes time. This butterfly fakes the quilled look by using tight reverse folds and small curled edges that create spiral-like highlights. It’s easy because the “curl” is made from pre-creasing and pinching, not from rolled strips. Use thicker paper so the curled edge holds its shape. This is a great option for kids who want the fancy look without the patience tax.
Use 15 cm square cardstock or thick paper. Fold a butterfly base and then do reverse folds along each wing edge to create a raised ridge. For the curl effect, pinch the outer wing tip and roll it slightly around your fingertip, then press that crease with a bone folder. Repeat on both wings, then pinch the body tight to keep the wings from springing open.
Test the curl on a scrap first — thick paper needs a firmer pinch to hold the spiral edge.
Don’t use super-thin printer paper; the curled wing edge will relax and look flat.
19. Ombre Wing Butterfly with Dark Center Body
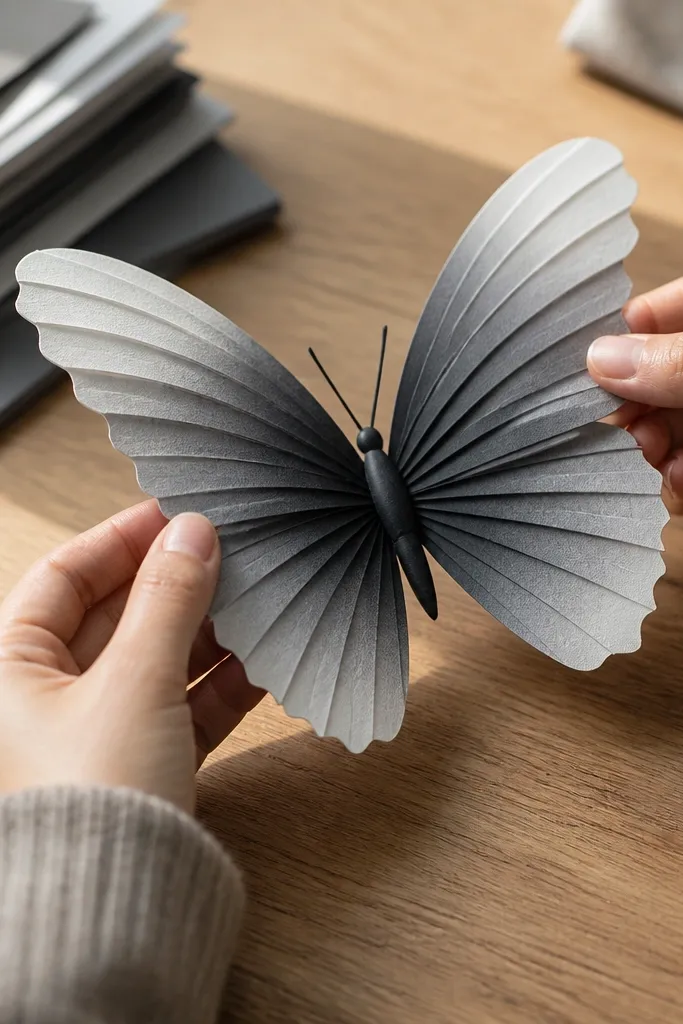
Ombre wings look high-end because the color shift follows the fold geometry. When the darkest point sits near the body and the lightest tone hits the tips, the butterfly reads dimensional. This is easy because the structure is straightforward, and the ombre does most of the visual work. Keep the body darker and matte so the wings look crisp. It’s a good choice for kids who want a “designed” look without complicated steps.
Use 20 cm square ombre paper with the darkest shade near one corner that you align toward the center. Fold a butterfly base and use reverse folds to lift wing edges so the ombre transition stays visible. Shape each wing tip by folding outward slightly and pressing the edge crease with a bone folder. Pinch the body so the dark center reads as a single focal point.
Align the ombre so the darkest edge lands on the center crease; sloppy alignment ruins the effect.
Don’t rotate the paper randomly mid-fold; keep the darkest section facing the body throughout.
20. Origami Butterfly with Layered Fringe Tips
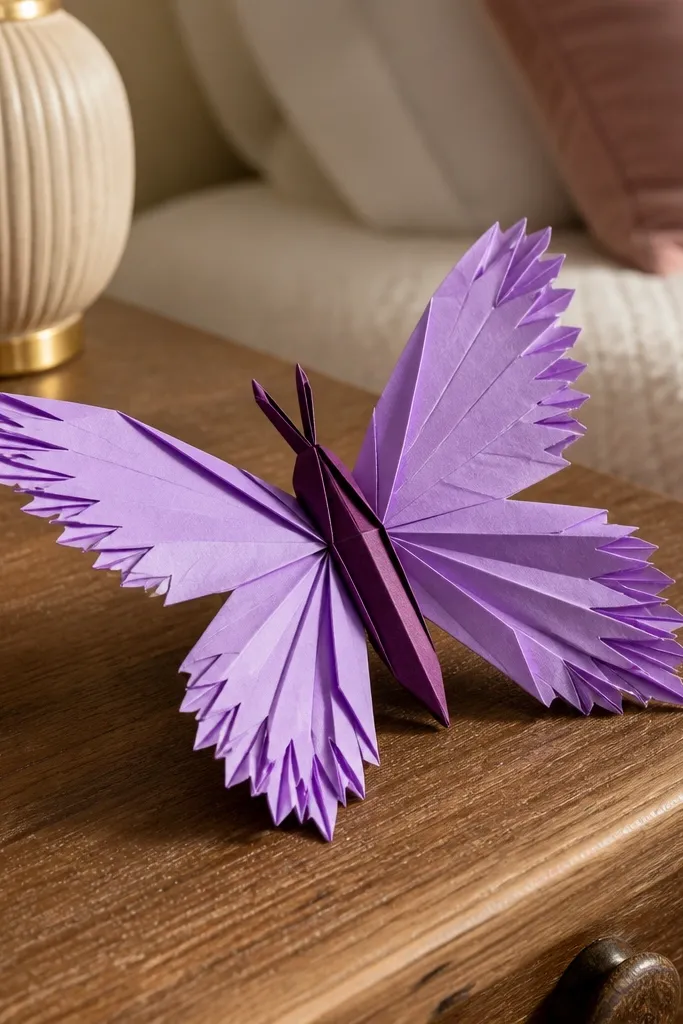
Wing tips with layered fringe look like a designer cutout because they add micro-detail at the silhouette edge. This butterfly uses small folds at the outer edge so the tips appear frayed, but still neat. It’s easy because the fringe is made from two or three simple edge folds per wing. Choose contrasting paper so the fringe edges show in photos. Great for party decor and for kids who like detail but still want a quick build.
Start with 15 cm square paper and fold a butterfly base. Create lifted wings using reverse folds at the wing base. For each wing tip, make a small edge fold inward, then fold it back outward to create a layered fringe look. Press each fringe fold with a bone folder so it stays crisp, then pinch the center body to finish.
Cut the wing tip crease line with a ruler edge lightly before folding — it makes the fringe edges snap sharper.
Avoid too much fringe length; long fringes get tangled and look messy.
21. Minimal Butterfly with Gold Foil Body Accent
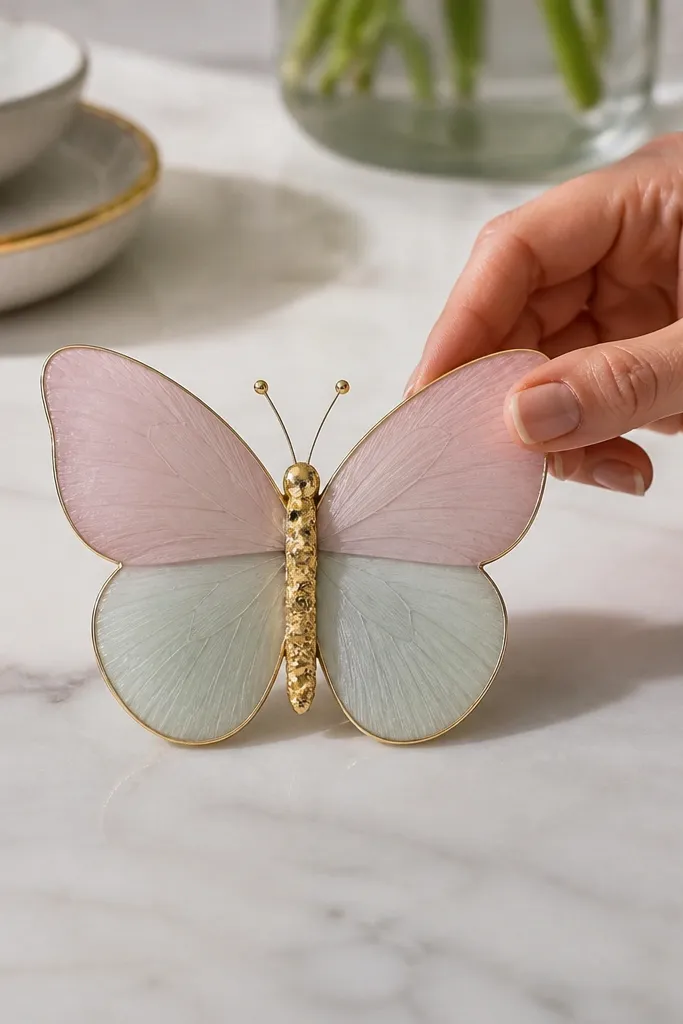
This is the cleanest “high-end” trick: keep the wings simple and add one premium detail. A gold foil body accent makes the butterfly look like jewelry even when the folds are basic. Use light pastel paper for wings and a narrow gold strip for the body. It photographs beautifully because the eye lands on one bright spot. It’s also forgiving for kids because the complexity stays in the accent, not the structure.
Use 15 cm square pastel paper and fold a simple butterfly base with reverse folds for slight wing lift. Cut a thin gold strip for the body, about 0.5-0.7 cm wide depending on paper size. Place the strip across the center pinch area and tape it down only at the body, not across the wings. Press the body area so the gold strip conforms to the fold and stays centered.
Use double-sided tape on the body strip before you place it; it prevents glue blobs.
Don’t glue the gold strip at the wing base; it stiffens the wings and kills the lift.
22. Origami Butterfly with Side-Profile Wings (Looks Like a Sculpture)
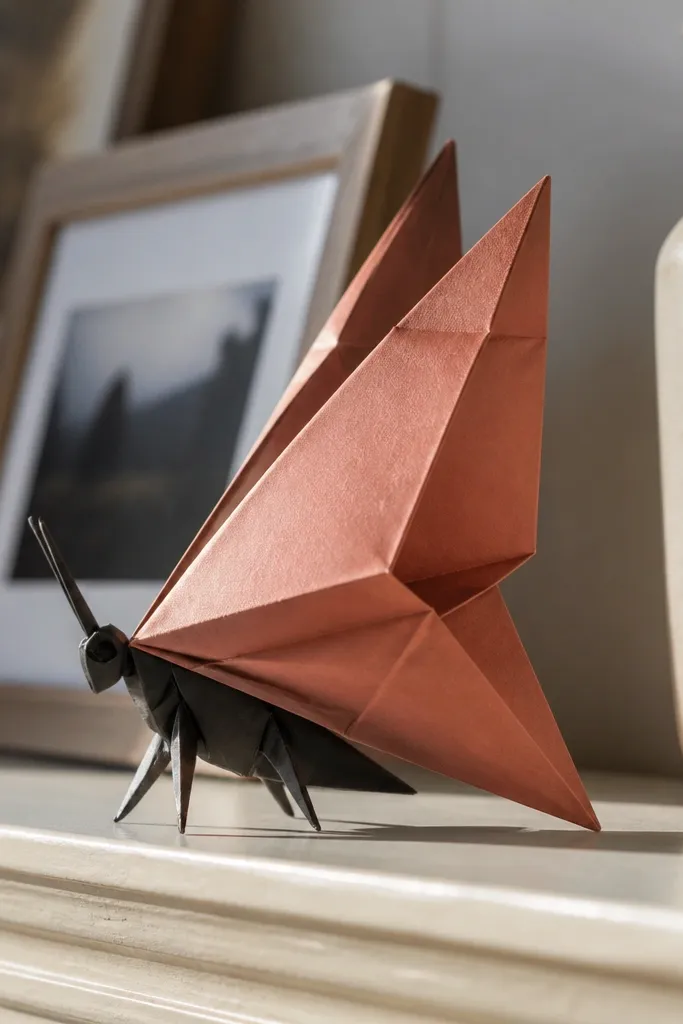
This one looks like a little sculpture because the wings sit at a noticeable angle instead of lying flat. The silhouette is dramatic and the shadows add depth in photos. It’s easy because it uses the same base folds as a standard butterfly, then adds wing angle control with a couple of internal creases. Use medium-weight paper so it holds the angle. Great for shelf decor and for kids who want a “display piece,” not just a flat craft.
Use 20 cm square paper and fold a butterfly base. Add wing angle by pushing each wing upward slightly and creating a small internal crease at the wing base where the wing meets the body. Press that internal crease with a bone folder so the wing keeps its upward position. Finish by pinching the body tight and adjusting the wing angles until both sides match.
Editor's noteIf the wings flop, reinforce the internal crease with an extra pass of pressure along the wing base fold.
Skip thisDon’t use super-flexible paper; the sculpture angle will collapse.
23. Butterfly with Folded-Edge Wings for a Paper-Fabric Look
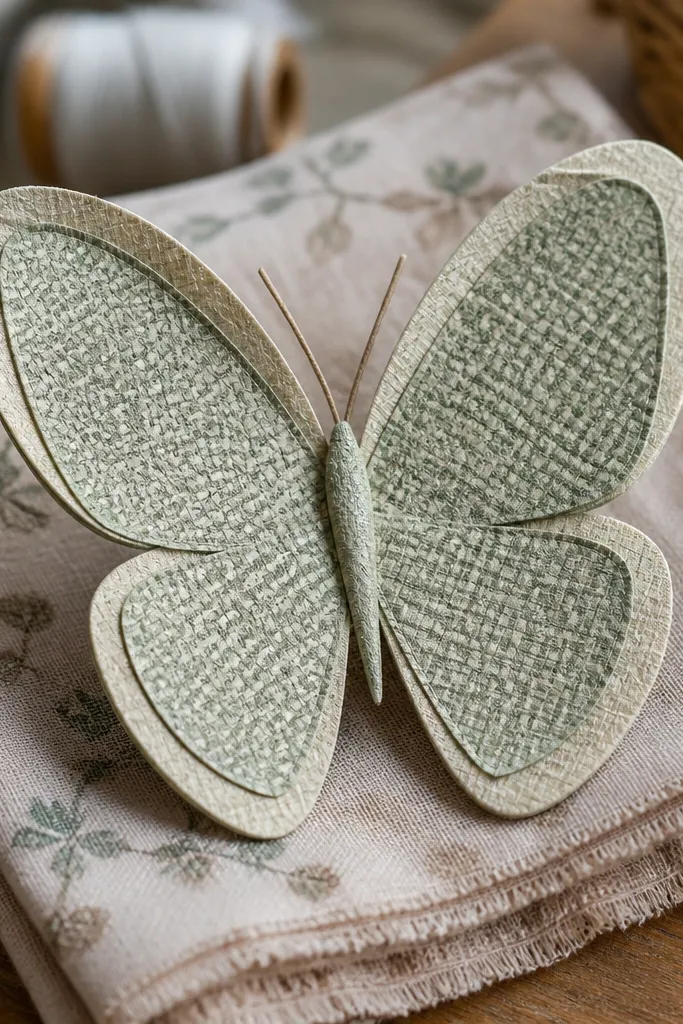
Folded-edge borders make wings look like they have a hem, which is why this reads high-end. The wings still stay easy, but the edge detail gives you that tailored look. Choose fabric-like patterned paper or textured cardstock so the hem effect feels real. This is a good project when you want the butterfly to look neat from all angles, not just from straight above. It’s also durable for repeated handling.
Use 20 cm square textured paper. Fold the butterfly base and then create wing lift with reverse folds. Along each wing edge, fold a thin strip inward to form a border, then press it flat with a bone folder. Repeat on both wings so the border thickness matches, and pinch the body to keep the wing edges aligned.
Editor's noteMake the border fold only 2-3 mm wide; wider borders bulk up the silhouette.
Skip thisAvoid leaving border folds soft; if the hem isn’t pressed, it looks wrinkled instead of finished.
24. Large Statement Butterfly with Oversized Wing Panels
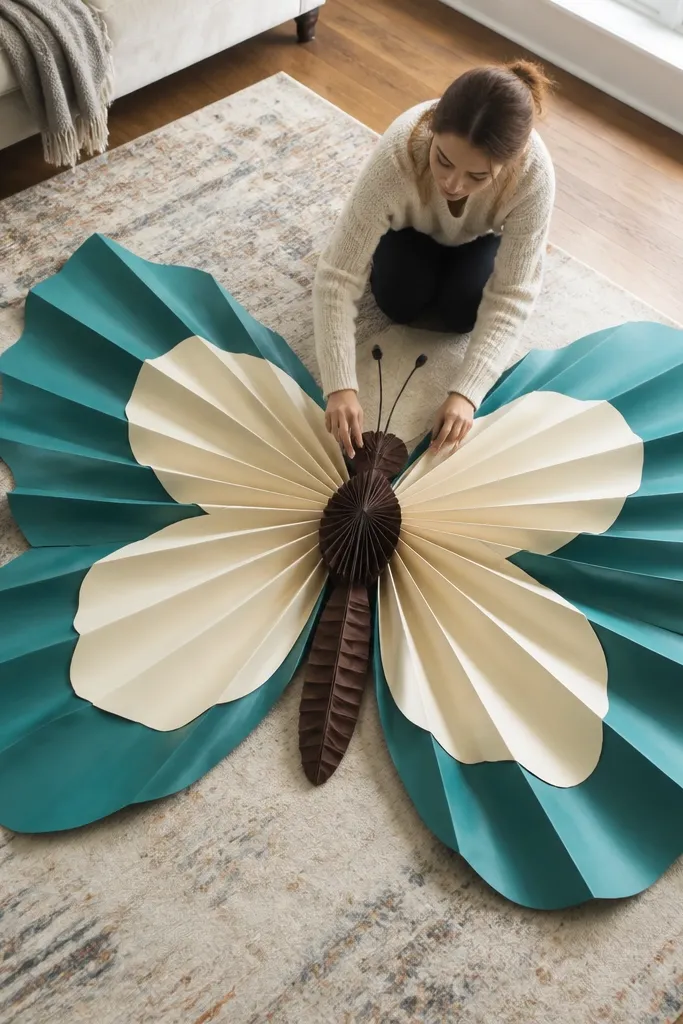
If you want a butterfly that looks premium from across the room, go large. Oversized wing panels make the shape graphic, and the center body stays readable even from a distance. This is easy because the folds are big and clear — you’re not doing tiny precision moves. Use thicker paper and keep the creases sharp so the wings don’t sag. Great for a kids' party backdrop or a bedroom wall cluster where you want impact.
Use 30 cm square paper for a statement size. Fold a butterfly base with a strong central crease, then do reverse folds on each wing to lift the outer panels. Create the oversized panel look by folding wing corners inward to form broad angles, then press the edges firmly. Pinch the center body and trim only if necessary to keep wing symmetry.
Use cardstock for statement size; thin paper waves and loses the sharp silhouette.
Don’t go too light on thickness; large wings sag and instantly look cheap.
25. Pocket-Cut Look Butterfly with Layered Negative Space
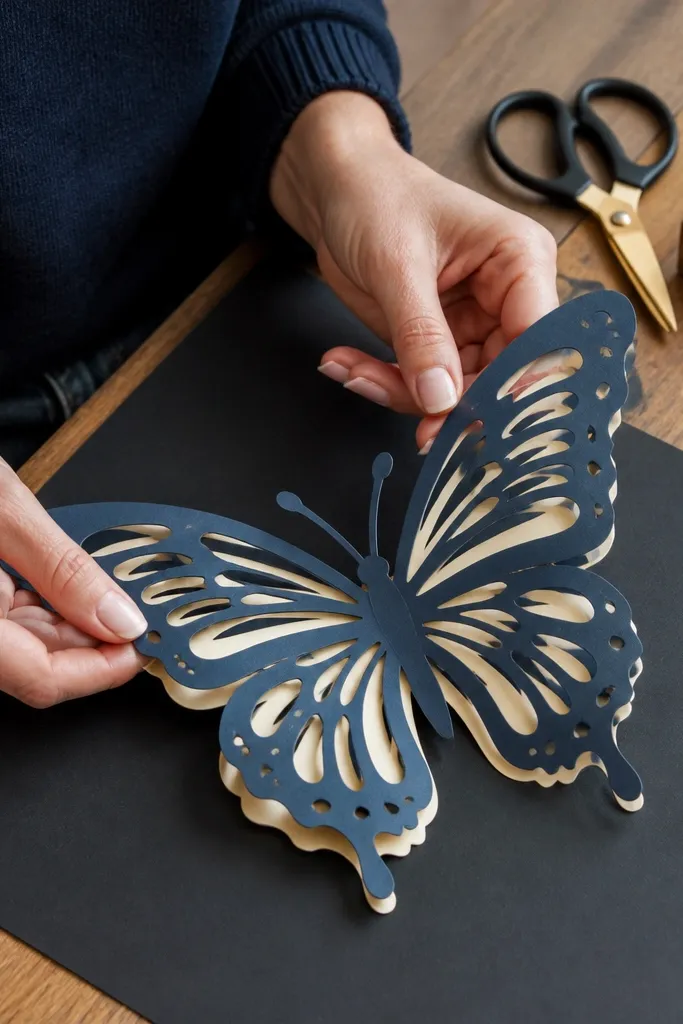
Layered negative space makes this butterfly look like it was cut with a laser, but it’s still fold-based. You get “pocket cut” shadows where one layer sits behind another, creating an expensive open-work vibe. It’s easy because you avoid actual delicate cutting and instead use fold placement to create the gaps. Use contrasting paper colors so the negative space reads clearly in photos. This is perfect for cards and wall decor where you want that cutout style without the mess.
Use 20 cm square paper in two colors, different on each side. Fold a butterfly base and keep wings lifted with reverse folds. Create the negative space by tucking one wing layer slightly under the other so a small gap remains visible at the center wing area. Press the tuck creases and adjust until the gap looks symmetrical on both wings.
Editor's noteAim for a gap width of 3-5 mm; smaller gaps disappear, bigger gaps make it look broken.
Skip thisDon’t glue the tuck flat; the gap needs to stay open for the shadow effect.



