
1. Rolled-Edge Tulip Bloom (Easy Center Roll)
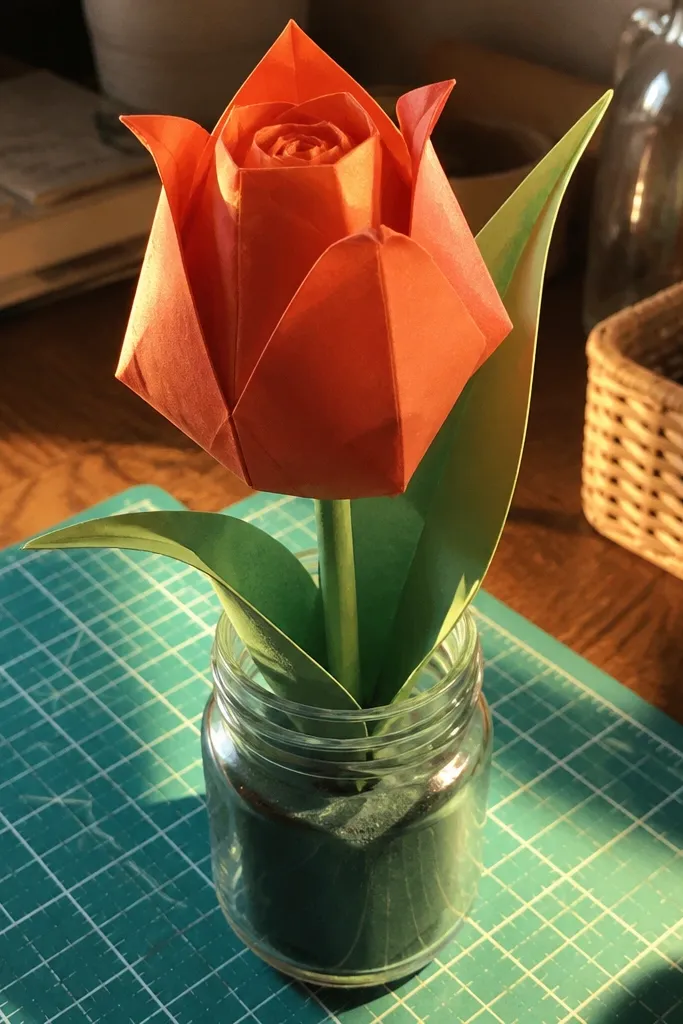
This one is a crowd-pleaser because the petals look like they’re curling around a real center. The rolled roll inside makes the flower feel “alive” even when the folds are simple. Use warm colors like orange, coral, or red — they read as tulip petals instantly. It’s a great choice if you want a good-looking Origami Easy flower that still looks dimensional from the side.
Editor's noteRoll the center with a ruler edge so the curl is even across the whole bud.
Start with a 15 x 15 cm square. Fold it into a basic kite shape, then roll the tip inward to form a tight center bud. Next, fold the outer flaps back to create petal edges, and pinch lightly so each petal has a curve. Finish by gluing only the bottom of the rolled center so the petals stay open and springy.
Skip thisDon’t glue the petal tips or the flower will flatten and lose that tulip curl.
2. Two-Tone Paper Dahlia (Layered Petal Squares)
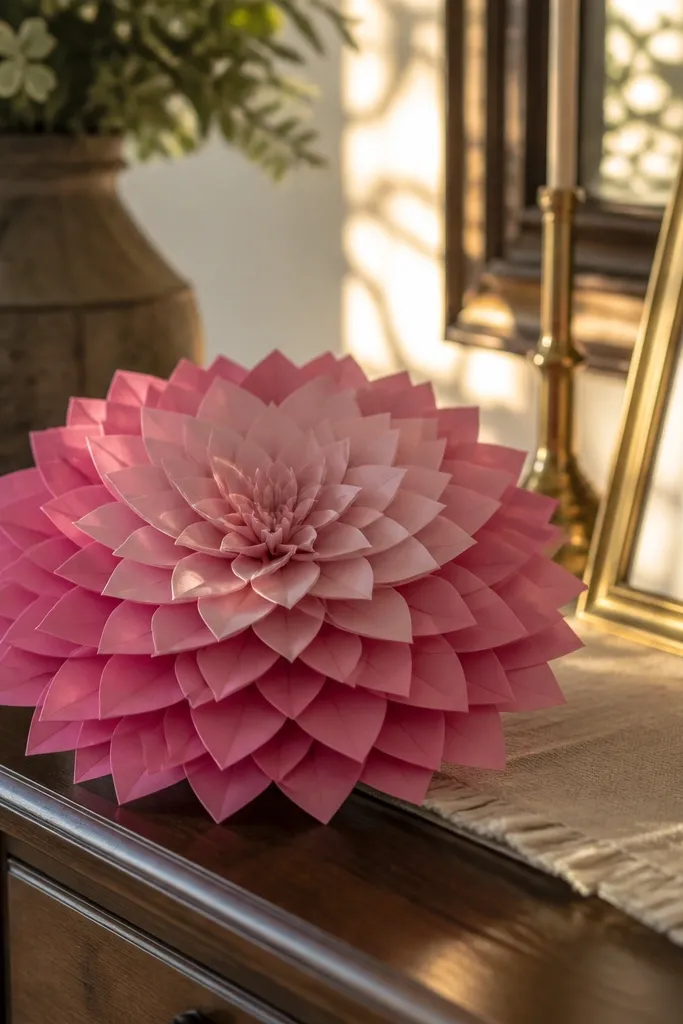
A dahlia is basically a petal machine, and this easy version gets the look without heavy complexity. The trick is stacking small petal units in a ring, so the bloom looks full even if each piece is simple. Two-tone paper makes it pop: pink outer petals with a lighter inner ring gives that soft “shadow” effect. This is the move when you want a big, photogenic flower from kid-level folds.
Cut or use pre-made squares in two colors, like 7.5 x 7.5 cm for inner pieces and 10 x 10 cm for outer pieces. Fold each square into a small petal shape with a diagonal crease, then fold the edges toward the center to form a compact triangle-petal. Arrange petals in concentric circles on a larger base square, alternating colors, and glue only the base edges. Press gently for 10 seconds so the layers stick flat.
Keep the inner petals slightly taller than the outer ones by gluing the base edge a few millimeters higher.
Skip oversized glue blobs — they show through and make the flower look lumpy.
3. Classic Lotus with Crisp Chevrons
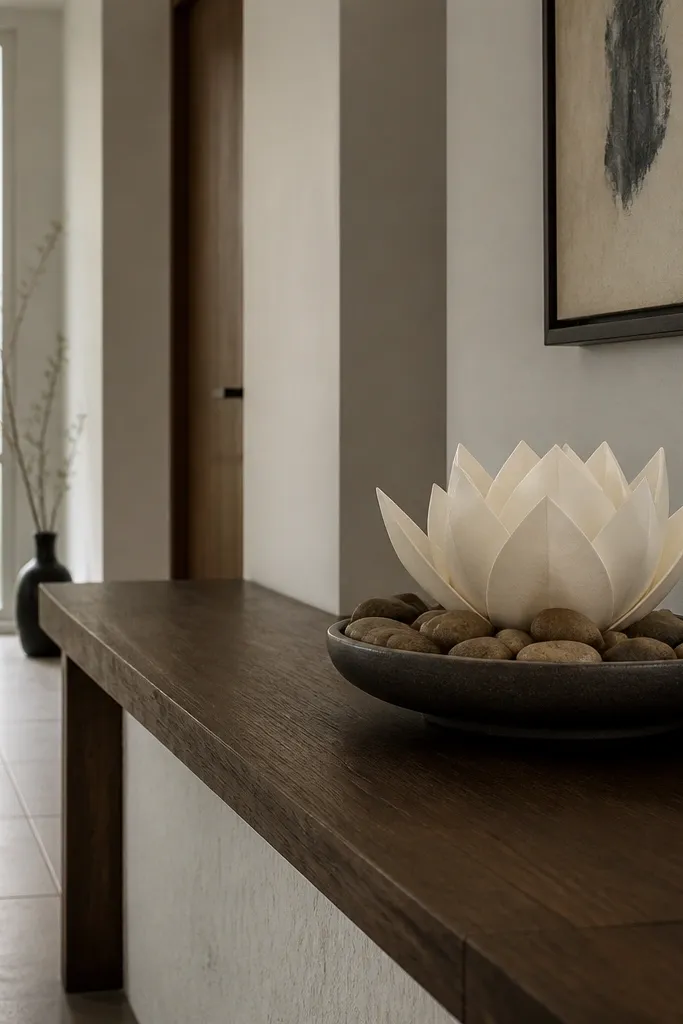
Lotus-style flowers look special because the petal tips form clean points. This design uses chevron-like folds that create sharp edges, so your flower reads like a real bloom instead of a paper star. Cream, ivory, or light yellow looks best because it shows off the geometry. If you want good-looking Origami Easy that looks “fancy” without being hard, this is one of the best bets.
Editor's noteUse a bone folder for every crease — lotus petals only look crisp when the folds are sharp.
Use a 20 x 20 cm square for a bigger, calmer lotus. Fold it into a preliminary base with diagonal creases, then open and fold each side into a chevron point. Repeat around the shape so you get 6 to 8 pointed petals. Tuck the points slightly inward, then glue the very bottom corners only to lock the shape.
Skip thisDon’t rush the chevron points; uneven points make the whole flower look messy.
4. Cherry Blossom with Tiny Pleated Petals
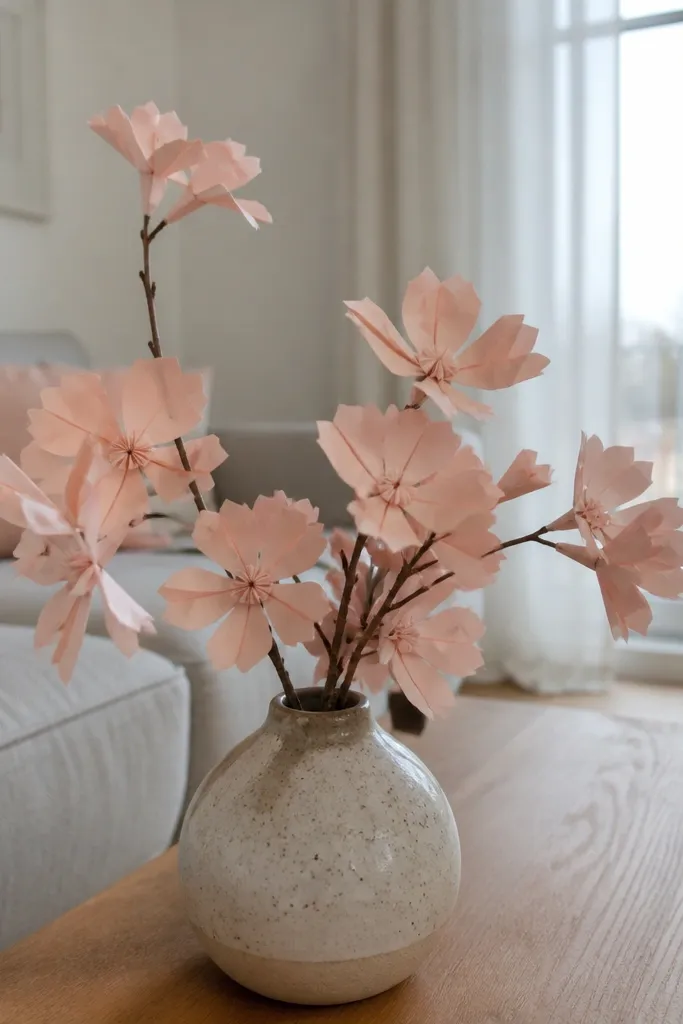
Cherry blossom flowers are gorgeous because the petals are light and slightly airy. This easy version uses pleats so each petal has a delicate texture that catches light. Use pale pink or blush paper and keep the center small so the petals look like a cluster. It’s a strong choice for spring decor, classroom crafts, and card toppers.
Start with 10 x 10 cm squares for the petals and a 5 x 5 cm square for the center. Fold each petal square into a small triangle, then add 2-3 tiny pleats along the base before you fold the tip down. Make 5 petals for a simple blossom or 8 for fuller petals. Glue petals around the center square and fluff them gently outward.
Pleat with short, firm folds — 2 mm creases give the “paper fabric” look.
Don’t make the center too big or it swallows the airy petal shape.
5. Paper Rosebud with Side Folds (No Spirals Needed)
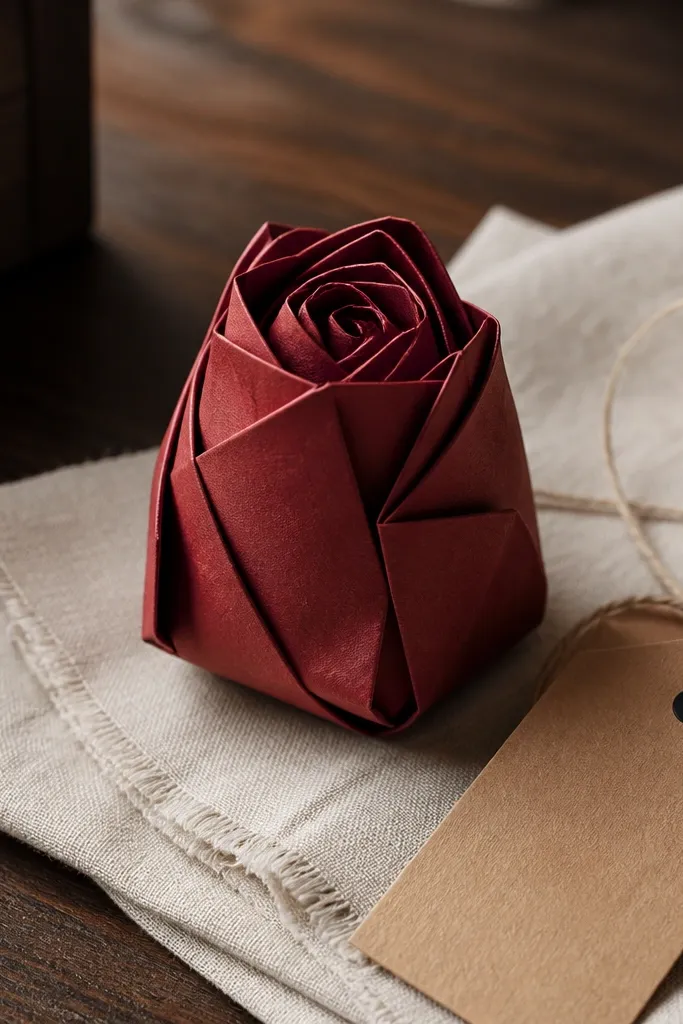
This rosebud looks good because the petals wrap in layers without needing a tight spiral. Side folds create a folded “petal stack,” so the bud looks rounded and cozy. Deep red or wine paper reads like a real rosebud. It’s ideal if you want one flower that looks like it belongs in a bouquet, even when you’re working fast.
Editor's noteMake the side folds slightly uneven by 1-2 mm so the bud feels natural, not machine-symmetrical.
Use a 20 x 20 cm square. Fold it in half diagonally to form a triangle, then fold one side edge toward the center to create a petal wall. Repeat on the other side so you get a symmetrical bud shape. Finally, fold the bottom flap up and glue the base to keep the layers from opening.
Skip thisDon’t flatten the bud after gluing — let it keep its rounded volume.
6. Sunburst Five-Petal Flower (Simple Layered Tabs)
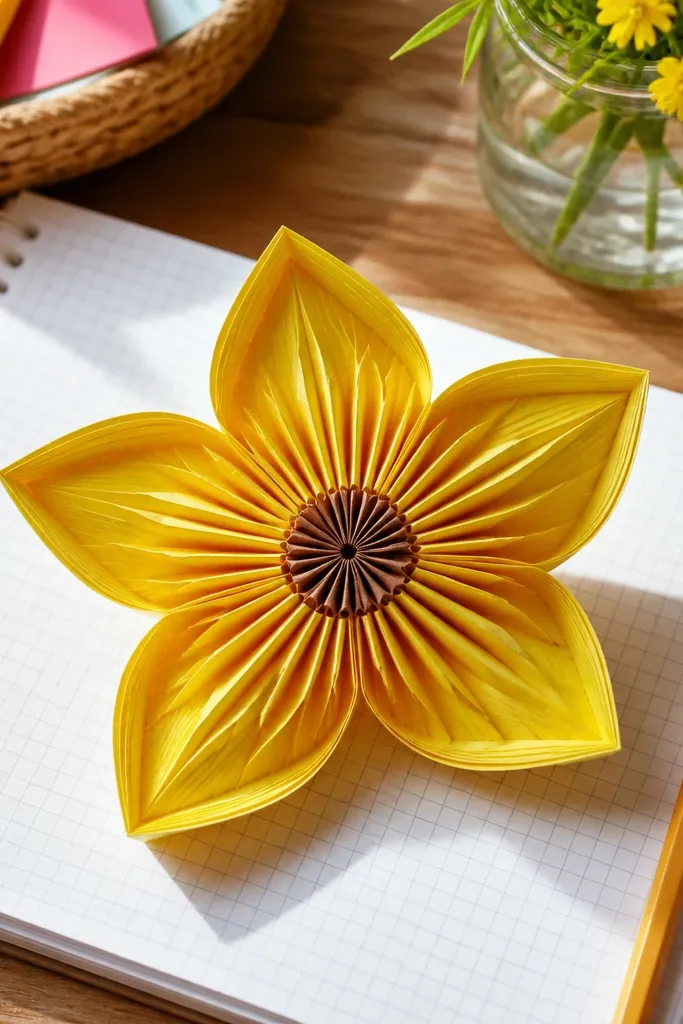
Sunburst flowers look happy, and the shape is easy to read from far away. This one uses layered tabs that create a “petal sandwich” effect, so the flower looks thicker than it really is. Bright yellow with a darker center makes it instantly flower-like. If you’re making a bunch for a kids' room or party table, this design stays consistent and photogenic.
Start with a 15 x 15 cm square. Fold to a basic base with diagonals, then create 5 petal tabs by folding each edge up and tucking the tip. Bring the tips toward the center to form a ring. Glue the tabs at the base, then add a small circle center cut from contrasting paper to finish the sunburst look.
Cut the center circle with a craft knife on a cutting mat for clean edges.
Skip floppy tabs — press each tab flat before gluing so the petals hold their angle.
7. Bluebell Fold with Curved Petal Edges
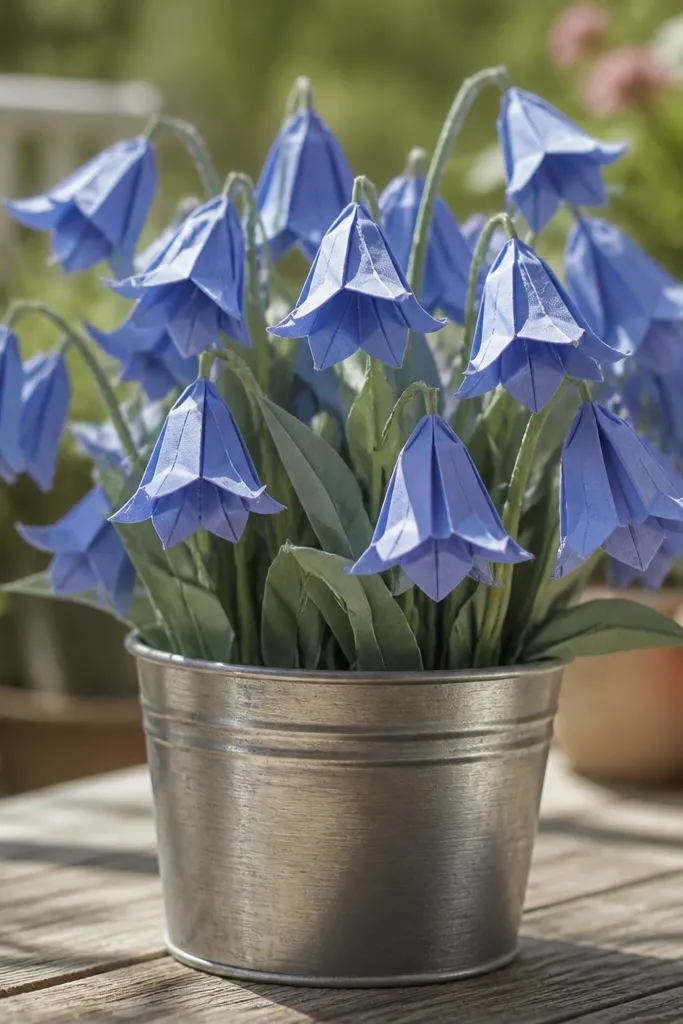
Bluebell shapes look sweet because the petals curve inward. This design uses petal edge shaping so the flower has a gentle cupped form, not a flat star. Choose medium blue or periwinkle paper — it matches the “cool” look of bluebell petals. It’s a good-looking Origami Easy option when you want something that looks soft and delicate.
Editor's noteCurve the petals by running your fingernail along the crease while holding the petal in a slight dome shape.
Use a 18 x 18 cm square for a cupped shape. Fold into a basic petal base, then shape each petal edge by bending the outer flap inward before you crease it down. Arrange the petals so they overlap slightly at the center. Glue only the overlap points near the base so the top edges stay free and curved.
Skip thisDon’t glue the entire petal — the cupped look disappears.
8. Marigold with Textured Fringe Look
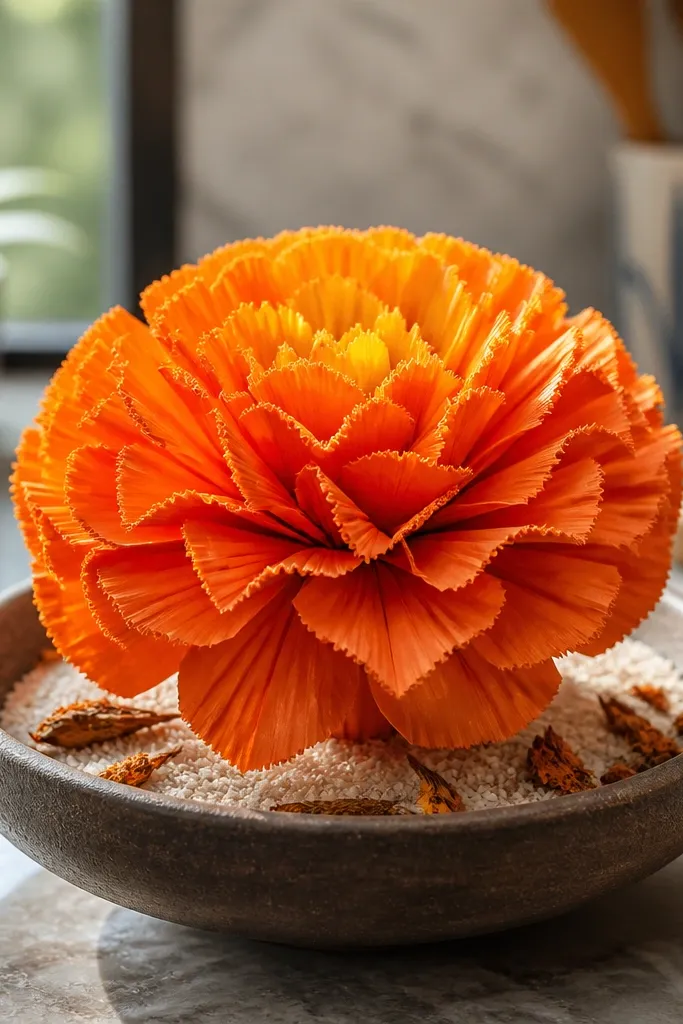
Marigolds are all about texture, and you can fake that texture with repeated small folds. This easy version creates a fringe-like petal edge that looks fluffy in photos. Orange plus a hint of yellow paper inside makes the bloom glow. Choose this when you want high visual impact with a simple technique.
Editor's noteUse a sharp pair of scissors and cut slowly — uneven fringe looks messy.
Start with a 20 x 20 cm square in orange. Fold it into a pleated strip by making 6-8 narrow folds toward the center, then open slightly to form petal sections. Cut the outer edge into small “fingers” only after you’ve created the pleats, then fold the fingers outward to look like fringe. Glue the base together and pinch the center to keep it tight.
Skip thisDon’t overcut the fringe; too many cuts make petals tear and collapse.
9. Mini Hydrangea Cluster (6 Petals Each)
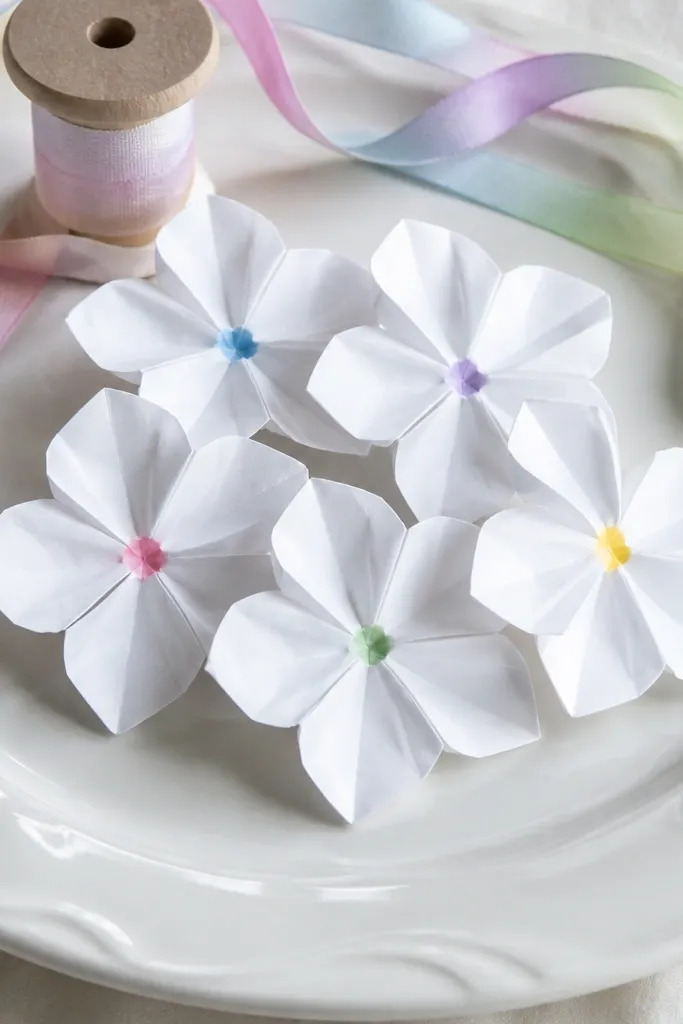
Hydrangea looks full because each flower is small and bunched. This project gives you a mini blossom you can repeat 6-12 times, then group them for a cluster that reads as one big bloom. White paper makes it look crisp and clean, and you can tint centers with a marker dot. It’s one of the best good-looking Origami Easy options for kids because assembly is simple and the result looks impressive.
Fold a mini 12 x 12 cm square into a 6-petal form by making a base fold, then folding 6 edges inward like a hexagon. Glue the edges at the center point so it holds a flower shape. Make 6 to 12 of these minis. For the cluster, glue them onto a small circle backing paper and stagger heights by gluing some petals slightly raised.
Add a tiny center dot with a dark marker for instant flower definition.
Don’t glue all minis at the exact same height — the cluster looks flat.
10. Paper Peony with Rolled Corner Petals
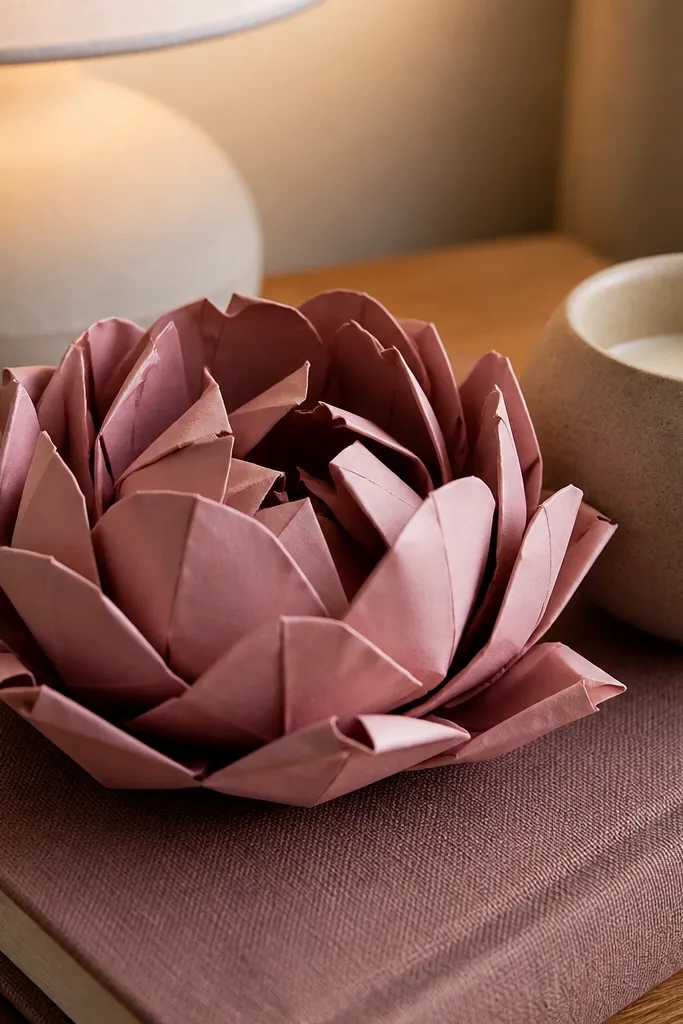
Peonies are fluffy, and you can mimic that fluff with rolled corners. Each petal looks like it has a soft curl, so the flower holds a romantic, layered look. Soft pink or dusty rose paper is the easiest color choice because it hides tiny unevenness. This is a great pick when you want a good-looking Origami Easy flower that looks like it has many layers.
Use 20 x 20 cm paper for the main flower. Fold into a basic petal base, then roll each corner inward before you crease it down so the petal tip curls. Repeat around the shape so you get 8 curled corners. Glue the base of each petal just enough to hold the curl, then fluff outward with gentle finger pressure.
Roll the corners the same direction on every petal so the texture reads as intentional.
Don’t over-roll — if the curl is too tight, the flower looks like a tight star.
11. Aster Flower with Folded Edge Ruffles
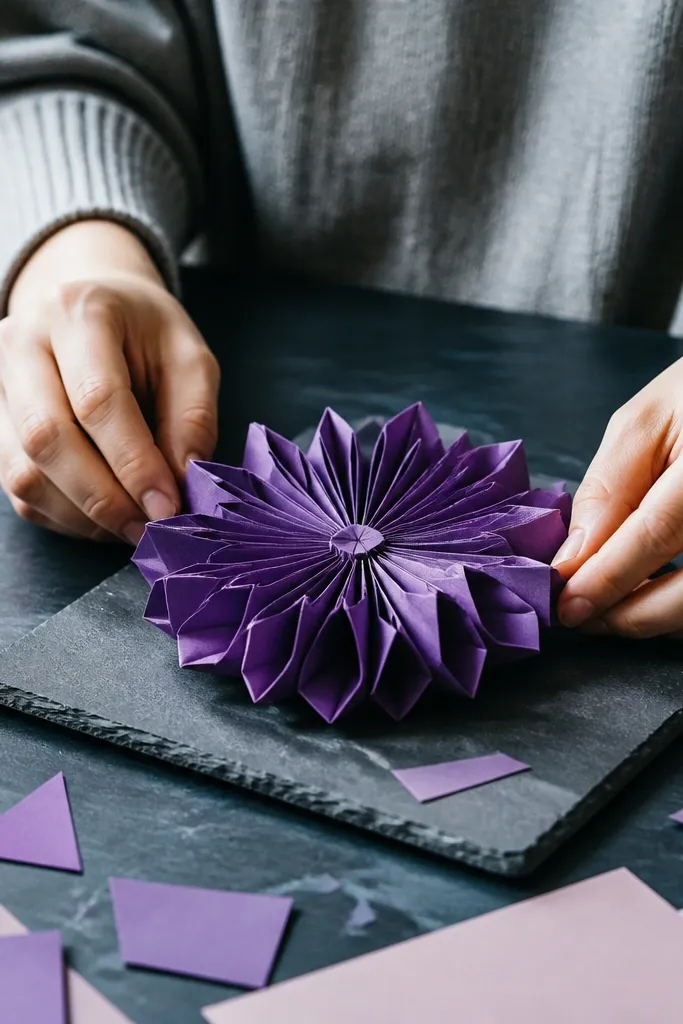
Asters look delicate because their petals have a ruffled edge. This design builds that ruffle with a simple fold line that creates a wavy petal rim. Purple paper makes it feel like an aster right away, and the ruffle catches highlights. It’s photogenic without extra decoration, which matters for AdSense-friendly, image-first posts.
Start with a 15 x 15 cm square. Fold into a basic petal shape, then add a small reverse fold along each petal edge to create a ruffle. Make 6 petals for a clean look. Glue petals to a small center circle cut from contrasting paper, then gently bend each ruffled edge outward.
If the ruffle looks flat, re-crease the edge with a bone folder while holding the petal slightly curved.
Don’t skip the reverse fold — plain edges make it look like a generic star.
12. Poppy with Black Center and Sharp Petal Tips
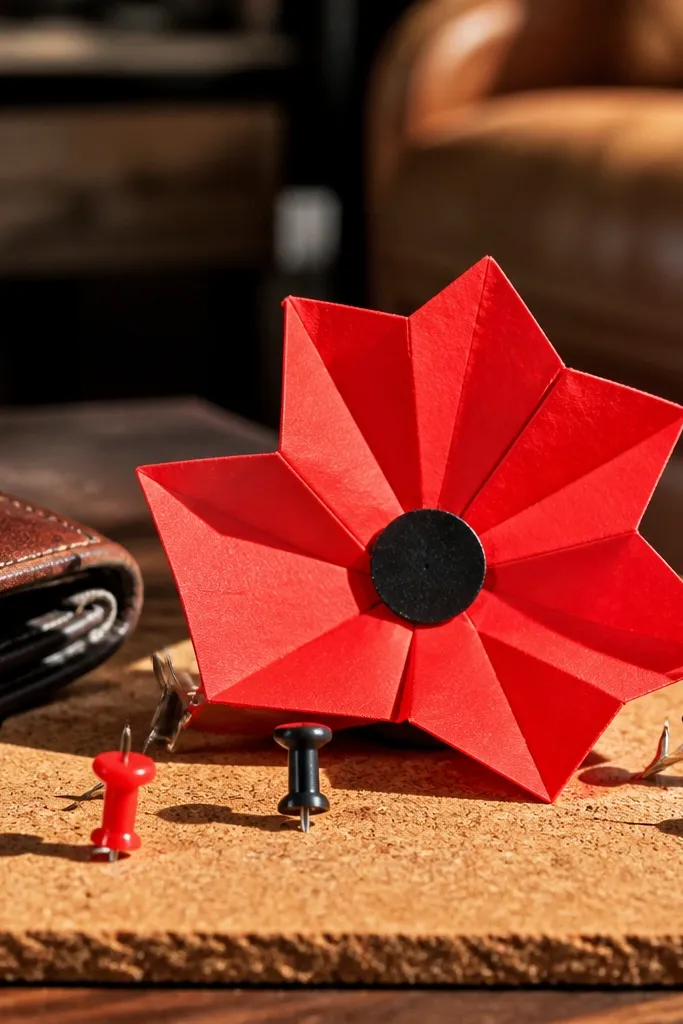
Poppies look dramatic because of contrast: red petals and a dark center. This easy design gives you sharp petal tips so the flower reads as poppy-shaped, not just “five petals.” Use red paper and a tiny black circle for the center. It’s one of the most striking good-looking Origami Easy options for bookmarks, cards, and simple stem decor.
Editor's noteCut the black center circle with a hole punch for a perfectly round dot.
Use a 15 x 15 cm square in red. Fold a base with diagonal creases, then shape 5 petals by folding each side to a point at the center. Keep the points crisp — press with a bone folder. Glue a black circle in the center, and add a small white dot if you want a realistic highlight.
Skip thisDon’t make the petal points rounded; poppy tips need to stay sharp.
13. Paper Iris with Long Narrow Petals
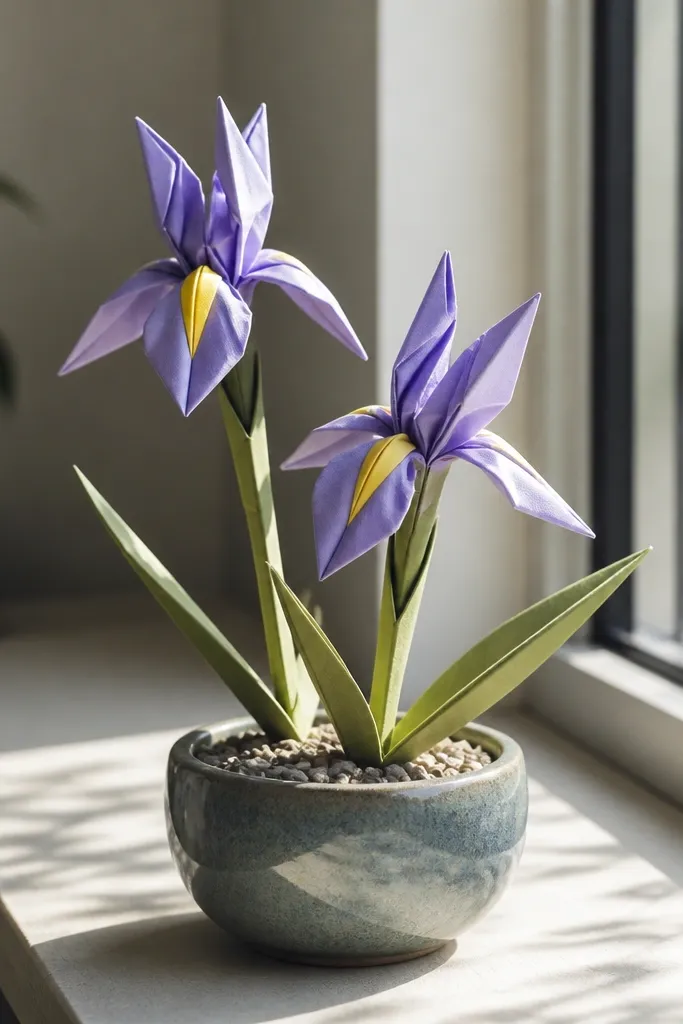
Iris flowers have that iconic long petal shape, and you can get it with narrow folds. This design makes the petals look stretched and layered, so the bloom has direction and drama. Lavender plus yellow for the inner petals creates that “iris” contrast immediately. It’s a good-looking Origami Easy flower when you want something that looks more advanced than it is.
Start with a 20 x 20 cm square. Fold a base, then create 3 long outer petals by folding each section into a narrow point. For the inner petals, use a smaller paper square in yellow and fold 3 narrow points that fit inside the outer ring. Glue the inner points to the center and let the outer petals extend past them.
Trim the outer point tips by 2-3 mm after folding so the petals look clean and not blunt.
Don’t use one color for everything — iris relies on contrast.
14. Simple Butterfly-Friendly Flower (5 Petals, Big Center)
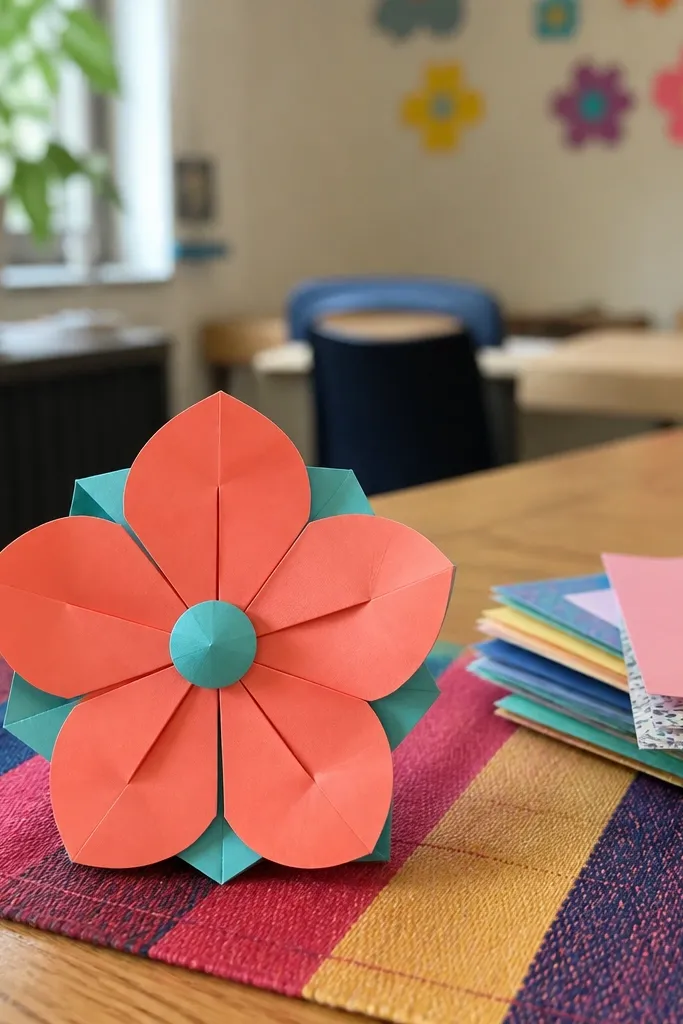
This is the “instant cute” flower. The petals are big and round, and the center is bold, so the flower looks clean from every angle. Coral, teal, or bright pink paper makes it cheerful and photo-friendly. It’s easy enough for kids, but the proportions make it look intentional — big petals, small center details.
Use a 15 x 15 cm square. Fold into a basic square base, then fold 5 rounded petal flaps by curving the corners inward before creasing. Make the folds symmetrical by marking the center with a light pencil dot. Glue the base of each petal at the center point. Finish with a large center circle in a contrasting color.
Use a circle template or lid to trace the center circle before cutting.
Don’t fold the petals too narrow; the round look depends on width.
15. Snowdrop with Green-White Two-Tone Look
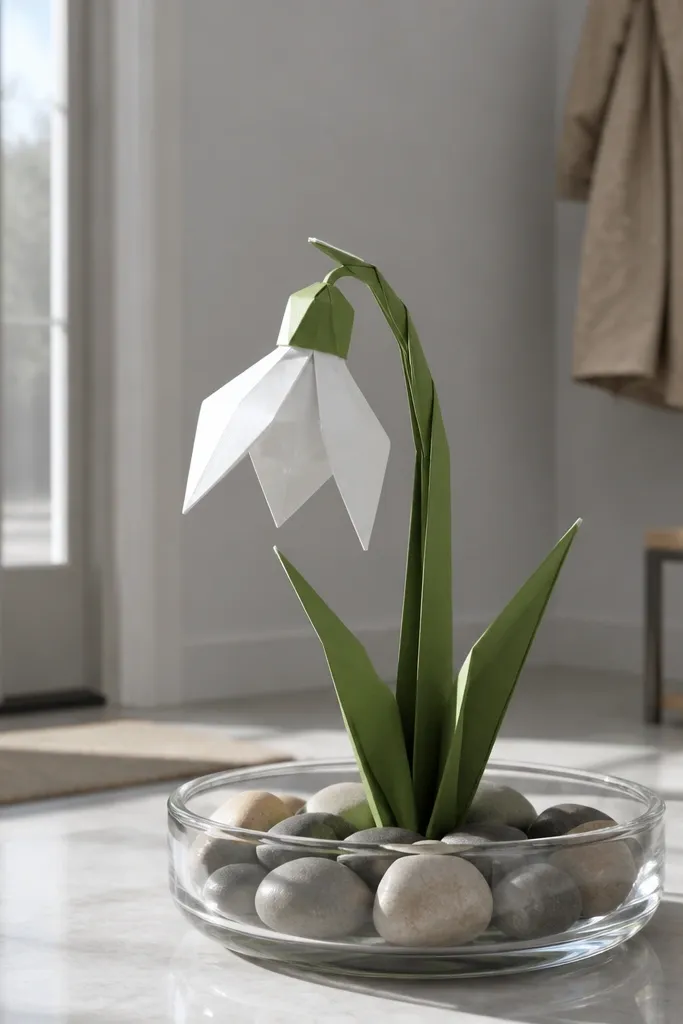
Snowdrops look elegant because the white petals hang over a green base. This easy origami version uses two-tone paper so the base reads as leaves even if you’re not adding extra stems. White with a small green section gives you that “spring” feel in a single fold. It’s a good-looking Origami Easy flower for minimalist cards and window decorations.
Editor's noteBend the petal tips downward before glue sets so they keep the hanging shape.
Use two squares: white 18 x 18 cm for the petals and green 8 x 8 cm for the base. Fold the white square into a simple petal shape with a pointed tip that you bend slightly downward. For the green base, fold a tiny triangle and wrap it under the petal base. Glue green under the center so the white petals appear to hang.
Skip thisDon’t skip the green base — white-only petals look flat.
16. Tropical Hibiscus with Wide Petals and Center Star
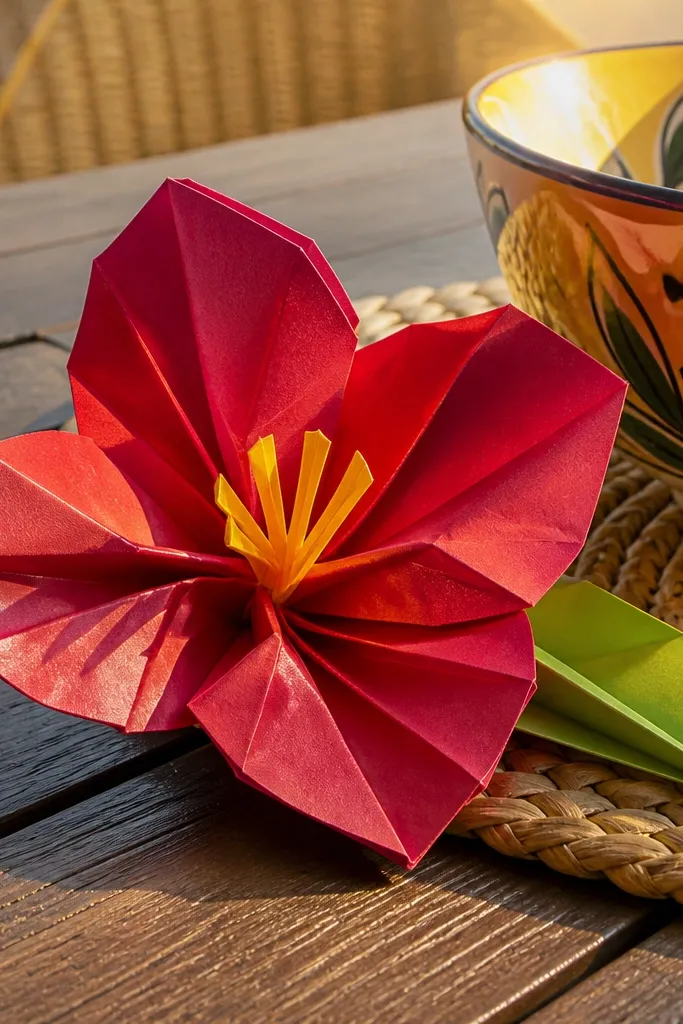
Hibiscus is bold, and the paper version can look bold too. The wide petals create a “tropical” silhouette, and a star-like center makes it feel energetic in photos. Use red or magenta paper for petals, then a yellow center piece for contrast. This is one of the most photogenic good-looking Origami Easy flowers when you want something that looks like a wall decoration.
Start with a 20 x 20 cm square in red. Fold a base and form 6 to 8 wide petal flaps by folding edges outward and then back so the flap has thickness. Glue petals into a ring with spacing — leave small gaps for a hibiscus look. For the center, cut a small yellow star or fold a compact star unit and glue it in the middle.
Make the gaps between petals slightly larger than you think — hibiscus needs air to look like a real flower.
Don’t overfill the center; too much glue makes the flower look like a blob.
17. Calla Lily with Folded Tube Center
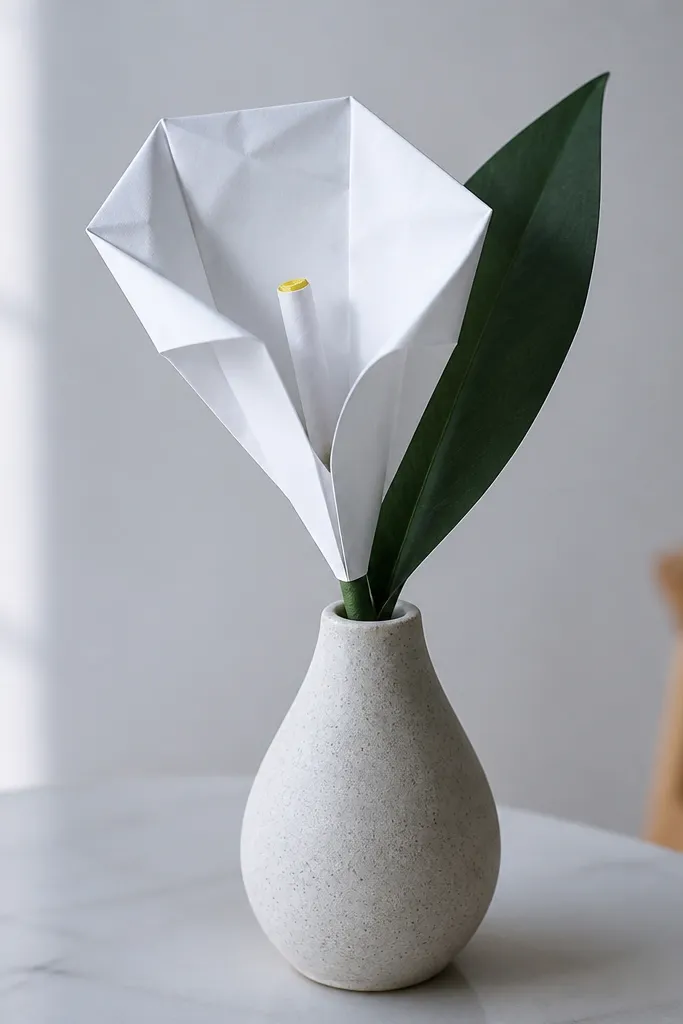
Calla lilies look clean and sculptural. This easy fold makes a tube center that gives you that signature “curling” look. White paper makes it feel modern, and a faint yellow center dot gives realism without extra supplies. If you want good-looking Origami Easy flowers that look classy instead of busy, this is the one.
Editor's noteUse thinner paper for the sheath so it drapes instead of standing stiff.
Use a 20 x 20 cm square. Fold into a tube-like center by rolling one corner tightly and gluing the edge at the base. Then fold the remaining paper into a long petal sheath around the tube, keeping the top open. Glue the sheath only near the bottom so the petal drapes and the tube stays visible.
Skip thisDon’t glue the tube through the middle — it should stay hollow-looking.
18. Crocus with Slim Petals and Tall Silhouette
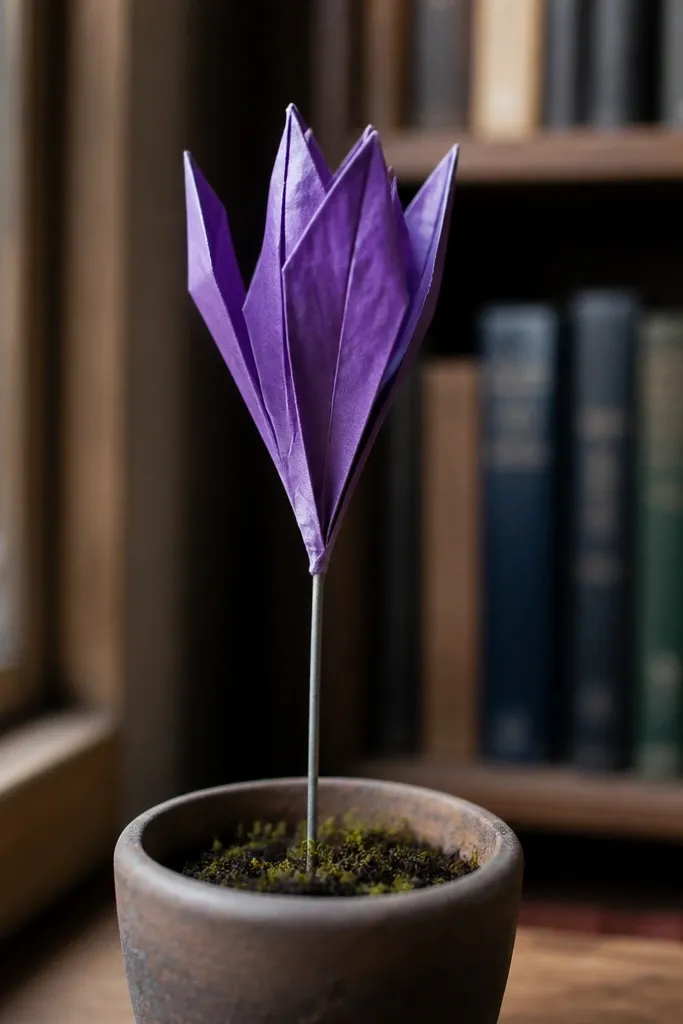
Crocus flowers look tall and delicate, and you can copy that silhouette with slim petal folds. This design makes narrow petals that stand up, so it reads as a real crocus even from a slight angle. Purple or violet paper makes the color match obvious. It’s a good-looking Origami Easy flower that works great on stems or as a vertical card topper.
Editor's notePress the base flat, but leave the top creases less pressed so petals can stand up naturally.
Start with a 15 x 15 cm square, or use 20 x 20 for extra height. Fold a base and create 3 narrow petal points by folding each section into a long triangle. Stand the petals up by bending along the crease lines before you glue the base. Add a tiny yellow center dot or small yellow triangle inside the petals.
Skip thisDon’t widen the petal points — crocus needs narrow, tall geometry.
19. Rose Flower Card Topper (Flat but Layered)
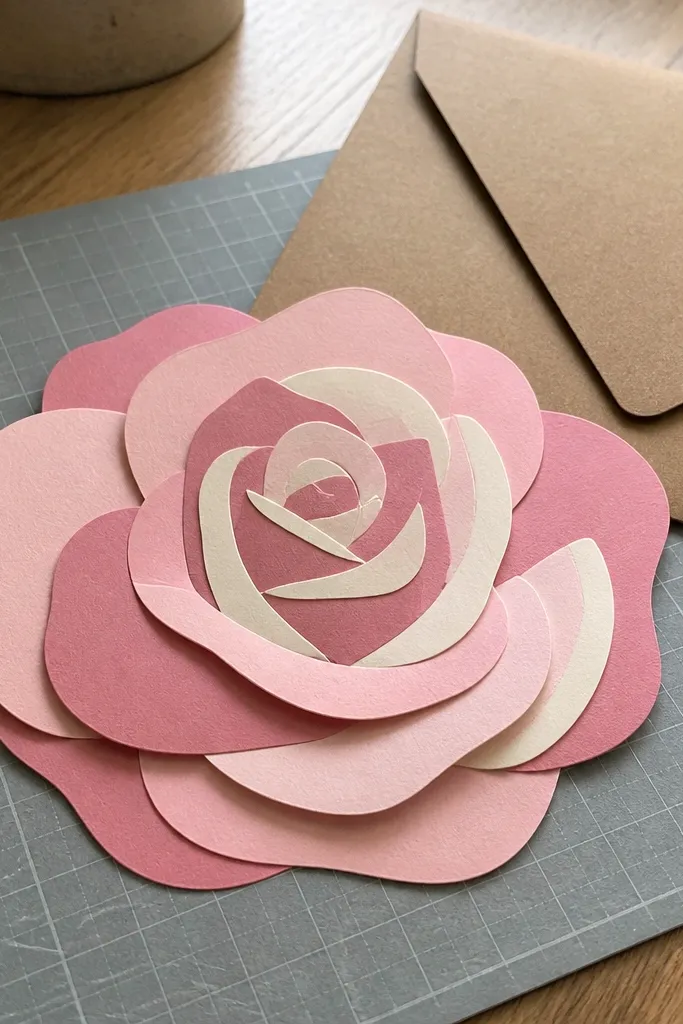
Some people want flowers that lie flat for cards, but still look layered. This rose topper is designed to stay flat while keeping petal layers visible. You get a realistic rose look from the overlap pattern, not from bulky 3D folds. Use two shades of pink or pink plus cream for the inner layer. It’s perfect when you want good-looking Origami Easy with zero hanging parts.
Editor's noteIf the petals curl up too much, place the finished topper under a book for 20 minutes.
Use a 15 x 15 cm square for the outer petals and a 7.5 x 7.5 cm piece for the inner layer. Fold the outer square into a petal base, then fold 5 to 6 petal tabs so they overlap slightly. For the inner layer, fold a smaller petal unit and glue it centered. Keep glue only at the overlap points so the outer petals lift slightly off the card.
Skip thisDon’t glue the whole center — the rose layers need separation.
20. Paper Sunflower with Spiky Center Ring
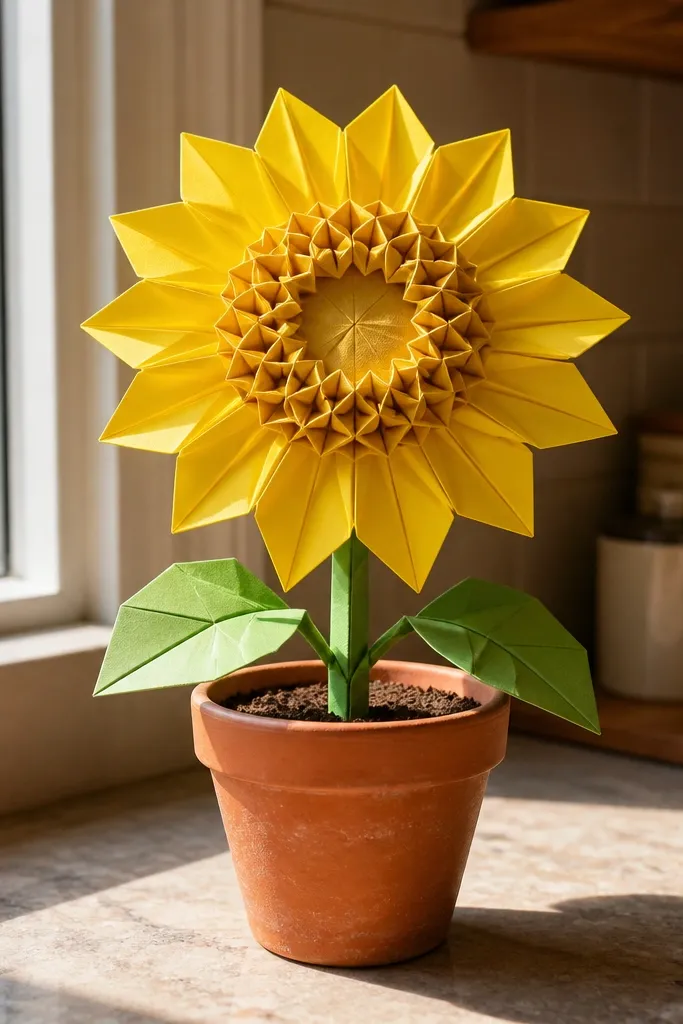
Sunflowers are instantly recognizable, and this design captures the look with spiky center petals around a round middle. The petals are easy folds, but the center ring makes it feel like a real sunflower. Use bright yellow for petals and brown or dark orange for the center. It’s one of the best good-looking Origami Easy flowers for kids because it looks fun and bold even with simple skills.
Editor's noteCut the spike triangles about 6 mm wide so they look like seeds, not paper shards.
Start with a 20 x 20 cm square in yellow. Fold 8 petal sections by folding edges toward the center point and creasing firmly, then glue the base of each petal at the ring. For the center, cut a small brown circle and add small folded “spikes” around it using tiny triangles. Glue the spiky ring on top of the center circle.
Skip thisAvoid a flat center without spikes — it will read as a generic flower.
21. Lilac Blossom with Layered Mini Flaps
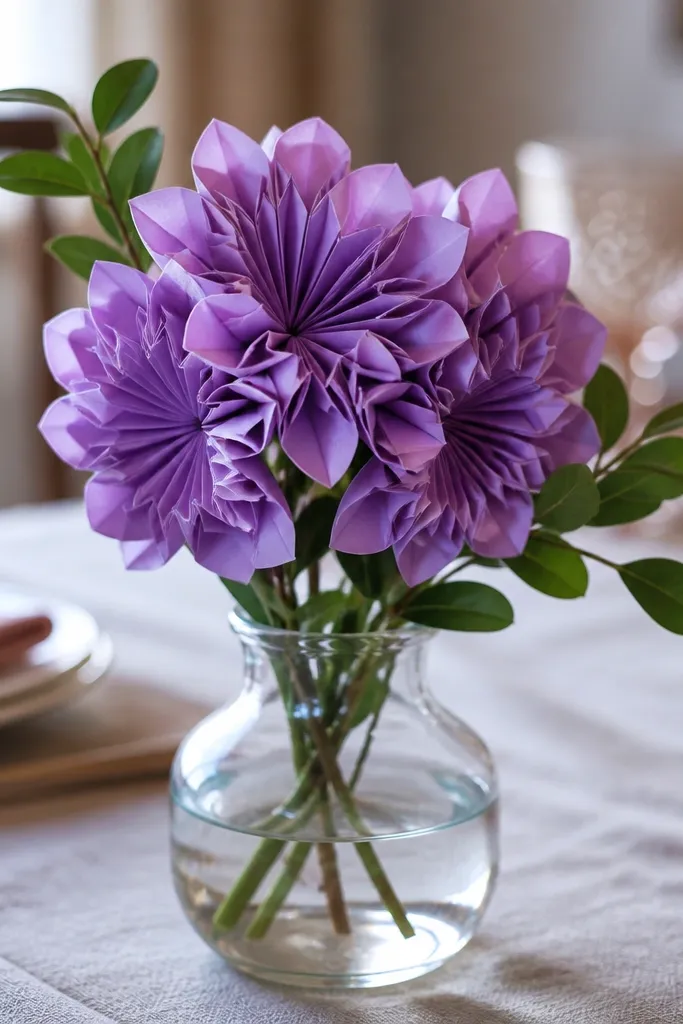
Lilac blossoms look delicate, and the trick is tiny flaps stacked in layers. This easy design gives you that “cluster” look without building a full bunch — one flower already looks like it has multiple tiny petals. Lavender paper with slightly darker edges makes the petals look dimensional. It’s a good-looking Origami Easy flower for spring garlands and small decor clusters.
Editor's noteMake the second layer flaps 1-2 mm shorter so the first layer peeks out like natural layering.
Use a 15 x 15 cm square in lavender. Fold a basic base and create 6 mini flaps by folding each side into a small rectangle, then folding the rectangle tip toward the center. Glue flaps in two layers: first layer flat, second layer slightly raised by gluing only the flap base. Add a tiny darker center dot to finish the blossom.
Skip thisDon’t glue every edge; raised layering is what makes it look like lilac.
22. Garden Rose with Pinched Petal Points
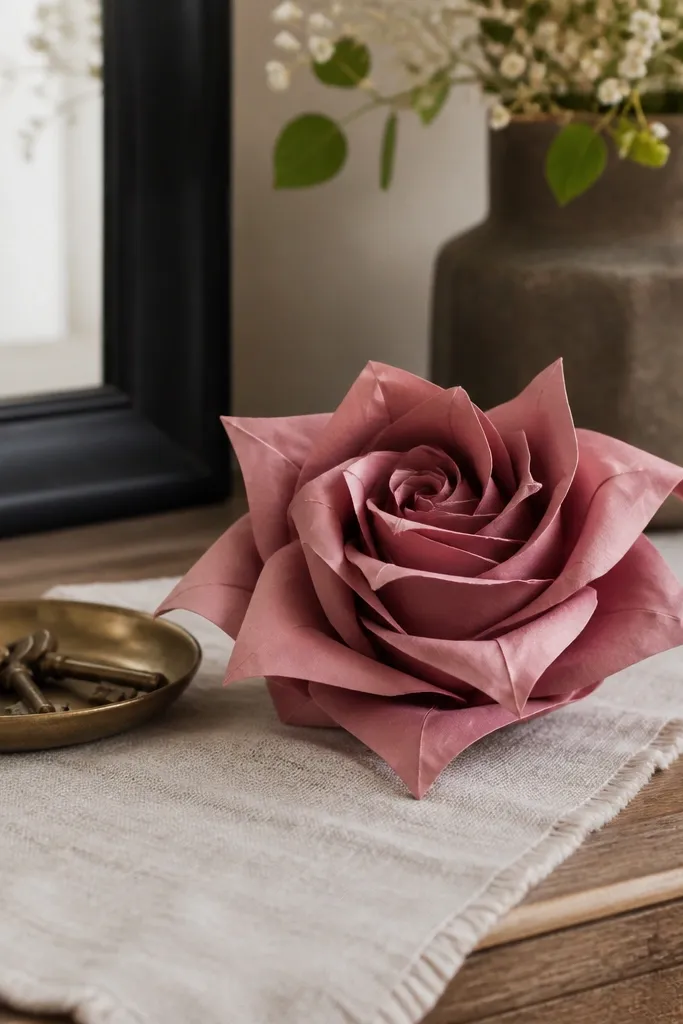
This rose style looks like a garden bloom because the petals pinch into points and then curve outward. Pinched points make the flower look structured, not floppy. Muted pink, dusty rose, or blush paper looks best because it softens the geometry. If you want a good-looking Origami Easy flower that looks “grown-up” for home decor, this fits.
Use a 20 x 20 cm square. Fold into a petal base, then fold each petal corner inward and pinch at the tip to create a pointed shape. Arrange 6 petals around a center point, overlapping slightly. Glue only the bottom edges so the tips stay curled outward.
Pinch with two fingers at the tip, then release — the crease holds better than a single hard press.
Don’t over-overlap petals; too much overlap makes it look like one thick wad.
23. Paper Orchid with Asymmetrical Petals
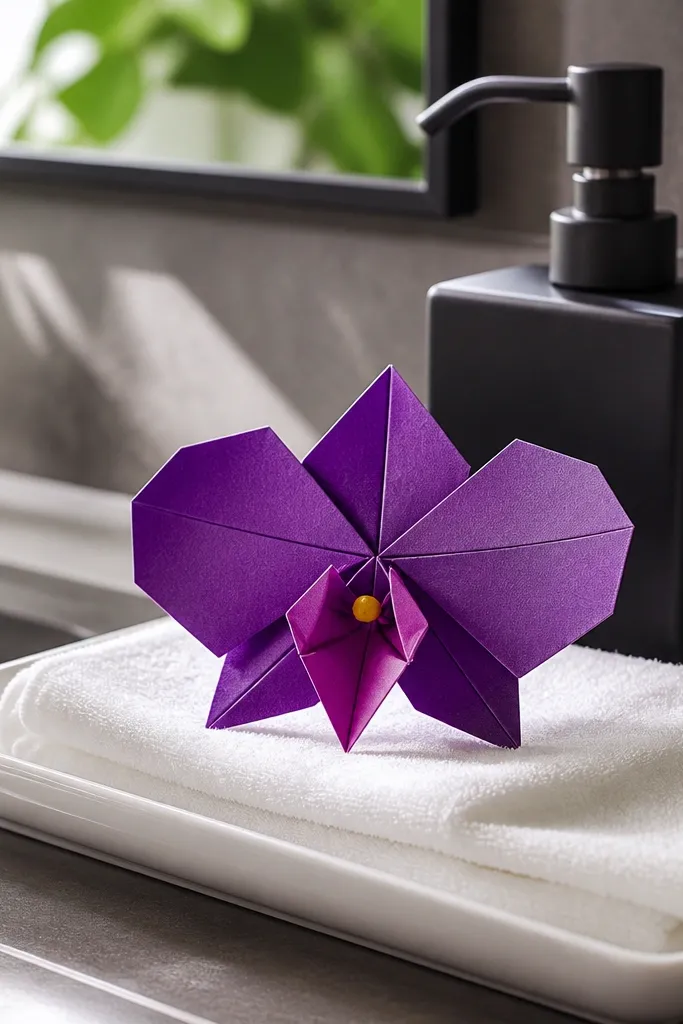
Orchids look sophisticated because they’re asymmetrical. This easy design uses different petal shapes on top and bottom so it reads as orchid-like, not generic. Purple plus a bright center spot — even a small yellow dot — makes it pop. It’s one of the best good-looking Origami Easy flowers when you want something that looks “designed,” not just folded.
Editor's noteDraw a tiny pencil guideline for petal widths so your asymmetry looks intentional.
Start with a 20 x 20 cm square. Fold the base and create 3 top petals slightly narrower, then 2 side petals wider by changing the fold width. Make a bottom lip petal by folding a flap down and pinching the edge. Glue petals in place, then add a small center spot cut from yellow or light orange paper.
Skip thisSkip perfectly mirrored folds — orchids need intentional imbalance.
24. Paper Daisy with Layered White Petals
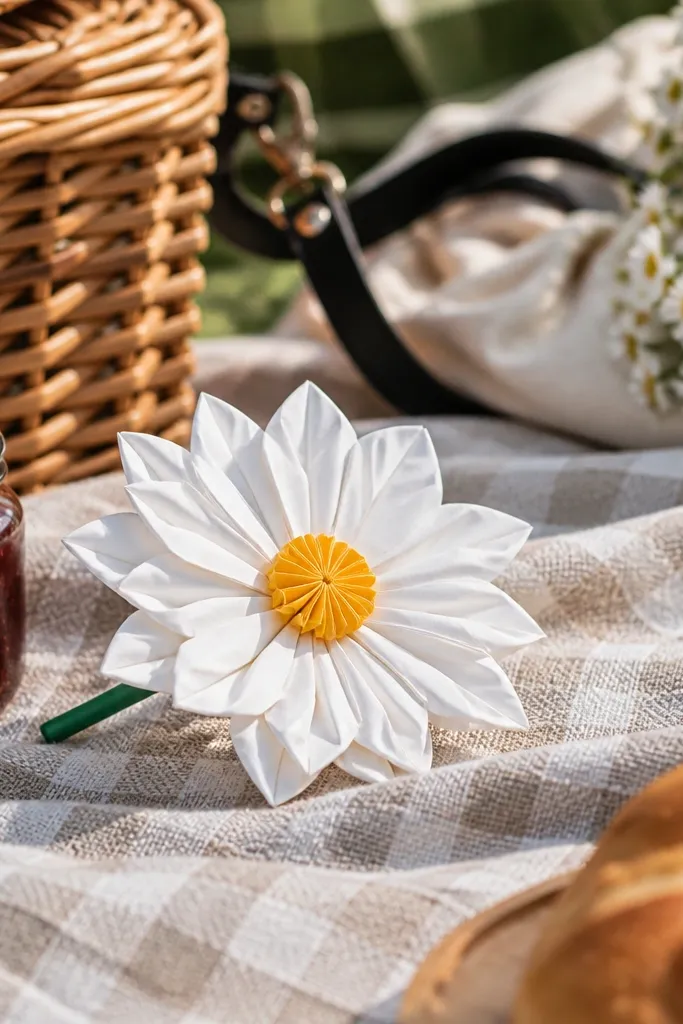
Daisies are simple but hard to make look real if the petals are all flat. This version adds a second petal layer so the petals look slightly thicker and more dimensional. White petals with a warm yellow center read as daisy immediately, and the clean shape looks great in photos. It’s an excellent good-looking Origami Easy pick for kids because the folds repeat.
Editor's noteTrim petal tips by a millimeter or two after folding for a crisp daisy edge.
Use a 15 x 15 cm square for the outer layer and a smaller 10 x 10 cm square for the inner layer. Fold the outer square into 8 petal folds by bringing corners toward the center and creasing, then glue at the base. Repeat with the smaller square for the inner ring. Glue the inner ring centered, then add a yellow circle in the middle.
Skip thisDon’t glue the outer petals flat to the backing; keep them slightly lifted.
25. Water Lily with Fan Petals (Soft Green Center)
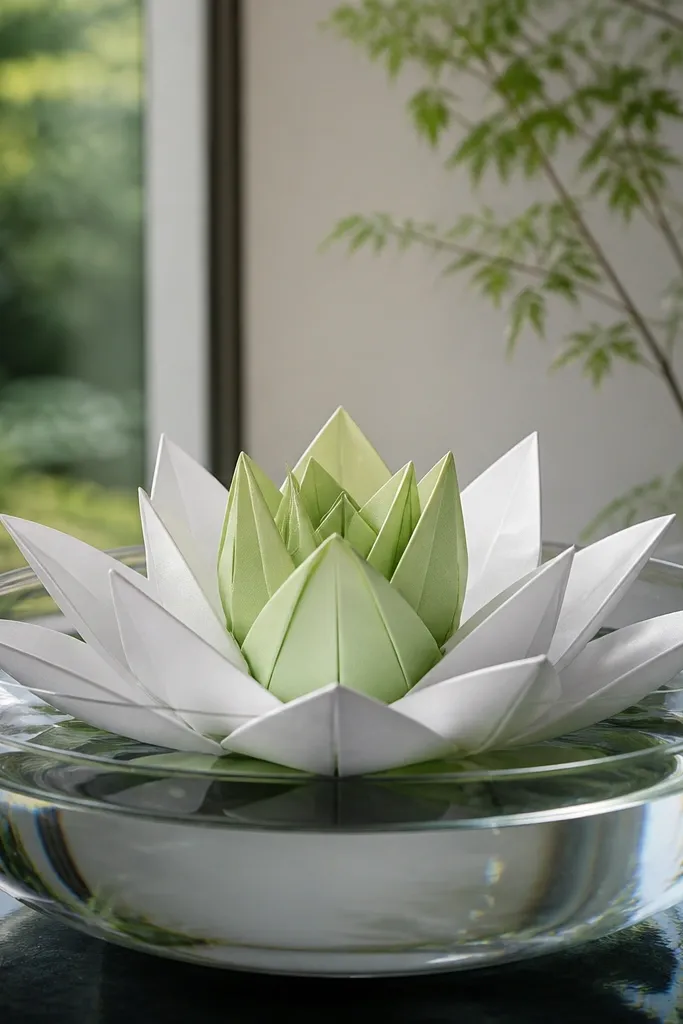
Water lilies look calm and pretty, and the fan-petal shape is what makes them. This easy design creates layered fans that open like petals on a lily pad. Use white or pale green for the petals, and a slightly darker green for the center. It’s a good-looking Origami Easy flower for window displays and calm, minimal room decor because it doesn’t scream — it glows.
Editor's notePress the fan creases on a hard surface for sharper petal edges.
Start with a 20 x 20 cm square. Fold it into a base and form 6 to 8 fan petals by folding each segment outward and then flattening it into a fan shape. Glue the base edges into a ring, leaving the tips free. For the center, use a small green square folded into a compact bud and glue it inside.
Skip thisDon’t over-bend the tips; too much bend makes it look like a starburst.



