1. DIY Pegboard Tool Wall
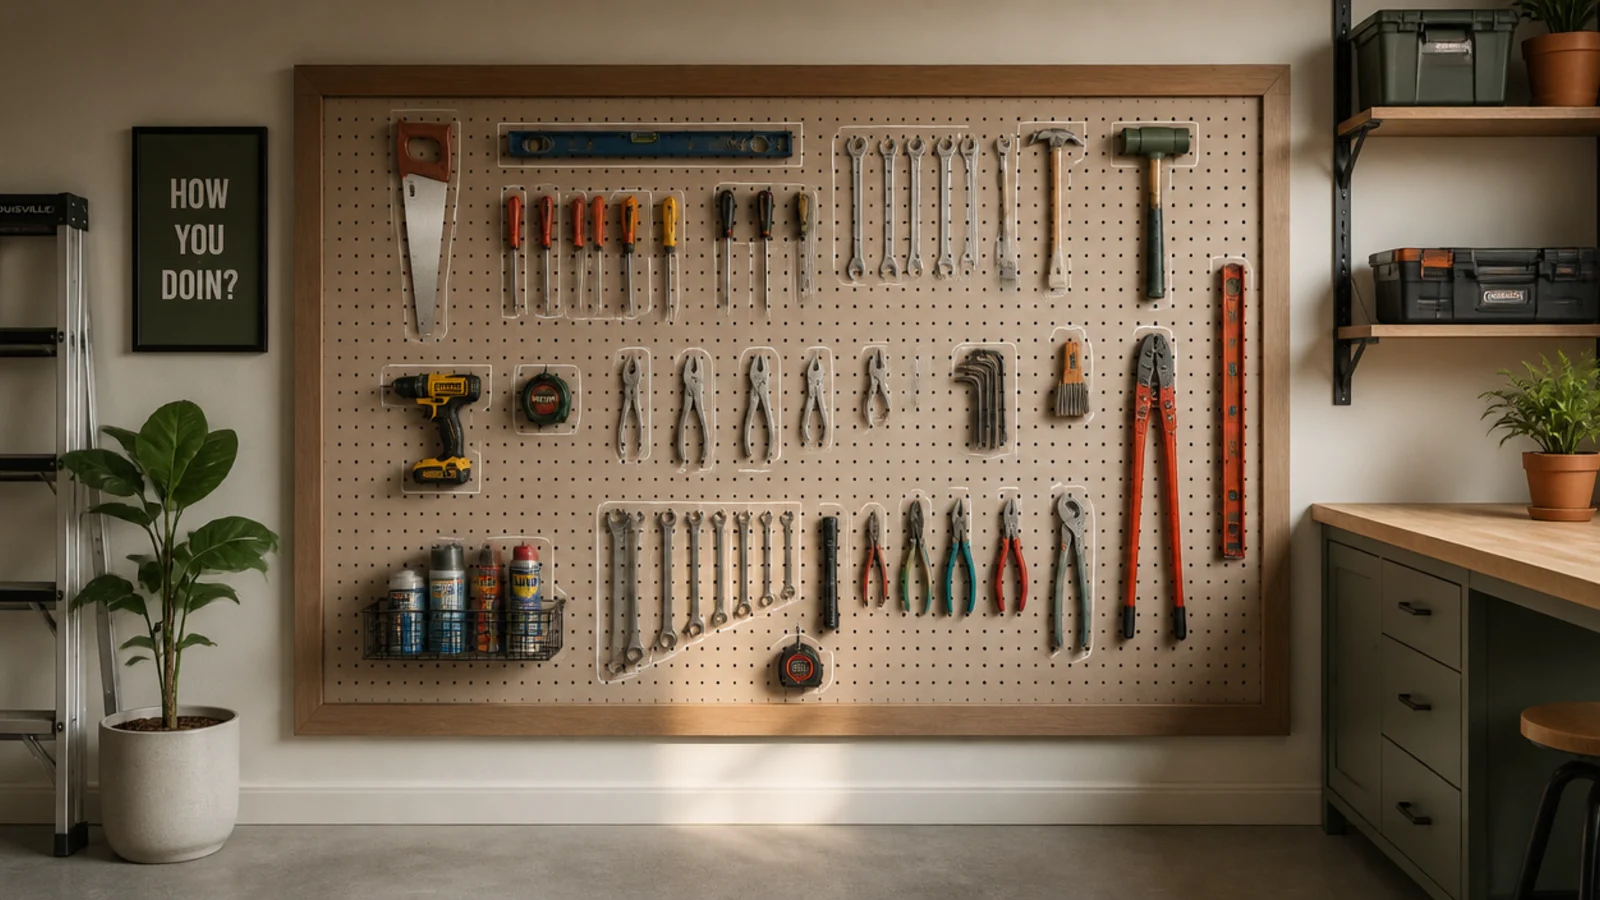
Cut 1x2 furring strips and screw them to the wall studs in a grid, keeping them level and flush at the front. Screw a tempered pegboard sheet to the furring strips with washers behind the screw heads. Snap in assorted hooks and hang your tools heaviest-near-the-studs. Trace each tool’s outline with a marker so everything has a home.
A pegboard wall is the easiest DIY build with the biggest payoff, turning one flat wall into storage for dozens of hand tools. The only trick is spacing it off the wall so hooks can seat. It’s the ideal first project for any beginner.
Skip thisDon’t screw pegboard flat to the wall; without the furring-strip gap the hooks can’t seat and the wall is useless.
Editor's noteRun the furring strips over every stud so the board is fully backed — a floppy midsection means hooks pull out when bumped.
2. DIY Plywood Workbench
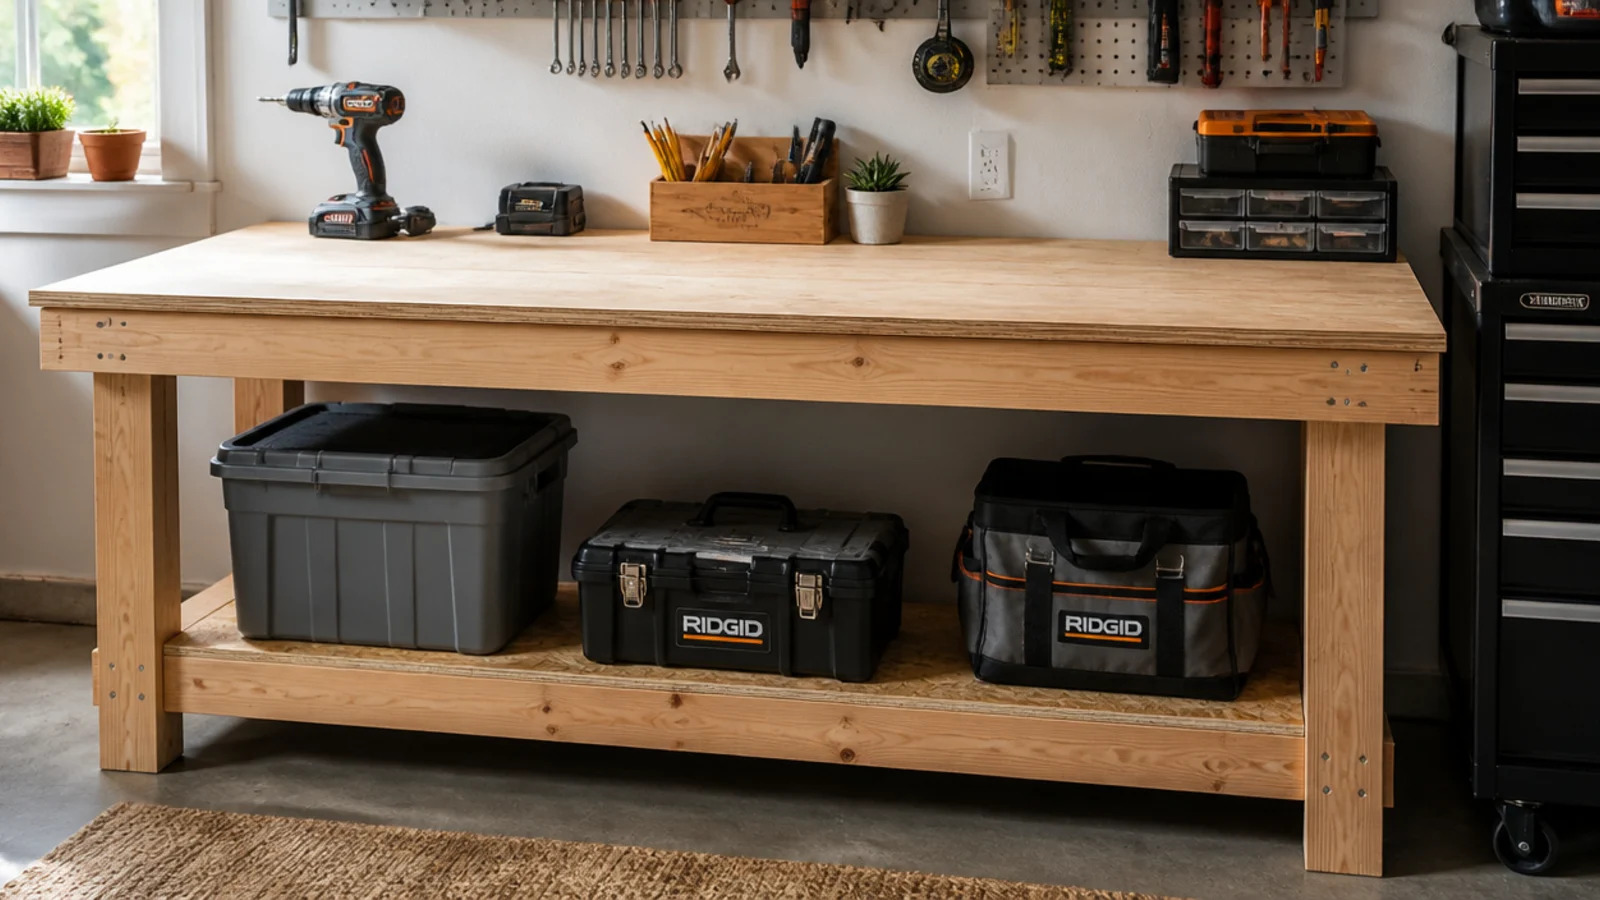
Build a frame from 2x4s: four legs, a top and bottom perimeter, and a mid-rail, joined with 3-inch screws and glue. Cap it with a 3/4-inch plywood top, screwed down from below or countersunk from above. Add a lower plywood shelf between the bottom rails for bins. Level the legs on the concrete with shims and, for stability, screw the back rail into a wall stud.
A 2x4-and-plywood workbench is the heart of an organized garage — a flat, strong surface to work on and a base to build everything else. It’s cheap, simple, and stronger than most store benches. Every DIY garage needs one.
Skip thisDon’t build the top from thin particleboard; it sags and swells — 3/4-inch plywood stays flat under real work.
Editor's noteMake the top overhang the frame a couple of inches at the front so you can clamp workpieces to the edge.
3. DIY French Cleat Wall
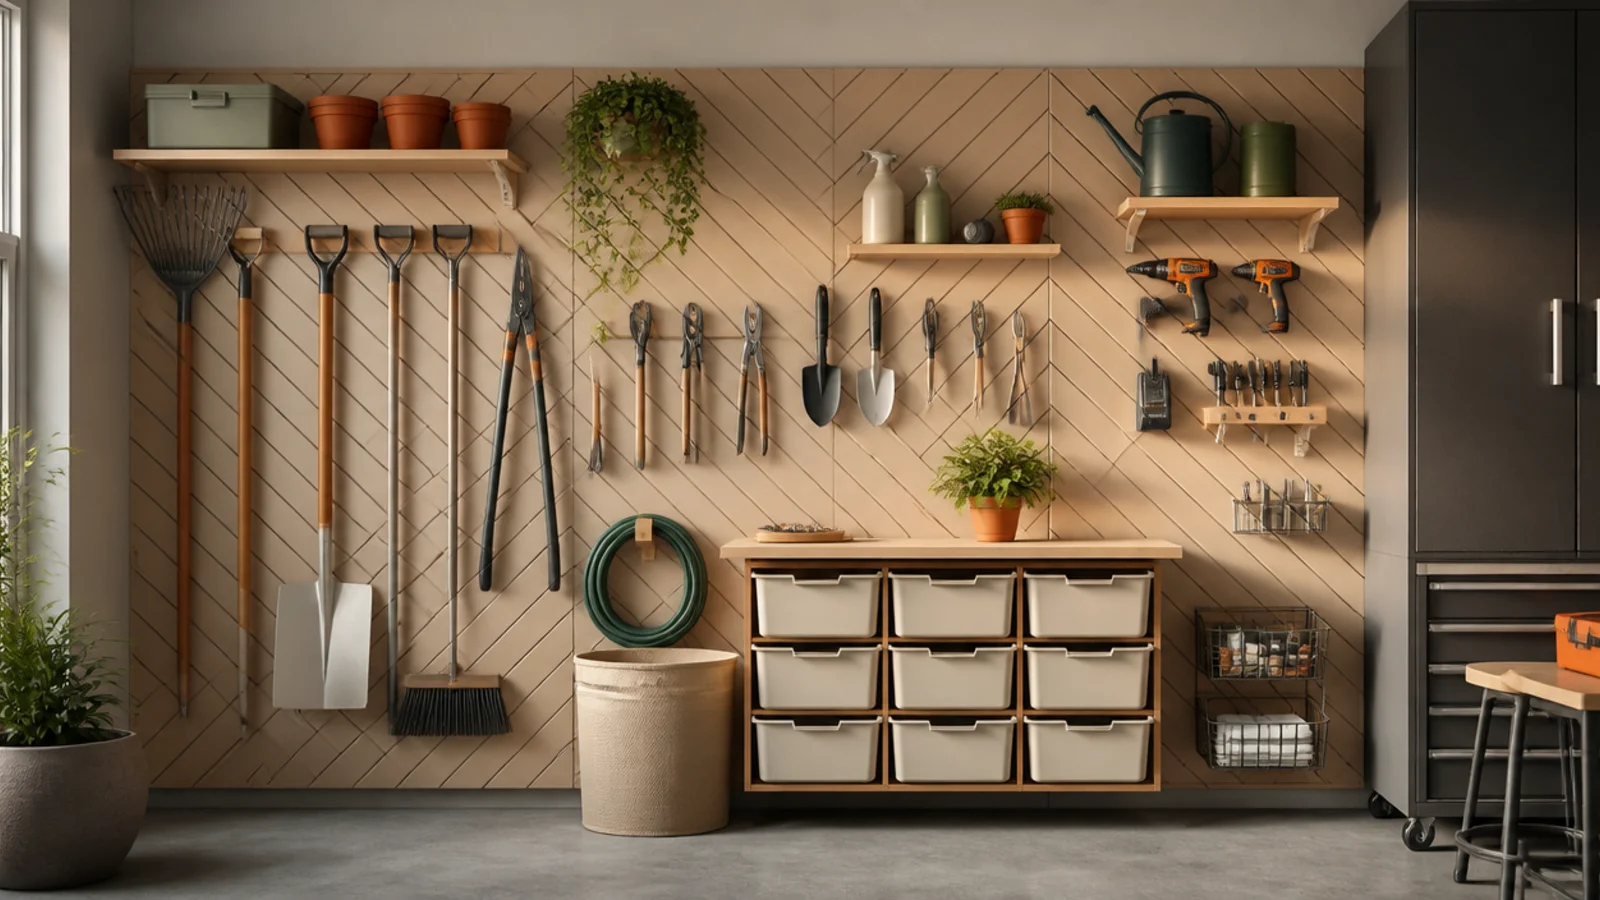
Rip 3/4-inch plywood into strips and cut a 45-degree bevel down each so they mate. Screw the wall cleats horizontally into every stud, bevel facing up and out, spaced about 6 to 8 inches apart up the wall. Build holders — tool racks, small shelves, bins — with a matching cleat screwed to the back. Hook holders over any rail and slide them to rearrange.
A French cleat wall is the most flexible DIY system there is: a run of angled rails that custom holders hook onto and move anytime. Build the wall once, then make holders forever. Best for anyone who likes to tweak and expand their setup.
Skip thisDon’t cut the wall cleat’s bevel facing down; the angle must point up and out or holders lift right off.
Editor's noteCover a big wall area with cleat rails first; the reusable rail is the system, and you build holders as needs come up.
4. DIY Overhead Plywood Shelves
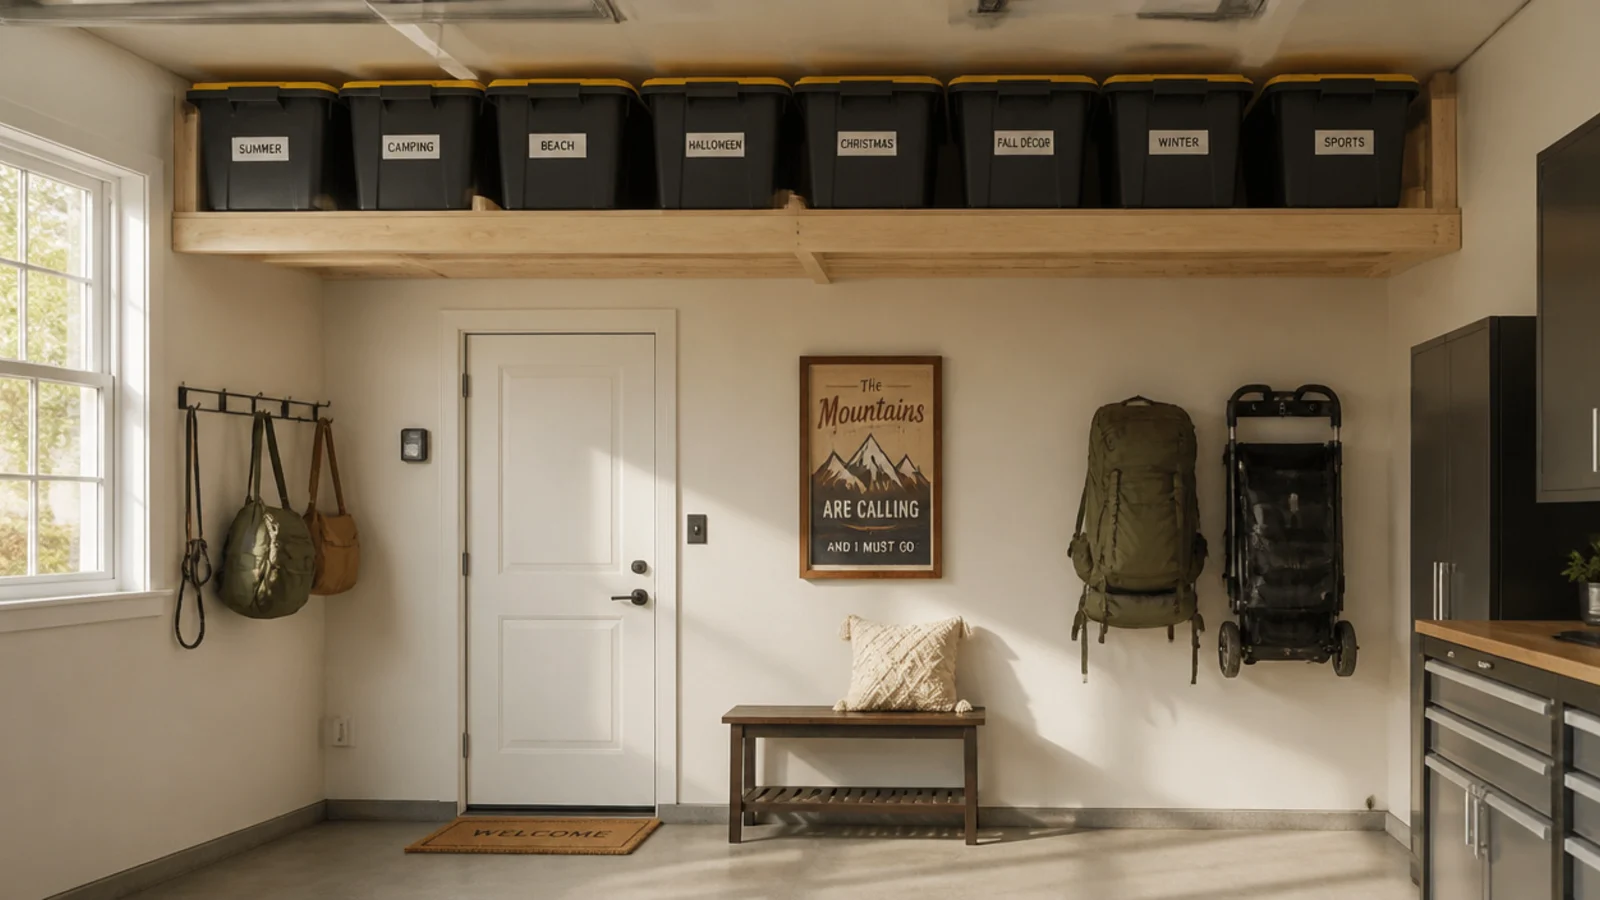
Screw 2x4 ledger cleats to the sides of the ceiling joists, level, at the depth you want. Lay 3/4-inch plywood across the cleats and screw it down into each joist. Frame a lip at the front edge so bins can’t slide off. Load only light, seasonal totes and confirm the shelf clears the car and the open door. Keep loads evenly spread.
Overhead plywood shelves built into the ceiling joists use the wasted air above your head for seasonal storage. It’s a half-day build that adds a huge amount of light-duty storage. Ideal for holiday bins and camping gear.
Skip thisDon’t store heavy items overhead; keep it to light seasonal bins and never exceed what the joists can safely carry.
Editor's notePosition the shelf above the garage door’s open path so it uses truly dead space and never blocks the car.
5. DIY Pipe-and-Wood Shelving
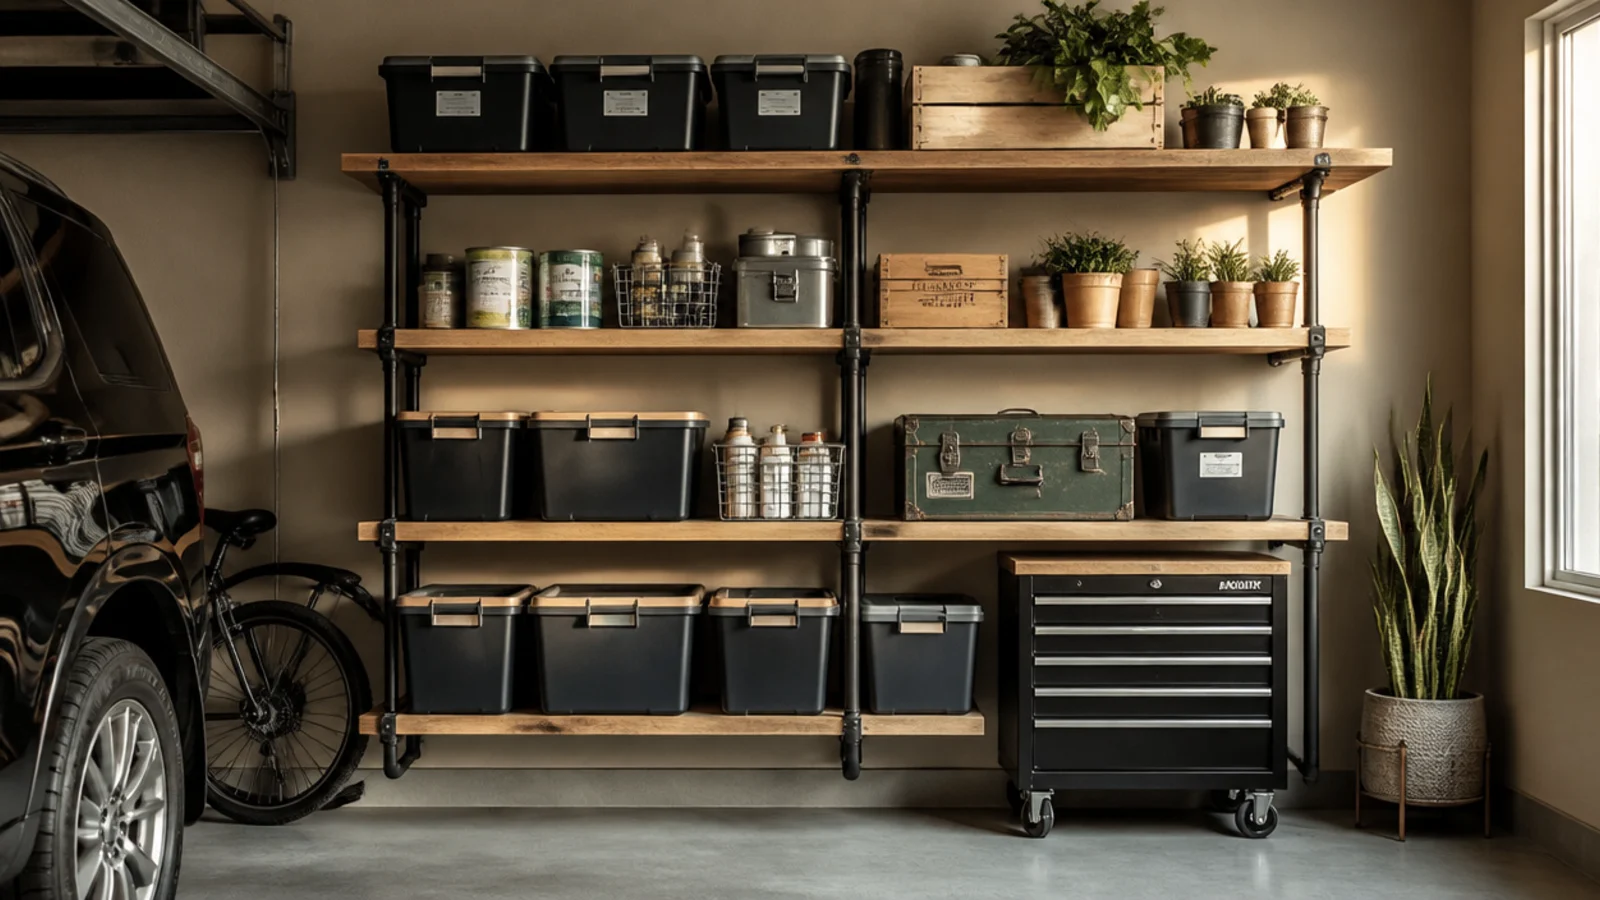
Pipe-and-wood shelving pairs black iron pipe flanges with thick wood planks for a strong, industrial wall shelf. It looks sharp and carries real weight. Great for a display-worthy tool or supply wall.
Screw iron pipe floor flanges into the wall studs, then thread short pipe nipples and elbows to form L-brackets under each shelf position. Cut 3/4-inch or thicker planks to length, seal or finish them, and screw them down onto the pipe brackets from below. Keep bracket spacing under 32 inches to prevent sag. Load heavier items over the brackets.
Buy pre-cut, pre-threaded pipe pieces from the plumbing aisle so you skip cutting and threading pipe yourself.
Don’t span long plank shelves on just two end brackets; add a middle bracket into a stud or the plank bows.
6. DIY Power Tool Charging Station
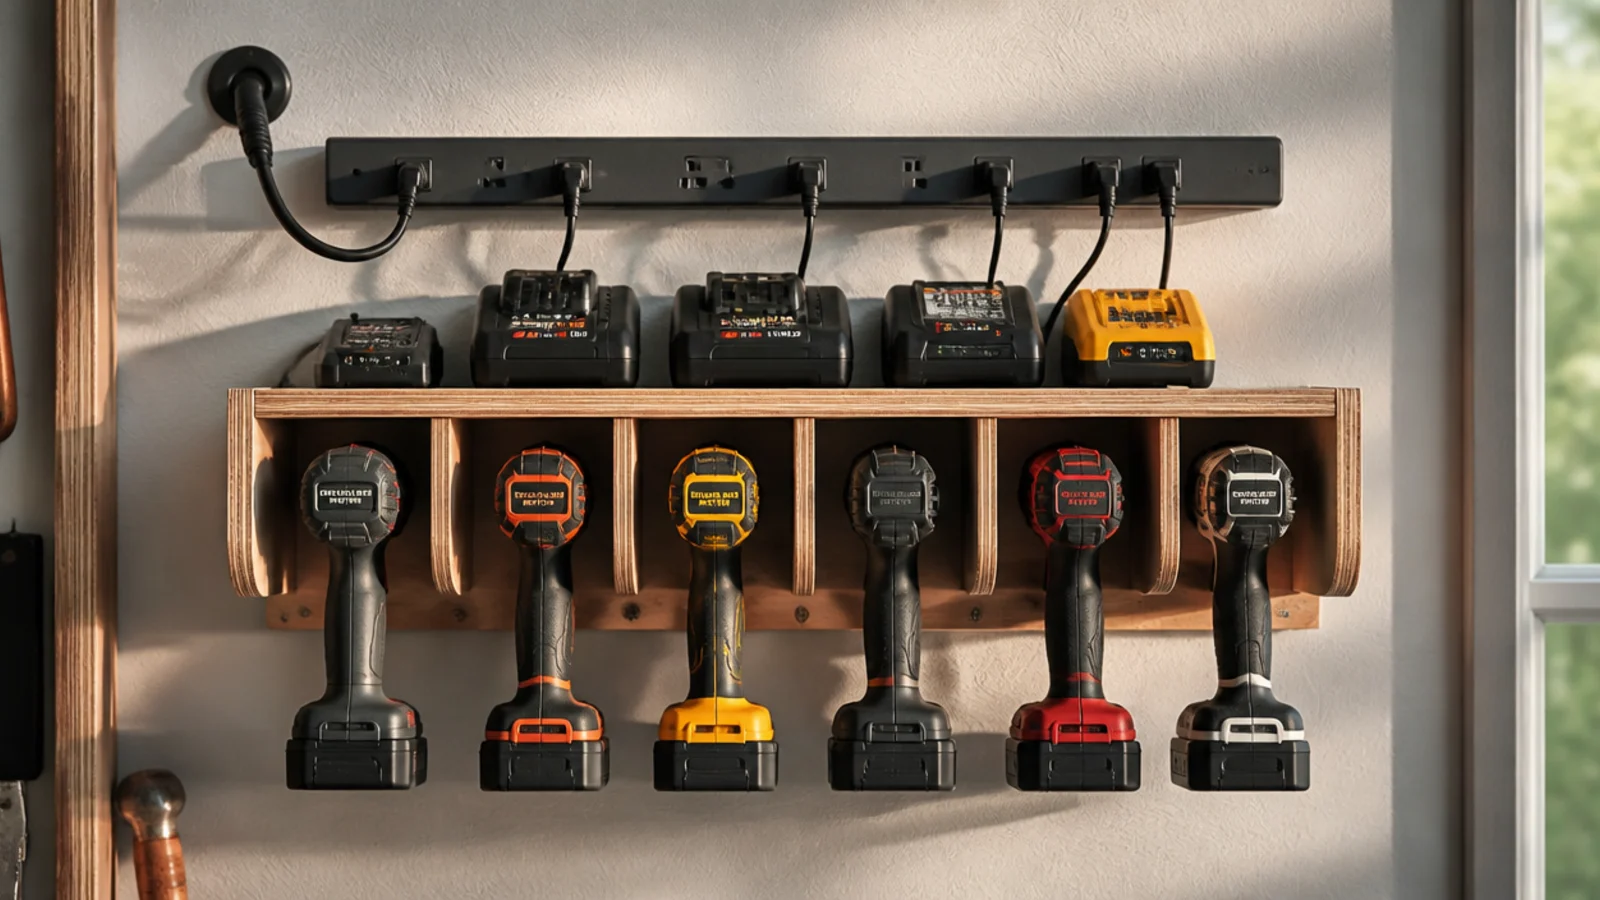
Build a shelf box from plywood with a top shelf for tools and a back panel for mounting chargers. Cut slots or cradles in the top shelf sized to your tool bases. Mount the chargers to the back panel and run their cords to a power strip screwed to the side. Anchor the unit into studs. Label each slot by tool so batteries and chargers stay paired.
A charging station puts all your cordless tools, batteries, and chargers in one powered spot so nothing’s ever dead when you need it. Tools drop into slots and batteries charge above. Essential for anyone with a cordless tool collection.
Skip thisDon’t box in chargers with no airflow; they get warm, so leave a gap above and behind for ventilation.
Editor's noteMount a single power strip with a switch so you can cut power to all chargers at once when everything’s topped up.
7. DIY Scrap-Wood Clamp Rack
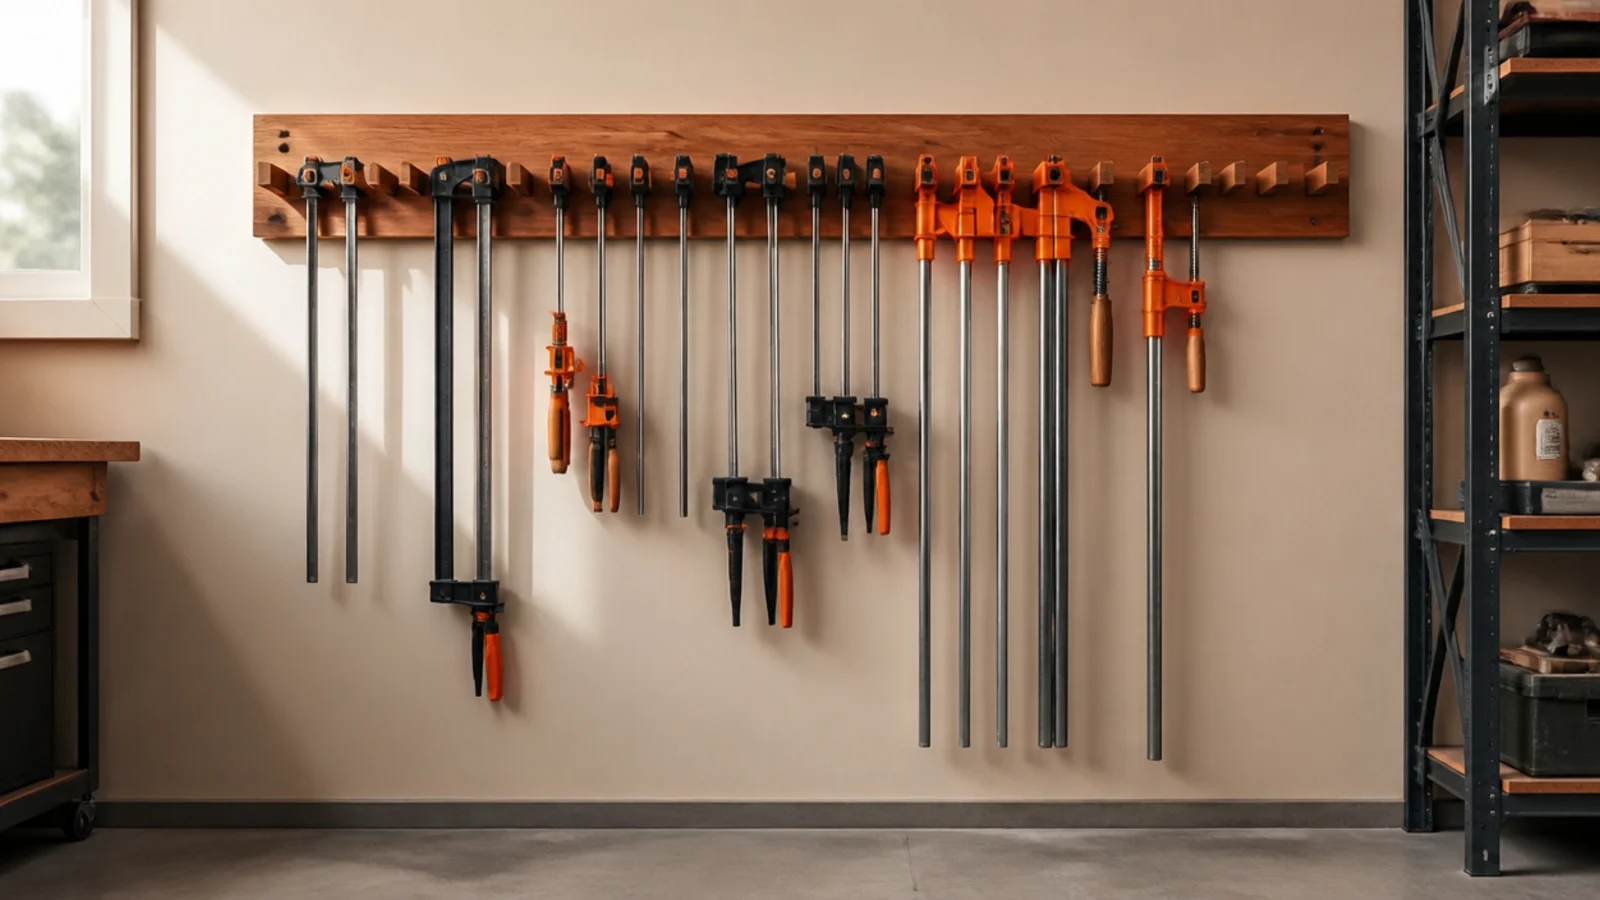
Screw a sturdy rail (a 2x4 on edge, or a cleat-backed board) to the wall studs. Cut a series of open-top slots or space dowels along it sized to your clamp bars. Hang each clamp by sliding its bar into a slot. Group by clamp type and size. Leave a little space between clamps so you can lift one out without knocking the row.
A clamp rack hangs bar and pipe clamps in a row so they stop sliding around in a drawer or bucket. Clamps hang by their bars in slots. Perfect for any woodworker whose clamps are a tangled pile.
Skip thisDon’t overload one thin rail with heavy pipe clamps; use a beefy 2x4 rail into studs or it flexes and pulls out.
Editor's noteSize the slots to your clamp bar thickness so clamps drop in snug and don’t rattle loose when you bump the rack.
8. DIY Cord Organizer Board
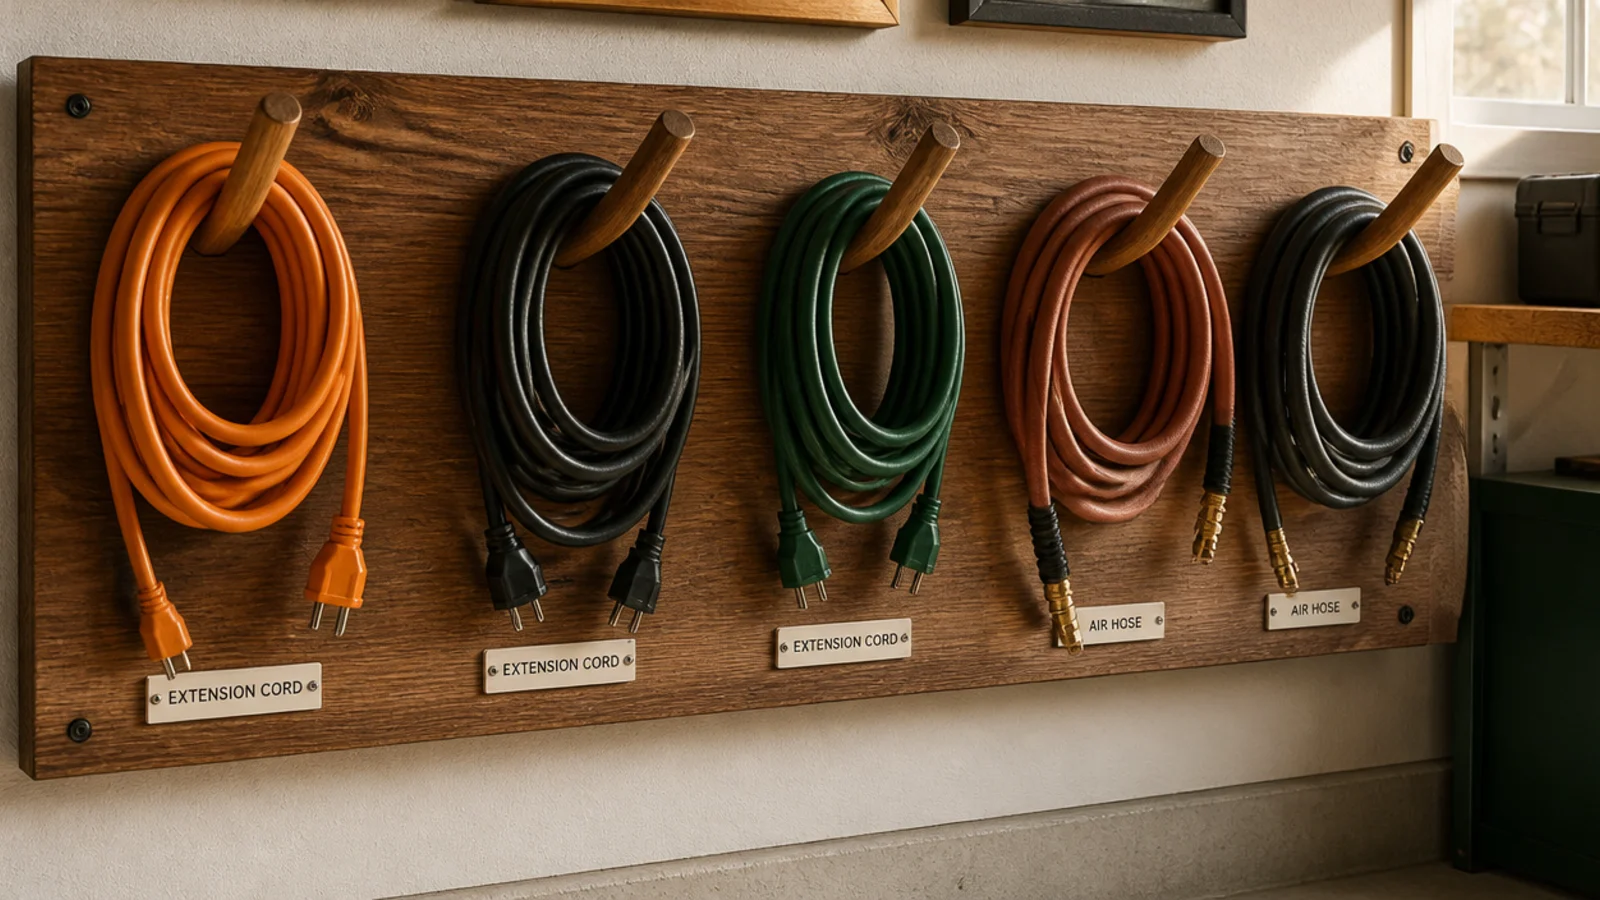
Drill angled holes in a 1x6 board and glue in 5-inch dowel pegs tilted slightly upward. Screw the board to two wall studs. Coil each cord in a figure-eight and hang it over a peg. Label the length or gauge under each peg. Space pegs so full coils don’t overlap and snag each other.
A cord board hangs coiled extension cords and hoses on angled pegs so they stop tangling in a heap. Each coil gets its own peg. It’s a one-hour build that ends the daily cord fight.
Skip thisDon’t set the dowels level; heavy coils slide off the ends unless the pegs tilt upward.
Editor's noteCoil cords figure-eight style rather than tight loops so they pay out without kinks when you grab them.
9. DIY Rolling Under-Bench Cart
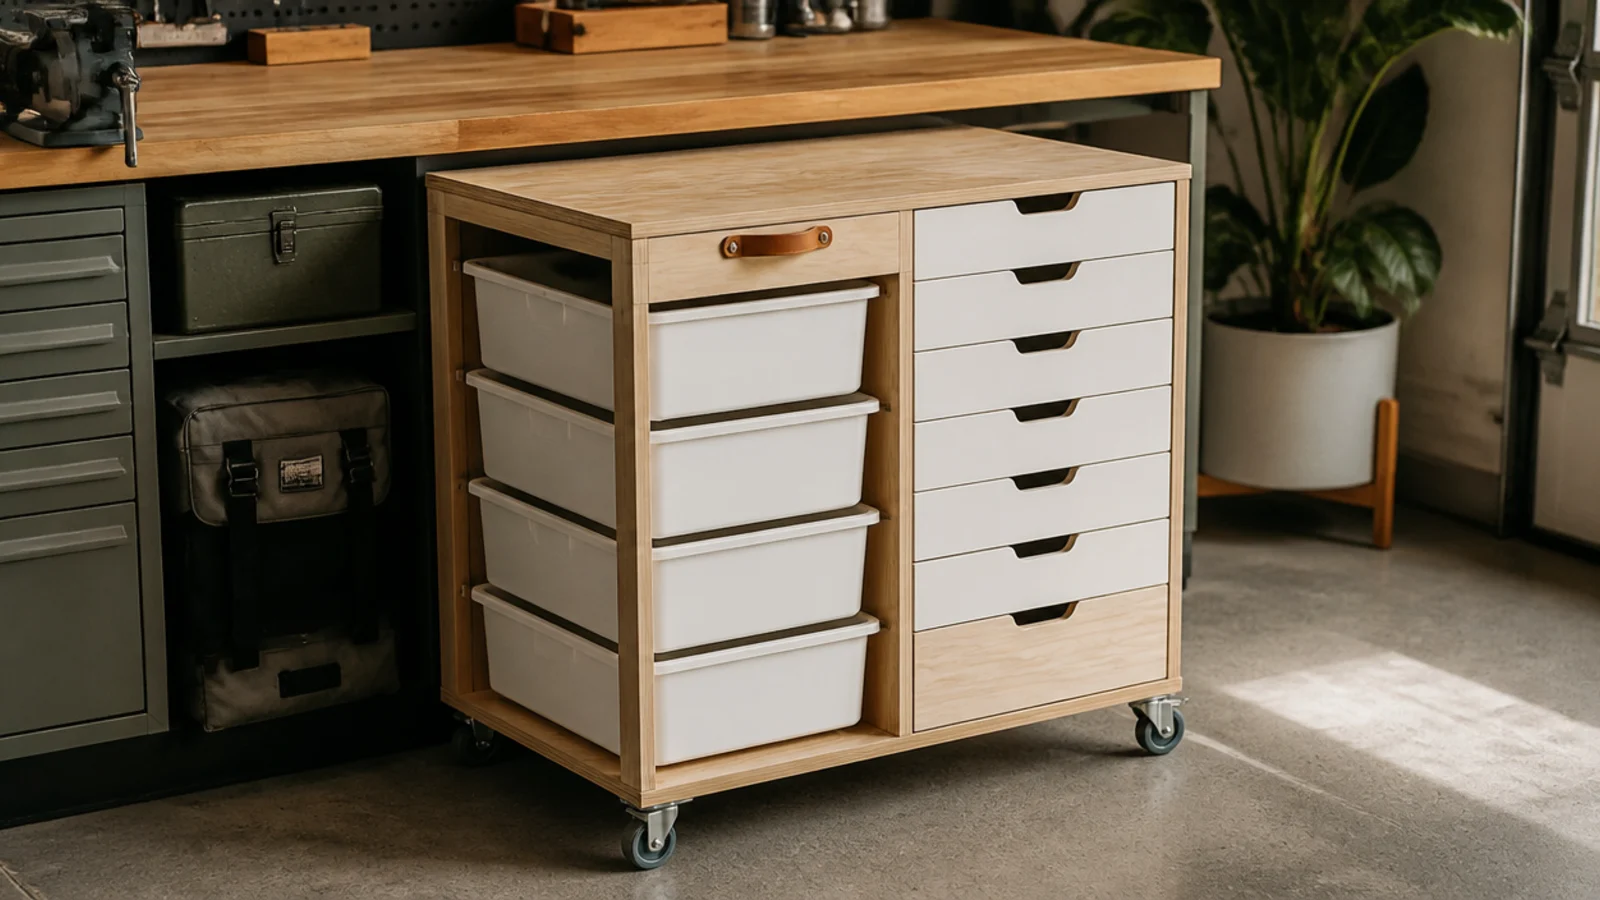
Measure the clearance under your bench and build a plywood box on locking casters to fit with headroom to spare. Add fixed shelves or drawer slides for pull-out trays. Fit a handle on the front. Sort tools by category into the drawers, heavy items low. Roll it under the bench when done and lock the casters.
A rolling cart built to fit the exact space under your bench turns dead space into pull-out storage. You size it to slide in perfectly and roll it out to work. Great for tools and supplies you want at the bench but out of the way.
Skip thisDon’t skip locking casters; on a sloped garage floor an unlocked cart rolls away from the bench on its own.
Editor's noteBuild it a touch shorter and narrower than the opening so it rolls in and out without scraping or jamming.
10. DIY Plywood Sports Locker
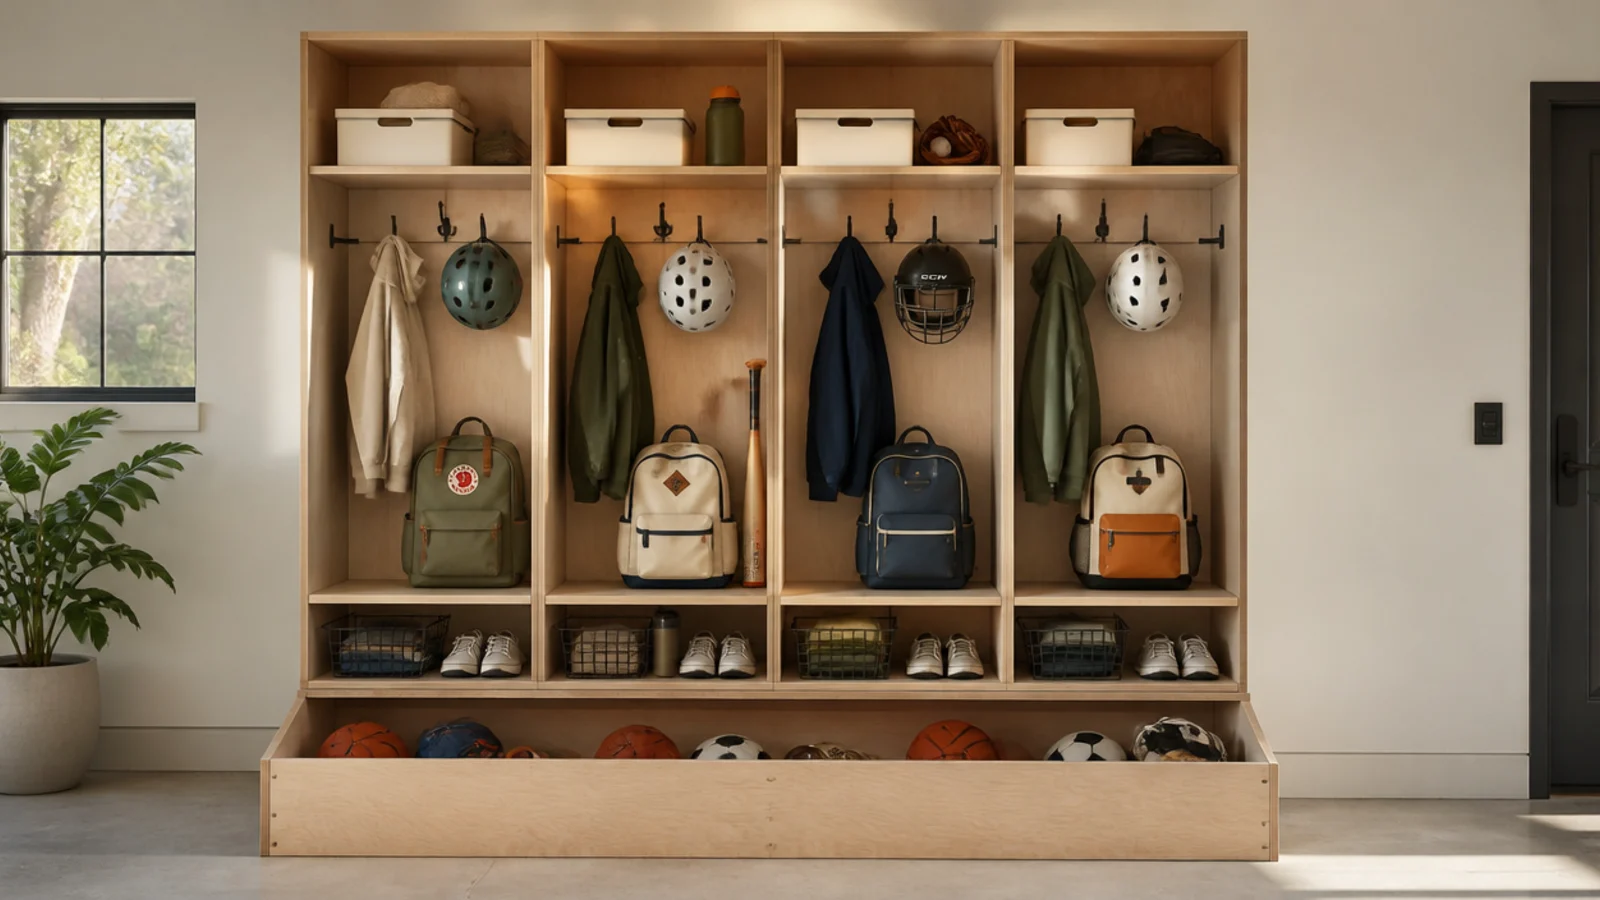
A plywood locker gives every family member a labeled spot for their sports gear so cleats and helmets stop scattering. Cubbies, hooks, and a ball bin keep it all in one station. Ideal for busy families with multiple sports.
Build a plywood carcass with a row of open cubbies, hooks screwed to the sides for helmets and bags, and a bottom bin or bungee corral for balls. Assign one cubby per person and label it. Anchor the unit to the wall studs so it can’t tip. Put daily gear at reachable heights and off-season gear up top.
Make the cubbies big enough for a full gear bag so kids can drop the whole bag in instead of unpacking it on the floor.
Don’t build one shared open bin for everything; without a spot per person, gear turns back into a floor pile fast.
11. DIY Jar Parts Wall
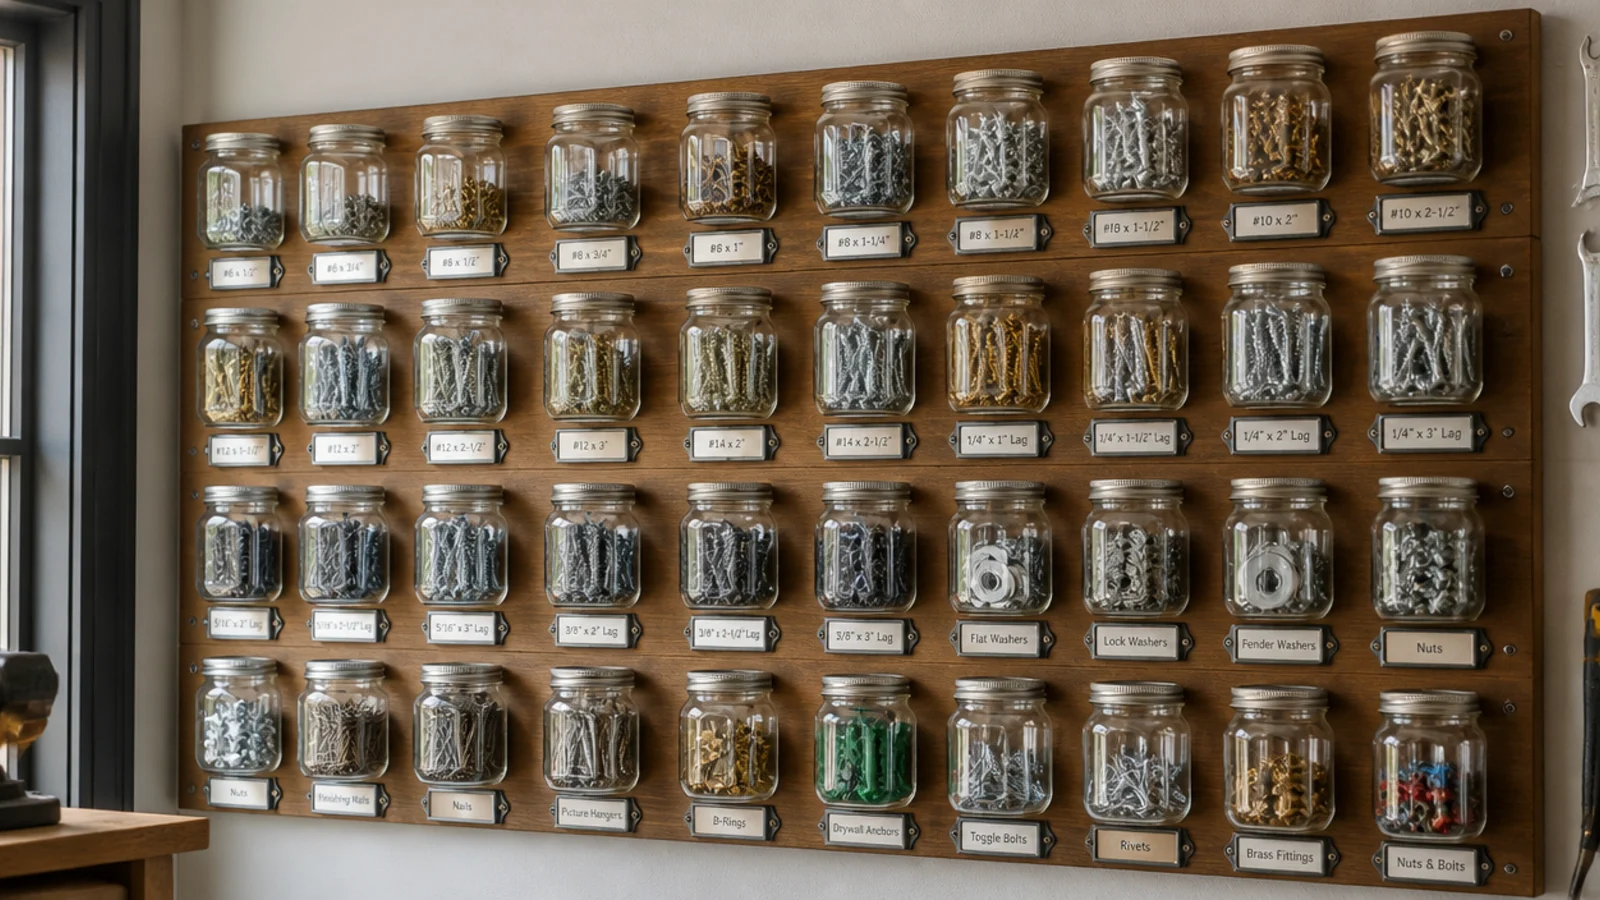
Screw jar lids in rows to a plywood panel or the underside of shelves, spaced so jars clear each other. Mount the panel to the wall studs. Sort hardware by type and size into the jars, then twist each up into its lid. Add a label facing out. Keep this above the bench so you grab parts without a ladder.
A jar parts wall mounts dozens of jars by their lids so small hardware is visible and sorted at a glance. You twist each jar into its lid to open it. Perfect for the loose-hardware chaos every garage accumulates.
Skip thisDon’t mount big heavy jars on a flimsy panel; use solid plywood into studs or the weight tears the screws out.
Editor's noteUse one jar size per row so they screw and unscrew without knocking into their neighbors.
12. DIY Magnetic Tool Bar
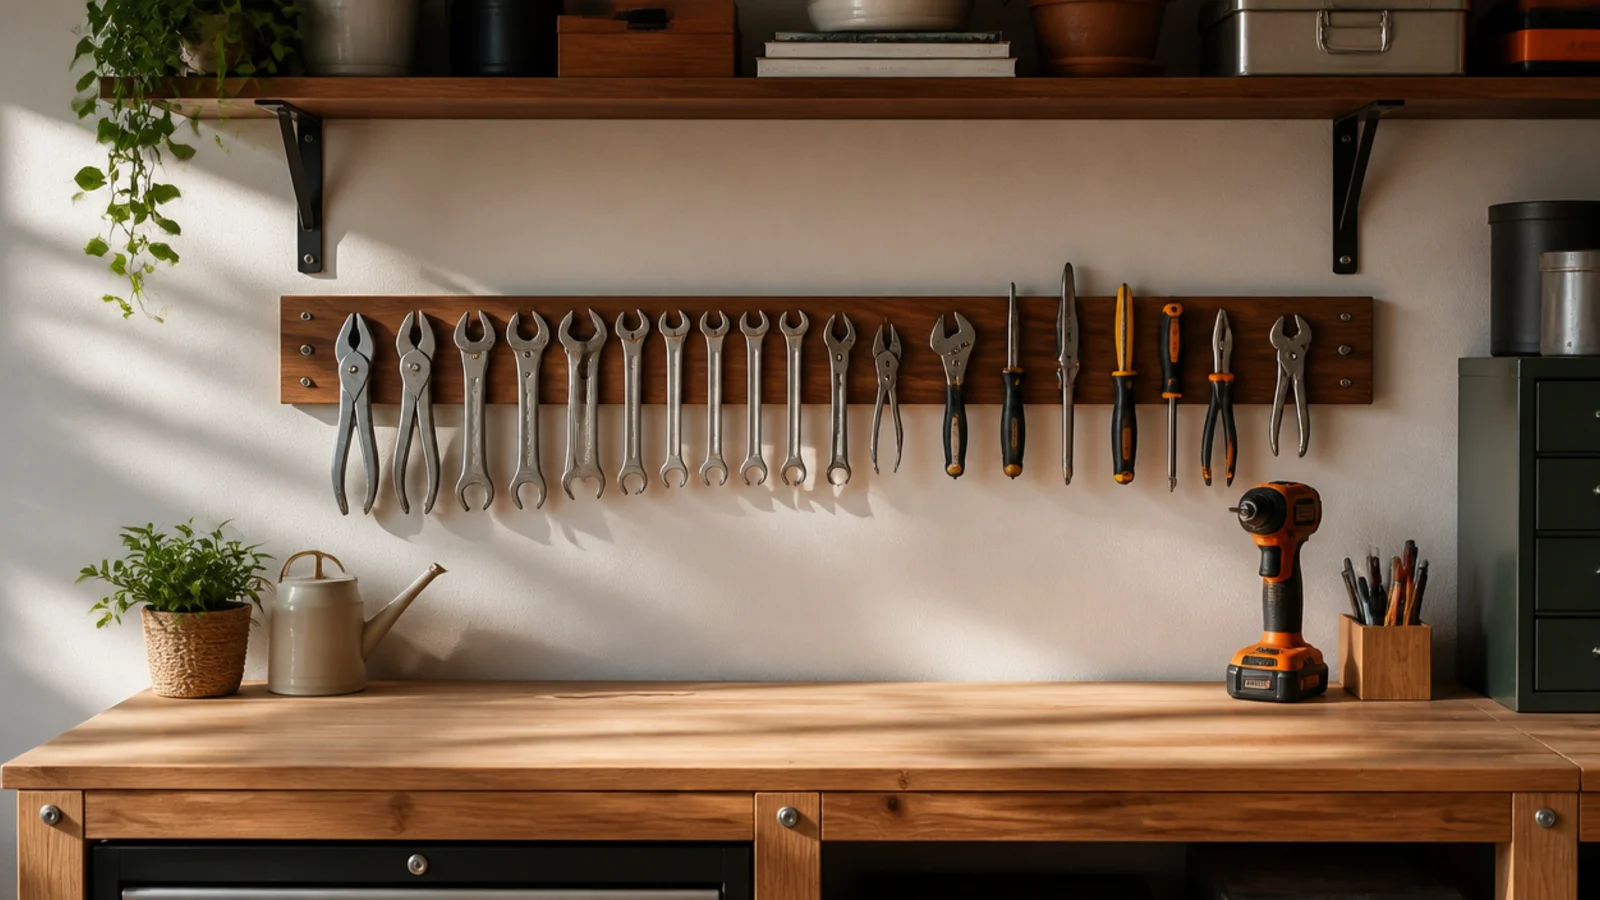
Drill shallow recesses along a wood strip and epoxy in strong neodymium magnets flush with the surface. Screw the strip to the wall studs above your bench. Stick metal tools to it, heaviest near the mounting screws. Test each tool’s hold before trusting it, and keep power tools off the bar entirely.
A DIY magnetic bar holds metal hand tools flat on the wall for one-handed grab-and-go. Build it by setting strong magnets into a wood strip. Great above a bench for your most-used wrenches and drivers.
Skip thisDon’t use weak craft magnets; only strong neodymium magnets hold real steel tools, and even then keep loads modest.
Editor's noteRecess the magnets slightly below the wood face so a thin protective layer keeps tools from scratching and sliding.
13. DIY Spray-Can Slot Shelf
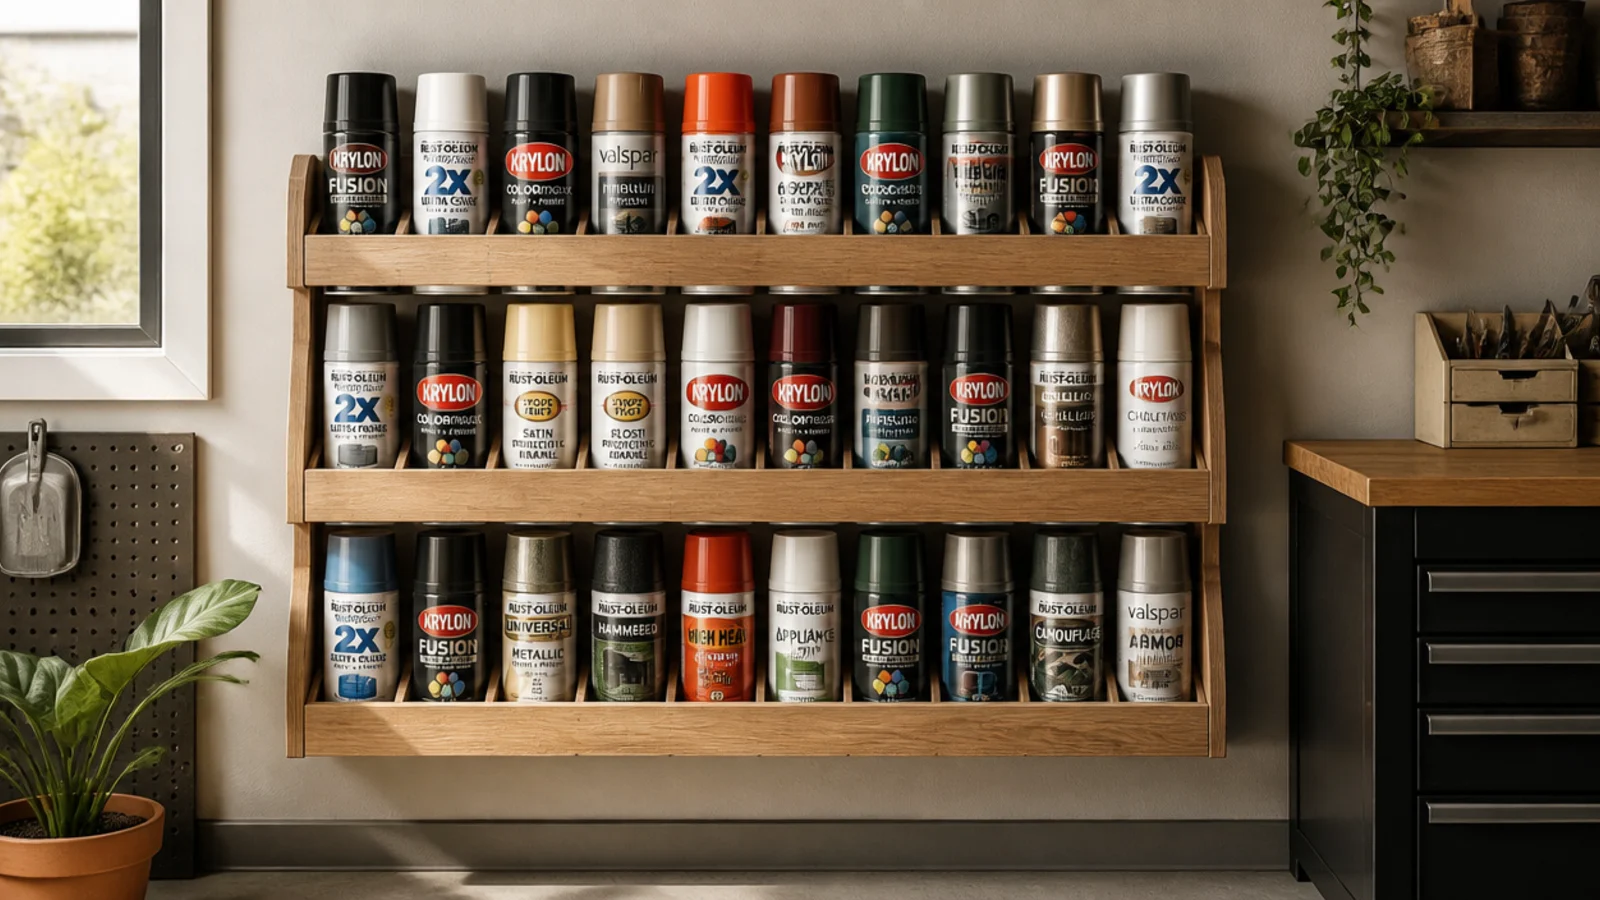
Build a shallow tiered shelf from plywood with a low front lip on each tier, or drill a grid of can-sized holes in a shelf so cans nest in. Mount it to the wall studs. Stand cans by type — primer, color, clear, lubricant — with labels out. Keep it away from heat sources since the cans are pressurized.
A slotted shelf stands spray cans in rows with labels visible so you find the right color fast. The slots keep cans from tipping and rolling. Ideal for anyone with a growing collection of spray paint and lubricants.
Skip thisDon’t mount a spray-can shelf near a heater or water heater; pressurized cans and heat are a real hazard.
Editor's noteTier the shelf like stadium seating so back-row can labels stay visible over the front row.
14. DIY 2x4 Ladder Hooks
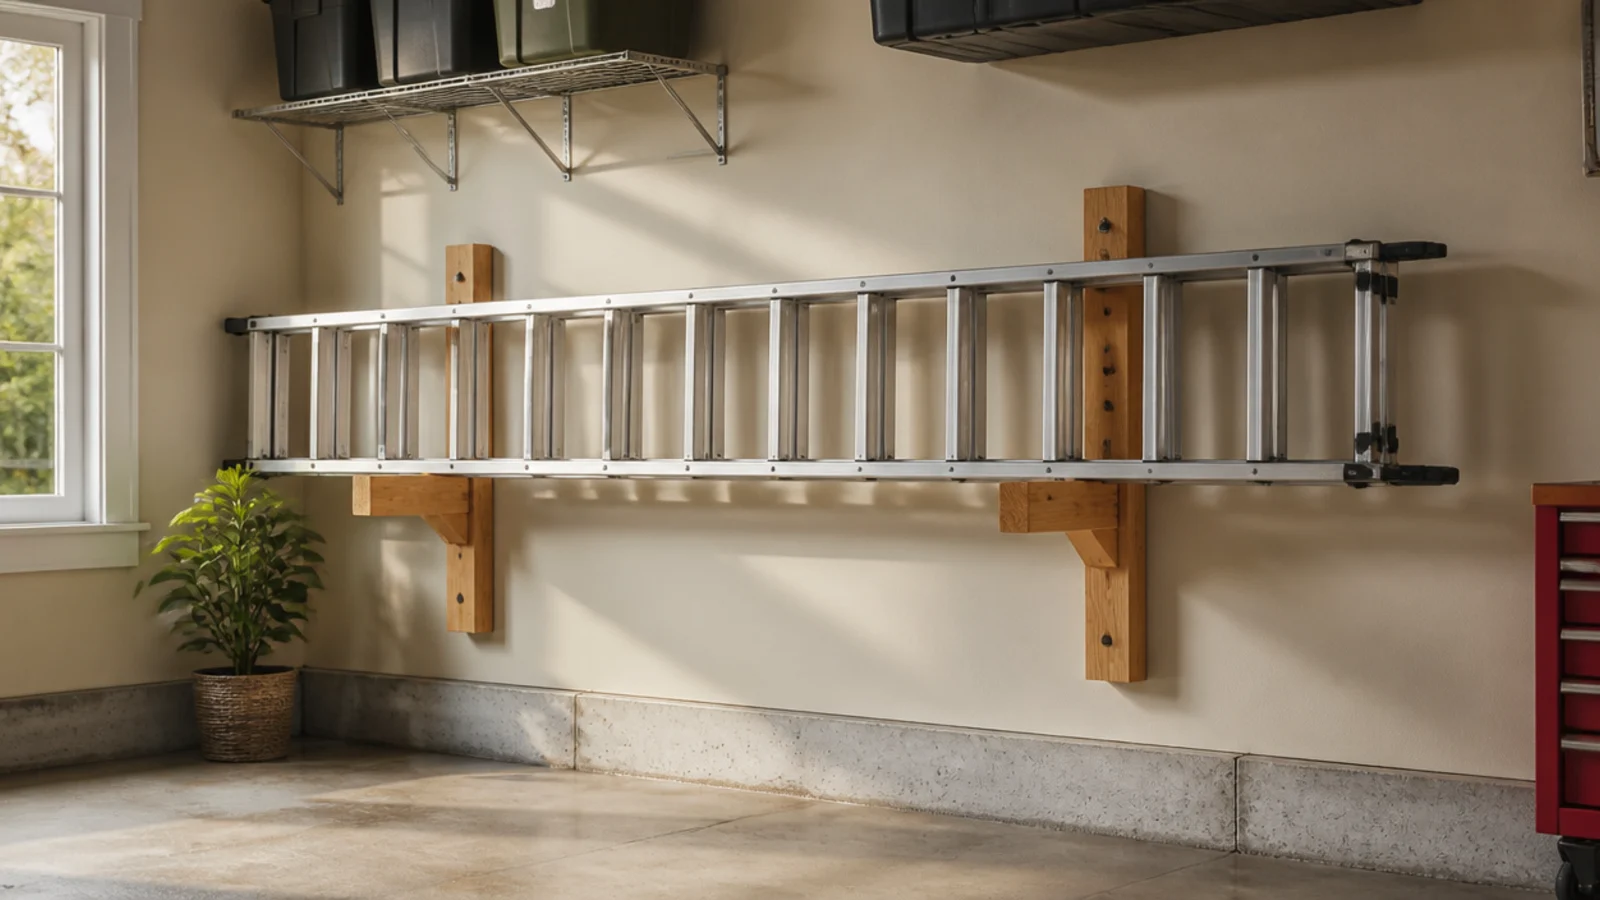
Heavy wooden hooks cut from 2x4 scraps hold a ladder flat and high on the wall, clearing the floor. They’re stronger than most store hooks and cost nothing but scrap. Best for extension ladders and long awkward items.
Cut L-shaped brackets from 2x4 blocks and screw and glue them into a sturdy hook shape. Mount two or three brackets into the wall studs, spaced to the ladder’s length, with the hook opening facing up. Rest the ladder across them horizontally. Round the hook tips so the ladder rails don’t catch. Anchor each bracket into a stud.
Mount the brackets high enough that the ladder clears head height but low enough to lift it down without a step stool.
Don’t mount ladder hooks into drywall; a heavy ladder needs each bracket screwed firmly into a stud.
15. DIY Tilted Paint Can Rack
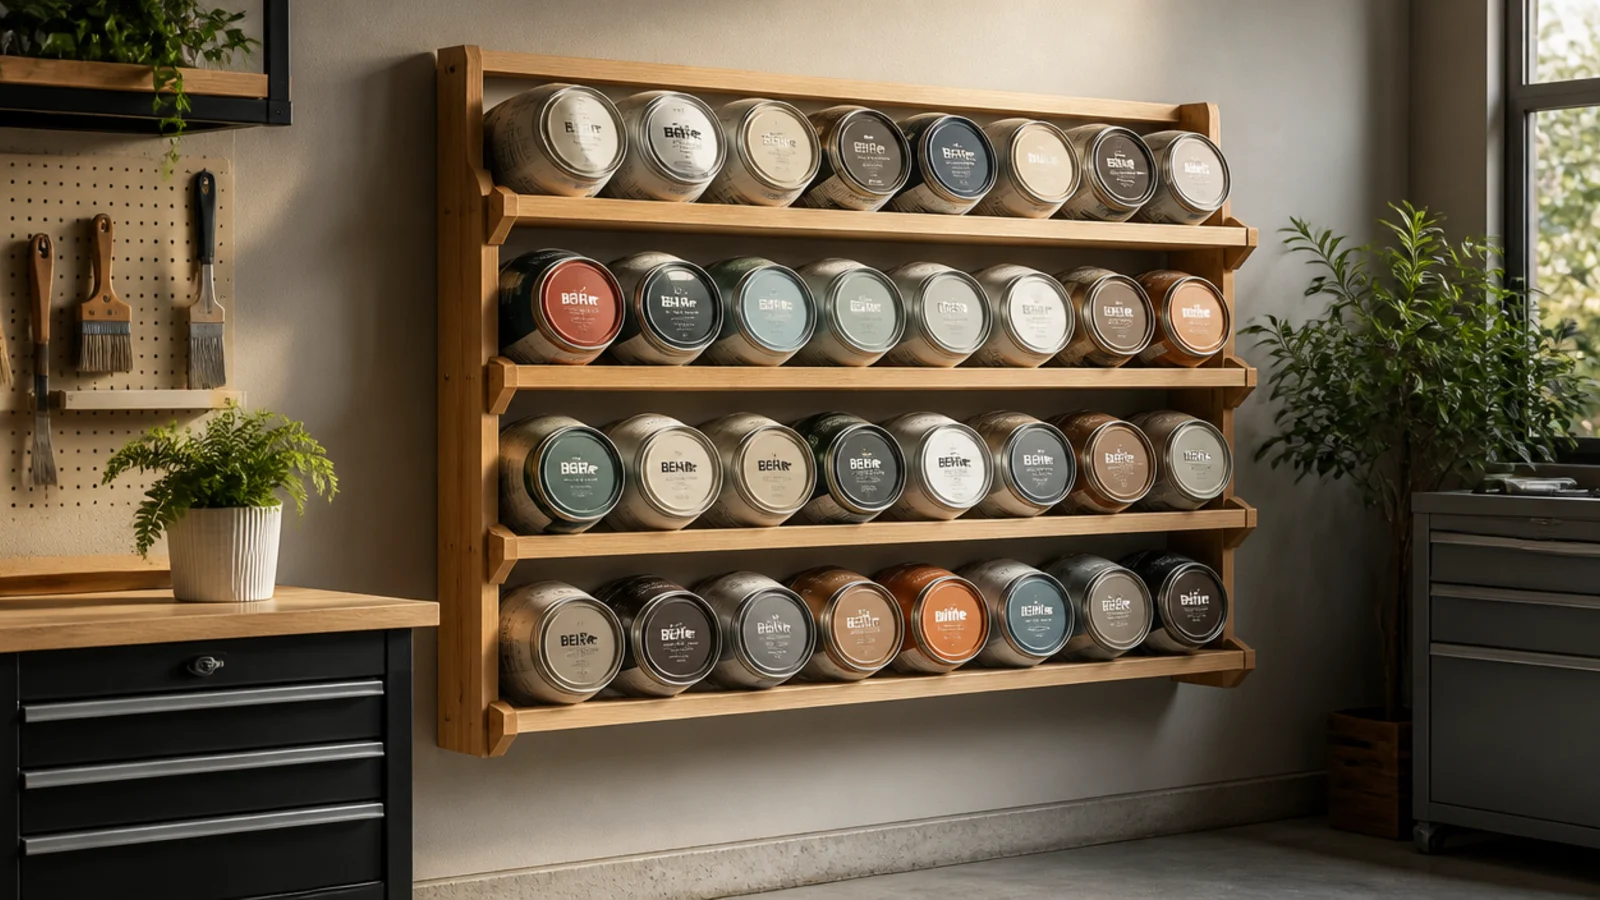
Build stepped plywood shelves with a slight backward tilt and a front retaining rail on each. Mount the rack to the wall studs. Stand paint cans on the tilted shelves so labels and lids face out and down toward you. Group by room or project and mark the color on the lid. Store away from freezing where you can.
A tilted paint rack angles cans so you read the color and lid from below without lifting each one. The slight tilt shows the label and keeps cans put. Great for anyone storing lots of leftover paint.
Skip thisDon’t tilt the shelves so steeply that cans slide; a gentle angle plus a front rail keeps them secure and readable.
Editor's noteDab each can’s actual color on its lid so you identify paints at a glance even when labels fade.