1. Pegboard Hand-Tool Wall
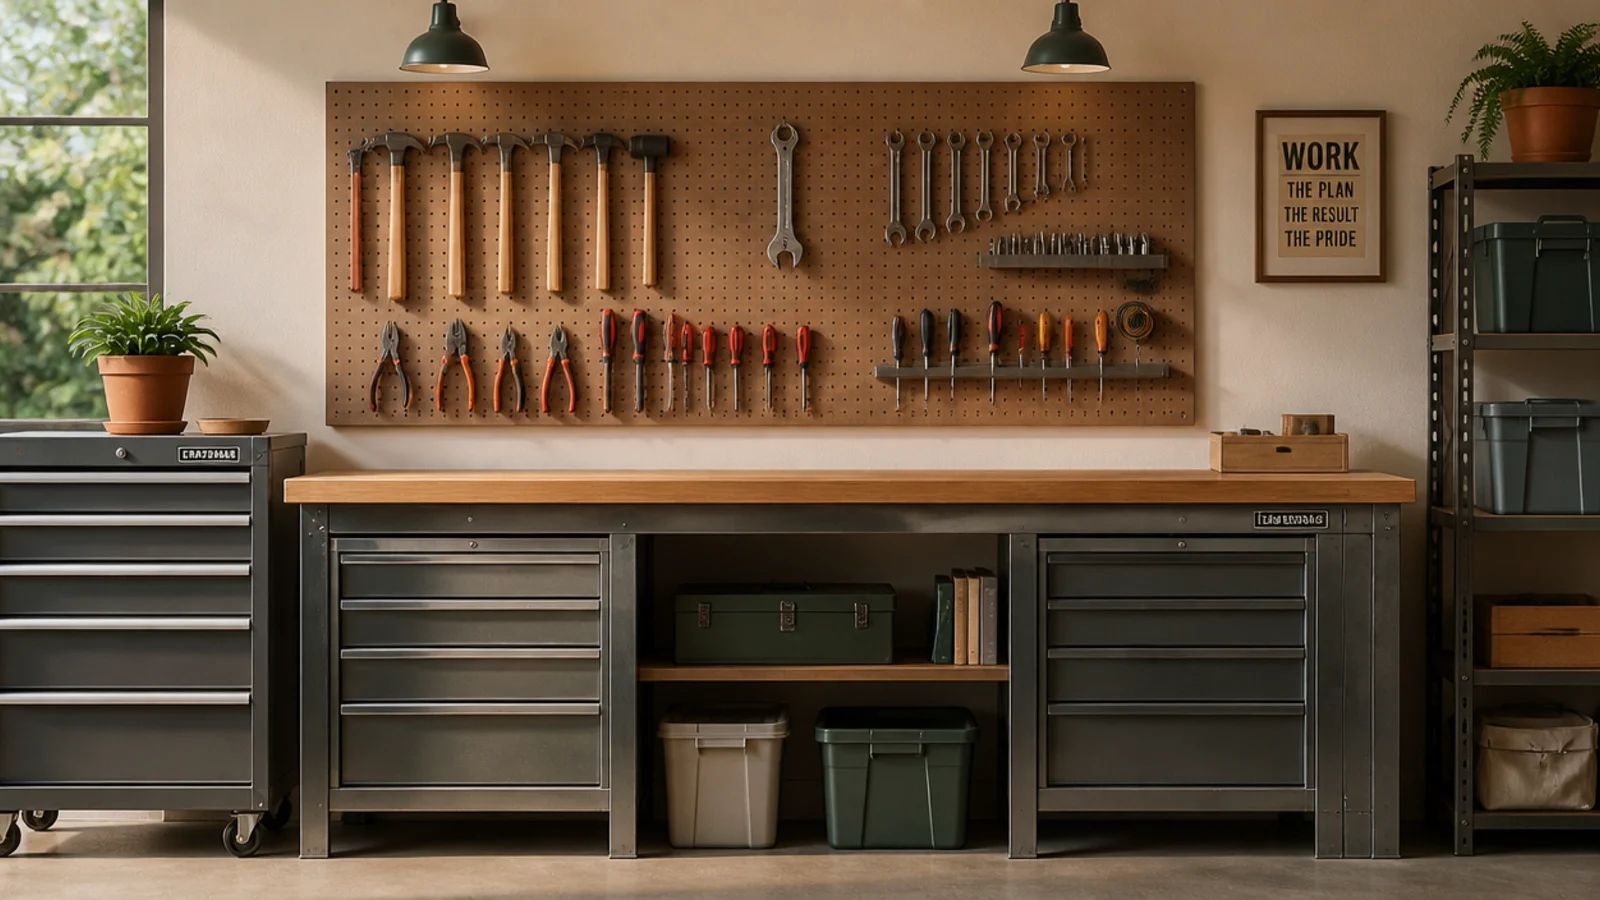
A pegboard is the fastest way to make every hand tool visible and grab-ready above the bench. Tools hang in the open where you see the whole kit at once. It’s the beginner-friendly backbone of any tool wall.
Screw furring strips to the studs, mount a tempered pegboard with washers behind the screws, and snap in assorted hooks. Arrange your most-used hand tools at eye level, heaviest near the studs. Trace each tool’s outline with a marker so an empty spot shows what’s missing. Group tools by type — striking, cutting, driving — in zones.
Editor's noteOutline every tool so an empty silhouette nags you to put the tool back instead of leaving it on the bench.
Skip thisDon’t screw pegboard flat to the wall; without the furring-strip gap the hooks can’t seat and it’s useless.
2. Foam-Lined Tool Chest
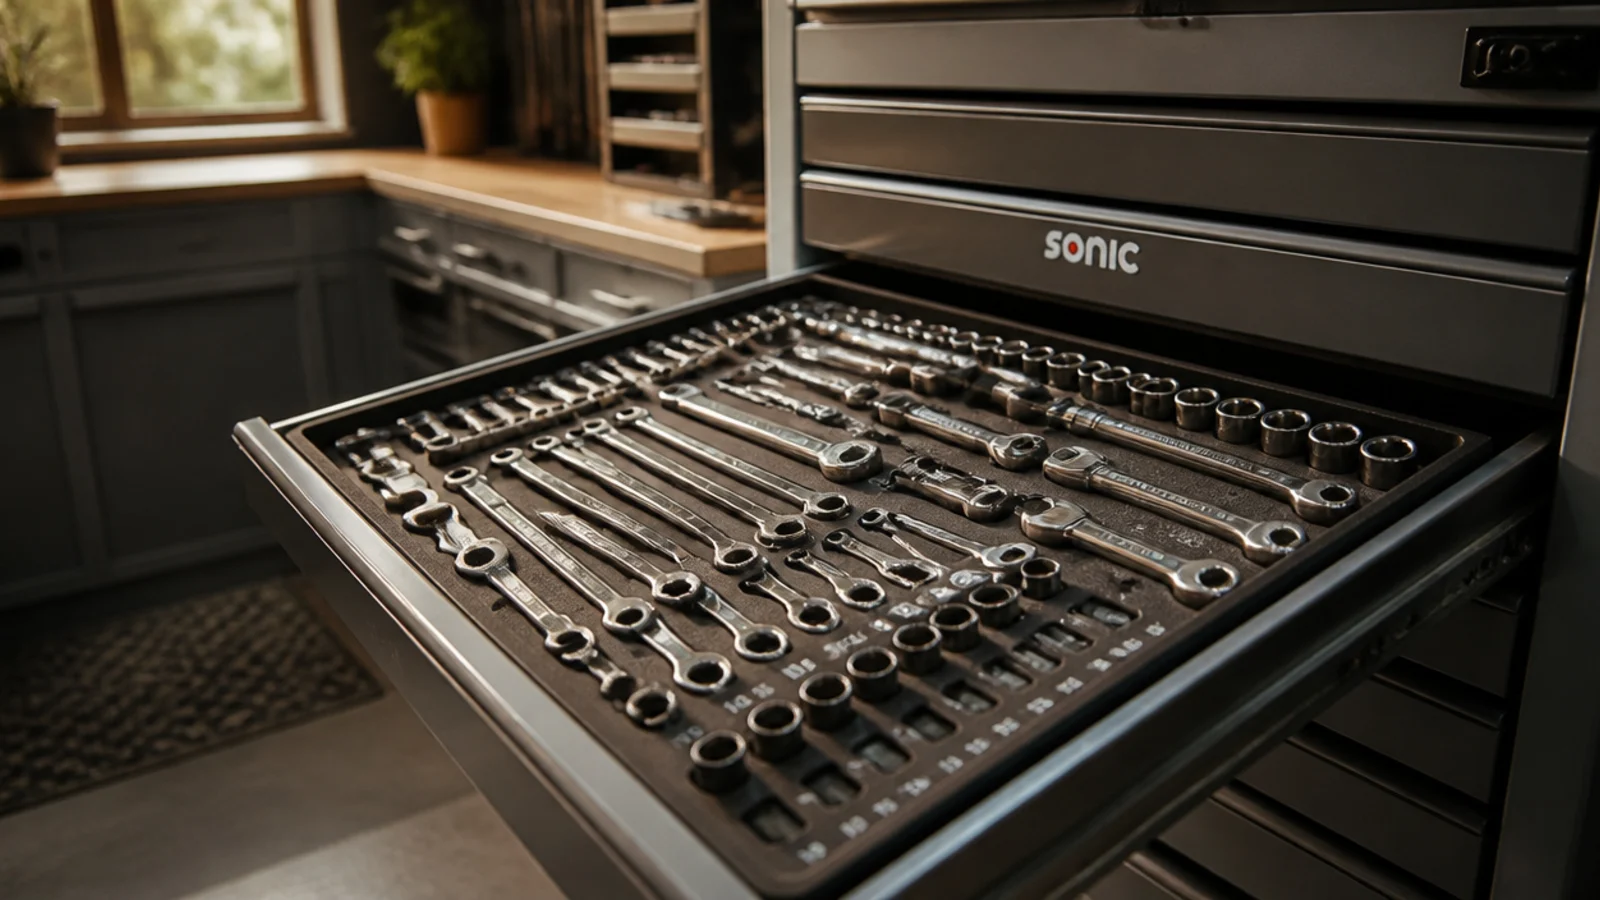
Foam-lined drawers cradle each tool in a cut slot so sets stay organized and a missing tool is obvious. It protects tools and inventories them at a glance. Best for sockets, wrenches, and any set you want kept complete.
Cut two-tone foam drawer inserts to trace each tool’s shape, or buy pre-cut trays for your set. Lay tools in size order within each drawer and label the slots. Keep heavy tools in the bottom drawers for stability. The contrasting foam color under a missing tool shows instantly what’s out. Lock the chest if it holds valuable tools.
Editor's noteUse two-tone foam so an empty slot flashes a bright color, telling you at a glance which tool is missing.
Skip thisDon’t cram tools loose in a drawer; without slots they scatter, and you can’t tell what’s missing from the set.
3. Power Tool Wall Rack
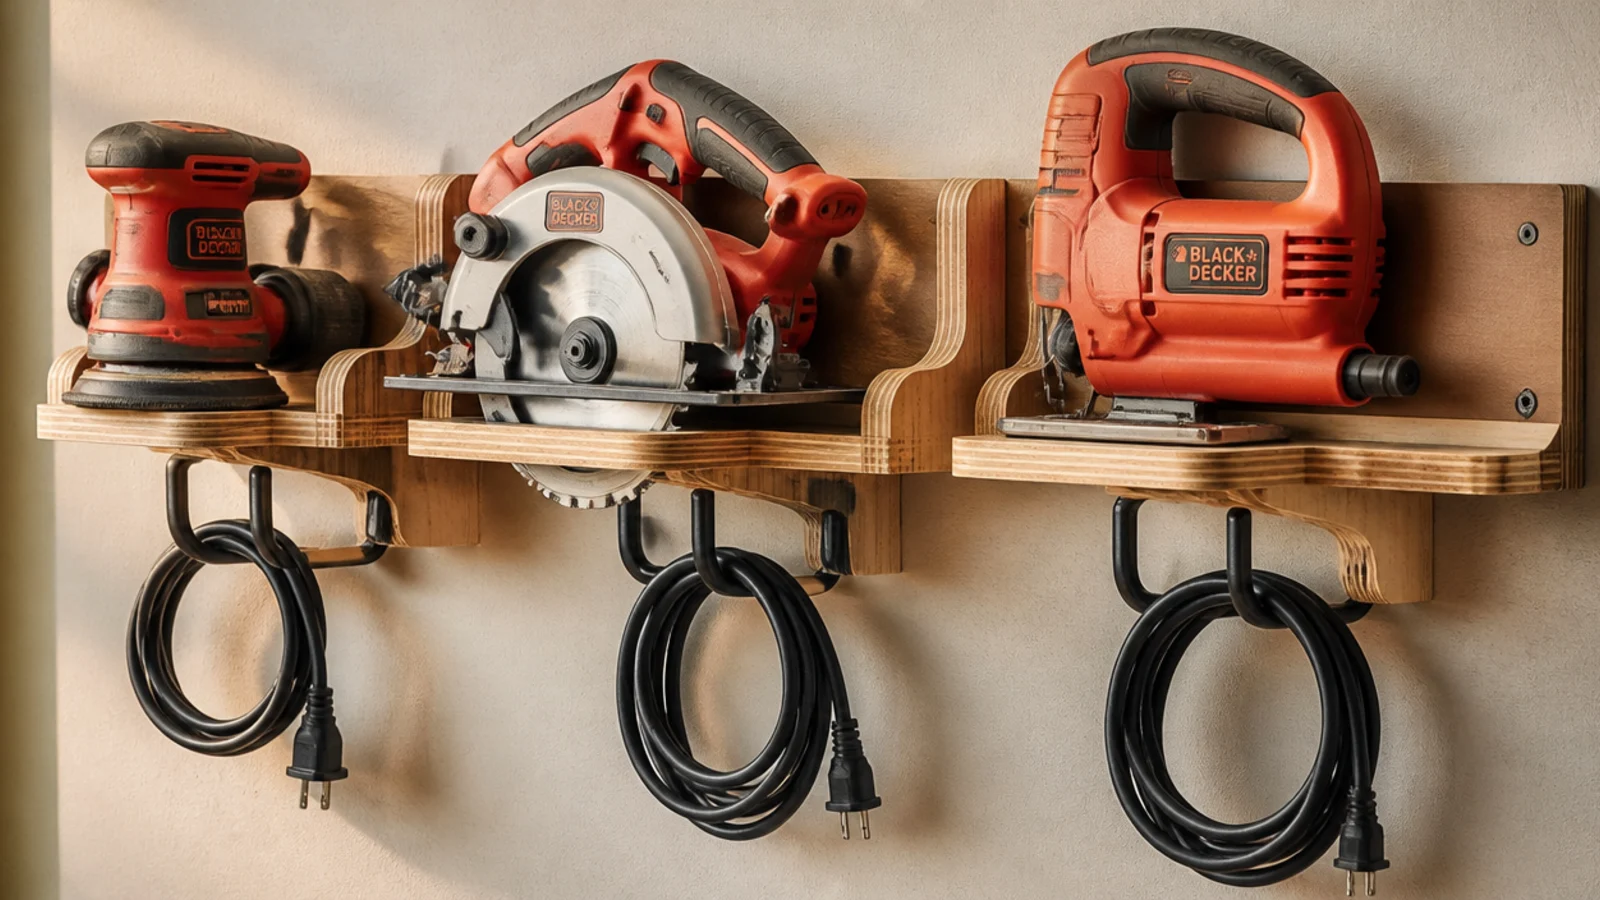
A wall rack gets bulky power tools off the bench and onto dedicated holders so your work surface stays clear. Each tool rests in a cradle or hangs on a hook. Ideal for corded tools that eat drawer and counter space.
Build or mount holders sized to each tool — a cradle for the circular saw’s base, hooks for the drill and sander, a shelf for the router. Anchor the rack into the studs. Group tools by type and keep the heaviest low. Coil each cord and hang it beside its tool. Leave the bench below clear for actual work.
Coil and hang each tool’s cord on a hook right beside it so cords never tangle in a drawer with the tool.
Don’t pile power tools in a drawer or bin; they bang together, cords tangle, and the bench stays cluttered.
4. Socket Rail Organizer
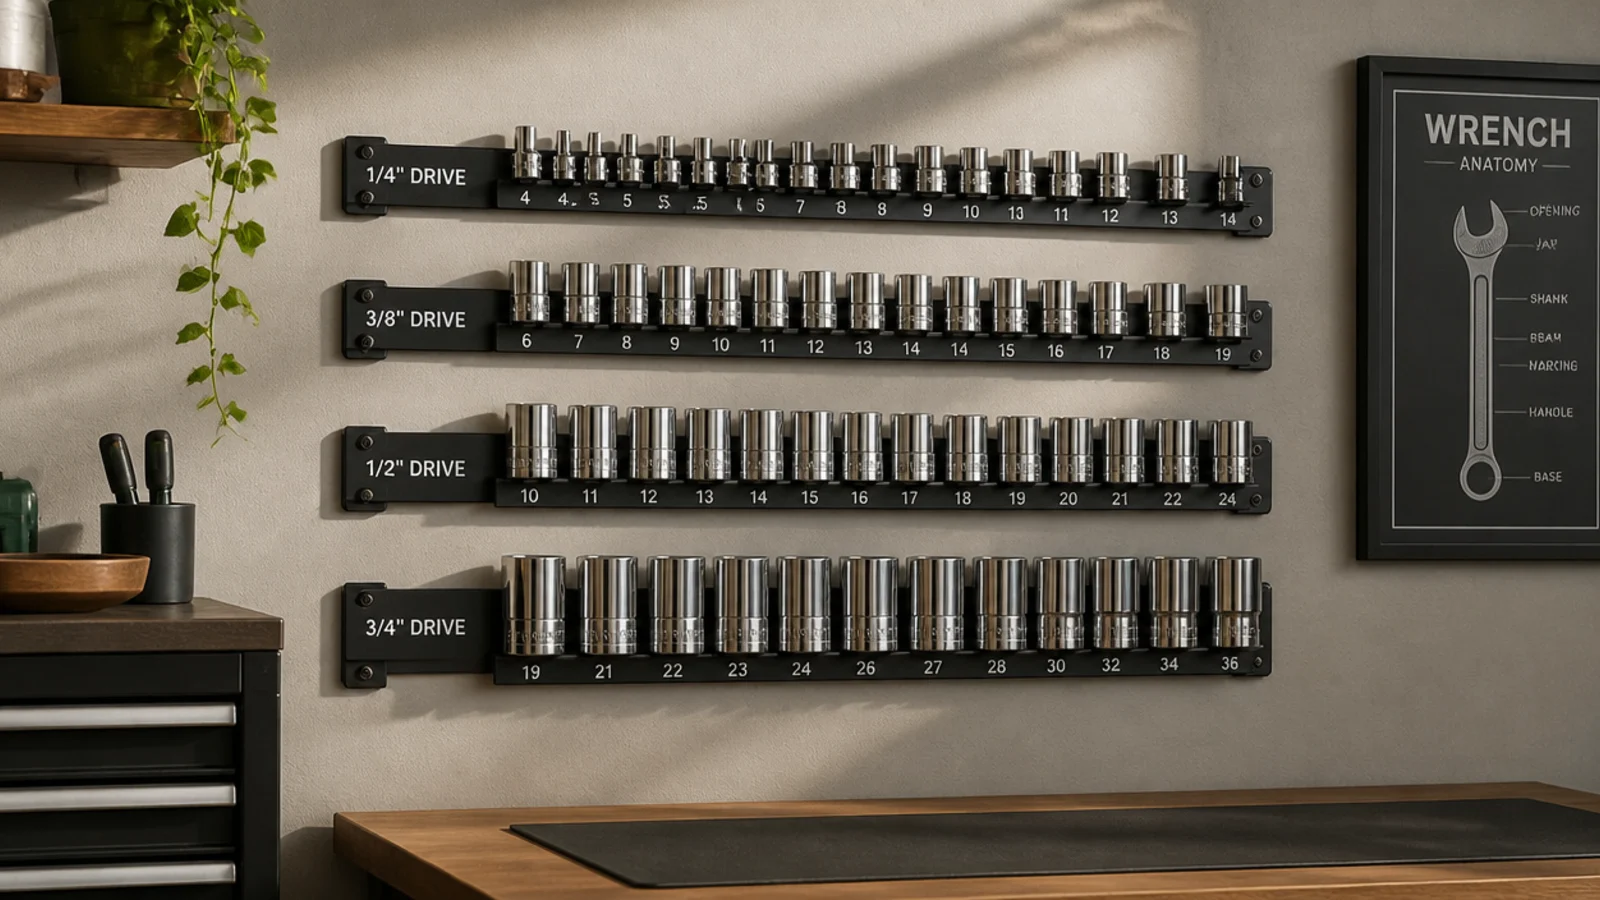
Socket rails hold every socket in size order so you grab the right one without testing three. Each drive size gets its own labeled rail. Essential for anyone tired of dumping a socket tray to find one size.
Mount socket rails or clip strips on the wall or in a drawer, one row per drive size (1/4, 3/8, 1/2 inch). Clip sockets in numerical order and add size labels. Keep metric and SAE on separate rails to avoid grabbing the wrong one. A gap in the row shows which socket is in use. Position them within reach of the bench.
Editor's noteKeep metric and SAE on clearly separated rails so you never grab a 12mm when you wanted a 1/2 inch.
Skip thisDon’t mix drive sizes on one rail; sorting by drive and size in order is the whole point of the system.
5. Screwdriver and Plier Strip
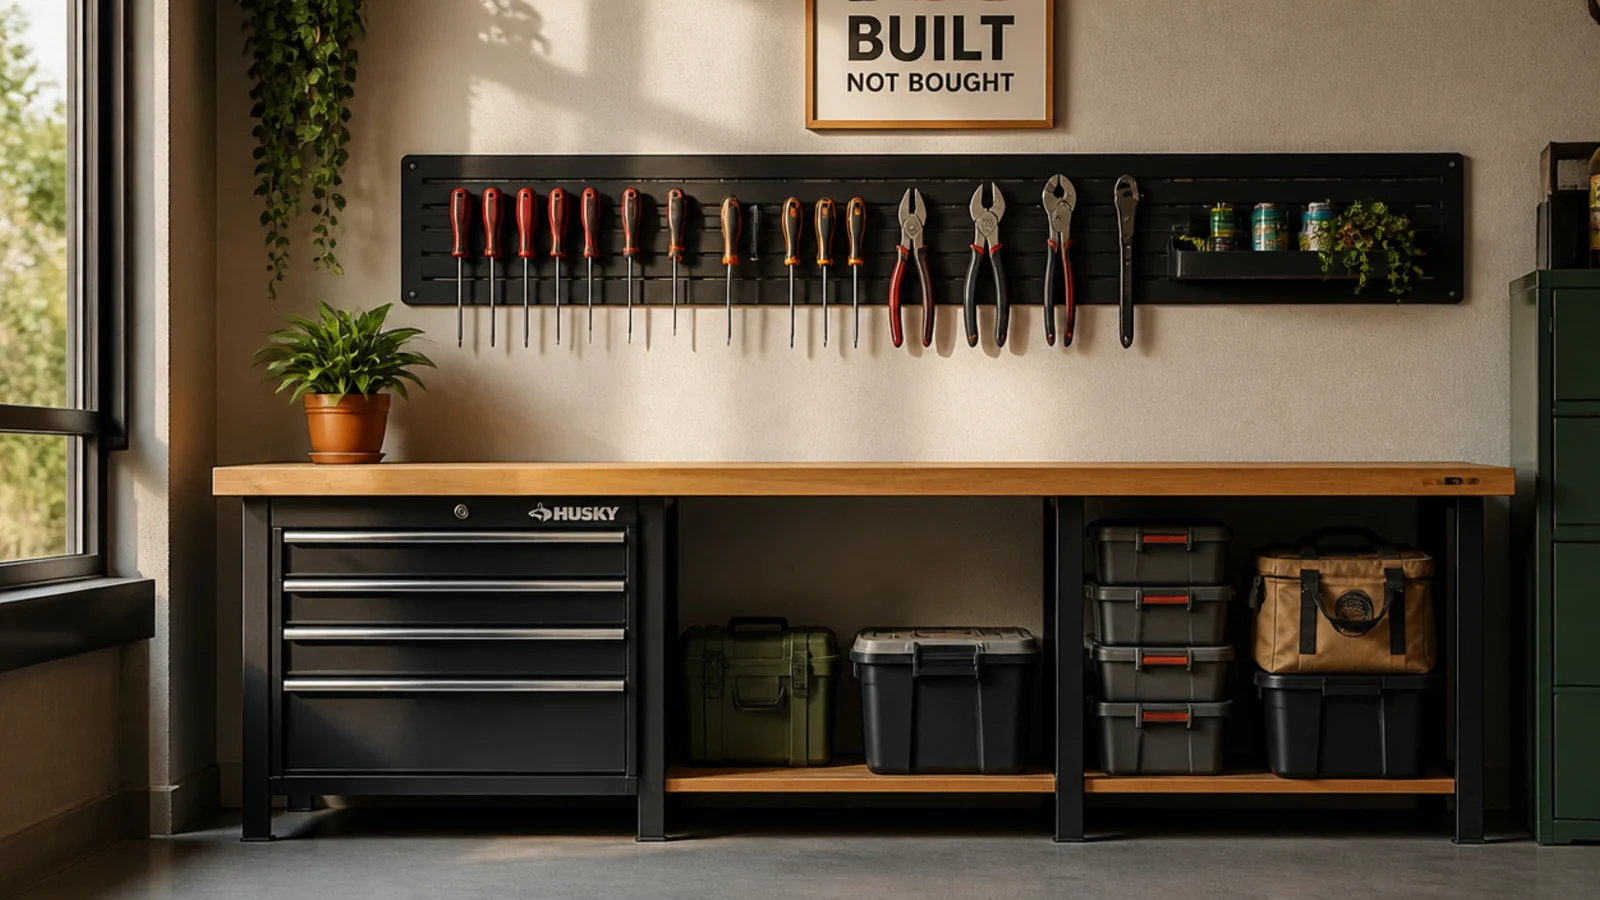
A slotted strip stands screwdrivers and pliers upright by their handles so you read the tips and grab the right one fast. Everything faces you in a row. Perfect for the drivers and pliers you reach for constantly.
Mount a slotted holder strip on the wall or the back of the bench. Drop screwdrivers tip-down into slots sized to their shafts, grouped by type and size — flathead, Phillips, Torx. Hang pliers on adjacent hooks or slots. Order them by size so you spot the right one instantly. Keep the strip right at the bench edge.
Editor's noteOrder drivers by tip type and size so your hand goes straight to the right one without reading every handle.
Skip thisDon’t toss drivers in a drawer jumble; you’ll dig every time and never keep the sizes in usable order.
6. Magnetic Tool Bar
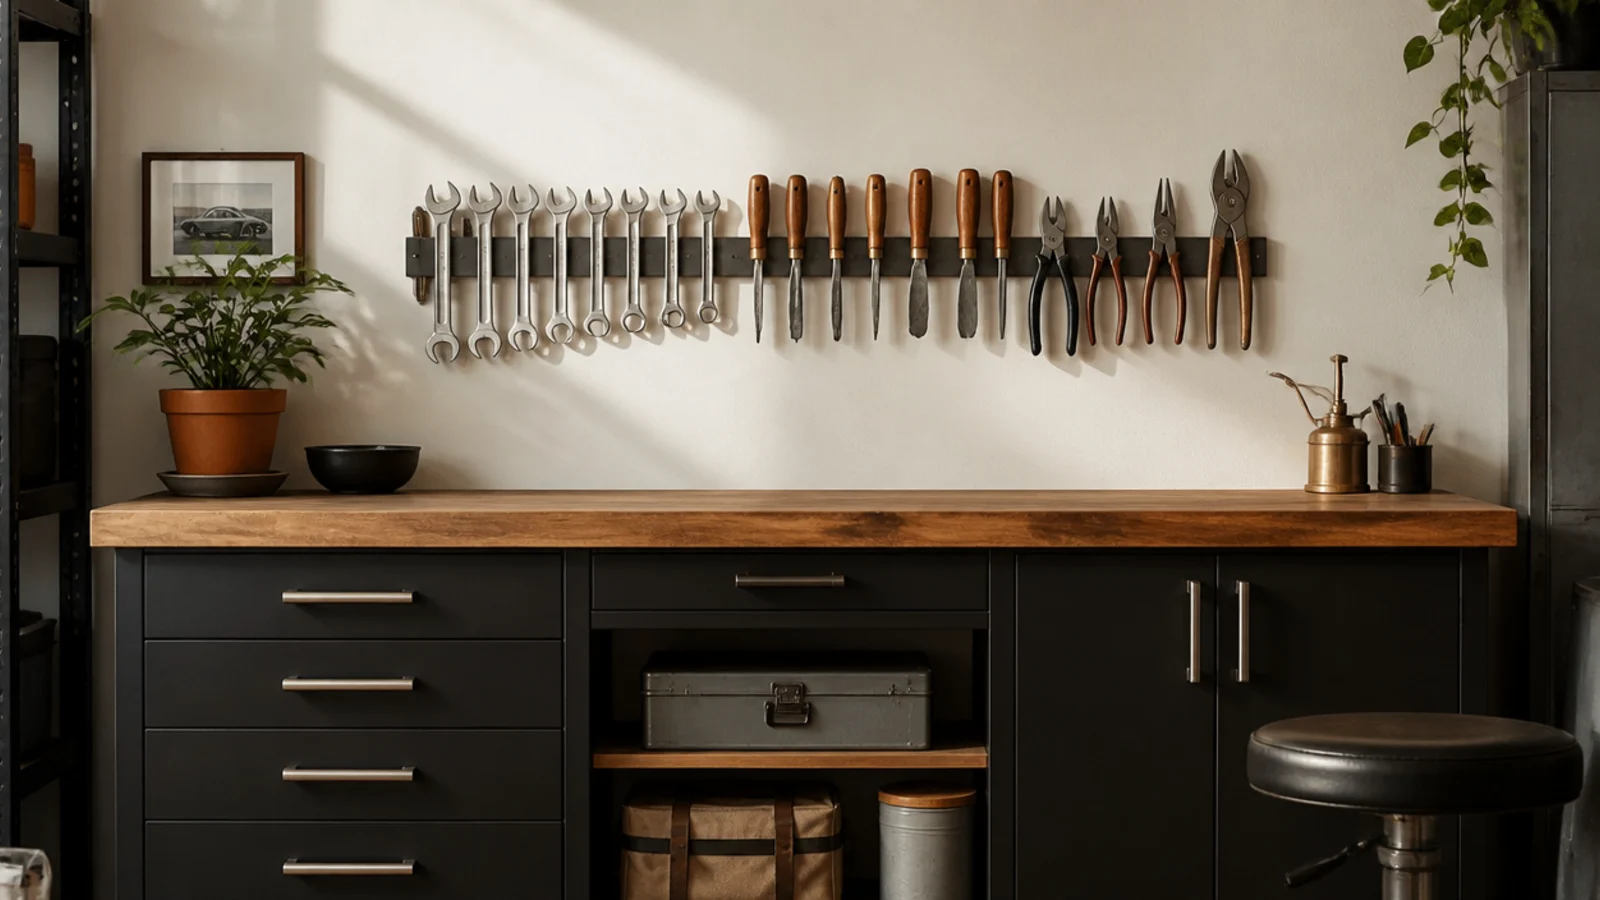
A magnetic bar holds metal tools flat on the wall for one-handed grab-and-go, right where you work. It’s faster than any drawer for daily tools. Great above the bench for your most-used metal hand tools.
Screw a magnetic tool bar into a stud at reach height above the bench. Stick your most-used metal tools to it, heaviest near the mounting screws. Keep a magnetic parts tray beside it for loose bits and screws you remove mid-project. Wipe the bar occasionally so grit doesn’t weaken the grip. Test each tool’s hold first.
Editor's noteKeep a magnetic tray next to the bar for the screws and bits you remove mid-job so nothing rolls off and vanishes.
Skip thisDon’t hang power tools or very heavy tools on a magnetic bar; keep it to hand tools it can reliably hold.
7. Wrench Organizer Rack
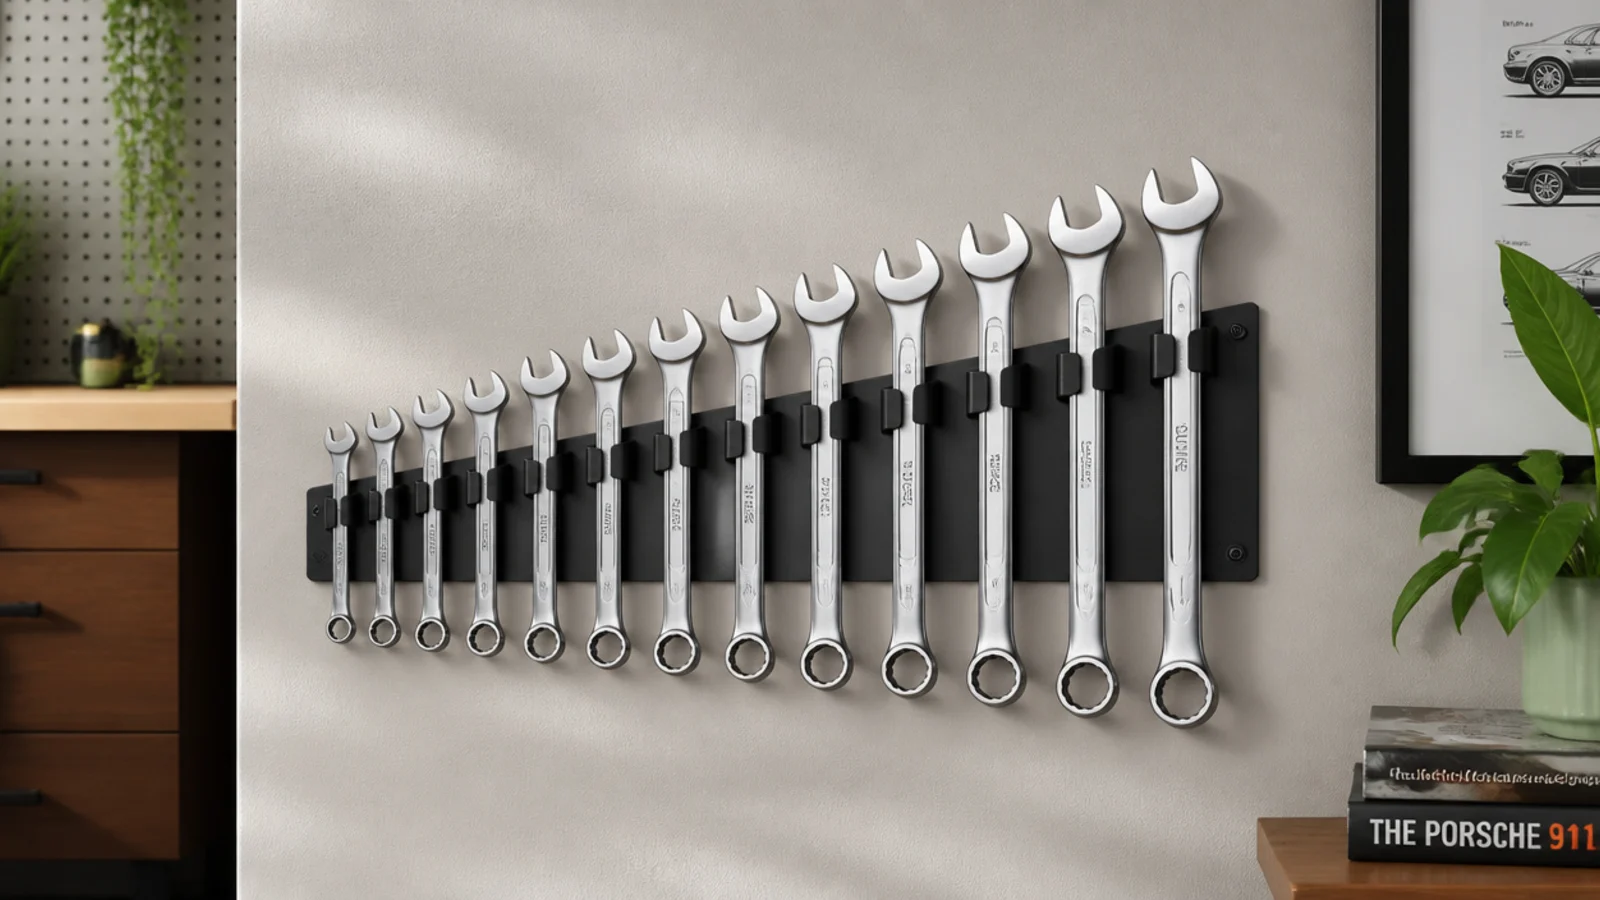
A wrench organizer fans combination wrenches out in size order so you grab the exact size instantly. Each wrench has a labeled slot. Ideal for anyone whose wrenches live in a tangled drawer pile.
Use a wrench rack, roll, or slotted holder that holds each wrench by size, mounted on the wall or laid in a drawer. Load wrenches in numerical order and label the sizes. Keep metric and SAE sets separate. A gap shows which wrench is in use. Position the rack within reach of the bench for daily jobs.
Editor's noteStore the rack so sizes read left to right in order — your eye finds the size before your hand even moves.
Skip thisDon’t keep wrenches loose in a drawer; they tangle, sizes hide, and you waste minutes on every job hunting.
8. Drill and Driver Bit Station
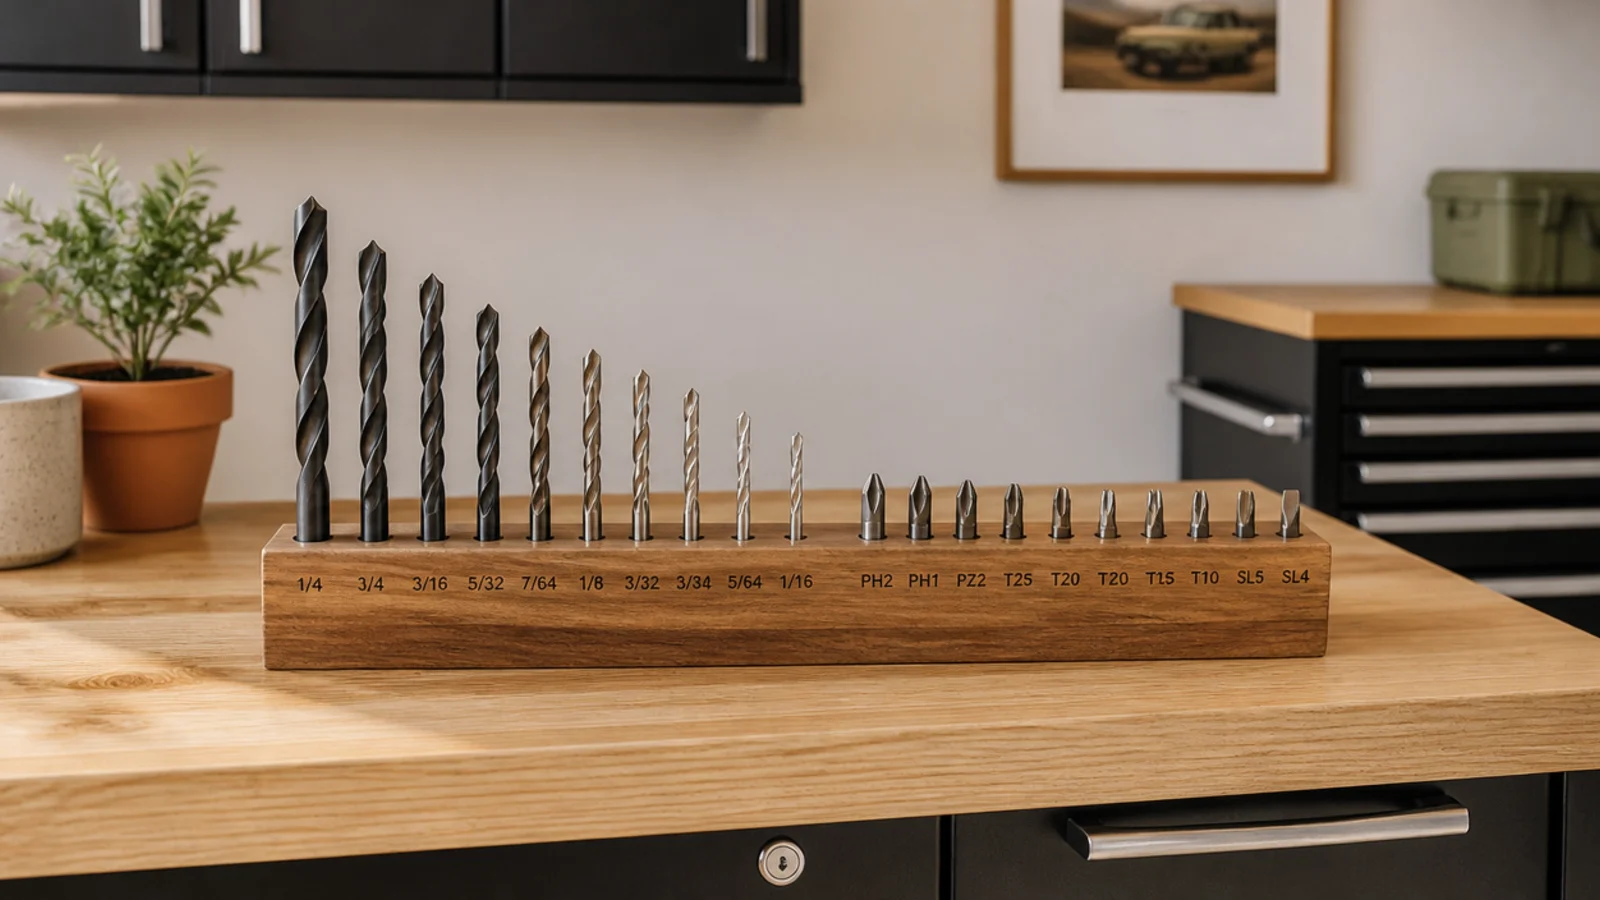
A bit station stands drill and driver bits upright in size order so you find the right bit in seconds. No more digging through a bit box. Essential for anyone who drills and drives constantly.
Use a bit block or a drilled hardwood holder with size-ordered holes for drill bits, plus a strip for driver bits by type. Label the sizes. Keep it on the bench beside the drill so swapping bits is instant. Separate wood, metal, and masonry bits into zones. Refill from bulk bit sets stored in the chest.
Editor's noteKeep the bit station right beside the charging station so a bit swap and a battery swap happen in the same spot.
Skip thisDon’t dump loose bits in a drawer or bag; sizes vanish and you strip screws using the wrong bit in a hurry.
9. Long-Tool Wall Hooks
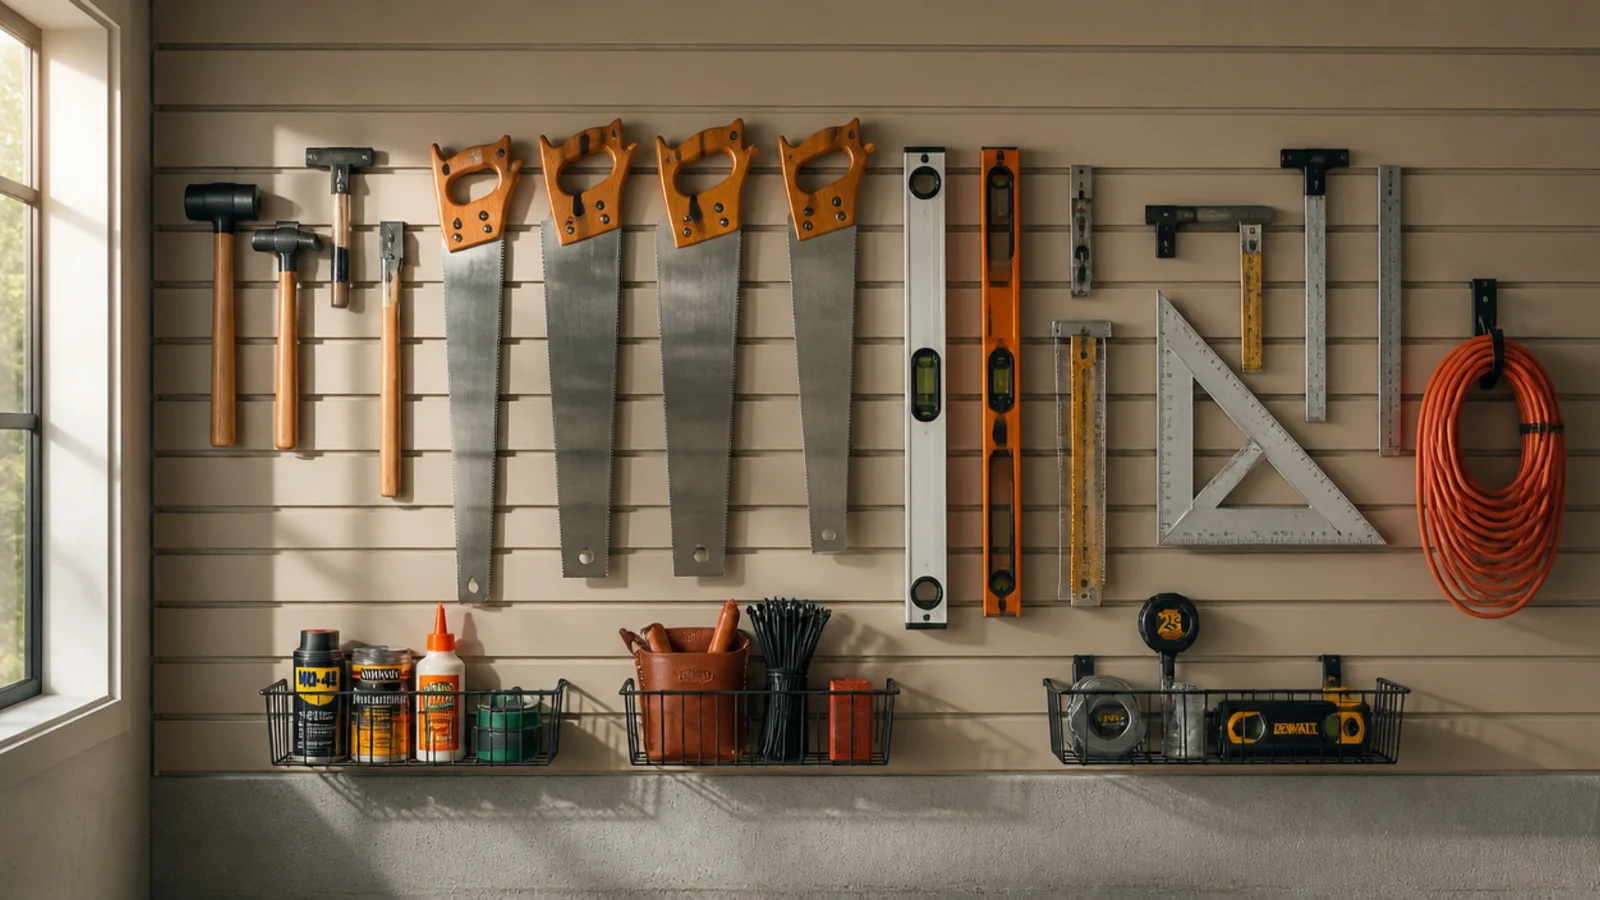
Dedicated hooks hang long, flat tools — hand saws, levels, squares — on the wall where they stay straight and visible. These awkward tools don’t fit drawers well. Best for keeping edge and measuring tools protected and reachable.
Screw hooks or a slotted holder into the studs, sized and spaced for each long tool. Hang saws by their handles, levels flat on two hooks so they don’t bend, and squares on a peg. Group by type. Keep measuring tools together and cutting tools together. Position them near the bench but clear of your work reach so blades stay safe.
Editor's noteHang levels flat across two hooks, not by one end, so they never take a set and stay true over time.
Skip thisDon’t stack saws in a drawer where teeth dull against other tools; hang them clear so edges stay sharp.
10. Cordless Charging Station
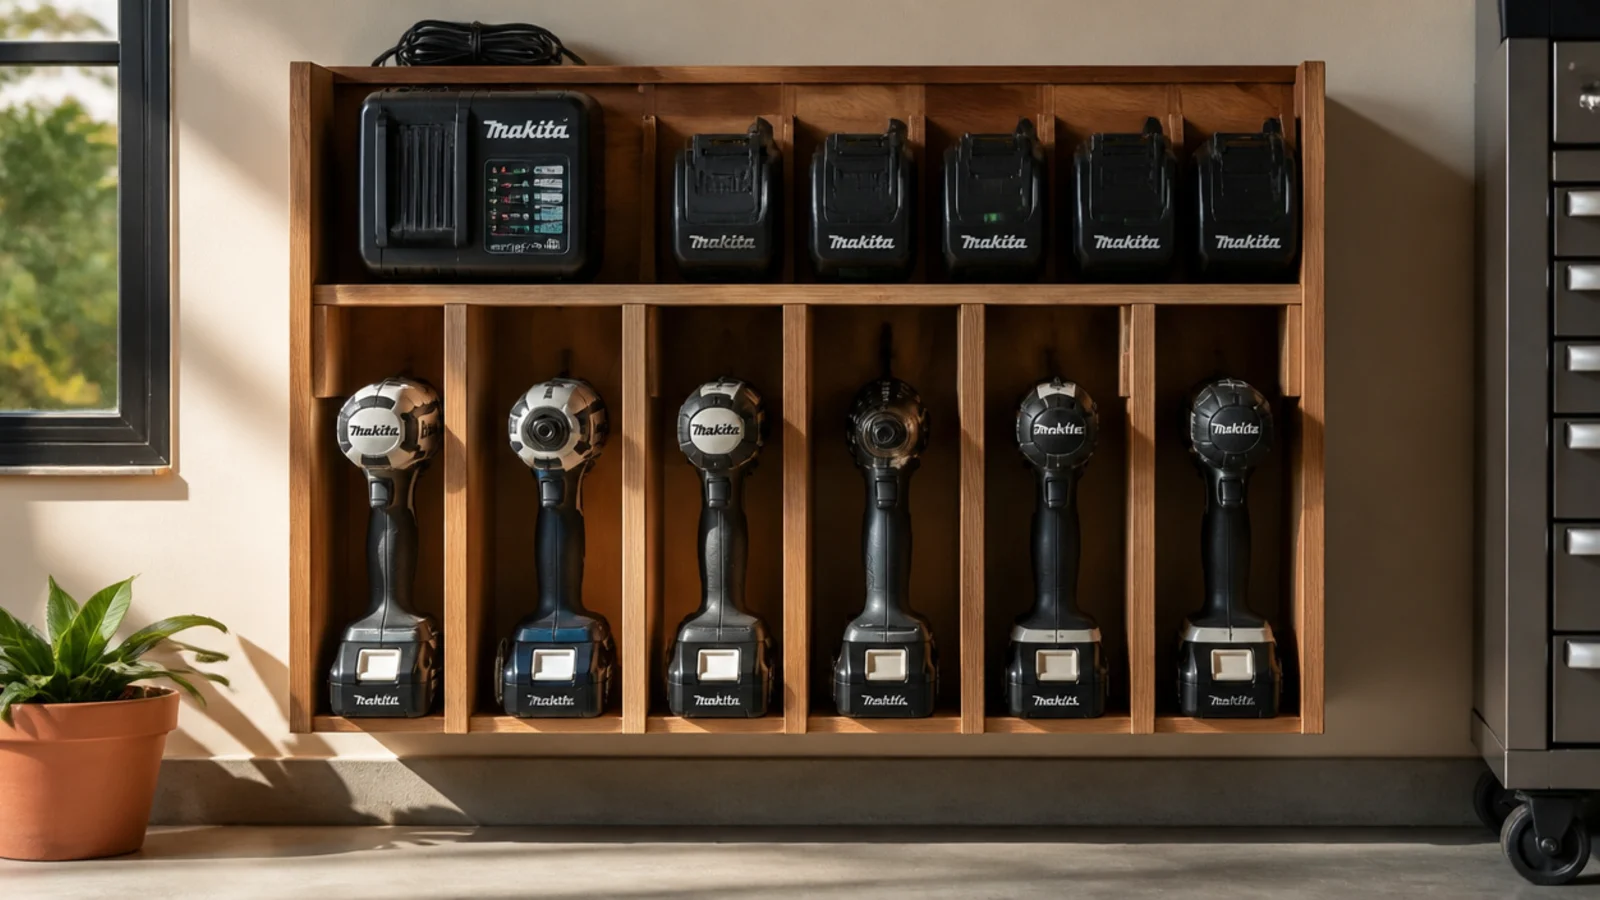
A charging station keeps every cordless tool, battery, and charger in one powered spot so nothing’s ever dead. Tools drop into slots and batteries charge above. Essential for a shop running on cordless tools.
Build or mount a shelf with tool cradles and a back panel of chargers fed by one power strip. Slot each tool and pair it with its charger and spare battery, labeled. Leave airflow around the chargers so they don’t overheat. Anchor the unit into studs. Keep it near the bench so grabbing a charged tool is one motion.
Editor's noteWire the chargers to one switched power strip so you can cut power to all of them once everything’s topped up.
Skip thisDon’t box chargers in with no ventilation; they warm up, so leave a gap above and behind for airflow.
11. Small-Parts Bin Wall
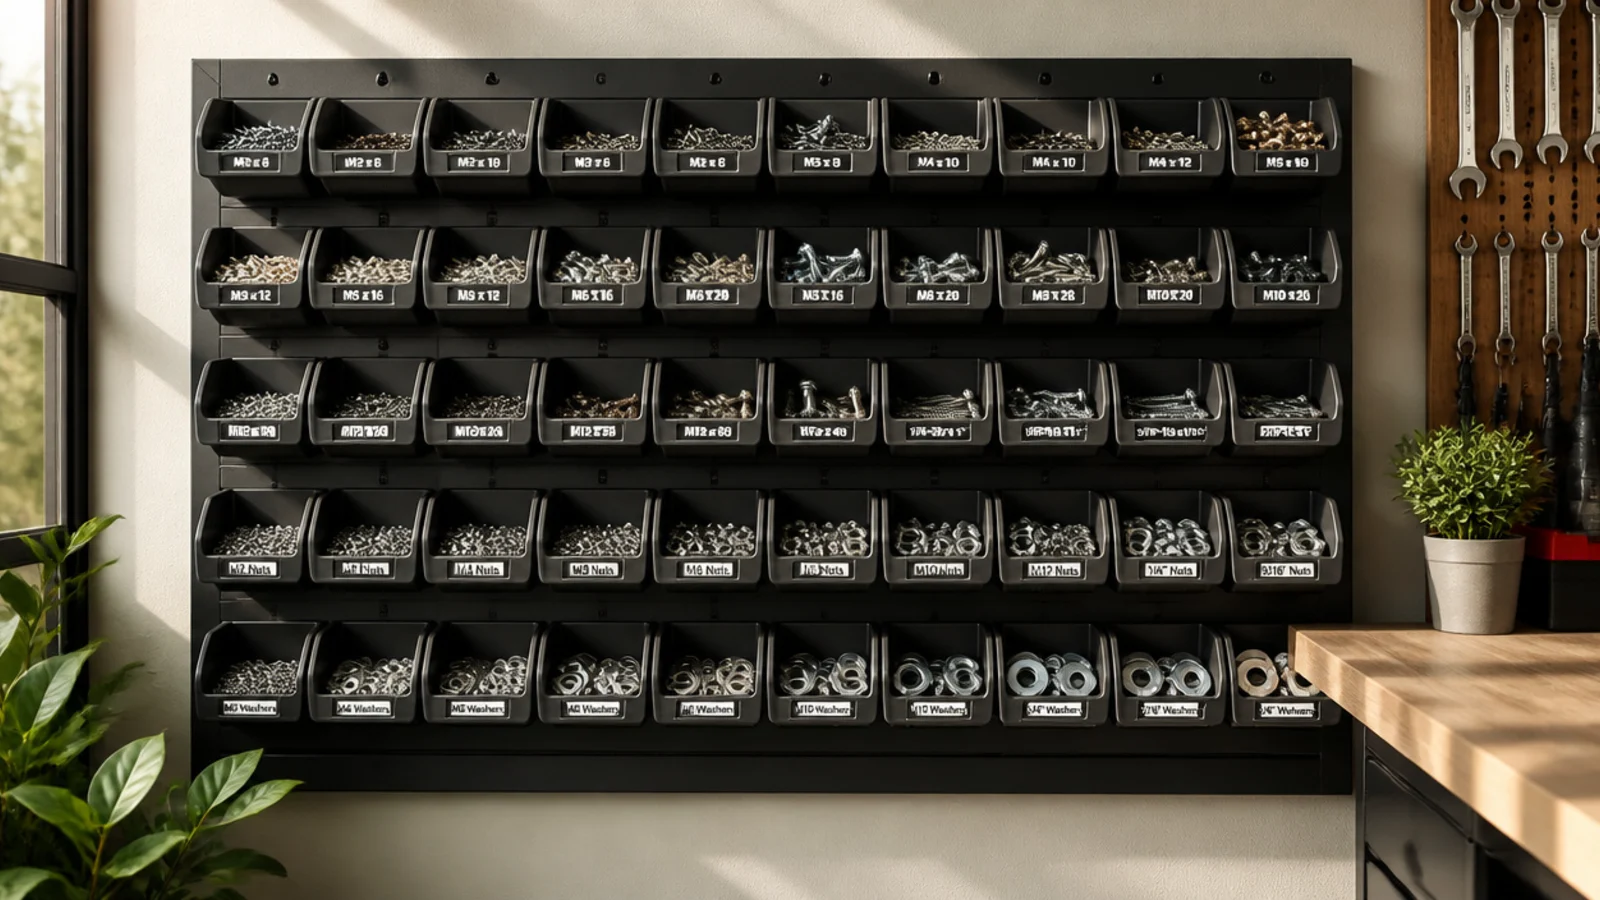
A bin wall sorts fasteners and small parts into dozens of grab-in compartments so you find the right screw fast. Each size gets its own bin. Ideal for the hardware chaos every shop accumulates.
Hang open-front parts bins on a louvered panel or stack them on a shelf, mounted into studs. Sort fasteners by type and size — wood screws, machine screws, nuts, washers — one per bin. Label each bin’s front lip. Keep the most-used sizes at eye level. Refill from bulk boxes stored elsewhere so bins never run empty mid-job.
Editor's noteTape a sample of each fastener to its bin’s label so you match the size by sight, not by reading tiny print.
Skip thisDon’t overfill bins past the lip; parts spill out the front every time you pull a bin off the wall.
12. French Cleat Tool Holders
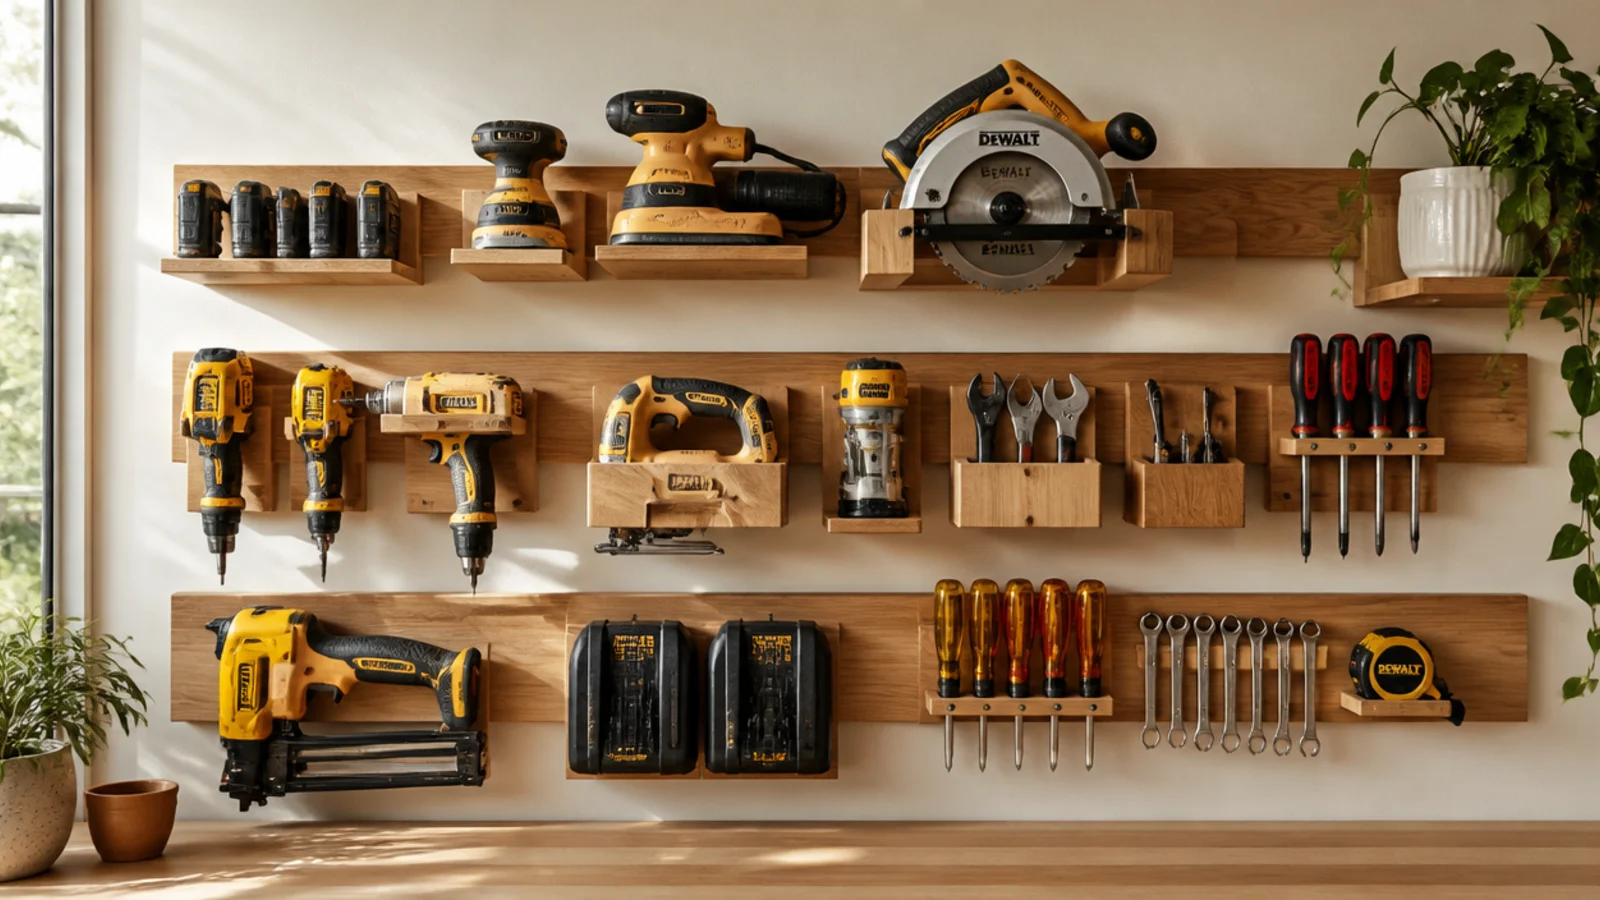
A French cleat wall lets you build custom holders for each tool and rearrange them endlessly as your kit grows. Every tool gets a made-to-fit home. Best for a shop that keeps evolving.
Screw 45-degree cleat rails into the studs, bevel up. Build cleat-backed holders shaped to each tool — a cradle for the drill, a slot rack for chisels, a shelf for the sander. Hook each holder over the rail and slide to arrange. Add new holders as you acquire tools. Keep daily tools bench-side and specialty tools farther out.
Editor's noteBuild a holder shaped to each specific tool so it drops into one obvious spot and returns there every time.
Skip thisDon’t cut the wall cleat’s bevel facing down; the angle must point up and out or holders lift off the wall.
13. Chisel and Carving Tool Rack
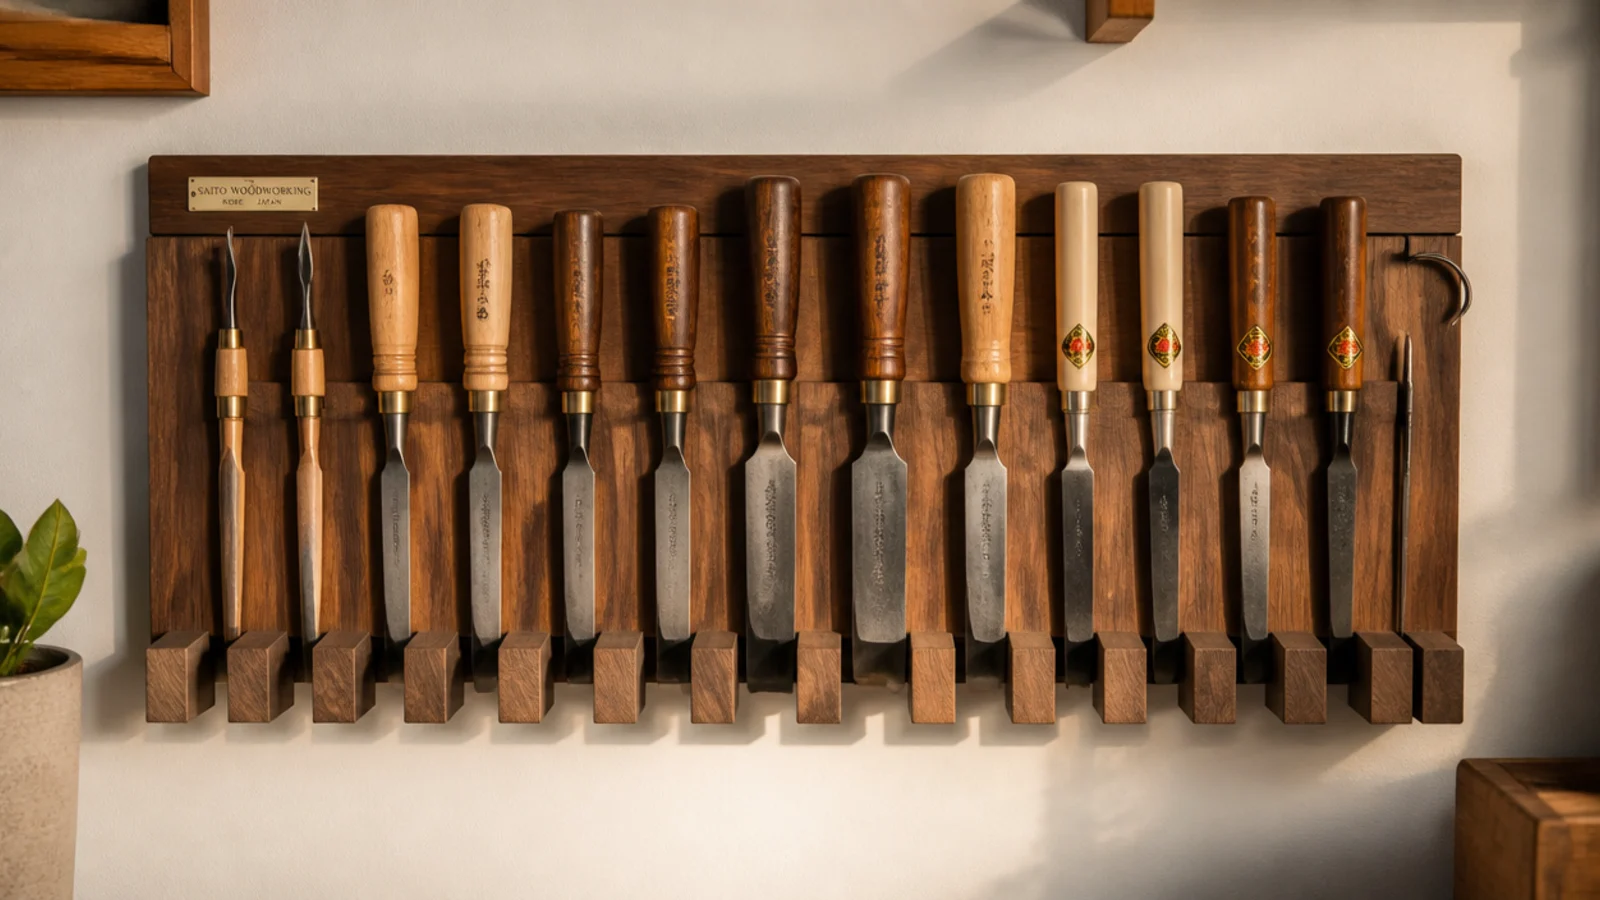
A slotted rack holds chisels and carving tools by their handles so the edges stay protected and sharp. Each tool sits in its own slot, blade down and safe. Essential for anyone with edge tools worth keeping keen.
Mount a slotted holder with each slot sized to a chisel handle, on the wall or in a lined drawer. Stand tools blade-down in the slots so edges never touch each other. Order them by width. Keep the rack away from where you’d bump the blades. Add edge guards for the sharpest gouges. Position it near the bench but out of the work path.
Editor's noteStand chisels blade-down in individual slots so no two edges ever touch and nick each other dull.
Skip thisDon’t store sharp chisels loose in a drawer; the edges knock together, dull fast, and can cut a reaching hand.
14. Clamp Rack
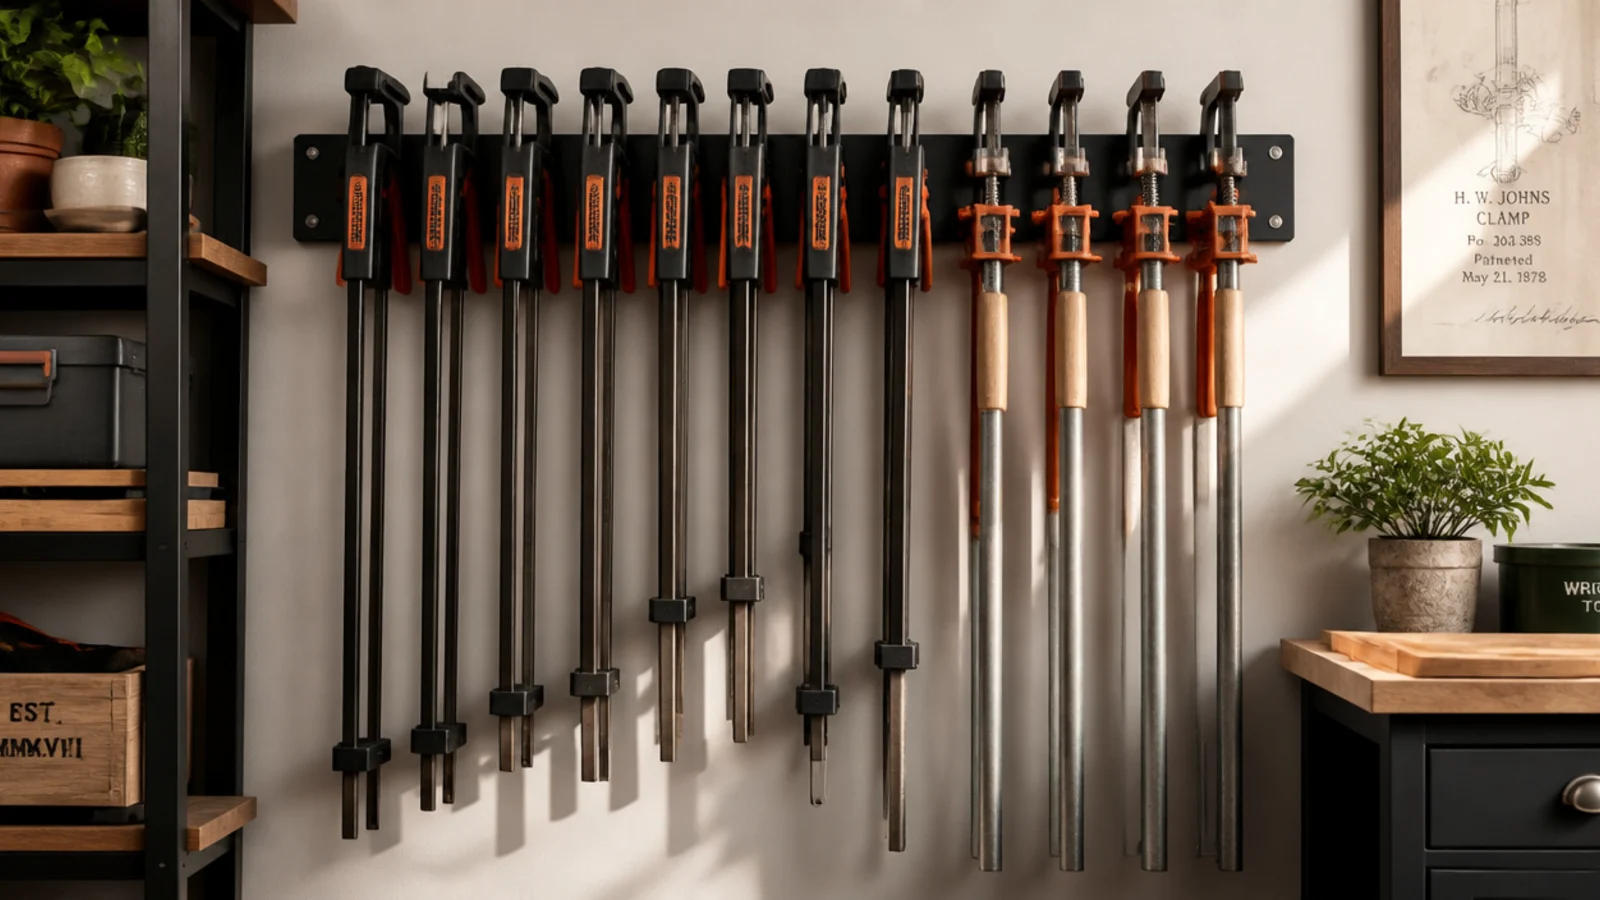
A clamp rack hangs bar and pipe clamps in a row so they stop sliding around in a bucket or drawer. Clamps hang by their bars, sorted by type. Perfect for any woodworker whose clamps are a tangled pile.
Screw a sturdy 2x4 rail or cleat into the studs and cut open-top slots or add pegs sized to your clamp bars. Hang each clamp by its bar, grouped by type and size. Leave space between clamps so you can lift one without knocking the row. Keep the rack near the bench where glue-ups happen. Load heavy pipe clamps low.
Editor's noteGroup clamps by type and length so you can grab a matched pair for a glue-up without hunting through the row.
Skip thisDon’t hang heavy pipe clamps on a thin rail; use a beefy 2x4 into studs or it flexes and pulls out.
15. Mobile Tool Cart
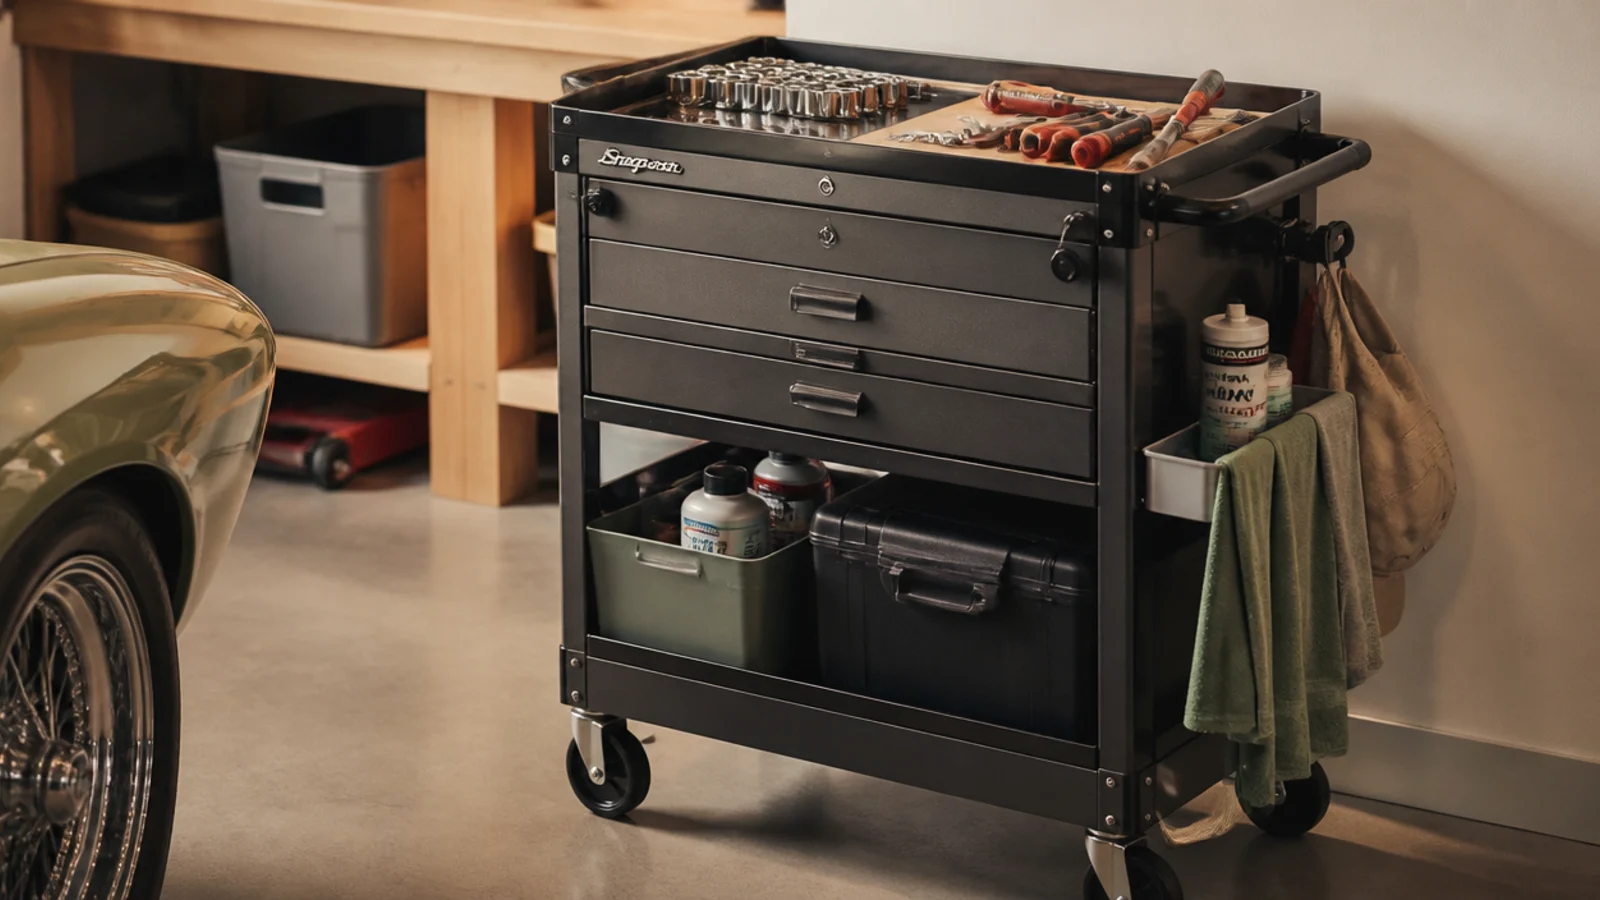
A mobile tool cart brings your core tools to the project instead of walking back to the bench for each one. Drawers sort the tools; the wheels bring them along. Ideal for jobs away from the bench — on the car, across the garage, outside.
Load a rolling cart with drawers or a stackable tool box on casters. Sort your go-to tools into it — the ones you use on most jobs — heavy items low. Add a tray top for the tools in current use. Lock the casters while working. Roll it to the project, then park it at the bench or under it when done.
Editor's noteKeep one cart permanently stocked as your everyday kit so a common job doesn’t mean loading tools each time.
Skip thisDon’t load the top drawers heavy; a top-heavy rolling cart tips the moment you pull a full drawer out.