1. Old Ladder Tool Hanger
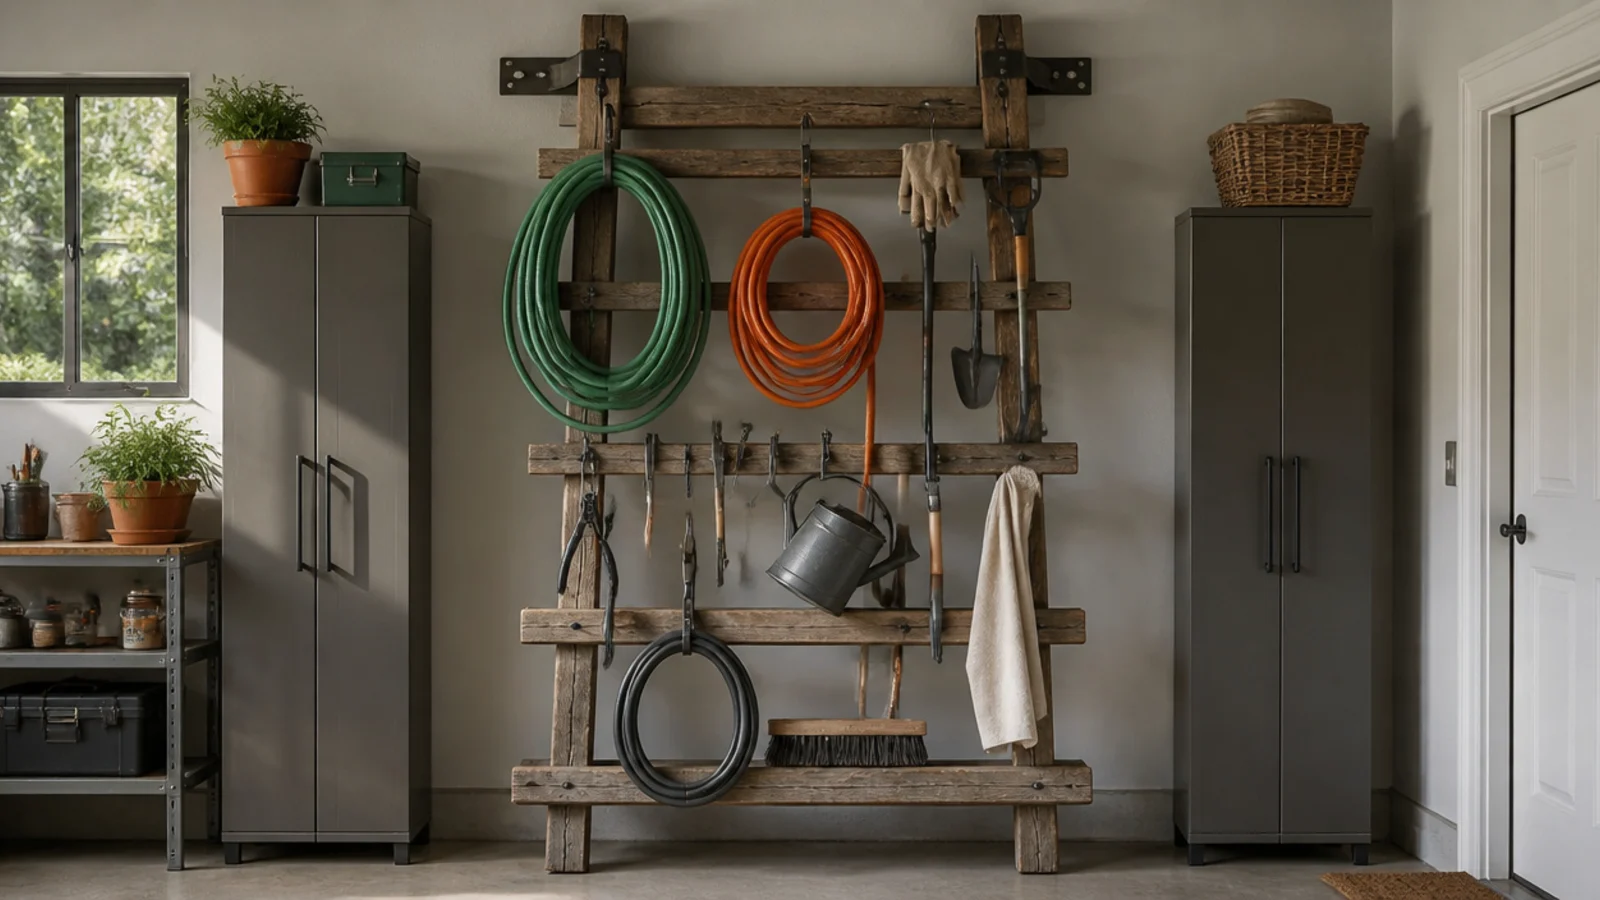
An old wooden ladder leaned against the wall becomes an instant tool and hose hanger with zero building. The rungs hold hooks, coils, and hanging tools. It’s the easiest free fix and a good first project.
Lean a sturdy old ladder against the wall and secure the top to a stud with a screw or strap so it can’t slide. Hang coiled hoses and cords over the rungs, add S-hooks for hand tools, and rest longer tools across two rungs. Group by type. Paint it with leftover paint if you want it to look deliberate rather than salvaged.
Editor's noteStrap or screw the top rail to a stud so a loaded ladder can’t slide out at the base and fall.
Skip thisDon’t hang heavy items on a rickety or rotted ladder; check the rungs are sound before you load it up.
2. Tin Can Wall Caddies
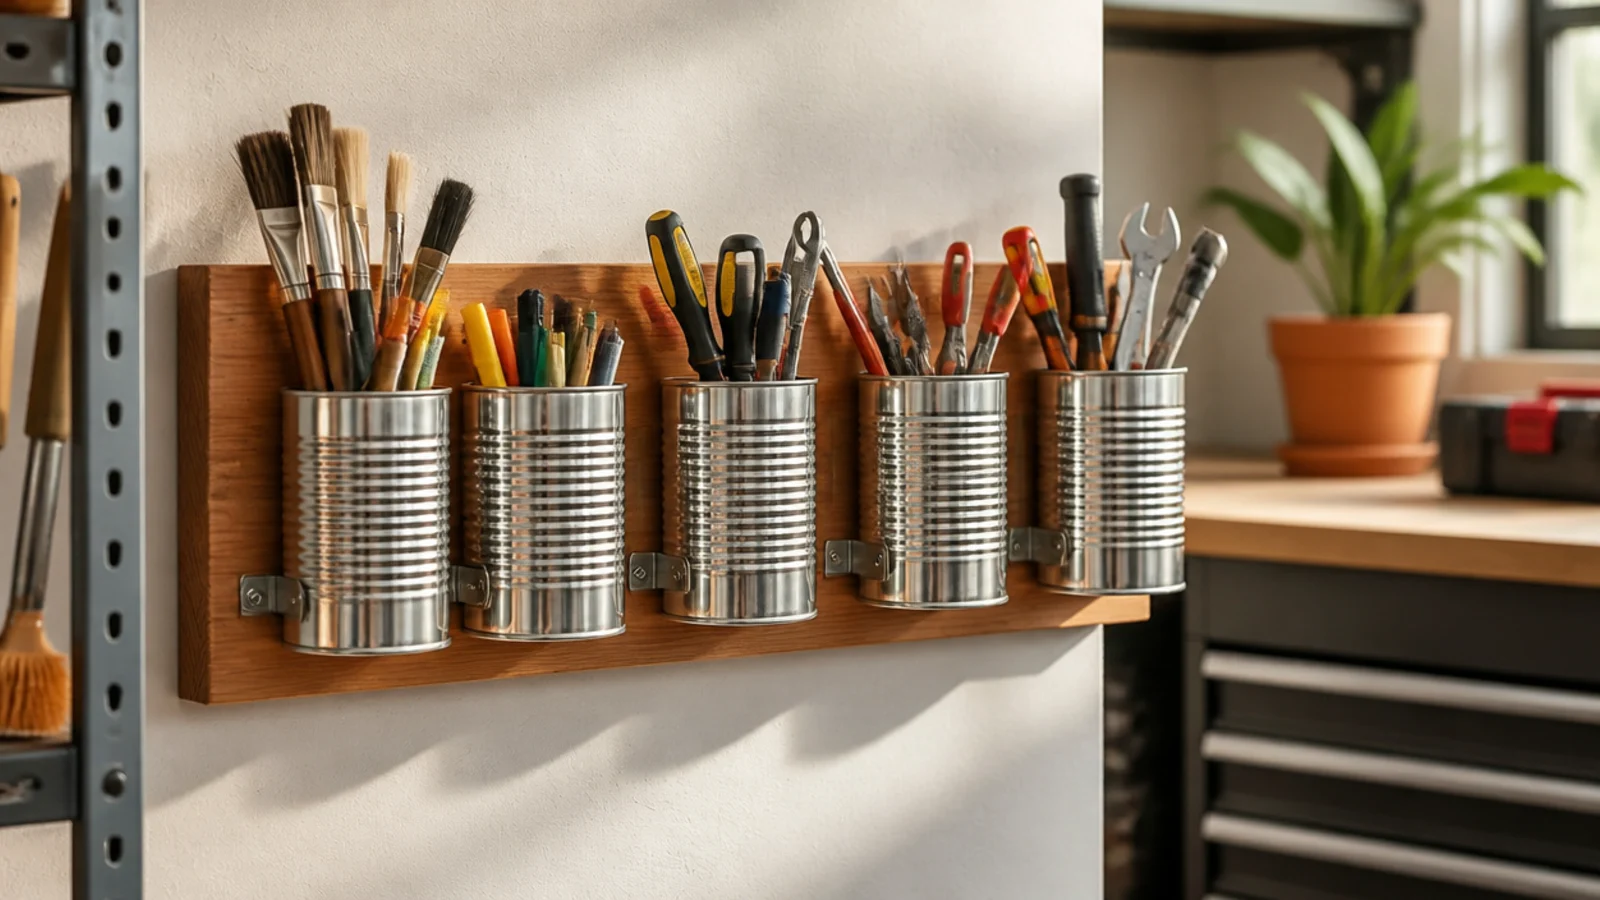
Tin cans screwed to a board make free upright holders for brushes, markers, and small tools. Each can corrals one category. Perfect for the loose small stuff that rolls around a bench.
Clean cans and tape or sand any sharp rims. Drill a hole through the back of each and screw them to a 1x6 board in rows. Mount the board to the wall studs. Stand brushes, markers, zip ties, and small tools in the cans by type. Label each can. Space them so you can reach in without knocking neighbors.
Editor's noteMix can sizes so tall brushes get deep cans and short items get shallow ones — one size wastes space.
Skip thisDon’t skip taping sharp can rims; a raw cut edge you reach into is an easy way to get nicked.
3. Wood Crate Wall Shelves
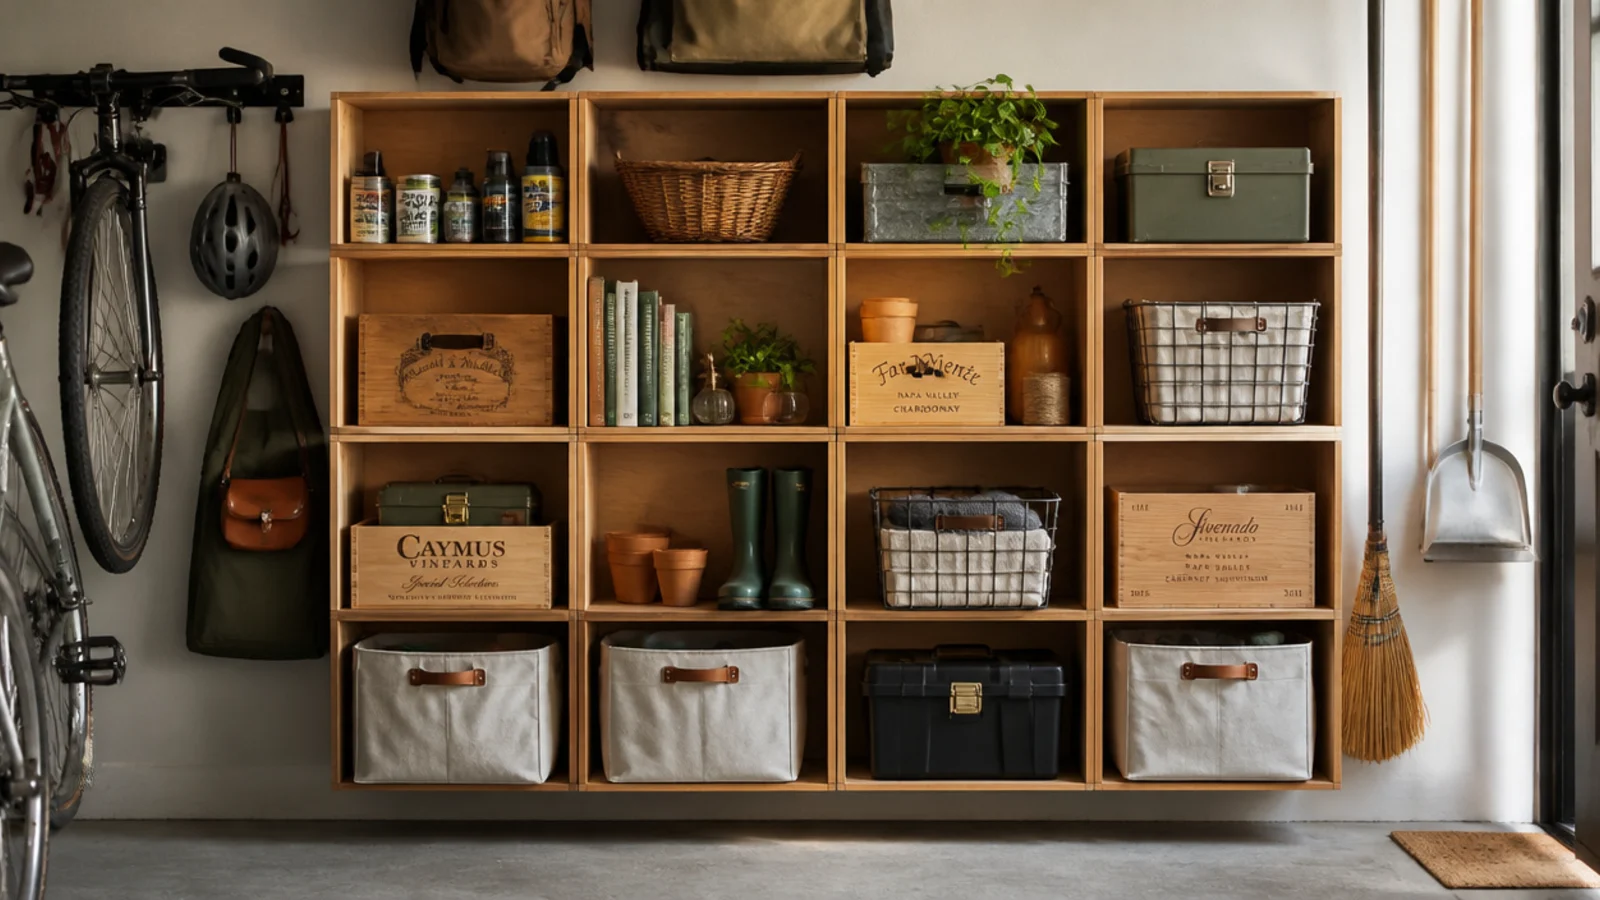
Wood or wine crates mounted open-side-out become instant cubby shelves for almost nothing. Each crate is a compartment. Great for supplies you want visible in a grid.
Find or buy cheap wood crates and mount them open-side-out to the wall studs with screws through the back. Arrange them in a grid or staggered. Store supplies by category, one crate per type, and add small bins inside for loose items. Sand and seal or paint them so they don’t snag or shed splinters.
Editor's noteArrange crates in a staggered grid rather than a straight row so the wall of cubbies looks designed, not just stacked.
Skip thisDon’t mount heavy-loaded crates on drywall alone; screw through the back into studs or they pull off the wall.
4. Repurposed Dresser Storage
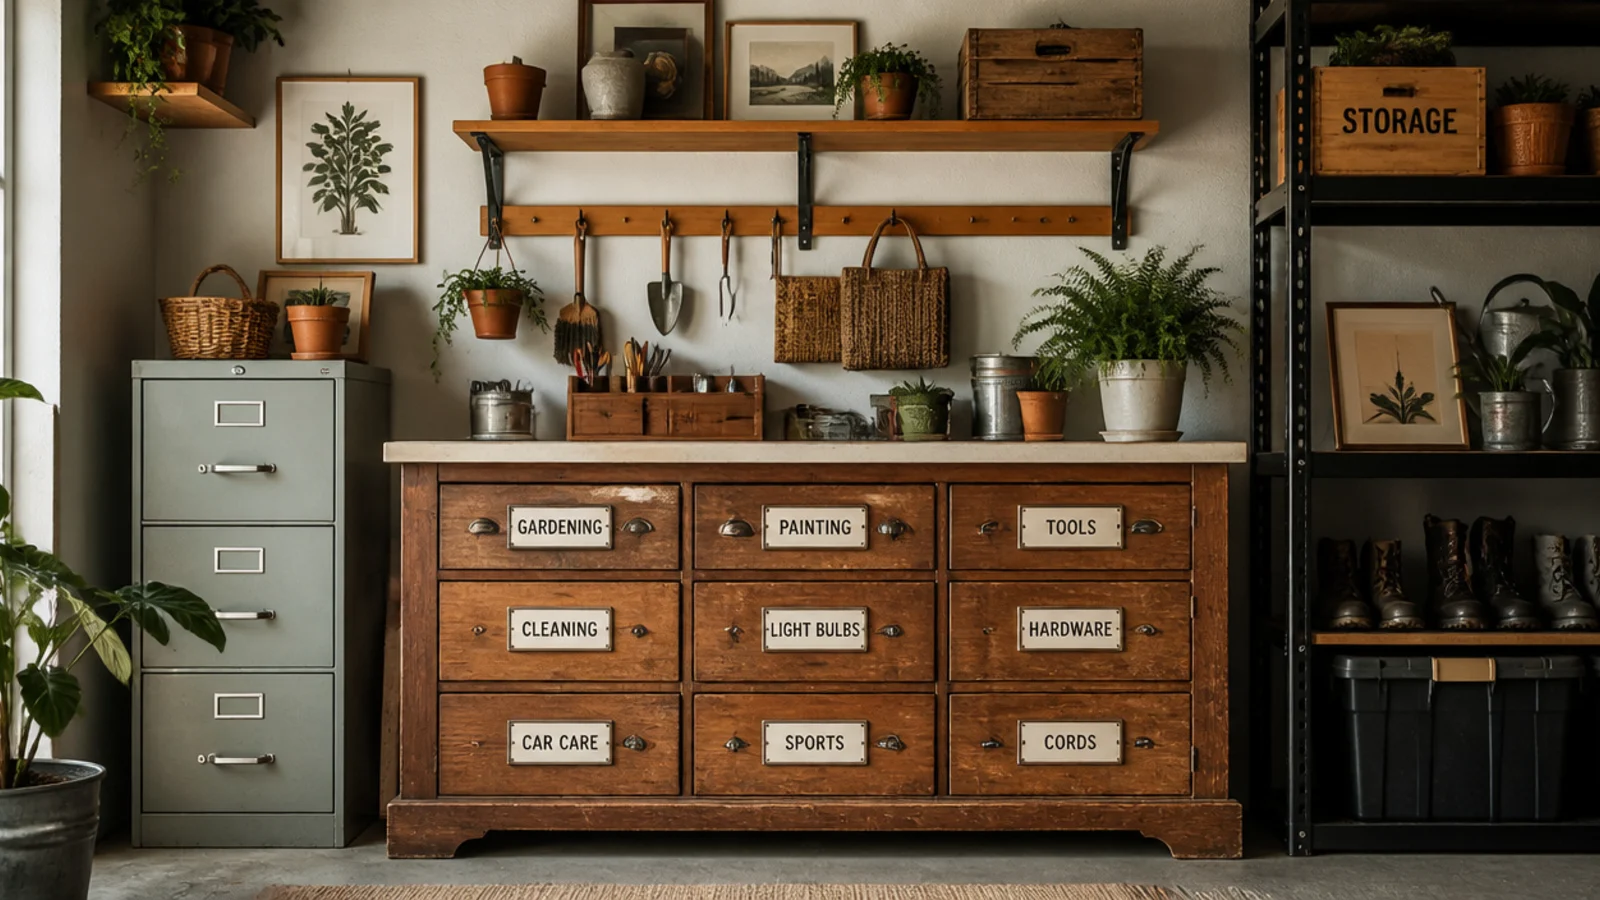
A cast-off dresser gives you a whole bank of closed drawers plus a work-surface top for free. The drawers hide clutter; the top holds a vise or project. Ideal for turning a curb find into serious storage.
Place a sturdy dresser against the wall and assign each drawer a category — auto, garden, painting, hardware. Label the drawer fronts. Use the top as a work surface or staging area, and add a strip of hooks to the side for hanging tools. Seal or paint it if the finish is rough. Level it on the concrete with shims.
Editor's noteLine the drawers with cardboard or old mats so oily tools and parts don’t stain or scratch the wood.
Skip thisDon’t overload old drawers with heavy metal parts; distribute weight so the drawer slides don’t give out.
5. Milk Crate Modular Stack
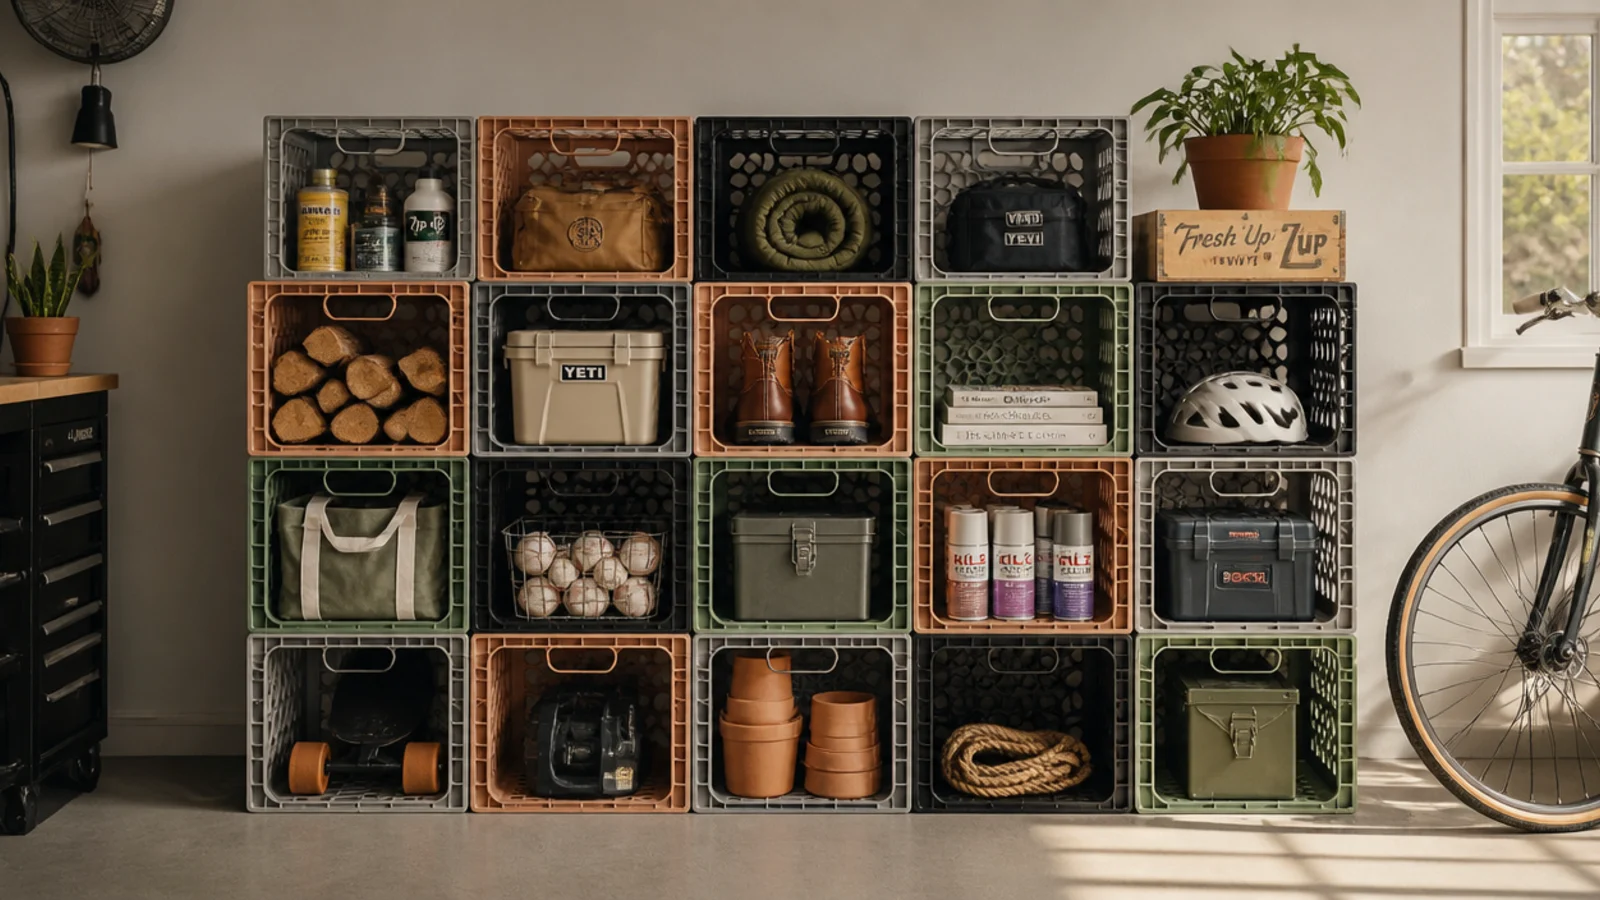
Milk crates stack and interlock into free modular cubbies you can rearrange anytime. They’re sturdy, ventilated, and hold a lot. Perfect for sports gear, garden supplies, and bulk items.
Collect matching crates and stack them into a column or grid, interlocking the rims so they don’t slide. Zip-tie or screw adjacent crates together for stability. Sort gear by category, one crate per type, and label them. Anchor a tall stack to the wall with a strap. Nest empties inside each other when not in use.
Zip-tie the crates together into one unit so the stack moves and stays put as a block instead of sliding apart.
Don’t stack crates too high unsecured; a tall free stack topples when you pull from a lower crate.
6. Spice Rack for Small Bottles
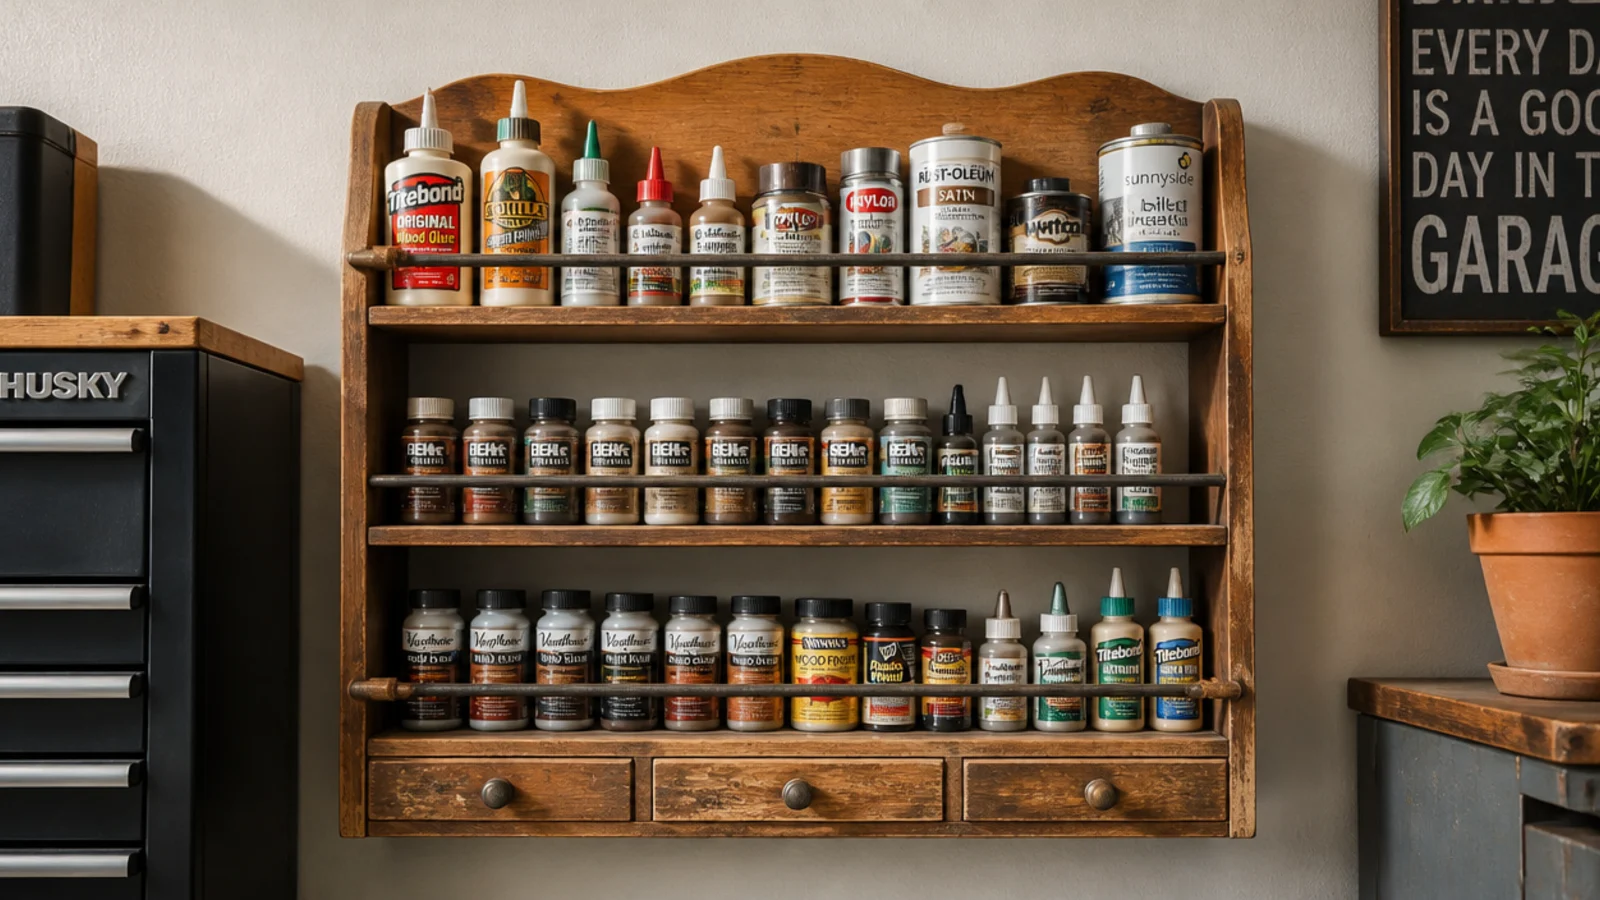
An old spice rack is perfectly sized to hold small garage bottles — glue, oil, solvent, touch-up paint. The little shelves keep them upright and visible. Great for the small containers that get lost on a big shelf.
Mount a cast-off spice rack on the wall or the side of a cabinet. Stand small bottles on its shelves, grouped by type, labels facing out. Use the rail lip to keep them from sliding off. Keep flammables away from heat sources. It’s a five-minute reuse that clears a shelf of little bottles.
Group by use — all adhesives on one shelf, all lubricants on another — so you grab the right small bottle fast.
Don’t overload a lightweight spice rack with heavy bottles; keep it to small containers it was built to hold.
7. Zip-Tie Tool Loops
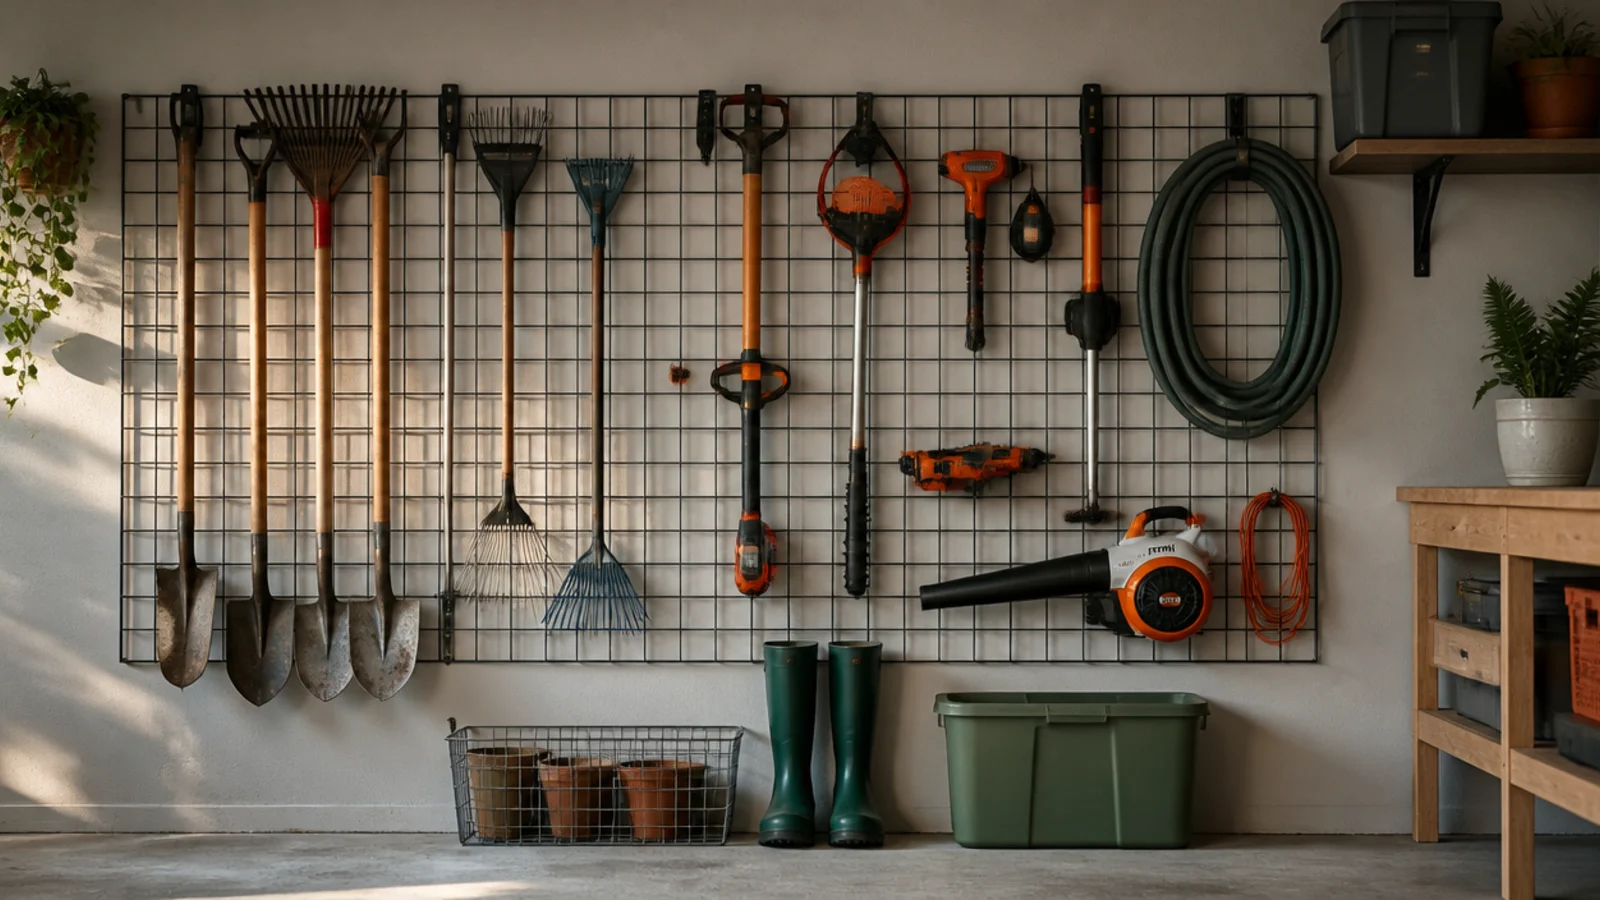
Zip ties make near-free hanging loops for tools when you don’t have hooks. Loop one through a board or wire grid and hang a tool by its handle. Ideal for a quick, cheap hanging fix.
Drill pairs of holes in a mounted board, or use a leftover wire grid, and thread heavy-duty zip ties through to form loops. Hang tools by their handles or hang-holes in the loops. Trim the tie tails. Group by type. Replace a loop in seconds if it wears. Use thick ties for anything with weight.
Editor's noteDouble up two zip ties for any tool with weight so a single tie can’t snap and drop the tool.
Skip thisDon’t hang heavy tools on thin dollar-store zip ties; they cut and snap — use thick, rated ties or double them.
8. Golf Bag for Long Tools
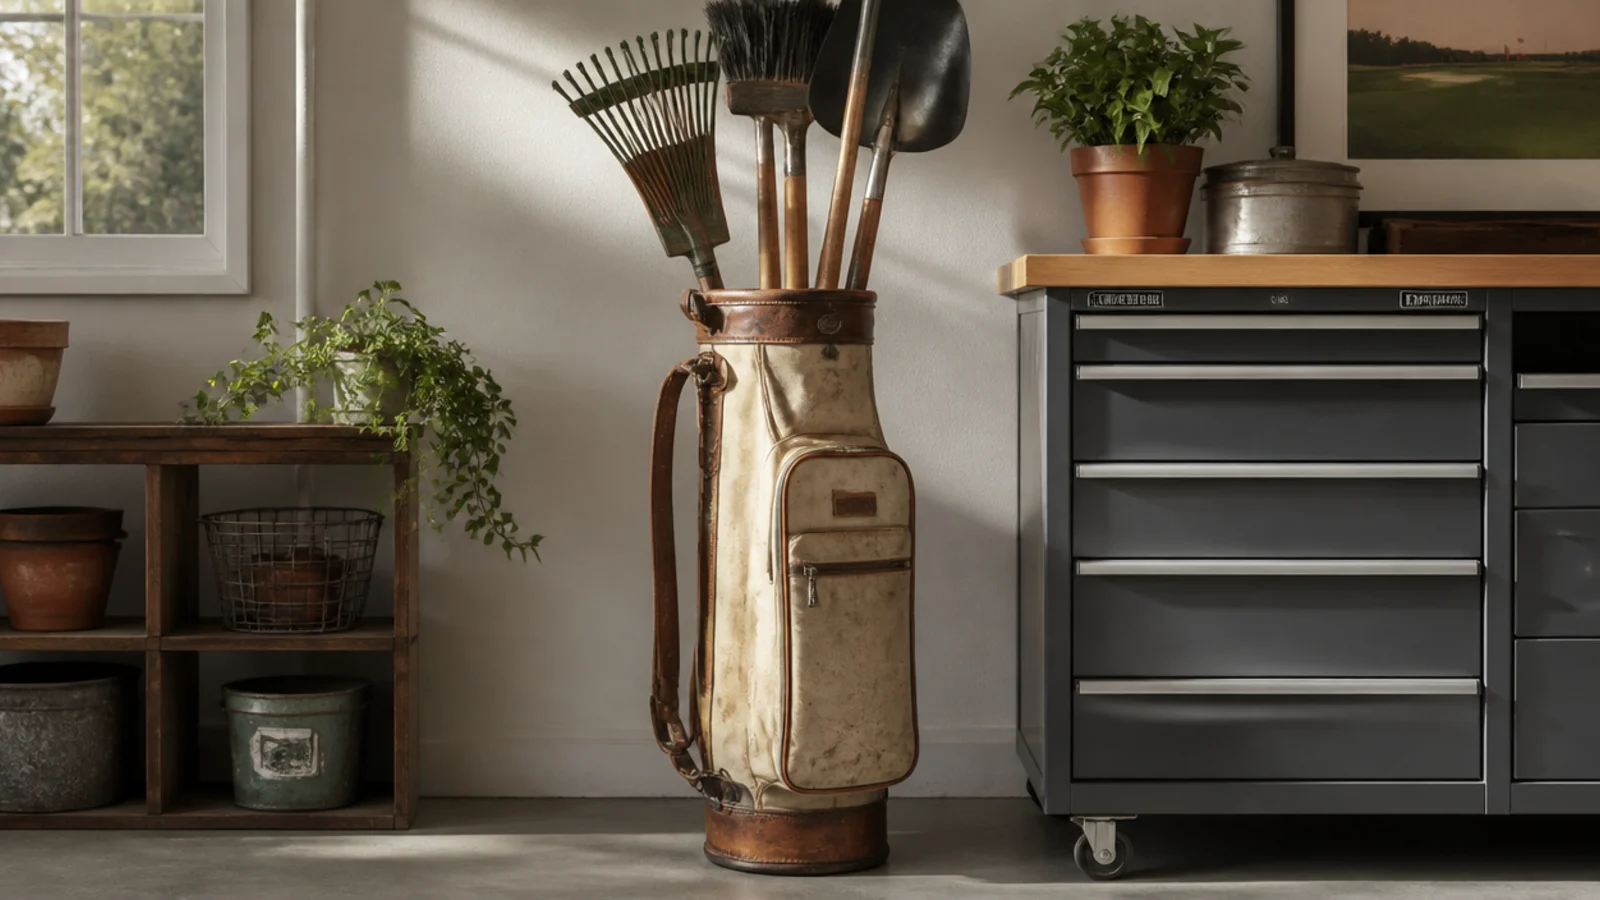
An old golf bag stands long-handled tools upright in its club dividers, and the wheeled ones even roll. It’s a free, mobile rake-and-shovel holder. Perfect for garden tools with nowhere to stand.
Stand an old golf bag in a corner or use its wheeled cart if it has one. Slot rakes, shovels, brooms, and long tools into the club dividers, heads up. Use the bag’s pockets for gloves, twine, and hand tools. Roll it to the garden bed if it’s a cart bag. Group tools by type in the dividers.
Editor's noteUse a wheeled golf cart bag so you can roll all your garden tools out to the yard in one trip.
Skip thisDon’t overload one side of the bag; balance the tools around the dividers so a standing bag doesn’t tip over.
9. Repurposed File Cabinet
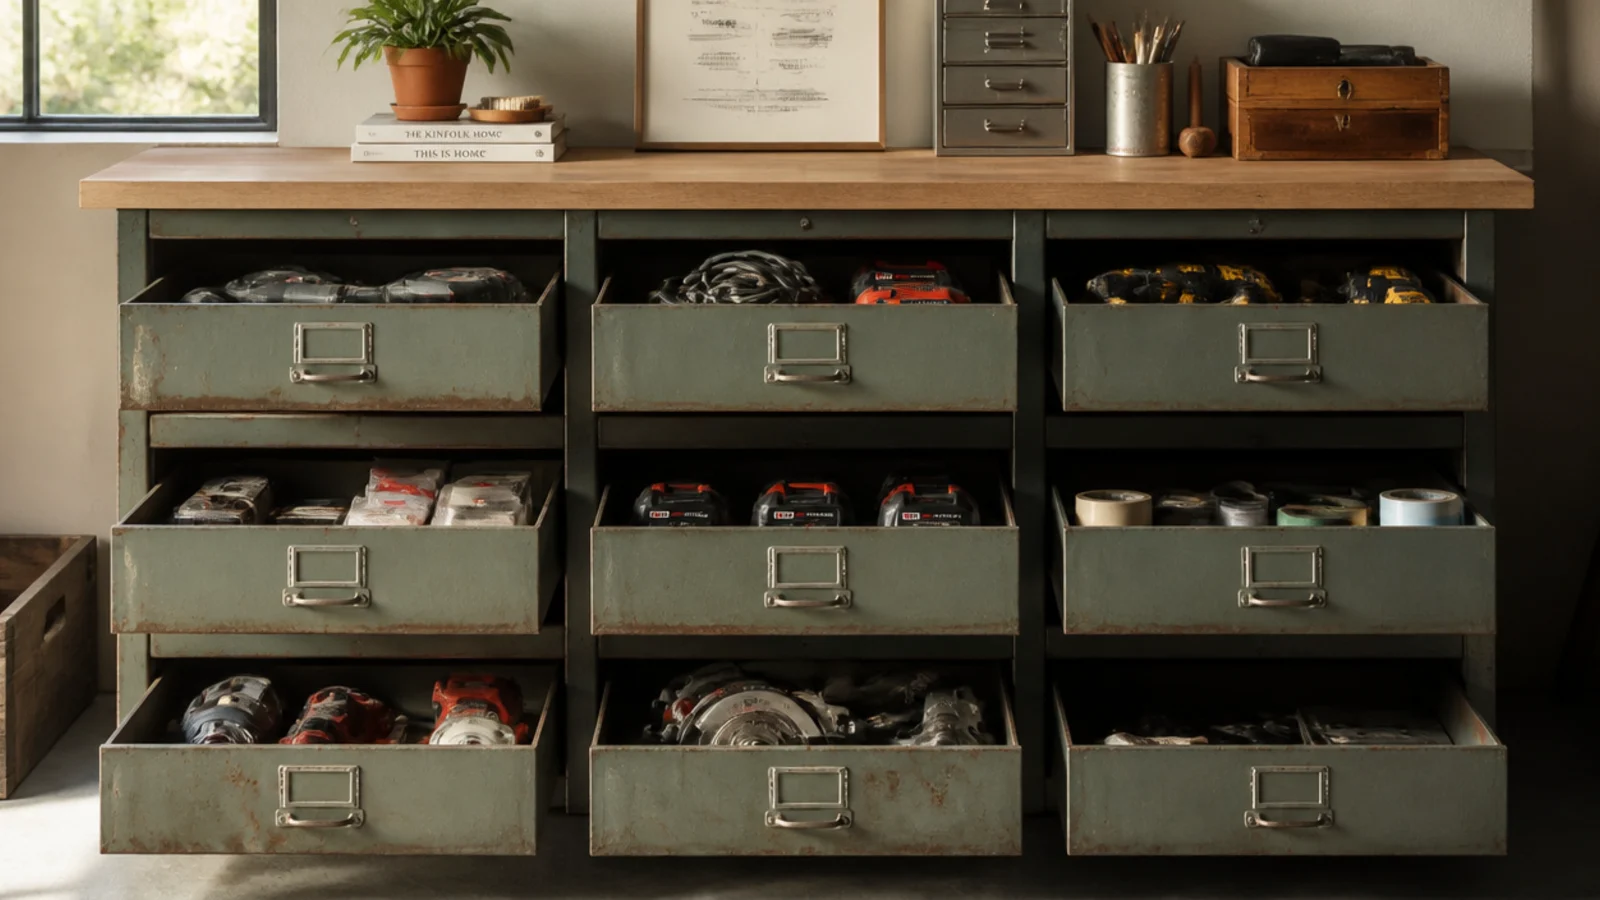
A cast-off metal file cabinet gives you deep, sturdy, lockable drawers for tools and supplies. The heavy drawers handle power tools and metal parts. Great free closed storage that resists garage grime.
Place a metal file cabinet against the wall and use the deep drawers for power tools, cords, and heavier supplies. Add drawer dividers (cardboard or bins) to sort within each drawer. Label the fronts. Lock it if it holds valuables. Level it and, if tall, anchor it to a stud so a loaded top drawer can’t tip it.
Use the deep hanging-file drawers for tall items like power tools and spray cans that won’t fit a shallow drawer.
Don’t open two loaded drawers on a tall cabinet at once; it tips forward — open one at a time.
10. Shower-Ring Spray Bottle Hangers
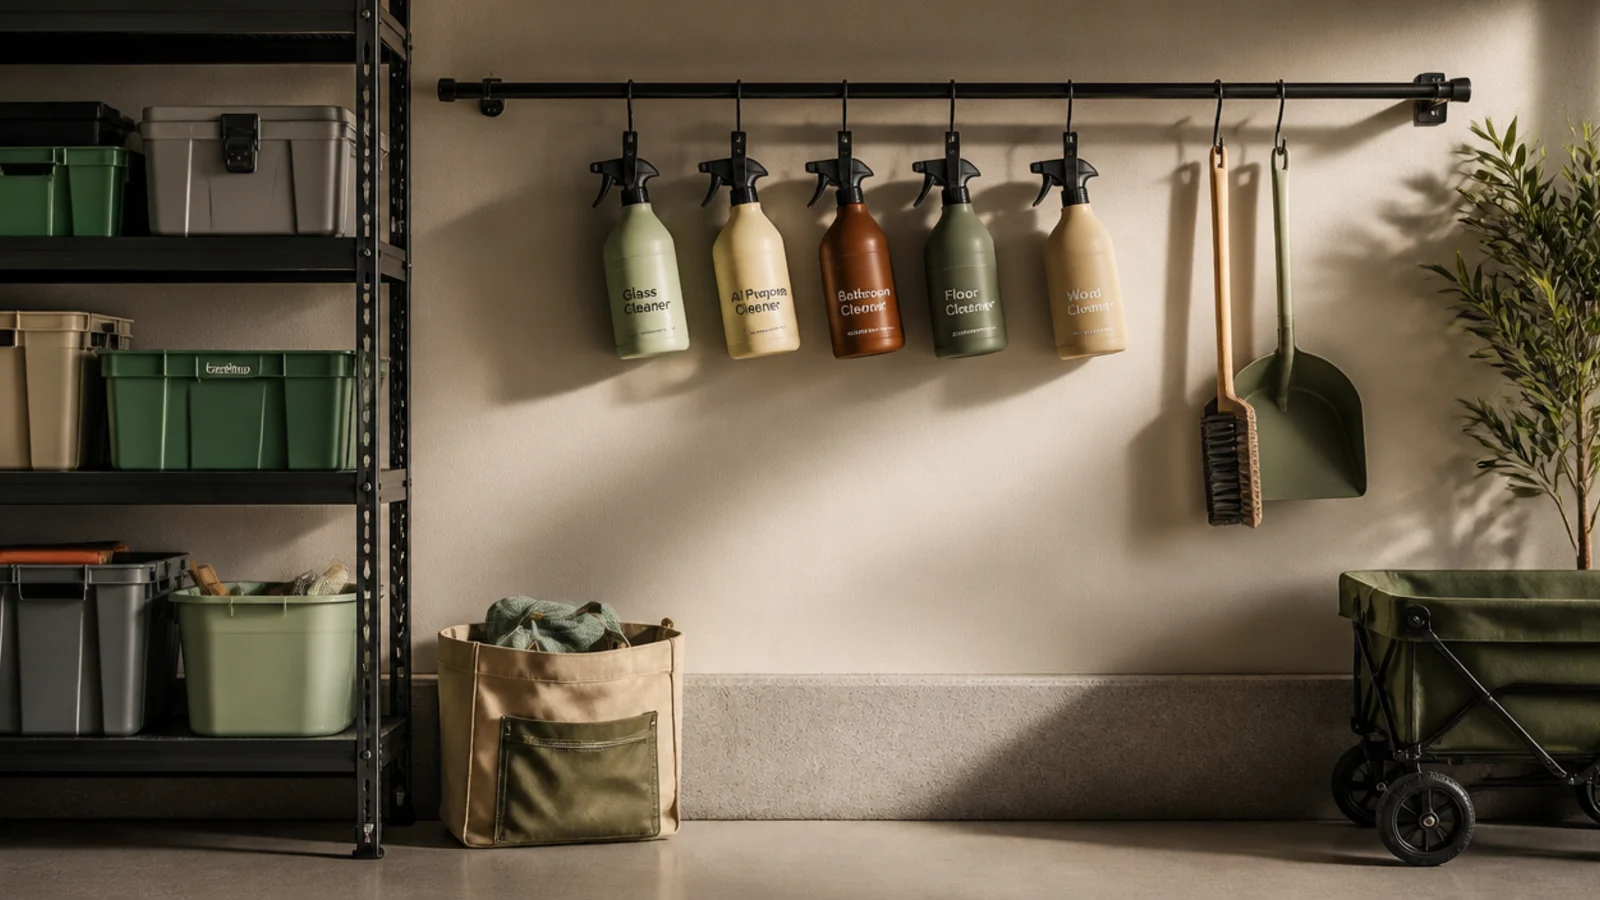
Shower curtain rings clipped onto a rod hang spray bottles by their trigger handles, freeing the shelf below. It’s a near-free hanging system. Perfect for cleaners and garden sprays.
Mount a closet rod or tension rod across a cabinet or between two brackets. Clip shower curtain rings onto it, then hang each spray bottle by its trigger through a ring. Group bottles by type, labels forward. Use the freed shelf below for flat items. Space the rings so bottles don’t knock together.
Use the clip-style rings so you can hang and unclip a bottle one-handed without threading it through a solid ring.
Don’t overload a light tension rod with heavy bottles; too many and it slips down out of the brackets.
11. Cardboard Tube Cord Keepers
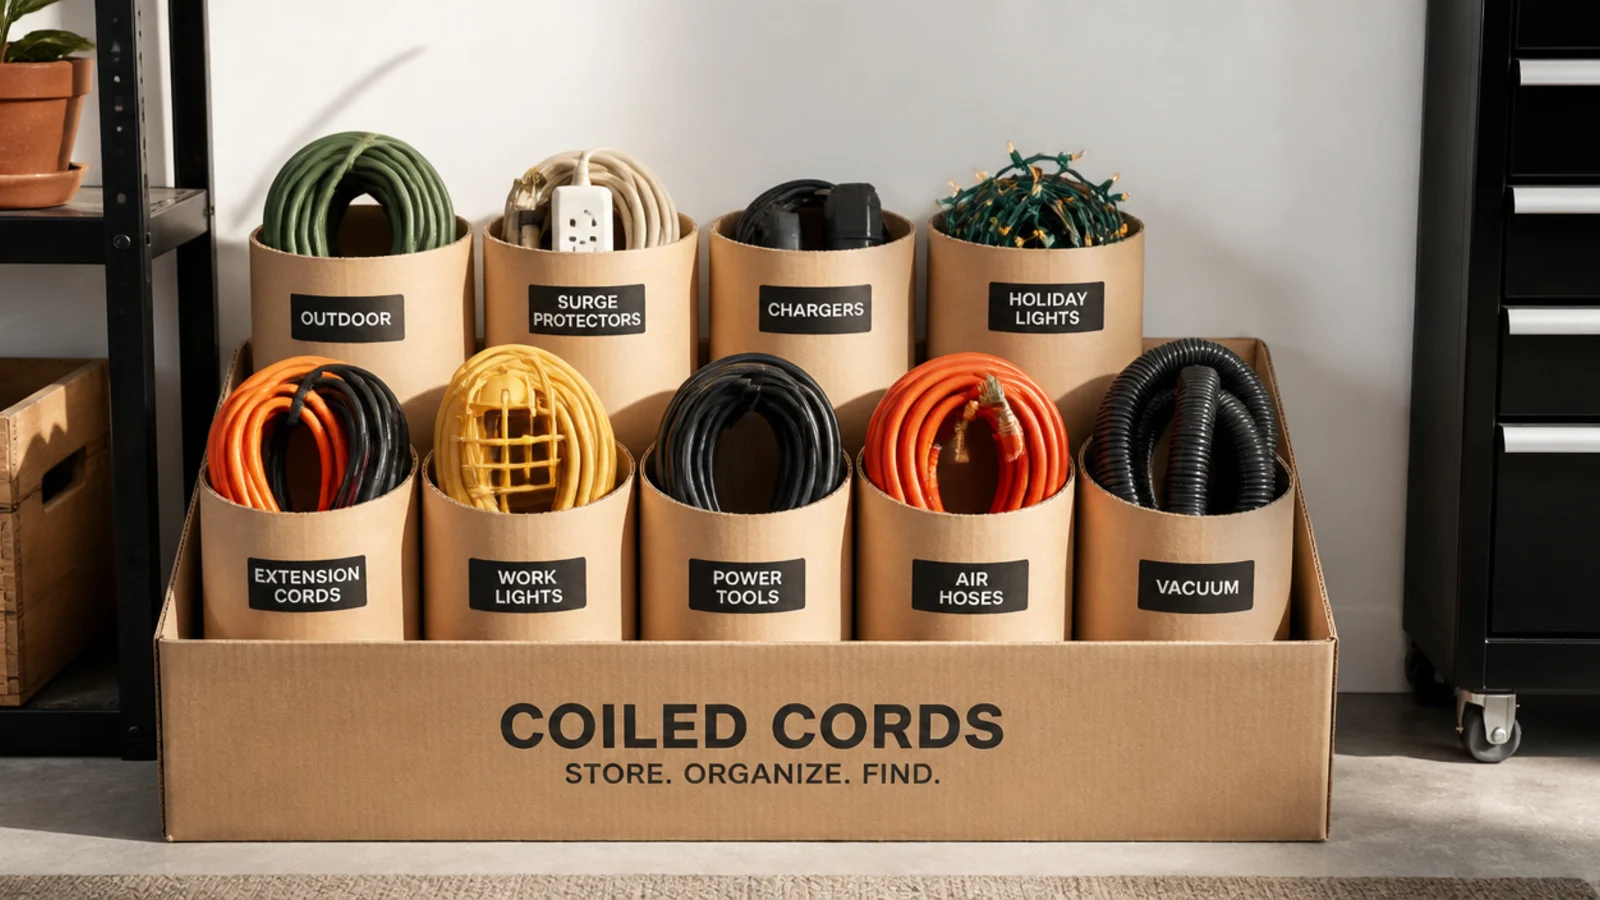
Cardboard tubes from paper towels keep coiled cords from tangling for absolutely free. Each coil slides into its own tube. Ideal for the drawer of knotted cords everyone has.
Coil each cord and slide it into a cardboard tube so it can’t unravel. Stand the tubes upright in a box or drawer. Label each tube with the cord’s length or use. For heavier cords, use sturdier mailing tubes. Keep them in one box so all cords live in one spot instead of a tangled pile.
Label each tube with the cord’s length and gauge so you grab the right extension cord without unspooling three.
Don’t cram thick cords into flimsy thin tubes; they burst — match the tube size to the coil.
12. Egg Carton Parts Sorter
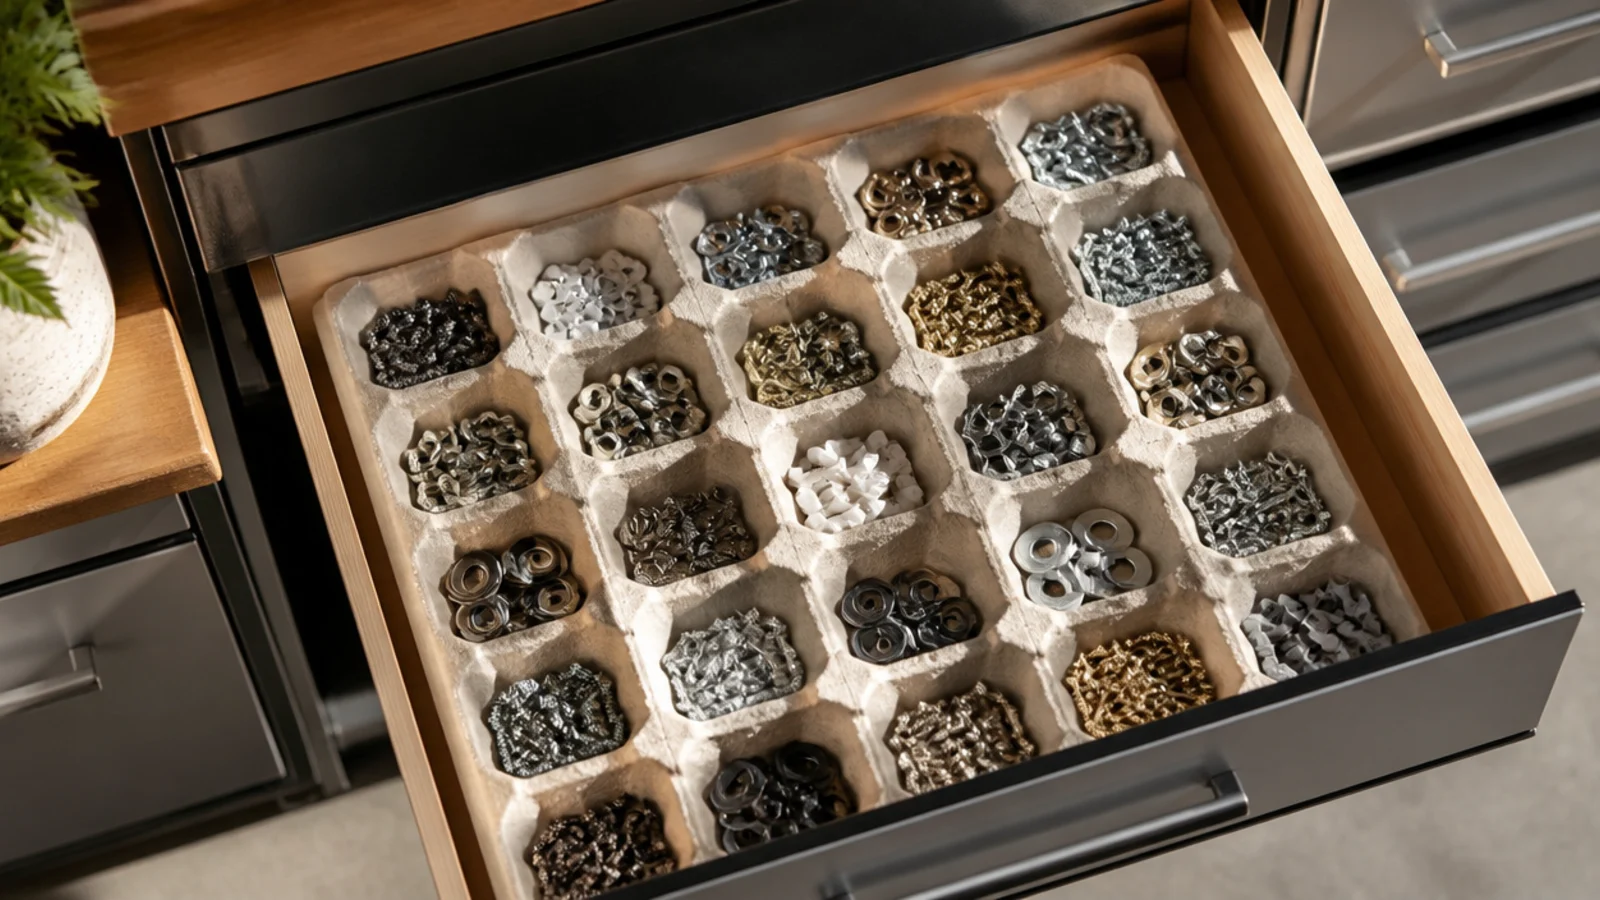
An egg carton turns a drawer into a dozen tiny sorted compartments for free. Each cup holds one type of small hardware. Perfect for grommets, cotter pins, and spare small parts.
Set an egg carton in a drawer and sort tiny hardware into the cups — one type per cup. Close the lid to keep parts from spilling if you move it. Label the lid with what’s inside. Use foam or cardboard cartons for sturdiness. Line up several cartons in a deep drawer for a full small-parts system.
Close and label the lid so you can lift the whole carton out to a project without spilling the sorted cups.
Don’t use egg cartons for heavy hardware; they crush — keep them to lightweight tiny parts only.
13. Tackle Box Screw Store
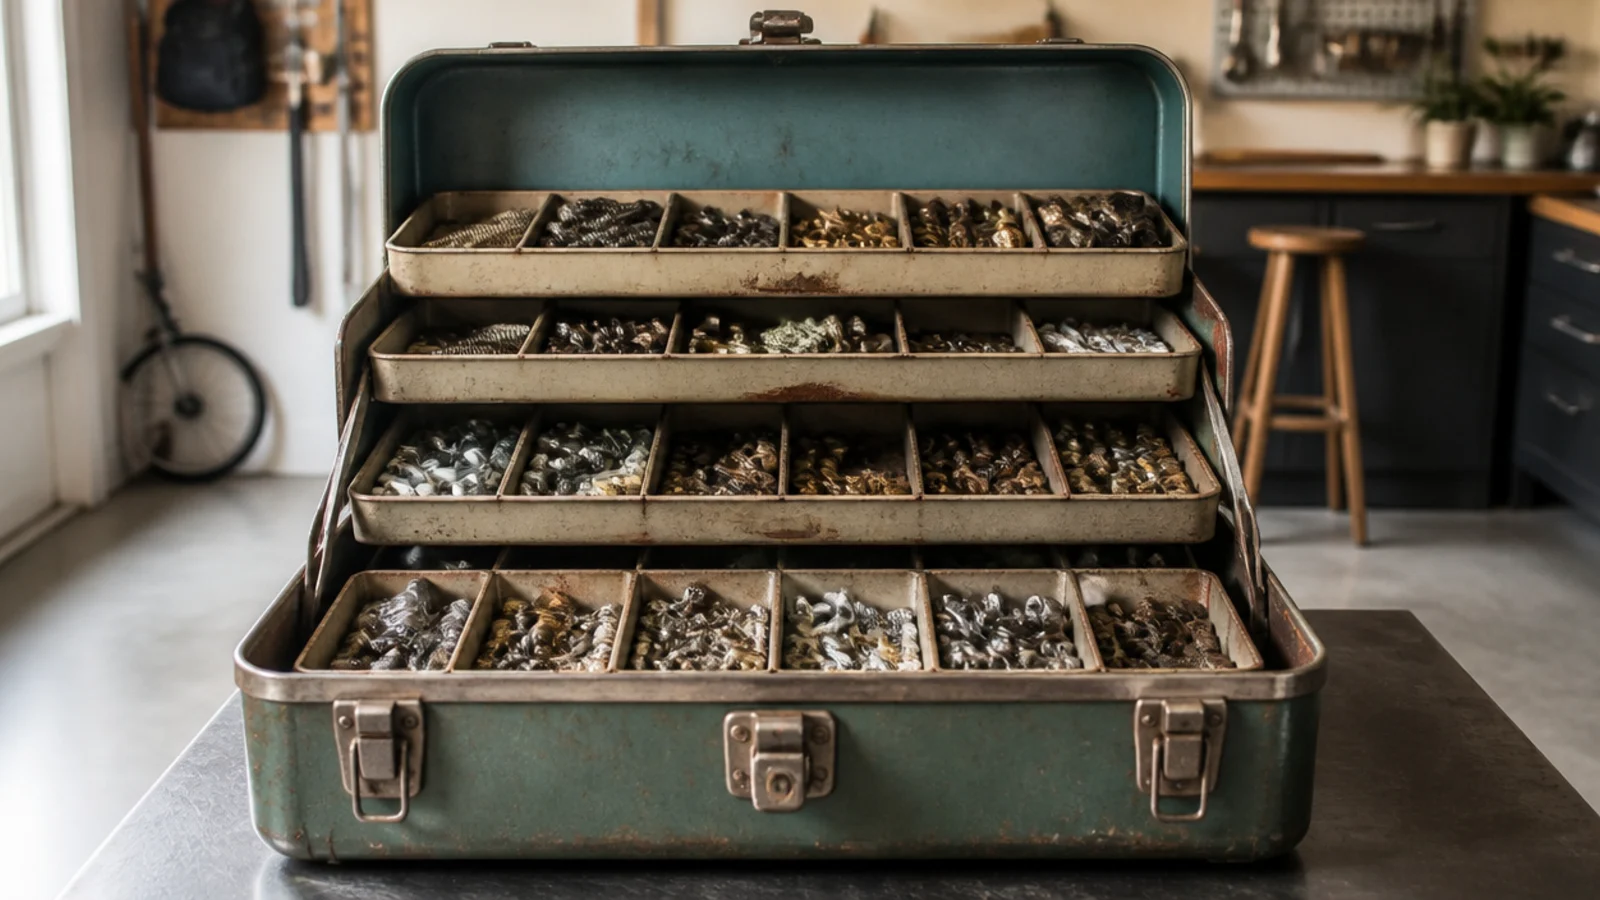
An old tackle or craft box has adjustable divided compartments made for sorting small parts. It’s a ready-made, portable fastener organizer. Great for carrying the right screws to a project.
Repurpose a tackle box and set the dividers to fit your fastener sizes. Sort screws, nails, anchors, and fittings into the compartments by type and size. Label the lid or the compartments. Carry the whole box to a project so you have every size on hand. Keep a second box for electrical or plumbing small parts.
Editor's noteKeep one tackle box loaded as a grab-and-go repair kit so common fixes don’t mean raiding the whole parts wall.
Skip thisDon’t overfill compartments past the dividers; parts jump their walls and mix when you close and carry the box.
14. DIY Caster Crate Rolling Bin
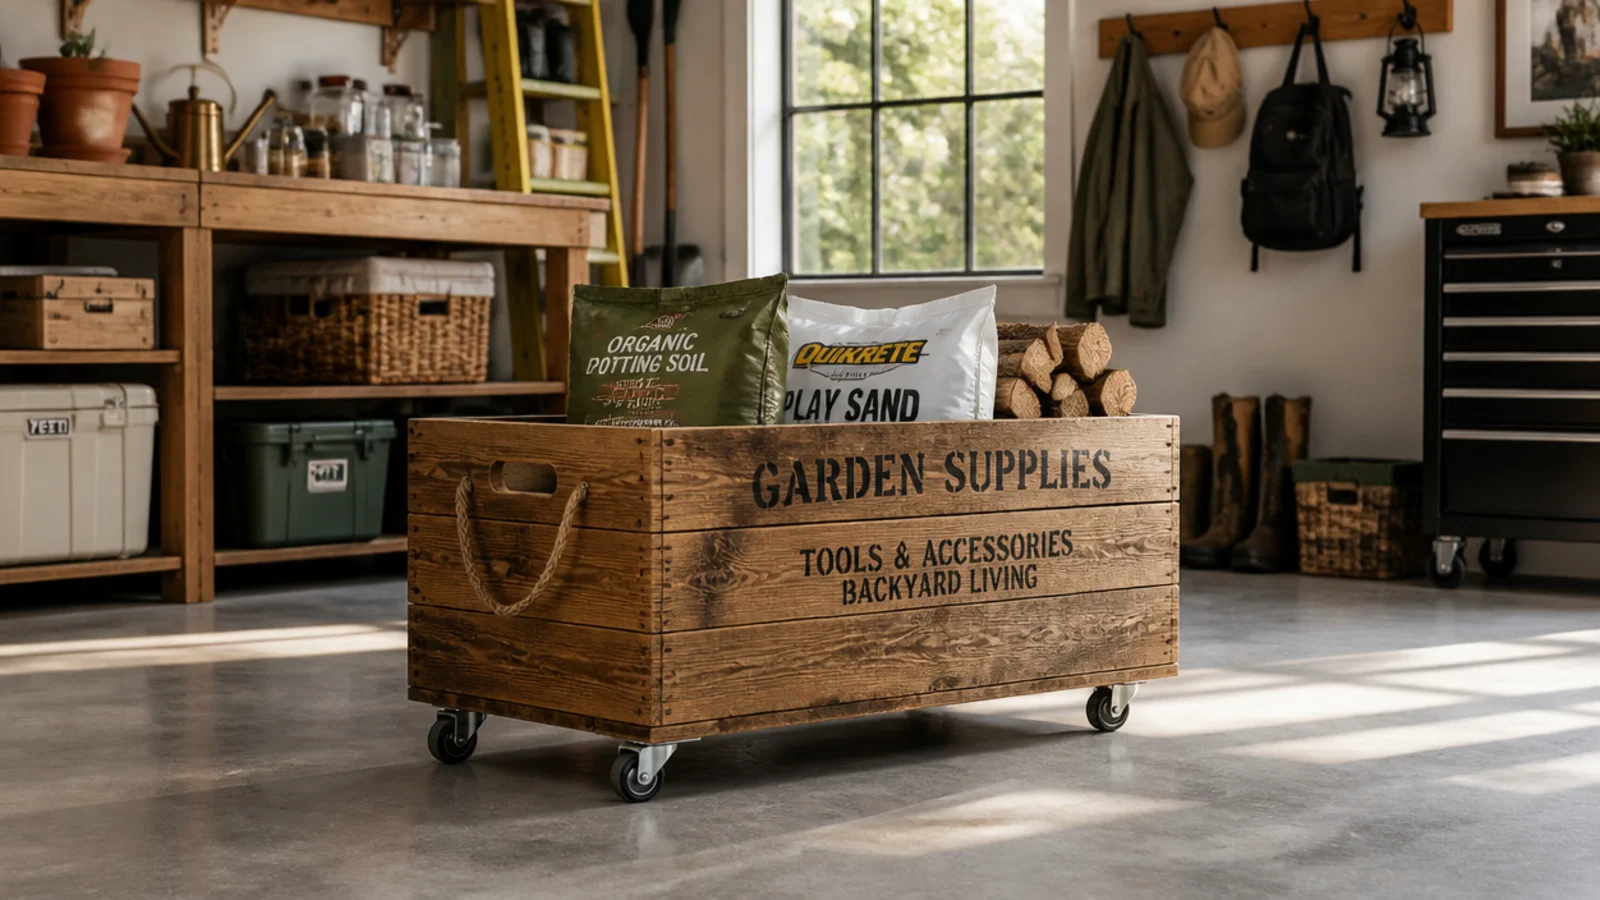
Four cheap casters screwed under a wood crate or old drawer make a rolling bin for next to nothing. It rolls to the project and tucks away. Ideal for bulky supplies you move around.
Screw four swivel casters (the one thing worth buying) to the reinforced bottom corners of a sturdy crate, box, or old drawer. Add a rope handle through two holes in the front. Load bulky supplies and roll it where you need it. Tuck it under a bench when done. Use locking casters if your floor slopes.
Buy locking casters so the bin stays put on a sloped garage floor instead of drifting away while you work.
Don’t mount casters to a flimsy bottom; reinforce it first or the wheels tear out under a loaded crate.
15. Magnetic Spice Tin Parts
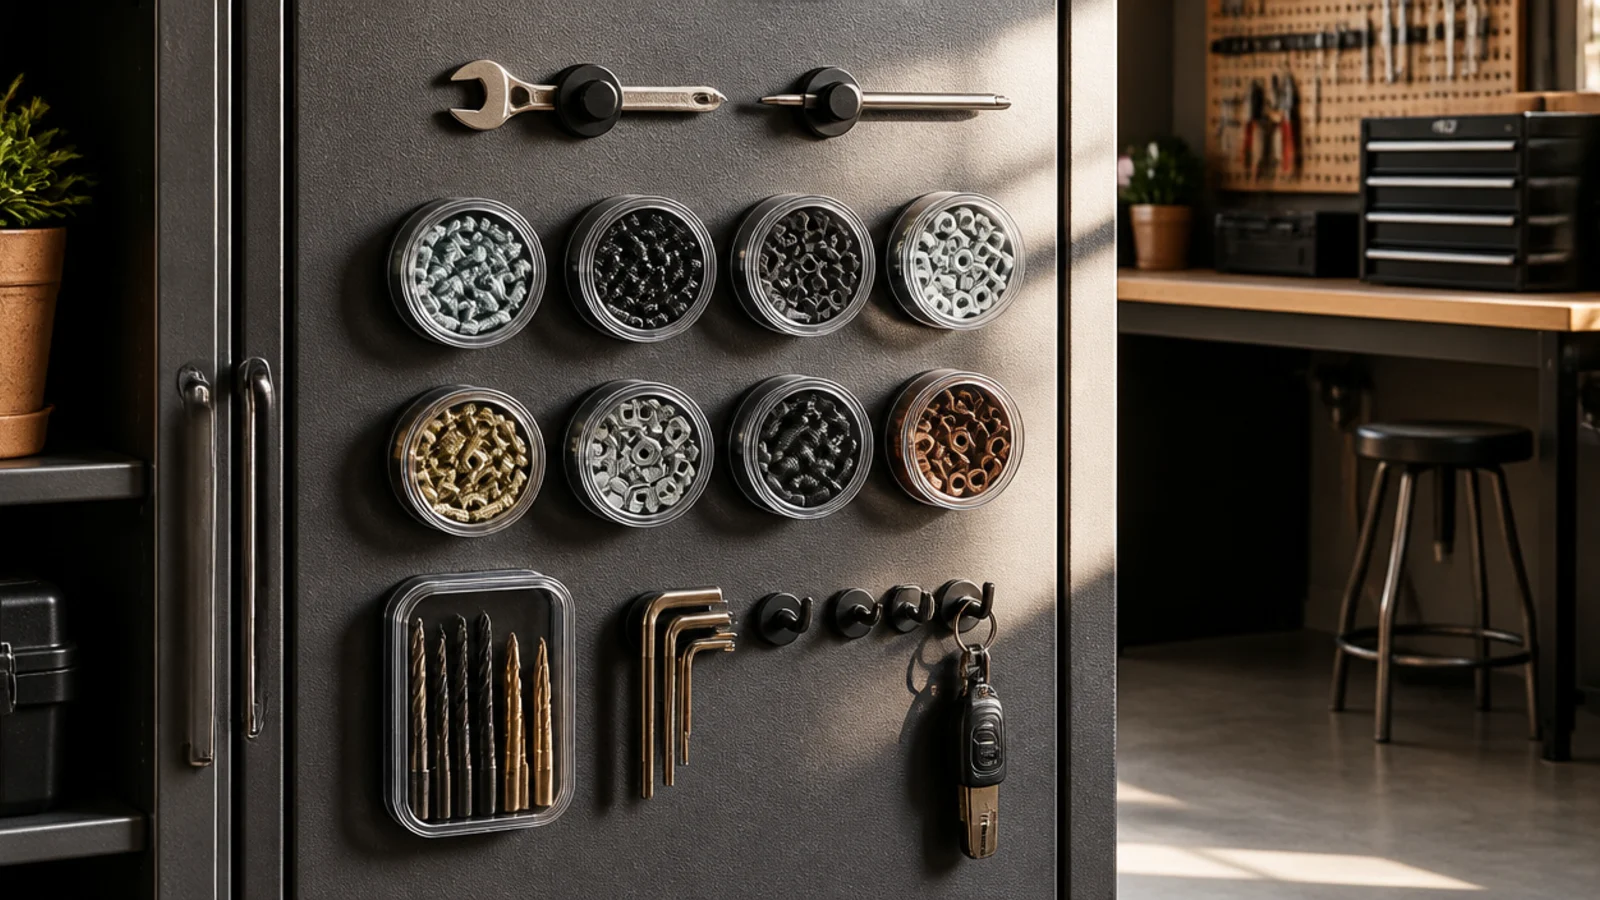
Magnetic spice tins stick to any metal surface and hold small parts behind clear lids. They reclaim the sides of metal cabinets and shelves. Perfect for the small parts you want right at the bench.
Reuse magnetic spice tins (or glue magnets to small tins) with clear lids. Fill each with one type of small part — screws, bits, washers — and stick them to the side of a metal cabinet or a steel shelf near the bench. Keep contents light so the magnet holds. Arrange in a grid and turn the clear lids out.
Editor's noteUse clear-lid tins so you read the contents at a glance instead of opening each one to check.
Skip thisDon’t overload magnetic tins with heavy hardware; too much weight and they slide down or drop off the metal.
16. Old Shutter Tool Wall
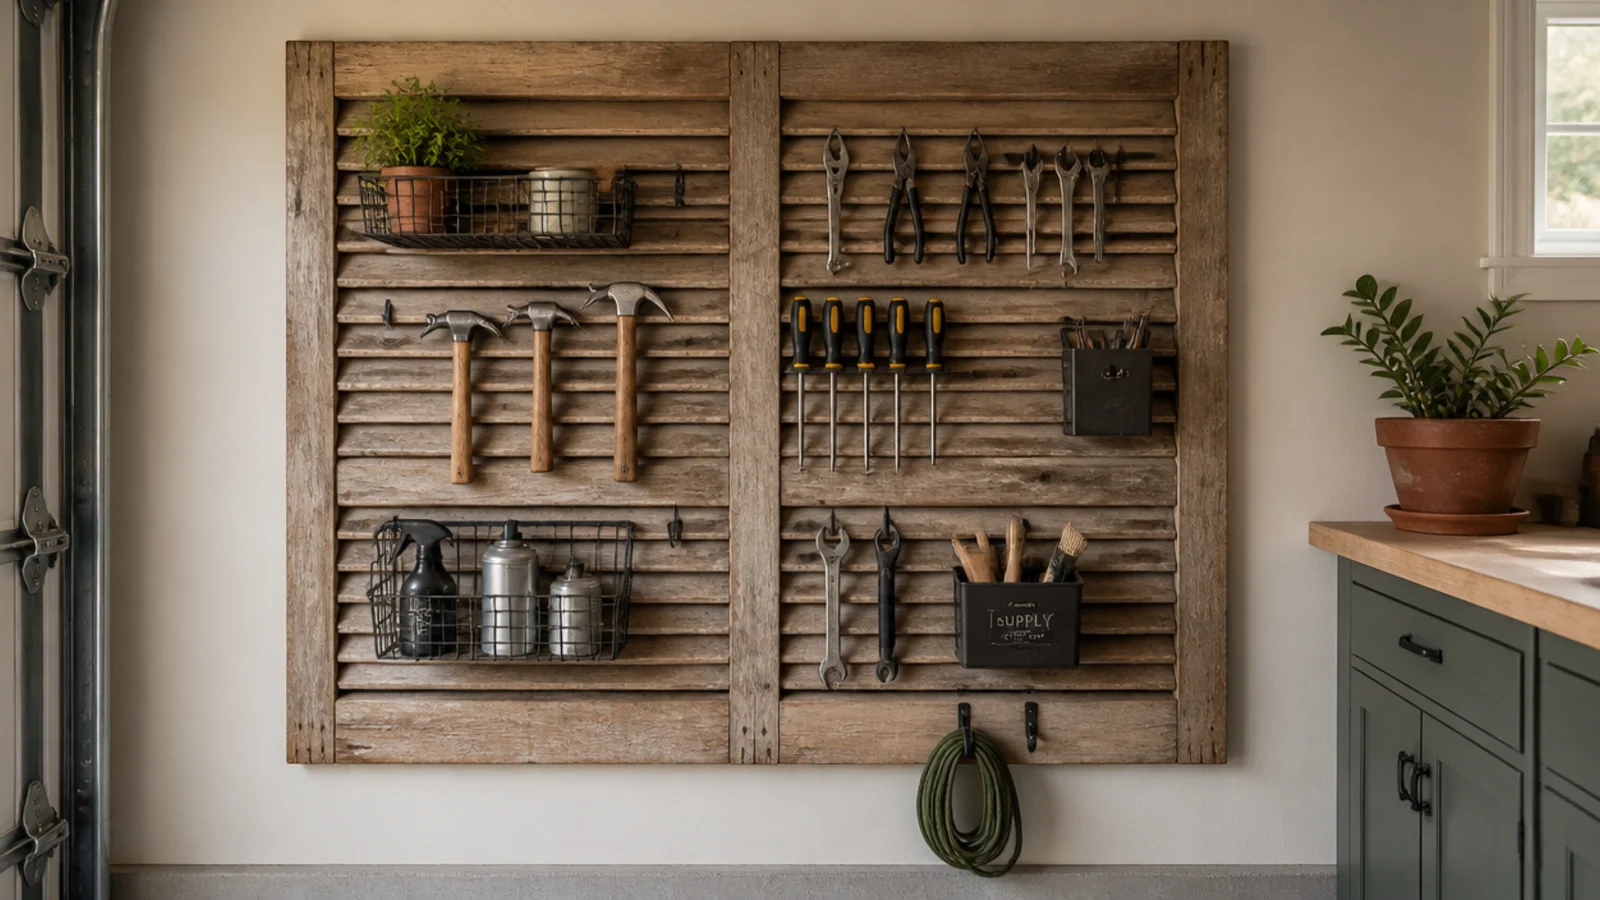
An old louvered shutter mounted on the wall becomes a slatted tool holder, the slats gripping tools and hooks. It’s a free, characterful alternative to slatwall. Great for light hand tools and small holders.
Mount a sturdy louvered shutter flat to the wall studs. Slot hand tools, hooks, and small holders into the angled slats. Add S-hooks and clips for hanging. Group tools by type. Paint it with leftover paint to tidy up the look. Keep loads light since the slats aren’t as strong as real slatwall.
Editor's noteSlip S-hooks and clip-on holders into the slats so you can rearrange the tool layout without any new holes.
Skip thisDon’t hang heavy power tools on delicate shutter slats; keep it to light hand tools the louvers can hold.
17. Nail-and-Board Simple Hooks
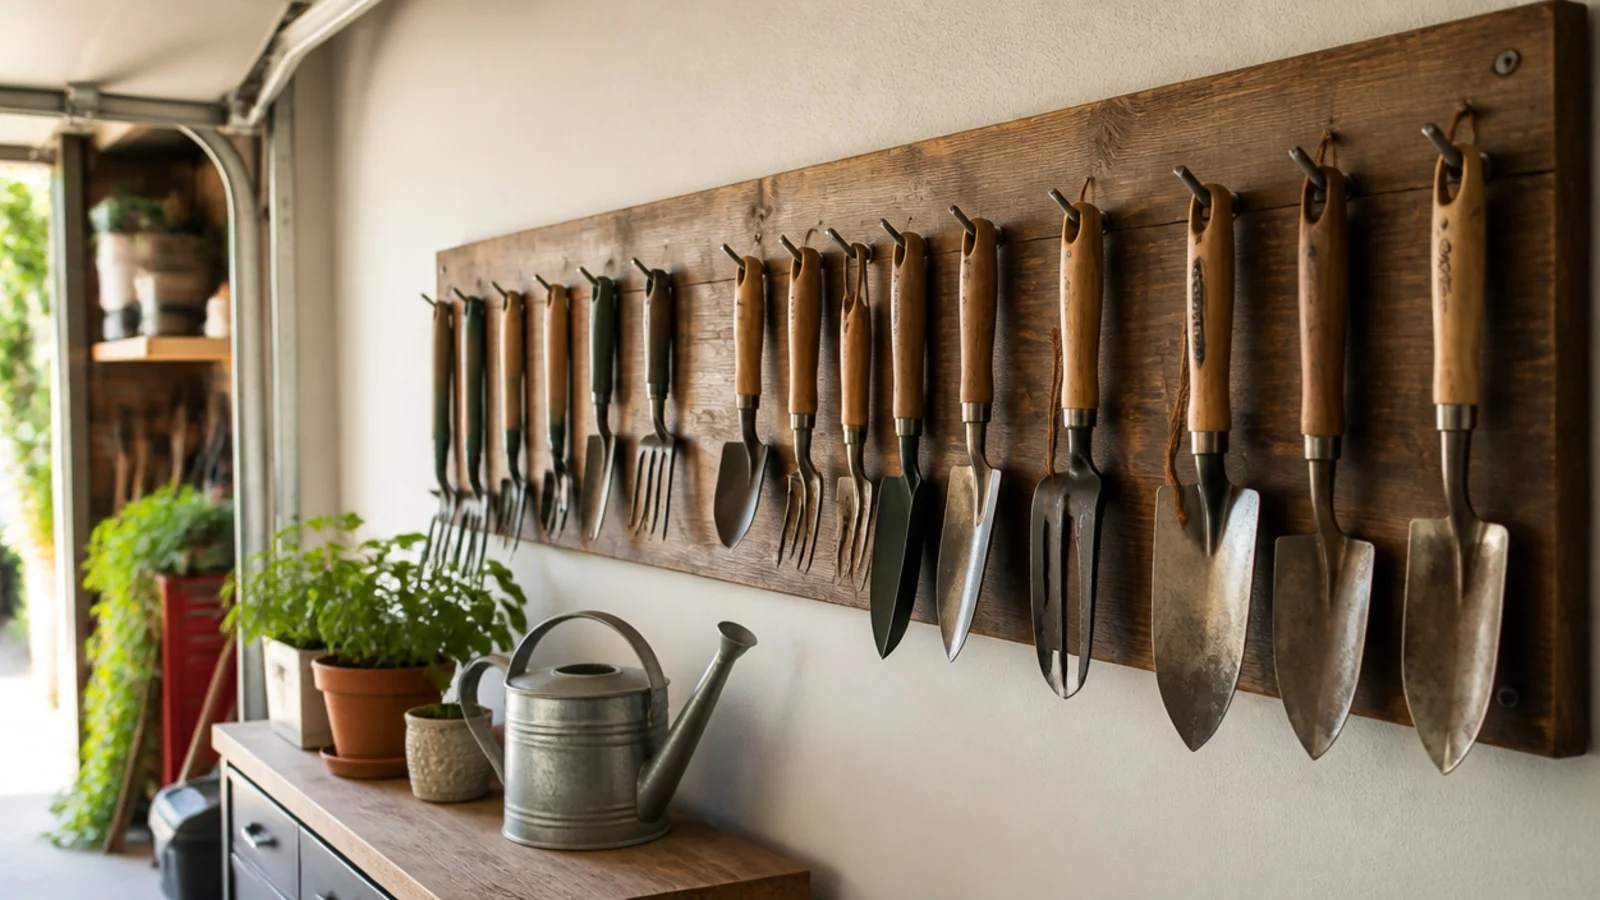
Big nails or screws driven at an upward angle into a board make the simplest tool hooks there are. Tools hang by their handles or hang-holes. It’s the most basic free hanging fix, and it works.
Screw a 1x6 board to the wall studs. Drive large nails or long screws into it at a slight upward angle where you want each tool. Hang tools by their handles, hang-holes, or heads over the angled nails. Space them so tools don’t overlap. The upward angle keeps tools from sliding off when bumped.
Angle every nail slightly upward so tools can’t jump off when you bump the board or grab a neighbor.
Don’t drive nails straight or downward; tools slide right off level or downward-angled hooks.
18. Wire Closet-Shelf Offcut
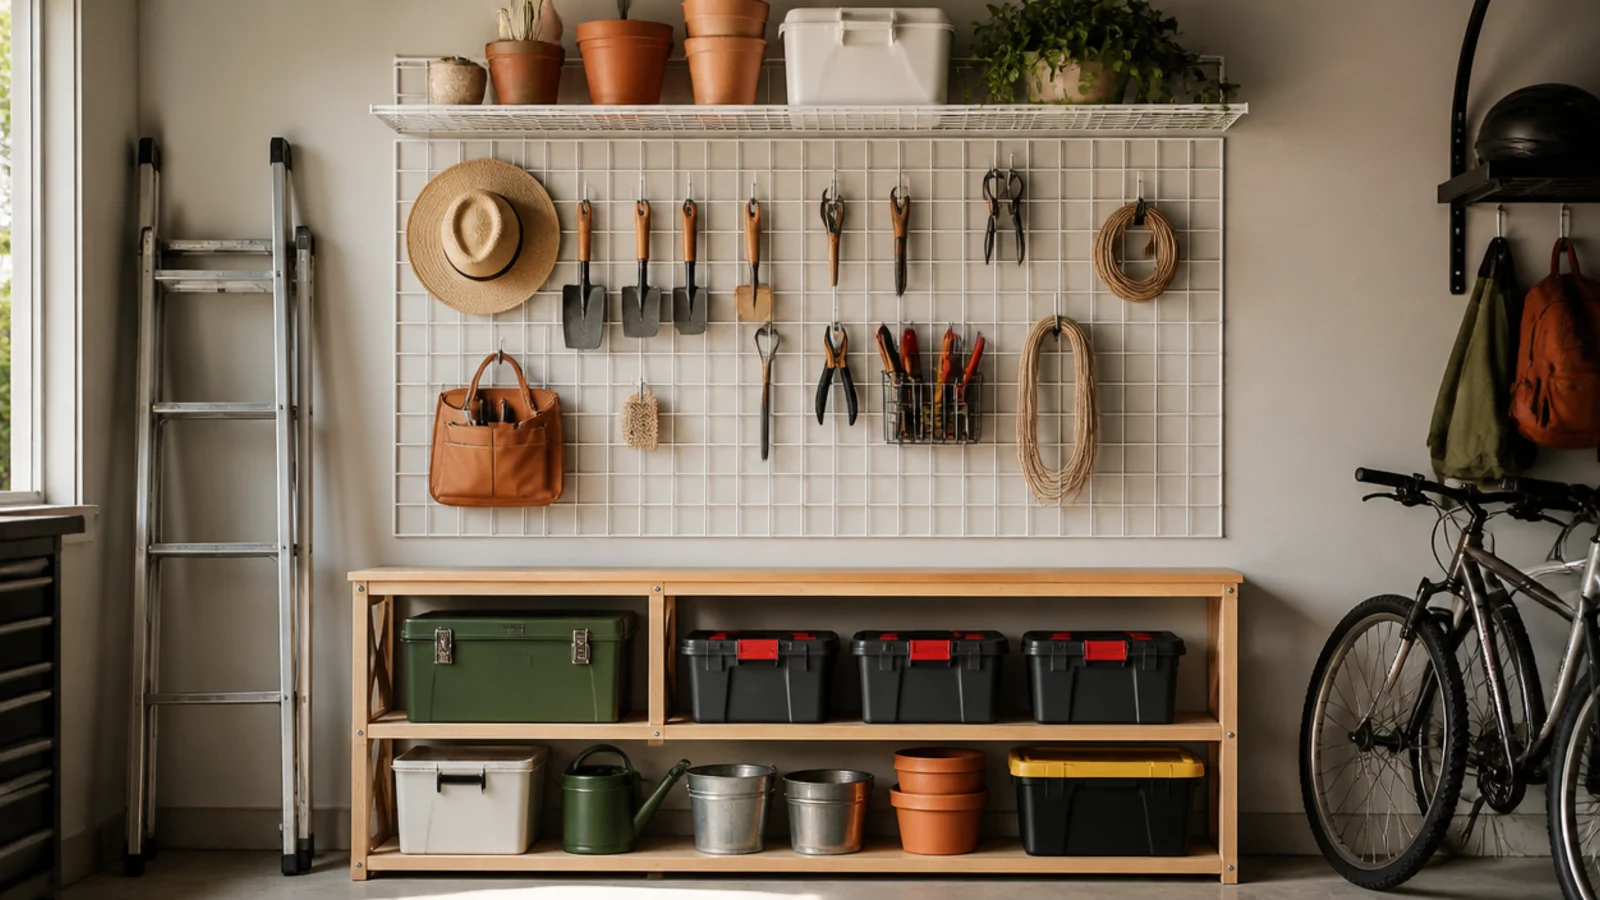
A leftover piece of wire closet shelving mounts as a free shelf or a hanging grid. The grid holds hooks and the shelf holds bins. Great use for the offcut left after a closet install.
Cut a wire shelf offcut to size with a hacksaw and mount it to the studs with the shelf clips or brackets. Use it flat as a shelf for bins, or vertical as a grid for S-hooks and hanging tools. Group items by type. File the cut ends smooth. It’s sturdy, ventilated, and already sized for wall mounting.
Editor's noteMount an offcut vertically as a hook grid where a solid shelf won’t fit — it holds S-hooks anywhere on the mesh.
Skip thisDon’t leave the cut wire ends raw; file them smooth or they scratch you and snag whatever you hang.
19. Adhesive Hooks for Renters
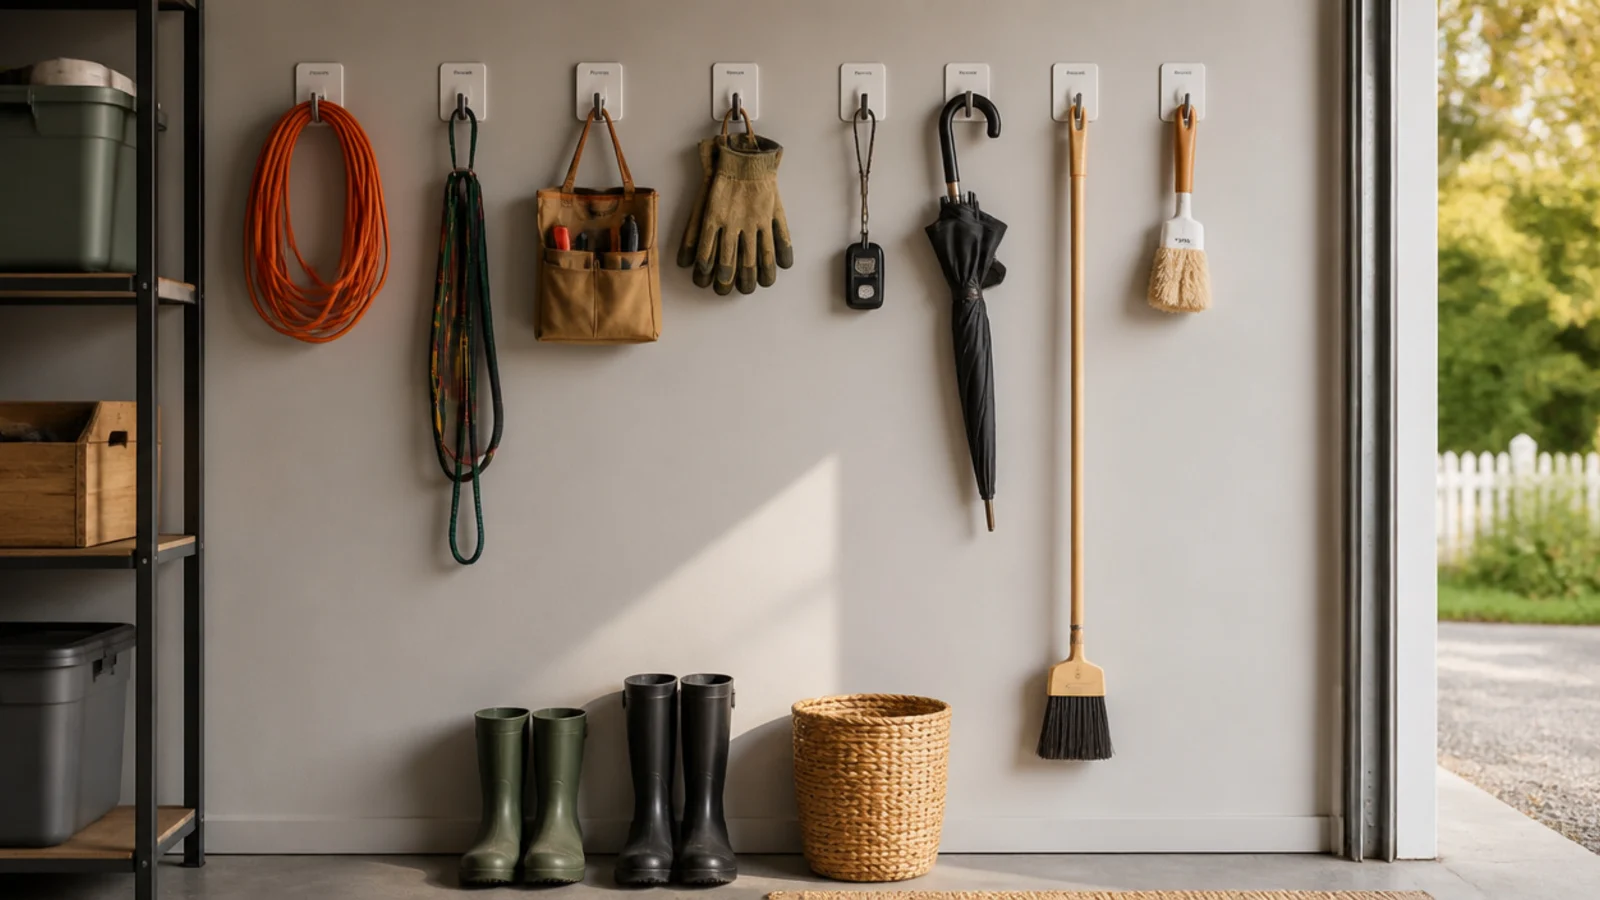
Strong adhesive hooks hang light items with no drilling, perfect for renters or finished garage walls. They stick, hold, and peel off cleanly. Ideal for cords, gloves, and light tools.
Clean the wall with rubbing alcohol so the adhesive grips, then press on hooks rated for your item’s weight and let them cure per the instructions before loading. Hang light items — cords, gloves, small tools, hats. Group by type. Keep well under the weight rating. Remove them by stretching the tab straight down to peel clean.
Editor's noteWipe the wall with alcohol and let the hooks cure a full day before loading, or they let go the first time you use them.
Skip thisDon’t hang heavy tools on adhesive hooks; overloading is why they fail — keep strictly to light items.
20. Utensil Rail with S-Hooks
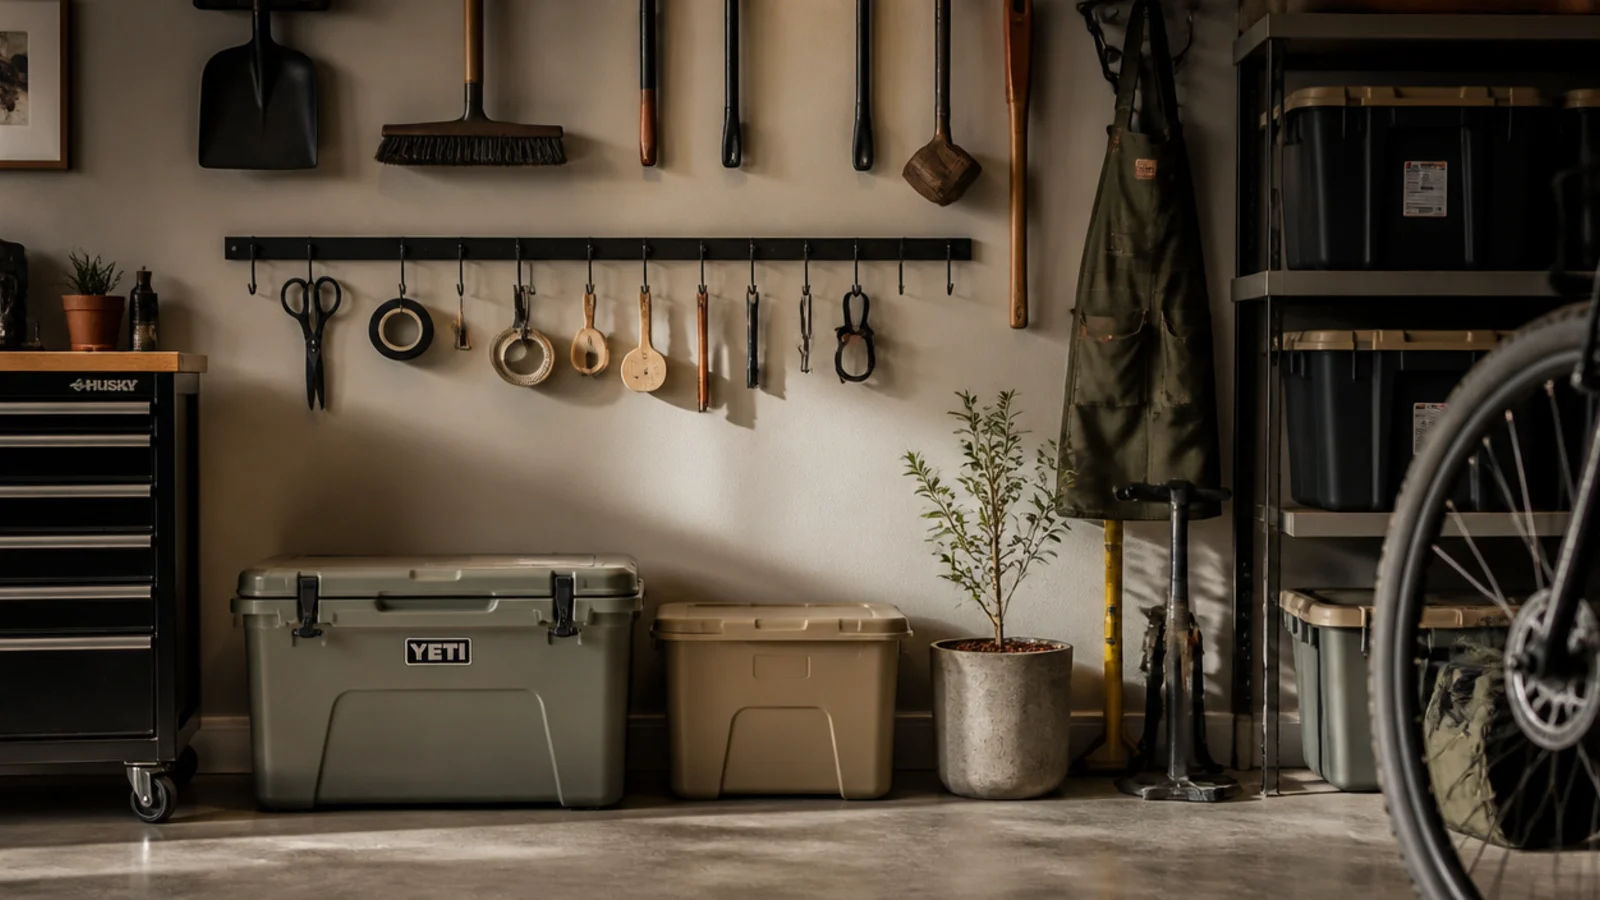
A cast-off kitchen utensil rail plus S-hooks makes a cheap hanging rail for small tools and supplies. Items hang from the hooks and slide along. Great for the small go-to items you want in a row at the bench.
Mount a utensil rail (or a length of pipe) to the wall studs. Hang S-hooks along it and clip small tools, tape, scissors, and gloves from them. Slide hooks to rearrange. Group by type. Add cup hooks or small baskets for loose items. Keep it at the bench for the things you grab constantly.
Editor's noteHang small baskets from a couple of the S-hooks for loose items that won’t hang on a hook by themselves.
Skip thisDon’t load a light rail with heavy tools; use it for the small, light items it can comfortably carry.
21. Plastic Bottle Cord Organizers
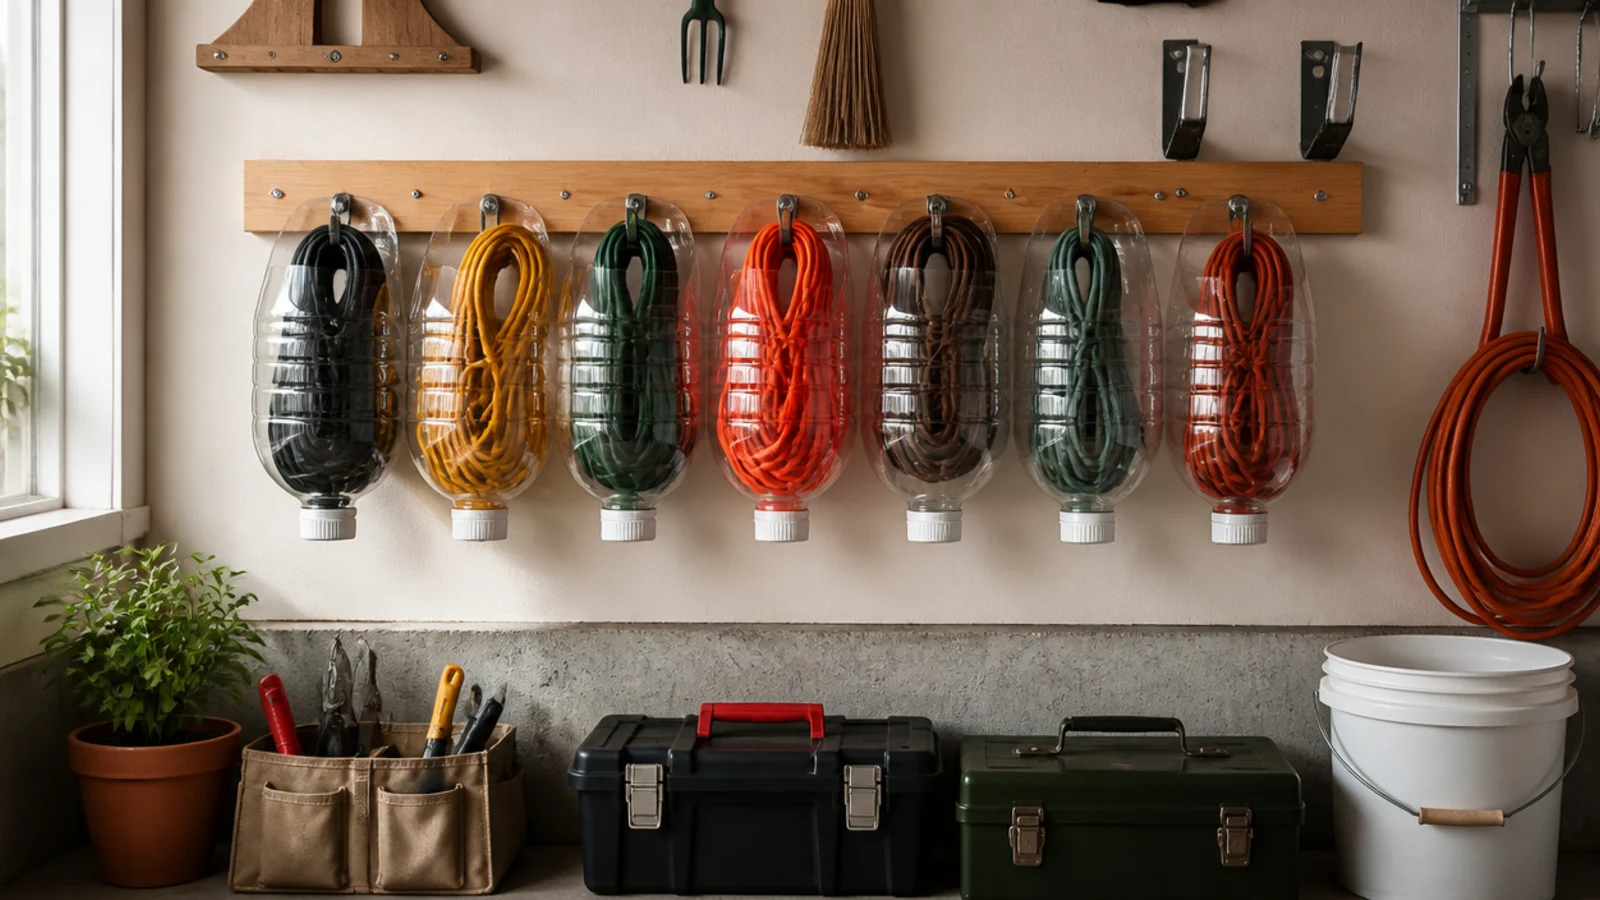
A cut plastic bottle holds a coiled cord with the plug fed through the neck so it never tangles. It’s free from your recycling. Perfect for keeping short cords and cables tidy.
Cut the bottom off a clean plastic bottle, coil a cord inside, and feed the plug out through the neck. Stand the bottles in a box or screw their necks to a board. Label each with the cord type. For cables, use smaller bottles. It contains each coil so cords stay separate instead of knotting together.
Editor's noteFeed the plug out through the bottle neck so you can pull the cord out without unpacking the whole coil.
Skip thisDon’t use bottles with sharp cut edges around cords; smooth the cut rim so it doesn’t nick the cord jacket.
22. Cut-Jug Scoop and Funnel Holder
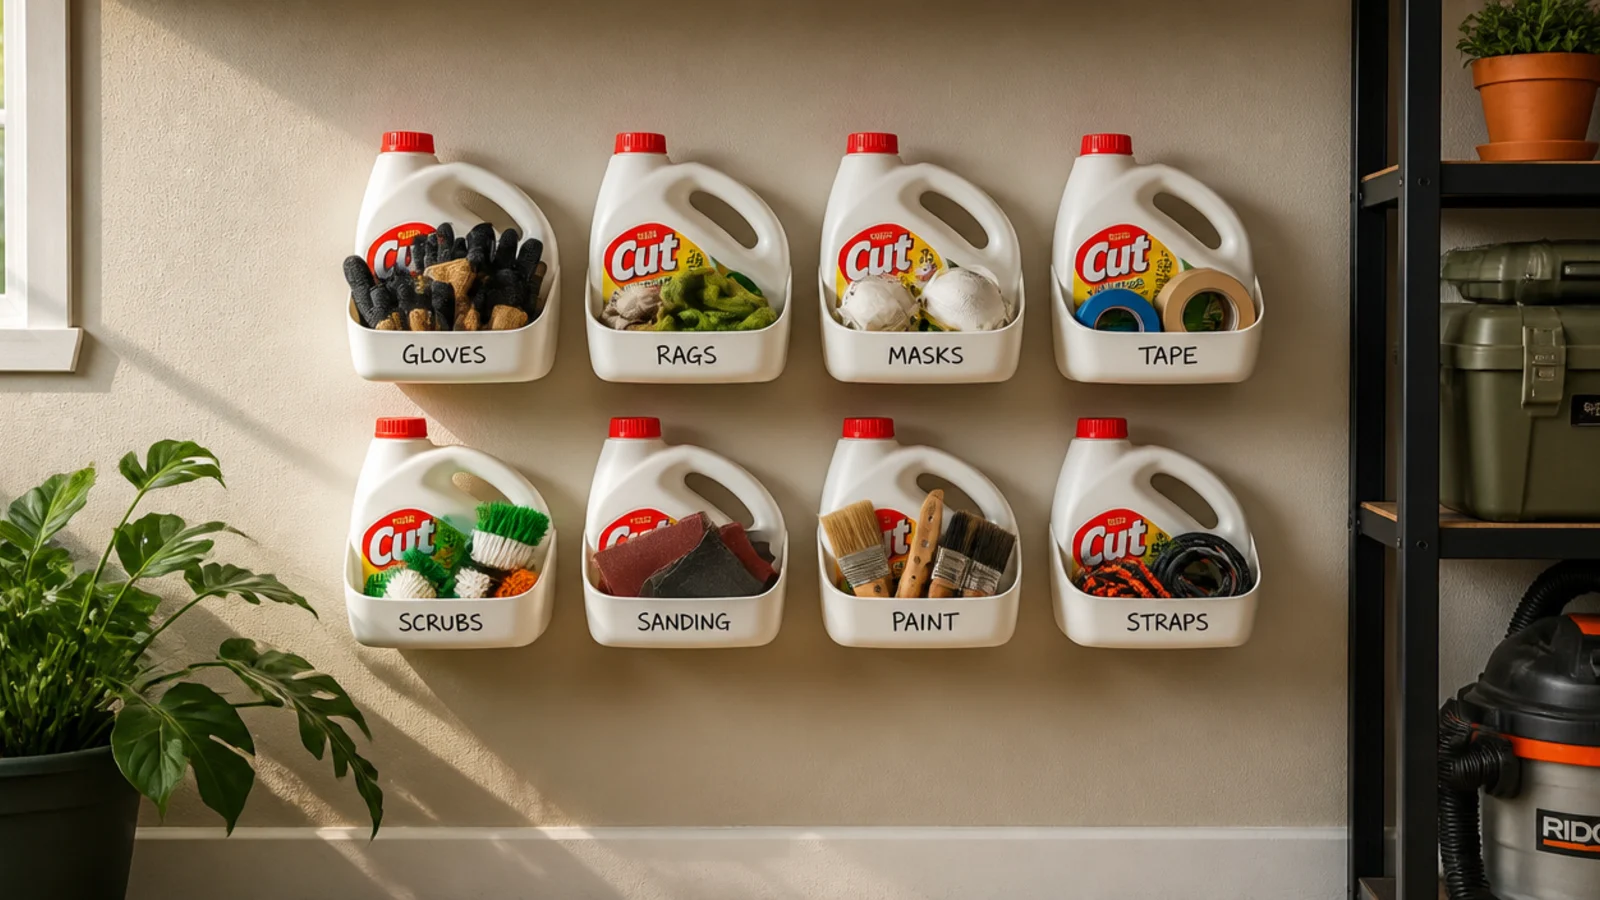
A cut detergent or milk jug becomes a free scoop or an open-front wall holder with a built-in handle. The handle hangs it; the cut opening holds supplies. Great for gloves, rags, and loose bits.
Clean a jug and cut it diagonally to leave the handle intact, forming an open-front scoop. Hang it by the handle on a wall hook, or screw the back to a board. Fill with gloves, rags, sponges, or small supplies. Label the front. Cut smaller jugs into scoops for sand, salt, or soil. Smooth the cut edges.
Editor's noteCut the opening on the opposite side from the handle so the handle stays strong for hanging the loaded holder.
Skip thisDon’t leave jagged cut edges; smooth them so the holder doesn’t snag gloves or scratch your hand.
23. Cardboard Box Drawer Dividers
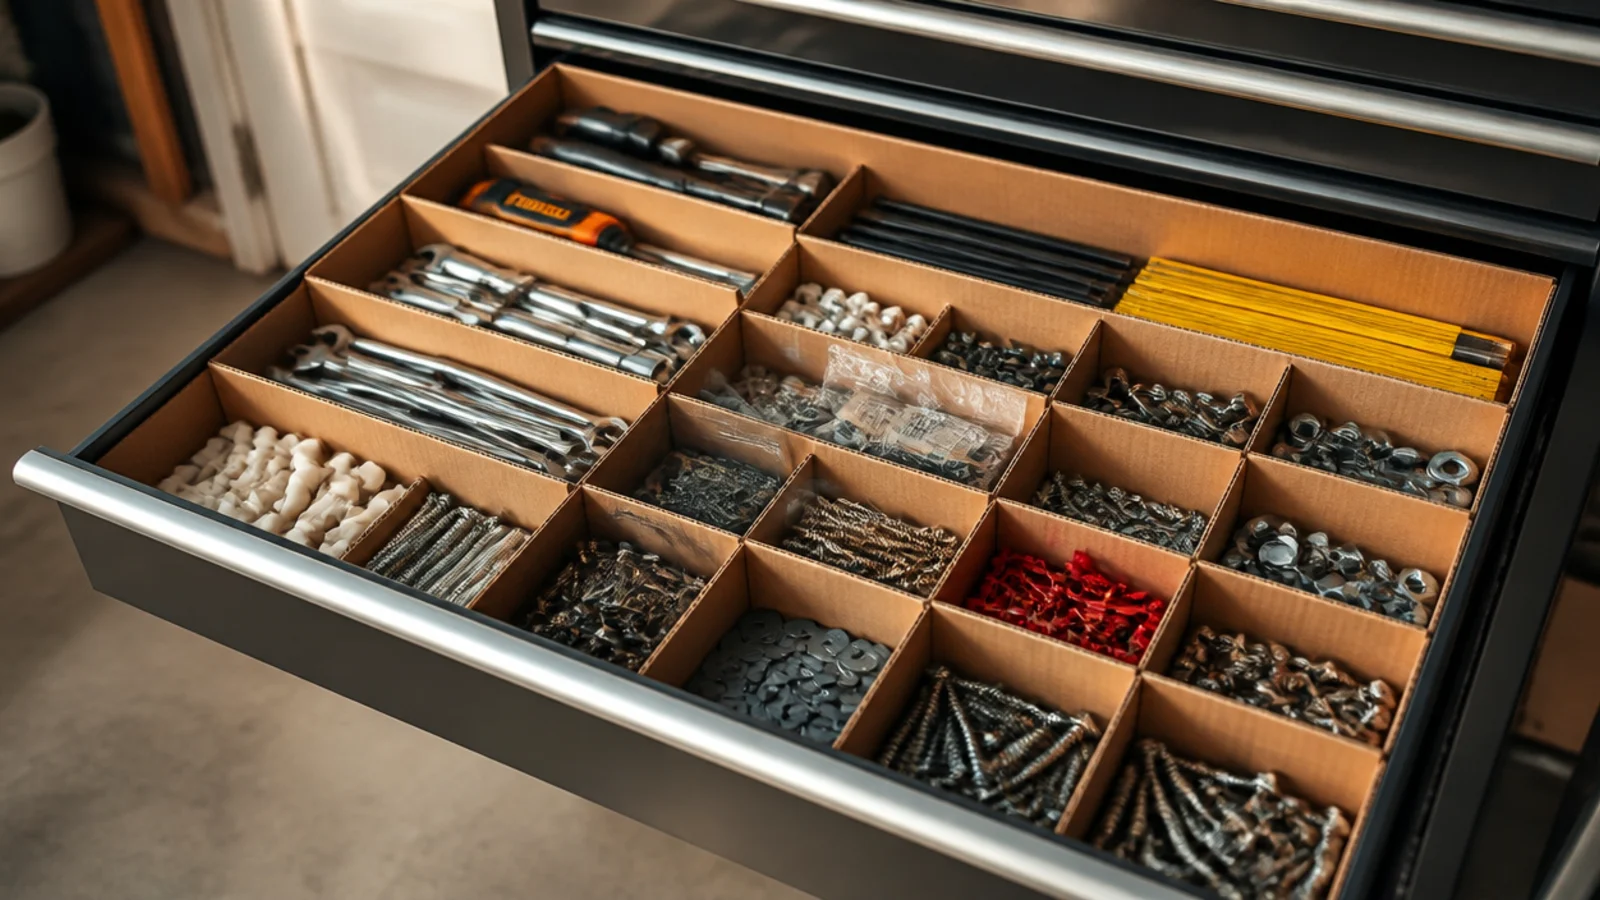
Cut cardboard makes free custom drawer dividers sized exactly to your drawer and your stuff. It stops everything sliding into one pile. Perfect for a junk drawer that needs order.
Cut cardboard strips to your drawer’s depth and slot them together in a grid, or cut small boxes to fit as compartments. Size the sections to your items — long channels for tools, small cups for parts. Sort by category into the sections. Replace the cardboard free anytime it wears. Label sections if helpful.
Editor's noteNotch the cardboard strips halfway and slot them together into a grid so the dividers stay put without glue.
Skip thisDon’t use flimsy thin cardboard for heavy parts; use corrugated box board so the dividers hold their shape.
24. Repurposed Drawer Wall Tray
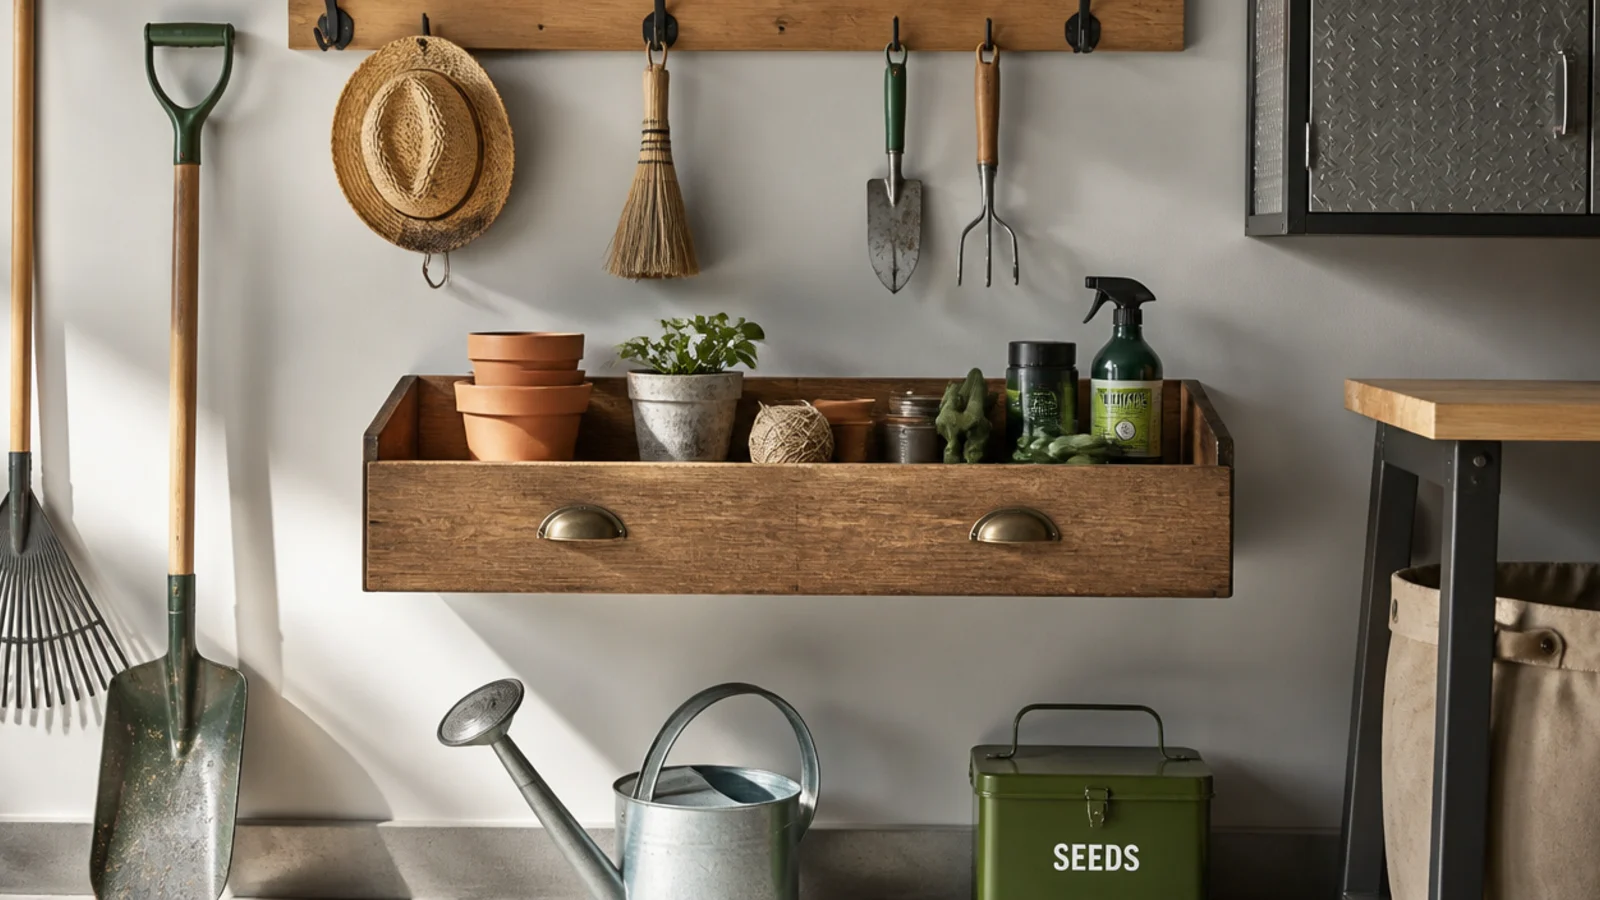
An old drawer mounted on the wall becomes a shallow tray shelf with built-in sides that keep contents from sliding off. It’s free from a broken dresser. Great for a small parts or supply ledge.
Screw an old drawer to the wall studs through its back panel, open side out, so it forms a shelf with a lip. Store small supplies, bottles, or bins in it. Mount several at different heights for a set. Paint them to match. The drawer’s sides act as a retaining rail so nothing rolls off.
Editor's noteMount a few drawers at staggered heights so the mismatched trays read as an intentional wall arrangement.
Skip thisDon’t mount a drawer by its thin bottom; screw through the solid back panel into studs or it pulls loose.
25. Clothespin Glove and Bag Clips
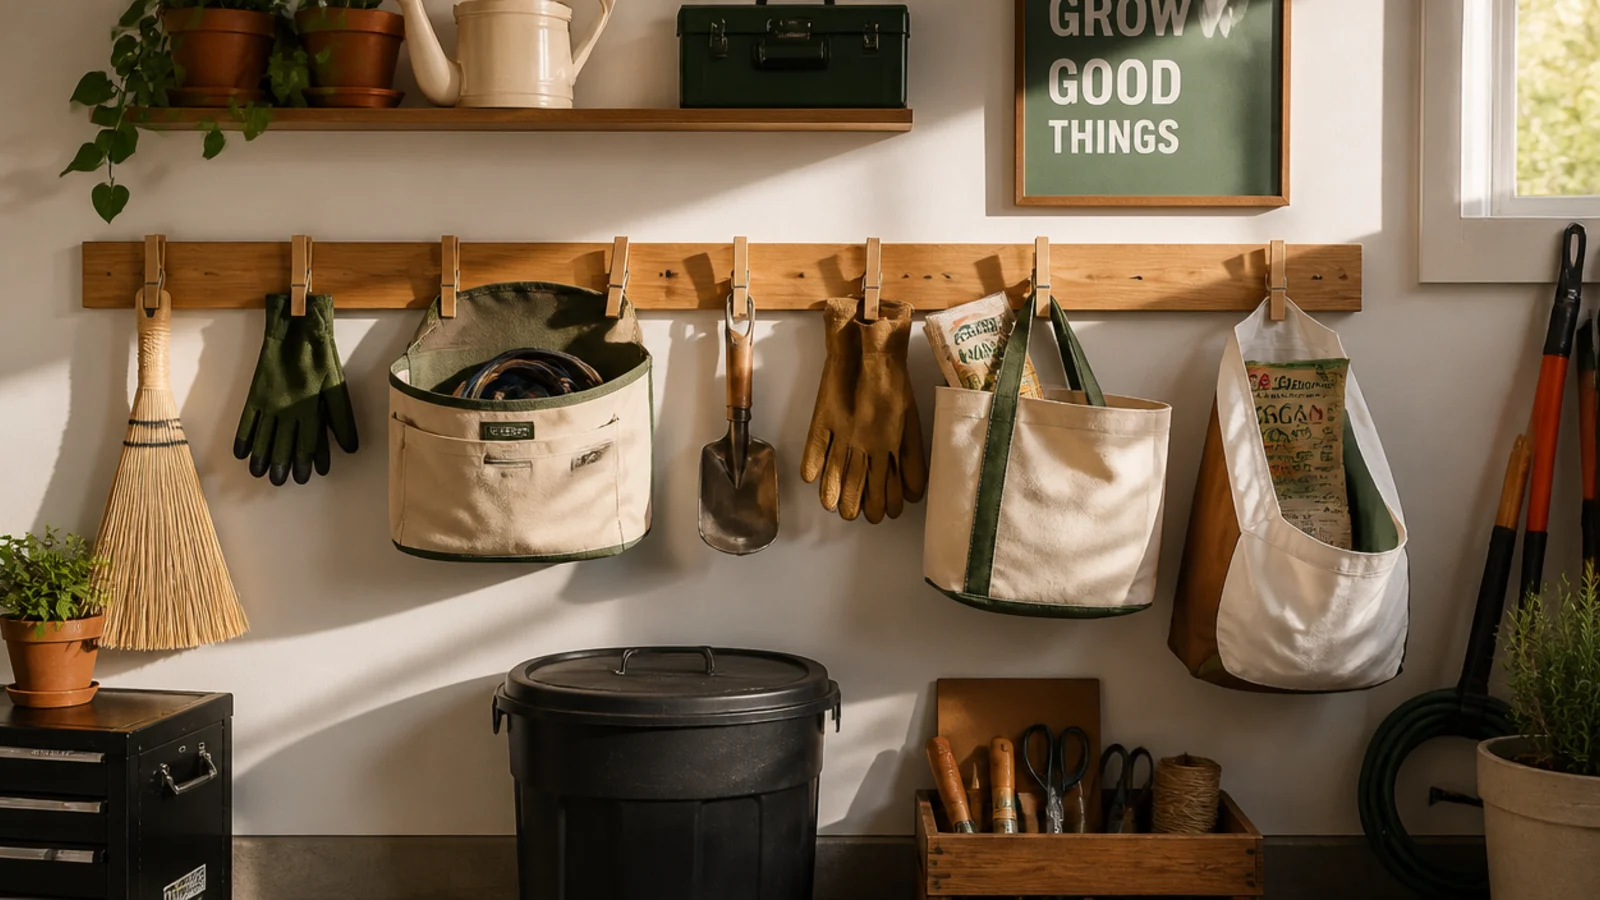
Clothespins clipped to a wire or glued to a board hang gloves, bags, and rags by their edges to dry and stay paired. They grip and release with a pinch. Perfect for wet gloves and open supply bags.
Glue or screw clothespins to a mounted board, or string a wire between two hooks and clip clothespins along it. Pinch gloves, rags, and open bags into the clips by an edge. Keep pairs together. The clips let air dry wet gloves. Space them so items don’t overlap. Replace a worn clothespin for free.
Clip wet gloves and rags here to air-dry instead of tossing them in a bin where they stay damp and smell.
Don’t clip heavy items in clothespins; they pop open — keep it to light gloves, rags, and bags.
26. Old Mailbox Garden Caddy
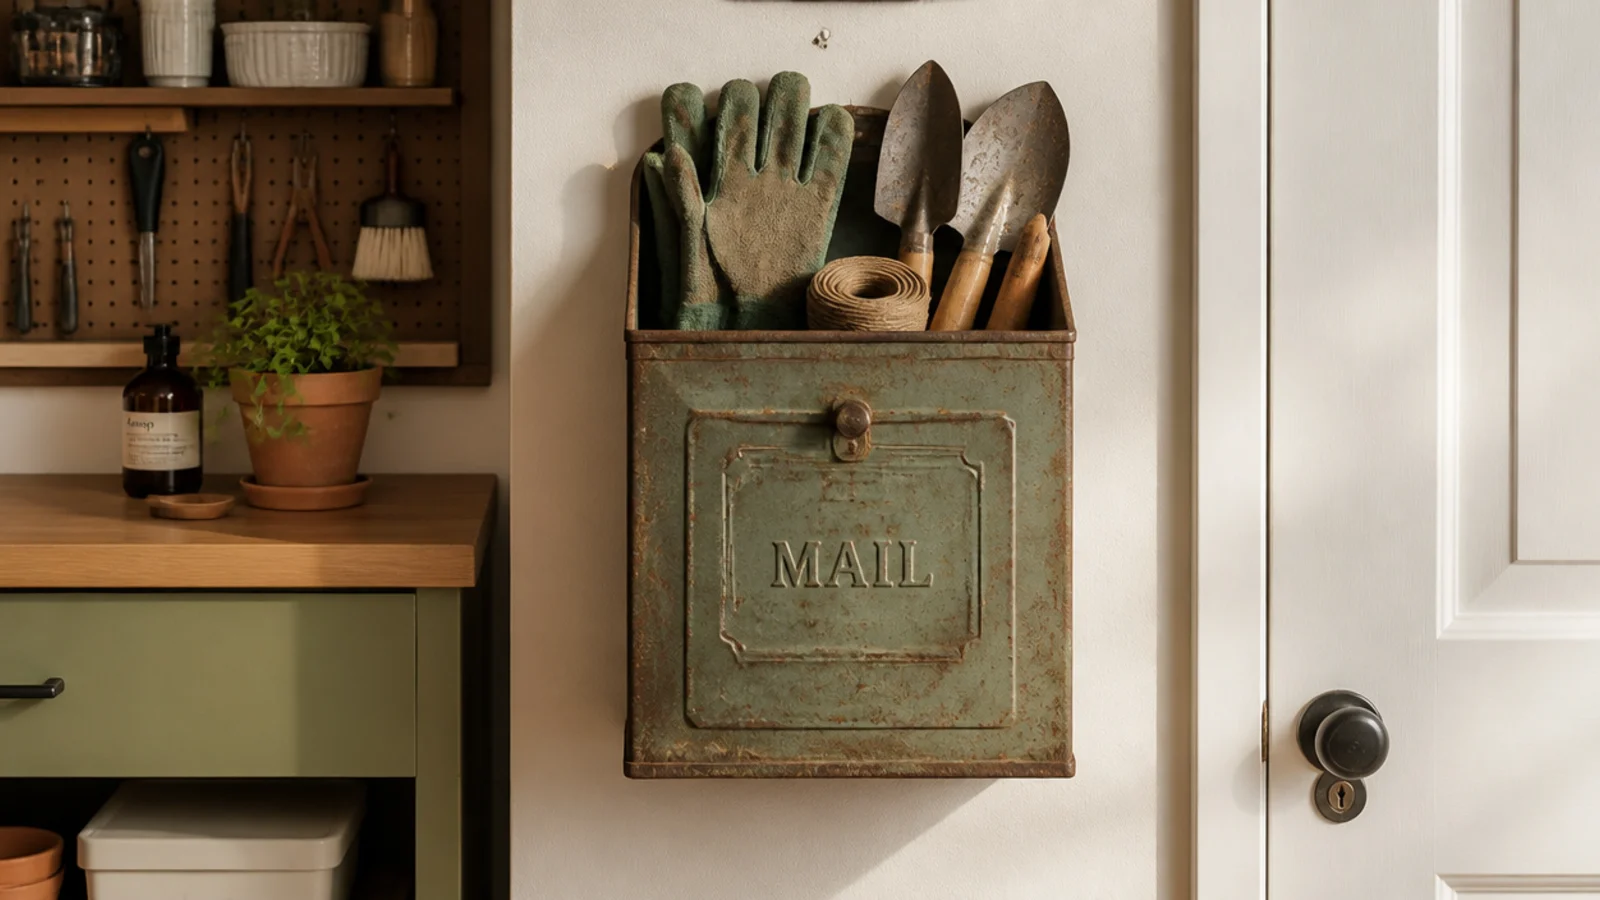
An old mailbox mounted by the door holds garden gloves, twine, and hand tools behind a flip-down door, keeping them clean and grabbable. It’s a quirky free caddy. Great by the garden-access door.
Mount an old mailbox to the wall studs or a post near the door at grab height. Store garden gloves, twine, seed packets, and small hand tools inside. The door keeps dust off. Label it if you like. Keep it by the door you use to reach the garden so tools are grabbed on the way out.
Mount it right by the garden-access door so gloves and trowels get grabbed on the way out and dropped back on return.
Don’t store anything that rusts loose inside a metal mailbox in a damp garage; keep tools dry or lined.
27. Bookcase-on-Its-Side Cubbies
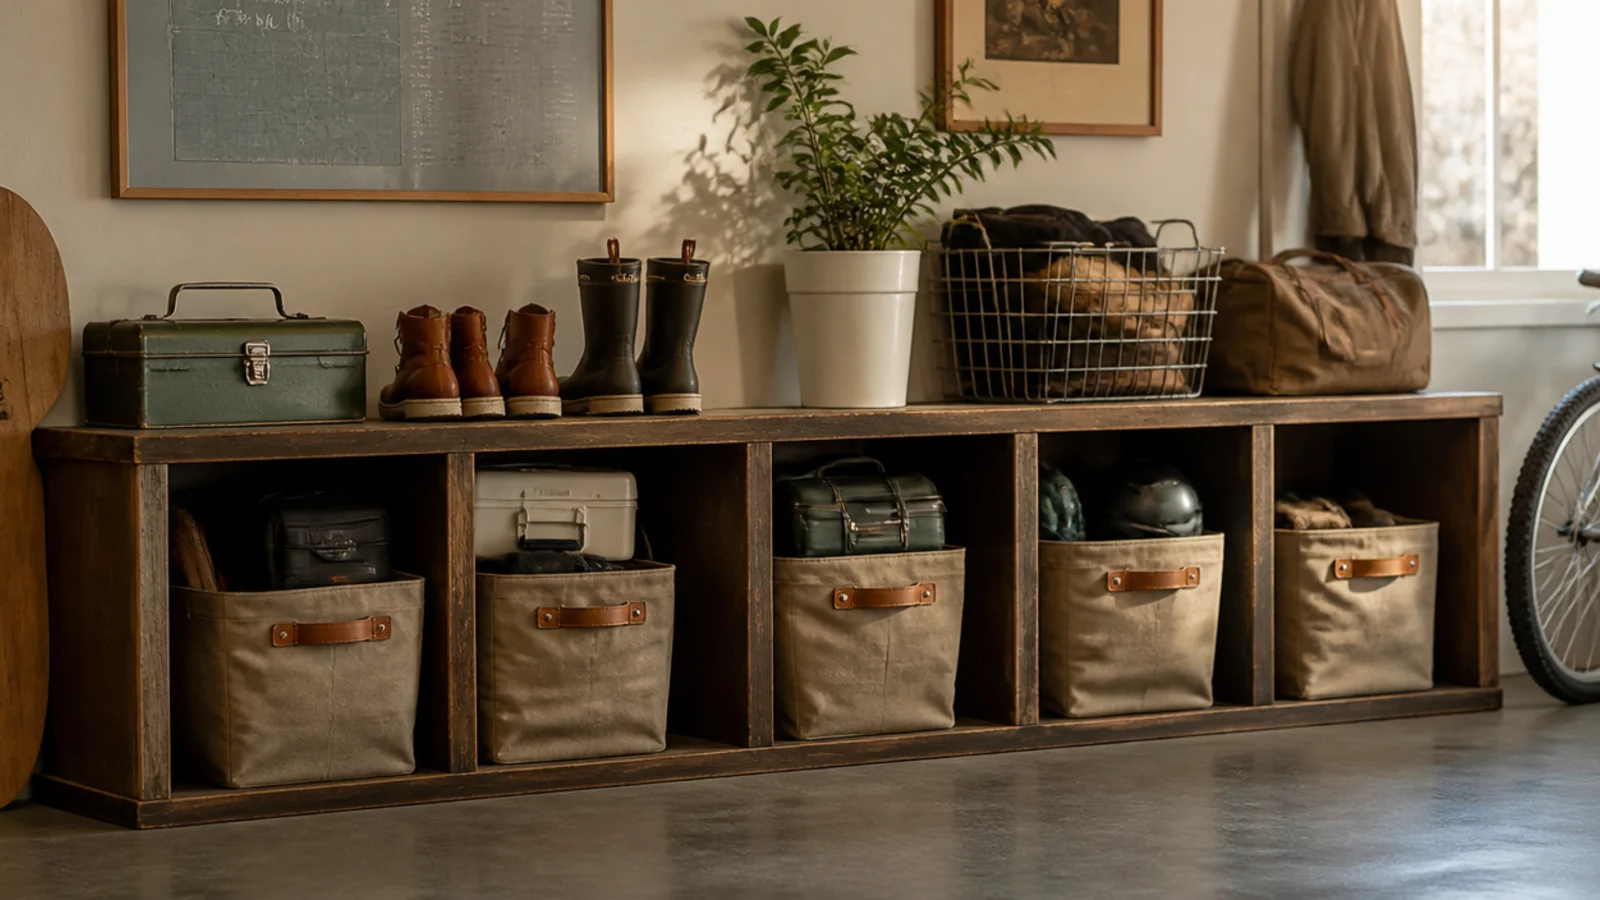
An old bookcase laid on its side turns shelves into a low run of cubbies that doubles as a bench. Each bay holds a bin. Great for low storage plus a surface on top.
Lay a sturdy bookcase on its side so the shelves form vertical cubbies. Slide a bin into each bay, sorted by category, and label them. Use the flat top as a bench or landing surface. Anchor it to the wall if kids climb. Add casters underneath to make it a rolling bench-cubby unit.
Editor's noteAdd casters to the bottom so the whole cubby bench rolls out for cleaning or rearranging.
Skip thisDon’t stand on a bookcase not rated for it; use the top for storage and light staging, not as a step.
28. Hanging Basket Ball Net
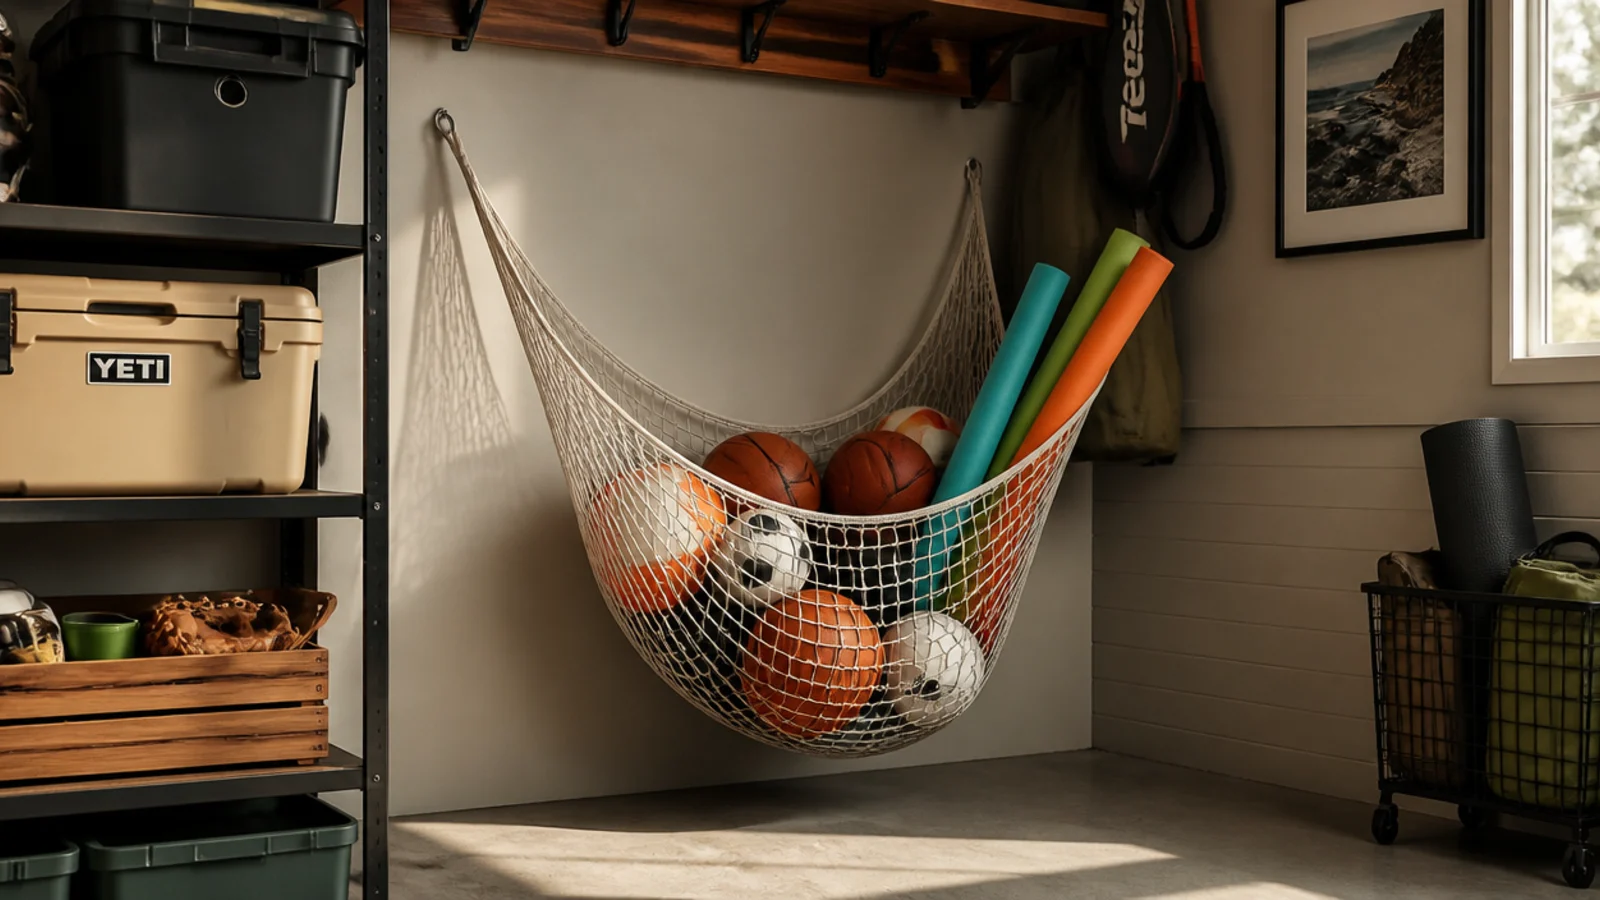
A mesh laundry basket or net bag hung in a corner corrals balls and inflatables for almost nothing. Balls drop in the top and the mesh lets them dry. Perfect for a family’s loose sports and pool gear.
Hang a mesh laundry basket or a drawstring net bag from wall or ceiling hooks in a corner. Drop balls and pool toys in the top. The mesh drains water and lets wet gear dry. For easy access, hang it at kid height. Use a second bag for smaller items. Anchor the hooks into studs or joists.
Editor's noteChoose mesh over solid so wet pool toys and balls drain and dry instead of sitting in a damp puddle.
Skip thisDon’t overfill one bag with heavy balls on a light hook; split the load or anchor into solid framing.
29. Chalk-Labeled Jar Shelf
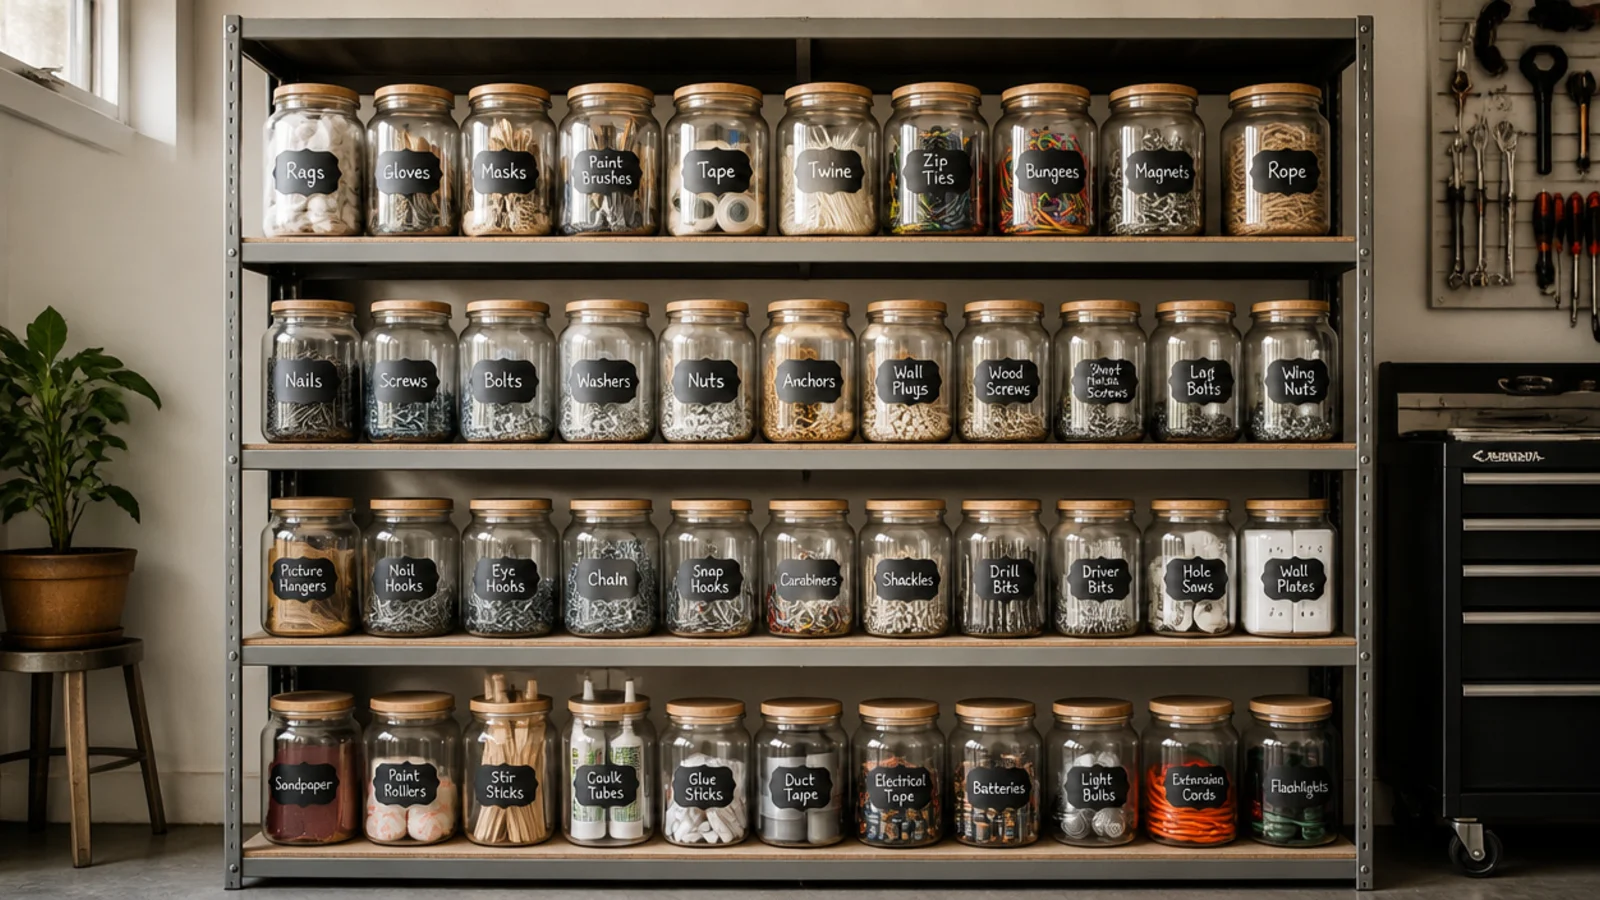
Matching jars with chalk-paint label patches turn a shelf of odds and ends into a tidy, relabelable system for free. The chalk patch wipes and rewrites. Great for supplies whose contents change.
Line up clean matching jars on a shelf and brush a small patch of chalkboard paint on each front. Once cured, season the patch with chalk and wipe it, then label each jar with a chalk marker. Sort contents by type into the jars. Rewrite a label anytime the contents change. Keep jar sizes consistent for the tidy look.
Editor's noteUse one jar size in a straight row and chalk-label each front so the shelf reads as a set, not a collection.
Skip thisDon’t skip seasoning the chalk patch first; your first label ghosts and won’t fully wipe off later.
30. Reused Deli-Container Parts Bins
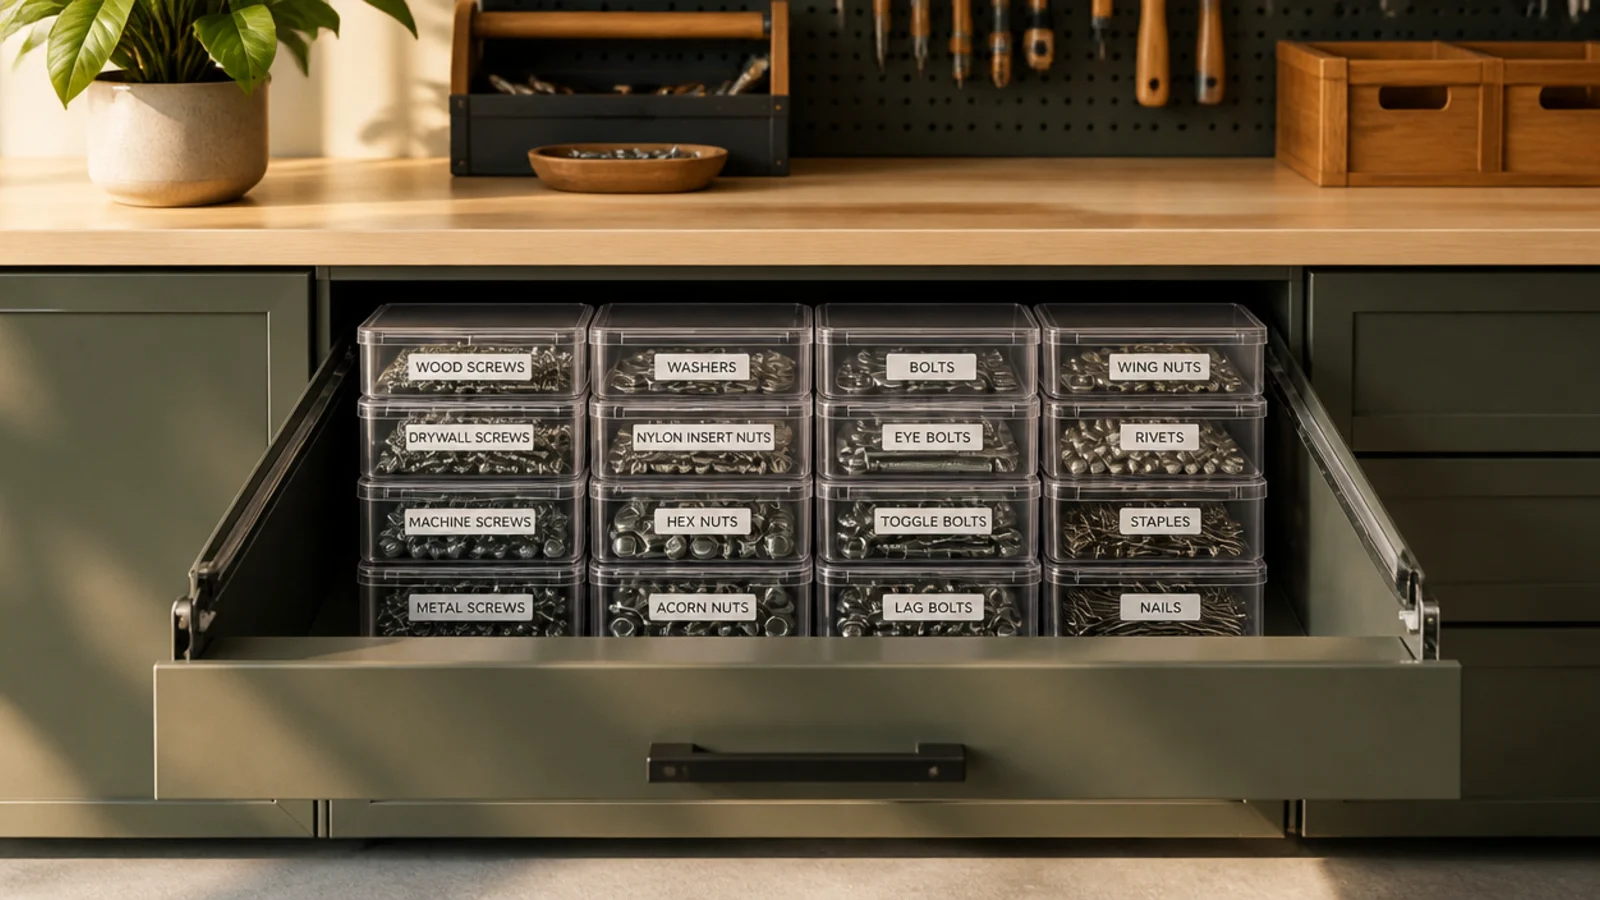
Clear deli and takeout containers stack into free see-through parts bins with snap lids. You see the contents and they stack flat. Perfect for sorting small hardware in a drawer or on a shelf.
Wash clear deli containers and lids and sort small hardware into them — one type per container. Snap the lids on and stack them, labels on top or on the front. Line them up in a drawer or on a shelf. The clear walls show contents; the lids keep parts in when you move them. Keep sizes consistent so they stack level.
Use containers with the same footprint so they stack square and level instead of sliding off each other.
Don’t stack mismatched container shapes; uneven stacks topple and you lose the tidy, see-through benefit.