
1. Cozy Mini Bookmark with Corner Pocket
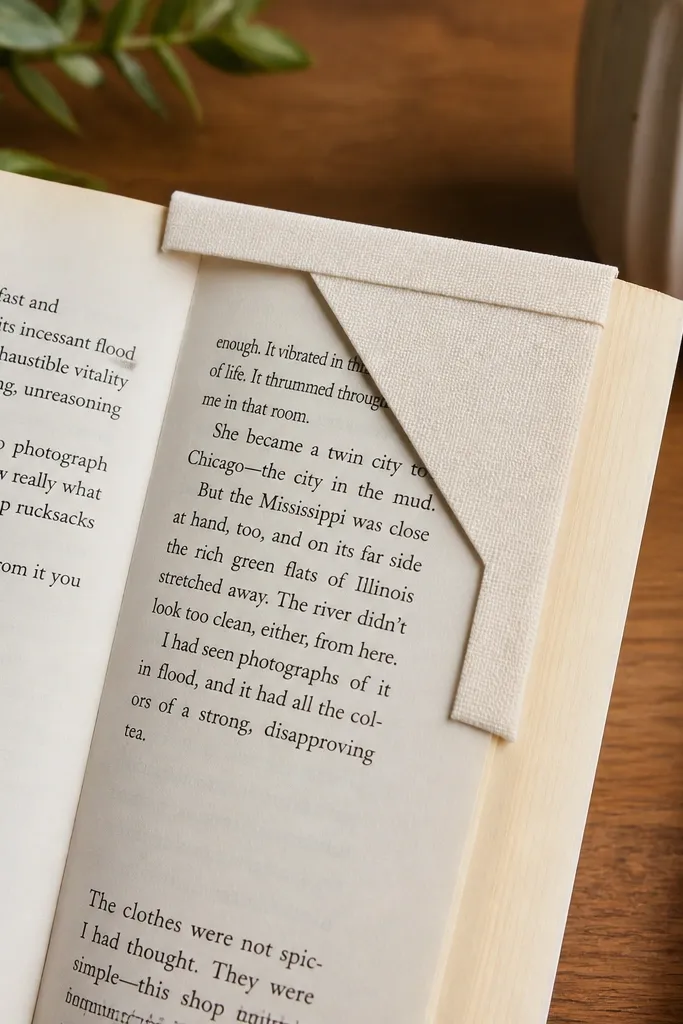
This bookmark is the fastest “I made something” project and it actually holds in place. You fold a square into a slim strip, then create a corner pocket so the bookmark grips a page without slipping. It looks cozy because the pocket edge frames the book page like a little tab. Plan on about 10-15 minutes, and use 15 cm (6 inch) square paper for the best size. It’s great for kids because there’s a clear end shape and no tiny parts to lose.
Start with a 15 cm square. Fold it in half to make a rectangle, then fold the top corners inward to form a neat triangle that sits flat. Create the pocket by folding one corner flap under so it tucks into the back layer. Press all creases with a bone folder, then glue only the pocket tab if it doesn’t hold on its own.
If the pocket won’t grip, make the pocket flap 2-3 mm wider by trimming the outer edge slightly before tucking.
Don’t skip pressing the pocket fold — weak creases make the bookmark slide.
2. Paper Fortune Cookie with a Folded Crimp
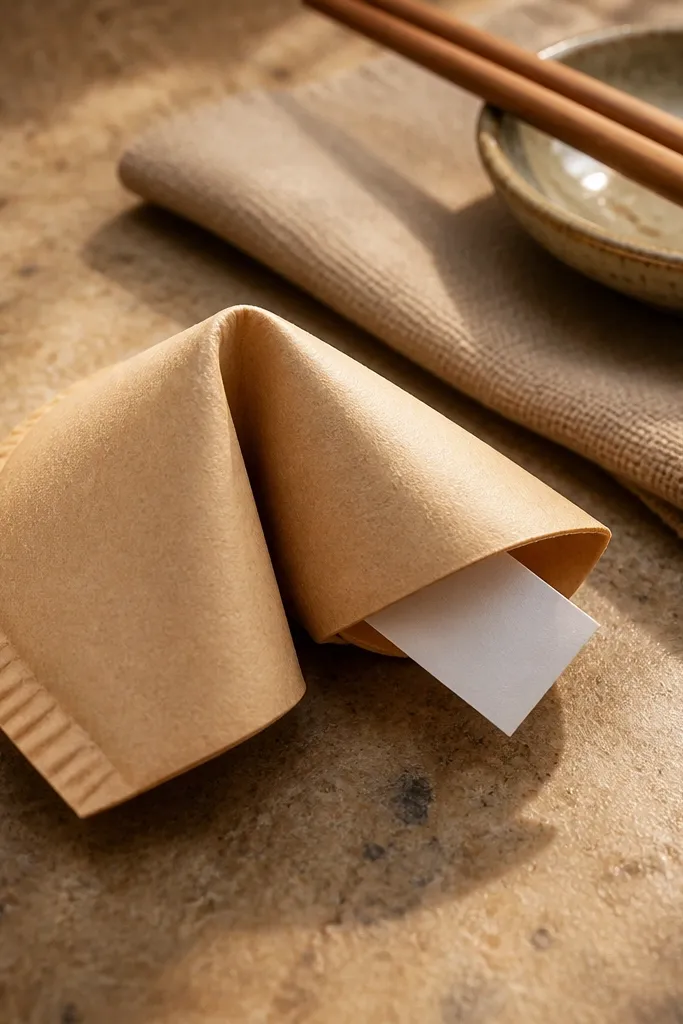
This one is cozy because it turns plain paper into a snack-shaped prop. The fold pattern makes a curved “cookie” body, and the crimp edge gives it that crinkle look. It’s quick at about 12-18 minutes and works well for kids because the shape is forgiving and easy to hold. You can write fortunes on a tiny strip and tuck it inside. Use 15 cm squares so the cookie stays chunky, not too thin.
Start with a 15 cm square and fold it in half both ways to mark creases. Bring opposite corners toward the center to form a diamond base, then fold the top triangle down and tuck edges to lock the body. For the crimp look, fold a short strip along the edge into small accordion bends. Insert a folded fortune strip, then press the final flap closed.
Use a glue stick on the last crimp only — too much glue makes the cookie stiff and hard to open.
Don’t try to make the crimp tiny; a larger crimp looks better and folds faster.
3. One-Sheet Paper Cat Face
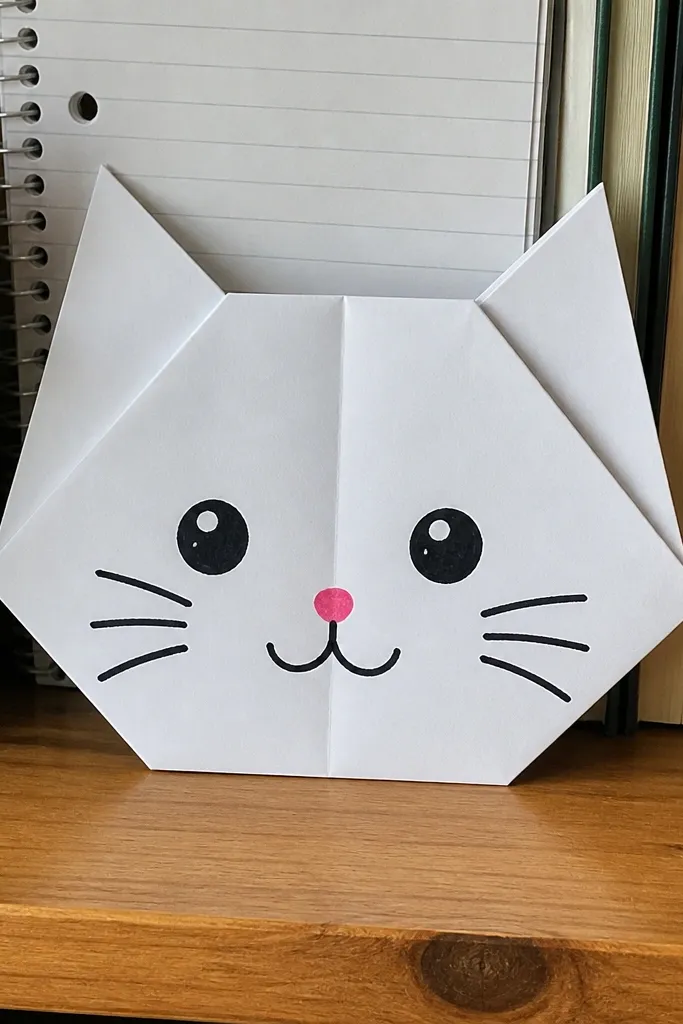
Start with a 20 cm square and fold it in half diagonally, then unfold to create a guide. Fold both top corners down toward the center to form ears, then tuck the bottom edge up slightly for a muzzle ridge. Turn it over and fold the sides inward so the face stays symmetrical. Finish by drawing eyes, a nose triangle, and whisker lines with a fine-tip marker.
A cat face is cozy because it’s instantly recognizable and you can customize it with markers. This is a quick fold that creates a face shape using just a few folds, then you add eyes and whiskers. Plan on 10-20 minutes depending on how detailed the drawing is. It works great for a desk buddy or a kid’s party activity because the drawing part is quick and forgiving. Use 20 cm origami paper for a face that’s big enough to draw neatly.
Skip thisDon’t cut details out of the paper — keeping it whole makes it sturdier for kids.
Editor's noteDraw the eyes only after you fold the sides — the face shape changes slightly once it’s locked.
4. Cozy Waterbomb Mini Pillow
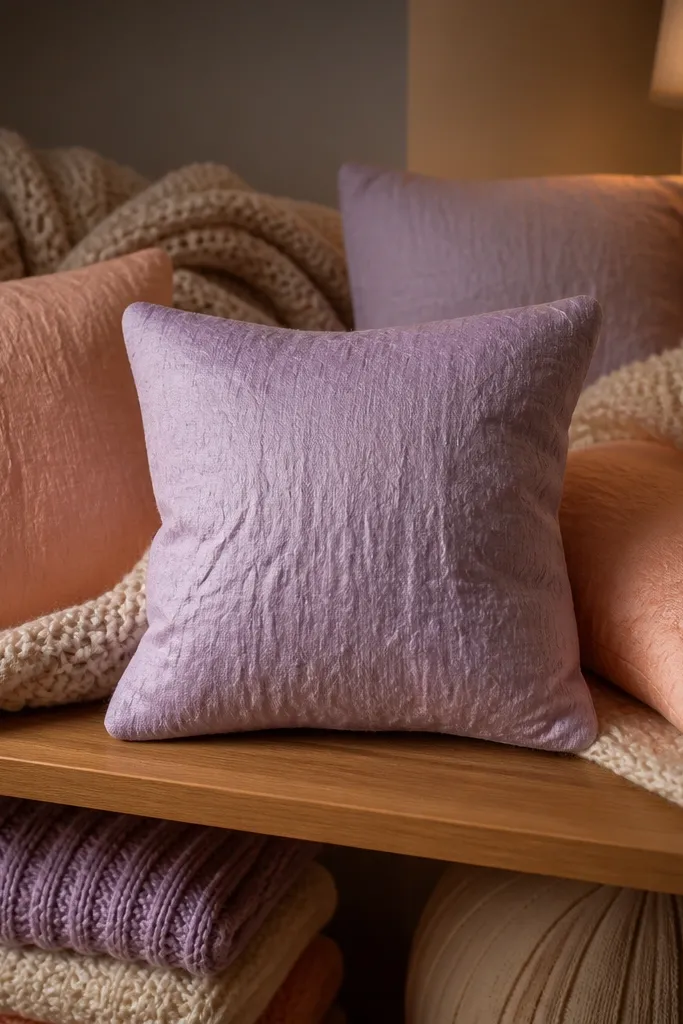
This mini pillow looks cozy because it has that puffy, soft silhouette, even though it’s paper. The waterbomb base creates rounded volume, and the finished piece sits nicely on a shelf or becomes a tiny stress toy. It takes about 15-25 minutes and is best for kids who like pushing paper into shape. Use 20 cm squares so it holds volume instead of collapsing flat.
Start with a 20 cm square and fold it into a basic square base: fold corners to the center, then open to a diamond guide. Lift one layer and push the sides inward to form the waterbomb shape, then fold the top and bottom flaps down to lock. Repeat on the other side if needed, then press the edges so it keeps its pillow shape. If it won’t hold, add a tiny dab of glue to one locking edge.
Make the inside folds first, then lock — if you try to lock too early, you fight the shape.
Don’t use heavy cardstock — it resists the “push” step and slows kids down.
5. Quick Paper Heart with a Clean Back
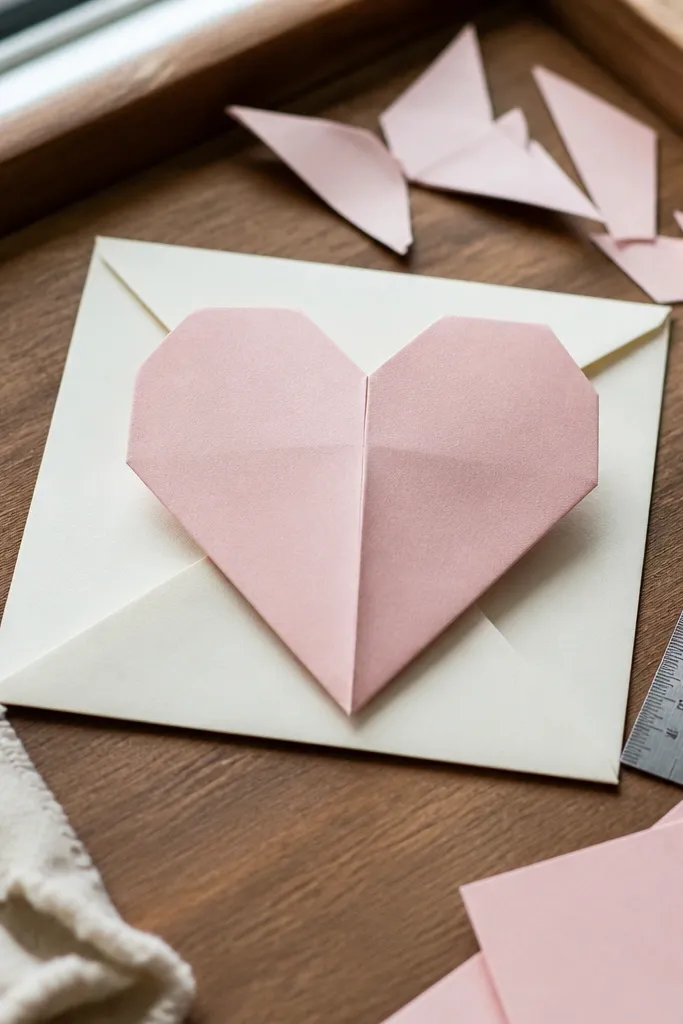
Start with a square and fold it in half, then unfold. Fold the top corners down to meet at the center crease, then fold the bottom point up to form a heart base. Flip the paper, repeat the corner folds on the back so both sides match. Finish by pressing the top lobes and adjusting the points so they sit neatly.
A paper heart is cozy because it turns boring scrap paper into a gift in one sitting. This model is friendly for kids because the folds are symmetrical and the shape is obvious once it’s done. Expect 10-15 minutes. It works as a card topper, a bookmark charm, or a classroom Valentine. Use 15-18 cm squares so the heart is big enough to look good without being bulky.
Skip thisDon’t rush the corner folds — the heart shape depends on those meeting points.
Editor's noteUse a ruler to keep the corner edges aligned to the center crease — it makes the heart look “clean,” not lopsided.
6. Easy Paper Star Bookmark
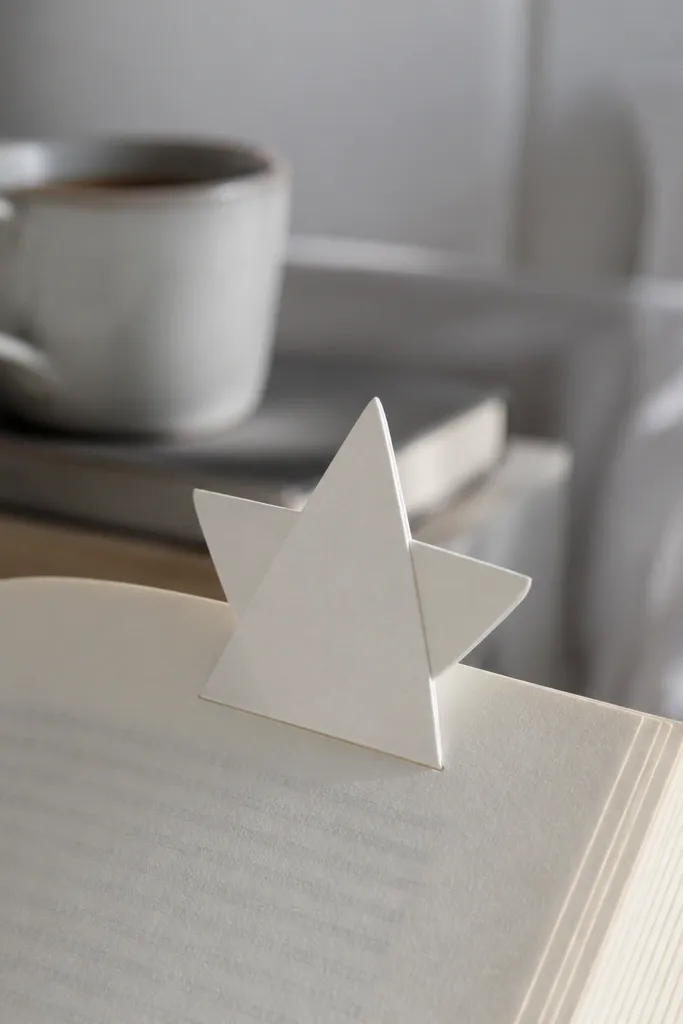
This star bookmark is cozy because it adds a little “crafty magic” to reading. It’s a simple modular-feel shape made from repeated folds, and the star outline looks good even with plain paper. Plan on 15-25 minutes. It suits kids because you can decorate with markers and keep the design consistent across multiple bookmarks. Use 20 cm squares for a star that stands out on the page.
Start with a 20 cm square and fold it into a smaller square by bringing corners to the center. Fold the square into a rectangle, then fold the rectangle into thirds to create guide creases. Open carefully and fold the star points inward using the guides, then lock the bottom tab behind the back layer. Press firmly, then decorate the edges with a marker for extra contrast.
If the star points don’t crisp up, run the bone folder along each point crease twice.
Don’t pull the opened creases too far apart — you’ll lose alignment for the points.
7. Cozy Paper Box for Small Treats
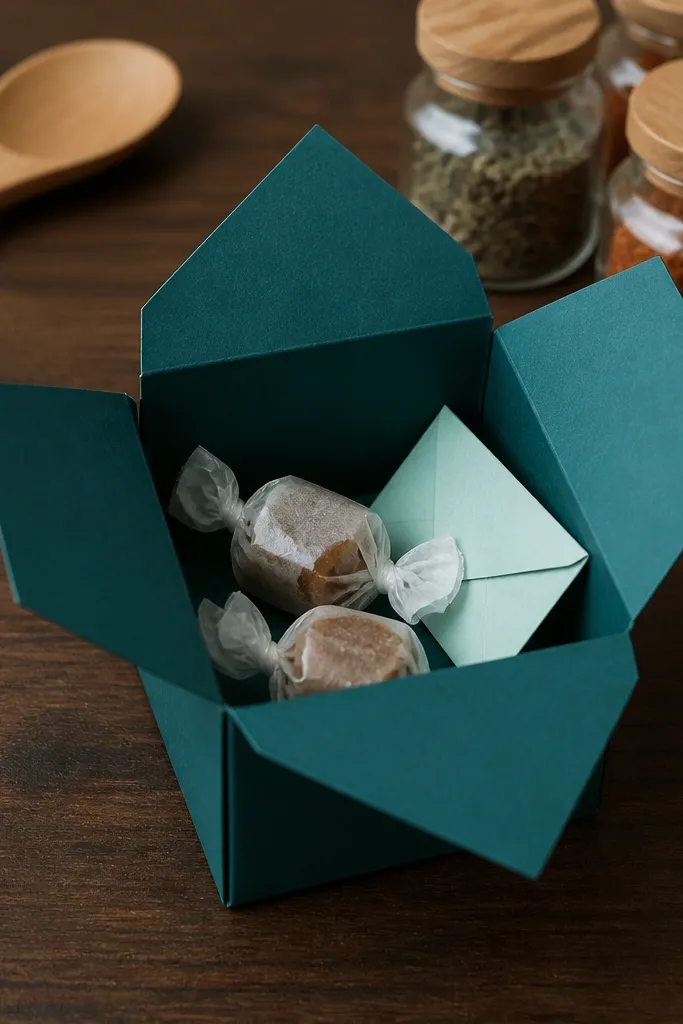
This box fixes a real problem: where do you put tiny stuff without it spilling? It’s cozy because it’s a clean little container for candies, beads, or a folded note. The build is straightforward and takes about 20-30 minutes. Use 20 cm square paper for a box that’s big enough to hold a couple of cookies or small toys. Kids like it because it feels useful, not just decorative.
Start with a 20 cm square and fold it into a grid by folding in half both directions, then unfold. Fold each corner to the center, then fold the resulting flaps up to form the box sides. For the lid, repeat the same corner-to-center fold on a slightly smaller square (about 18 cm) so it fits over the base. Press creases hard, then test fit before gluing anything.
Use a slightly smaller lid square and skip glue if the fit is snug — friction holds better than glue for kids.
Don’t make the lid the same size as the base — it will scrape and won’t slide on.
8. Easy Paper Bunny Ears Bookmark
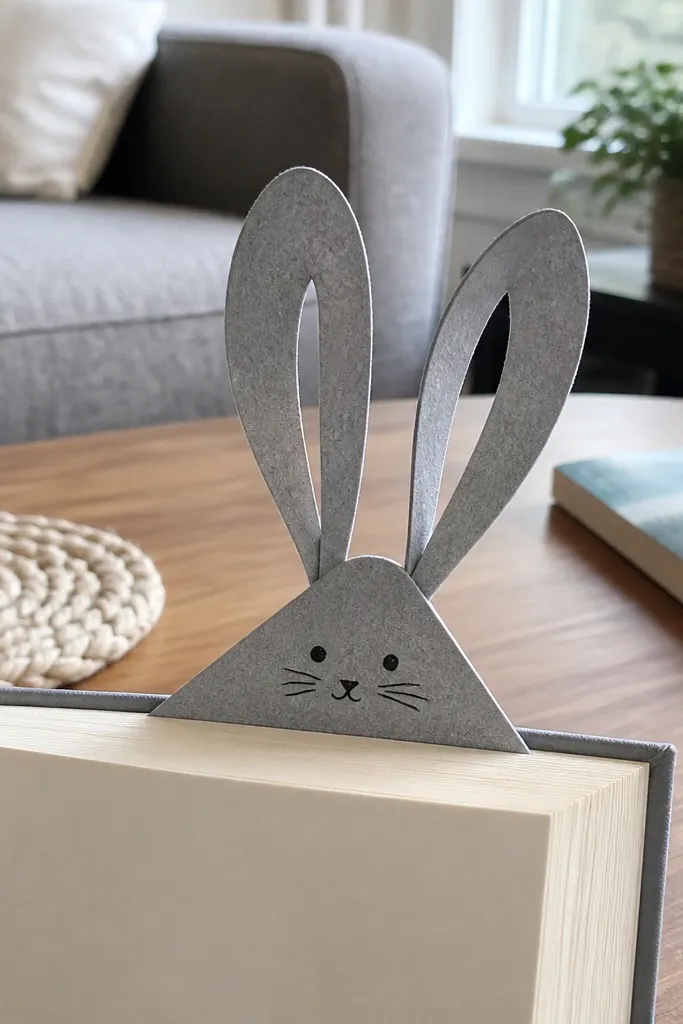
This bunny bookmark is cozy because it combines a flat bookmark with cute ears that stick up. It’s quick, about 15 minutes, and it’s easy to personalize with a tiny face. The folds make a sturdy spine so it doesn’t flop. Great for kids who want something they can decorate immediately. Use 15-18 cm square paper so the ears are noticeable but not too wide.
Start with a square and fold it into a rectangle, then fold the bottom edge up to create a bookmark body. Fold the top corners into pointed ears, then fold a small strip down at the top to lock the ear base. Add a simple face by drawing eyes and a nose on the front. If you want extra strength, glue the last locking flap only.
Use a marker to darken the ear fold lines — it hides tiny asymmetry and looks intentional.
Don’t over-trim the ears — smaller ears look cute but weaken the top lock.
9. Cozy Paper Snowflake Ornament
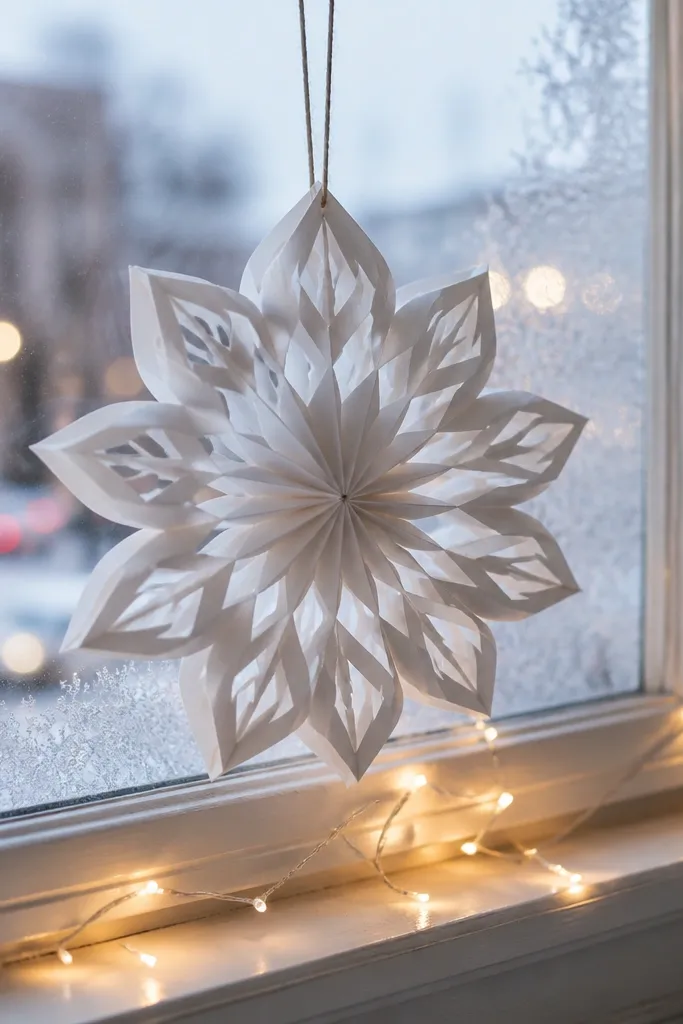
This snowflake turns paper into winter decor without complicated cutting patterns. The symmetry comes from folding a square into a wedge and then folding again, so you get repeated shapes. Expect 20-30 minutes including cutting and unfolding. It’s cozy for kids' rooms or classroom windows, especially if you use white or light blue paper. Use 15 cm squares so it stays manageable for cutting.
Start with a 15 cm square and fold it into a triangle, then fold again into a smaller wedge. Draw simple cut shapes on the wedge edge with a pencil, keeping cuts small so the snowflake doesn’t fall apart. Carefully cut along the lines, unfold slowly, and press flat with your hands. Add a small loop of tape or string through one notch if you want it hanging.
Cut away from the center first, then do the outer details — it keeps the structure intact.
Don’t cut all the way through every layer — you’ll end up with holes that collapse the snowflake.
10. Easy Paper Ladybug Clip
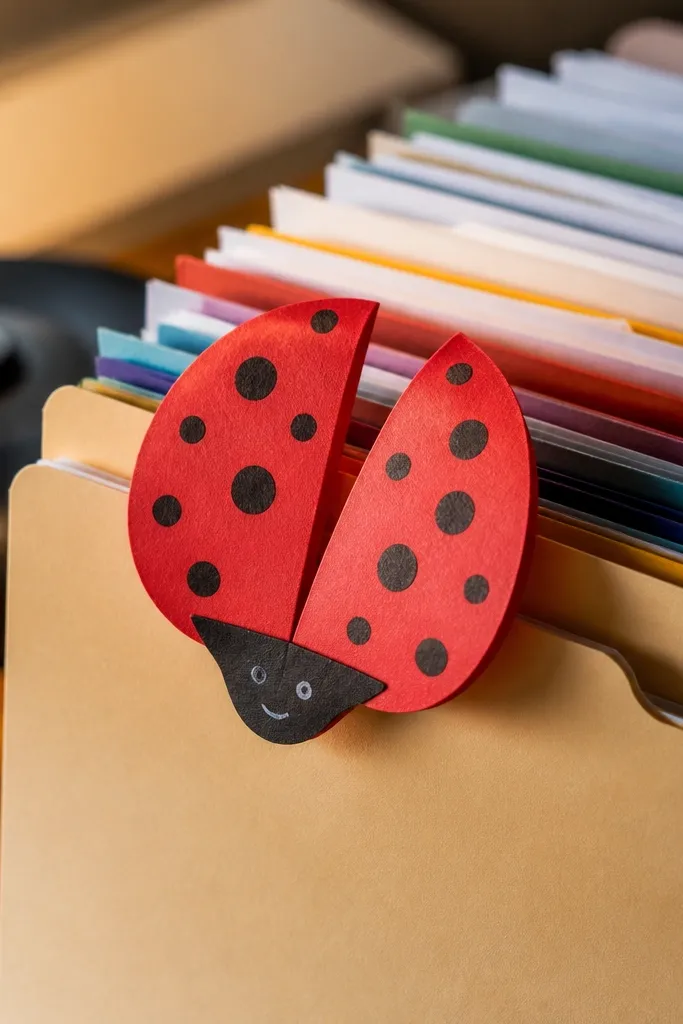
A paper ladybug clip is cozy because it’s both craft and function. The folded wings make a bug shape, and you can clip it to a folder or a child’s art stack. It takes about 15-20 minutes. Use 15-18 cm paper for the body, then add a clip on the back with tape or a small glue tab. Kids love the quick personalization with black dots and a tiny smile.
Start with a square and fold it into a triangle, then fold the triangle corners back to form two wing-like flaps. Fold the bottom point up for the body base. Decorate the wings with marker dots and a head circle. Attach a paperclip by taping it to the back or gluing two small tabs that hold it in place.
Use a thicker marker tip for dots — it bleeds less and dries faster for kids.
Don’t glue the clip directly to thin paper — it tears. Glue small tabs instead.
11. Cozy Paper Fish with Fin Folds
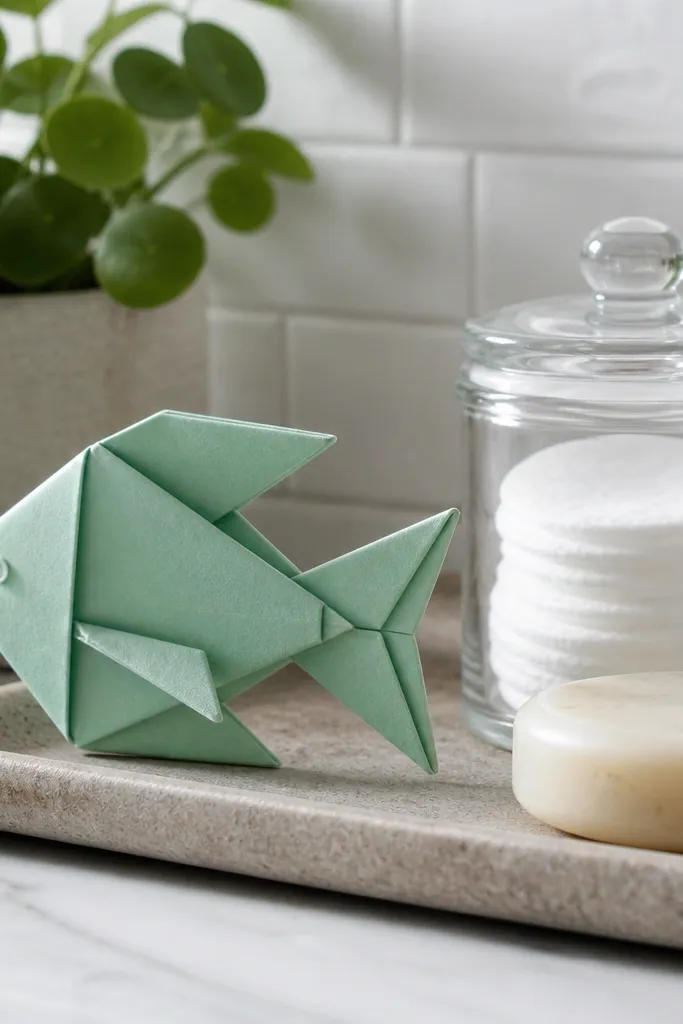
Start with a 20 cm square and fold it in half, then unfold. Fold the top corner down to create the head shape, then fold the bottom corner up for the tail base. Create the fins by folding small side flaps inward along guide creases. Finish by curving the tail slightly with your fingers and drawing scales with a marker.
This paper fish looks cozy because the fin folds create a little “swim” motion even when it sits still. It’s a quick fold, about 15-25 minutes, and it’s great for kids who like moving things. The model has a tail you can shape, and the body folds give it a clean outline. Use 20 cm square paper for a fish that’s easy to hold and decorate with scales.
Skip thisDon’t over-decorate before the folds — drawing can hide misalignment and make it harder to fix.
Editor's noteMark the fin crease with a ruler — it keeps the fins even on both sides.
12. Easy Paper Rocket with a Twist Nose
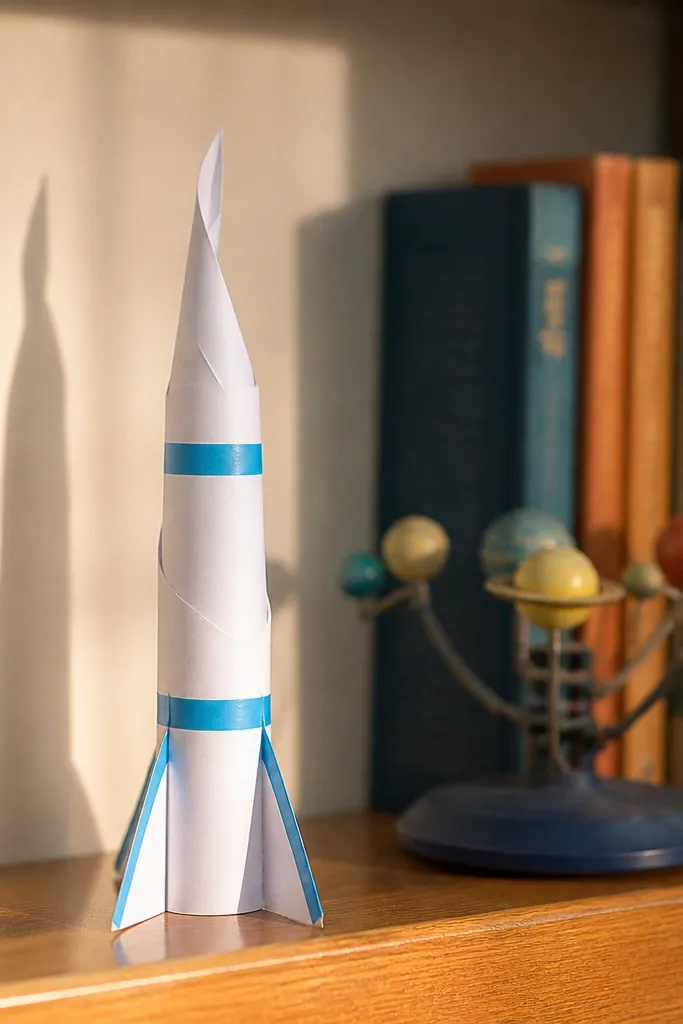
A paper rocket is cozy because it turns a plain craft into a play object. This one takes about 12-20 minutes and ends with a crisp nose shape that looks good on a shelf. The folds are simple enough for kids, but the final nose twist makes it feel more “designed” than a basic model. Use 20 cm paper for a rocket that doesn’t look skinny. Great for a quick STEM craft night.
Start with a 20 cm square and fold it into a triangle, then fold the triangle edges to create a tighter cone. Use a small tuck fold to lock the body so it stays open on one end. Form the nose by twisting the top layer slightly and pressing the crease. Add fins by folding two small side tabs outward and gluing the bases if needed.
Make the cone tight first, then adjust fins last — fins depend on the body shape.
Don’t glue the fins until you check the rocket’s center — skewed bodies make fins look crooked.
13. Cozy Paper Envelope Card Holder
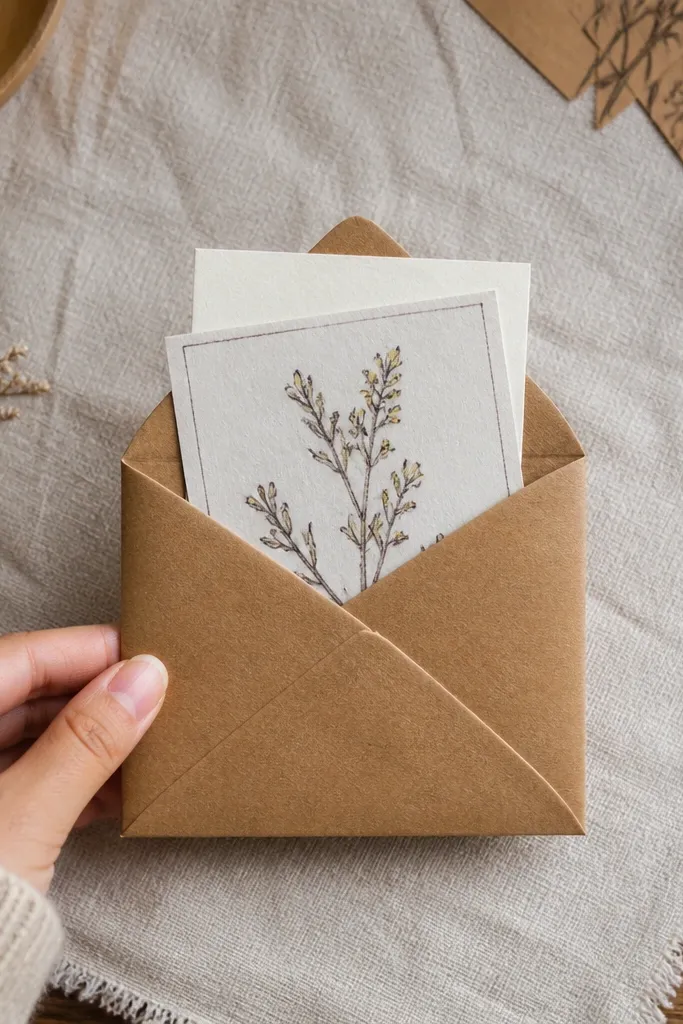
This envelope card holder is cozy because it protects a note and looks neat even with simple paper. It’s fast, about 10-15 minutes, and it’s perfect for kids making a message for a parent or teacher. You can write on the front, then slip in a small drawing. Use 15-20 cm paper; smaller squares make tiny envelopes, bigger ones fit standard folded notes.
Start with a square and fold it into a rectangle, then unfold. Fold the left and right sides toward the center crease, then fold the top down to form the flap. Fold the bottom up to meet the flap edge and create a pocket. If you want it extra secure, glue only the pocket edge.
Use a ruler for the side folds — the envelope looks sharper with straight edges.
Don’t overstuff the pocket — it will pop open and crease the front.
14. Easy Paper Flower with a Folded Petal Strip
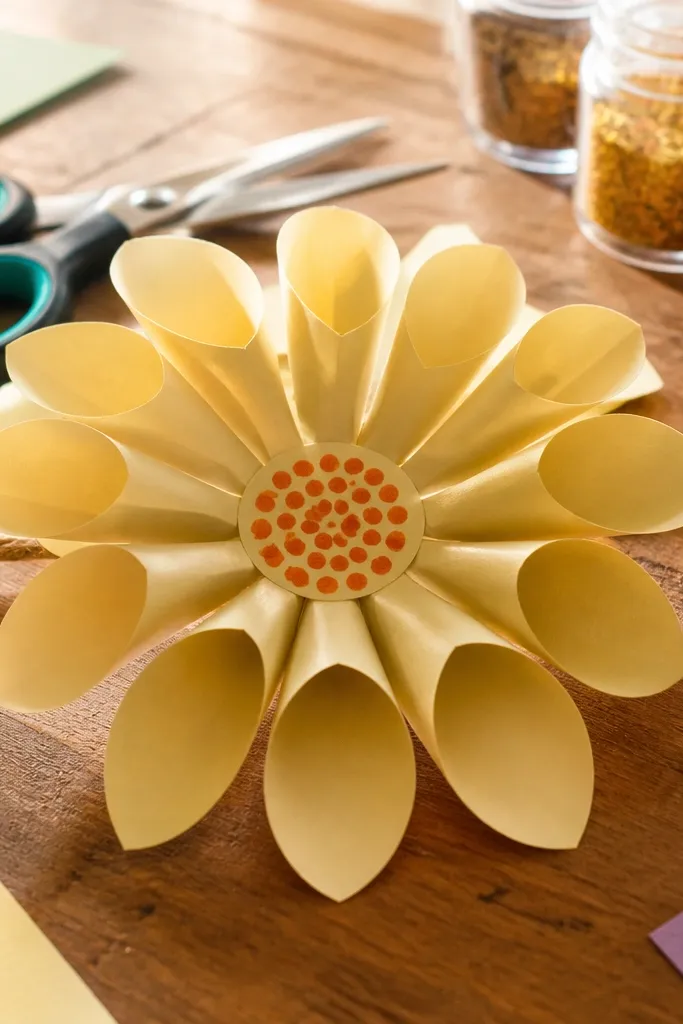
This flower is cozy because it looks layered even though it’s simple. The petal strip folds create that “bloom” look, and you can stack multiple flowers on a string for room decor. Time is about 20-30 minutes for one flower. Kids like it because the center can be decorated with glitter glue or marker dots. Use 20 cm paper or cut a strip from craft paper if you want a thinner bloom.
Start with a square and fold it into a rectangle strip by bringing corners in. Fold the strip accordion-style along short segments, then pinch the middle to form a petal bundle. Shape each fold into a petal by pulling gently and pressing the base. Glue the petal base to a small circle center cut from the same paper, then let it dry flat.
Use a glue stick instead of liquid glue — it dries faster and warps less.
Don’t use too much glue on the center — it soaks in and makes petals curl.
15. Cozy Paper Owl with Simple Layer Folds
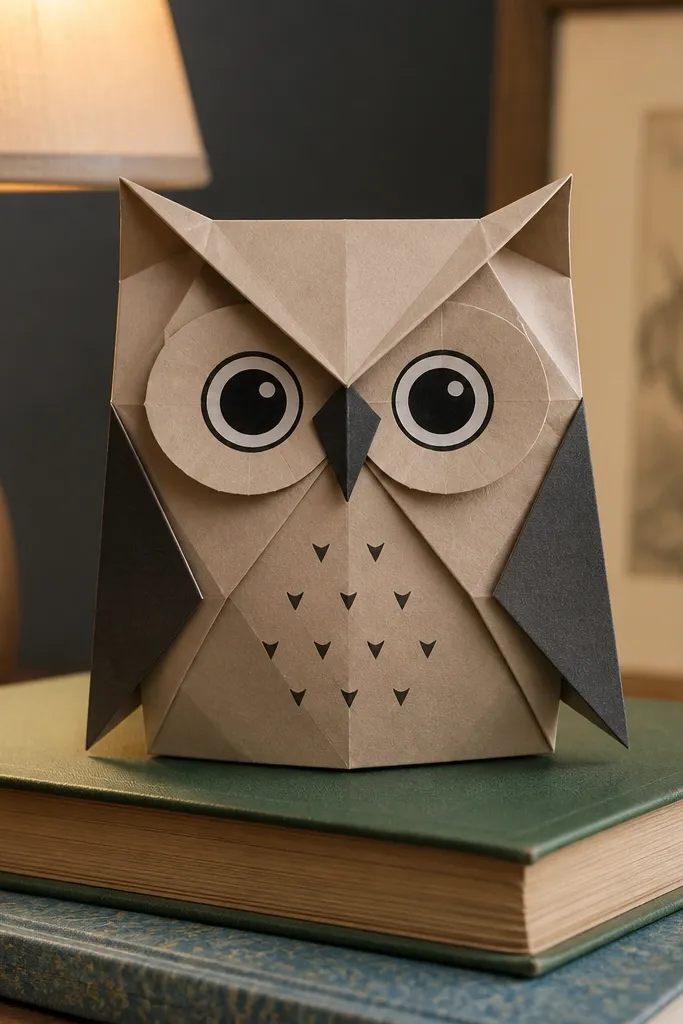
An owl is cozy because it’s cute without needing tiny detail work. This model uses layer folds to create a body shape and then adds eyes, so it looks finished even with minimal drawing. Plan on 20-30 minutes. It suits kids because the steps are clear and the final look is forgiving if the eyes aren’t perfect. Use 20 cm paper for the best proportions.
Start with a 20 cm square and fold it into a triangle, then unfold slightly to create a guide for the body layers. Fold the sides inward to form wings, then tuck the bottom flap up for the belly. Create the head by folding the top corners down and pressing the crease lines. Add eyes by drawing circles or gluing two small paper dots, then reinforce any loose tabs with a tiny bit of glue.
Draw the eyes last and keep them centered on the head fold — it makes the owl look “right” instantly.
Don’t glue big areas — small tabs keep the owl flatter and easier for kids to handle.



