
1. Crisp Paper Heart Bookmark

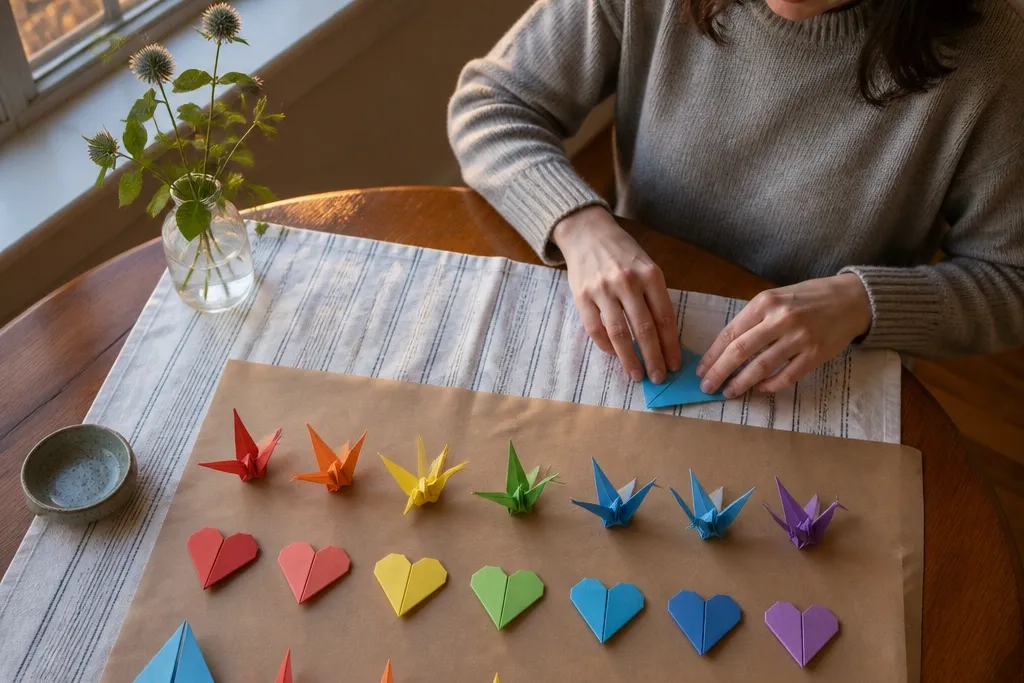
This heart bookmark looks sweet and polished because it finishes flat enough to slide into a book, but it still has a clear heart outline. It uses a simple symmetrical fold so the top bumps look even on both sides. The trick is pressing the center crease hard so the heart reads as a single shape in photos. It’s a budget win because you can use leftover square scrap paper and still get a clean silhouette.
Start with a 6x6 in red square and fold it in half both directions to mark a cross crease. Fold the bottom half up so the lower edge meets the center, then fold the left and right corners in toward the center to form the heart points. Flip it over and repeat the corner folds so both sides match, then press the base flat to create a bookmark tab.
Editor's noteRun the bone folder along every crease twice — once before you open the paper and once after you shape it.
Skip thisDon’t skip the cross crease — the heart shape falls apart without that center guide.
2. Rainbow Paper Star Ornament
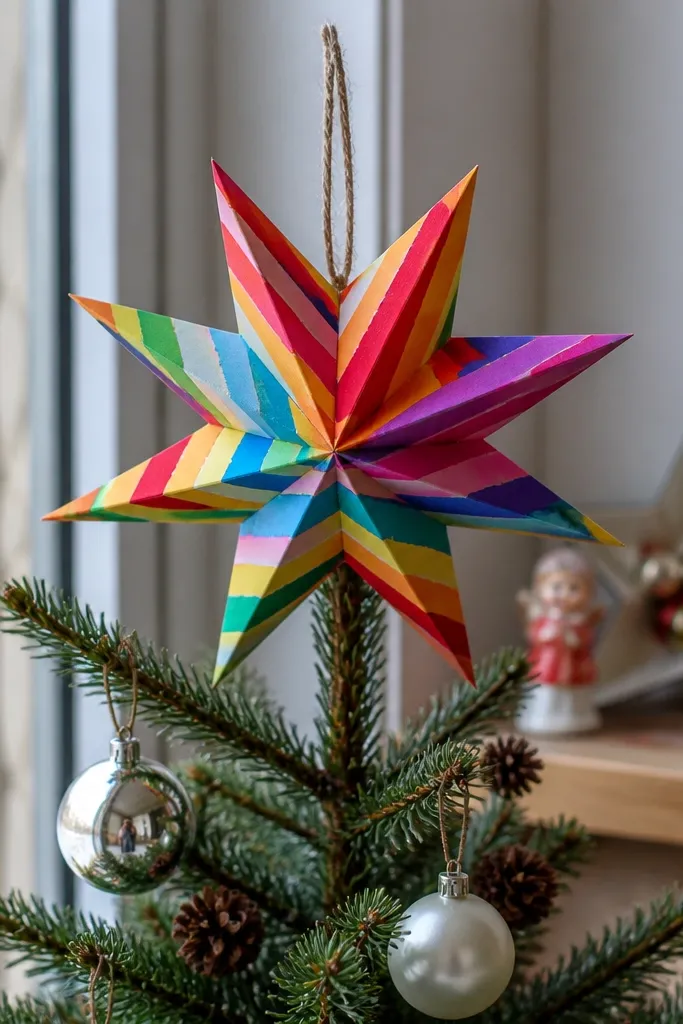
A paper star instantly looks festive, and the best part is it photographs like a mini decoration even when it’s made from cheap paper. Use bright rainbow paper or print your own stripes on cardstock for a clean, high-contrast look. The folds create crisp points that catch light, so it doesn’t look flat or flimsy. Hang it on a string, tape it to a wall, or tuck it into a kid’s gift bag.
Cut five identical strips from 1-inch wide paper and fold each strip into a tight accordion. Form a ring by connecting the strip ends with tape, then pinch and fold each accordion segment inward to create five star points. Add a tiny loop from leftover paper at the top point and tape it underneath for strength.
Editor's noteUse 180-250 gsm cardstock for the strips so the points keep their shape.
Skip thisDon’t make the accordion too loose — weak folds make the star look like a blob.
3. Folded Paper Butterfly with Pressed Wings
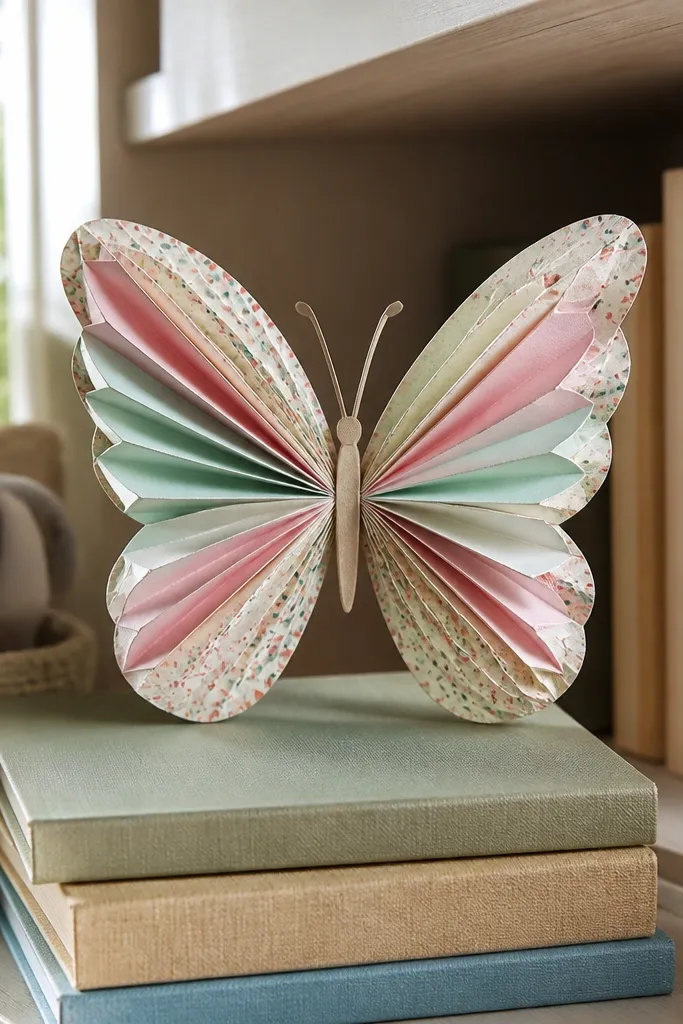
This butterfly looks lively because the wings have visible layers and a gentle curve. Pastel paper makes it softer, while patterned paper makes it pop. The body is simple, but the wing folds create a natural “lift” that makes the model look more detailed than its difficulty. It’s great for decorating a kids' room or turning a stack of scrap paper into a wall of butterflies.
Start with a 6x6 in square and fold it in half, then fold the left and right corners toward the center to form a kite shape. Fold the kite in half lengthwise so you get a symmetrical wing shape, then open slightly and press the outer edges flat. Repeat on a second sheet for a fuller look, then tape or glue the two wings to a short folded strip body.
Editor's noteUse a ruler edge to press the wing layers so they look like separate planes in photos.
Skip thisDon’t glue the wings flat to the body — leave the wing base slightly open so it curves.
4. Standing Paper Frog That Holds Its Shape
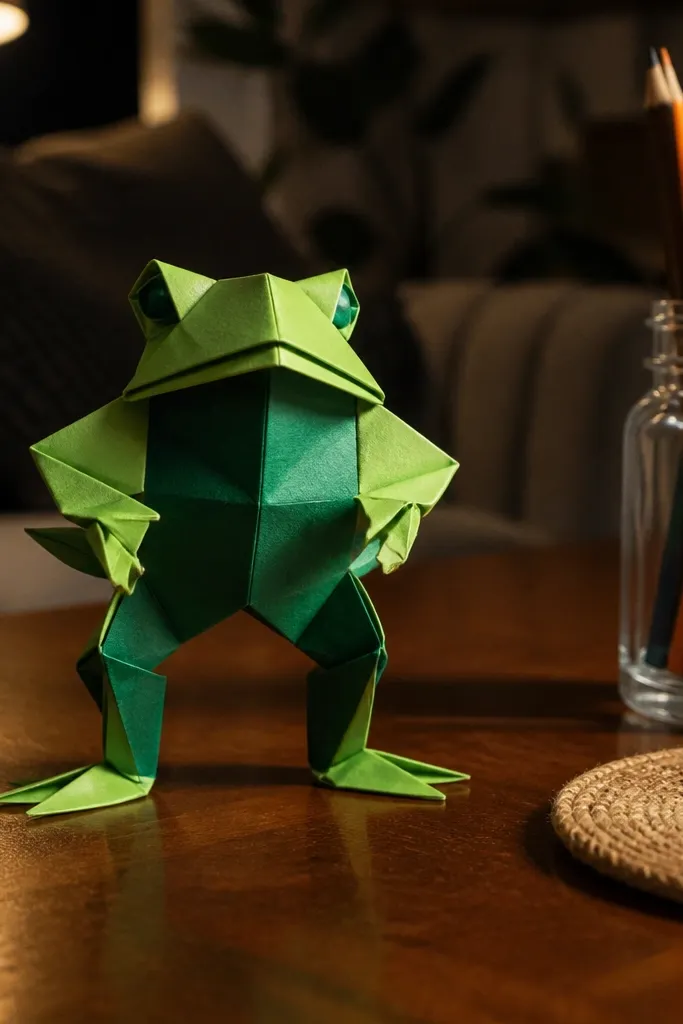
A standing frog is the easiest way to get that “3D wow” without complicated modular building. It looks cute in a photo because the legs create depth and the head points forward. Green paper with a slightly darker shade on one side makes it more lifelike even at a small size. This is a good “Budget Origami Easy” project for kids because you can keep it playful and durable.
Use a 8x8 in green square and fold it diagonally both ways to set creases. Fold all corners toward the center to make a small square, then fold it in half and shape the top into a head using a small squash fold. Create two leg flaps by folding the lower corners outward, then press the bottom edge so it stands.
Editor's noteIf it won’t stand, add a tiny paper shim under the bottom crease by folding a 1/8 in strip and taping it.
Skip thisDon’t over-stretch the leg folds — they should fold crisply, not wrinkle.
5. Classic Paper Crane Bookmark
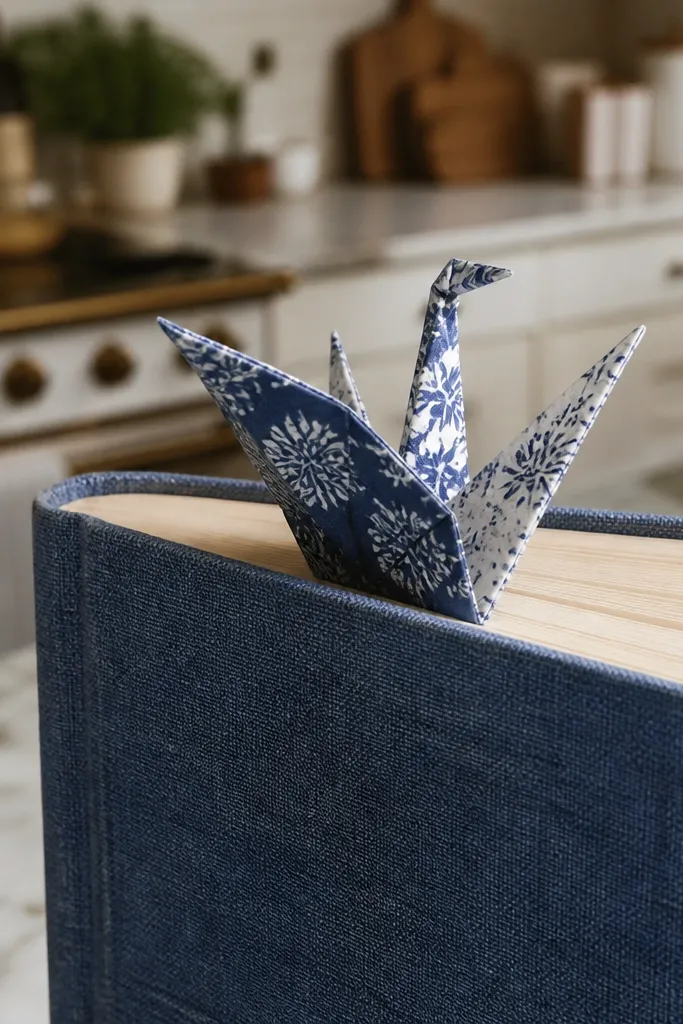
The crane is the origami icon, but this version is designed to look good fast and stay readable in a close photo. Make it with one color for clean lines or use two-sided patterned paper for extra contrast on the wings. The head and beak are what sell the look, and you get them with a few sharp folds. It’s also practical — it can mark a page without needing extra craft supplies.
Start with a 6x6 in square and fold it diagonally both ways to create an X crease. Fold all four corners to the center point, then fold the model in half and form the tail by pulling one flap out and flattening it. Shape the head by folding a small corner down, then press the wing edges so they look like separate planes.
Editor's noteUse a slightly thicker square if you want the wings to hold their angle without springing back.
Skip thisDon’t rush the center folds — if the square isn’t centered, the crane silhouette looks lopsided.
6. Mini Paper Envelope Gift Card Holder
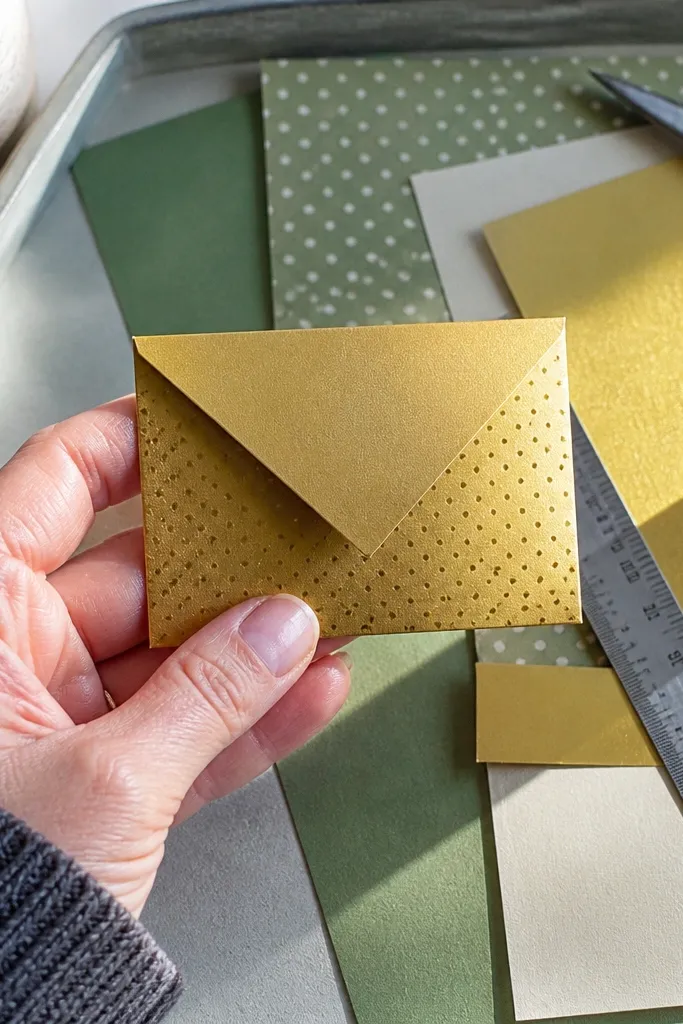
This envelope looks like a real gift card holder even though it’s made from a single sheet. It’s photogenic because the flap creates a clear triangle shape and the front panel can be patterned. Use metallic or printed paper to make it feel special on a budget. It’s ideal for kids because it’s forgiving — you can adjust the closure after the first fold.
Use an 8x8 in square and fold it in half to mark the center. Fold the top edge down to the center, then fold the bottom edge up to meet the top fold line. Fold the left and right corners in to form the envelope sides, then finish by folding the top flap down and tucking it into the pocket on the front.
Editor's noteCut a small notch on the pocket edge so the flap slides in without tearing.
Skip thisAvoid super-thin paper — it wrinkles at the pocket opening after a few uses.
7. Accordion Paper Fan Wall Decor
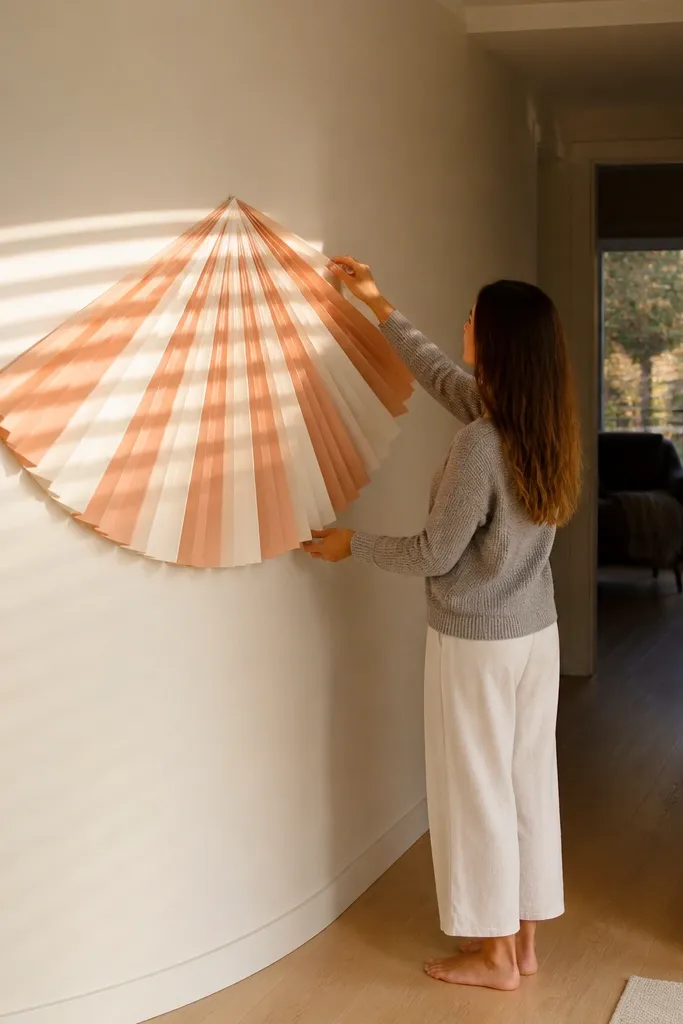
Fans look great from across the room because the pleats create shadow lines. You get a clean aesthetic with minimal folding: make a long accordion, then shape it into a circle or half-circle. This is a strong budget Origami Easy pick because you can scale it up or down depending on the paper size. It’s also kid-friendly since the main work is repetitive pleating.
Cut a 4x10 in strip from cardstock and accordion-fold it in 1/4 in pleats. Bring the ends together and tape them to form a ring, or keep it open for a half-fan. Add a paper circle or small strip as a center knot, then attach a string loop to hang it.
Editor's noteUse two colors alternating pleats for an instant “designer” look.
Skip thisDon’t make the pleats uneven — the fan looks crooked in photos.
8. Geometric Paper Cube Box
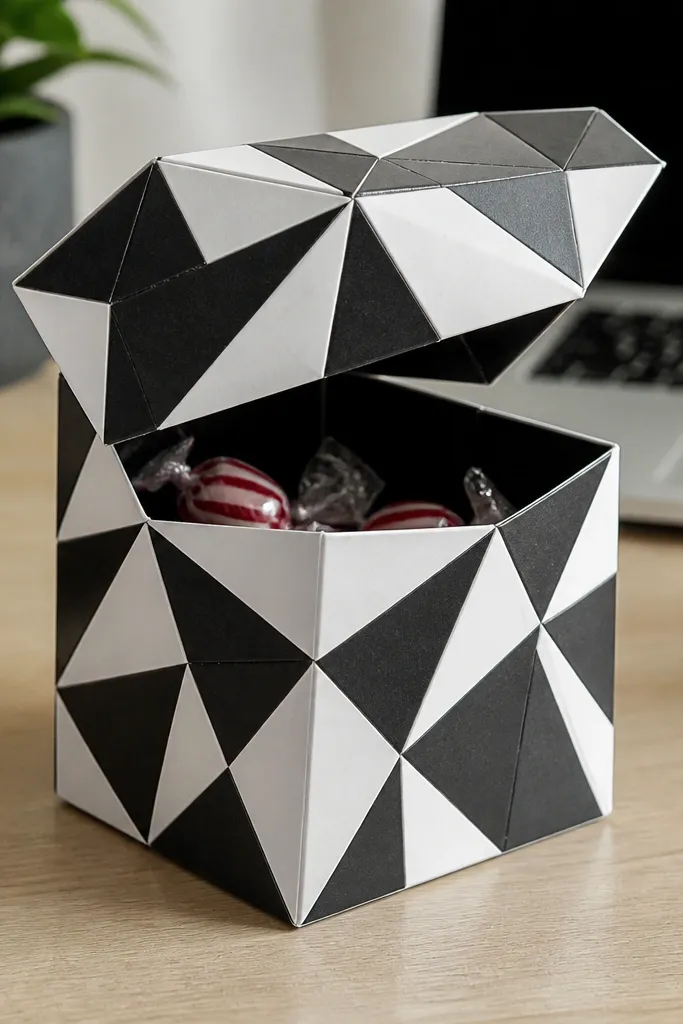
A cube box is the best way to make origami look like real decor. The crease grid reads as intentional geometry, especially when you use patterned paper with high contrast. It’s sturdy enough to hold a few candies or small erasers, and it closes cleanly without extra glue. This one is satisfying because it goes from flat sheet to a shape you can set on a shelf.
Start with an 8x8 in square and fold it into a grid: fold in half, then fold into quarters by creasing each half again. Use the grid to fold up four sides, then tuck the top flaps into the side pockets. Press each edge flat so the cube forms sharp corners, then adjust the top until it sits level.
Editor's noteUse heavier paper for crisp corners, especially if you want it to stand without collapsing.
Skip thisSkip the grid creases and the cube turns into a lumpy box.
9. Paper Bow Tie Pin
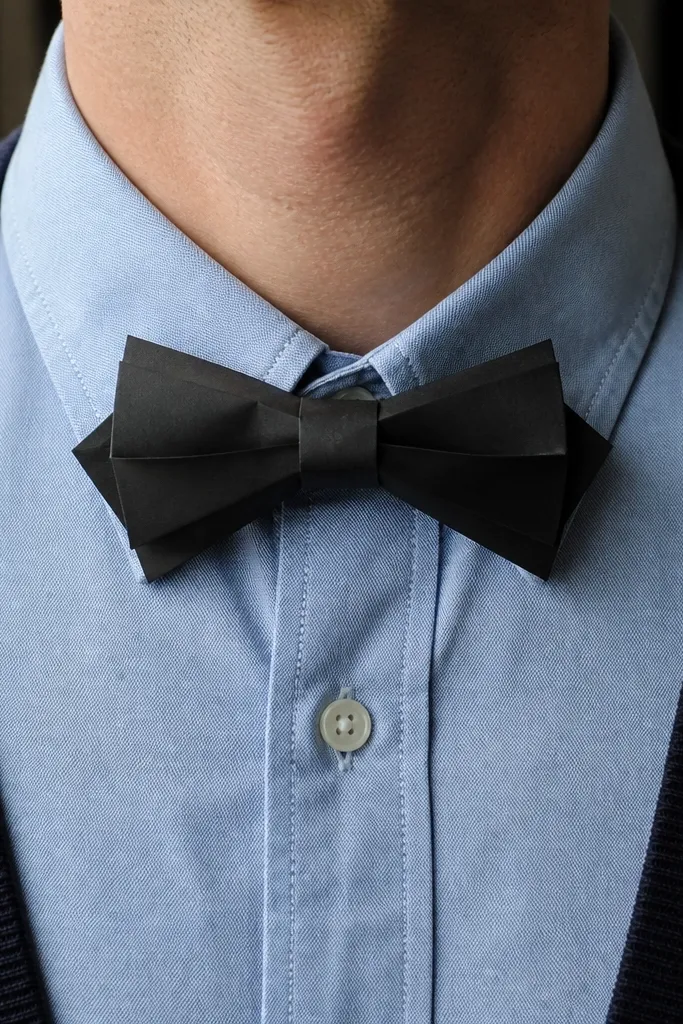
A paper bow tie is a fun aesthetic project because it looks like fashion without needing fabric. It’s also one of the easiest ways to make a “kid craft” look like a real accessory in a photo. Use black paper for a classic look or bright patterned paper for a playful vibe. The folded loops give it shape and a nice silhouette.
Start with two 4x6 in rectangles cut from craft paper. Fold each rectangle accordion-style into small pleats, then pinch the center and open it to form two loops. Fold a tiny strip for the center knot and tape it over the pinched middle, then attach a small paper clip or glue a craft pin back to the underside.
Editor's noteIf the bow flops, crease the pleats thicker by folding with a ruler edge before pinching.
Skip thisDon’t use flimsy copy paper — the loops lose their shape quickly.
10. Layered Paper Flower with Rolled Petals
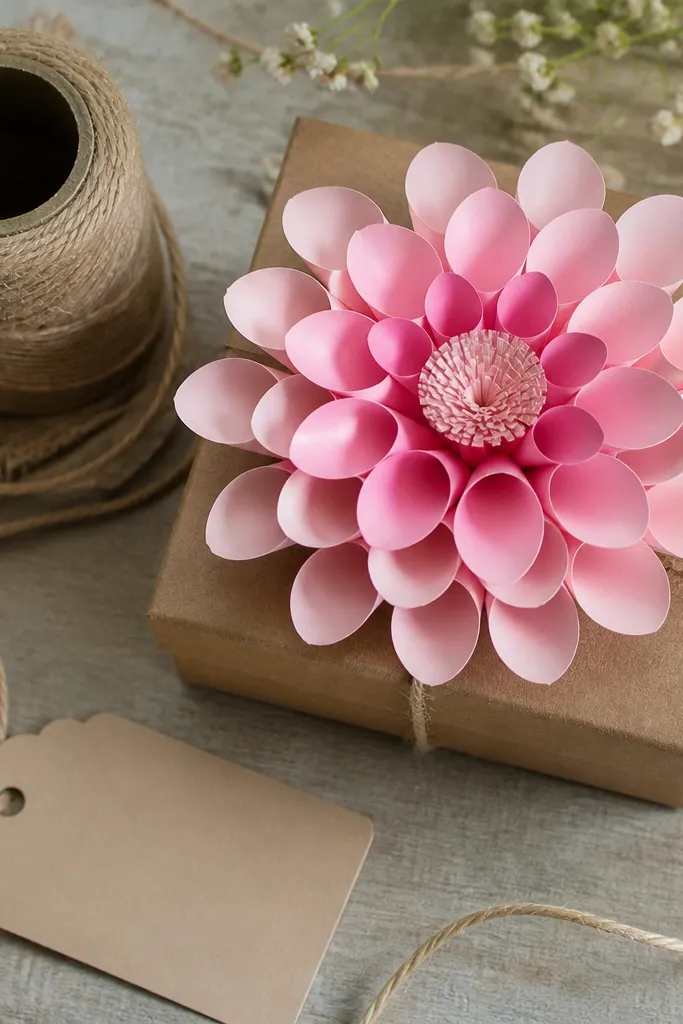
This flower looks layered because the petals have a rolled edge that catches light. It’s photogenic even when it’s small, and it feels more “crafted” than flat paper blooms. Use two shades of the same color for depth — for example, light pink petals and a darker pink ring. It also works as a gift topper or a kid’s desktop decoration.
Use 6x6 in squares for petals and cut each into a circle or rounded shape if needed. Roll each petal edge by wrapping it around a pencil tip, then crease it flat at the base. Stack 5-7 petals around a center disk, then add a green folded leaf strip behind the center for a cleaner look.
Roll all petals in the same direction so the flower has a consistent spiral glow.
Don’t glue the petals flat to the center — leave a slight lift so they show layers.
11. Paper Water Drop Favor Tag
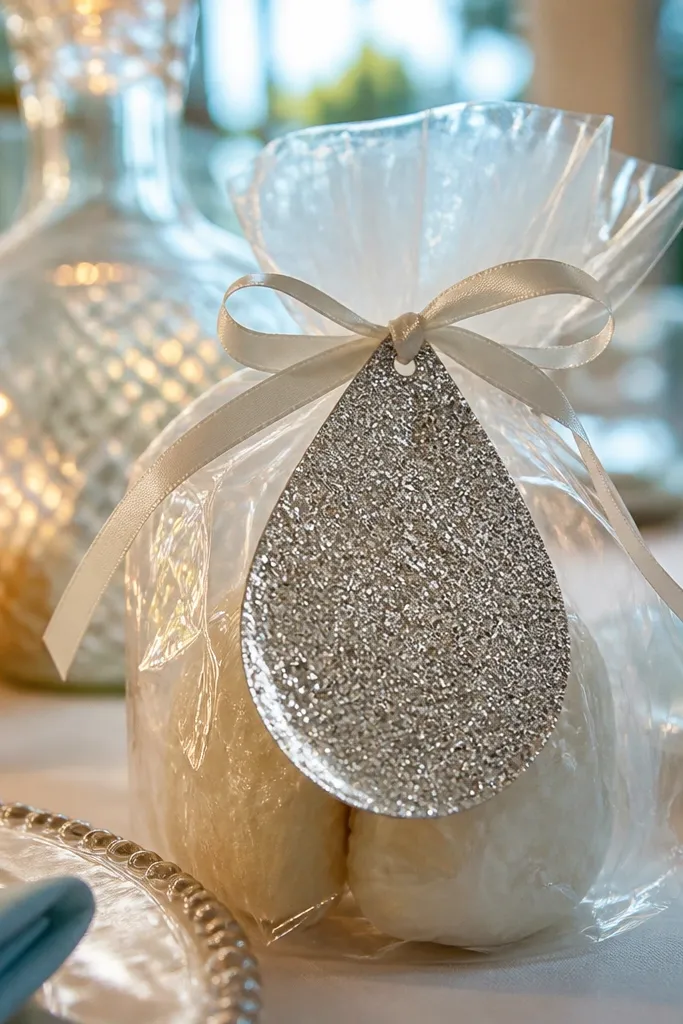
This teardrop tag looks like a tiny gift label with a glossy silhouette, even though it’s just folded paper. It’s easy to make in batches, which matters if you’re doing a kid event or party. The shape frames a label area nicely, and the folded edges create a highlight line. Use glitter paper or foil paper for the best photo pop.
Start with a 6x8 in rectangle and fold it lengthwise so one long crease is sharp. Fold the top corners down toward the center to create a pointed top, then fold the bottom point up slightly so it forms a teardrop. Punch a small hole near the top and thread ribbon through, then press the edges to lock the folds.
Use foil-backed paper with the foil side on the outside for a stronger shine line.
Avoid thick paper for the fold — it makes the teardrop edges too bulky.
12. Paper Sailboat That Looks Like It's Floating
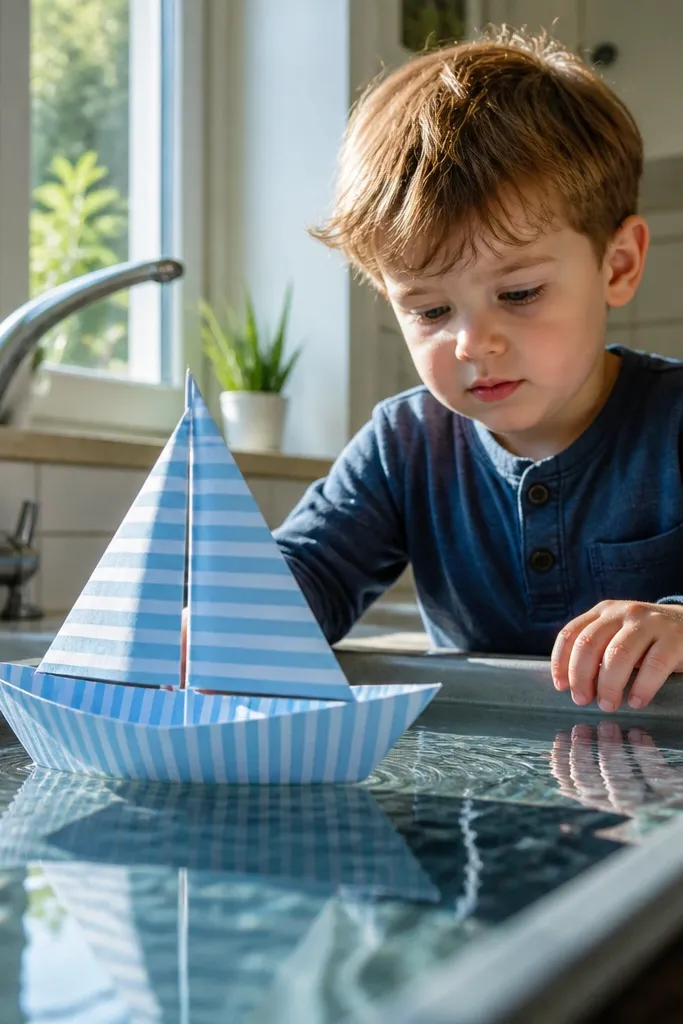
Sailboats look instantly recognizable, and that’s why they’re a great “easy but striking” choice. The sail triangle creates a clean silhouette, while the hull fold gives it structure so it doesn’t droop. Use blue-and-white striped paper for the sail or a solid bright color for the sail so it stands out against a table background. This one also works as a desk decoration.
Use an 8x8 in square and fold it diagonally to set a crease. Fold the corners toward the center to form a smaller triangle, then open slightly and collapse the shape so the sail stands up. Fold the bottom flap up to create the hull, then tuck the side edges to keep the boat symmetrical.
Editor's notePress the sail fold with a ruler so the triangle stays crisp when you set it down.
Skip thisDon’t leave the collapse loose — the boat loses its “floating” look.
13. Paper Crown with Sharp Points
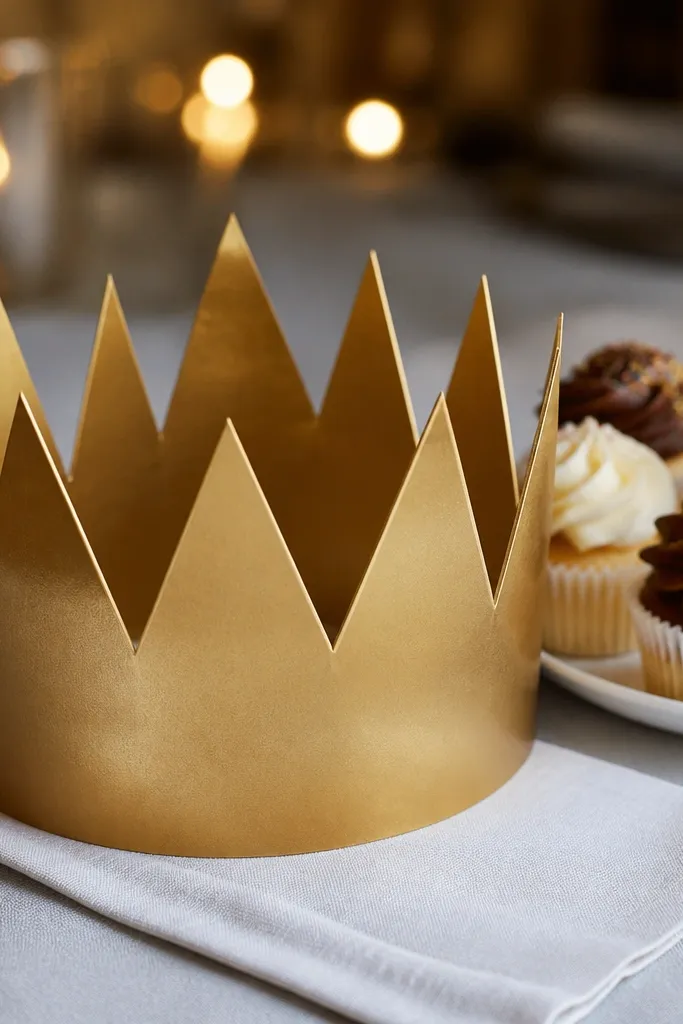
A paper crown is pure kid joy, but you want the points to look sharp so it reads as “intentional” in photos. This crown uses a repeating peak fold, so you get consistent triangles across the band. Choose metallic gold paper for a party look or use patterned paper for everyday fun. It’s quick, and it fits better than most flimsy crowns because the band has a clear structure.
Start with a strip of paper about 2 inches tall and long enough to wrap a child’s head. Fold the strip in half lengthwise to strengthen it, then mark 6-8 peak sections with light creases. Fold each peak upward into a triangle, then fold the top edges down slightly to lock the point. Wrap the band around and tape the ends, then adjust the peaks so they sit evenly.
Editor's noteUse a longer strip than you think and trim after — it fits more easily.
Skip thisDon’t make the peak folds too shallow — flat peaks make the crown look dull.
14. Paper Hexagon Snowflake Ornament
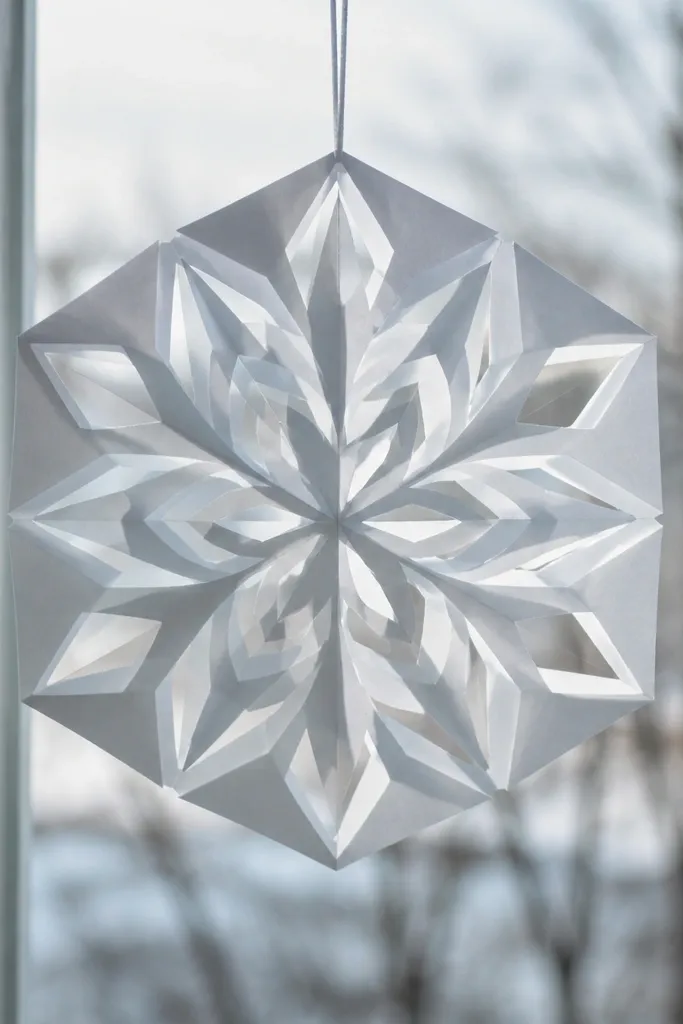
Snowflakes look amazing on a budget because the symmetry does the heavy lifting. This folded hexagon ornament creates a lace-like look without needing expensive supplies. Use white or light blue paper for a clean winter aesthetic, and add a tiny string loop so it hangs straight. It’s also satisfying to make because each fold produces a new pattern.
Fold a 6x6 in square into a triangle, then fold it again until you get a small wedge. Draw simple cut patterns on the outer edge — tiny triangles, half-moons, and small slits — keeping cuts at least 1/4 inch from the tip. Cut carefully, unfold to reveal the hexagon snowflake, then reinforce the center with a small dot of glue if needed and add a hanging loop.
Keep your cuts narrow and repeat the same thickness — it makes the snowflake look neat.
Avoid cutting right through the center crease — the ornament collapses.
15. Paper Rocket with Folded Fins
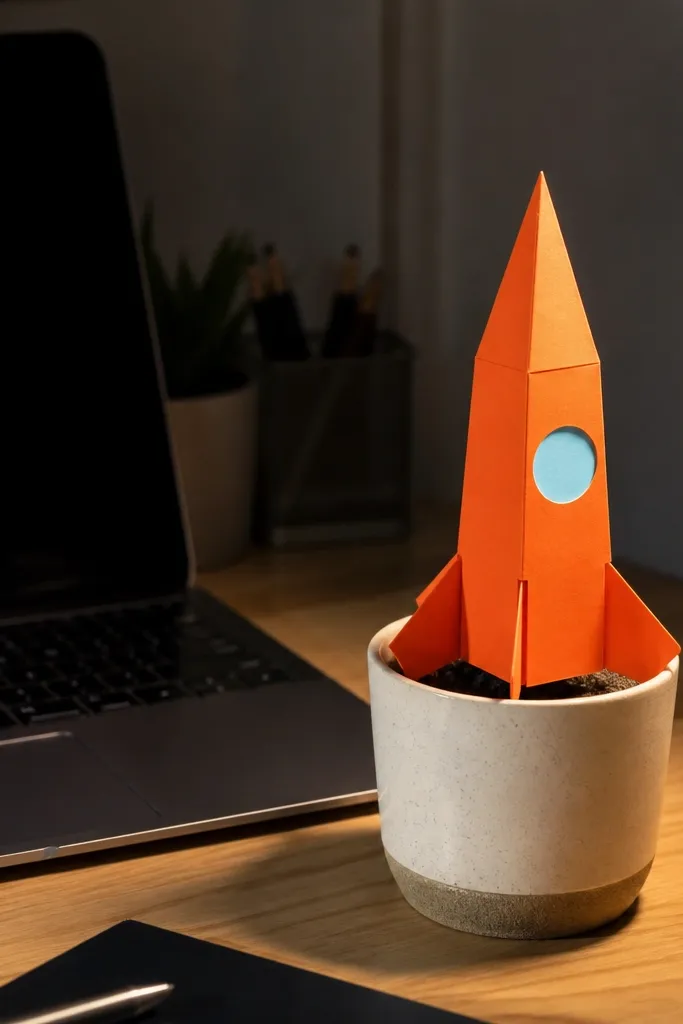
A rocket is one of the fastest ways to get a dramatic shape from a single sheet. The folded fins create a “speed” look, and the pointed nose makes it instantly readable. Use bright paper like orange or red for maximum contrast, and add a small window circle for a cute detail. It’s a great desk toy because it stands up on a table if you press the base correctly.
Start with an 8x8 in square and fold it into a triangle by bringing two opposite corners together. Fold the triangle’s bottom edge up to form a short base flap, then fold the side corners outward to make rocket fins. Roll the front tip slightly to tighten the nose, then fold the back flap under to create a stable stand.
Editor's noteUse double-sided paper so the outside stays clean even if the folds show edges.
Skip thisDon’t skip base pressing — weak bases make rockets fall over.
16. Paper Heart Box for Small Treats

This heart box looks like a gift box, not a flat craft, because the walls fold up into a real container. It’s a budget Origami Easy project that still feels special — people can see the shape immediately. Use thicker paper so the walls don’t collapse, and pick a contrasting inside color so the inside looks intentional when you open it. Fill it with a couple candies or a small note.
Use an 8x8 in square and fold it in half, then fold it in half again to make a cross and a quadrant guide. Fold the corners toward the center to form a smaller square, then fold the top and bottom layers outward to create the heart outline. Open the model slightly and fold the sides into walls, then tuck the top flap down to close.
Editor's noteTrim 1/8 inch off any bulky corners so the walls meet without gaps.
Skip thisAvoid thin paper for the walls — it bends and the heart outline collapses.
17. Paper Bookmark Starburst
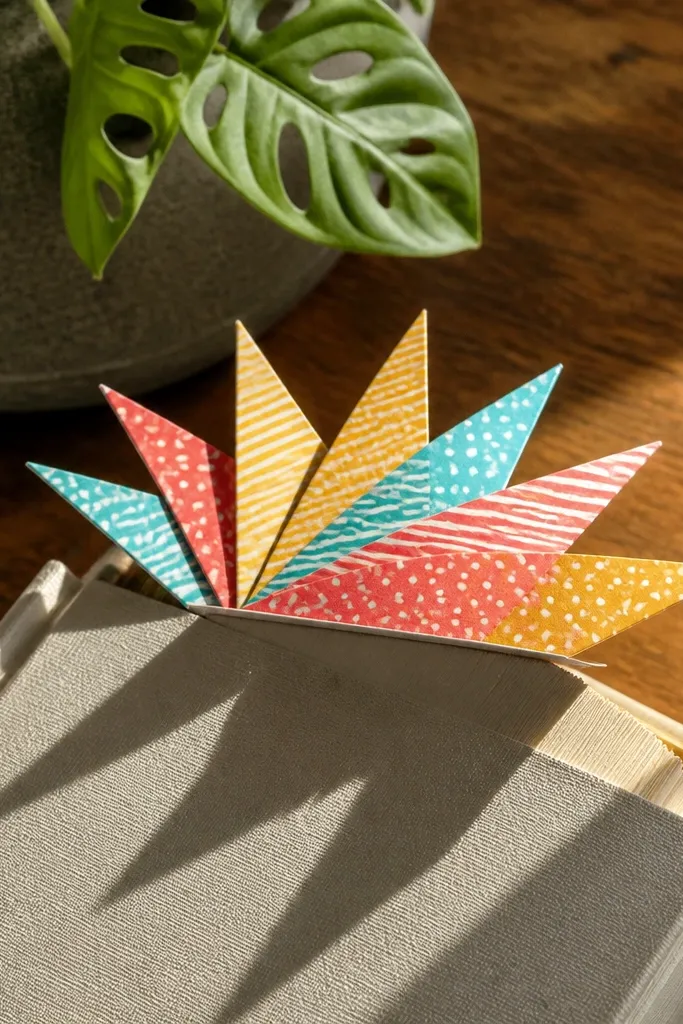
Starbursts look energetic and graphic, which makes them perfect for a photogenic kids' craft. This bookmark version keeps the back flat while the front has a crisp burst shape. Use patterned paper like polka dots or stripes so each point shows a different color. It’s easy to fold and quick to make in a set for siblings.
Start with a 6x6 in square and fold it into a smaller square by folding both sides to the center. Fold one corner up to the top edge, then repeat for the other corners so you get a pinwheel-like outline. Flatten the back into a bookmark tab and fold the burst points forward to form the starburst shape.
Editor's noteUse bright paper for the center panel so the burst reads clearly even on dull backgrounds.
Skip thisDon’t leave the folds soft — press each corner point so it stays sharp.
18. Paper Kitty Face with Pointed Ears
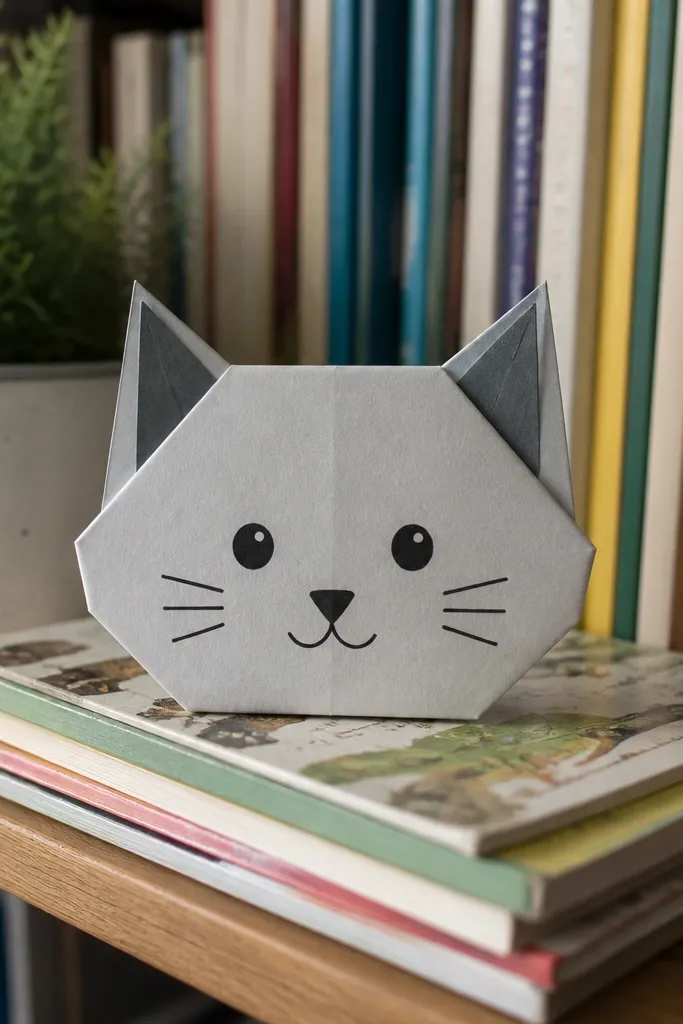
This kitty face looks cute because the ears are clean triangles and the face sits flat for easy drawing. You can add eyes and whiskers with a marker, but the folded shape does most of the work. Use light gray paper with darker gray for the ears if you can — it gives contrast without extra coloring. It’s great for kids who want to customize their animal.
Use a 6x6 in square and fold it diagonally to make a triangle. Fold the bottom corner up to form a smaller triangle, then fold the two top corners down to create ear points. Flip it over, press the edges flat, and draw eyes, a nose, and whisker lines on the face area.
Outline the ears and face with a thicker marker after folding so the lines stay crisp.
Avoid thin paper if you’re drawing hard with a marker — it wrinkles.
19. Paper Envelope Rose Bud
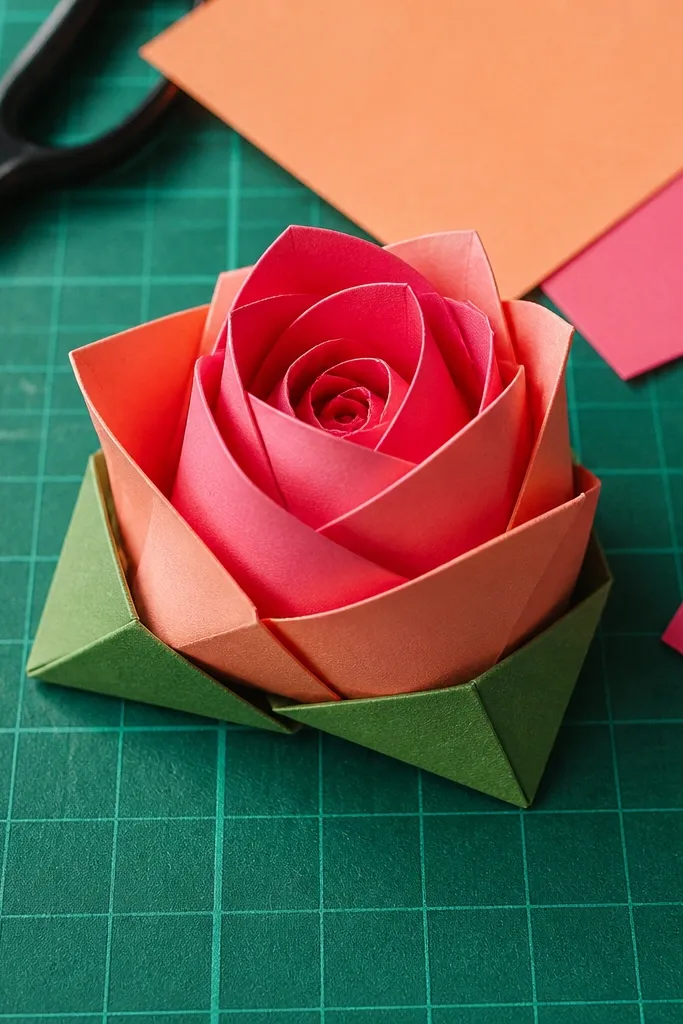
This rose bud looks more realistic than most easy origami because the layers overlap like a flower center. It’s also budget-friendly: you can use scrap paper cut into small rectangles. Choose warm tones like peach, pink, or red for the petals and green for the base. The bud shape is photogenic from above and looks good in a row.
Cut 6 rectangles about 2x3 inches each from petal paper. Fold each rectangle into an envelope shape by folding the corners to the center and pressing a crease along the top edge. Roll each folded envelope slightly and stack them into a tight bud, then wrap a green strip around the base to finish.
Editor's noteCut rectangles with a paper trimmer for even layers.
Skip thisDon’t over-roll — tight rolls make the bud look like a coil, not a rose.
20. Paper Water Lily That Opens Flat
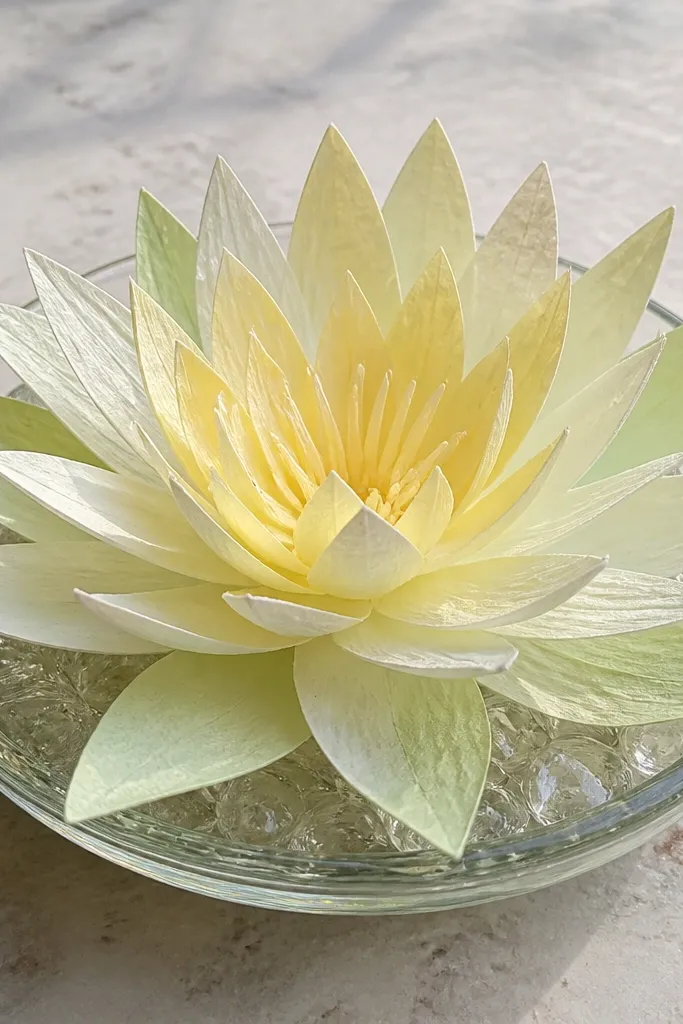
A water lily looks calm and pretty because it has layered petals that spread outward. Even with simple folds, the petal layers create a sense of depth that reads well in photos. Use pale green or cream paper for a soft look, or go bold with deep teal. This model also works well as a table centerpiece when you set it on a plate.
Start with a 8x8 in square and fold it into quarters by folding in half both ways. Fold the corners toward the center so you get a small square base, then lift one layer at a time and fold outward to form petal points. Press the center so it stays flat, then open the outer petals gently until it looks like a lily.
Editor's noteUse slightly thicker paper so the petals stay open instead of sagging.
Skip thisAvoid forcing the petals — if they resist, your base folds are uneven.
21. Paper Bookmark Butterfly in One Sheet
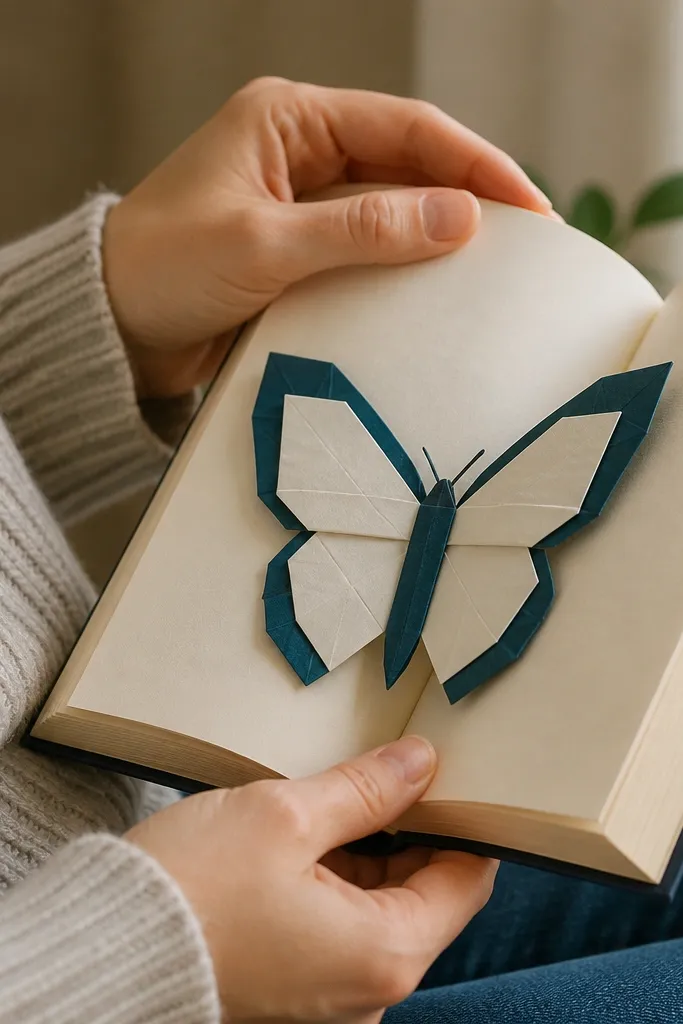
This butterfly bookmark is a great “Budget Origami Easy” choice because it’s recognizable and it finishes flat enough to slide into a book. It looks more detailed than it is because the wing panels have a folded edge that creates a clean border. Use two-tone paper to get a stronger contrast between upper and lower wing areas. It’s also easy to batch — make a few and rotate them for school.
Start with a 6x6 in square and fold it in half diagonally, then fold the triangle’s top corner down slightly. Fold the left and right edges toward the center to form the wing panels, then fold the bottom point up to create a tail. Press the bookmark base flat and adjust the wing angles so both sides mirror each other.
Editor's noteUse a ruler to hold the wing crease straight before you press — it keeps symmetry.
Skip thisDon’t trim the paper after folding — the symmetry breaks and the tail looks off.
22. Paper Dollar-Style Fan Wallet
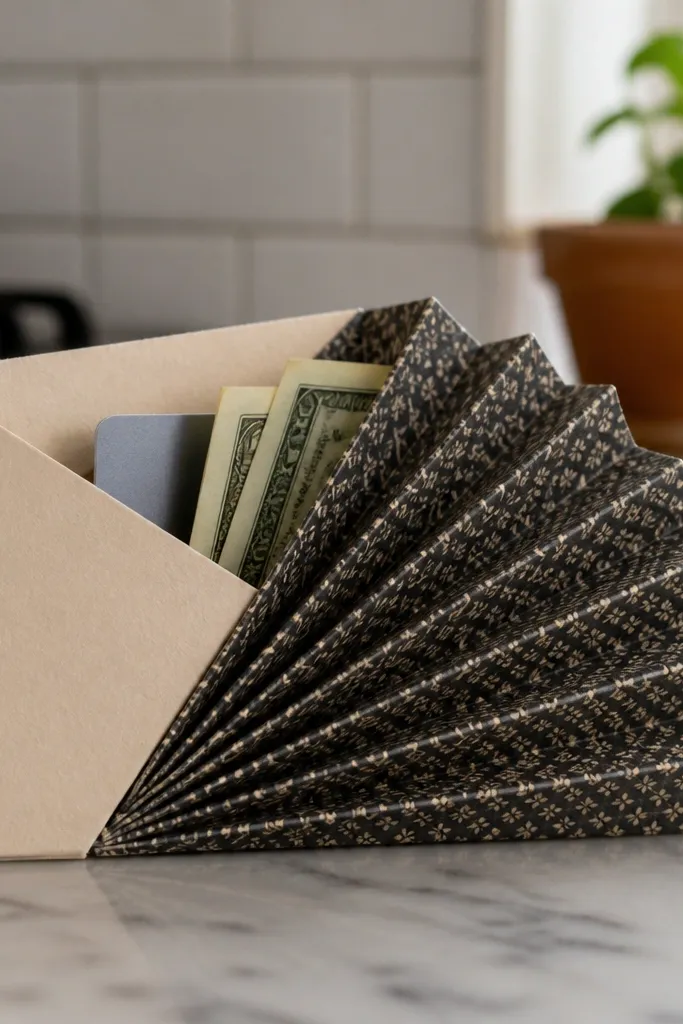
This mini wallet looks clever because the pleats fold like a fan, so the front looks structured instead of flat. It’s ideal for small cash, a bus pass, or a kid’s “secret stash” card. Use patterned paper for the outside and a plain color for the inside if you have it. It’s budget-friendly because you can make it from one sheet and reinforce only the stress points.
Use an 8x8 in square and fold it into a long rectangle by folding in half. Accordion-fold the rectangle into 1/2-inch pleats, then fold it back into a compact stack. Add a front flap by folding one outer layer over the stack, then tape only the edges that need strength so the fan still opens.
Editor's noteTape inside corners, not the middle — it keeps the pleats flexible.
Skip thisAvoid covering the whole pleat line with tape — it kills the fan motion.
23. Paper Fish with Open Mouth Pocket
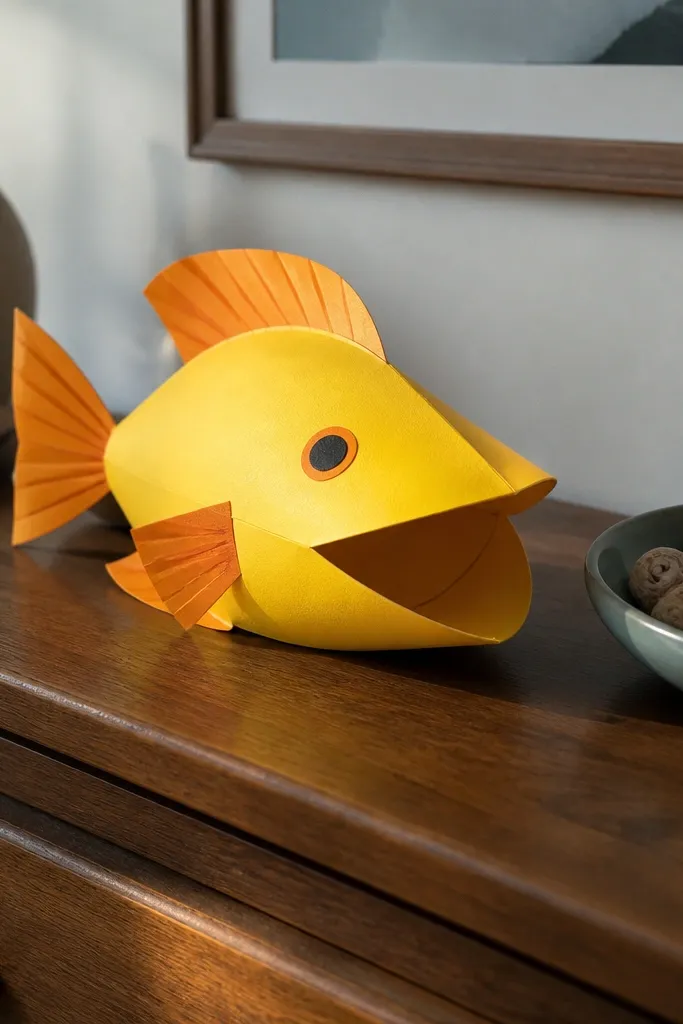
This fish looks animated because the mouth becomes a pocket you can open and close with your fingers. That movement reads as “alive” in photos and it’s fun for kids to play with after they fold it. Use bright paper like yellow with orange fins or solid blue for an easy theme. The body folds create a smooth curve so it doesn’t look like a flat triangle.
Start with a 8x8 in square and fold it diagonally both ways to set creases. Fold the square into a triangle, then fold the two bottom corners back slightly to form the tail fin. Shape the top into a small pocket by folding down one flap and tucking the edge, then press the outline so the fish stays open.
Editor's noteUse a craft glue stick sparingly on the pocket edge — too much glue makes it rigid.
Skip thisDon’t make the pocket too deep — it won’t open cleanly.
24. Paper Butterfly Bookmark with Layered Body
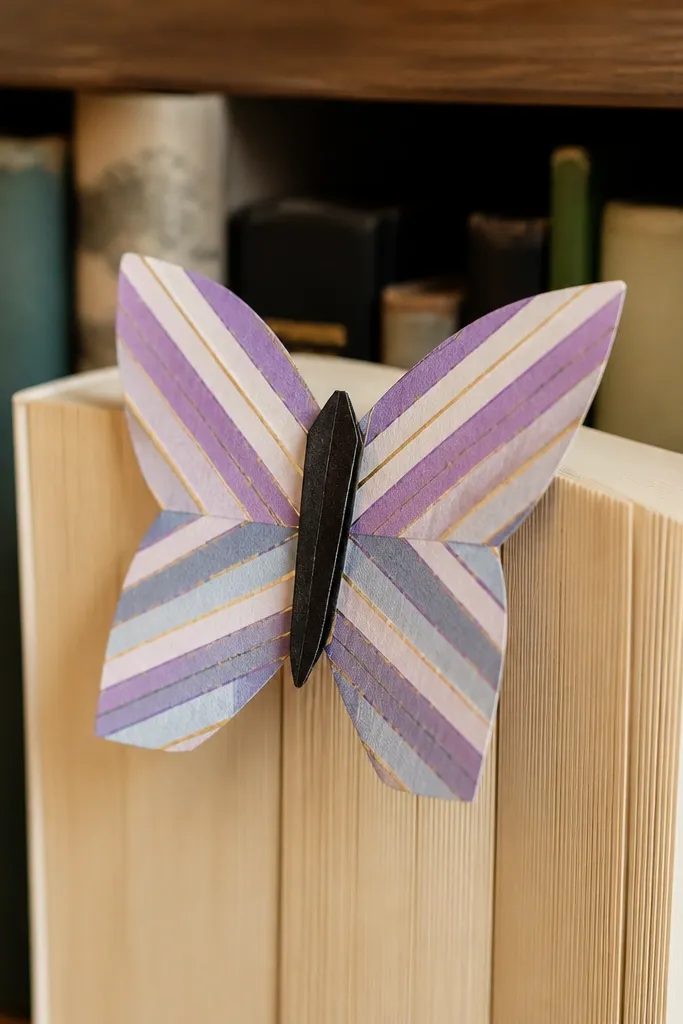
This version looks extra neat because the body has a layered fold that gives it a thicker center line. The wings stay crisp and symmetrical, so it reads as a clean silhouette even from a distance. Patterned paper works especially well because the fold lines create natural stripes across the wings. It’s a strong pick if you want “good-looking” over complicated — the model is simple but the finish is sharp.
Use a 6x6 in square and fold it diagonally to form a triangle crease. Fold the triangle corners toward the center to create wing shapes, then fold the model in half so the wings mirror. Create the layered body by folding a narrow strip and slipping it under the center crease, then flatten the bottom into a bookmark tab.
Editor's notePress the center body fold first, then shape the wings — it keeps the silhouette from drifting.
Skip thisAvoid gluing the wings to the tab area — it makes the wings look stuck.
25. Shimmering Folded Paper Lantern with a Twist Handle
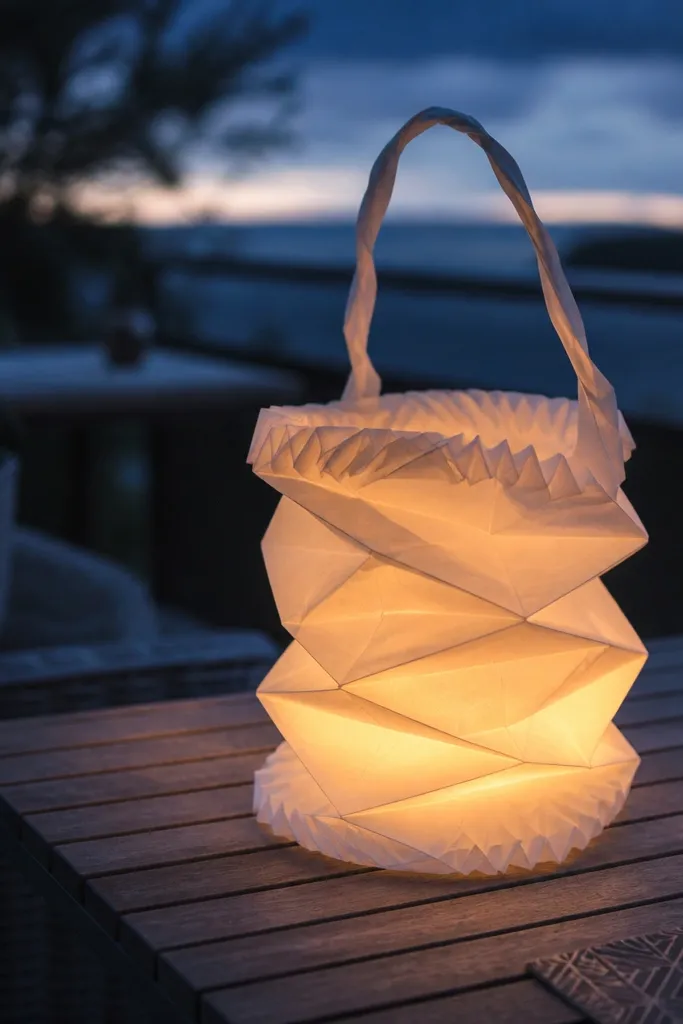
This one is for when you want budget Origami Easy that looks like store-bought decor. The lantern shape reads instantly from across the room, and the twist handle gives it that “real object” feel instead of a flat paper craft. Use translucent paper so the light spreads through the folds and makes crisp highlights along the creases. It takes about 25-35 minutes for a first run, and it stays forgiving because you only need straight folds and careful glue placement. It fits bedrooms, parties, and small window displays where you want something photogenic without buying a bunch of supplies.
Cut two strips from translucent craft paper: 25 mm wide by 280 mm long for the body and 10 mm wide by 180 mm long for the handle. Make accordion folds along the 25 mm strip — fold 8 mm forward, 8 mm back, repeat until you have about 8-9 ridges across the length. Fan the accordion into a cylinder and glue the first ridge to the last ridge to lock the shape, then glue a small 15 mm circle of paper on each end to hide the seam. Fold the 10 mm strip into a tight spiral by rolling it around a pencil, then glue the end so it holds. Attach the spiral handle to the inside top edge of the lantern with two small dots of glue, and let it dry fully before lighting.
Use a glue stick for the seams inside the lantern — it soaks in less than liquid glue and keeps the paper from warping. For light, use a battery LED tea light so the paper stays cool and safe.
Don’t skip end caps — without them the lantern looks like a collapsed accordion instead of a finished lantern.