
1. The 8-Foot Wall Bin Row With Hidden Shelf Feet
I built this for the "small stuff avalanche" - the kind of garage clutter that hides in the corners. Clear bins let you see what's inside, and the white wire shelf keeps it airy instead of heavy. The wood blocks under the shelf feet stop the bottom from rusting and make the whole setup look intentional.
Use a single continuous shelf run (about 8 ft) with 10 to 12 in deep bins. Pick bins with flat front faces so your labels sit straight. Cut 2x2 or scrap wood blocks about 1.5 in tall, then screw the shelf legs into the blocks so everything stays level.
Pro tipLabel with a label maker and print on white vinyl so it wipes clean when the garage gets dusty.
AvoidDon't mix bin heights randomly - it makes the wall look uneven even if the storage is organized.
2. Pegboard Tool Wall With Color-Coded Hook Spots
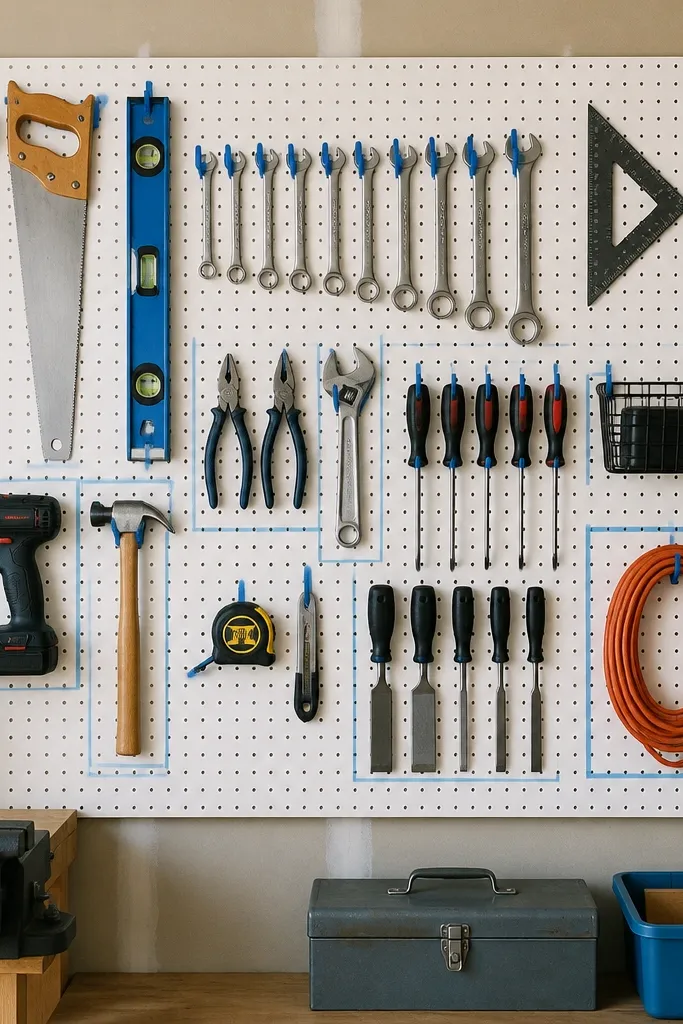
Pegboard is the quickest way to make tools look neat because the "empty space" becomes part of the design. I use color-coded tape on the board before drilling so each family of tools has a consistent spot. The white board makes everything pop, and the layout stays readable from across the garage.
Start with a 4x8 ft sheet of pegboard, painted white if it's raw. Plan hook spacing so the biggest tool handle clears the one next to it by about 1 in. Mark squares using painter's tape, drill only after you like the layout, then paint over tape residue if needed.
Pro tipUse two hook types: one for flat tools and one for handles, so your hanging looks consistent.
AvoidDon't drill holes first - move the tools around on tape until the layout feels right.
3. Labeled Canvas Tote Stations for Kids' Sports
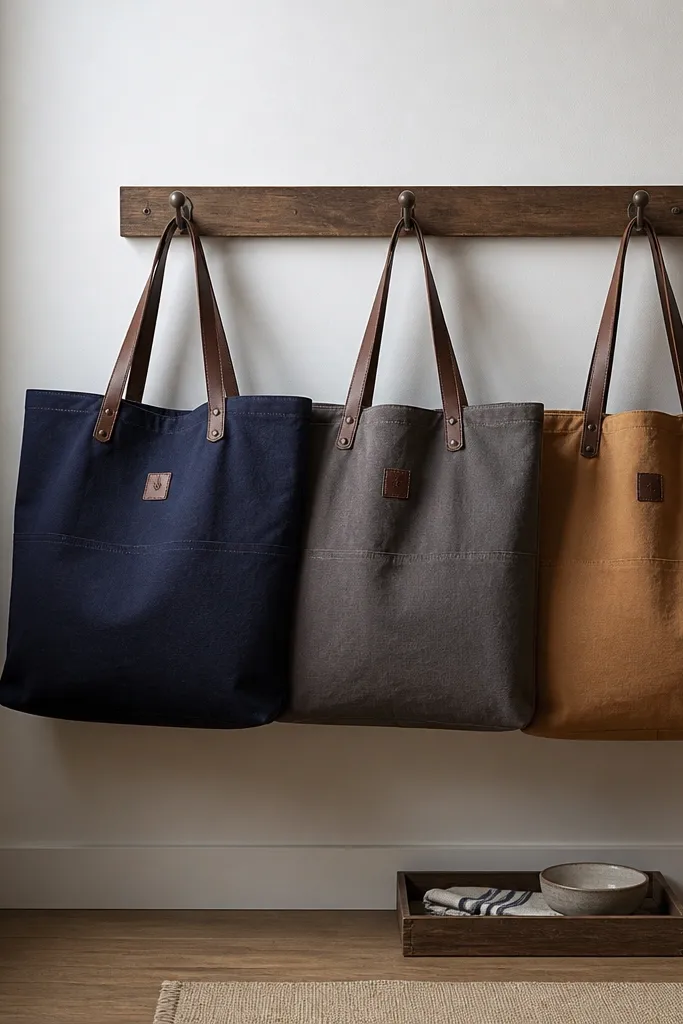
For kids, bins that are too deep become mystery pits. Canvas totes with short sides look tidy and grab easily, and the fabric hides the mess while still feeling organized. I pair them with a small floor tray so the bottom doesn't turn into loose socks and mouthguards.
Mount a simple metal rail (or a row of 2x2 wood cleats) at kid height, around 34 to 40 in from the floor. Use totes that are about 12-14 in tall so they don't drag on the ground. Put a 12x18 in plastic or galvanized tray under the rail to catch small items.
Pro tipAdd a "return rule" label inside each tote - one sentence on a tag makes the routine stick.
AvoidDon't use flimsy totes - thin fabric collapses and looks messy fast.
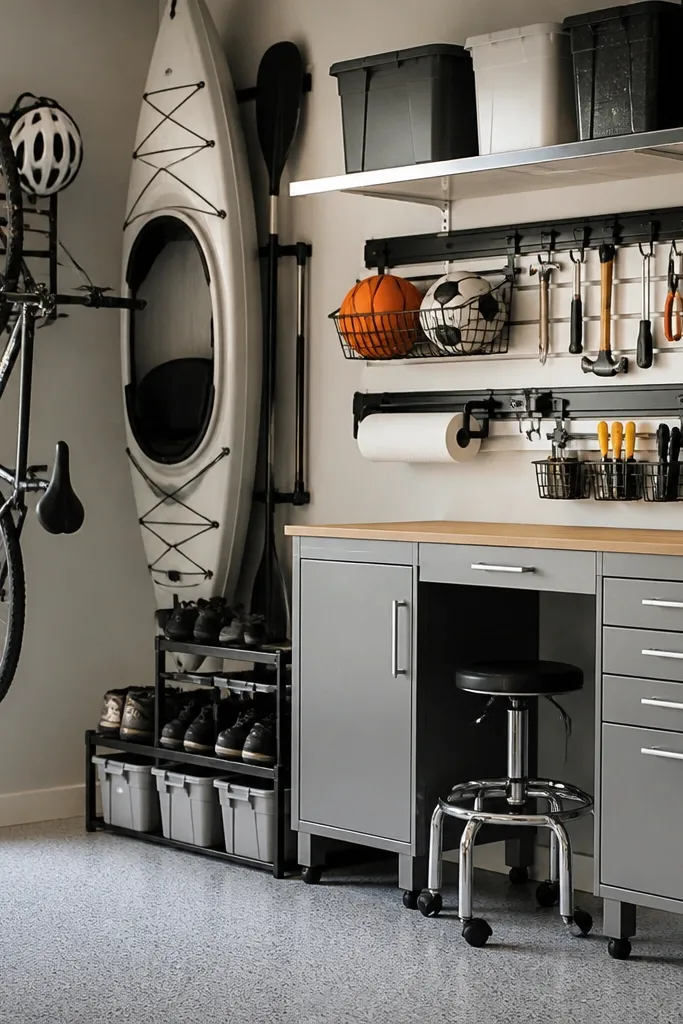
4. Wall-Mounted Bike Shelf With Foam Edge Stops

This is how you keep bikes off the floor without wrestling them into a corner every day. The shelf gives the bike a clear landing spot, and foam edge stops prevent scuffs on frames and tires. It also looks clean because the bike is aligned and sits at a consistent height.
Build a platform from 2x4s with a smooth sanded top, then stain or paint satin black. Mount it into studs with heavy-duty screws, and add foam weather stripping on the front edges where the tire touches. Set the shelf height so the wheel clears the floor by 8-12 in.
Pro tipHang a small hook for helmets directly next to the shelf so the bike zone stays complete.
AvoidDon't mount into drywall anchors - bikes are heavy and the shelf will loosen.
5. PVC Pipe Organizer for Spray Bottles and Small Tools
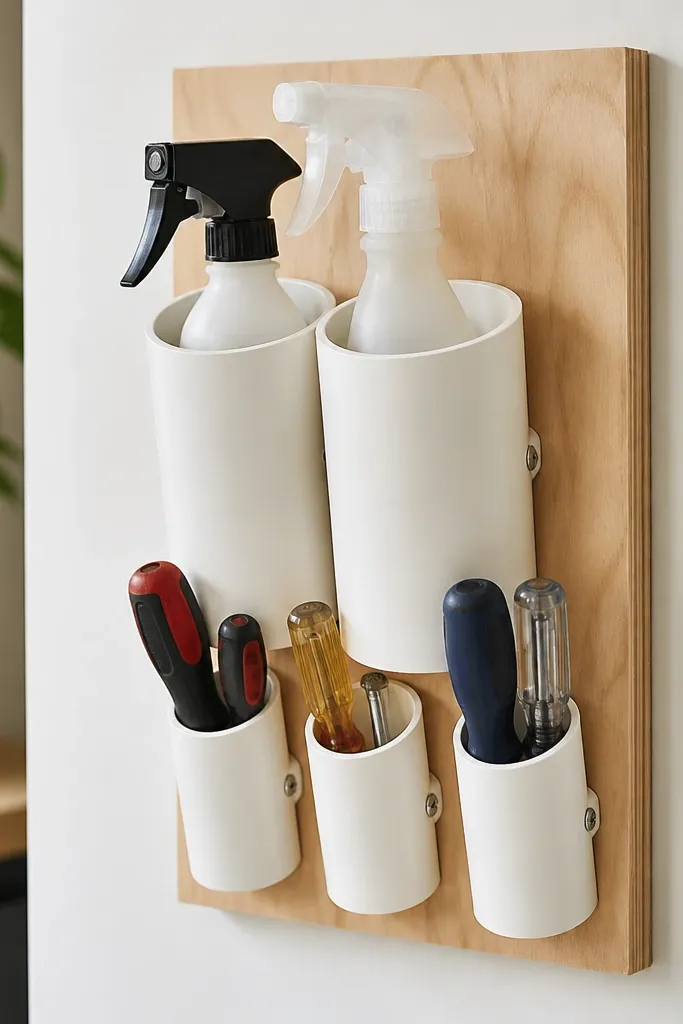
PVC is cheap, and it looks clean when you paint it the same color as the wall. This setup keeps spray bottles, brushes, and small hand tools from rolling around. The round openings make each item easy to grab, and the plywood backing makes it look like a real system, not random parts.
Cut PVC into 4 to 8 in sections, glue them to a plywood panel, and sand the cut edges. Use 1.5 in pipe for screwdrivers and 2 in pipe for spray bottles, then paint the whole panel with a durable satin. Mount the panel at about 48 in high for adult reach.
Pro tipAdd a rubber shelf liner strip at the bottom so bottles don't rattle.
AvoidDon't leave PVC raw - it looks unfinished and scuffs easily.
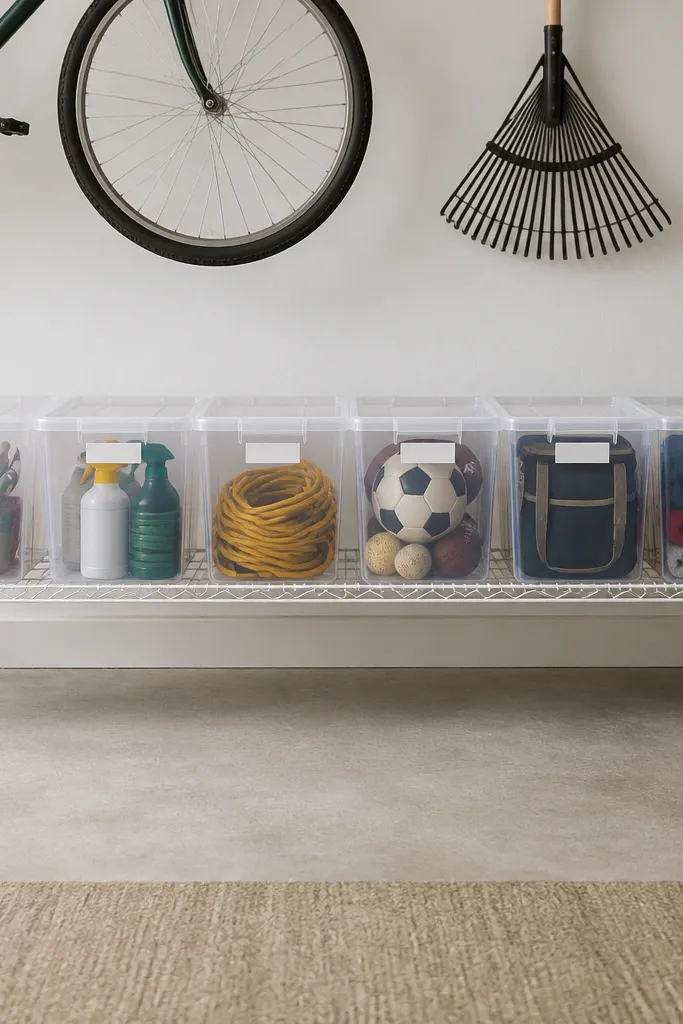
6. Flip-Top Under-Shelf Bins for Car Wash Supplies
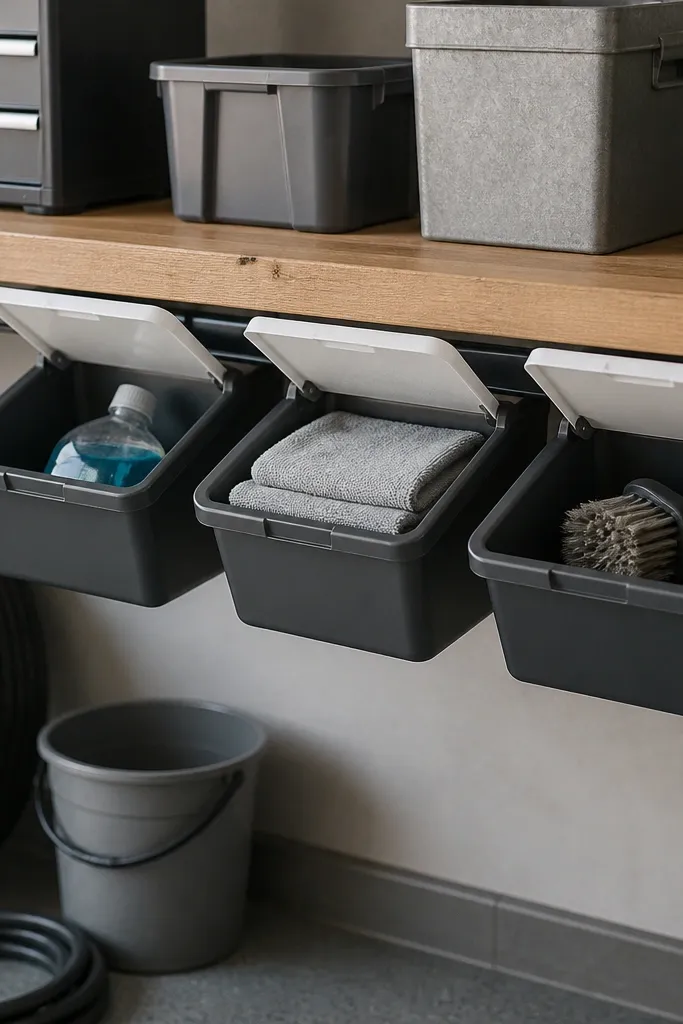
This is the "dead space" trick. Under-shelf storage keeps bottles and towels out of sight, and flip lids stop dust from settling on supplies. The look stays clean because the front of your shelves stays clear.
Use shallow plastic bins that slide into a simple wood frame under the shelf. Add a hinged lid or a flip-top cover using scrap plastic and small hinges. Keep bins about 6-8 in deep so they don't bump into your knees when you move around.
Pro tipGroup by use: one bin for soap and mitt, one for towels, one for brushes.
AvoidDon't store wet towels uncovered - they smell and stain the bins.
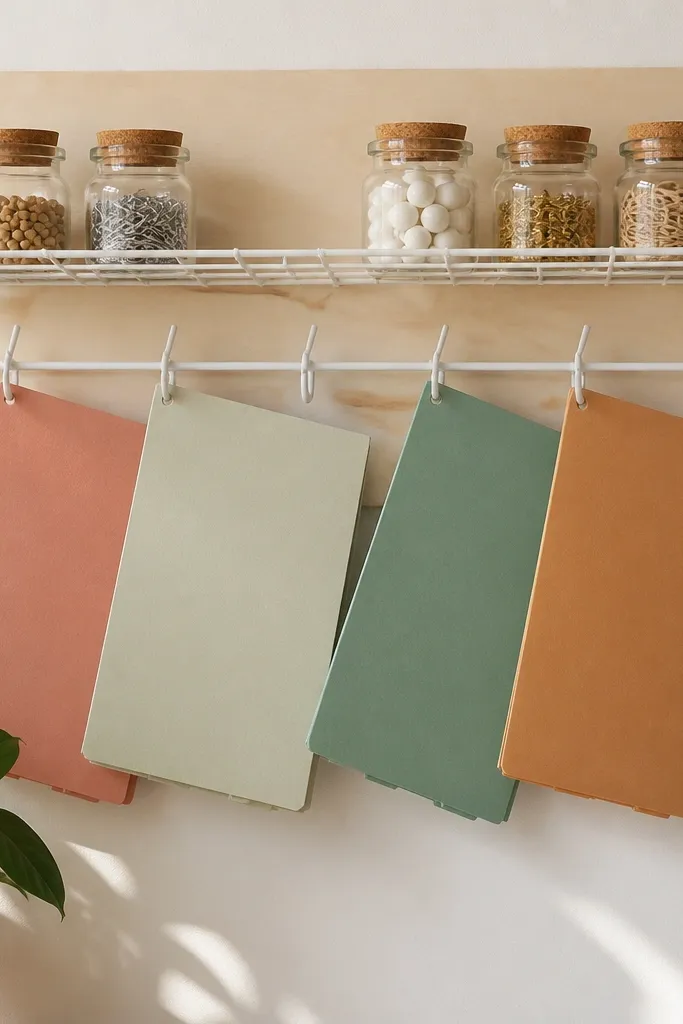
7. Color-Blocked Storage Labels for Seasonal Bins
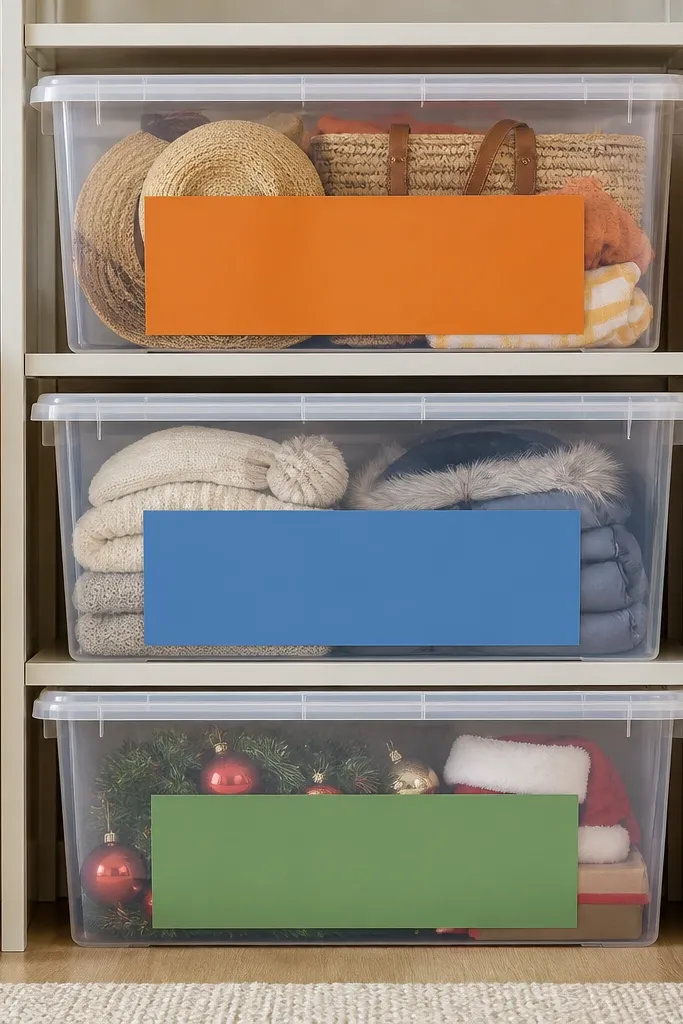
Labels are where budget organization turns into "this looks planned." I use a thick color band so you can identify bins from across the garage without reading tiny text. It also helps kids spot the right bin when you're hunting for a costume or a helmet.
Pick three to four colors and stick to them. Print label text on white vinyl, then apply the colored band behind it on the bin front. Keep the label area consistent - about 2.5 in wide and 1.5 in tall.
Pro tipWrite the date range on the label (example: "Spring yard - Apr to Jun") so you don't guess later.
AvoidDon't use one-off labels in random fonts - it looks chaotic even when the contents are correct.
8. Corner Ladder Rack With Scrap Wood Crossbars
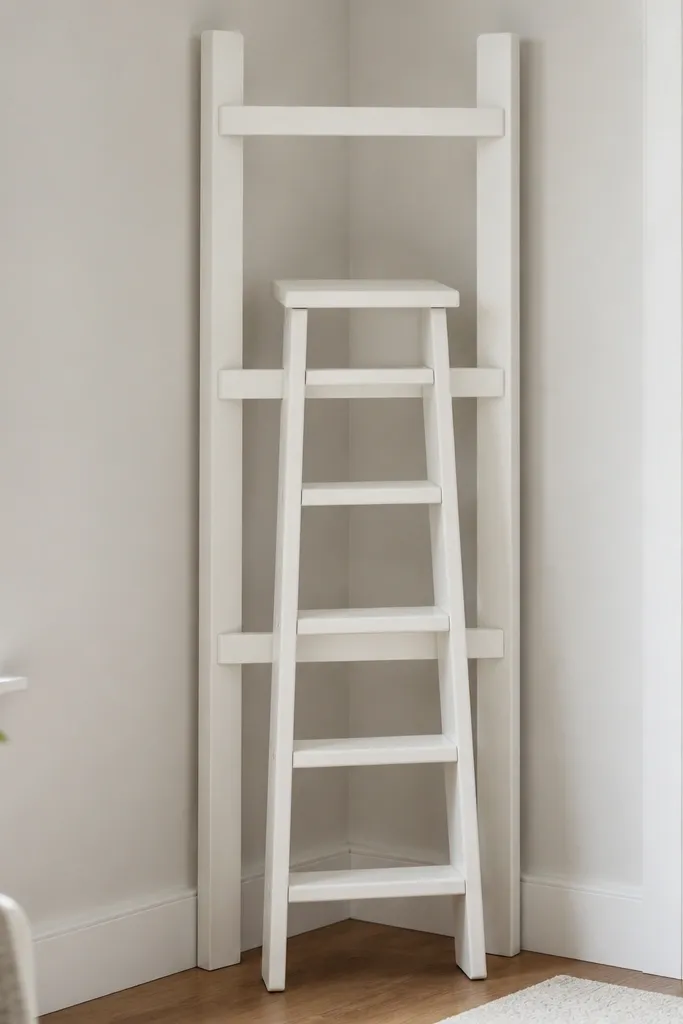
Corners are where garages go to die - and you can actually make them look neat. A ladder rack holds bulky items like ladders and long boards upright, so they don't sprawl across the floor. The crossbars keep weight distributed and stop wobbling.
Use 1x4 or 2x4 boards, screw into studs, and add three crossbars spaced 20-24 in apart. Paint matte white or a dark neutral so it blends with other wall storage. If you're storing a 6 ft step ladder, make sure the top support clears the ladder by at least 2 in.
Pro tipWrap the contact points with foam pipe insulation so metal doesn't chew the wood.
AvoidDon't rely on a single top hook - ladders shift and scratch.
9. Reclaimed Pallet Cubby for Paint Cans and Drop Cloth
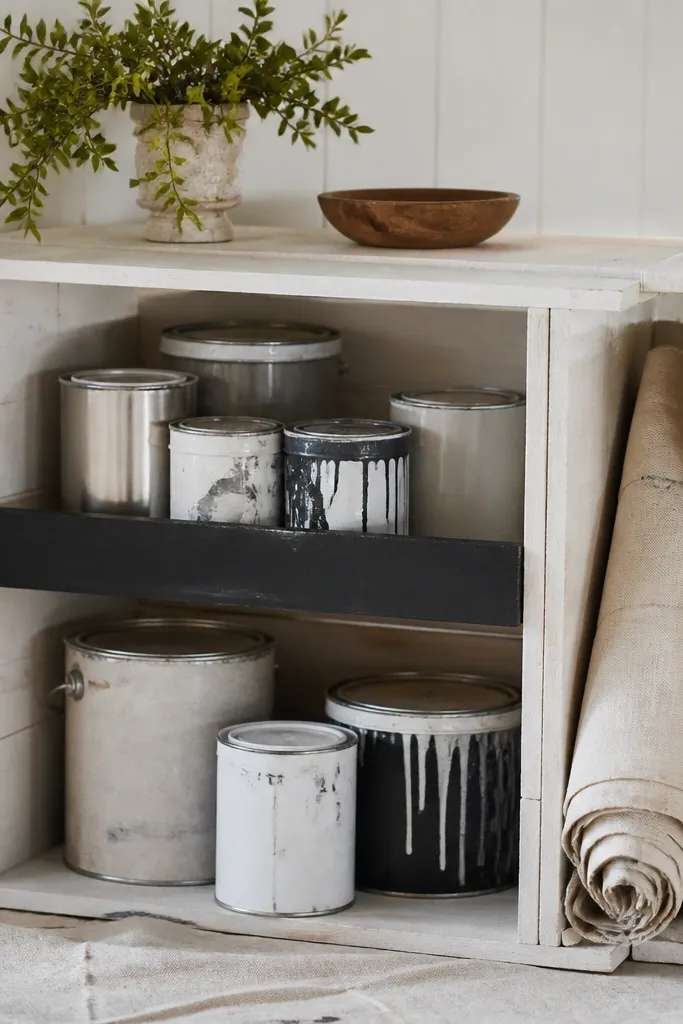
A pallet cubby looks charming, but it also solves a real problem: paint cans need a stable spot and a place for rags. I keep it off-white so it doesn't scream "construction pile," and I add a black shelf strip so drips don't ruin the wood. It's one of those units that makes your garage look more like a workspace.
Sand the pallet, then paint with primer plus a satin topcoat. Cut a small divider from scrap plywood to create two sections: one for cans and one for a rolled drop cloth. Mount it at about 40-48 in high so you don't have to crouch every time.
Pro tipPut a plastic paint tray liner under the cans if you get frequent drips.
AvoidDon't skip sanding - splinters look bad and can ruin your hands.
10. Clear Shoe-Box Bins for Hardware Drawer Zone
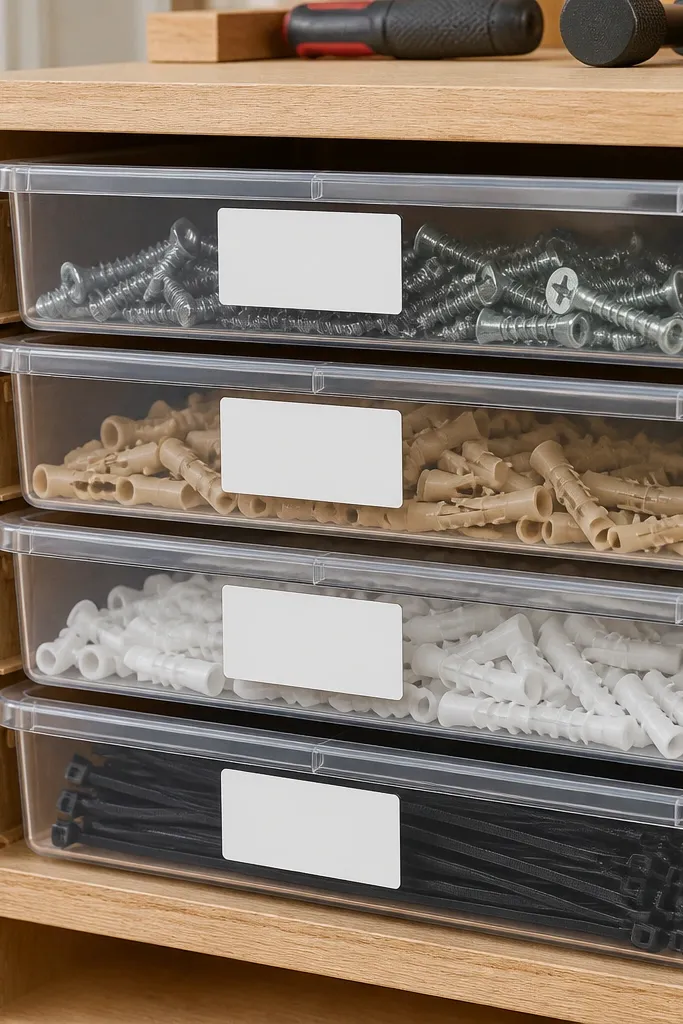
Hardware is the messiest part of a garage because it's small and easy to scatter. Clear shoe-box bins let you see the exact size at a glance, and they stack neatly so the unit stays tidy. I like this because it turns "one pile" into a grid.
Use clear bins that are about 10-12 in long and fit side-by-side in your drawer frame. Label by category and size (example: "3-in deck screws" instead of "screws"). Build a simple drawer frame from 1x6 boards or plywood, and add a stop strip so bins don't slide out.
Pro tipStore fasteners by length, not by project, so you can grab what you need quickly.
AvoidDon't mix tiny items in one bin - you'll end up shaking it all out again.
11. Steel Wire Shelf With Backer Board for Kids' Art Supplies
Wire shelves look clean, but the wall behind them can look messy. A plywood backer makes the whole thing look like one finished piece and keeps the background from showing random storage. For kids' art supplies, I use clear jars so you can see marker colors and glue sticks.
Mount the wire shelf and add a plywood back panel cut to the shelf width. Paint the backer white so it matches and doesn't create a dark shadow. Use small clear jars (about 4-6 oz) for markers and bigger jars for scissors.
Pro tipPut paper folders on hooks at the bottom shelf so they don't get crushed.
AvoidDon't leave the back open - the clutter behind it ruins the look.
12. Magnetic Strip for Hand Tools on a Painted Board
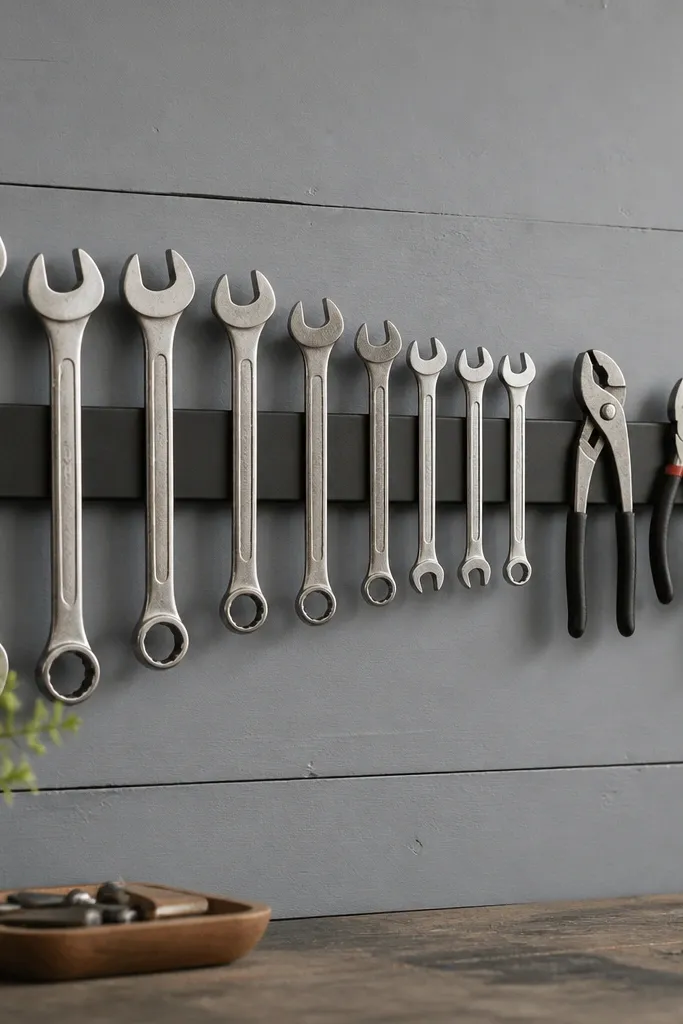
Magnetic tool boards look sharp because the tools hang flat and line up. It's also faster than pegboard for small hand tools - you feel for the tool and grab. The painted board keeps the whole strip from looking like a piece of store hardware.
Use a strong magnetic strip (about 24-36 in) mounted to a 1/2 in plywood board. Paint the board with primer and matte gray or black. Keep tools spaced so handles don't overlap, and mount the board at about 48 in high.
Pro tipAdd small rubber feet on the back so the board sits straight against the wall.
AvoidDon't overload the magnet - heavy tools will start to slide.
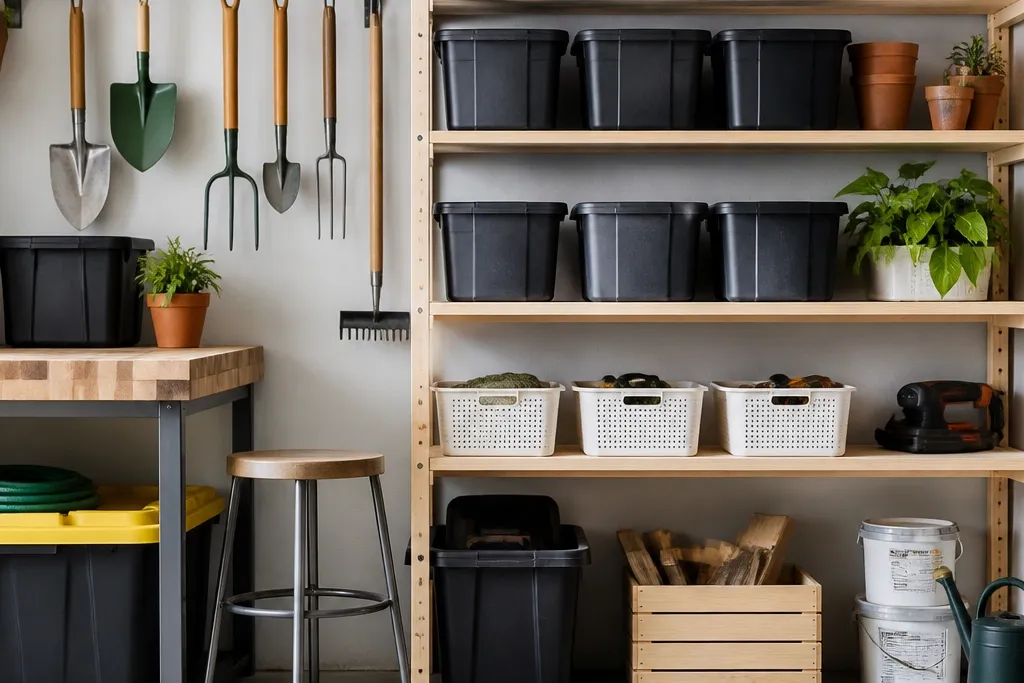
13. Stackable Lid Bins for Seasonal Yard Work

Lidded bins are the difference between "organized" and "organized for two weeks." Stackable bins keep yard work items like gloves, seed packets, and bug spray together. The wire rack behind them lets air flow and keeps the garage from trapping moisture right against the plastic.
Choose bins that stack without wobble and that fit your wire rack shelves. Use two heights: one for small packets and one for larger items like weed tools. Leave 1-2 in space between stacks so you can pull bins without scraping labels.
Pro tipLabel the lid too with a small icon (leaf, seed, spray bottle) so you can identify bins when the front is blocked.
AvoidDon't store everything on the floor - bending bins and dust make it look neglected.
14. Under-Bench Rolling Drawer for Cleaning Supplies
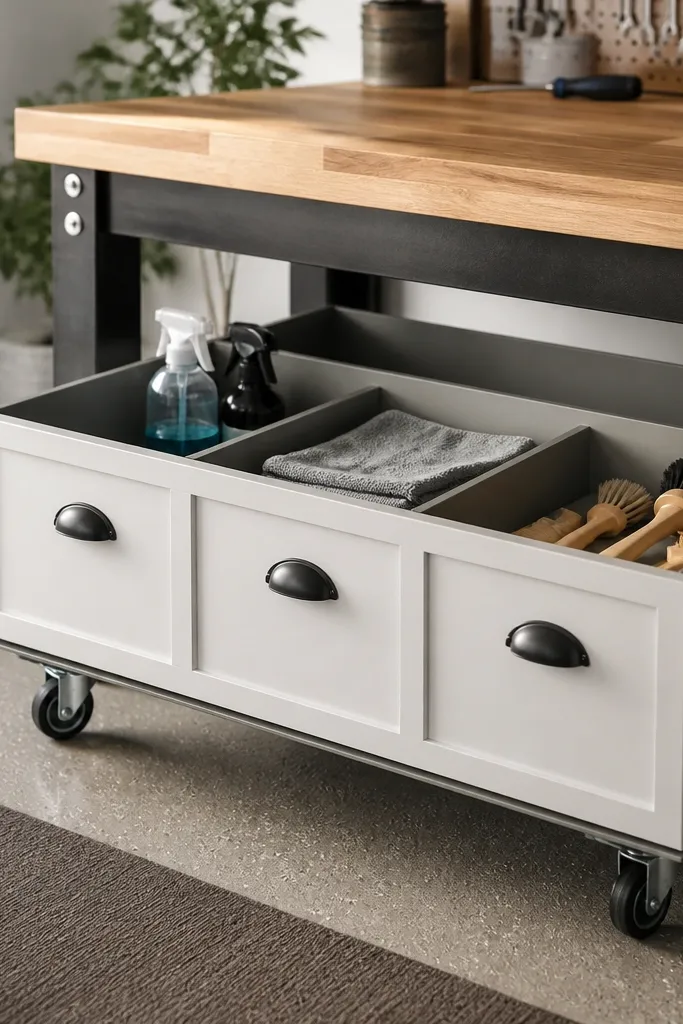
Rolling drawers make cleaning supplies feel like they belong in a workspace instead of in a corner. The drawer keeps bottles upright and prevents the "spill and wipe" routine from spreading to the whole bench. It also looks tidy because the drawer front is clean and labeled.
Build a simple drawer box from plywood with three compartments using thin dividers. Add drawer slides rated for the weight of bottles, and use small plastic bins inside the compartments for extra spill control. Keep the drawer width about 18-22 in so it doesn't stick out too far from the bench.
Pro tipPut a cheap plastic cutting board under the bins inside the drawer - it catches drips and wipes clean.
AvoidDon't skip a liner - dried cleaner residue makes the drawer look dirty fast.
15. Trash Bag and Recycling Station With Matching Can Covers
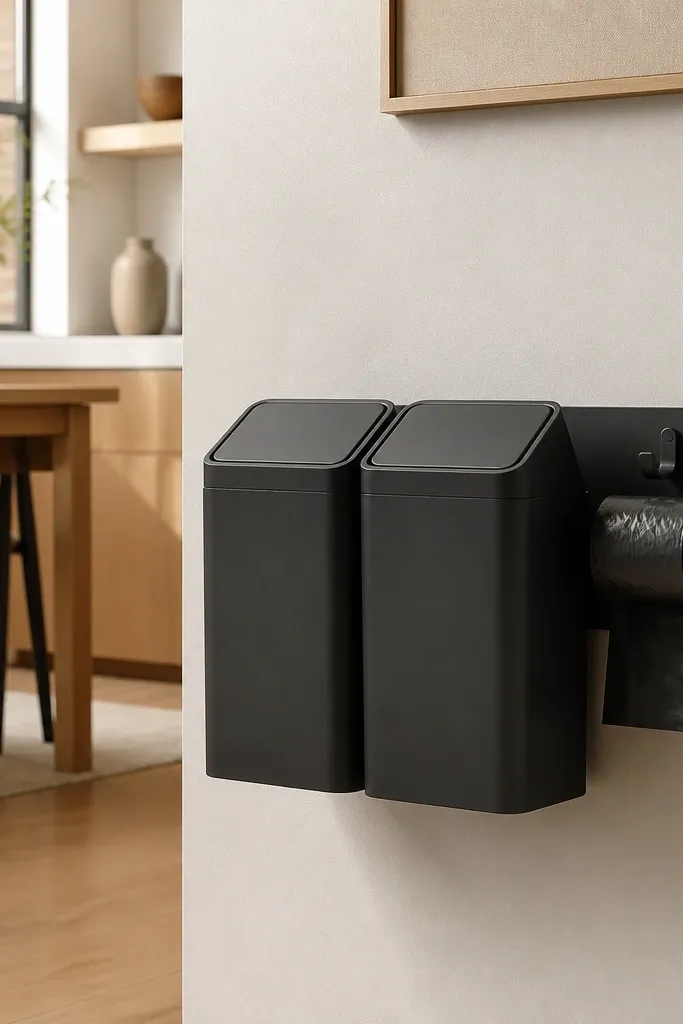
This one sounds boring, but it fixes the daily mess. When trash and recycling have a dedicated spot, garage clutter doesn't drift into random corners. Matching matte black bins look clean and hide smudges better than glossy plastic.
Mount the station on the wall near the workbench so you toss and move immediately. Use two bins and label them with simple white tape strips. Hang a roll holder hook next to the bins at about 52 in high.
Pro tipUse a small magnet or hook to keep a spare contractor bag tucked on the inside of one bin lid.
AvoidDon't place bins where you have to reach over tools - people will skip the station.
16. Bike Helmet Hooks and Name Tags at Kid Height
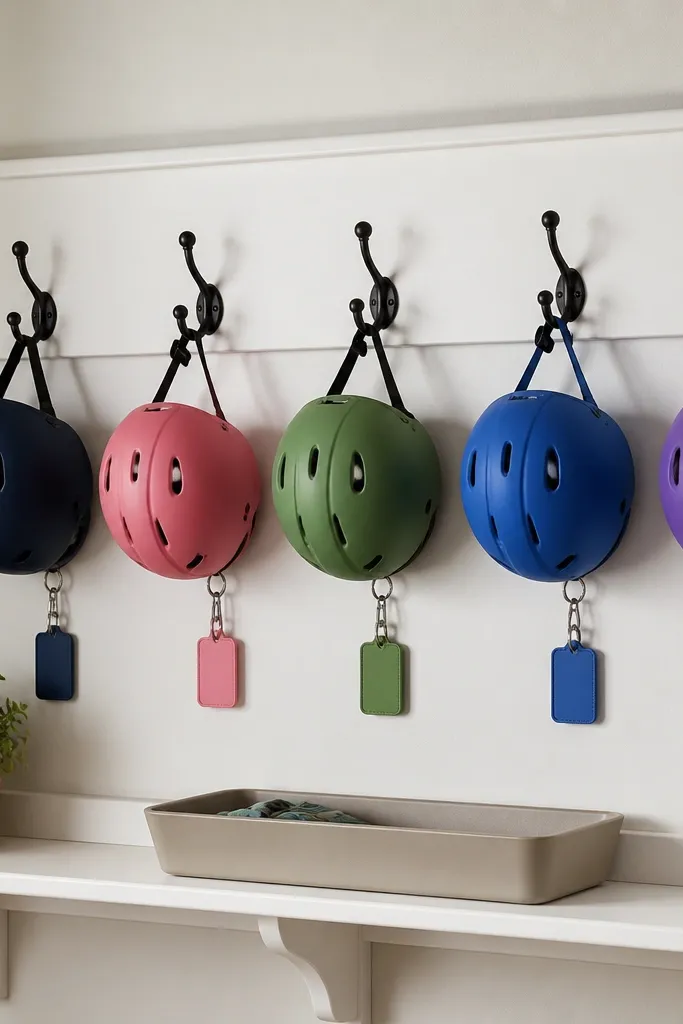
You don't need a fancy rack for helmets. A row of hooks at kid height keeps helmets off the floor and gives kids a simple return target. Name tags make it feel personal, and the matching board gives it a clean, designed look.
Mount a 1x6 board into studs and paint it white. Install 4-6 helmet hooks evenly spaced, then add a shallow tray under the board for gloves or goggles. Put the hooks so the helmet chin strap hangs just above the tray.
Pro tipUse two label colors: one for "helmet" and one for "goggles," so kids don't mix gear.
AvoidDon't mount hooks too high - kids will toss helmets on the floor if they have to reach.
17. Cable Management Clips for Garage TV and Tools
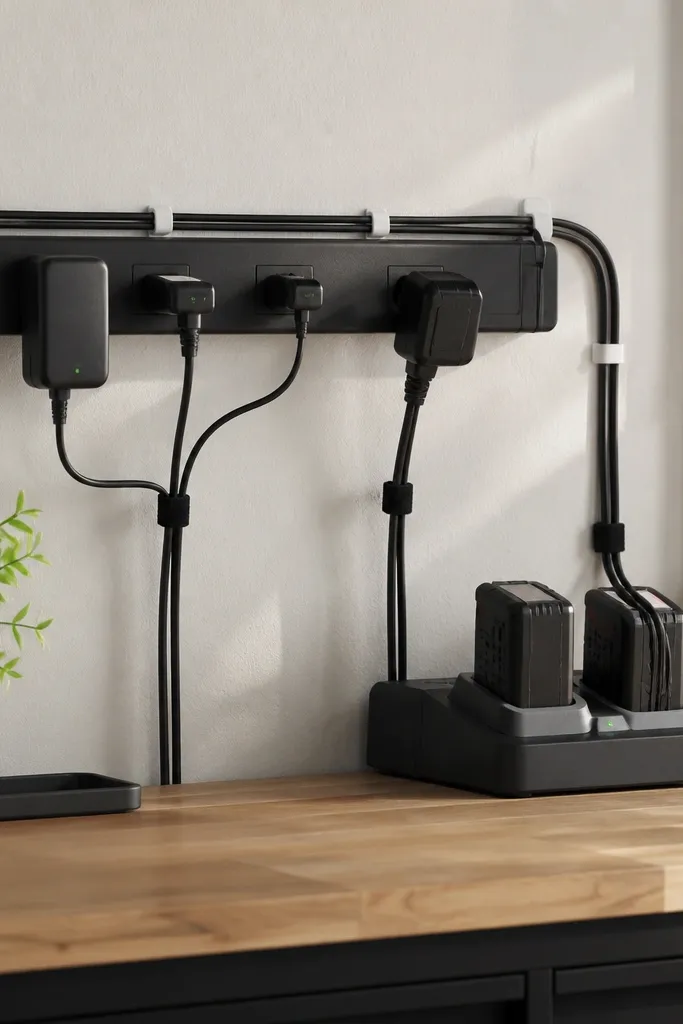
Cords are the sneaky garage mess. When they hang loose, they catch on bikes and tool carts, and they look messy even when everything else is clean. I route cords along the wall using clips and bundle them so the lines look straight.
Mount a power strip inside a plastic cord cover box on the wall. Use adhesive cable clips every 12-16 in so cords don't sag. Bundle with Velcro ties and leave a small service loop of about 6 in near each device.
Pro tipMark each cord with a small label tag where it plugs in so you don't guess later.
AvoidDon't coil cords tightly around the device - battery chargers overheat when wrapped.
18. Wall Shelf for Step Stool With Non-Slip Rubber Pads
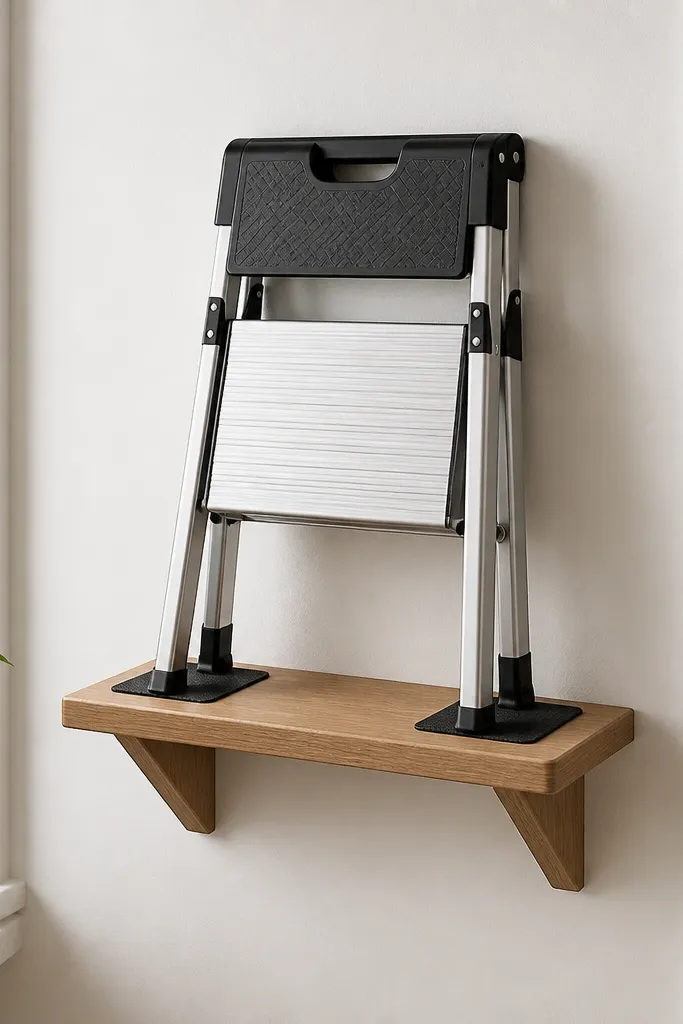
Stools tip over when you lean them against the wall. A wall shelf with rubber pads keeps it stable and makes it look like part of the storage system. It also clears floor space, which makes the whole garage feel bigger.
Build a shelf from 1x4 boards and mount into studs. Add black rubber shelf liner or cut rubber pads where the stool legs touch. Place the shelf so the stool doesn't hit the wall outlet or door swing.
Pro tipPut a small hook on the side for the stool strap or handle so it never ends up on the floor.
AvoidDon't store it on a slick wood shelf - it will slide and scratch.