1. Single-Color Dip
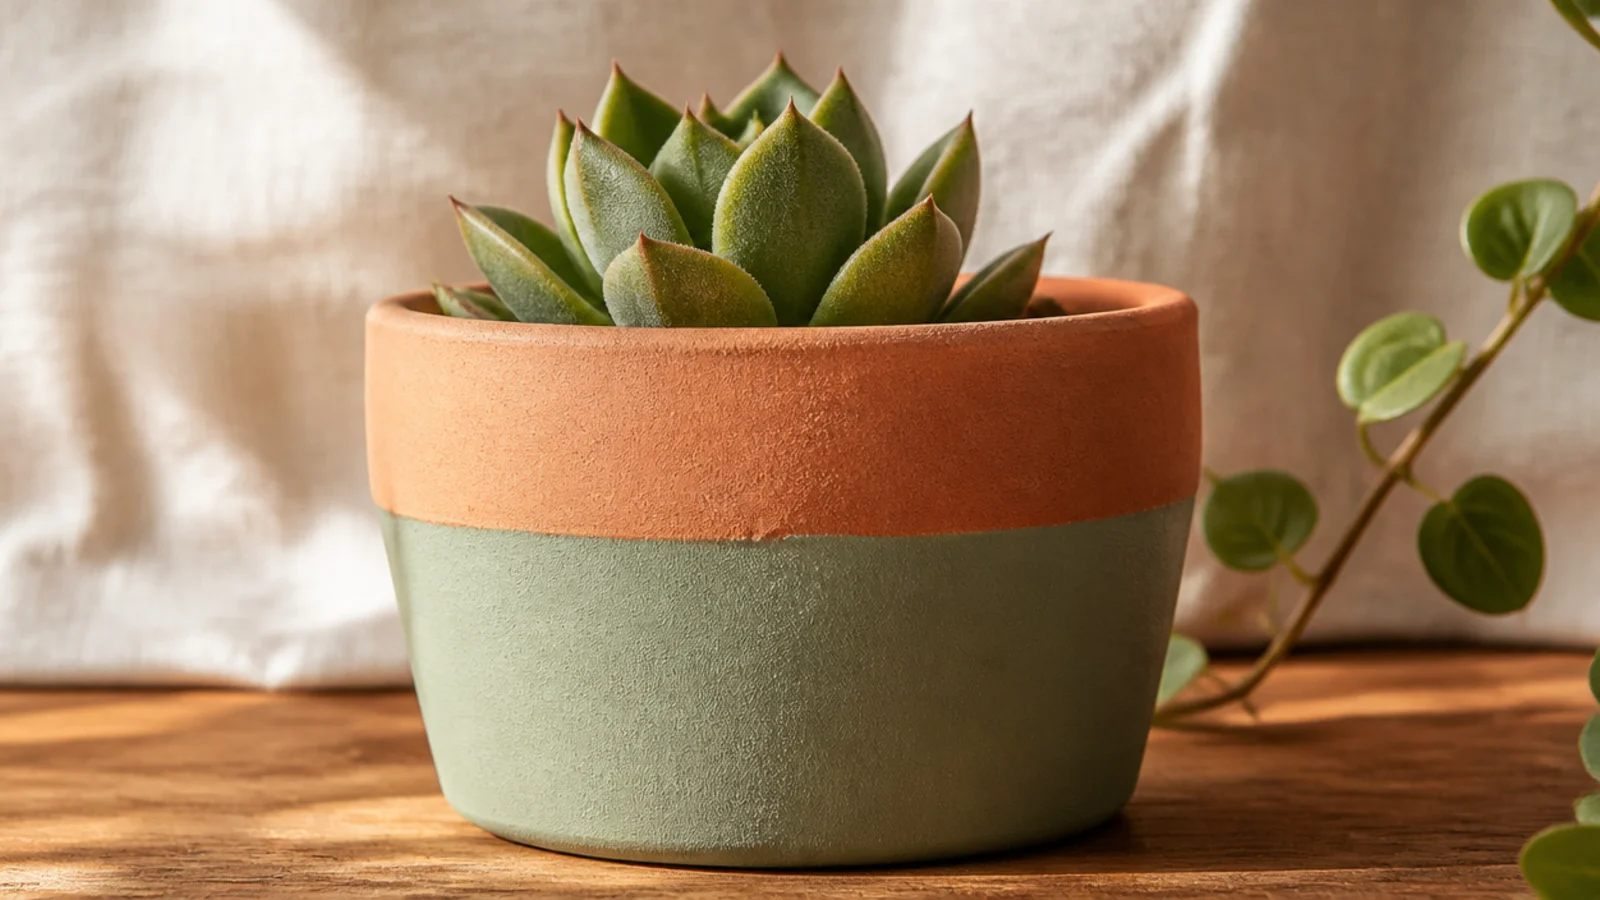
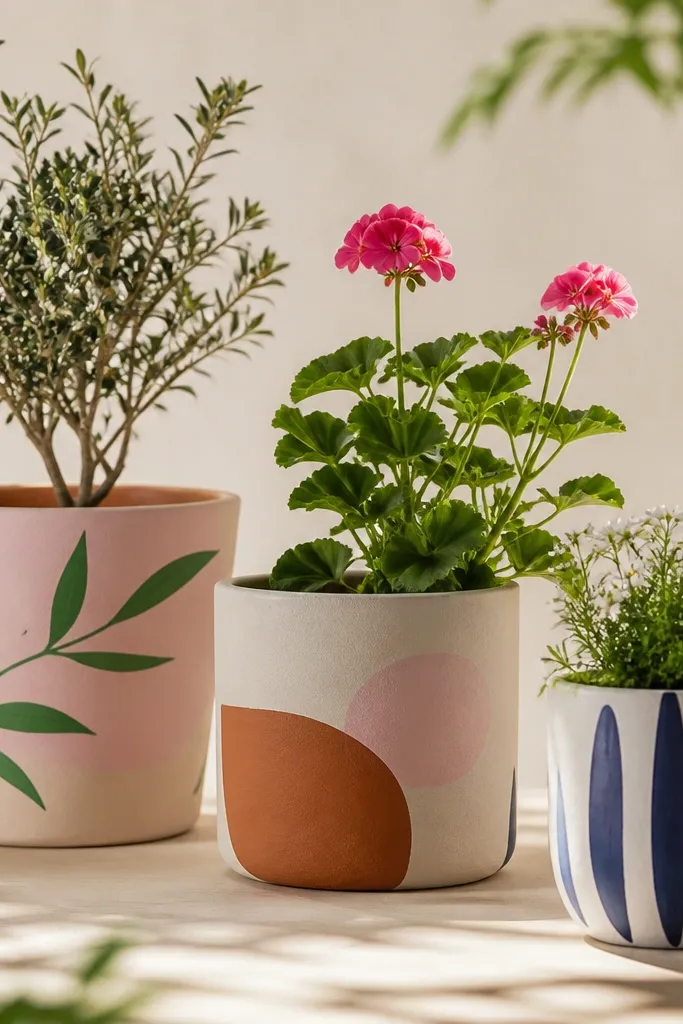
Prime the pot and let it dry. Wrap a strip of thin painter’s tape level around the middle, using the pot’s own height as your guide. Paint below the tape with two thin coats of acrylic using a small flat brush, letting the first dry before the second. Peel the tape while the second coat is still slightly wet for a crisp edge, then seal once fully dry.
This is the easiest mini design that still looks boutique. You paint only the bottom half of the pot one solid color and leave the raw terracotta on top. On a small pot the two-tone split reads modern with zero pattern to get wrong. Pick one soft, grounded color — sage, dusty blue, or cream — so it works with any succulent.
Skip thisDon’t eyeball the tape line freehand — on a small pot a crooked line is the first thing the eye catches.
Editor's noteRest the pot upside down on a jar lid so you can spin it and keep the tape line perfectly level as you wrap.
2. One Bold Stripe
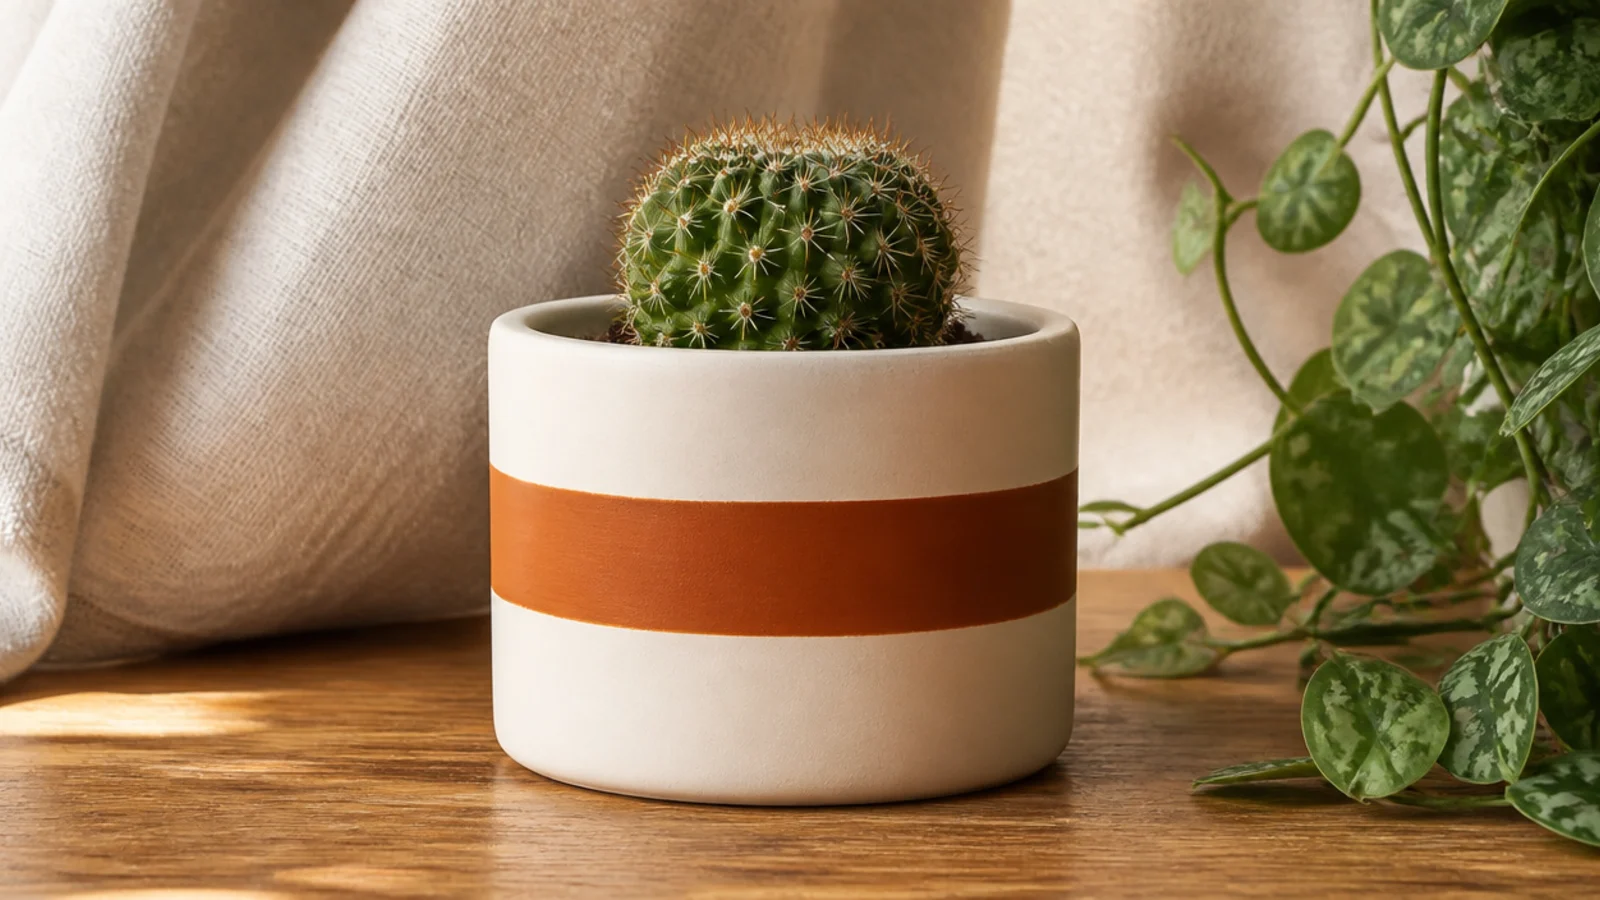
One clean stripe around the middle is all a tiny pot needs to look designed. A single band reads calmer than several stripes crammed onto a small surface. Keep the stripe centered and a touch bold so it stands out against a light base — it’s a five-minute upgrade that tape makes foolproof.
Base-coat the pot in a light color and let it dry. Lay two strips of thin painter’s tape parallel around the middle to mask the stripe’s top and bottom edges. Paint the exposed band between them with two thin coats using a size 2 round brush. Peel both tape strips while slightly wet, touch up any bleed with the brush tip, then seal.
Use narrow washi or thin painter’s tape to set the stripe width — regular wide tape leaves a band too heavy for a small pot.
Don’t add a second or third stripe on a 2-inch pot; one stripe looks intentional, more looks busy and cheap.
3. Tiny Dot Cluster
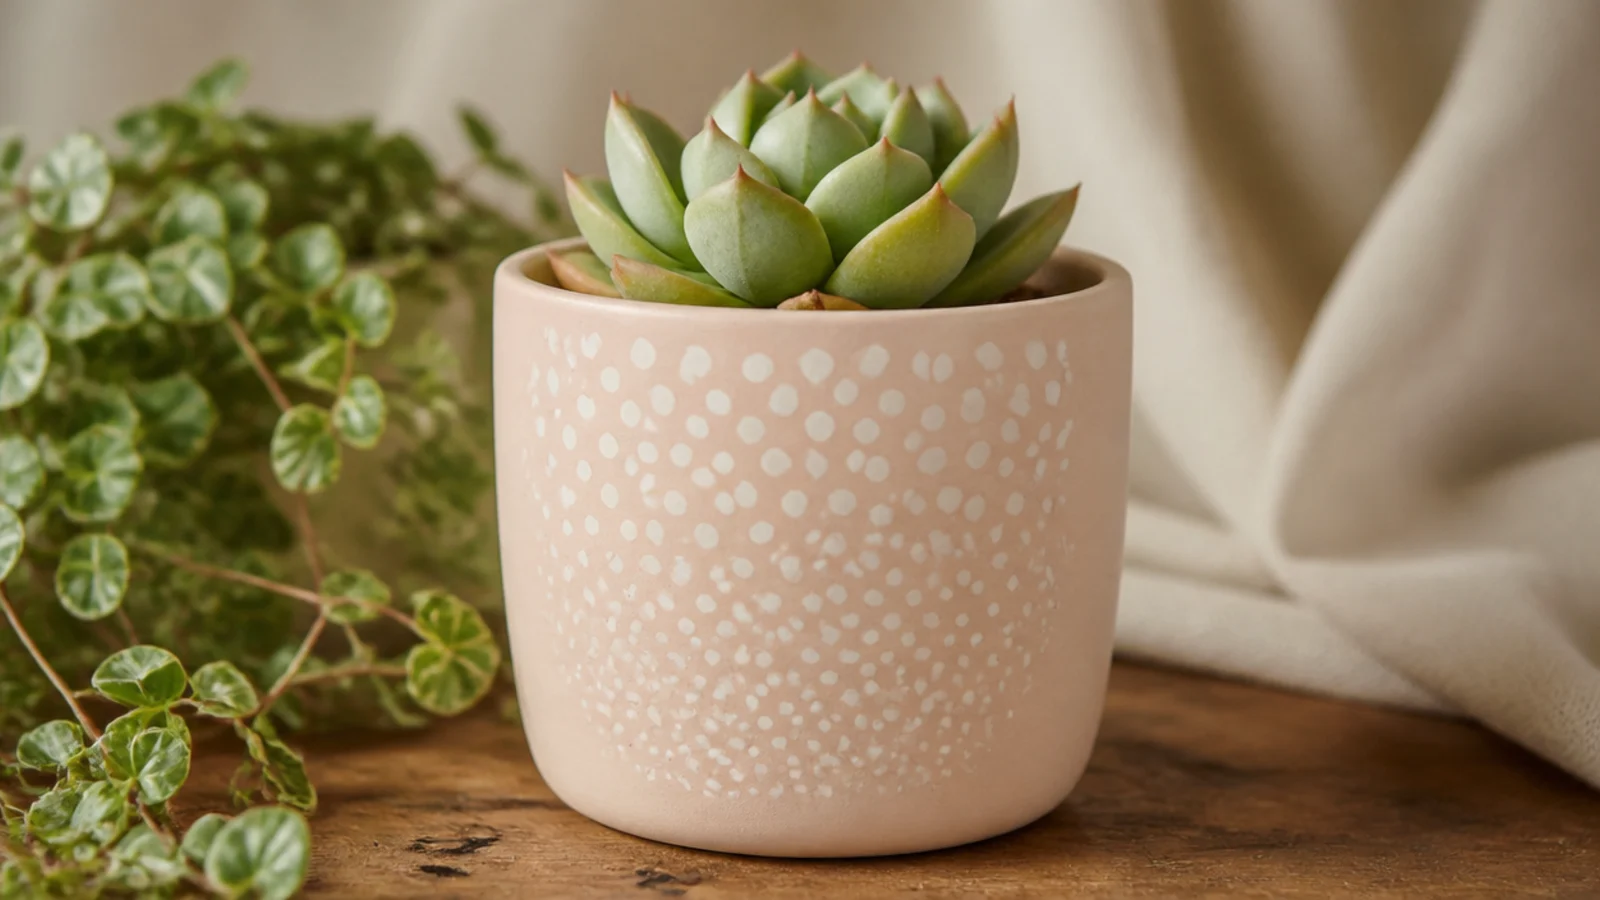
A little cluster of dots on the front looks hand-designed but is just repeated stamps. Because you use a toothpick, every dot comes out the same tiny size. Group them densely in one corner and let them scatter out for a modern, deliberate feel rather than a full pattern.
Base-coat and dry the pot. Dip the tip of a wooden toothpick into your paint, tap off the excess, then press straight down for one dot. Re-dip for every dot so they stay uniform, clustering them tight on one side and spacing them out toward the edge. Let dry fully, then seal.
Keep the dots to one front-facing area rather than wrapping the pot — a contained cluster looks styled, a full wrap looks random.
Don’t drag the toothpick sideways as you lift — press straight down and pull straight up or the dots smear into tails.
4. Single Initial
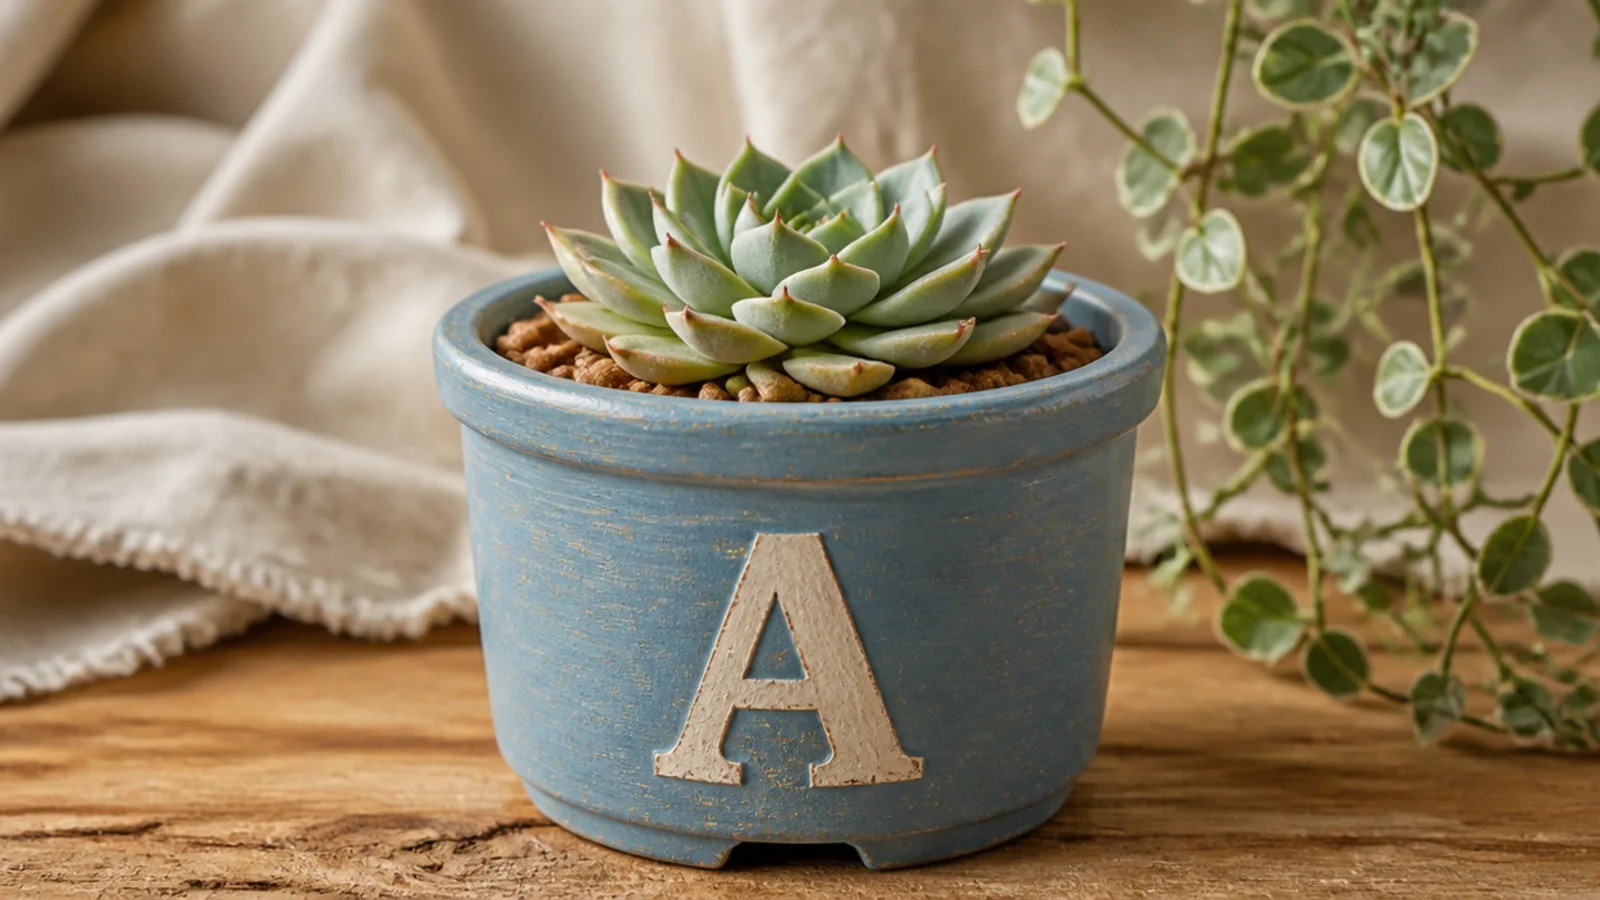
One initial on the front turns a tiny pot into a personalized gift or a labeled set. Use a printed letter as a stencil so the shape is perfect at small size. A simple block or bold serif reads best on a little pot — thin script disappears and is nearly impossible to paint cleanly this small.
Base-coat and dry the pot. Print your letter at about two-thirds the height of the front panel, cut it out, and trace it lightly in pencil on the pot. Fill the outline with two thin coats using a size 0 or 1 round brush, working from the edges inward. Erase stray pencil marks and seal.
A fine-tip paint pen fills a small letter more cleanly than a brush — use it if your initial has thin strokes.
Don’t try freehand script on a mini pot; a traced block letter is far more forgiving at this size.
5. Metallic Dipped Base
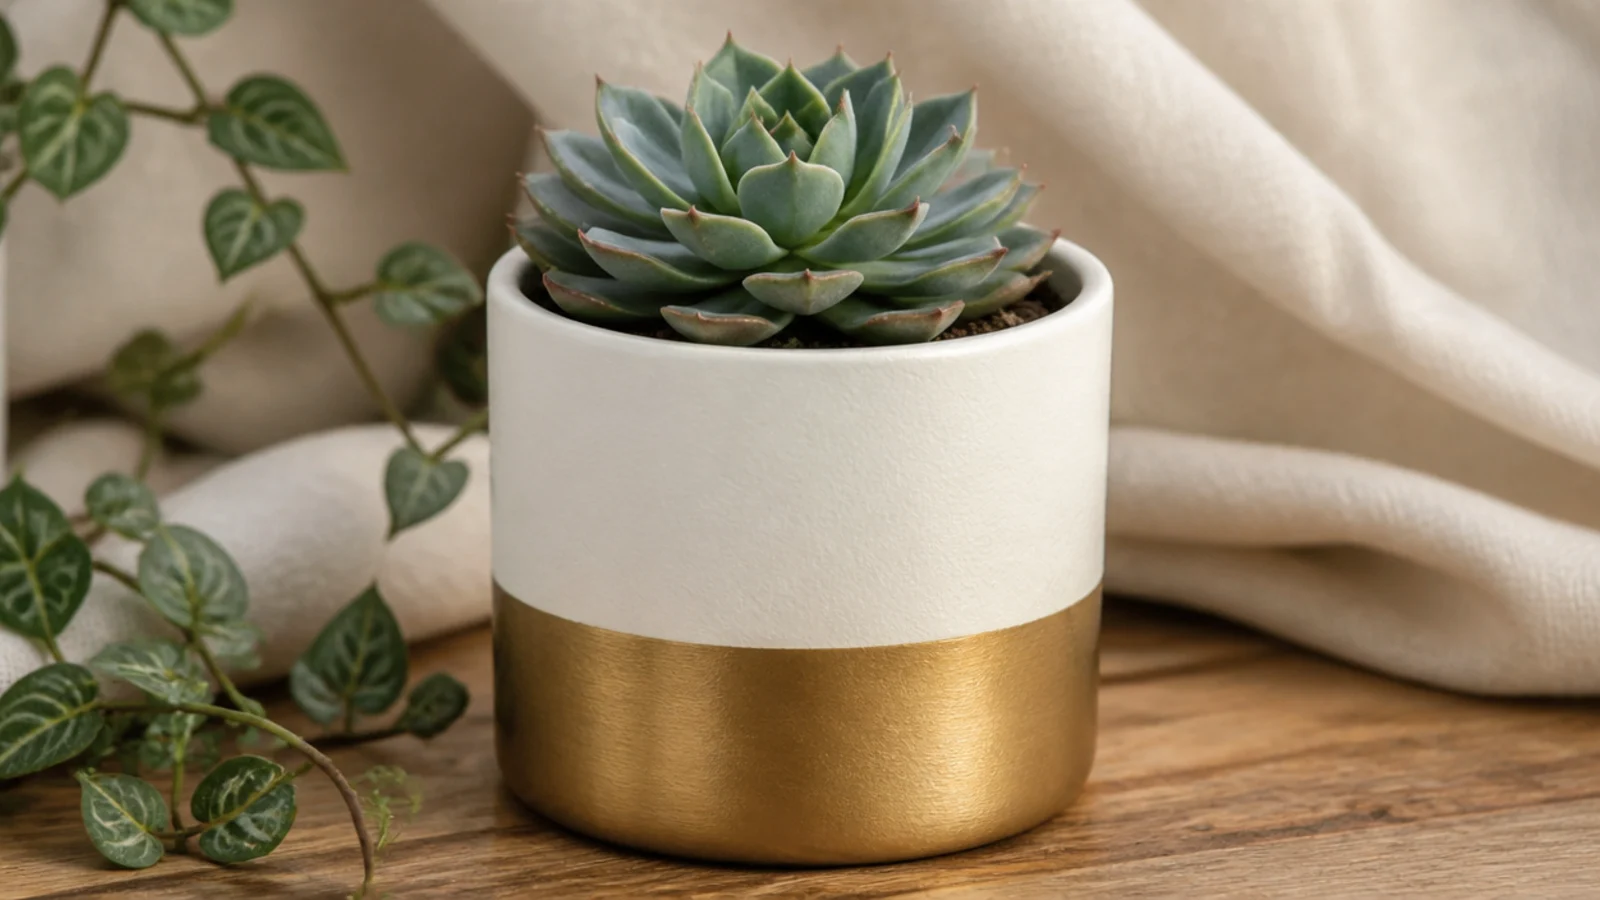
Prime and base-coat the pot, then let it dry. Tape a level line about a third of the way up. Paint below the line with two thin coats of metallic acrylic or a metallic paint pen for the smoothest finish, letting the first coat dry. Peel the tape before it fully cures, then seal with a light spray clear that won’t drag the metallic.
A gold-dipped base makes a tiny pot look expensive with almost no work. The metallic bottom catches the light and reads luxe against a white or black top. It’s the fastest way to dress up a plain mini pot for a shelf styling or a gift.
Skip thisDon’t brush a heavy varnish over metallic paint; it dulls the shine, so use a gentle spray sealer instead.
Editor's noteMetallic acrylic covers better over a dark base coat — a coat of black or charcoal under gold makes it richer and more opaque.
6. Color-Block Half
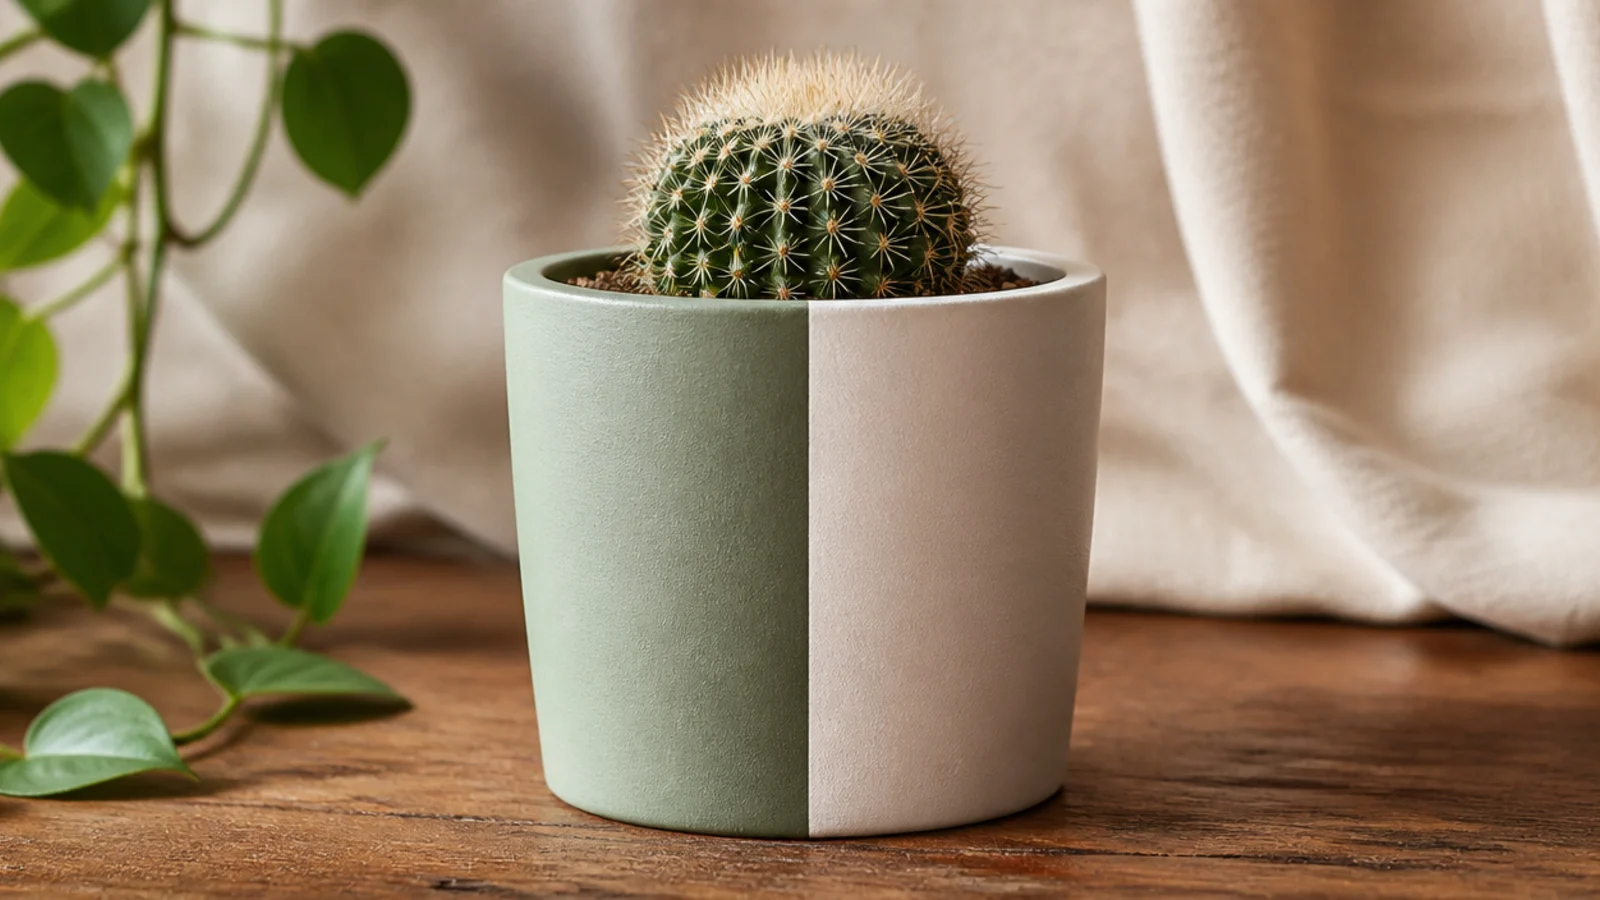
Prime, then base-coat the whole pot in your lighter color and let it dry. Run a strip of tape vertically down the front and around to divide the pot in half, pressing the edge down hard. Paint one half in your second color with two thin coats. Peel the tape before it cures, touch up any bleed, then seal.
A vertical color split is a fresh twist on the classic block, and it suits tall skinny mini pots. Two colors meeting at one line down the front looks graphic and current. Choose two soft tones — sage and cream, blush and white — so the split feels calm rather than harsh on a small pot.
Skip thisDon’t skip base-coating the whole pot first; if the second color doesn’t meet the seam cleanly, the split looks muddy.
Editor's noteBurnish the tape edge with a fingernail before painting so paint can’t creep under the vertical line.
7. Painted Rim Ring
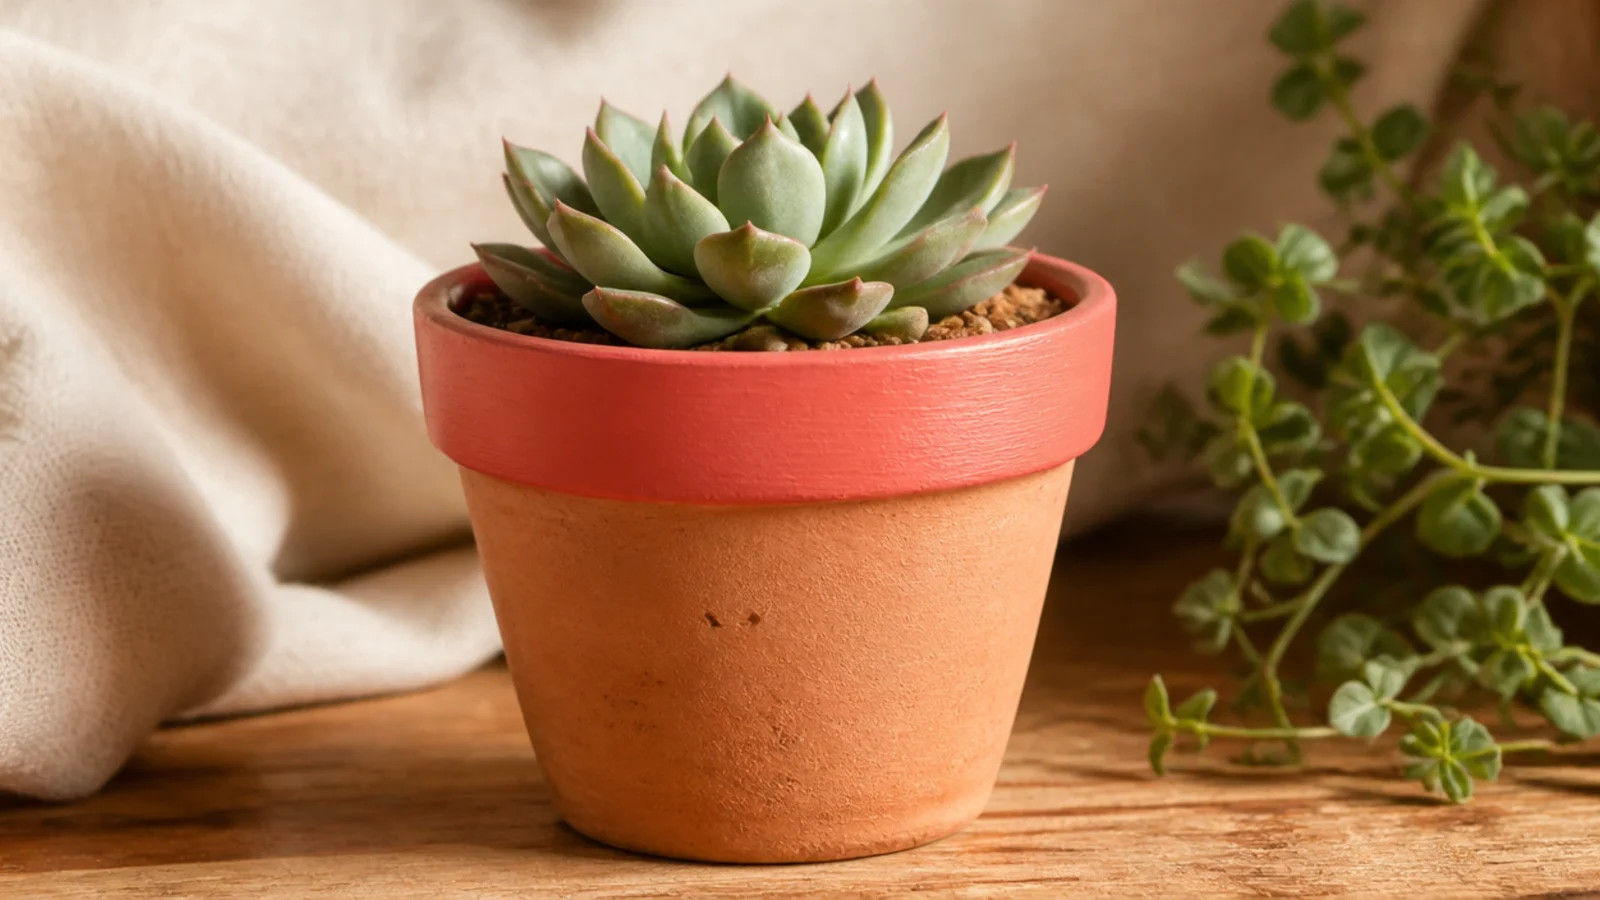
Prime the rim area. Tape along the bottom edge of the rim where it meets the body, then paint the rim in two thin coats of a bold color with a small flat brush. Carry the color slightly over onto the inside lip. Peel the tape before it sets and seal the painted rim.
Painting just the little rim in one bright color is a three-minute project with a big payoff. The rim frames the plant and one cheerful color — coral, mustard, teal — adds personality without covering the terracotta. Perfect when you like the raw clay but want a pop of color up top.
Skip thisDon’t use runny, watered-down paint on the rim; drips down bare clay are obvious on a small pot.
Editor's notePaint a little way down the inside lip so you don’t see raw clay when you look into the pot from above.
8. Sleepy Face
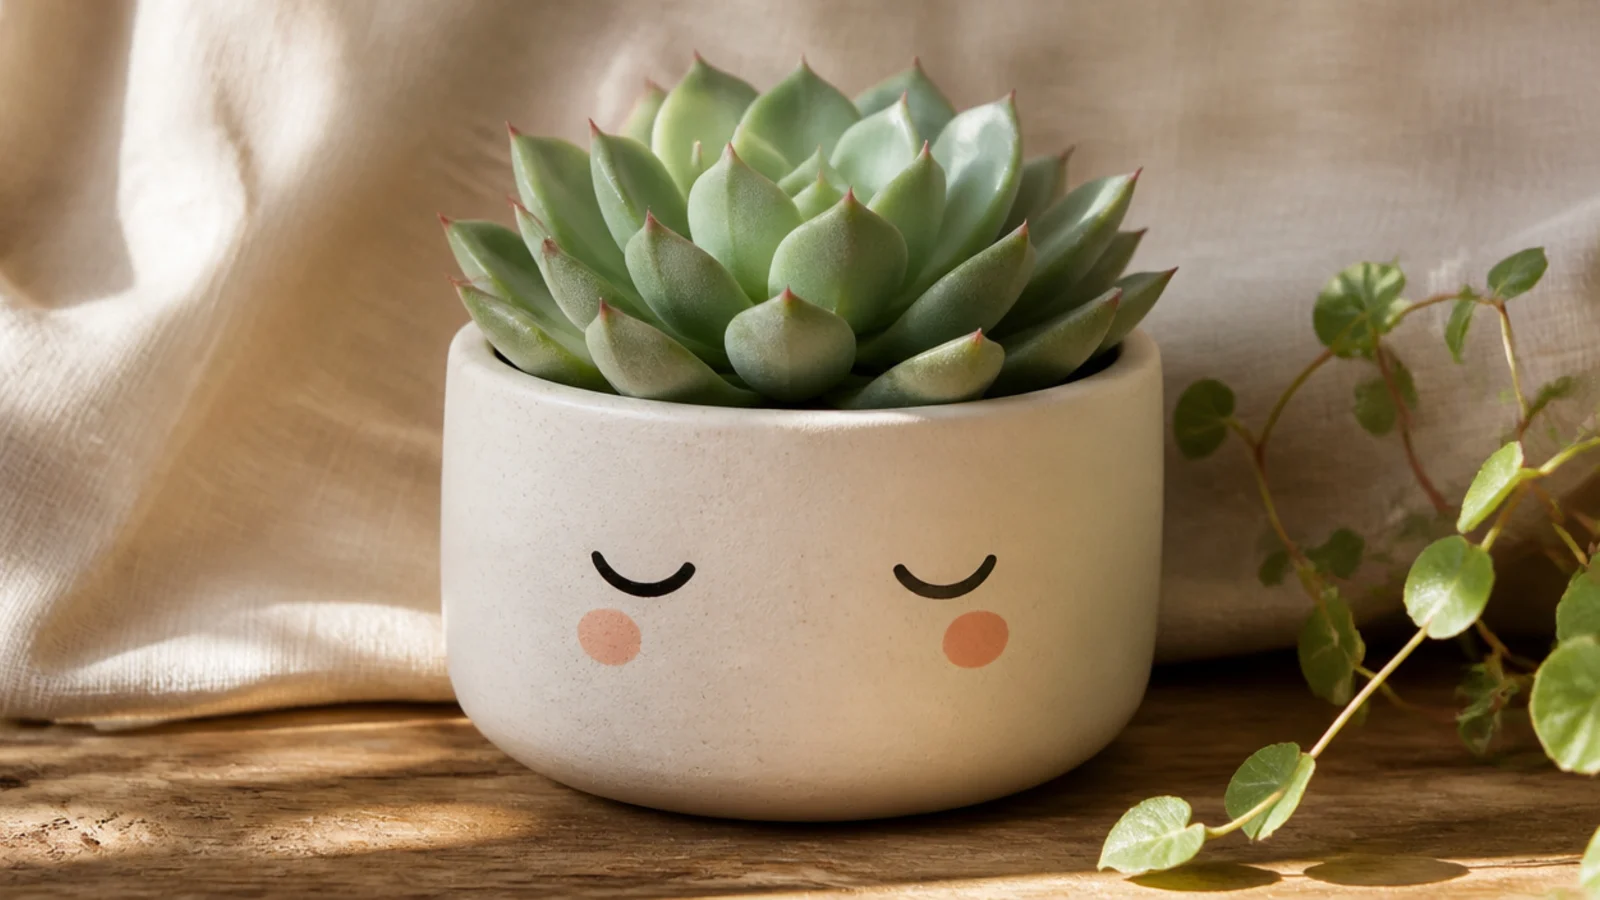
A simple sleepy face turns a mini pot into a character, and the plant on top reads as its hair. Two curved closed eyes and two little cheek dots is all it takes — the charm is in how minimal it is. It’s a favorite for kids' rooms and desk plants.
Base-coat and dry the pot in a soft neutral. Using a fine-tip black paint pen, draw two short downward-curved lines for closed eyes on the front. Add two small blush cheek dots below with a toothpick. Keep the features small and centered, let dry, then seal.
Draw the eyes as simple curved lines rather than full circles — closed, calm eyes are cuter and much easier to keep even.
Don’t add a mouth, nose, and eyebrows; a mini face gets cluttered fast, so stop at eyes and cheeks.
9. Cactus Silhouette
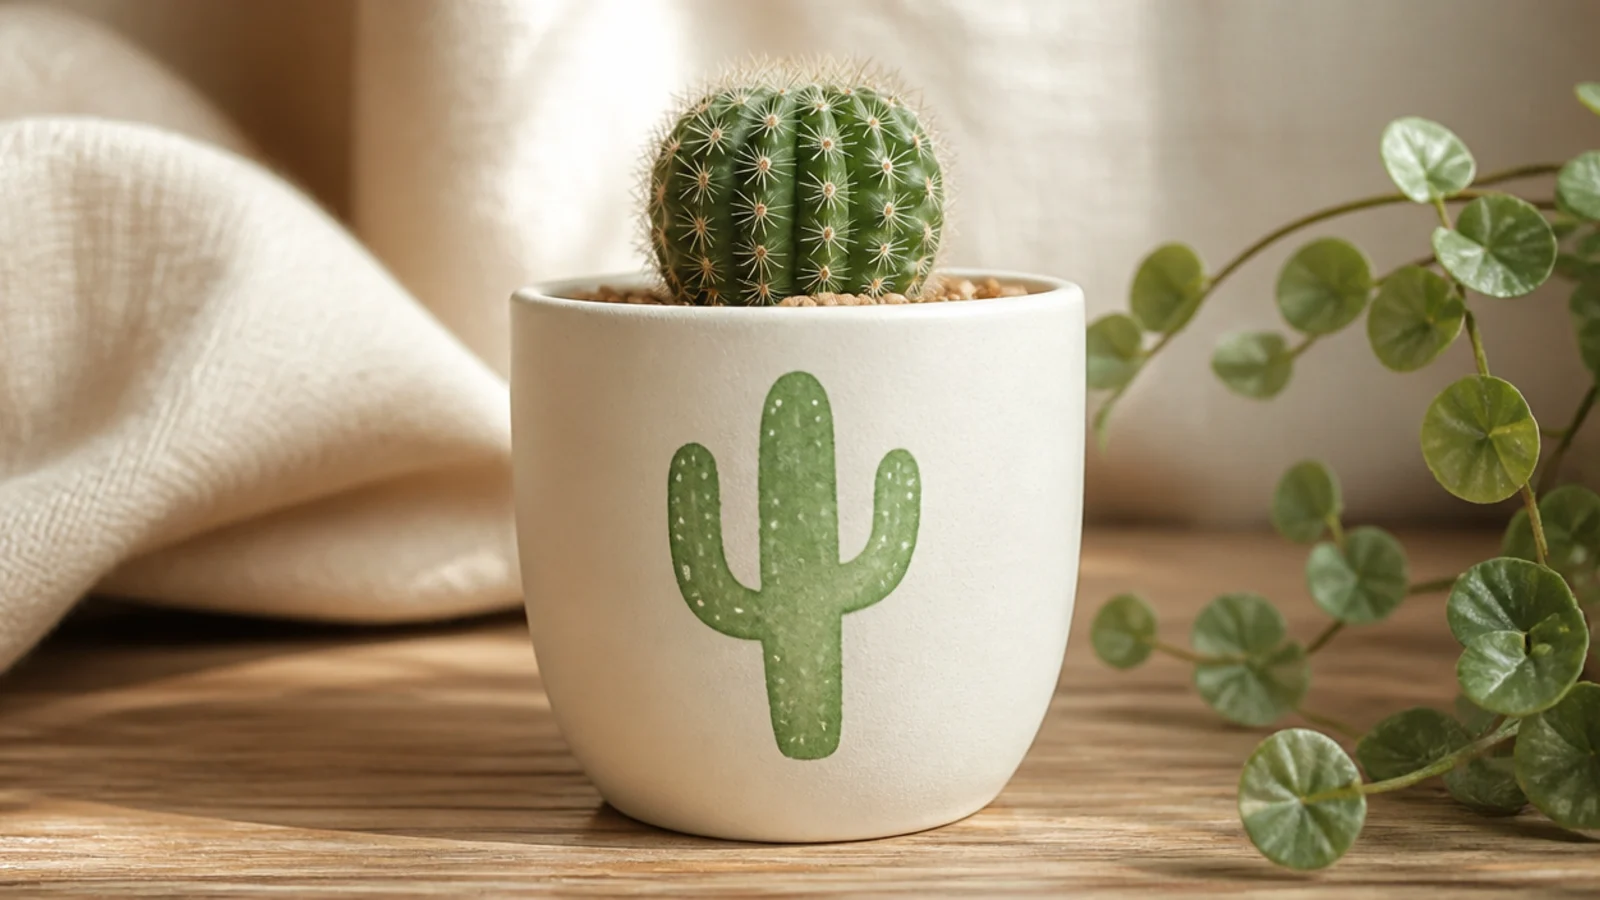
A little cactus silhouette on the front nods to what’s planted inside and looks charming on a desert pot. One simple two-armed cactus shape is enough — it’s basically a rounded trunk with two upturned arms. Sage or olive green on a cream base keeps it soft and modern.
Base-coat and dry the pot. Lightly pencil a simple cactus shape — a vertical rounded trunk with one or two upturned arms — on the front. Fill it with two thin coats of green using a size 1 round brush. Once dry, add a few tiny white dot spines with a toothpick if you like, then seal.
Keep the cactus to a single simple shape; a two-armed saguaro silhouette reads instantly and is easy to paint small.
Don’t overdetail the cactus with ribs and flowers on a tiny pot — a clean silhouette looks far more intentional.
10. One Bloom
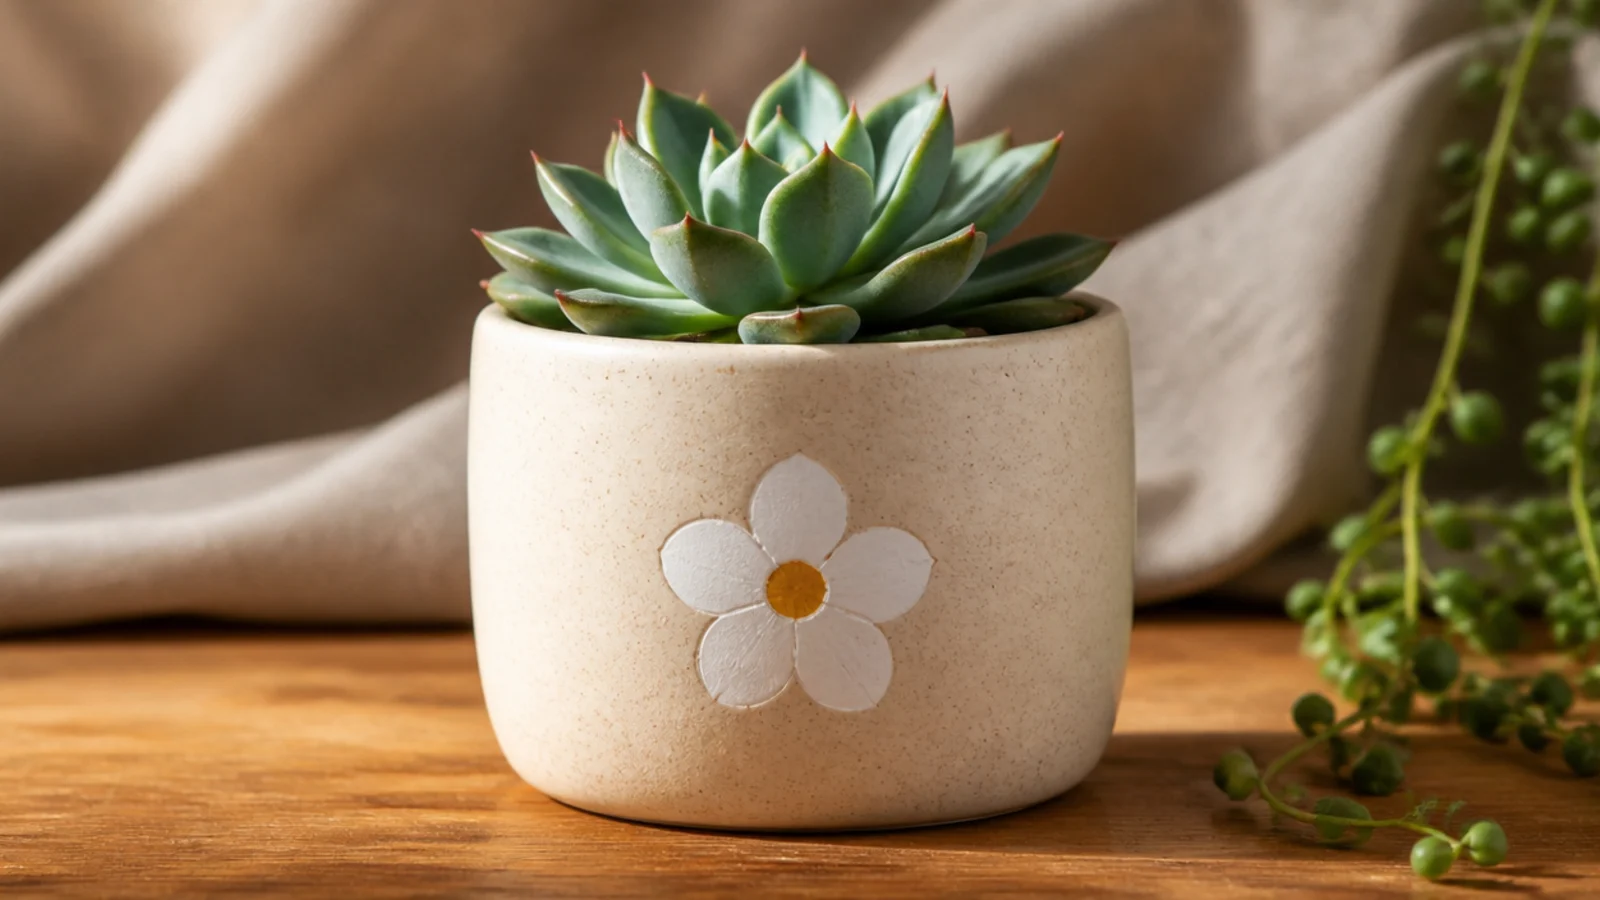
A single dot-flower on the front is sweet without being fussy, and it’s just six dots. Five petal dots in a circle plus one center dot makes a clear little bloom. One flower on a mini pot looks intentional where a scattered handful would overwhelm the surface.
Base-coat and dry the pot. Using a toothpick or a size 0 brush, place five petal dots in a rough circle on the front, then add a contrasting center dot. Keep the petals close so they read as one flower. Add two tiny green leaf dashes below with the brush tip, then seal.
Add the center dot last and in a bold color — it pulls the five petals together into a clear flower.
Don’t scatter several flowers around a mini pot; one well-placed bloom looks styled, a cluster looks crowded.
11. Mini Speckle
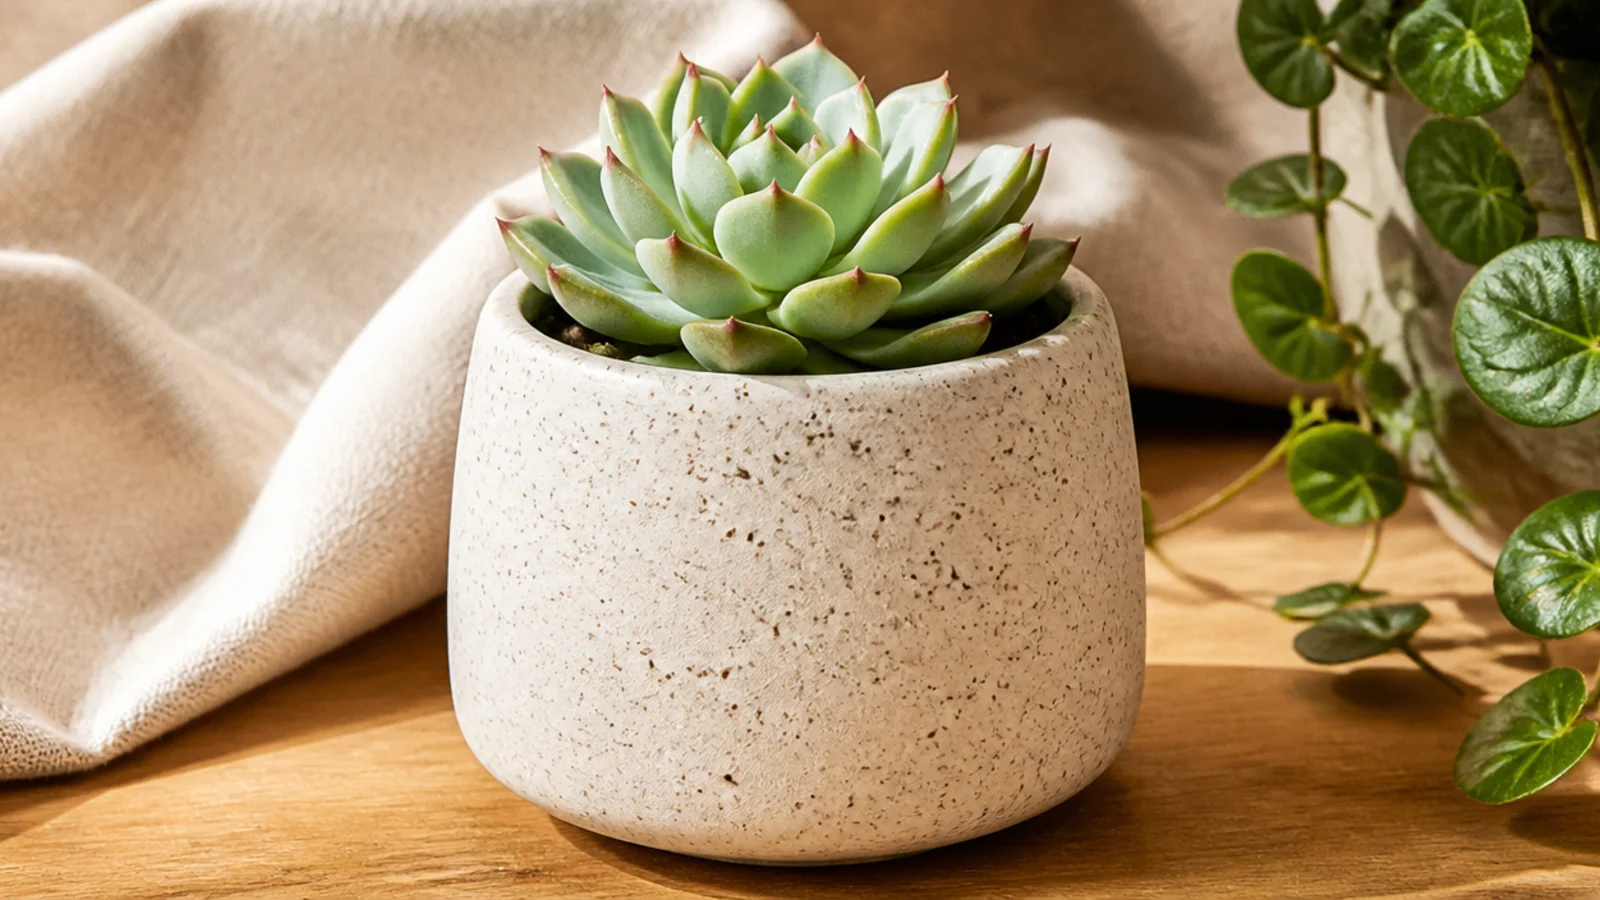
Base-coat the pot white or cream and let it dry. Thin a little dark brown or charcoal paint with water to a milky consistency. Dip a stiff brush or an old toothbrush, then run your thumb across the bristles to flick fine speckles. Rotate the pot for even coverage, let dry, and seal.
Fine speckles make a tiny pot look like miniature handmade stoneware. You flick thinned paint off a stiff brush to scatter little dots across the surface. It’s forgiving and genuinely hard to get wrong, and it hides any small flaws in the base coat.
Skip thisDon’t over-thin the paint or flick too close; big wet splatters look like accidents on a tiny surface.
Editor's noteFlick from a little farther back on a small pot so the speckles land fine and even rather than as a few big blobs.
12. Diagonal Dip
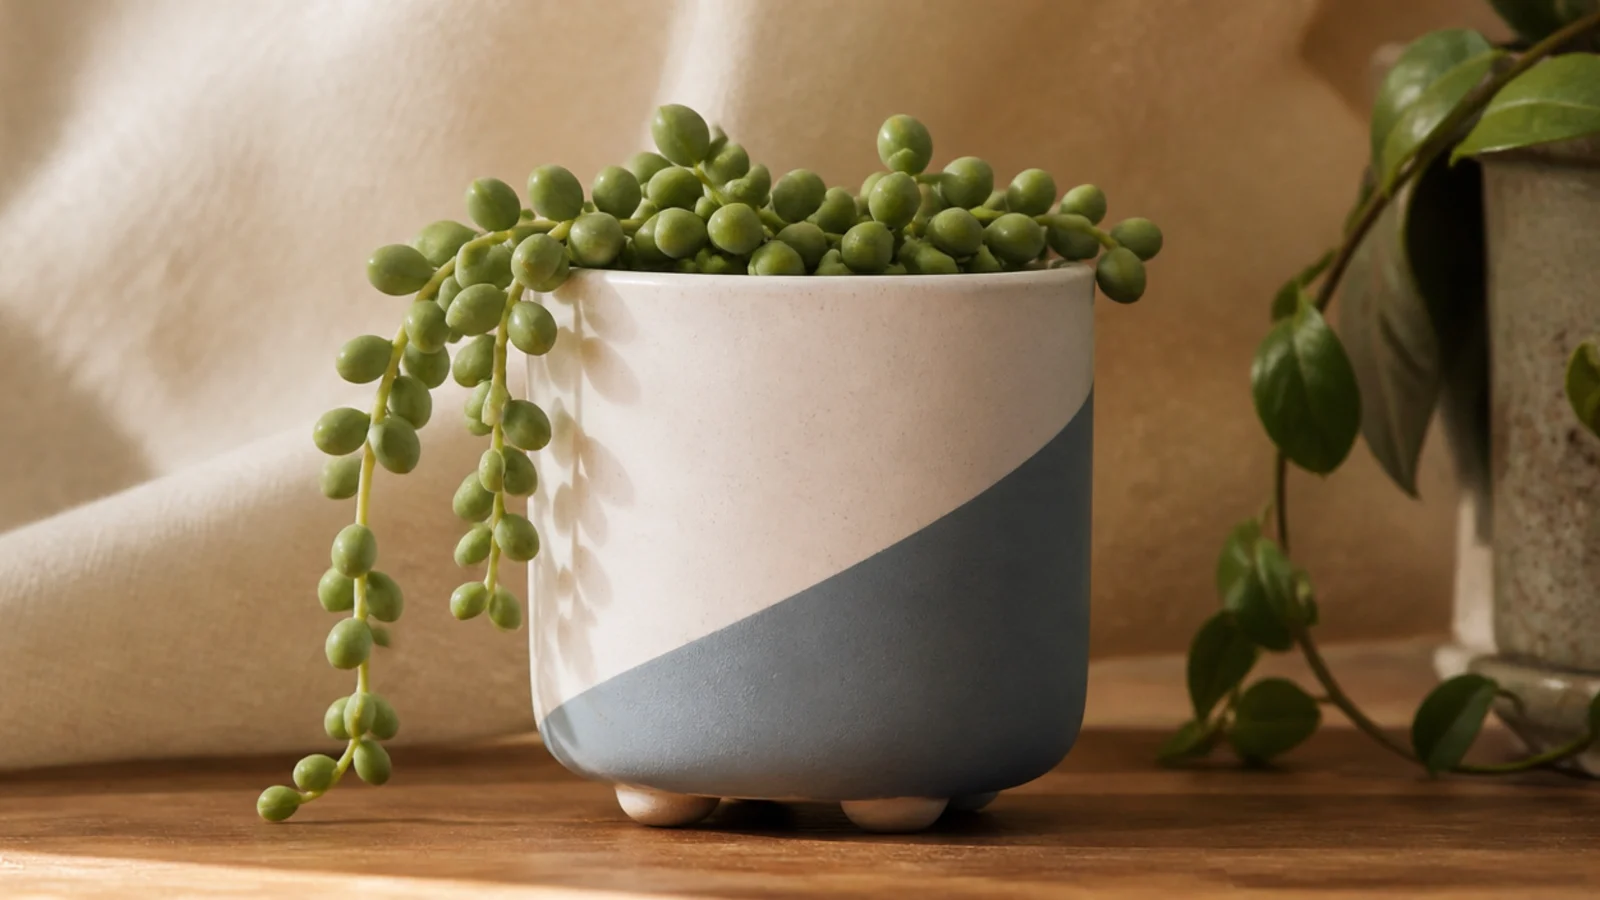
Prime and base-coat the pot, then dry. Run a strip of tape at a shallow diagonal across the front and around, pressing the edge firmly. Paint below the tape in two thin coats. Peel the tape before it cures, touch up the point where the diagonal meets, then seal.
A diagonal split is a modern update on the straight dip and gives a tiny pot movement. One color painted below a slanted line looks dynamic and designed. Keep the angle gentle and the color soft — dusty blue or blush — so it feels intentional, not off-kilter.
Skip thisDon’t let the tape lift at the sharp corner of the diagonal; press it down hard there or paint bleeds into a fuzzy point.
Editor's noteKeep the diagonal shallow, around 20 degrees — a steep angle looks like a mistake, a gentle slant looks deliberate.
13. Tiny Triangle Row
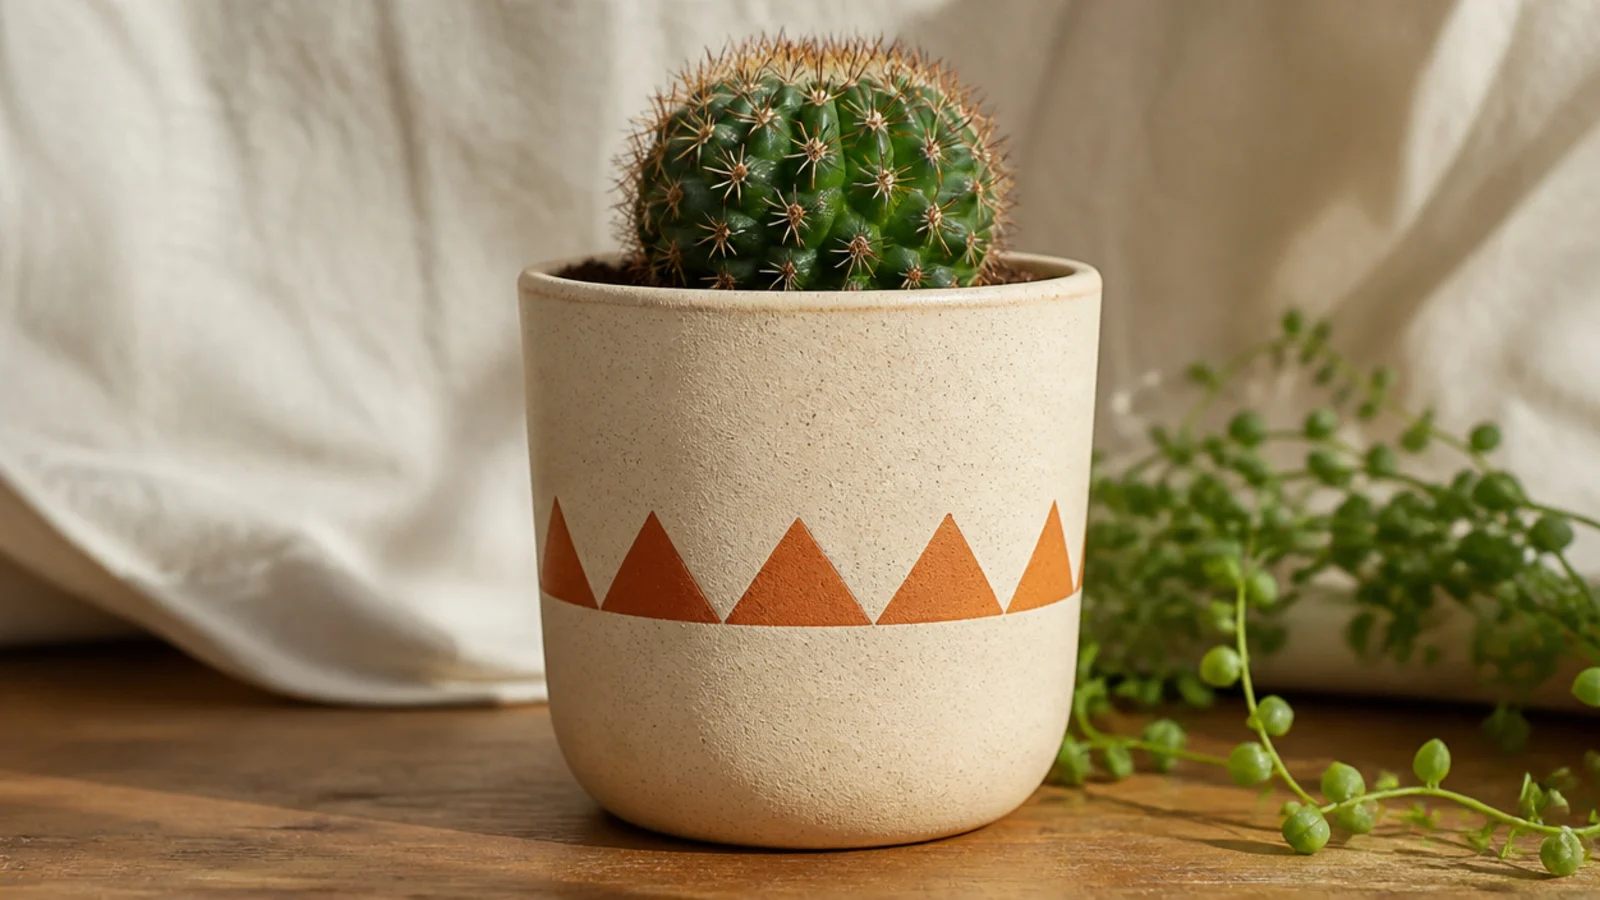
A row of little triangles reads like a folk pattern and suits a desert-themed mini pot. Keep it to one row around the middle so it doesn’t overwhelm the small surface. One earthy color — terracotta or olive — against cream keeps it clean and graphic.
Base-coat and dry the pot. Lightly pencil small evenly spaced triangles in a single row around the middle. Fill each one with two thin coats using a size 0 round brush, or use a fine paint pen for crisper points. Erase visible pencil, let dry, then seal.
Mark the pot into equal sections with pencil ticks first so the last triangle meets the first with even spacing.
Don’t stack multiple rows of triangles on a mini pot; one row looks patterned, several look chaotic at this scale.
14. Gold Pen Rim Line
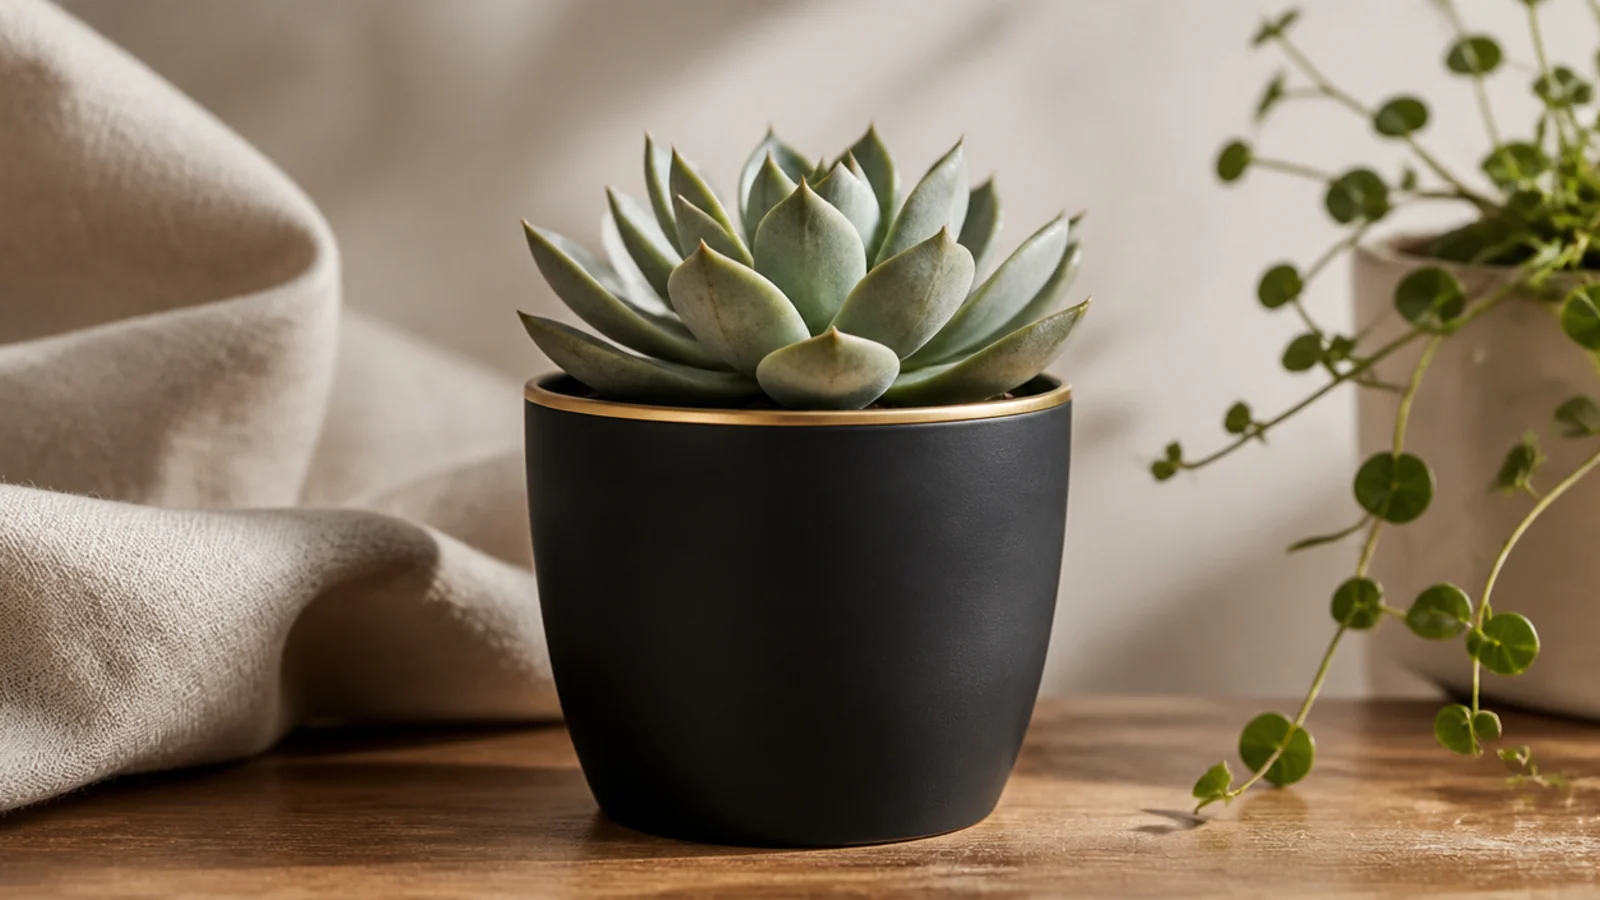
Base-coat the pot and let it dry fully. Shake a fine-tip metallic paint pen and prime it on scrap paper. Rest the pen tip on the rim edge and slowly rotate the pot with your other hand so the pen draws the line for you. Let it dry, then seal with a light spray clear that won’t smear the ink.
A single thin gold line around the rim edge makes a tiny pot look finished and a little luxe. A metallic paint pen gives a clean line with zero brush skill, which matters on a small curved rim. It works over any base but looks most striking over black, deep green, or navy.
Skip thisDon’t brush a heavy varnish over the metallic line; it can drag the ink, so use a gentle spray sealer.
Editor's noteMove the pot, not the pen — spinning the pot against a steady pen hand gives a far smoother line at this small size.
15. Single Heart
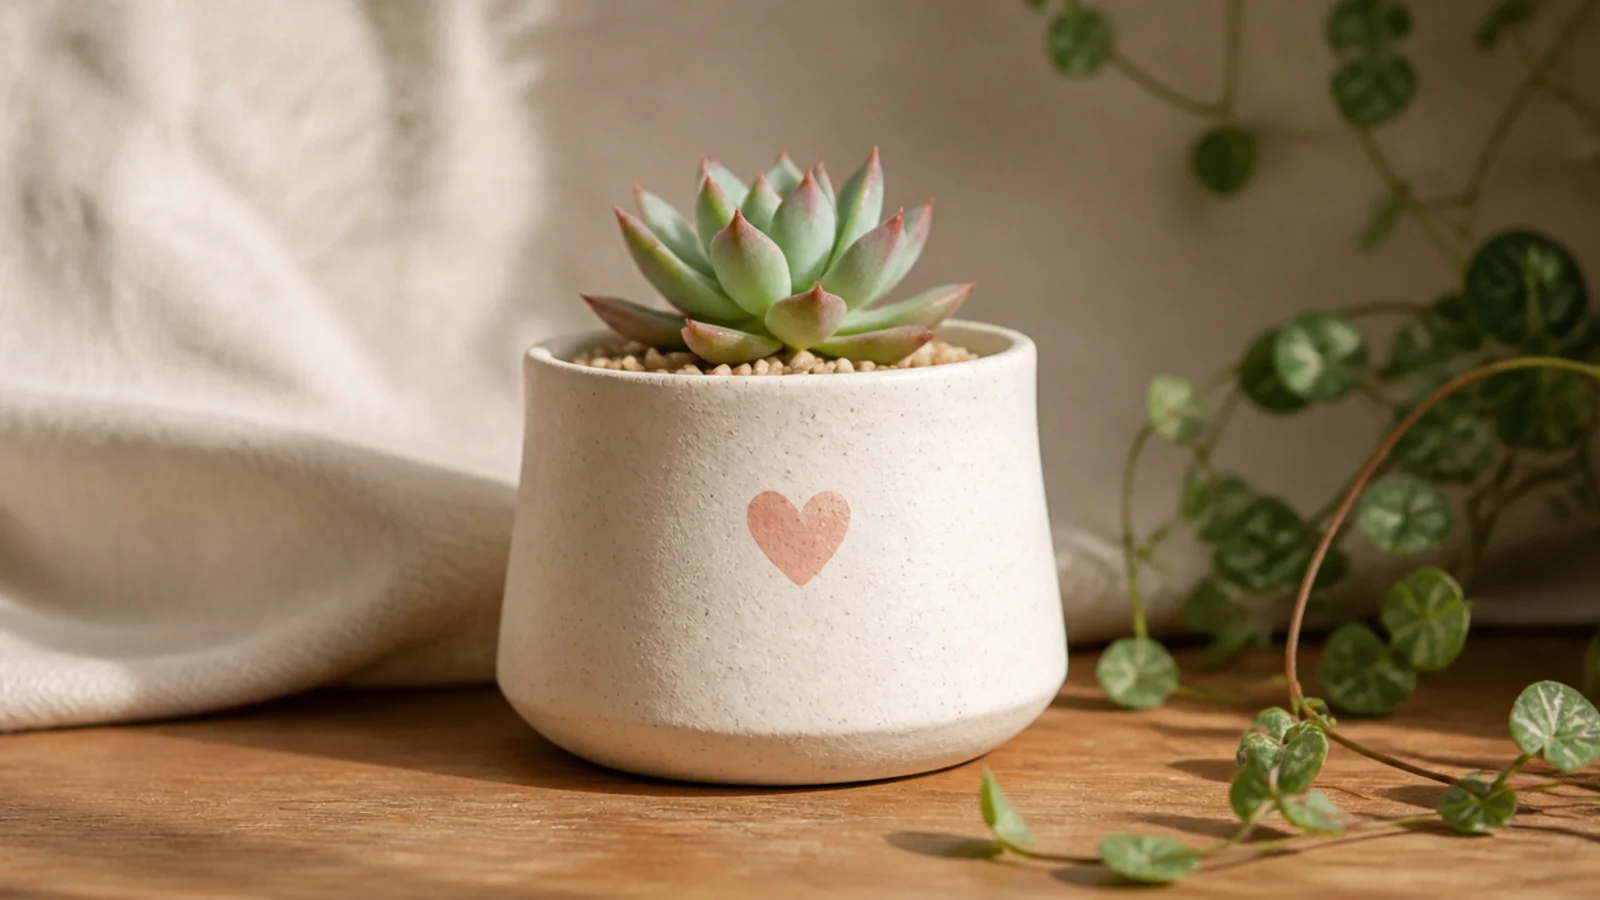
Base-coat and dry the pot. Lightly pencil a small heart on the front, or make two dots side by side and pull them down to a point with a size 0 brush. Fill it with two thin coats. For the cleanest edge on a tiny heart, outline and fill with a fine paint pen instead, then seal.
One little heart on the front is a sweet, simple touch for a gift pot or a Valentine’s succulent. A single small heart in a soft color looks intentional where scattered hearts would read as busy. It’s an easy shape that even shaky hands can manage at small size.
Skip thisDon’t make the heart too big for the panel; a small centered heart looks styled, an oversized one looks childish.
Editor's noteDraw the heart as two joined dots pulled to a point rather than freehand outlining — it comes out symmetrical every time.
16. Half-Moon Arc
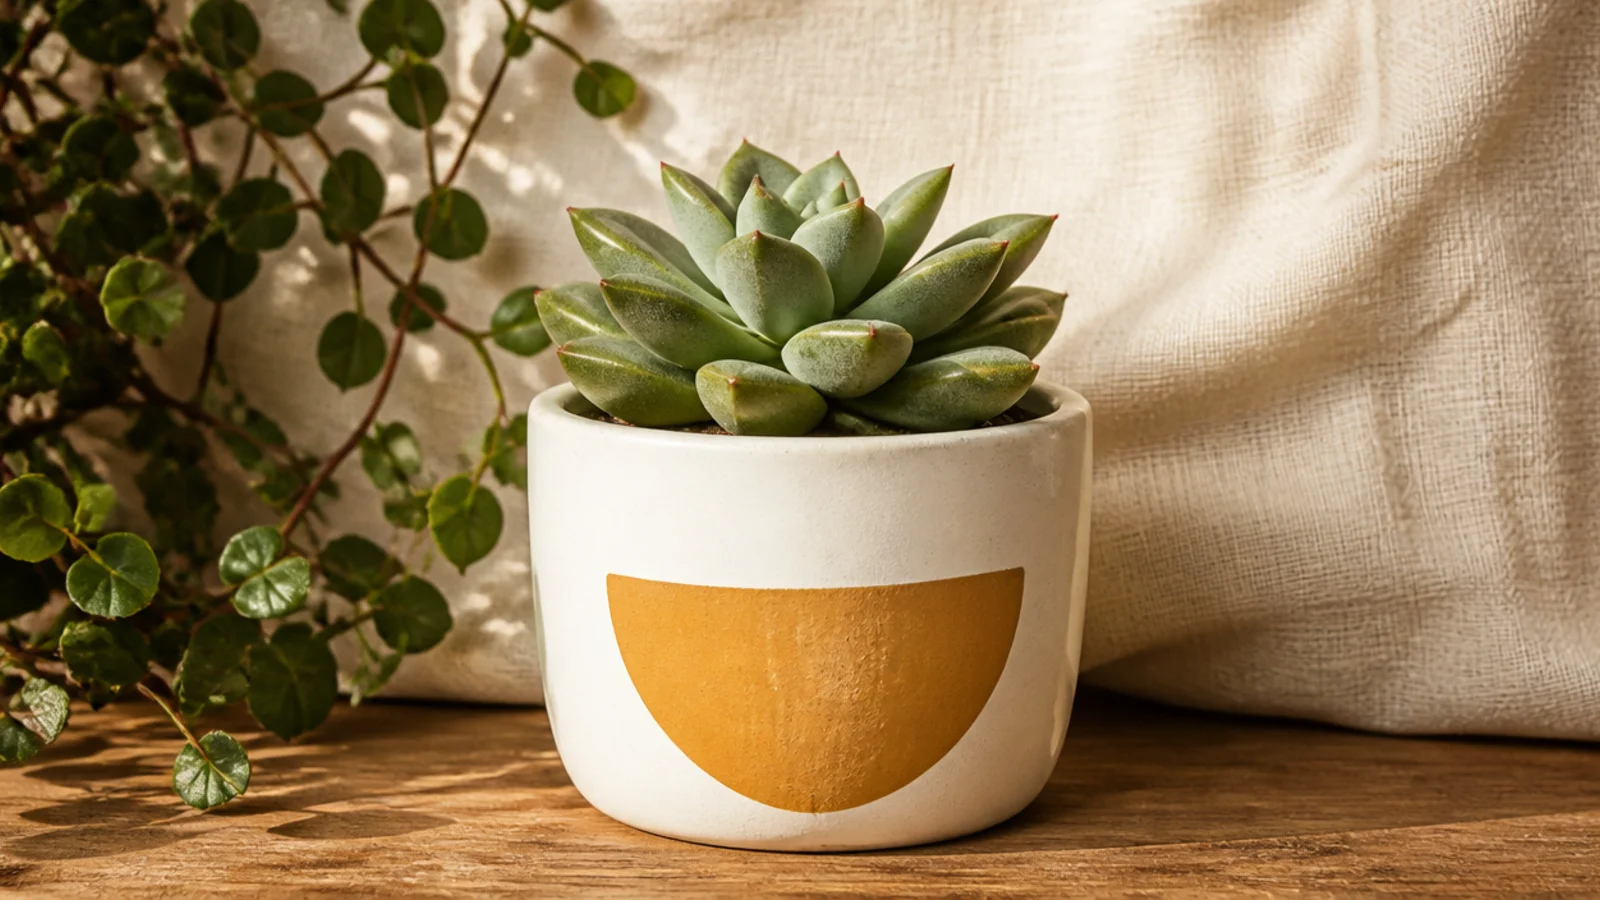
Base-coat and dry the pot. Trace around a coin or bottle cap on the front and pencil a half-moon, or mask a straight edge with tape and fill a curve above it. Paint the arc in two thin coats with a size 1 round brush. Erase stray pencil, let dry, then seal.
One painted arc on the front is a clean, modern graphic that suits minimal shelves. A single half-moon shape in one warm color reads like a designed logo rather than a craft. Keeping it to the front, not wrapping the pot, is what makes it look intentional.
Skip thisDon’t wrap the arc around the whole pot; a single front-facing shape looks graphic, a full band looks unfinished.
Editor's noteTrace a small round object for the curve instead of freehanding — a perfect arc is what separates designed from doodled.
17. Leaf Sprig
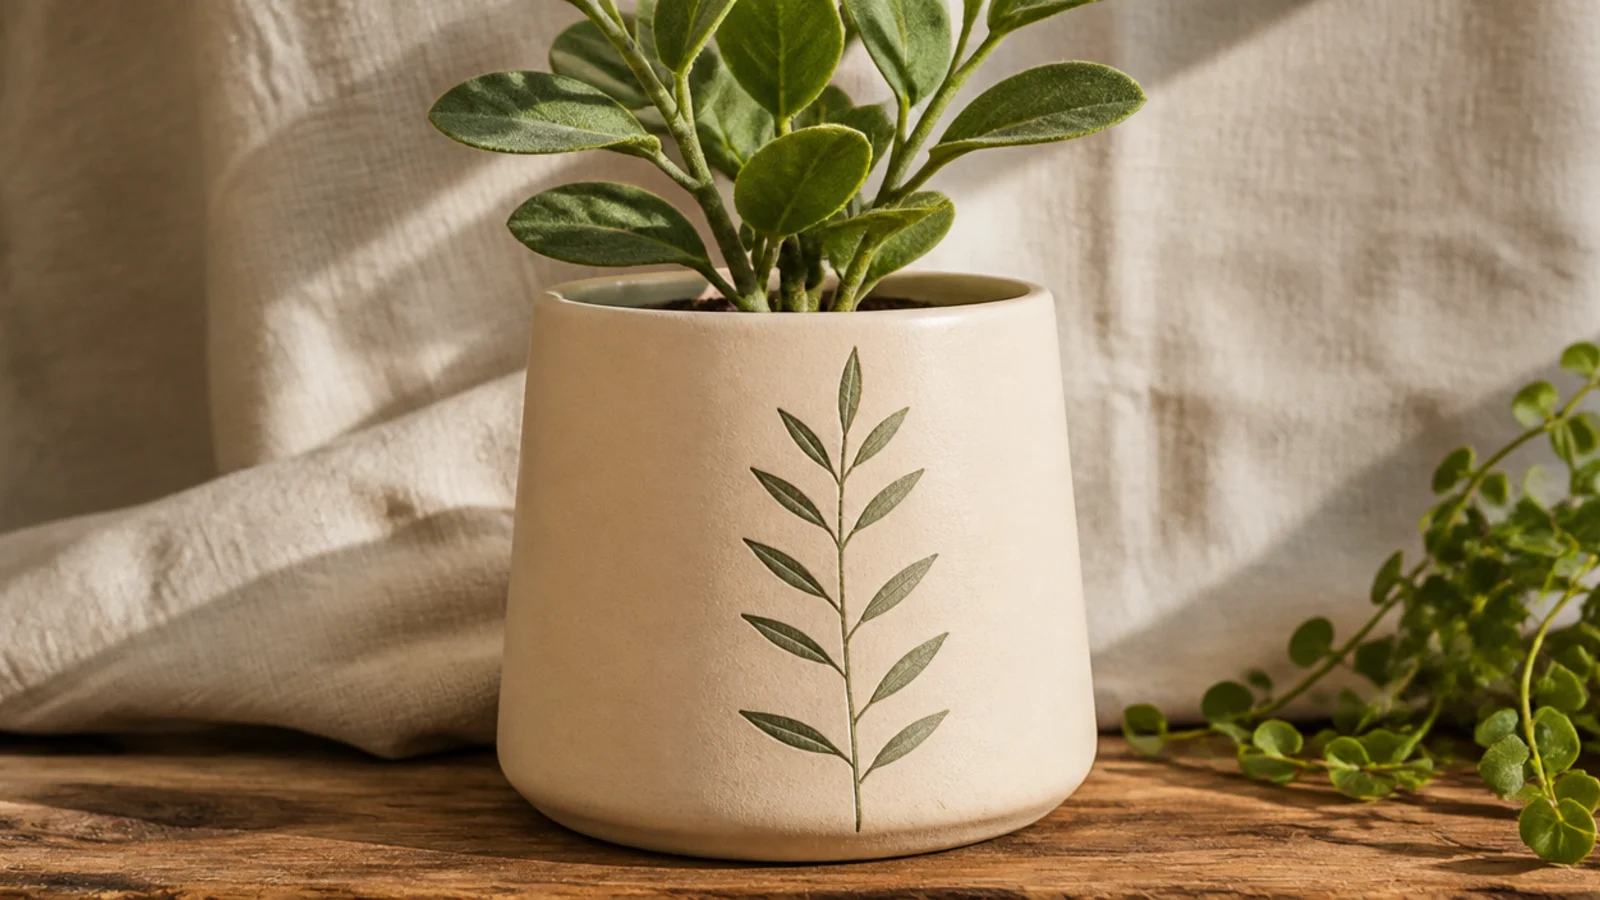
Base-coat and dry the pot. With a size 0 round brush, paint one thin curved stem up the front. Add small paired leaf shapes along it with quick single strokes, lifting the brush so each leaf tapers. Keep it to one sprig, let dry, then seal.
A single leaf sprig up one side of the pot is delicate and botanical, and it echoes the plant on top. One thin stem with a few paired leaves looks hand-illustrated without needing real drawing skill. Olive or sage on cream keeps it soft and grown-up.
Skip thisDon’t wrap vines all the way around a mini pot; one simple sprig looks elegant, a full vine looks overworked.
Editor's notePaint each leaf in one quick press-and-lift stroke rather than outlining it — the tapered ends look natural and hand-drawn.
18. Sheer Color Wash
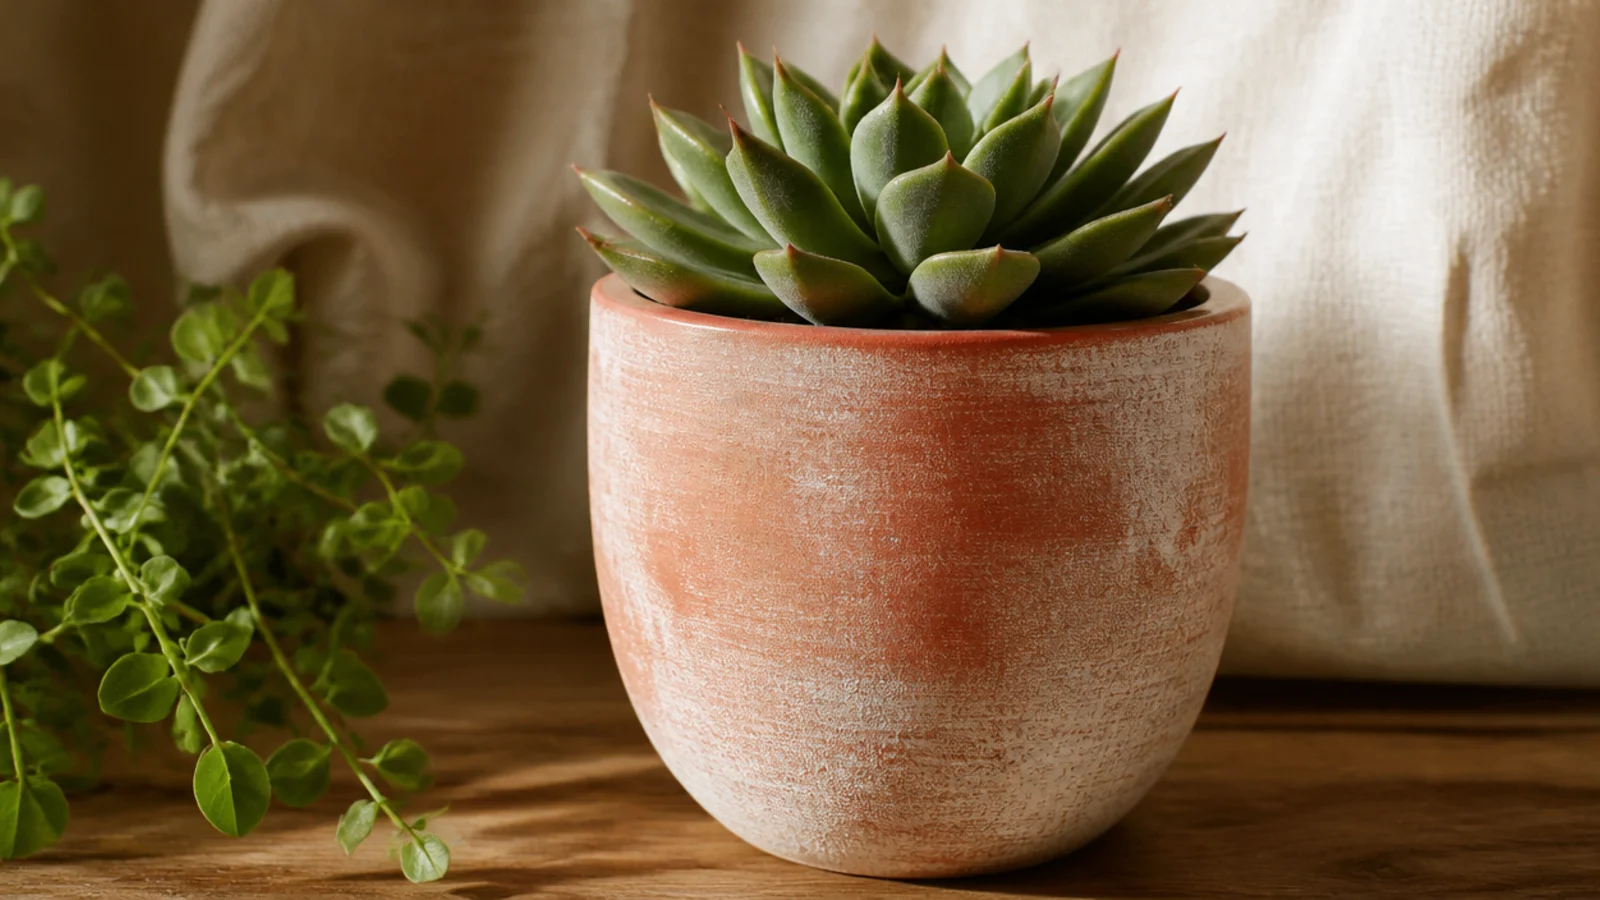
Skip primer for this one — you want the clay to absorb the wash. Thin white or a pale acrylic with water to a milky consistency. Brush it on in long strokes with a small flat brush, letting some areas stay lighter. Wipe back the high spots with a cloth for a worn look, let dry, and seal with a matte clear.
A watered-down wash lets the terracotta texture show through for a soft, aged look — and it’s the single easiest finish here. One sheer coat of white or a pale color over natural clay tones the pot down without hiding it. Great when you like the little pot but want it a shade calmer.
Skip thisDon’t prime under a wash; primer seals the clay so the wash sits on top instead of soaking in for that soft look.
Editor's noteWipe the wash back on the raised texture right away with a damp rag for an authentic, sun-faded finish.
19. Single Scallop Row
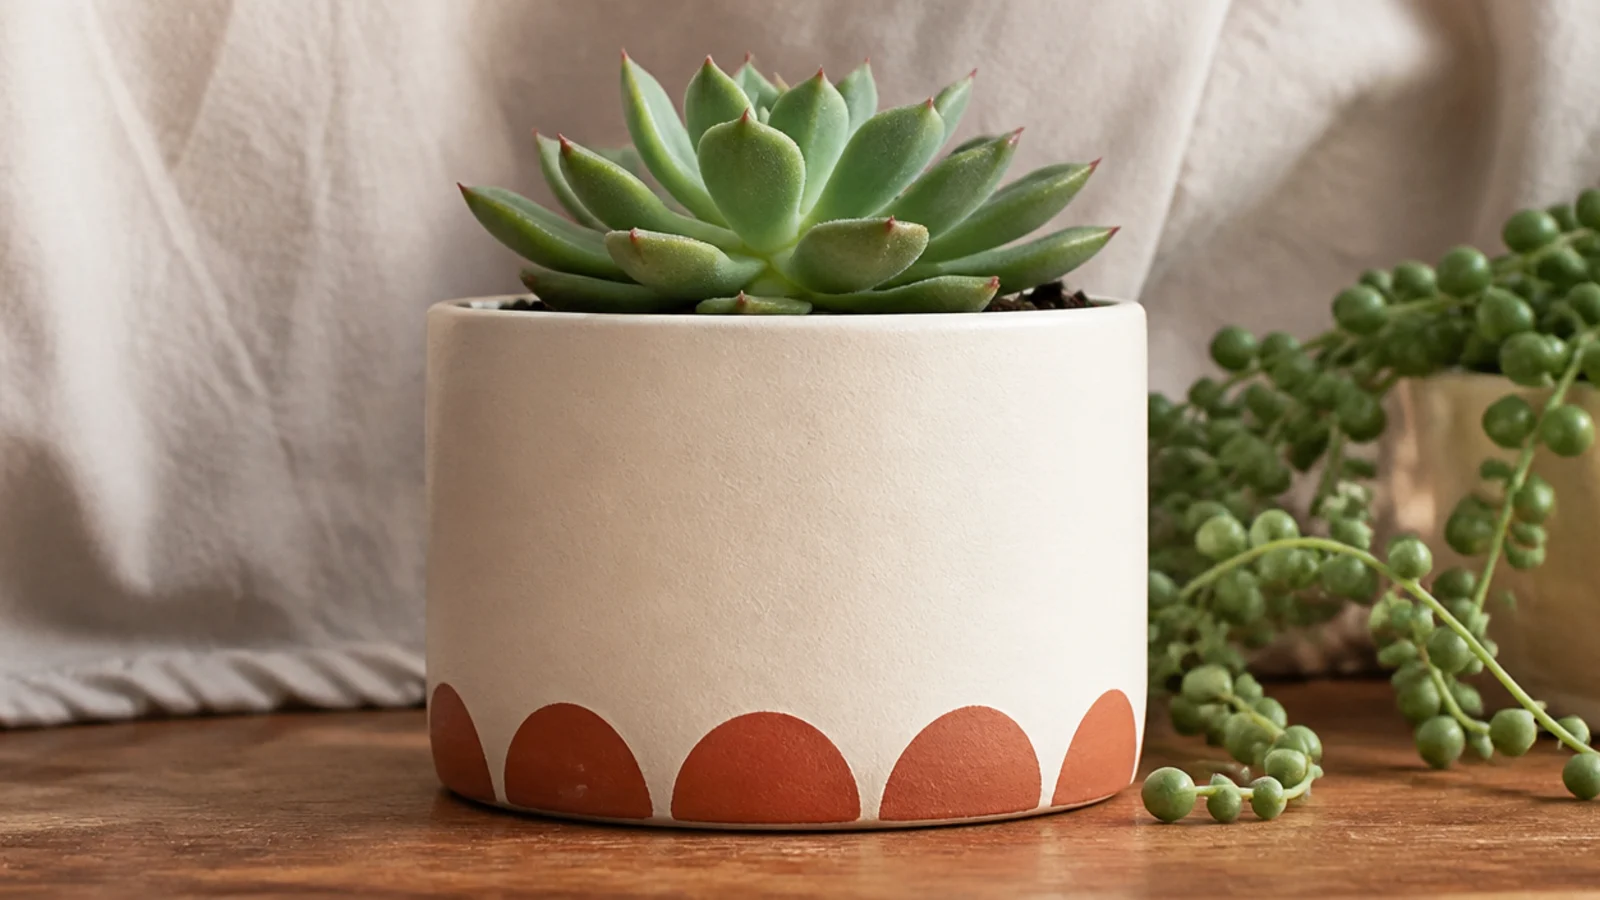
Base-coat and dry the pot. Find a small round cap the size you want your scallops. Dip its rim in paint and stamp overlapping half circles along the bottom, or trace and fill them with a size 1 brush for solid scallops. Keep spacing even, let dry, then seal.
A single row of little scallops along the base looks like a detail from a ceramics studio, and it’s just half circles. Stamp them with a small round object so they stay uniform on the tiny surface. One color along the bottom is plenty — it frames the pot without covering it.
Skip thisDon’t freehand the scallops; hand-drawn half circles drift in size and break the tidy rhythm on a small pot.
Editor's noteMark the pot into equal sections first so the last scallop meets the first cleanly around the base.
20. Mini Ombre
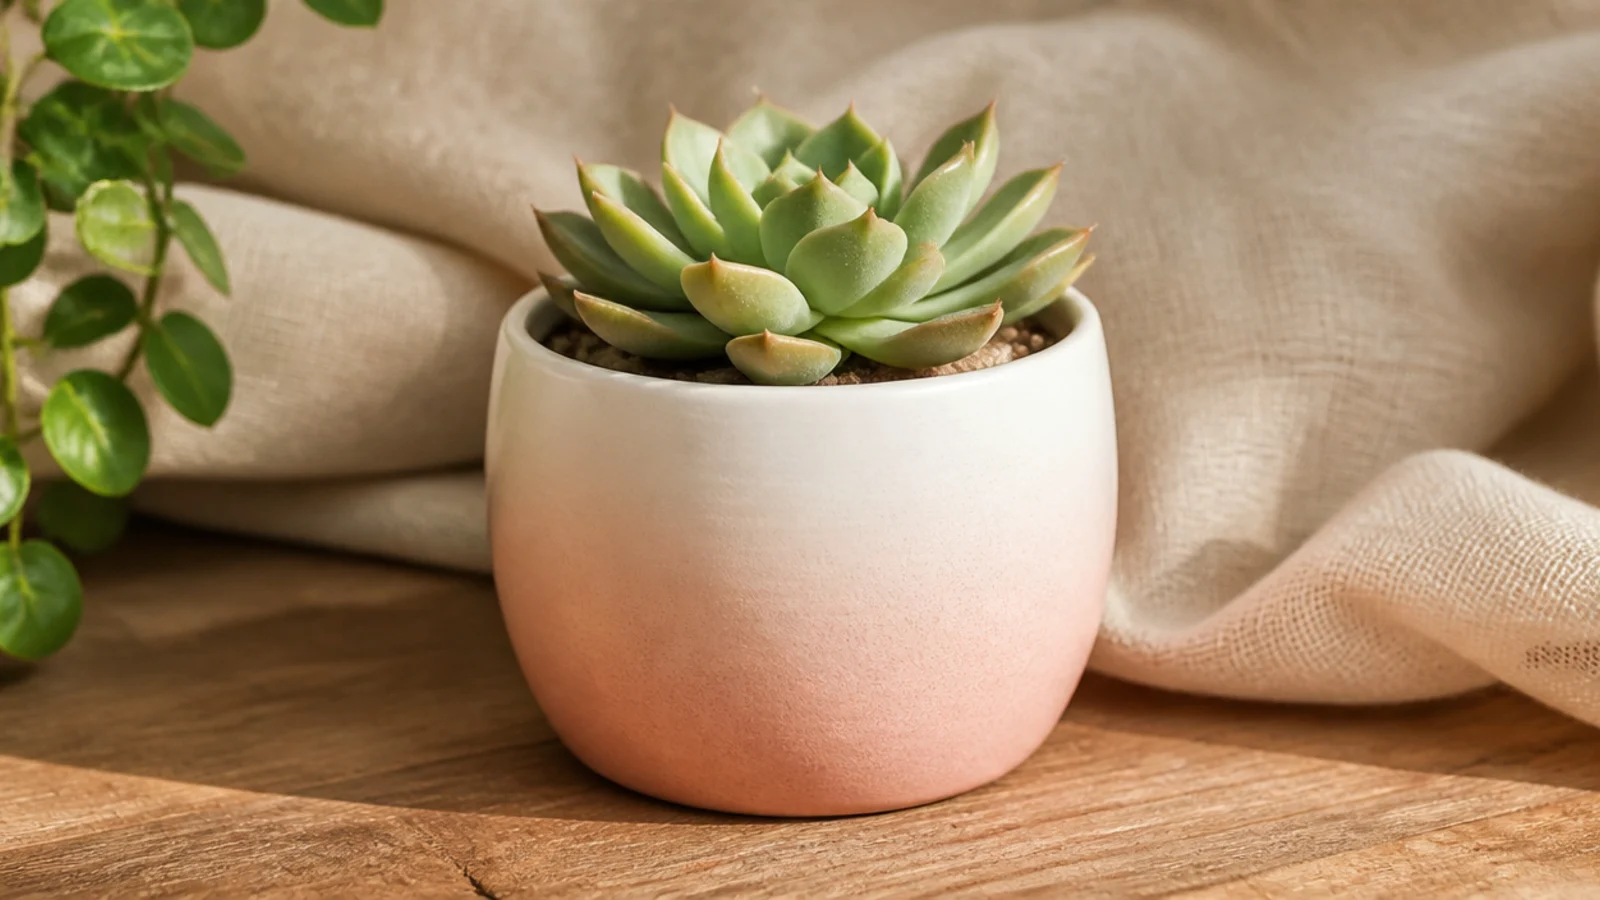
Base-coat the pot in your lightest color. While it’s tacky, dab your darker color along the bottom with a damp makeup sponge, then work upward with lighter pressure so it thins out. Pounce the transition zone with a clean part of the sponge to blur the line. Build it gradually, let dry, and seal.
A soft ombre fade looks advanced but a makeup sponge does the blending for you, even at small scale. You dab the darker color at the bottom and lighter toward the top so they melt together. Soft, tonal colors — blush to white, blue to cream — blend the most forgivingly on a tiny pot.
Skip thisDon’t pick two high-contrast colors for a first ombre; a hard jump between shades is hard to blend on a tiny surface.
Editor's noteLightly mist the sponge with water — a slightly damp sponge blends smoother than a dry one on a small curve.