1. Happy Smiley Face
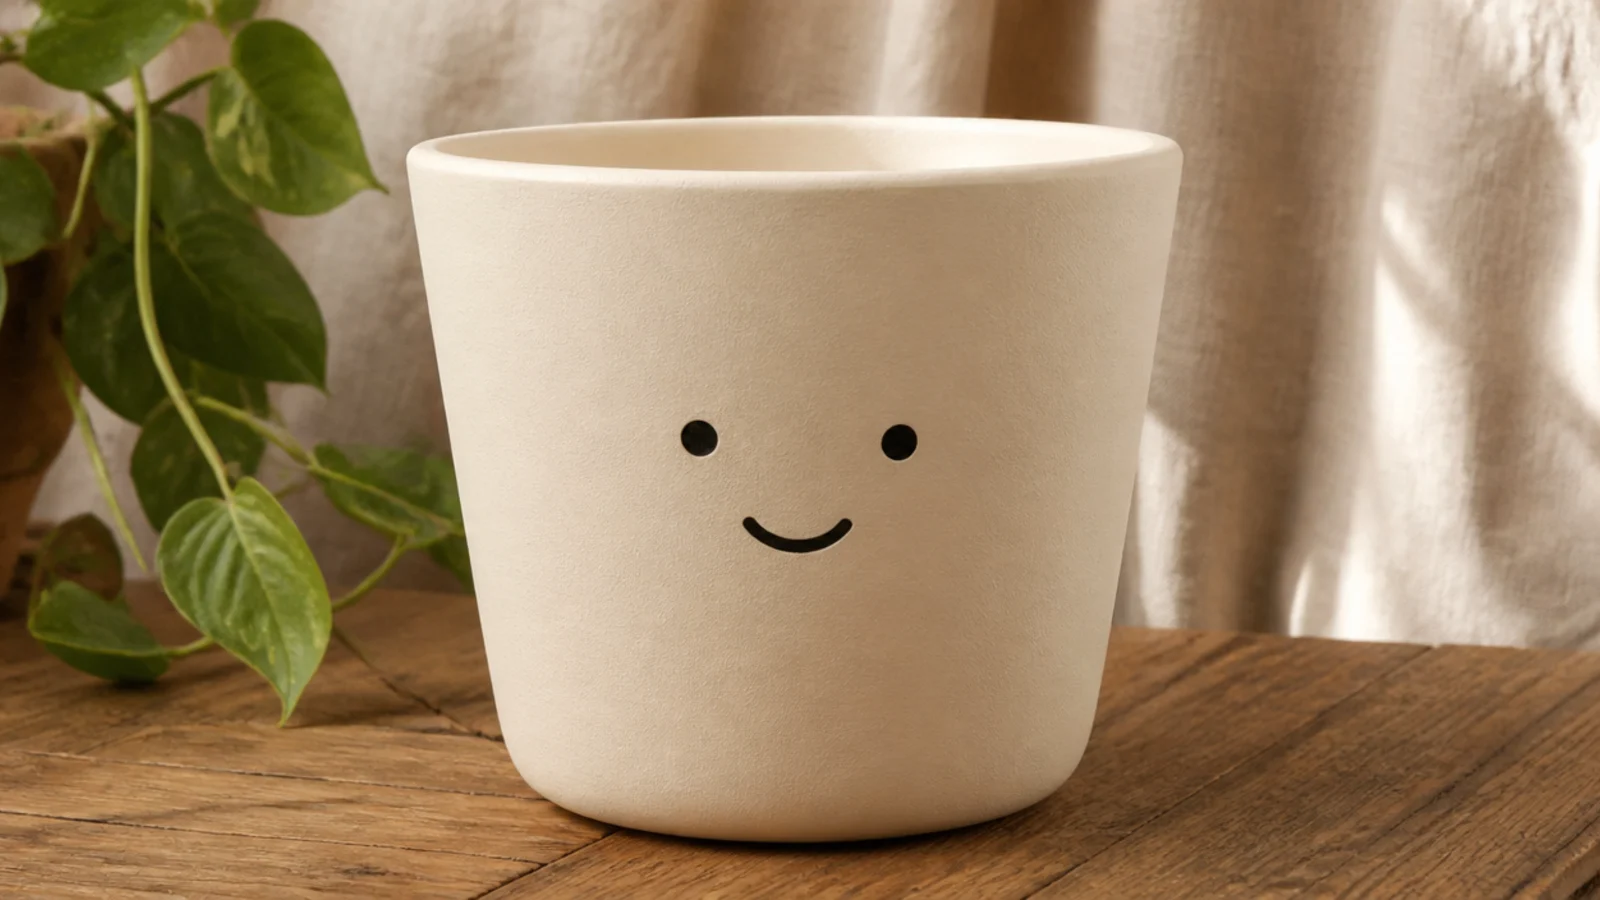
This is the cheapest, easiest cute design there is, which is exactly why I start beginners here. It’s just two dot eyes and one small curved smile on a solid base, so there’s almost nothing to get wrong and it uses pennies of paint. A happy little face makes even a wonky $1 pot feel friendly and intentional. It suits absolute beginners and looks great in a cheerful yellow, cream, or soft sage.
Prime the pot, then base-coat it in your color with two thin coats of acrylic and let it dry. Dip a pencil eraser in black paint and stamp two eyes about a third of the way down, spaced an inch apart. For the smile, use a size 2 round brush or a black paint pen to draw a short upward curve below and between the eyes. Let it dry fully, then seal with a matte clear.
Keep the smile small and low — a tiny curve reads cuter and more modern than a big grin stretching across the pot.
Don’t space the eyes too far apart or too high; a wide, high-set face looks surprised instead of sweet.
2. Blushing Cheeks Face
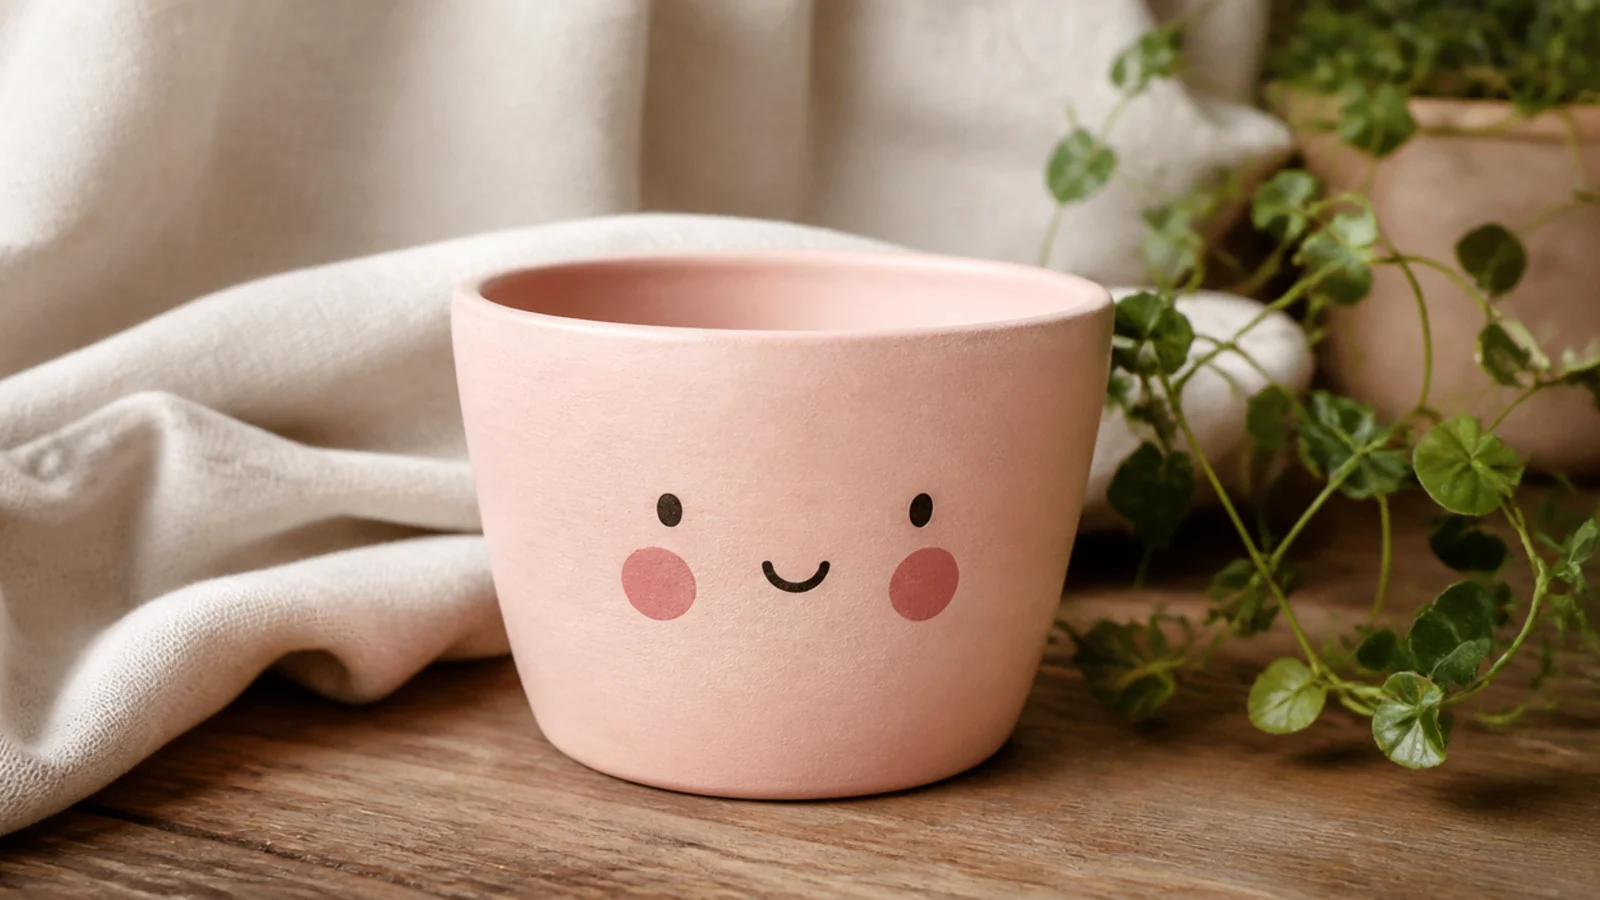
Adding two round pink cheeks to a simple face is the trend that makes a pot look like a boutique ceramic. The blush turns a plain smiley into a shy, adorable character that people always ask about. It builds directly on the smiley face, so it’s still beginner-friendly, and it looks best on a cream or pale-peach base. This one costs almost nothing but reads far more expensive than the $1.25 pot underneath.
Base-coat the pot in cream and let it dry. Add two dot eyes with a pencil eraser and a small curved smile with a round brush, as with the smiley face. For the cheeks, water down a little pink acrylic, dab it onto a cotton swab, and press two soft circles just below and outside the eyes. Build the blush in light layers so it stays soft, then seal.
Editor's noteWater the pink down more than feels right — a sheer, barely-there blush looks far cuter than two solid hot-pink dots.
Skip thisDon’t use undiluted bright pink for the cheeks; a heavy, saturated circle looks like a clown, not a shy face.
3. Tiny Mushroom Cluster
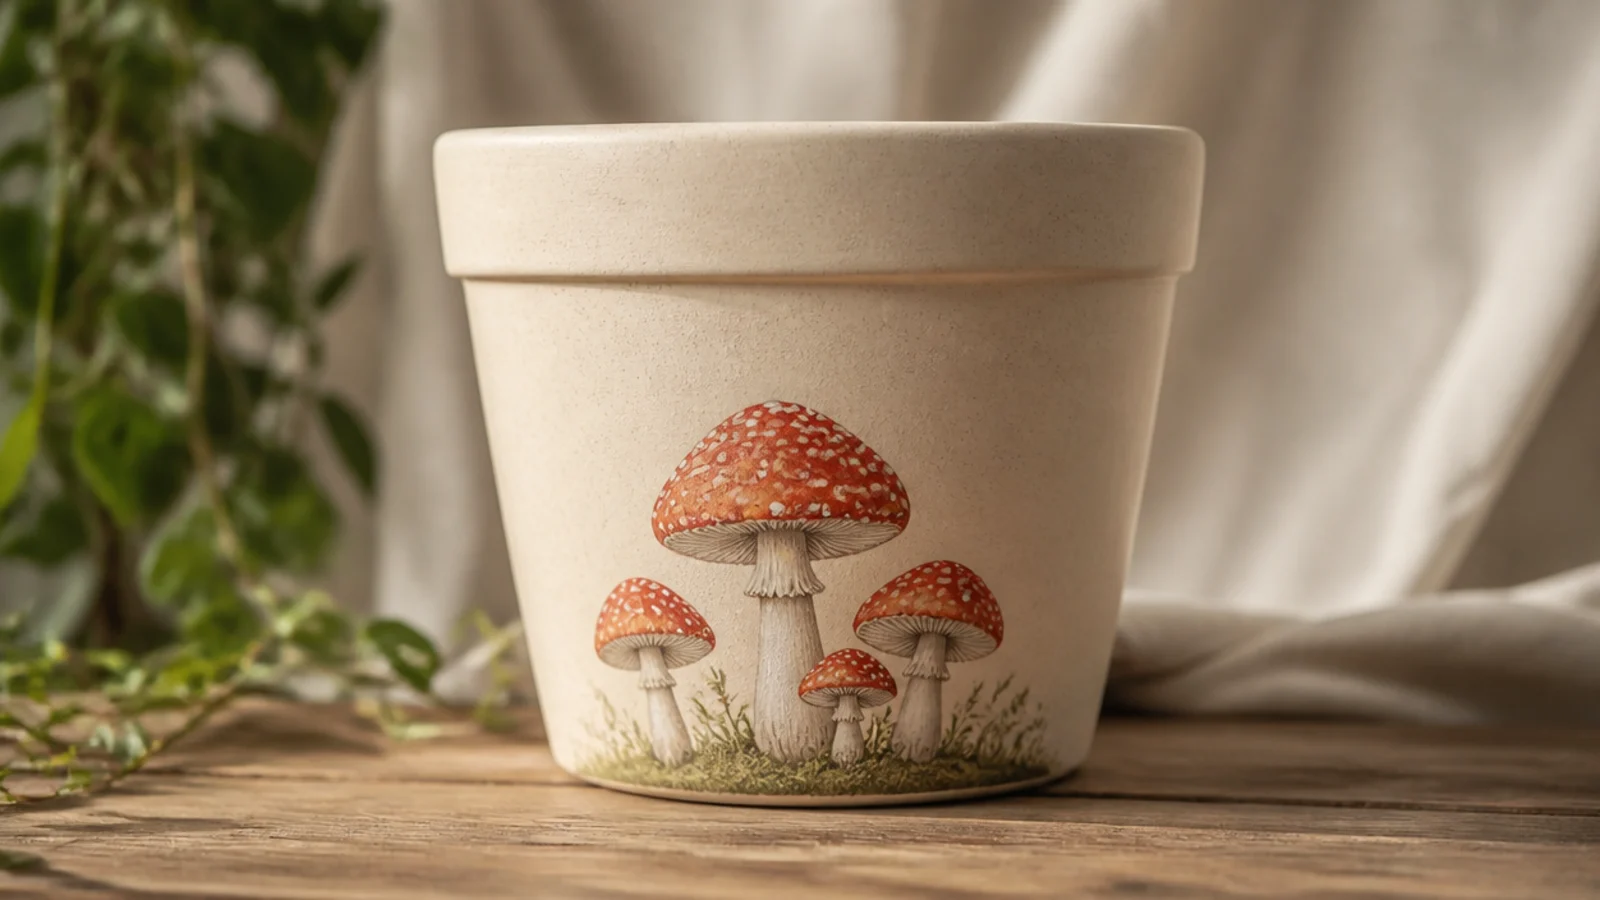
Little red-and-white toadstools are peak cottagecore cute and look charming clustered near the base of the pot. Three mushrooms of different heights read as a sweet forest scene without needing any real drawing skill. They suit anyone who loves a woodland, storybook vibe and look best on a cream or sage base. Mine cost about $2 in pot and paint combined.
Base-coat the pot in cream and dry. For each mushroom, paint a small white stem with a round brush, then add a rounded red cap on top like a half-circle. Once the red dries, dab tiny white dots on each cap with the tip of a cotton swab. Add a few small green grass dashes at the base, let it dry, and seal.
Paint three mushrooms in different heights and cluster them close together — odd numbers and varied sizes always look more natural than a matched row.
Don’t add the white cap-spots before the red is dry, or they’ll smear into pink streaks instead of crisp dots.
4. Mini Rainbow
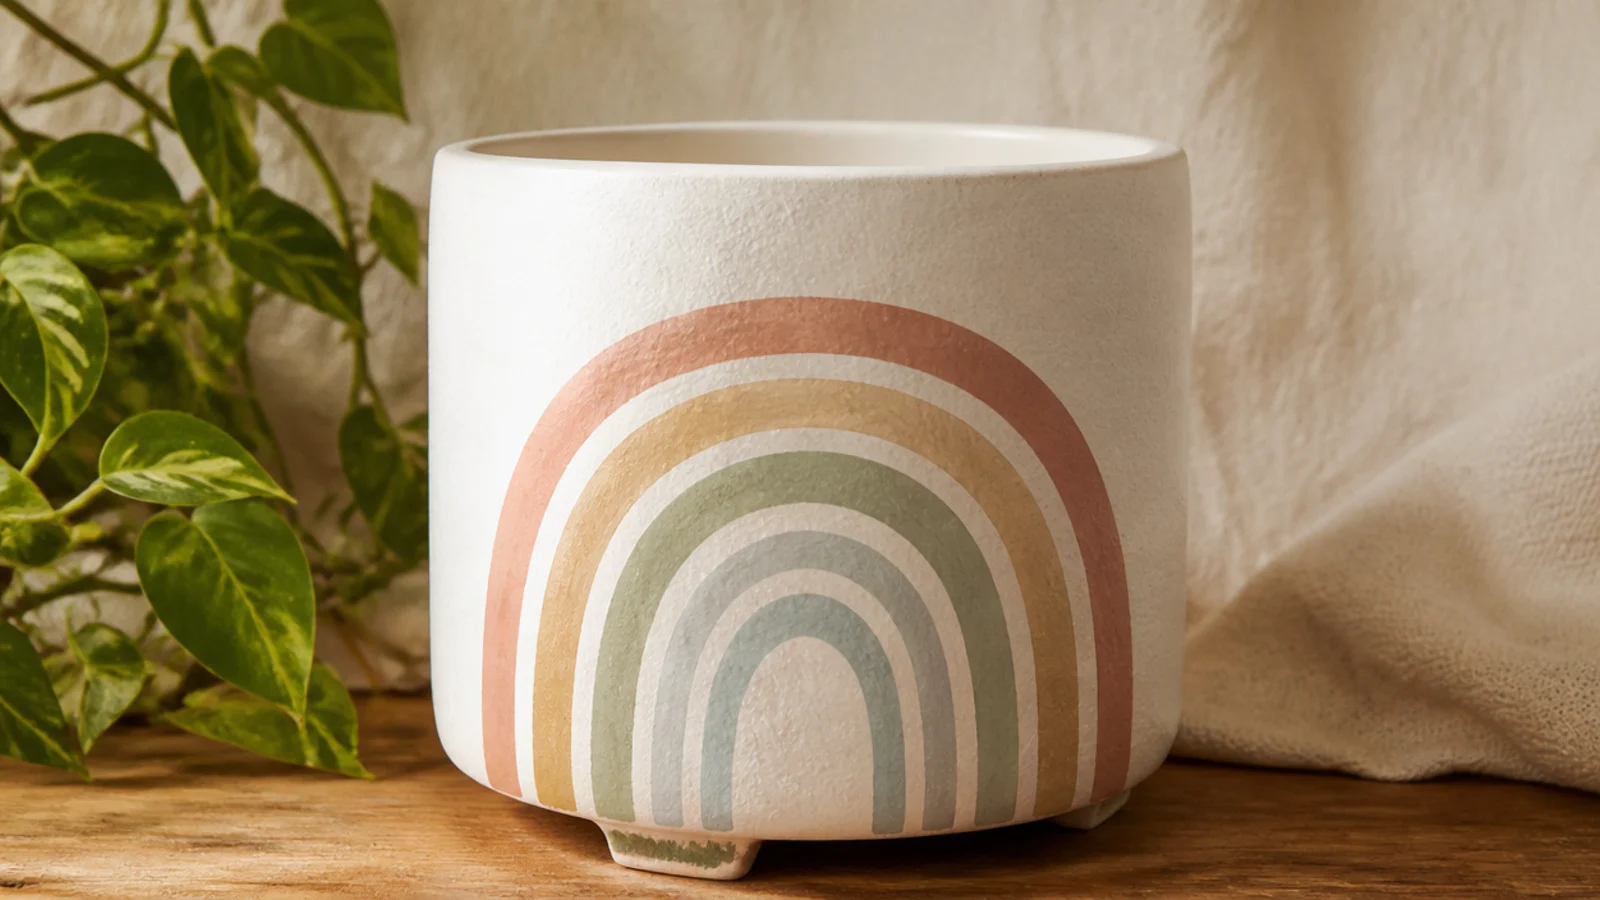
A little rainbow on the front of the pot is instantly cheerful, and in soft pastels it looks grown-up rather than childish. It’s just a few nested arches filled in, so it’s very beginner-friendly. It suits a kid’s room, a kitchen sill, or anyone who wants a pop of color, and it works over any pale base. I painted mine with leftover craft paint, so it cost nothing extra.
Base-coat the pot white and let it dry. Trace around graduated round objects — a bottle cap, a jar lid, a small cup — to pencil three or four nested arches on the front. Fill each band with a small round brush in muted colors like blush, mustard, sage, and dusty blue, keeping the bands even. Add two small cloud puffs at each end if you like, erase stray pencil, and seal.
Editor's noteUse pastel or earthy tones instead of bright primary colors — a muted rainbow reads far more expensive and styled.
Skip thisDon’t let the arch bands vary in thickness; uneven widths make the rainbow look wobbly and rushed.
5. Scattered Hearts
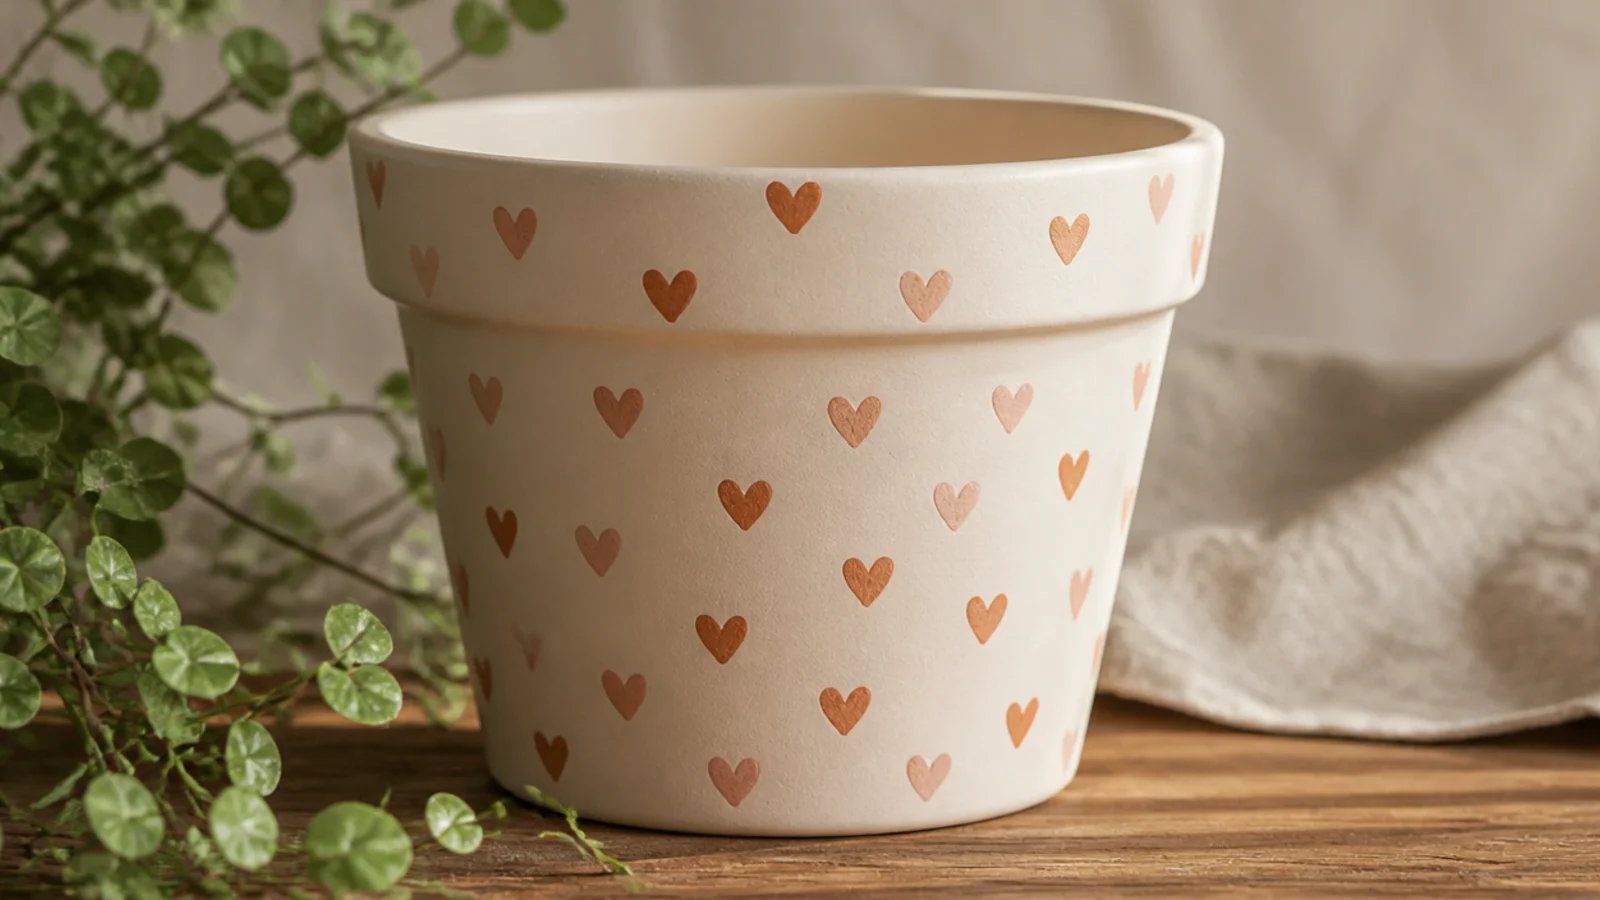
Small hearts scattered across the pot are simple, sweet, and forgiving — the all-over pattern actually hides chips and rough patches on a cheap pot. Two heart colors keep it from looking flat. It suits gifts, Valentine’s decor, or anyone who wants cute without a focal design, and it looks lovely on a cream base. This is a great pot for one that came out of the bargain bin with a flaw.
Base-coat the pot in cream and dry. Make each heart with two small dots side by side, then pull the paint down into a point with the tip of a round brush — or use a heart-shaped punch as a light stencil. Alternate two colors like terracotta and blush, spacing the hearts evenly around the pot. Let it dry and seal.
Editor's notePractice the two-dots-into-a-point heart on scrap paper a few times first; once you find the rhythm they come out uniform fast.
Skip thisDon’t cluster the hearts unevenly; leave roughly equal gaps so the scatter looks planned, not random.
6. Hand-Dotted Daisies
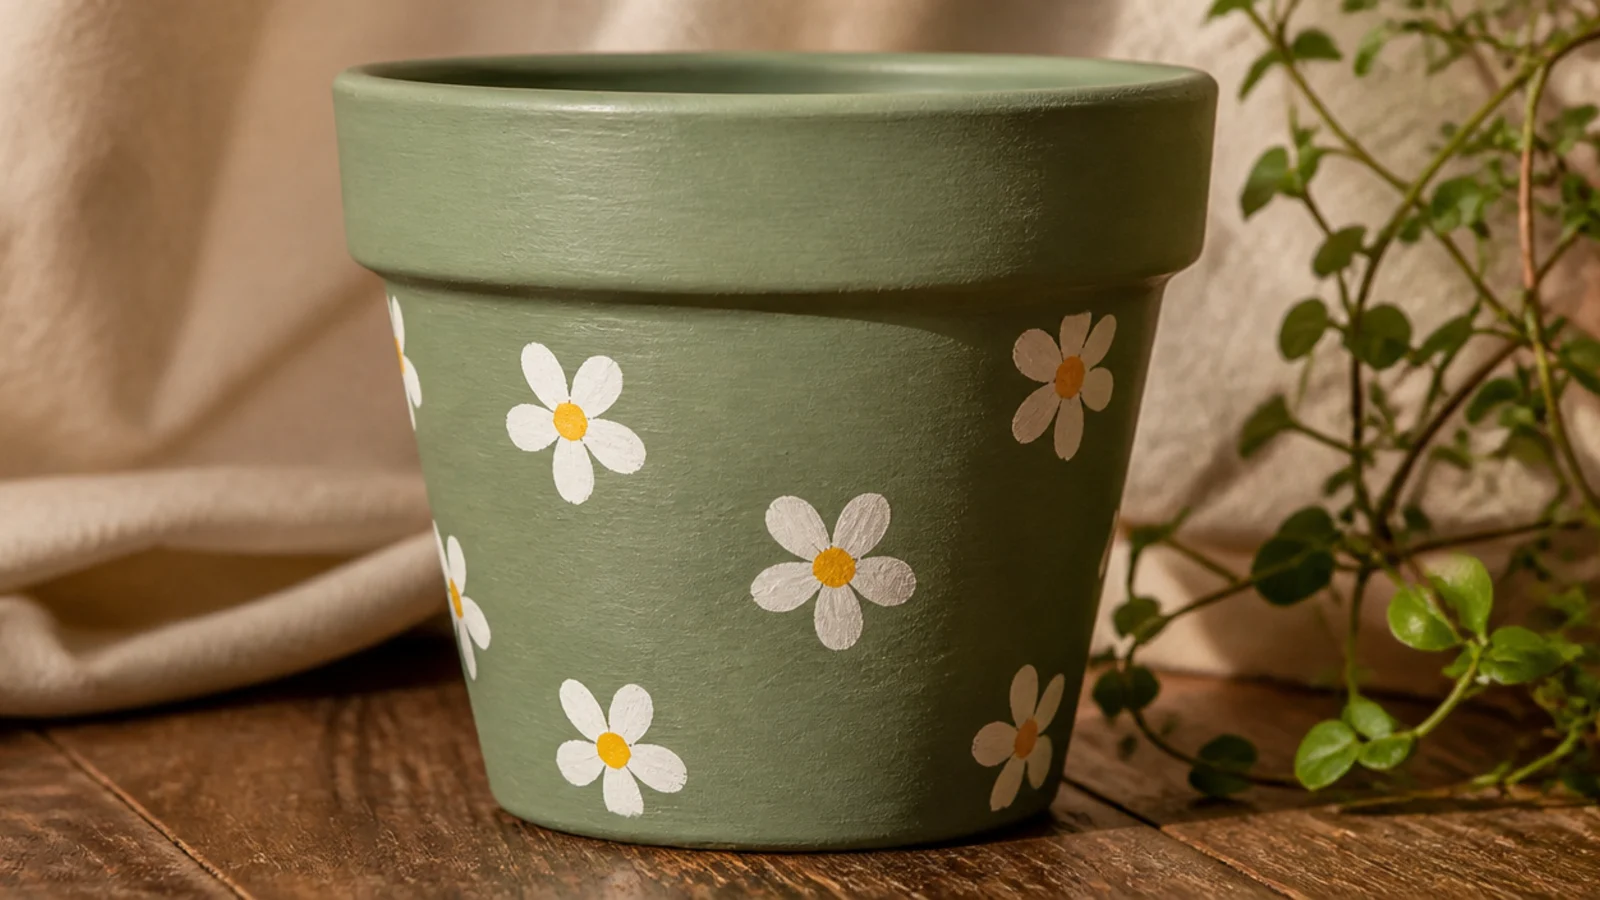
Little dot-daisies look hand-painted and delicate but they’re just five dots in a circle around one center dot. It’s the first flower most beginners can nail because every part is a dot. It suits a spring or garden look and pops beautifully against a sage or dusty-blue base. Cheap, quick, and endlessly cute — I put these on half my windowsill.
Base-coat the pot in sage and dry. Using a cotton swab or size 2 round brush, place five white petal dots in a rough circle, keeping them close so they read as a flower. Add a yellow center dot to pull each daisy together. Scatter a few daisies around the pot with tiny green leaf dashes between them, then seal once dry.
Editor's noteAdd the yellow center last and make it bold — it’s what ties the five loose petal dots into a clear flower shape.
Skip thisDon’t overcrowd the pot; a few well-spaced daisies look intentional, while a dense cluster looks messy.
7. Cozy Gingham Check
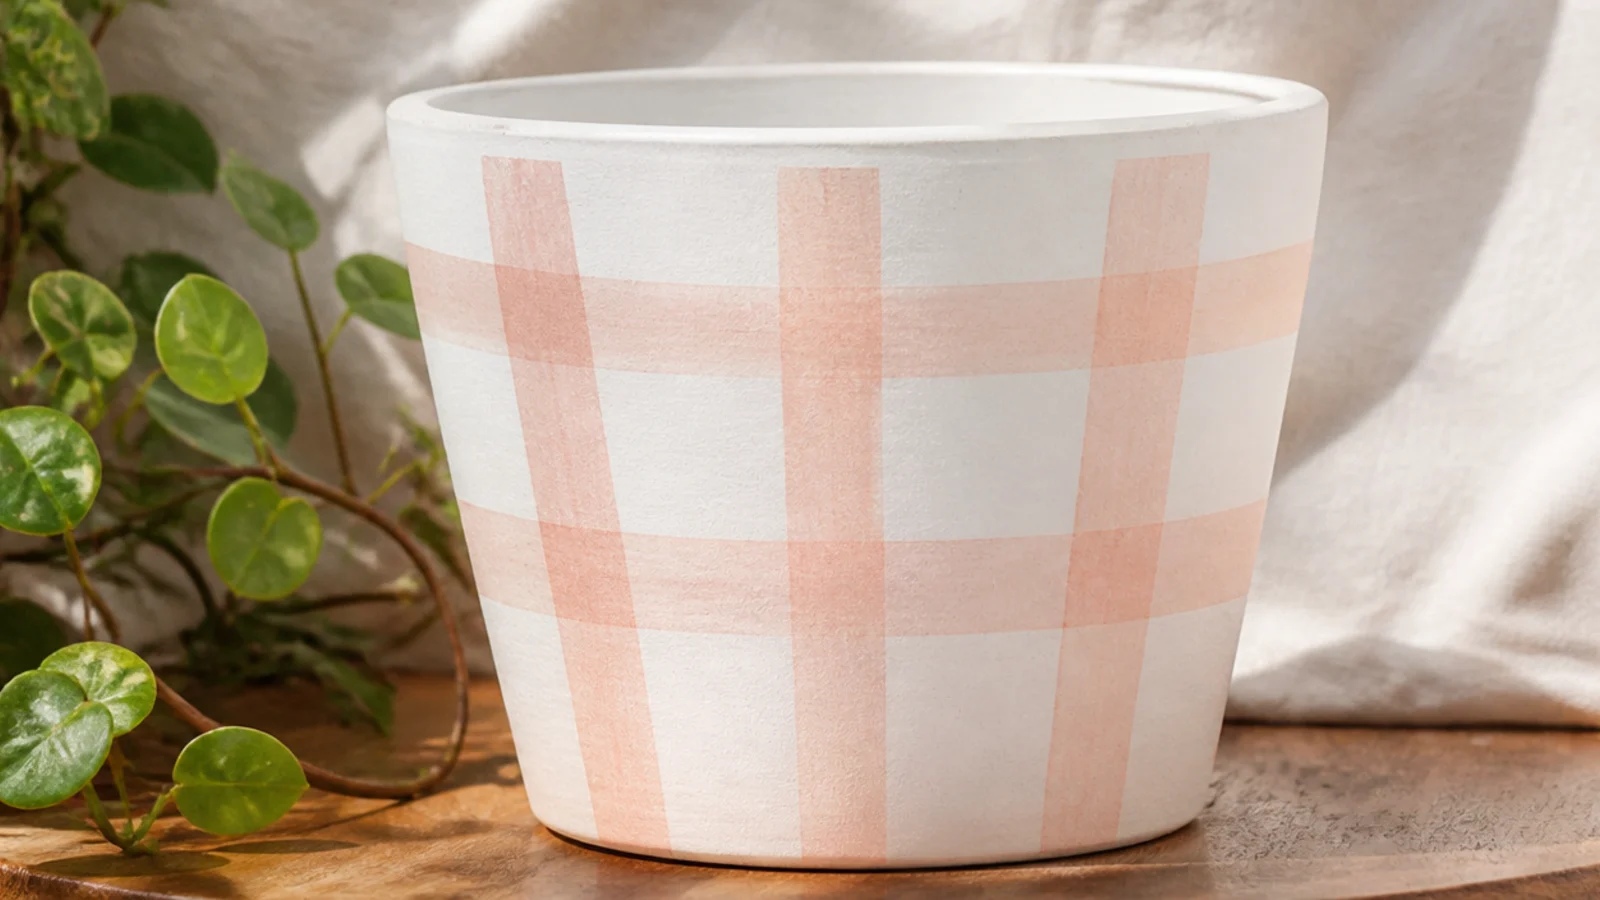
Gingham looks like a lot of work but it’s just translucent stripes crossing each other, and the grid hides any wobble. It gives a pot a cozy, cottage-picnic charm that feels expensive. It suits a country kitchen or a gift and looks sweet in blush, sage, or dusty blue over white. Because the pattern is busy, it’s perfect for disguising a rough dollar-store surface.
Base-coat the pot white and dry. Water down one color of acrylic so it’s slightly translucent. Paint evenly spaced vertical stripes around the pot with a flat brush, let them dry, then paint horizontal stripes the same width across them. Where the stripes overlap, the color doubles up into the classic gingham grid. Let it dry and seal.
Editor's noteThin the paint so the stripes are semi-transparent — the darker squares where they cross are what make it read as gingham, not plaid.
Skip thisDon’t use fully opaque paint; solid stripes just look like a grid, missing the soft layered gingham effect.
8. Little Strawberries
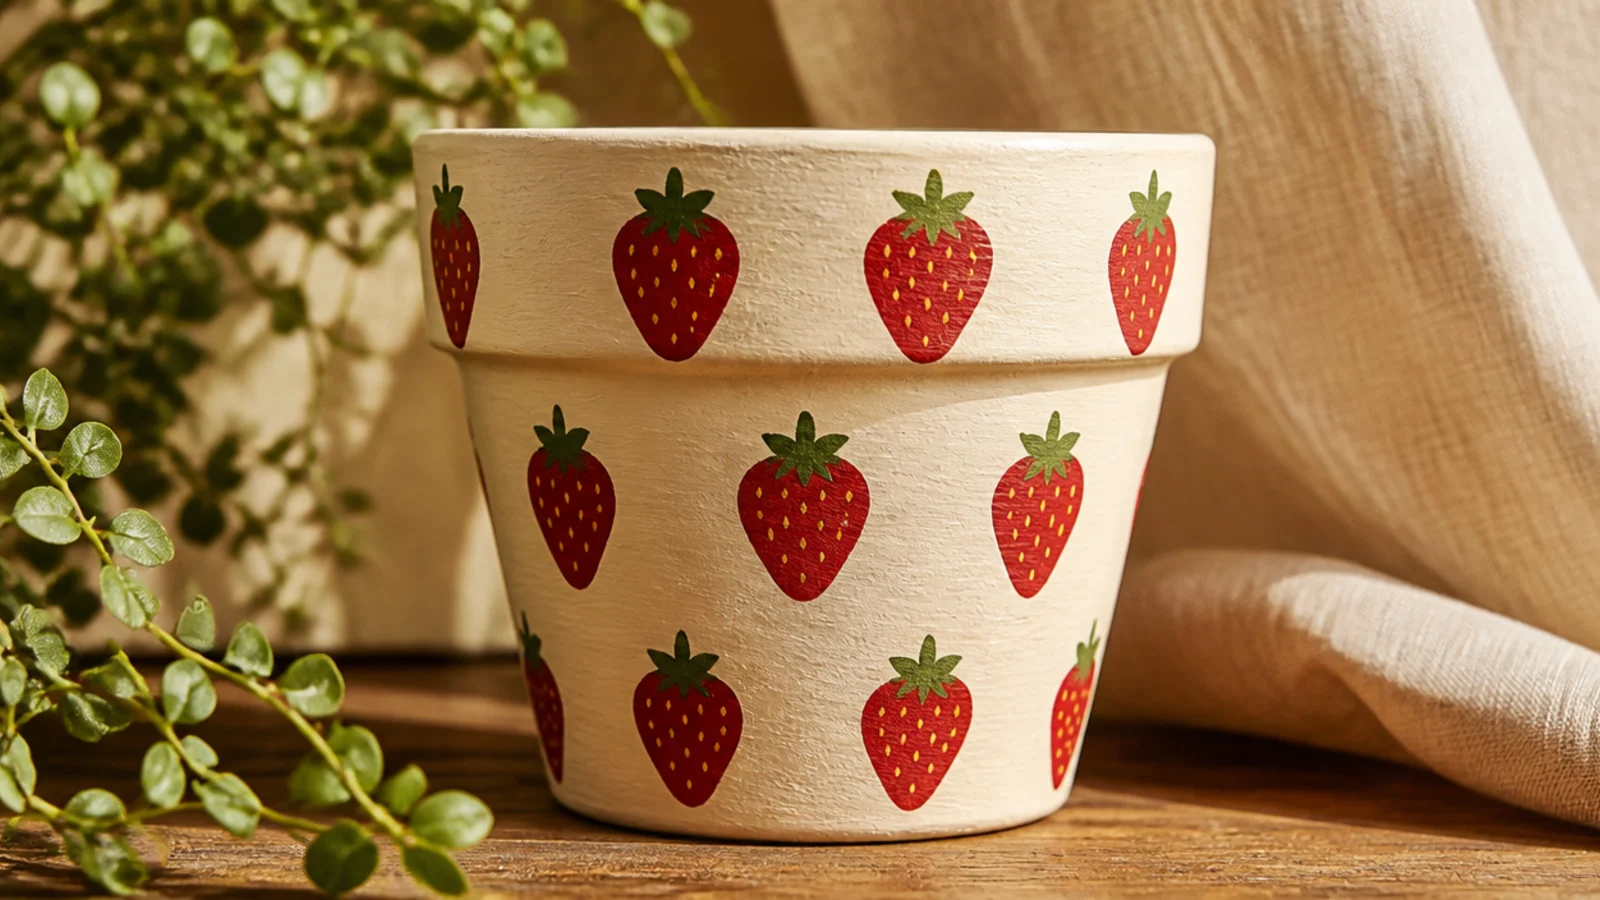
Tiny strawberries are having a moment and they’re genuinely easy — a red teardrop, a green top, and a few dots. They give a pot a fresh, fruity, cottagecore feel that suits a kitchen herb pot perfectly. They look best scattered on a cream base. Mine cost about $2 total and get more compliments than anything else on the sill.
Base-coat the pot in cream and dry. For each berry, paint a small red teardrop or rounded triangle with a round brush, point facing down. Add a little green leafy cap and a tiny stem at the top. Once the red is dry, dab small yellow seed dots across each berry with the very tip of your brush. Scatter a few berries around, then seal.
Editor's noteKeep the berries small — about the size of a real strawberry relative to the pot — so several fit and read as a sweet pattern.
Skip thisDon’t add the yellow seeds while the red is wet; wait until it dries or the seeds blur into the red.
9. Puffy Clouds
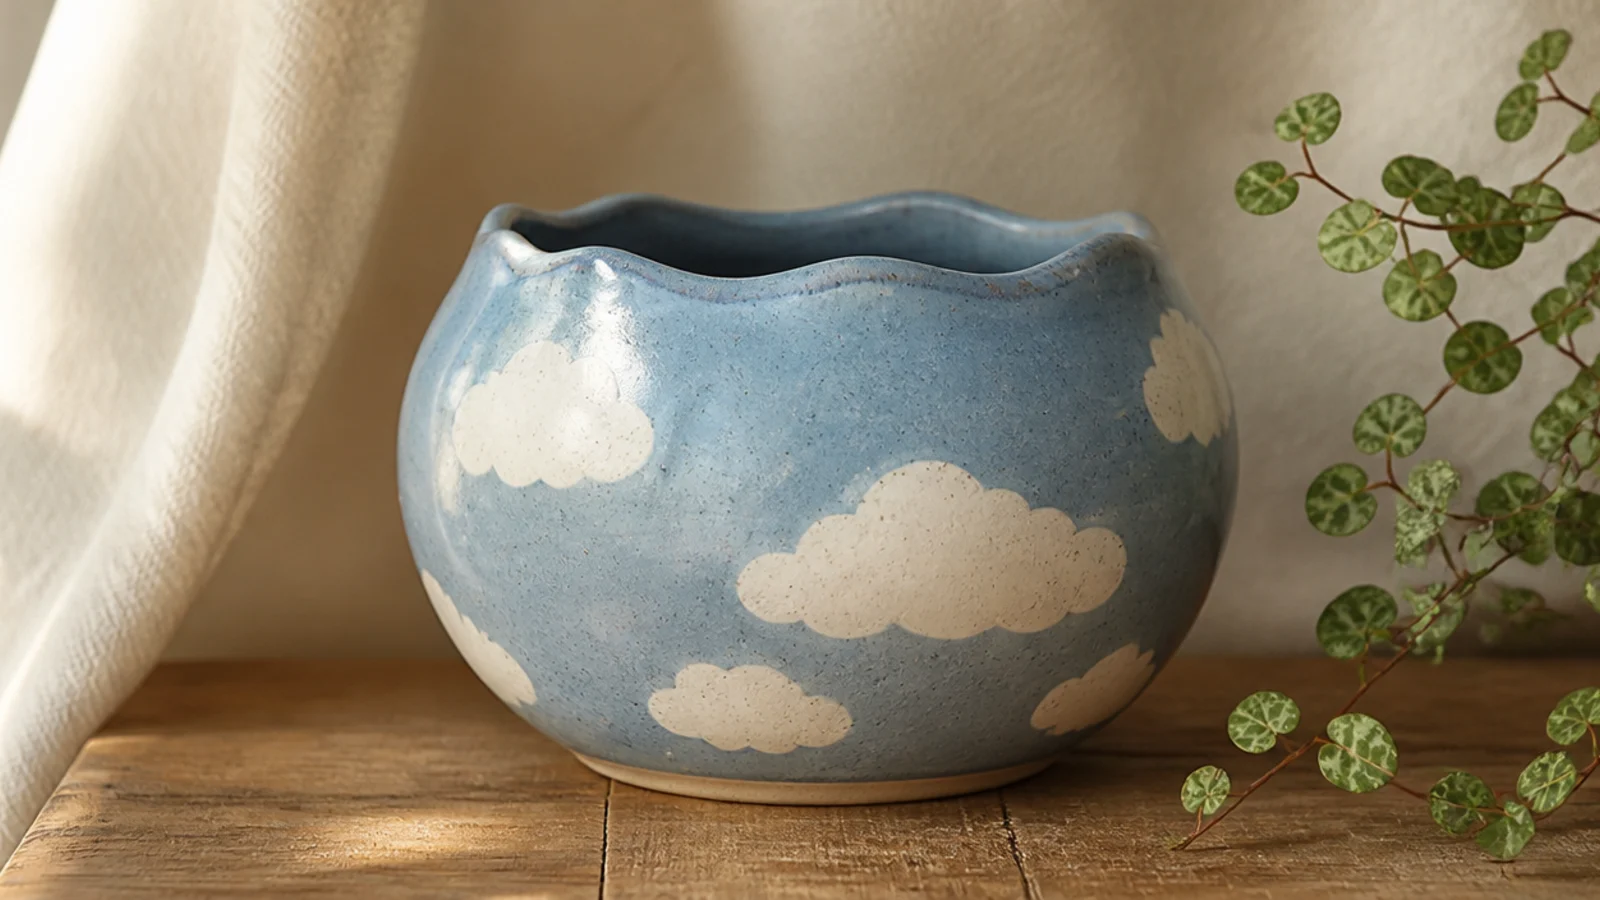
Simple white clouds on a soft blue pot are calming and cute, and they’re one of the most forgiving designs because clouds have no exact right shape. It suits a nursery, a bathroom, or anyone who wants a soft dreamy look. The pale-blue base with white clouds is a two-color project that costs almost nothing. Add tiny cheeks to a cloud for extra charm.
Base-coat the pot in a soft sky blue and dry. Load a round brush with white and paint each cloud as a flat-bottomed row of overlapping bumps — a few small circles along the top and a straight line underneath. Keep the clouds low and wide. Add a tiny blush cheek or a small smile to one cloud if you want it cuter, then let it dry and seal.
Give clouds a flat bottom and a bumpy top rather than a full oval — that flat base is what makes them read as clouds.
Don’t make the clouds too tall or perfectly round; a tall round puff looks more like a sheep than a cloud.
10. Cottagecore Wildflower Sprig
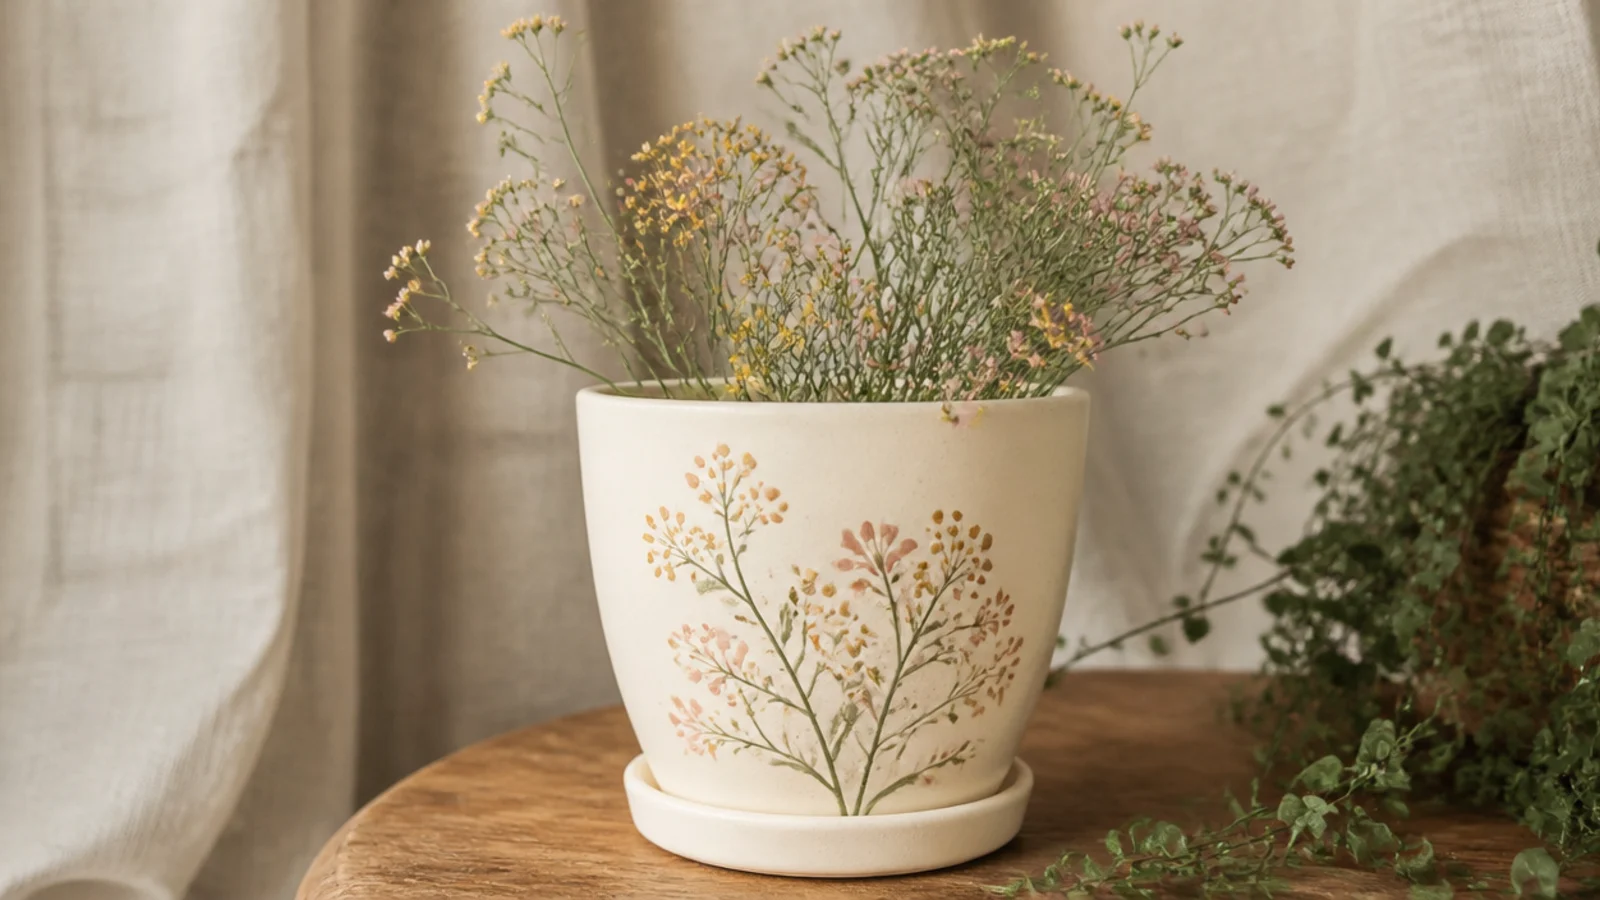
A single delicate sprig of tiny wildflowers looks like something from an artisan pottery shop, but it’s just thin stems with dot blooms. It’s a touch more advanced than the daisies but still very doable. It suits anyone chasing that soft, hand-painted cottagecore look and reads beautifully on a cream base. A whole meadow’s worth of charm from one $1 pot and a few dabs of paint.
Base-coat the pot in cream and dry. With a size 2 round brush, paint a few thin curved green stems rising from one spot on the front. Add tiny leaf dashes along the stems. Top the stems with small dot blooms in blush, yellow, and dusty blue, varying the heights. Add a couple of unopened bud dots for realism, then seal.
Editor's noteLet the stems fan out at slightly different heights and angles — a loose, uneven sprig looks far more natural than a stiff bouquet.
Skip thisDon’t make the stems thick or perfectly straight; heavy, ruler-straight stems kill the delicate wildflower feel.
11. Lucky Ladybugs
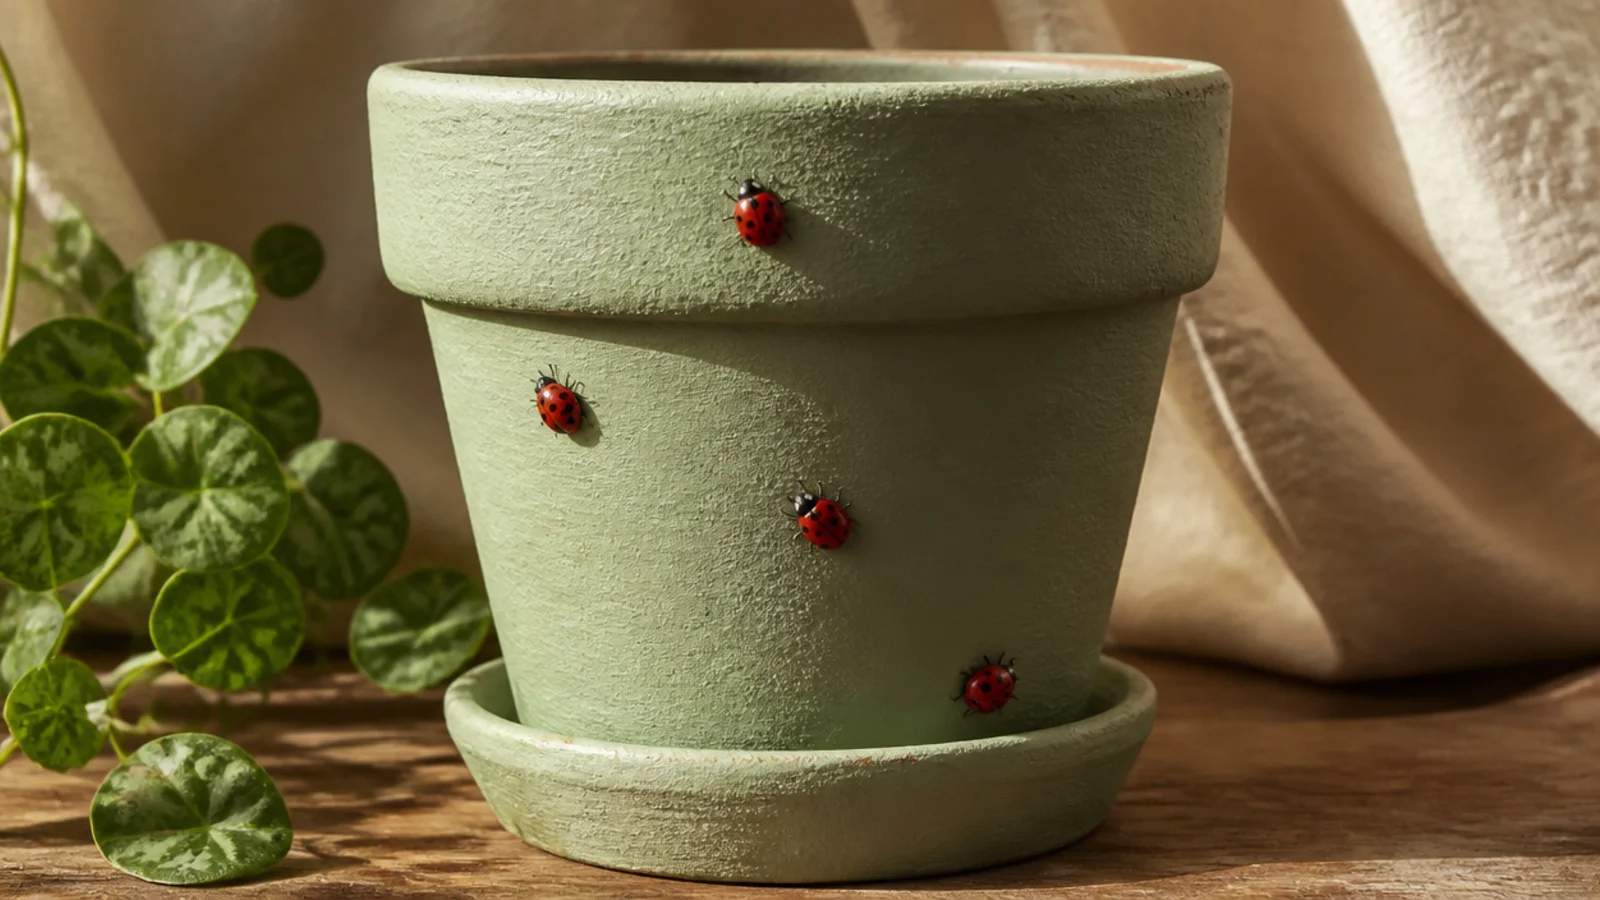
Little ladybugs are cheerful and quick — a red oval, a black head, and a few dots. They look charming crawling across a leafy green or cream pot and suit a garden or kid’s plant. Kids especially love them. Three or four scattered bugs is plenty, and the whole design uses just red and black, so it’s cheap and beginner-simple.
Base-coat the pot in pale green and dry. For each ladybug, paint a small red oval body with a round brush. Add a smaller black half-circle head at one end and a thin black line down the middle of the back. Once dry, dab a few small black spots on each side with the tip of your brush. Add tiny dot legs if you like, then seal.
Editor's notePaint the black head and spots only after the red body is fully dry, so the black stays crisp instead of bleeding into pink.
Skip thisDon’t overload each bug with spots; three or four per side looks like a ladybug, while a dozen looks like a blob.
12. Bumblebee Buddies
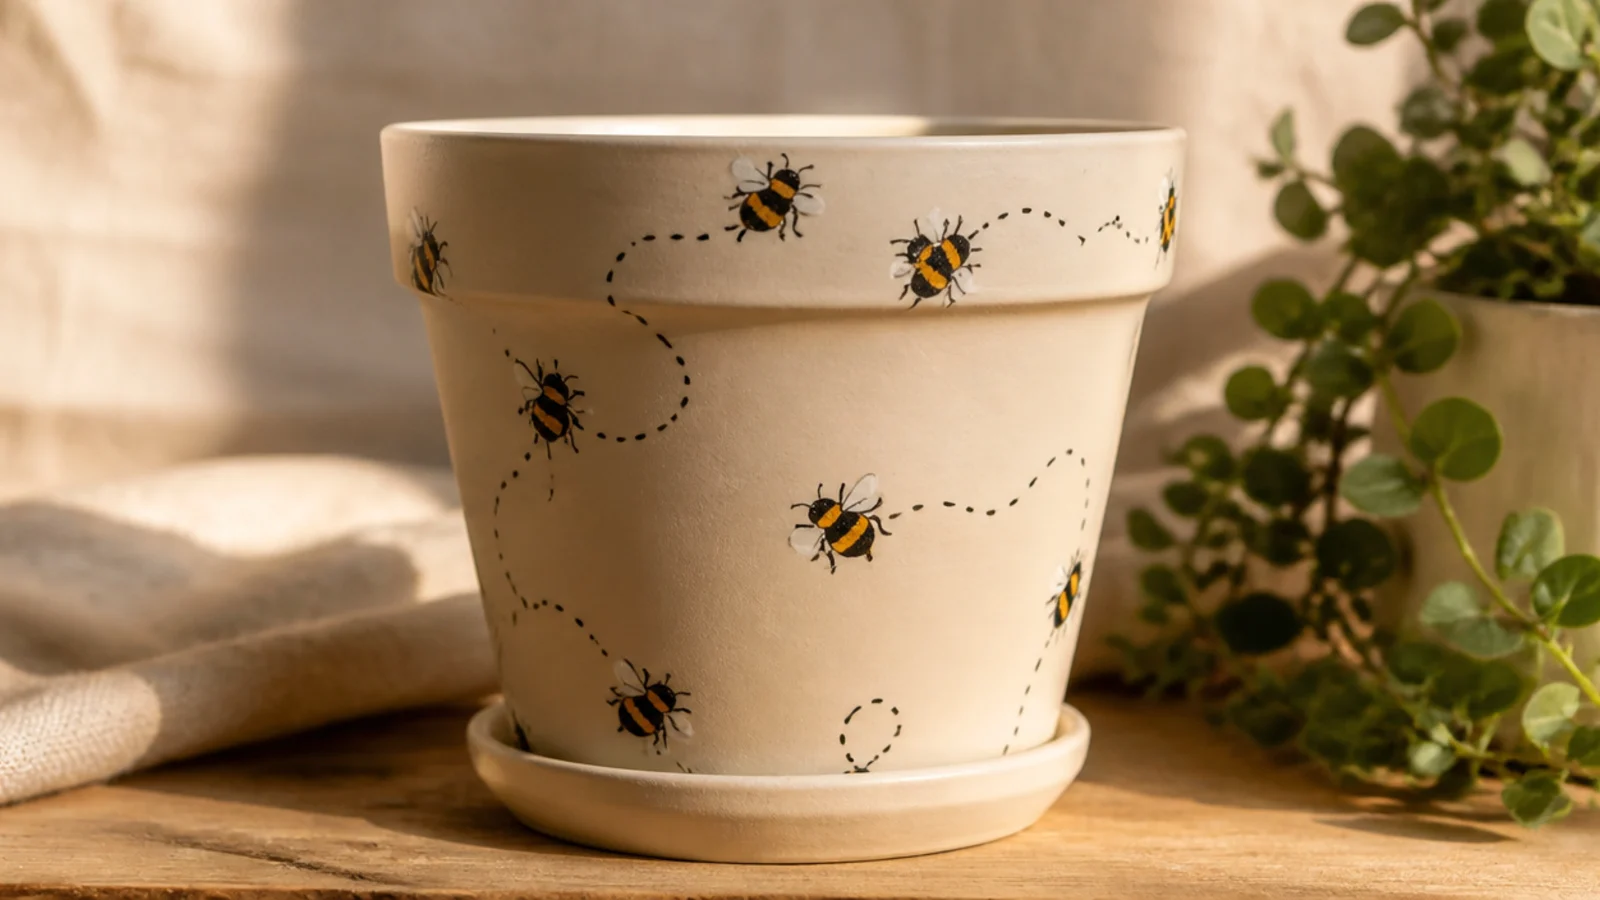
Round little bumblebees with dotted flight-path trails are irresistibly cute and simpler than they look — a striped oval and two wings. They suit a sunny kitchen or garden pot and pair perfectly with the daisy or wildflower pots for a matching set. The yellow-black-white palette is cheap and the dashed trails hide any shakiness. Great for a spring gift.
Base-coat the pot in cream and dry. Paint a small yellow oval for each bee, then add two or three short black stripes across it and a black dot head. Add two small white wing shapes at the top with a round brush. Finish with a dashed, looping black flight trail behind each bee using tiny dots, then seal.
The dashed loop-de-loop trail is what sells the design — it adds movement and cuteness for almost no effort.
Don’t paint the black stripes edge to edge; leave yellow showing between them or the bee just looks like a dark blob.
13. Retro Checkerboard Band
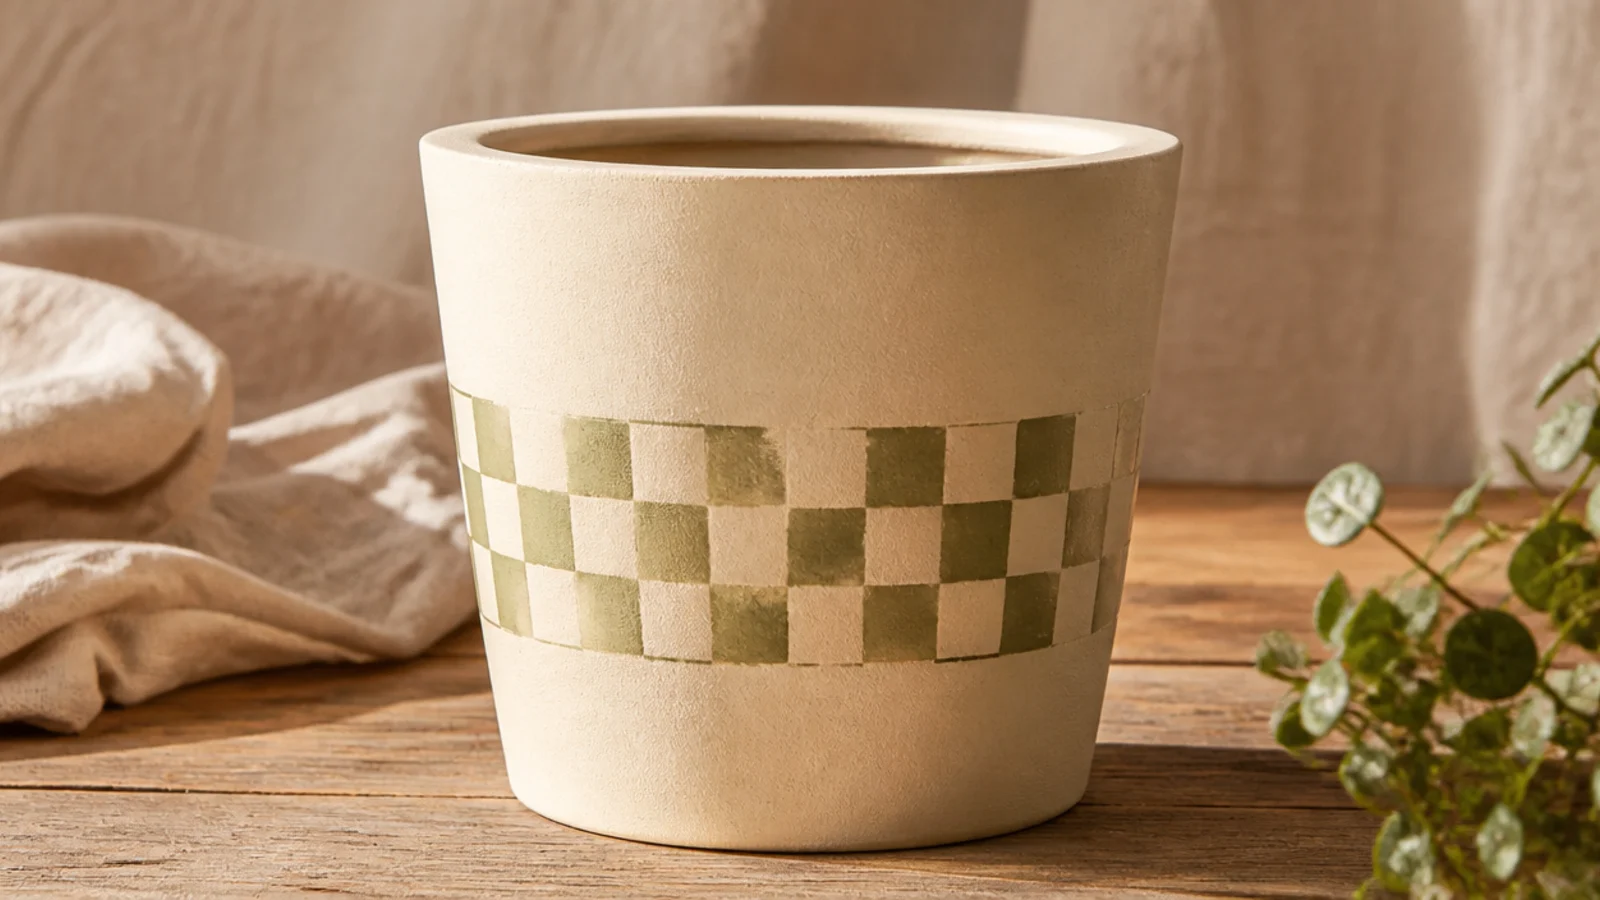
A checkerboard band is playful and on-trend, and the grid structure makes it forgiving because it hides small wobbles. Keeping it to one band around the middle instead of the whole pot keeps it clean and modern. It suits a retro or fun aesthetic and looks great in sage-and-cream or blush-and-cream. The busy pattern is another good one for disguising a flawed bargain pot.
Base-coat the pot in cream and dry. Lightly pencil a grid for one horizontal band around the middle, sizing the squares evenly. Paint alternating squares in your second color with a small flat brush, following the grid lines. Use two thin coats so the squares stay solid. Erase visible pencil marks and seal.
Editor's noteUse a small flat brush rather than a round one — its square tip fills each check with fewer, cleaner strokes.
Skip thisDon’t checker the whole pot as a beginner; a single band is faster, looks intentional, and stays even more easily.
14. Twinkle Stars
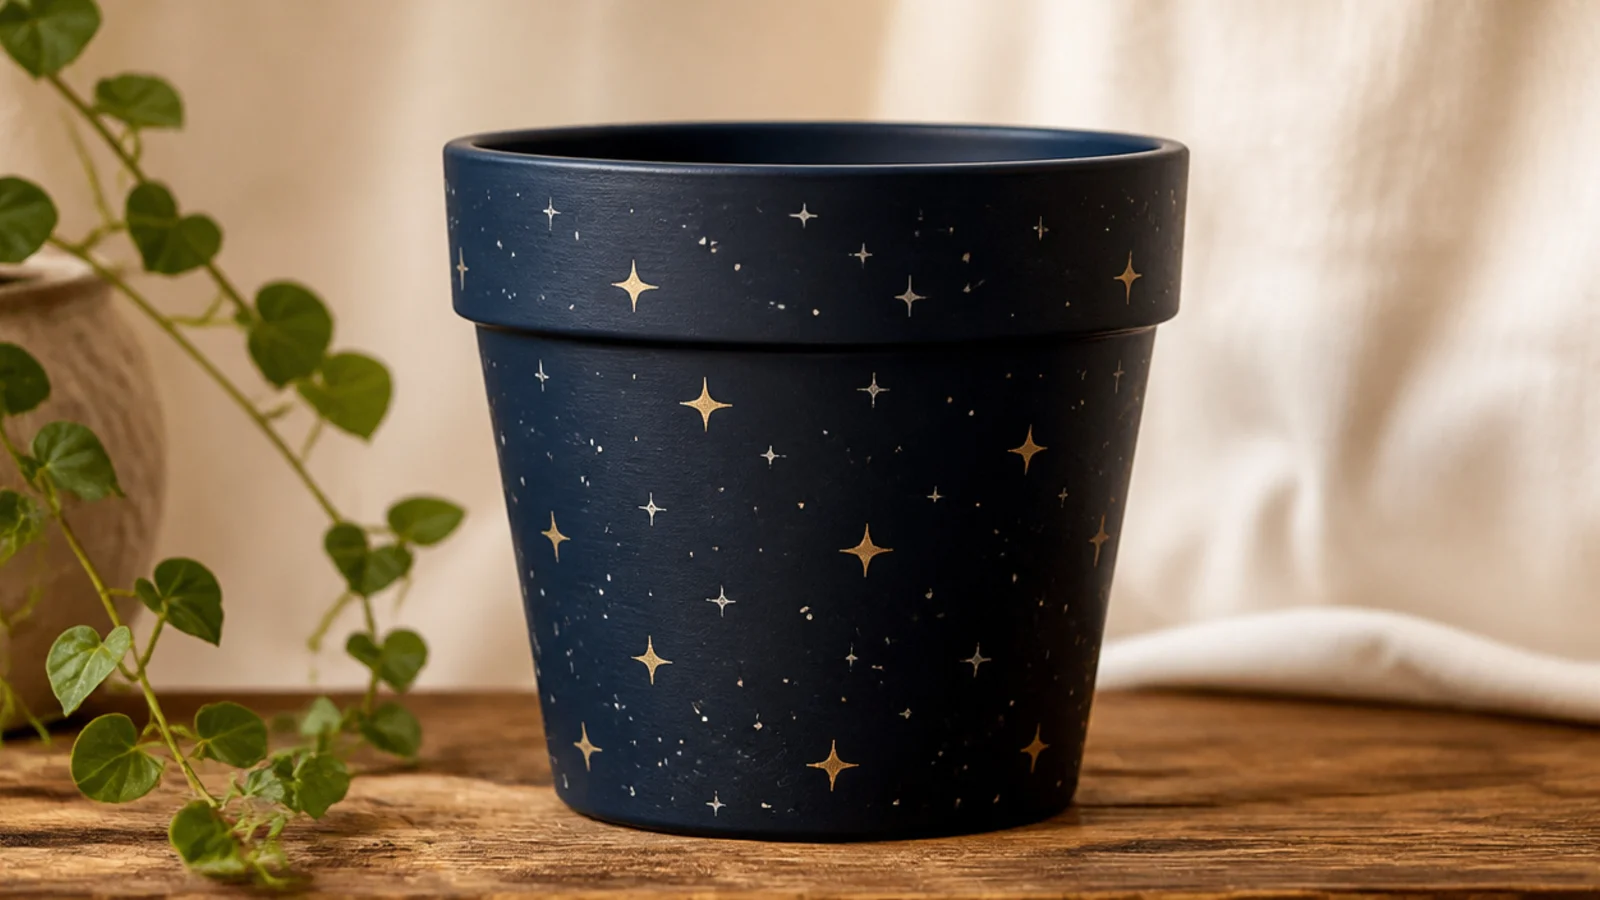
Tiny scattered stars on a dark pot look magical and are surprisingly easy with a simple four-point star shape. It suits a nursery, a cozy evening corner, or anyone who loves a night-sky theme. A deep navy or charcoal base with cream and gold stars feels expensive but costs the same $1 pot plus a little paint. The scatter pattern hides any surface flaws too.
Base-coat the pot in navy or charcoal with two thin coats and dry. Paint small four-point stars by making a thin vertical stroke crossed with a shorter horizontal one, thicker in the middle and tapering to points. Alternate cream and gold stars, and fill gaps with tiny dots for a sparkle effect. Let it dry and seal — use a light spray clear over gold so it doesn’t smear.
Editor's noteVary the star sizes and mix in tiny dots between them so the sky looks scattered and natural, not like a grid.
Skip thisDon’t seal gold paint with a heavy brushed-on varnish that can drag it; use a gentle spray clear instead.
15. Smiling Sunshine Face

A little smiling sun combines everything cute — a cheerful face, warm rays, and blush cheeks — into one happy design. It’s the perfect send-off project because it builds on the face and rainbow skills from earlier in the list. It suits a sunny windowsill or a pick-me-up gift and glows against a cream base. Mustard-yellow craft paint and a few dabs of pink are all it takes.
Base-coat the pot in cream and dry. Paint a solid mustard-yellow circle on the front, then add short triangle rays pointing outward all around it with a round brush. Once dry, add two black dot eyes, a small curved smile, and two soft watered-down pink cheeks inside the sun. Let everything dry fully, then seal with matte clear.
Editor's noteKeep the rays short and evenly spaced around the circle so the sun looks tidy rather than spiky and chaotic.
Skip thisDon’t crowd the face too close to the edge of the sun circle; leave room so the eyes, smile, and cheeks aren’t cramped.