
1. Dollar-Store Wooden Frame with Felt Leaf Border
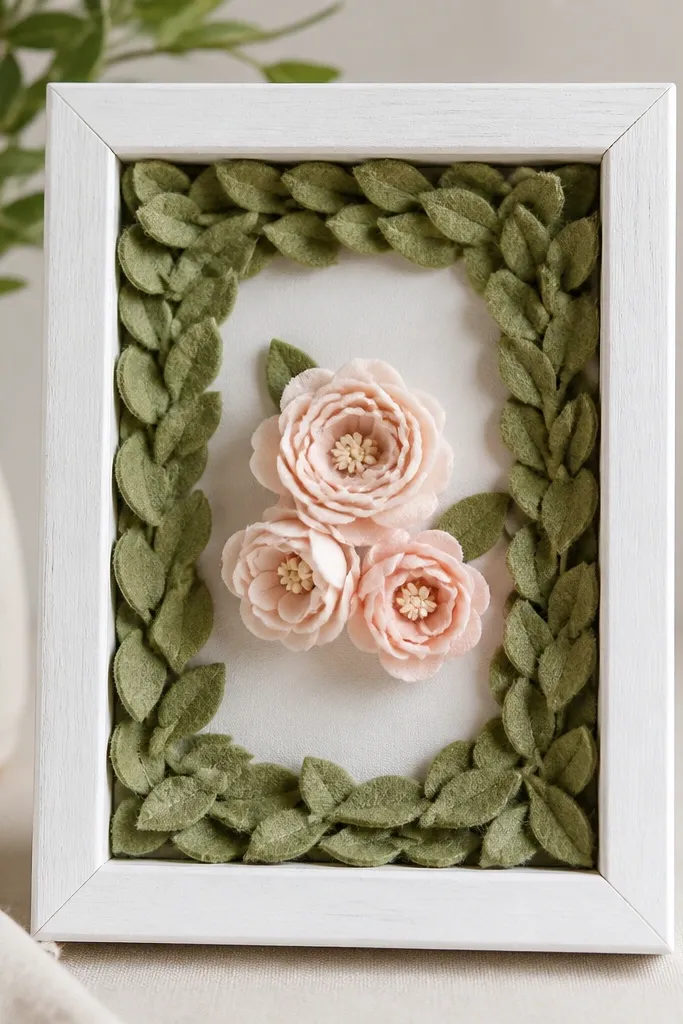
This one looks clean because the felt leaf border creates a consistent outline. The frame is matte white so the center flowers pop, and felt gives you soft texture without bulk. I use blush or dusty pink for the flowers and add two tiny gold bead picks at the tips for sparkle. The leaf border also hides glue lines along the inner edge.
Use a thrifted or dollar-store wooden frame, 8x10 or 9x12. Cut felt leaves from one sheet using a template (I trace a 2-inch leaf shape and cut 18-22 leaves), then glue them around the inner border at staggered angles. Add the flower cluster with hot glue on the back and tuck the petals edges under the leaf ring.
Pro tipSpray the felt with a light fabric-safe clear coat after assembly so it doesn't shed fuzz when you wipe the glass later.
AvoidAvoid gluing leaves directly to the glass - it looks messy and catches dust.
2. Green Garland Frame with Ribbon Vines
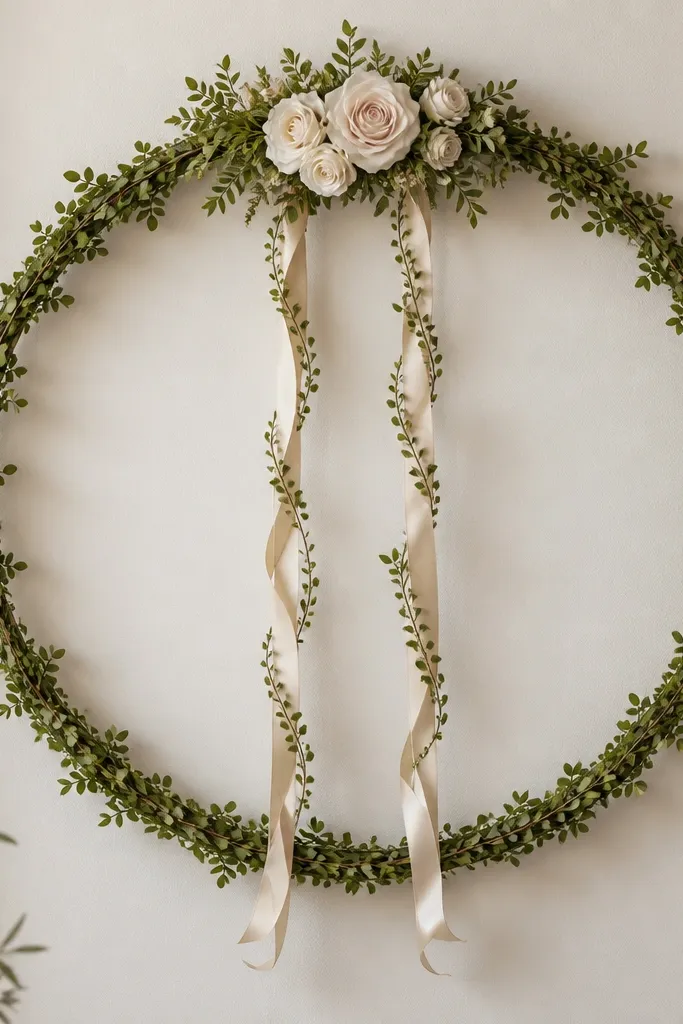
Ribbon vines give movement even when the flowers are simple. The boxwood garland anchors the look and keeps it seasonal because you can swap the top flower color. I like a deep green garland with cream or sage ribbon because it reads "fresh" in spring and "formal" in winter. The vertical drape makes the frame feel taller and more expensive.
Start with a round or oval frame, then wrap it with a thin faux garland using hot glue every 3-4 inches. Tie two long satin ribbons (1-1.5 inches wide), then tack the bottom ends on the back so the drape stays smooth. Place one hero flower cluster at the top center - faux hydrangea or small paper roses - and finish with a tiny bow at the knot.
Pro tipCut the ribbon ends on a diagonal and seal with a quick pass of clear nail polish to stop fraying.
AvoidDon't use stiff wired ribbon - it twists and looks uneven against the garland.
3. Thrifted Window Frame with Dried Citrus and Mini Flowers
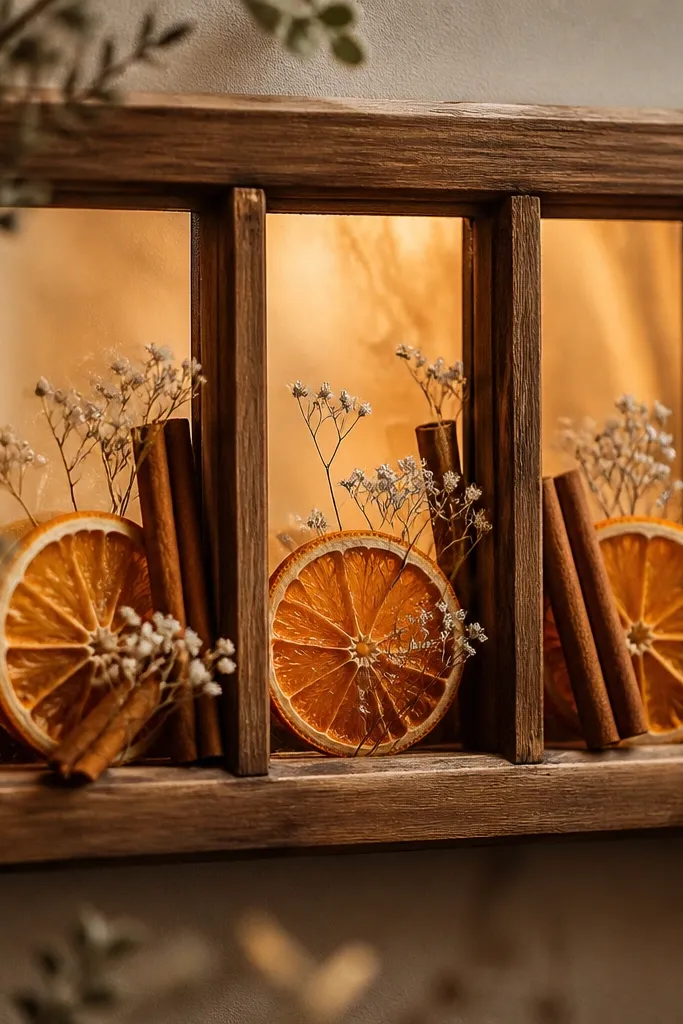
Dried citrus adds color that stays seasonal without changing the whole design. White mini flowers keep it bright, and cinnamon sticks make it smell amazing if you're placing it near a kitchen. This setup looks intentional because you're not trying to cover every inch; the negative space shows off the frame. It also photographs well because the citrus has natural texture.
Use a small thrifted window frame with open squares. Hot glue dried orange slices in a cluster, then tuck cinnamon sticks behind the top crossbar using thin twine. Add tiny blooms (baby's breath faux or small daisy picks) by gluing only the stems to the wood so the petals stay airy.
Pro tipSpritz the citrus lightly with a matte finish acrylic spray so it doesn't look glossy and plastic in photos.
AvoidSkip real citrus if you need it to last - it dries unevenly and can shed.
4. Scrapbook Paper Flower Frame with White Mat
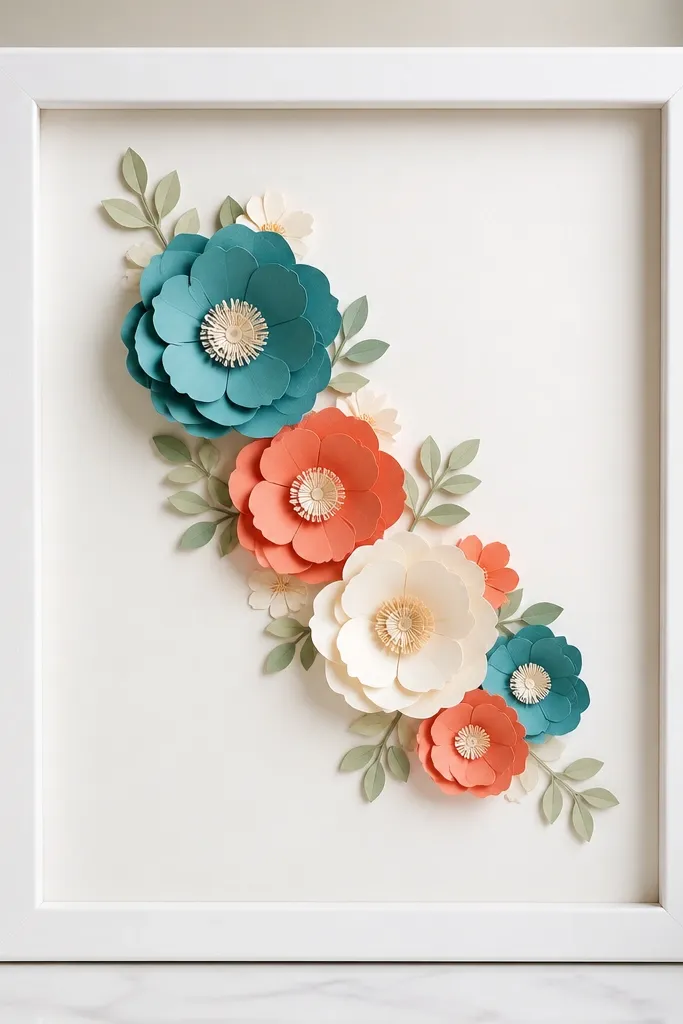
Paper flowers can look high-end when you use a mat and keep the palette tight. The white mat creates a clean breathing space so your layered petals stand out. I like mixing two patterns of scrapbook paper and one solid - it reads curated without spending on premium florals. The frame feels light, so it works great for spring and summer.
Use an 8x10 frame with a removable backing and add a white cardstock mat window. Cut flower layers from 6x6 scrapbook paper using a simple circle stack (I cut 5 sizes per flower: 1.5, 1.25, 1, 0.75, 0.5 inches). Glue petals on a slight offset so each layer shows a rim.
Pro tipUse a foam dot under the top petal layer so the paper flower has lift instead of looking flat.
AvoidDon't pick too many colors - five+ shades makes it look like a kid craft.
5. Black Frame with Faux Peony and Linen Ribbon Bow
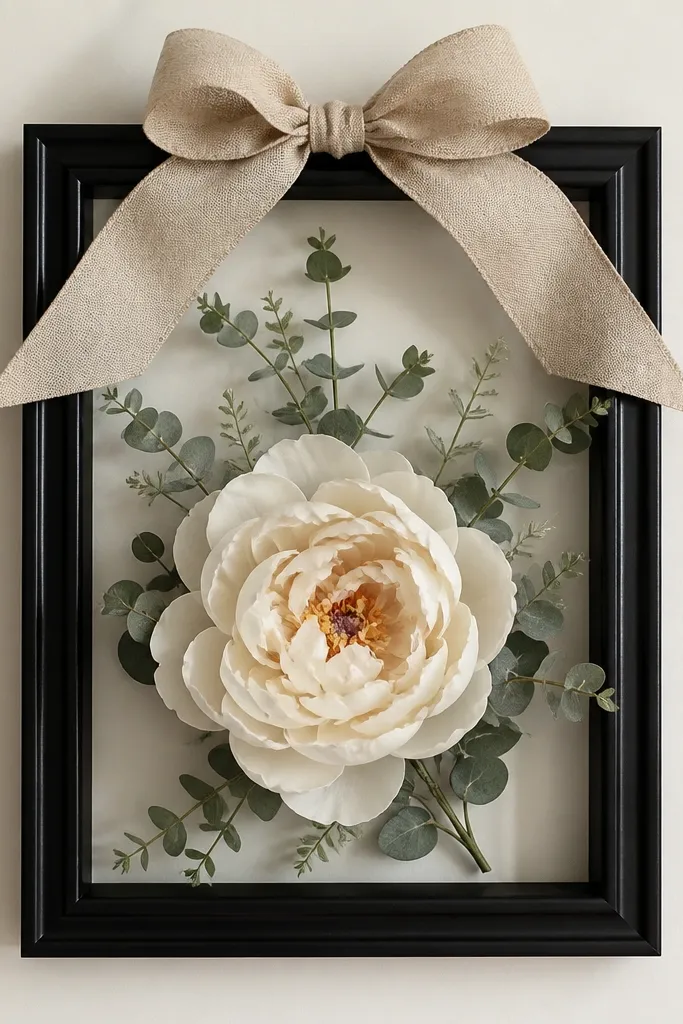
Matte black makes fake flowers look more "real" because it absorbs light. A single large peony is the hero, and eucalyptus sprigs soften the edges. Linen ribbon looks expensive because it has texture and doesn't shine like satin. This design reads fall and winter too if you swap the peony for burgundy.
Pick a 11x14 or 12x16 black frame. Glue eucalyptus sprigs around the bottom and sides with hot glue on the back. Build the bow from 2.5-inch wide linen ribbon, make loops about 6 inches wide, and tack the center to the back so it sits tight.
Pro tipUse a thin gold paint pen to add two tiny dots on the frame border for a subtle "jewelry" effect.
AvoidAvoid glossy ribbon - it cheapens the black frame contrast.
6. 3D Paper Flower Shadow Box Frame
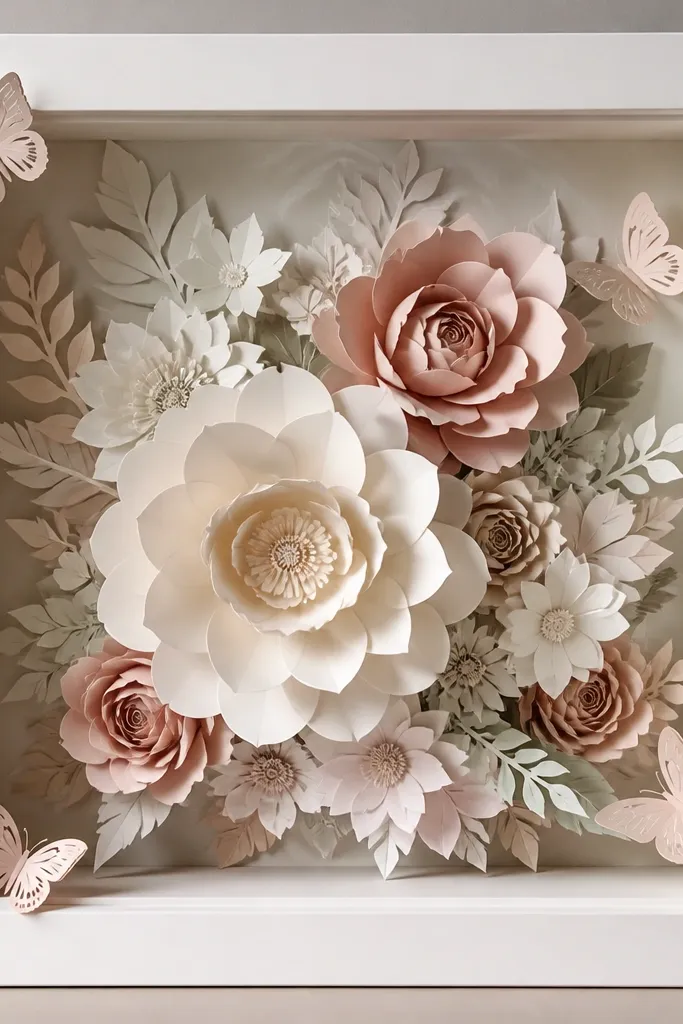
Shadow boxes make paper flowers look dimensional without buying real 3D materials. I stack petals in layers and place each flower at a different depth so the whole thing has movement. The corner butterflies add a seasonal hint without clutter. This is the closest you get to a "store-bought" look on a budget.
Use a deep frame or shadow box backing with at least 1 inch depth. Cut flowers in 3 sizes and mount each layer on foam tape strips (about 1/4 inch). Place the largest flower bottom-left, medium top-right, and small in the center. Seal the front with a clear acrylic sheet if your frame doesn't have glass.
Pro tipKeep your paper grain direction consistent for each flower - petals fold cleaner.
AvoidDon't glue every layer flat - it kills the shadow effect.
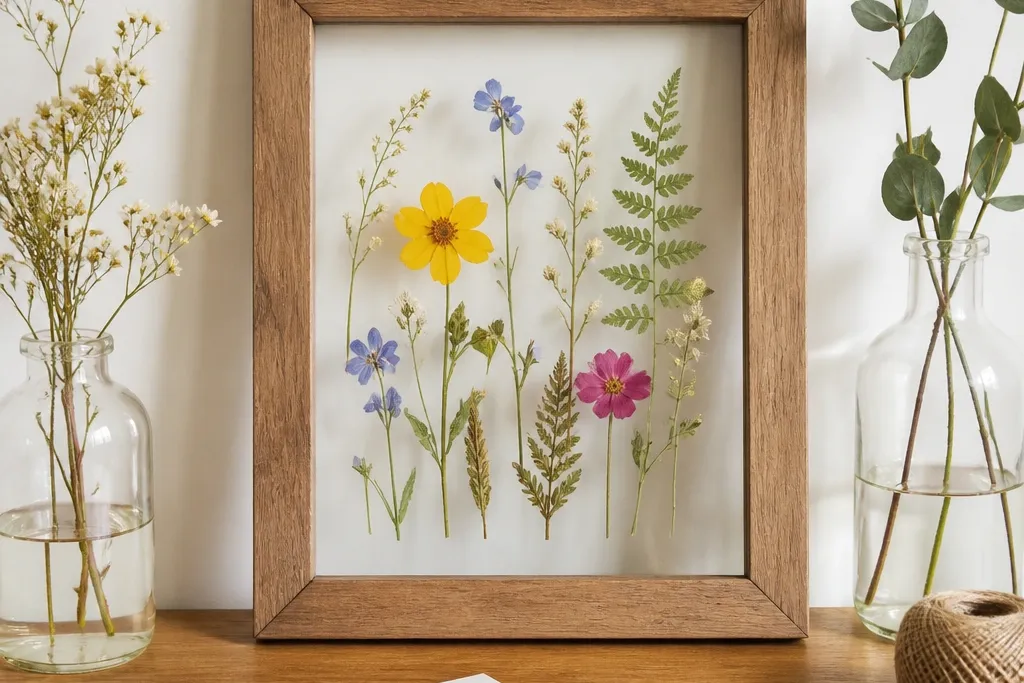
7. Maple Wood Frame with Pressed Ferns
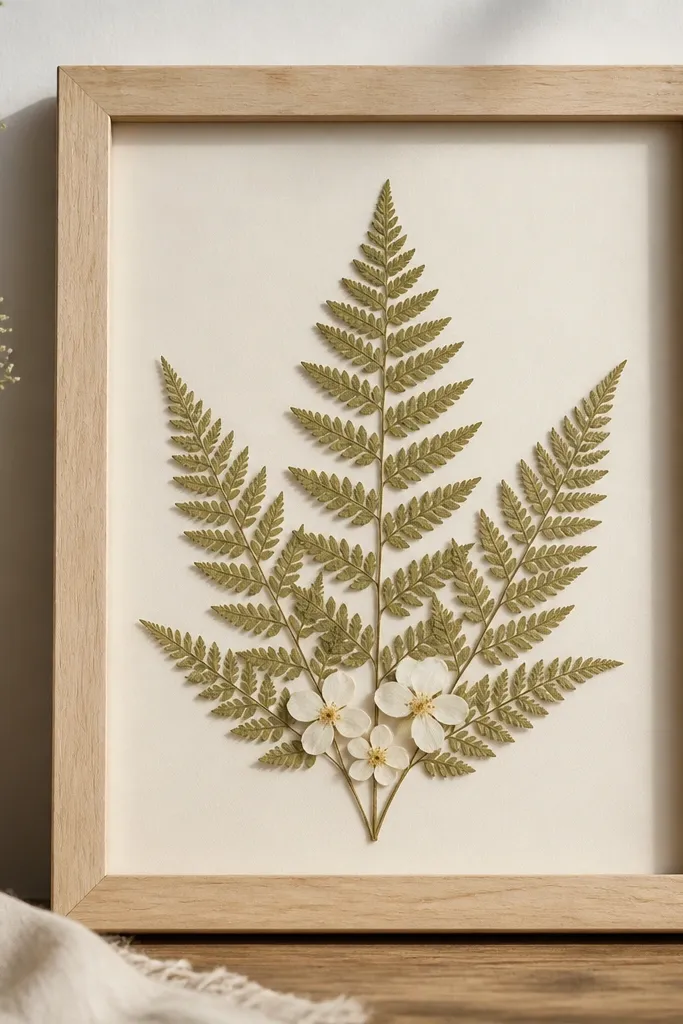
Pressed ferns look delicate and expensive when the background is plain. The cream paper makes greens look richer, and the fan shape gives you a clear composition. Add small white flowers at the bottom to balance the visual weight. This one suits spring and early summer because it feels airy.
Use a natural wood frame with a cream cardstock backing. Press fern fronds between heavy books for 2-3 weeks, then mount using acid-free glue or photo corners. Add 3 small white faux or dried blossoms at the base, glued only at the stem.
Pro tipSpray a light layer of clear matte fixative over the fern edges to reduce crumbling.
AvoidSkip glossy backgrounds - they reflect light and flatten the fern texture.
8. Ribbon-Wrapped Frame with Seasonal Tulip Picks
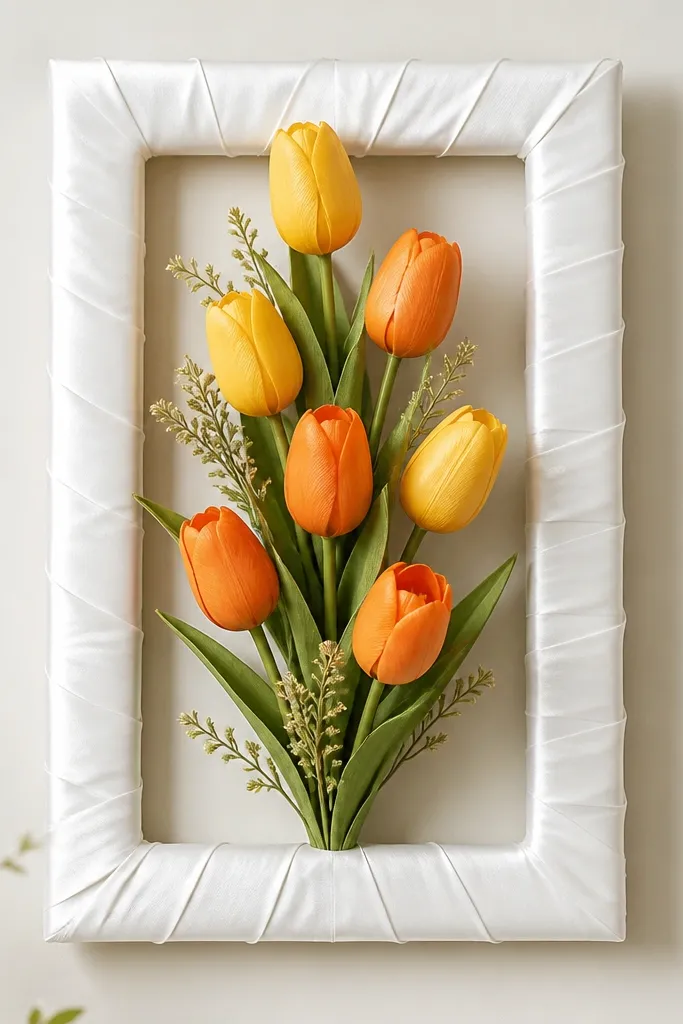
Wrapping a frame with ribbon makes even a cheap frame look finished. The satin wrap gives a smooth edge line, and the tulip picks give a strong vertical rhythm. Keep the number of tulip stems to three or five - too many makes it look like a bouquet exploded. This design is perfect for spring entryways or Mother's Day.
Wrap the frame front edge with 1-inch satin ribbon, hot glue at the back corners. Use a backing board and glue three tulip picks in a tight V shape. Add two small leaves behind the tulips so the stems look grounded.
Pro tipTuck the ribbon ends under the backing lip so you don't see raw edges.
AvoidAvoid wrapping with wrinkled ribbon - it shows through and looks rushed.
9. Eucalyptus and Pinecone Frame for Early Fall
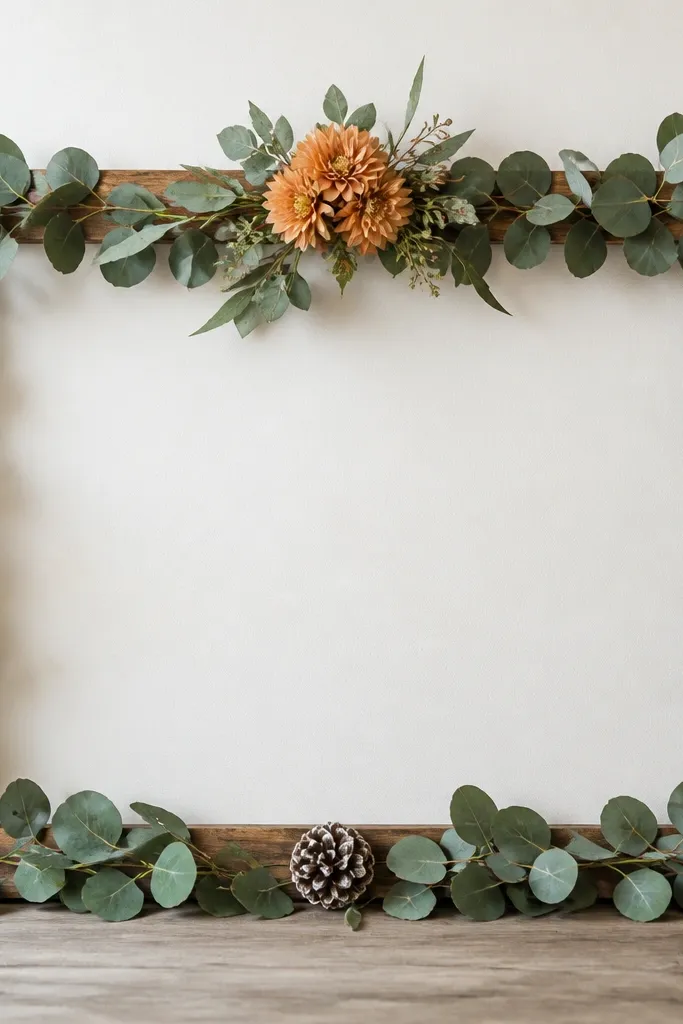
Pinecones add instant fall cues, but eucalyptus keeps it looking fresh instead of fully rustic. The pinecones are placed in a triangle so your eye keeps moving instead of staring at one spot. Muted orange flowers (or faux marigold heads) give warmth without going Halloween. This looks great on a mantel or dining wall.
Use a 10x20 or 11x14 frame. Glue eucalyptus garland around the inner border, then glue pinecones at top-left, top-right, and bottom-center using hot glue. Add a center cluster with 3-4 faux blooms, then fill gaps with tiny leaf picks.
Pro tipPaint the pinecones with a light dusting of watered-down brown acrylic if they look too shiny from the store.
AvoidSkip bright neon florals - they clash with pinecone texture.
10. Halloween Black Frame with Spider Mum Cluster
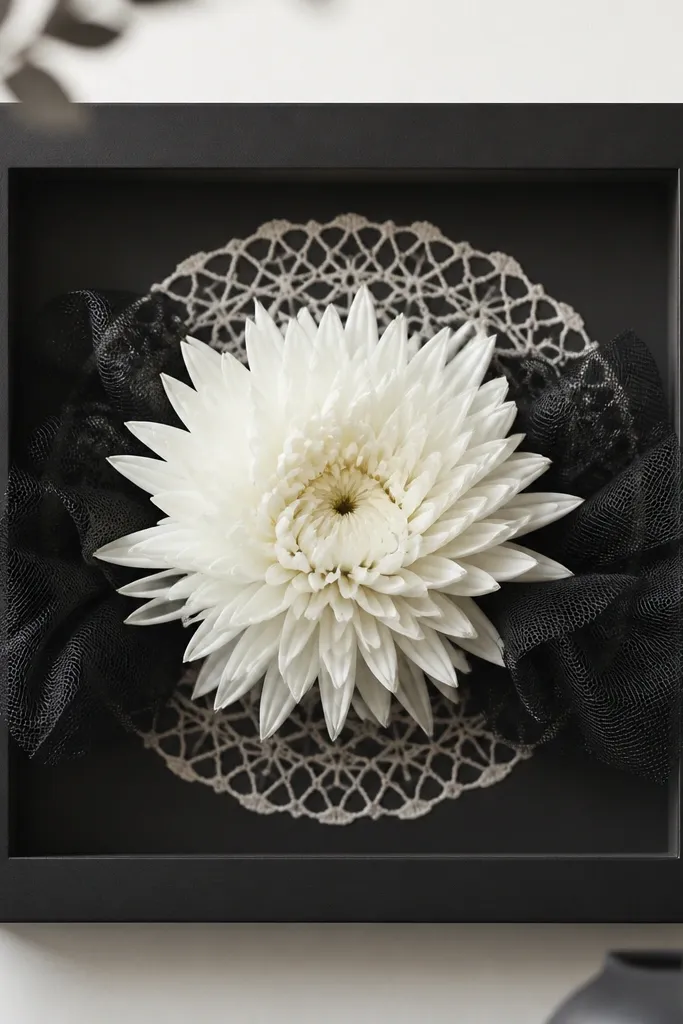
Spider mums have a built-in "spooky" shape, so you don't need lots of extra decor. Black mesh frames the sides and makes the flower look bigger. A doily web pattern gives texture without adding clutter. This design reads Halloween from across the room but still looks classy.
Use a square frame, 12x12. Glue a black mesh ribbon behind the flower area, pulling it slightly outward at the corners. Add a white spider mum at center and glue it to the backing. Place a small black doily behind with the web lines visible through mesh.
Pro tipUse a glue gun on the back side only - you want the front clean and flat.
AvoidDon't use glitter glue everywhere; it sheds and looks messy fast.
11. Coastal Blue Frame with Seashells and Starfish
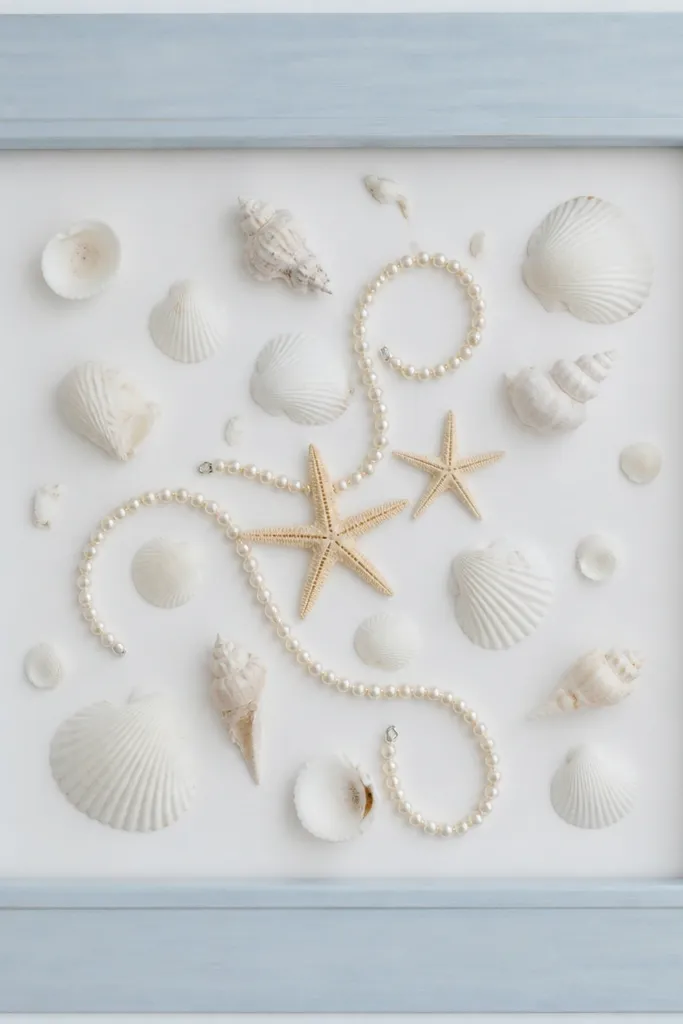
Coastal frames look best when you keep the palette to two colors plus neutrals. The light blue border makes the shells read brighter, and the faux pearl strand adds a soft "shine" without looking like a craft kit. I use mostly white shells with one or two pale sand-colored pieces so it feels natural. This one works for summer and can switch to fall with different florals later.
Paint a thrifted frame light blue (I use matte craft paint). Arrange shells in a loose triangle and glue them down with hot glue. Add a small starfish near the center, then tuck a strand of faux pearls around the bottom edge.
Pro tipWipe shells with rubbing alcohol before gluing so hot glue bonds better.
AvoidAvoid super-gloss paint on the frame - it reflects and hides the shell texture.
12. Christmas Red Frame with Burlap Bow and Holly Leaves
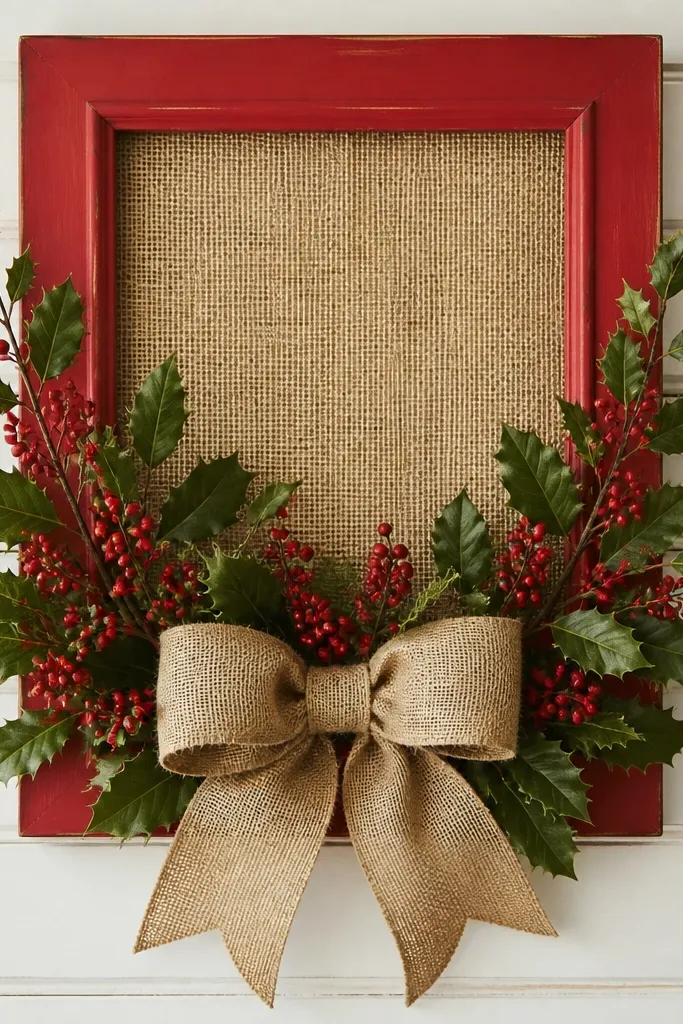
Burlap makes Christmas decor look grounded, not plastic. The holly V shape gives structure, and the big bow anchors the bottom so the frame doesn't feel top-heavy. Use red berries as small pops, not a full spray - you want a few glossy touches. This is the kind of frame people stop to look at because the textures are obvious.
Use a red or natural wood frame. Cut a burlap rectangle to fit the inner opening and glue it flat to the backing. Create a V with holly sprigs, then tuck 4-6 berries into the V. Make a burlap bow with 4 loops about 6 inches wide each, tie the center, and glue the knot to the burlap backing.
Pro tipCut burlap edges with pinking shears if you want a cleaner look without fraying.
AvoidDon't overfill with berries - too many makes it look like a cheap wreath.
13. Neutral Linen Frame with Dried Lavender Sprigs
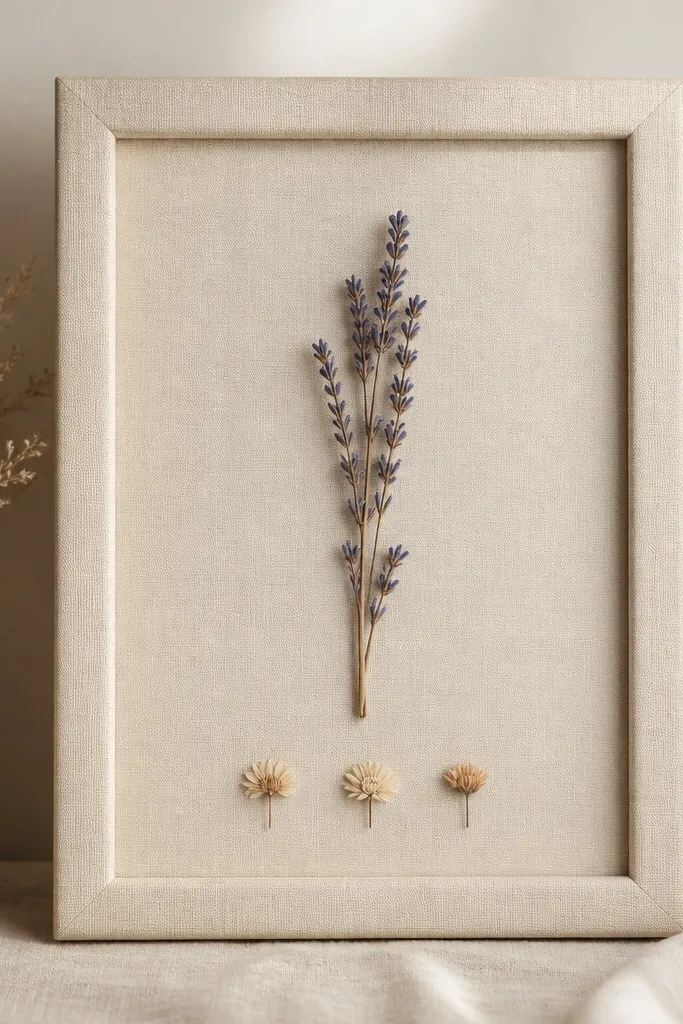
Dried lavender gives color you can't fake with most craft paint. The linen wrap softens the whole piece and makes the frame feel cozy instead of holiday-only. Keep the layout vertical so the lavender looks like it's growing. This works for spring, summer, and even winter if your home style is calm and neutral.
Wrap the frame front with linen fabric using spray adhesive or hot glue, then trim neatly at the corners. Glue lavender sprigs to a backing board, using two vertical sprigs and one smaller side sprig. Add three tiny dried flowers at the base for balance.
Pro tipMist lavender with a tiny amount of clear matte spray after assembly so dust doesn't float when you move it.
AvoidAvoid wet glue near dried plants - it warps and darkens them.
14. Fabric Scrap Flower Frame with Rolled Ruffles
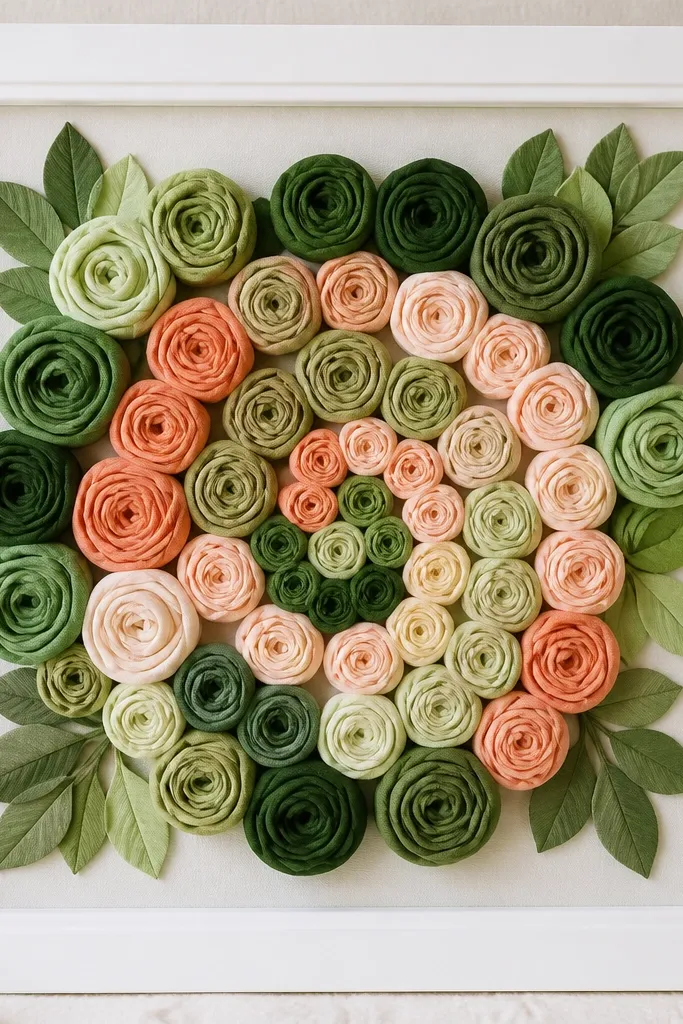
Rolled fabric ruffles look soft and expensive because the edges are naturally uneven. You can use scrap fabric from old shirts and curtains, which keeps it budget-friendly. The spiral arrangement makes the frame feel intentional and "designed," not random. This is great for spring and summer because the fabric reads airy.
Cut fabric strips about 1 inch wide and 12-14 inches long. Roll tightly, stitch the base with hand needle, then glue finished ruffles onto a backing board. Use felt leaves or thin green fabric strips as fillers around the outer edge.
Pro tipChoose one fabric with a subtle pattern and keep the rest solid so the texture stays the focus.
AvoidSkip stretchy knits - they roll unevenly and sag over time.
15. Rustic Twine Frame with Paper Blossoms and Mini Tags
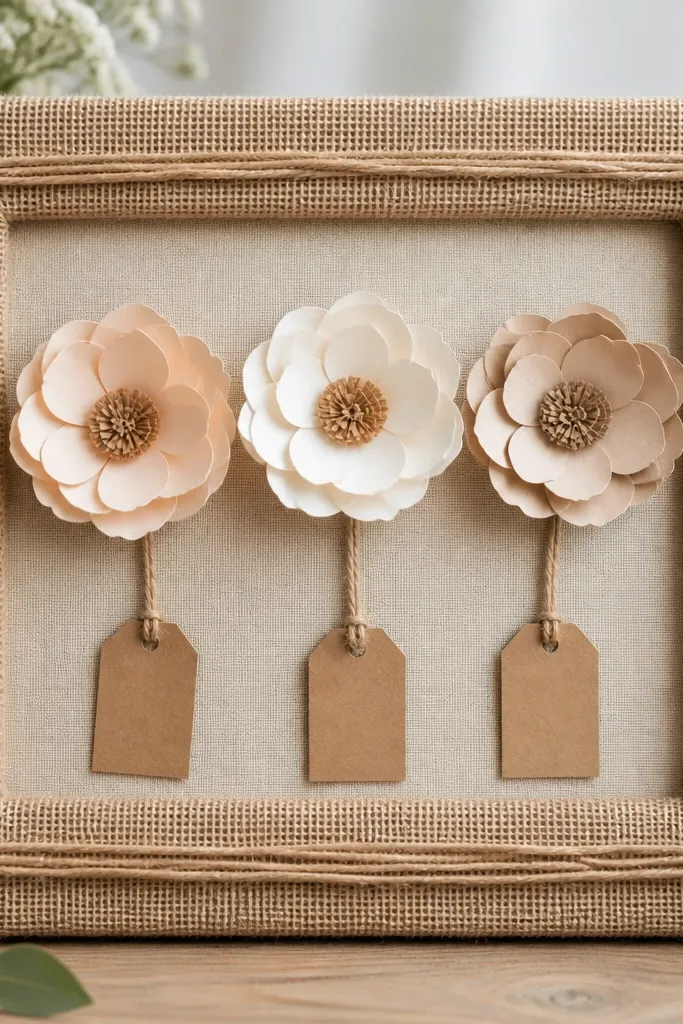
Twine gives you that handmade texture, but the paper blossoms keep it light. The small tags add charm without adding bulk. I like kraft paper tags with stamped dates or simple words because they look like you planned it. This one looks great for birthday parties, spring events, and farmhouse decor.
Wrap the frame edges with twine and glue down every 2 inches. Add a burlap strip across the middle opening, then attach paper blossoms using foam squares so they lift. Tie mini kraft tags (about 1x2 inches) to the twine under the blossoms.
Pro tipStamp tags with archival ink so they don't smear if you touch the frame.
AvoidAvoid thick lumps of twine - they warp the frame surface and look uneven.
16. Matte Gold Frame with Monochrome Paper Roses
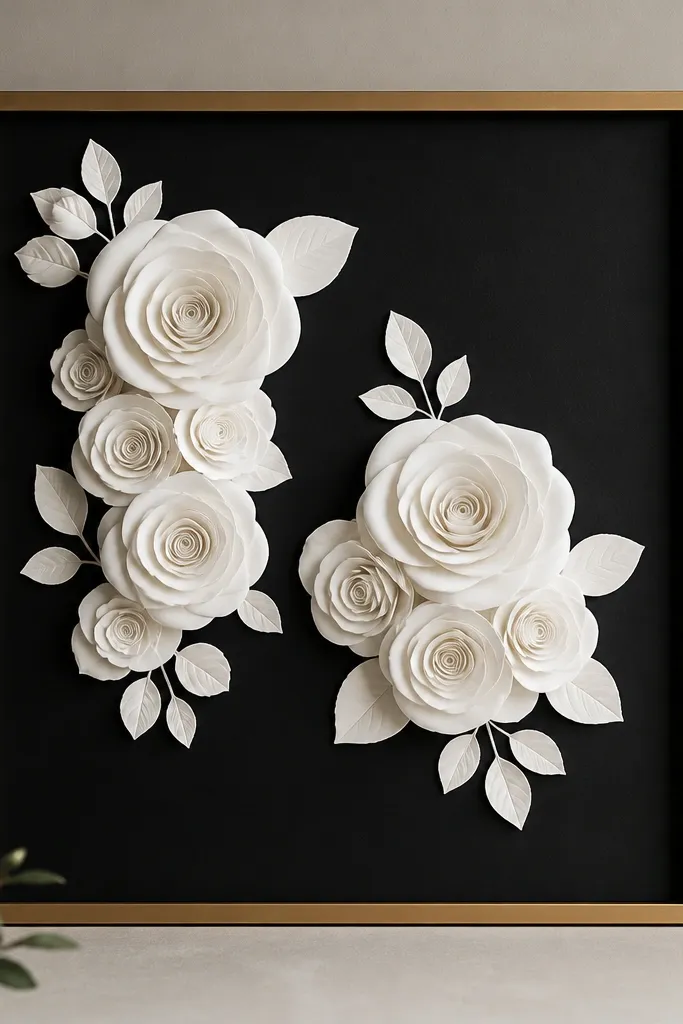
Monochrome roses look expensive because the shape does all the work. Matte gold plus black is a classic combo that makes white petals pop. I keep the roses in two clusters so the composition feels balanced. This one is perfect for winter weddings, anniversaries, or a glam holiday corner.
Paint or buy a matte gold frame. Use black cardstock backing. Make paper roses in white (or off-white) and glue them with foam tape blocks underneath the outer petals. Keep spacing - leave about 1 inch between clusters so it doesn't look jammed.
Pro tipCurl paper petals slightly with a bone folder so the rose edges hold a natural curve.
AvoidDon't use shiny paper - it reflects light and flattens the petal layers.
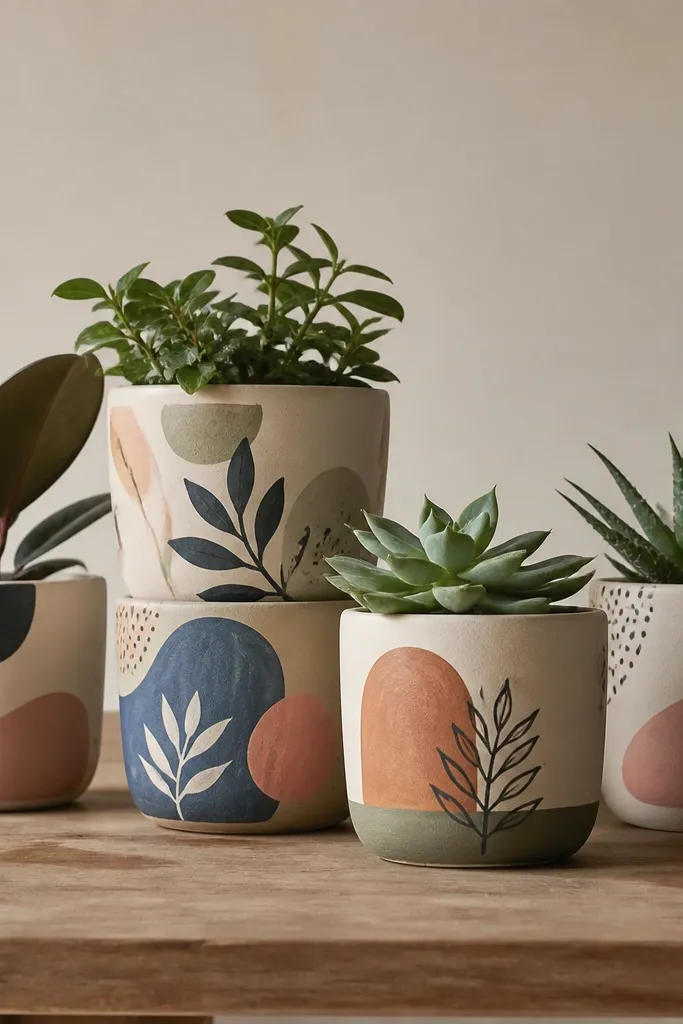
17. Terracotta Frame with Mini Succulents and Cream Blooms
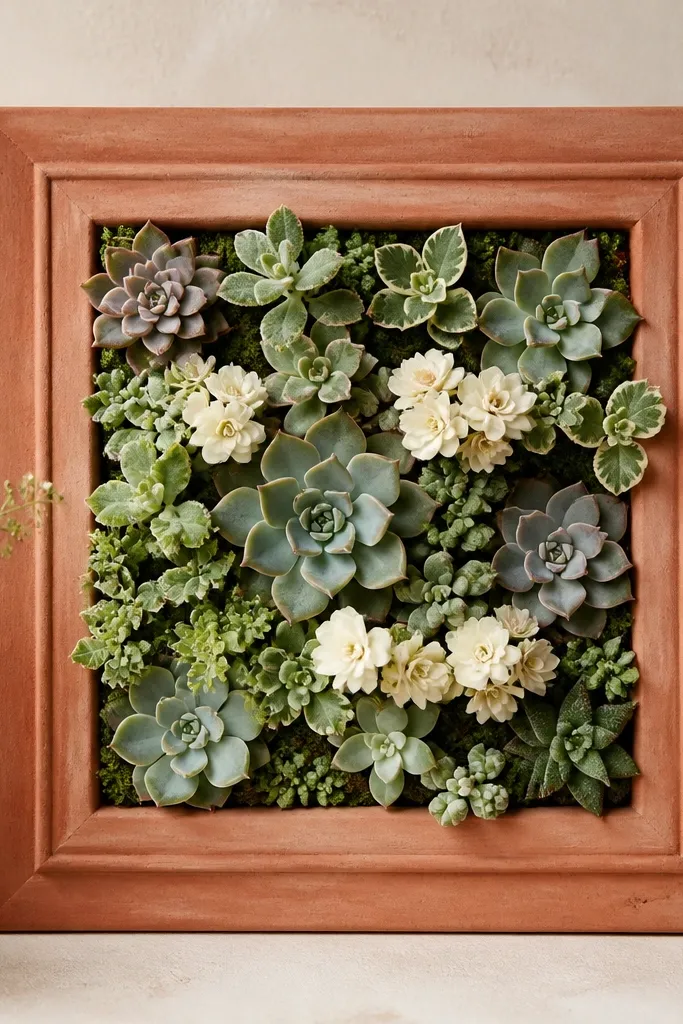
Succulent + flower combos look current without needing expensive materials. Terracotta warms the whole piece, and cream flowers keep it from looking too heavy. I arrange succulents like a ground layer and tuck small blooms on top so it feels layered. It reads spring-to-summer and also looks good on a porch.
Paint the frame terracotta matte. Add a thin felt "soil" layer to the backing (brown felt), then glue mini succulents around the bottom edge. Place cream blooms in the center and secure stems under the felt so the front stays clean.
Pro tipUse two shades of succulents (sage and deep green) so it looks like you didn't buy everything in one bundle.
AvoidDon't glue tall succulents straight up - it looks like plastic picks stuck on.
18. Spring Pastel Frame with Paint Swatch Background and Daisy Cluster
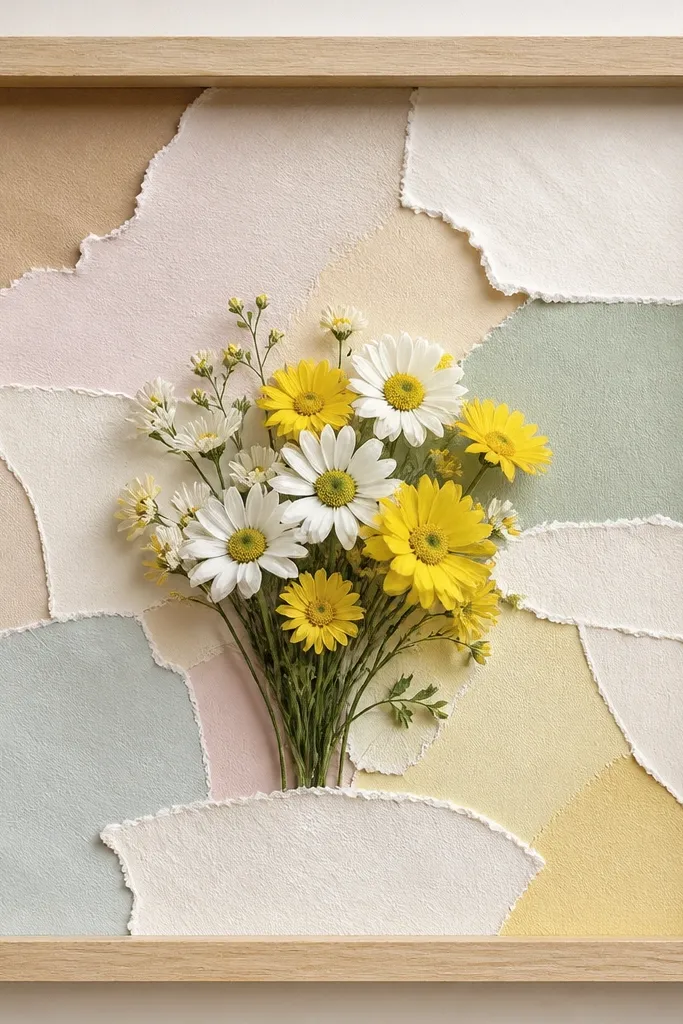
A paint swatch background makes the frame look like a design board, not a flat craft. Daisies are simple and cheerful, and the pastel tears create movement behind them. Keep the daisies in a tight cluster so the background stays the texture support. This one feels playful and costs almost nothing if you save swatch samples.
Use a light wood frame and cut a backing panel from cardstock. Tear paint swatches into 1-2 inch pieces and overlap them slightly, then glue to the backing. Add daisies with hot glue on stems only, then trim any excess stems on the back.
Pro tipChoose three swatches max: one dominant, one accent, one neutral. It keeps the look calm.
AvoidSkip busy backgrounds with bold patterns - daisies get lost.
19. Winter Pine Frame with Faux Snow and Ribbon Banner
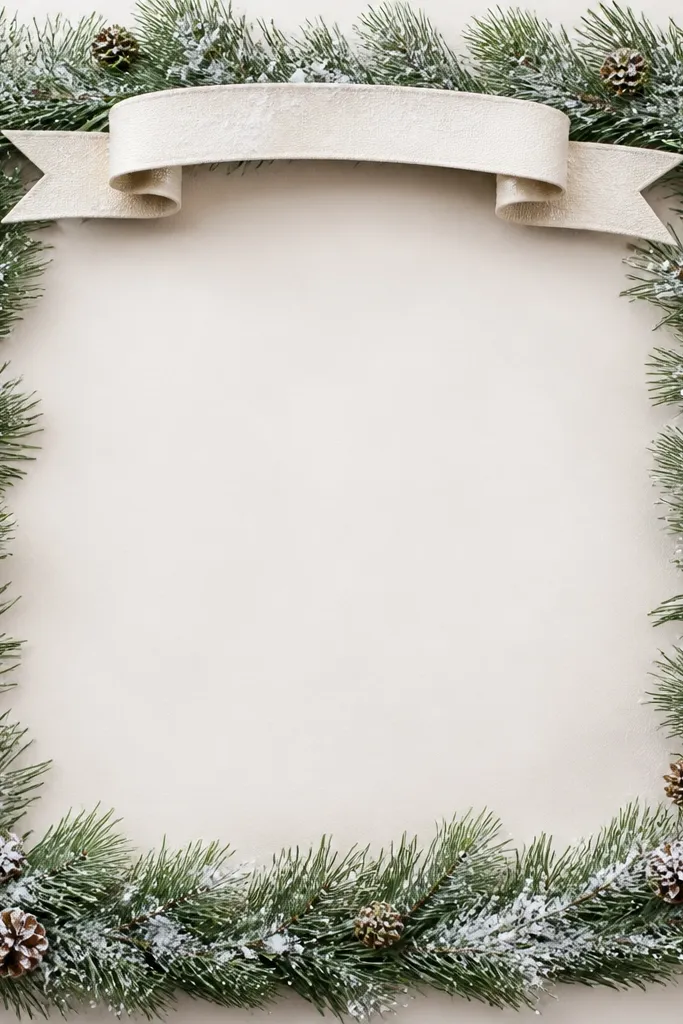
Faux snow makes winter frames read instantly, and a ribbon banner adds a holiday "message" without needing a sign. I use pine garland because it fills space quickly and looks real from a distance. The trick is to keep the snow dust only on the tips and edges so it doesn't look like powder everywhere. This one fits Christmas, but it also works for January decor.
Line the inner opening with faux pine garland, gluing at corners and midpoints. Add a small cream ribbon banner across the top (about 3 inches wide), then glue it to the backing. Dust the outer edges with faux snow spray, focusing on the pine needles tips.
Pro tipSpray faux snow onto a brush first, then dab - it gives you controlled coverage.
AvoidDon't cover the ribbon - it turns stiff and ugly fast.
20. Flower Frame with Embroidery Hoop Border and Button Blossoms
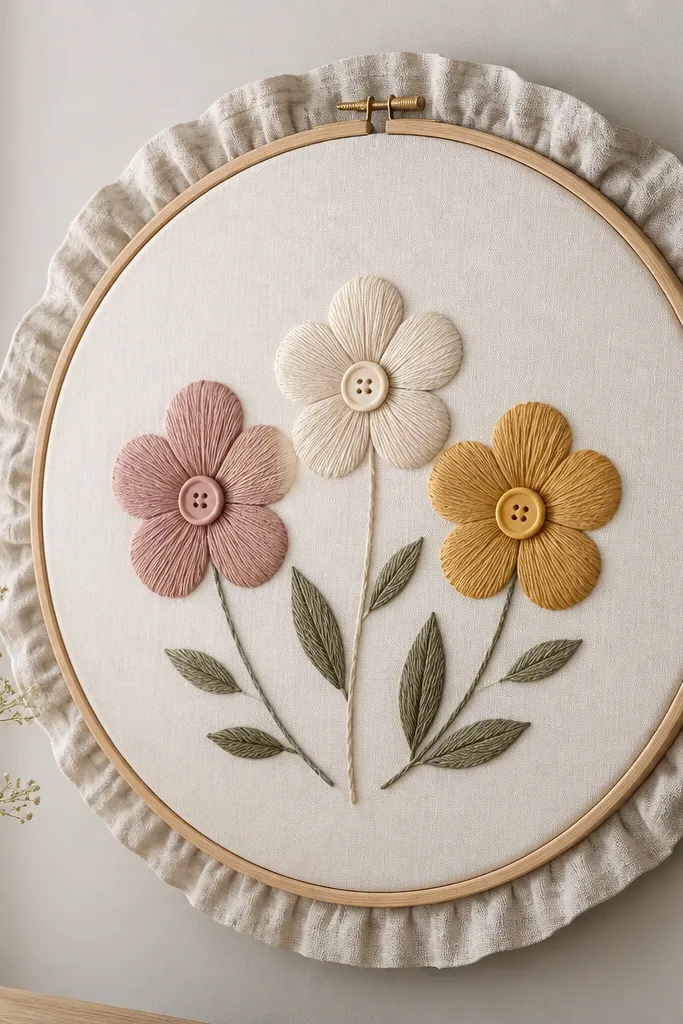
Embroidery hoops look handmade in a good way, and they fit seasonal swaps because the fabric backing is easy to change. Button blossoms are small but charming, especially if you use two sizes of buttons for layered petals. The fabric border gives you a clean edge line that hides messy glue. This is a great budget-friendly diy flower frame if you already have a sewing kit.
Use an embroidery hoop (10-12 inch). Stretch fabric over the inner ring and secure with the hoop's tension screw. Stitch or hot glue button flowers in the center using a simple flower pattern - 6-8 petals around one center button. Add small felt leaves around the buttons.
Pro tipUse hot glue only for the buttons; sew the leaves so they stay flatter over time.
AvoidDon't stretch fabric too tight - it warps the hoop and makes flowers look tilted.
21. Photo Frame with Spring Wreath of Paper Butterflies
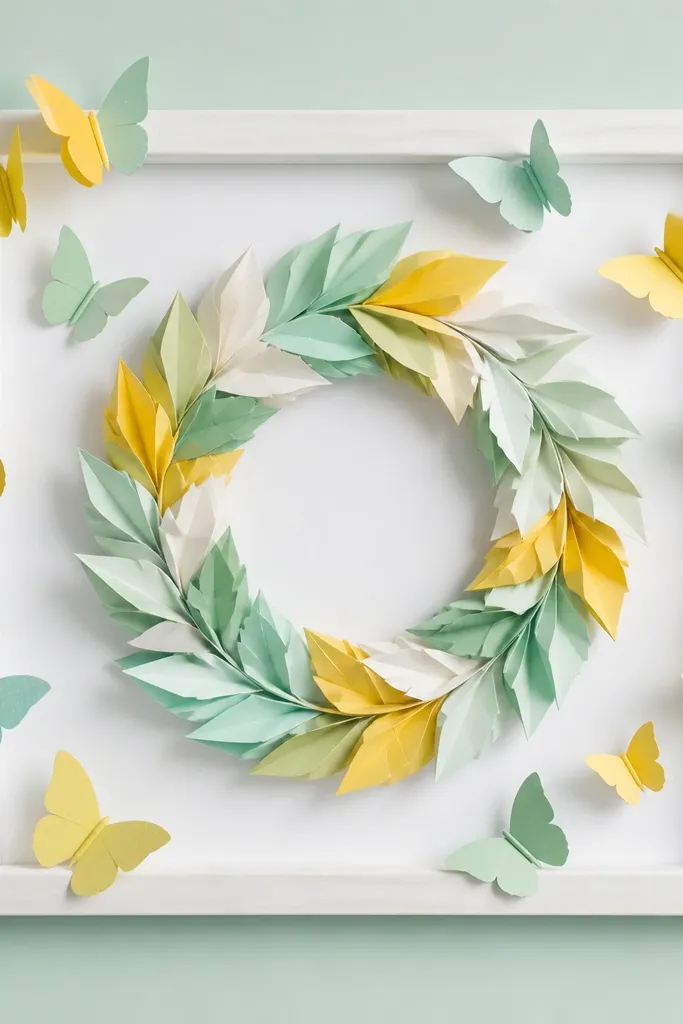
Butterflies create a light, springy vibe without relying on real flowers. The folded paper wreath ring keeps the center open so the butterflies don't feel cramped. I use mint, butter yellow, and white to keep it airy. This frame looks best at eye level where you can see the layered paper wings.
Use a white photo frame with the glass removed. Create a wreath ring from folded paper strips or rolled circles, glue to the backing. Add butterflies by layering two sizes of paper wings on foam dots. Place the densest cluster at the top half so it reads like movement.
Pro tipUse a black marker to outline butterfly wing veins for instant detail.
AvoidAvoid using only one butterfly color - it looks flat and repetitive.
22. Monogram Flower Frame with Faux Floral Alphabet Letters
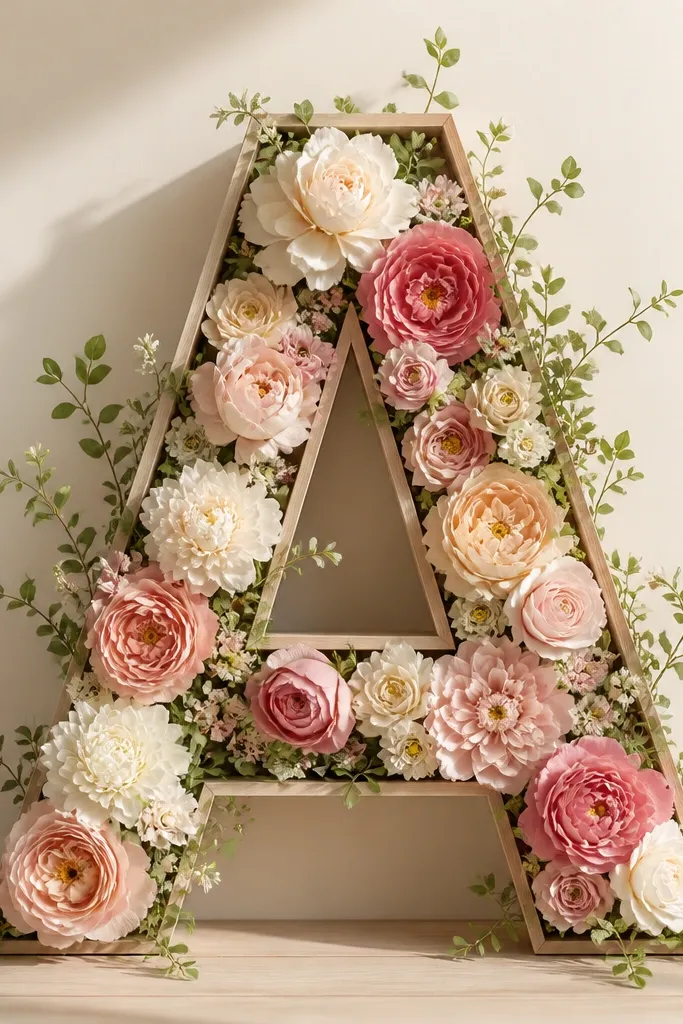
A monogram makes a flower frame feel personal without spending on custom signs. When the letter is covered with faux flowers, you get texture that looks intentional, not like random blooms pasted around. I like using one letter shape and one flower type so it reads clean. This works for holidays too by swapping the letter and flower color.
Cut a large letter from foam board (about 6-8 inches tall) and paint it to match your flower palette. Glue faux flower heads onto the letter surface, starting at the edges and working inward. Place the letter on a backing board inside the frame and wrap thin greenery sprigs around it for depth.
Pro tipLeave a 1/4-inch foam border around the letter edges so the frame backing doesn't show through gaps.
AvoidDon't glue flowers directly onto unpainted foam - it shows through and looks cheap.
23. Fall Pumpkin Vine Frame with Dried Hydrangea Heads
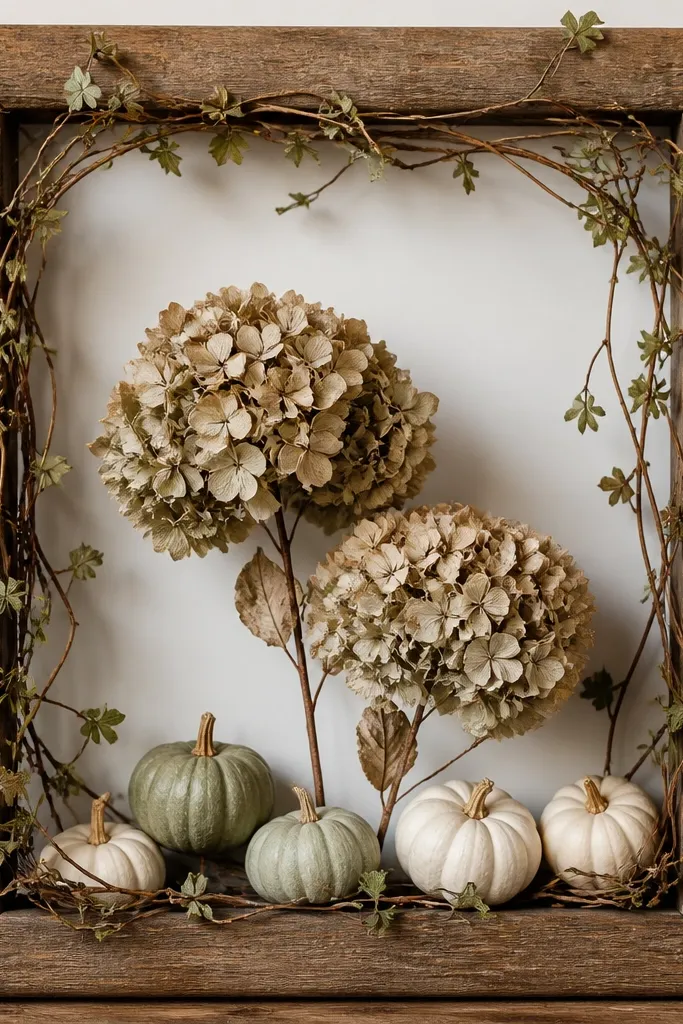
Dried hydrangea heads look best when you give them space. A vine loop frames the hydrangeas and makes the whole piece feel like it's growing, not arranged. Tiny faux pumpkins add fall cues without turning it into a Halloween-only decor. This is one of my favorite budget-friendly diy flower frame styles for September through Thanksgiving.
Use a wood frame and glue a thin vine garland around the inner border. Place two dried hydrangea heads center-left and center-right, then tuck four tiny pumpkins along the bottom edge. Fill gaps with a few dried leaves or small eucalyptus pieces.
Pro tipDust dried hydrangeas with a soft brush before gluing so they don't shed powder onto your frame.
AvoidSkip thick glue blobs near hydrangea - they create shiny spots.
24. Single Stem Minimalist Frame with Floral Tape and Glass
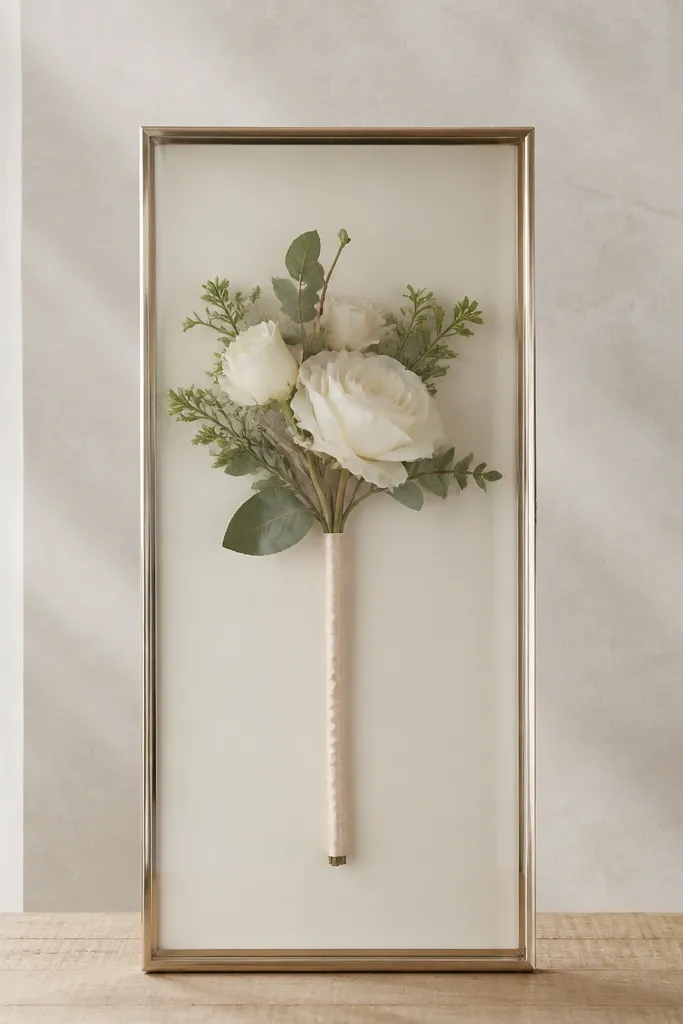
Minimalist frames look expensive because they leave room to breathe. A single stem reads intentional, and the ribbon wrap adds a soft highlight. I like pale ribbon and one flower color so the composition feels calm. This works year-round if you swap the stem flower and ribbon tone.
Use a slim frame with a clear acrylic sheet or glass. Glue the stem base to the backing so the top sits above mid-height. Wrap the stem lightly with floral tape, then tuck the ribbon under two small leaf sprigs near the base.
Pro tipUse a matte ribbon so it doesn't glare under sunlight.
AvoidDon't add multiple stems - it stops looking minimalist fast.
25. Holiday Candy Cane Frame with Red and White Paper Flowers
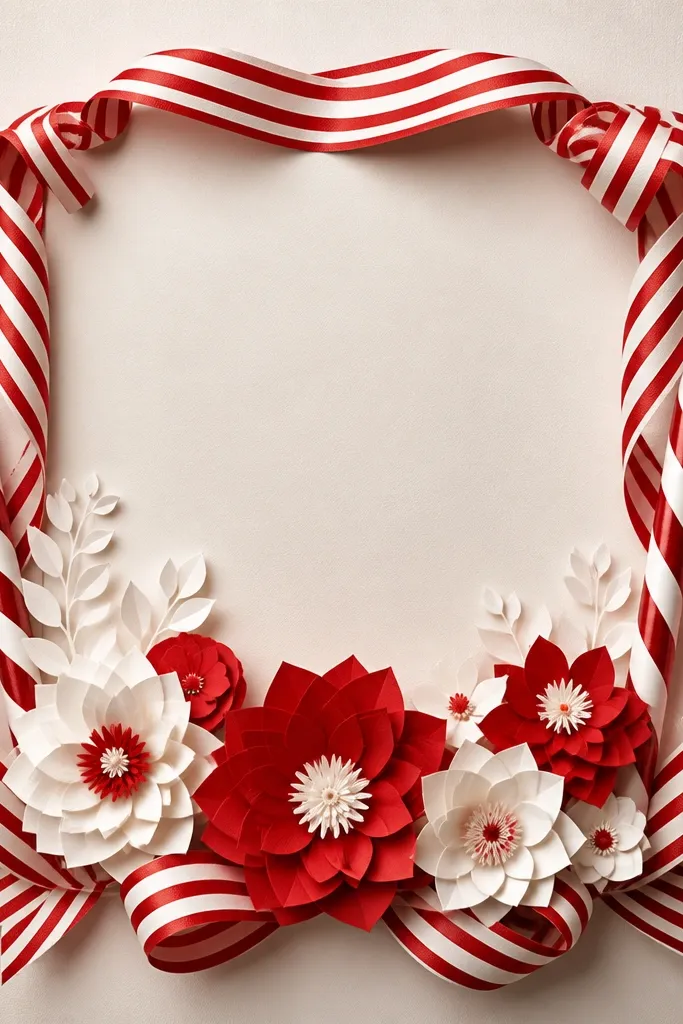
Candy cane shapes make the holiday theme obvious without stuffing the frame with ornaments. Red-and-white paper flowers keep the design crisp, and the stripes add motion. I arrange the flowers in a shallow triangle so it balances the two side candy shapes. This one looks great for Christmas and also photographs well against dark walls.
Make candy canes from white foam board and paint red stripes or wrap with red ribbon. Glue them to the sides of the backing, about 1 inch from the inner edge. Add paper flowers center using foam tape so the petals stand out. Finish with a small bow at the top corner.
Pro tipCut paper flower petals with a craft knife on a cutting mat for clean edges.
AvoidAvoid cheap glitter accents - they smear and look messy after a few weeks.