

1. Framed Mesh Earring Board
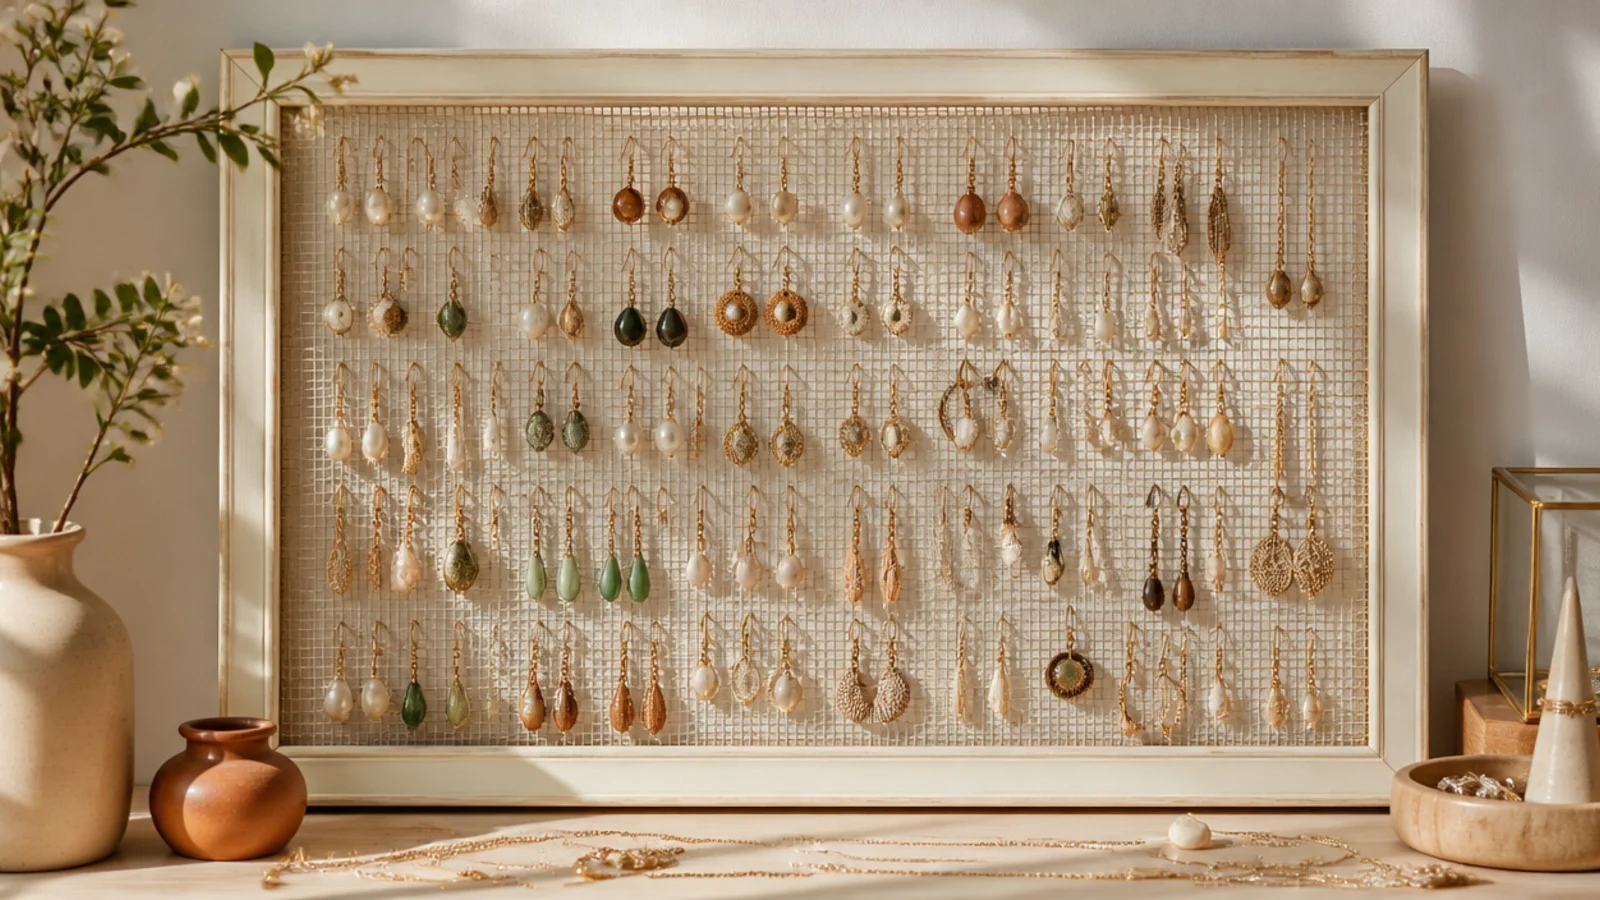
This is the easiest wall organizer that holds a lot — a frame backed with wire mesh takes earrings by the dozen. Dangles hook into the squares and studs push through anywhere. It suits a growing earring collection and anyone who wants everything visible at once.
Cut fine wire mesh an inch larger than a frame’s opening, fold the edges back, and staple or glue it taut across the back. Hang the frame with two 5-pound adhesive strips or two anchors, leveling first. Hook earrings into the squares in neat columns and push studs through where you like. Add a row of cup hooks along the bottom rail for a few necklaces.
Editor's noteChoose mesh with roughly quarter-inch holes — big enough for earring hooks, small enough that stud posts don’t slip through.
Skip thisDon’t leave raw mesh edges exposed; fold them fully behind the frame so you don’t scratch your hand loading earrings.
2. Shaker Knob Necklace Rail
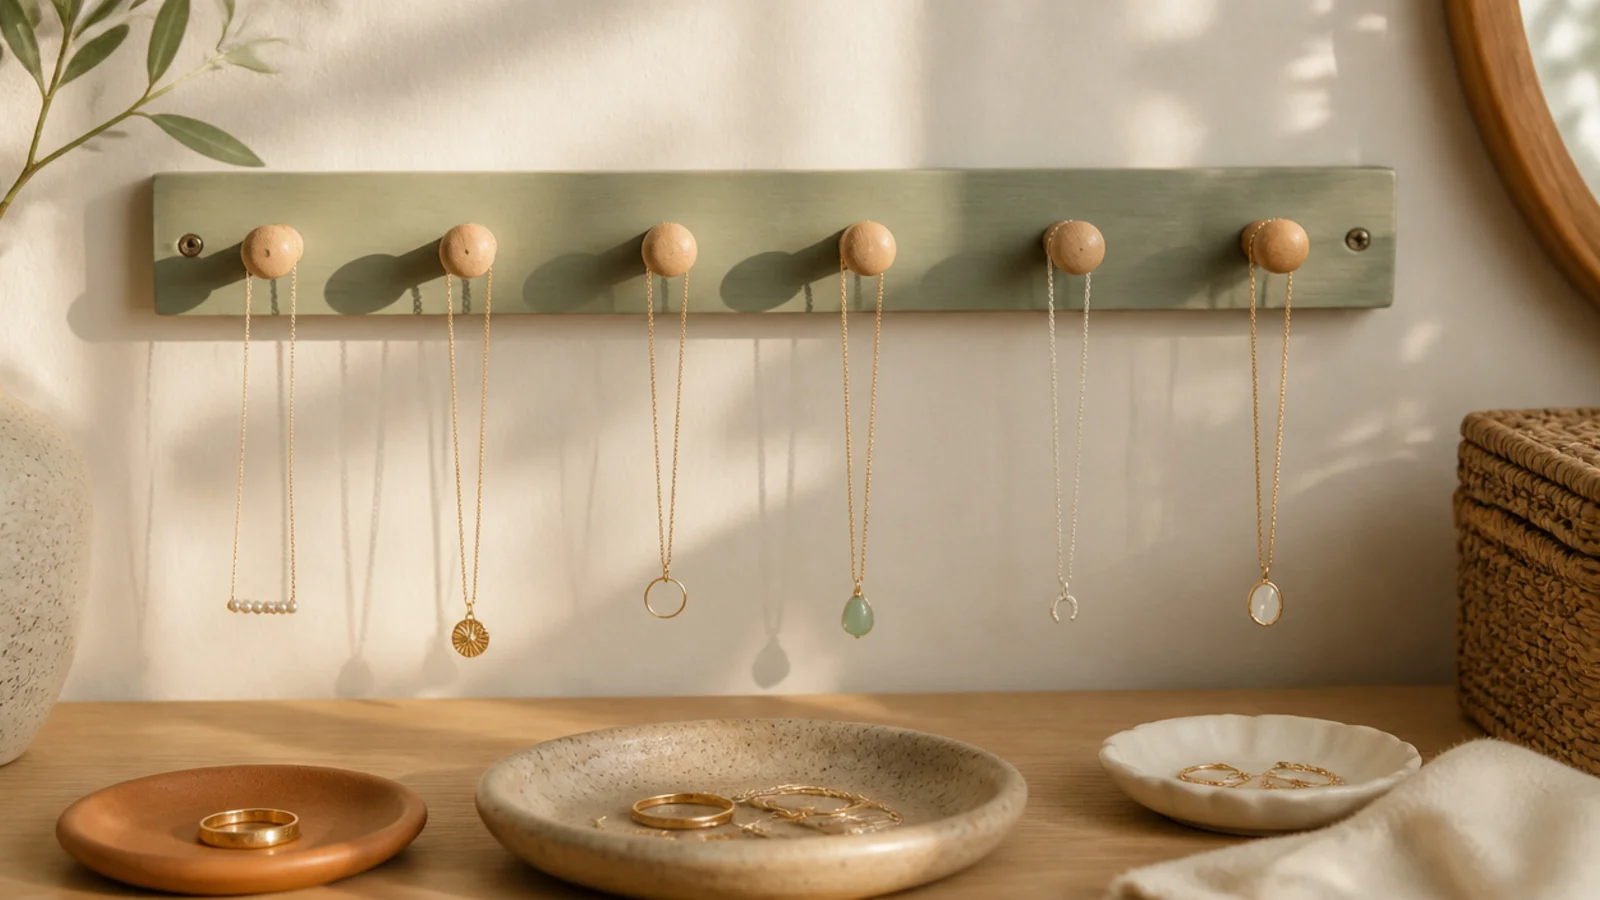
A rail of wooden knobs gives every necklace its own peg, so the tangle problem disappears. The rounded knobs are gentle on chains and look warm and tidy. It suits anyone whose necklaces live in a knotted heap.
Cut a wood rail about 4 inches tall and as wide as your space. Sand, prime, and paint it, then mark knob positions every 3 inches along a level pencil line. Drill pilot holes and screw a Shaker knob at each mark. Mount the rail with two anchors, level it, and hang longer necklaces on the outer knobs, shorter ones toward the center.
Editor's noteSpace knobs a full 3 inches apart; any closer and long chains swing into their neighbors and tangle anyway.
Skip thisDon’t hang a loaded rail on one anchor; use two spread points so it can’t pivot and dump the necklaces off.
3. Corner Pegboard Panel
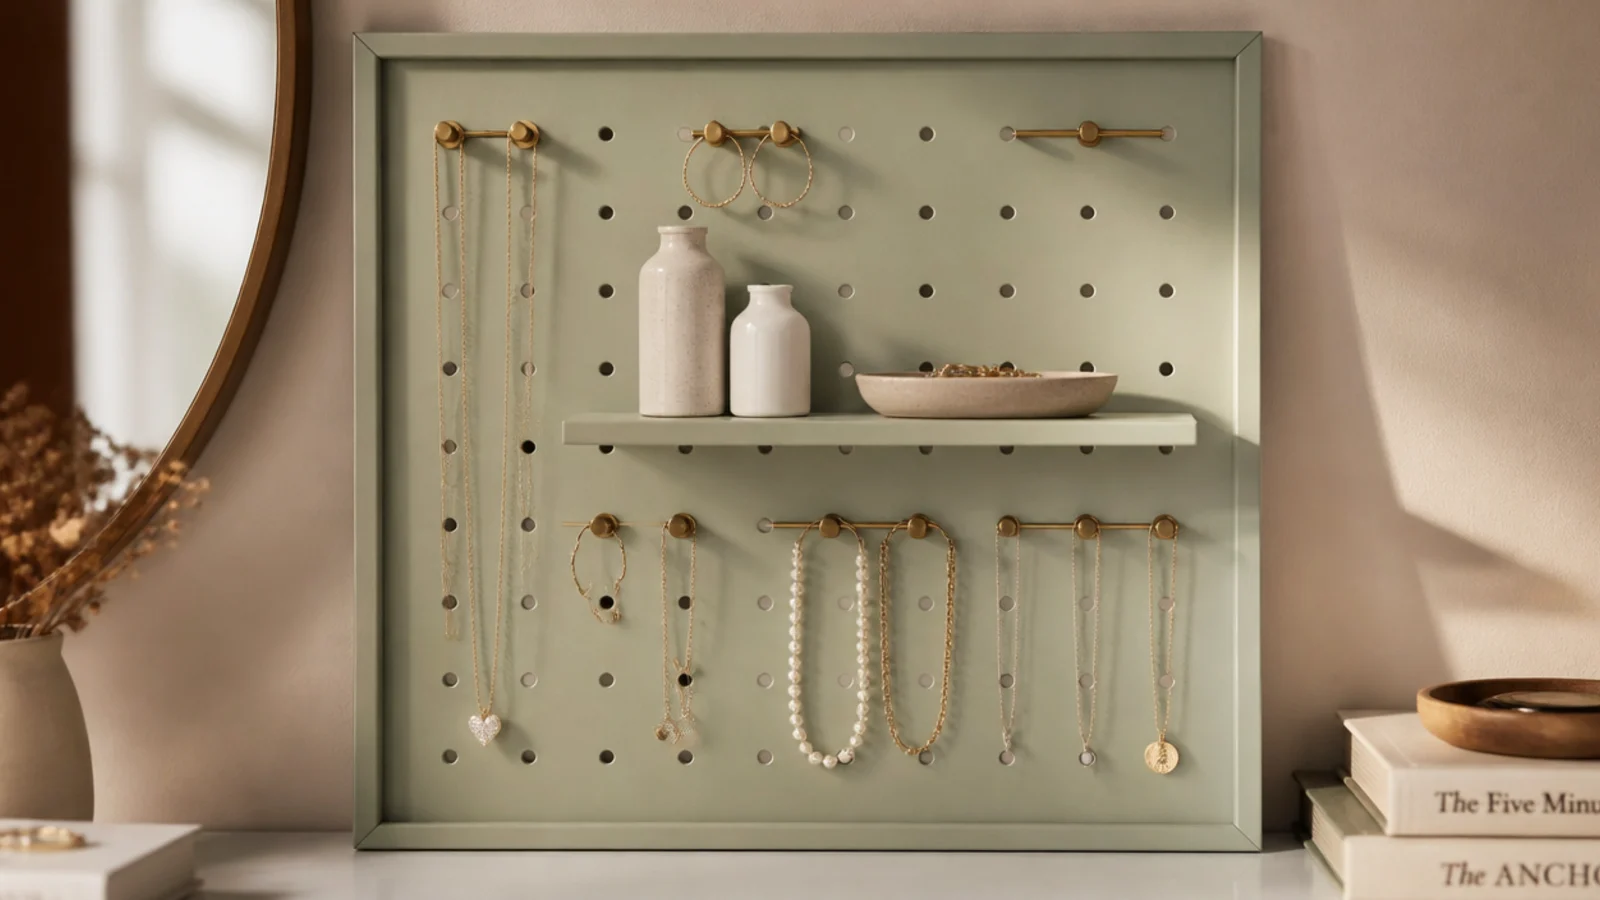
A pegboard is the most flexible wall organizer — you move hooks, shelves, and dishes as your collection changes. It holds every type on one panel. It suits a large or evolving collection and anyone who likes to restyle often.
Cut a pegboard to size, paint it one flat color, and frame the edges with thin trim. Mount it on spacers so the pegs have clearance behind, anchoring the corners. Add peg hooks for necklaces, a small peg shelf for a ring dish, and clip on a strip of mesh for earrings. Group each type in its own vertical zone so getting ready is one sweep.
Editor's noteMount the pegboard on spacers or standoffs; without the gap behind it the peg hooks won’t seat and pop out under weight.
Skip thisDon’t screw the board flat to the wall; flush mounting stops the hooks locking in and they fall out loaded.
4. Wall Mirror Jewelry Cabinet
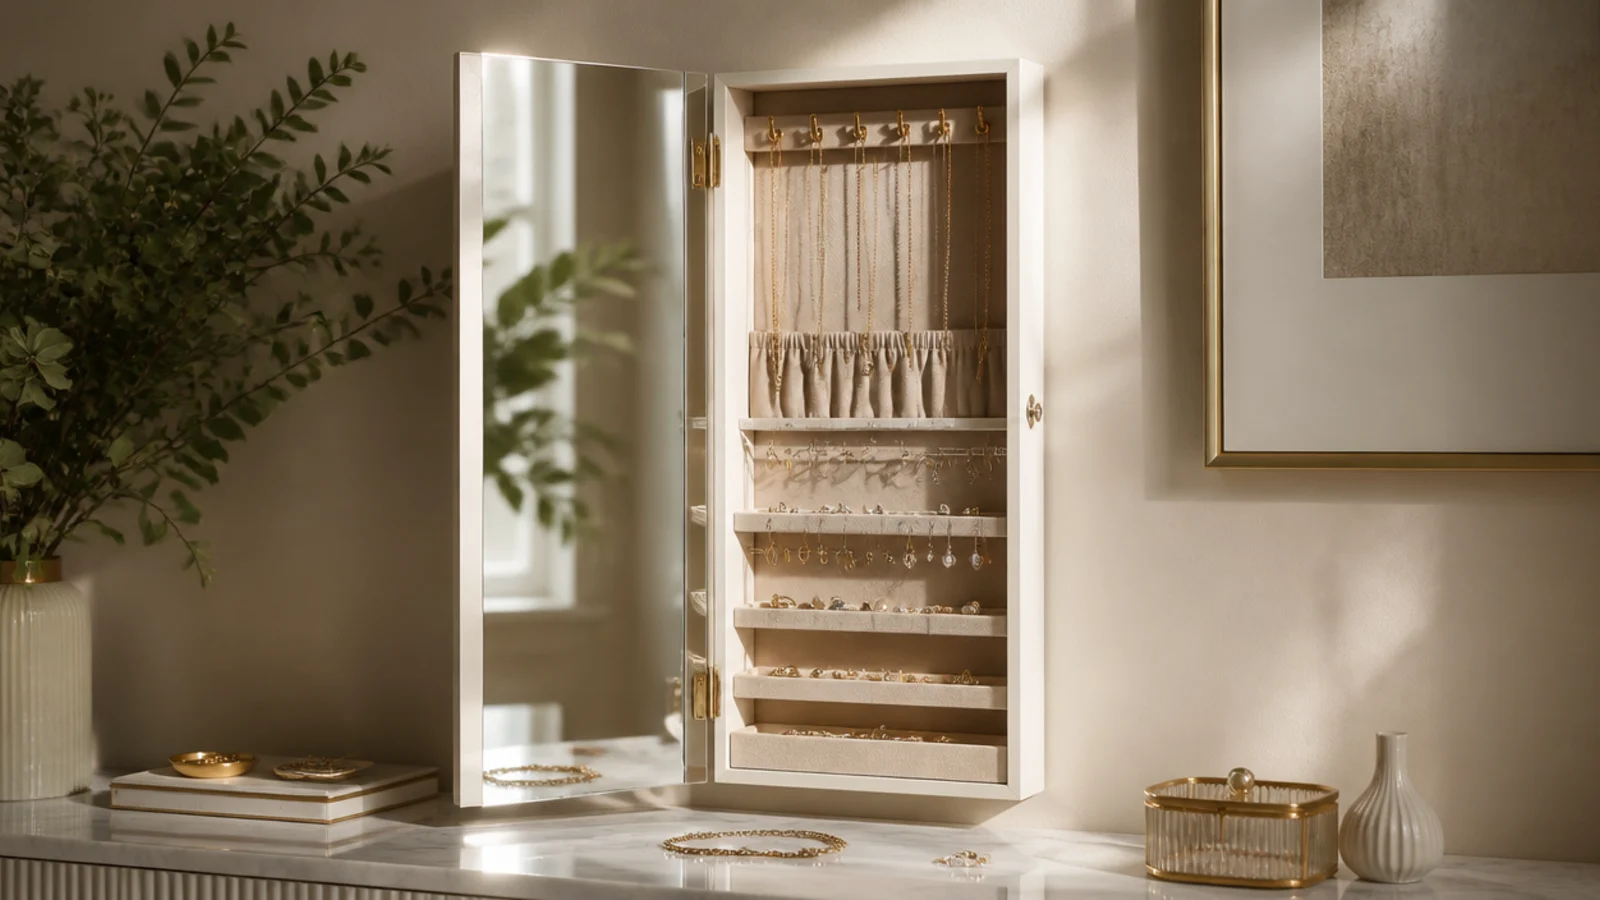
A mirror-front cabinet hides all your jewelry behind a full-length mirror, so it’s a two-in-one for a small room. Inside, hooks and shelves sort everything out of sight and dust. It suits anyone short on both dresser space and wall space.
Choose a wall-mount jewelry cabinet with an internal mirror or one that doubles as your dressing mirror. Locate studs and screw the mounting bracket into at least one, adding anchors for the other points, since a loaded cabinet is heavy. Level it, hang it, and sort inside — necklace hooks up top, ring rolls and earring bars below. Keep daily pieces near the front.
Anchor at least one screw into a stud; a full jewelry cabinet is genuinely heavy and drywall anchors alone can pull out.
Don’t mount a heavy cabinet on adhesive strips or a single anchor; it needs solid, stud-backed support to stay up loaded.
5. Floating Shelf with Dish Row
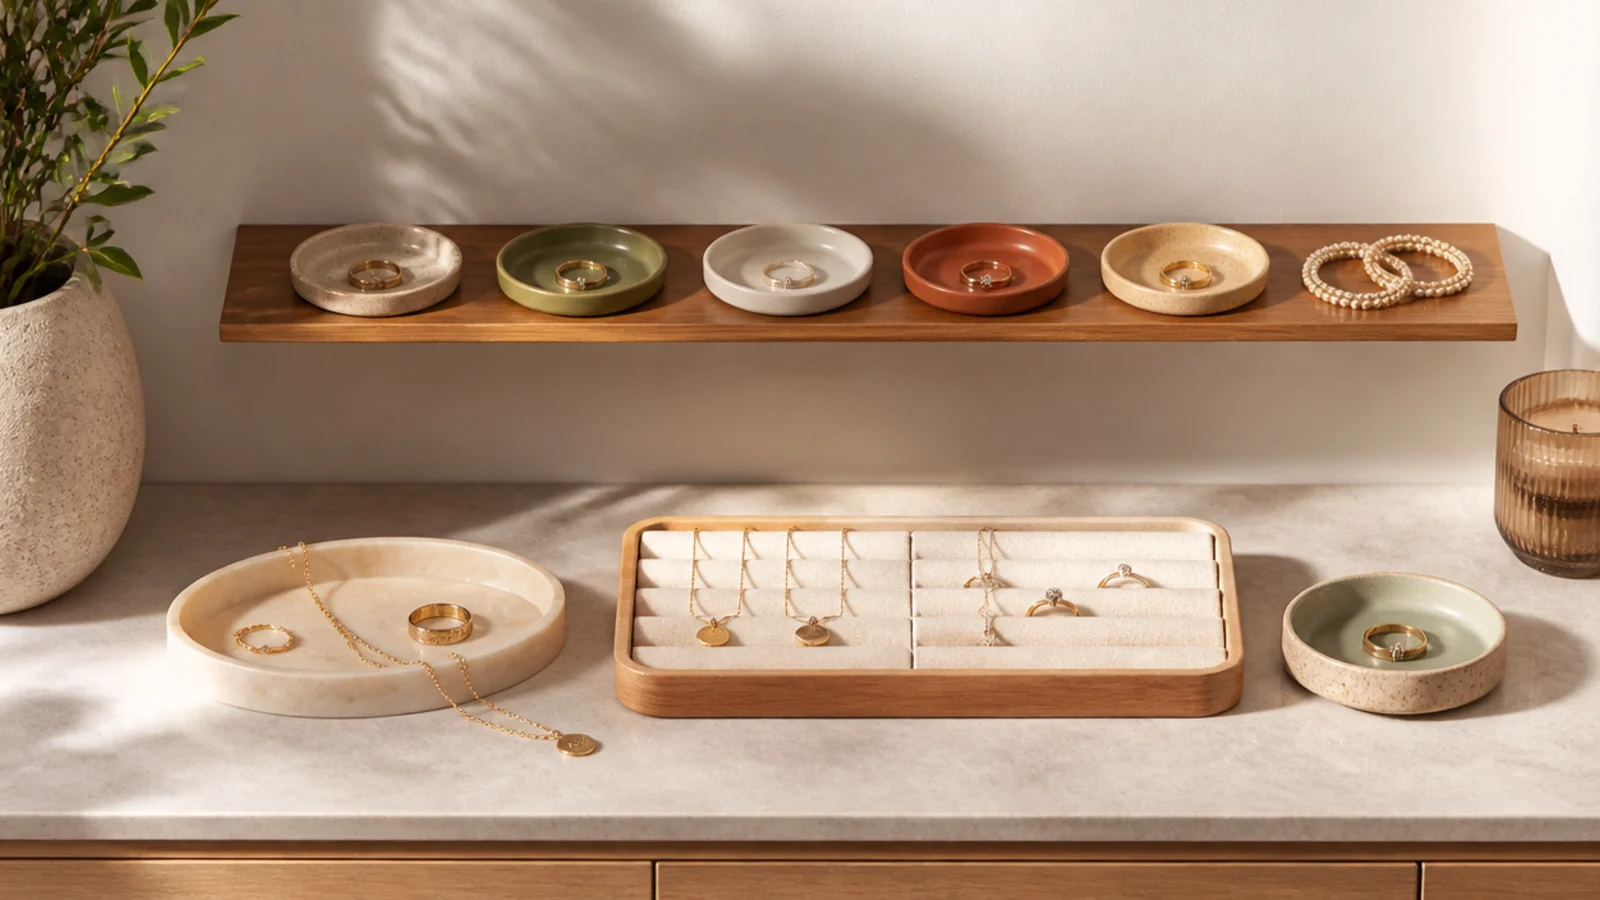
A narrow floating shelf holds a row of small dishes at eye level for rings, studs, and coiled bracelets. It keeps the dresser clear while showing pieces off. It suits anyone who prefers dishes to hooks and wants a styled ledge.
Mount a slim floating shelf with concealed brackets into anchors or a stud, leveling carefully. Line up two or three small ring dishes along it and coil a bracelet or two between them. Keep the shelf shallow so it doesn’t crowd the room. Set it near your mirror at eye level, and leave space between the dishes so it reads as a display.
Editor's noteChoose a shelf with a slight lip or back rail so dishes can’t get nudged off when you reach past them.
Skip thisDon’t overload a floating shelf past its bracket rating; concealed brackets fail suddenly, so keep the dishes light.
6. Hook Strip Under a Shelf
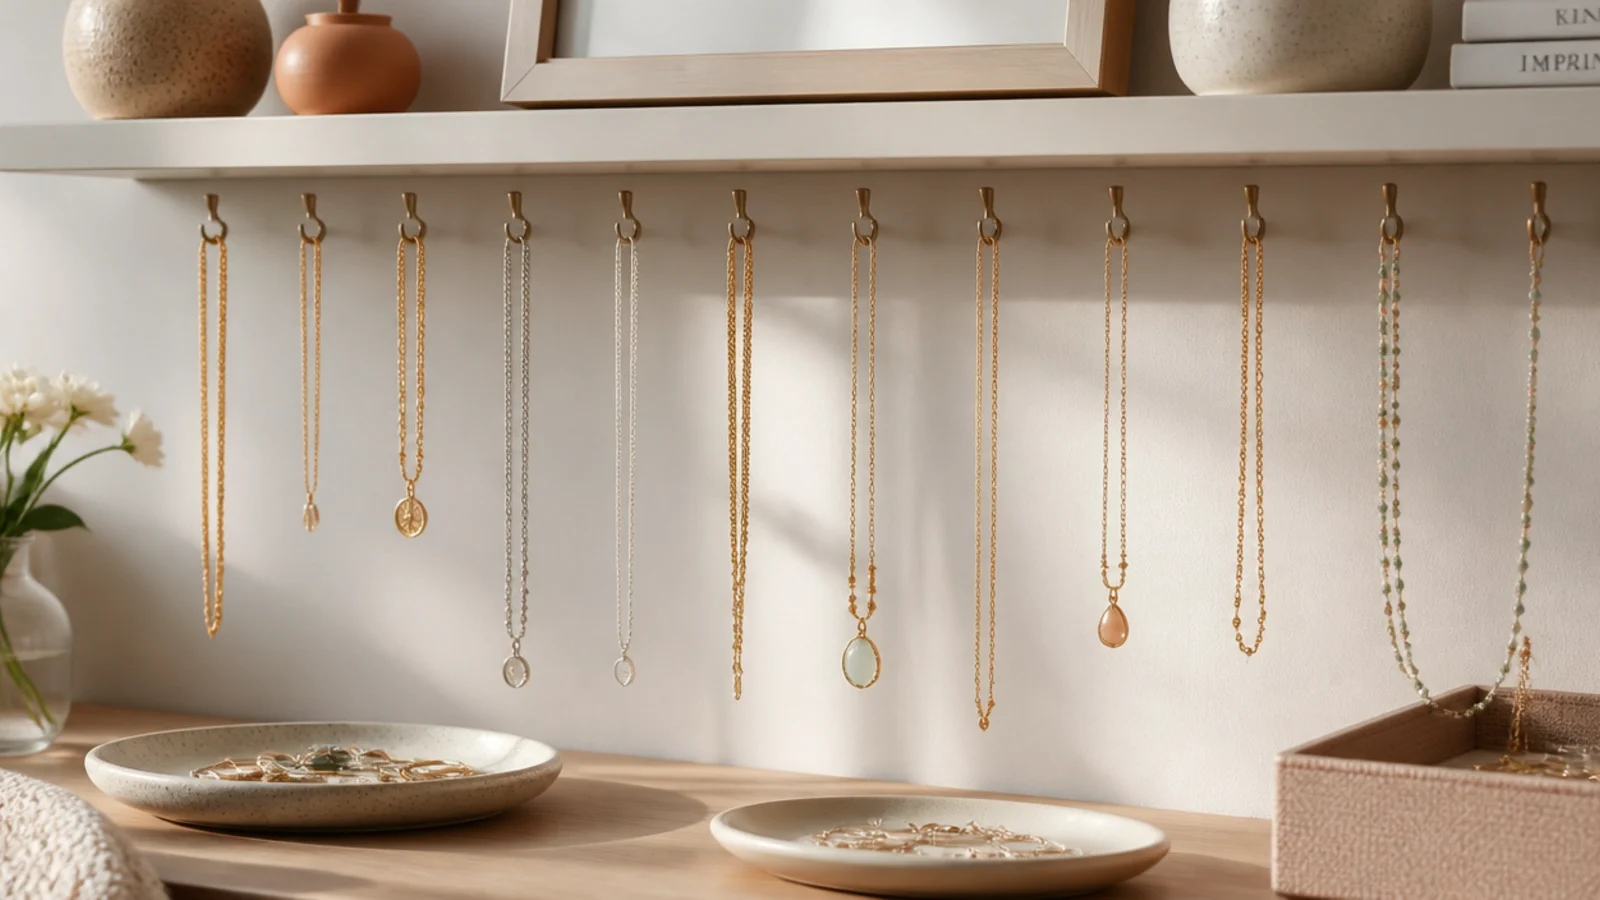
Adding hooks to the underside of an existing shelf doubles its use — display on top, necklaces below. It uses space you already have. It suits anyone with a shelf near their mirror who needs necklace storage without a new board.
Mark evenly spaced points along the underside of a shelf, about 2 to 3 inches apart. Drill shallow pilot holes and screw in small brass cup hooks, being careful not to go through the shelf top. Hang necklaces on the hooks, longest at the ends. Use the shelf top for a dish or a small plant so the whole unit works twice as hard.
Measure your shelf’s thickness first and pick hook screws shorter than it, so they don’t poke through the display surface.
Don’t crowd the hooks; too close together and the necklaces below swing into each other and tangle.
7. Wall-Mounted Cork Tiles
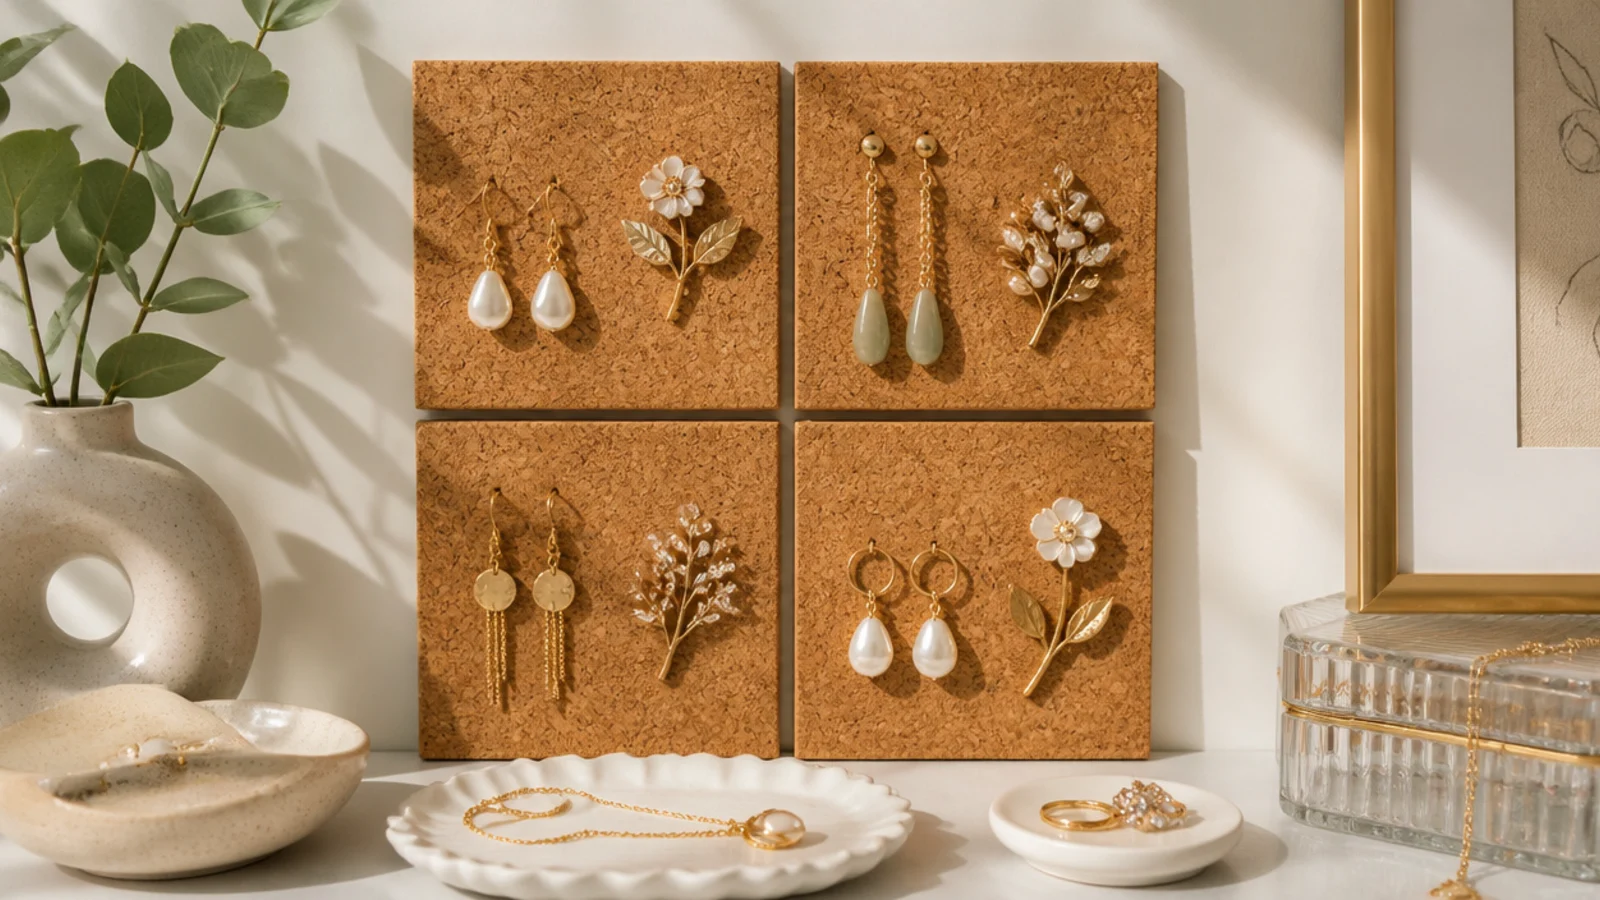
A grid of cork tiles makes a large, low-cost earring and brooch wall you can size to your space. Earrings and pins push straight into the cork. It suits a big collection and a bare wall that needs filling.
Arrange self-adhesive cork tiles in a grid on the wall, or glue them to a backing board first for a cleaner edge, then mount the board with strips or anchors. Level the whole grid before pressing it firmly. Push dangle earrings and brooches into the cork in even rows. Keep spacing consistent across all the tiles so the grid looks intentional.
Editor's noteGlue the tiles to one backing board before hanging; a single mounted panel stays aligned better than tiles stuck up separately.
Skip thisDon’t rely on the tiles' own adhesive on textured or painted walls; it lets go over time, so back them with a board.
8. Wall-Mounted Ladder Hook Panel
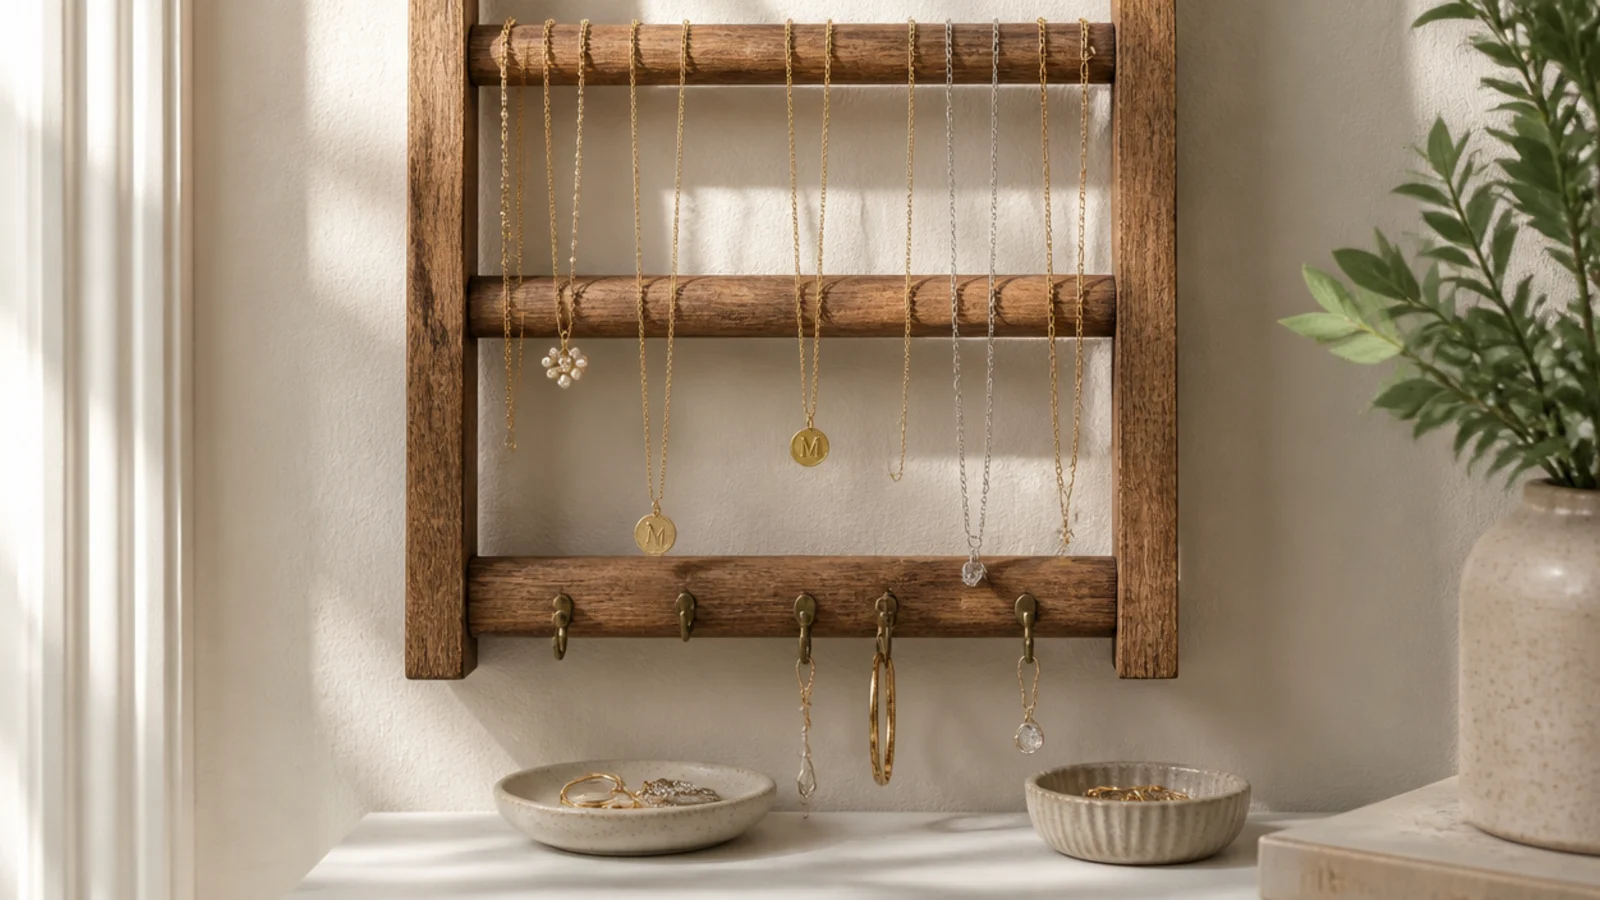
A short ladder mounted flat to the wall turns each rung into a rail for necklaces and bracelets. It’s rustic and holds a lot across several levels. It suits a farmhouse or boho room and a medium collection.
Cut a decorative ladder down to three or four rungs and mount it flat to the wall with L-brackets into anchors at top and bottom. Level it, then drape necklaces over the rungs and add a few cup hooks under the lowest rung for extra pieces. Space items along each rung so nothing overlaps. Keep the ladder finish matching your other wood tones.
Mount it flat with brackets top and bottom so it can’t tip; a leaning ladder walks forward as you load and unload it.
Don’t drape too many necklaces per rung; overlapping chains on one bar tangle just like they would in a drawer.
9. Picture Ledge Earring Row
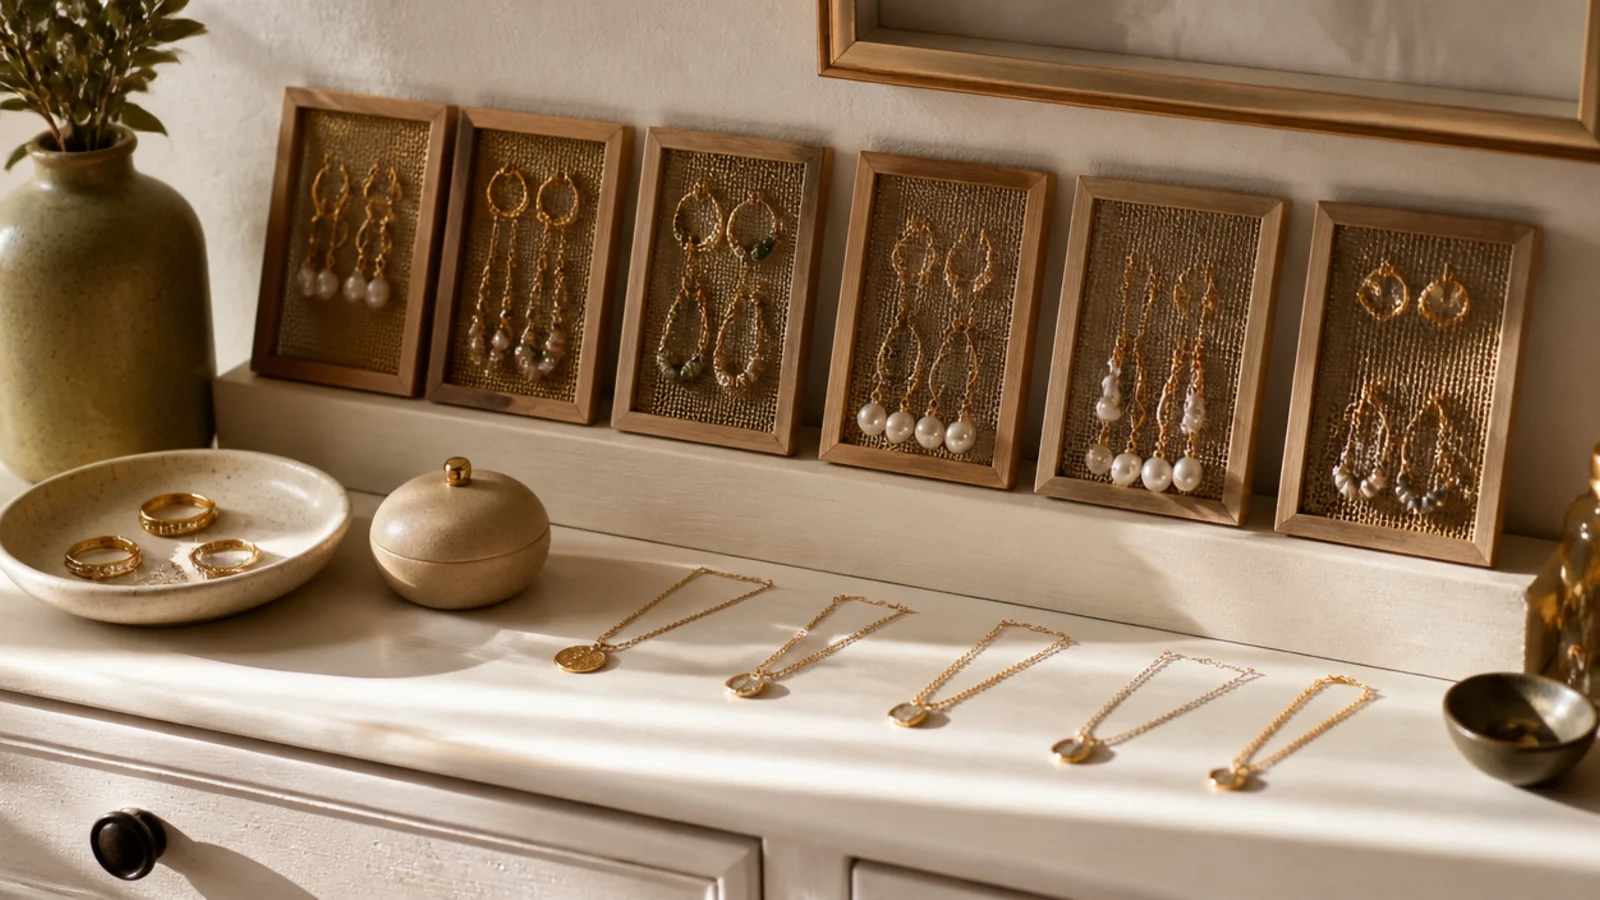
A picture ledge lets you lean several small earring frames in a row, so you can rearrange them like art. It’s flexible and pretty. It suits anyone who likes a gallery look and wants to swap pieces around easily.
Mount a narrow picture ledge into anchors or a stud, leveling it. Make two or three small mesh or cork earring frames and lean them along the ledge, overlapping slightly like framed prints. Load each frame with earrings before setting it up. The ledge’s lip keeps the frames from sliding forward. Rearrange the frames whenever you want a new look.
Editor's noteGive the frames a slight lean back against the wall so the ledge lip catches them and they don’t tip forward loaded.
Skip thisDon’t use a ledge without a front lip; a flat shelf lets the leaning frames slip off when the wall gets bumped.
10. Fabric-Covered Magnetic Panel
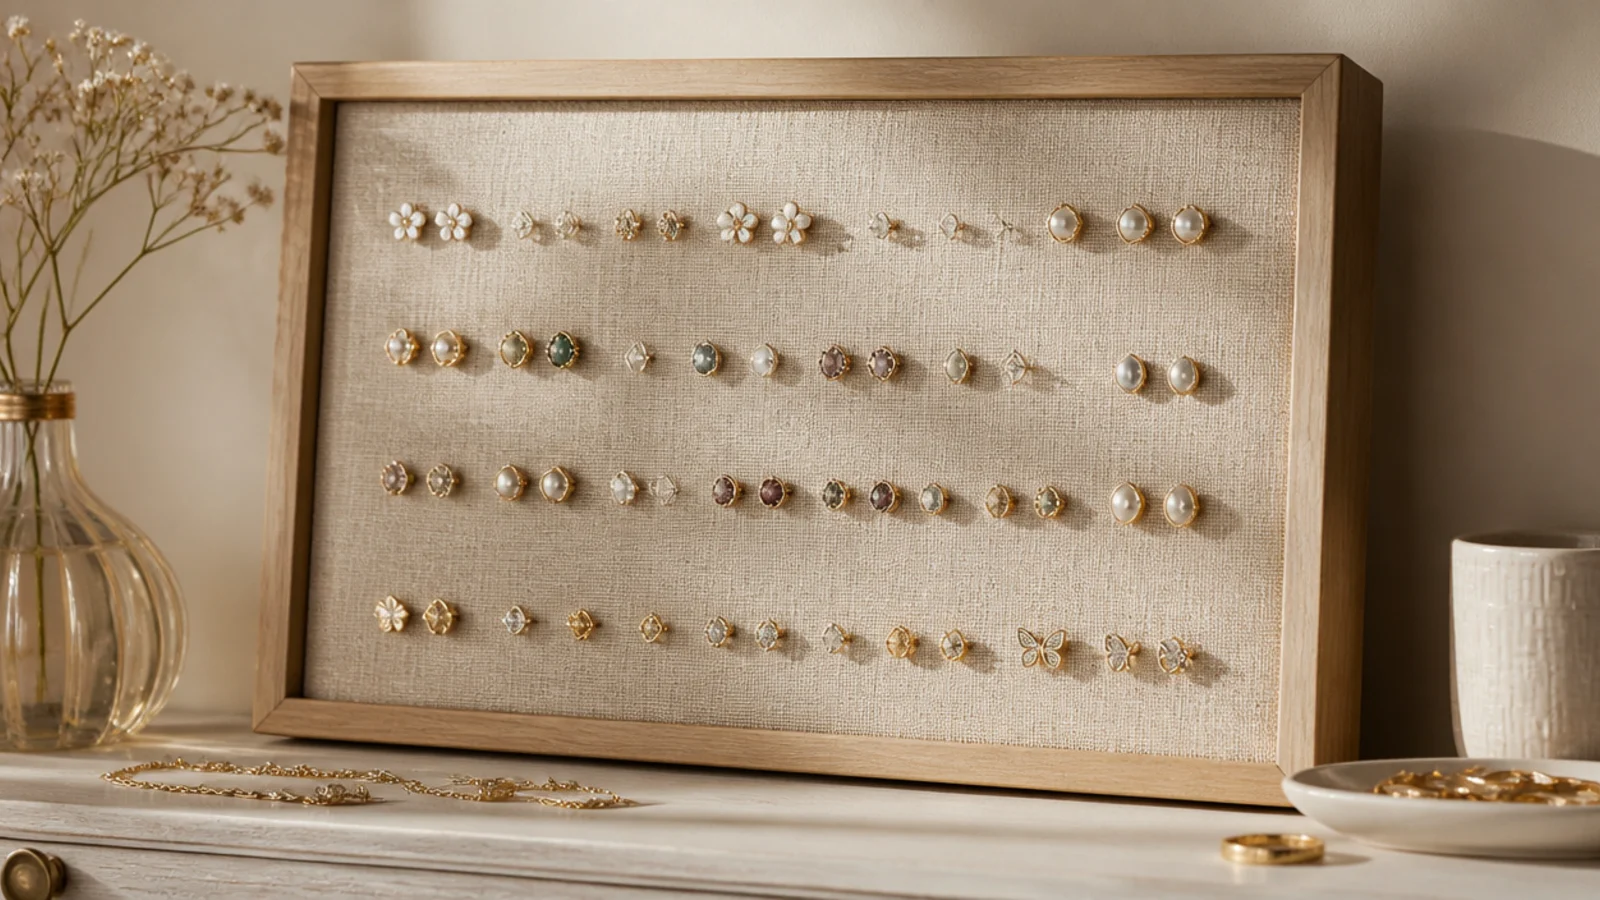
A magnetic panel behind fabric holds stud earrings by their backs, the cleanest way to store studs on a wall. Pairs stay together and visible. It suits a big stud collection and anyone tired of losing tiny backs.
Glue magnetic strips to a stiff board and stretch linen over the front, stapling it behind so the magnets pull through. Frame it if you like and hang it with two strips or anchors, level. Press each stud’s steel back to the fabric where it grabs, lining up pairs side by side. Keep dangles on a separate mesh board since magnets only hold the studs.
Editor's noteTest the pull through the fabric first; you want studs to hold firmly but still lift off with an easy tug.
Skip thisDon’t expect it to hold gold or brass backs; only steel and nickel studs grab, so keep the rest in a dish.
11. Knobs Over a Wall Dish
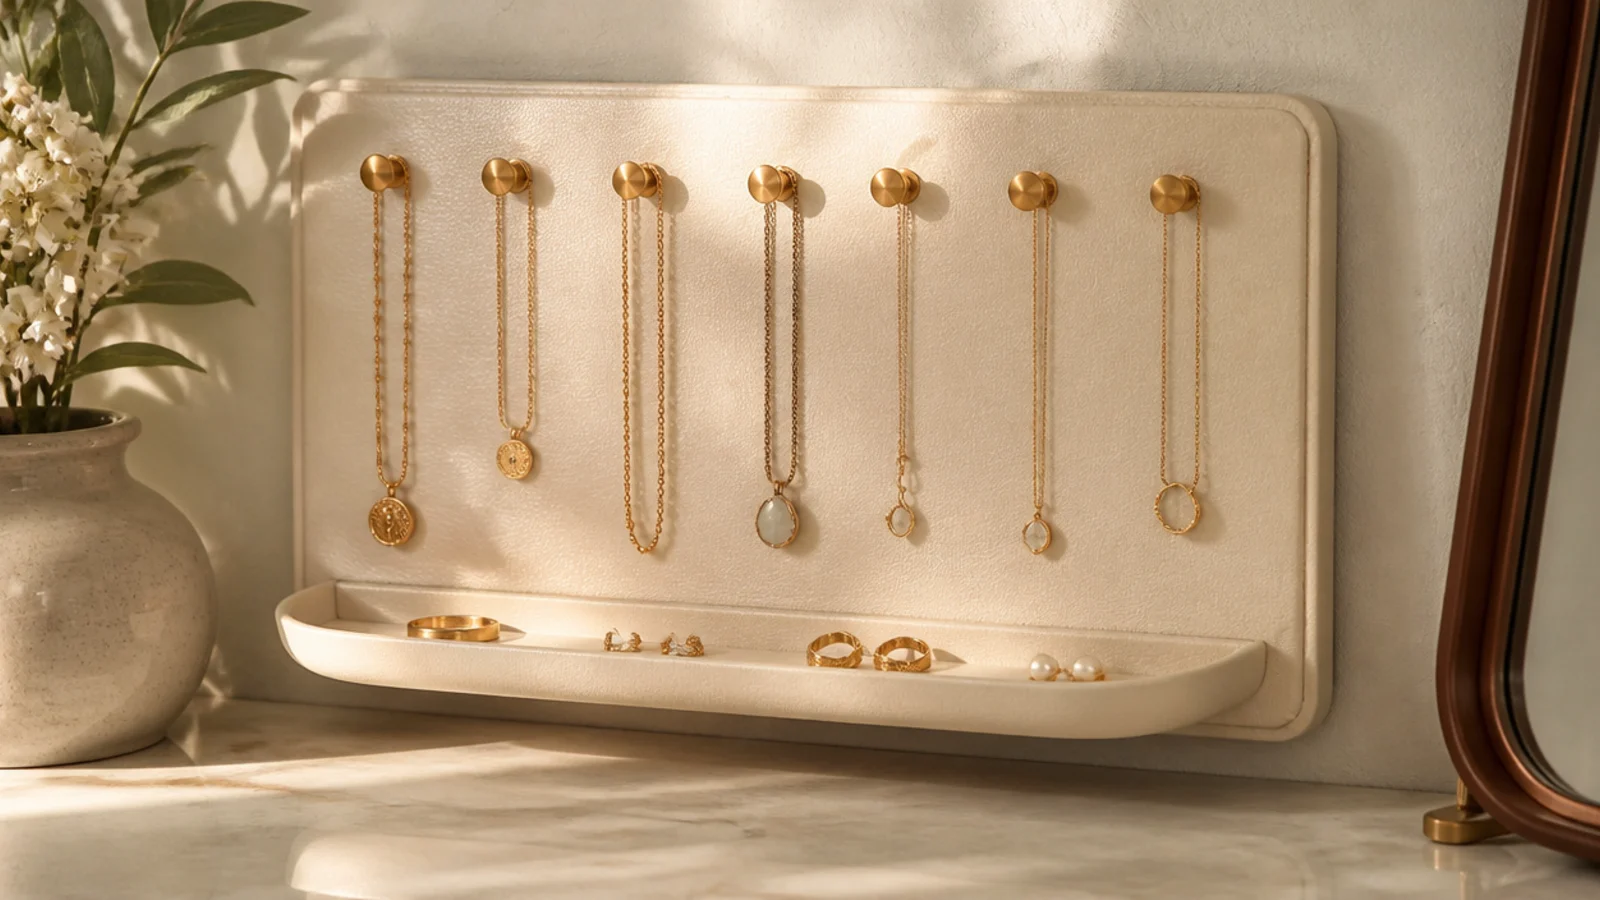
This pairs a knob row for necklaces with a small mounted dish below to catch rings and studs, so one board handles the two hardest types. Everything drops into place as you undress. It suits a compact spot by the mirror.
Paint a wood board and screw a row of knobs along the upper half every 3 inches. Fix a small ledge or shelf dish to the lower half with brackets. Mount the whole board with two anchors, level. Hang necklaces on the knobs and drop rings and studs into the dish below. The single board keeps your two tangle-prone types in one grab zone.
Editor's notePut the dish directly below the knobs so rings you slip off land in the same spot every night without a second thought.
Skip thisDon’t mount the catch dish too high; keep it at hand height so you’re not reaching up to drop small pieces in.
12. Over-the-Wall Hanging Organizer
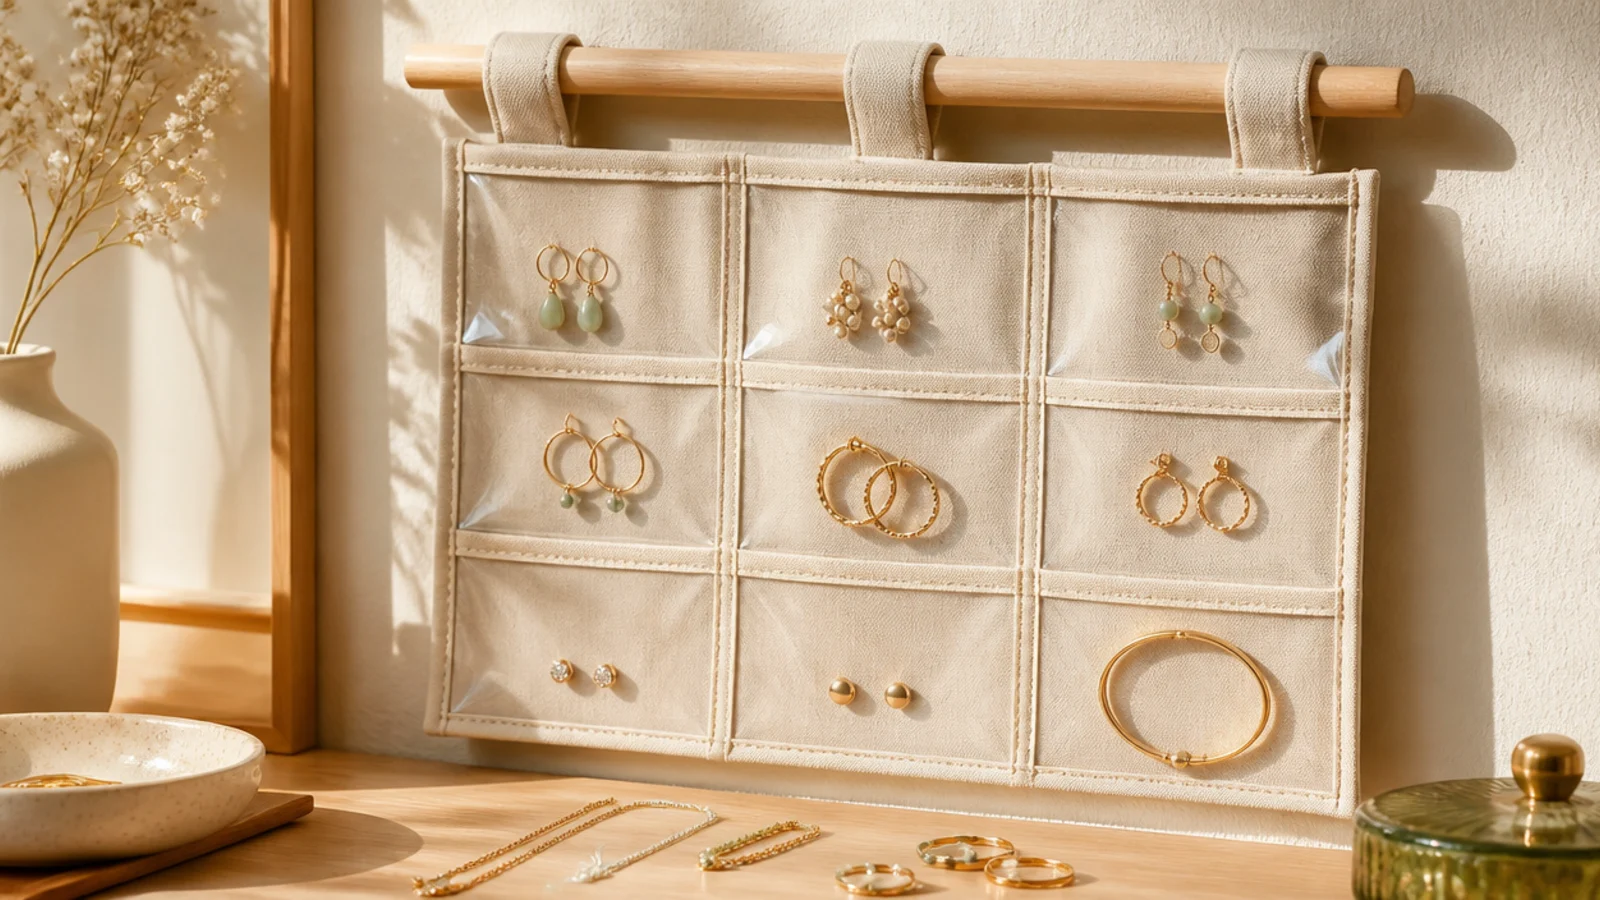
A fabric organizer with clear pockets hangs from one hook and sorts small pieces into see-through slots. It’s renter-friendly and holds a lot. It suits travelers and anyone who wants everything pocketed and portable.
Hang a clear-pocket fabric organizer from a single sturdy wall hook mounted into an anchor. Sort pieces by pocket — studs in one, rings in another, a bracelet in a third — so each is visible. Choose one with a firm top bar so it hangs flat against the wall. Because it lifts off the hook, you can take the whole thing when you travel.
Editor's notePick one with a rigid top bar or dowel so it hangs flat instead of curling away from the wall when loaded.
Skip thisDon’t hang a heavy loaded organizer on an adhesive hook; use an anchored hook so the whole panel doesn’t drop.
13. Carved Wooden Wall Hooks
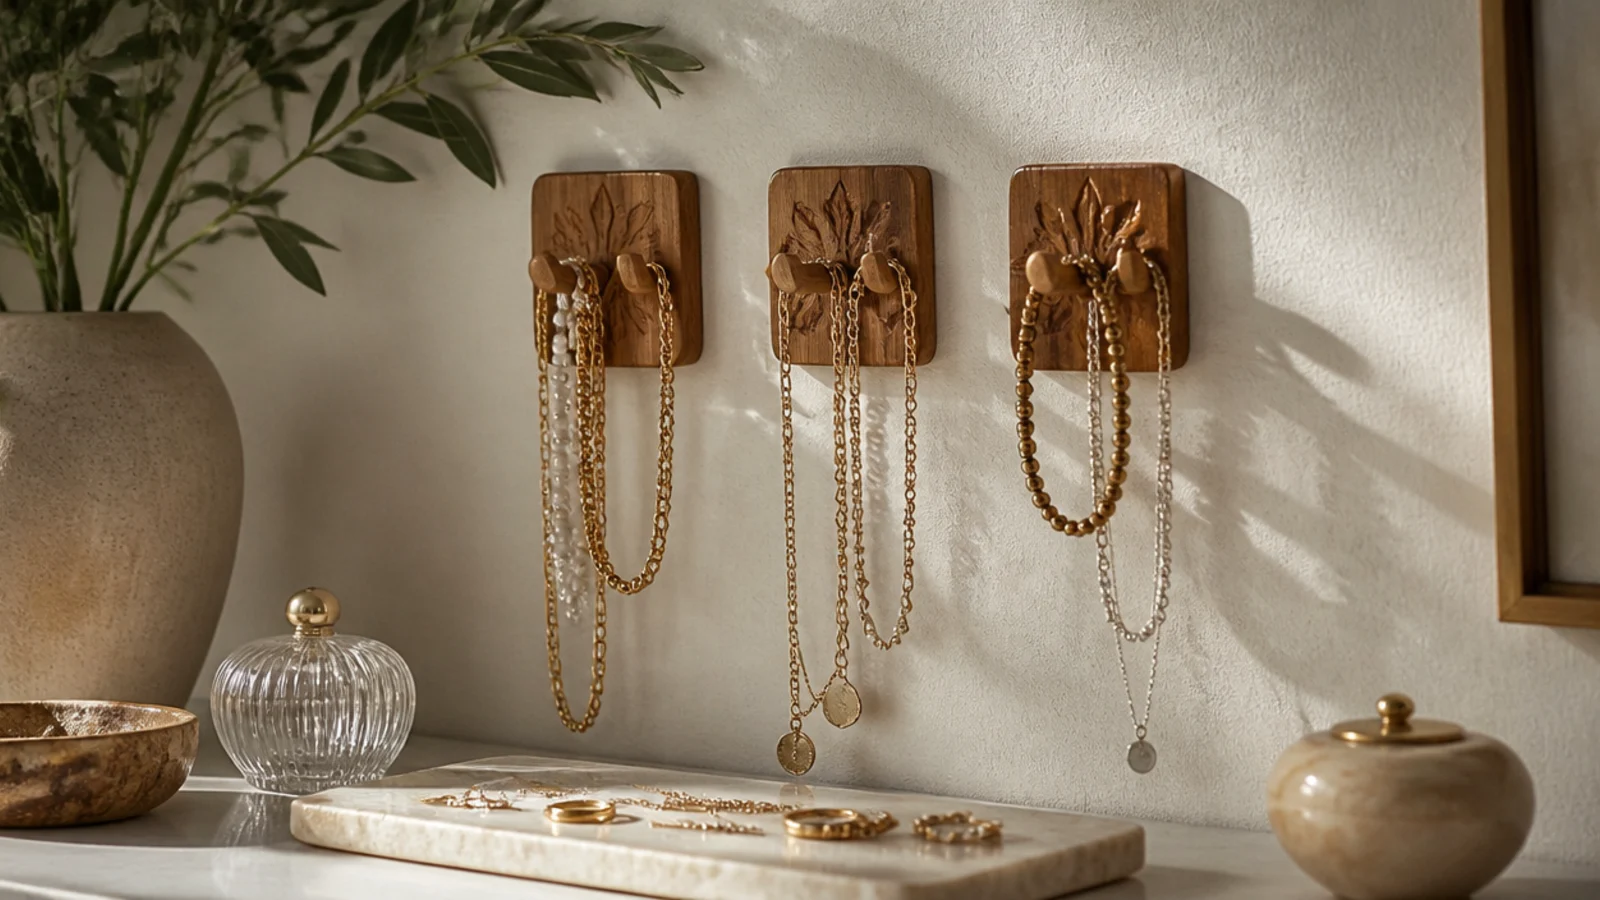
A few individual carved wooden hooks make a minimal, warm necklace wall without a full board. Each hook is its own small object. It suits a pared-back room and a modest collection you want to keep airy.
Choose three or four small wooden or brass hooks with a shape you like. Mark a level line and space them evenly, about 4 to 6 inches apart. Drill pilot holes and screw each into an anchor or stud. Hang one or two necklaces per hook, keeping it sparse. The gaps between hooks are part of the look, so resist crowding them.
Align all the hooks on one pencil level line before drilling; evenly leveled hooks read as intentional, not scattered.
Don’t overload each hook to save wall space; two necklaces per hook keeps the minimal, airy look you’re after.
14. Framed Chicken Wire Panel
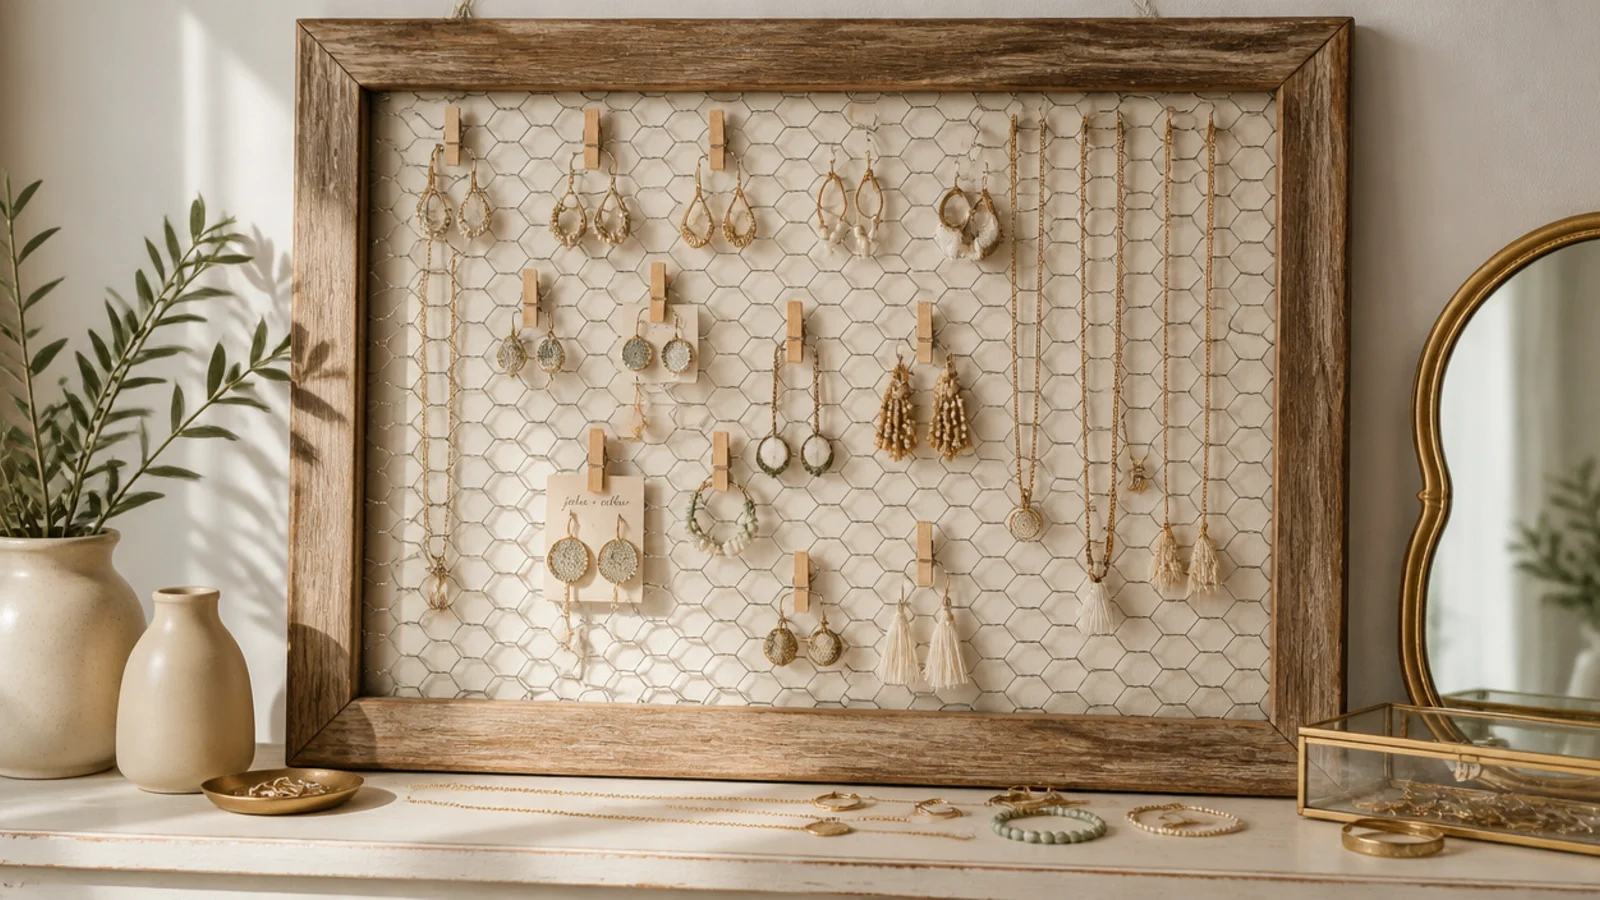
A big frame filled with chicken wire makes a farmhouse-style panel that holds earrings in the mesh and necklaces on clips. It covers a lot of wall attractively. It suits a rustic room and a large mixed collection.
Staple chicken wire taut across the back of a large rustic frame, folding the sharp edges under. Hang it with two anchors, level, since a big frame is heavier. Hook earrings into the hexagons and clip small S-hooks or shower rings onto the wire for necklaces. Vary where you place each type so the panel stays balanced and not bottom-heavy.
Wear gloves and fold every cut chicken-wire end back on itself; the raw ends are sharp and snag both skin and chains.
Don’t hang a wide chicken-wire frame from one point; its size makes it tilt easily, so anchor both top corners.
15. Geometric Shelf with Hooks
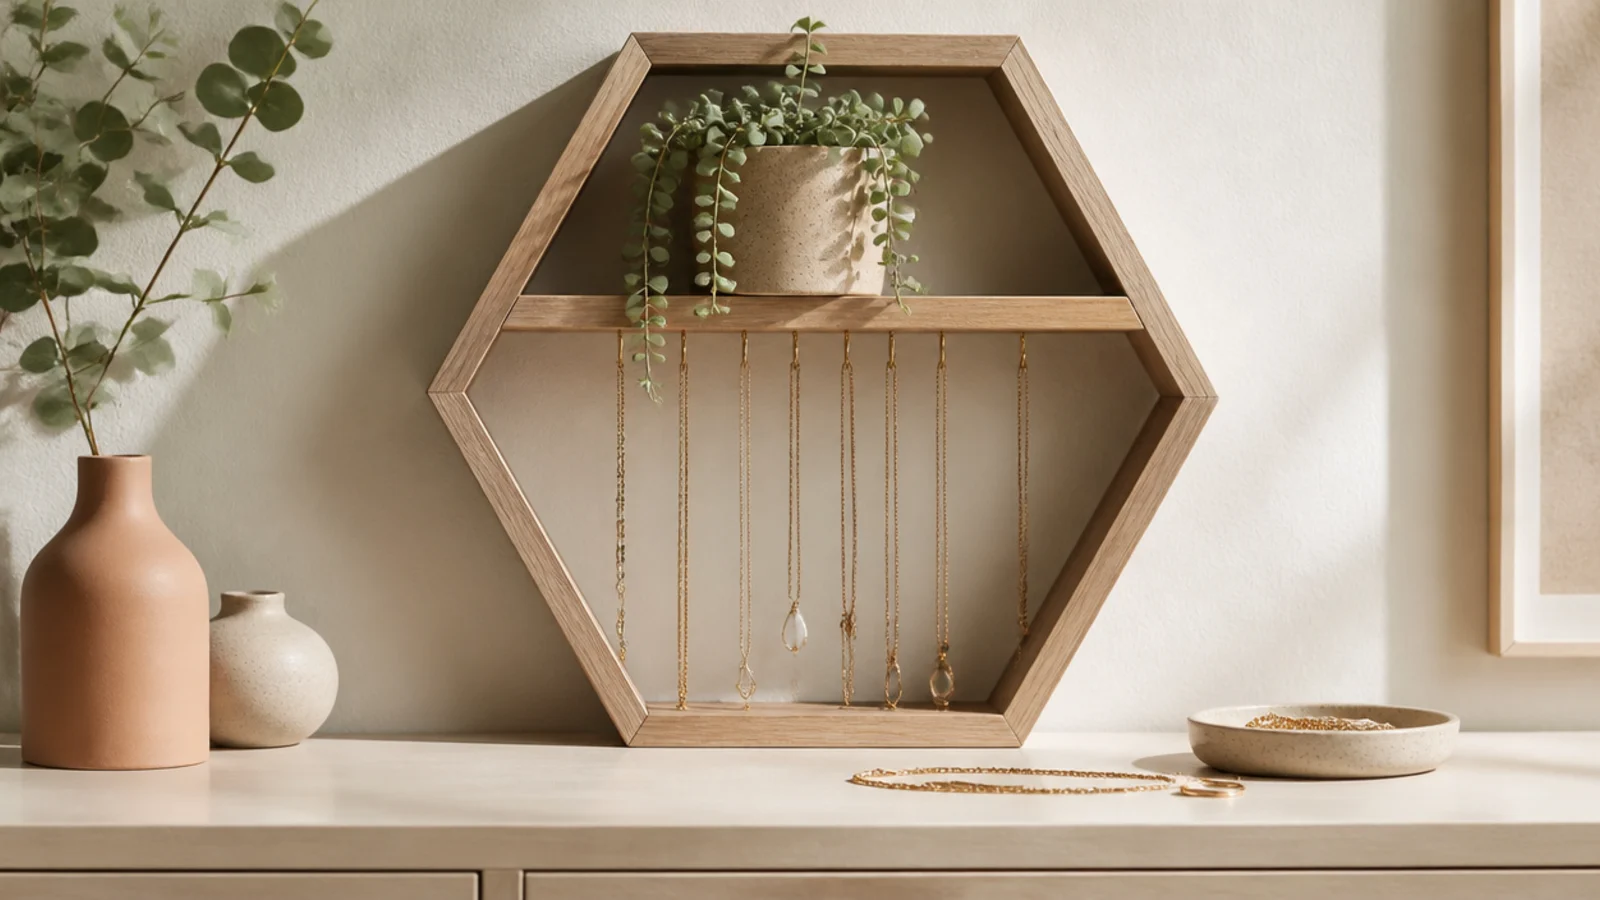
A geometric shelf with hooks underneath is decor and storage in one modern shape. The top holds a plant or dish while necklaces hang below. It suits a contemporary room where the organizer should also look like art.
Mount a hexagonal or geometric wall shelf into anchors or a stud, leveling it. Add small hooks along its lower edge, drilling pilot holes first. Set a small plant, a ring dish, or a candle on top and hang necklaces from the hooks below. Keep the styling on top minimal so the shape reads. Position it at eye level beside the mirror.
Editor's noteStyle the shelf top with just one object — a small plant or dish — so the geometric outline stays the star.
Skip thisDon’t clutter the shelf top with several items; a busy top fights the clean geometric shape and looks messy.



