

1. Simple Pinch-Pot Ring Dish
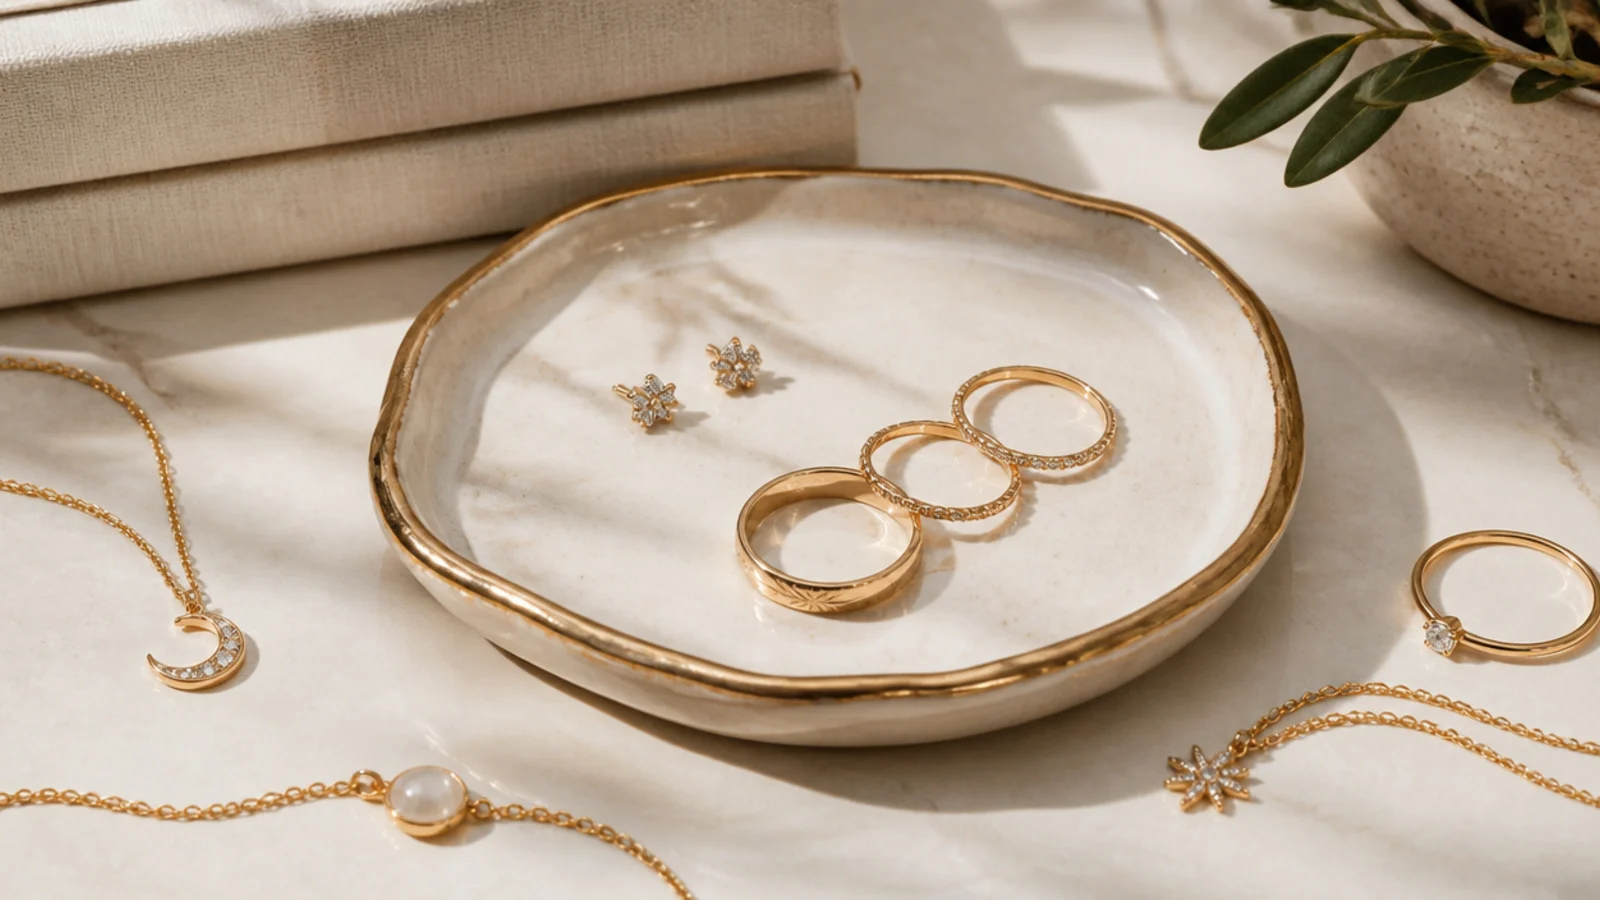
This is the easiest clay organizer and the one to learn on — a shallow dish for the rings and studs you take off at night. You shape it with your thumb, so there are no tools to master. It suits a nightstand or a spot by the sink.
Roll a ball of air-dry clay, press your thumb into the center, and pinch the walls up evenly into a shallow dish about 3 inches across. Smooth the surface with a damp finger and flatten the base on the table so it sits level. Dry fully for a day or two, sand the rim, paint the inside a soft color, add a thin gold rim, and seal with clear varnish.
Press the base flat on the table while the clay is still soft so the finished dish sits level and doesn’t rock.
Don’t skip sealing; unsealed air-dry clay soaks up skin oils and lotion and stains within a few weeks.
2. Leaf-Imprint Trinket Dish
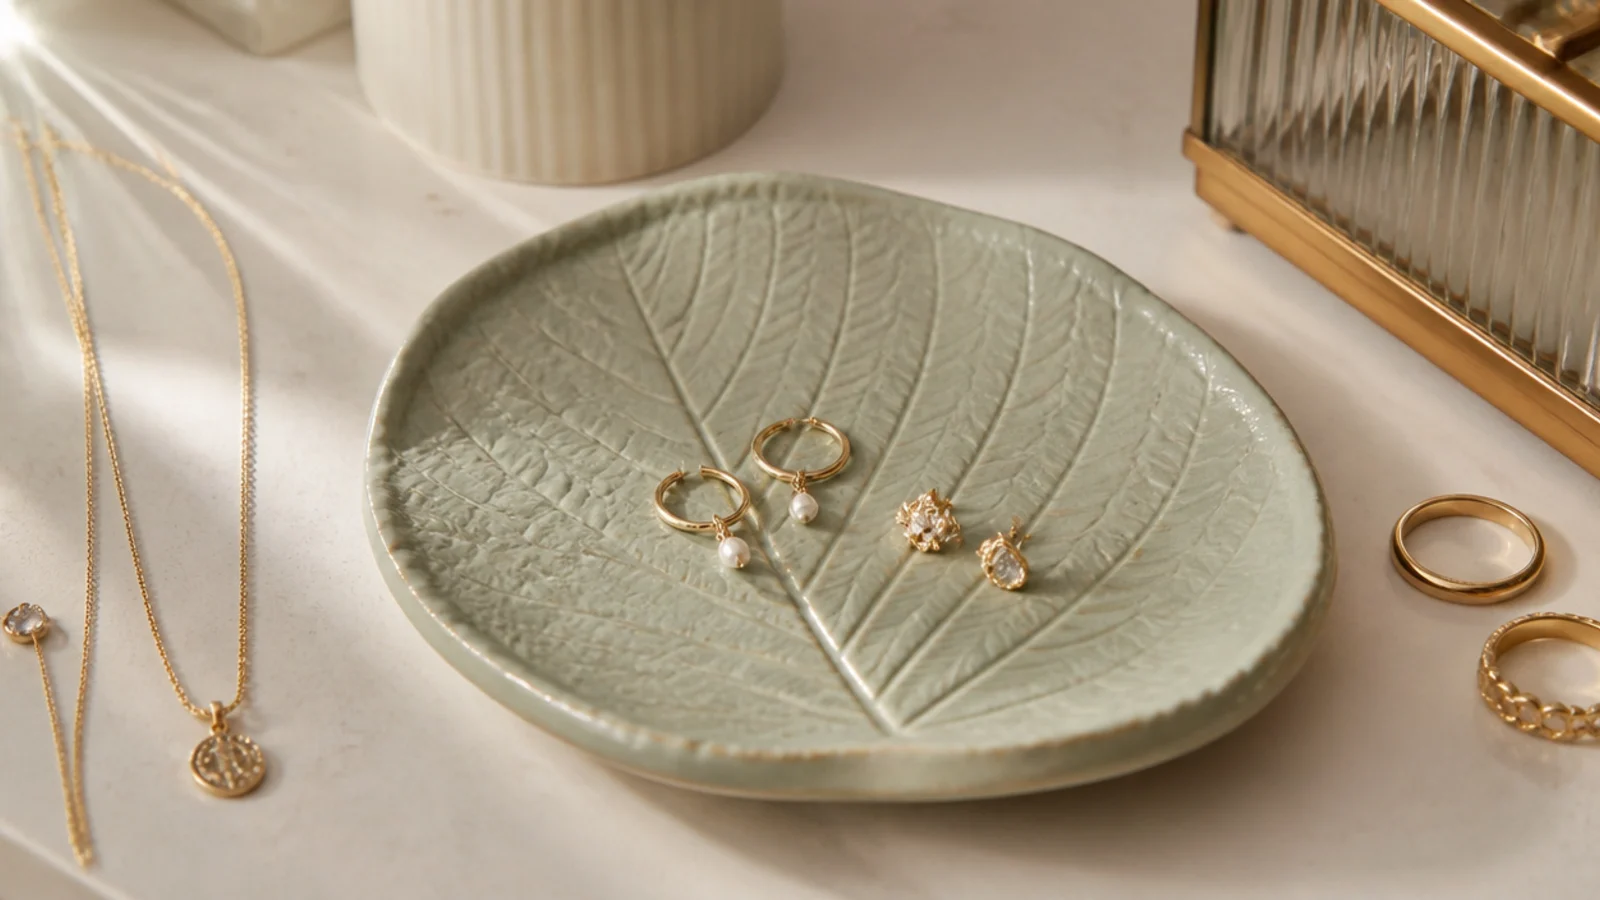
Roll out air-dry clay to a quarter-inch, press a flat leaf firmly vein-side down, and peel it off to leave the imprint. Trim around the leaf shape with a craft knife, then drape the slab over a bowl to give it a gentle curve. Dry fully, sand the edge, and wash a little paint into the veins, wiping the surface so the texture pops. Seal when dry.
Pressing a real leaf into the clay leaves a crisp botanical texture with zero drawing skill. The veins do all the decorating. It suits a nature-leaning room and looks especially good in soft green or cream.
Skip thisDon’t press the leaf too gently; a light press gives a faint imprint that disappears once you paint over it.
Editor's noteWipe a darker paint into the vein lines and off the raised surface so the leaf detail stands out clearly.
3. Marbled Slab Dish
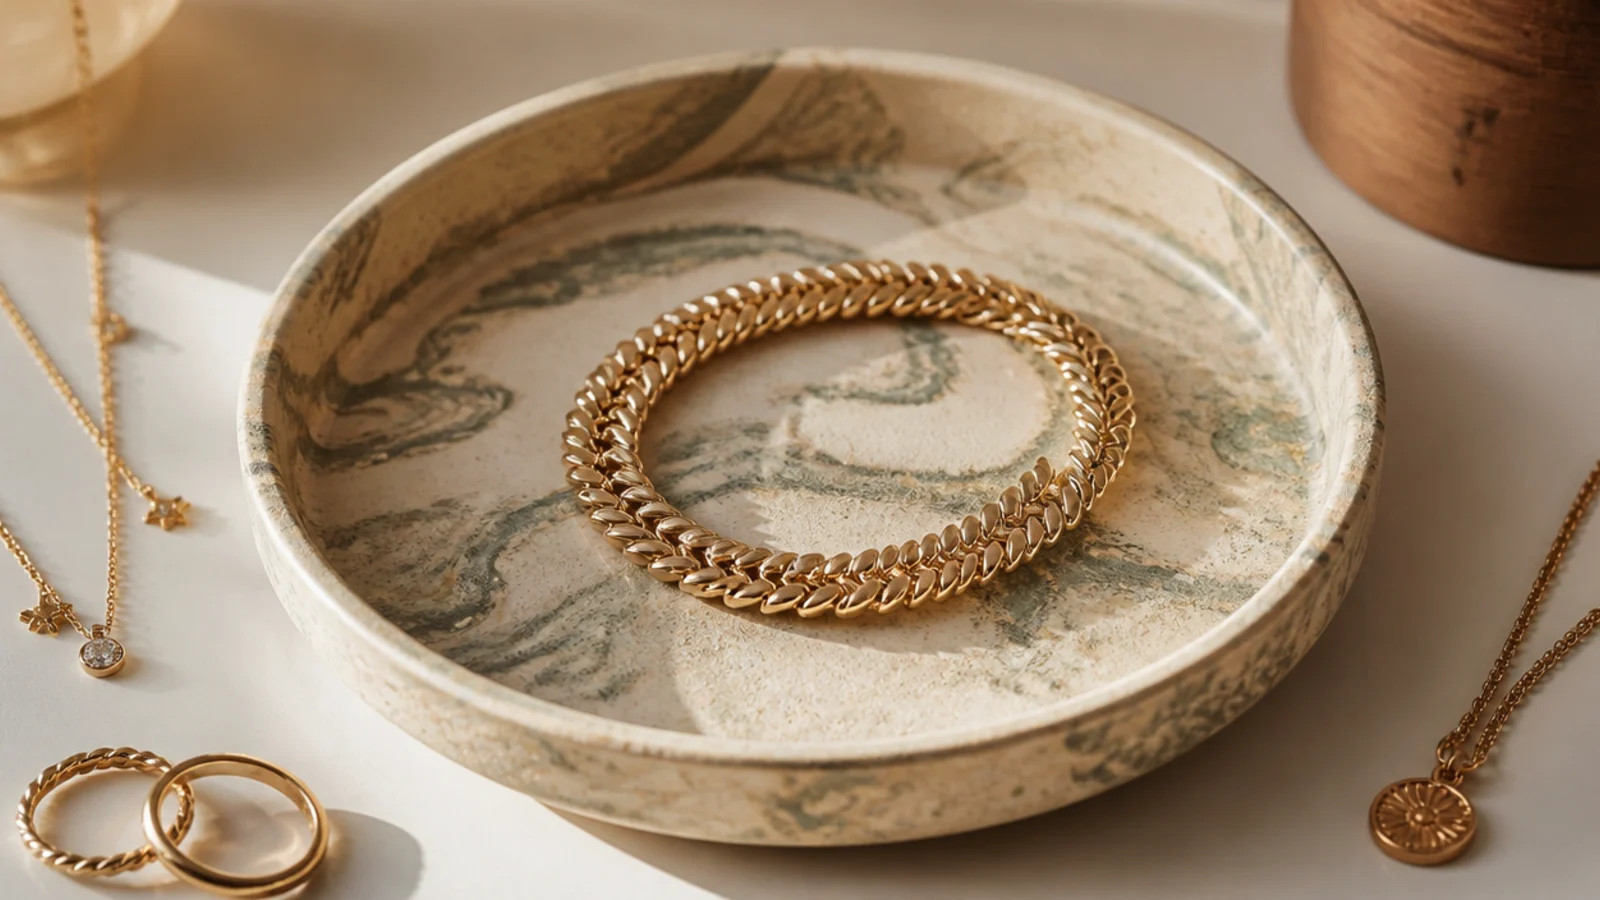
Marbling two clay colors together gives a swirl that runs all the way through, so it never chips off. Each dish comes out unique. It suits anyone who wants pattern baked into the piece rather than painted on top.
Twist two colors of polymer or colored air-dry clay together a few times, then roll flat — don’t over-mix or the marble muddies. Drape the slab over a small bowl to form a shallow dish and trim the edge. Cure polymer in the oven per its instructions or dry air-dry fully. Sand the rim smooth and seal with a glaze for sheen.
Twist the two clays only a few times before rolling; over-mixing blends them into one flat color and loses the marble.
Don’t handle marbled clay too much as you shape; warm hands blur the swirl into mud, so work it quickly.
4. Clay Ring Cone
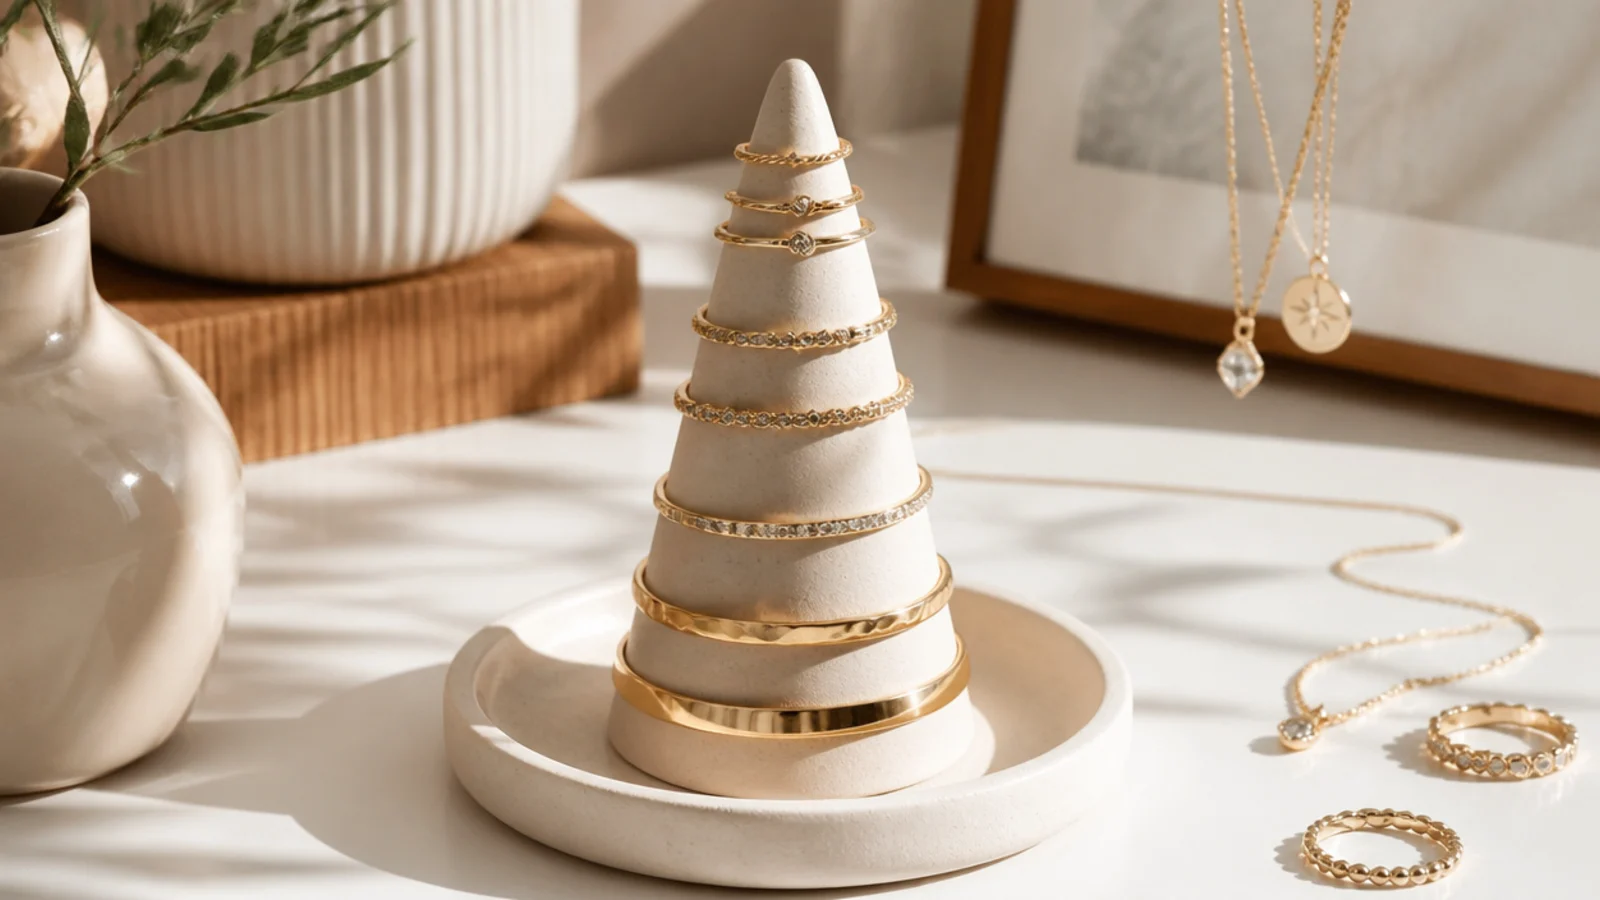
A ring cone stacks rings down its slope so they stay visible and easy to grab. The simple sculptural shape looks modern. It suits a ring collection you want displayed in order on a vanity.
Shape a smooth cone from polymer clay around a rolled paper core, or build it solid if small, keeping the slope gentle enough that rings stack rather than slide off. Smooth the surface and set it on a small matching clay saucer. Cure or dry fully, sand, paint a neutral matte, and seal. Stack rings smallest at the top to largest at the base.
Keep the cone’s slope gentle and the surface slightly matte so rings grip and stack instead of sliding to the bottom.
Don’t make the cone too steep or glossy; rings slide straight down into a clump instead of stacking neatly.
5. Clay Earring Tree Stand
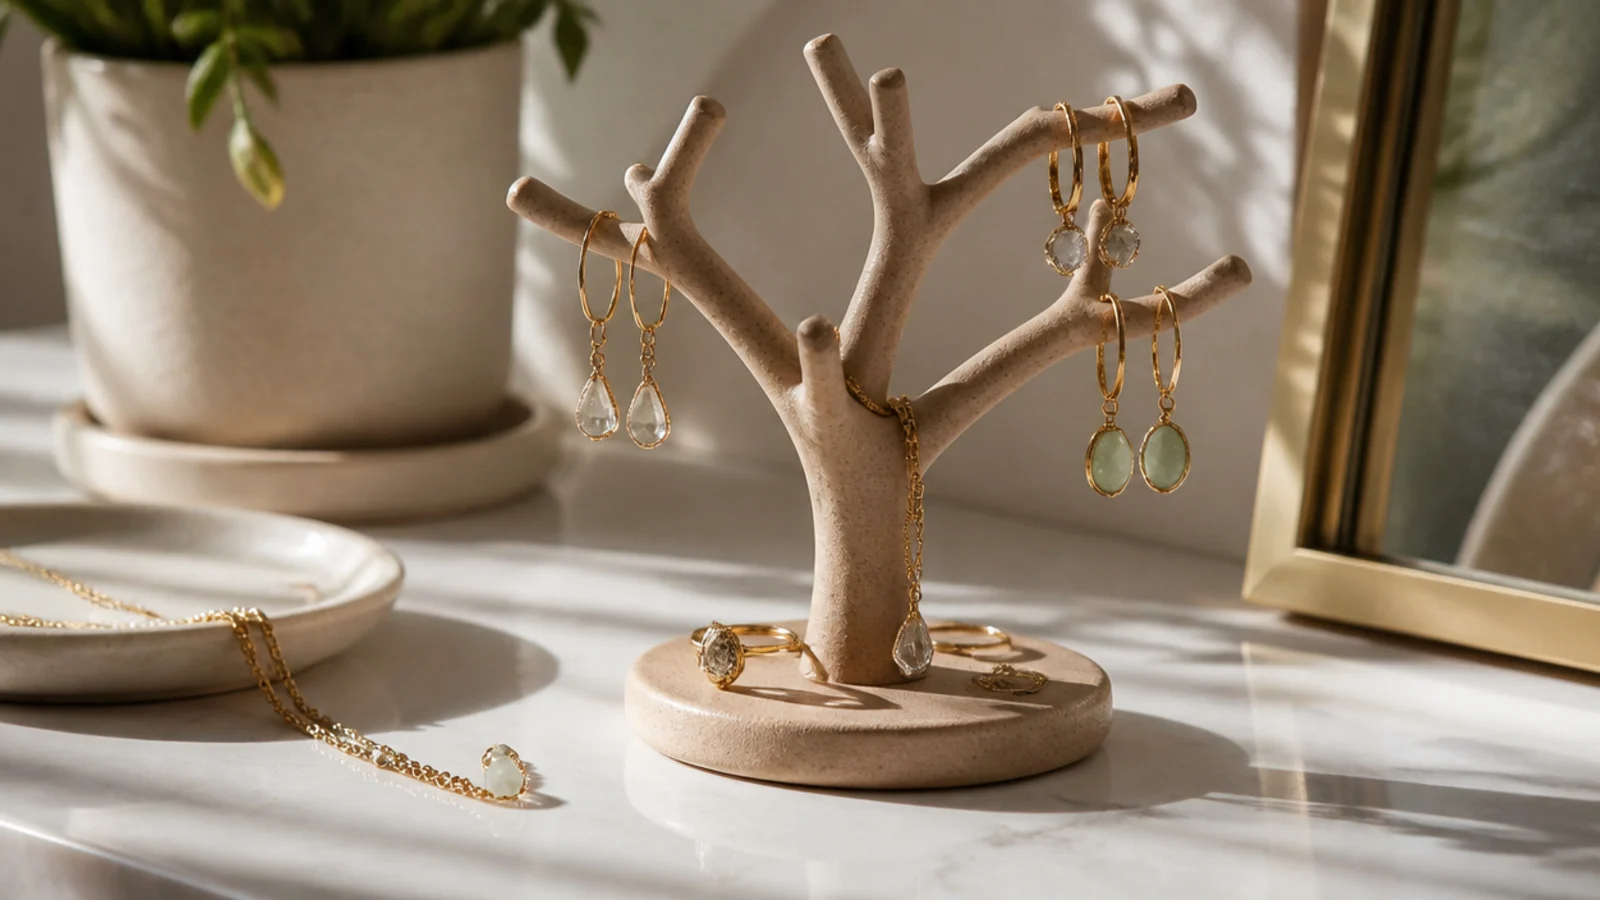
A little clay tree hangs dangle earrings on its arms so pairs stay together and airy. It’s sculptural and holds a surprising number. It suits a small earring collection you want on display.
Build a branching form from polymer clay around thick floral wire for strength, pressing the wire ends into a wide, flattened base for stability. Smooth the joints and keep the arms thick enough not to snap. Cure fully, sand, paint one color, and seal. Weight the base by pressing a coin into the underside before curing so it doesn’t tip when loaded.
Embed a coin or washer in the base before curing; the added weight keeps a loaded earring tree from tipping over.
Don’t make thin, unsupported arms; without wire inside, clay branches crack and drop earrings, so always reinforce them.
6. Stacking Nesting Bowls
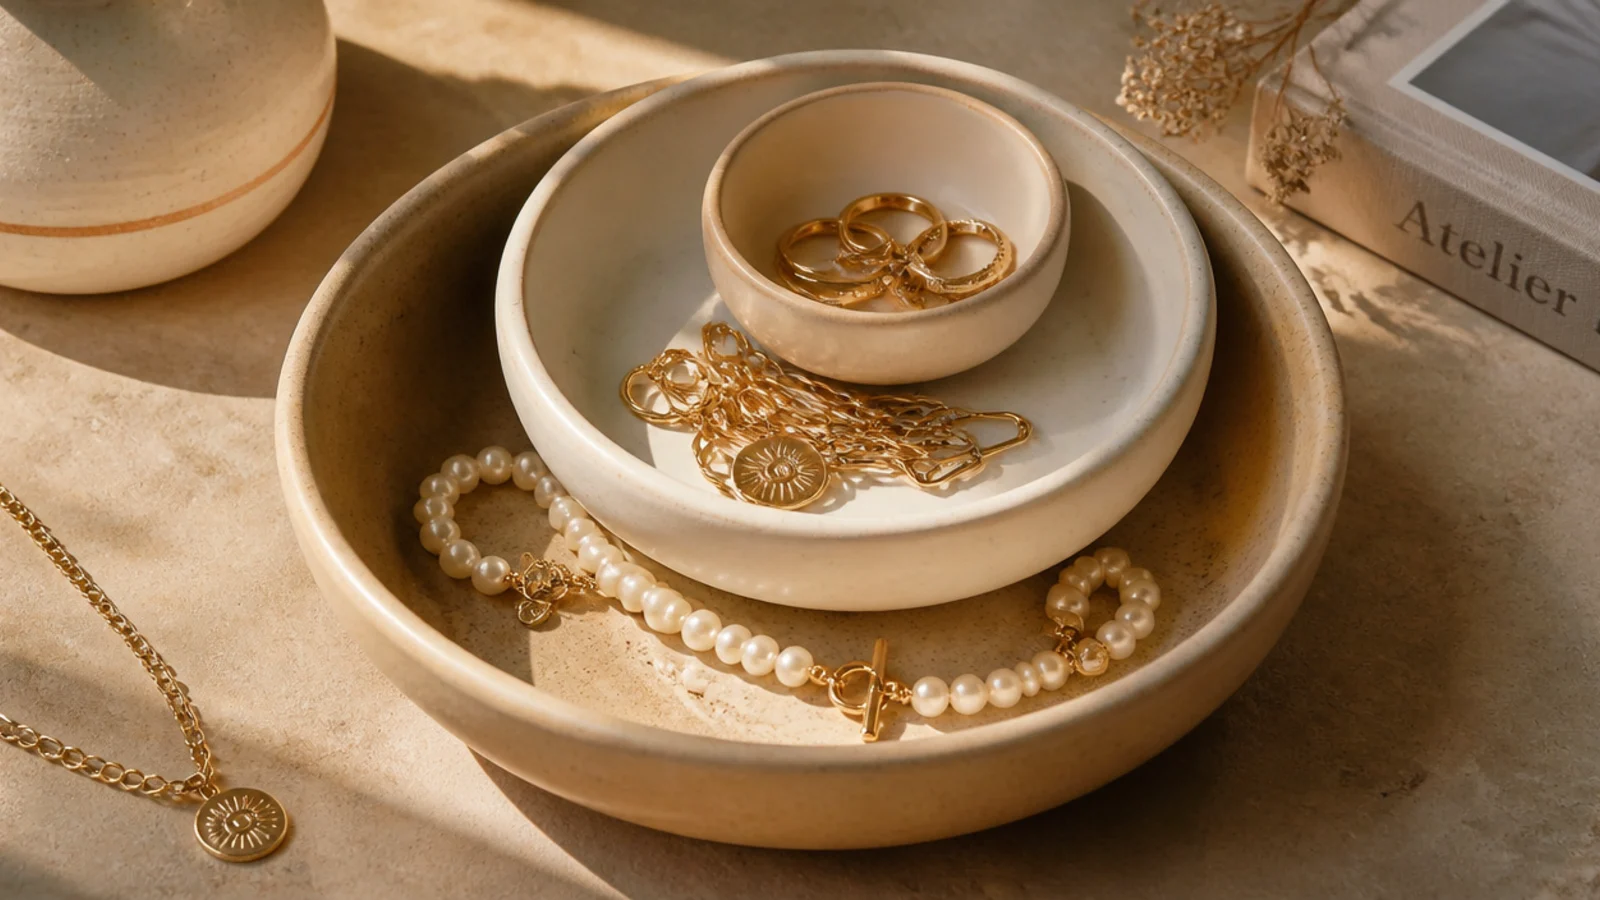
Make three pinch or slab bowls in graduated sizes so they nest, keeping the walls even. Shape them over three different-sized bowls for consistent curves. Dry or cure fully, sand the rims, and finish them in one tonal family so they read as a set. Use the biggest for bracelets, the middle for rings, and the smallest for studs, nesting them when not in use.
A set of three graduated bowls nests to save space and sorts pieces by type when spread out. The matching set looks intentional. It suits anyone who wants flexible storage that tidies away.
Skip thisDon’t make the bowls too close in size; without a clear step between them they won’t nest and just look mismatched.
Editor's noteShape each bowl over a store bowl of the right size; the mold gives you clean, matching curves that nest properly.
7. Gold-Fleck Catch-All
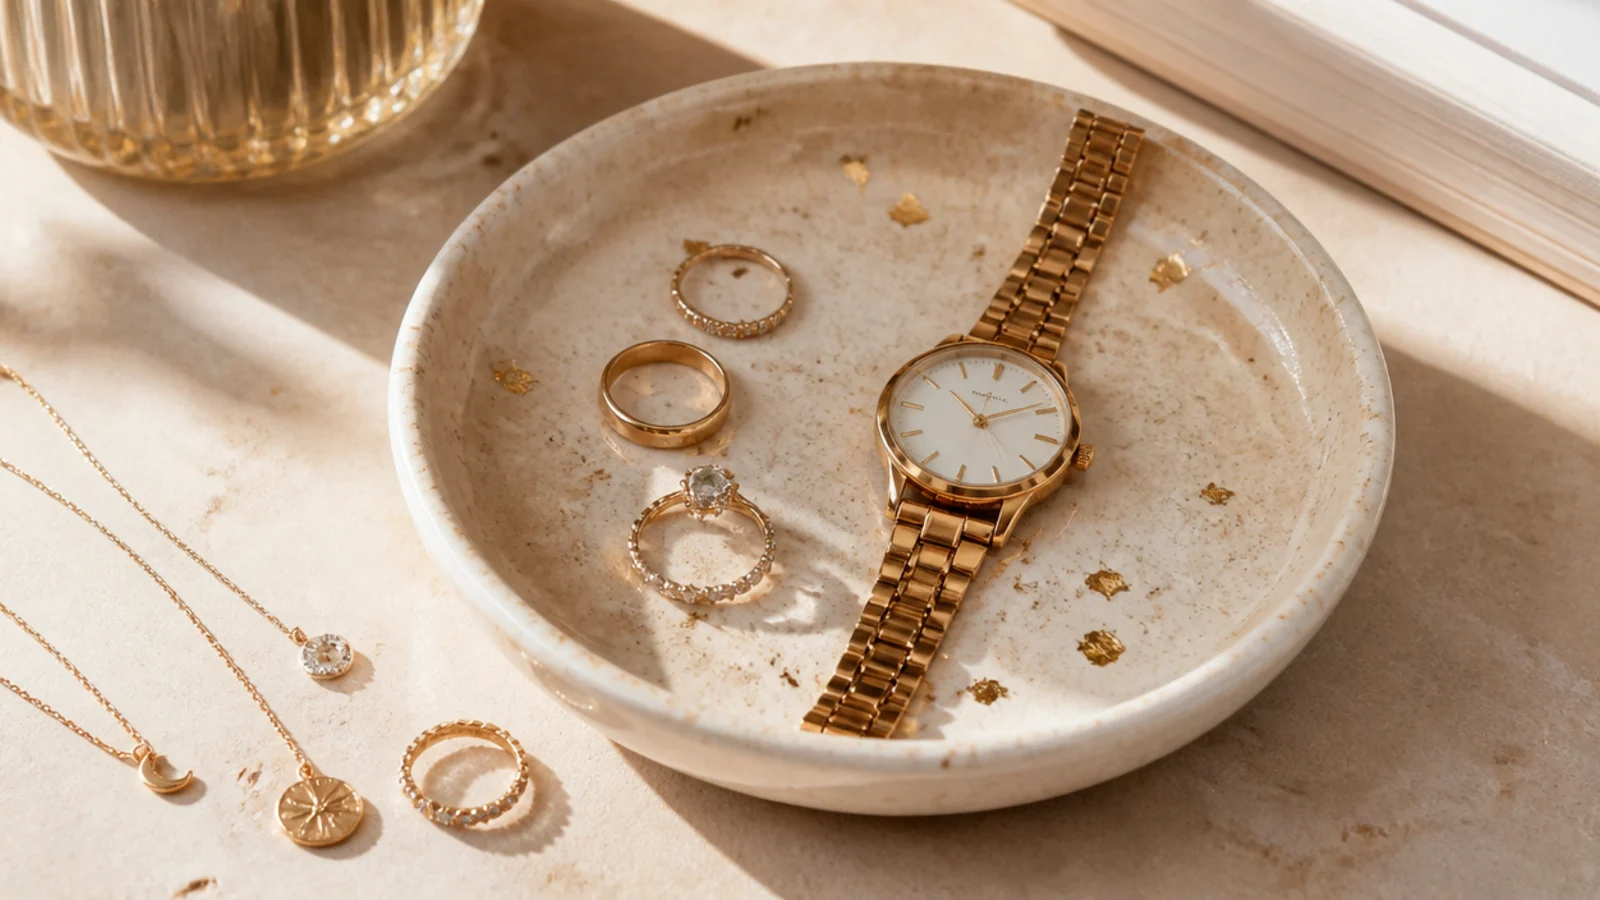
Roll out light clay and press small flakes of gold leaf randomly across the surface, then roll once more lightly so they sit flush. Drape over a bowl to form a shallow catch-all and trim the edge. Dry or cure, sand the rim carefully to avoid the leaf, and seal with a clear glaze so the flecks don’t lift. Keep the fleck density light for an expensive look.
Pressing gold leaf flecks into the clay gives a subtle sparkle that looks luxe. The flecks catch the light without being loud. It suits a glam vanity and pairs beautifully with gold jewelry.
Skip thisDon’t overload the surface with gold leaf; a few scattered flecks read expensive, while full coverage looks gaudy.
Editor's notePress the gold leaf in and roll once more so the flecks sit flush; raised flakes rub off even after sealing.
8. Scalloped-Edge Dish
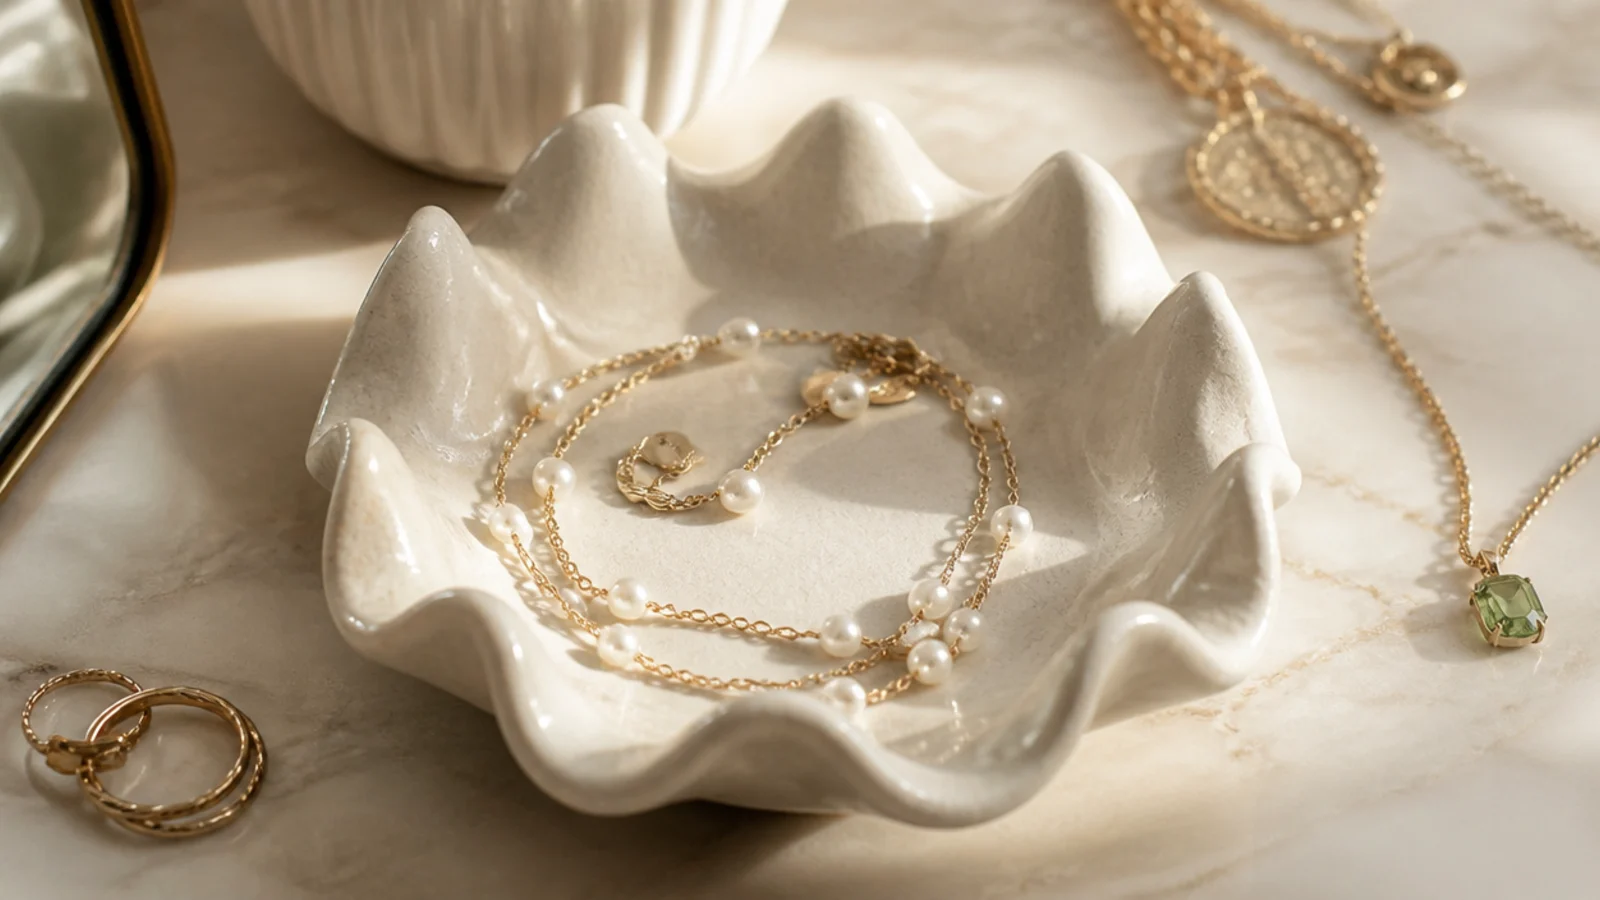
Shape a shallow slab dish over a bowl, then pinch the rim at even intervals with your finger and thumb to form scallops. Space the scallops evenly by lightly marking the rim first. Smooth each pinch so it’s rounded, not sharp. Dry or cure, sand gently, paint a soft neutral, and seal. Coil a fine chain inside so the curve echoes the rim.
A scalloped rim adds a soft, boutique detail with just your fingertips. The wavy edge does the decorating. It suits a romantic room and works for a coiled chain or rings.
Skip thisDon’t pinch the scallops too thin; delicate points crack as the clay dries, so keep each rounded lobe solid.
Editor's noteMark the rim into equal sections before pinching so the scallops come out even instead of drifting in size.
9. Geometric Faceted Dish
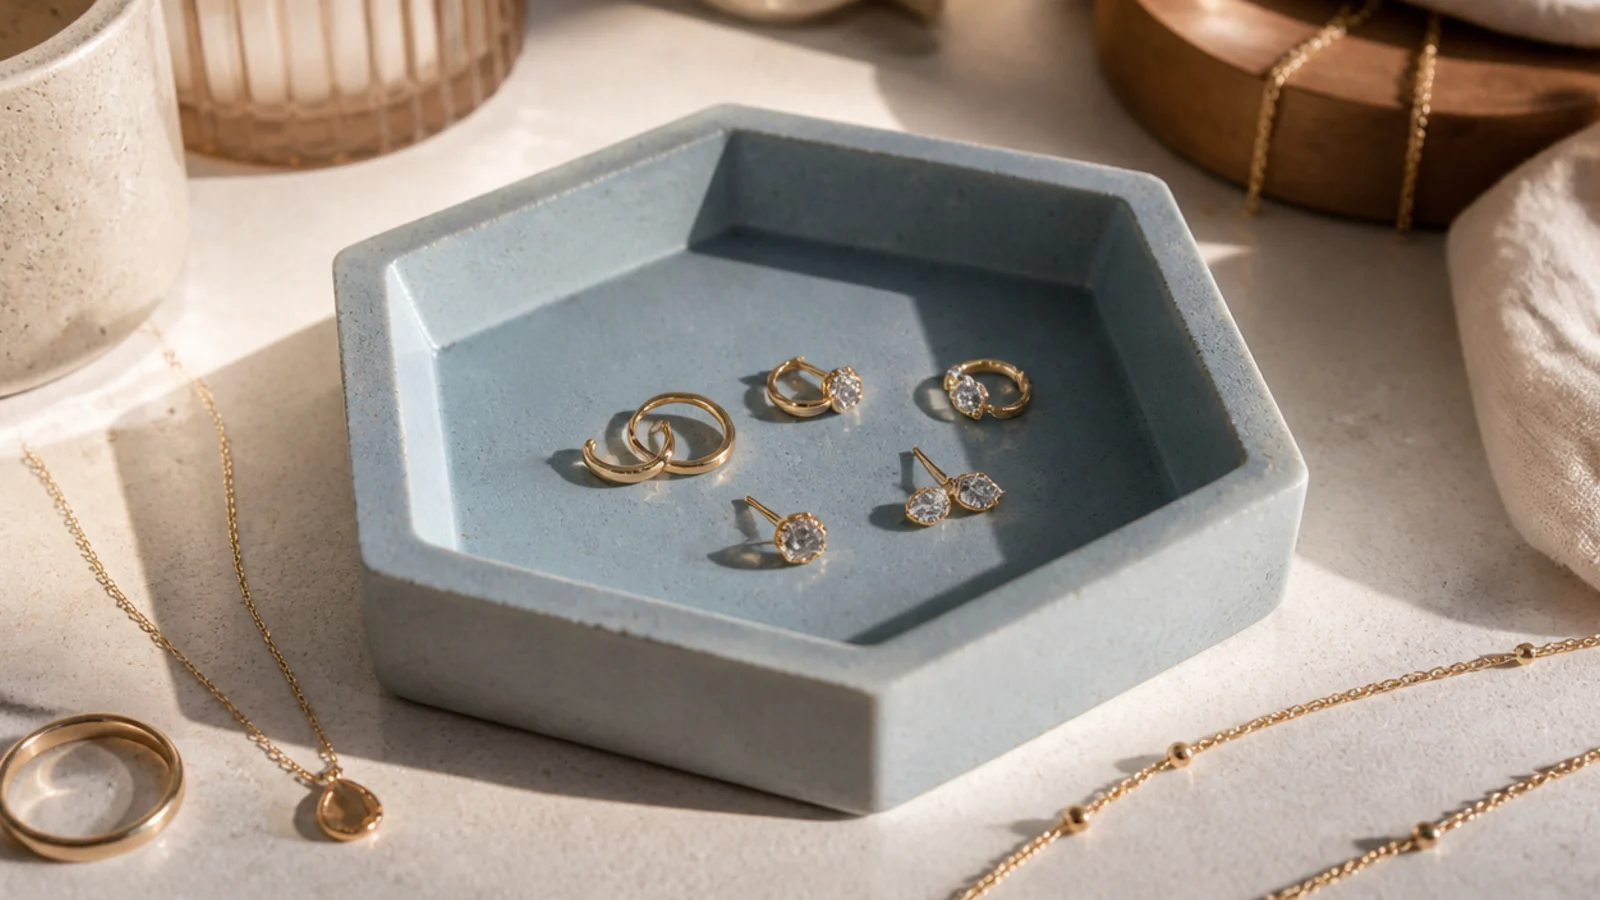
A faceted dish with flat angular sides looks modern and architectural. The geometry gives it a designed edge. It suits a contemporary room and anyone who likes clean lines over organic curves.
Cut clay slab pieces into equal trapezoids and press their edges together to build faceted walls on a flat base, smoothing the seams inside. Keep the angles consistent for a clean hexagon or octagon. Dry or cure fully, sand the top edge flat, paint one flat color, and seal. Use it for studs and small rings, where the flat facets keep pieces from rolling.
Cut all the wall panels from one template so the facets match; uneven panels make the geometry look accidental.
Don’t leave the inside seams rough; smooth them well, since visible joins make a geometric dish look pieced together.
10. Coil-Built Bowl
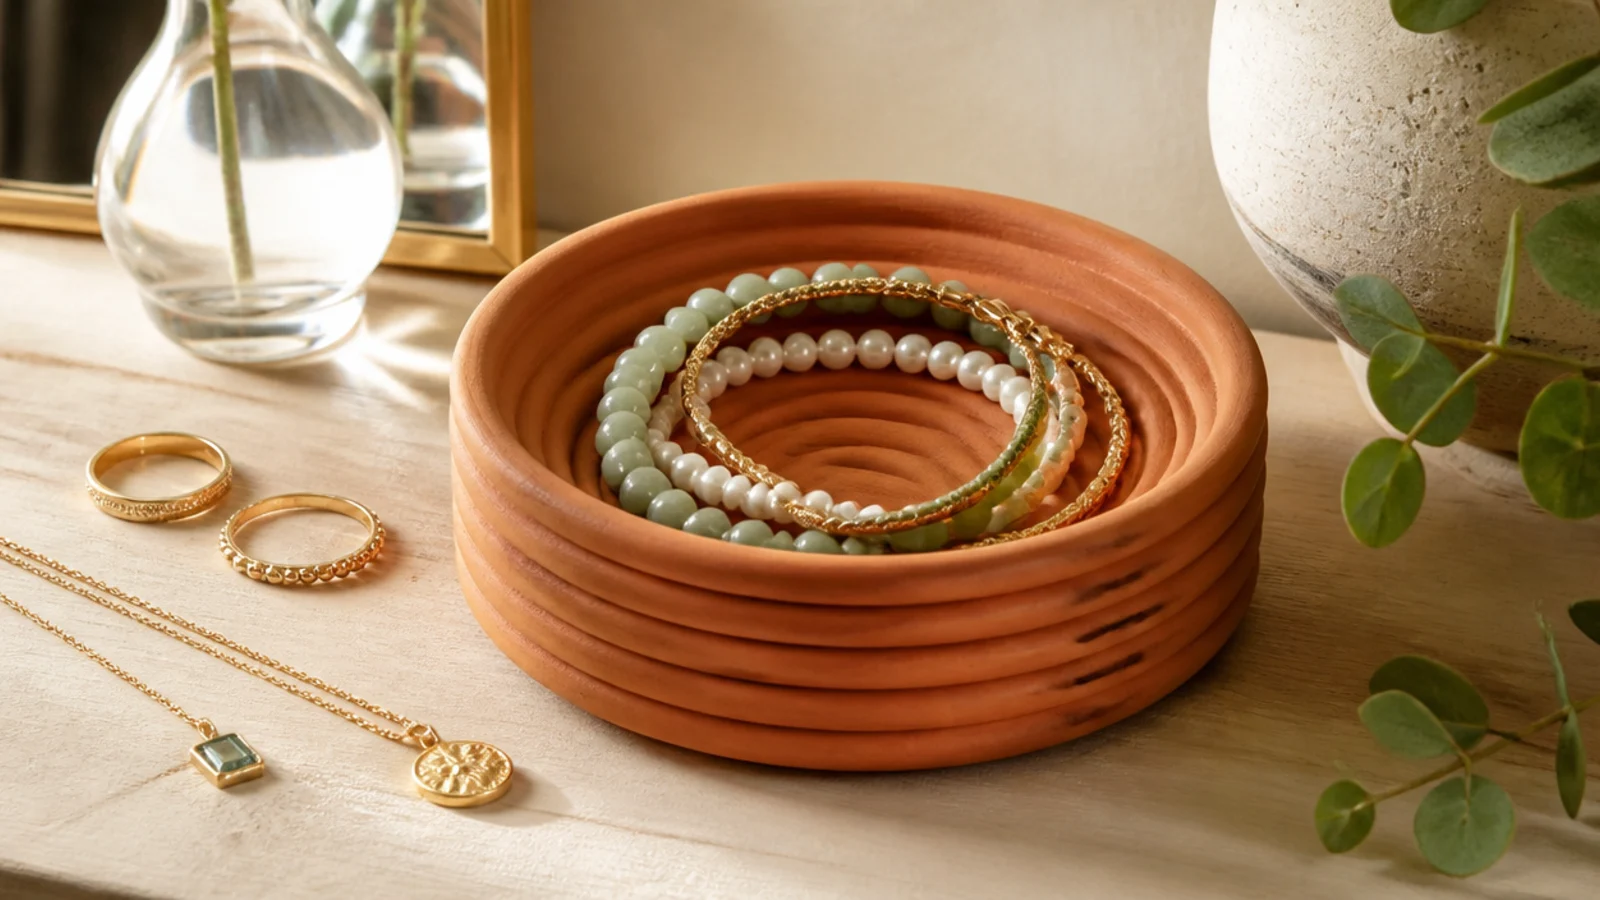
A coil-built bowl shows off the stacked-rope technique for a handmade, textural look. You can leave the coils visible or smooth them. It suits a boho room and a bigger pile of bracelets.
Roll clay into even ropes and stack them in a spiral to build up bowl walls on a flat clay base, pressing each coil to the one below. Leave the coils showing for texture or smooth the inside for strength. Keep the walls thick enough to hold. Dry or cure fully, sand the rim, and seal. Use it as a roomier catch-all for bracelets and larger pieces.
Blend the coils together on the inside even if you leave them showing outside; unjoined coils crack apart as they dry.
Don’t stack coils without pressing them together; loosely piled ropes separate and the bowl falls apart when dry.
11. Trinket Box with Lid
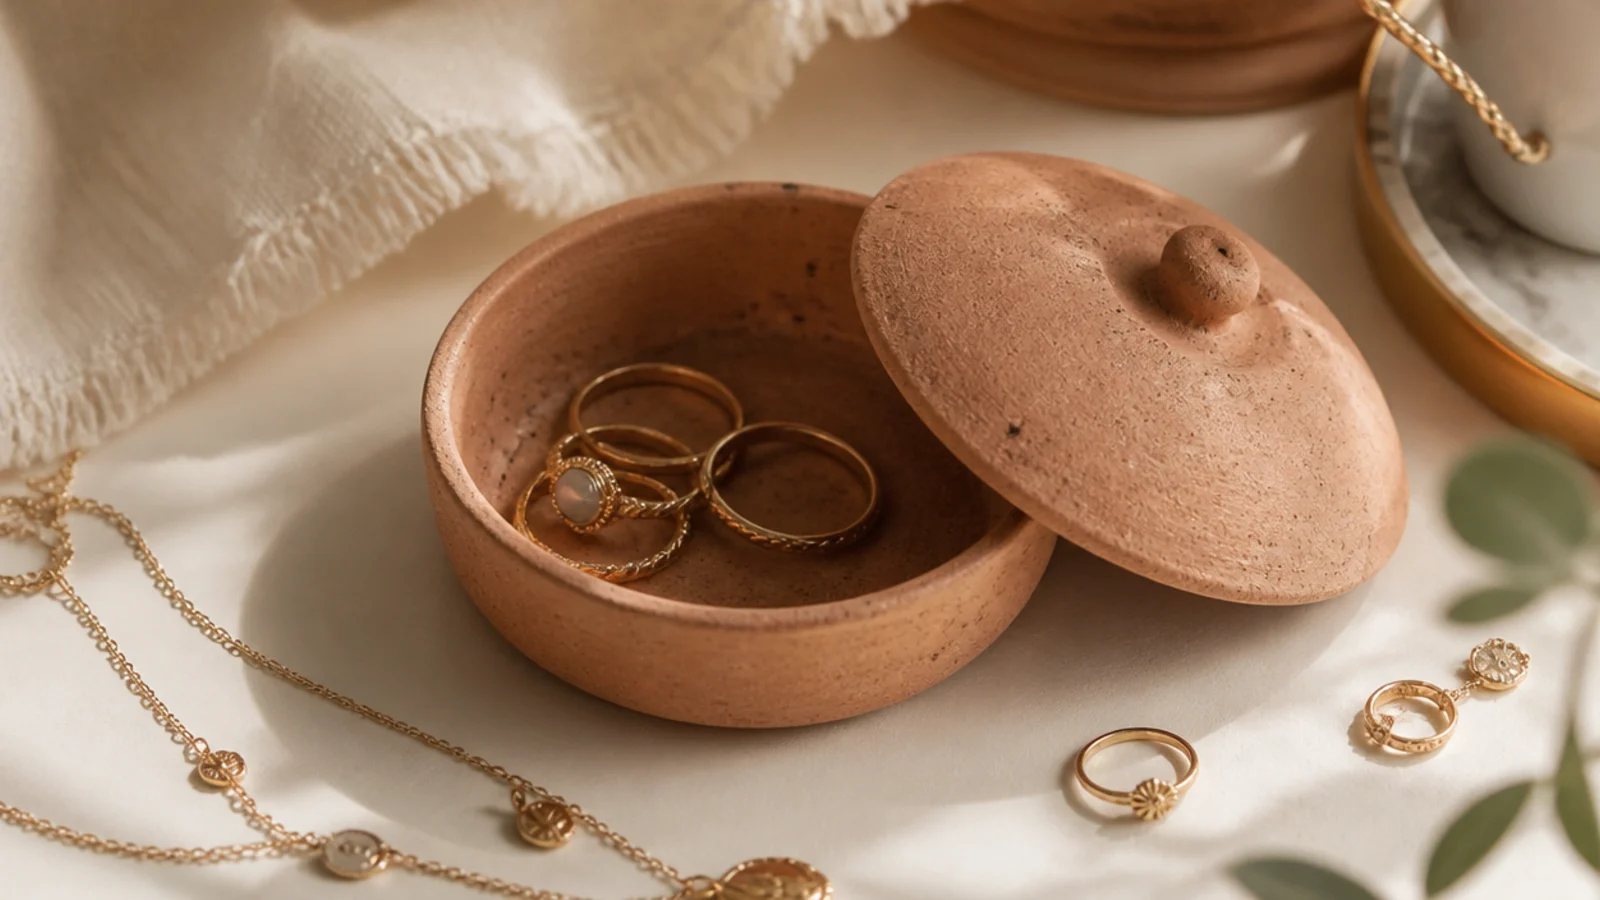
Form a small cylinder box and a matching lid, shaping the lid slightly larger so it sits over the rim. Add a tiny rolled knob to the lid top. Let both dry or cure with the lid off so it doesn’t stick. Sand the rim and lid edge so they fit cleanly, paint, and seal inside and out. Line the base with a felt circle to protect rings.
A lidded clay box keeps small pieces dust-free and hidden, and the knob makes it feel finished. It’s a step up in skill but very satisfying. It suits precious rings or studs you want tucked away.
Skip thisDon’t make the lid the same size as the box opening; without a slight overlap it won’t sit on and stay put.
Editor's noteDry the box and lid separately so they don’t fuse, then sand both edges until the lid drops on cleanly.
12. Cupped-Hand Dish
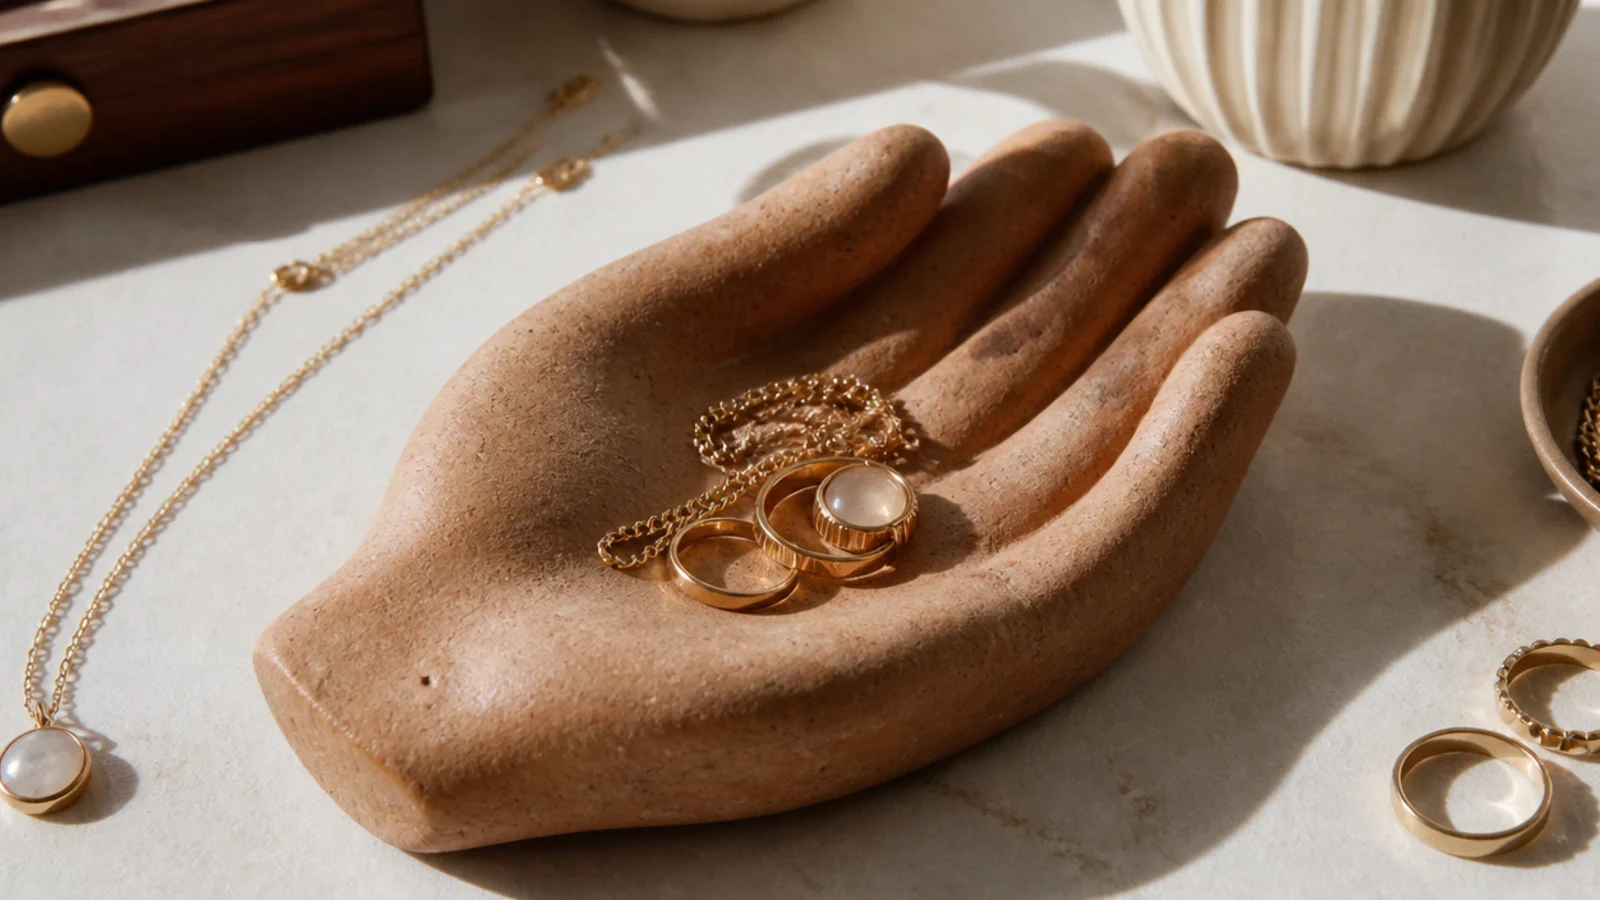
A dish molded over your own cupped hand makes a personal, sculptural holder with a real palm shape. It’s a sweet gift. It suits anyone who wants a piece with a story behind it.
Drape a rolled clay slab over your own cupped hand or a hand mold, pressing gently to capture the palm’s curve, and trim to a hand-like shape. Support it while it dries so the fingers hold their form. Dry or cure fully, sand the edges, paint a soft color, and seal. The natural cup of the palm cradles rings and a folded chain.
Support the shaped fingers with balls of paper while it dries so they hold the cupped form instead of flattening.
Don’t make the fingers thin and detailed; slender clay fingers snap easily, so keep the hand shape simple and solid.
13. Speckled Stoneware-Look Dish
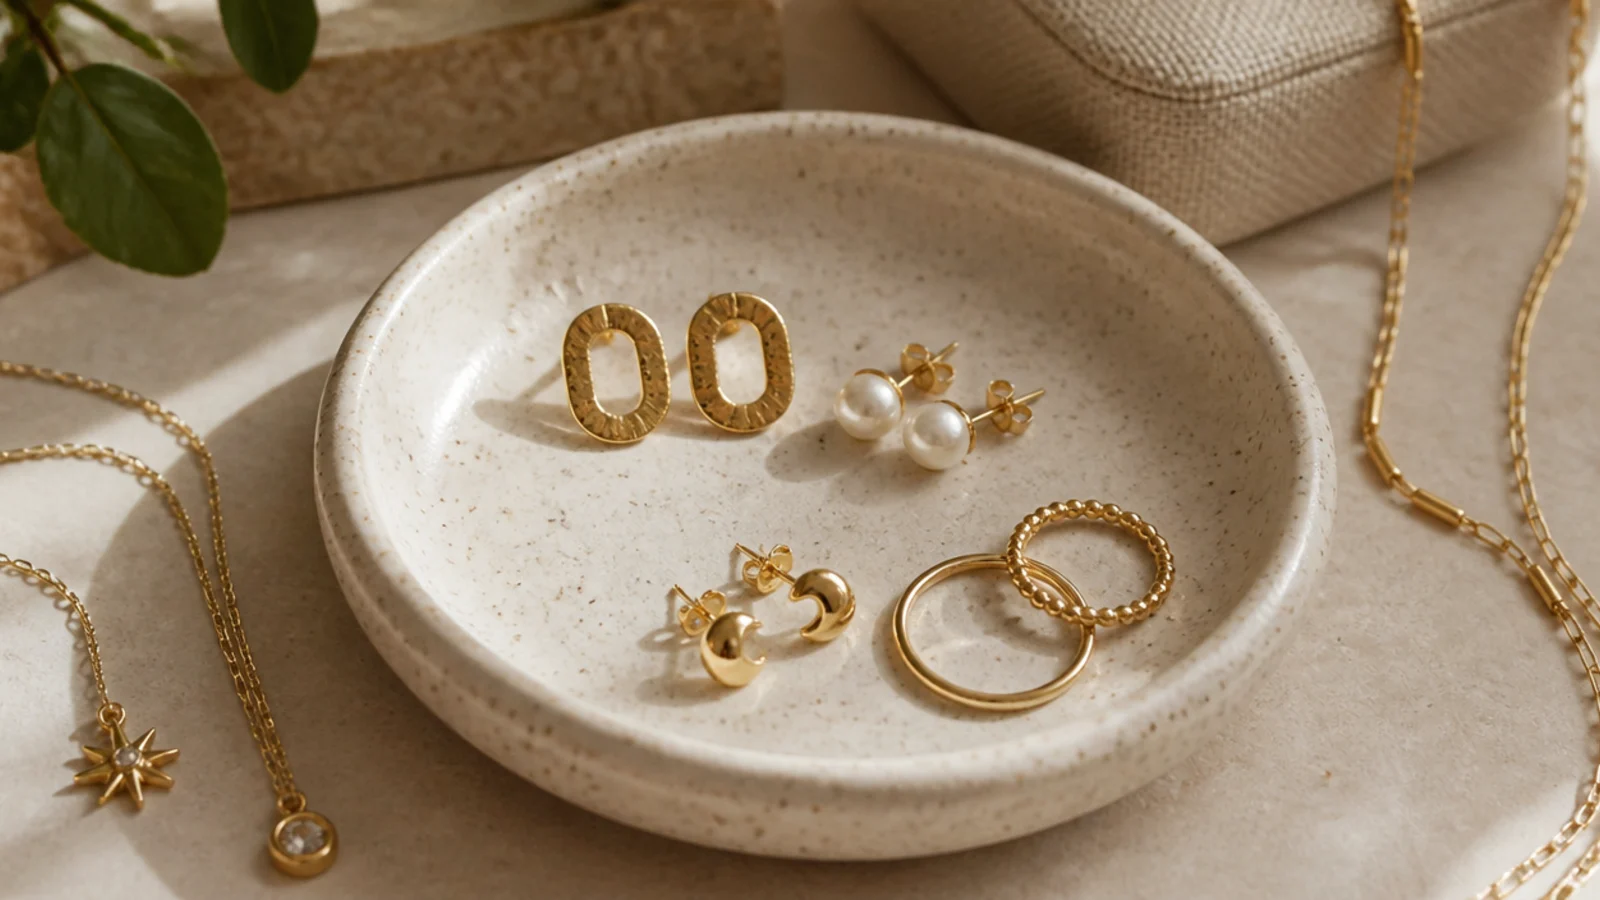
Fine speckles make plain clay look like handmade stoneware from a ceramics studio. It hides small surface flaws too. It suits a modern-rustic room and anyone who loves the pottery look.
Shape a plain shallow dish and dry or cure it, then base-coat cream. Thin dark brown or charcoal paint to a milky consistency, dip a stiff brush, and flick fine speckles by running your thumb across the bristles. Rotate the dish for even coverage. Let it dry and seal with a matte clear so it keeps the natural stoneware look.
Practice the flick on paper first to dial in the paint thickness; too thick makes blobs, too thin makes runs.
Don’t hold the brush too close or over-thin the paint; big wet splatters look like accidents, not fine speckles.
14. Clay Wall Hook Plaque
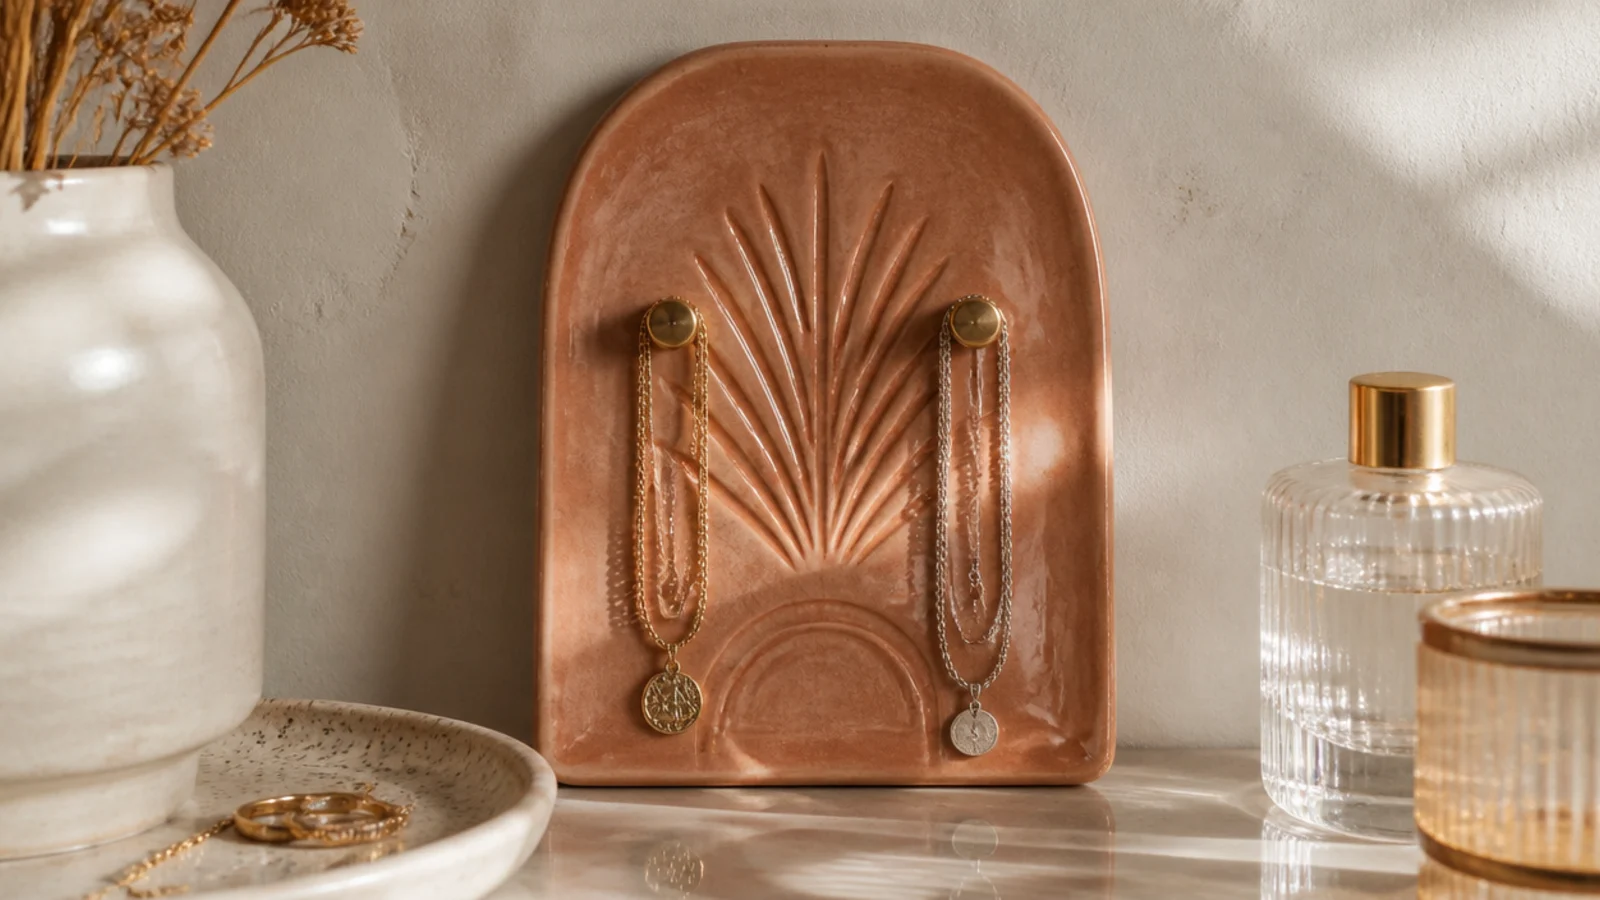
A clay plaque with embedded hooks brings the handmade look to the wall for necklaces. The clay is the decorative backing. It suits a small necklace collection and anyone who wants wall storage with character.
Roll a flat clay plaque and, before drying, press two small brass cup hooks into the lower edge and a keyhole or hanging hole at the top. Reinforce around the hooks with extra clay so they hold. Dry or cure fully, sand, paint or glaze, and seal. Screw the plaque to the wall through the hole into an anchor, and hang light necklaces on the hooks.
Pack extra clay around each embedded hook before drying so it grips firmly and doesn’t pull out under a necklace.
Don’t hang heavy necklaces on clay-set hooks; use this for light chains, since a yanked hook cracks the plaque.
15. Stamped-Pattern Slab Tray
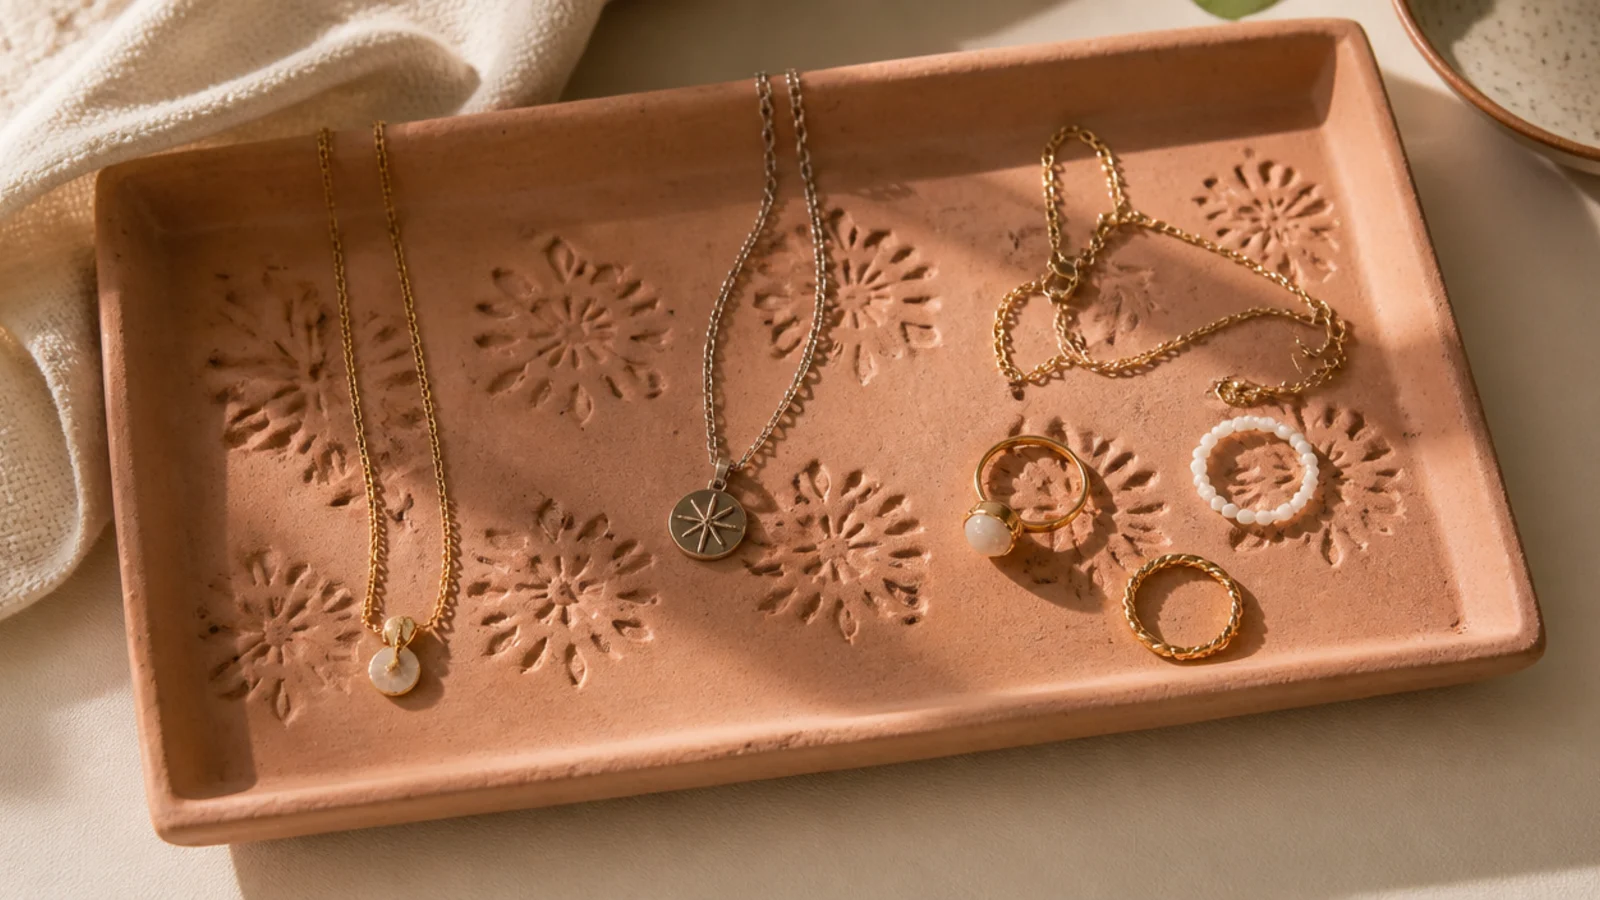
A flat slab tray stamped with a repeating pattern gives a decorative surface for a whole mix of pieces. Stamps make the pattern effortless. It suits a dresser that needs one tray to hold a bit of everything.
Roll a rectangular slab a quarter-inch thick and press a rubber stamp or textured object across it in a repeating pattern before the clay dries. Pinch up a low rim around the edge so pieces don’t slide off. Dry or cure flat so it doesn’t warp, sand the edges, and seal. Use it as a landing tray for rings, studs, and a folded chain.
Dry a flat tray under a light weight on a level surface so it cures flat instead of warping up at the corners.
Don’t stamp too deep near the edges; deep impressions there weaken the thin rim and it cracks as it dries.
16. Clay Earring Bar Stand
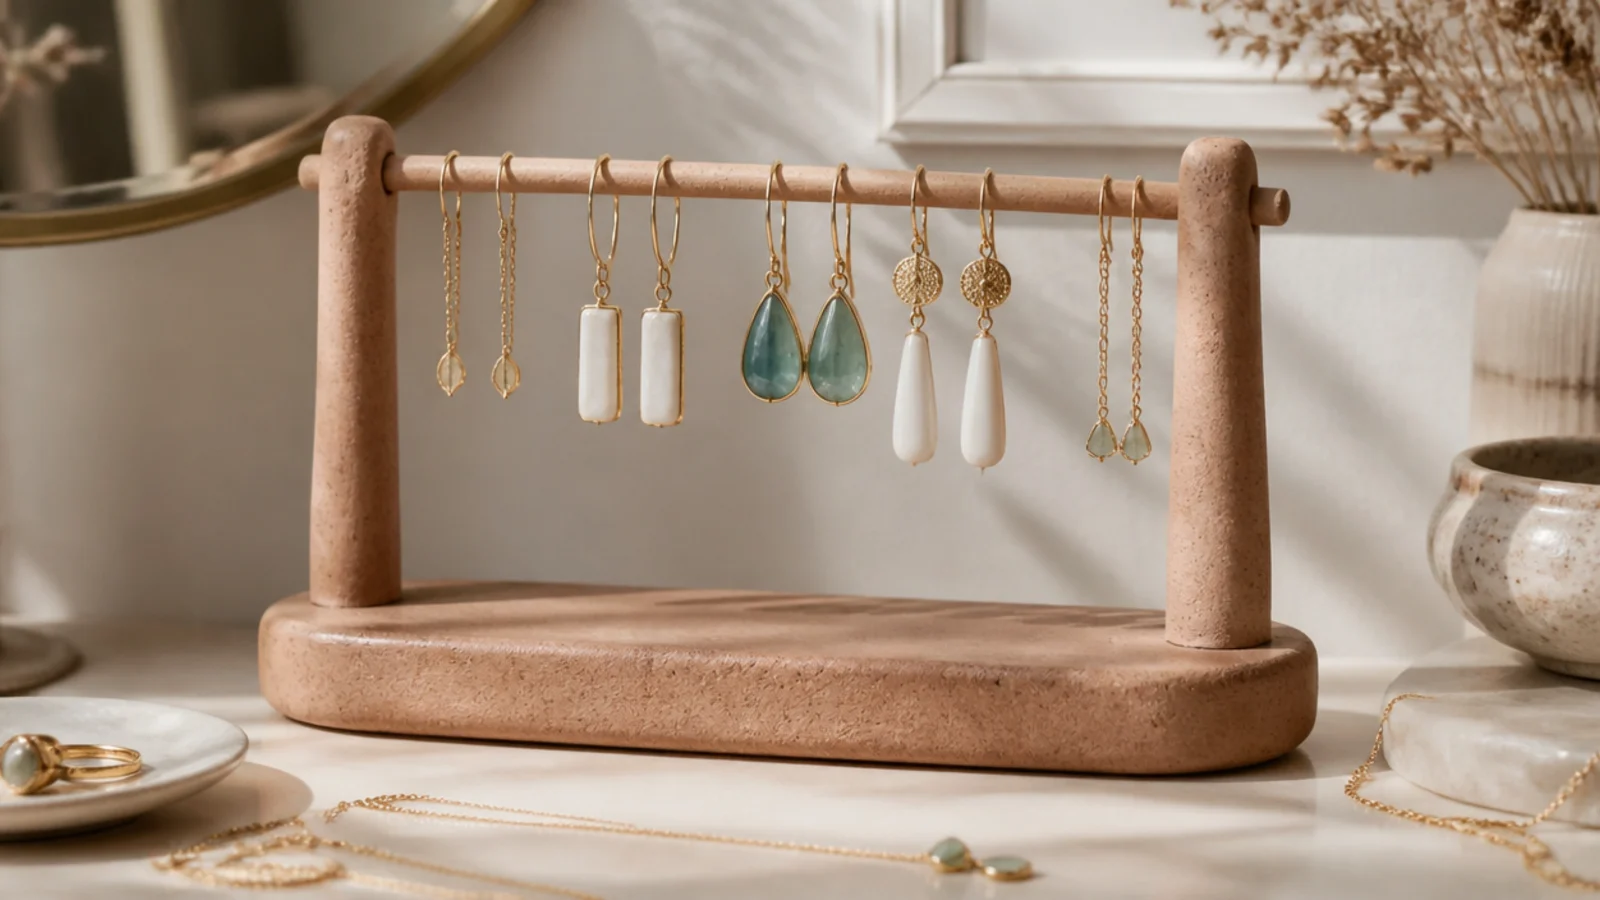
A stand with a horizontal bar hangs a whole row of dangle earrings in a line. It’s tidy and shows pairs clearly. It suits anyone with a lot of hooks who wants them all visible at once.
Build two clay uprights on a wide flat base and bridge them with a thin clay bar reinforced with wire inside for strength. Keep the bar high enough that long earrings clear the base. Cure or dry fully, sand, paint, and seal. Weight the base by pressing a coin underneath before curing. Hook dangle earrings along the bar, spaced so they don’t touch.
Run a wire through the horizontal bar before curing; a plain clay bar sags or snaps under a row of earrings.
Don’t set the bar too low; if long earrings brush the base they bunch up instead of hanging clear and separate.
17. Organic Blob Dish
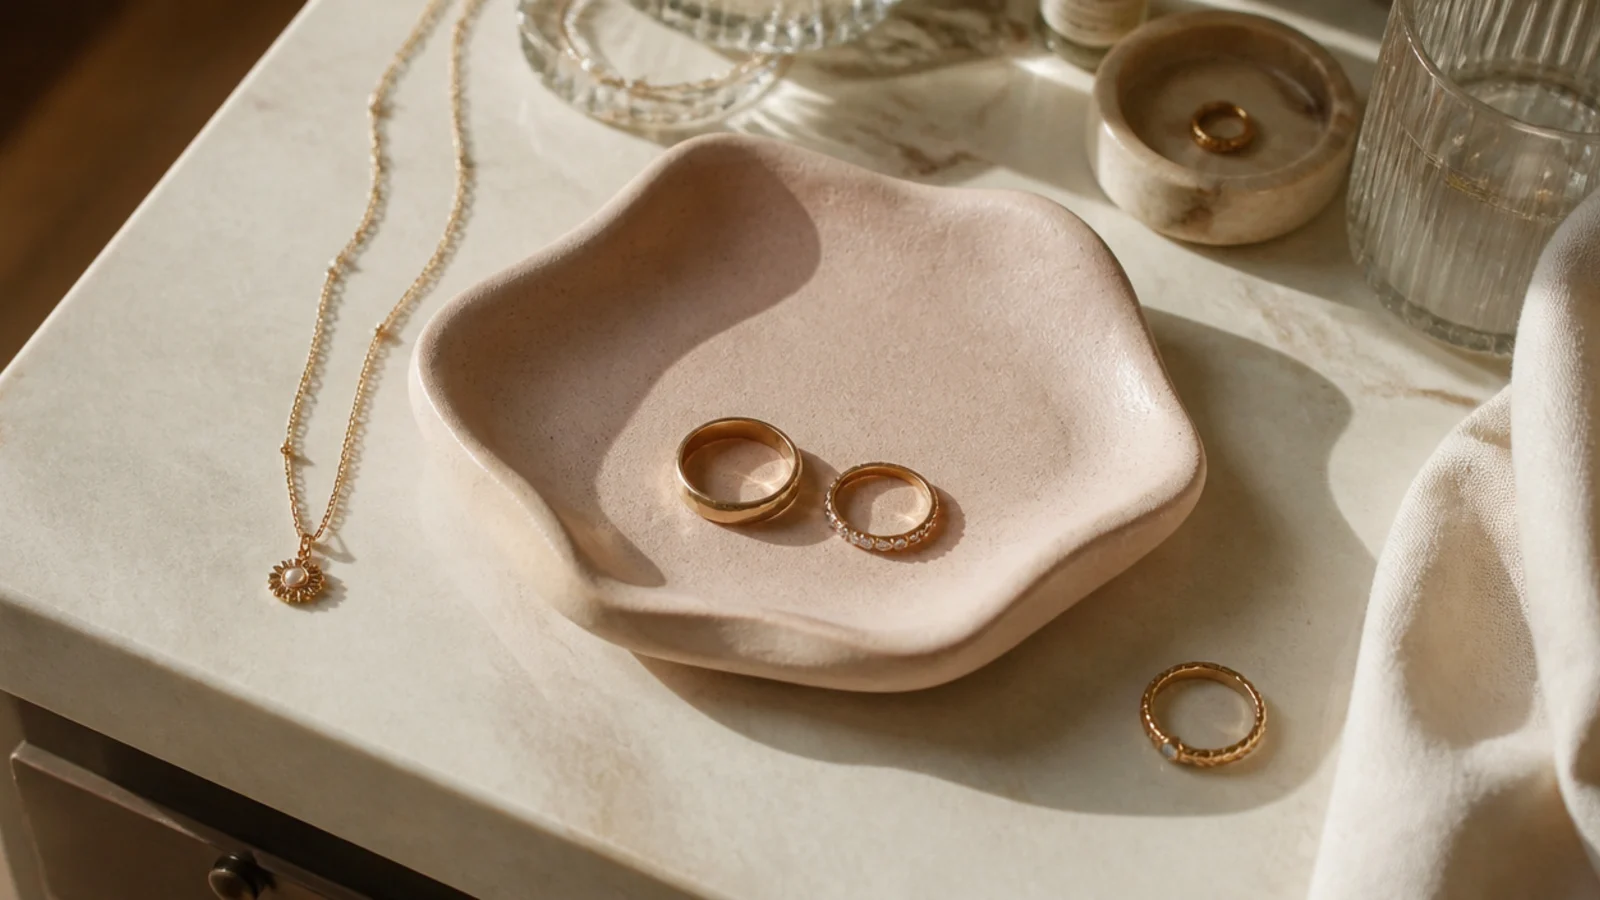
Flatten a slab and shape it over a small bowl, letting the edges stay wavy and organic rather than trimming them straight. Smooth the surface and edges with a damp finger. Dry or cure, sand lightly, and finish in a matte solid color so the shape reads. The uneven rim is intentional, so don’t fight it. Use it for a few rings by the sink.
A free-form blob dish embraces irregular edges for a trendy, artful look with no need for symmetry. Imperfection is the point. It suits a modern room and beginners who find round dishes fussy.
Skip thisDon’t make the walls too thin chasing an organic look; thin free-form edges crack, so keep them a solid quarter-inch.
Editor's noteLet the edges stay naturally uneven; the free-form shape is forgiving, so lean into the wavy rim instead of correcting it.
18. Two-Tier Clay Stand
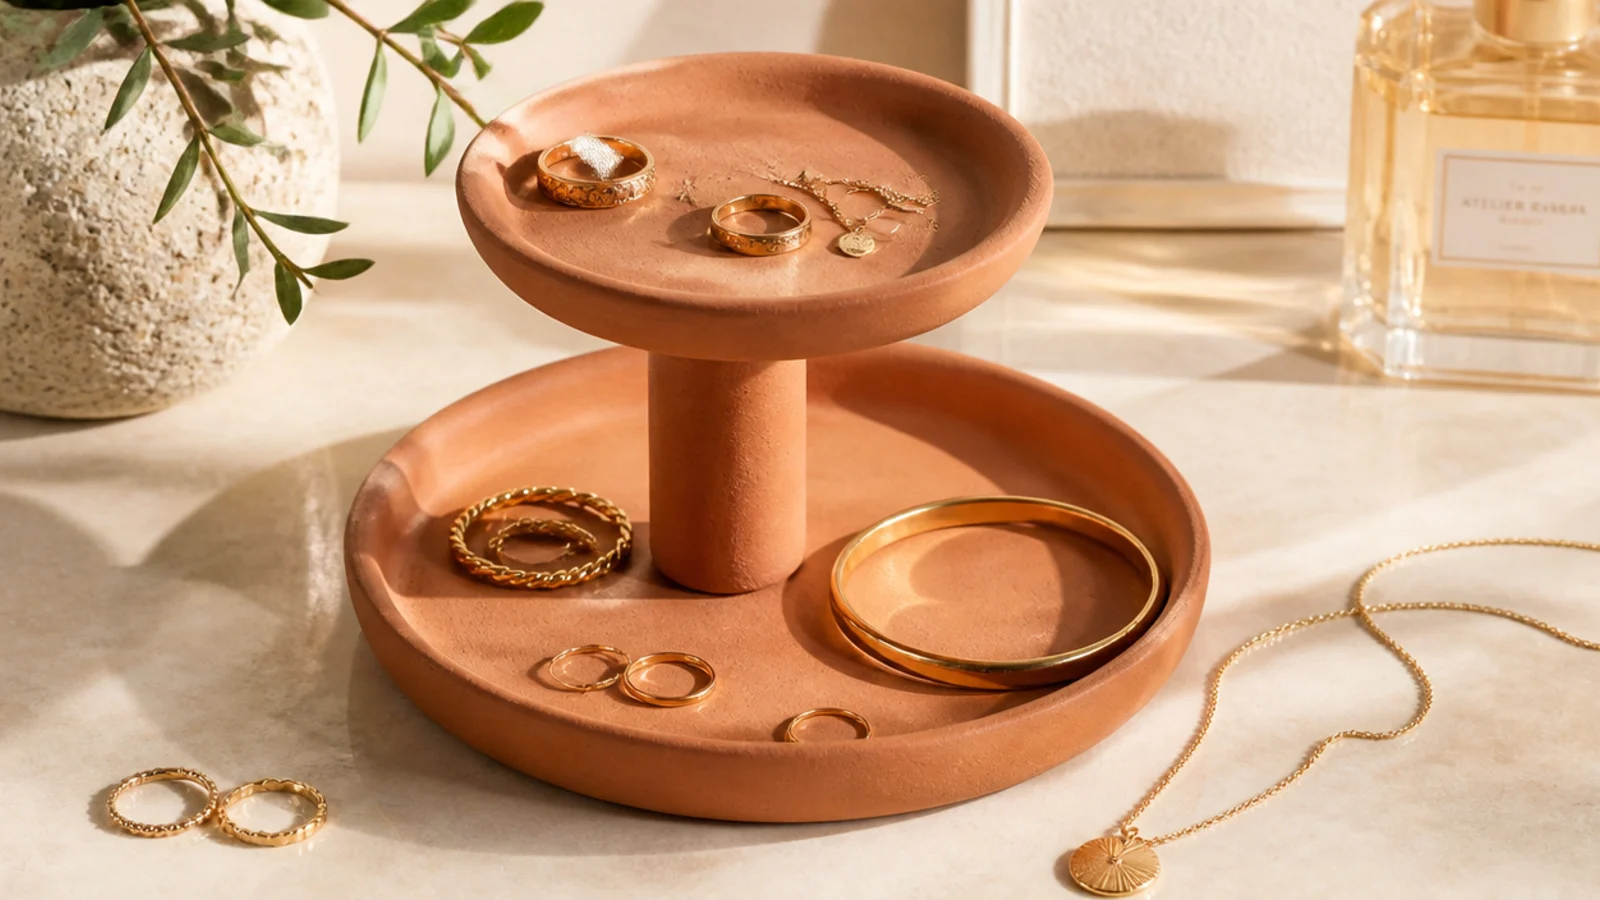
A two-tier stand gives you two levels of dishes on one small footprint. It adds height and sorts by tier. It suits a vanity where surface is tight but you have several types to store.
Make two graduated slab dishes and a short central clay post to join them, or use a metal rod for strength. Assemble with the smaller dish on top, securing the post before curing. Cure or dry fully, sand, paint, and seal. Keep the base dish wide for stability. Put everyday pieces on top and larger bracelets in the bottom tier.
Use a metal rod through the center rather than a solid clay post; the rod carries the weight so the tiers can’t snap off.
Don’t top a narrow base with a wide upper dish; a top-heavy stand tips when you reach for the top tier.
19. Faux-Ceramic Bud Vase Holder
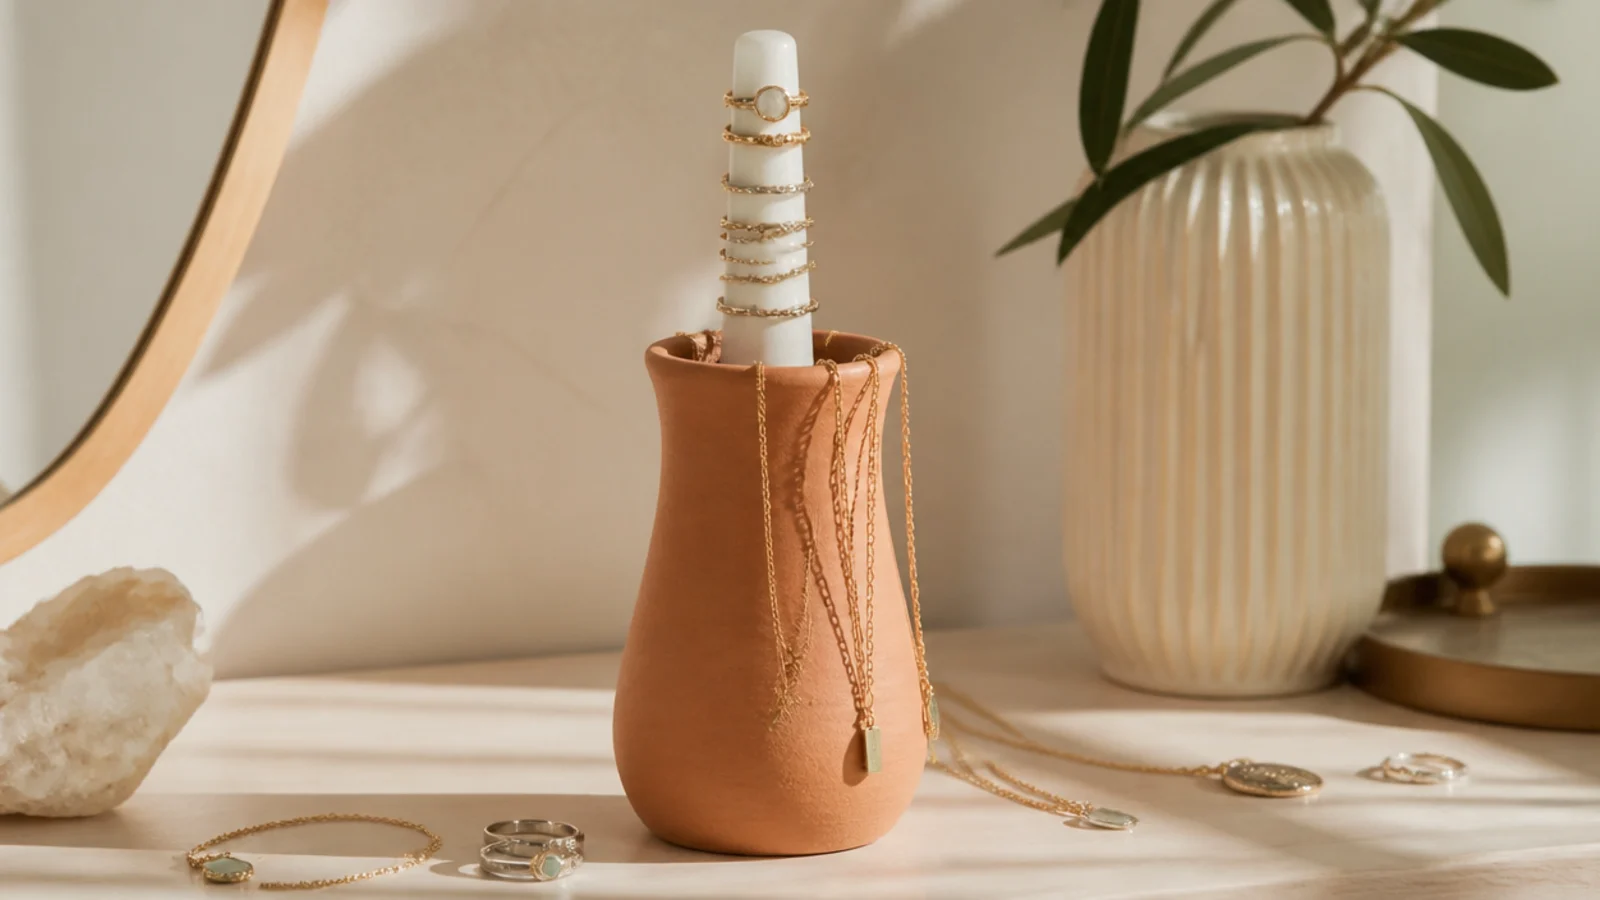
A slim clay vase shape holds a ring dowel and drapes chains over its rim, doubling as decor. It looks like a tiny ceramic vase. It suits a minimal nightstand and a small collection.
Build a narrow clay cylinder closed at the base, keeping the walls even. Before it dries, set a slim dowel upright in the center held by a little clay at the base. Dry or cure fully, sand, glaze, and seal. Slide rings down the dowel and drape thin chains over the rim. Keep the base weighted so it doesn’t tip with rings loaded.
Set the dowel dead center and weight the base so the loaded vase stays upright instead of leaning under the rings.
Don’t make the cylinder tall and narrow with thin walls; it topples easily, so keep the base wide and heavy.
20. Personalized Name Dish
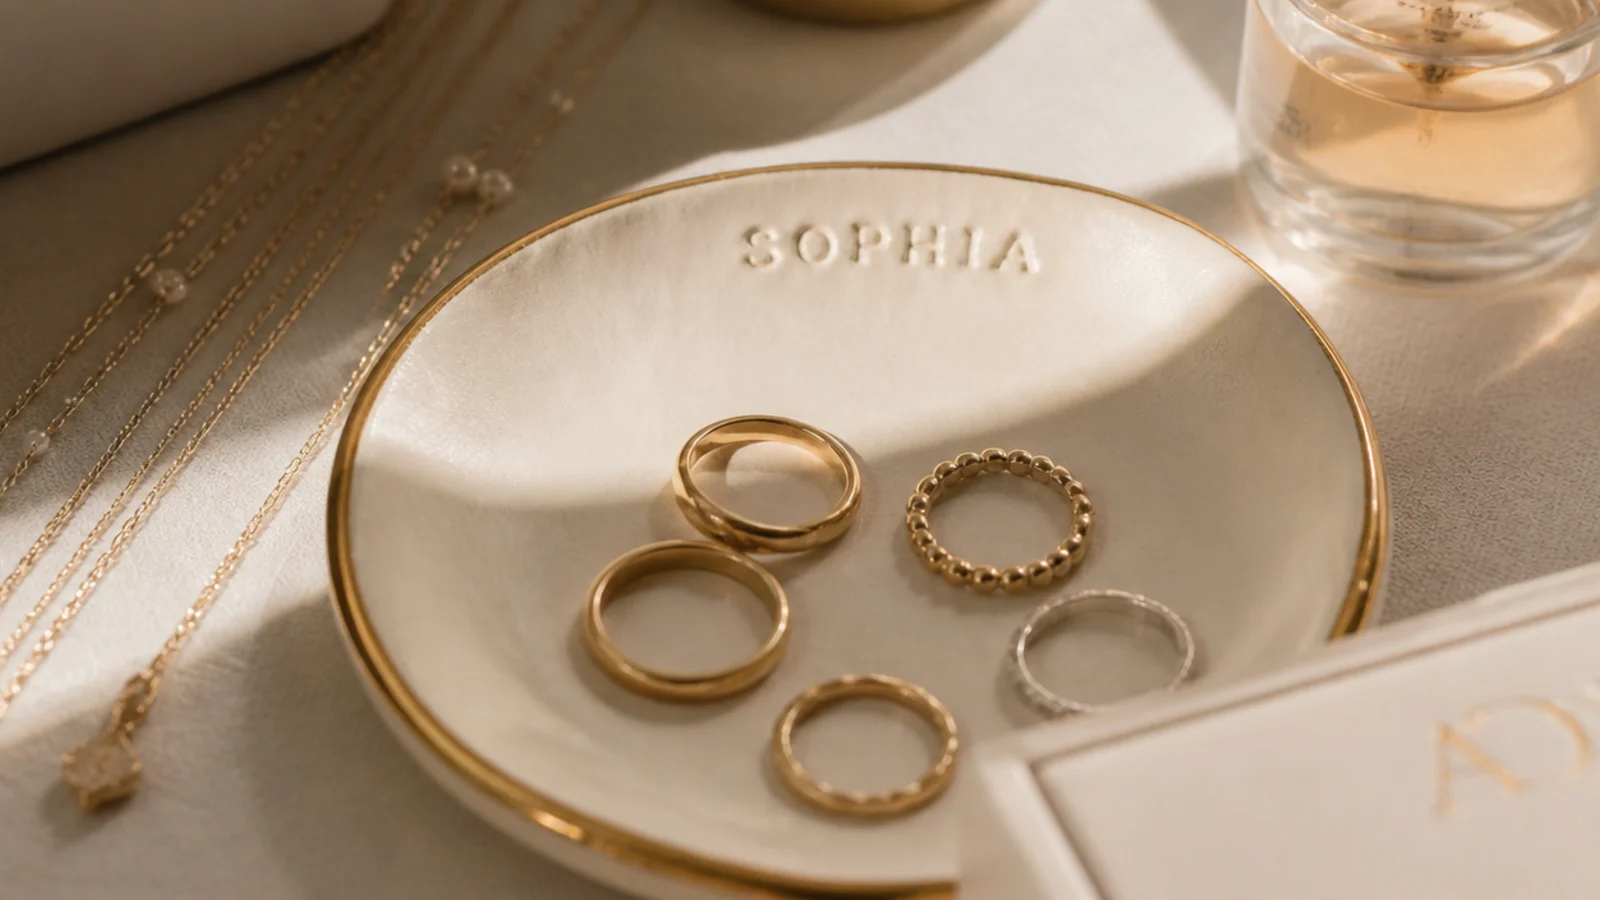
A dish with a name or initial stamped into the rim makes a heartfelt, custom gift. The personalization takes seconds with letter stamps. It suits a present for someone special or your own bedside.
Shape a shallow slab dish and, before it dries, press metal or clay letter stamps into the rim to spell a name or initial. Keep the letters level and evenly spaced. Dry or cure fully, sand the rim, then rub gold or a contrasting paint into the stamped letters and wipe the surface clean. Seal so the lettering stays put. Line with felt if it’s a gift.
Rub paint into the stamped letters and wipe the raised surface clean so the name reads crisp and dark.
Don’t stamp the letters too shallow; a faint impression disappears once painted, so press firmly and evenly.



