1. Mason Jar Pen Holders
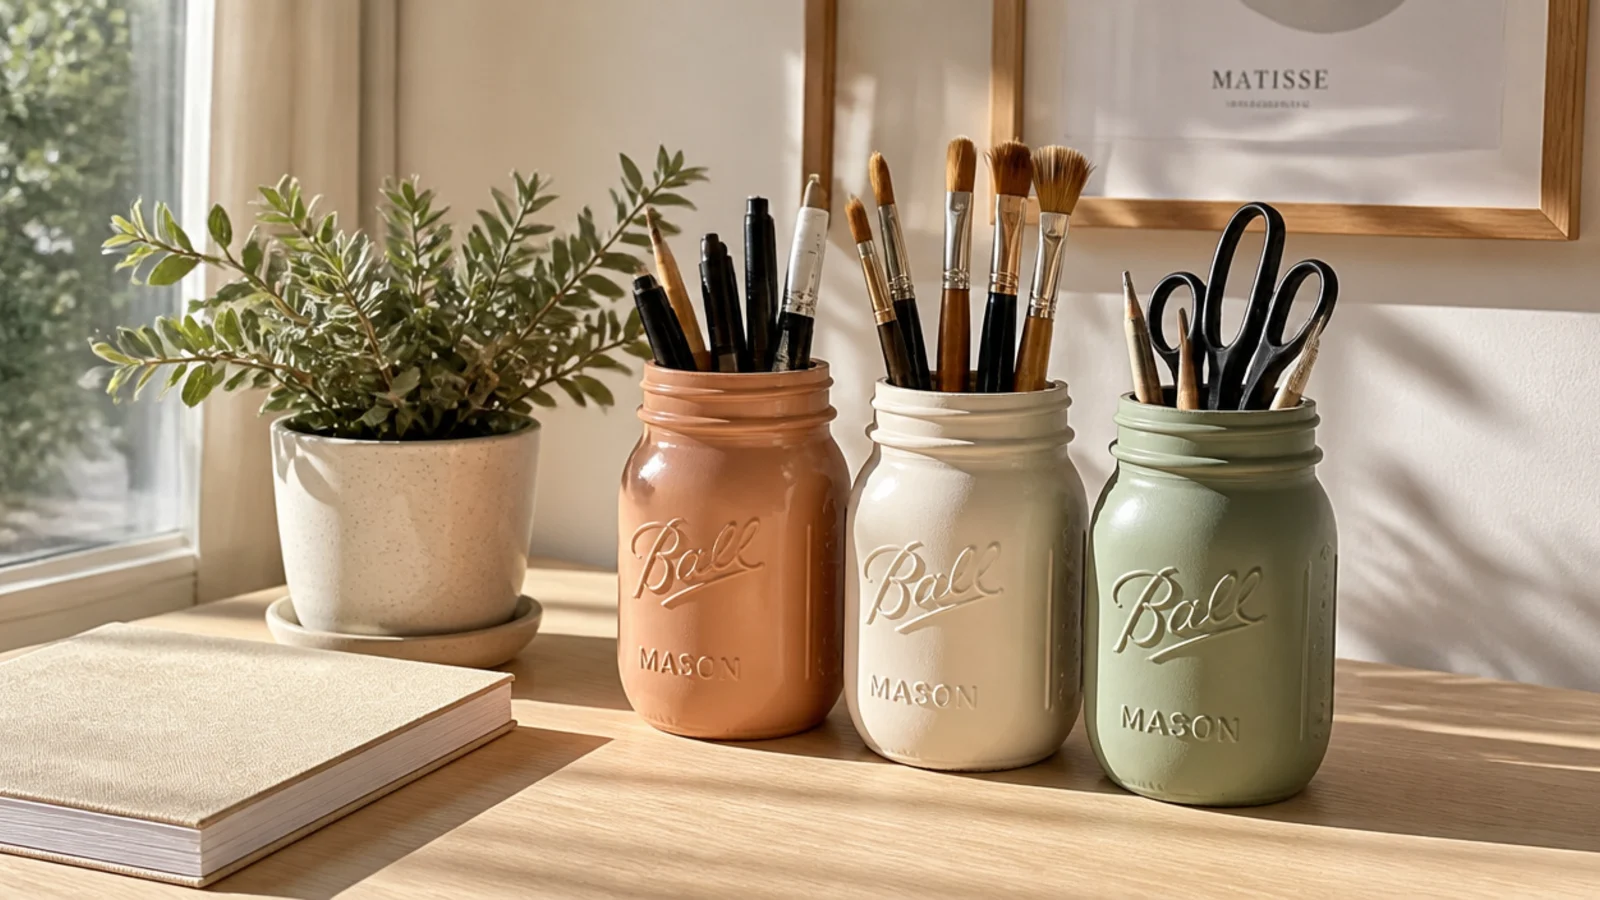
This is the easiest DIY on the list and a great first win. A few mason or jam jars become sturdy pen and tool holders with just a coat of paint. Grouped in matching colors, they look like a bought set for the price of nothing.
Editor's notePaint the inside of the glass instead of the outside for a smooth frosted finish that never chips where your hand grabs it.
Clean and de-label the jars. For a frosted look, paint the inside with acrylic swirled to coat, or paint the outside after a coat of primer. Use two thin coats and let each dry. Assign each jar a job — pens, brushes, scissors. Seal the outside with a matte clear coat so the paint doesn’t chip. Group three in graduated sizes on a small tray.
Skip thisDon’t skip primer on the outside of glass; acrylic slides right off smooth glass and peels within days without it.
2. Painted Tin Can Caddy
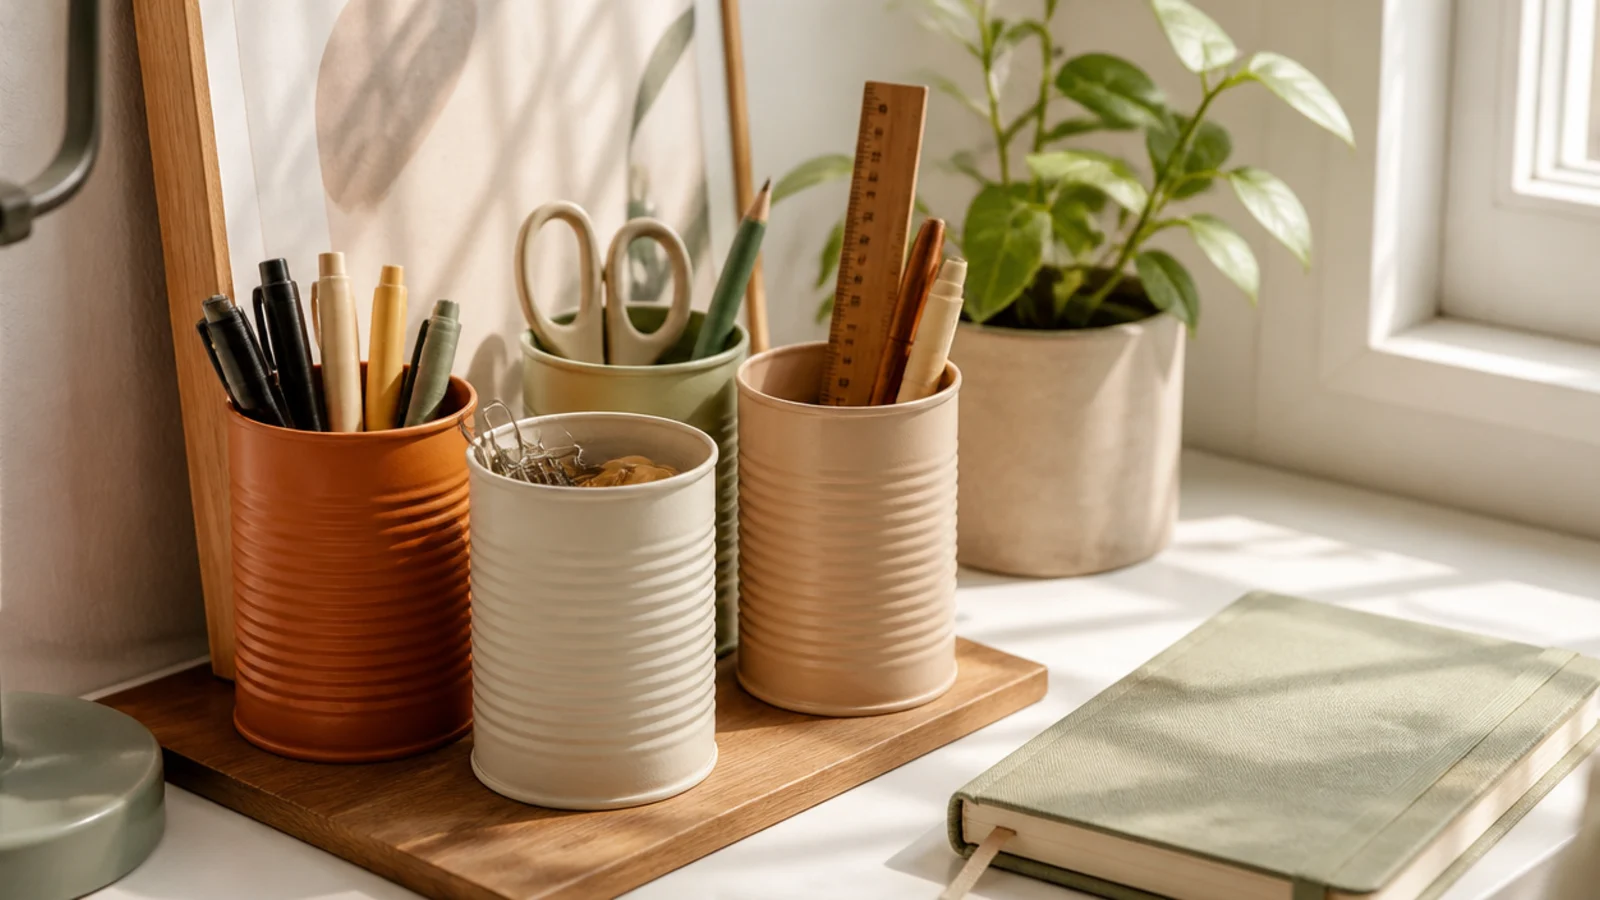
Soup and vegetable cans make perfectly sized supply holders once cleaned and painted. Group a few different heights and glue them to a small board for a caddy you can move as one. It’s the classic budget organizer for a reason — it just works.
Editor's noteFile or fold down any sharp edge on the cut can rim before painting so you never catch a finger reaching in.
Remove labels and sand any sharp inner rim smooth or cover it with tape. Prime with a spray metal primer, then paint two thin coats of acrylic or spray paint. Once dry, hot-glue three or four cans of varying heights onto a small wood offcut or sturdy cardboard base. Seal with clear coat. Fill each can with one supply category.
Skip thisDon’t leave cans unprimed; bare metal shows through acrylic and can rust where moisture gets in over time.
3. Cardboard Drawer Dividers
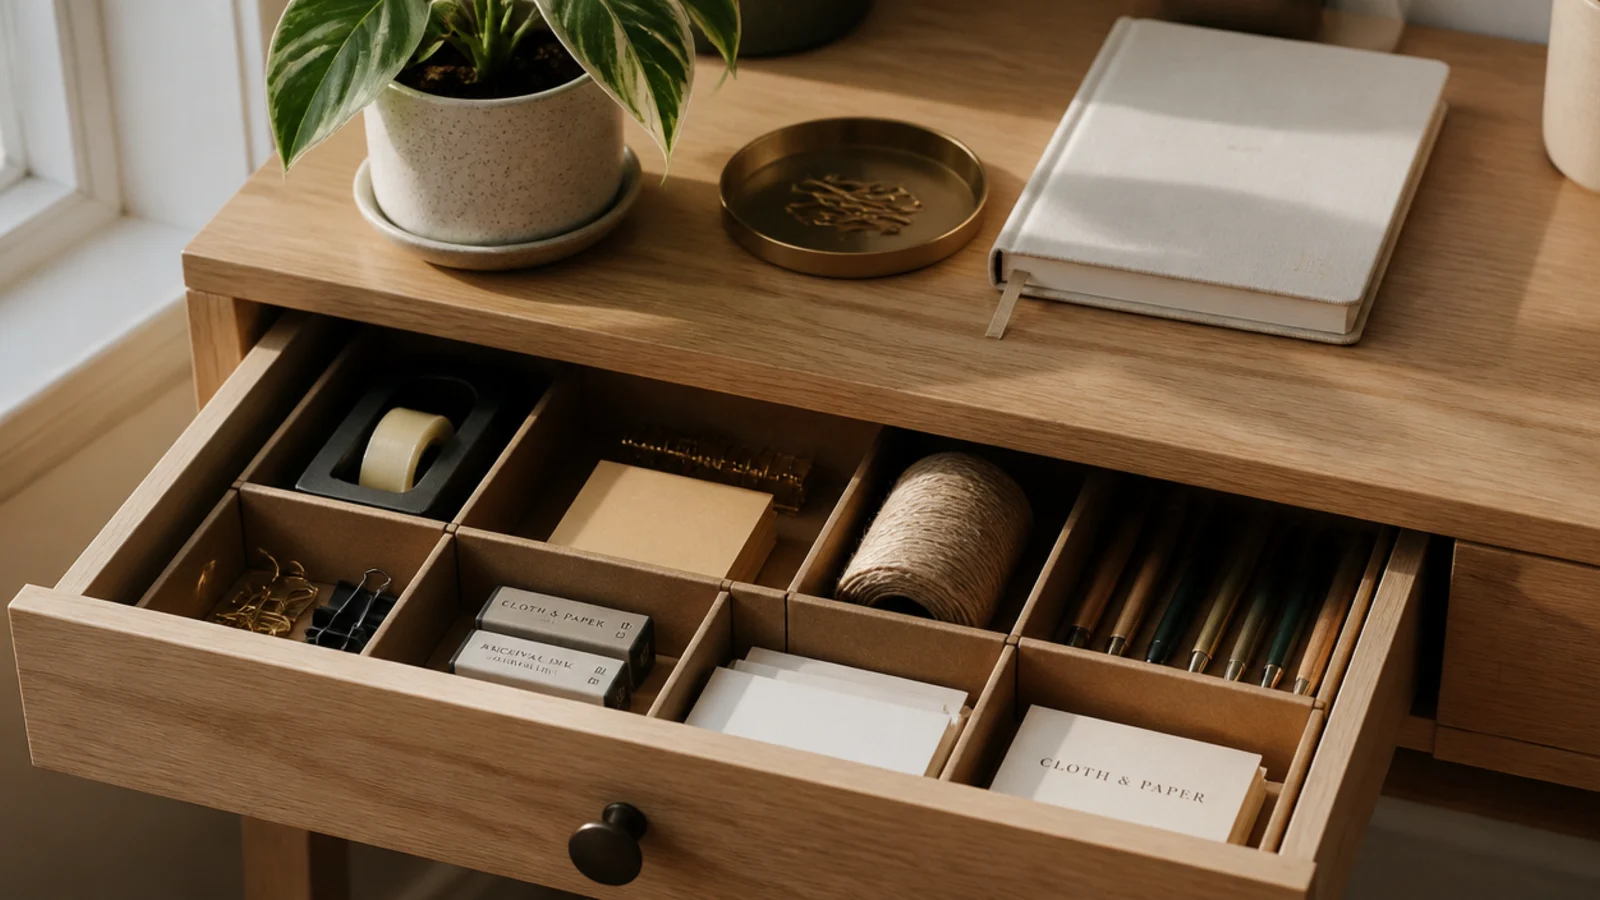
Custom cardboard dividers turn a messy drawer into fixed compartments for free, cut to your exact drawer. Because you make them to fit, they’re better than store dividers that never quite match your drawer size. A great no-cost fix for a junk drawer.
Measure the drawer’s interior length, width, and depth. Cut strips of corrugated cardboard to the depth height. Cut notches halfway down where strips cross so they slot together into a grid. Test-fit and trim so it slides in snugly. Wrap the strips in paper or paint them so raw cardboard doesn’t show, then drop the grid into the drawer.
Cut the dividers a hair shorter than the drawer so the grid drops in and lifts out easily instead of buckling.
Don’t use thin cereal-box card for dividers; it bends under supplies — use corrugated cardboard for structure.
4. Cereal Box File Holders
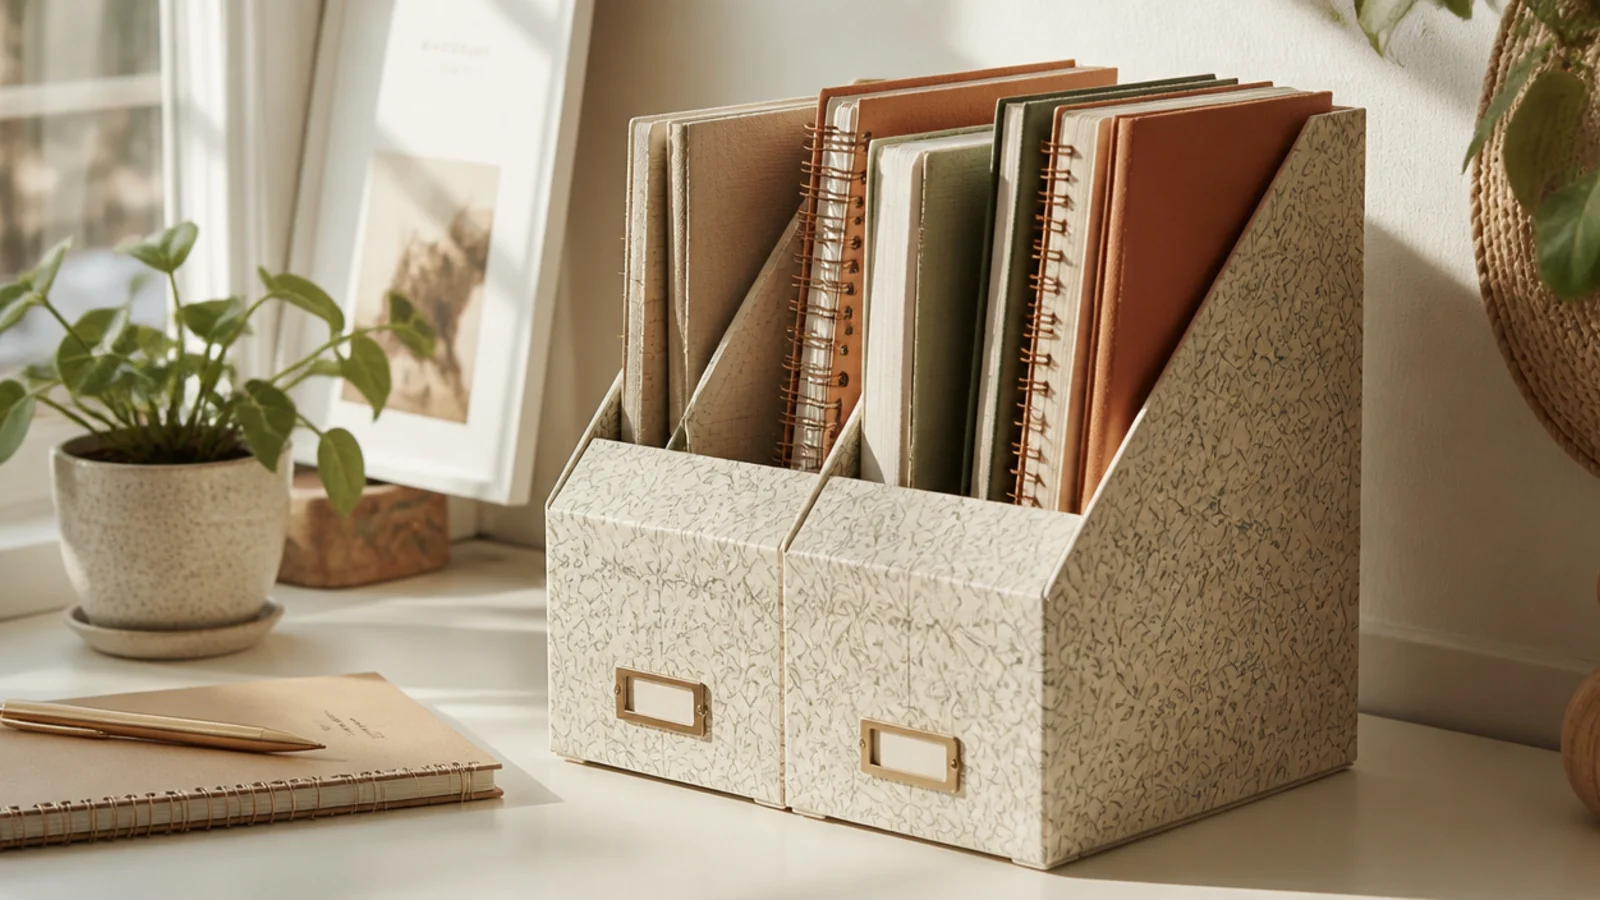
A cereal box cut on an angle becomes a magazine or file holder that stands papers and notebooks upright. Covered in paper or painted, it rivals the store version. Perfect for corralling the paper that piles flat on a desk.
Editor's noteCover the box in the same paper as your other DIY pieces so the whole paper-storage set matches at a glance.
Cut the cereal box diagonally from the top of one wide side down to about a third up the other, making the classic magazine-holder shape. Reinforce the cut edges with tape. Cover the whole box in kraft paper, gift wrap, or two coats of paint over primer. Stand notebooks or file folders inside. Make two or three matching ones for a set.
Skip thisDon’t skip reinforcing the angled edge; unreinforced cardboard sags and tears where papers lean against it.
5. Cardboard Tube Cable Organizers
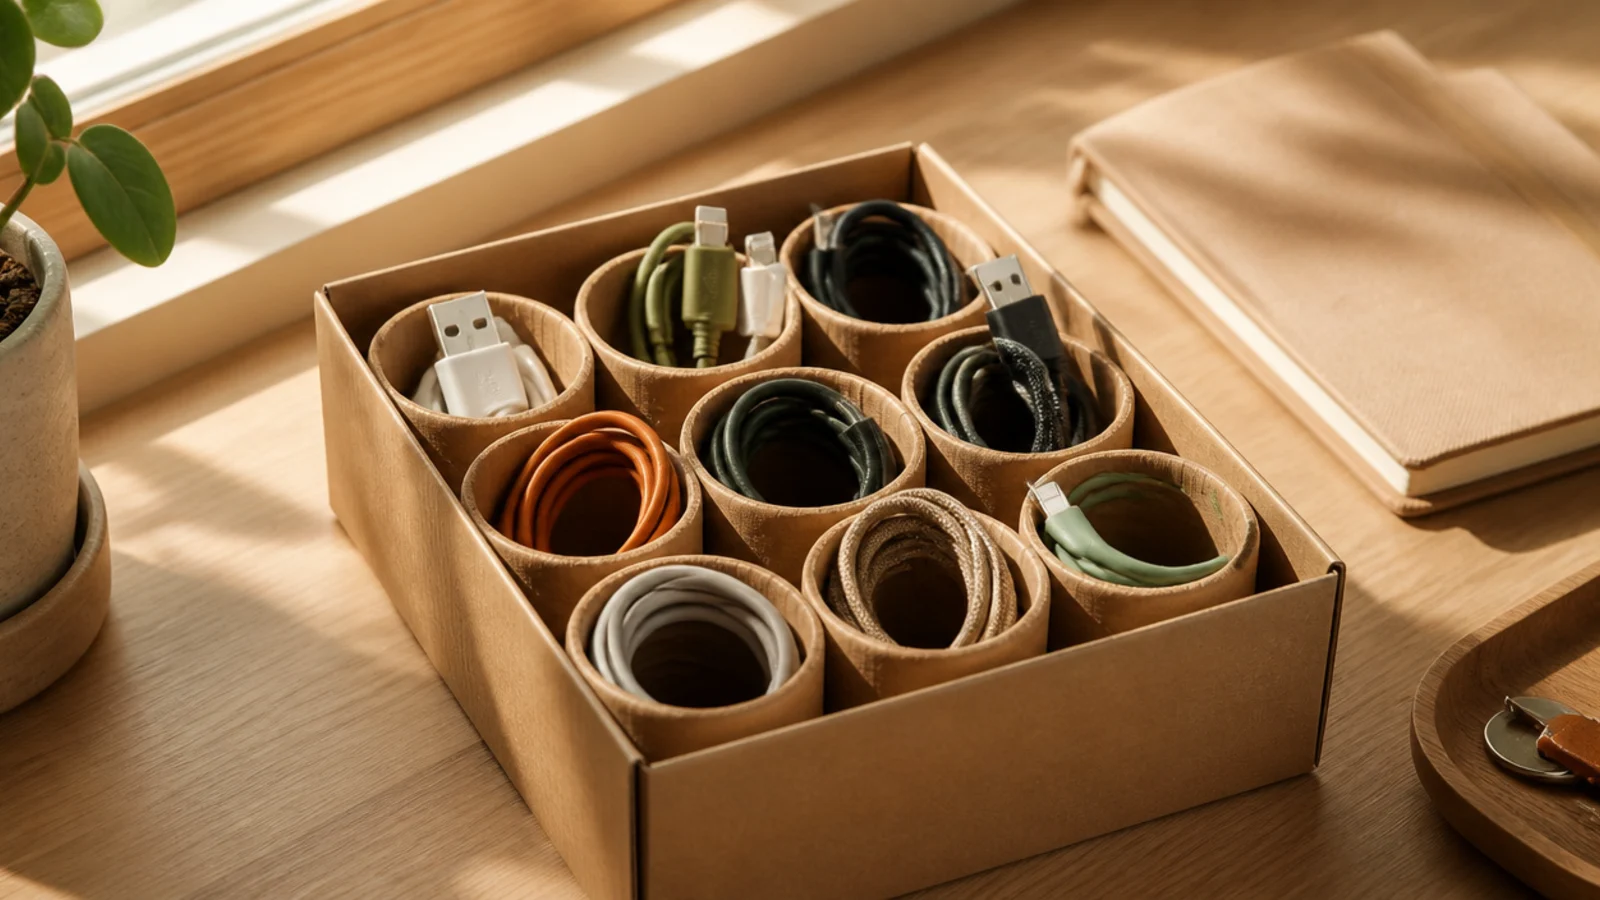
Toilet-paper and paper-towel tubes keep coiled cables from tangling into one nest. Each cable coils inside its own tube, standing upright in a box. It’s the simplest cable-storage fix there is, and it’s free.
Editor's noteWrite the cable type on the outside of each tube so you find the right cord without pulling them all out.
Cut paper-towel tubes into 3-4 inch sections, or use toilet-paper tubes whole. Coil each unused cable and slide it into its own tube. Stand the tubes upright in a small box so they stay separated. Paint or wrap the tubes if they’ll be visible. Label each tube or write the cable type on it so you grab the right one.
Skip thisDon’t cram two cables into one tube; the whole point is one cable per tube so nothing tangles together again.
6. Egg Carton Parts Tray
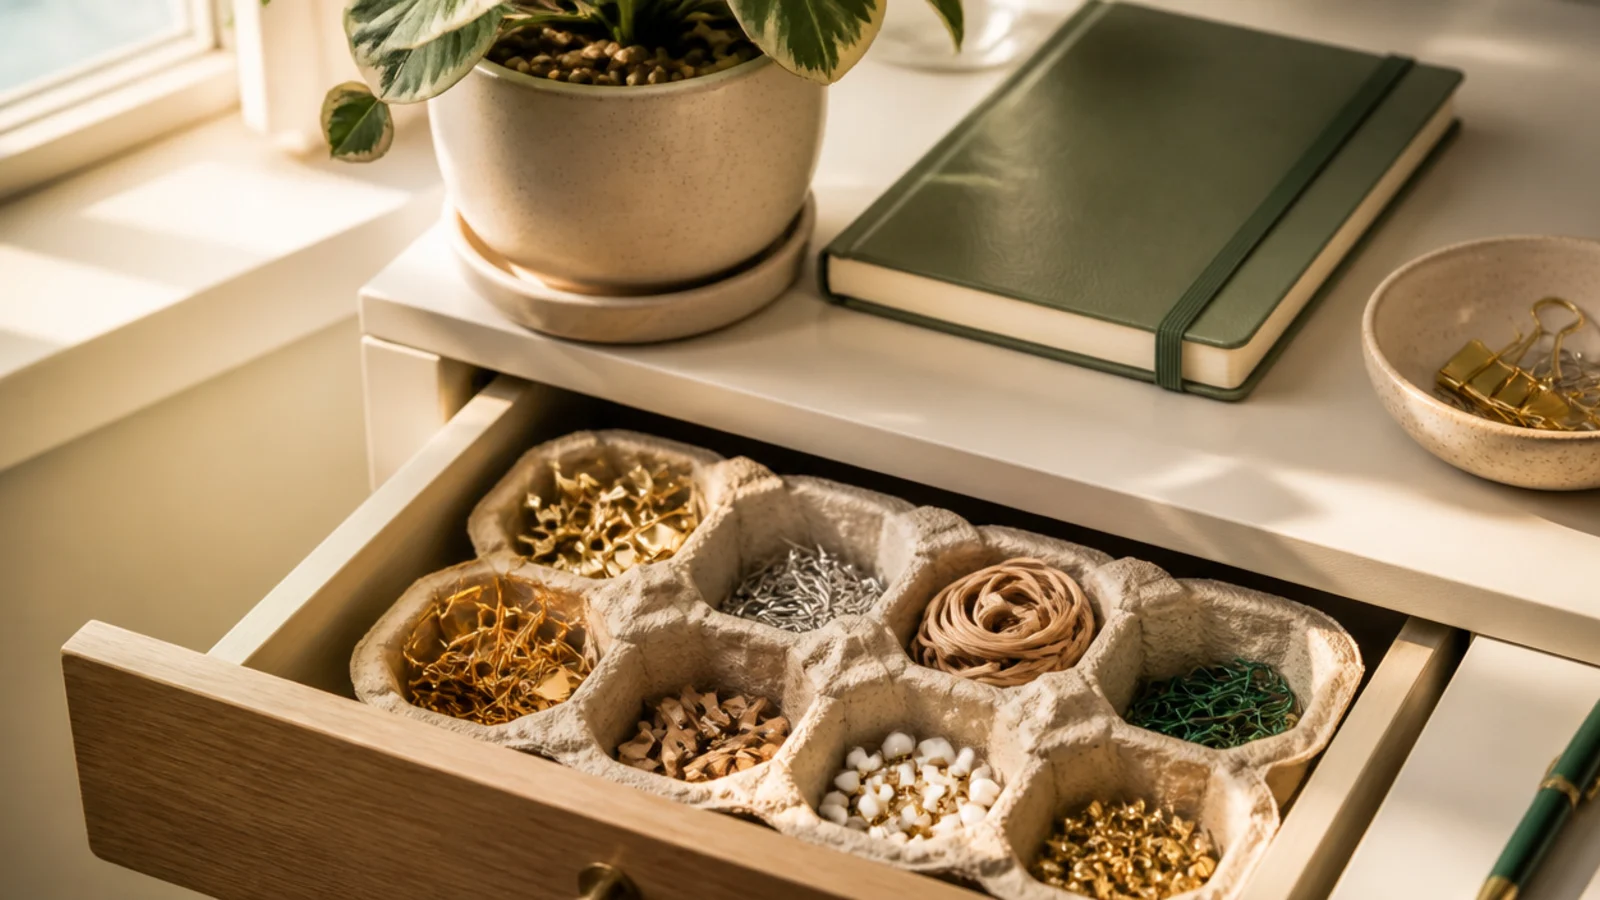
An egg carton is a ready-made grid of tiny compartments for the smallest desk supplies. Paper clips, pushpins, rubber bands, and USB drives each get their own cup. It’s the best free organizer for the little stuff that gets lost in a drawer.
Editor's noteUse a sturdy molded-pulp egg carton rather than a flimsy foam one; the pulp cups hold their shape far better.
Cut a cardboard egg carton to fit inside your drawer, keeping as many cups as fit. Paint it if you want it to look finished, or leave it plain inside a drawer. Sort one type of small item per cup. Set it in a corner of the drawer so it doesn’t slide. Replace it easily when it wears out since it’s free.
Skip thisDon’t use it on the open desktop; egg cartons look scrappy in the open — keep this one hidden inside a drawer.
7. Wooden Crate Shelf
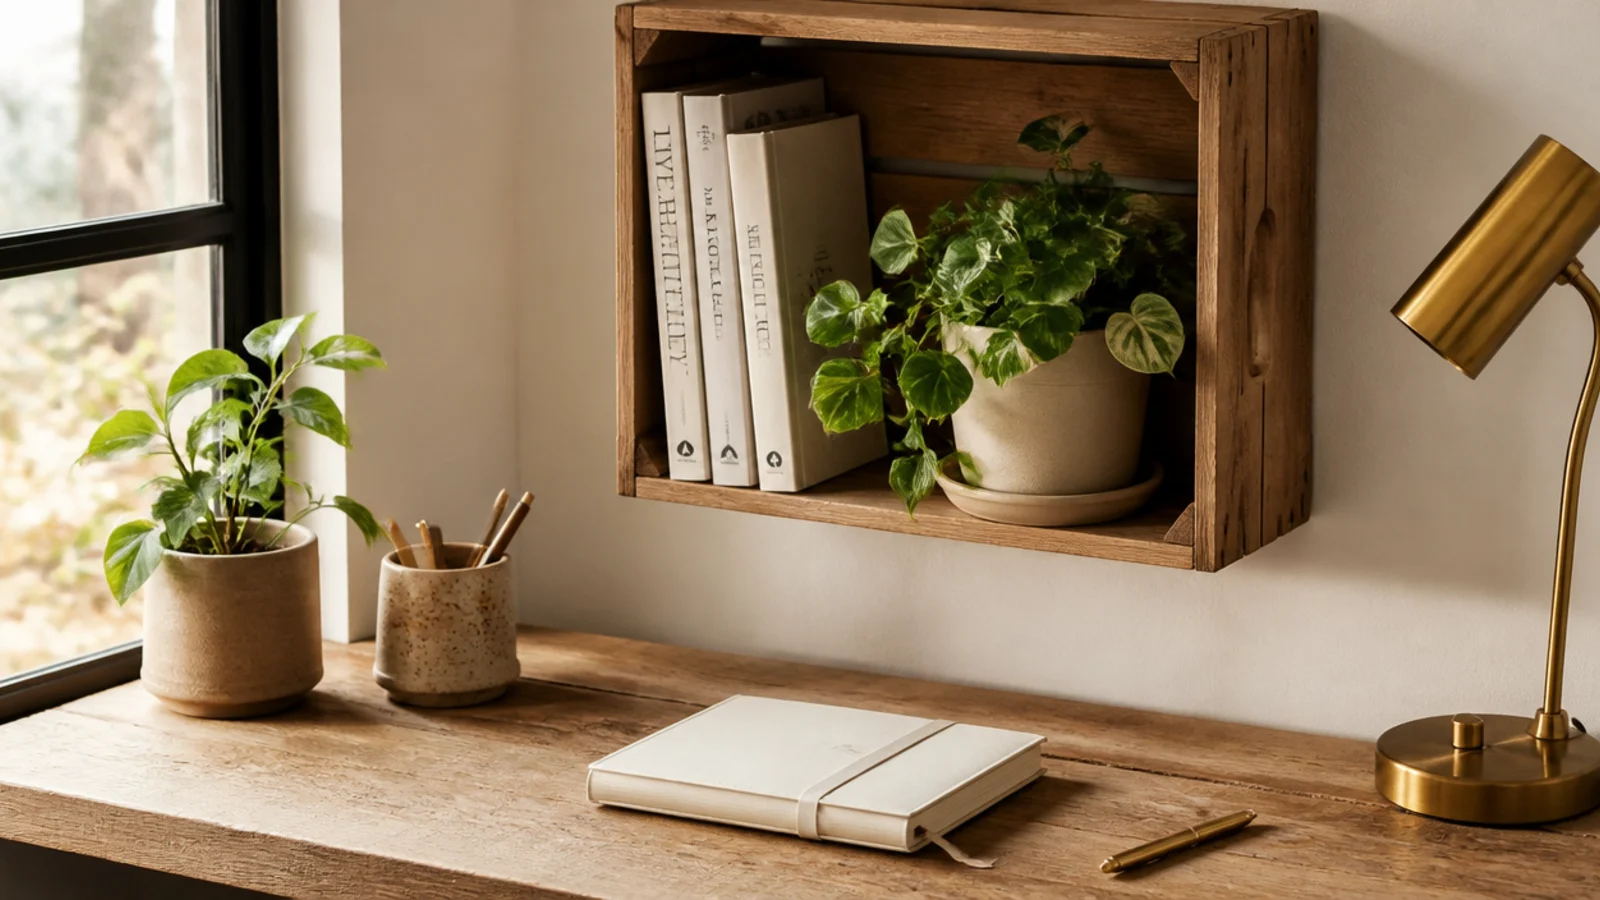
A cheap wooden crate becomes a rustic wall cubby or a desktop riser shelf with almost no work. Mounted on the wall or set on the desk, it adds storage with instant character. One of the best value-for-effort projects here.
Sand a wooden crate smooth with 220-grit and wipe off the dust. Stain or paint it in your palette and seal it. To wall-mount, screw it to studs or heavy anchors with the open side facing out as a cubby. To use on the desk, set it open-side up or on its side as a riser shelf. Load it with books, a plant, or supply jars.
Mount two crates offset on the wall for a stepped shelf look that holds more without feeling like a heavy block.
Don’t wall-mount a crate on drywall without anchors into studs; loaded with books it will pull straight out.
8. DIY Plywood Pegboard
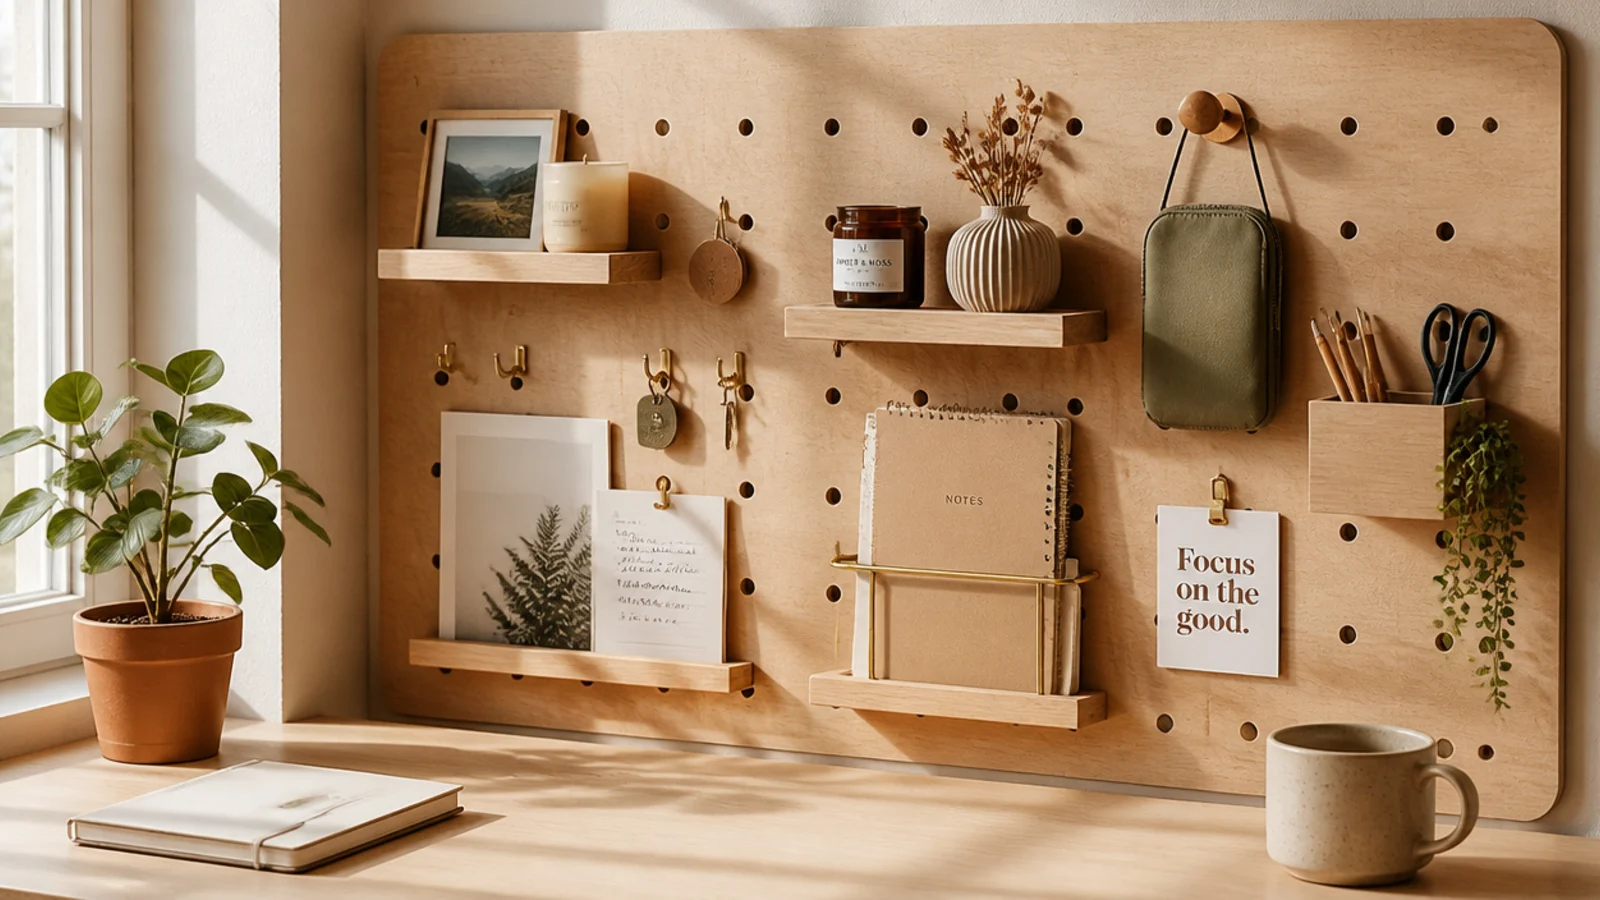
A sheet of pre-drilled pegboard (or hardboard you drill yourself) becomes a full wall organizer for a few dollars. It turns the wall behind your desk into flexible, off-surface storage. The most impactful DIY for freeing desktop space.
Editor's noteAdd a thin frame of furring strips behind the board so pegboard hooks have room to hook in from behind.
Buy a pegboard panel cut to size at the hardware store, or drill a grid of holes in hardboard yourself. Paint it in your palette and seal. Mount it on the wall with furring strips or standoffs behind it so hooks can slot through, screwing into studs or anchors. Add hooks, small cups, and a shelf. Arrange your most-used items at arm height.
Skip thisDon’t mount pegboard flush to the wall; without a gap behind it, the hooks have nothing to catch and fall out.
9. Shoebox Desktop Drawers
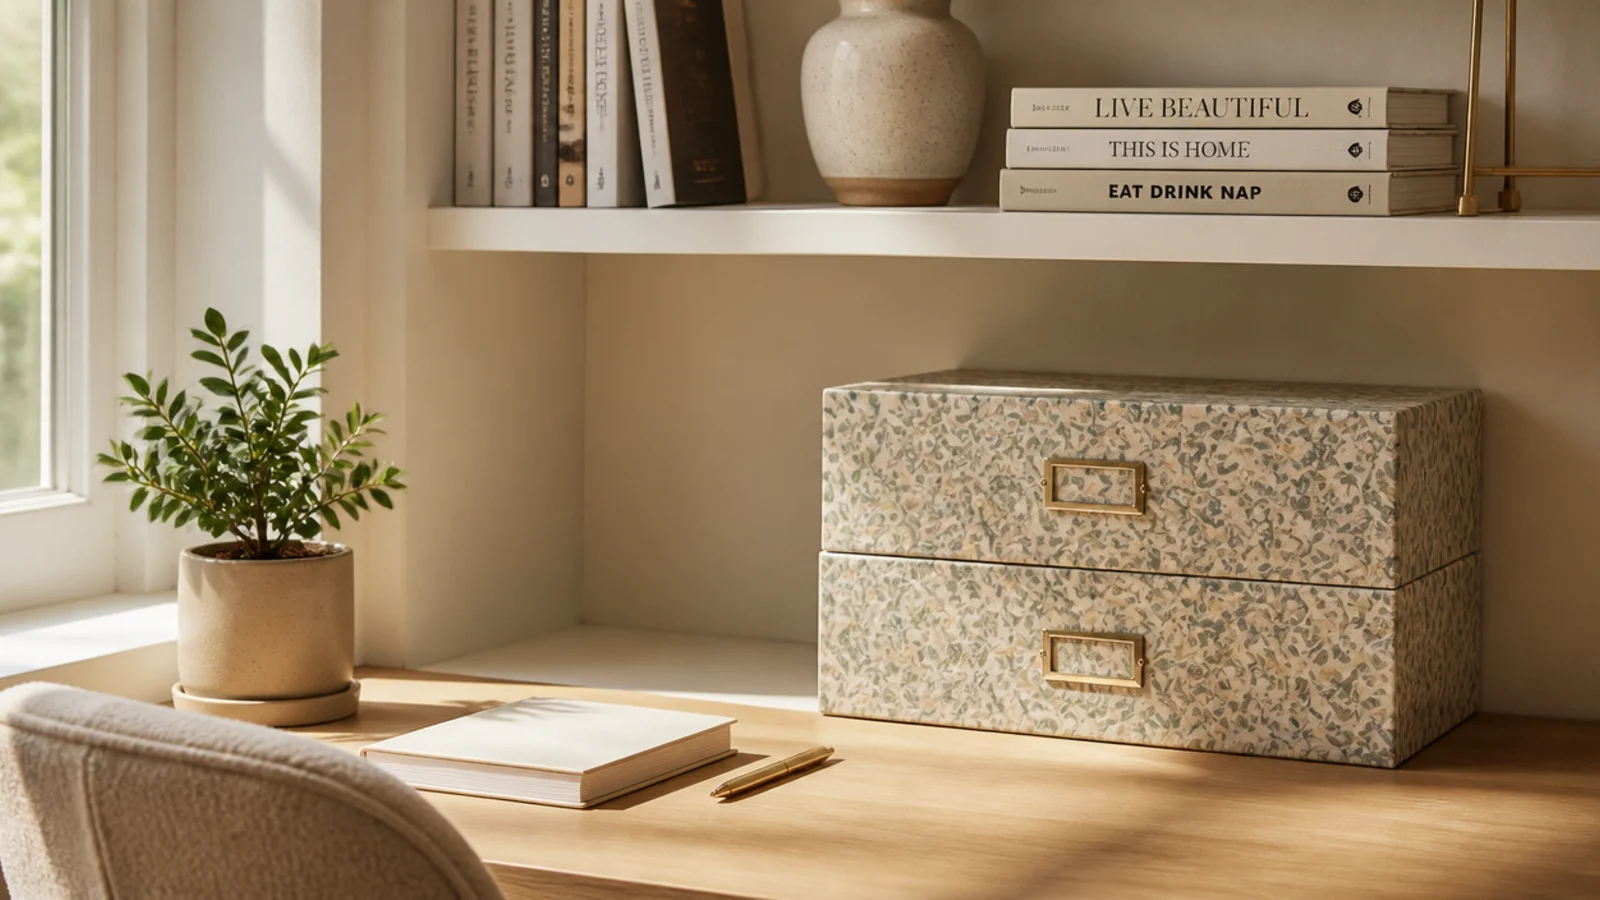
Shoeboxes stack into a sturdy little storage tower once covered to match. Each box is a drawer for supplies you want out of sight. It’s free bulk storage that looks intentional once wrapped.
Editor's noteCover the boxes in the same paper as your file holders and tube caddies so all your paper-wrapped pieces coordinate.
Choose matching shoeboxes and cover the boxes and lids in kraft paper or fabric, gluing it smooth. Add a ribbon or punched hole as a pull. Stack two or three, or set them side by side on a shelf. Use each for one category — spare supplies, cables, papers. Label the front so you know what’s inside without opening each one.
Skip thisDon’t stack too many shoeboxes high; more than three gets tippy and the bottom box crushes under the weight.
10. Binder Clip Cable Holders
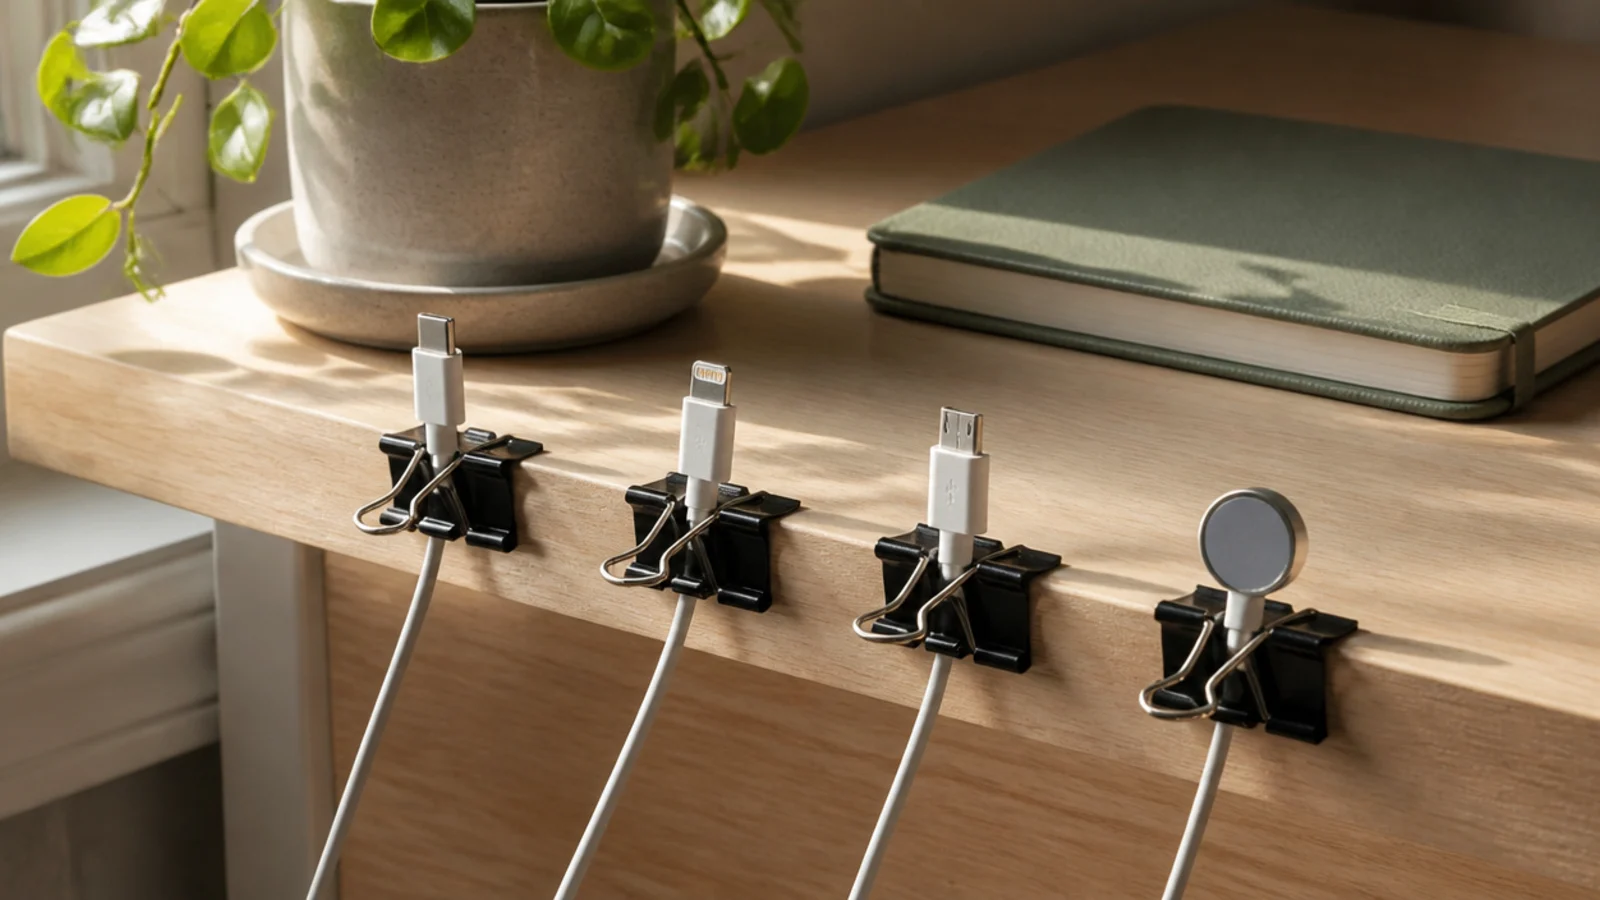
Binder clips clipped to the desk edge hold your loose cable ends so they never slide off behind the desk. Thread the cable through the metal loop and it stays put, ready to grab. A near-free fix for the most annoying daily cable problem.
Clip a few medium binder clips onto the back edge of the desk where cables live. Pop the silver arms off, thread the cable end through the loop, and snap the arm back so the cable is captured but slides freely. Space them so each daily cable — charger, earbuds — has its own clip. Paint the clips your palette color if you want them to blend.
Use a different clip size or color for each cable so you instantly know which loop holds your phone charger.
Don’t use tiny clips for thick cables; the small loop won’t hold a chunky charger cable and it slips right out.
11. Wine Cork Organizer Board
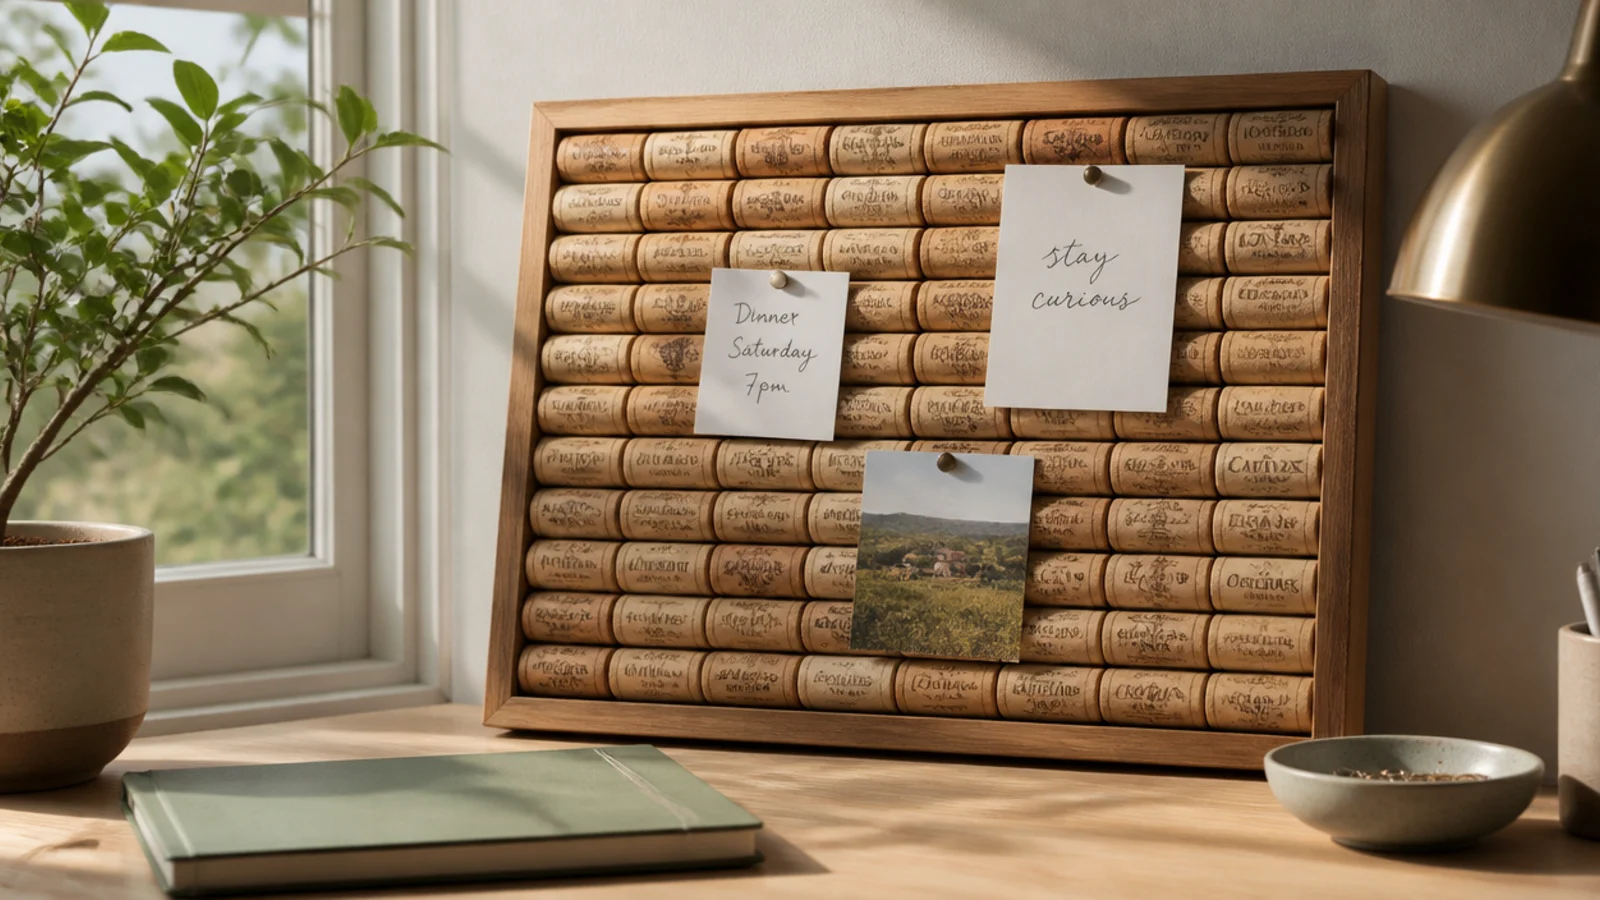
Wine corks glued to a board make a soft, characterful pushpin board for notes and photos. The corks grip pins perfectly and add warm texture. A charming way to use a collection you’ve been saving.
Editor's noteSlice corks lengthwise so they sit flat and glue down solidly instead of rolling or popping off the board.
Collect enough corks to cover a small board or picture frame. Slice each cork in half lengthwise so it lies flat and glues securely. Hot-glue them in tight rows onto the board, edges touching. Trim the outer corks to fit the frame. Hang it beside the desk and pin notes and photos with pushpins.
Skip thisDon’t leave gaps between corks; loose spacing looks unfinished and pins pushed into gaps hit the board and bend.
12. Book-Stack or Wood Monitor Riser
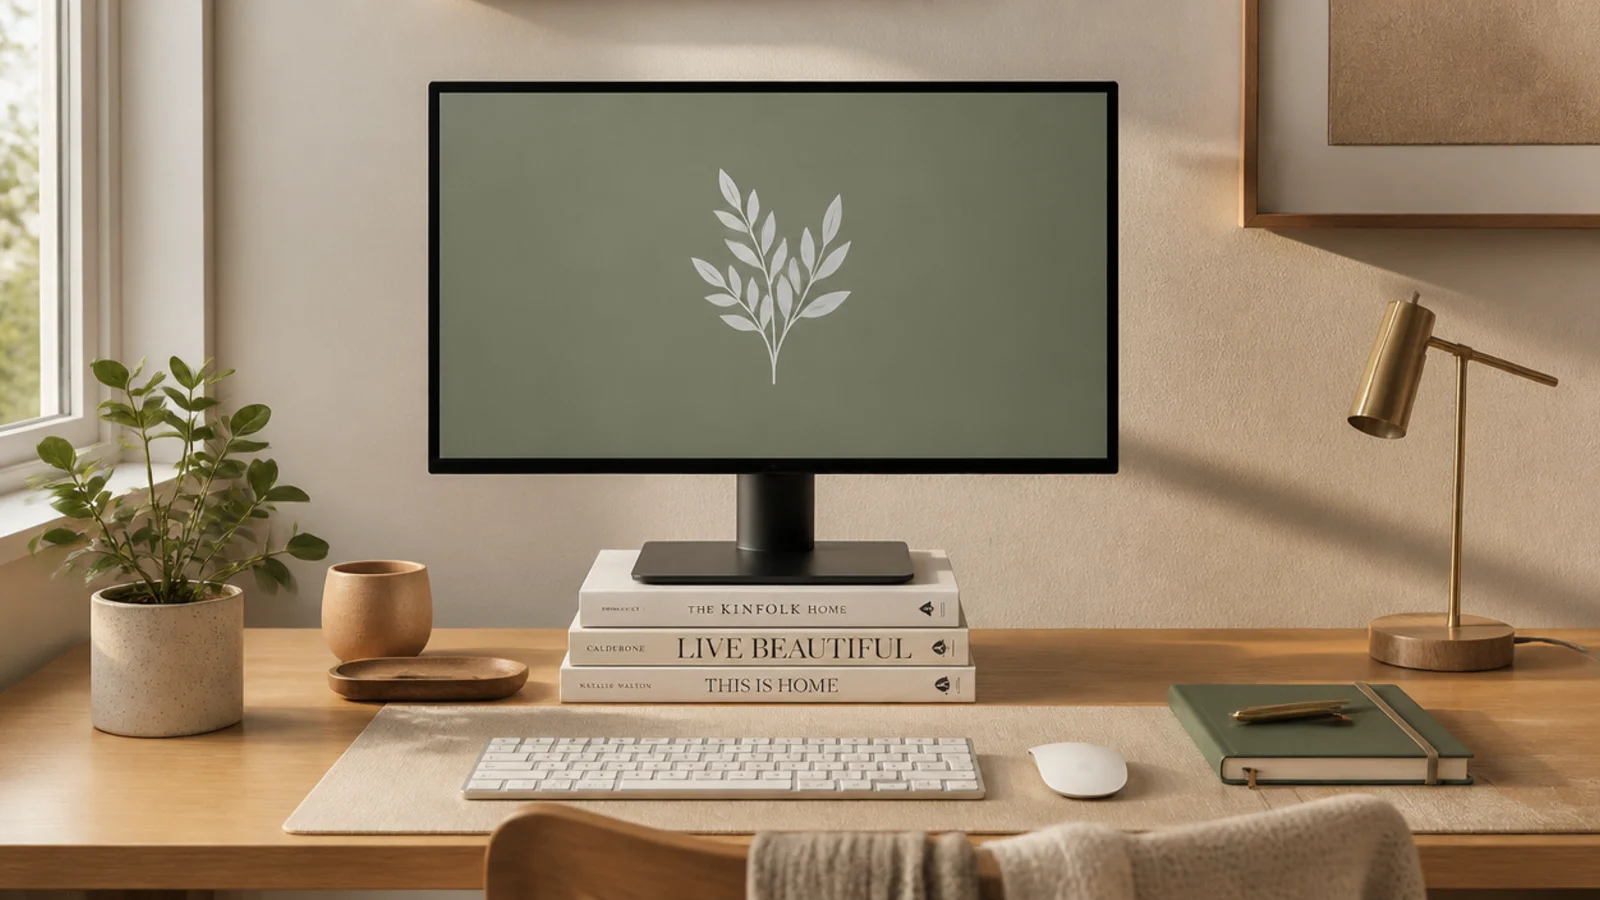
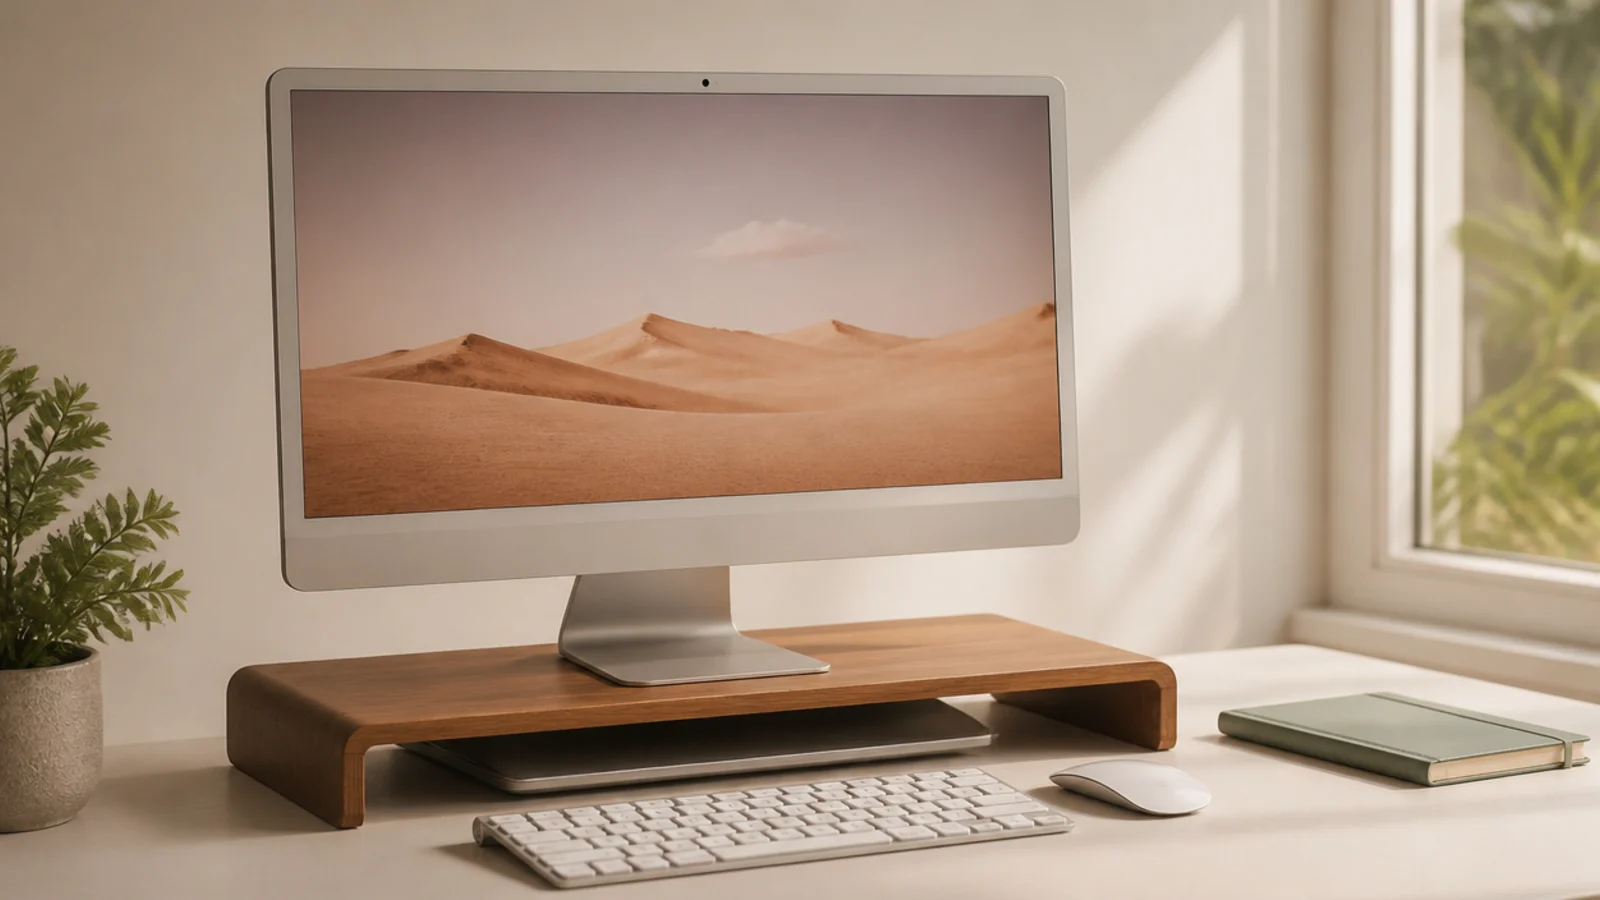
You can raise a monitor to eye height for free with a tidy stack of hardcover books, or build a simple wood box riser. It fixes your neck angle and frees the space beneath. The cheapest ergonomic upgrade there is.
Editor's noteWrap a book stack in kraft paper or a single band so it reads as one deliberate riser instead of a random pile.
For the quick version, stack sturdy hardcover books until the top of the screen hits eye level, keeping the stack neat and stable. For a built version, cut and glue or screw a simple open-bottom wood box to the right height, then sand, paint, and seal it. Set the monitor on top and slide the keyboard underneath. Check the stack or box is level and stable.
Skip thisDon’t use a wobbly or uneven stack; an unstable riser with a monitor on top is an expensive accident waiting to happen.
13. Magnetic Jar-Lid Cups
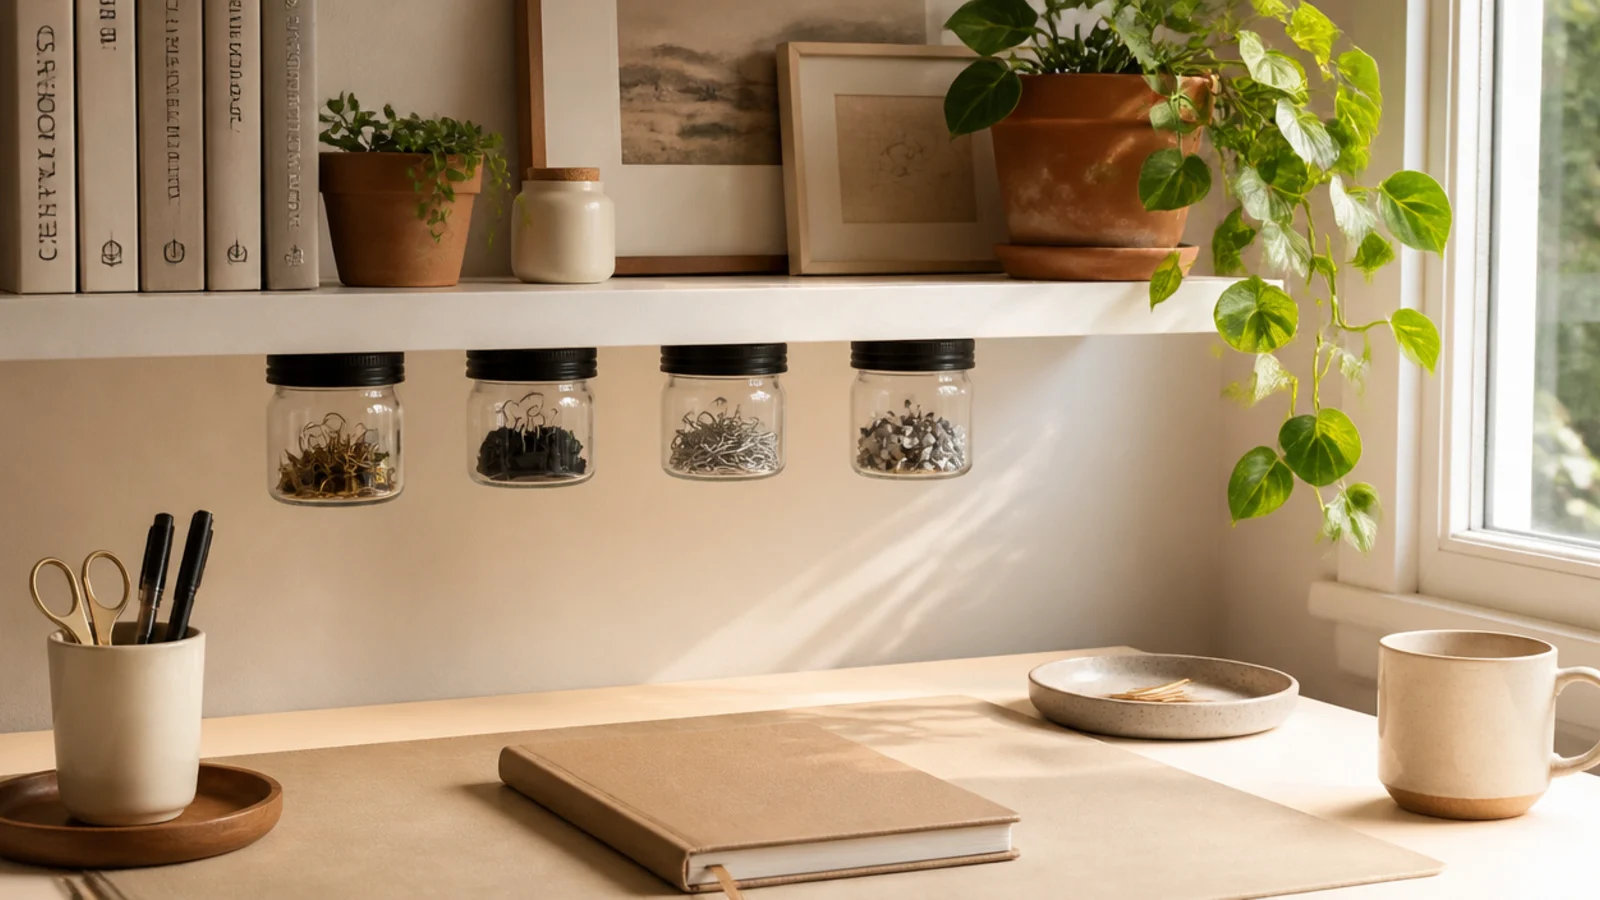
Small jars with their lids screwed to the underside of a shelf hang beneath it as see-through storage for tiny parts. You unscrew the jar to reach in. It uses the dead space under a shelf and keeps small supplies visible.
Editor's noteUse clear glass jars so you can see the contents at a glance without unscrewing every one to find what you need.
Screw the lids of small jars (baby-food or spice jars) to the underside of a shelf or the desk overhang, evenly spaced. Fill each jar with one type of small item — clips, pins, screws. Screw the jar back into its mounted lid. Paint the lids to match. Keep the jars light so the screws hold in the shelf.
Skip thisDon’t mount heavy full jars under a thin shelf; the weight can pull the screws out — keep contents light.
14. PVC Pipe Pen and Cable Holder
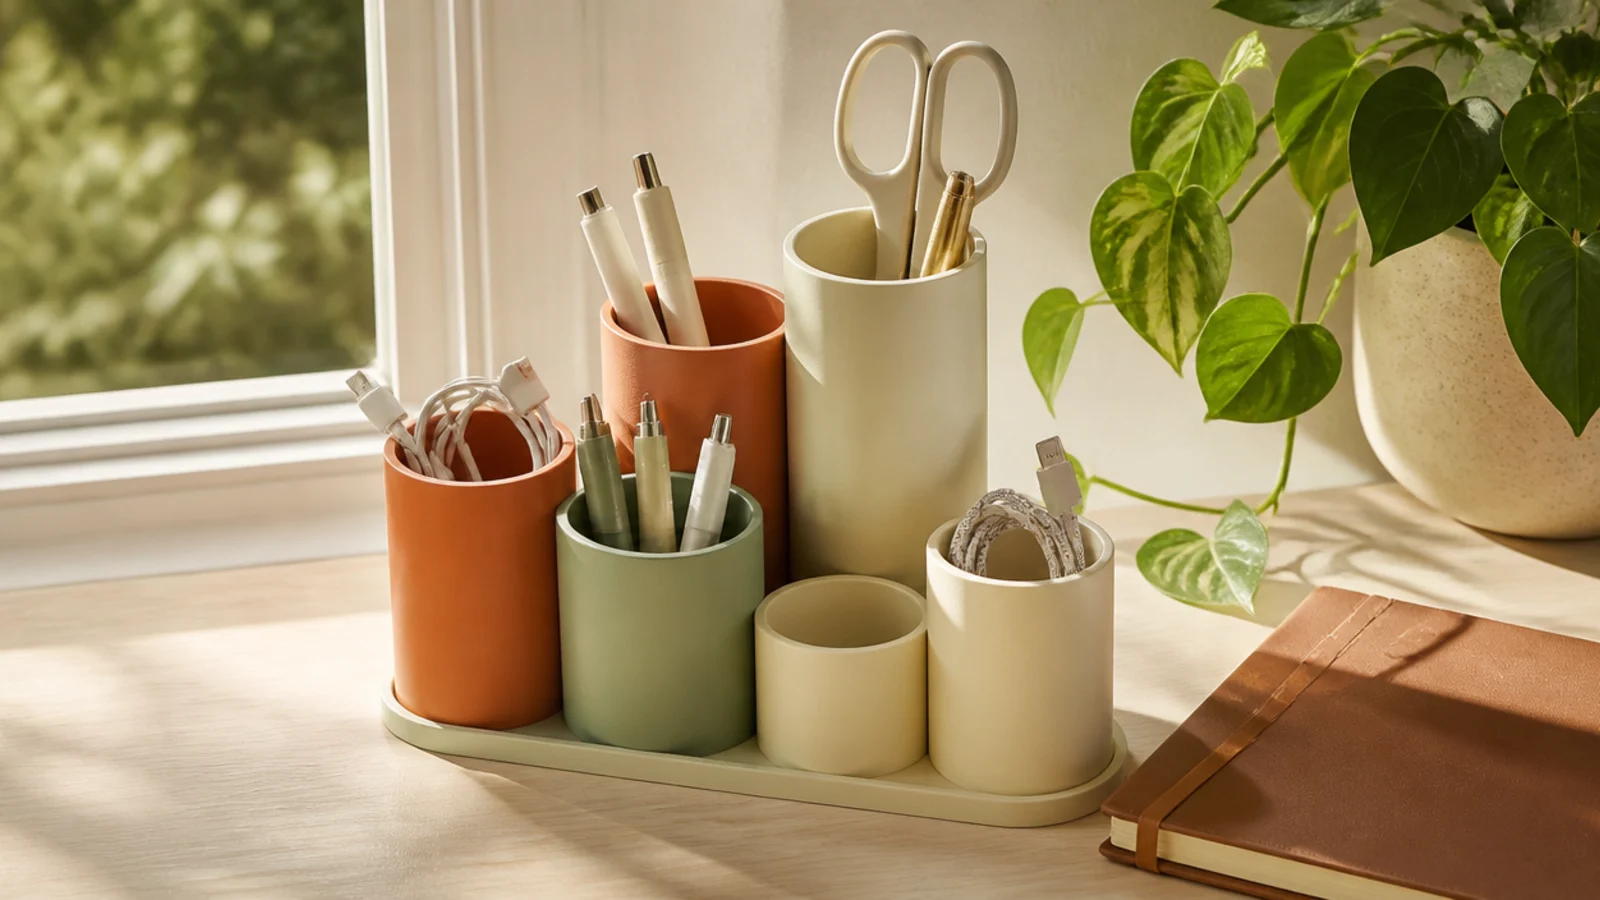
Short offcuts of PVC pipe painted and bundled make a modern multi-tube holder for pens, brushes, or coiled cables. The uniform tubes look surprisingly sleek once painted. A great use for leftover pipe from other projects.
Editor's noteCut the tubes to a few different heights so shorter items stay reachable and the holder looks designed, not uniform.
Cut PVC pipe into sections of varying heights (a hacksaw works). Sand the cut edges smooth. Prime with a plastic-bonding primer, then paint two coats. Bundle the tubes and glue them together, or glue them upright onto a base. Seal with clear coat. Sort pens, tools, or cables by tube.
Skip thisDon’t paint PVC without a plastic-bonding primer; regular paint peels off the slick pipe surface almost immediately.
15. Ice Cube Tray Organizer
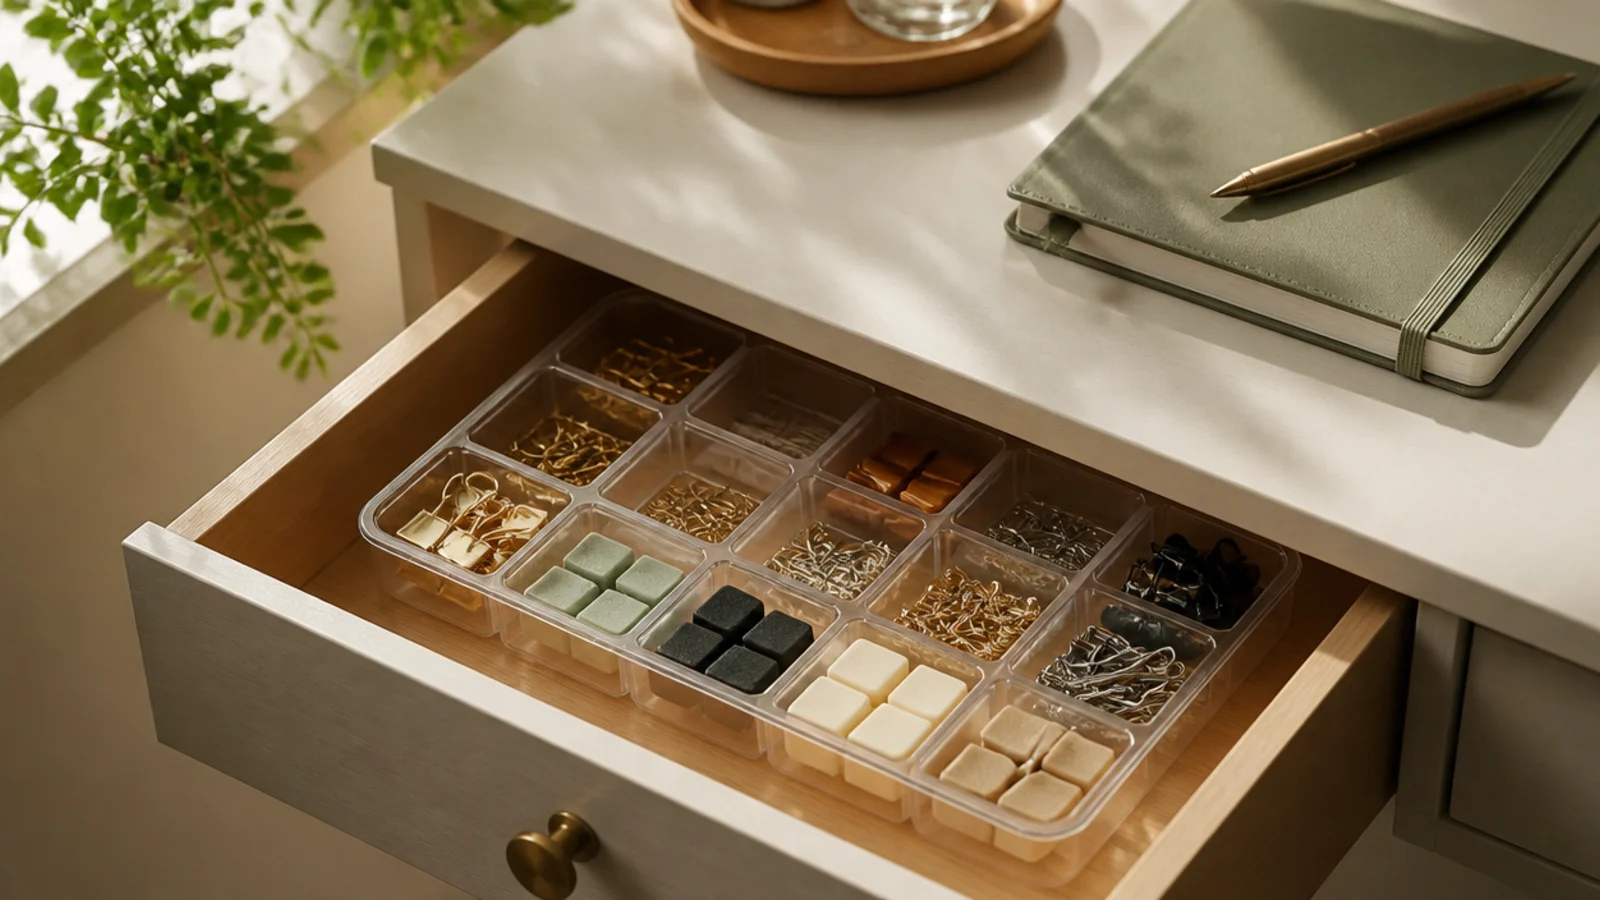
An old ice cube tray is a ready grid for the tiniest supplies. Each cell holds one type — pins, clips, staples, beads. It’s the perfect free organizer for a drawer full of loose small things.
Editor's noteUse a rigid tray over a flexible silicone one in a drawer, so it doesn’t flex and spill when the drawer slides.
Clean and dry an ice cube tray you no longer use for ice. Drop it into a drawer and sort one item type per cell. Choose a rigid plastic or silicone tray that holds its shape. For a visible spot, spray-paint it after a plastic primer. Keep it in a corner so it doesn’t slide around when you open the drawer.
Skip thisDon’t fill cells with mixed items; one type per cell is the whole benefit, or you’re back to digging through a jumble.
16. Dowel Ribbon and Tape Holder
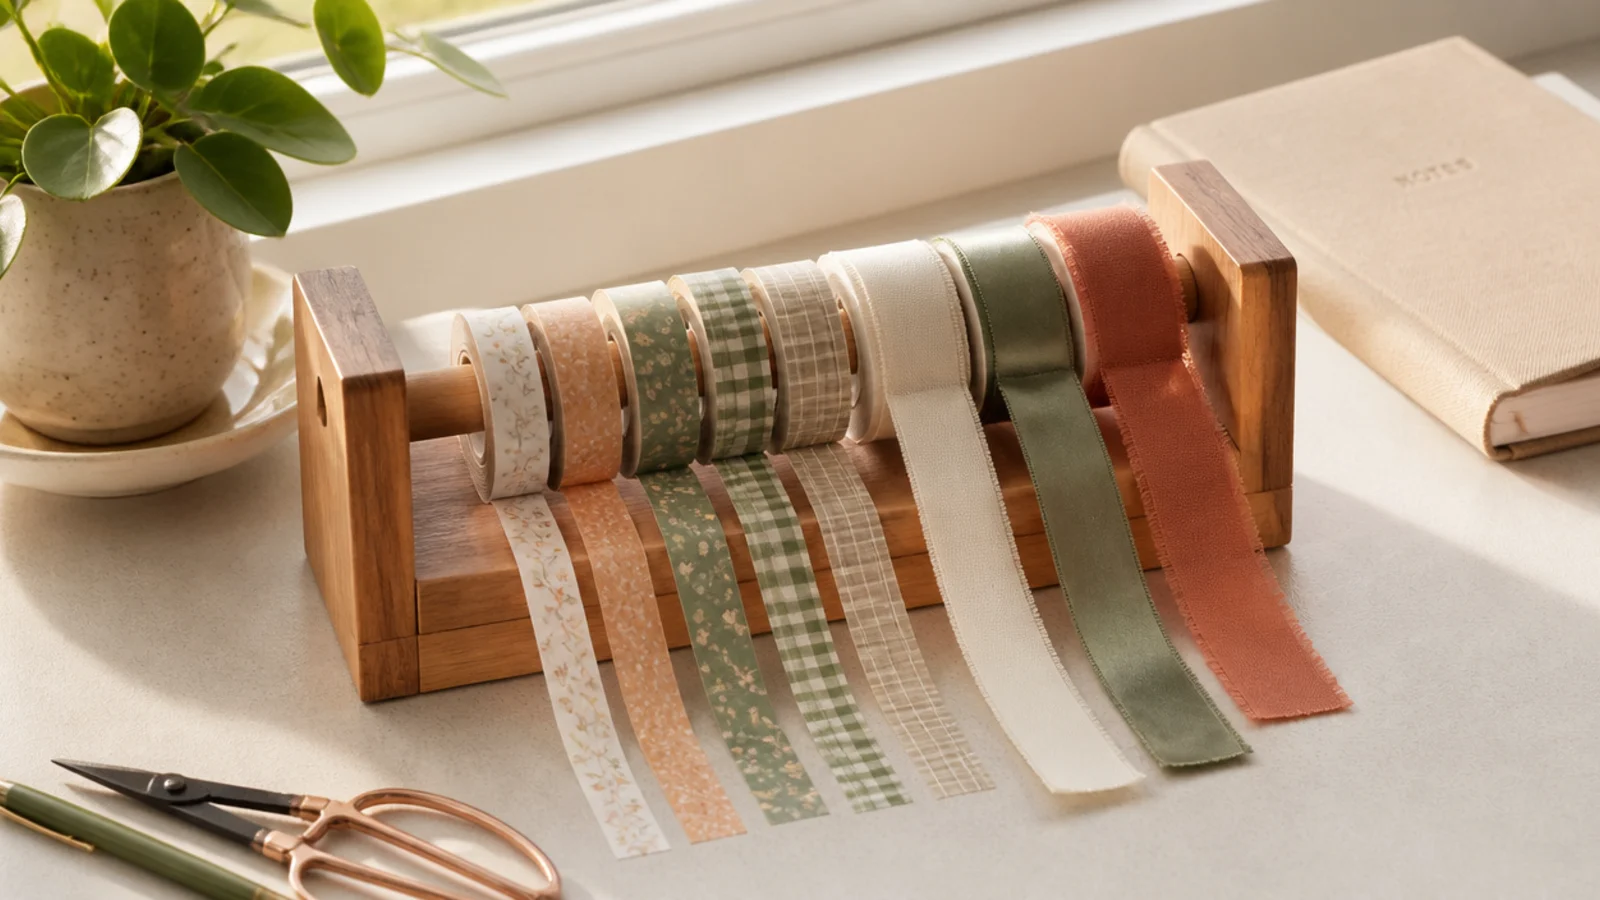
A dowel held between two blocks lets rolls of tape and ribbon spin freely so you can pull and cut in one motion. It keeps rolls from unspooling into a mess in a drawer. Ideal if you use a lot of washi or ribbon.
Editor's noteMake one end lift-out so you can slide new rolls on without dismantling the whole holder each time you restock.
Cut a wooden dowel a bit longer than your widest roll needs. Drill a hole in two small wood blocks to seat the dowel ends, or notch them so the dowel lifts out to reload. Glue the blocks to a base. Sand, paint, and seal. Slide your tape and ribbon rolls onto the dowel. Set it where you can pull and cut easily.
Skip thisDon’t glue both dowel ends permanently; you’ll have no way to add or swap rolls once they run out.
17. DIY Charging Station Box
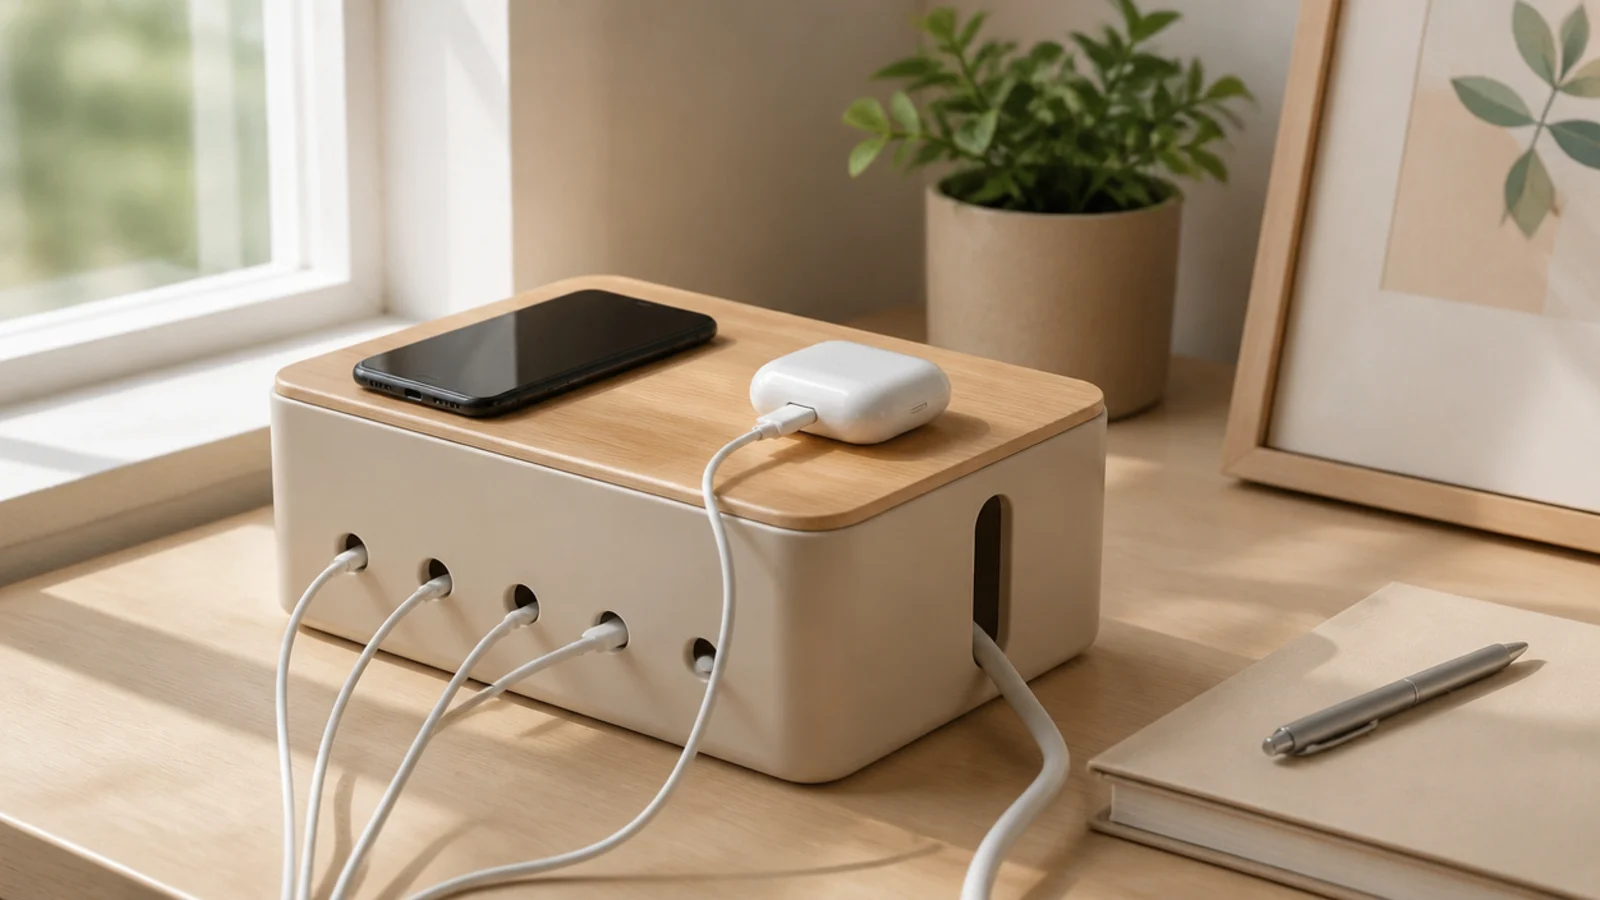
A box with a few holes hides a power strip and its cable mess while devices charge on top. Only the short charging ends emerge, so the tangle is contained. It turns the ugliest part of a desk into a clean little station.
Choose a box big enough to hold your power strip. Cut or drill a hole in the back for the strip’s plug and small holes along the front or top for the charging cables. Set the strip inside, feed the charging cables out through the holes, and plug them in. Cover the box in paper or paint to match. Stand devices on top to charge.
Use a wooden or sturdy box rather than thin cardboard so it holds its shape and stays cool around the power strip.
Don’t enclose a power strip tightly with no airflow; leave the holes open so heat escapes and never cover a hot strip.
18. Painted Jar Succulent Planter
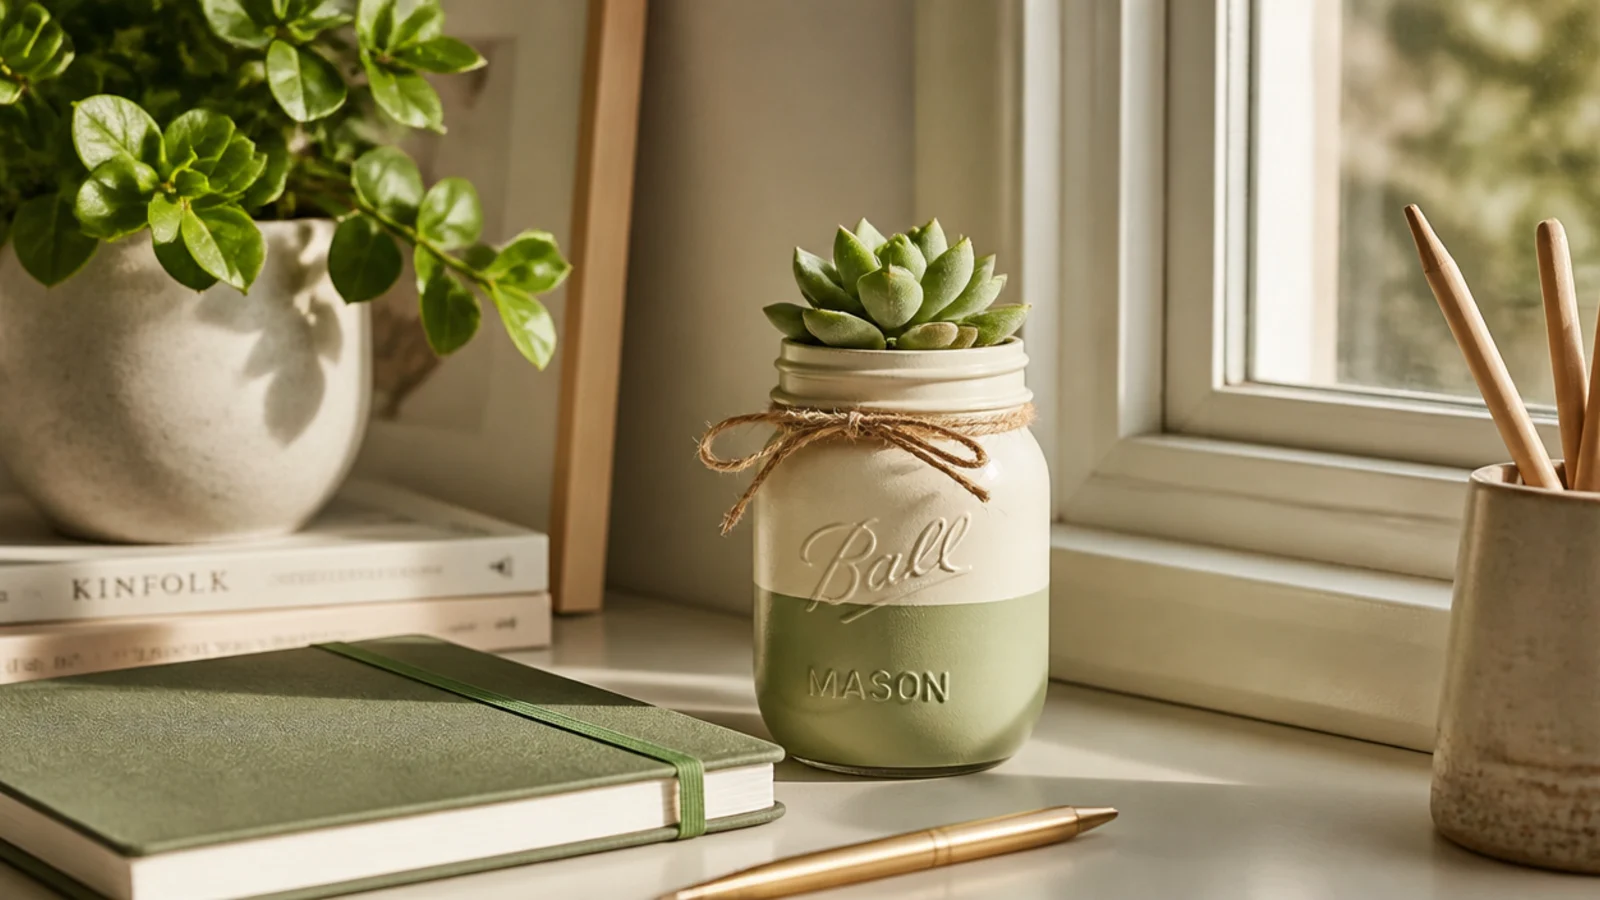
A painted jar becomes a little planter that adds life to the desk in your palette color. A small succulent or air plant needs almost no care and softens the workspace. Function meets a bit of greenery for free.
Clean and de-label a jar, prime the outside, and paint two coats in your palette color; seal it. Add a shallow layer of pebbles at the bottom for drainage, then cactus soil and a small succulent, or skip the soil entirely for an air plant. Set it at a back corner. Water succulents sparingly since the jar has no drainage hole.
Use an air plant if the jar has no drainage hole; it needs no soil and won’t rot from water pooling in the base.
Don’t overwater a jar with no drainage; without a drain hole, excess water sits at the bottom and rots the roots.
19. Clothespin Memo Clips
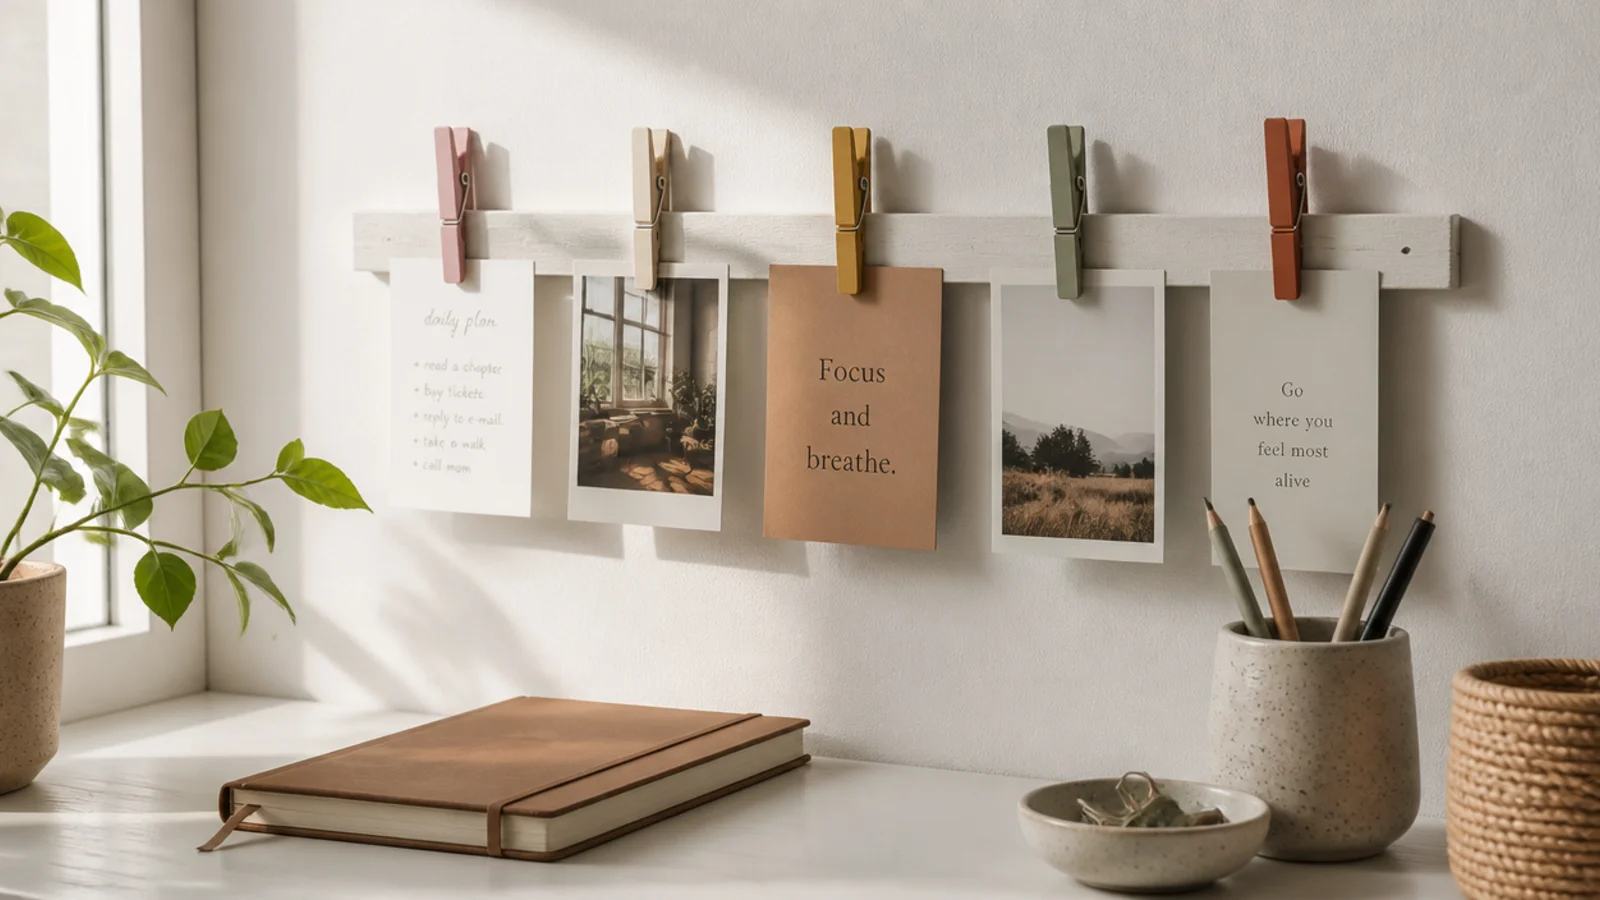
Painted clothespins glued to a board or strip make swappable clips for notes and photos. Each pin holds one card, so your reminders line up neatly. A sweet, near-free alternative to a corkboard.
Editor's noteSpace the clothespins the width of a photo apart so cards and pictures hang in a tidy, even row.
Paint a handful of wooden clothespins in your palette and let them dry. Hot-glue them evenly spaced onto a painted wood strip or the frame of a board, spring-side out. Mount the strip on the wall beside the desk. Clip notes, photos, and cards into the pins. Swap them anytime without pins or tape.
Skip thisDon’t glue the pins so close they overlap; crowded clips can’t open fully and notes bunch into a messy strip.
20. Cork Roll Desk Mat
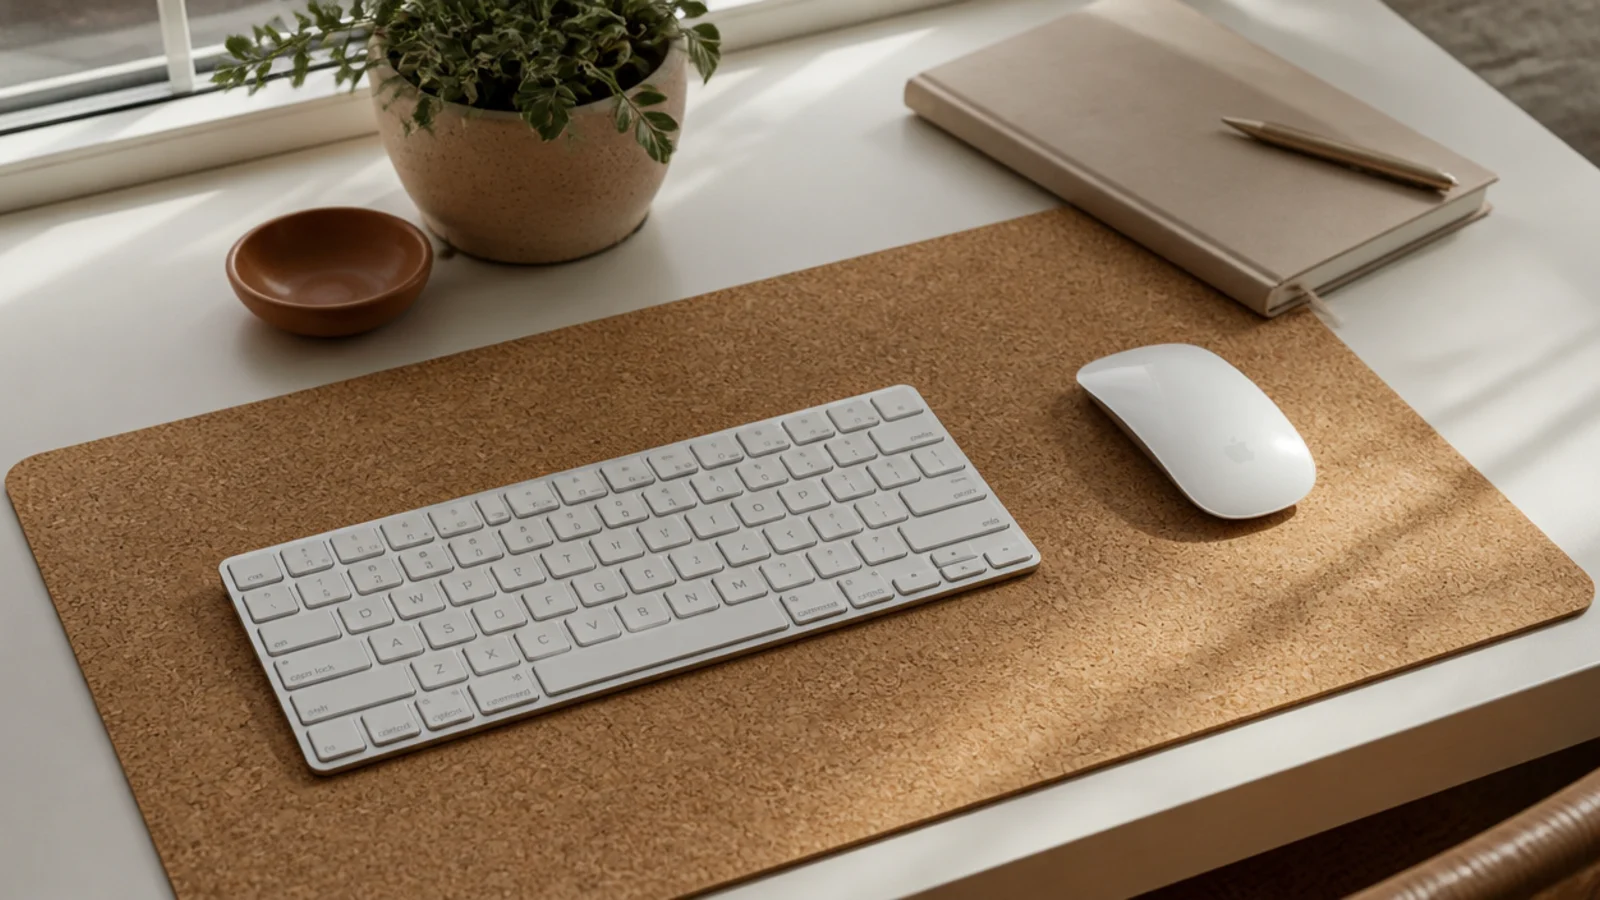
A piece cut from a roll of cork or a large placemat makes a warm, natural desk mat for a fraction of a bought one. It defines your work zone and protects the desk. Cheap, cuttable, and surprisingly good-looking.
Editor's noteRound the corners slightly with scissors so the cut mat looks finished and the corners don’t lift or fray.
Buy a roll of cork sheet or a large cork placemat. Measure your keyboard-and-mouse zone (about 31 by 15 inches) and cut the cork to size with a craft knife against a ruler. Sand the cut edges lightly. Seal the surface with a matte spray if you want it wipeable. Center it in front of the monitor as your work zone.
Skip thisDon’t cut cork freehand; use a ruler and a sharp blade or the edges come out wavy and cheapen the whole mat.
21. Muffin Tin Supply Caddy
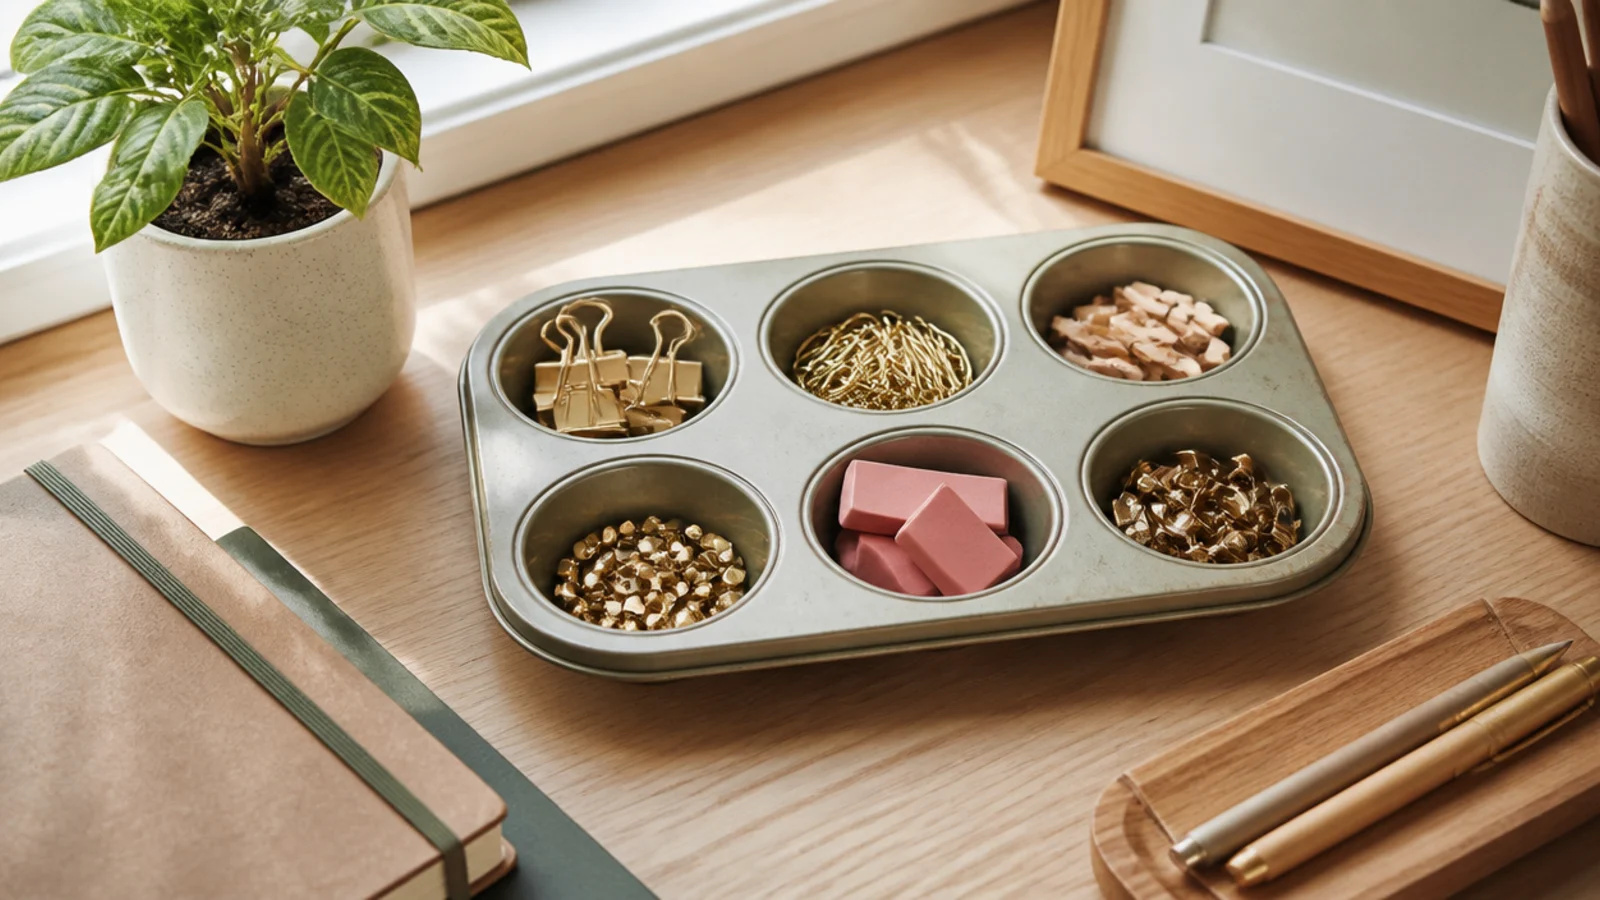
An old muffin tin is a ready-made six-or-twelve-cup caddy for sorting supplies. Each cup holds one type, and the metal wipes clean. A sturdy free organizer for a craft-heavy or supply-heavy desk.
Editor's noteSet the muffin tin on a small lazy Susan so you can spin it and reach every cup without moving the whole caddy.
Clean a muffin tin you no longer bake with. Prime and spray-paint it in your palette if it’ll be visible, or leave it as is inside a drawer. Sort one supply type per cup — clips, pins, erasers, stamps. Set it where you reach often. For a rotating version, spin it on a lazy Susan for craft supplies.
Skip thisDon’t use a rusty or scratched tin on the desktop unpainted; prime and paint it or it looks like it came from the trash.
22. Decoupage Paper Container
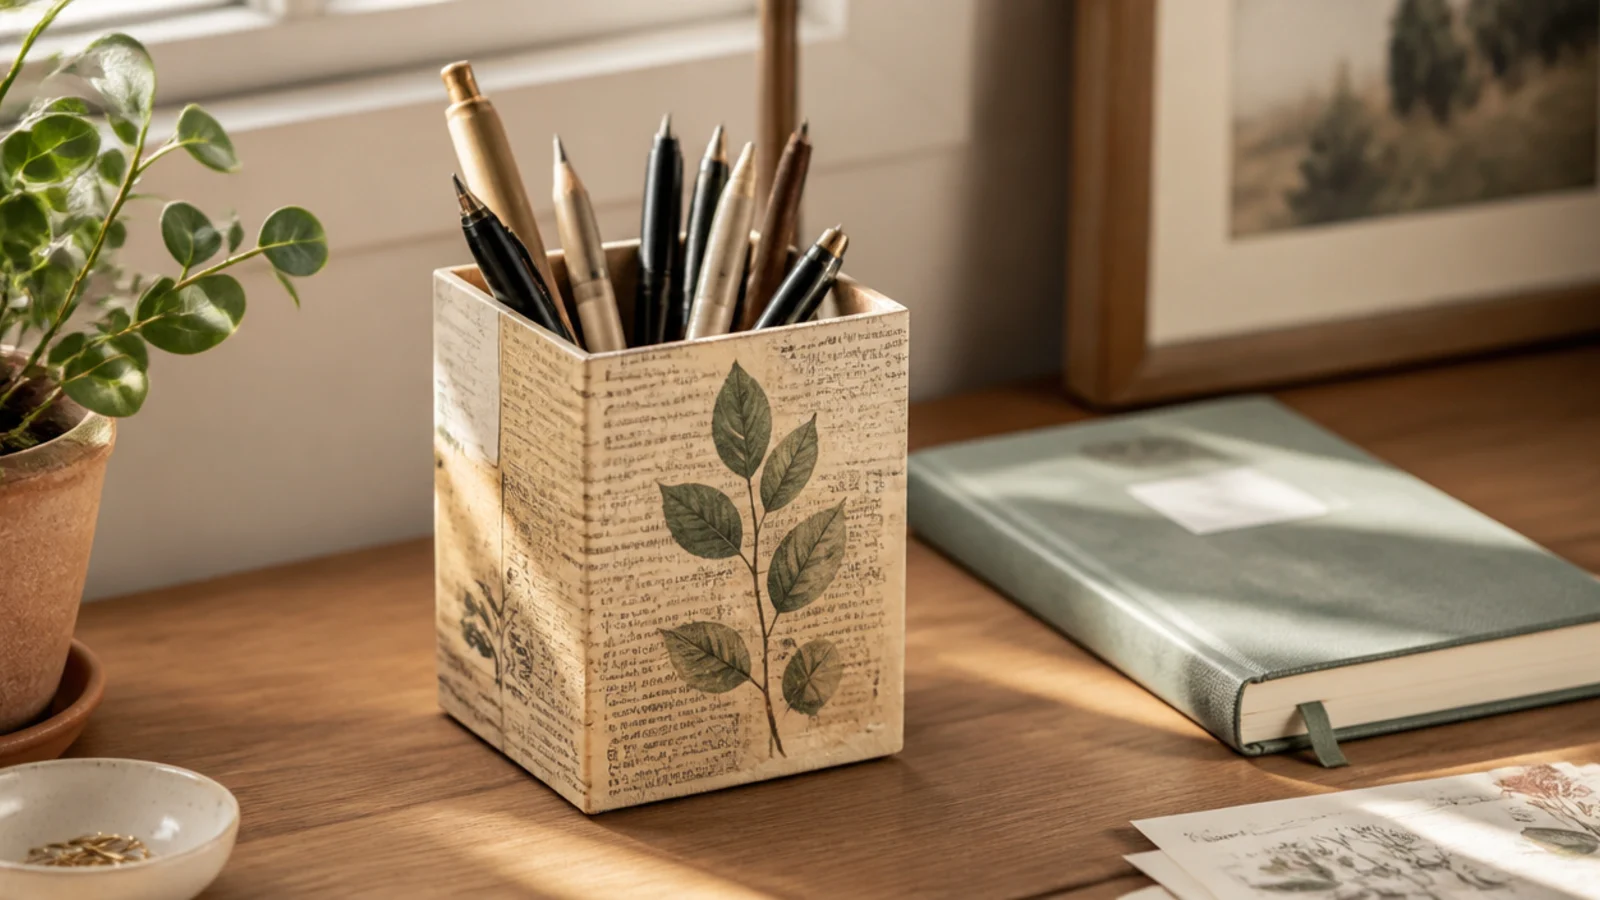
Decoupaging a can or box with book pages, maps, or pretty paper turns plain upcycles into decorative pieces. The paper finish hides the humble base entirely. A way to make free materials genuinely beautiful.
Editor's noteOverlap the paper pieces and wrap them slightly over the top rim and base so no bare surface peeks through.
Clean your can or box. Tear or cut paper — book pages, sheet music, a map, gift wrap — into pieces. Brush mod podge onto the surface, press the paper down, and coat over the top with more mod podge, smoothing bubbles. Overlap pieces to cover fully. Let it dry, then seal with a clear coat so it wipes clean. Fill and use.
Skip thisDon’t leave decoupage unsealed; without a clear topcoat the paper stains and lifts the first time it gets damp.
23. Wood Scrap Headphone Hook
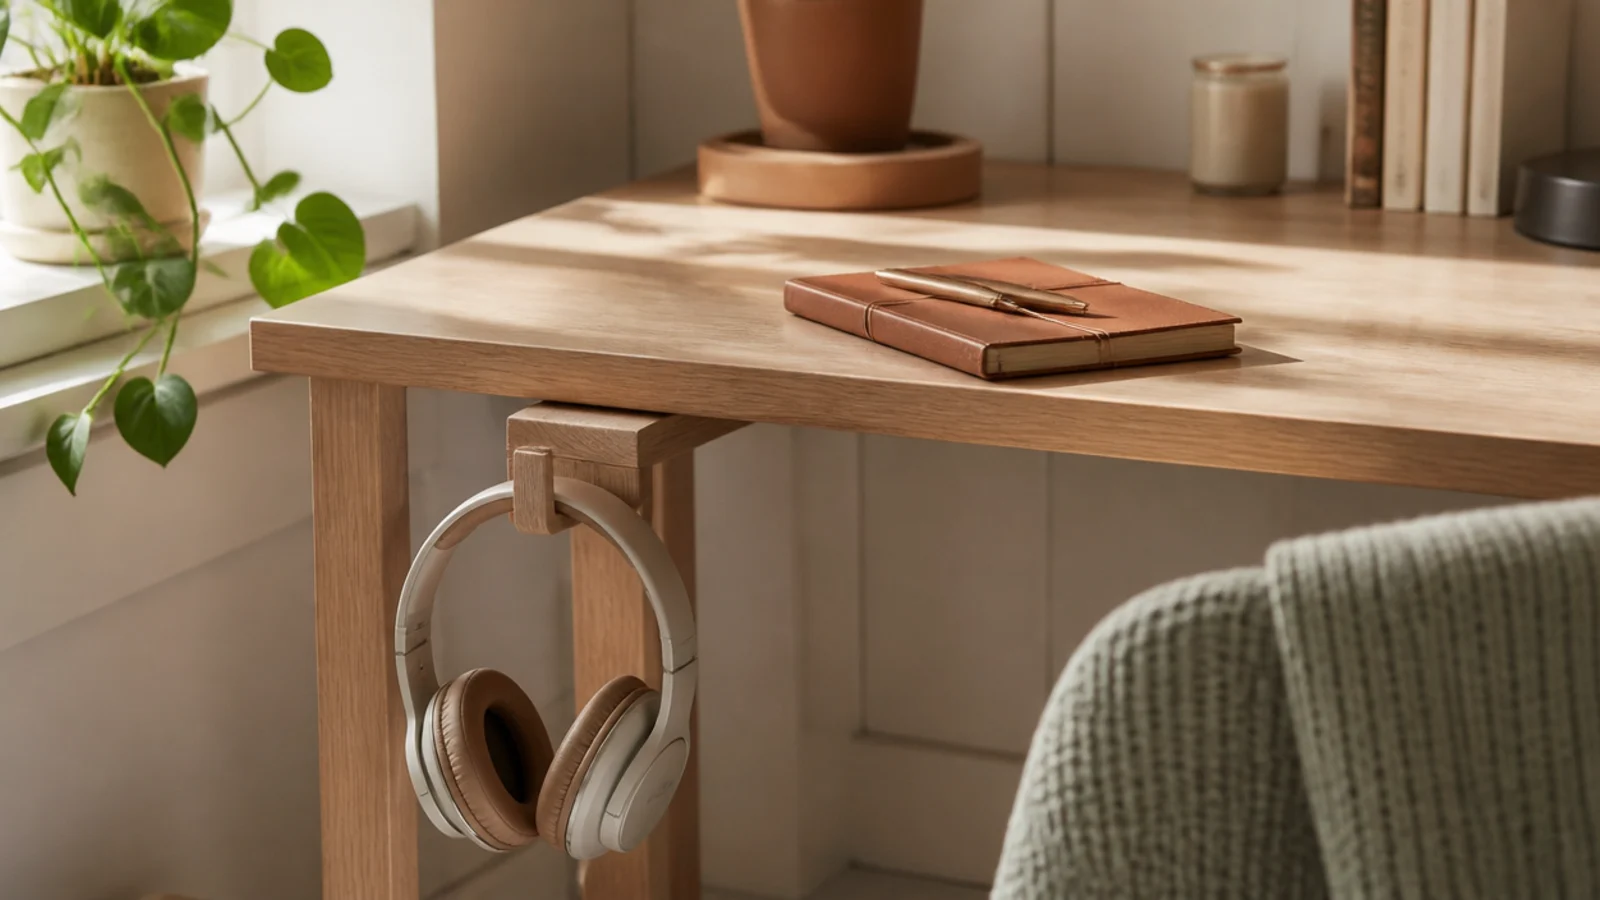
A small L-shaped wood offcut screwed under the desk edge becomes a headphone hook that clears a big footprint. Headphones hang out of sight underneath. A five-minute project from a scrap of wood.
Cut or find a small wood scrap that can form an L or a peg. Sand it smooth, paint or stain it, and seal. Screw it to the underside of the desk edge so the peg points out, using short screws that won’t poke through the top. Hang headphones by the headband. Position it on your non-dominant side.
Round the end of the peg so the headphone band rests on a smooth curve and doesn’t dent or crease over time.
Don’t use screws longer than the desk is thick; a screw poking through the desktop is a nasty surprise.
24. Chalkboard-Label Jars
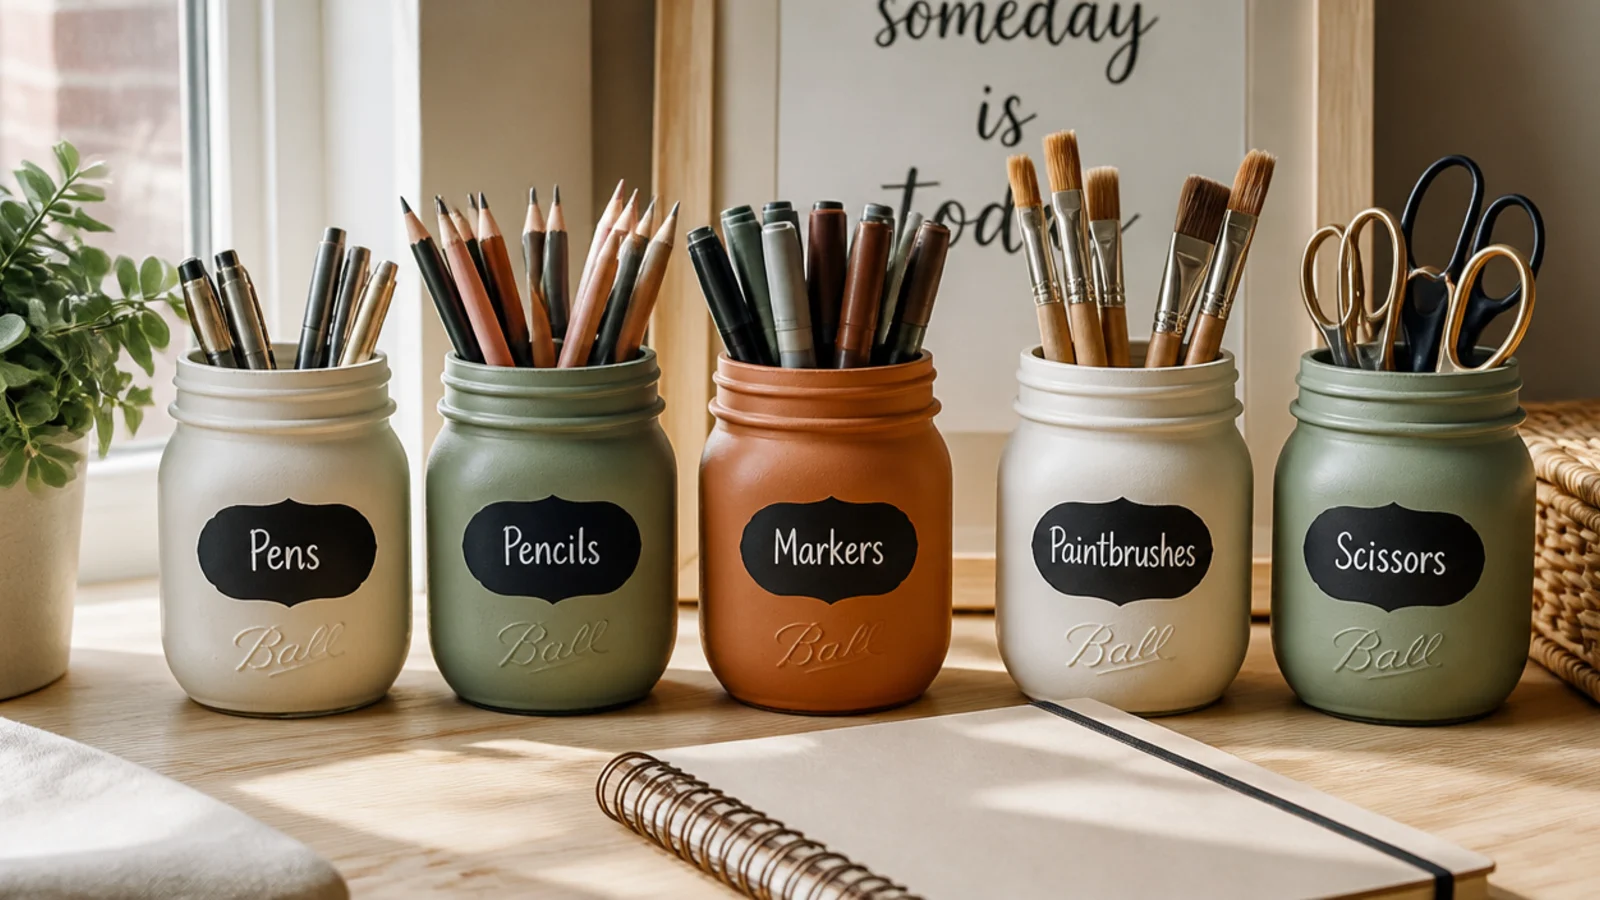
Adding a chalkboard-paint panel to your DIY jars and cans lets you relabel them anytime. The little black label looks tidy and makes the whole set feel considered. Practical for supplies you reorganize often.
Editor's noteSeason each chalkboard panel with a full rub of chalk before the first label, or the first writing ghosts forever.
On a painted, sealed jar or can, tape off a small oval or rectangle on the front. Brush two coats of chalkboard paint inside the tape and peel it before it cures. Once cured, rub the whole panel with chalk and wipe it to season it. Write the contents with a chalk marker. Rewrite whenever the jar’s job changes.
Skip thisDon’t write with regular chalk if you want it crisp; a chalk marker gives clean labels that don’t smudge off.
25. Box Lid Catch-All Tray
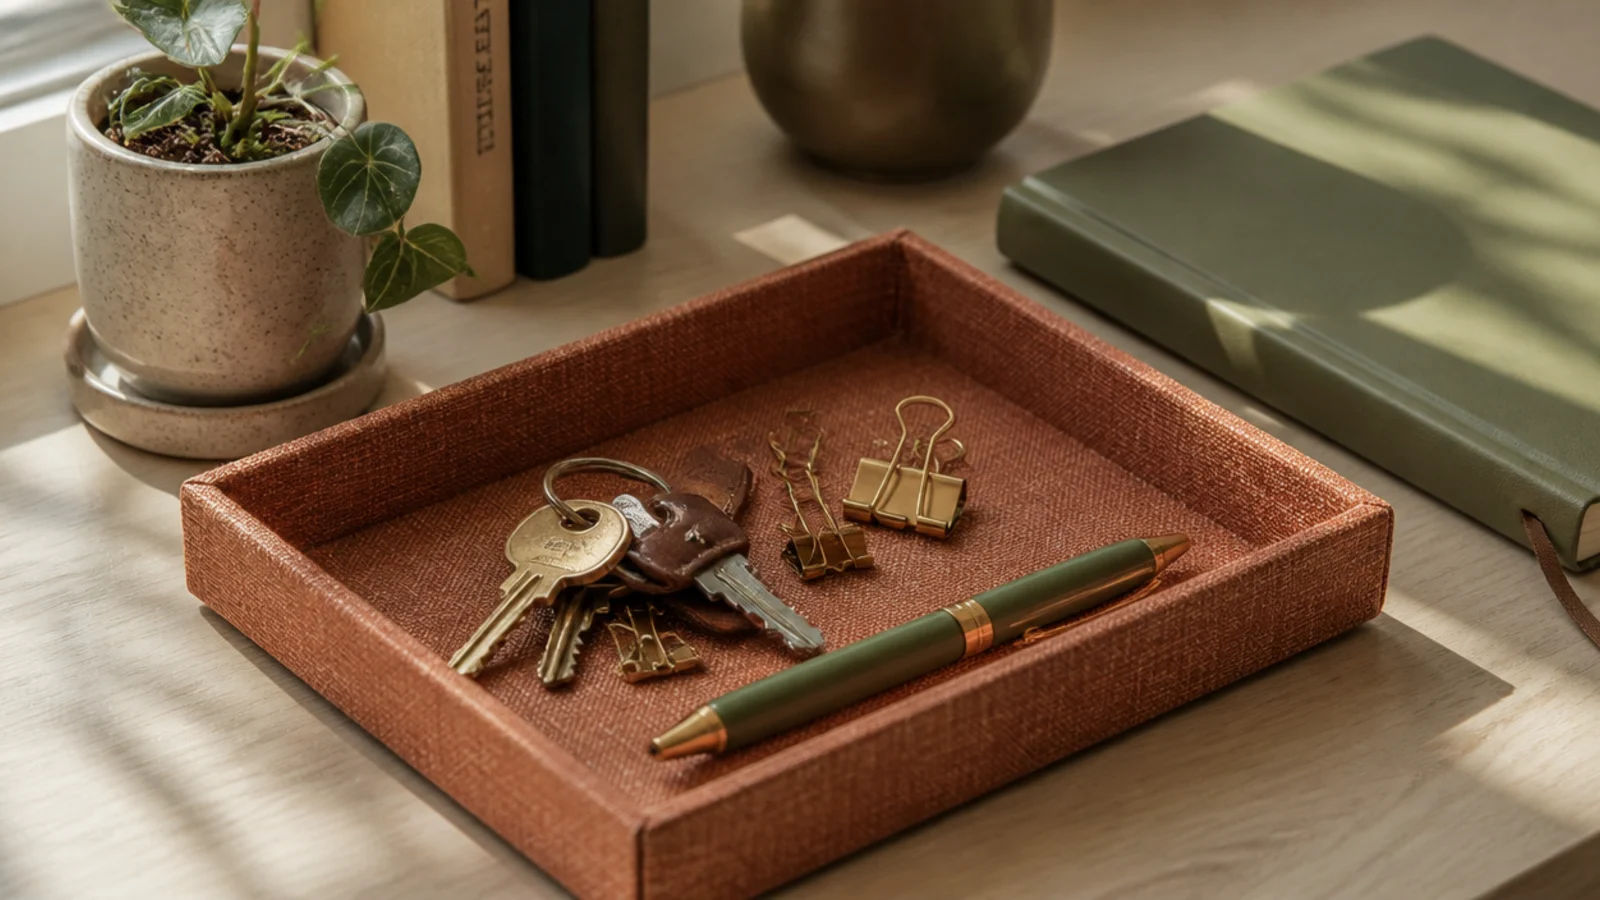
A shallow box lid becomes a catch-all tray for keys, clips, and small items with a little covering. It contains the pocket clutter that scatters across a desk. The easiest tray you can make from packaging you’d throw out.
Editor's noteLine the bottom with felt so keys don’t scratch through and the lightweight tray doesn’t slide when you drop things in.
Find a shallow, sturdy box lid — a gift box or shoebox lid works. Line the inside with felt or fabric and wrap the outside in paper or paint it, sealing the edges. Set it at the front corner where you set things down. Keep it for pocket items — keys, wallet, glasses — and empty it as you leave so it resets daily.
Skip thisDon’t use a flimsy lid that bends; a floppy tray tips its contents the moment you set anything heavy like keys in it.
26. Twine-Wrapped Can
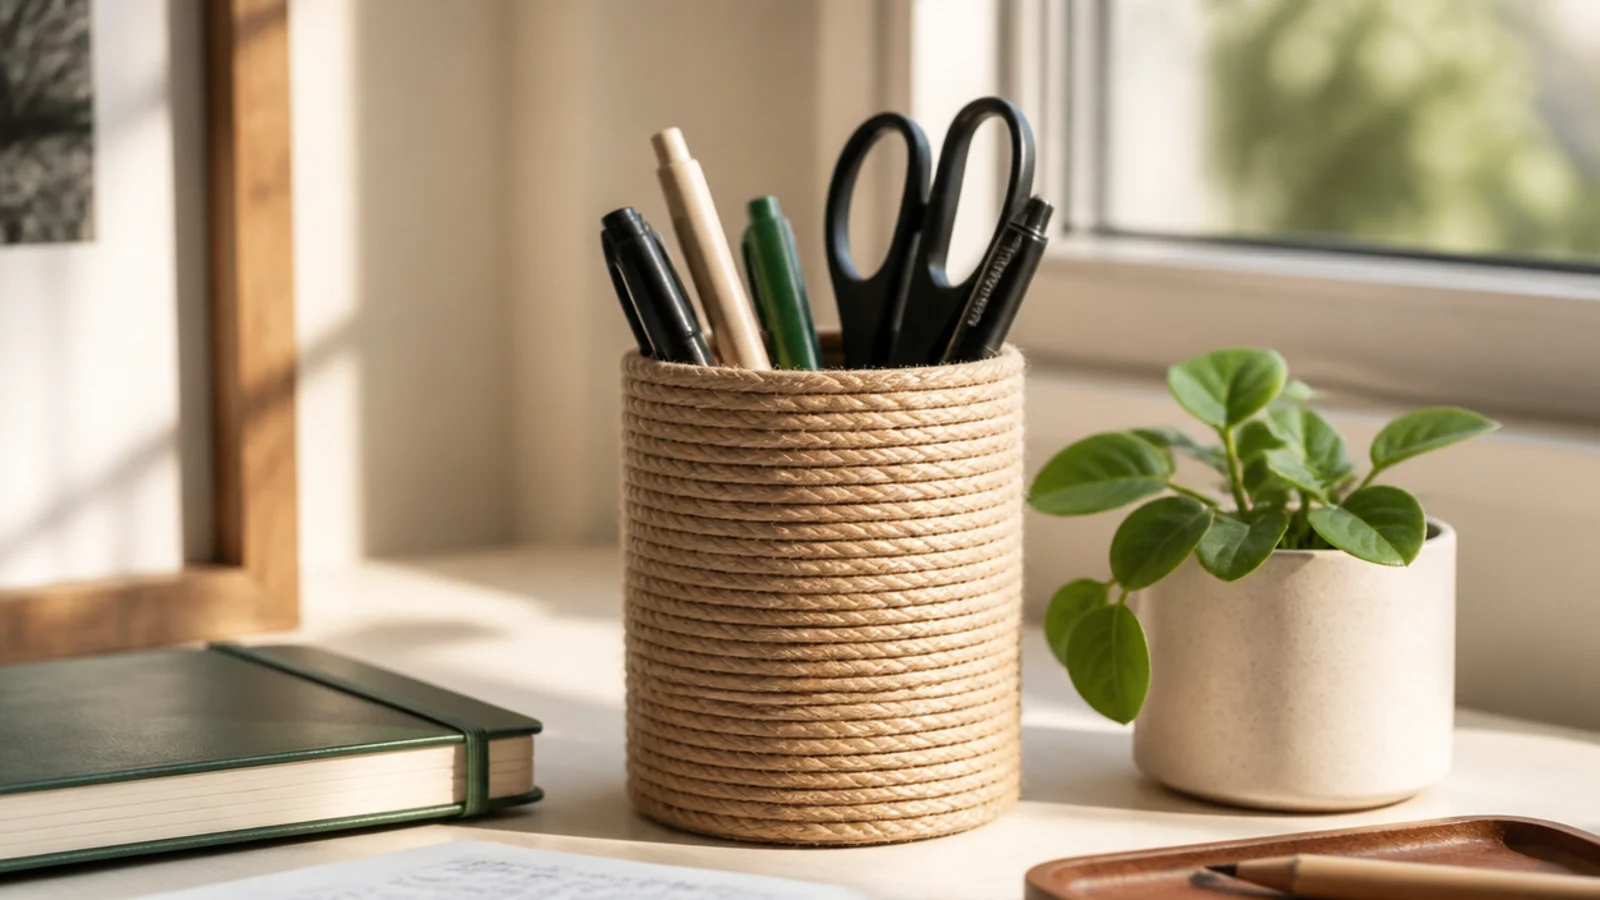
Wrapping a can in jute twine gives it a warm, natural texture that fits a rustic or boho desk. The rope finish hides the can completely and adds a tactile element. A no-paint way to upgrade a plain can.
Editor's noteKeep the twine rows pressed tight against each other as you wrap so no shiny can shows between the coils.
Clean and de-label a can and smooth any sharp rim. Starting at the base, run a line of hot glue and press the twine down, coiling it tightly upward with a dab of glue every inch. Keep the rows snug with no gaps. Trim and glue the end neatly at the top rim. Fill with pens or brushes. No sealing needed unless it’ll get damp.
Skip thisDon’t rush the gluing; loose or gappy wrapping unravels and shows the can, undoing the whole natural look.
27. DIY Floating Shelf
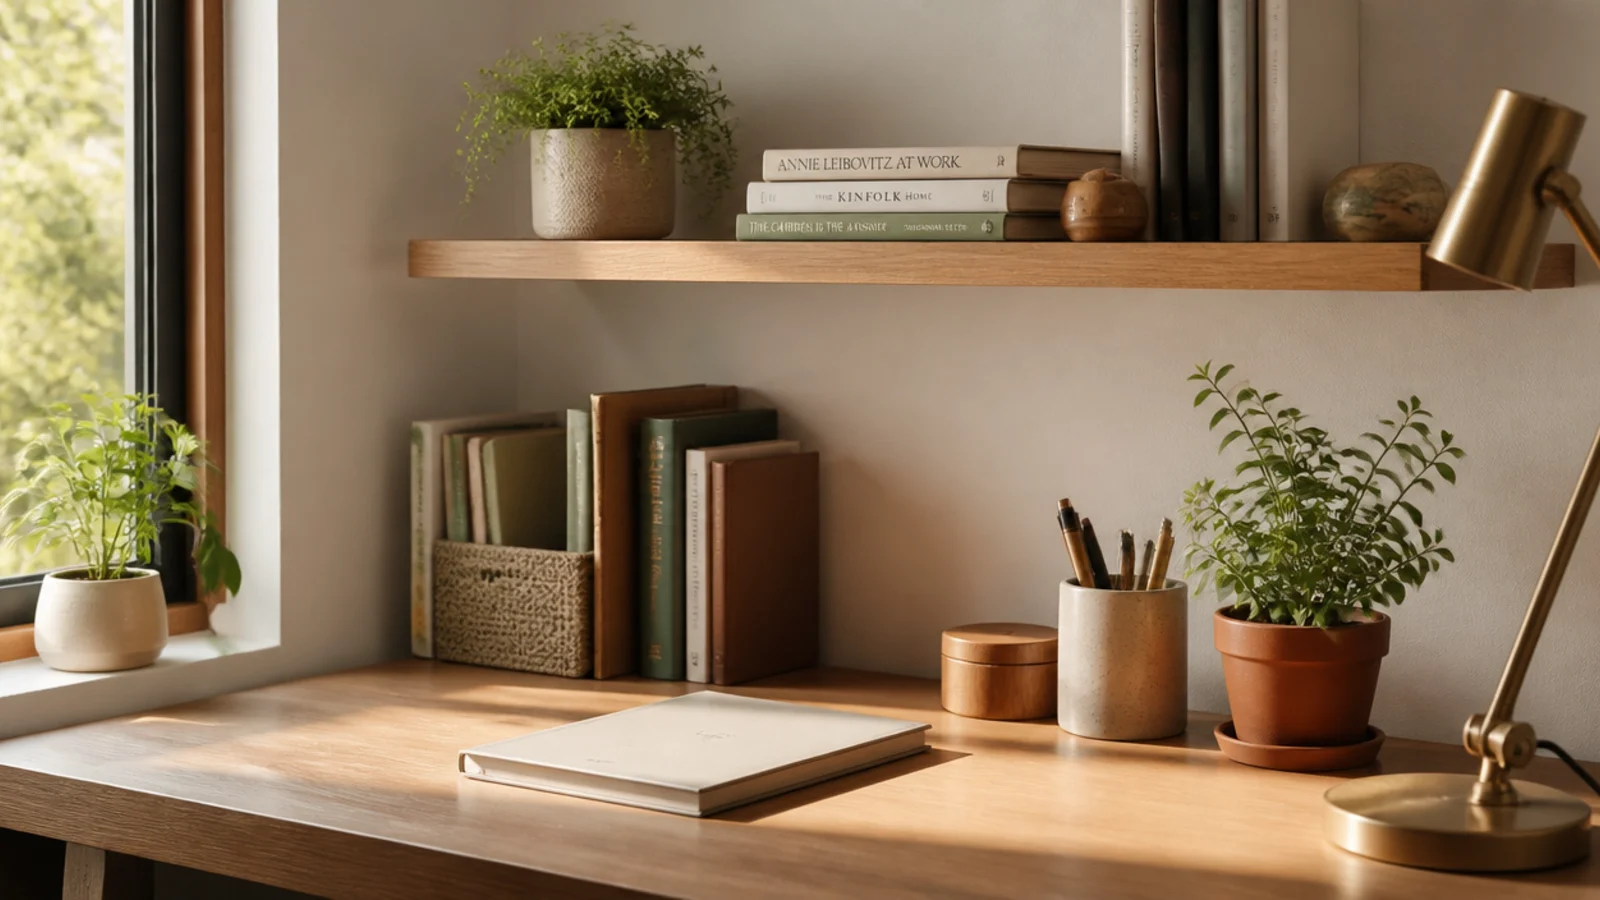
A single board on concealed brackets becomes a floating shelf that clears the desktop by using the wall. It’s a step up in effort but hugely useful for a small or busy desk. The clean floating look hides all the hardware.
Editor's noteFind the studs and mount into them; a floating shelf holds far more weight anchored to studs than to drywall alone.
Cut a board to length (or buy one cut) about 6-8 inches deep. Sand, paint or stain, and seal it. Mark a level line on the wall, install floating-shelf brackets into studs or heavy anchors, and slide the board onto them. Load reference books, a plant, and a supply cup, keeping heavy items near the brackets. Leave gaps so it reads as decor.
Skip thisDon’t overload a floating shelf mounted only in drywall; without studs it sags and eventually tears out of the wall.
28. Fabric-Covered Storage Bin
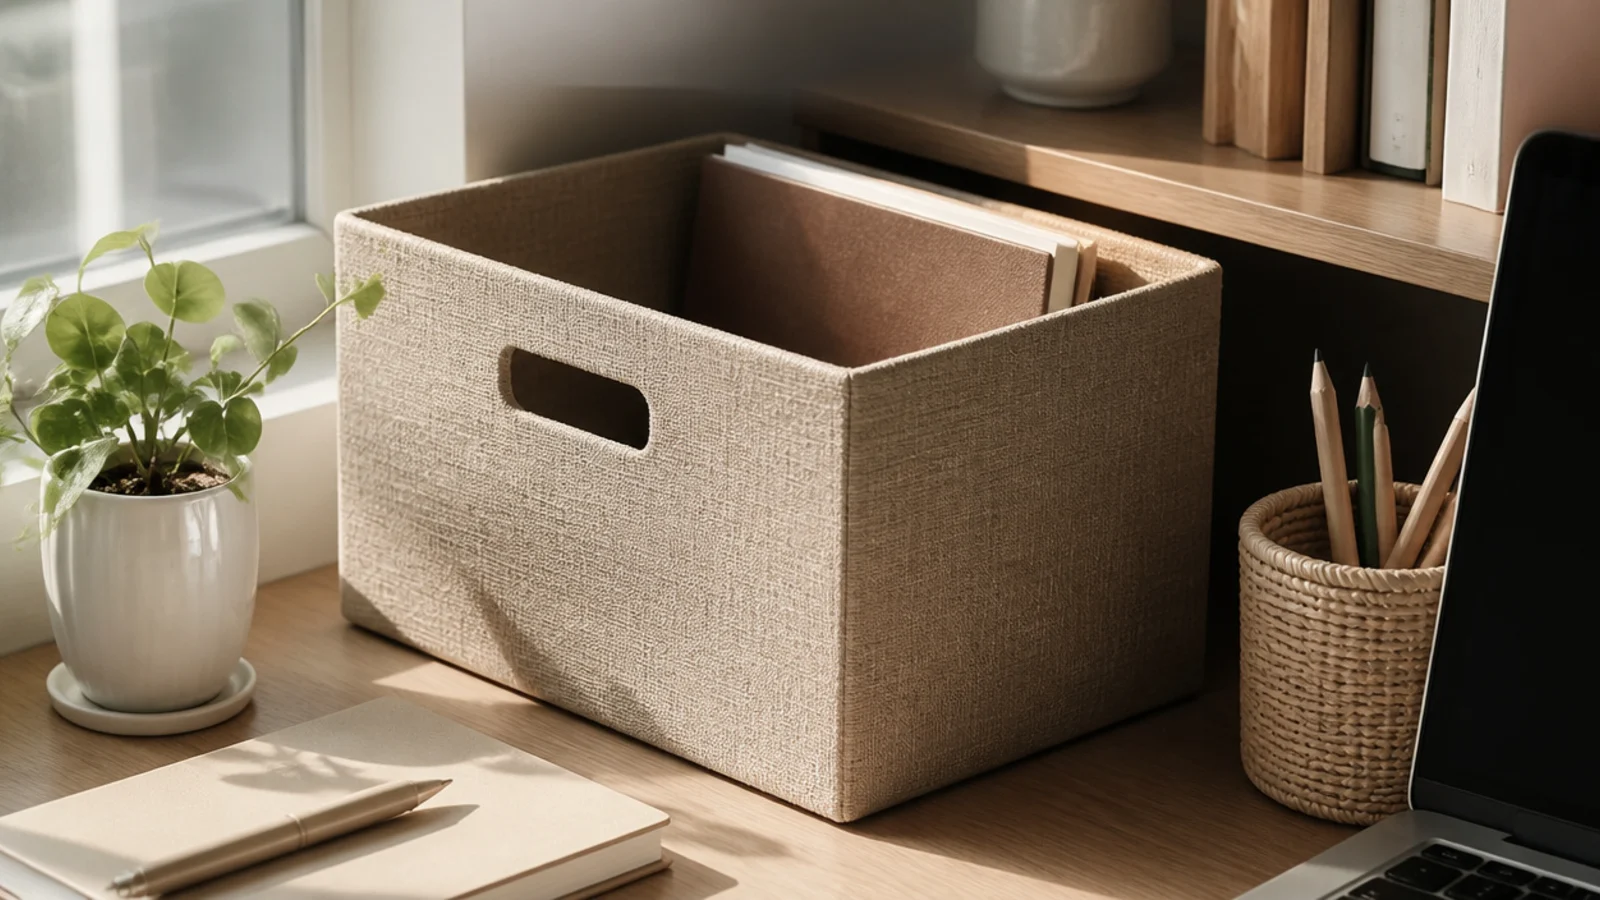
Covering a sturdy box in fabric turns it into a soft storage bin that hides bulky supplies behind a nice texture. It looks like a bought fabric box for the cost of a remnant. Ideal for a shelf beside the desk.
Editor's noteIron the fabric before wrapping so it goes on smooth and wrinkle-free, which is what makes it look store-bought.
Choose a rigid box and a piece of linen or cotton. Wrap the box like a gift, gluing the fabric taut with fabric glue or hot glue and folding the corners cleanly. Line the inside with fabric or paper too. Add a fabric or ribbon pull on the front. Use it for cables, backups, or papers on a shelf, not on the desktop.
Skip thisDon’t cover a flimsy box; it slumps under the fabric and the whole bin sags out of shape when you fill it.
29. Magazine Holder Drawer Unit
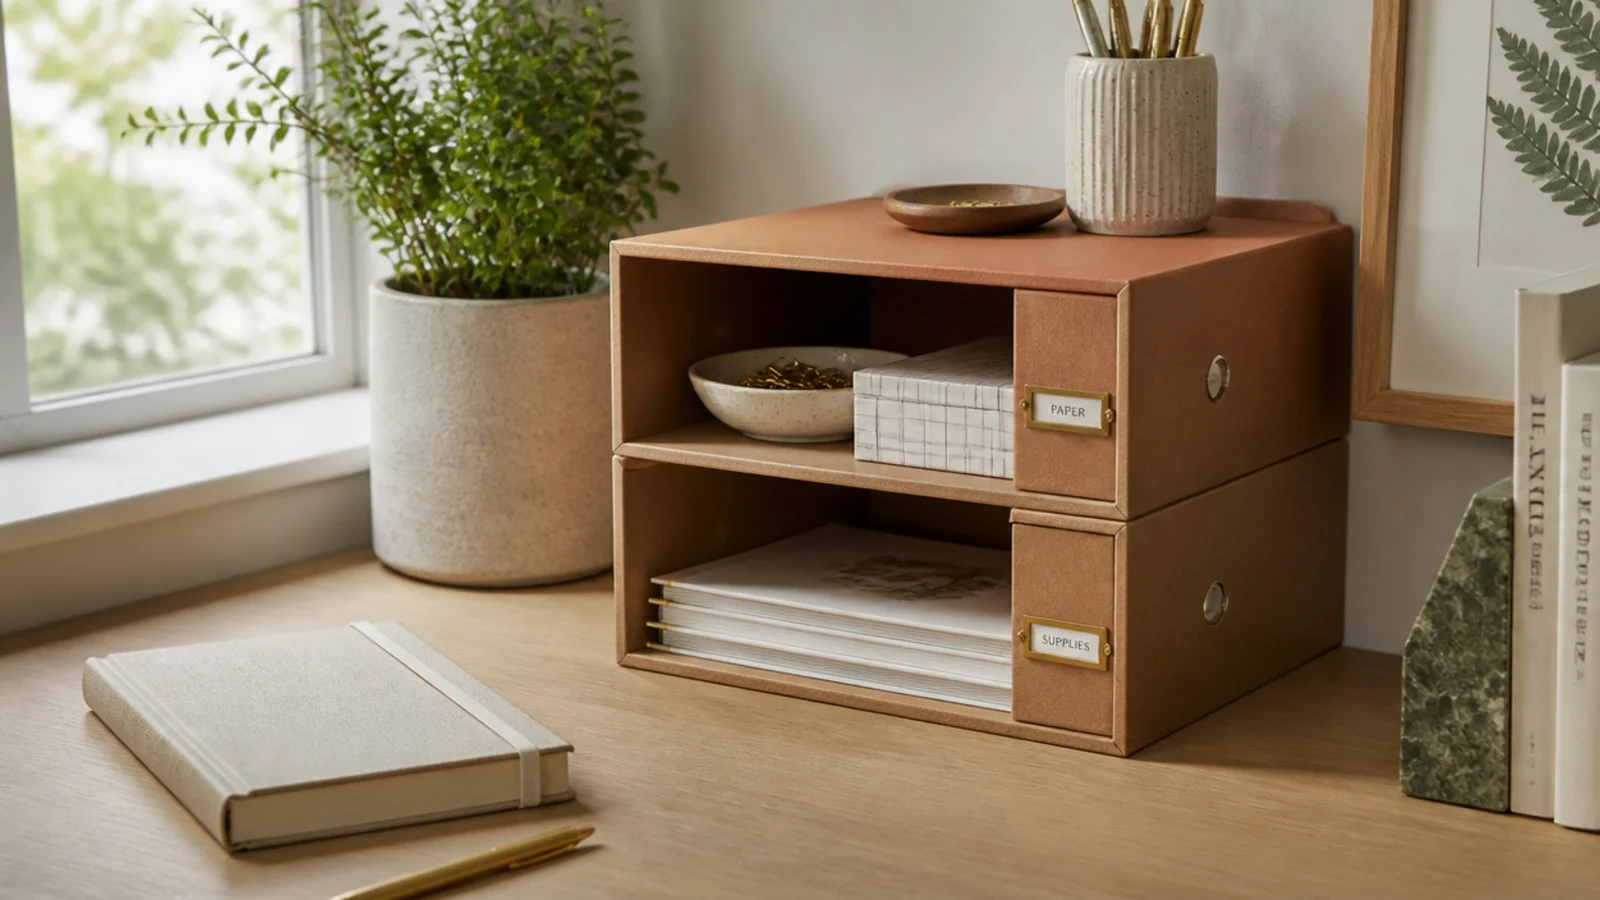
Magazine holders laid on their sides and stacked become open cubbies for supplies, notebooks, or small boxes. Turned sideways they’re little shelves instead of file storage. A clever repurpose of holders you might already own.
Editor's noteGlue the stacked holders together so the tower stays square instead of sliding apart when you pull things out.
Take two or three sturdy magazine holders (store-bought or your cereal-box ones) and lay them on their sides so the opening faces out. Stack or line them up and glue them together for stability. Paint them one color to match. Use each cubby for a category — notebooks, small boxes, supply jars. Set the unit on a shelf or the floor beside the desk.
Skip thisDon’t stack more than two or three high unsupported; a tall glued stack of holders gets tippy and unstable.
30. Unified Palette Finish
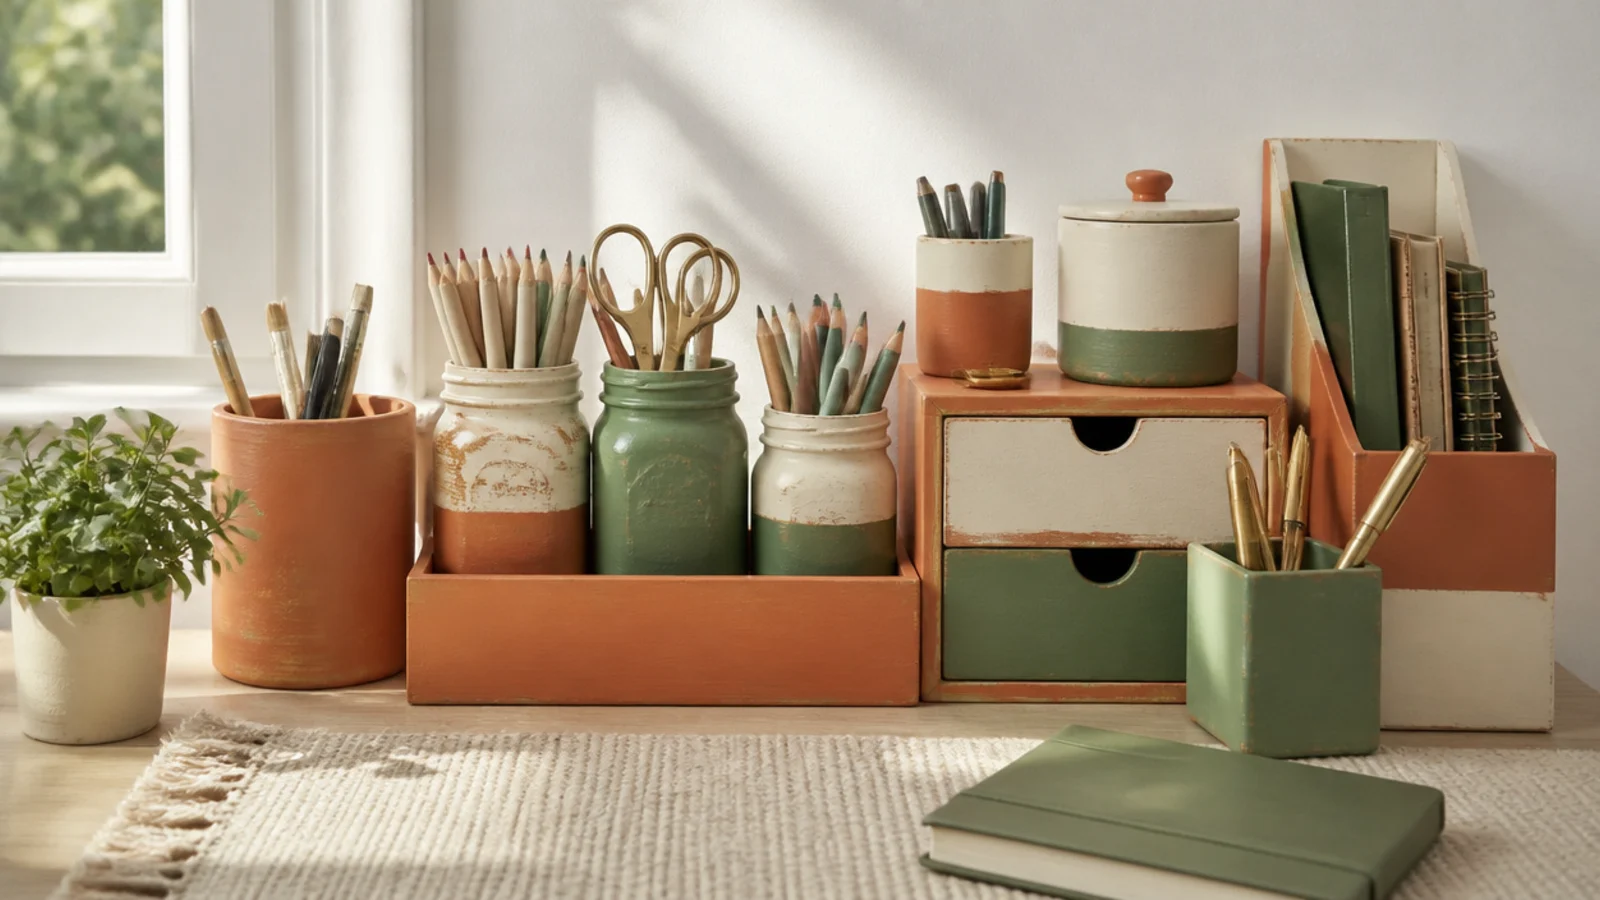
This is the finishing idea that ties every project together: paint or cover all your DIY pieces in one palette. A soup can, a cereal box, and a jam jar look like random recycling apart — but painted the same three colors, they read as a coordinated set you designed. It’s the single trick that makes budget DIY look intentional.
Editor's noteBuy one larger bottle of your main color rather than many small ones, so every piece matches exactly across the set.
Pick two or three colors — say cream, sage, and natural wood tones. As you finish each project, paint or wrap it in those colors, sealing everything. Repeat one color across most pieces to tie them together and use the others as accents. Line the finished set up together and adjust any outlier. Keep the palette in mind for every future project.
Skip thisDon’t leave pieces in mismatched original finishes; one shiny bare can among painted pieces breaks the whole set.