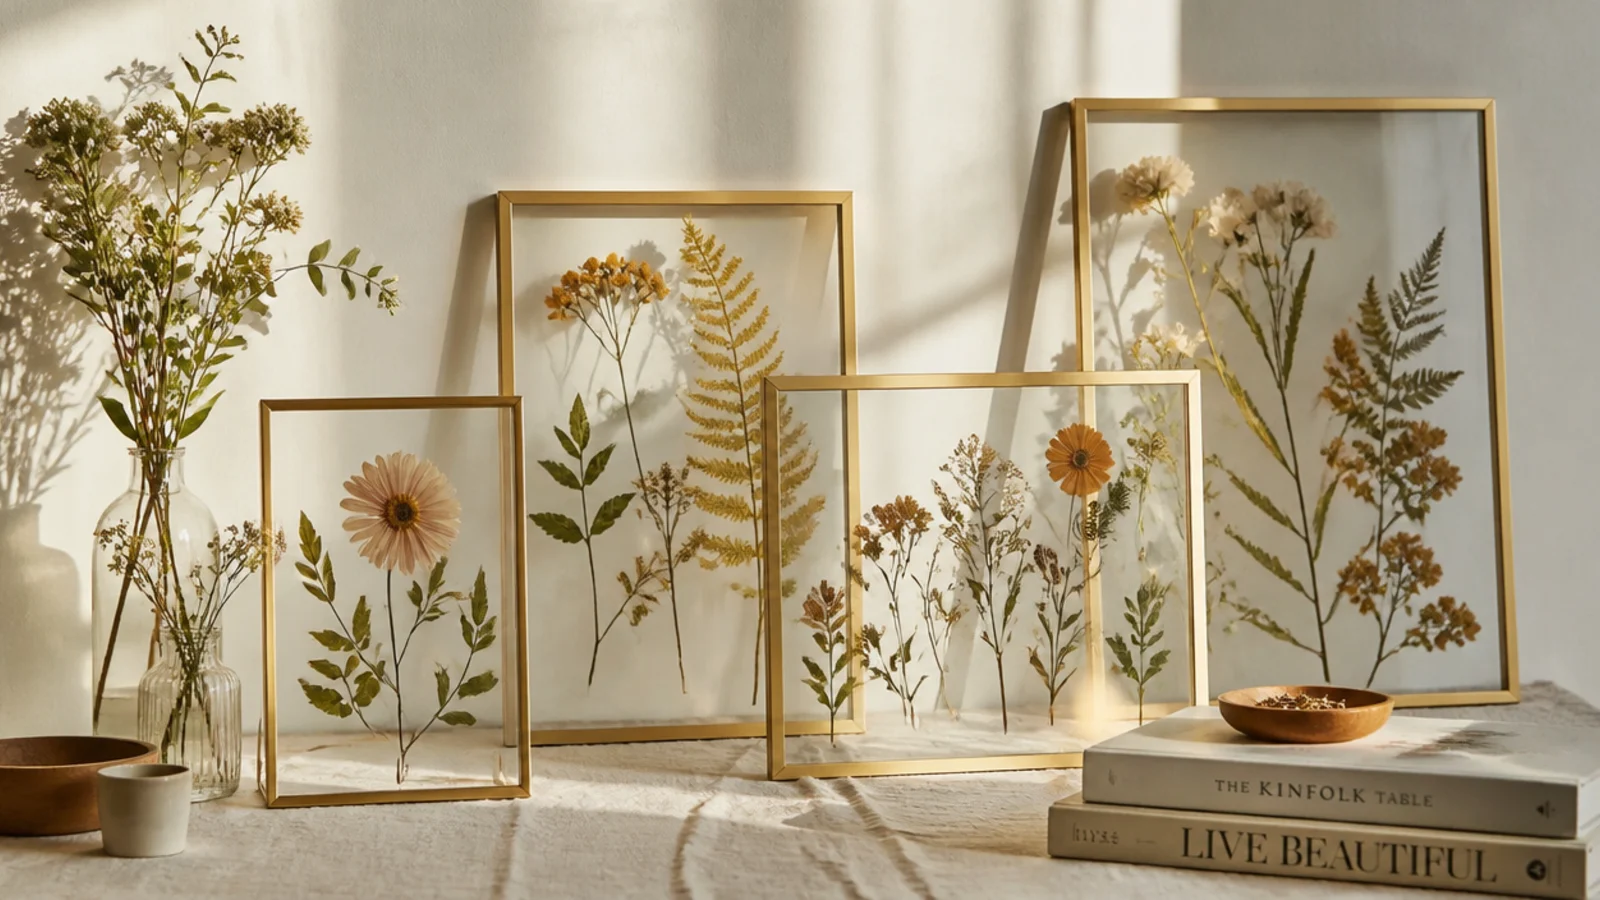
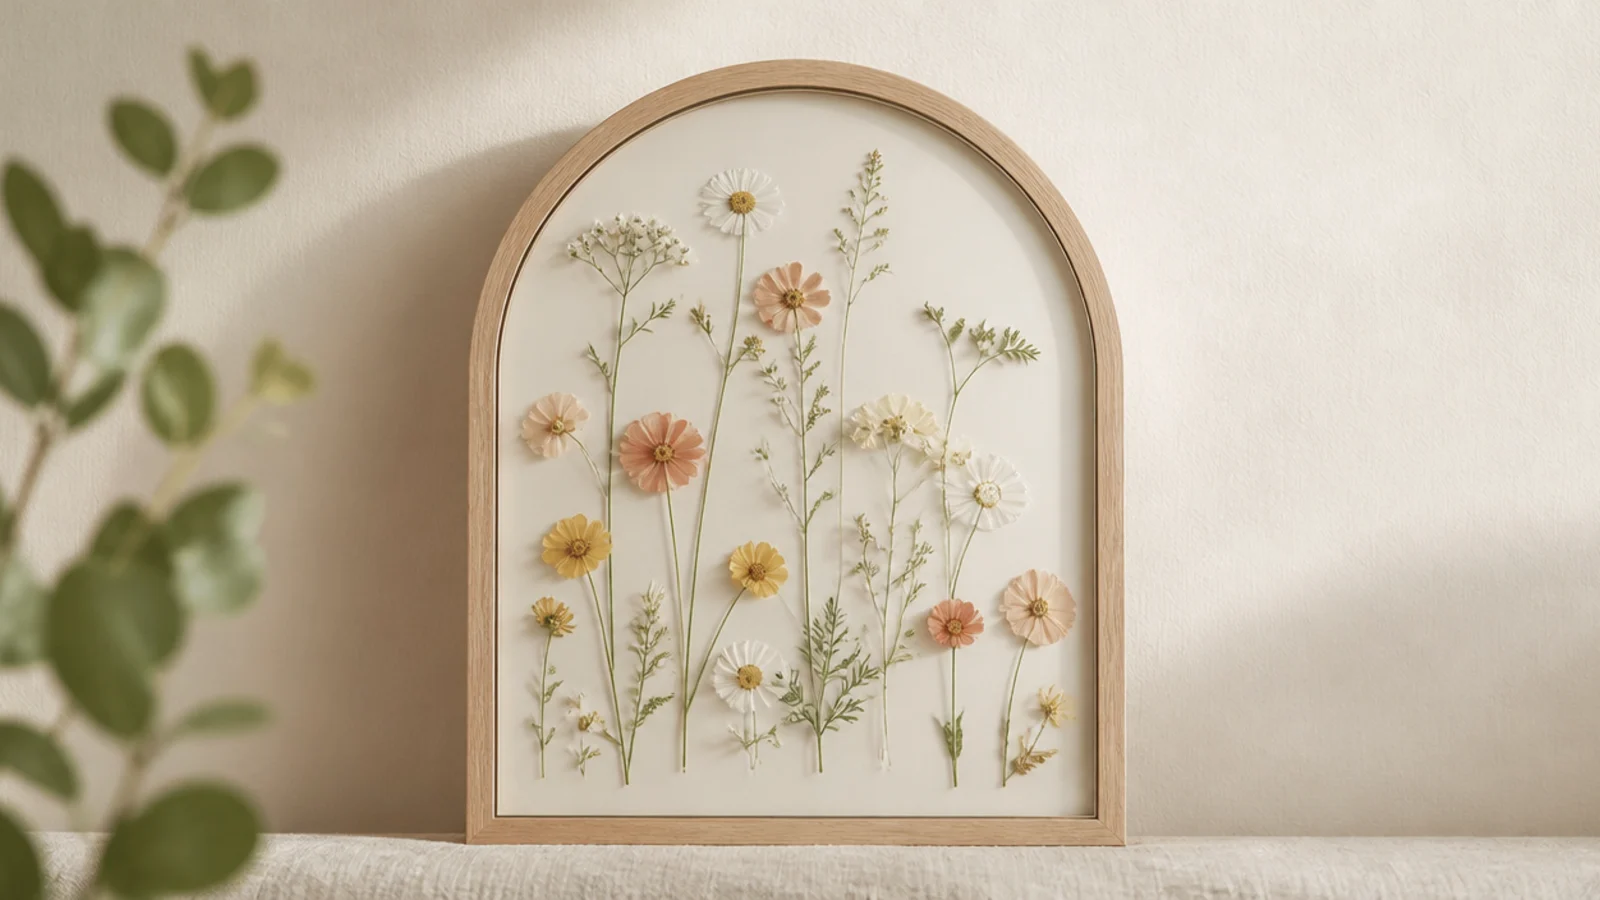
1. Simple Dried Flower Corner Accent
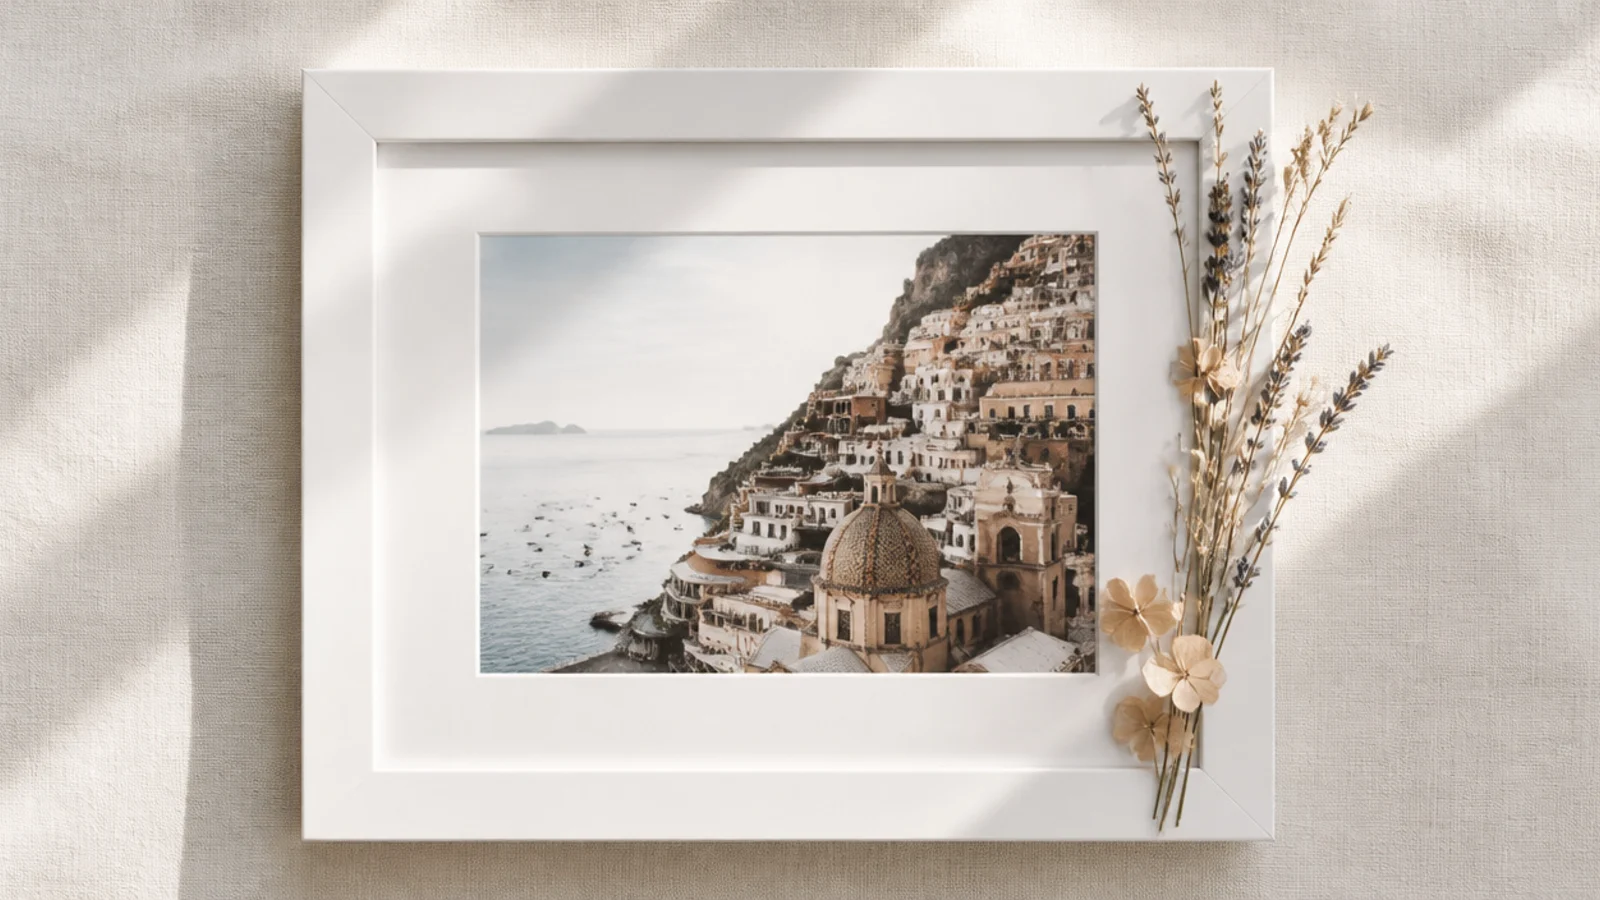
This is the easiest flower photo frame and the one to start with. A small cluster of dried flowers on one corner adds charm while leaving the photo completely clear. A few blooms in one corner is impossible to overdo. It suits any photo and any room.
Choose a plain frame and a few small dried flowers with bits of greenery. Trim the stems short. Using a hot glue gun, dab glue on each bloom’s base and press it into one corner, building a small, tight cluster that fans slightly along the two edges. Keep it compact so nothing overhangs the photo opening, and let the glue set.
Editor's noteBuild the corner cluster outward from the very corner along both edges a little; the L-shape reads as intentional framing rather than a random blob.
Skip thisDon’t let the cluster creep over the photo opening; keep every bloom on the frame border so the picture stays fully visible.
2. Full Floral Border Frame
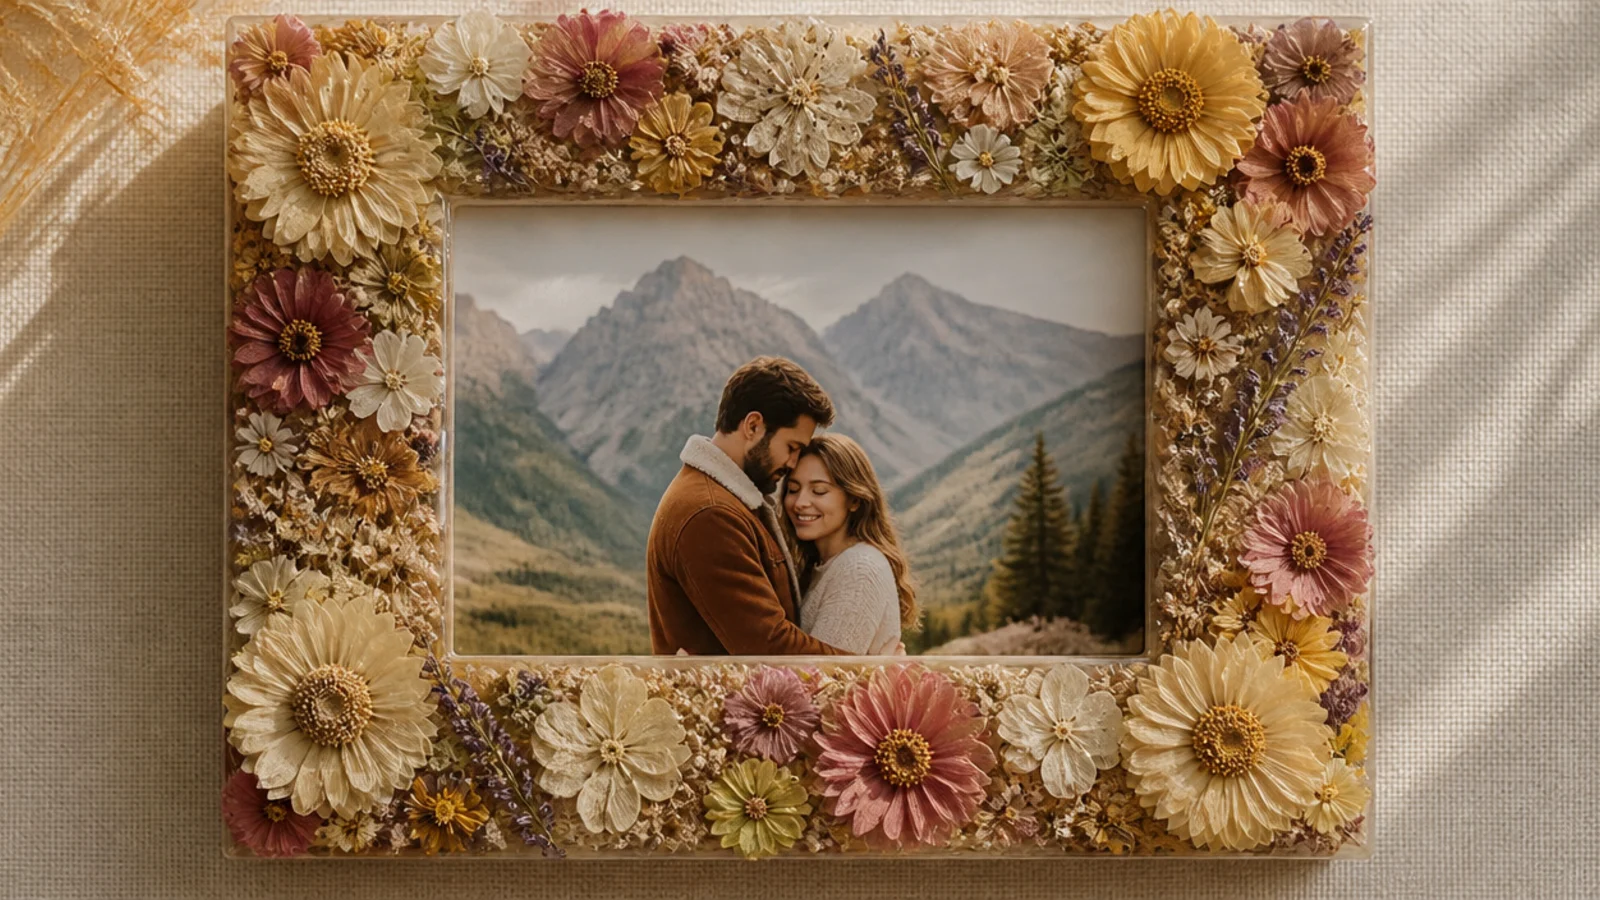
Covering the whole frame border in dried flowers makes a lush, romantic surround for a simple photo. The full ring of blooms turns the frame itself into a wreath. It suits a clean portrait that can carry a bold floral border.
Use a flat, wide frame. Gather plenty of small dried flowers and greenery. Hot-glue them around the entire border, all flowing in one direction, overlapping so no frame shows and layering for fullness. Keep the inner edge tidy so nothing overhangs the photo. Work in small sections and let each set before moving on.
Editor's noteWork all the flowers in one direction around the border, like a wreath, so the full frame has flow instead of looking like scattered clumps.
Skip thisDon’t let flowers spill over the inner edge onto the photo; keep the border’s inside line clean so the picture stays framed, not buried.
3. Pressed Flower Photo Mat
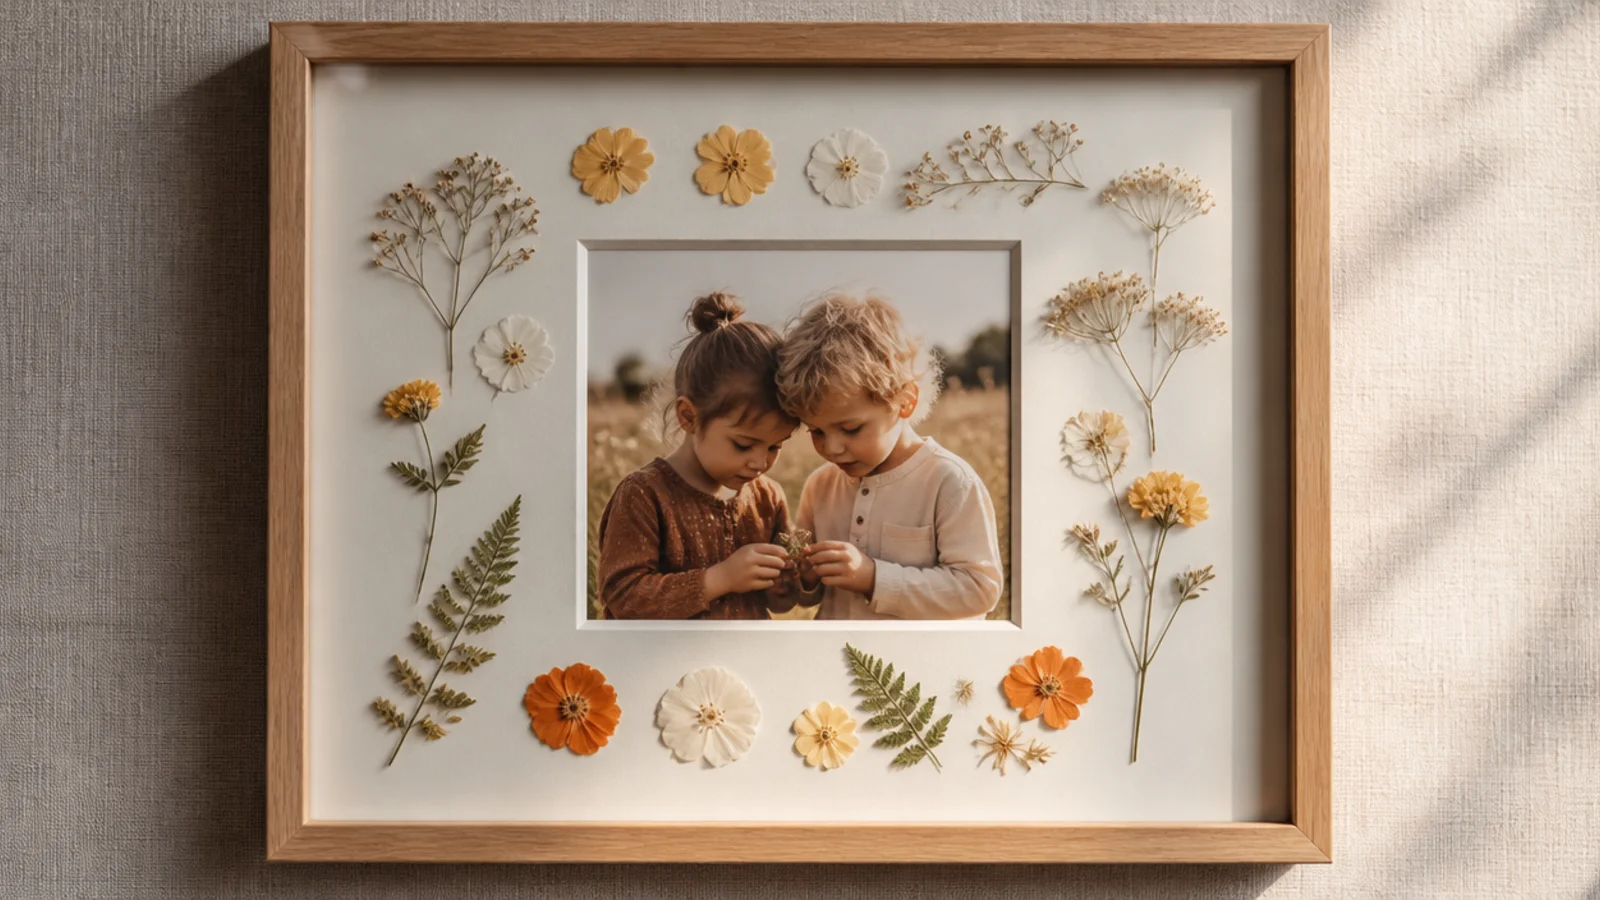
Arranging pressed flowers on the mat around a photo keeps everything behind glass, protected and flat. The flowers decorate the mat while the photo sits clean in the center. It’s elegant, durable, and reads like custom framing.
Use a frame with a wide mat and real glass. Press flat flowers. Mount the photo in the mat opening as usual. Arrange pressed flowers on the mat around the opening — a corner spray or a full border — anchoring each with an archival PVA dot. Close the frame so the glass holds both photo and flowers flat.
Editor's noteKeep pressed flowers a little back from the photo opening so the glass sits flat over both; flowers too close to the edge can lift the mat.
Skip thisDon’t use bulky dried flowers on a mat behind glass; only flat pressed flowers sit properly under the glass without gapping.
4. Single Bloom Cluster Corner
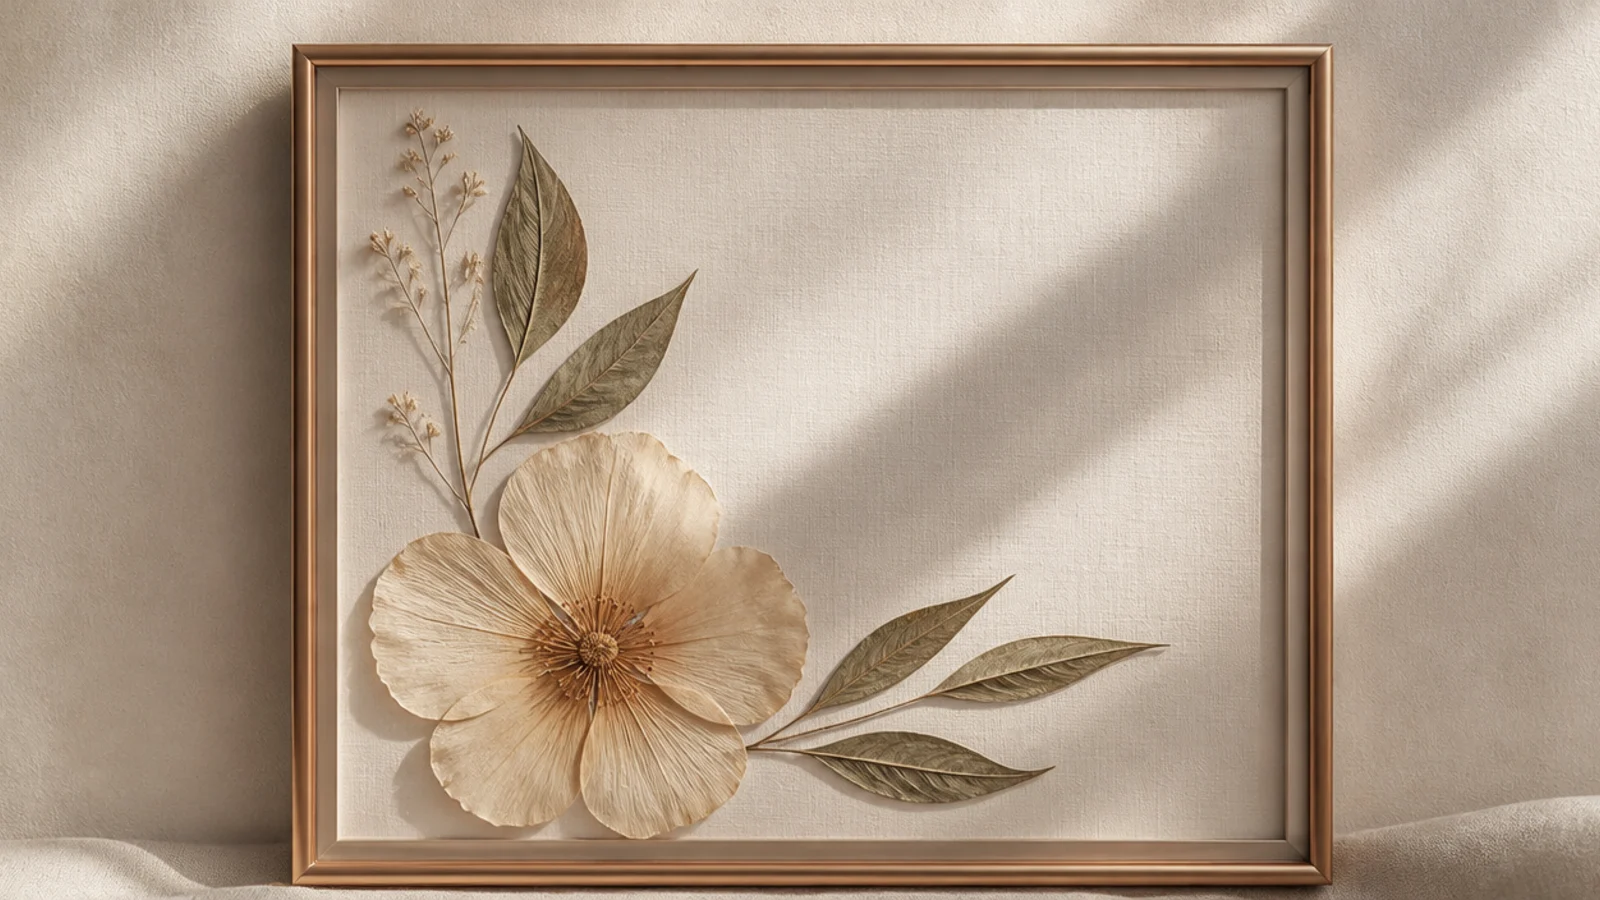
One larger statement bloom, like a preserved rose, with a few leaves in a corner is simple but striking. The single focal flower feels more designed than a scattered cluster. It suits a romantic or special photo.
Choose one preserved rose or peony and a few small leaves or filler. Trim the stem off. Hot-glue the leaves first into a corner as a base, then nestle the single bloom on top so it sits proud. Add one or two tiny buds beside it for balance. Keep it in the corner, clear of the photo, and let it set.
Editor's noteGlue the greenery down first as a bed, then set the main bloom on top; the layered base makes the single flower look nestled and full.
Skip thisDon’t use a bloom so large it overhangs the photo; pick a flower sized to sit comfortably within the corner of the frame.
5. Eucalyptus Sprig Frame
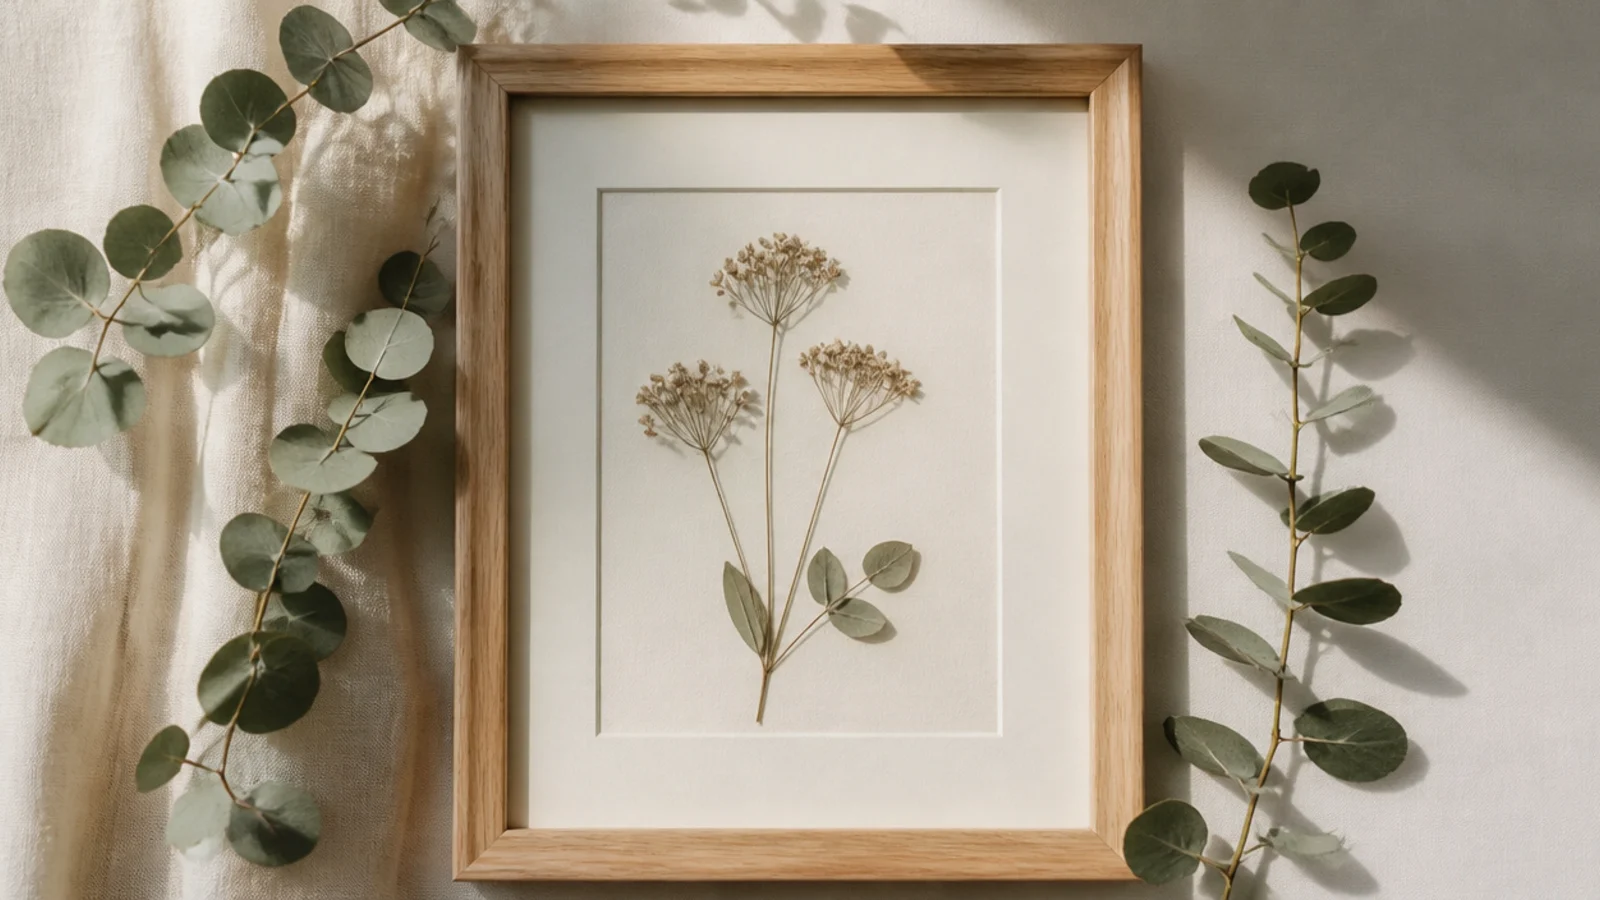
Dried eucalyptus sprigs trailing along two edges give a calm, greenery-only frame. The silvery leaves are elegant and suit any photo without competing for color. It’s a serene, modern take on a flower photo frame.
Use a plain frame and a few dried eucalyptus sprigs. Trim them to length. Hot-glue them along two adjacent edges so they trail from one corner, following the frame’s lines and slightly overlapping. Keep the leaves on the frame surface, clear of the photo, and let the glue set.
Editor's noteLet the eucalyptus follow the frame’s edges rather than sticking out; sprigs that hug the lines look styled, while ones that jut out look messy.
Skip thisDon’t cover all four sides with eucalyptus; trailing along just two edges from a corner looks more modern and intentional than a full wrap.
6. Baby's Breath Border
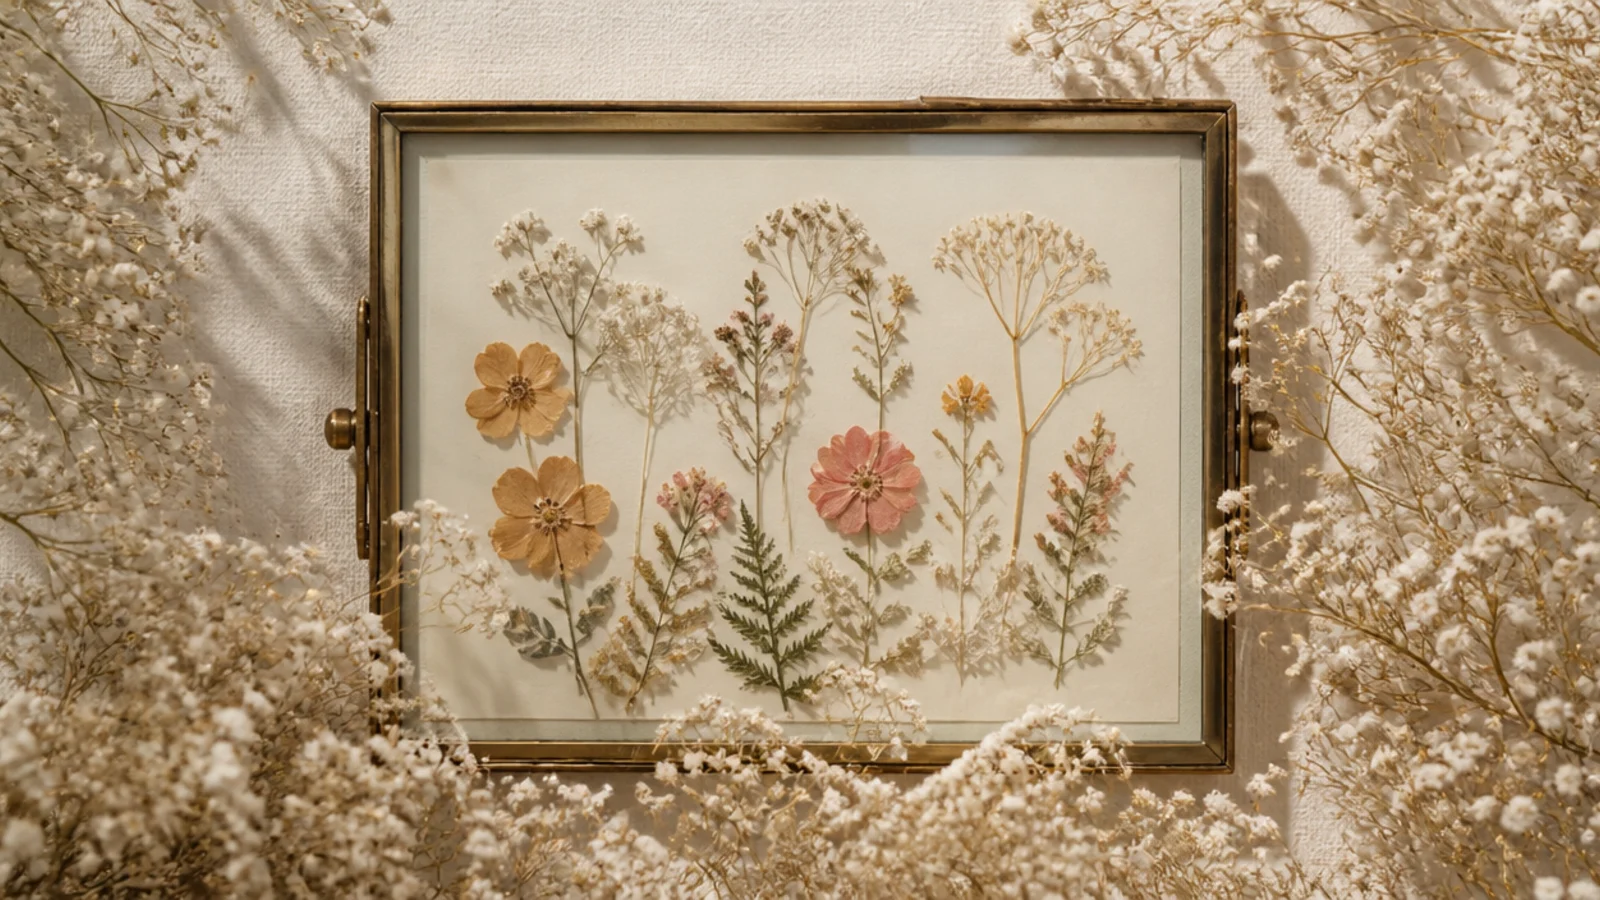
A border of dried baby’s breath is soft, cloudy, and nearly impossible to get wrong. The tiny white flowers fill space gently and read dreamy and romantic. It’s one of the most forgiving flower photo frames for beginners.
Use a flat frame. Break dried baby’s breath into small sprigs. Hot-glue them around the border, packing them close so they form a soft, even cloud with no frame showing. Layer for fullness and keep the inner edge tidy. Work in small sections and let each set before adding more.
Editor's notePack the baby’s breath denser than you think you need; a full, cloudy border looks lush, while a sparse one looks patchy and thin.
Skip thisDon’t let the delicate sprigs poke over the photo edge; trim and tuck the inner border so the picture stays clear and framed.
7. Preserved Rose Corner
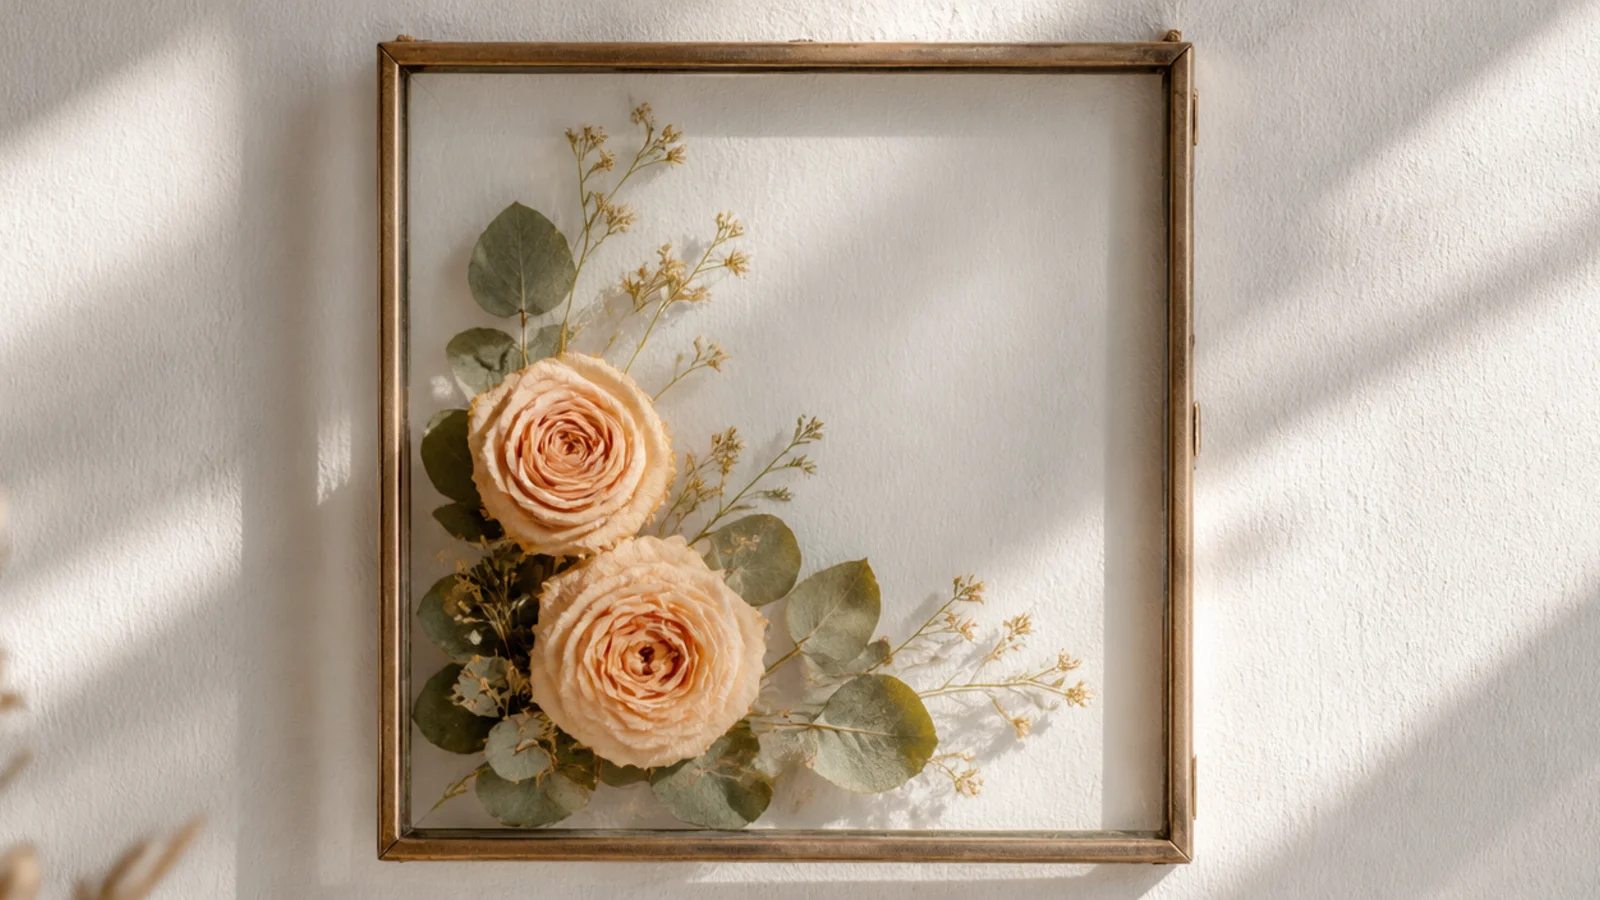
Two preserved roses with greenery in a corner are romantic and full without covering the photo. Preserved roses keep their soft real-flower look and last for years. It suits anniversary, wedding, or love-story photos.
Choose two preserved roses and some greenery or filler. Trim stems off. Hot-glue greenery into a corner as a base, then nestle the two roses at slightly different heights, with filler tucked around them. Keep the cluster in the corner, angled along both edges, clear of the photo, and let it set.
Editor's noteSet the two roses at slightly different heights and angles; matching them exactly looks stiff, while a little variation looks natural and full.
Skip thisDon’t use fresh roses on a frame; they wilt and drop within days, while preserved roses hold their shape and color indefinitely.
8. Wildflower Meadow Base
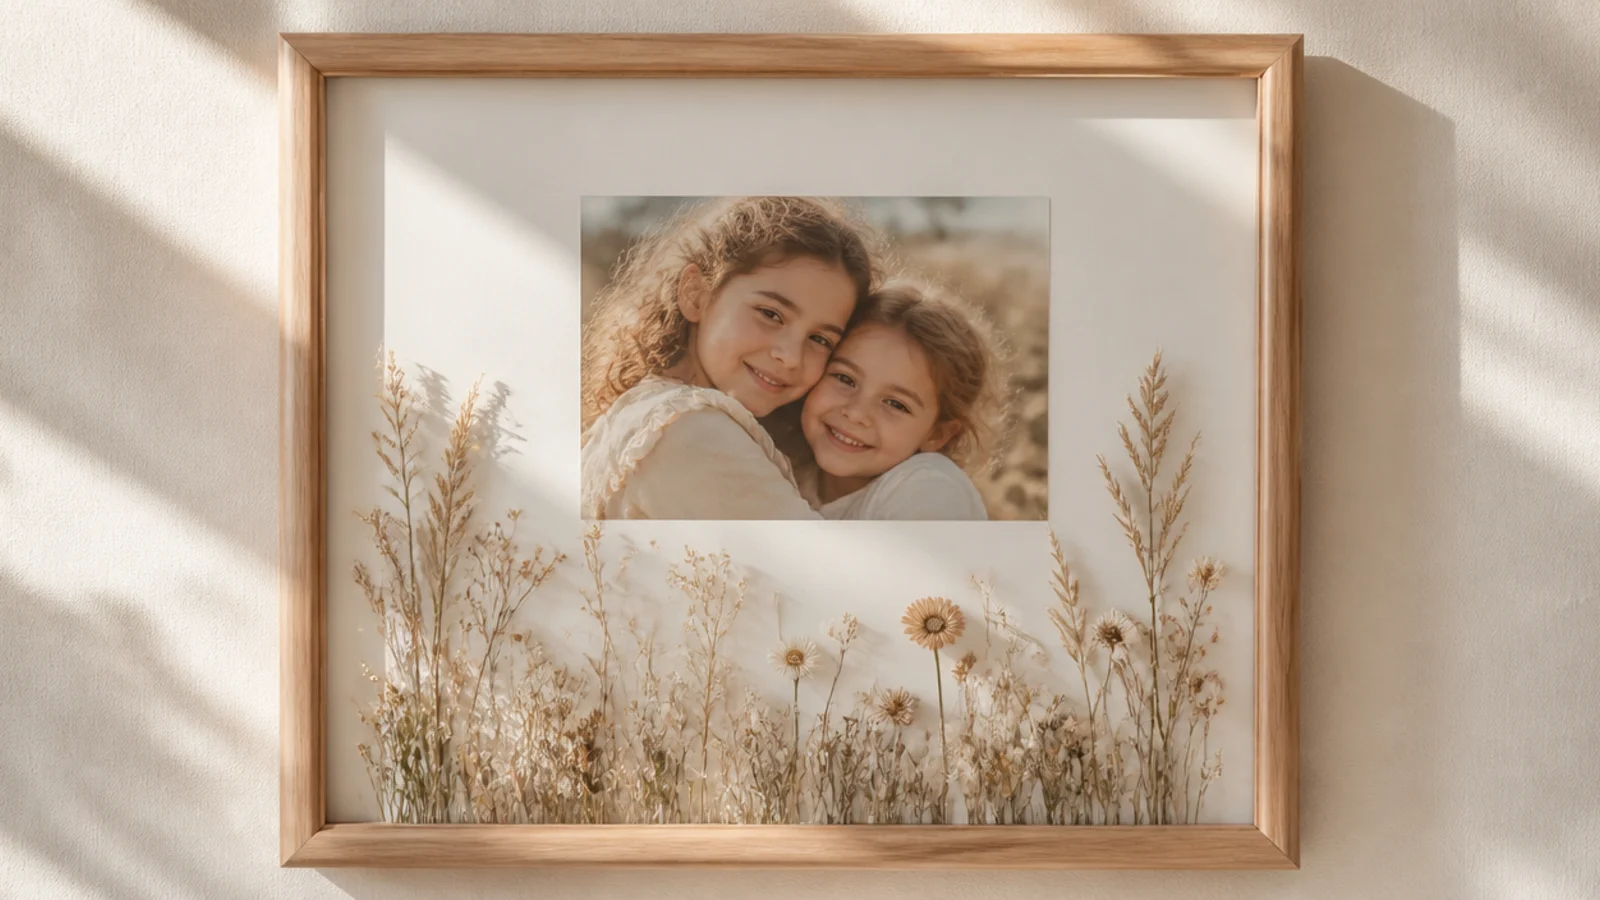
Dried wildflowers and grasses along the bottom edge look like a little meadow growing beneath the photo. The single-edge arrangement is fresh and leaves the rest clear. It suits nature, travel, or outdoor photos.
Use a flat frame. Gather small dried wildflowers and grasses. Hot-glue them along the bottom edge only, standing upright like a meadow, with taller grasses behind and shorter blooms in front. Vary the heights for a natural look, keep them on the frame’s bottom border, and let the glue set.
Editor's noteVary the heights along the bottom edge and let a few grasses stand taller; an even row looks like a fence, staggered heights look like a meadow.
Skip thisDon’t run the meadow up the sides too; keeping it to the bottom edge only is what makes it read as a ground line beneath the photo.
9. Lavender Accent Frame
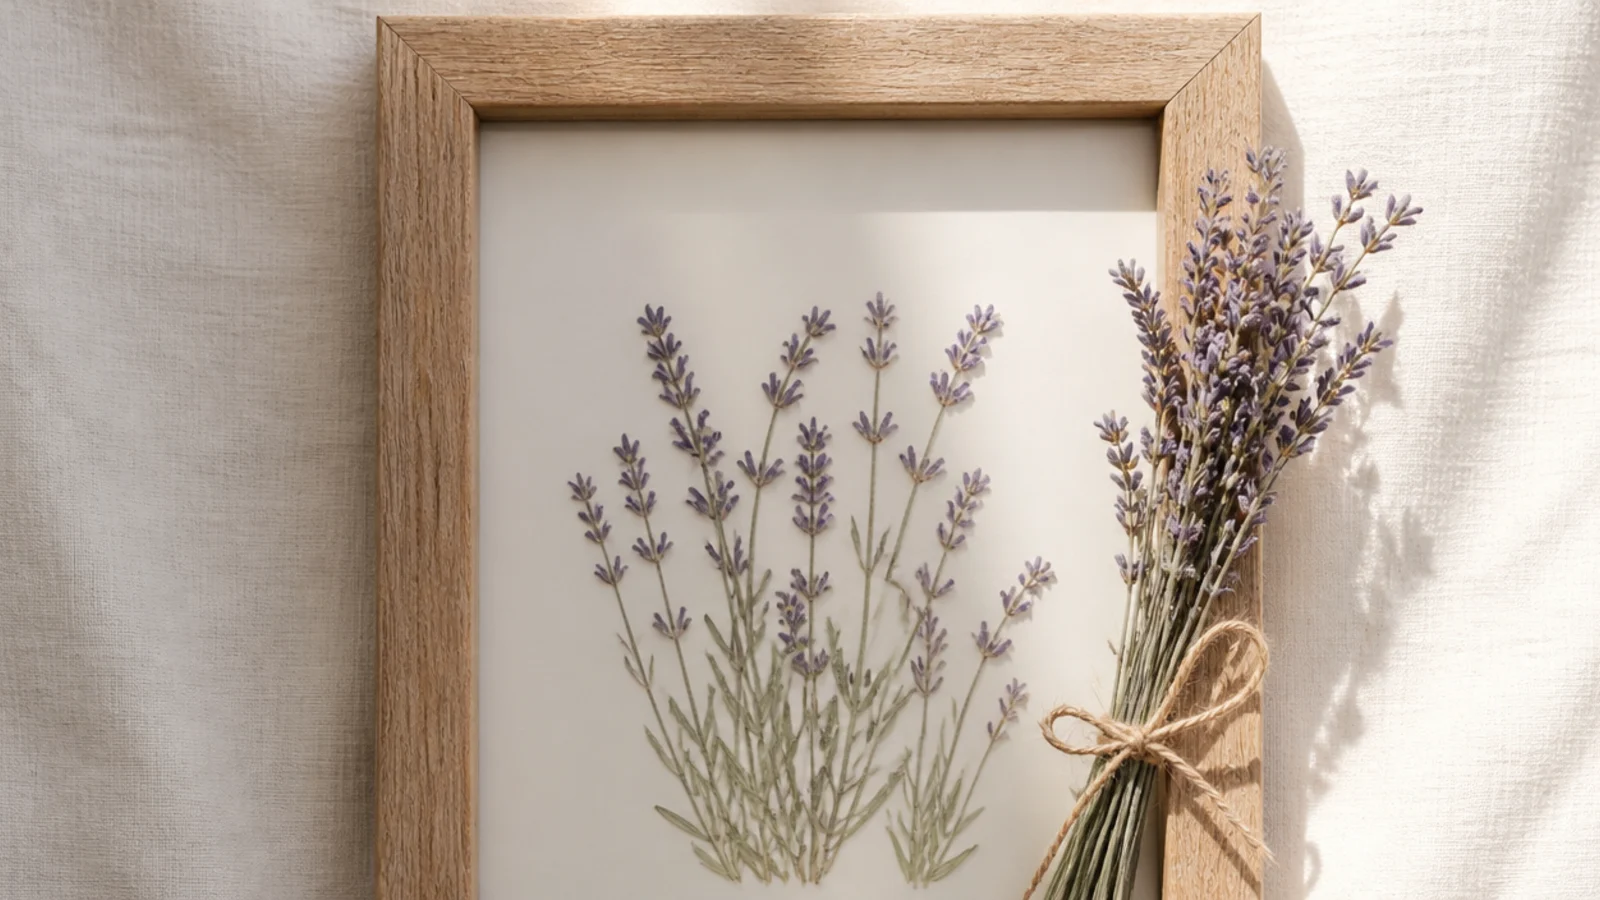
A little tied bundle of dried lavender in a corner is fragrant-looking and farmhouse-pretty. The purple-grey stems and twine tie feel styled and calm. It suits soft, homey photos and bedroom displays.
Dry lavender by hanging it. Gather a small bundle, trim the stems even, and tie it with twine or linen ribbon. Hot-glue the bundle diagonally into one corner of a plain frame, angled along the edge. Keep it compact and clear of the photo, and let the glue set behind the tie.
Editor's noteTie the lavender bundle before gluing; the neat tied cluster looks intentional, while loose stems glued individually look scattered.
Skip thisDon’t hang the frame in bright light; lavender’s purple fades fast in sun, so display it somewhere shaded to keep the color.
10. Faux Flower Statement Frame
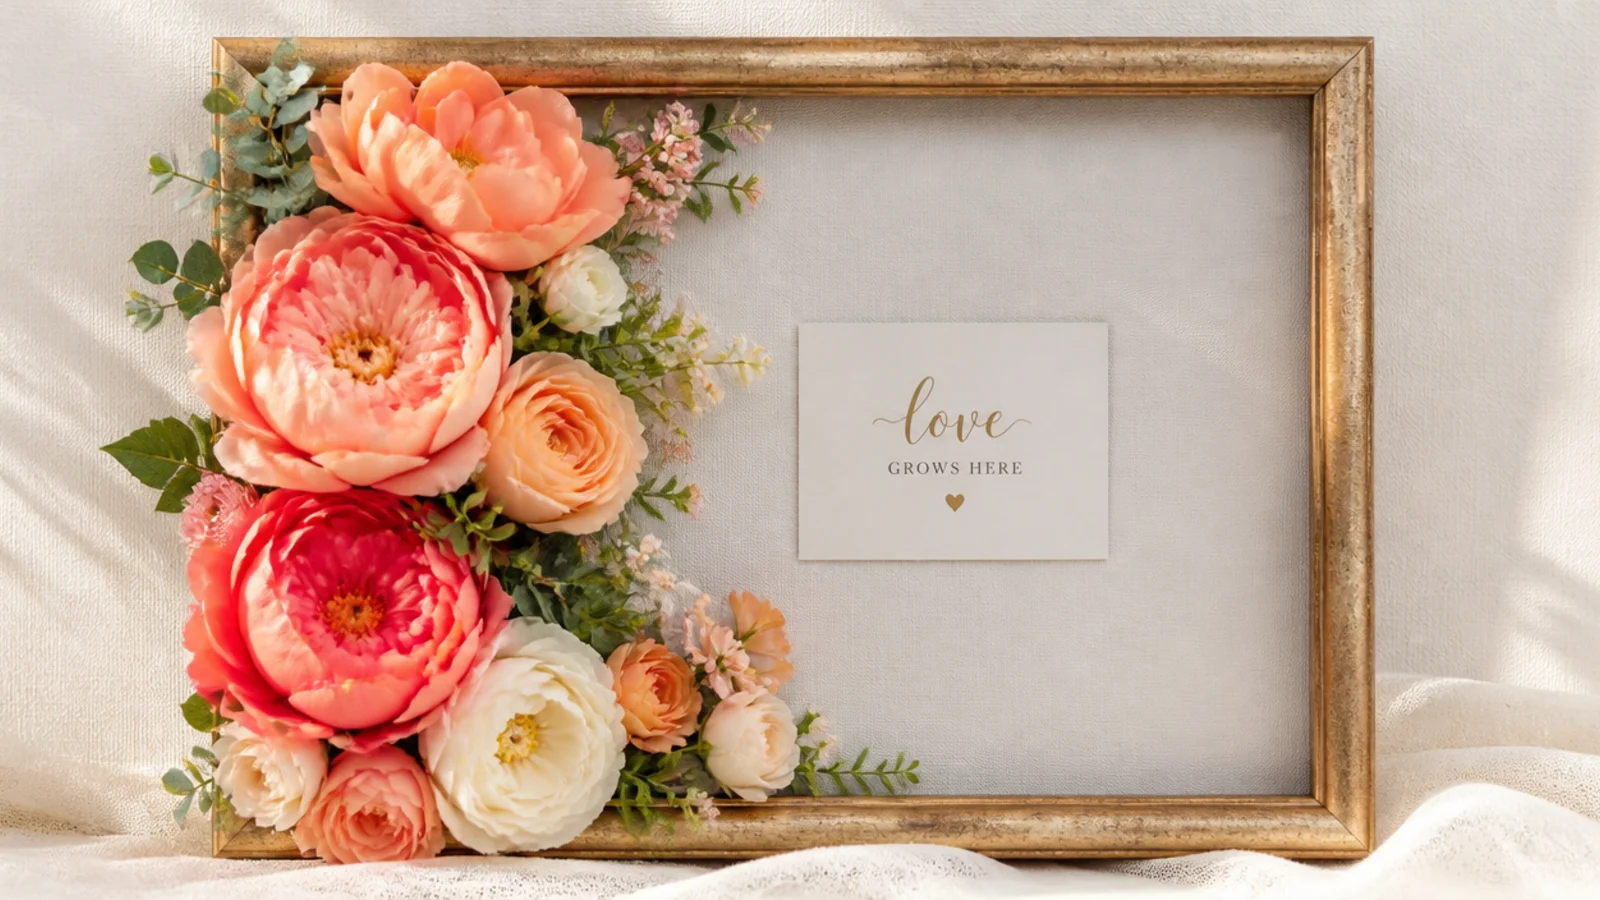
High-quality faux flowers let you make a bold, colorful frame that never wilts or drops. Lush faux peonies and roses down one side make a strong statement. It’s the most durable option for a frame that will be handled often.
Choose good-quality faux flowers (silk or real-touch) in a bold color. Cut the blooms off their stems. Hot-glue them down one full side of a flat frame, clustering large blooms with smaller buds and leaves filling gaps, for a lush, layered look. Keep them on the frame surface, clear of the photo, and let set.
Editor's noteSpend on a few real-touch faux flowers rather than many cheap plastic ones; a few realistic blooms look far better than a mass of obvious fakes.
Skip thisDon’t use flat, shiny plastic flowers; they read cheap up close, so choose matte, realistic faux blooms for a convincing frame.
11. Pampas and Bunny Tail Frame
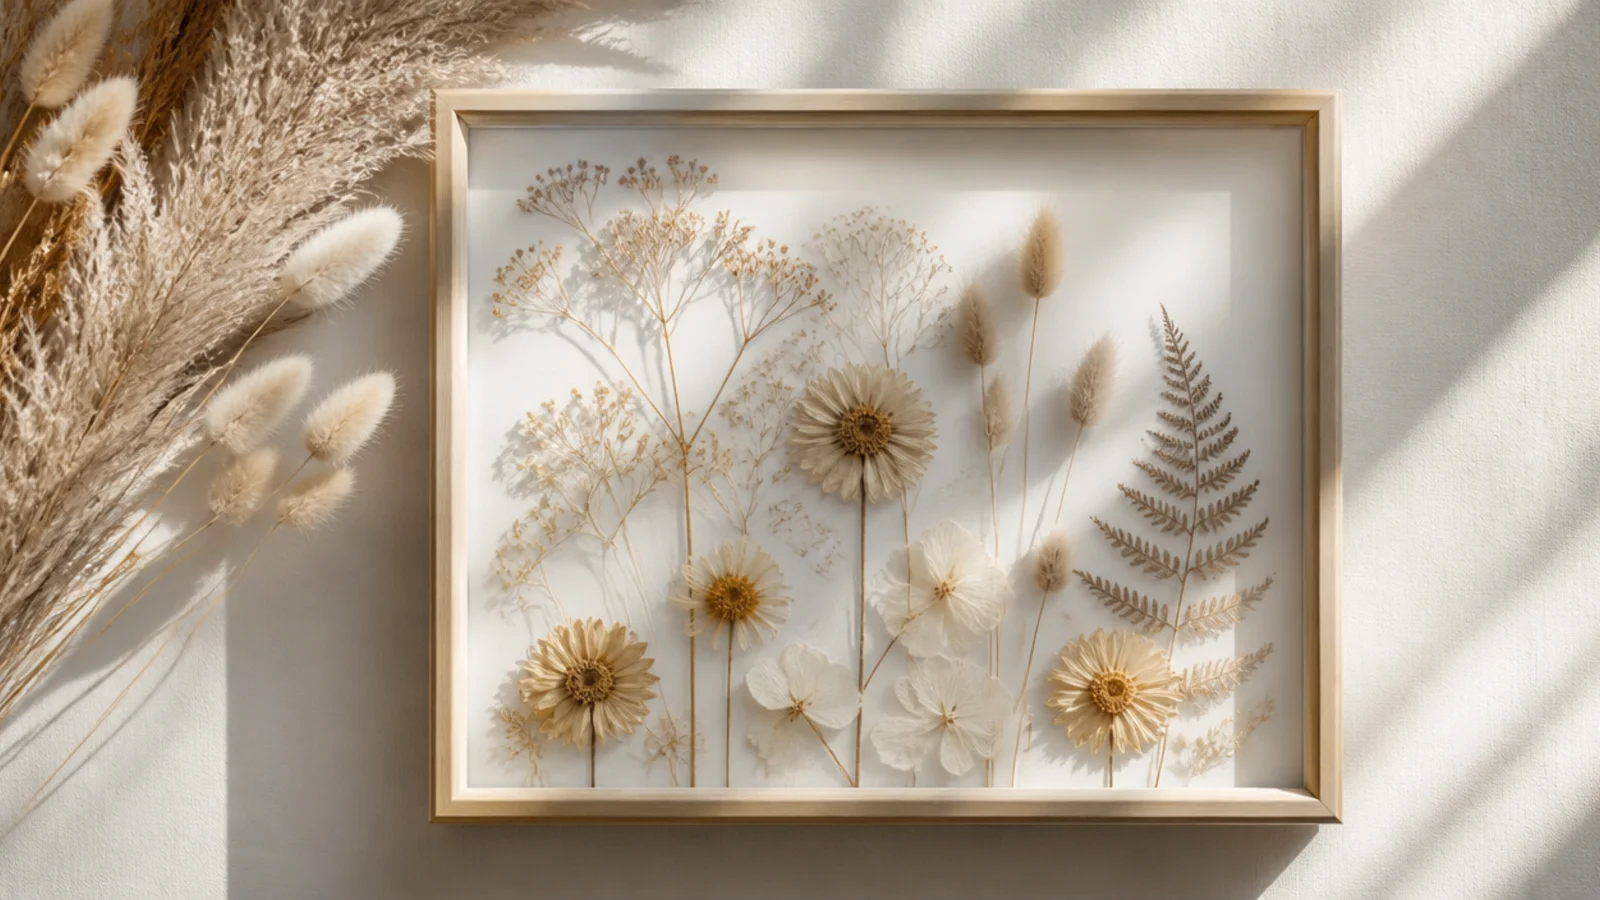
Soft dried pampas and fluffy bunny tails make a boho, neutral frame full of texture. The feathery fronds are on-trend and calming. It suits modern, earthy interiors and neutral photos.
Gather small pieces of dried pampas and bunny tail grass. Trim them short. Hot-glue them into one corner of a flat frame, fanning the fluffy pieces outward for a soft, textural cluster. Spray with a little hairspray first to reduce shedding. Keep the cluster clear of the photo and let set.
Editor's noteSpray pampas and bunny tails with hairspray before gluing; it stops the fluffy heads from shedding fibers onto the photo and around the frame.
Skip thisDon’t overload the corner with big pampas plumes; a few small, fluffy pieces look chic, while large plumes overwhelm a photo frame.
12. Floral Monogram Photo Frame
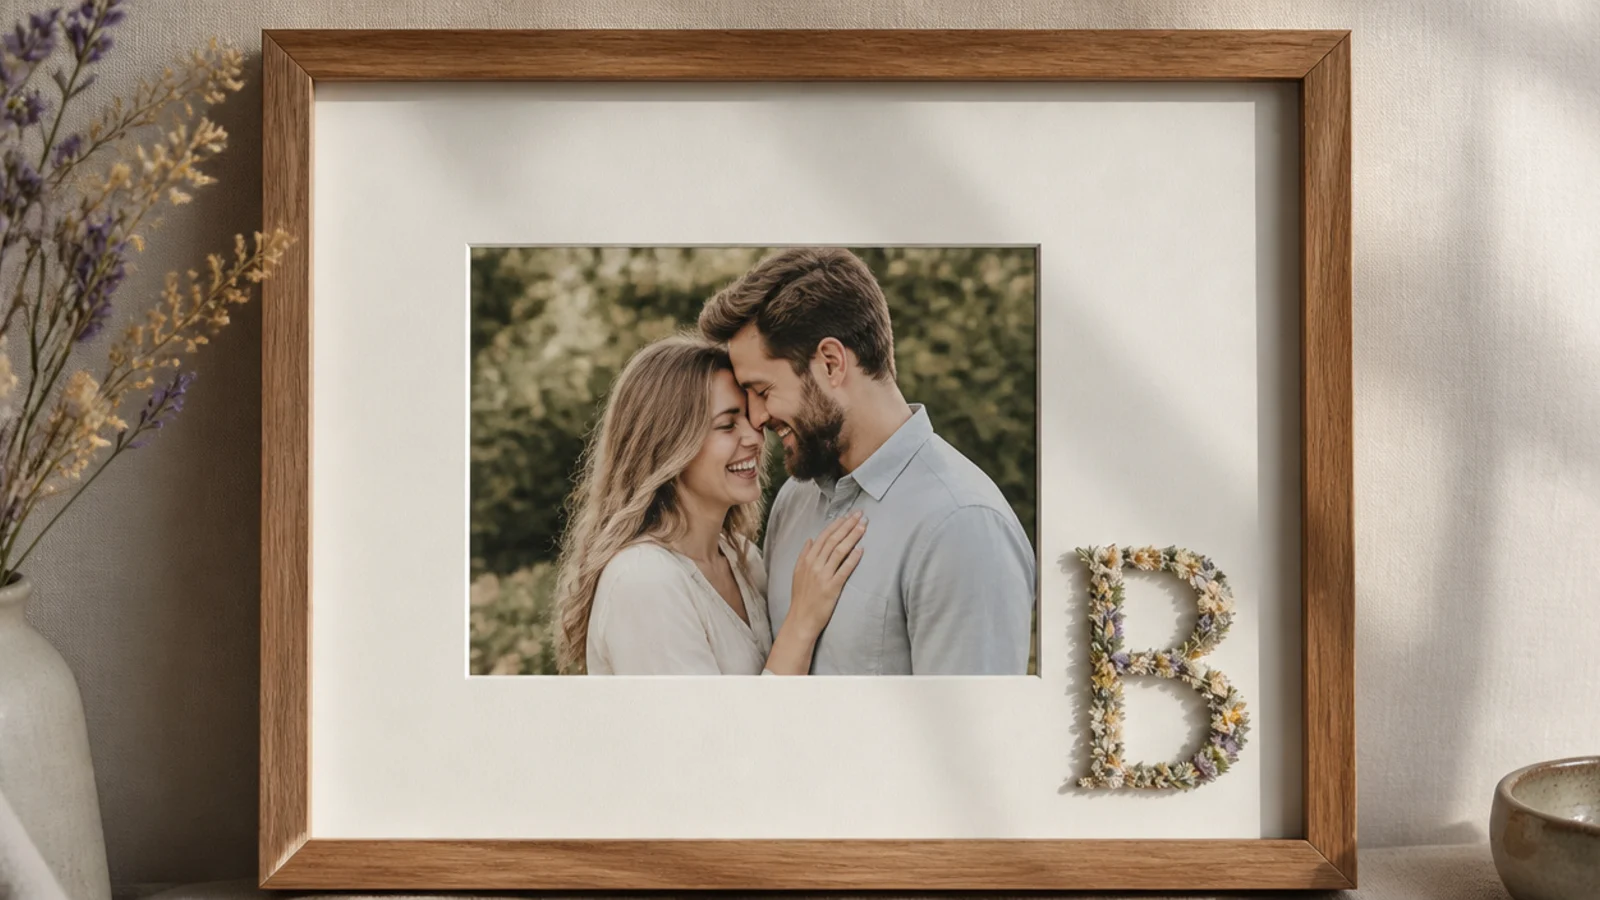
A small letter initial covered in tiny dried flowers, mounted in a corner, personalizes a photo frame. The floral monogram adds a custom, gift-worthy touch. It suits family photos, weddings, and nurseries.
Get a small wooden or cardboard letter. Hot-glue tiny dried flowers all over it to cover the shape. Once dry, hot-glue the finished floral letter into one corner of a plain frame. Add a few loose blooms around its base to blend it in. Keep it clear of the photo and let set.
Editor's noteCover the letter completely with small blooms before attaching it; a fully floral letter reads as a monogram, while bare patches look unfinished.
Skip thisDon’t use a large letter that competes with the photo; a small, neat floral initial in the corner accents the picture rather than fighting it.
13. Vintage Pressed Flower Overlay Mat
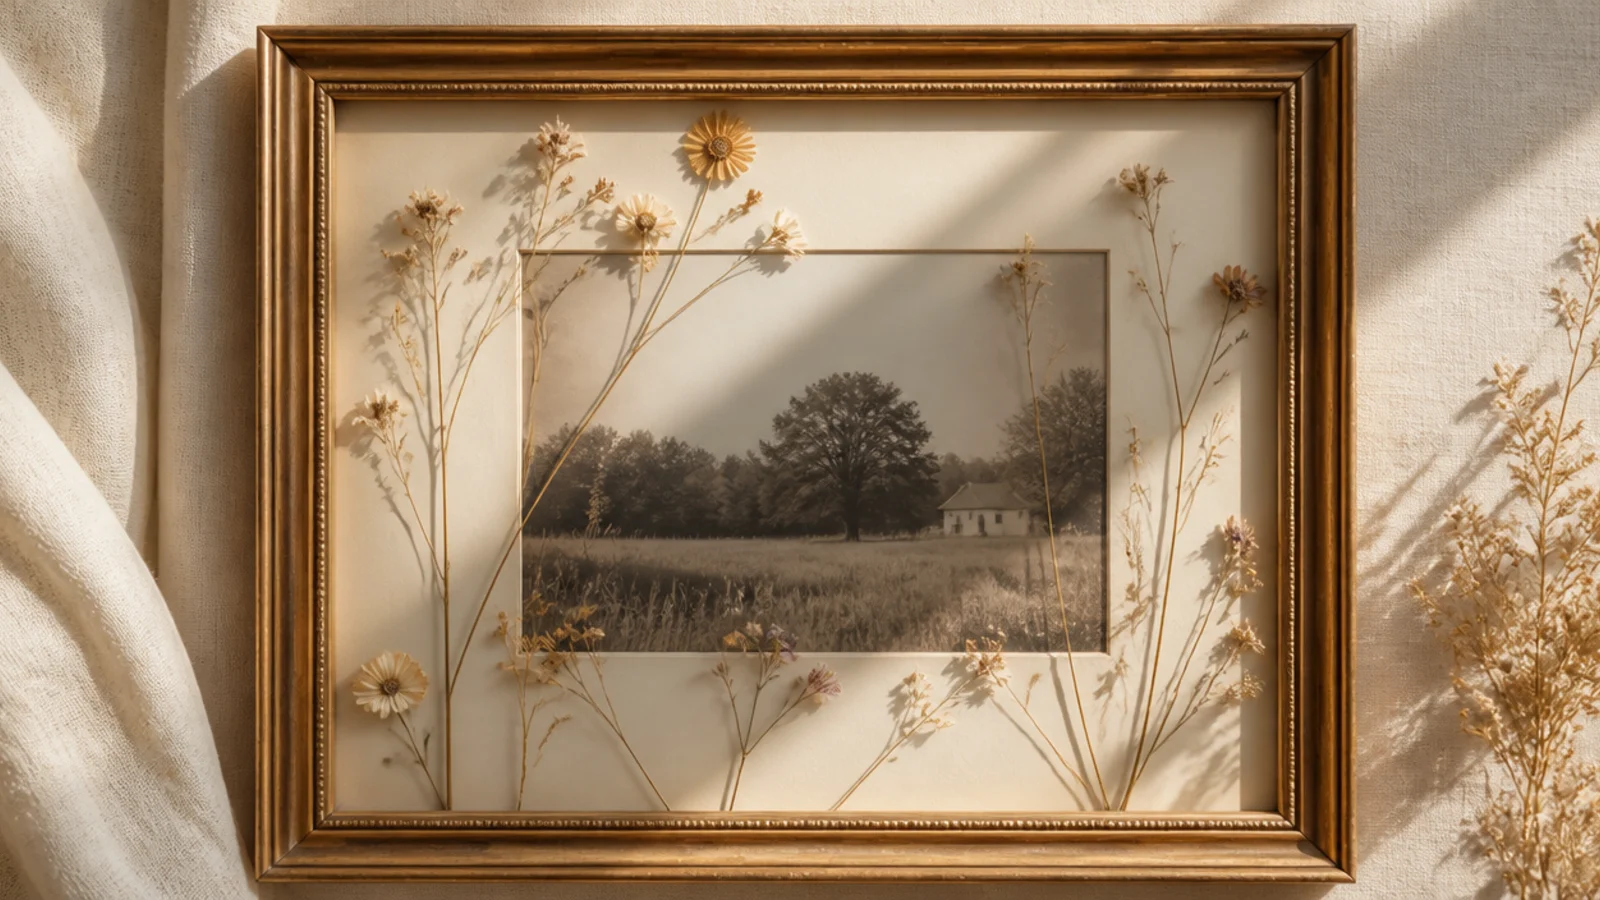
Scattering pressed flowers across the mat and slightly over the glass edge gives a soft, vintage overlay effect. The flowers seem to drift across the frame around the photo. It suits romantic, old-fashioned pictures.
Use a frame with a mat and glass. Mount the photo. Arrange pressed flowers on the mat drifting toward the photo, with a few near the opening edge, anchored with archival PVA dots. Keep them flat so the glass closes over them. The scattered, drifting layout gives the soft vintage feel.
Editor's noteLet a few pressed flowers drift toward the photo but stop at its edge; the gentle drift toward the picture ties the flowers and photo together.
Skip thisDon’t let pressed flowers overlap the photo itself; keep them on the mat so the picture stays clear beneath the drifting blooms.
14. Half-Wreath Photo Frame
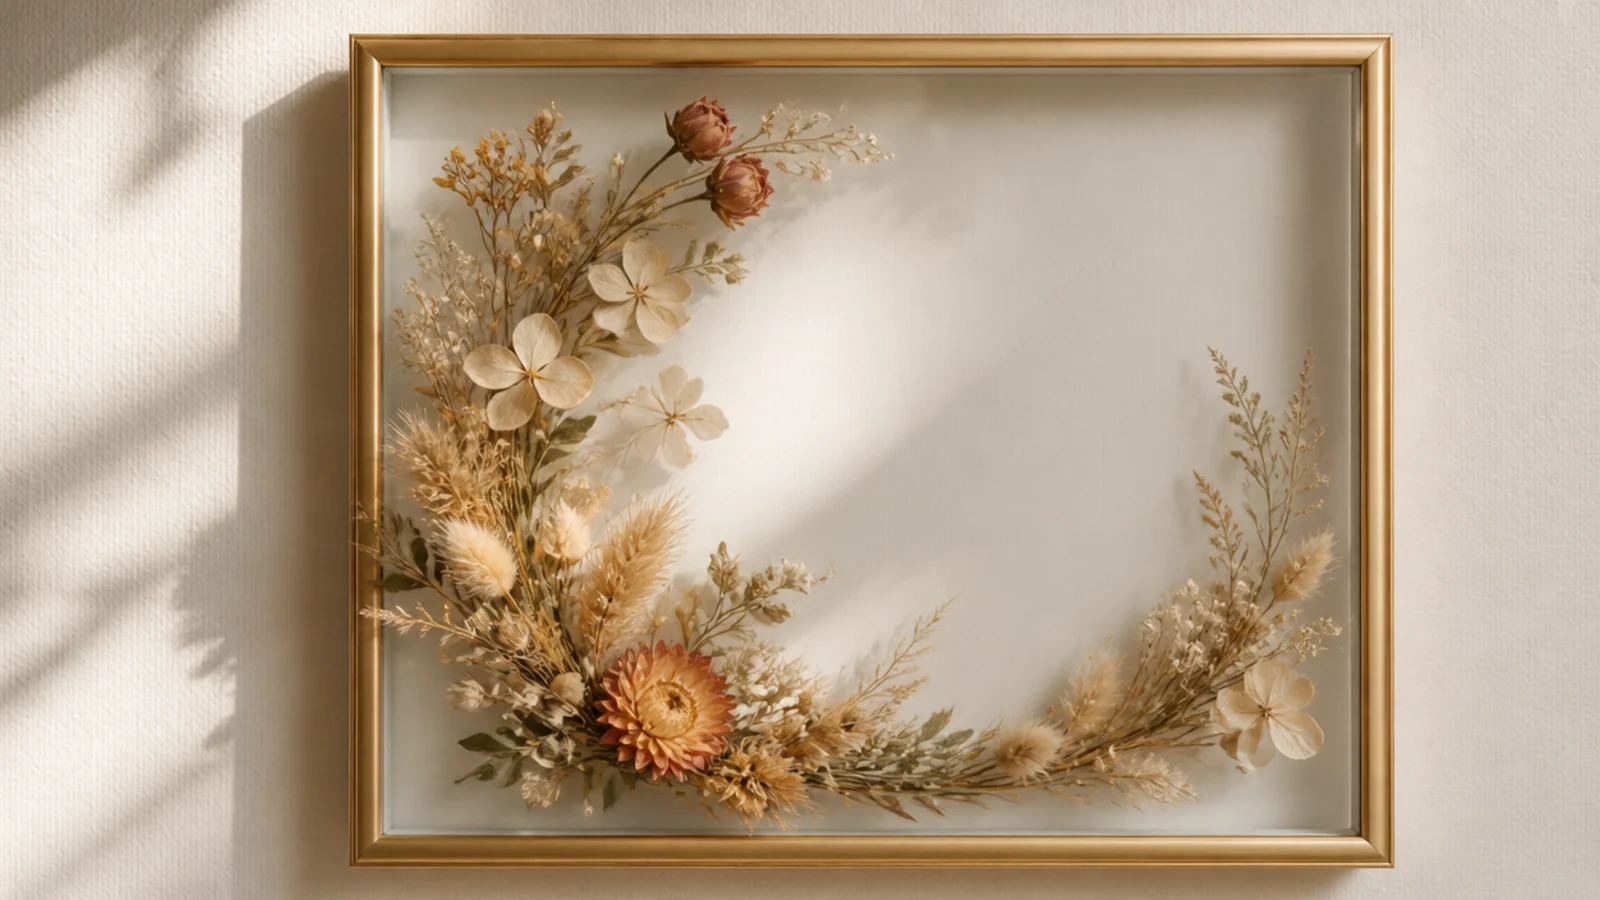
A half-wreath of dried flowers curving around two corners frames the photo on one side while leaving the other clean. The partial wreath feels fresh and balanced. It suits any photo and looks less expected than a full border.
Use a flat frame. Gather small dried flowers and greenery. Hot-glue them in a curve around two adjacent corners, flowing in one direction and tapering to sprigs at both ends. Leave the opposite two corners bare. Keep the blooms on the frame border, clear of the photo, and let set.
Taper the wreath to fine sprigs at both ends so it looks like it grows around the corners rather than stopping in a hard line.
Don’t complete the full border; the open, asymmetric half-wreath is what makes this look modern instead of a standard floral frame.
15. Dried Berry and Bloom Frame
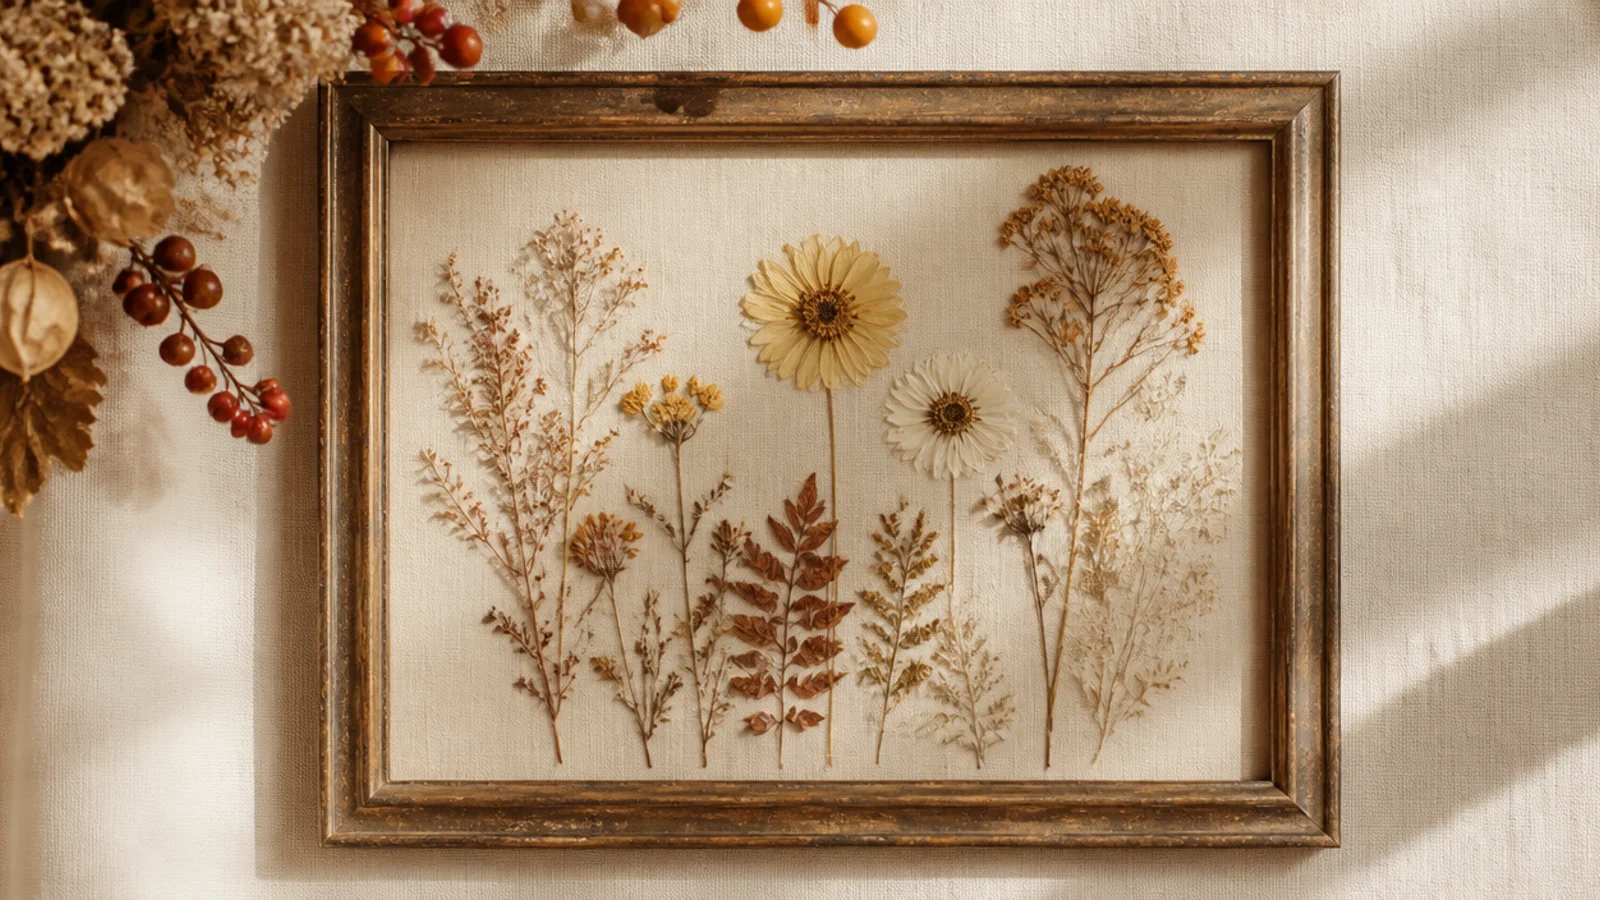
Adding dried berries and seed pods alongside blooms gives a frame rich, autumnal texture. The mix of round berries and flowers looks abundant and seasonal. It suits fall photos and warm-toned rooms.
Gather dried berries (like pepperberry), small seed pods, and a few dried blooms. Trim them. Hot-glue greenery into a corner as a base, then add blooms, and finish with clusters of berries and pods tucked among them for texture. Keep it in the corner, clear of the photo, and let set.
Editor's noteAdd the berries last, tucked among the flowers; the little round berries fill gaps and add the pop of texture that makes it look abundant.
Skip thisDon’t use berries that shed color or crumble; choose sturdy dried berries so they don’t stain the frame or drop bits over time.
16. Botanical Resin-Edge Frame
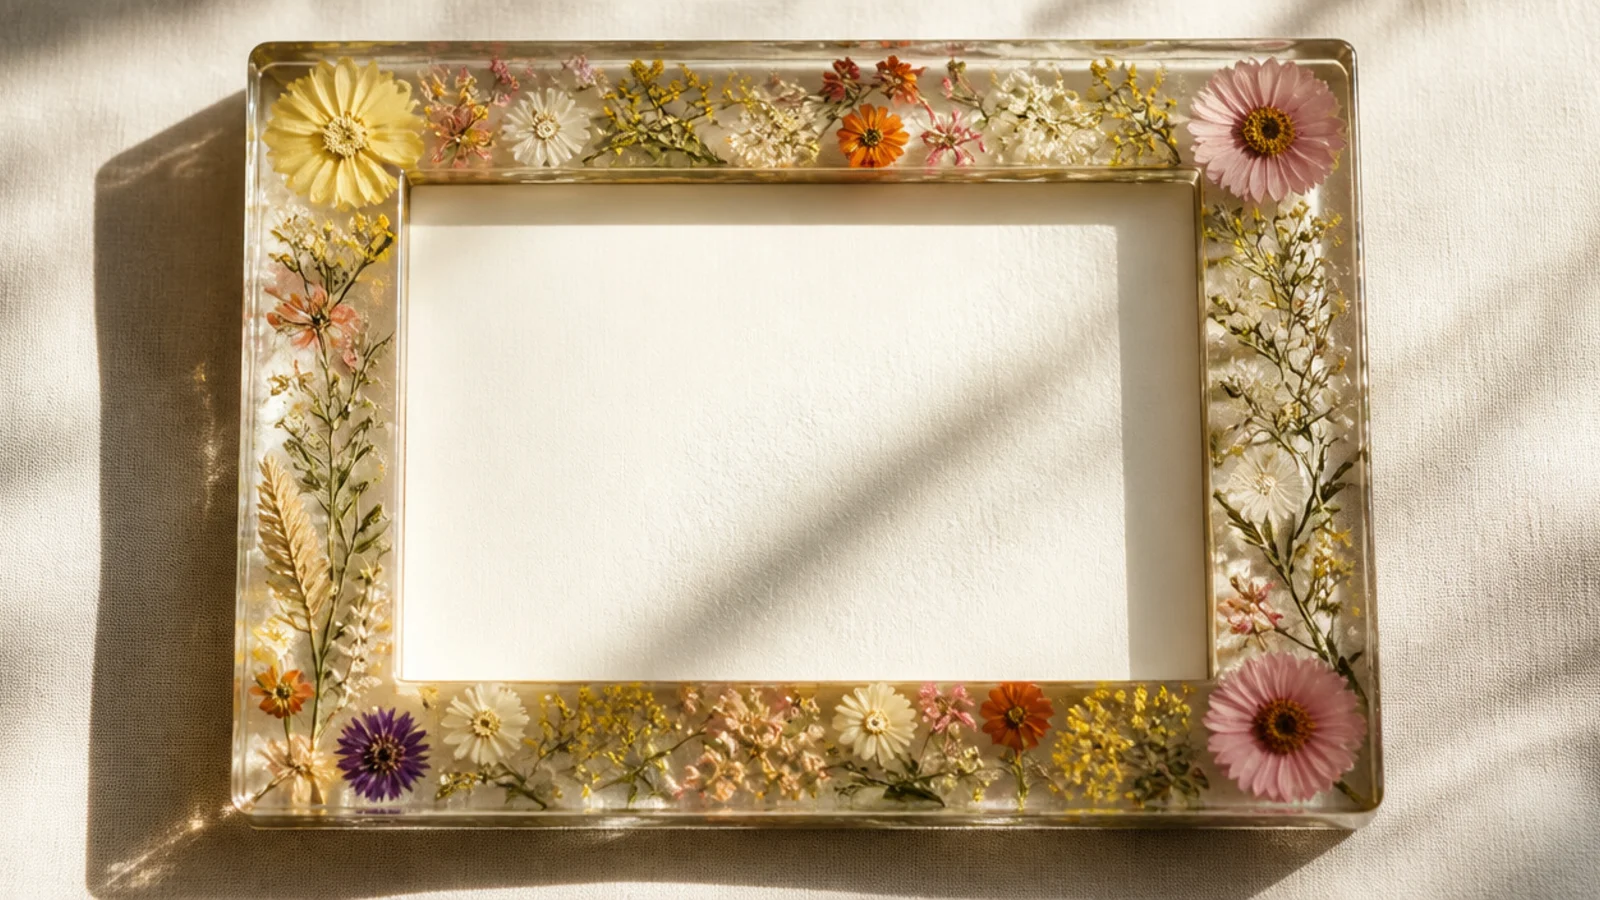
Encasing pressed flowers in a thin resin coat along the frame’s edge makes a glossy, durable floral border. The resin protects the flowers and gives a high-end finish. It’s more advanced but looks professional and lasts.
Use a flat wooden frame. Arrange pressed flowers along the frame’s face and fix with a dot of glue. Mix clear casting resin and brush or pour a thin layer over the flowers on the frame surface, keeping it off the photo area. Pop bubbles with a heat gun, and let it cure fully to a smooth, glassy finish.
Seal the pressed flowers with a light spray sealant before adding resin, so the resin doesn’t soak in and turn the petals translucent.
Don’t let resin drip onto the photo opening or the back; tape off those areas first so the resin stays only on the decorated edge.
17. Polymer Clay Flower Frame
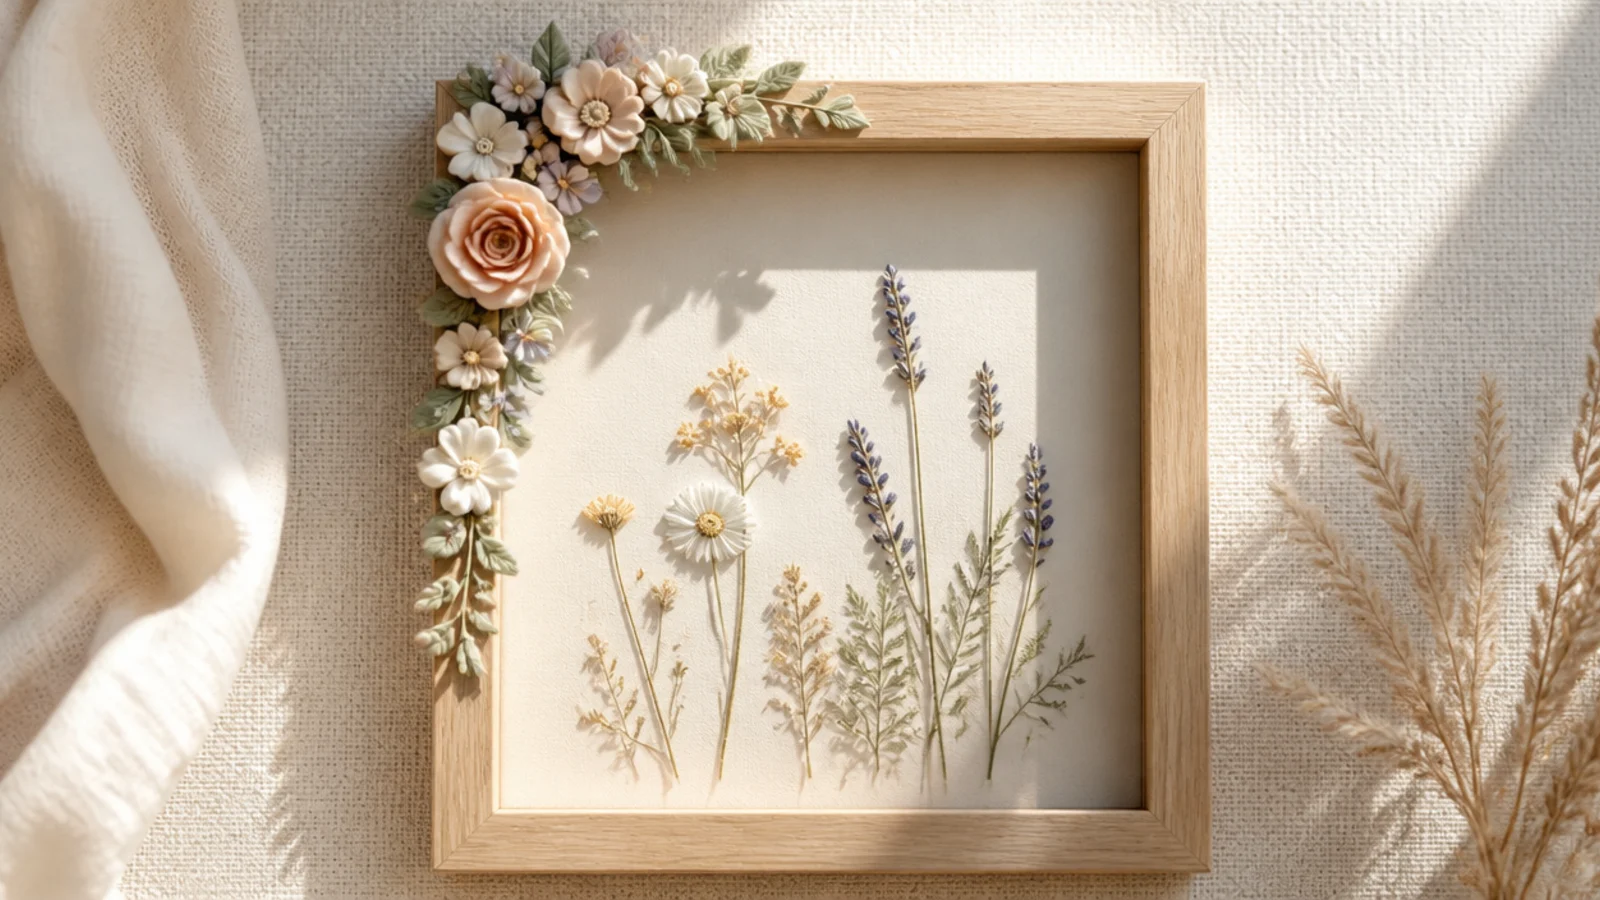
Tiny handmade polymer clay flowers give a frame permanent, colorful blooms that never fade. The sculpted flowers are durable and fully customizable in color. It suits anyone who enjoys a crafty, made-by-hand look.
Sculpt small flowers from polymer clay and bake them per the clay’s instructions until hard. Once cool, hot-glue or use strong craft glue to attach them to a corner or edge of a plain frame, clustering blooms and adding tiny clay leaves. Keep them clear of the photo and let the glue cure.
Editor's noteBake the clay flowers before attaching them; hardened flowers are sturdy and won’t dent, and you can glaze them for a subtle sheen.
Skip thisDon’t make the clay flowers too large or thick; small, delicate blooms look refined, while chunky ones look heavy and childlike.
18. Hanging Floral Hoop Photo Frame
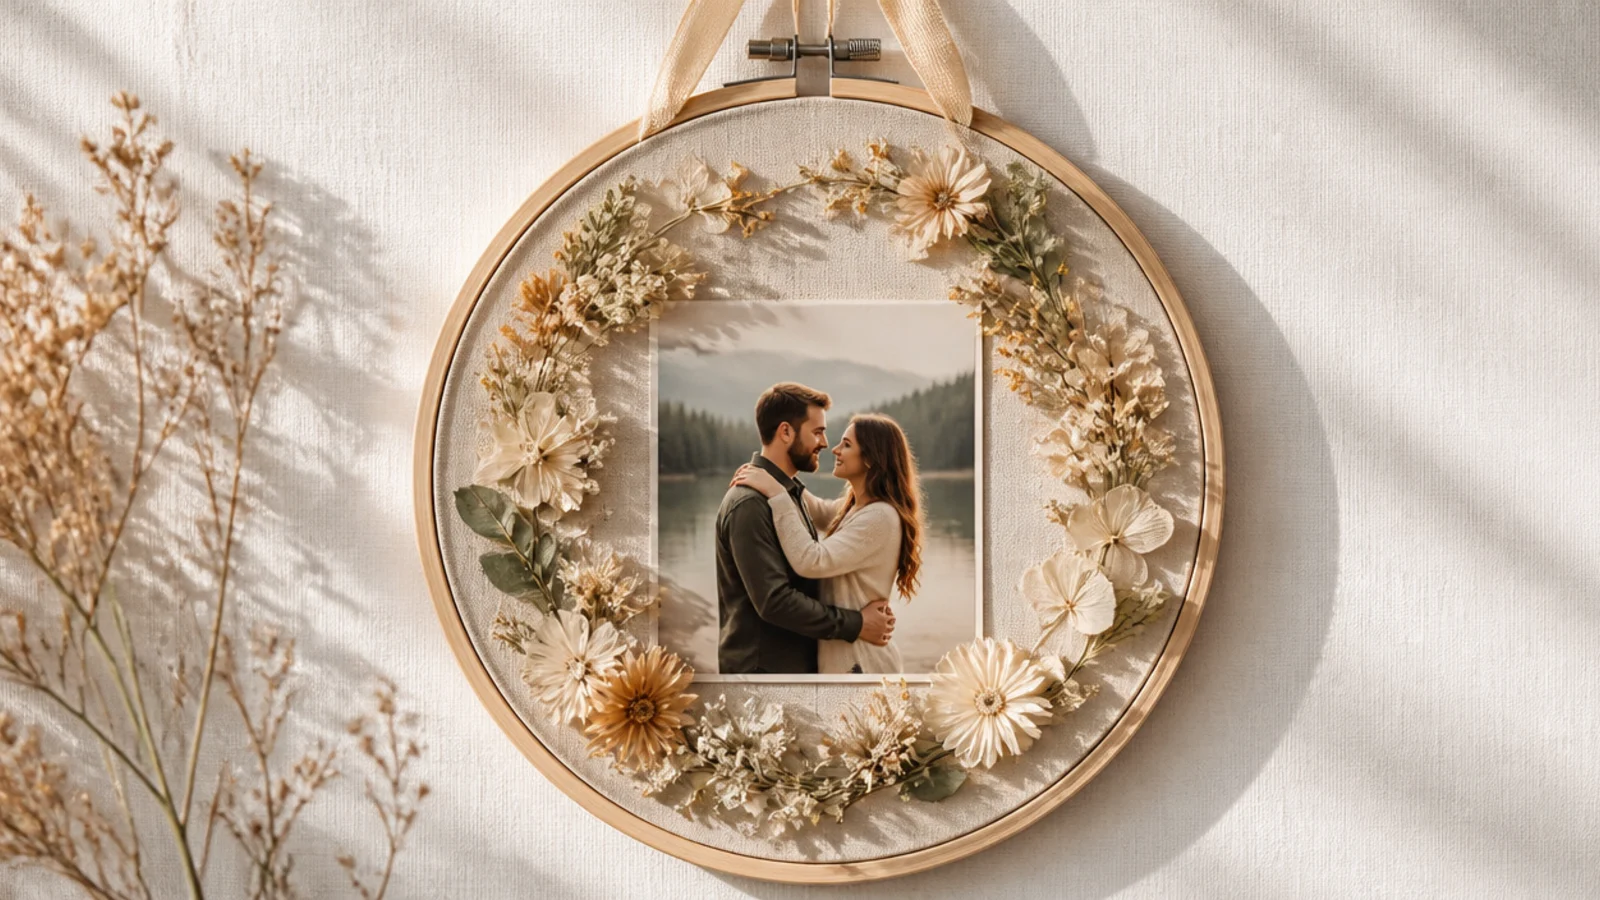
A round embroidery hoop with a photo in the middle and flowers around the rim makes a soft, hanging floral frame. The circular shape and dried blooms feel boho and handmade. It suits a single special portrait.
Stretch fabric in an embroidery hoop and tighten it. Attach a photo to the center of the fabric with double-sided tape or by pinning at the edges. Hot-glue dried flowers around part or all of the hoop’s rim. Add a ribbon loop at the top to hang. Keep the flowers on the rim, clear of the photo.
Arrange the flowers on the lower part of the hoop rim like a crescent; a partial floral rim looks more elegant than flowers all the way around.
Don’t glue flowers so they cover the photo; keep them on the wooden rim so the picture in the center stays fully visible.
19. Seasonal Autumn Leaf Frame
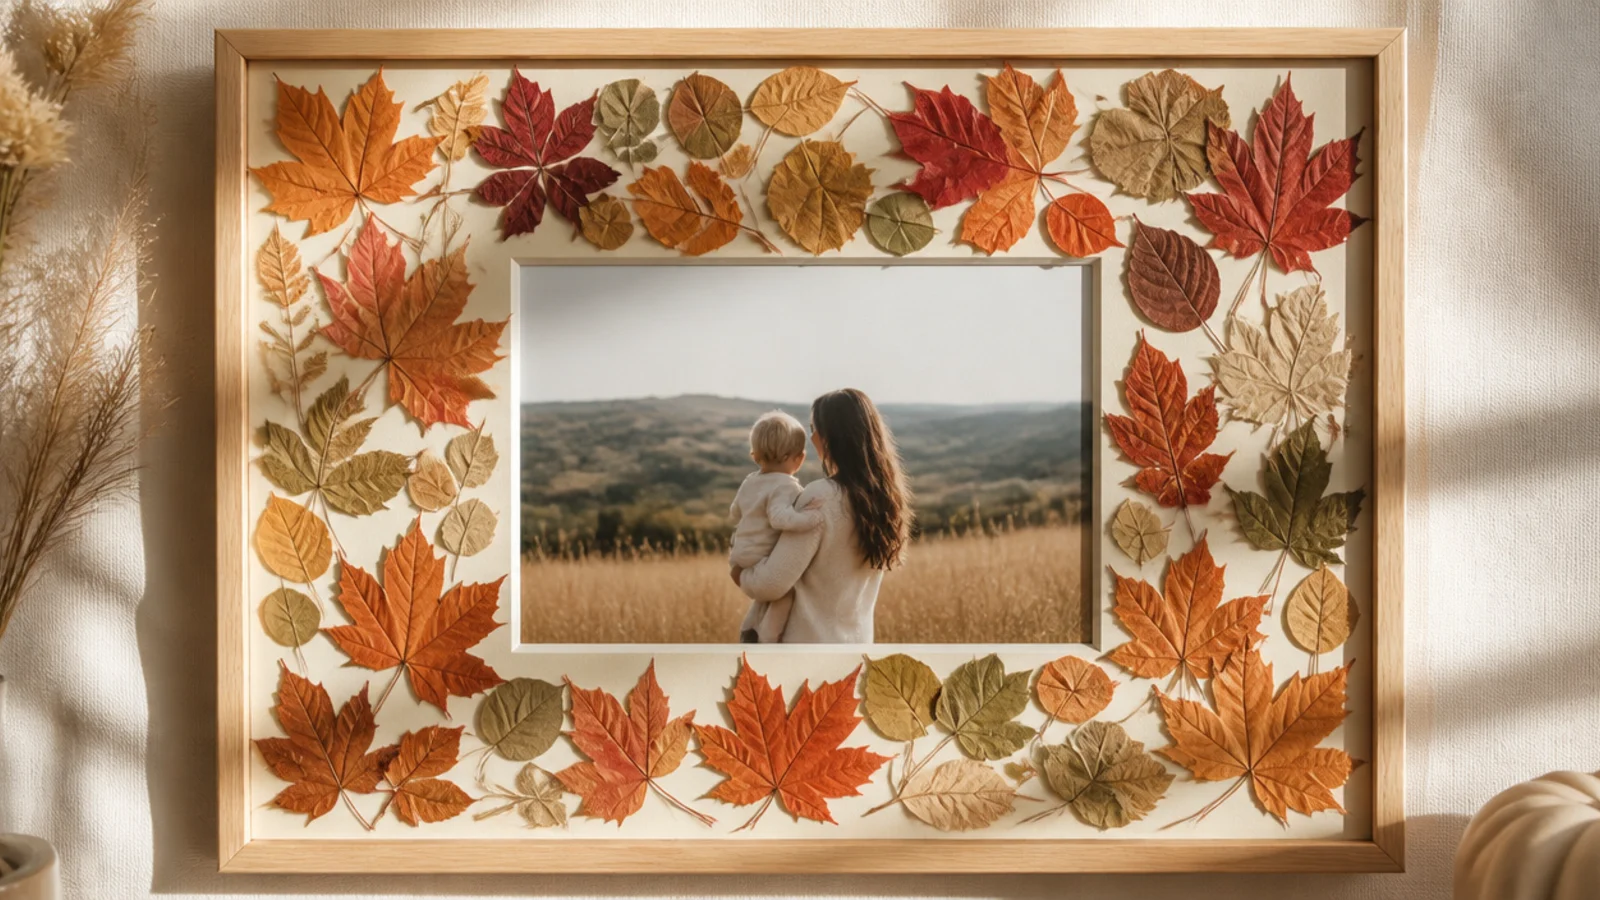
Pressed autumn leaves in warm reds, oranges, and golds make a seasonal frame full of color. The overlapping leaves feel cozy and celebratory. It suits fall family photos and Thanksgiving displays.
Press colorful autumn leaves flat until dry. Use a flat frame. Hot-glue the leaves around the border, overlapping them like scales and flowing in one direction, mixing colors for richness. Keep the inner edge tidy and clear of the photo. Seal with a light spray of clear acrylic to stop them crumbling, and let set.
Seal pressed autumn leaves with clear spray after gluing; dried leaves get brittle, and a light sealer keeps them from cracking and flaking.
Don’t use leaves that aren’t fully dry; damp leaves curl and mold, so press them completely flat and dry before gluing them on.
20. Wedding Photo Floral Frame
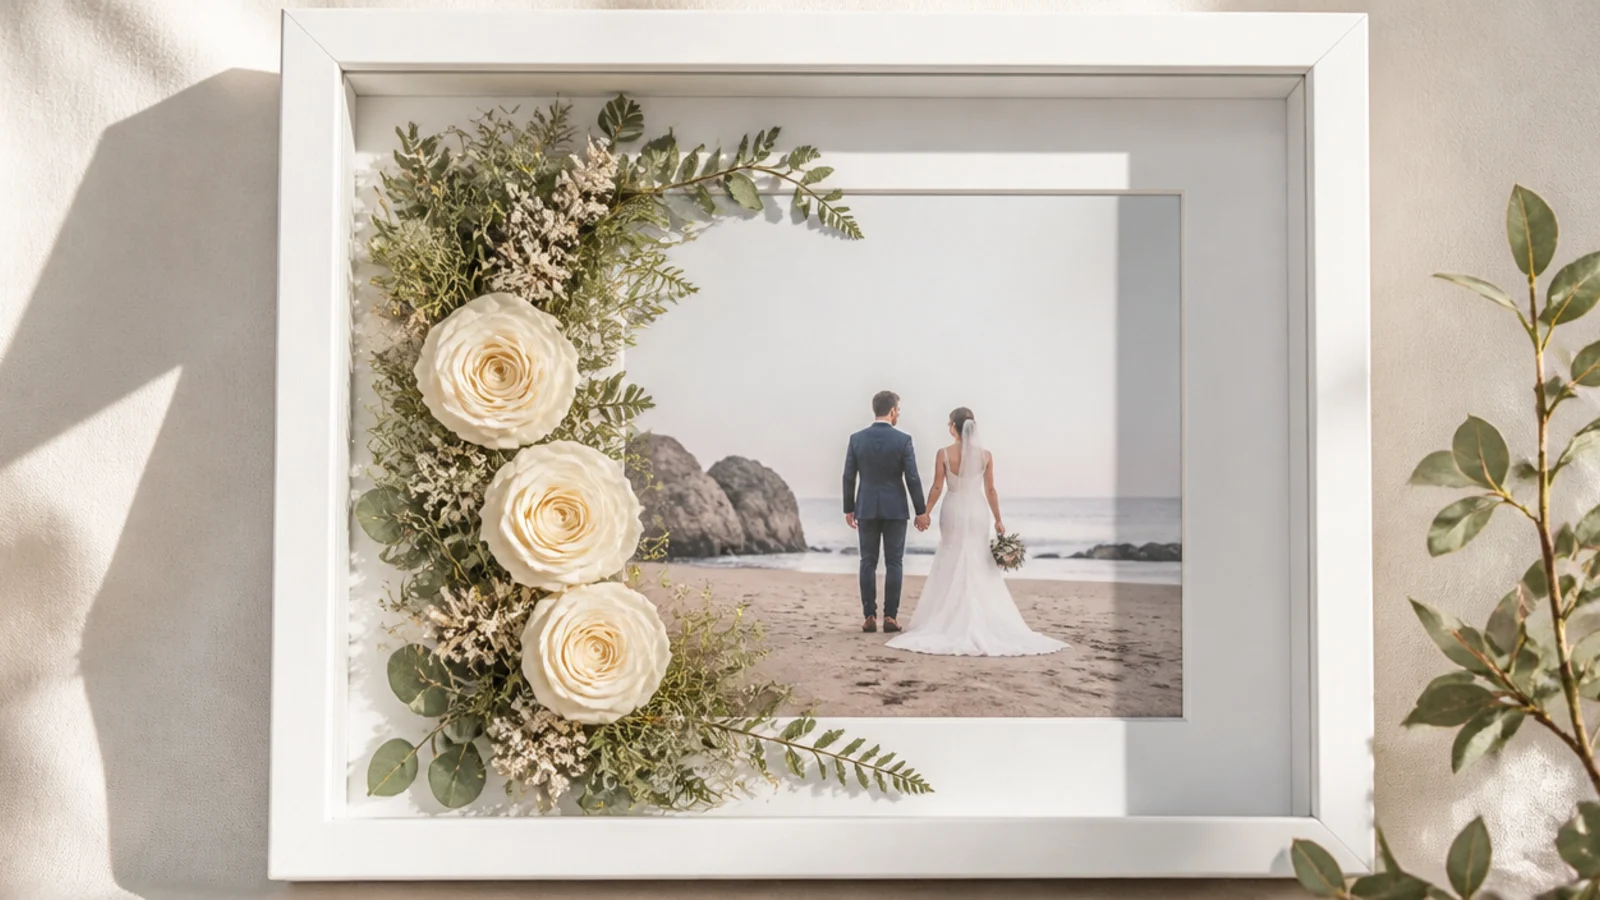
A frame decorated with preserved white roses and greenery around a wedding photo is timeless and romantic. Using preserved blooms echoes the bouquet and lasts as long as the marriage. It’s a meaningful keepsake or gift for newlyweds.
Use an elegant white or neutral frame. Choose preserved white roses, buds, and greenery. Hot-glue greenery down one side as a base, then nestle the roses and buds among it in a graceful vertical sweep. Keep it to one side, clear of the photo, and let set. Consider preserving flowers from the actual bouquet.
Editor's noteUse flowers that echo the couple’s actual bouquet; matching the wedding flowers makes the frame feel like part of the day, not generic.
Skip thisDon’t overcrowd a wedding frame; an elegant sweep down one side is more refined than smothering the whole frame in blooms.
21. Mini Bud Cluster Frame
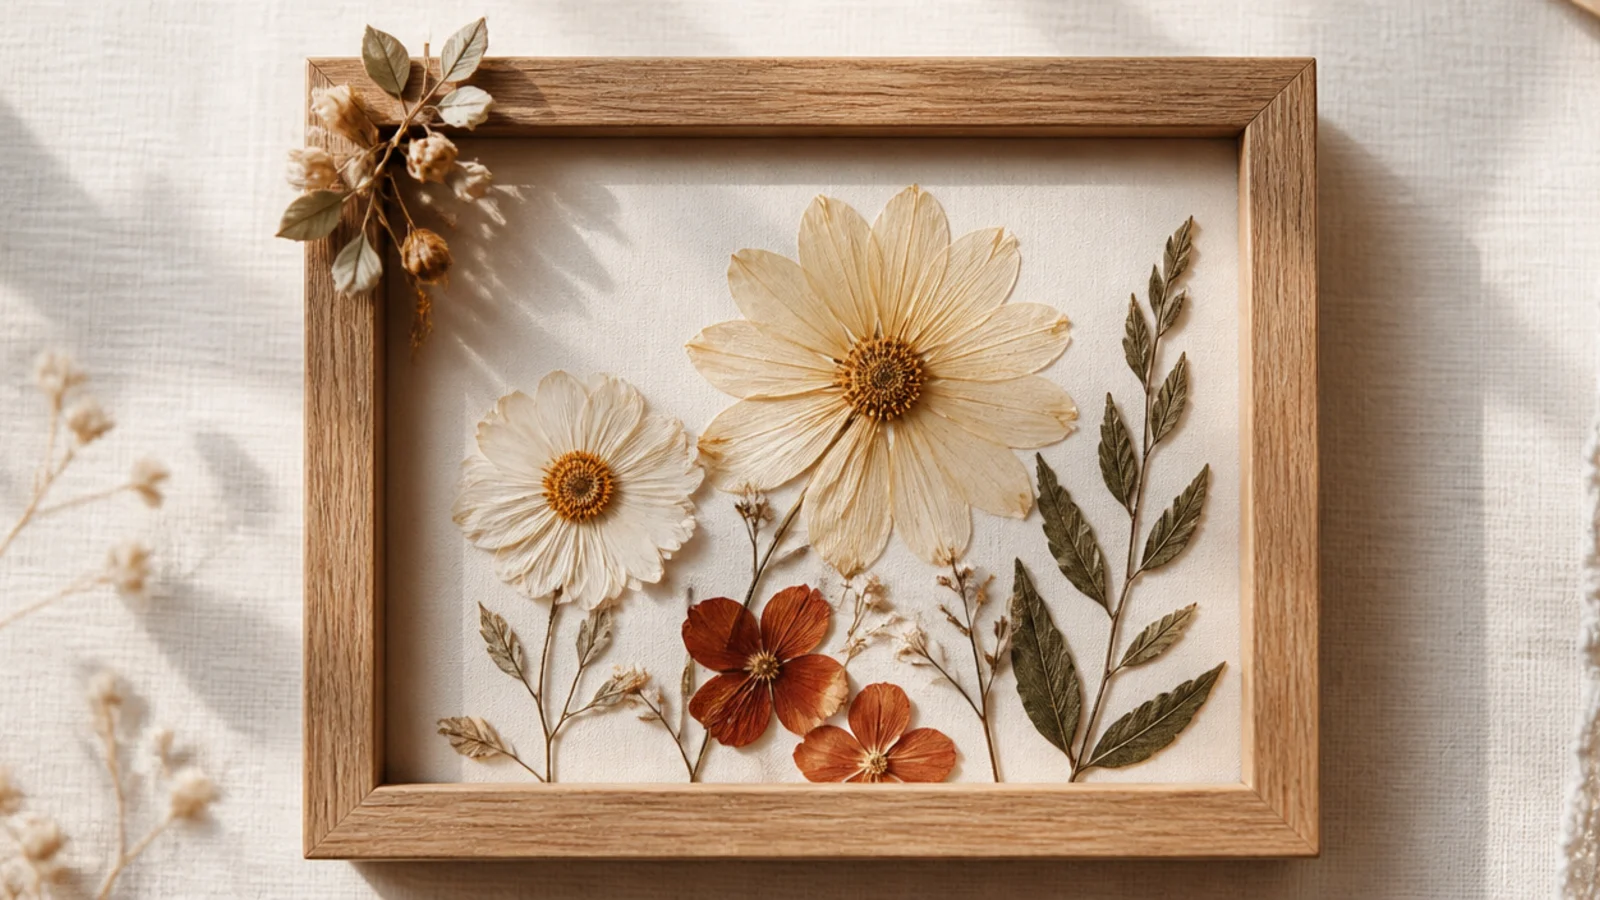
A tiny cluster of miniature dried buds suits a small photo frame perfectly. The delicate scale keeps it dainty and refined. It’s ideal for little desk or shelf frames holding small photos.
Choose a small frame and the tiniest dried buds and leaves you can find. Trim them minutely. Hot-glue a small base of tiny leaves into one corner, then add a few miniature buds on top in a compact cluster. Keep everything in proportion to the small frame and clear of the photo, and let set.
Editor's noteScale the flowers to the frame; on a small frame, tiny buds look refined, while normal-sized blooms overwhelm the little photo.
Skip thisDon’t use full-sized dried flowers on a mini frame; oversized blooms swamp a small photo and look clumsy and out of proportion.
22. Greenery-Only Photo Frame
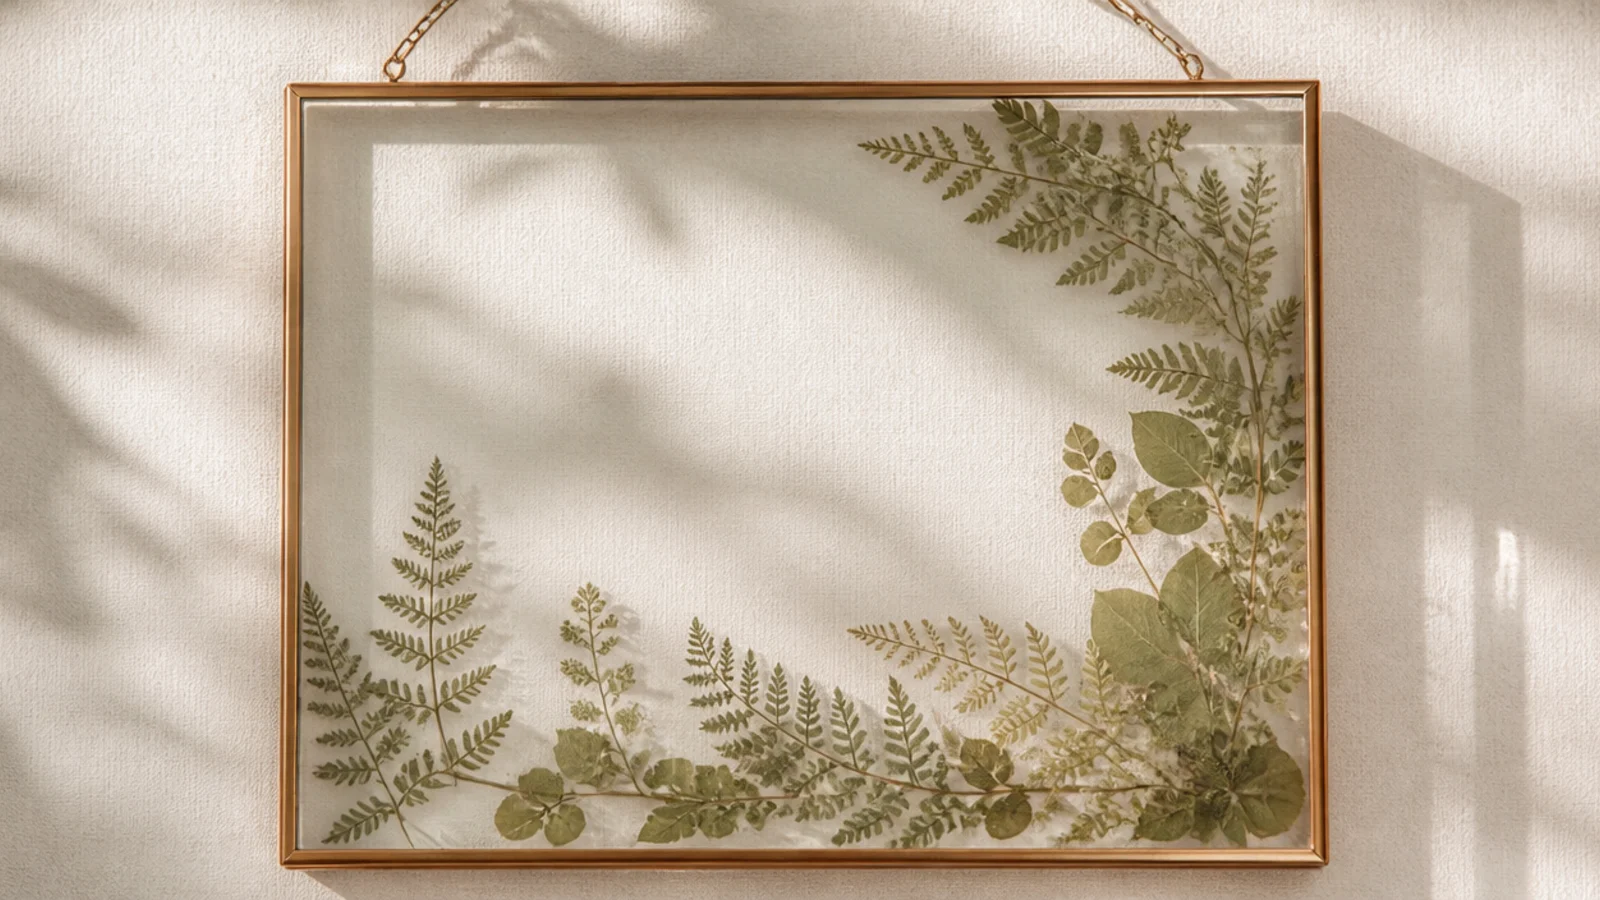
A frame decorated with only dried greenery — leaves and ferns — is calm, fresh, and endlessly versatile. Skipping flowers keeps it understated and modern. It suits any photo and any decor without adding color.
Gather dried leaves, ferns, and small greenery. Trim them. Hot-glue them along two edges of a plain frame, trailing from a corner and following the frame’s lines, layering for a natural, leafy look. Keep the greenery on the frame surface, clear of the photo, and let set.
Editor's noteMix a few different leaf shapes and greens; variety in the foliage keeps a greenery-only frame interesting without needing any flowers.
Skip thisDon’t use greenery that’s browned or crispy; choose preserved or well-dried green foliage so the frame looks fresh, not dead.
23. Pressed Flower Under-Glass Photo Mat
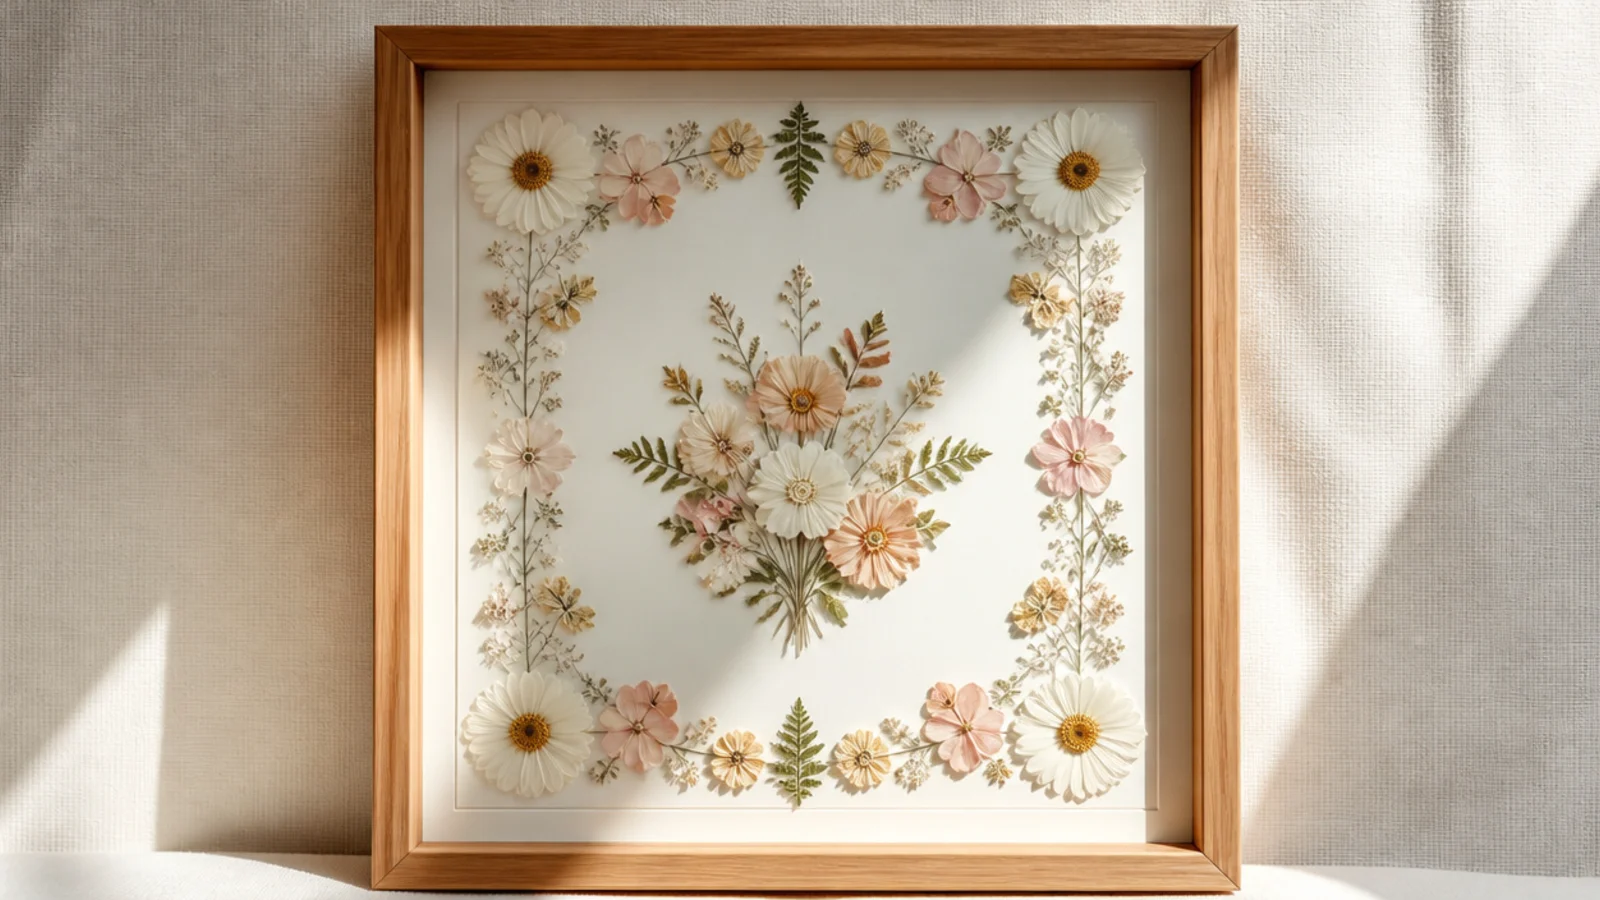
A full, symmetrical border of pressed flowers on the mat, all behind glass, looks like professionally floral-matted art. The even floral frame around the photo is protected and flat. It’s polished and durable.
Use a frame with a wide mat and glass. Press many small flat flowers. Mount the photo. Arrange the pressed flowers in an even border all around the mat opening, symmetrical and evenly spaced, anchored with archival PVA dots. Close the frame so the glass holds the border flat around the photo.
Lay out the whole border before gluing to check the symmetry; an even, balanced floral border is what makes it look professionally matted.
Don’t crowd the flowers unevenly; a lopsided border looks homemade, so keep the spacing and density even all the way around.
24. Floral Fabric-Wrapped Frame
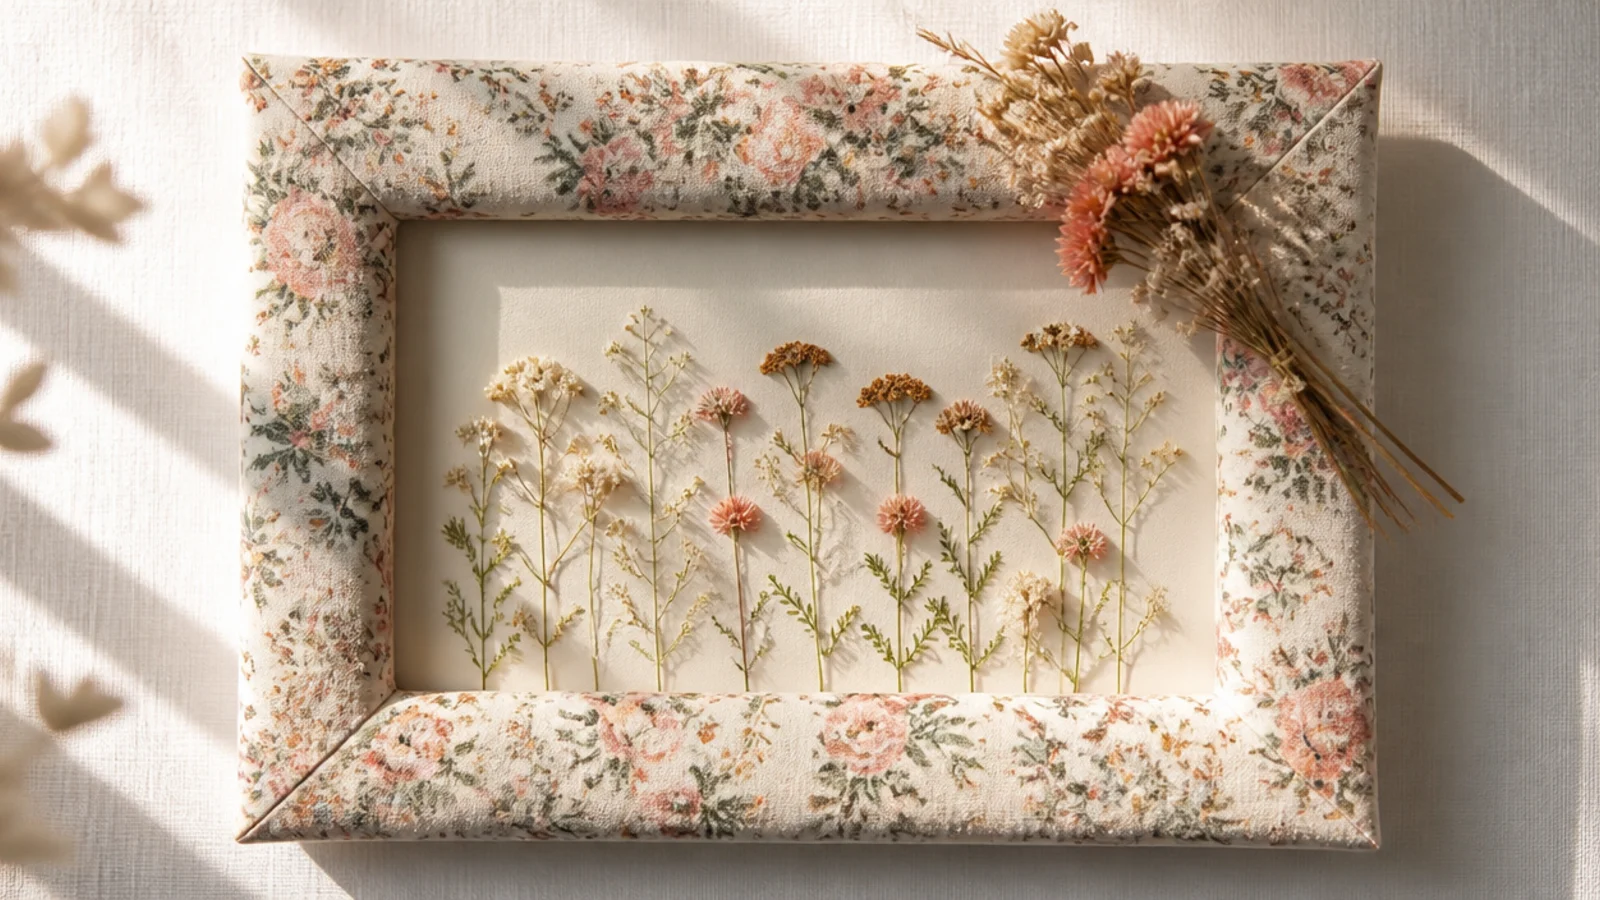
Wrapping a frame in floral-print fabric and adding a few real dried blooms mixes pattern with texture. The fabric gives soft color and the dried flowers add dimension. It suits cottage and vintage styles.
Take a flat frame and wrap it smoothly in floral-print fabric, gluing the edges neatly on the back. Trim the fabric around the photo opening cleanly. Hot-glue a small cluster of dried flowers into one corner to echo the print. Keep the cluster clear of the photo and let set.
Match the dried flower colors to the fabric print; echoing the pattern’s colors in real blooms ties the two together beautifully.
Don’t use a loud, large-scale print; a small, soft floral pattern complements the dried flowers, while a bold print fights them.
25. Dried Citrus and Flower Frame
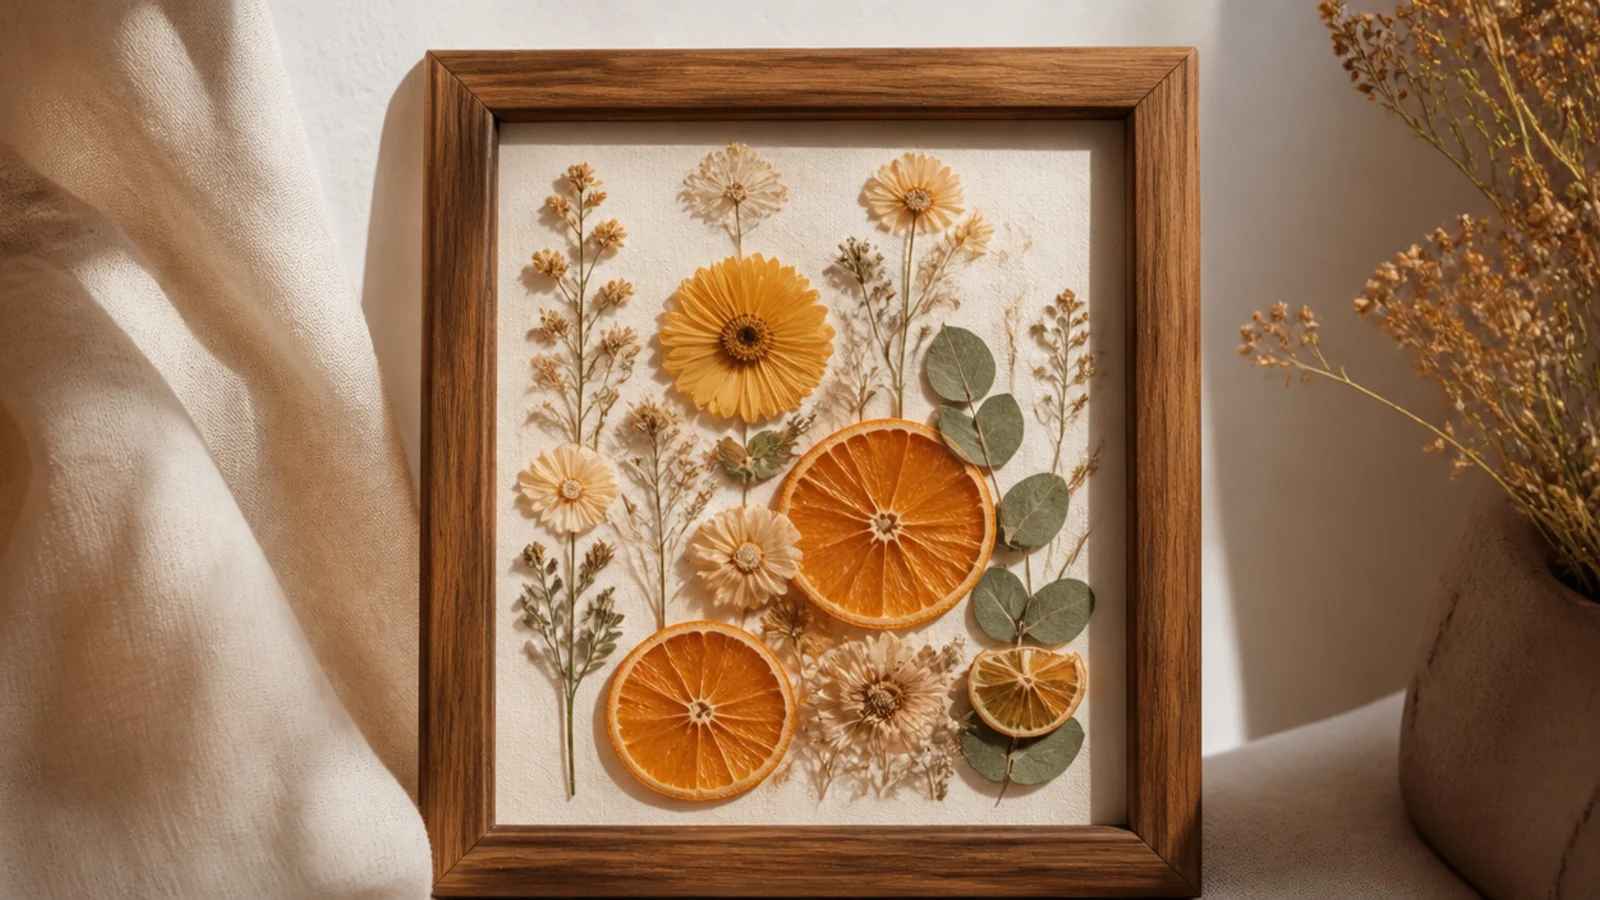
Dried citrus slices with small blooms give a warm, rustic, faintly festive frame. The translucent orange rounds add a unique pop among the flowers. It suits kitchen photos and cozy winter displays.
Dry thin citrus slices in a low oven until crisp and translucent. Gather small dried blooms and greenery. Hot-glue greenery into a corner as a base, add a couple of dried citrus slices, then tuck small blooms around them. Keep the cluster in the corner, clear of the photo, and let set.
Editor's noteDry citrus slices thin and low-and-slow in the oven; thin slices turn translucent and glow, while thick ones stay opaque and dull.
Skip thisDon’t use citrus slices that aren’t fully dried; any moisture left in them will mold and soften behind or on the frame.
26. Boho Macrame and Flower Frame
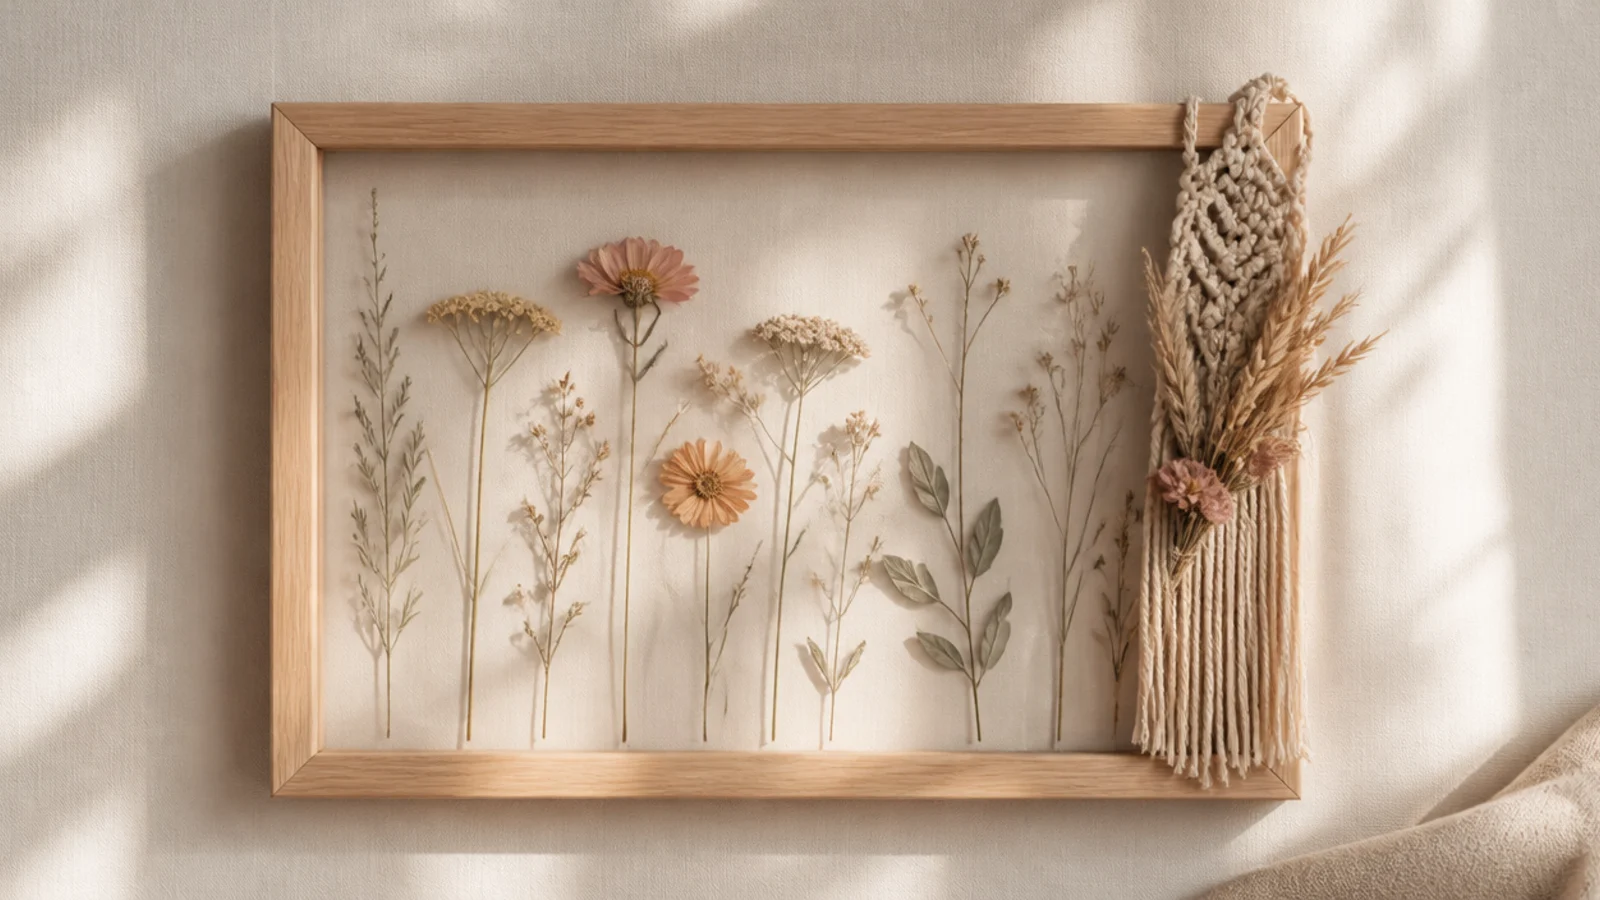
Adding a small macrame detail with dried flowers gives a frame a boho, handmade feel. The knotted cord and natural blooms suit earthy, textured rooms. It’s a distinctive twist on a flower photo frame.
Tie or attach a small piece of macrame (a few knotted cords with fringe) to one corner or the top of a plain frame. Hot-glue small dried flowers and greenery into the macrame and along the adjacent frame edge. Keep the arrangement to one corner, clear of the photo, and let set.
Editor's noteKeep the macrame small and let it drape from one corner; a little knotted detail with flowers reads boho, while too much looks cluttered.
Skip thisDon’t let the macrame fringe cover the photo; position it at a corner or top edge so it frames the picture rather than hanging over it.
27. Hand-Painted Floral Photo Frame
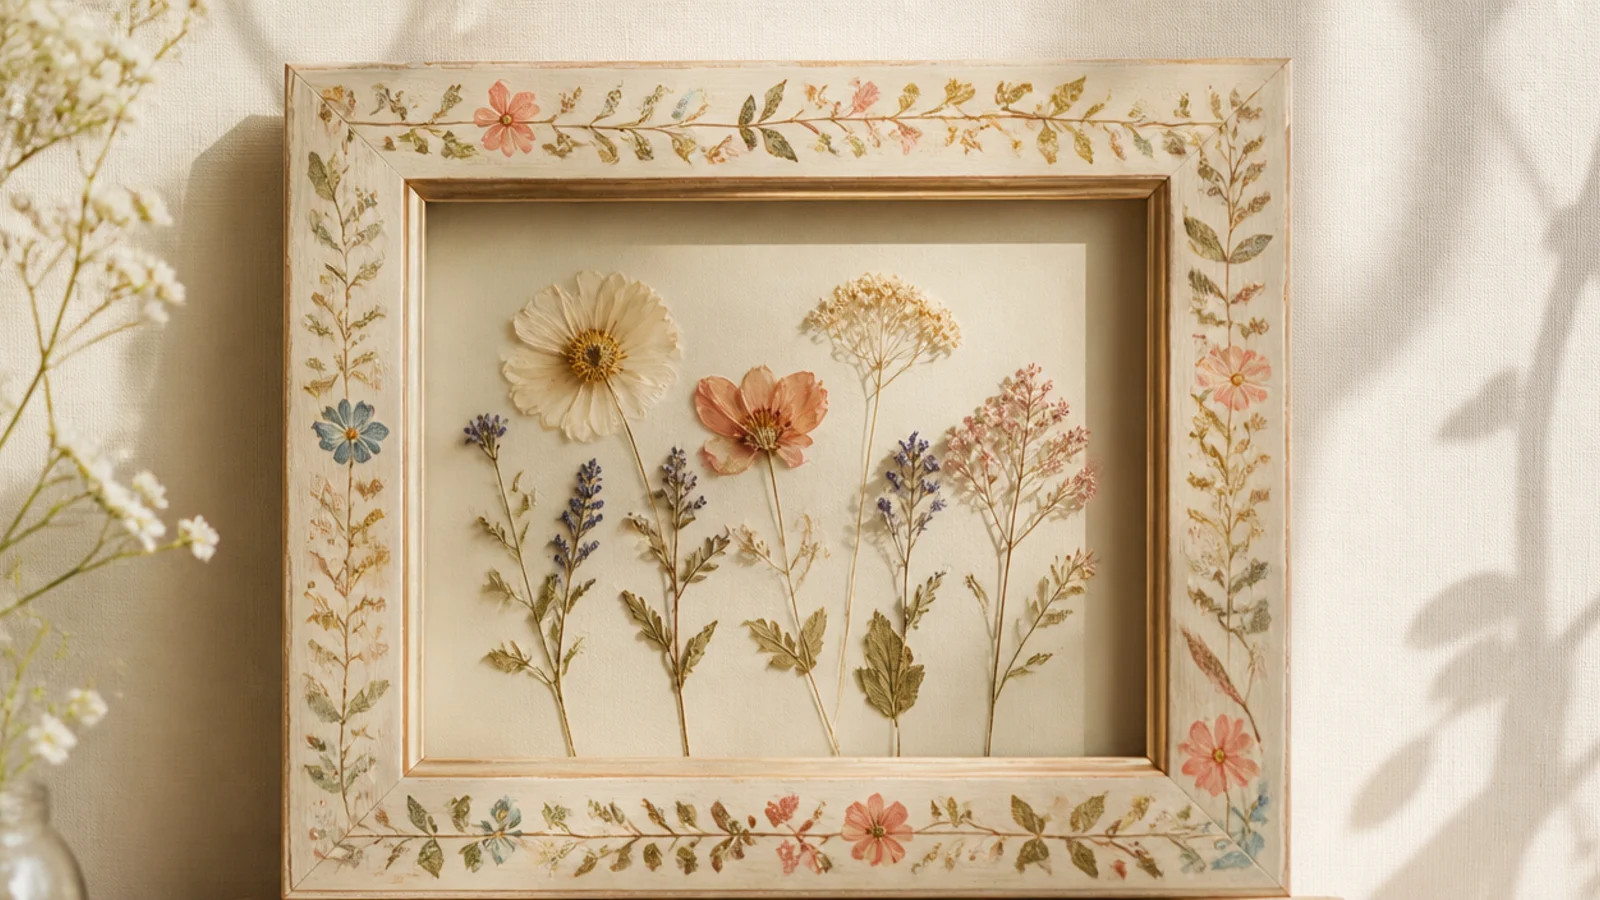
Hand-painting a floral vine around the frame gives permanent flowers that never shed or fade much. The painted blooms are fully customizable and durable. It suits anyone who’d rather paint than glue real flowers.
Base-coat a plain wooden frame and let it dry. Lightly pencil a simple floral vine around the border. Paint the vine and blooms with acrylic craft paint and a small round brush, keeping the design delicate. Let it dry, erase stray pencil, and seal with a clear topcoat. Add the photo once fully cured.
Editor's noteKeep the painted florals delicate and to the border; a fine vine frames the photo, while heavy painted flowers overwhelm the picture.
Skip thisDon’t skip the sealing topcoat; unsealed craft paint on a handled frame scuffs and chips, so a clear coat protects your painting.
28. Floating Pressed Flower and Photo Combo
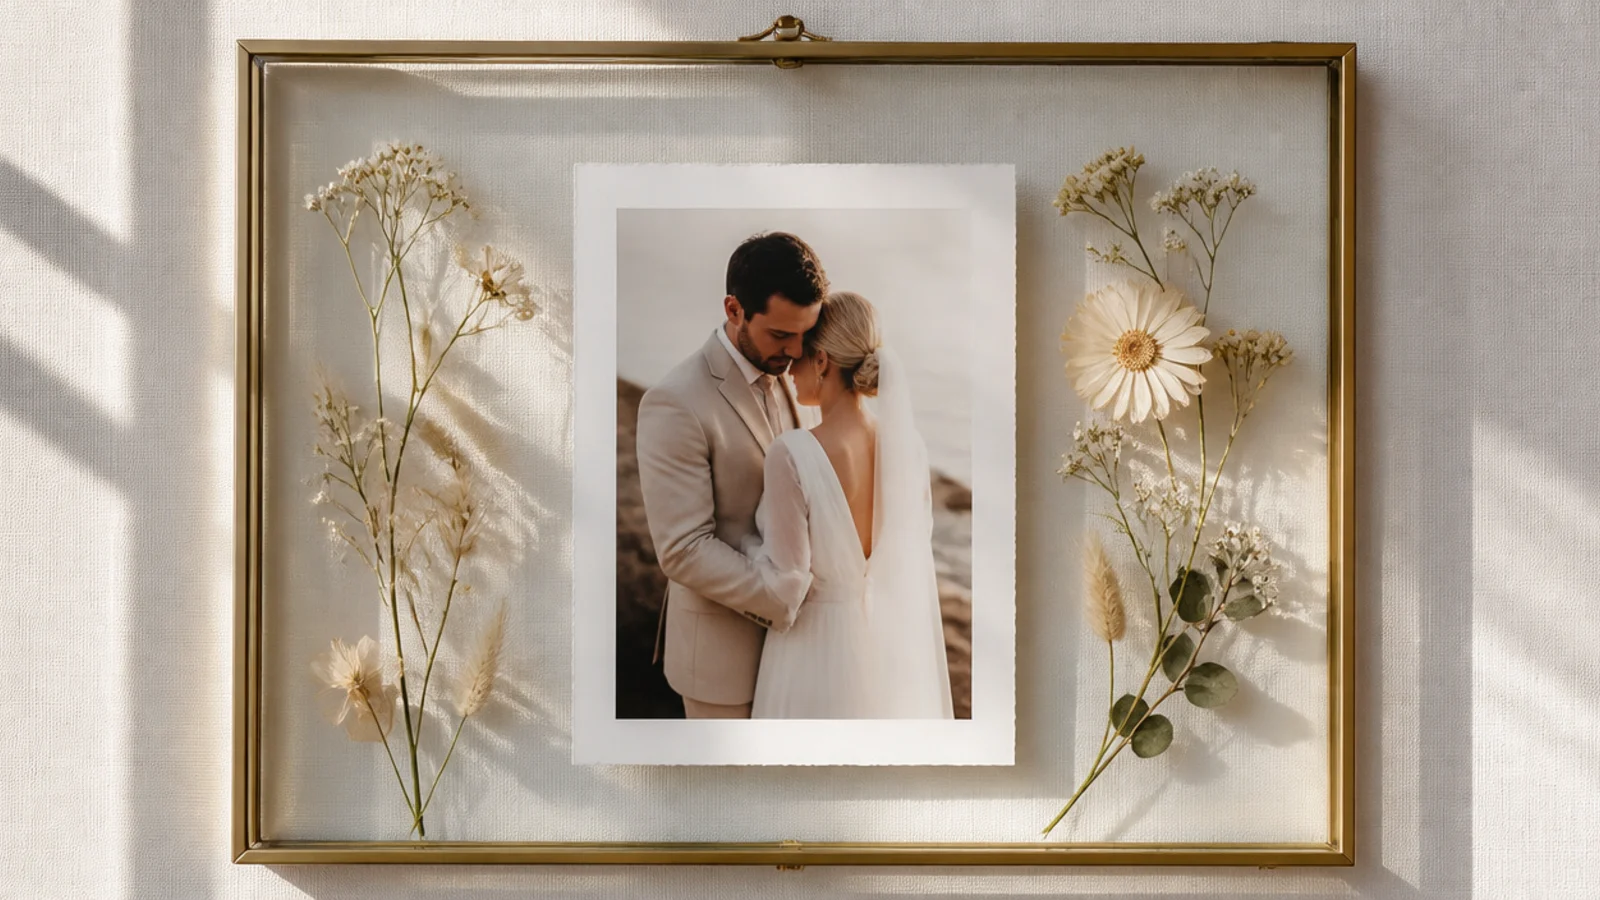
A double-glass float frame holds a photo and pressed flowers together, both seeming to hover. The photo and blooms share the clear space for a modern, airy look. It suits a favorite candid paired with meaningful flowers.
Use a double-glass float frame. Place the photo on the back pane where you want it, then arrange flat pressed flowers around or beside it. Close the second pane so the glass holds both photo and flowers by pressure. No glue needed if everything is flat and the panes press firmly.
Editor's notePosition the photo off-center and let pressed flowers fill the rest; the asymmetric photo-and-flowers layout looks more designed than centered.
Skip thisDon’t use thick flowers in a float frame; only flat pressed blooms stay put beside the photo, and bulky ones let the panes gap.
29. Wildflower Wreath Full Frame
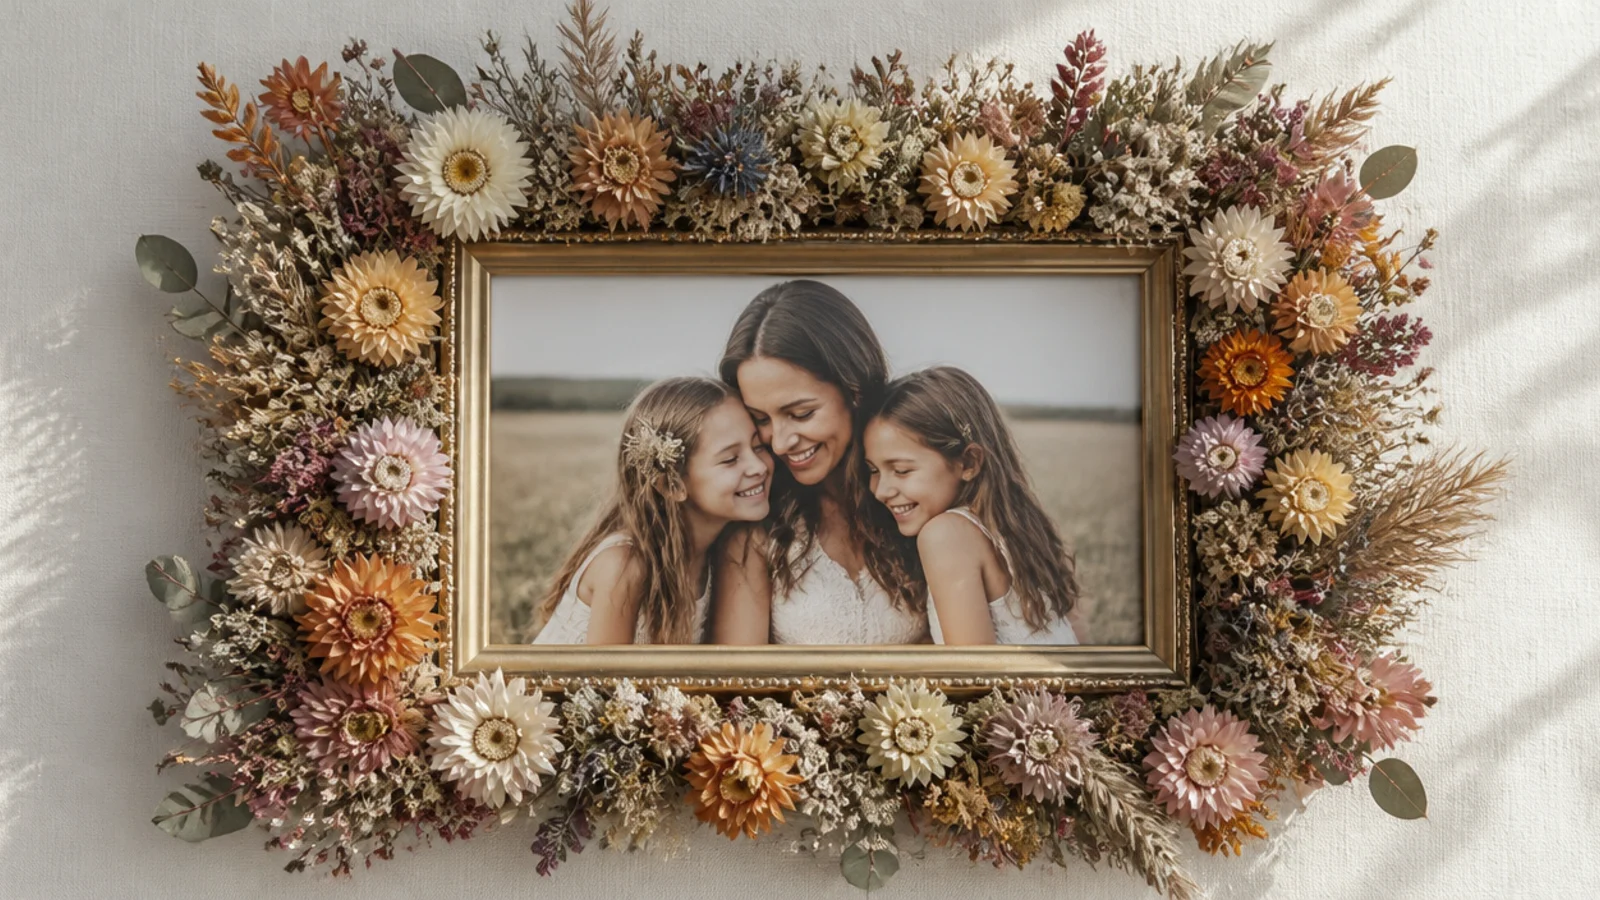
A lush full wreath of mixed dried wildflowers around the whole frame turns it into a floral ring. The abundant mix of blooms and grasses feels wild and romantic. It suits a simple portrait that can carry a bold, full surround.
Use a flat, wide frame. Gather a rich mix of small dried wildflowers, grasses, and greenery. Hot-glue them around the entire border, all flowing one direction, layering for a full, wild look with no frame showing. Keep the inner edge tidy and clear of the photo. Work in sections and let each set.
Editor's noteMix many textures — blooms, buds, grasses, seed heads — for a wild look; variety is what makes a full wreath feel lush rather than uniform.
Skip thisDon’t let the dense wreath spill over the photo edge; keep the inside line clean so the picture stays framed within the flowers.
30. Grand Floral Gallery Photo Wall
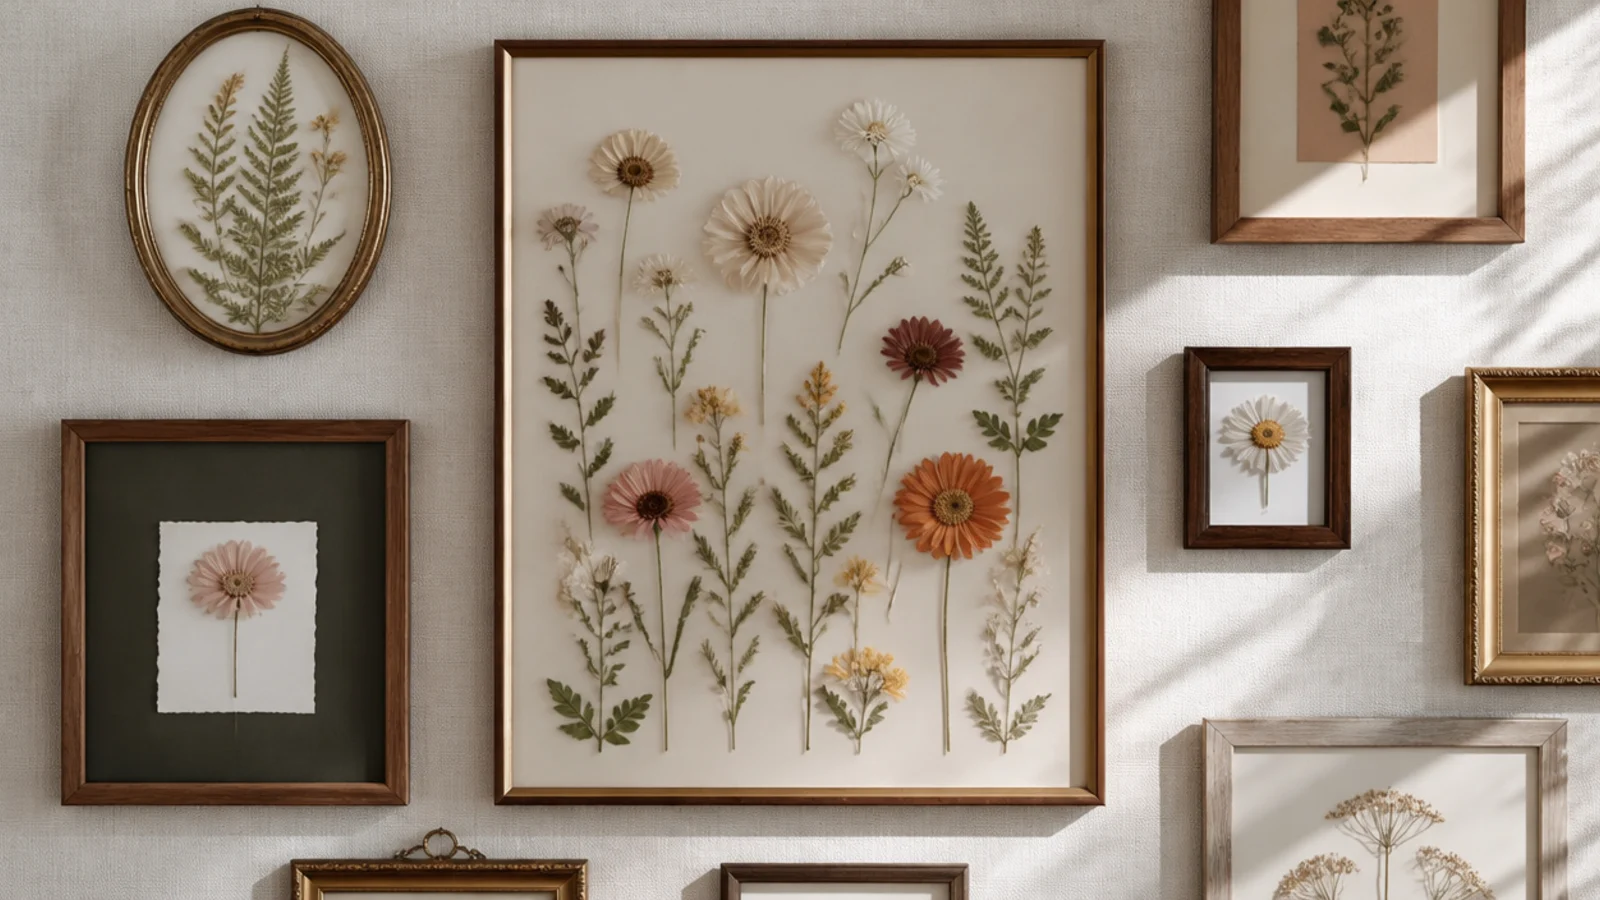
Grouping several flower-decorated photo frames into a gallery wall makes a warm, personal statement. Mixed floral styles hung together read as a curated collection. It’s the grand finale that pulls all your flower photo frames into one display.
Gather several flower photo frames in varied styles but a shared color palette. Lay them out on the floor first to plan the arrangement, keeping gaps even (about two inches). Trace each on paper and tape the templates to the wall to test placement. Hang from the center outward, using a level, until the cluster fills the wall.
Editor's noteKeep a shared color thread across all the frames' flowers; varied styles unified by one palette read as a collection, not a jumble.
Skip thisDon’t space the frames far apart; a gallery reads as one display only when the frames hang close together with tight, even gaps.