

1. Two-Tone Dipped Mug
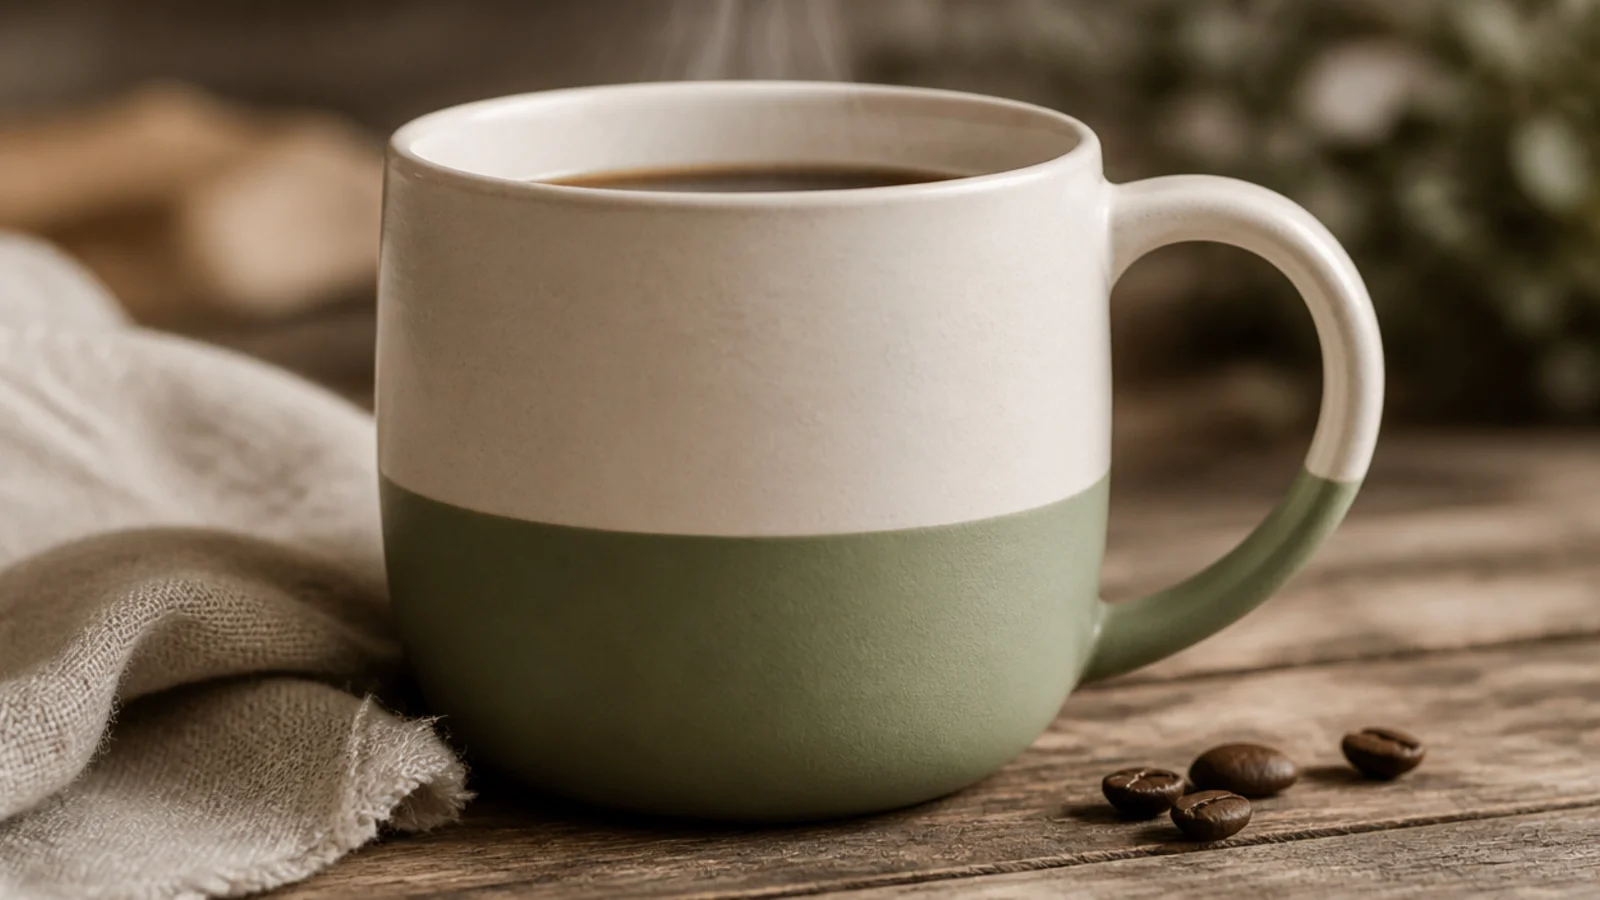
A clean two-tone dip is the easiest gift-worthy design and needs no drawing. The muted color against cream reads calm and boutique. It suits anyone, which makes it a safe, elegant gift base.
Degrease the mug with rubbing alcohol. Tape a level line at the halfway point, burnish the edge, and brush two thin coats of muted sage porcelain paint below it, peeling the tape while the second is slightly wet. Air-dry 24 hours, then bake in a cold oven at 300F/150C for 30-35 minutes and cool inside.
Choose a soft, dusty color rather than a bright one; muted tones make the dip look considered and gift-shop worthy.
Don’t eyeball the tape line; a crooked dip is the one thing that makes a handmade gift look careless.
2. Hand-Lettered Name
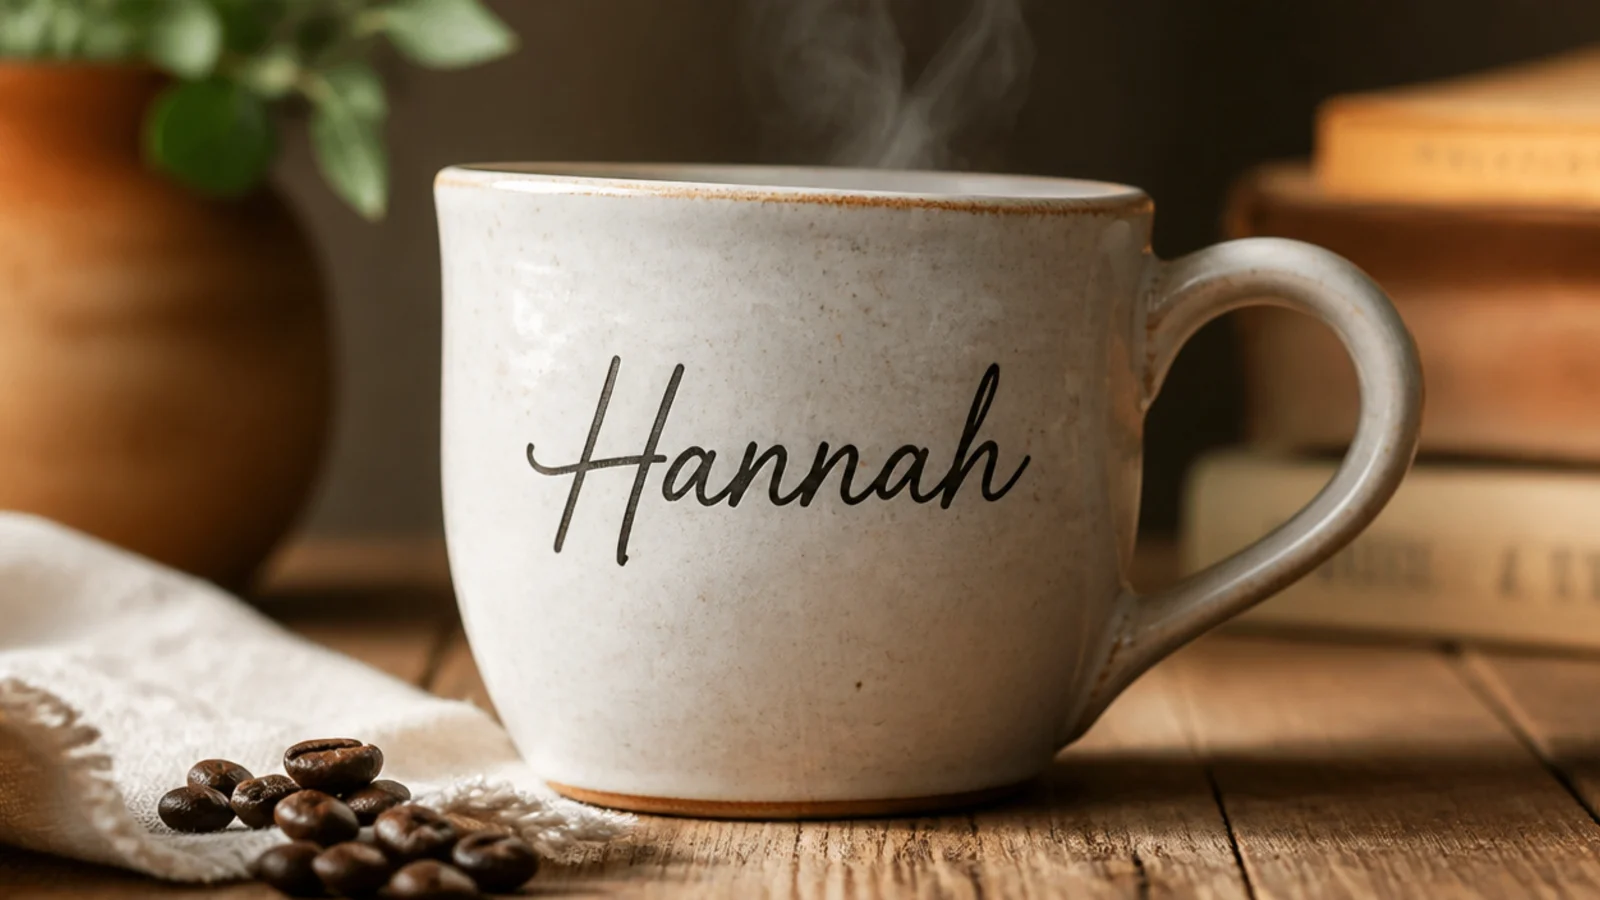
Degrease the mug and pencil the name in a straight baseline below the rim to set spacing. Trace it with a fine porcelain paint pen, then thicken the downstrokes on a second pass. Erase pencil once dry to the touch. Air-dry 24 hours, then oven-cure at 300F/150C for 30-35 minutes in a cold oven and cool inside.
A name is the most personal gift detail there is, and it turns a plain mug into clearly theirs. Simple faux-calligraphy looks skilled without training. It’s the classic personalized-gift design.
Skip thisDon’t attempt ornate script for a first name mug; a clean faux-calligraphy or print is far easier to keep neat.
Editor's notePencil the whole name and adjust the spacing before inking; even, centered letters are what make it look professional.
3. Folk Flower Band
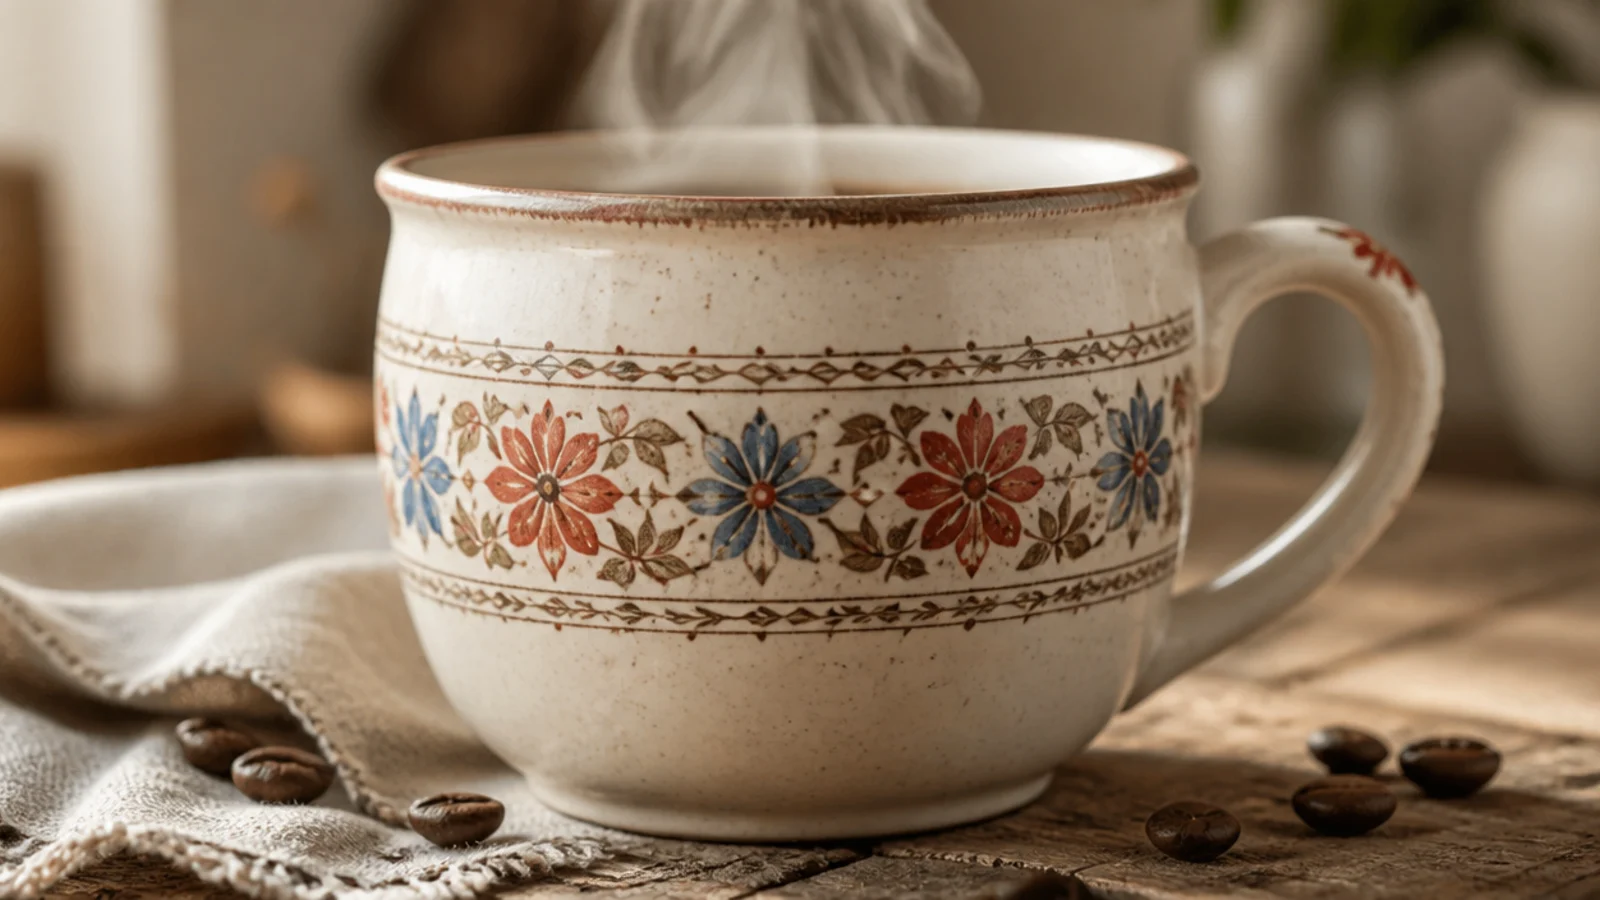
A folk flower band feels heritage and hand-crafted, perfect for someone who loves cozy style. The repeating small flowers read as traditional pottery. Working symmetrically keeps it balanced and giftable.
Degrease the mug and pencil a horizontal band with a center flower. Paint a central bloom, then mirror small flowers, leaves, and dots outward on both sides with a fine brush in red and blue. Keep the two halves matching. Air-dry 24 hours, then bake in a cold oven at 300F/150C for 30-35 minutes and cool inside.
Build the band outward from a center motif so both sides stay symmetrical instead of drifting by the end.
Don’t freehand the whole band left to right; without a center anchor the flowers crowd unevenly.
4. Botanical Leaf Wrap
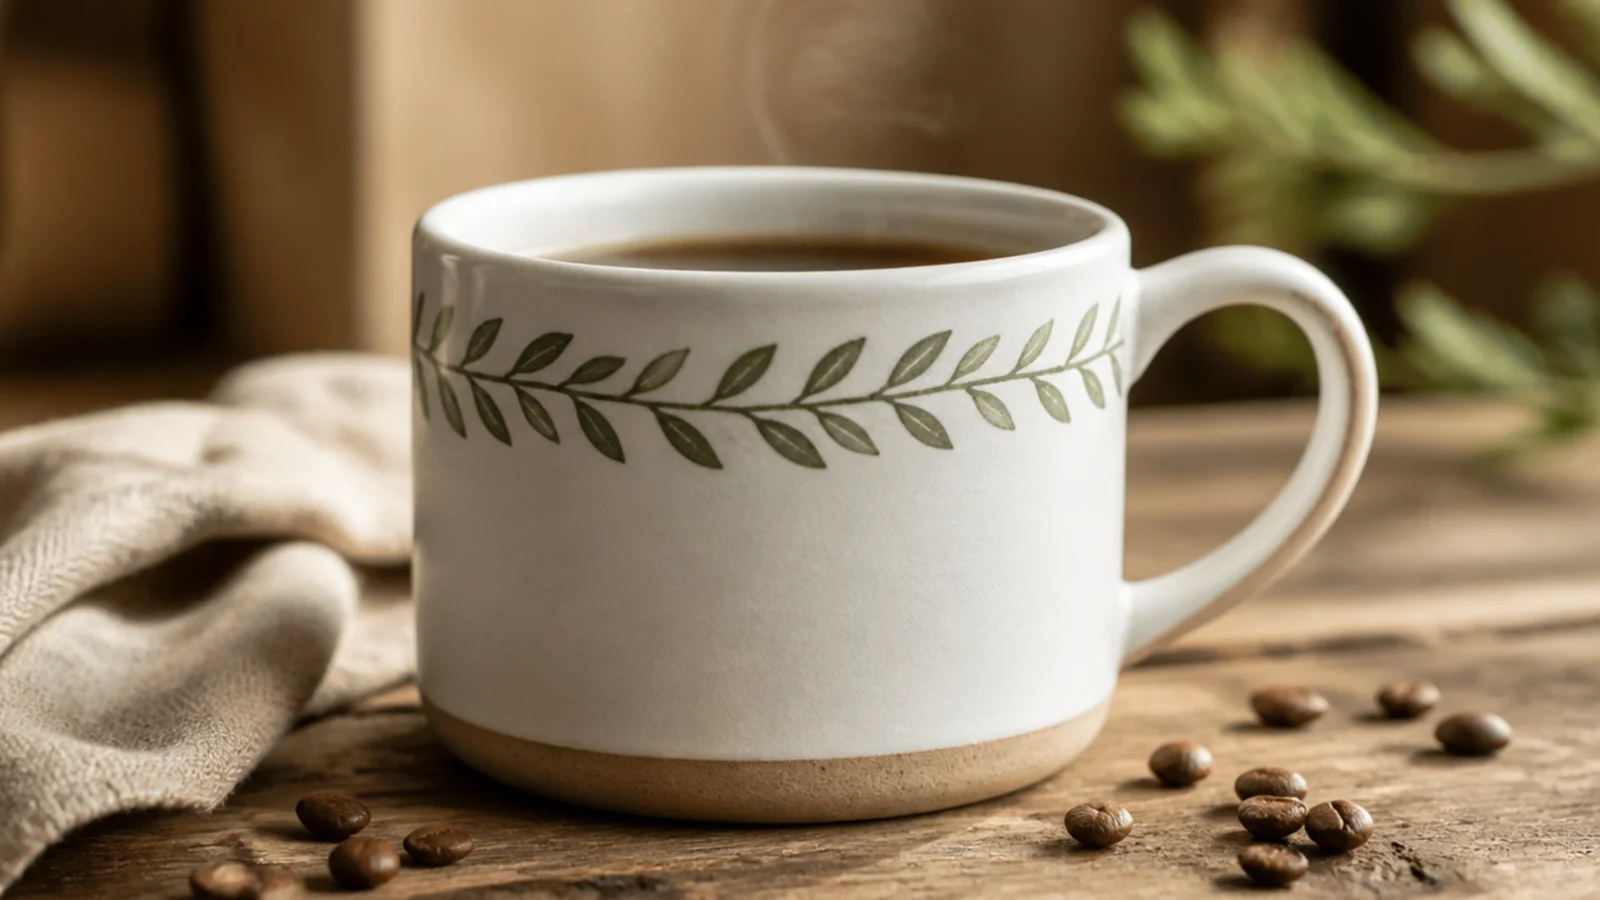
A leafy vine circling the mug is fresh, elegant, and suits almost anyone. The repeating leaf strokes look sophisticated. It’s a natural, calming gift that isn’t fussy.
Degrease the mug and pencil a gentle wavy line around the body a half-inch below the rim. Paint the vine olive with a fine brush, then add leaves with single press-and-lift strokes, alternating sides, as a continuous band. Air-dry 24 hours, then oven-cure at 300F/150C for 30-35 minutes in a cold oven and cool inside.
Paint each leaf with one press and lift of the brush for a natural tapered shape, faster than outlining and filling.
Don’t let the vine climb toward the lip; keep the wrap a half-inch below the rim for food safety.
5. Birth Flower Motif
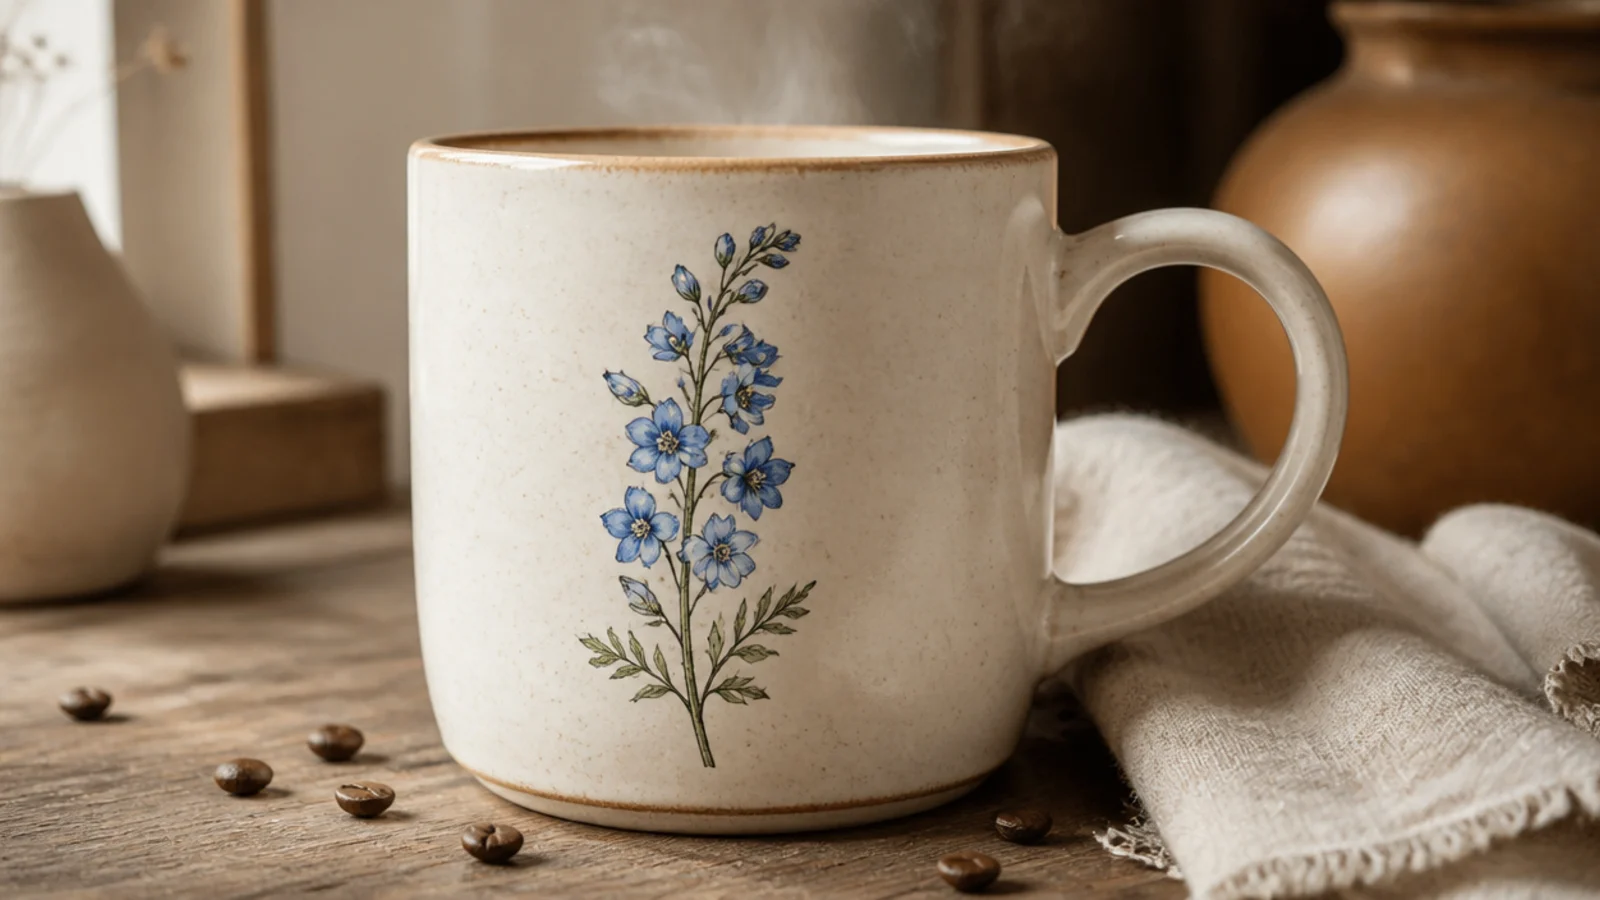
A recipient’s birth flower is a meaningful, personal gift detail tied to their birthday. A simple stylized version reads better than a botanical study. It feels thoughtful and custom.
Degrease the mug and look up the person’s birth-month flower, then pencil a simplified version on the front. Paint the stem and leaves green and the blooms in a muted color with a fine brush, keeping it clean and stylized. Air-dry 24 hours, then bake in a cold oven at 300F/150C for 30-35 minutes and cool inside.
Simplify the flower to a few clean shapes; a stylized bloom reads far better on a curved mug than a detailed one.
Don’t try to render every petal accurately; over-detailing makes it muddy and harder to keep neat.
6. Monogram Initial
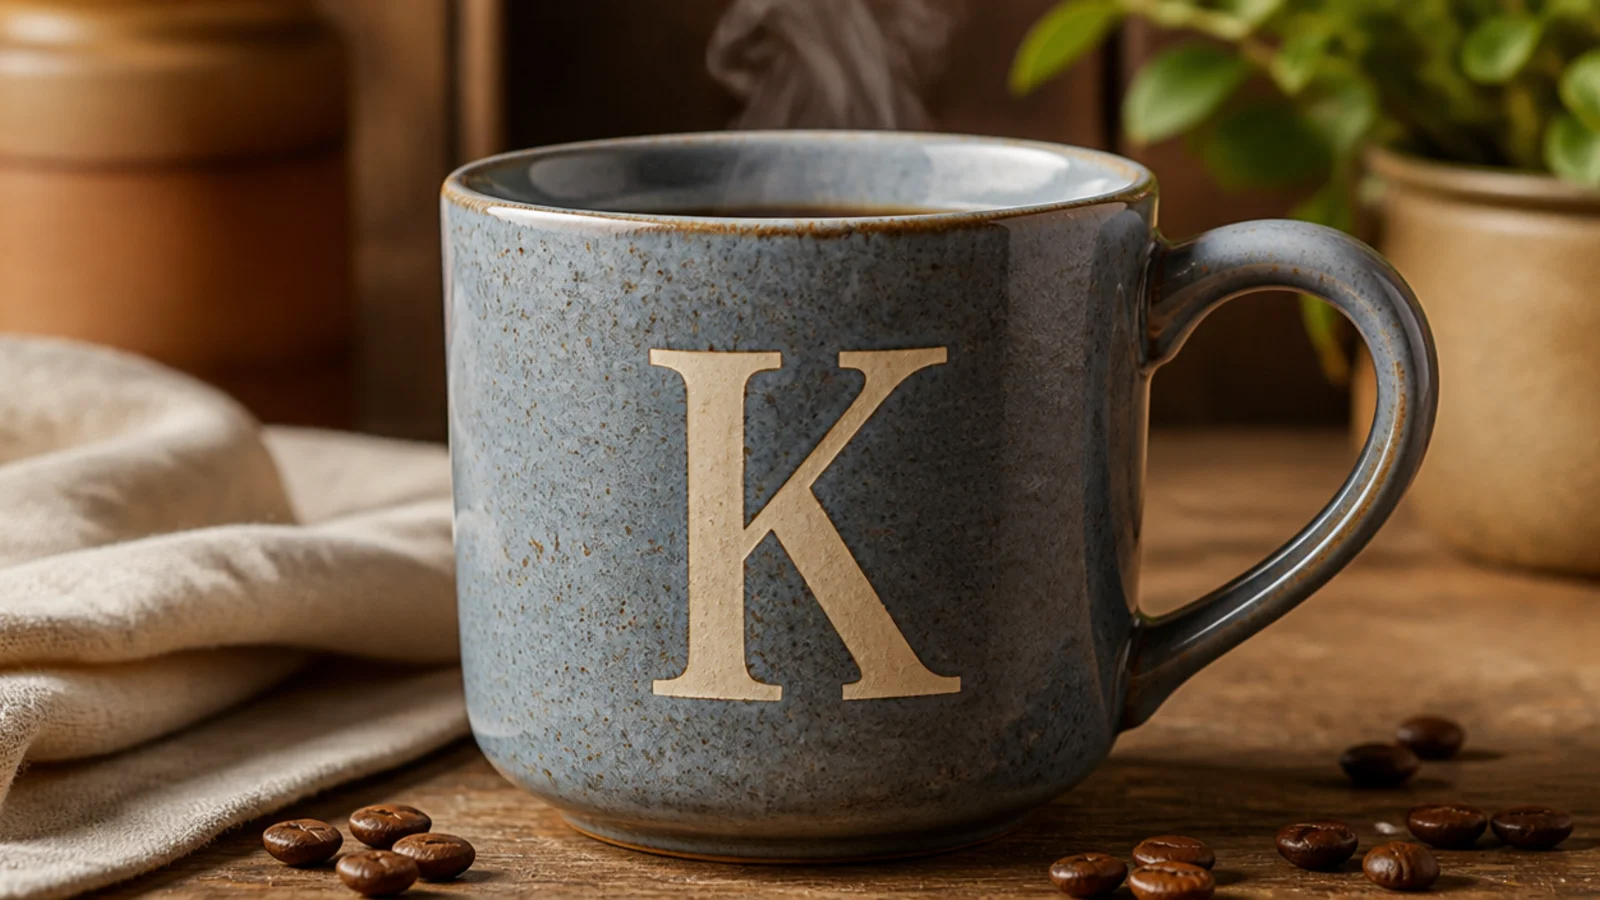
One elegant initial is a timeless, grown-up gift that suits anyone. Using a printed letter as a stencil keeps the shape perfect. It’s understated and always well received.
Degrease and base-coat the mug if you want a colored background, letting it dry. Print the initial at size, cut it out, and trace it lightly in pencil, then fill the outline with two thin coats using a small brush. Erase stray pencil, air-dry 24 hours, then oven-cure at 300F/150C for 30-35 minutes in a cold oven and cool inside.
Size the letter to fill about 60% of the front height so it looks intentional rather than lost or cramped.
Don’t try freehand script; a clean traced serif or block initial is far more forgiving and elegant.
7. Rustic Speckle Finish
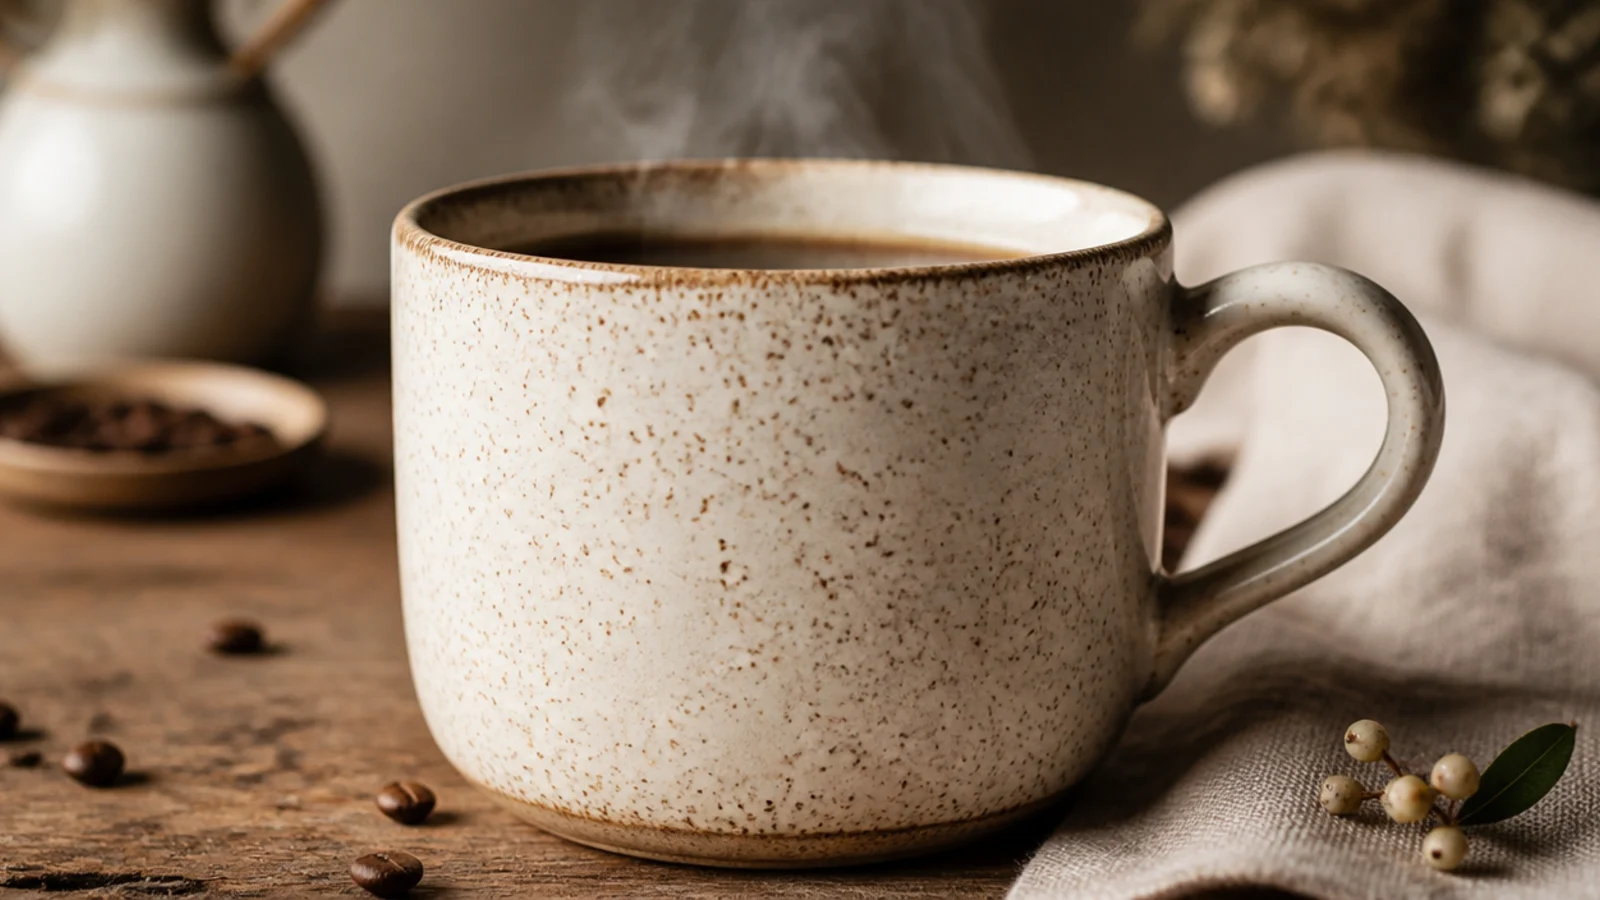
A speckled finish makes a plain mug look like artisan pottery, which reads as a high-end gift. You flick thinned paint for the scatter. It’s forgiving and hides any base-coat unevenness.
Degrease the mug and base-coat cream if you like, letting it dry. Thin warm brown porcelain paint to a milky consistency, load a stiff brush or old toothbrush, and flick speckles by dragging your thumb across the bristles, rotating for even coverage. Air-dry 24 hours, then bake in a cold oven at 300F/150C for 30-35 minutes and cool inside.
Test the flick on paper first; the right thinness gives fine even specks rather than blobs or runs.
Don’t hold the brush close to the mug; big wet splatters look like spills, not artisan speckle.
8. Dotted Mandala
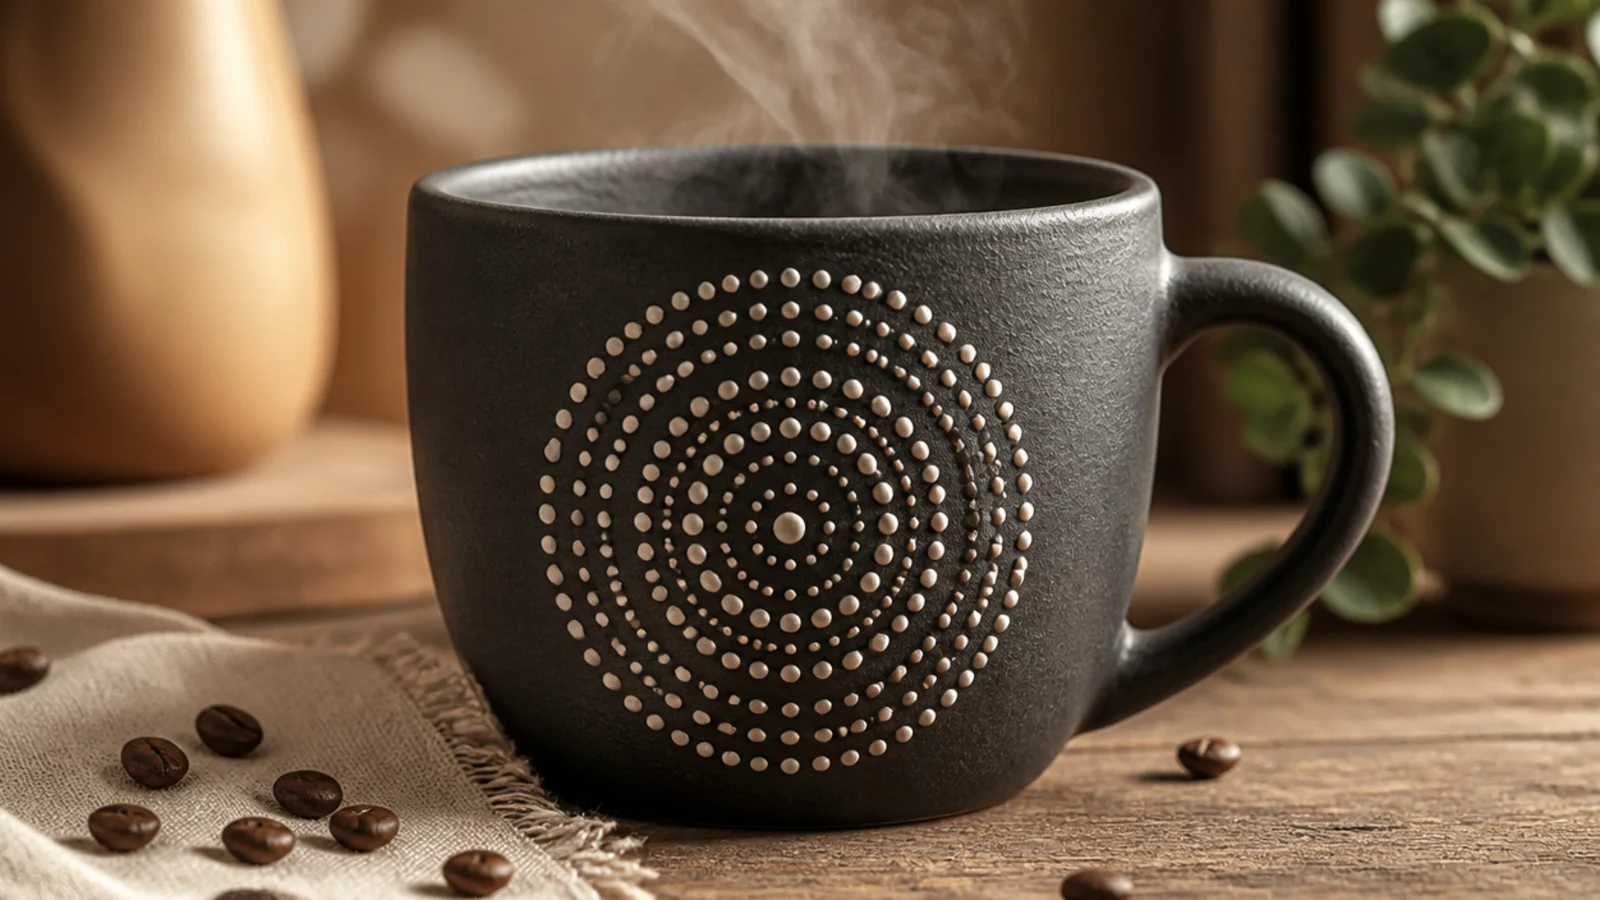
A dot-mandala medallion looks intricate but is built entirely from stamped dots, so it’s more achievable than it appears. The symmetry reads as skilled craftsmanship. It makes an impressive-looking gift.
Degrease and base-coat the mug charcoal, letting it dry. Start with one center dot, then build concentric rings of evenly spaced dots outward using dotting tools or the ends of brushes in graduated sizes. Keep each ring even. Air-dry 24 hours, then oven-cure at 300F/150C for 30-35 minutes in a cold oven and cool inside.
Work from the center dot outward, keeping each ring evenly spaced; the symmetry is what makes a mandala impressive.
Don’t rush the outer rings; uneven spacing there breaks the symmetry that makes the whole medallion work.
9. Sponged Two-Tone
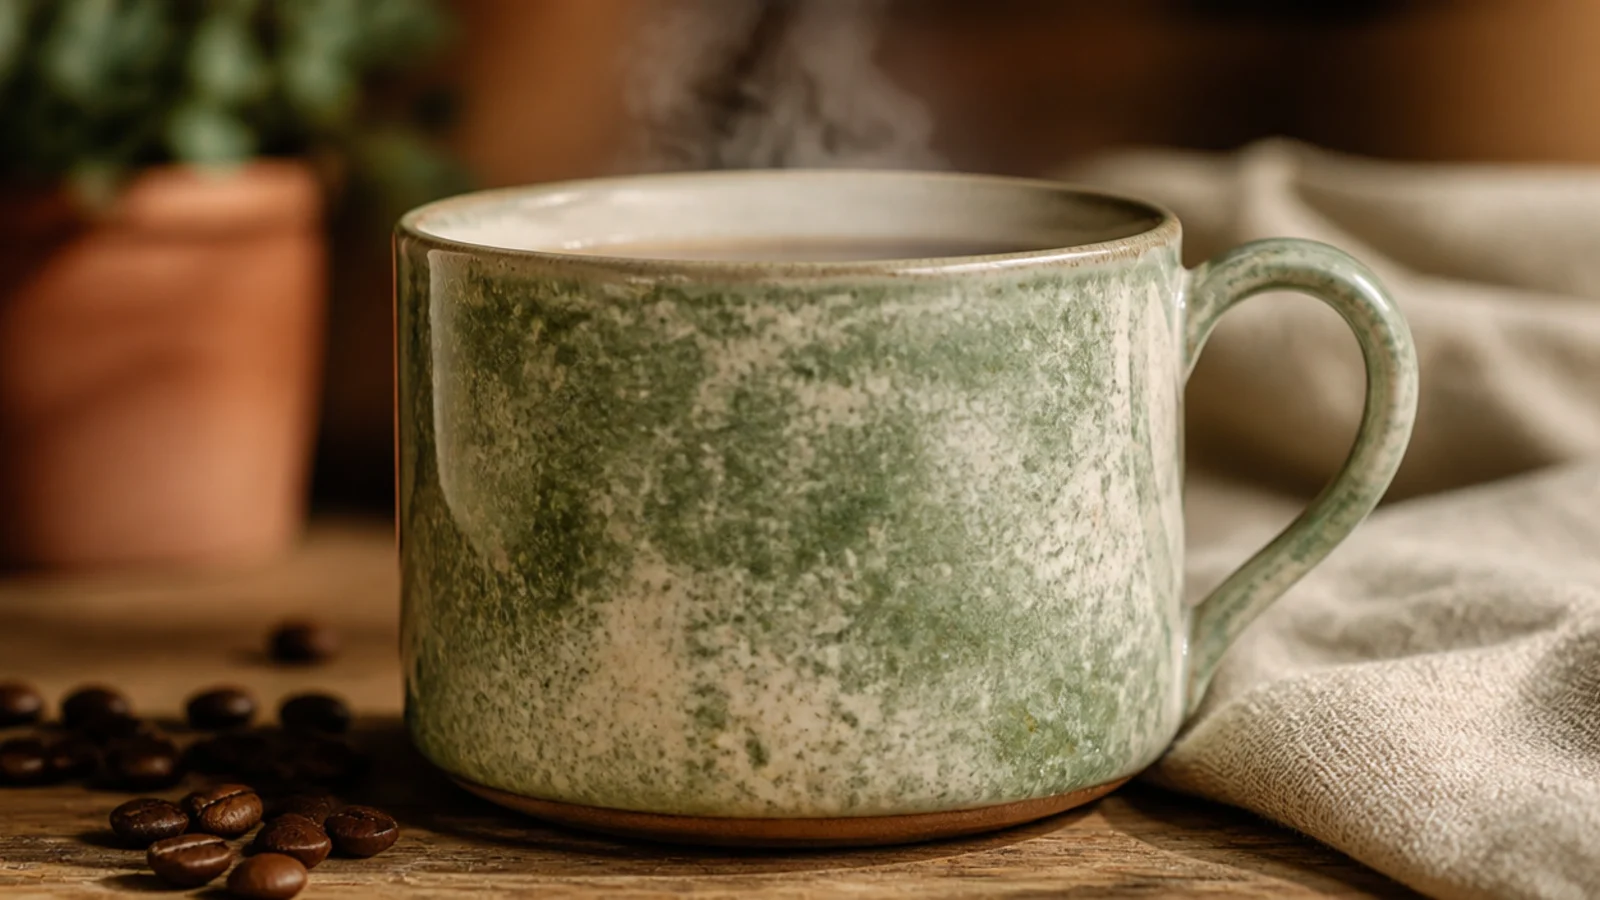
A soft sponged blend of two muted tones mimics a hand-glazed pottery finish. The organic mottling looks artisanal. It’s a forgiving, textural gift that reads expensive.
Degrease the mug and base-coat cream, letting it dry. Dab muted sage over the surface with a damp sponge in an uneven, mottled way, letting some cream show through, then soften with a clean part of the sponge. Air-dry 24 hours, then bake in a cold oven at 300F/150C for 30-35 minutes and cool inside.
Keep the sponging uneven and let the base color peek through; a mottled blend looks like real glaze, a flat one looks painted.
Don’t cover the base color completely; the two-tone mottle is the whole effect, so leave some cream showing.
10. Wildflower Meadow
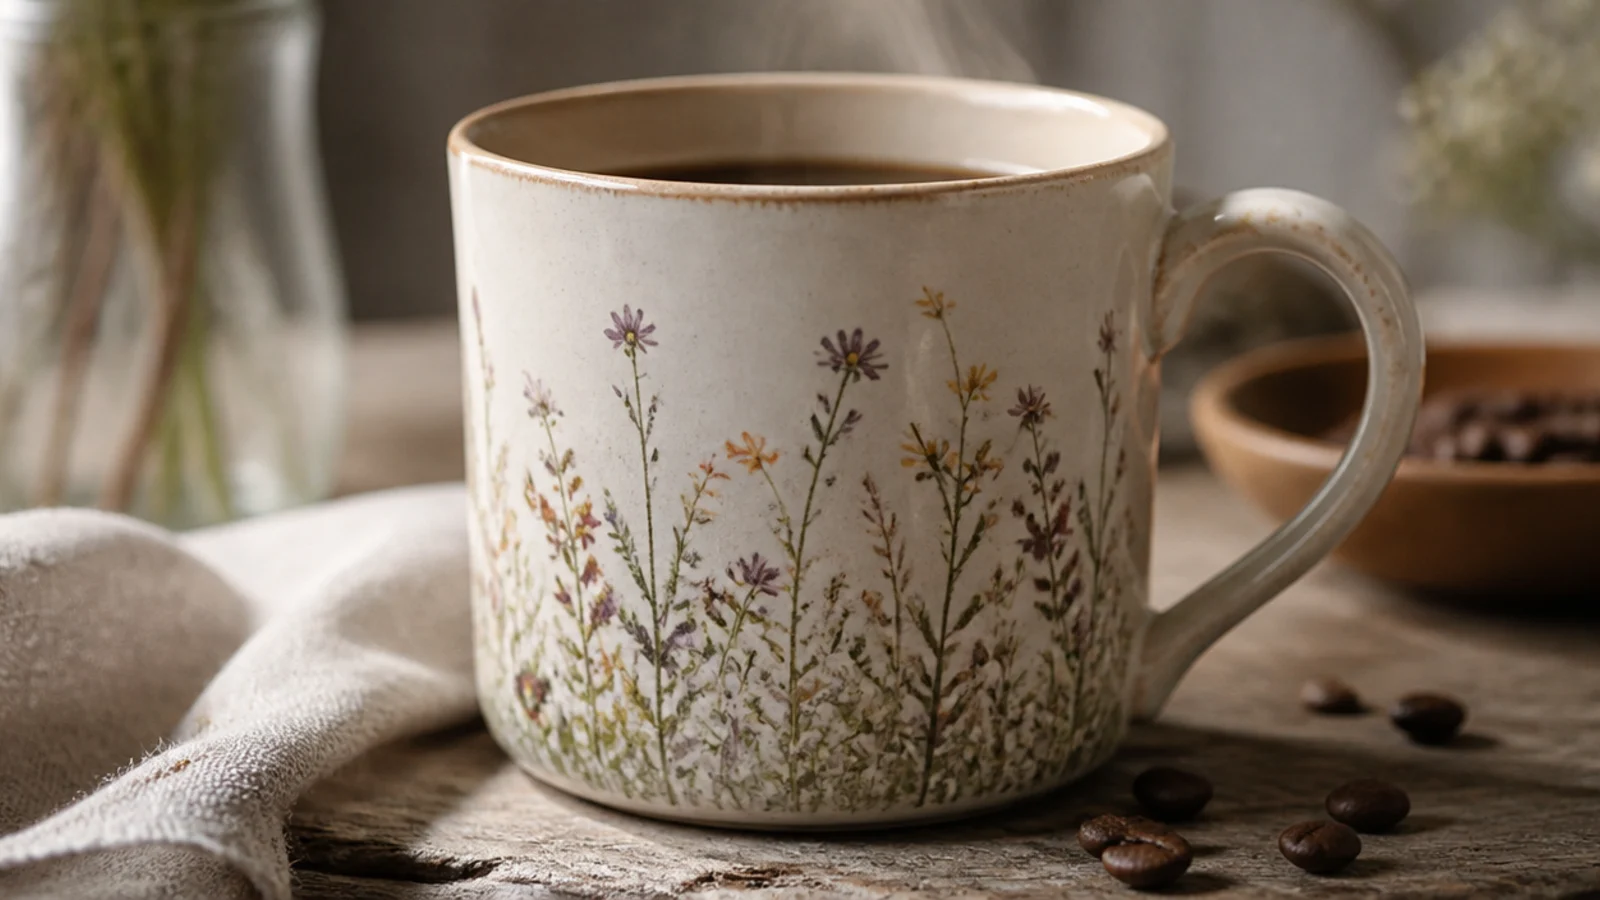
Degrease the mug and pencil several thin stems of varying heights rising from near the base. Paint the stems olive, then add small leaves and tiny bud dots in blush, lavender, and butter yellow with a fine brush. Air-dry 24 hours, then oven-cure at 300F/150C for 30-35 minutes in a cold oven and cool inside.
A little meadow of mixed wildflowers rising from the base is charming and giftable. Thin stems with tiny buds read as a soft meadow. It feels romantic without being fussy.
Skip thisDon’t paint big detailed blooms; tiny dot-and-dash buds are what give the delicate wildflower feel.
Editor's noteVary the stem heights and let them fan slightly apart; a natural spray looks like a meadow, a stiff bunch looks pasted on.
11. Custom Quote
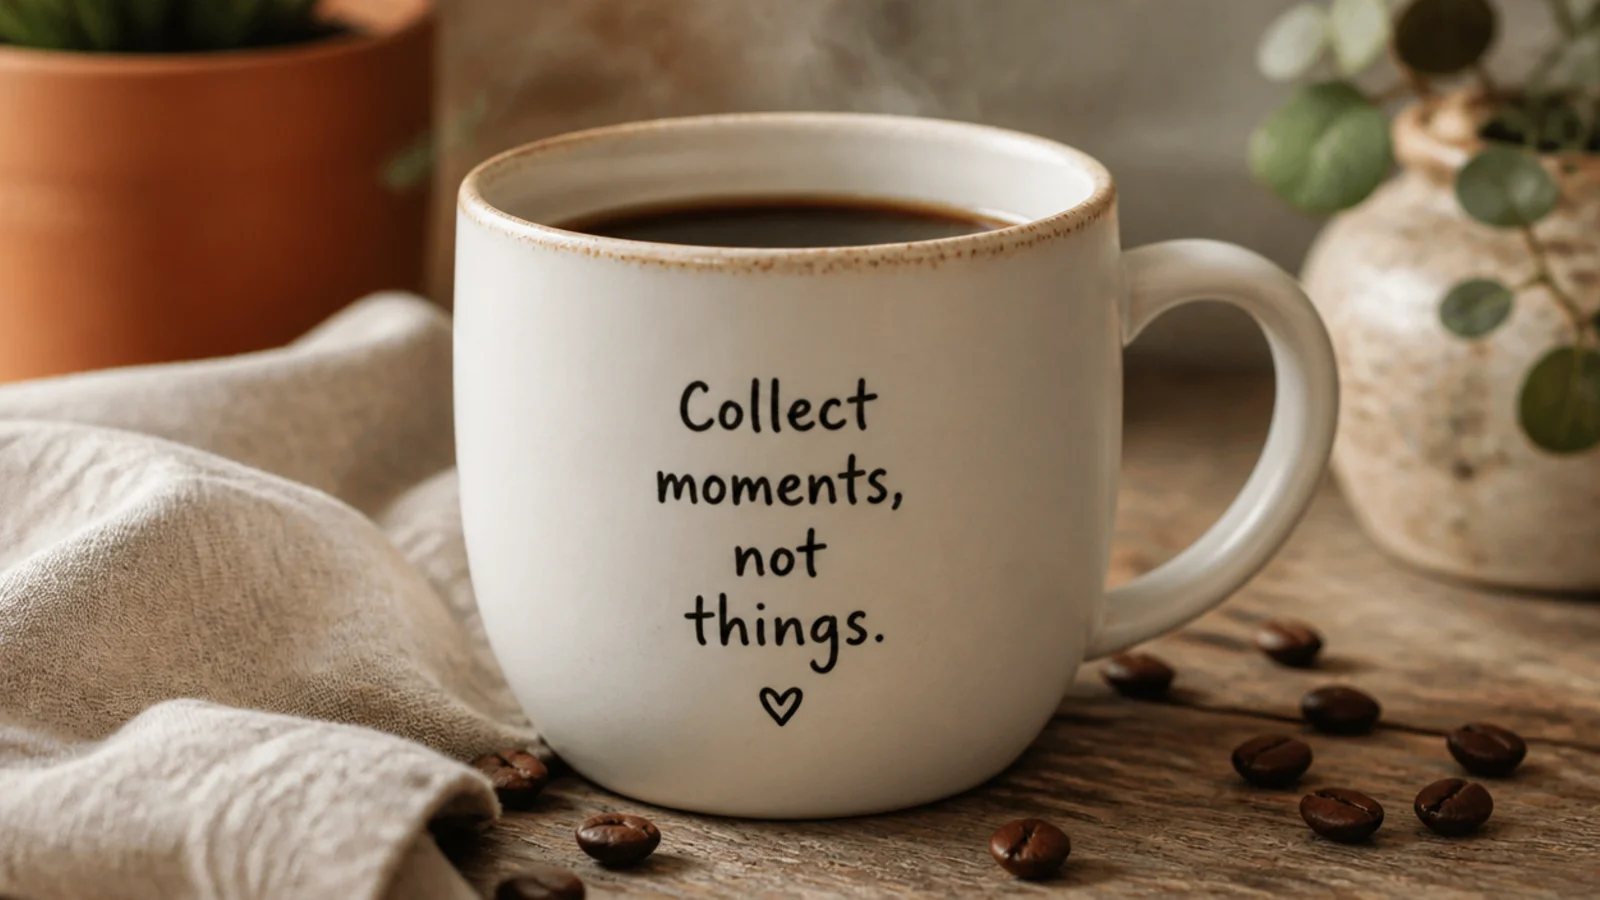
A short quote that means something to the recipient is a heartfelt gift detail. Keeping it to a few words makes it fit and read cleanly. It personalizes the mug with a message rather than a picture.
Degrease the mug and pencil the quote in a stacked layout below the rim to set spacing. Trace it with a fine porcelain paint pen, thickening downstrokes for emphasis. Erase pencil once dry. Air-dry 24 hours, then bake in a cold oven at 300F/150C for 30-35 minutes and cool inside.
Stack a short quote on a few lines rather than wrapping it around, so the letters stay large and legible.
Don’t choose a long quote; it wraps awkwardly and shrinks until it’s hard to read on the curve.
12. Scandinavian Folk Heart
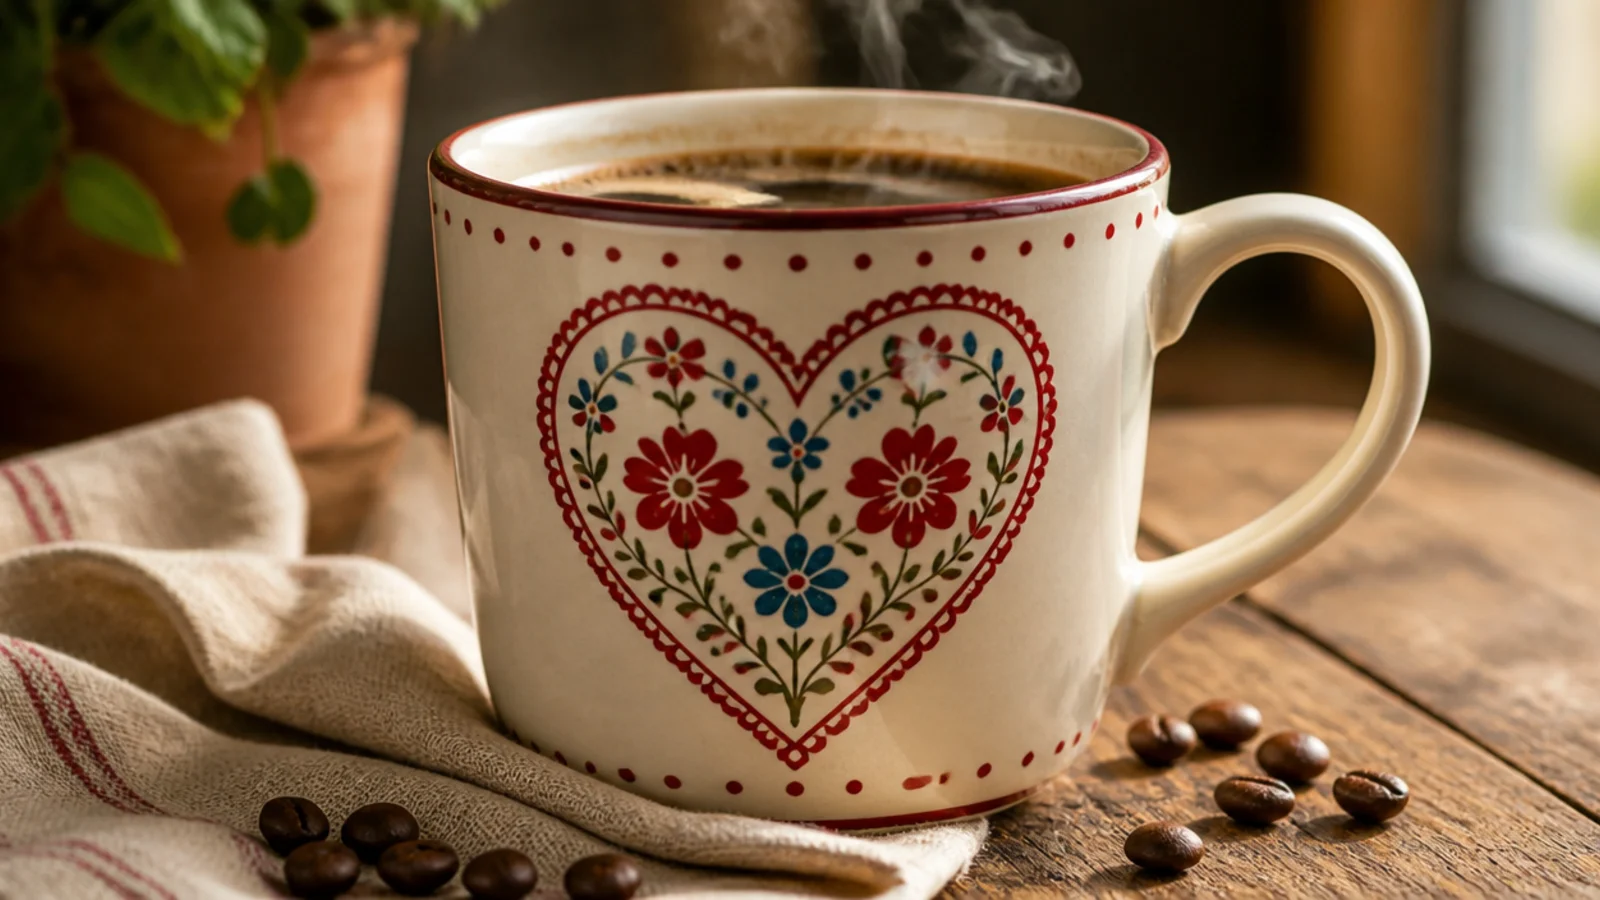
A decorative folk heart filled with tiny flowers is warm and traditional, ideal for a loved one. The heart outline holds a little folk pattern. It’s romantic but still craft-forward and heritage-feeling.
Degrease the mug and pencil a heart outline on the front. Paint the outline in red, then fill it with small flowers, leaves, and dots in blue and red using a fine brush. Keep the pattern balanced within the heart. Air-dry 24 hours, then oven-cure at 300F/150C for 30-35 minutes in a cold oven and cool inside.
Keep the little motifs inside the heart evenly spaced and symmetrical so it reads as a designed folk piece.
Don’t cram too many motifs inside; a few well-placed flowers read folk, an overstuffed heart reads messy.
13. Vine Wreath with Initial
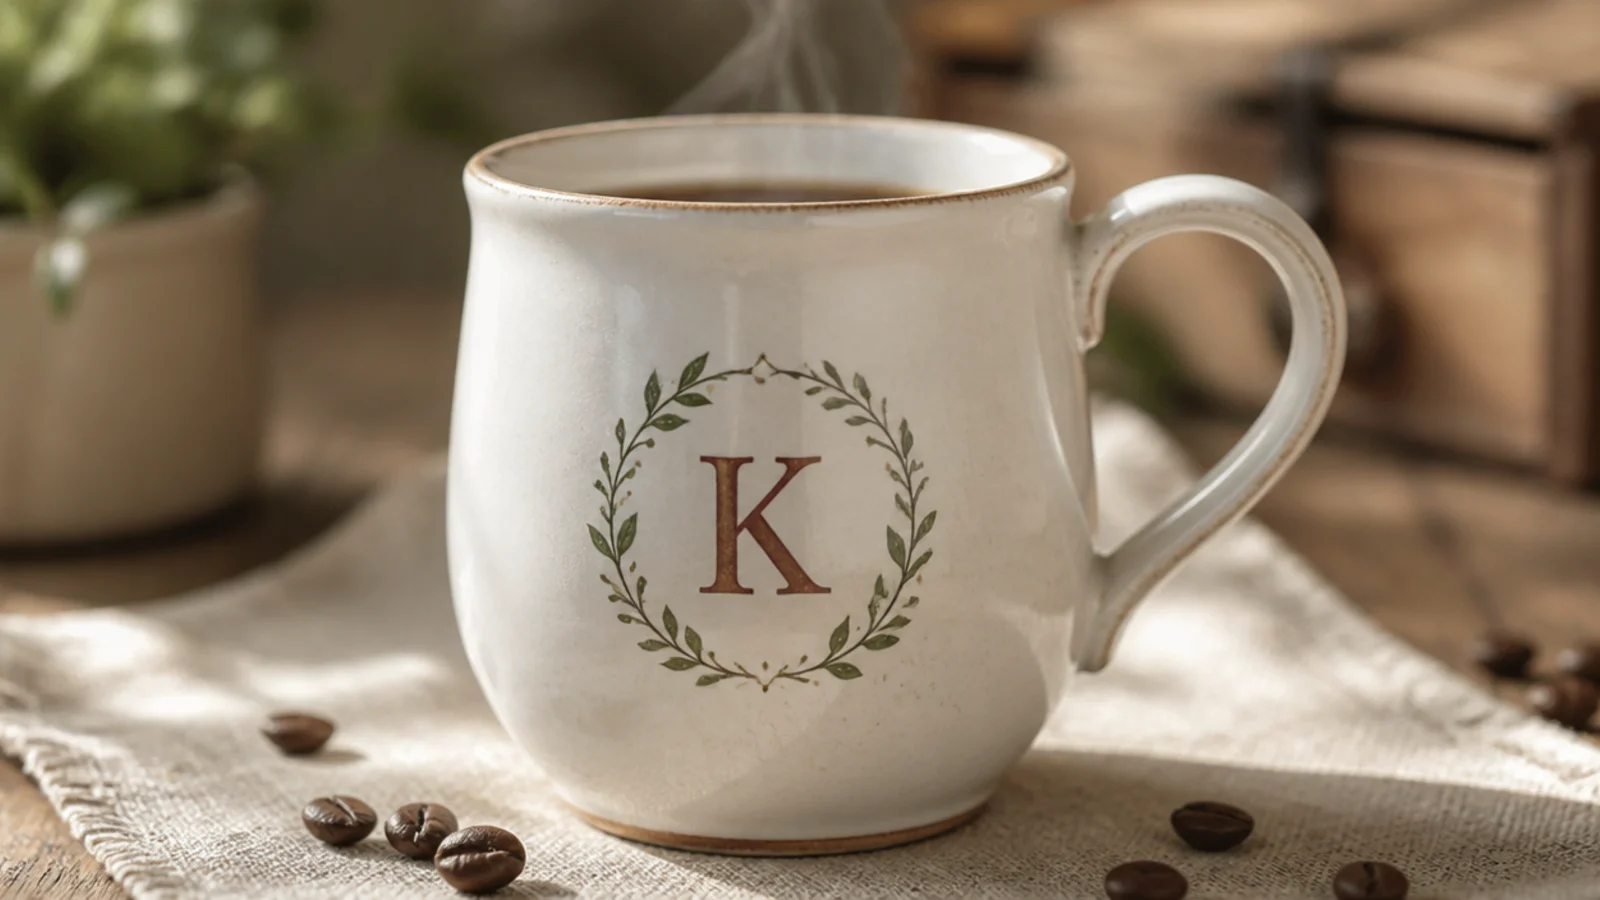
A leafy wreath framing an initial combines botanical charm with personalization. The vine ring makes the letter feel special. It’s a polished, thoughtful gift design.
Degrease the mug and pencil a circle guide with an initial in the center. Paint the initial first, let it dry, then ring it with a leafy vine of small press-and-lift leaf strokes in olive. Keep the wreath even. Air-dry 24 hours, then bake in a cold oven at 300F/150C for 30-35 minutes and cool inside.
Paint the initial first and build the wreath around it, so the letter stays centered inside the ring.
Don’t let the wreath overwhelm the letter; keep the leaves small so the initial stays the clear focal point.
14. Striped Name Mug
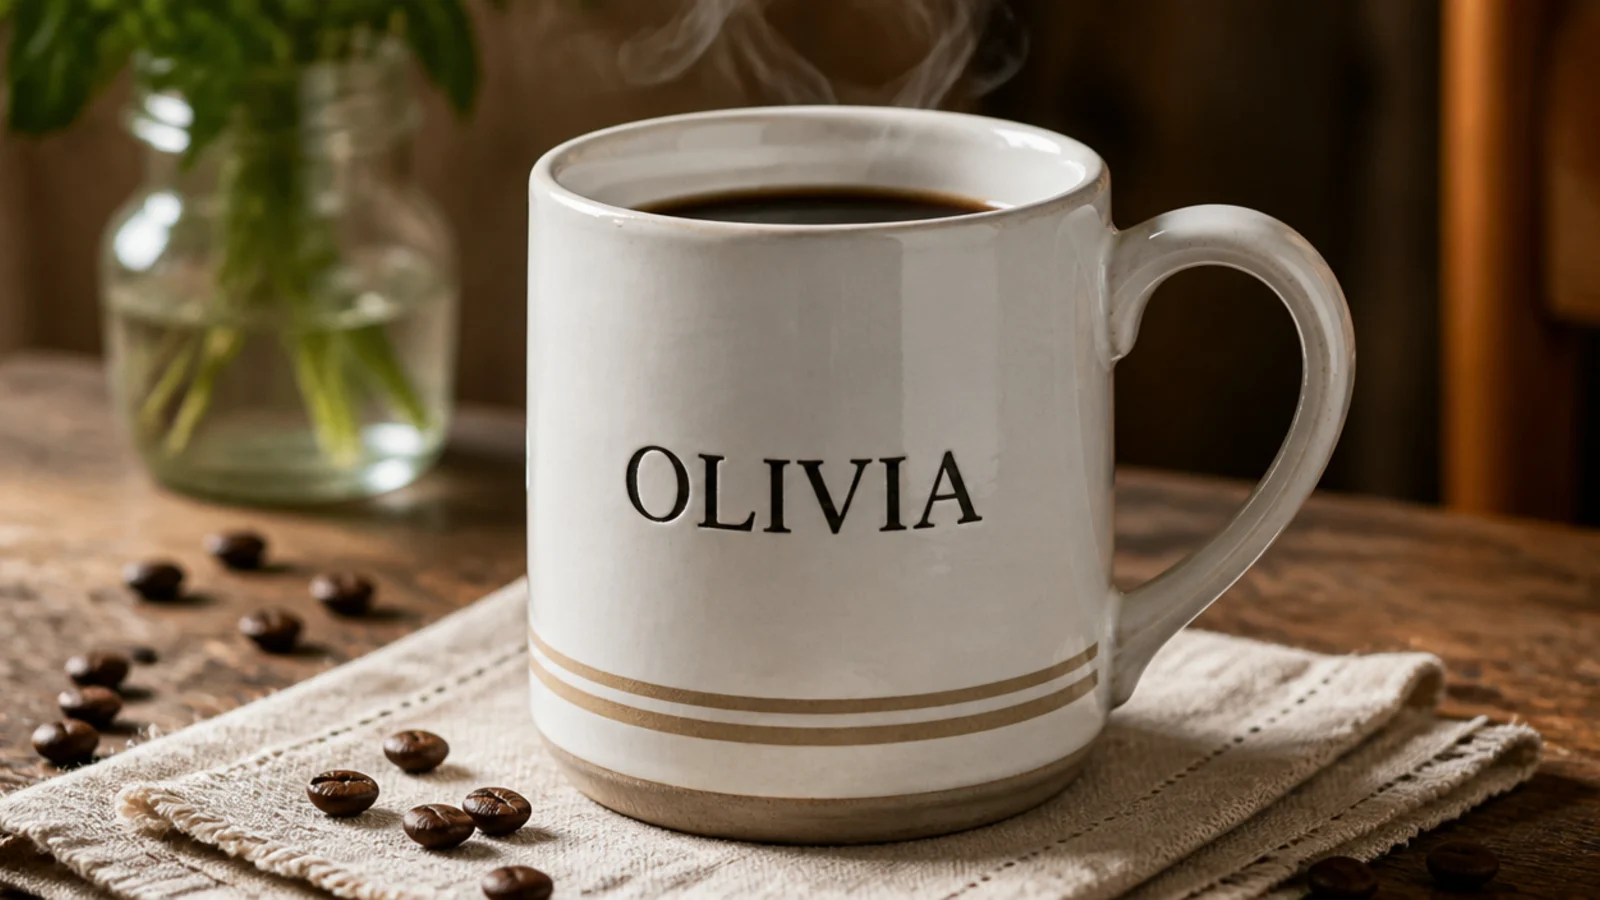
Degrease the mug and tape two thin level stripes near the base, painting them a muted color and peeling while slightly wet. Once dry, pencil and letter the name above them with a fine porcelain paint pen. Erase pencil, air-dry 24 hours, then oven-cure at 300F/150C for 30-35 minutes in a cold oven and cool inside.
Pairing a name with a couple of clean stripes gives a personalized mug a tidy, designed frame. The stripes ground the lettering. It feels both custom and put-together as a gift.
Skip thisDon’t crowd the name against the stripes; leave clear space between them so both read cleanly.
Editor's noteMatch the stripe color to a subtle accent in the lettering so the name and stripes read as one intentional design.
15. Watercolor-Style Floral
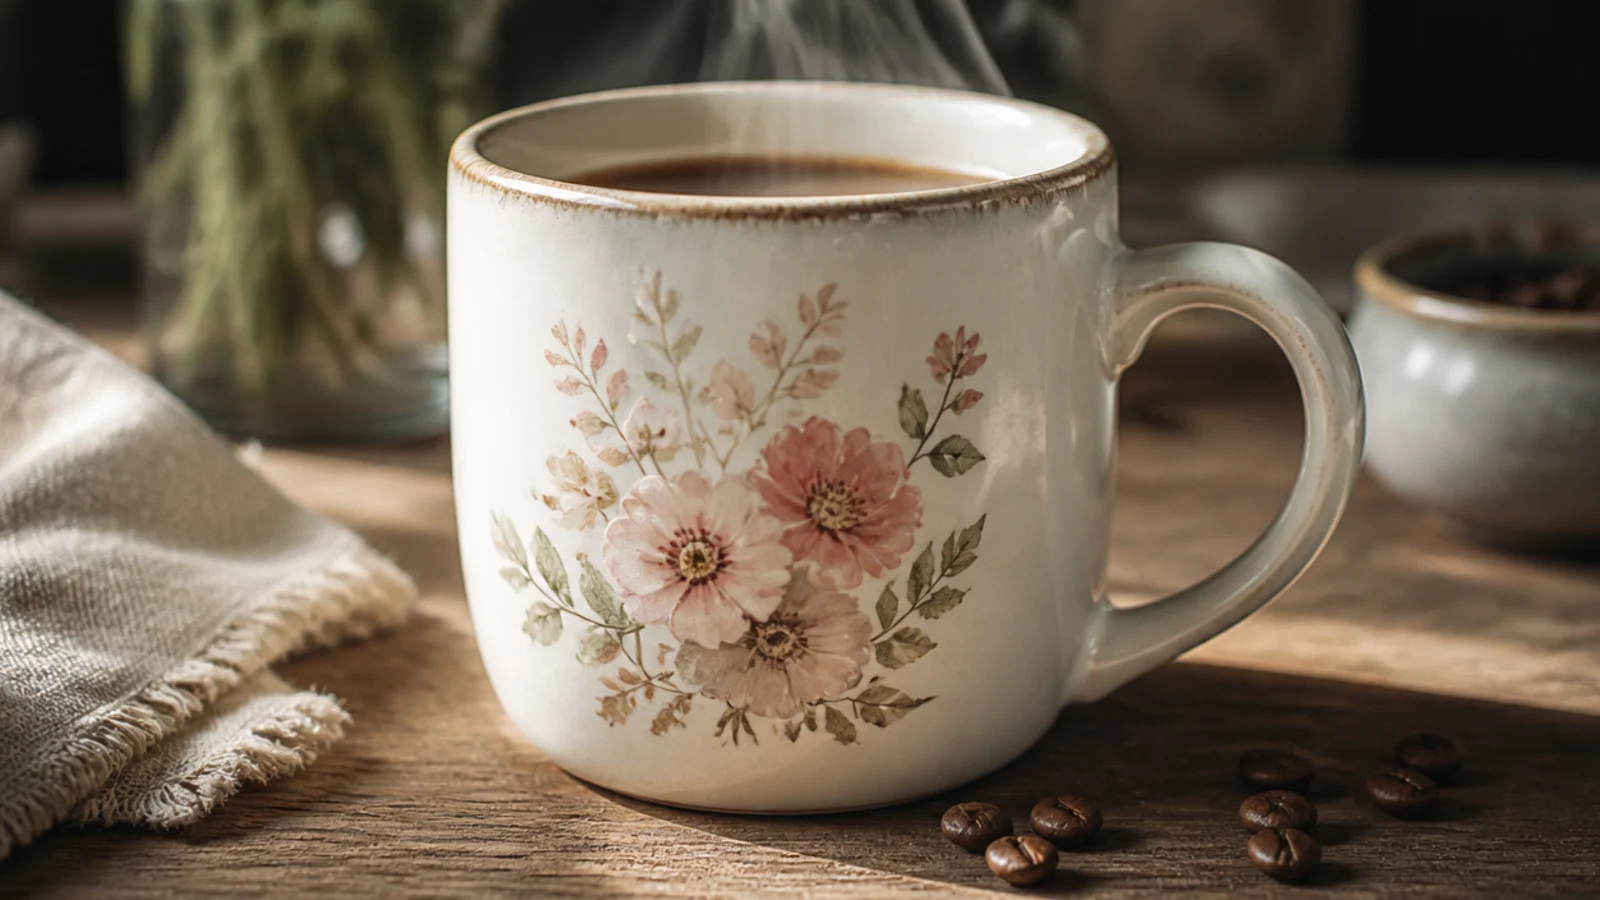
Degrease the mug and thin muted porcelain paints slightly for a translucent look. Brush loose petal shapes on the front in soft pinks, blending edges while wet, then add green leaves and fine stem lines once dry. Air-dry 24 hours, then bake in a cold oven at 300F/150C for 30-35 minutes and cool inside.
A loose watercolor-style floral looks soft and artistic, a lovely gift for someone who likes gentle florals. Thinned, blended color gives the watercolor feel. It’s the most painterly design here and still forgiving.
Skip thisDon’t outline the flowers with hard lines; crisp outlines kill the soft watercolor effect you’re after.
Editor's noteWork while the paint is wet and let the colors blend softly; the gentle bleed is what gives the watercolor look.



