



1. Dipped Base

Painting only the bottom third of a ceramic mug is the easiest way to a designed look with no drawing. The clean band against white glaze reads modern and boutique. One grounded color — dusty blue, sage, terracotta — keeps it versatile.
Wipe the glaze with rubbing alcohol and let it flash off. Tape a level line a third of the way up, using the base as a guide, and burnish the edge down. Brush two thin coats of porcelain paint below the line, peeling the tape while the second is slightly wet. Air-dry 24 hours, then bake in a cold oven at 300F/150C for 30-35 minutes and cool inside.
Editor's noteSpin the mug on a jar lid as you wrap the tape so the band stays perfectly level all the way around.
Skip thisDon’t apply one thick coat to speed it up; on slick glaze a heavy coat chips at the tape edge instead of curing smooth.
2. Two-Tone Split

Two colors meeting at one crisp line looks like a design-shop piece, and tape does the precise work. A lighter top over a deeper bottom feels grounded. It is a natural next step up from a single dip.
Degrease the glaze, then brush the whole mug in your lighter color with two thin coats and let it dry. Tape a level line at the middle, press it down hard, and paint the lower half in your second color. Peel before it fully sets and touch up any bleed. Air-dry 24 hours, then oven-cure at 300F/150C for 30-35 minutes in a cold oven and cool inside.
Editor's noteRun a fingernail along the tape edge before the second color so paint can’t seep under and blur the seam.
Skip thisDon’t skip base-coating the whole mug; if the top color doesn’t cover the seam, the dividing line looks muddy.
3. Speckled Stoneware Finish

Fine speckles make a smooth ceramic mug look like artisan stoneware. You flick thinned paint off a stiff brush, which is hard to get wrong and hides any unevenness. It is one of the most satisfying finishes for a plain mug.
Degrease the glaze and base-coat in cream if you like, letting it dry. Thin dark brown porcelain paint with a few drops of its medium to a milky consistency. Load a stiff brush or old toothbrush and drag your thumb across the bristles to flick speckles, rotating the mug for even coverage. Air-dry 24 hours, then bake in a cold oven at 300F/150C for 30-35 minutes and cool inside.
Editor's noteTest your flicks on paper first; the right thinness gives tiny even specks instead of blobs or runs.
Skip thisDon’t hold the brush close to the mug; big wet splatters look like spills, not stoneware speckle.
4. Hand-Lettered Quote

A short phrase in simple lettering turns a mug into a personal message. Keep it to two or three words so it fits the curve and stays legible. Faux-calligraphy — thin up, thick down — looks skilled without training.
Degrease the glaze and pencil the words in a straight baseline below the rim to set spacing. Trace with a fine porcelain paint pen, then thicken every downstroke on a second pass for the calligraphy look. Erase pencil with an alcohol swab once dry to the touch. Air-dry 24 hours, then oven-cure at 300F/150C for 30-35 minutes in a cold oven and cool inside.
Editor's notePencil the whole phrase and adjust spacing before inking; letters that crowd or drift are the mark of a rushed job.
Skip thisDon’t try a long sentence; it wraps awkwardly on the curve and shrinks the letters until they smear.
5. Glazed-Look Color Rim
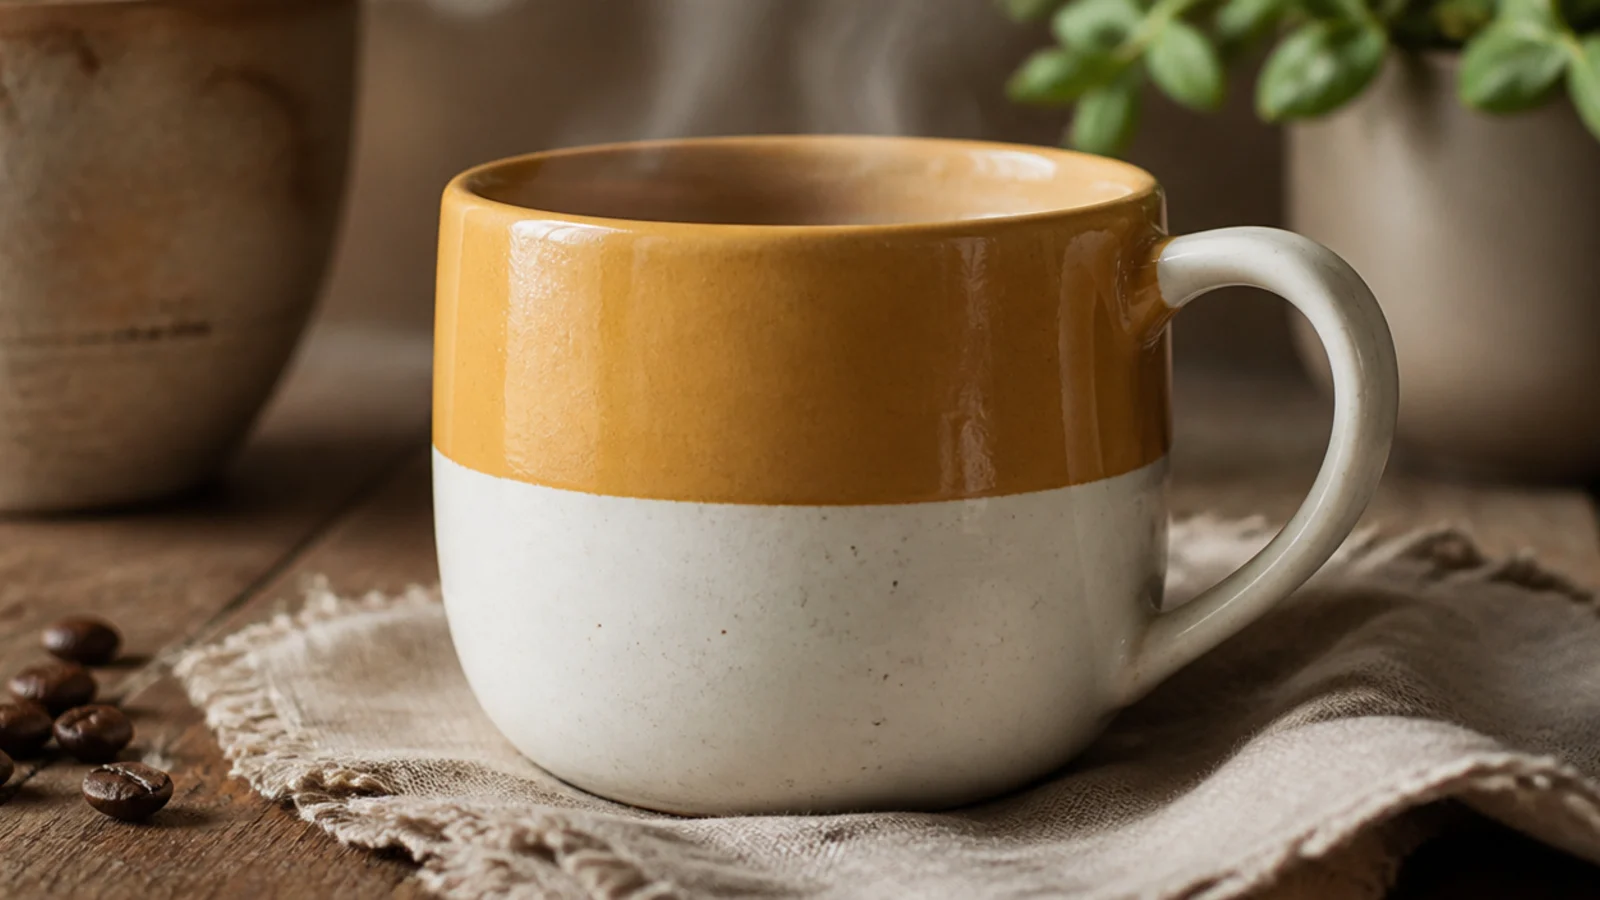
A wide color band on the upper third gives a strong, intentional frame while leaving the lip clean. It mimics a two-glaze ceramic look with just paint. A glossy warm color like mustard or rust reads especially rich.
Degrease the glaze. Tape a level line a half-inch below the rim and another where you want the band to end, then paint between them in two thin coats of a glossy porcelain color. Peel the tape before it sets, keeping the lip bare. Air-dry 24 hours, then bake in a cold oven at 300F/150C for 30-35 minutes and cool inside.
Keep the top tape line a half-inch below the rim so the band looks deliberate and no paint reaches the mouth.
Don’t run the color to the very lip; painting the drinking edge is both unsafe and looks unfinished.
6. Floral Wreath
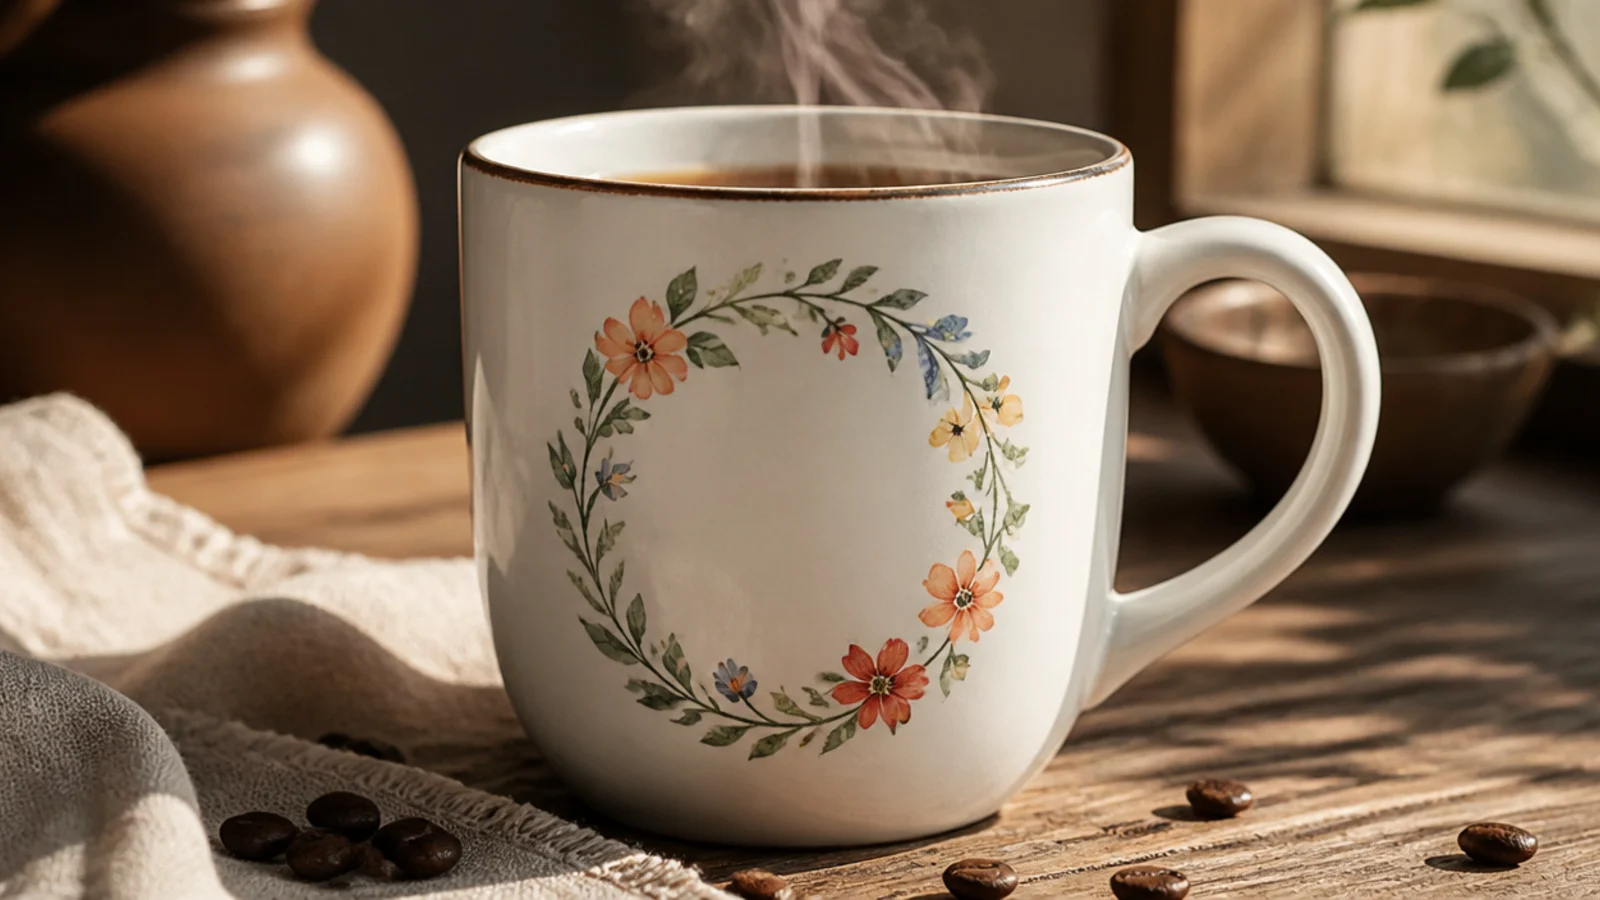
A little floral wreath framing a blank center looks classic and can hold an initial later. Simple dot-and-leaf flowers keep it achievable. It suits gifts and reads as hand-painted in the best way.
Degrease the glaze and pencil a circle guide on the front. Paint small flowers around the ring — five petal dots with a center — and add leaf strokes between them with a fine brush, leaving the middle empty. Air-dry 24 hours, then oven-cure at 300F/150C for 30-35 minutes in a cold oven and cool inside.
Editor's noteSpace a few flowers around the circle first, then fill leaves into the gaps so the wreath stays balanced.
Skip thisDon’t overfill the ring into a solid mass; gaps of white glaze between blooms keep it looking airy and intentional.
7. Geometric Triangle Band
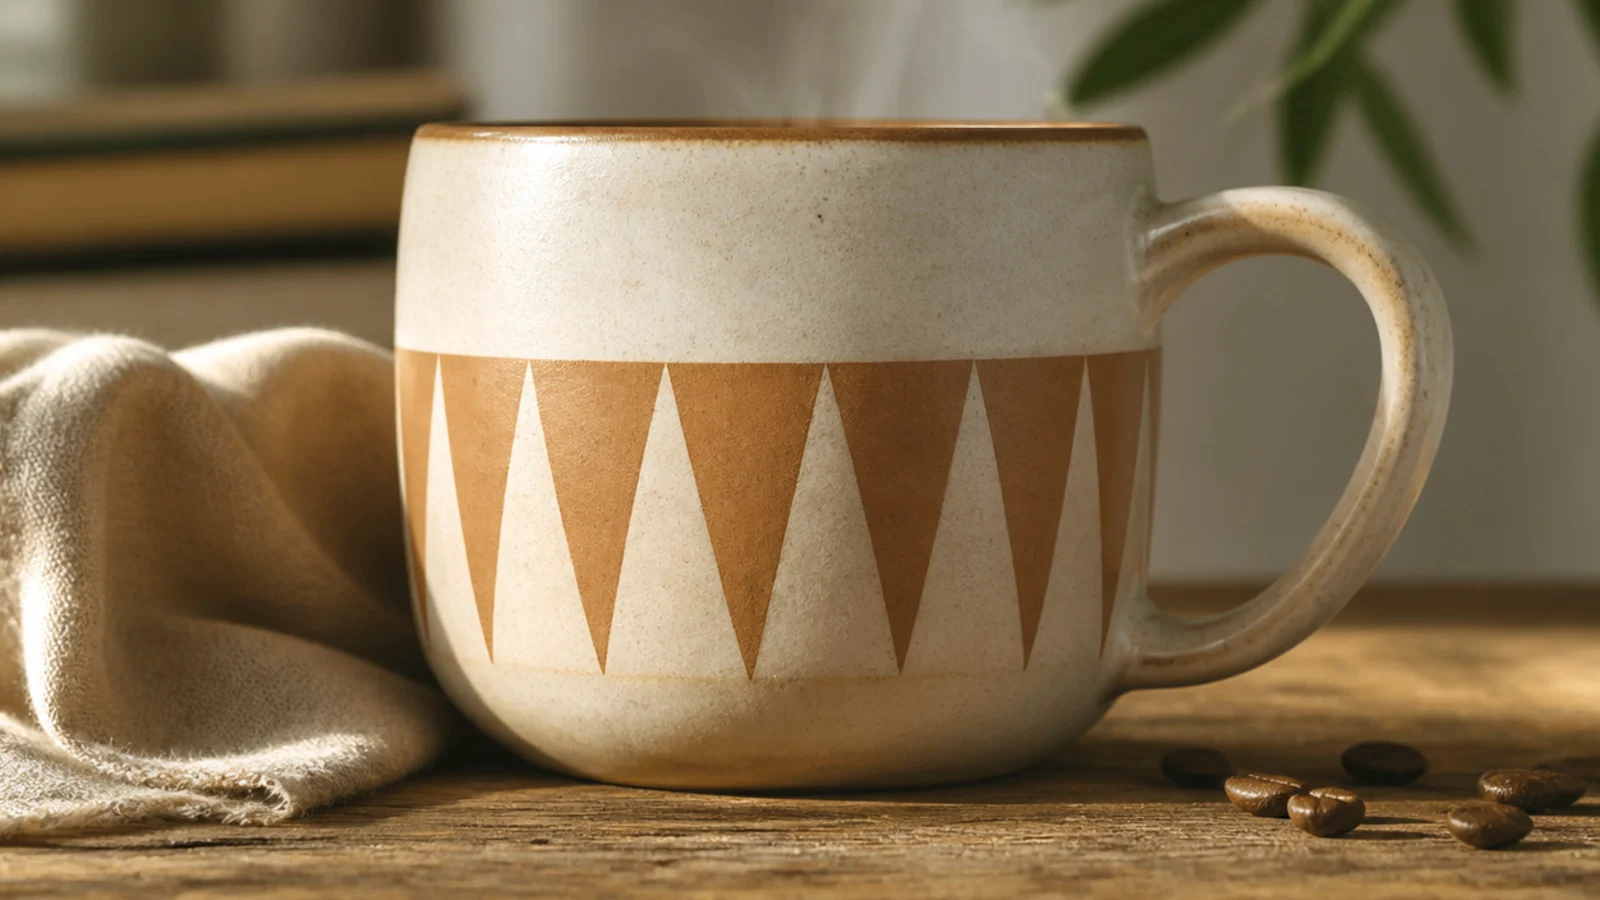
A row of sharp triangles looks graphic and modern, and tape gives you the crisp points. Alternating two earthy colors keeps it from feeling heavy. It is a clean, contemporary look for a straight-sided mug.
Degrease and base-coat the mug in cream, letting it dry. Lay painter’s tape in a zigzag to mask triangles, burnishing every edge. Paint the exposed triangles terracotta in two thin coats, peel while slightly wet, and touch up points. Air-dry 24 hours, then bake in a cold oven at 300F/150C for 30-35 minutes and cool inside.
Press each taped edge hard with a fingernail; sharp triangle points only happen when the tape is fully sealed.
Don’t reuse tape that has lost its stick; loose tape bleeds and rounds off the points.
8. Even Polka Dots

A tidy field of dots is timeless and beginner-proof because you stamp them. White dots on a colored ceramic base look crisp and fresh. It is pattern without any drawing skill.
Degrease the glaze and base-coat in sage, letting it dry. Dip a pencil eraser in white porcelain paint, tap off the excess, and press straight down, re-dipping for each dot. Use light pencil ticks for a true grid if you want. Air-dry 24 hours, then oven-cure at 300F/150C for 30-35 minutes in a cold oven and cool inside.
Editor's noteRe-dip for every single dot so they all carry the same amount of paint and stay uniform in size.
Skip thisDon’t drag the eraser as you lift; press and pull straight up or the dots turn into little commas.
9. Abstract Color Blobs
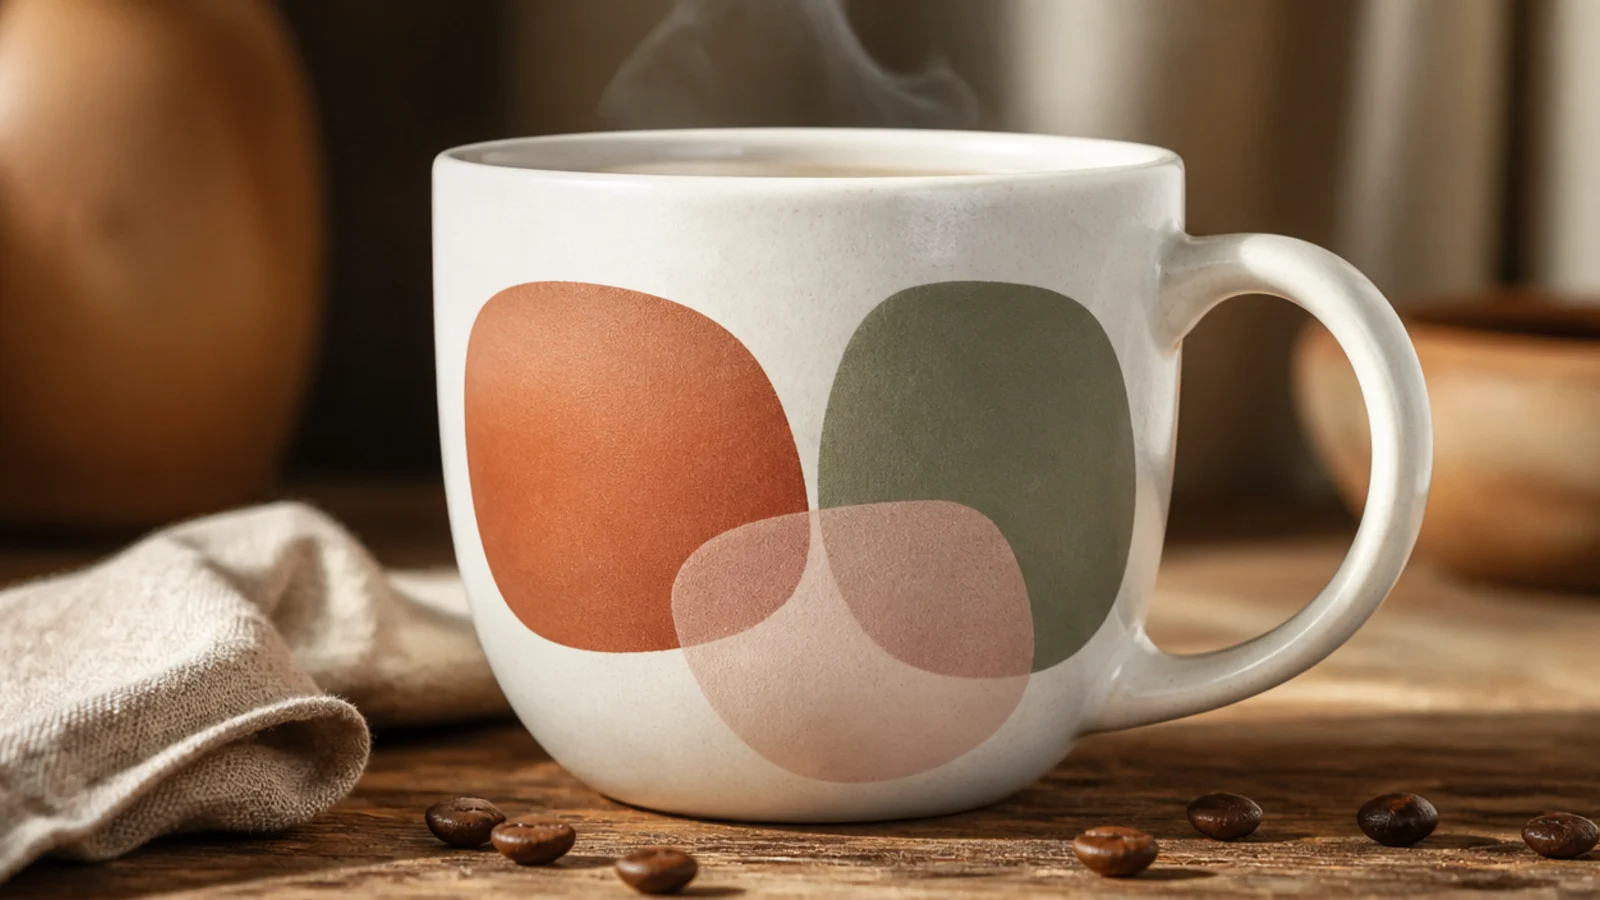
A few overlapping organic blobs read as modern art and are impossible to get wrong. The shapes have no correct form, so confidence is all you need. A muted three-color palette keeps it gallery-like.
Degrease the glaze and pencil two or three loose rounded shapes on the front. Fill each with a flat porcelain color in two thin coats, letting edges just kiss or overlap. Keep the palette muted and the shapes few. Air-dry 24 hours, then bake in a cold oven at 300F/150C for 30-35 minutes and cool inside.
Editor's noteLet the shapes overlap slightly rather than float apart; the overlap is what makes it feel like an intentional composition.
Skip thisDon’t add five or six colors; a tight muted palette reads expensive, while many bright blobs look chaotic.
10. Line-Art Face
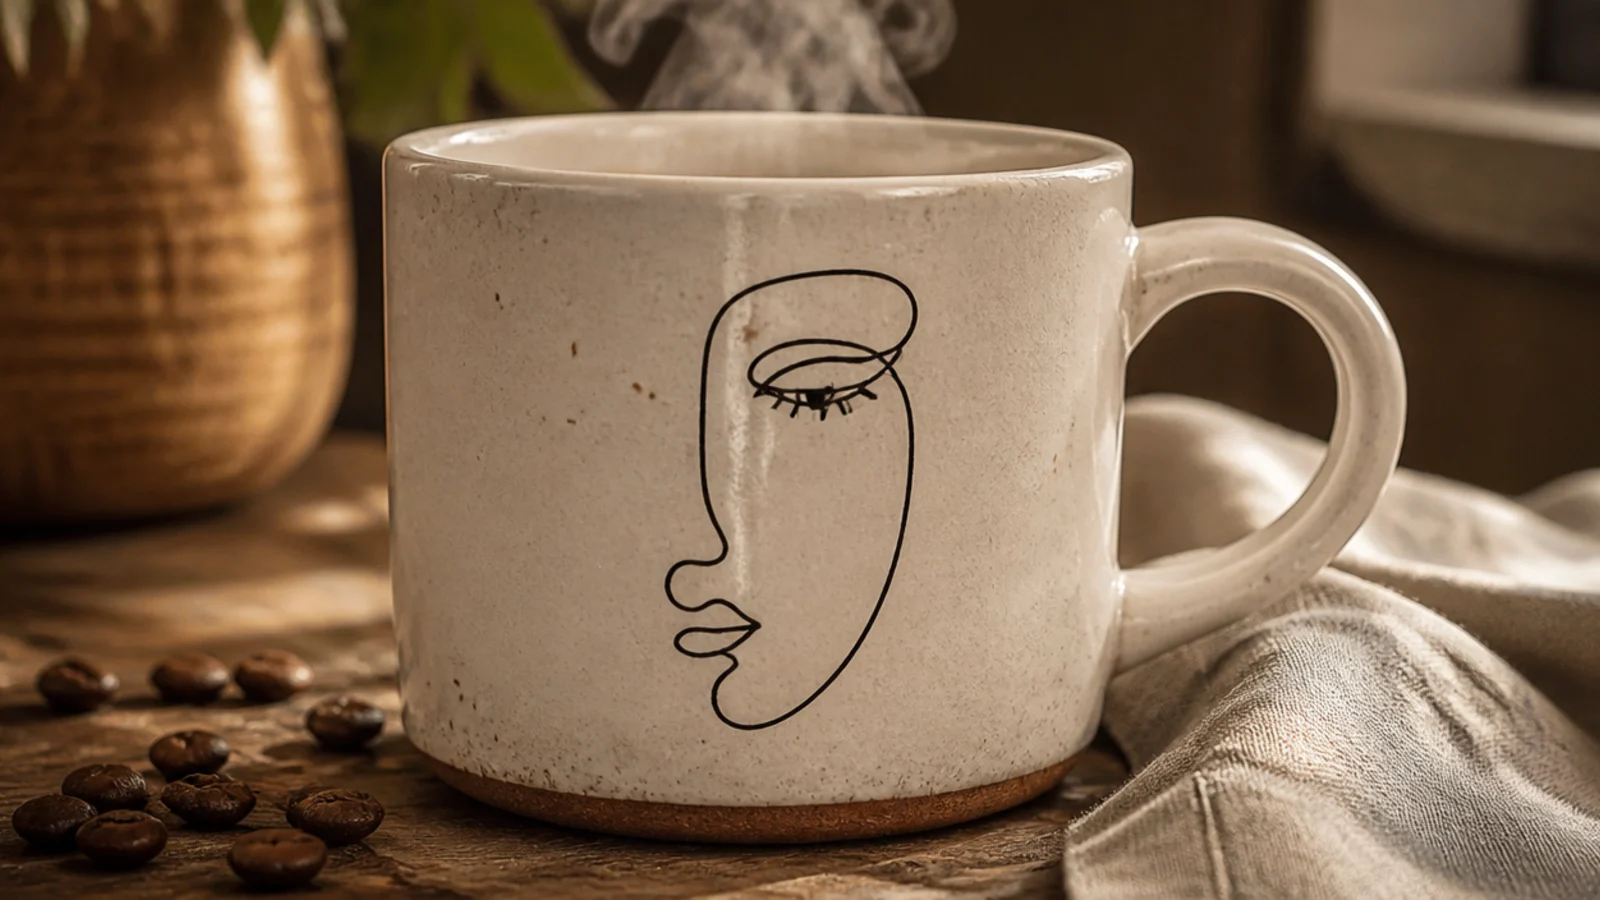
A one-line abstract face is a trendy, artful motif that looks intentional and minimal. It is a single continuous contour, so it feels modern rather than cartoonish. It suits anyone who likes a design-forward mug.
Degrease the glaze and lightly pencil a simple face contour — a profile with a dot eye and a suggestion of lips. Trace it in one continuous line with a fine porcelain paint pen, lifting as little as possible. Erase pencil once dry to the touch. Air-dry 24 hours, then oven-cure at 300F/150C for 30-35 minutes in a cold oven and cool inside.
Practice the continuous line a few times on paper so you can draw it on the mug in one confident, unbroken motion.
Don’t over-detail the features; the appeal of line-art is the single spare contour, and extra marks kill it.
11. Botanical Wrap

A leafy vine circling the mug feels fresh and a little more ambitious than a single sprig. The repeating leaf strokes are simple once you find a rhythm. It looks lovely on a wide ceramic mug.
Degrease the glaze and pencil a gentle wavy line around the body a half-inch below the rim. Paint the vine olive with a fine brush, then add leaves along it with single press-and-lift strokes, alternating sides. Keep it a continuous band. Air-dry 24 hours, then bake in a cold oven at 300F/150C for 30-35 minutes and cool inside.
Paint each leaf with one press and lift of the brush; it gives a natural tapered shape faster than outlining.
Don’t let the vine wander up toward the lip; keep the whole wrap a half-inch below the rim for food safety.
12. Gold Accent Dots

Metallic gold dots on a dark ceramic mug look understated and luxe. A porcelain paint pen makes even dots with no brush skill. It is a quick way to make a plain dark mug feel special.
Degrease the glaze and base-coat in matte black, letting it dry. Shake a metallic gold porcelain paint pen and prime it on scrap paper. Press small even dots across the lower half, denser at the bottom and thinning upward. Air-dry 24 hours, then oven-cure at 300F/150C for 30-35 minutes in a cold oven and cool inside.
Graduate the dots — closer together low, sparser high — so the scatter feels designed rather than random.
Don’t cover the whole mug in gold dots; a partial scatter reads elegant, full coverage reads busy.
13. Ombre Fade

A smooth color fade up the mug looks advanced but a sponge does the blending. Tonal colors — terracotta to cream, blue to white — blend most forgivingly. It gives ceramic a soft, glazed-looking gradient.
Degrease the glaze and base-coat in the lighter color. While tacky, dab the darker color at the base with a slightly damp makeup sponge, working up with lighter pressure, then pounce the transition to blur it. Build gradually. Air-dry 24 hours, then bake in a cold oven at 300F/150C for 30-35 minutes and cool inside.
Editor's noteKeep the sponge barely damp; a hint of moisture blends smoother than a dry sponge and avoids streaks.
Skip thisDon’t pick two high-contrast colors for a first ombre; a hard jump between shades is very hard to blend.
14. Scandinavian Folk Pattern
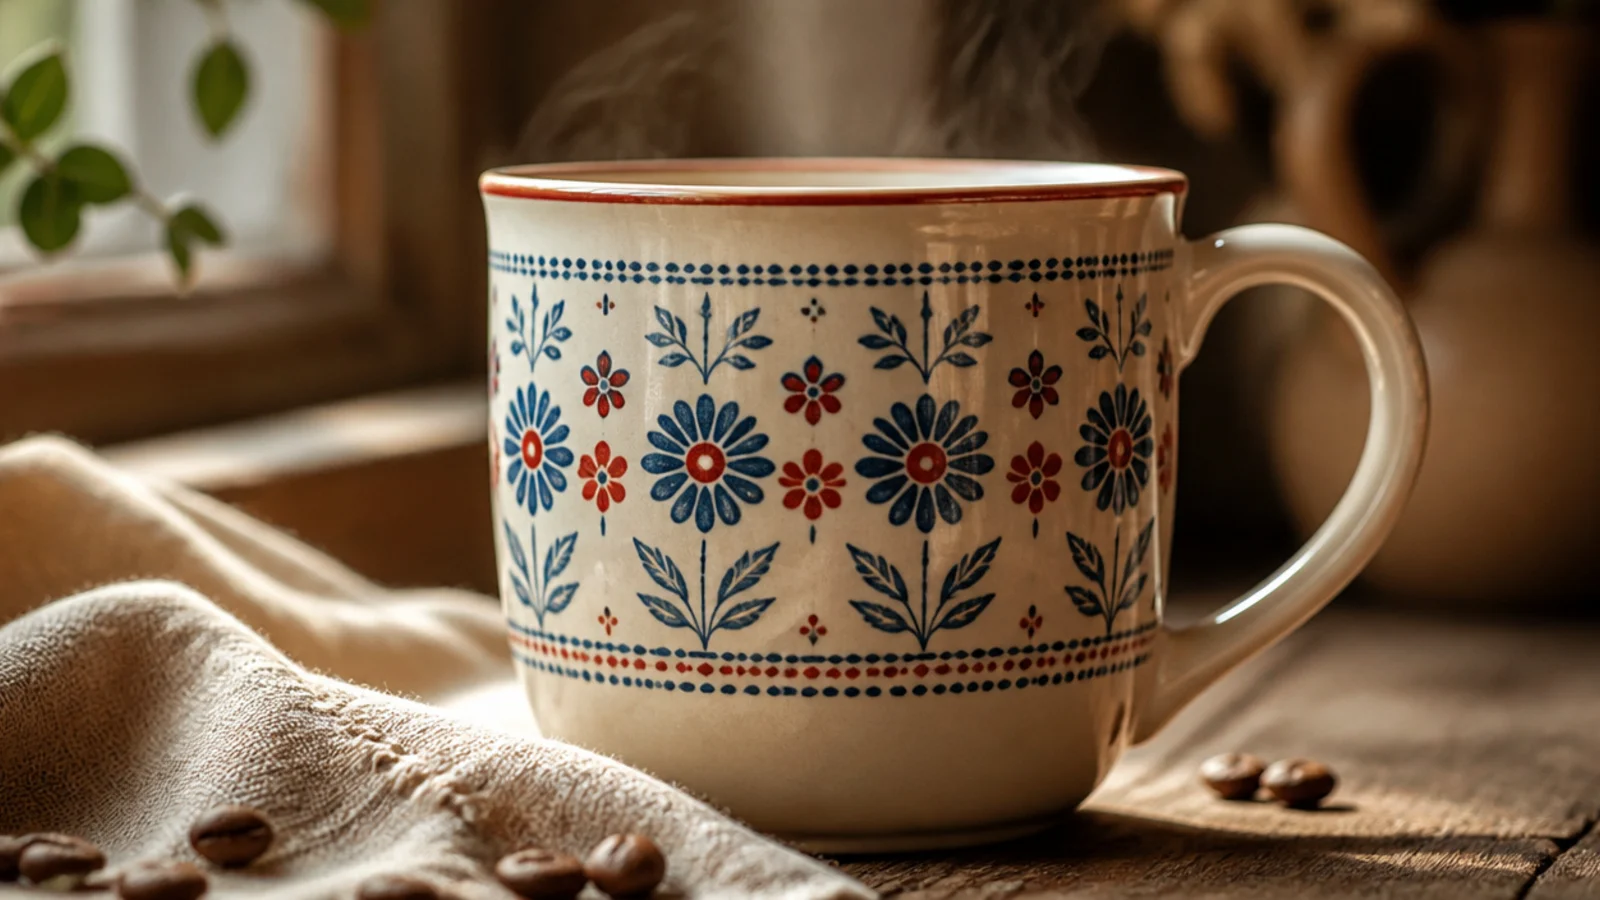
A symmetrical folk band feels heritage and hand-crafted, with repeating small motifs. Working from a center outward keeps it balanced. Blue and red on cream is a classic folk palette.
Degrease the glaze and pencil a horizontal band with a center motif. Paint a central flower, then mirror small dots, leaves, and buds outward on both sides with a fine brush and pen in blue and red. Keep the two sides matching. Air-dry 24 hours, then oven-cure at 300F/150C for 30-35 minutes in a cold oven and cool inside.
Editor's noteBuild the pattern symmetrically from the middle outward so both halves stay balanced instead of drifting.
Skip thisDon’t freehand the whole band left to right; without a center anchor the motifs crowd unevenly by the end.
15. Marbled Effect
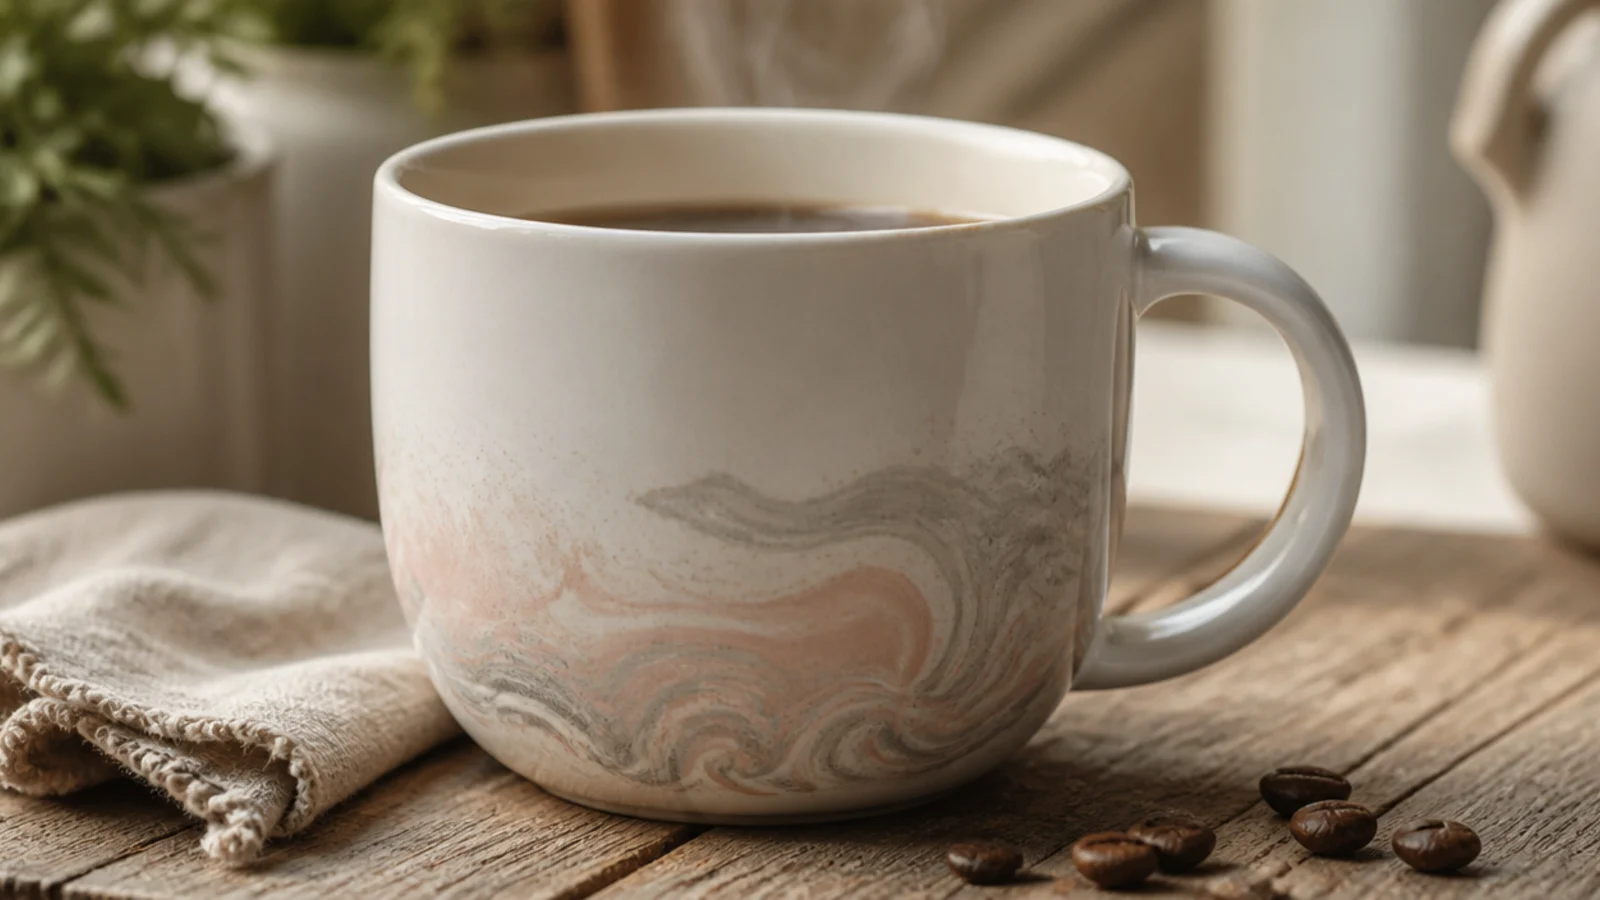
Soft swirled veins give a marble effect that looks high-end and is loosely controlled, so precision is not required. Muted veins on white read like real stone. It is the most artistic finish here and still forgiving.
Degrease the glaze. Brush a base of white porcelain paint on the lower body, then while wet drag thin lines of grey and blush through it with a fine brush and feather the edges with a dry brush. Keep the veins irregular. Air-dry 24 hours, then bake in a cold oven at 300F/150C for 30-35 minutes and cool inside.
Editor's noteWork while the base is still wet and feather with a clean dry brush; wet-on-wet is what gives the soft marble blend.
Skip thisDon’t add too many veins or bright colors; a few soft irregular lines look like marble, many look like scribbles.



