

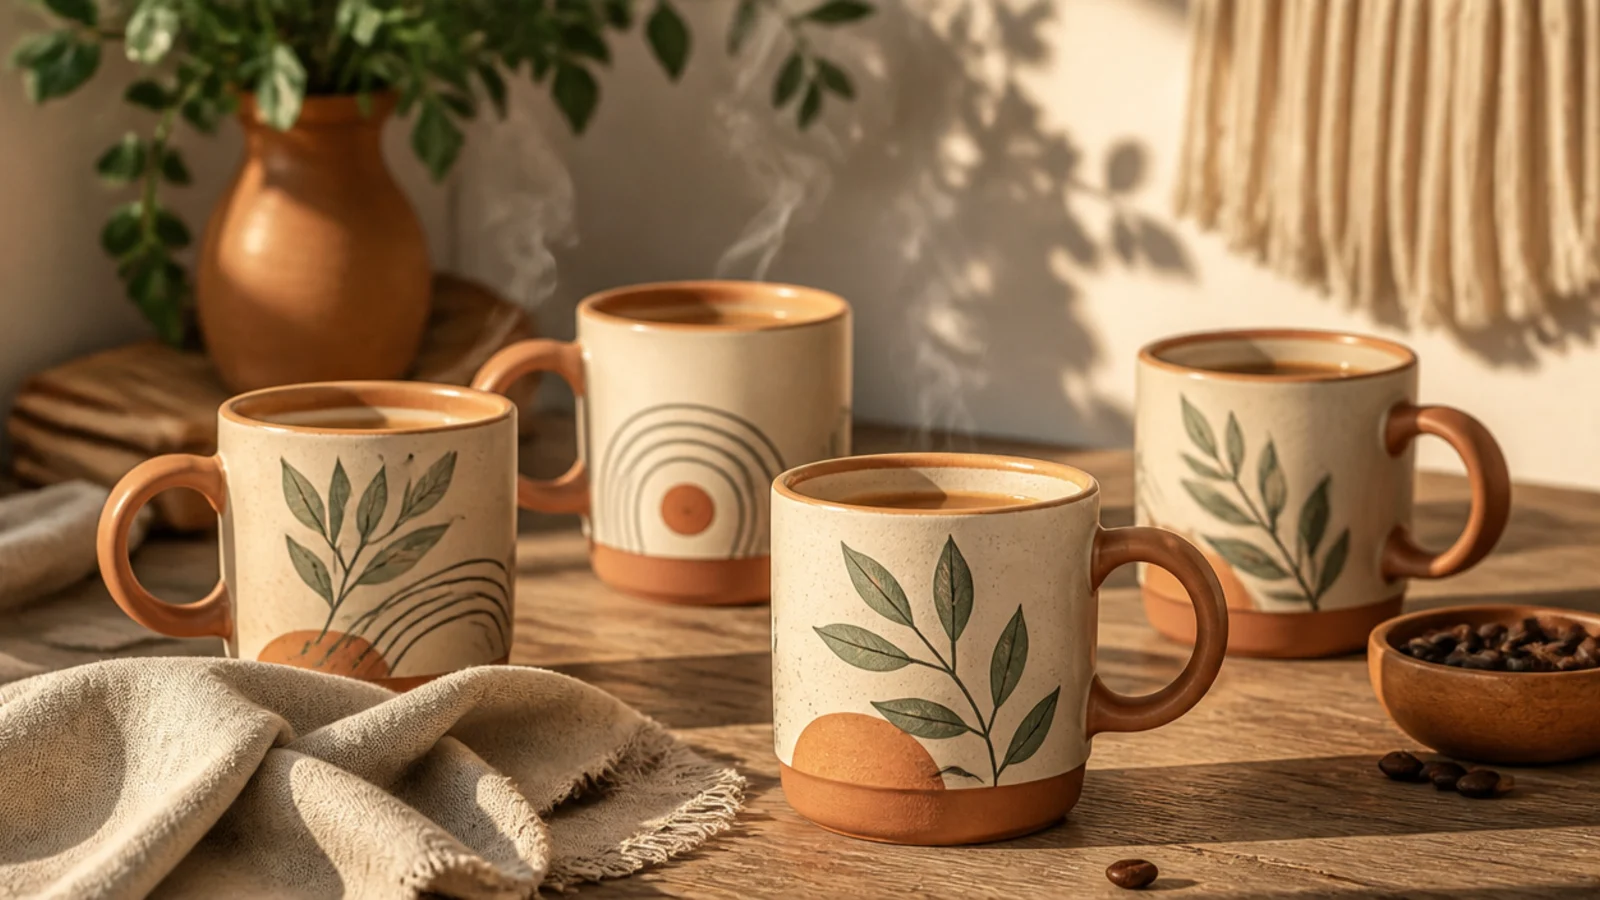

1. Espresso Dip Base

Degrease the mug with rubbing alcohol. Tape a level line a third of the way up, burnish the edge, and brush two thin coats of espresso porcelain paint below it, peeling the tape while the second is slightly wet. Air-dry 24 hours, then bake in a cold oven at 300F/150C for 30-35 minutes and cool inside.
A warm espresso-brown dip at the base is the easiest coffee-themed design and needs no drawing. The rich brown instantly reads coffee. It’s a grounded, cozy look that pairs with any kitchen.
Skip thisDon’t eyeball the tape line freehand; a crooked band is what makes a simple dip look sloppy.
Editor's noteSpin the mug on a jar lid as you wrap the tape so the band stays level all the way around.
2. But First, Coffee Lettering

Degrease the mug and pencil the words in a stacked layout below the rim to set spacing. Trace with a fine porcelain paint pen, then thicken the downstrokes on a second pass for the calligraphy look. Erase pencil once dry to the touch. Air-dry 24 hours, then oven-cure at 300F/150C for 30-35 minutes in a cold oven and cool inside.
A classic coffee phrase in simple lettering is relatable and cheerful on a morning mug. Faux-calligraphy makes it look skilled without training. It’s a gift favorite for anyone who isn’t a morning person.
Skip thisDon’t cram it all on one line around the mug; wrapped text shrinks and distorts, while stacked text stays clean.
Editor's noteStack the phrase on three short lines rather than one long line so the letters stay large and legible on the curve.
3. Coffee Bean Scatter
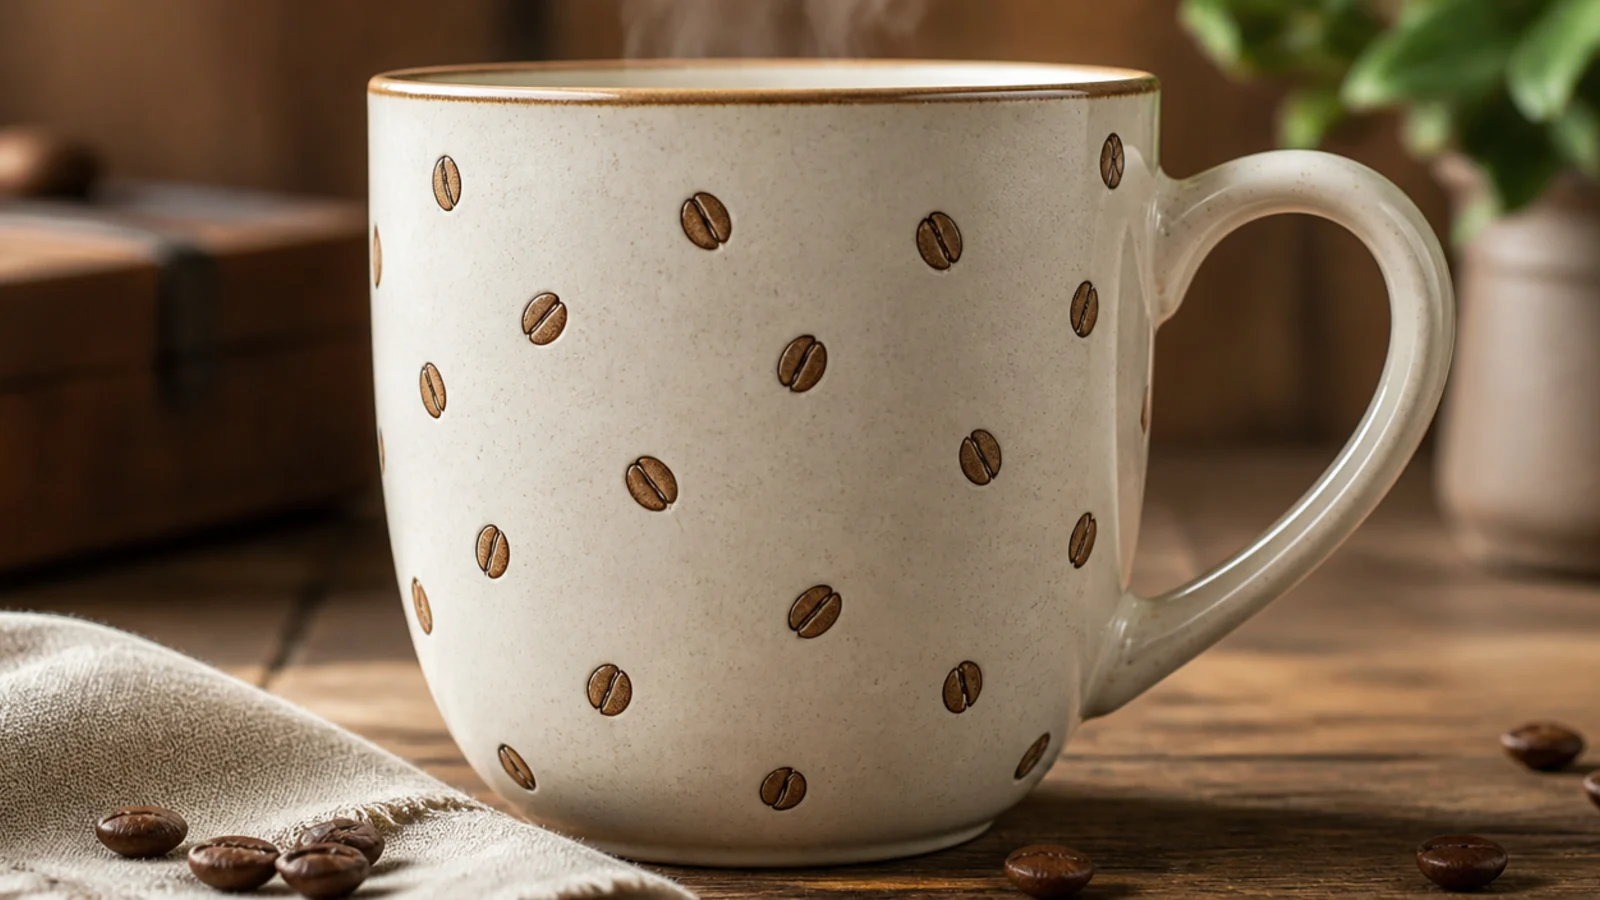
A loose scatter of coffee beans is unmistakably coffee and beginner-proof. Simple brown ovals with a center line read instantly as beans. It’s a warm all-over pattern that hides small imperfections.
Degrease the mug and let it dry. Stamp small brown ovals with a dauber or paint them with a round brush, scattered loosely across the body, then add a single center line to each with a fine pen once dry. Air-dry 24 hours, then bake in a cold oven at 300F/150C for 30-35 minutes and cool inside.
Tilt the beans at slightly different angles; beans all facing the same way look stamped, varied angles look scattered.
Don’t line the beans up in rigid rows; a loose random scatter is what makes them look like spilled beans.
4. Latte-Art Heart

Degrease the mug and paint a tan or cream circle of foam near the top of the front, then let it dry. With a fine brown porcelain pen, draw a heart or leaf rosetta on top of the foam, keeping it centered. Air-dry 24 hours, then oven-cure at 300F/150C for 30-35 minutes in a cold oven and cool inside.
A little latte-art heart looks like foam art viewed from above and delights coffee lovers. Building it in two layers gives the crisp cafe look. It’s a charming, specific coffee detail.
Skip thisDon’t draw the heart while the foam layer is wet; the two colors merge into a muddy blur.
Editor's noteLet the foam circle fully dry before adding the heart so the brown line sits crisp on top instead of bleeding in.
5. Rising Steam Swirls

Curling steam lines rising from a tiny cup are a sweet, minimal coffee motif. The wavy lines are forgiving and easy. It suits anyone who wants a small, clean coffee icon.
Degrease the mug and pencil a small cup shape low on the front with steam curls above it. Paint the little cup in a warm color, then draw the curling steam lines above it with a fine grey pen. Air-dry 24 hours, then bake in a cold oven at 300F/150C for 30-35 minutes and cool inside.
Make the steam lines loose and uneven; stiff matching curls look mechanical, while relaxed ones look like real steam.
Don’t run the steam up to the rim; keep the whole motif below the lip so no paint meets your mouth.
6. Little Coffee Cup Doodle

A simple line-drawn takeaway cup is a fun, modern coffee icon. It’s just a few clean lines with one pen. It reads instantly and leaves the rest of the mug clean.
Degrease the mug and pencil a takeaway cup — a tapered body, a lid, and a little sleeve. Trace it with a fine porcelain paint pen in confident lines, adding a couple of detail lines on the sleeve. Erase pencil once dry. Air-dry 24 hours, then oven-cure at 300F/150C for 30-35 minutes in a cold oven and cool inside.
Keep the linework a single consistent weight; varying line thickness on a small icon makes it look shaky.
Don’t over-detail the cup with logos or text; a clean simple outline reads far more modern.
7. Morning Sunrise Gradient

Degrease the mug and base-coat the lower front area. Sponge peach along the bottom and gold above it while tacky, pouncing the overlap to blend, then paint a small half-sun arc rising from the base. Air-dry 24 hours, then bake in a cold oven at 300F/150C for 30-35 minutes and cool inside.
A warm sunrise gradient captures the morning-coffee mood. Soft peach fading to gold feels like dawn. Adding a small sun arc makes the theme clear without any hard drawing.
Skip thisDon’t add clouds, birds, or a landscape; the simple glow and sun arc carry the sunrise on their own.
Editor's noteKeep the two dawn colors close in tone; a gentle peach-to-gold shift blends far easier than a bold contrast.
8. Cozy Cable-Knit Texture

Degrease the mug and base-coat in cream, letting it dry. With a fine pen in a slightly deeper cream or grey, draw repeating cable twists — two lines crossing in an S — down the front in vertical columns. Keep the columns even. Air-dry 24 hours, then oven-cure at 300F/150C for 30-35 minutes in a cold oven and cool inside.
A cable-knit pattern makes a mug feel like a cozy sweater, perfect beside a coffee. The twisting cords are a repeating motif. It’s warm and tactile-looking without real texture.
Skip thisDon’t vary the twist shape between columns; consistency is what makes it read as knitting rather than scribbles.
Editor's notePractice one cable twist on paper until the crossing looks right, then repeat that exact shape down each column.
9. Coffee Ring Motif

Degrease the mug and dip the rim of a small bottle cap or lid in thinned brown porcelain paint, then stamp overlapping rings on the front, re-dipping between stamps. Keep them loose and overlapping. Air-dry 24 hours, then bake in a cold oven at 300F/150C for 30-35 minutes and cool inside.
A cluster of thin brown rings turns the classic coffee-cup stain into a playful design. Overlapping circles look casual and clever. It’s an easy, tongue-in-cheek coffee nod.
Skip thisDon’t overload the cap with paint; a thin coat gives a crisp ring, while too much fills the circle into a blob.
Editor's noteUse a cap slightly smaller than a real cup ring and stamp a few at different angles for a natural, layered look.
10. Cream and Espresso Split

A two-tone split in cream and espresso is coffee itself in color form. The clean line looks like a designed piece. It’s a simple, warm color block that reads coffee at a glance.
Degrease the mug and brush the whole outside cream, two thin coats, letting it dry. Tape a level line at the middle, burnish it, and paint the lower half espresso brown. Peel before it sets and touch up any bleed. Air-dry 24 hours, then oven-cure at 300F/150C for 30-35 minutes in a cold oven and cool inside.
Run a fingernail along the tape edge before the second color so paint can’t creep under the seam.
Don’t skip base-coating the whole mug cream; a patchy top color makes the dividing line look muddy.
11. Fueled by Coffee Quote

A short coffee quote with a little bean icon is friendly and clear. Simple print lettering keeps it legible and easy. It’s a relatable gift for the coffee-dependent.
Degrease the mug and pencil the phrase in a straight stacked layout below the rim. Trace with a fine porcelain paint pen in clean print letters, then add a small painted bean at the end. Erase pencil once dry. Air-dry 24 hours, then bake in a cold oven at 300F/150C for 30-35 minutes and cool inside.
Keep the letters an even height with a light pencil baseline and cap line so the print looks tidy and deliberate.
Don’t mix several lettering styles; one consistent print font reads cleaner than a jumble of scripts and prints.
12. Coffee Bean Border
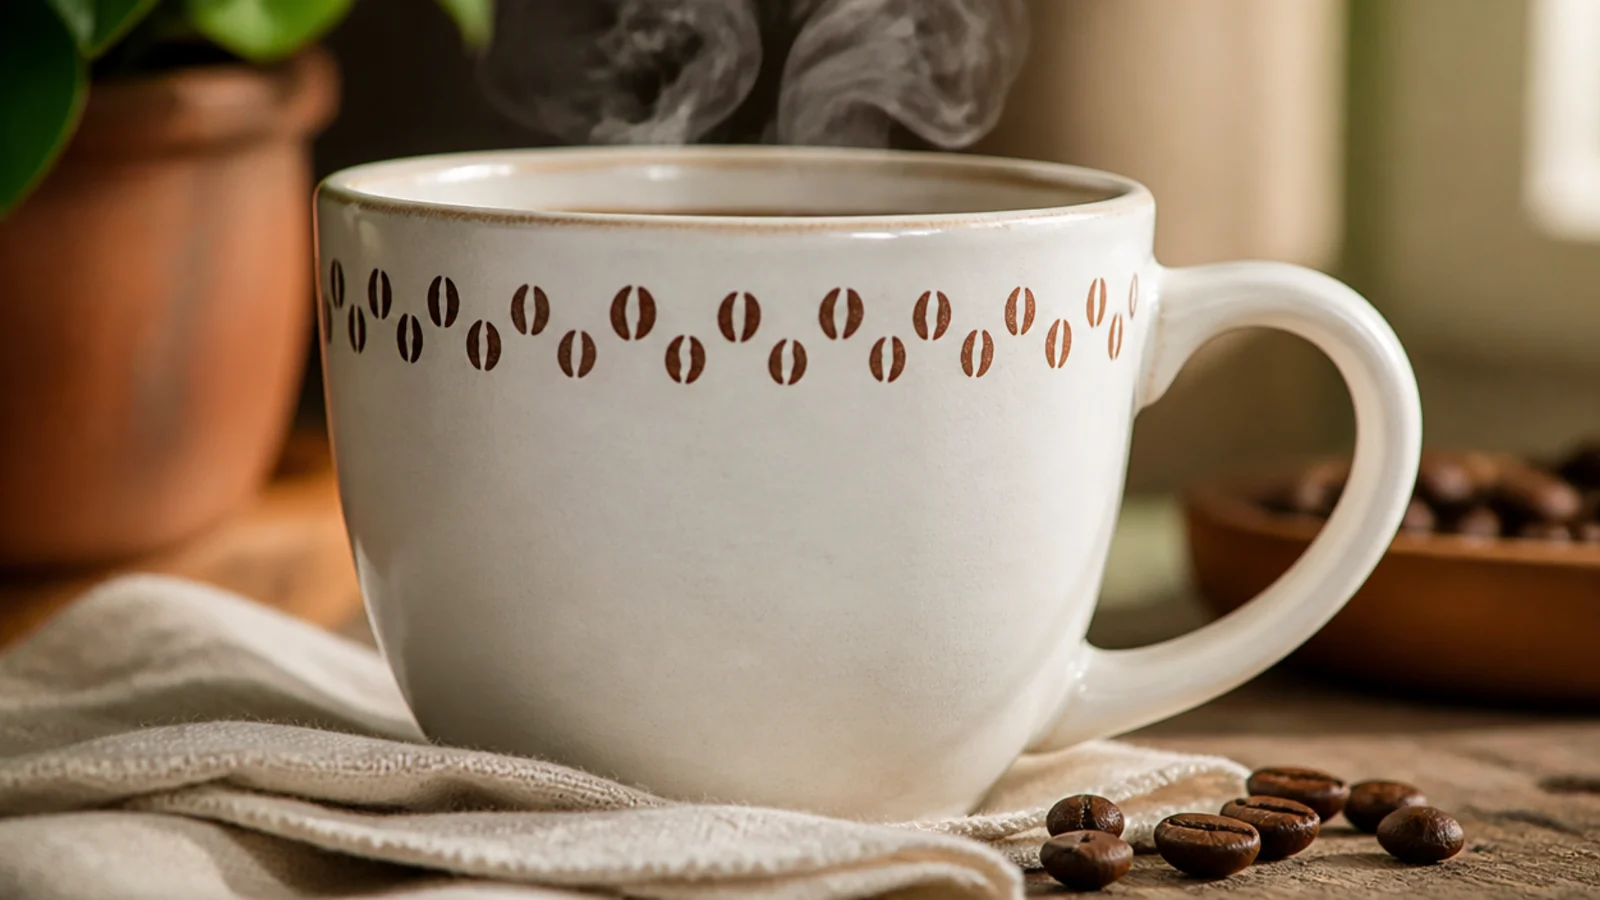
A tidy row of beans circling the mug is a clean, minimal coffee frame. Kept to one row it stays elegant. It’s a nice alternative to an all-over scatter.
Degrease the mug and mark light guide ticks a half-inch below the rim. Stamp or paint small brown bean ovals in an even row around the mug, adding a center line to each with a fine pen once dry. Air-dry 24 hours, then oven-cure at 300F/150C for 30-35 minutes in a cold oven and cool inside.
Mark even ticks first so the beans stay evenly spaced and the row closes cleanly where it meets.
Don’t crowd the beans; a little space between each keeps the border reading as a neat row, not a smear.
13. Minimal Coffee Pot Line Art

Degrease the mug and lightly pencil a moka pot outline — the octagonal base, waist, and handle. Trace it in one continuous line with a fine porcelain paint pen, lifting as little as possible. Erase pencil once dry. Air-dry 24 hours, then bake in a cold oven at 300F/150C for 30-35 minutes and cool inside.
A single-line moka pot is a stylish, retro coffee icon. Drawn as one continuous contour it feels modern and artful. It suits someone who likes a design-forward mug.
Skip thisDon’t add shading or lots of detail; the appeal is the clean single contour, and extra marks clutter it.
Editor's notePractice the moka pot’s outline a few times on paper so you can draw it on the mug in one confident motion.
14. Coffee-Tone Polka Dots

Polka dots in warm coffee tones keep a classic pattern on-theme. Caramel and espresso dots on cream read cozy. It’s beginner-proof because you stamp them with an eraser.
Degrease the mug and base-coat cream if you like, letting it dry. Dip a pencil eraser in caramel porcelain paint and stamp even dots, then repeat with espresso, filling gaps so the two tones mix. Re-dip each time. Air-dry 24 hours, then oven-cure at 300F/150C for 30-35 minutes in a cold oven and cool inside.
Alternate the two coffee tones as you stamp so neither color clusters in one area of the mug.
Don’t drag the eraser as you lift; press and pull straight up or the dots smear into ovals.
15. Cafe Awning Stripes
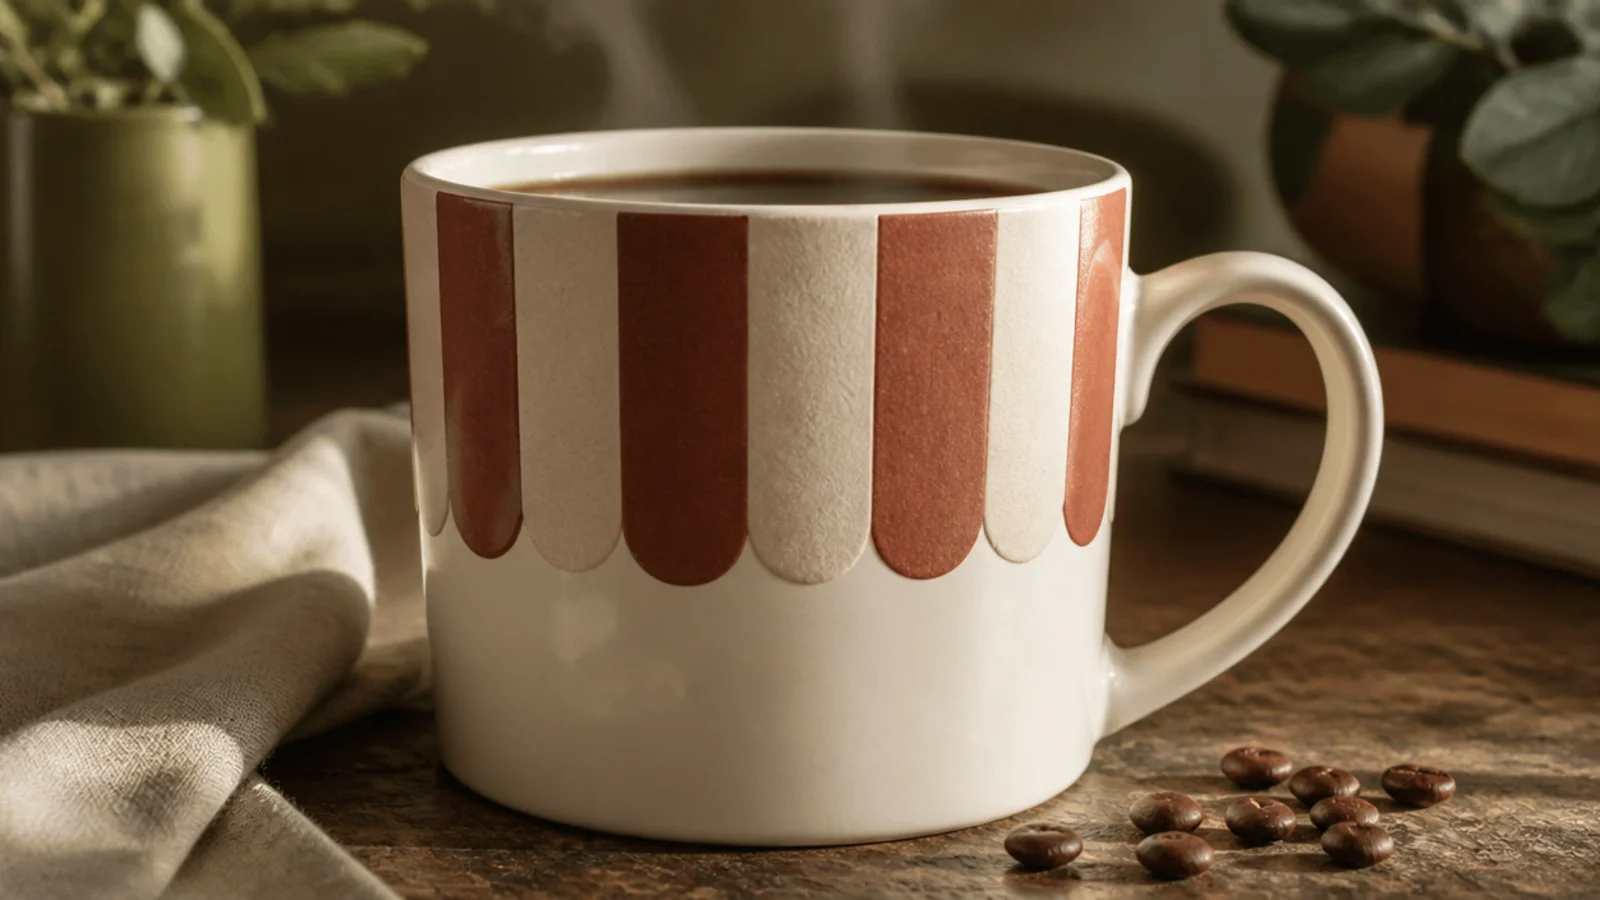
Degrease the mug and base-coat cream, letting it dry. Tape off even vertical stripes around the upper band and paint the exposed ones warm brown, then peel while slightly wet. Keep the band below the rim. Air-dry 24 hours, then bake in a cold oven at 300F/150C for 30-35 minutes and cool inside.
Bold vertical stripes around the top evoke a cafe awning and feel cheerful. Two warm colors alternating read like a coffee-shop sign. It’s a fun, graphic coffee-bar look.
Skip thisDon’t run the stripes to the lip; keep the awning band a half-inch below the rim for a clean, safe edge.
Editor's noteKeep the stripe widths equal by cutting your tape to a consistent width and butting the pieces edge to edge.
16. Coffee Plant Sprig
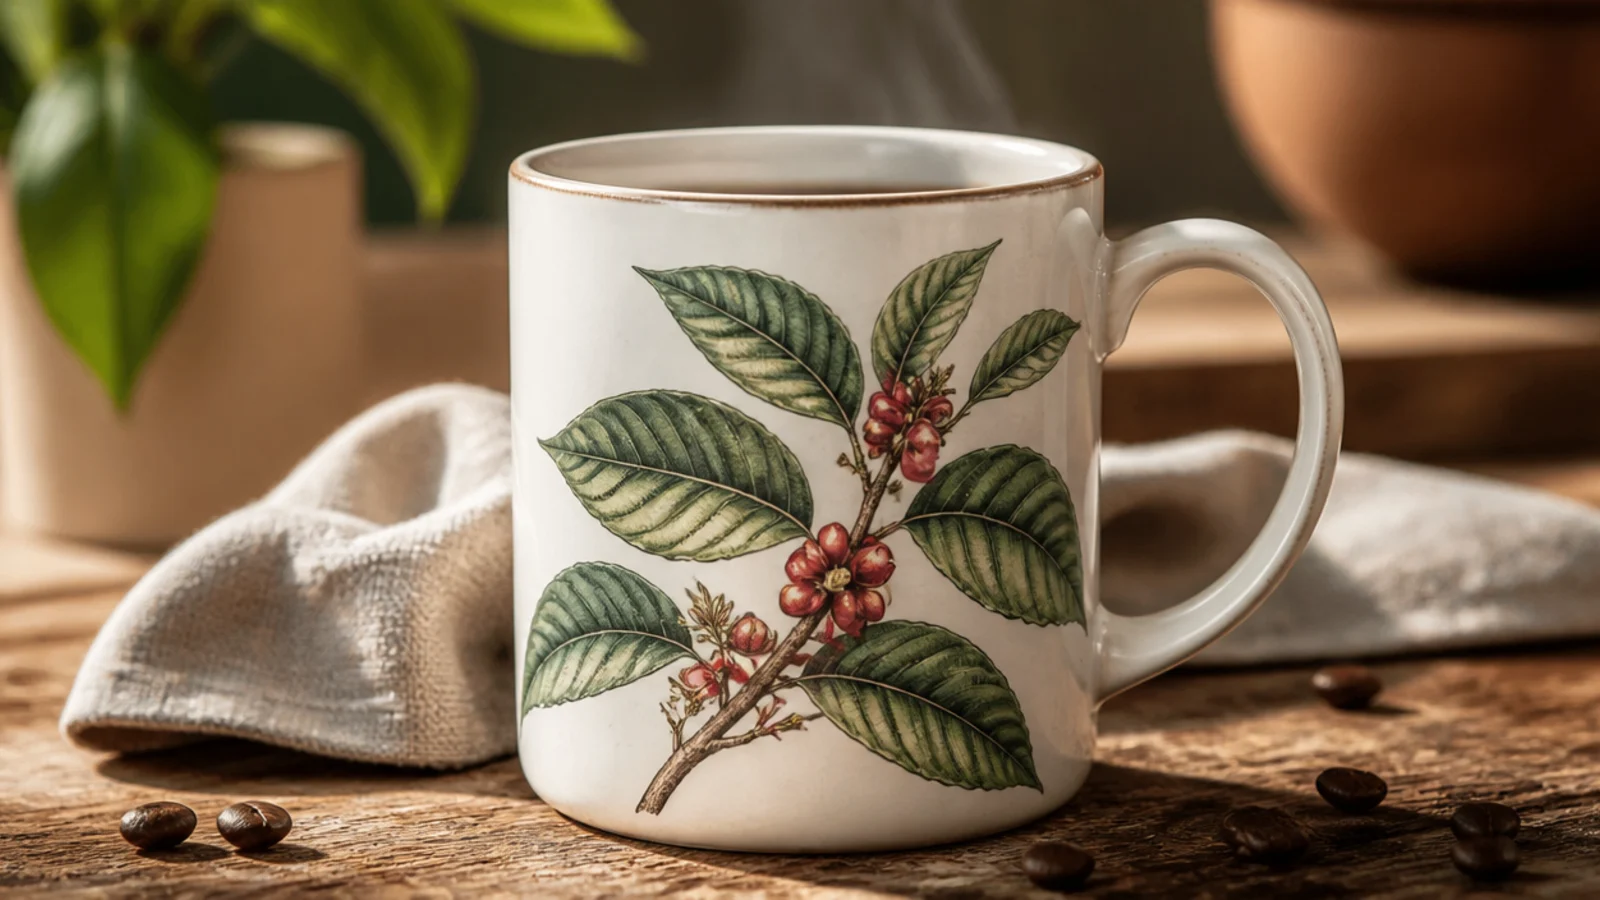
A coffee-plant sprig with cherries is a sophisticated, botanical take on the theme. The green leaves and red berries feel fresh and specific. It suits someone who likes understated, natural designs.
Degrease the mug and pencil a curved stem with paired leaves and a few berries. Paint the stem and leaves green with a fine brush, then dot red coffee cherries along it once dry. Keep it to the front. Air-dry 24 hours, then oven-cure at 300F/150C for 30-35 minutes in a cold oven and cool inside.
Paint the leaves in opposite pairs along the stem; that mirrored arrangement is what makes it look like a real coffee branch.
Don’t scatter the berries randomly; cluster them in small groups the way coffee cherries actually grow.
17. Foam Swirl Pattern
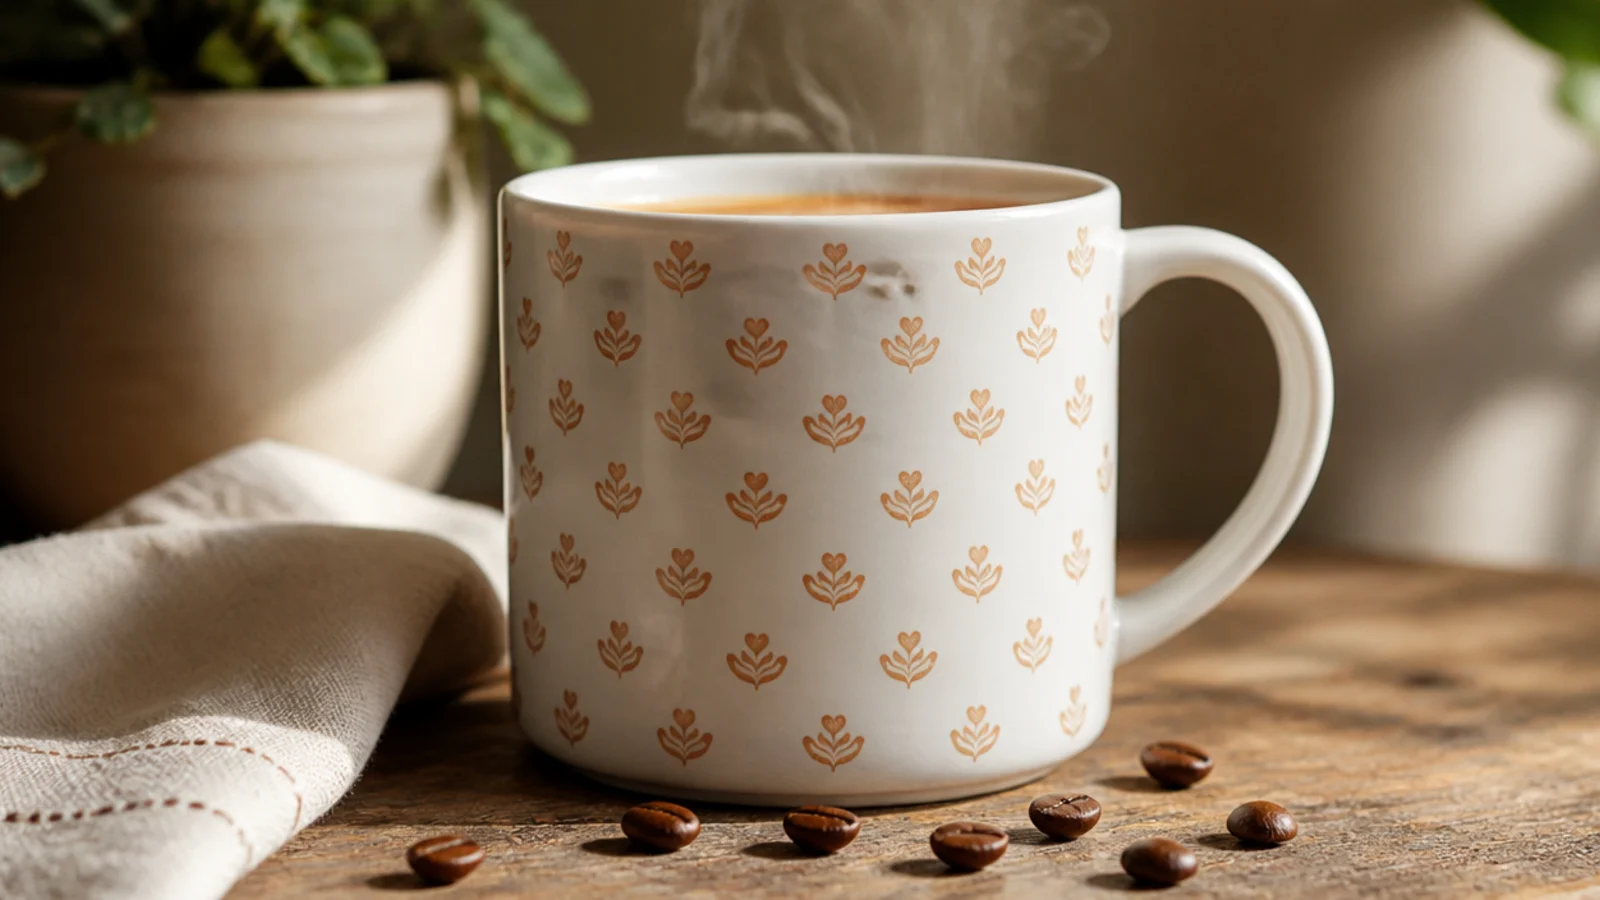
A repeating pattern of little foam swirls turns latte art into an all-over design. The soft tan swirls feel creamy and warm. It’s a subtle, pretty coffee motif for a whole mug.
Degrease the mug and, with a tan porcelain paint pen, draw small spiral swirls evenly across the front, keeping them a similar size. Add a lighter dot in each center once dry for depth. Air-dry 24 hours, then bake in a cold oven at 300F/150C for 30-35 minutes and cool inside.
Draw each swirl from the center outward in one motion so they stay round and even rather than lopsided.
Don’t make the swirls different sizes at random; keep them consistent so the pattern reads as intentional foam.
18. Cream-to-Espresso Ombre

Degrease the mug and base-coat cream. While tacky, dab espresso brown at the base with a slightly damp sponge, working up with lighter pressure, then pounce the transition to blur it into the cream. Air-dry 24 hours, then oven-cure at 300F/150C for 30-35 minutes in a cold oven and cool inside.
An ombre from espresso up to cream is literally coffee-and-cream in gradient form. The smooth fade looks polished, and a sponge does the blending. It’s a rich, warm finish.
Skip thisDon’t let the espresso reach the rim; leave the cream clear near the lip so no dark paint meets your mouth.
Editor's noteKeep the sponge barely damp and build the brown gradually; a slow buildup blends smoother than one heavy pass.
19. Minimalist Steam Lines

Degrease the mug and lightly pencil three tall gentle S-curves rising up the front. Trace them with a fine grey porcelain paint pen in smooth confident strokes, keeping them evenly spaced. Erase pencil once dry. Air-dry 24 hours, then bake in a cold oven at 300F/150C for 30-35 minutes and cool inside.
Three lone steam curls, with no cup at all, are the most minimal coffee reference there is. The abstract wavy lines feel calm and modern. It suits a lover of understated design.
Skip thisDon’t make the curls too busy or wobbly; three clean rising lines read as steam, while tangled ones read as scribbles.
Editor's noteDraw each steam curl in one flowing stroke rather than piecing it together, so the line stays smooth and elegant.
20. One More Cup Tally

Degrease the mug and pencil the phrase above a short line for the tallies. Ink the words with a fine porcelain paint pen, then add a small row of tally marks beneath in a warm color. Erase pencil once dry. Air-dry 24 hours, then oven-cure at 300F/150C for 30-35 minutes in a cold oven and cool inside.
A cheeky phrase with a little tally count is a fun, personal coffee joke. The lettering plus tally marks feel playful. It’s a lighthearted gift for a serious coffee drinker.
Skip thisDon’t crowd the phrase and the tallies together; leave clear space between them so both read at a glance.
Editor's noteKeep the tally marks evenly spaced and grouped in fives; a tidy count reads as a joke, a scattered one reads as a mistake.



