

1. Pastel Rainbow Stack
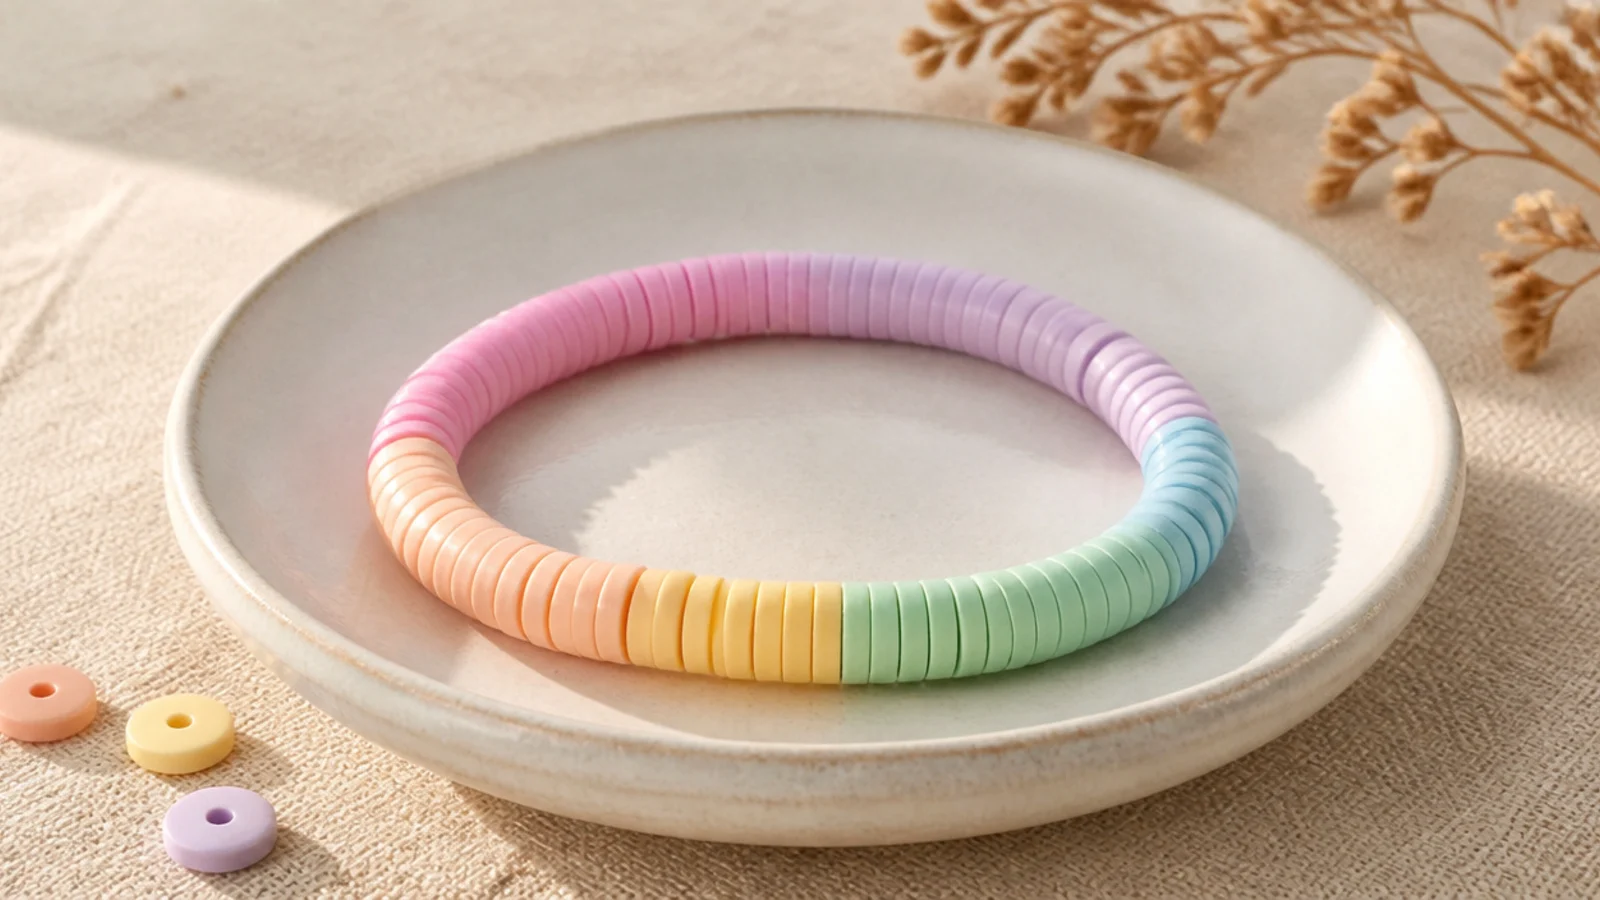
This is the easiest cute bracelet that still looks planned, because the rainbow order does all the design work for you. You string soft pastel versions of the rainbow — blush, peach, butter yellow, mint, sky blue, lilac — in that order and repeat. Muted pastels read sweeter and more grown-up than bright primary rainbow beads. It’s the perfect first bracelet and the base of a great stack.
Editor's noteLay the six-color repeat out on a bead mat once, then just copy that line — it keeps every rainbow section identical.
Cut 9 to 10 inches of 0.8mm clear cord and tape one end. Pull six pastel colors from your tube into a dish in rainbow order so you never lose the sequence. String one of each color, then repeat the six-bead group about seven times until you reach roughly 6.25 inches. Tie a surgeon’s knot, dab it with clear glue, let it dry, and slide the knot inside the nearest bead to hide it.
Skip thisDon’t mix in a few saturated neon beads with the pastels; one bright bead breaks the soft palette and looks accidental.
2. Smiley Face Focal Bead
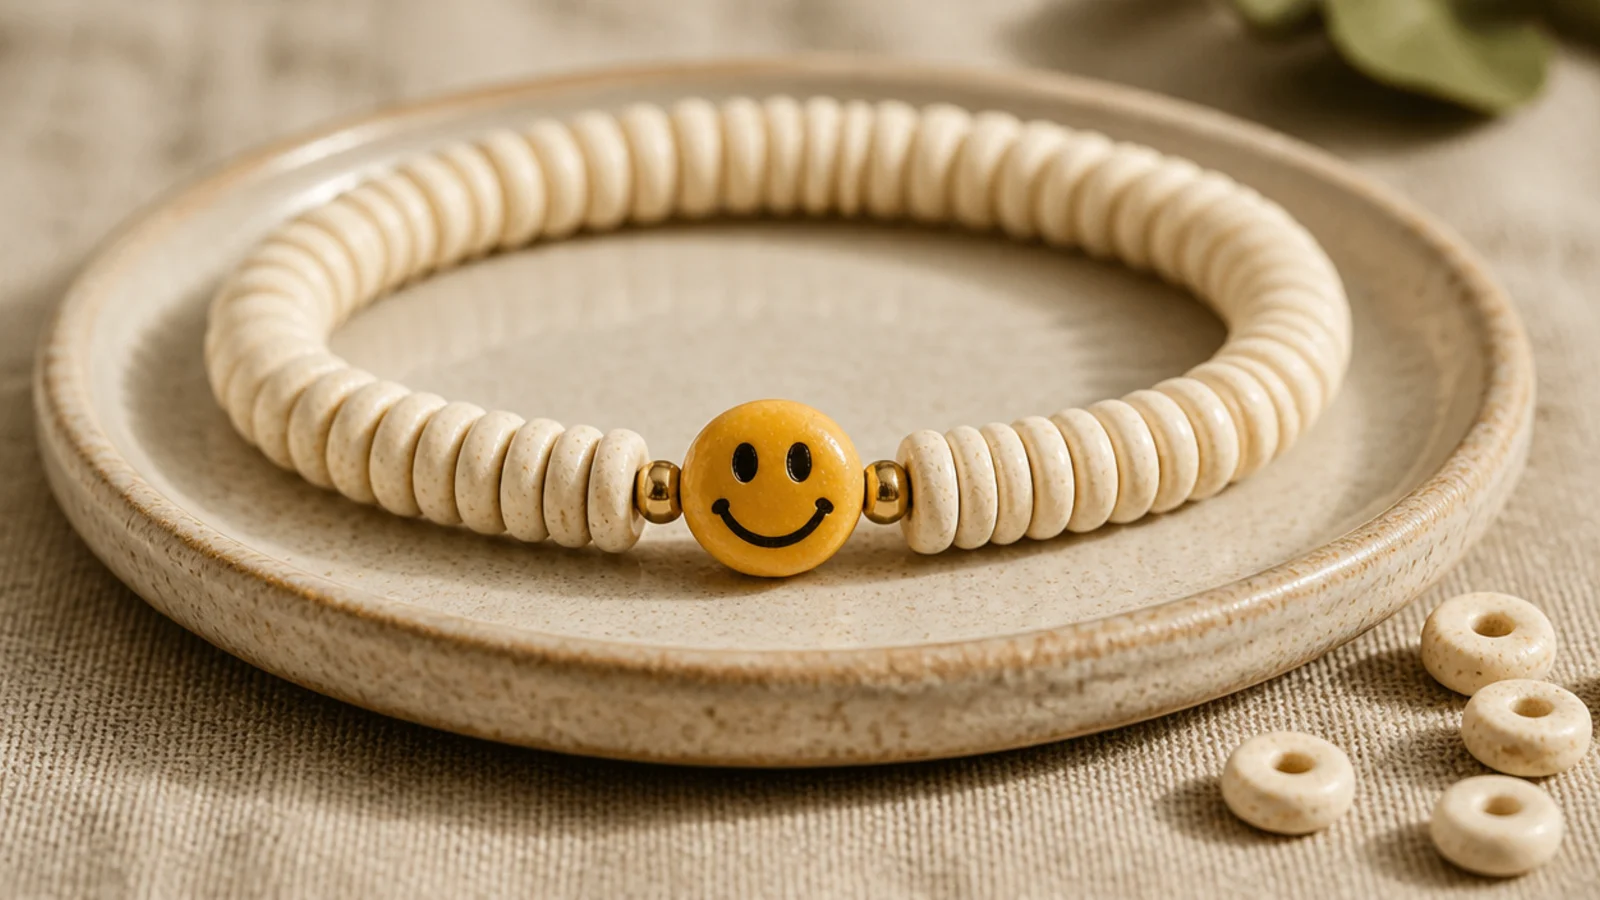
One smiley bead on a calm base is the cutest ten-minute bracelet there is. The plain cream row keeps it wearable, and the single happy face becomes the whole personality. Flanking the smiley with two tiny gold spacers frames it so it looks deliberate. This is the design people always ask me to make for them.
String cream clay beads until you’re about a third of the way to your wrist length. Add a small gold spacer, the yellow smiley-face bead, then another gold spacer. Fill the rest of the bracelet with cream beads to your measured length. Knot with a surgeon’s knot, seal with glue, and hide the knot inside a cream bead so nothing distracts from the smiley.
Center the smiley by counting your beads and placing it in the exact middle, not by eye — a slightly off-center focal always looks like a mistake.
Don’t crowd the smiley with lots of other charm beads; one focal against a plain base is what keeps it cute instead of busy.
3. Dot Daisy Row
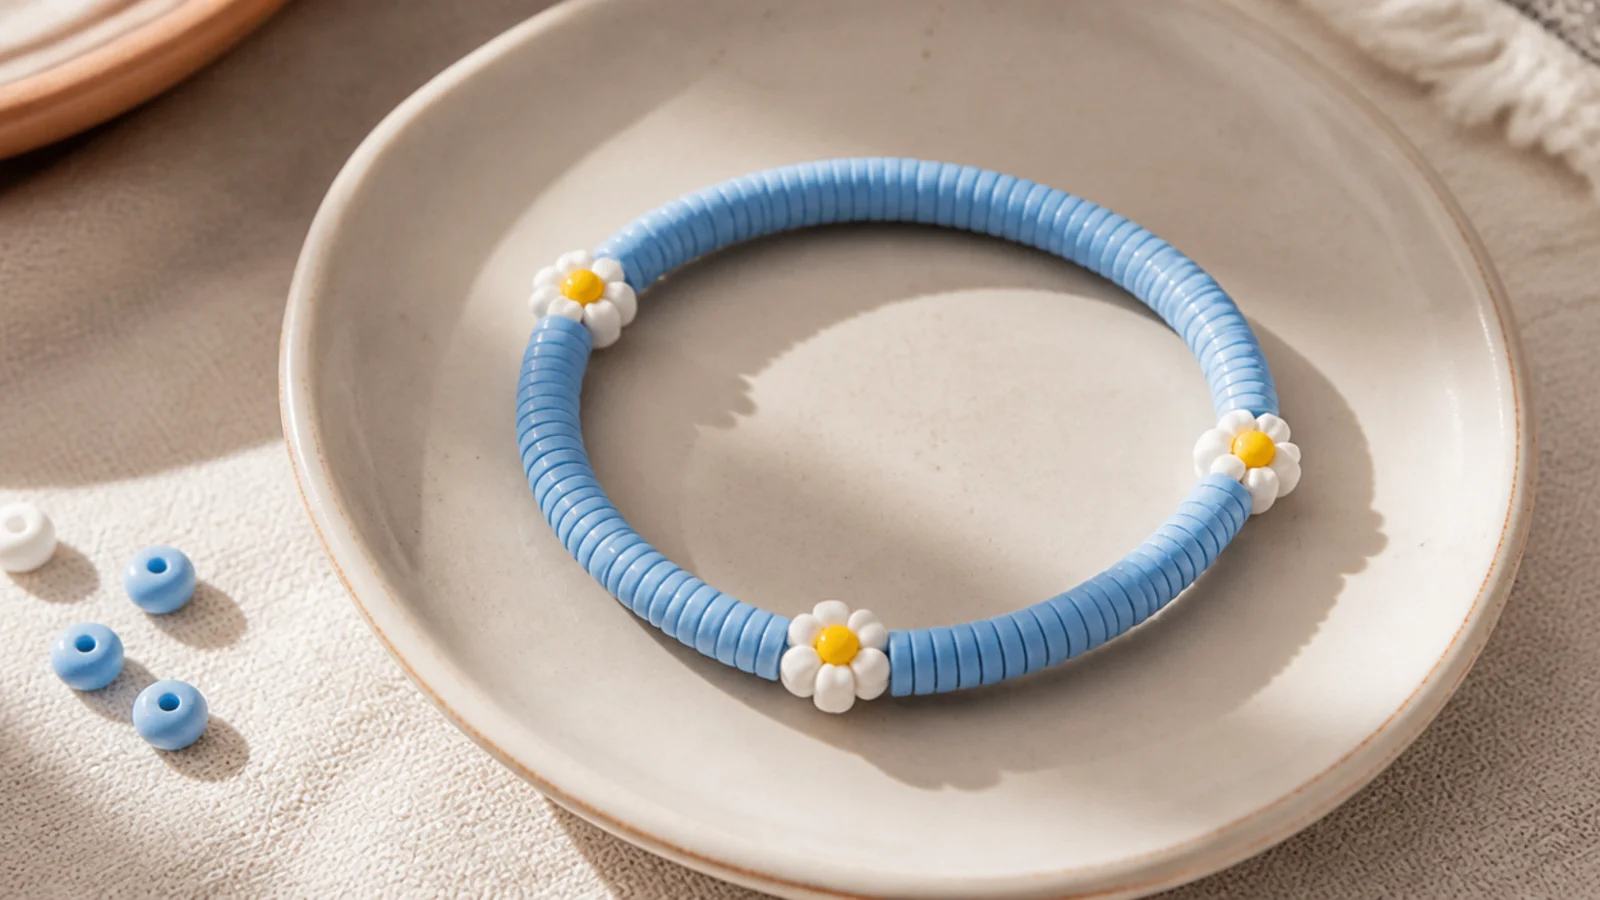
Little daisy beads scattered around a colored base look hand-picked and sweet without any real skill. Three evenly spaced daisies is the magic number — enough to feel like a pattern, not so many it turns busy. A soft base like sky blue or sage makes the white petals pop. It’s a favorite for spring and for gifting.
Editor's noteDivide your total bead count by three before you start so you know exactly how many base beads go between each daisy.
String your base color for a few beads, then add a daisy bead, then more base beads, repeating so you end up with three daisies evenly spaced around the bracelet. Count the base beads between each daisy so the spacing matches exactly. String to your wrist length, finish with a surgeon’s knot, glue it, and tuck it inside a base bead.
Skip thisDon’t place the daisies by eye as you go; uneven gaps make the flowers look scattered instead of spaced.
4. Strawberry Fruit Bead
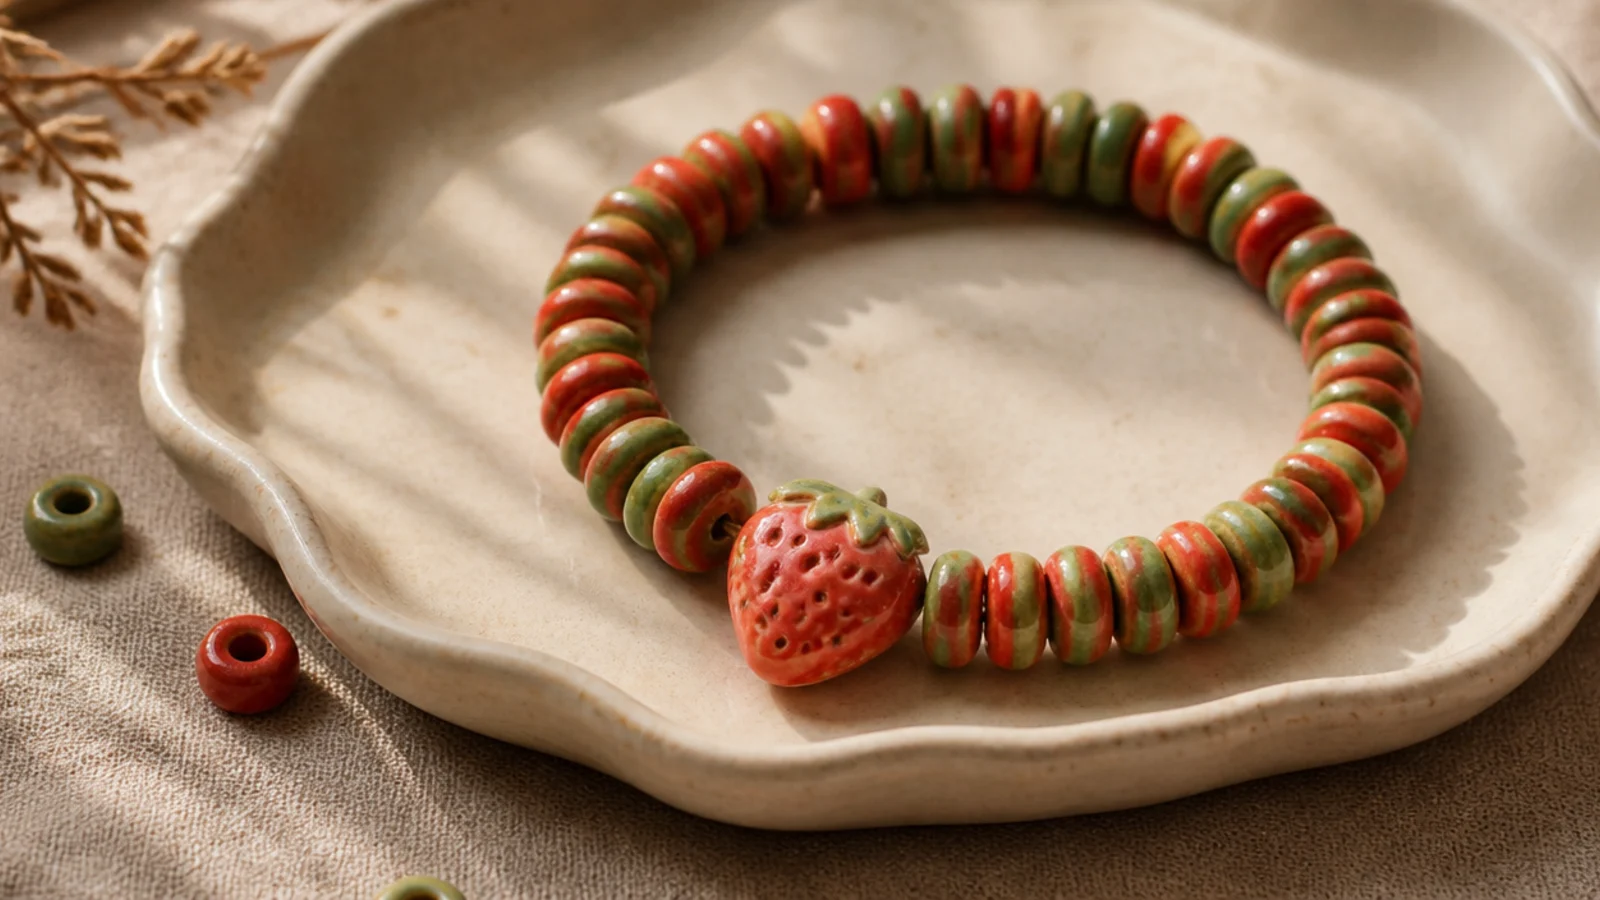
A tiny fruit bead turns a simple color pairing into a themed cutie. Here a red-and-green clay base echoes the strawberry focal so the whole thing reads as one idea. Fruit beads (strawberry, cherry, lemon) are the easiest way to give a bracelet a clear theme kids love. It’s playful without being childish.
Alternate three red clay beads and one green clay bead as your repeat to build a berry-colored base. Place the strawberry fruit bead in the center front, flanked by a single green bead on each side so it sits like a leaf. Continue the red-green repeat to your wrist length, then knot, glue, and hide the knot inside a red bead.
Echo the focal bead’s colors in your base beads — matching the palette to the charm is what makes it look designed, not random.
Don’t pick a heavy glass fruit bead for thin cord; a bulky focal drags and stresses the elastic, so use a light ceramic or resin one.
5. Heart Charm Center
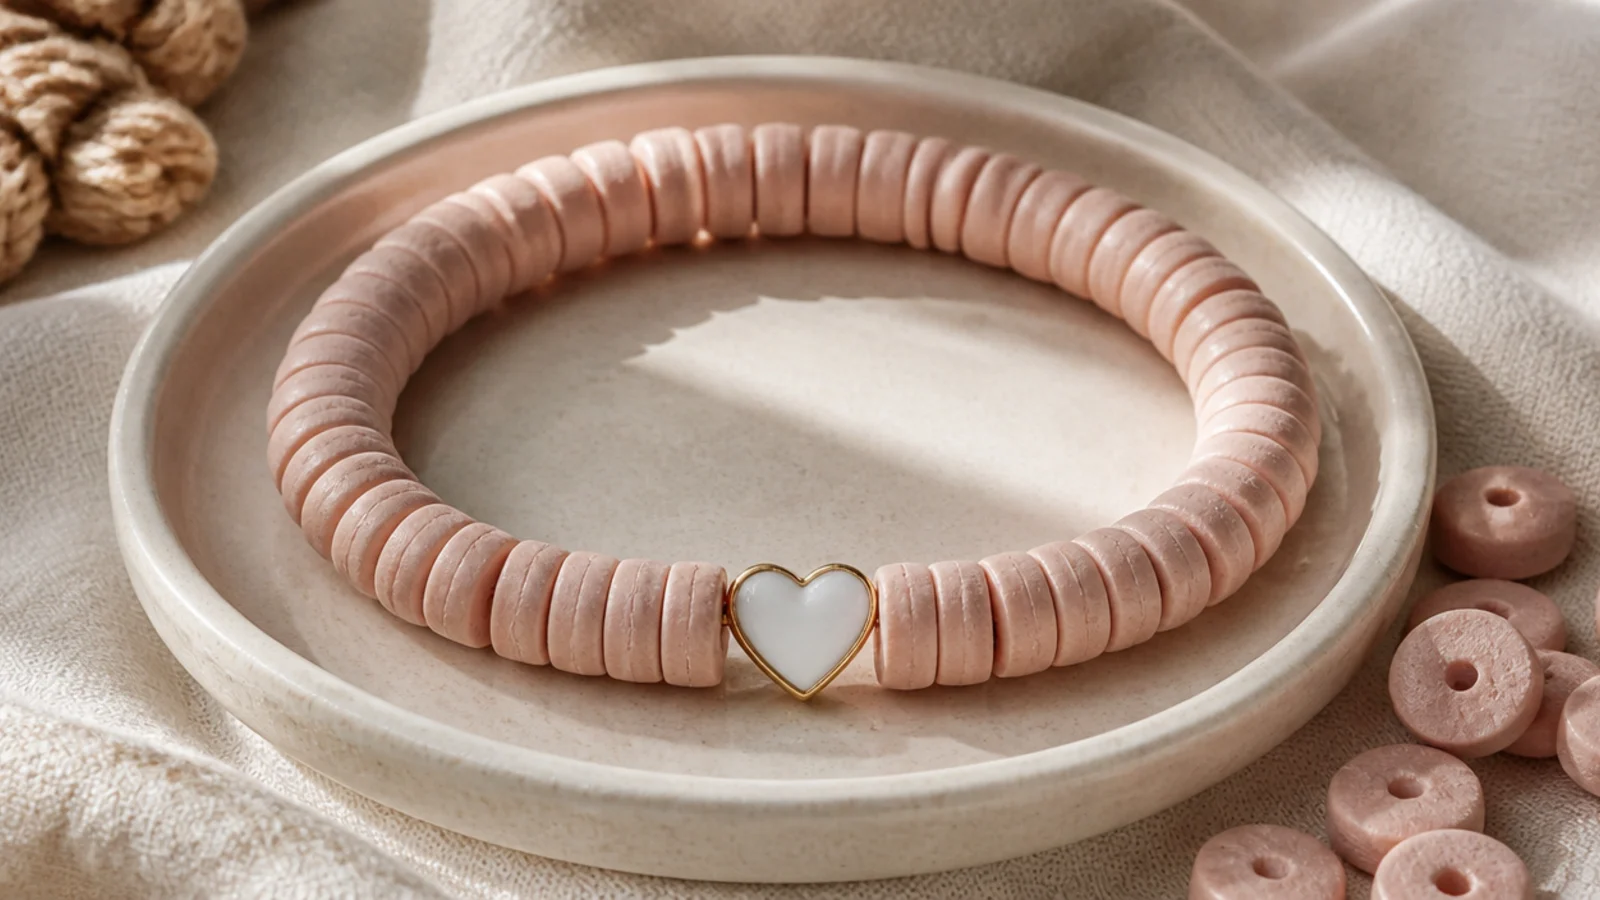
A single heart on a soft pink row is the sweetheart of cute bracelets — simple, romantic, and quick. The monochrome pink base lets the heart be the only event, which is exactly why it works. It’s my go-to for a last-minute Valentine or friendship gift. Swap the heart color to match any base you like.
Editor's noteUse a heart bead with a horizontal hole so it lies flat and faces outward instead of tipping sideways on the wrist.
String blush-pink clay beads to the halfway point of your wrist measurement. Add the enamel heart bead in the center, then continue with pink beads to your full length. Because the heart adds a little bulk, string one fewer clay bead on each side to keep the fit snug. Finish with a surgeon’s knot, seal, and tuck it away.
Skip thisDon’t string the heart with a top-drilled hole on stretch cord; it will spin and hang wrong every time you move.
6. Name Letter Bracelet
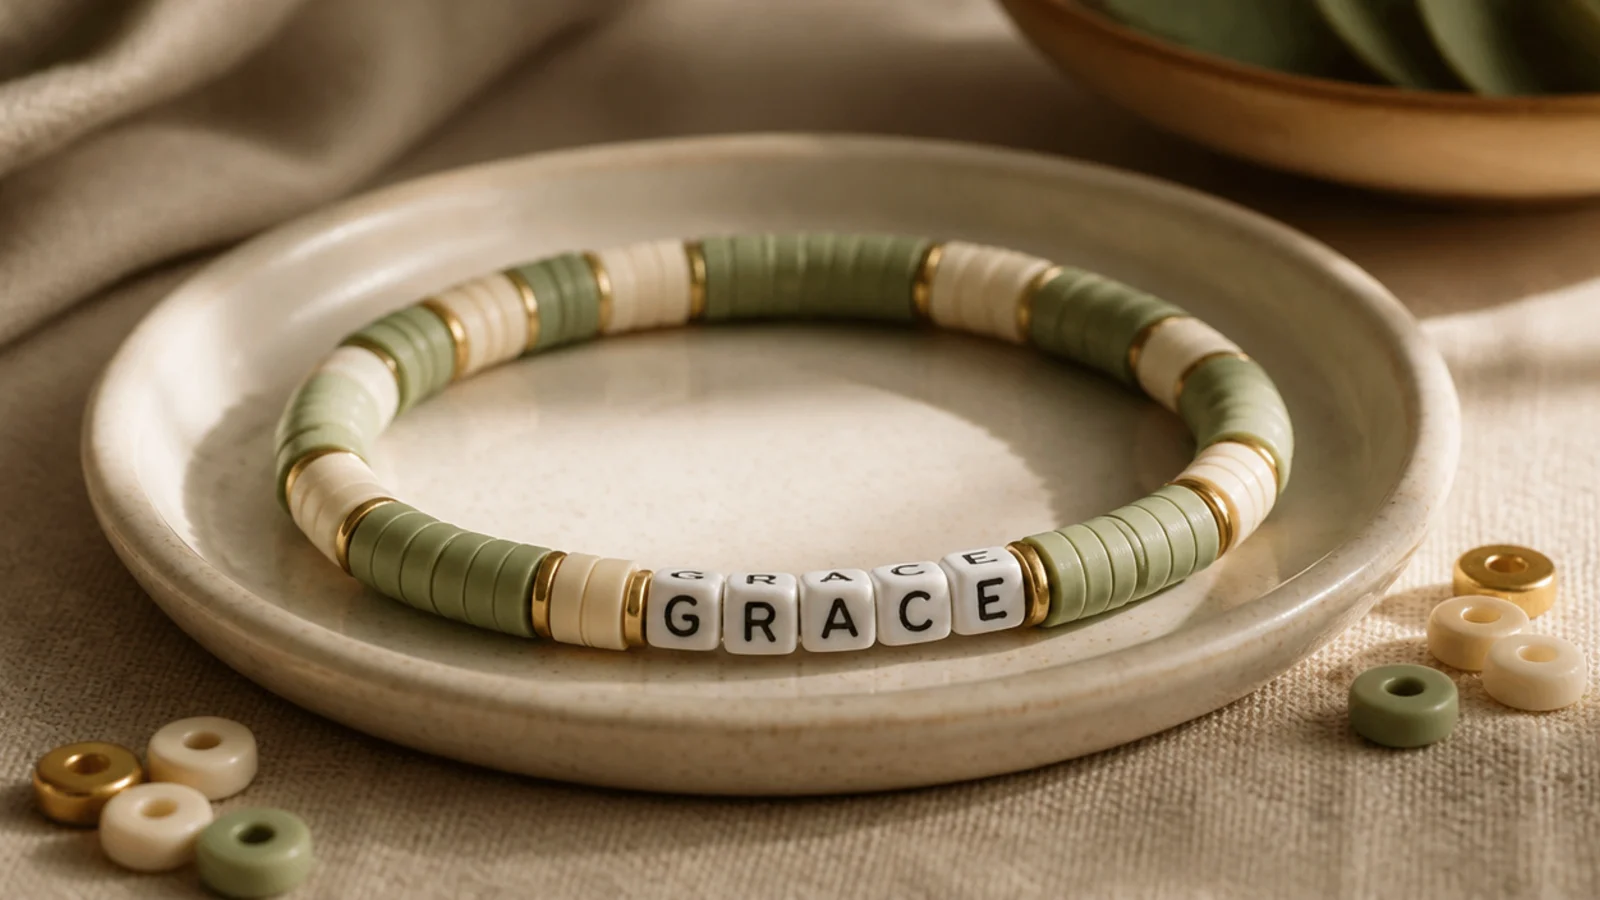
Spelling a name in letter beads instantly makes a bracelet personal, which is why these are the most-gifted style. A calm two-color base keeps the letters legible and grown-up. Short names and initials work best — they leave room to balance the word with plain beads on both sides. It’s the design everyone wants their own version of.
Lay out your letter beads first and count them, then subtract that from your total bead budget so the fit stays right. String base beads for the first third, add the letter beads in order for the name, then fill the rest with base beads. Center the word by keeping equal base beads on each side. Knot, glue, and hide it inside a base bead.
Thread letter beads left-to-right as you’ll read them on the wrist, and double-check the order before you knot — a backwards name is the classic mistake.
Don’t use letter beads with tiny holes on thick cord; test-fit one first or switch to 0.6mm cord so they thread smoothly.
7. Cherry Red Duo
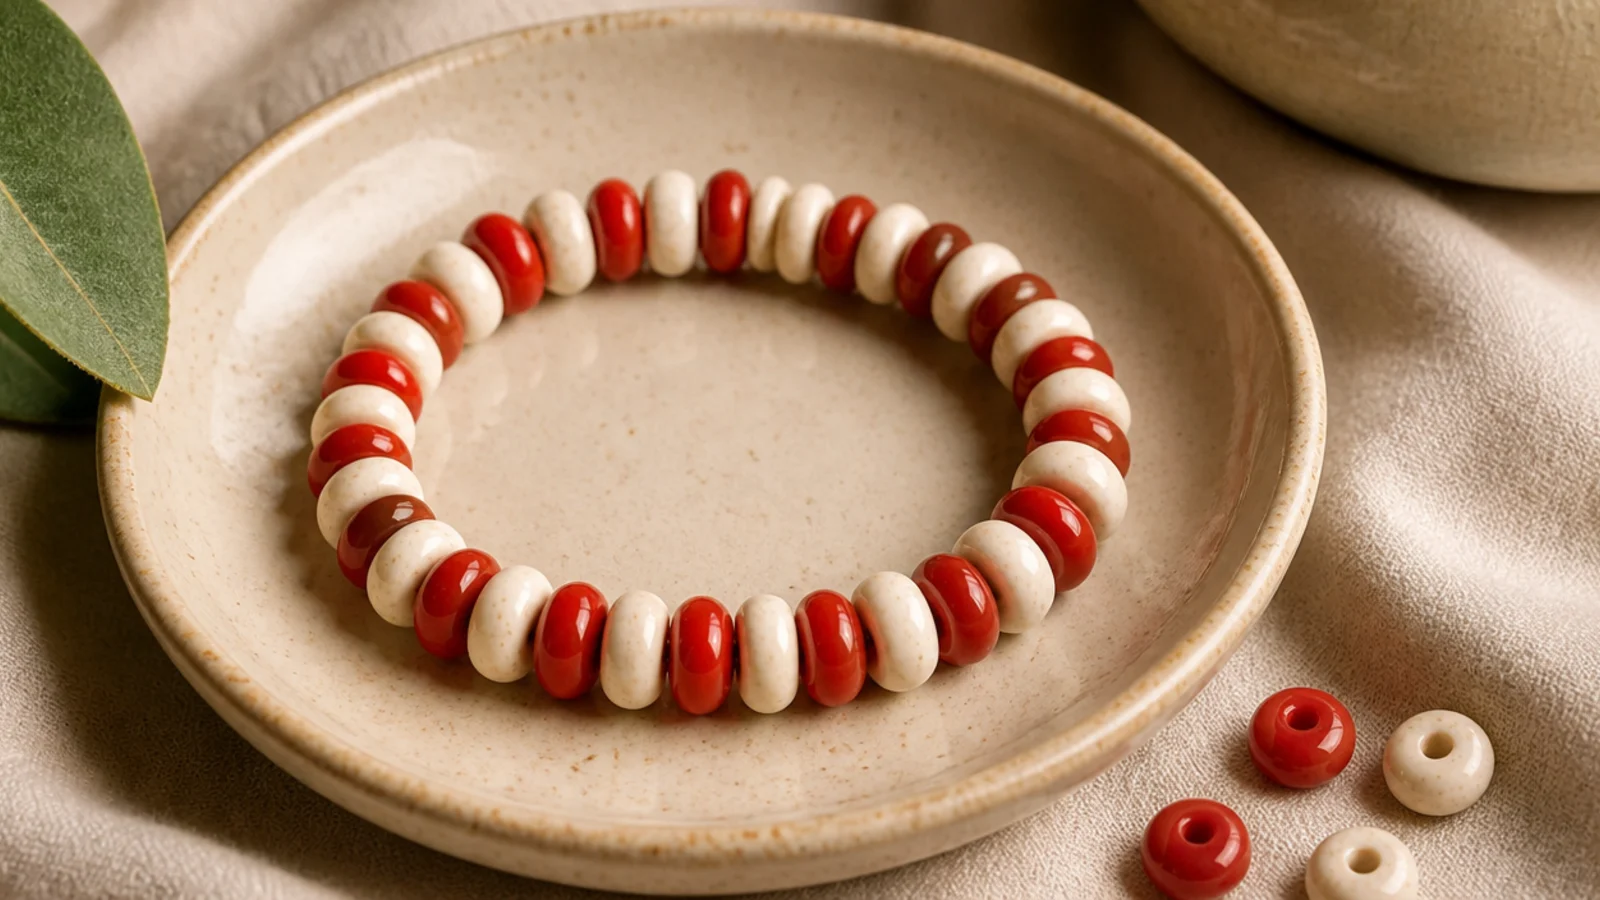
Two colors alternating is the cleanest cute pattern you can make, and cherry red with cream is a retro-sweet pairing. The strict one-and-one rhythm looks crisp and intentional with zero focal beads needed. It stacks beautifully with gold jewelry. This is proof that a great palette beats a busy design every time.
Editor's noteString in a steady one-red-one-cream rhythm without pausing to check your dish — the repetition keeps the pattern perfectly even.
Pull just two colors into your dish — cherry red and cream. String them strictly alternating, one red then one cream, all the way around; don’t let two of the same color sit together. String to your wrist length ending so the pattern meets cleanly, then finish with a surgeon’s knot and hide it inside a bead.
Skip thisDon’t accidentally double up a color; two reds together break the alternating rhythm and it’s the first thing the eye catches.
8. Cloud and Sky Blue
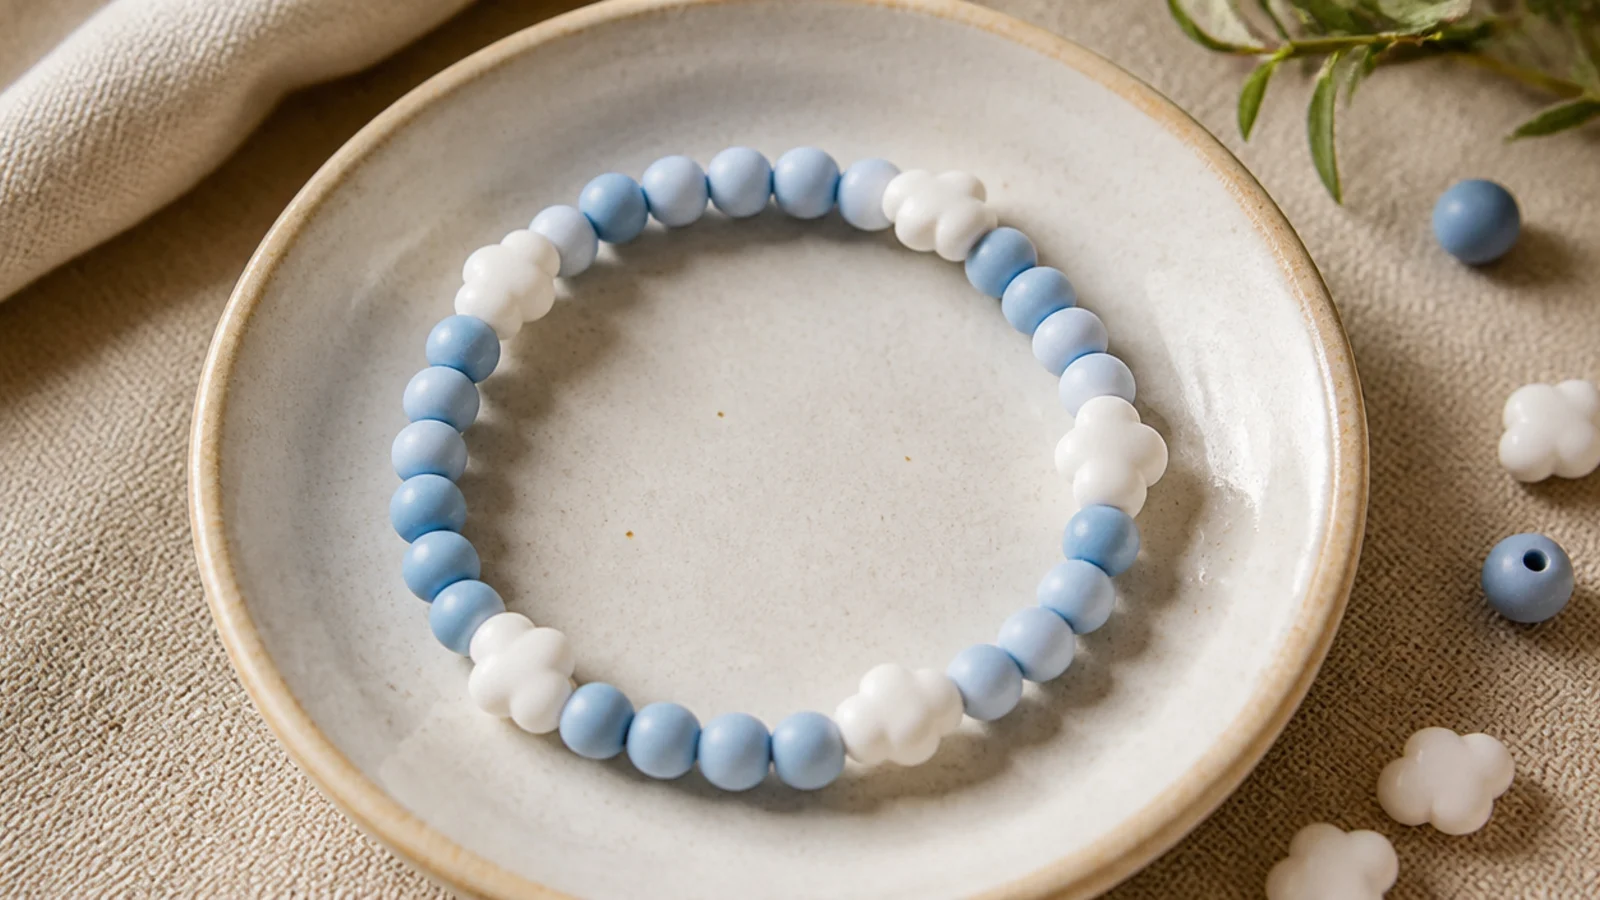
Sky blue beads with little white cloud beads is a dreamy, calming design that feels like a summer sky. The soft blue base and puffy white clouds make an obvious, gentle theme. It’s cute without any characters or faces, so it reads a touch more subtle. Great for anyone who loves a soft, airy aesthetic.
Editor's noteChoose cloud beads roughly the same thickness as your clay beads so the bracelet lies smooth and doesn’t bulge at the clouds.
String sky-blue clay beads as your base, spacing three or four small white cloud beads evenly around the band. Count the blue beads between clouds so the gaps match. Keep the clouds low-profile so they sit flat; string to your wrist length, then knot, seal with glue, and tuck the knot inside a blue bead.
Skip thisDon’t use a dark or saturated blue base; the pale sky tone is what makes the white clouds read as clouds and not just dots.
9. Star Bead Sprinkle
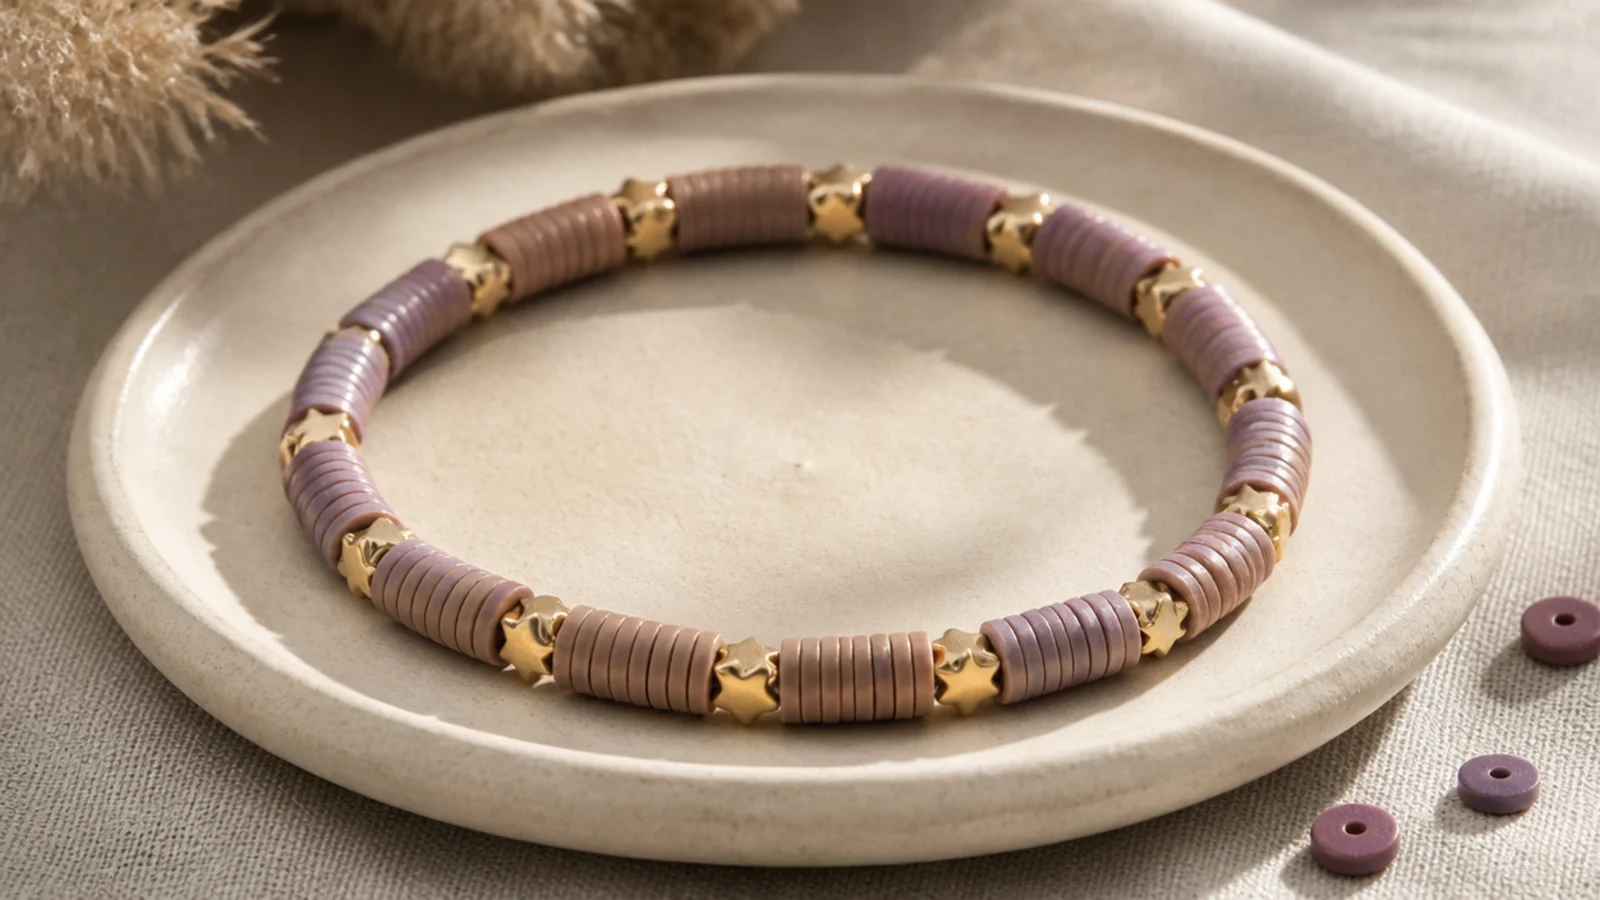
Small gold star beads sprinkled between clay discs add a little sparkle without going full glitter. The metallic stars catch the light and dress up an otherwise soft bracelet. A dusty lilac or midnight-blue base makes the gold really glow. It’s cute with a slightly celestial, grown-up edge.
String your base clay color and drop in a tiny gold star bead every fourth or fifth bead, keeping the count consistent so the stars space evenly. Because star beads are small, they’ll nestle between the discs. String to your wrist length, finish with a surgeon’s knot, glue it, and hide the knot inside a clay bead.
Keep the same bead count between every star — even spacing is what turns scattered stars into a deliberate sprinkle.
Don’t overload it with stars; more than one every few beads looks cluttered and hides the pretty base color.
10. Cottagecore Sage and Cream
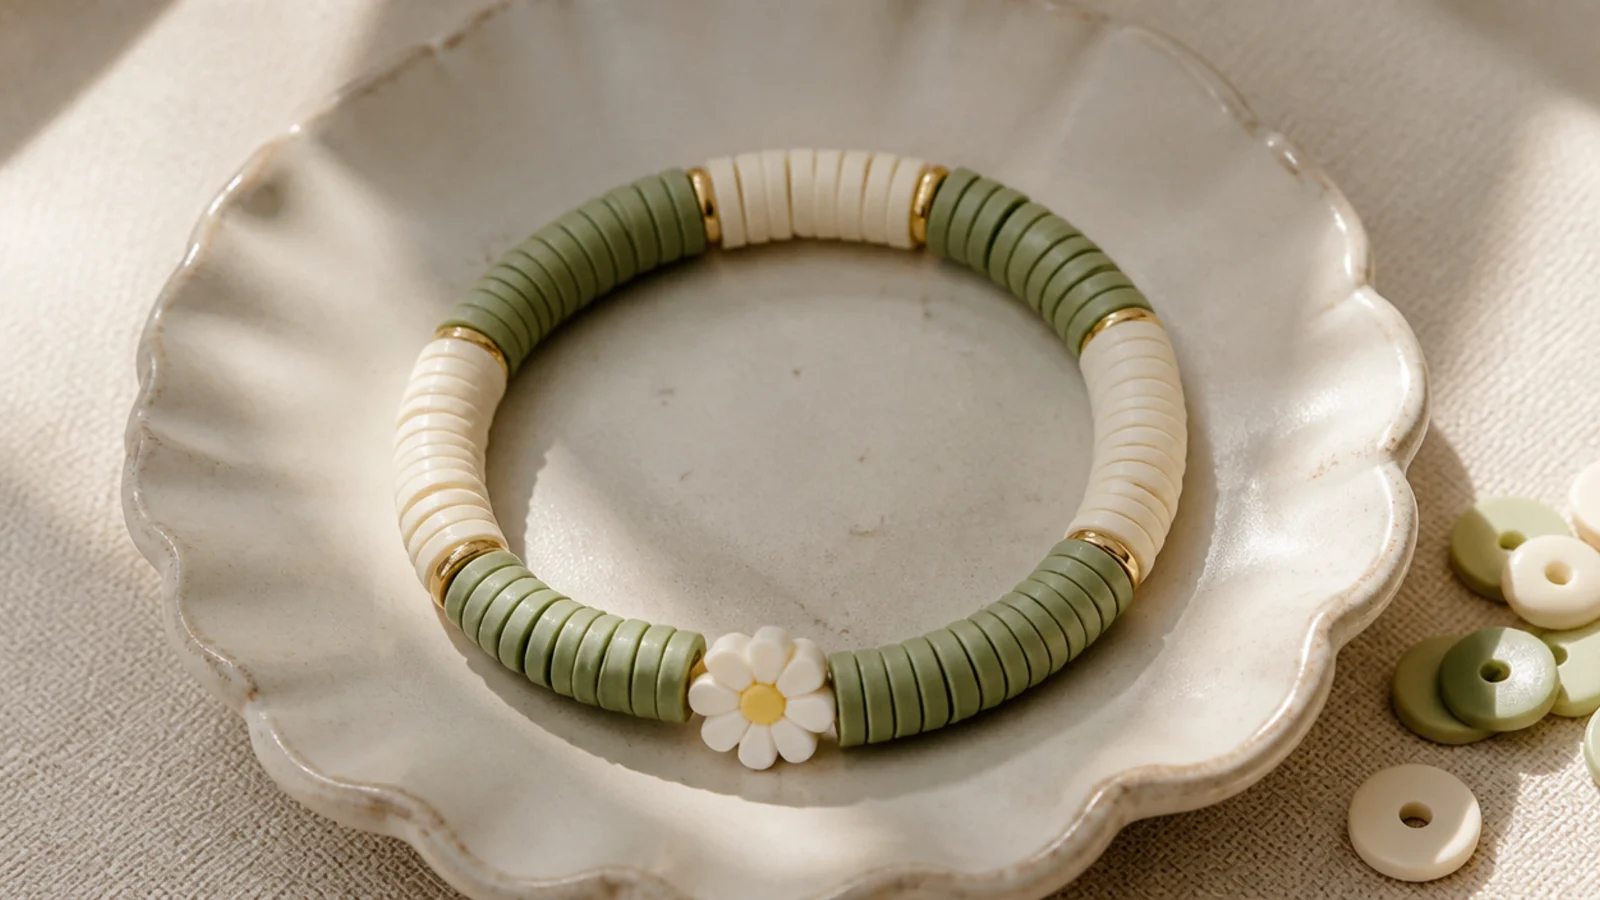
Soft sage and cream in gentle color blocks gives that quiet cottagecore look that pairs with everything. Grouping each color in little runs of three or four feels calmer than alternating single beads. A lone daisy accent keeps it sweet without shouting. It’s the bracelet I reach for when I want cute but understated.
Editor's noteKeep every color block the exact same length — consistent blocks are what separate a designed look from a random mix.
String three sage beads, then three cream, repeating the blocks around the band. Add a single small daisy bead at the front where two blocks meet. Keep your block counts identical so the rhythm stays even. String to your wrist length, then finish with a surgeon’s knot, seal, and tuck the knot inside a cream bead.
Skip thisDon’t make the blocks different sizes; uneven runs of color read as a mistake rather than a pattern.
11. Bubblegum Pink Gradient
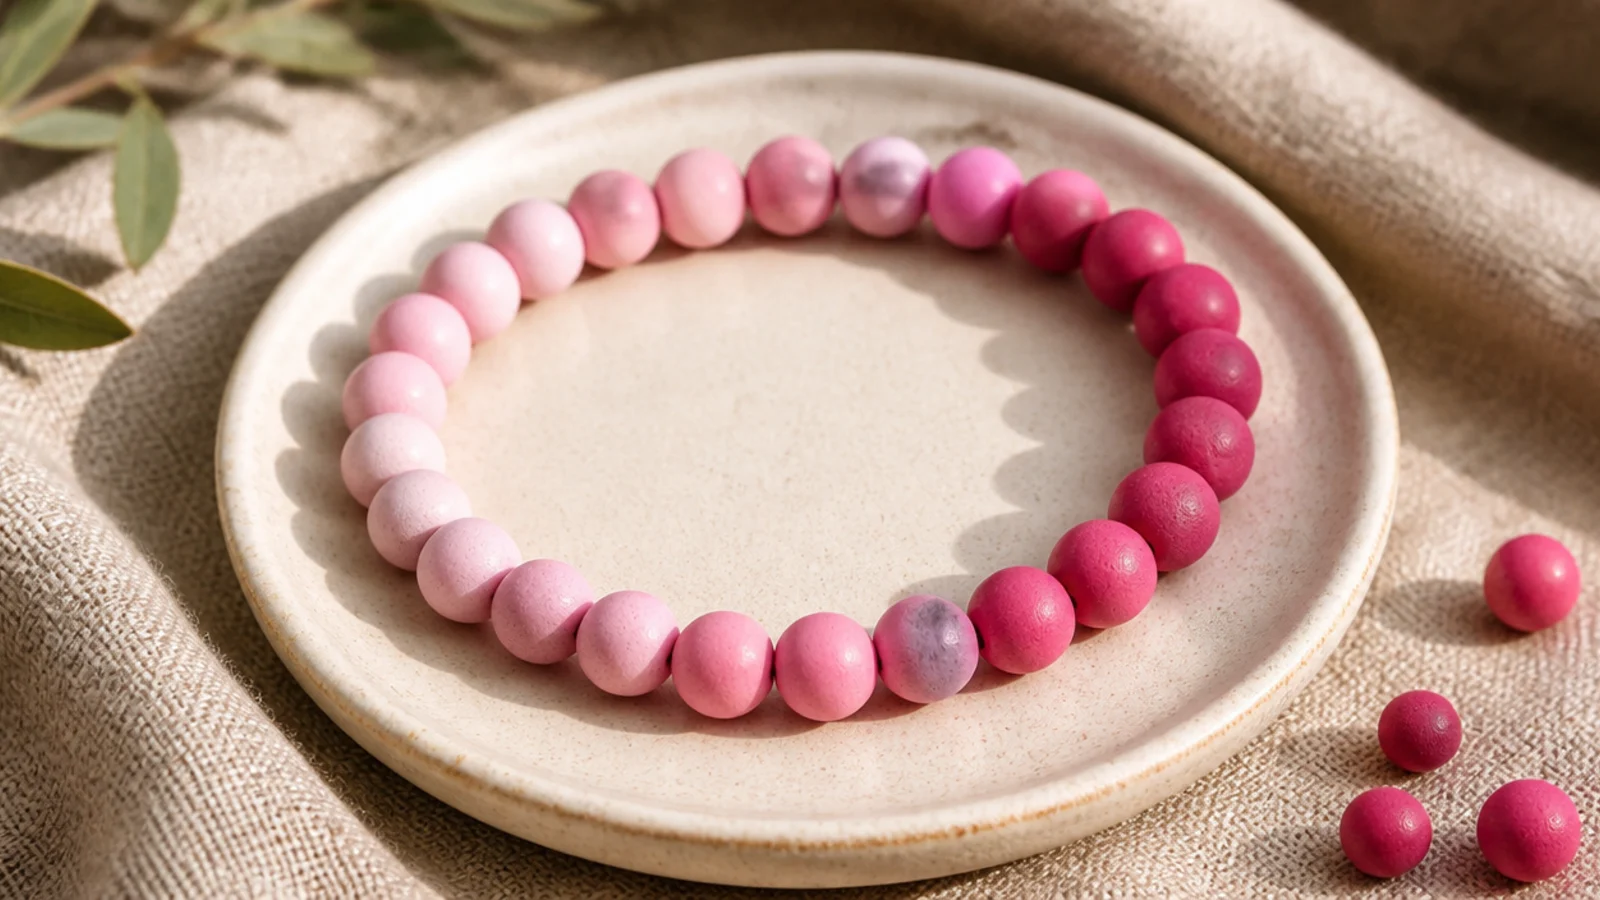
A single-color gradient looks advanced but only needs three or four shades of the same pink. You move from pale baby pink through bubblegum to deep magenta, and the fade does the work. Staying within one color family keeps it cohesive and very cute. It’s a lovely way to use up odd pinks from a mixed tube.
Sort three or four pink shades from lightest to darkest into your dish. String a short run of the palest pink, then the next shade, working darker toward the center and back to pale at the other end for a symmetrical fade. Keep each shade’s run the same length. String to your wrist size, knot, glue, and hide it.
Fade toward the center and back so both ends match — a symmetrical gradient looks intentional from any angle on the wrist.
Don’t jump from very pale straight to very dark; skipping the middle shade makes a hard stripe instead of a smooth fade.
12. Mushroom Bead Accent
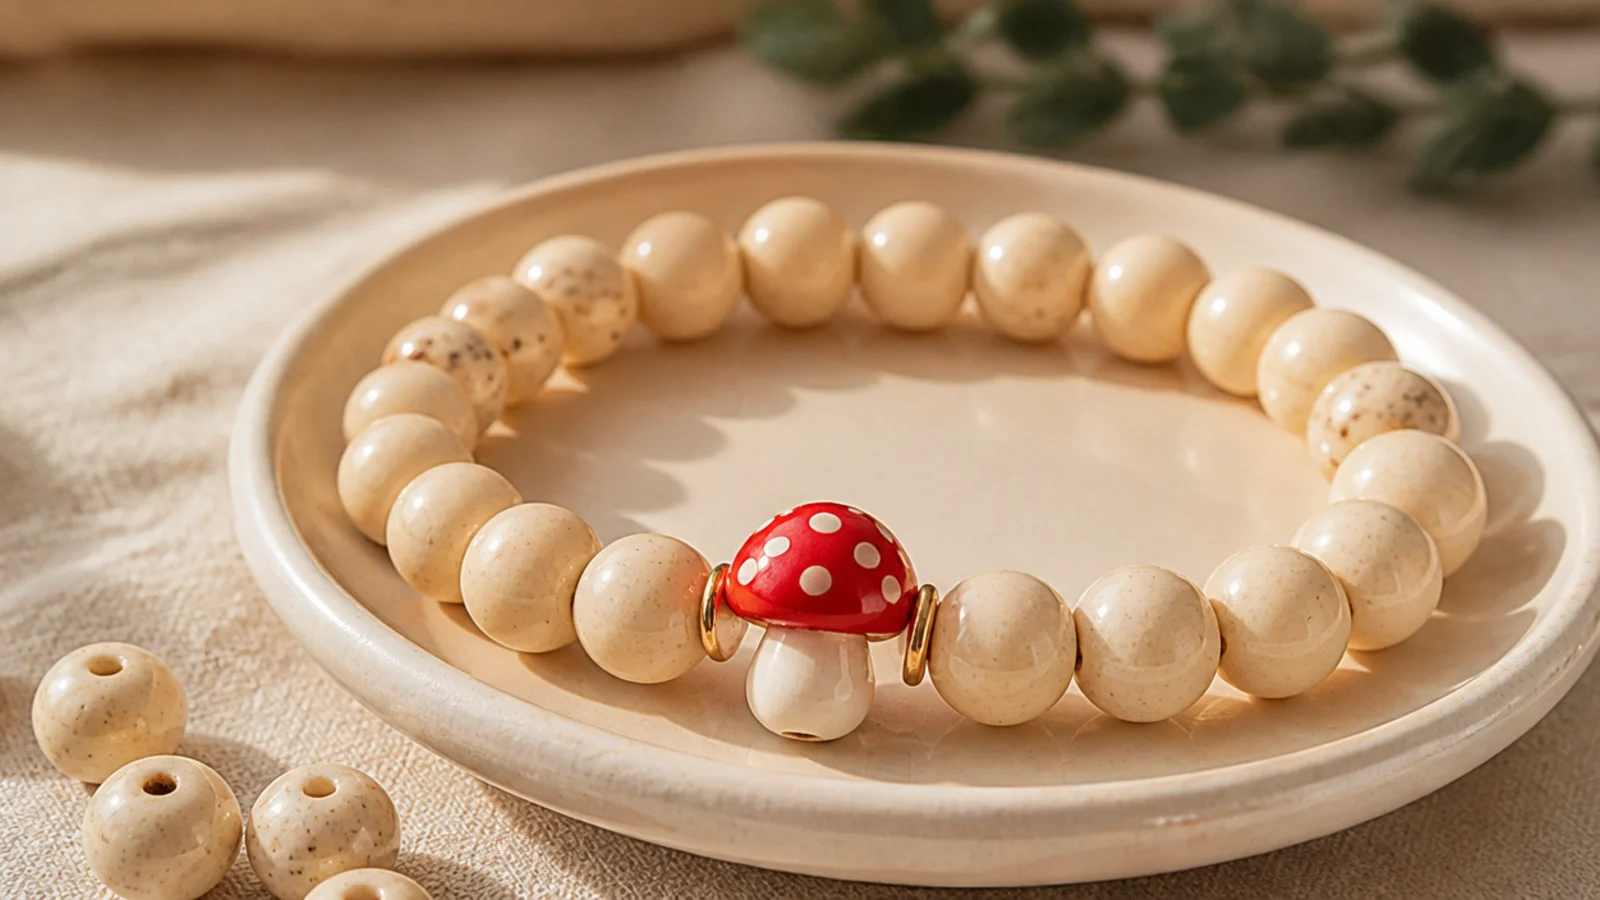
A little toadstool mushroom bead is peak cottagecore-cute and instantly charming. On a plain cream base, the red-and-white mushroom becomes a tiny scene-stealer. It’s whimsical without being babyish, which makes it a fun gift for grown-ups too. One mushroom is all you need.
String cream clay beads to the halfway point, then add the mushroom focal bead in the center front. Place a single tiny green bead on each side to suggest little sprouts if you like. Continue with cream beads to your wrist length. Finish with a surgeon’s knot, seal it, and tuck the knot inside a cream bead.
Pick a mushroom bead with a hole drilled through the stem so it sits upright and faces forward on the wrist.
Don’t add a second novelty bead nearby; the mushroom is the star, and a competing charm makes it look cluttered.
13. Butterfly Bead
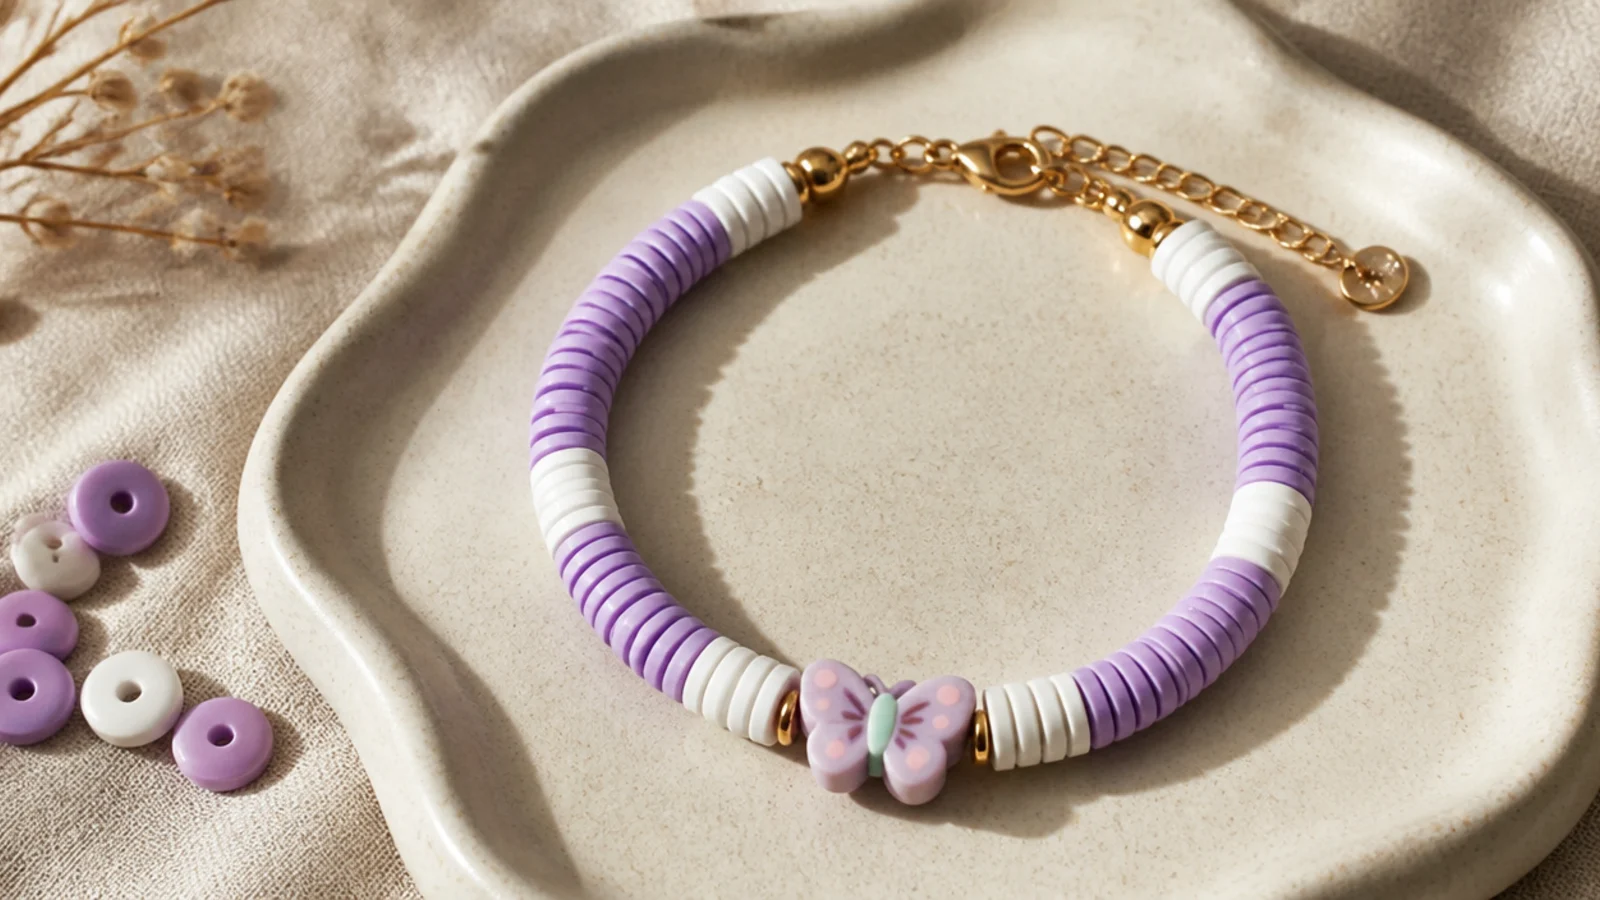
A pastel butterfly focal is delicate and pretty, perfect for spring stacks. Set on a lavender-and-white base that echoes its colors, the butterfly looks like it belongs. Butterfly beads come in lots of soft colorways, so you can match any palette. It’s cute with a light, feminine feel.
Build a base alternating lavender and white clay beads in short two-bead runs. Center the butterfly bead on the front, flanked by one white bead on each side so its wings read clearly. String to your wrist length keeping the base pattern even, then finish with a surgeon’s knot, glue, and hide the knot inside a bead.
Match one of your base colors to the butterfly’s wing color so the focal looks planned into the palette.
Don’t choose a butterfly bead wider than your wrist band; an oversized focal tips sideways and looks awkward.
14. Lemon Yellow Color Block
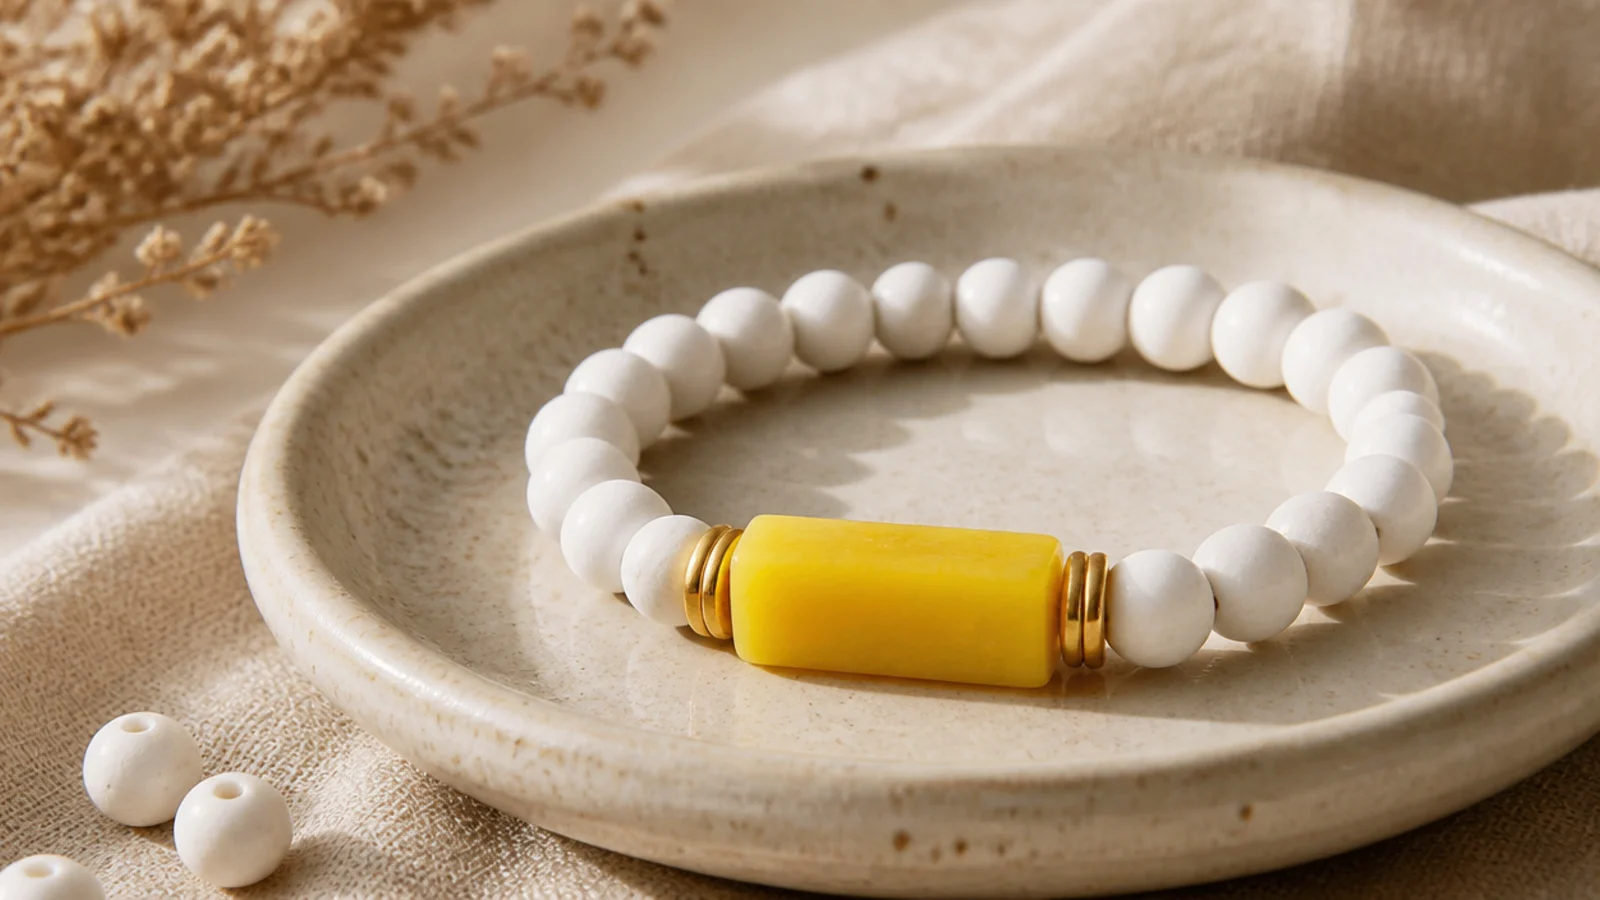
One cheerful block of color on an otherwise white bracelet is bold and modern-cute. A run of lemon yellow across the front reads like a designed graphic against the white. It’s fresh and summery without any charms. Swap yellow for coral or turquoise for a different mood.
Editor's noteCount your total beads and center the color block exactly — an off-center block looks unbalanced on the wrist.
String white clay beads for the first third of your wrist length. Add a solid block of eight to ten lemon-yellow beads across the front, then return to white for the final third. Keep the yellow block centered by counting equal white beads on each side. Knot with a surgeon’s knot, seal, and tuck the knot inside a white bead.
Skip thisDon’t make the block too small; a stingy run of three or four beads looks like a stray section rather than a design choice.
15. Busy Bee Beads
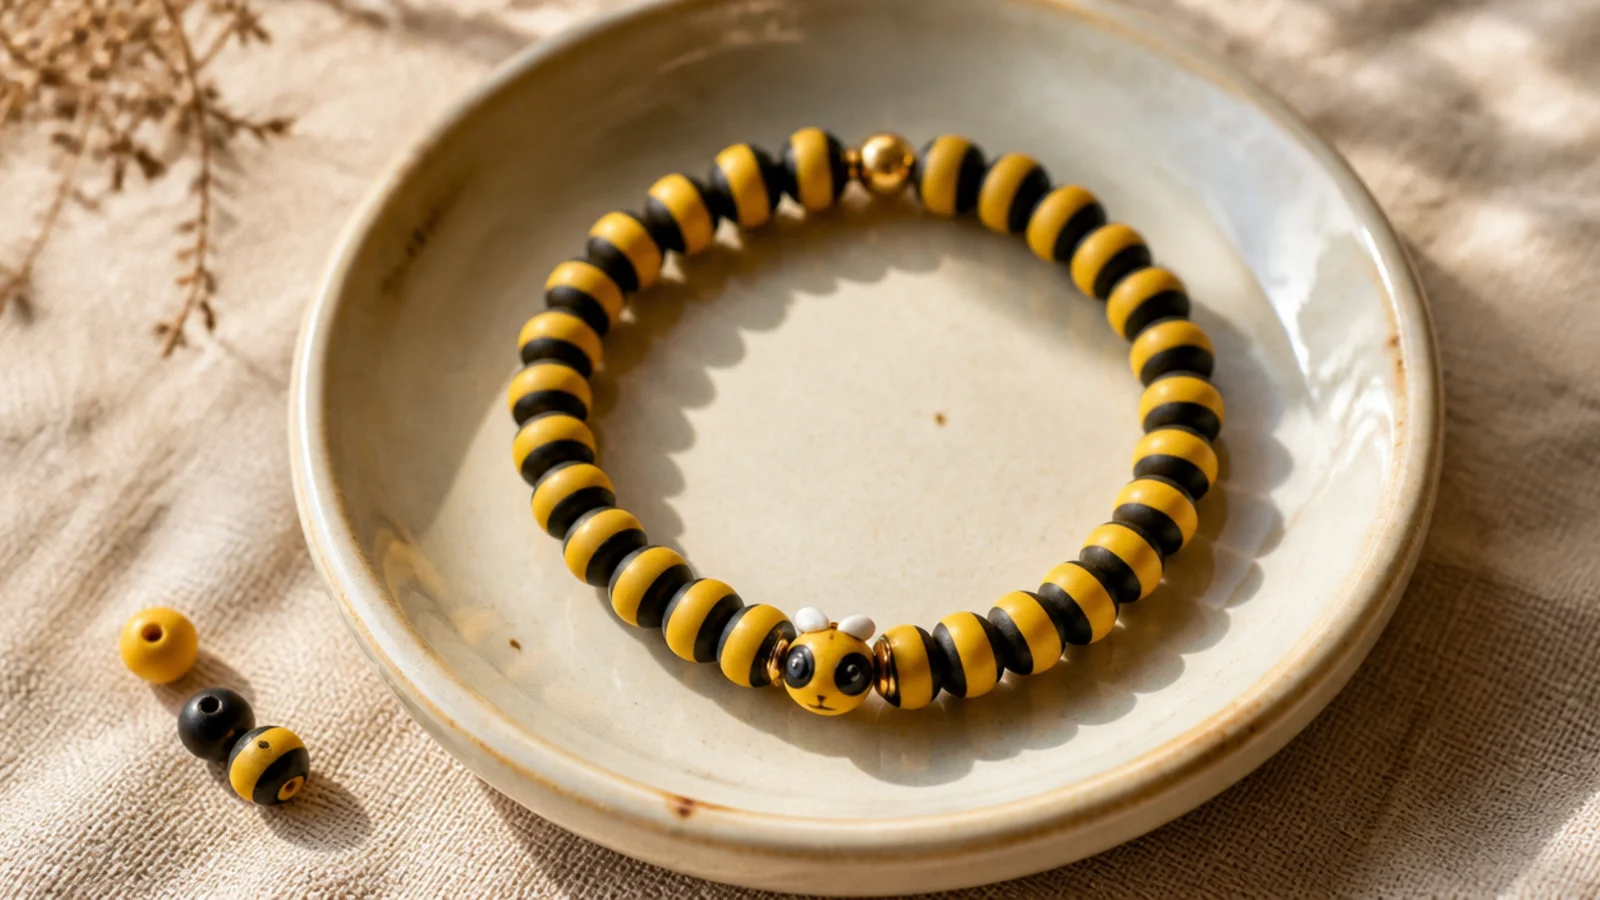
Black and yellow stripes with a little bee focal is a playful, punchy theme. The alternating stripe base sets up the bee perfectly so the whole thing tells one story. It’s a fun summer or garden-themed bracelet that kids adore. Keep the yellow soft rather than neon so it stays cute, not costume-y.
Editor's noteUse a warm, soft yellow rather than a neon one — it keeps the bee theme charming instead of looking like a costume piece.
Alternate two yellow and two black clay beads to create the striped base. Place the bee bead in the center front with a single yellow bead on each side. Continue the two-and-two stripe to your wrist length, ending so the stripes meet evenly. Finish with a surgeon’s knot, glue, and hide the knot inside a bead.
Skip thisDon’t let the black beads dominate; if the base skews too dark the cheerful bee theme gets heavy and loses its cuteness.
16. Pearl and Pastel Mix
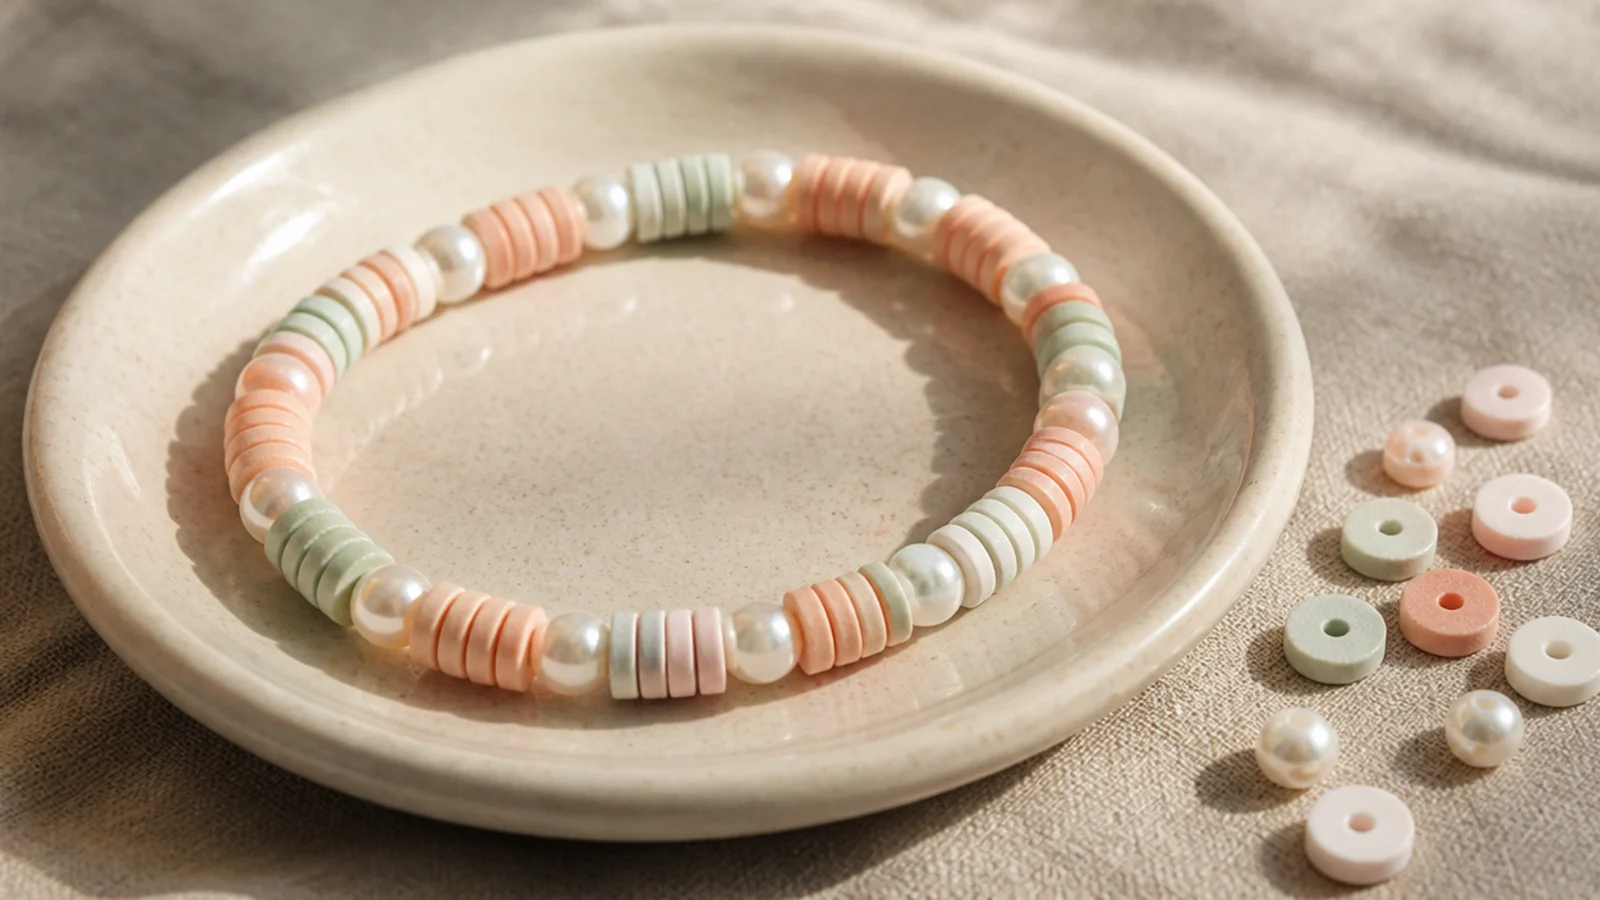
Dropping a few faux pearls among pastel clay beads adds an instant touch of elegance. The round pearls contrast nicely with the flat discs, giving texture as well as shine. It’s cute but a little dressed-up, so it works for events too. Keep the pastels soft so the pearls stay the highlight.
String pastel clay beads and slip a small round faux pearl in every fifth position, keeping the count even. Because pearls are round and beads are flat, the mix adds gentle texture; make sure the pearl holes fit your cord first. String to your wrist length, then finish with a surgeon’s knot, seal, and tuck the knot inside a clay bead.
Test one pearl on your cord before committing — pearl beads often have smaller holes than clay discs and may need thinner elastic.
Don’t crowd in too many pearls; a few make it elegant, but a full row of pearls loses the playful pastel-clay feel.
17. Ice Cream Pastel Scoop
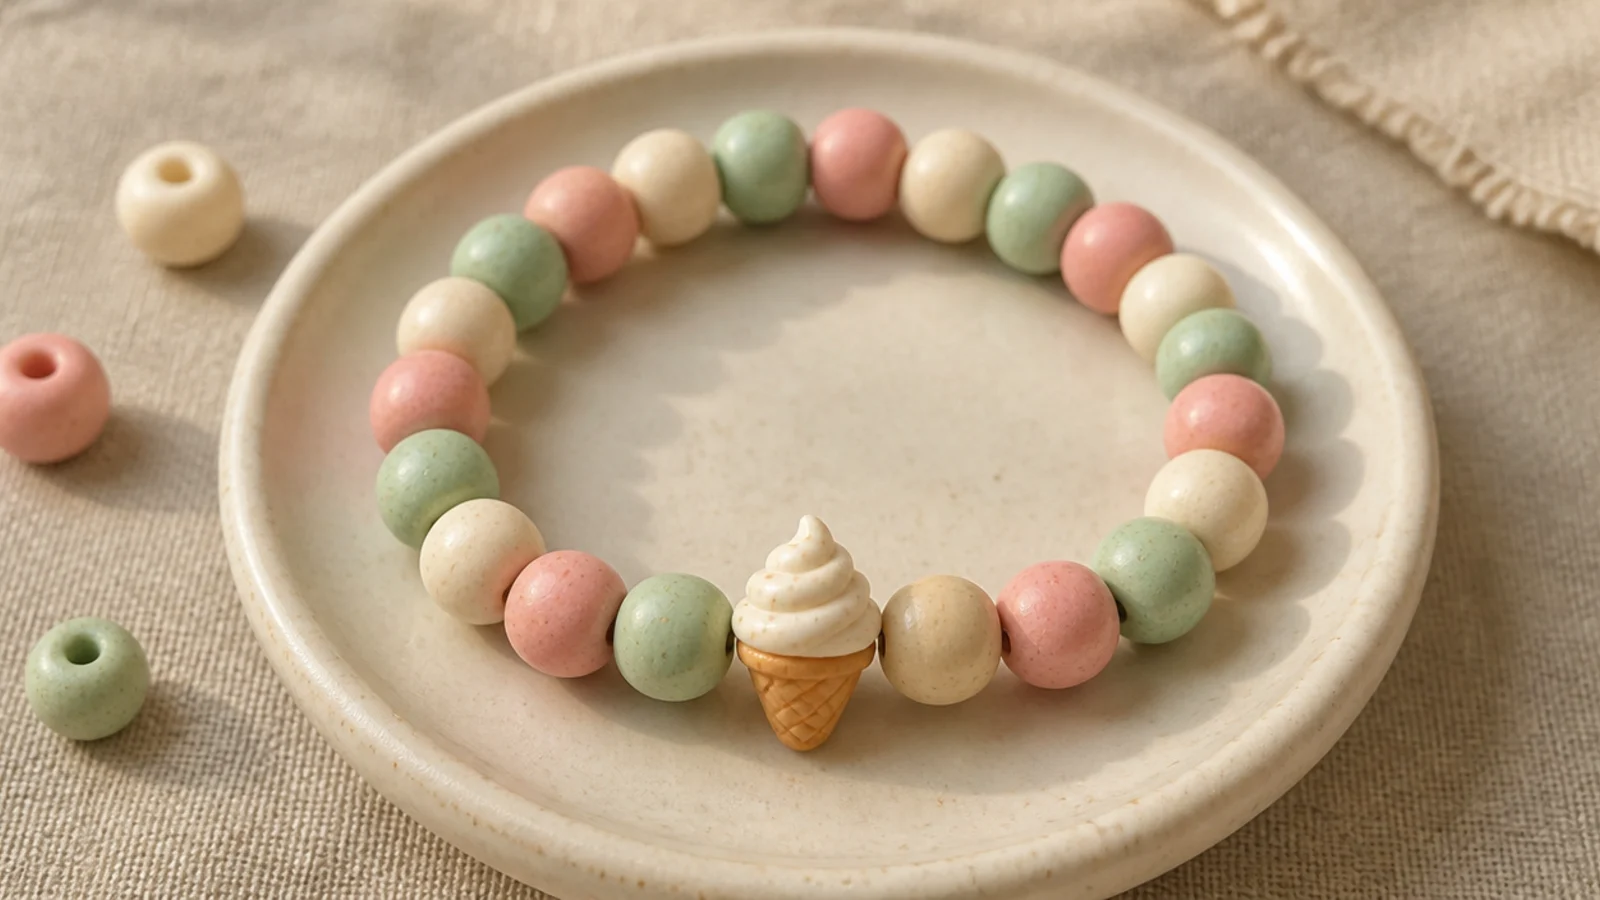
Scoop-inspired pastels — mint, strawberry, vanilla — with a little cone bead is a delicious summer theme. The three ice-cream colors give you a ready-made palette that just works. A single cone focal ties the whole flavor story together. It’s sweet, seasonal, and a hit with kids.
Editor's noteStick to three flavor colors max — a tight palette is what makes the scoops read as ice cream instead of a random mix.
Group your three flavors in short runs — three mint, three strawberry, three vanilla — and repeat the blocks. Add the ice-cream cone bead at the front where you want the focal. Keep block sizes equal for a clean rhythm, string to your wrist length, then finish with a surgeon’s knot, glue, and hide the knot inside a vanilla bead.
Skip thisDon’t add a fourth or fifth color; too many pastels muddy the ice-cream theme and it just looks like a color jumble.
18. Tiny Gold Spacer Accent
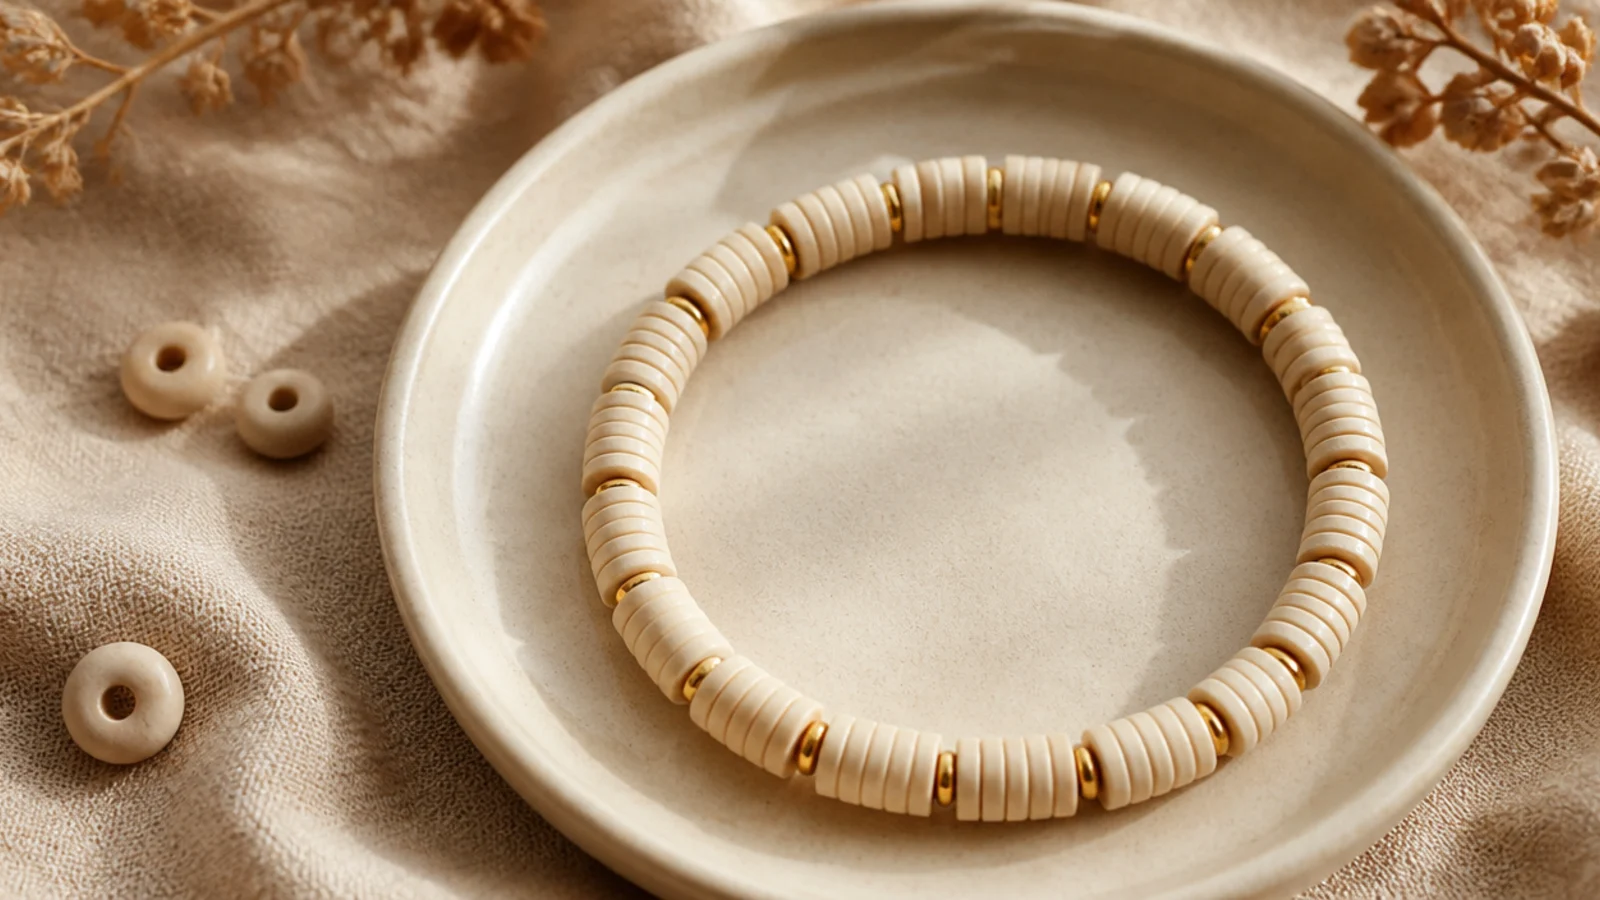
The most grown-up-cute idea here: plain clay beads with a tiny gold spacer every few beads. The little metallic breaks add rhythm and a hint of shine without any theme. It’s minimal, stacks with anything, and never looks childish. Proof that spacing alone can make a bracelet look designed.
Editor's noteKeep the gap between spacers identical all the way around — the even rhythm is the entire design, so consistency is everything.
String cream (or any single calm color) clay beads and add a small gold rondelle spacer every fourth bead, keeping the count exact. The thin spacers tuck neatly between the discs. String to your wrist length so the spacing stays even end to end, then finish with a surgeon’s knot, seal, and tuck the knot inside a clay bead.
Skip thisDon’t use chunky spacers that stick out past the clay discs; oversized metal breaks the smooth line of the bracelet.
19. Confetti Multicolor
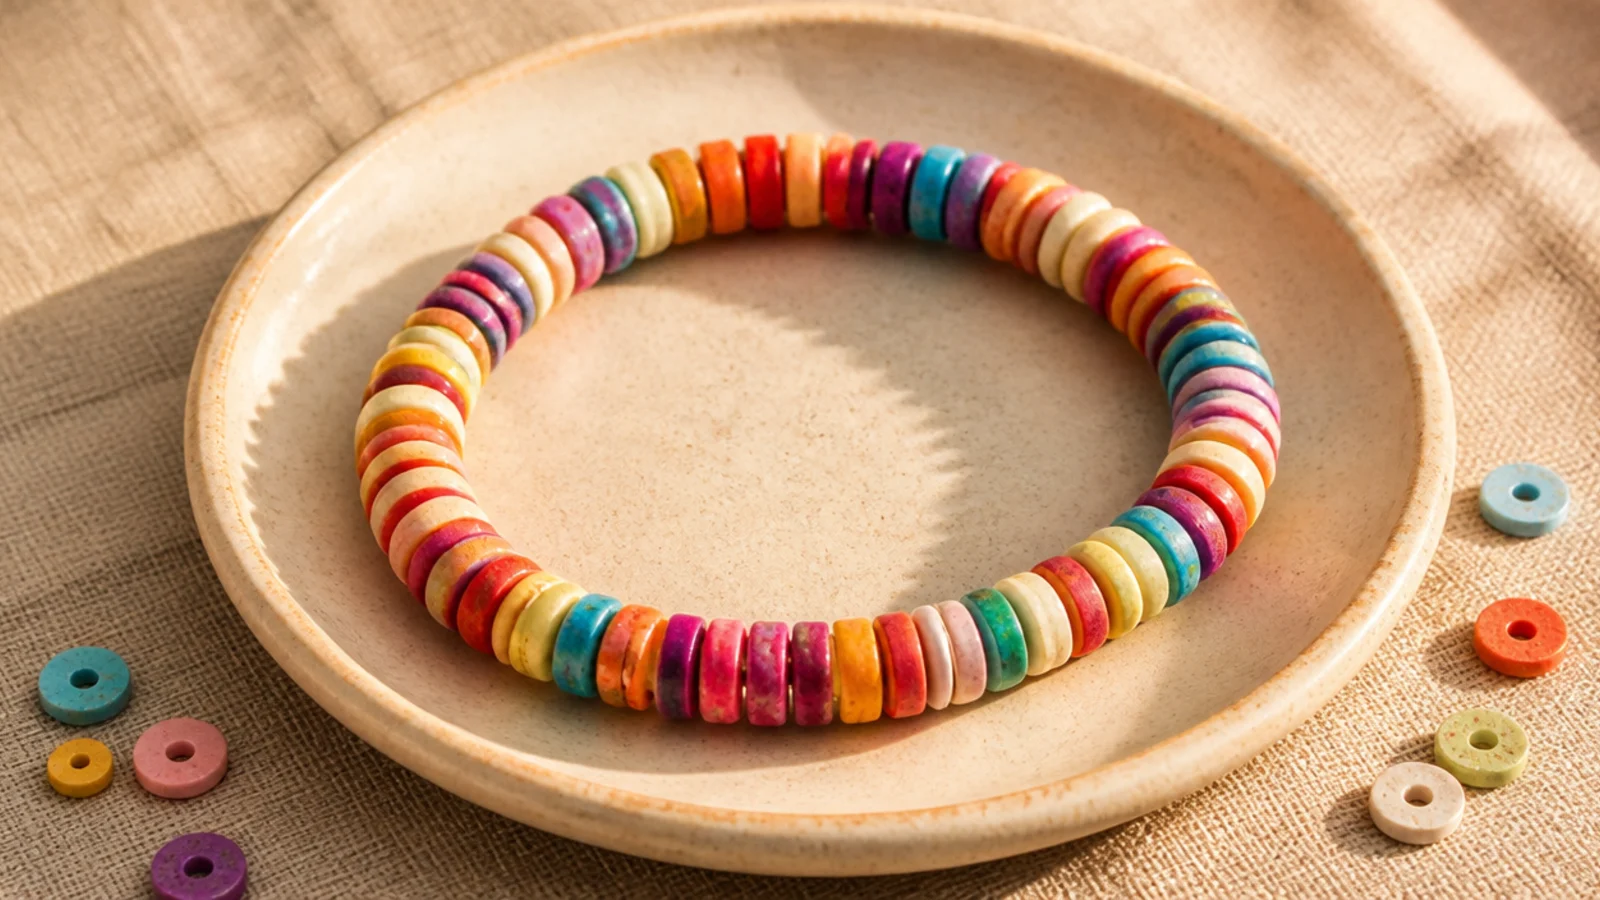
Sometimes cute means happily random — a full confetti mix of every color in the tube. The trick is that true randomness needs a rule so it doesn’t clump. This is the most forgiving design because there’s no pattern to get wrong. It’s joyful, kid-friendly, and uses up your odds and ends.
Editor's noteThe one rule — no two of the same color touching — is what keeps a random mix looking festive instead of blotchy.
Tip a wide mix of colors into your dish. String beads by grabbing without looking, but follow one rule: never let the same color sit next to itself. If two matching beads land together, swap one out. String to your wrist length, then finish with a surgeon’s knot, glue it, and hide the knot inside any bead.
Skip thisDon’t let colors clump; three of one shade in a row turns confetti into a stain and breaks the scattered look.
20. Matching Mini for Kids
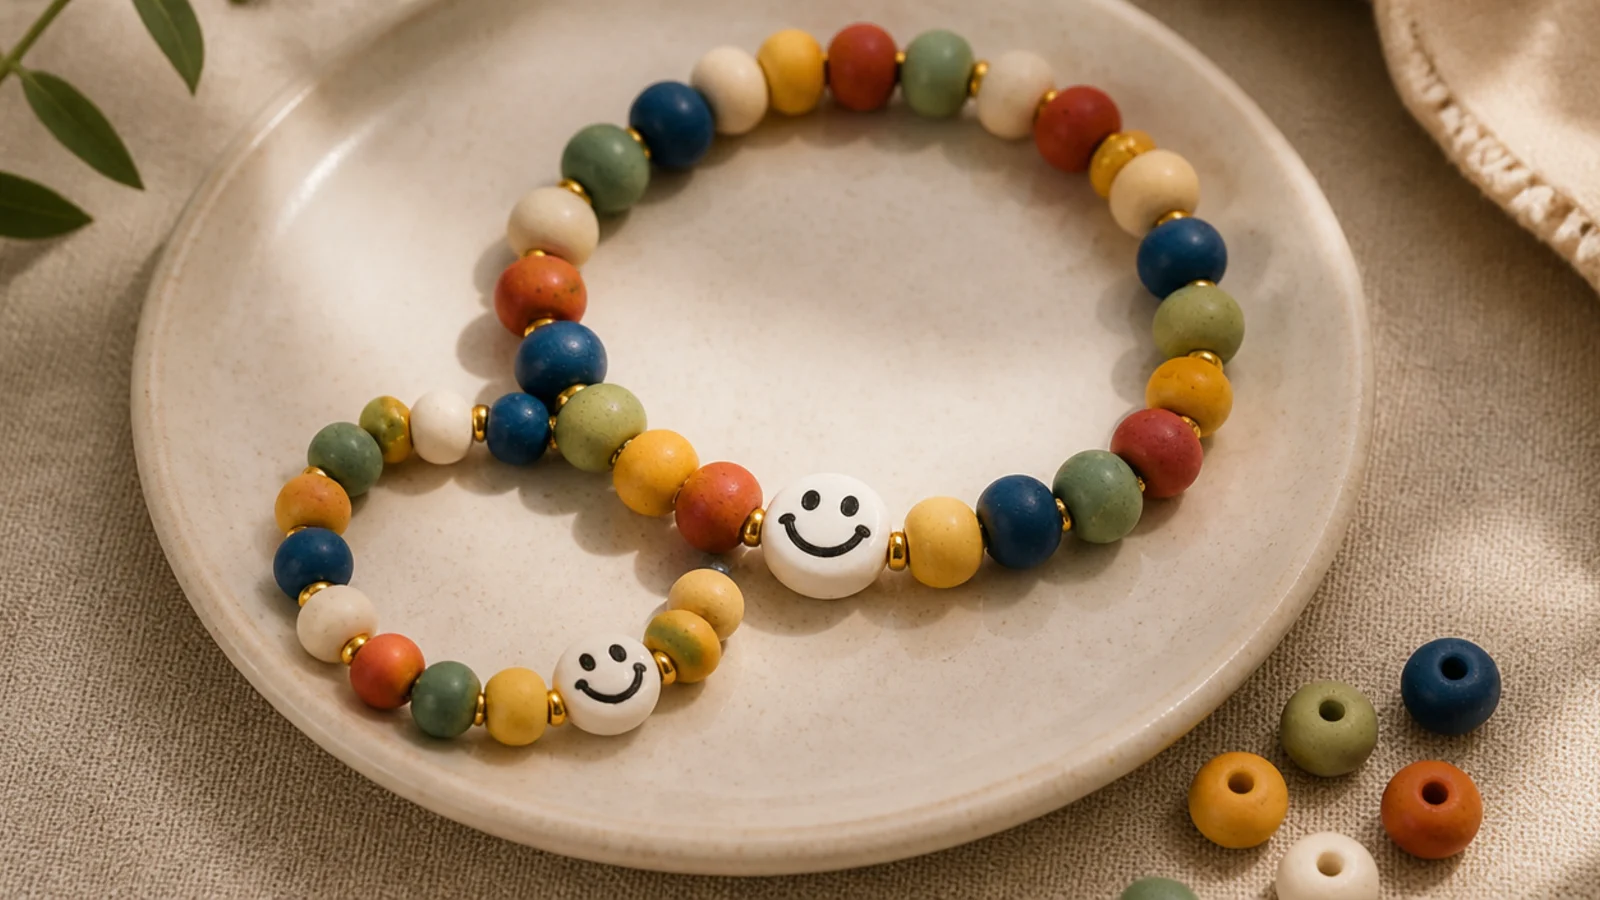
A downsized version of any design makes an adorable mommy-and-me or sibling set. You keep the same palette and focal but shorten the bead count for a small wrist. Matching sets are the cutest gift and cost almost nothing to make. Pick a simple focal like a smiley so both sizes stay clean.
Editor's noteMake the kid version on slightly thicker 1mm cord and double-glue the knot — little wrists put bracelets through a lot.
Measure the child’s wrist with a paper strip and string beads to that length minus a quarter inch — usually 34 to 40 clay beads. Use the same colors and focal bead as the adult version so they clearly match. Use 1mm cord for a little more durability, finish with a surgeon’s knot, add extra glue for active wear, and hide the knot inside a bead.
Skip thisDon’t just reuse the adult length and hope it fits; an over-long bracelet slides off small hands and gets lost.



