

1. Two-Color Alternating
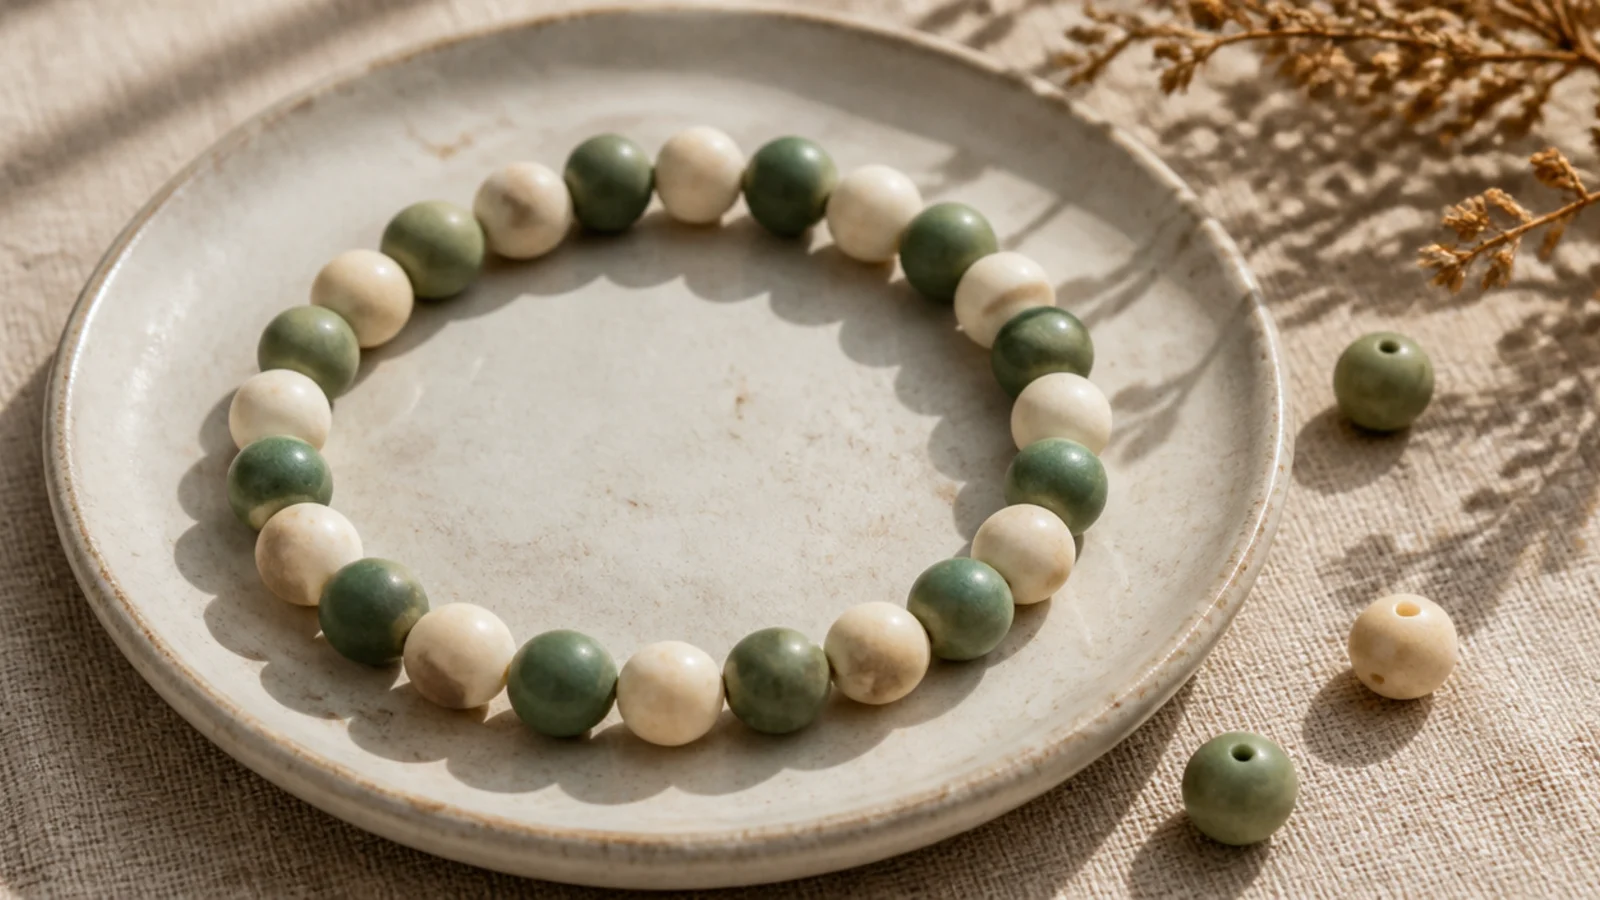
The simplest pattern and the best place to start — one bead of each color, repeating. It’s impossible to lose your place, and it always looks crisp and intentional. Any two colors work, but a soft contrast reads calm and clean. This is pattern-making at its most foolproof.
Pull two colors into your dish. Cut 9 to 10 inches of 0.8mm cord and tape one end. String strictly alternating — one cream, one sage — in a steady rhythm without pausing. Because the repeat is two beads, any even total closes cleanly. String to your wrist size, tie a surgeon’s knot, seal with glue, and hide the knot inside a bead.
String in a steady one-and-one rhythm without stopping to check — the repetition itself keeps the alternation perfectly even.
Don’t accidentally place two of the same color together; a single doubled bead is the first thing the eye catches.
2. Two-and-Two Blocks
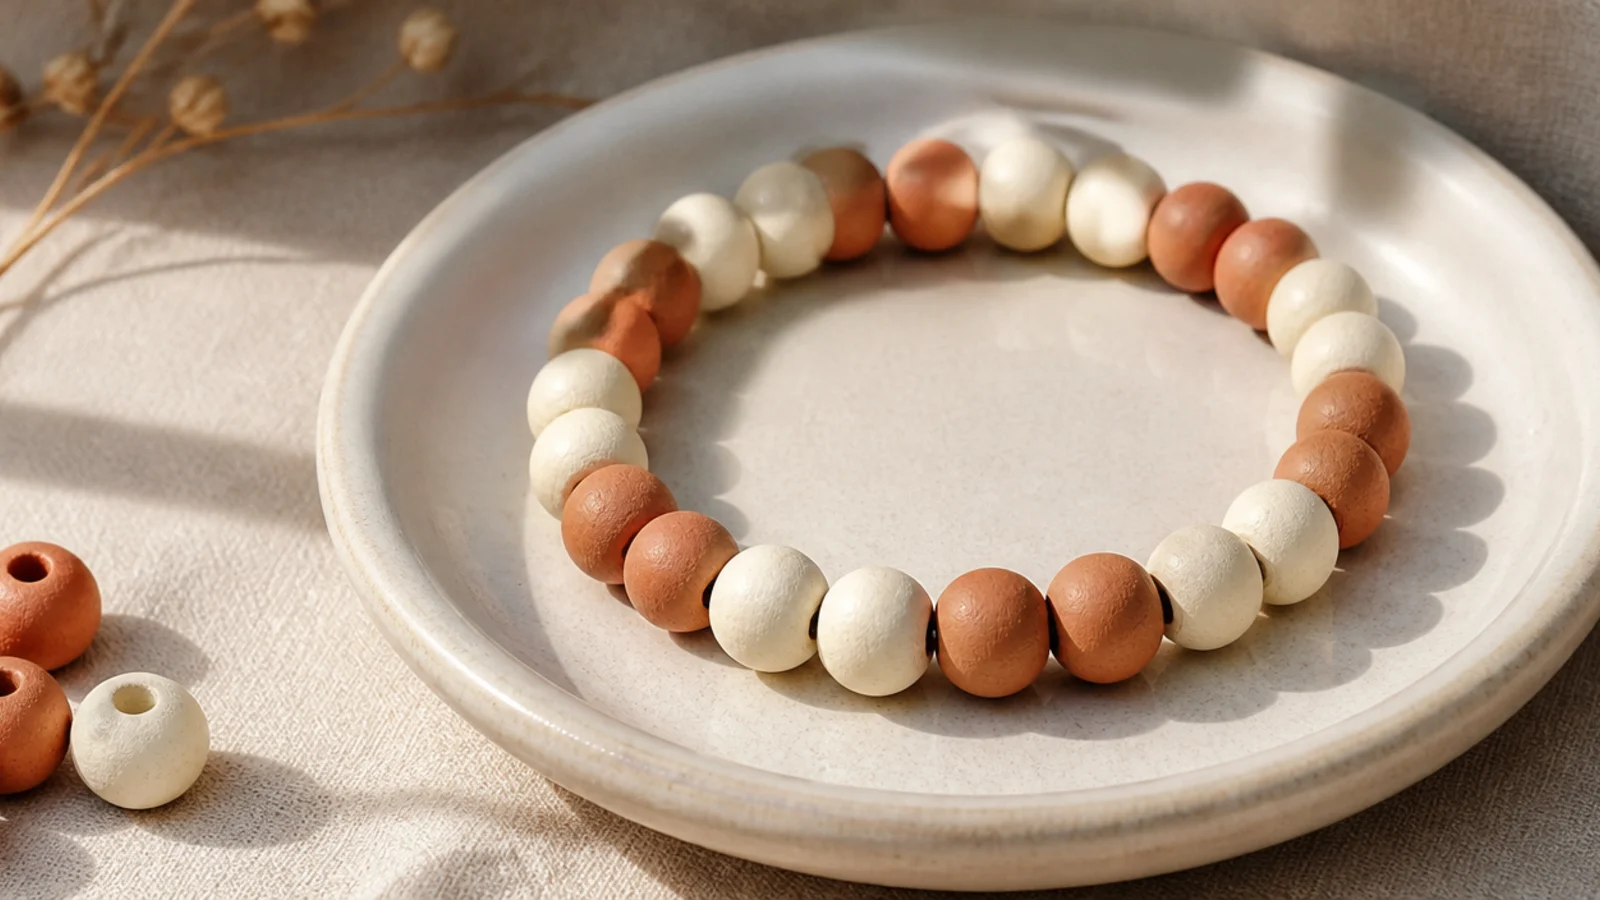
Grouping colors in pairs gives a slightly bolder rhythm than single alternating. Two of each color reads as small blocks and feels a touch more designed. It’s still very easy to track. A great second pattern once alternating feels too simple.
Editor's noteAim for a total bead count divisible by four so the two-and-two repeat meets cleanly at the knot.
String two terracotta, then two cream, repeating around the band on 0.8mm cord. Because the repeat is four beads, a total divisible by four closes cleanly — adjust your total by a bead or two if needed. String to your wrist size, then tie a surgeon’s knot, seal, and hide the knot inside a bead where a block ends.
Skip thisDon’t lose count and make a block of three; one oversized block breaks the even paired rhythm.
3. Three-Color Repeat
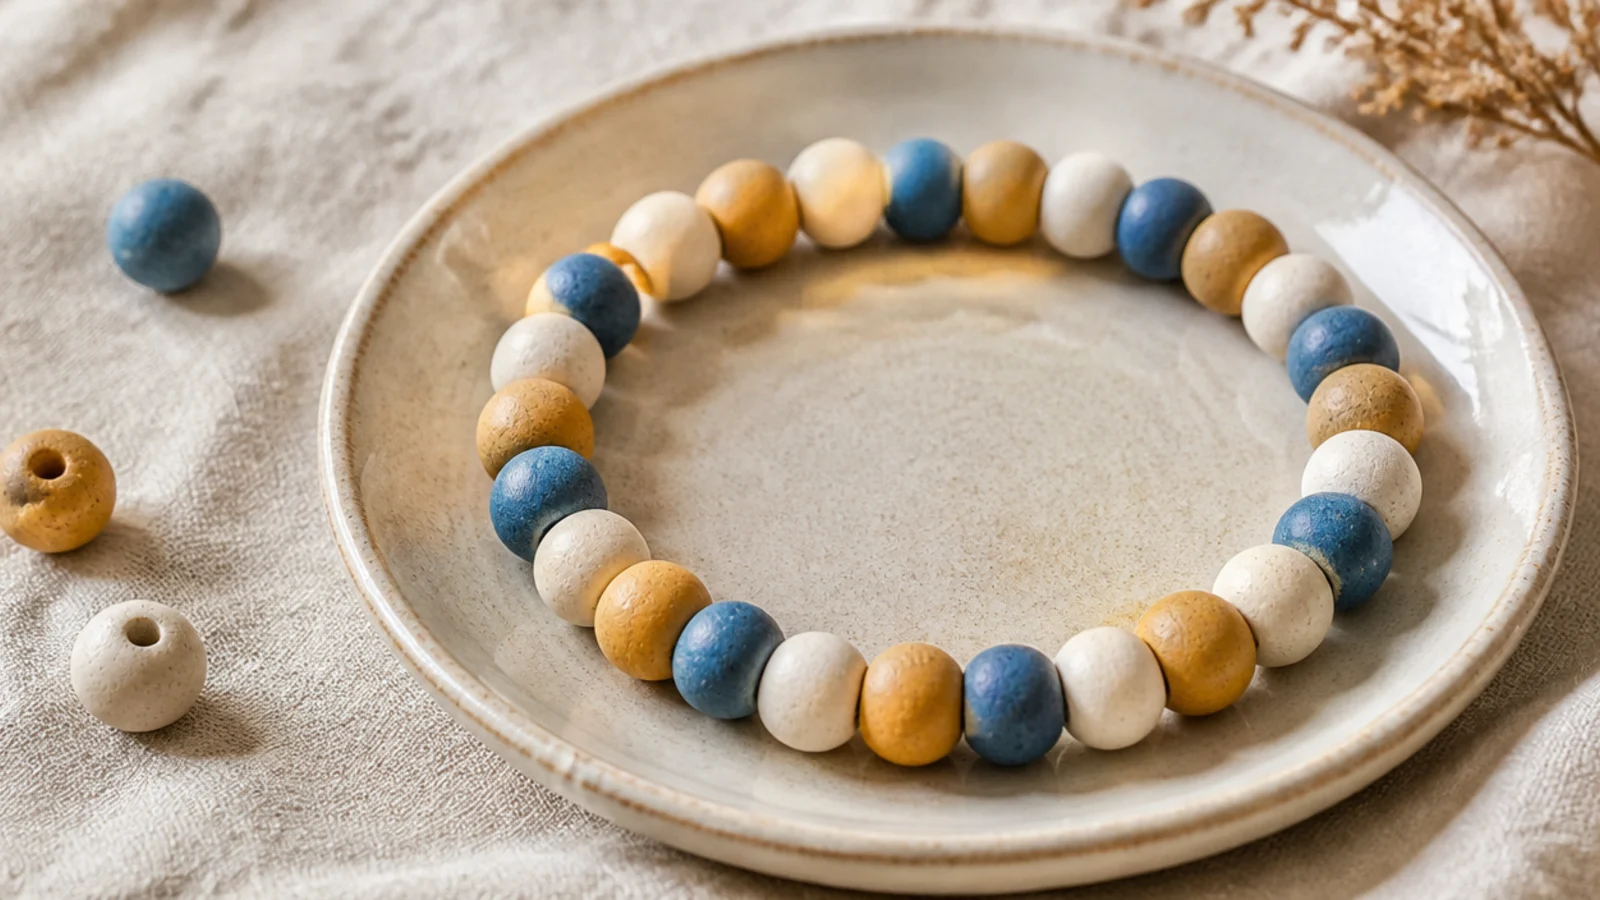
A three-color sequence adds richness while staying easy to follow. One of each color, repeating, gives a lively but orderly pattern. Choosing three colors that balance — a cool, a neutral, a warm — keeps it harmonious. It’s the step up from two-color work.
Editor's noteKeep the three colors in the same order every repeat — a consistent sequence is what makes the pattern read as intentional.
Pull three colors and set them in order in your dish. String one of each in the same sequence, repeating around the band on 0.8mm cord. A total divisible by three closes cleanly. String to your wrist size, then tie a surgeon’s knot, seal with glue, and hide the knot inside a bead at the end of a full sequence.
Skip thisDon’t swap the color order partway; a flipped sequence mid-bracelet reads as a mistake even if the colors match.
4. Color Block Halves
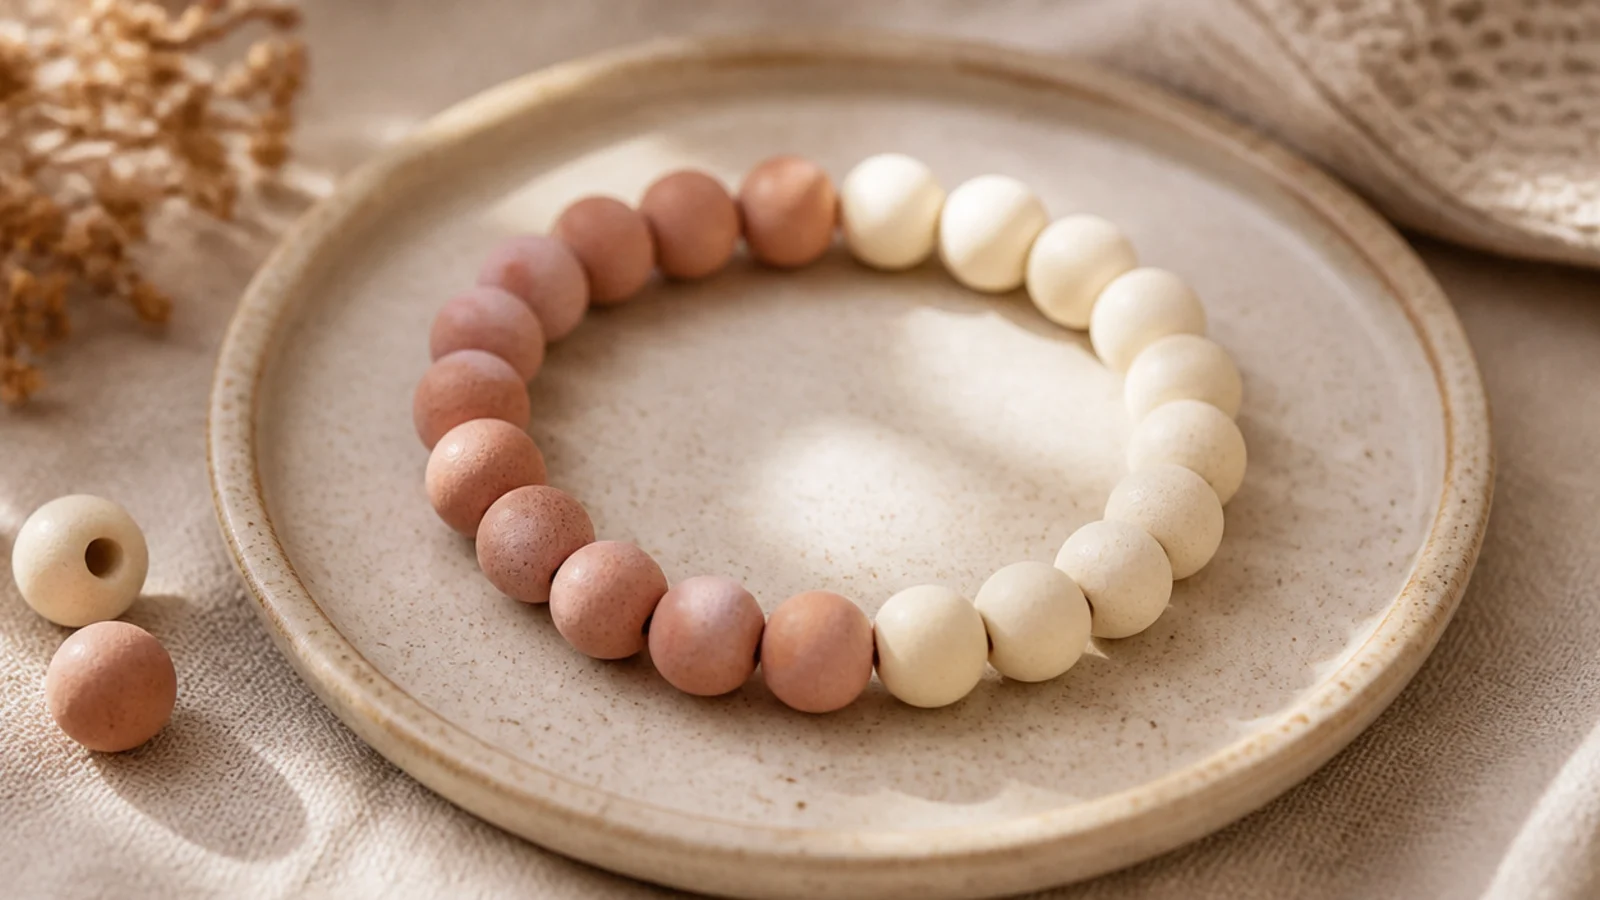
The boldest simple pattern: two solid halves of color. Each color gets exactly half the bracelet, meeting front and back. It’s graphic and modern with zero fiddly counting beyond splitting in two. A striking, quick pattern.
Editor's noteSplit your total exactly in half by counting — an uneven half makes the color meeting points sit off-balance.
Count your total bead count and divide by two. String the first color for the front half, switch to the second for the back half, keeping the two blocks equal. String to your wrist size, then tie a surgeon’s knot, seal, and hide the knot inside a bead at one of the color meeting points.
Skip thisDon’t eyeball the halves; a lopsided split is obvious because the two color joins won’t sit opposite each other.
5. Color Block Thirds
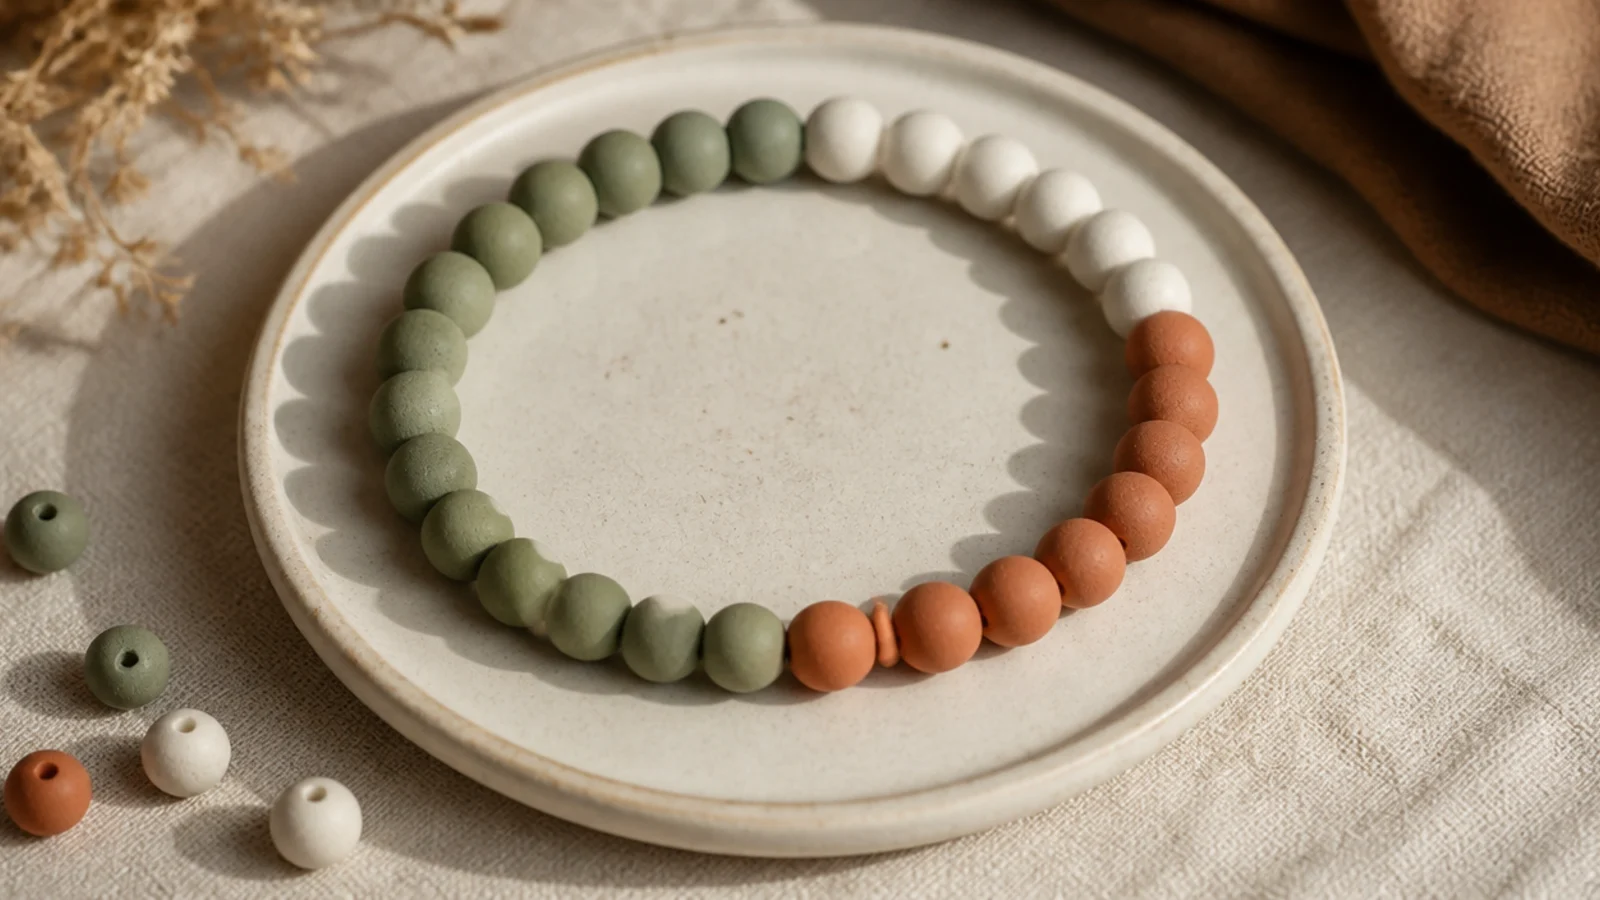
Three equal blocks of color is calm, graphic, and a little more interesting than halves. Each third gets its own clean section. It works beautifully in a tonal palette. A modern, easy-to-string pattern.
Editor's notePick a total divisible by three so each block is exactly equal — even thirds are what make color-blocking look deliberate.
Divide your total bead count by three. String each color as one solid block of that length — sage, cream, terracotta — around the band. Keep the three sections equal. String to your wrist size, then tie a surgeon’s knot, seal with glue, and hide the knot inside a bead at a block join.
Skip thisDon’t let one block run longer than the others; uneven thirds turn a clean design into a random split.
6. Smooth Gradient
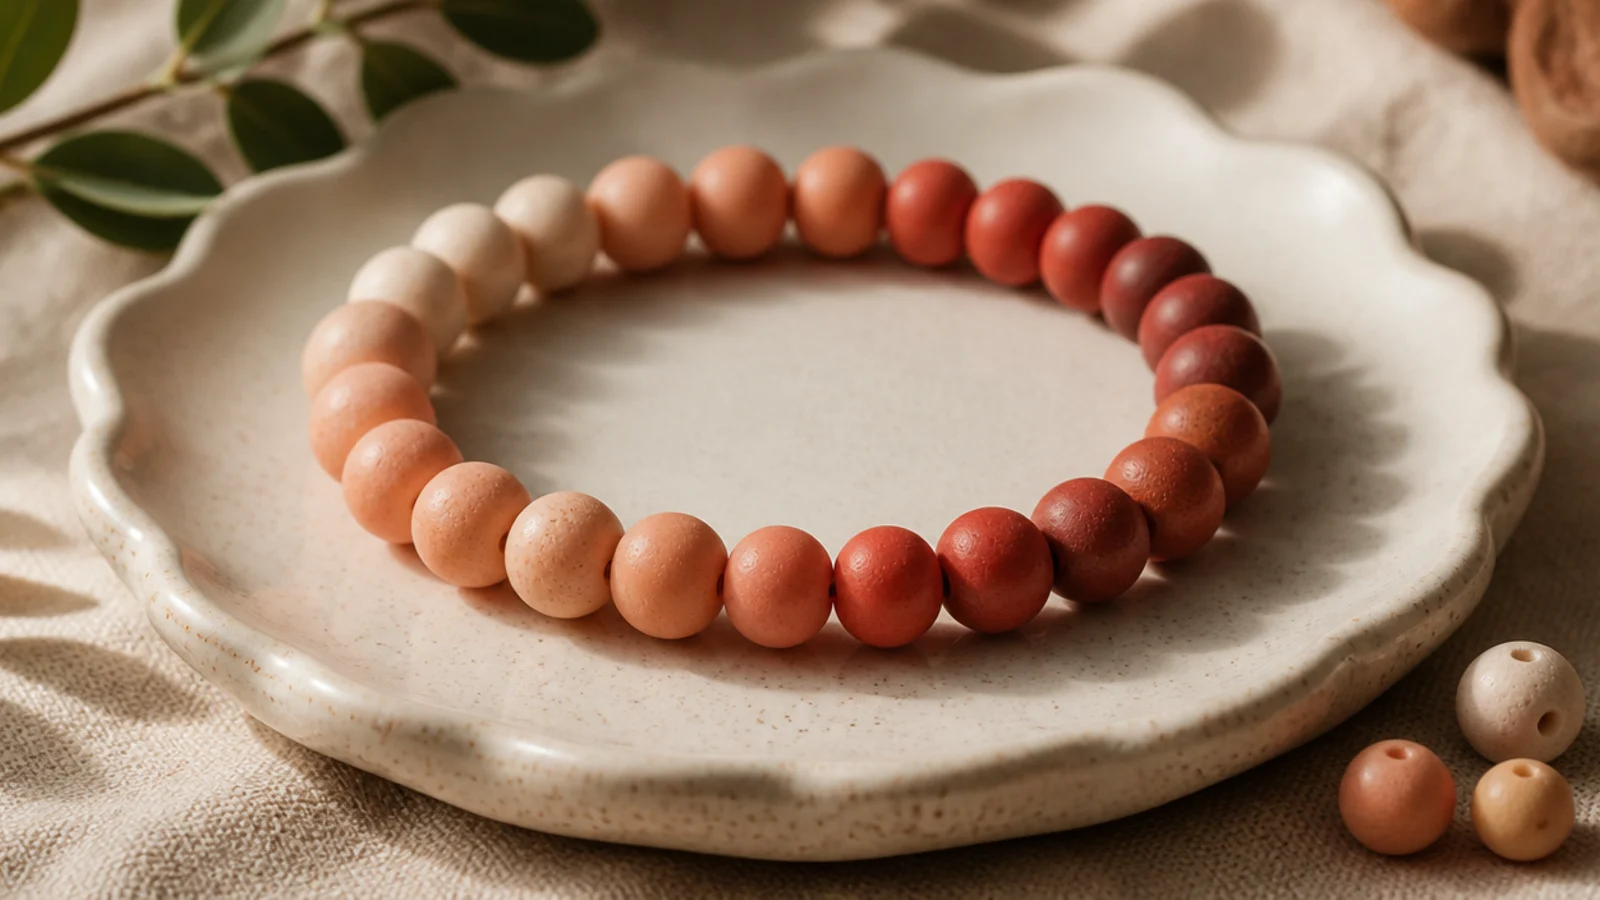
A smooth gradient looks advanced but is just sorted shades strung in order. You move from palest to deepest within one color family. The fade makes a simple bracelet look artful. Symmetry is the trick that sells it.
Editor's noteReverse the fade at the center so both wrist-ends are the palest shade — a symmetrical gradient looks intentional from any angle.
Sort four shades of one color lightest to darkest into your dish. String equal runs from pale to deep toward the center, then reverse back to pale so both ends match. Keep each run the same number of beads. String to your wrist size, then tie a surgeon’s knot, seal, and hide the knot inside a pale bead.
Skip thisDon’t skip a middle shade; jumping from pale to dark makes a hard stripe instead of a smooth fade.
7. Stepped Ombré Blocks
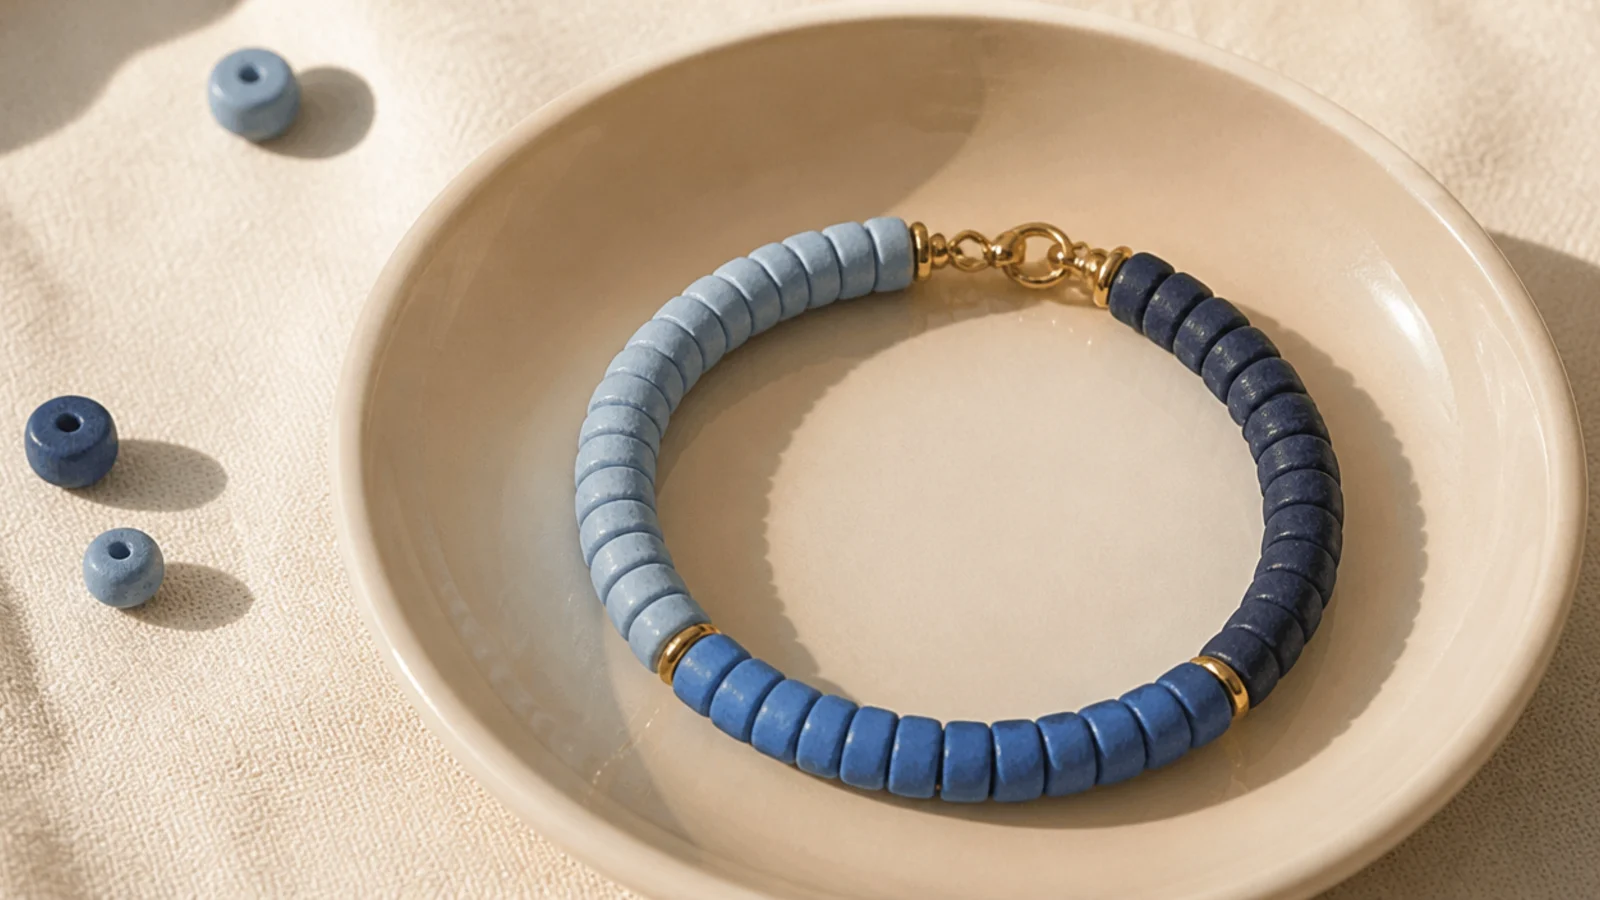
A stepped ombré uses solid blocks that shift shade instead of a smooth blend — even easier than a true gradient. Each block is one shade, moving light to dark. The stair-step effect looks graphic and considered. Great if smooth blending feels fiddly.
Sort four shades of one color and string each as an equal block, moving light blue to navy across the band. Keep every block the same length. For a symmetrical version, step up to the darkest at the center and back down. String to your wrist size, then knot, seal, and hide the knot inside a light bead.
Keep every shade block the exact same length — equal steps are what make the stepped ombre look deliberate rather than patchy.
Don’t vary the block sizes; uneven steps make the shade progression look accidental instead of designed.
8. Thin Accent Stripes
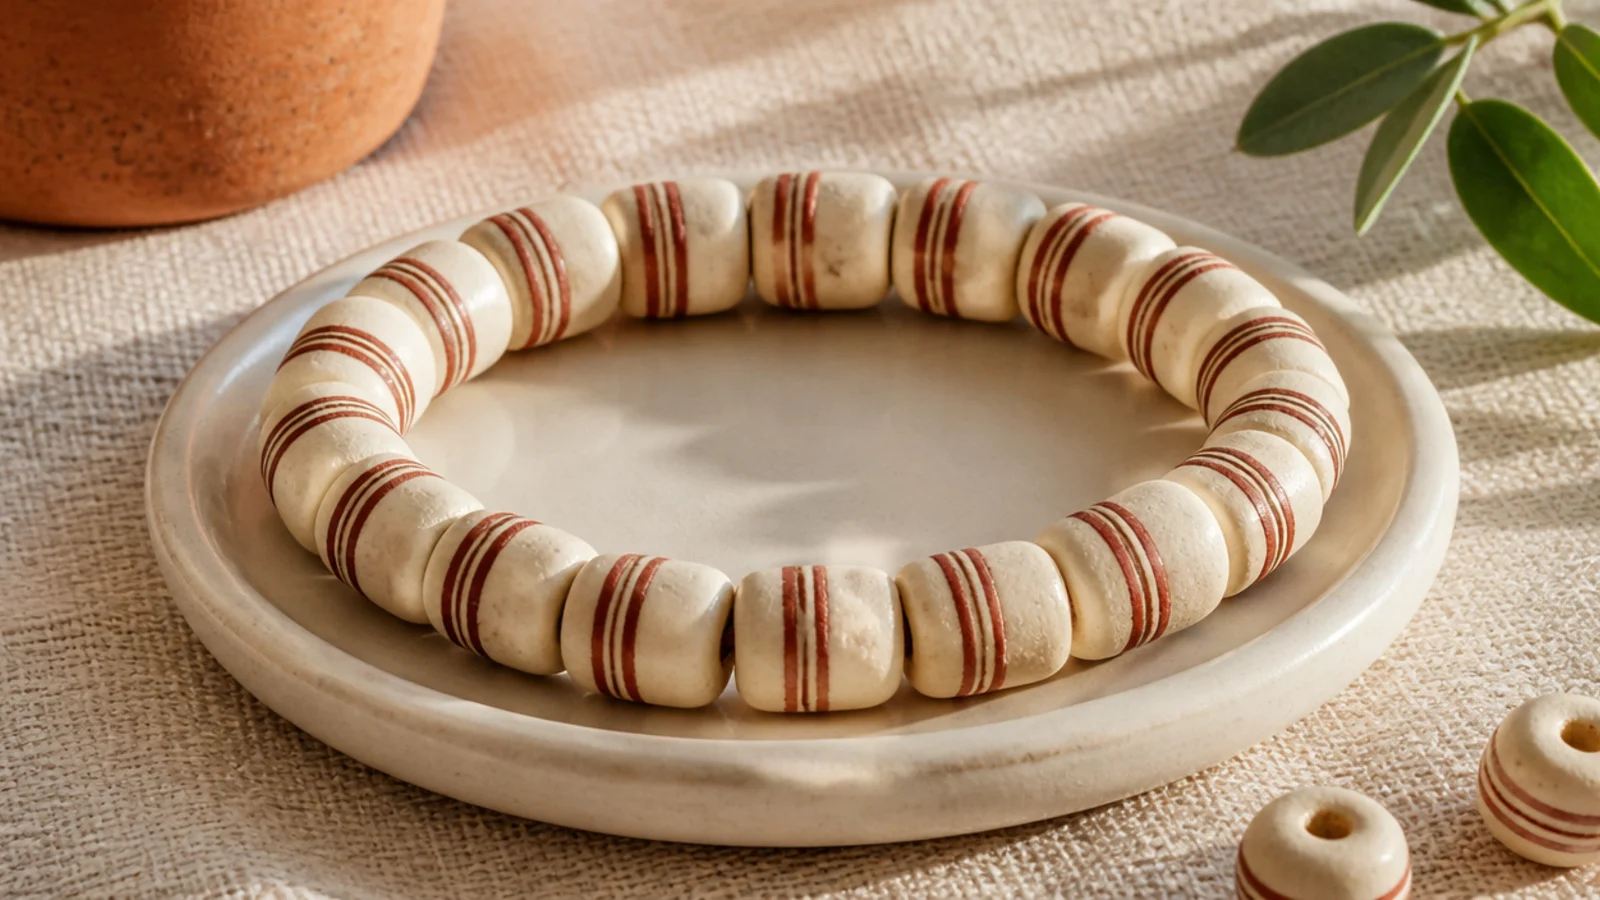
A plain base broken by a few thin stripes is clean and architectural. Two or three slim stripes read elegant, not busy. Even spacing is the whole game. A refined, minimal pattern.
Editor's noteDivide your total by the number of gaps before you start so the stripes land at even intervals around the band.
String a cream base and place three thin stripes — three beads each — evenly spaced around the band. Divide your total by the number of gaps so the stripes space evenly. String to your wrist size, then tie a surgeon’s knot, seal, and hide the knot inside a cream bead. Keep stripes thin for the most refined look.
Skip thisDon’t make the stripes thick or add too many; chunky, crowded stripes lose the clean, minimal effect.
9. Checkerboard Band
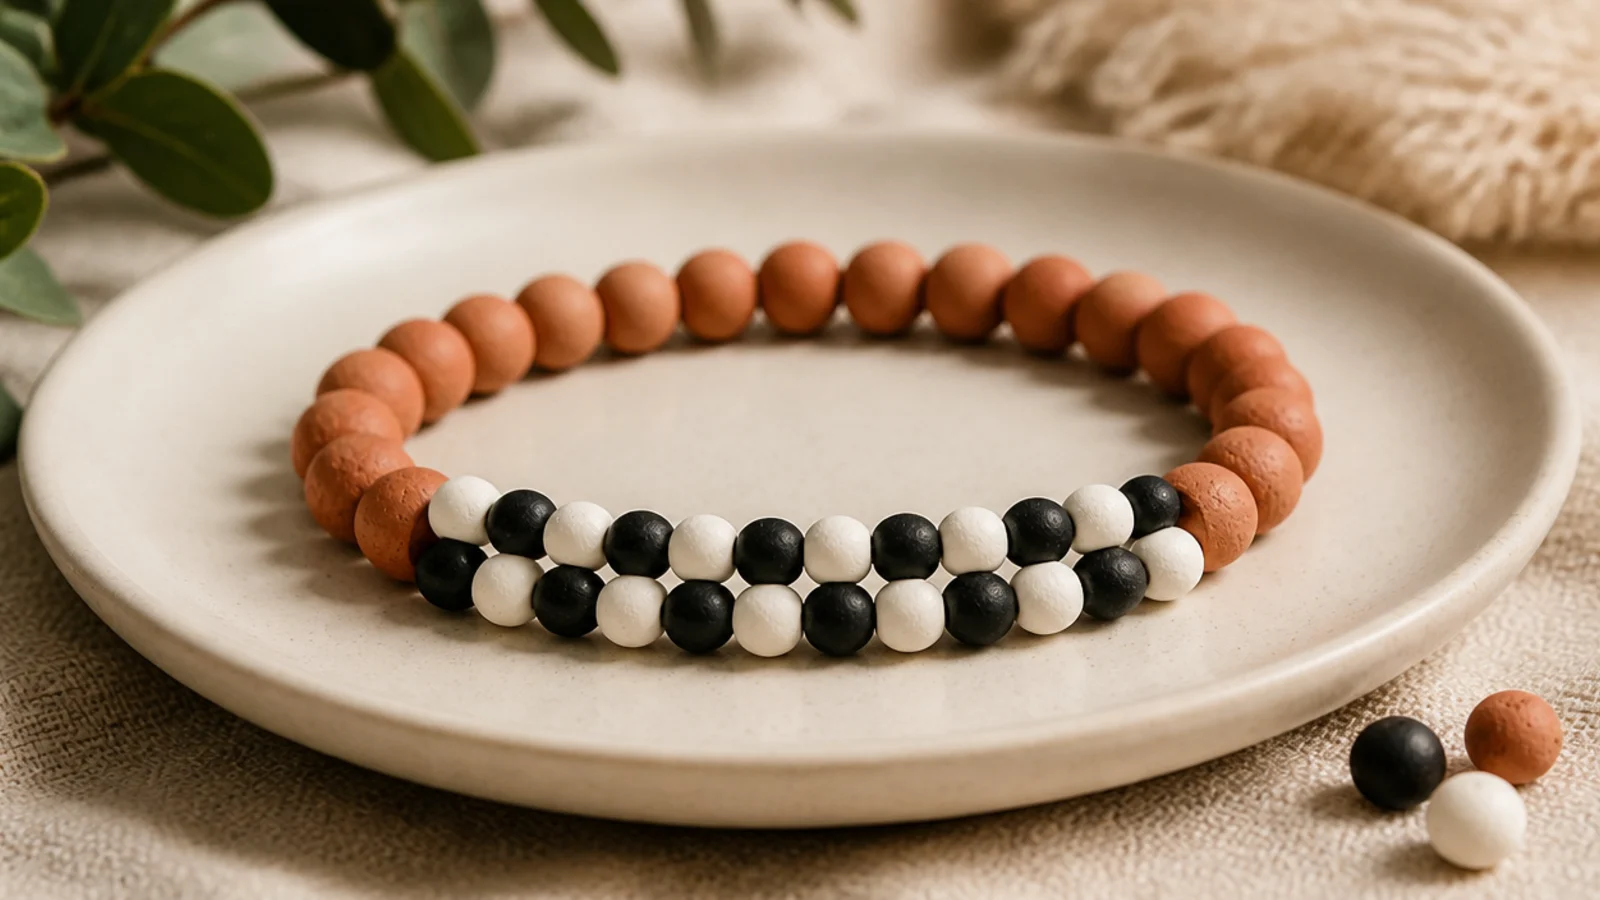
A checkerboard-look band is trendy and graphic. On a single strand you fake it by alternating pairs of two colors so the eye reads a checker. Keeping it to a front band with plain ends stays clean. A modern favorite.
Editor's noteKeep the checker to a centered front band with plain ends — an all-over paired pattern reads busy rather than as a checker.
String a plain base for the ends. For the band, alternate pairs — two black, two white — across the front so the paired blocks read as a checkerboard. Keep pairs consistent and center the band. String to your wrist size, then tie a surgeon’s knot, seal, and hide the knot inside a plain end bead.
Skip thisDon’t vary the pair sizes; consistent two-and-two pairs are what make the eye read a clean checkerboard.
10. Symmetrical Mirror
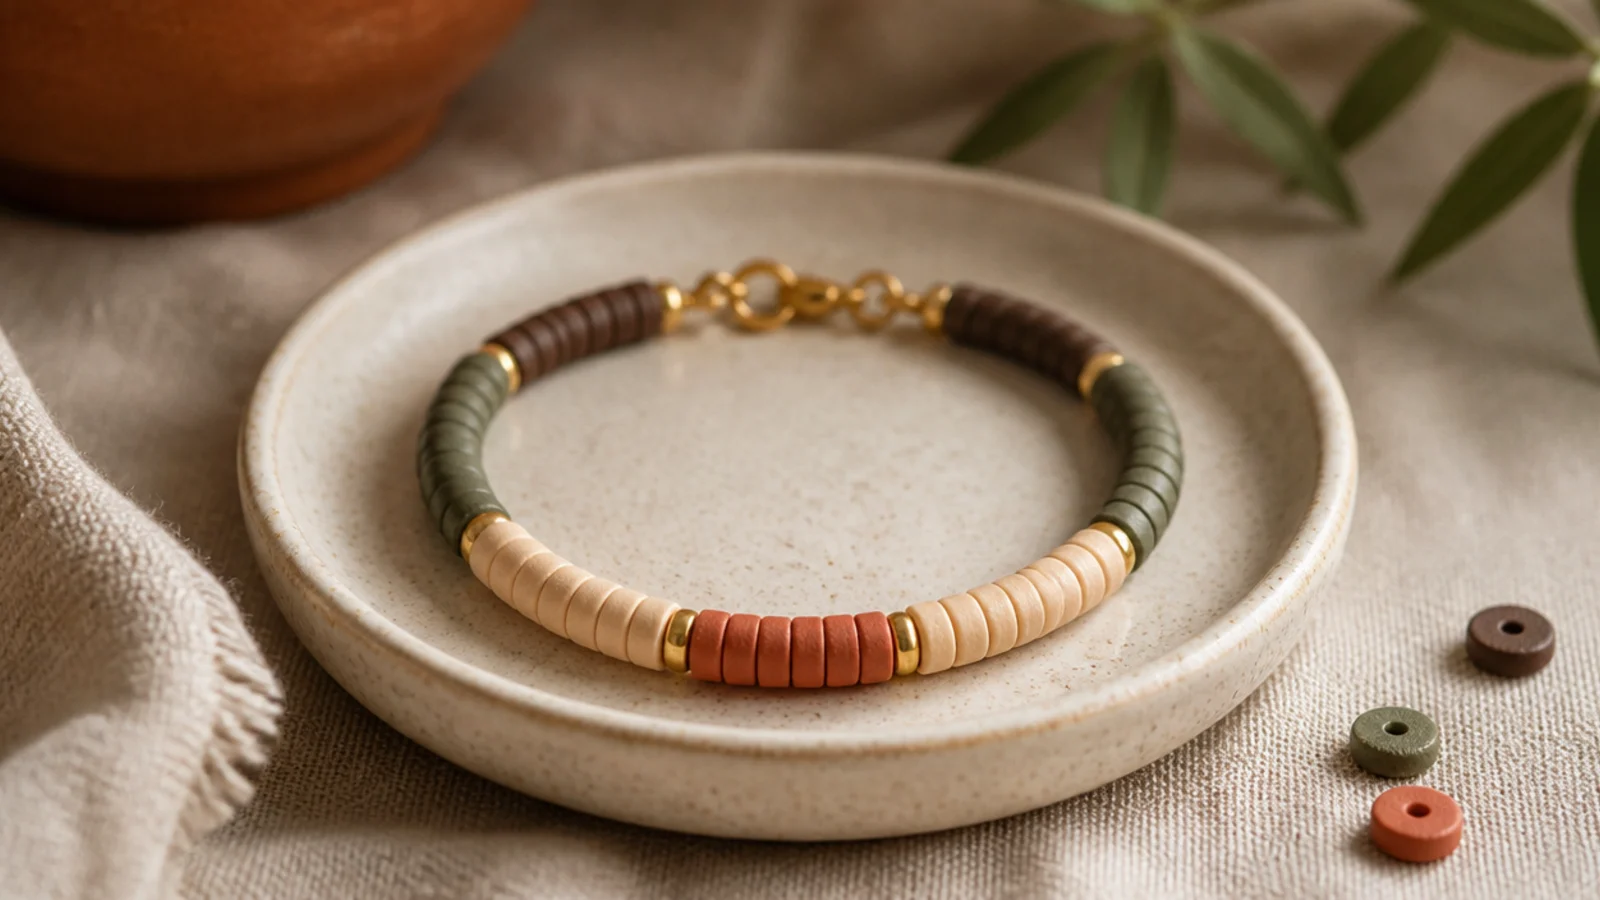
A mirrored pattern places a center point and repeats colors outward in both directions equally. It looks intentional and balanced, like a designed focal. It reads as more sophisticated than a simple repeat. The symmetry does the heavy lifting.
Editor's noteBuild outward from the center bead on both sides at once so the mirrored bands stay perfectly matched.
Choose a center color and a set of flanking colors. String the center bead, then add matching color bands moving outward on both sides so each side mirrors the other exactly. Count each band so both sides match. String to your wrist size, then knot, seal, and hide the knot at the back center.
Skip thisDon’t let one side’s bands run longer; an uneven mirror is instantly obvious because the two sides won’t match.
11. Spaced Polka Dots
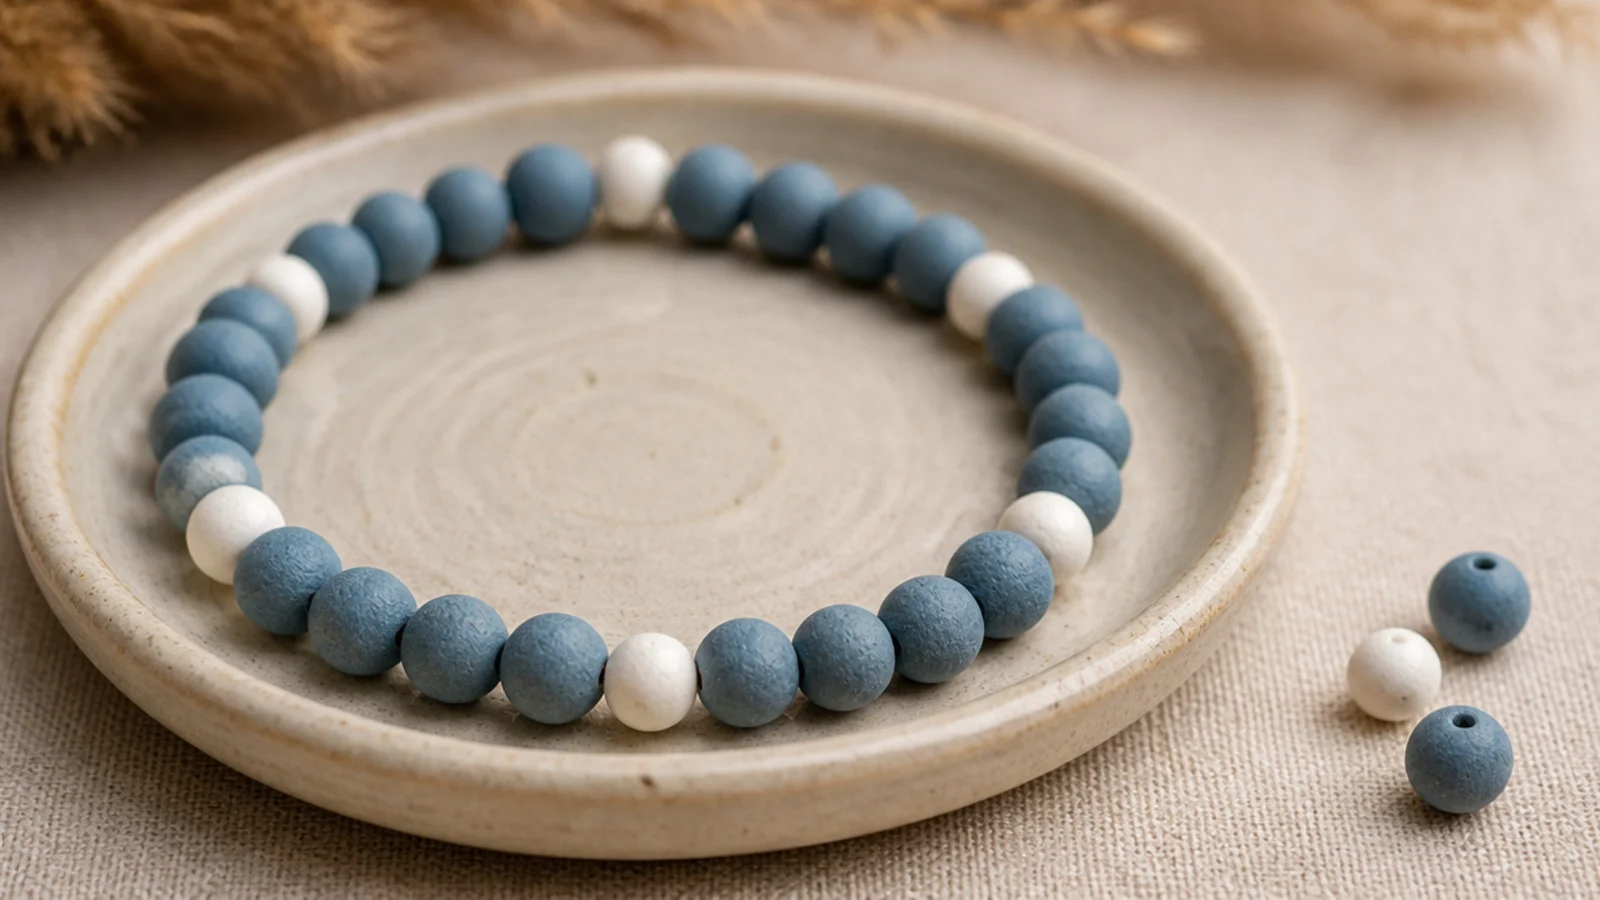
A single accent color dropped in at even intervals reads like polka dots. The regular spacing is what makes it a pattern rather than random. It’s a subtle, clean look on any base. Easy but effective.
String a base color and place a single white accent bead every fifth bead, keeping the count exact so the dots space evenly. String to your wrist size so the spacing stays consistent end to end, then tie a surgeon’s knot, seal, and hide the knot inside a base bead.
Keep the same number of base beads between every accent — even spacing is the entire pattern, so consistency is key.
Don’t let the gaps drift; irregular spacing turns tidy polka dots into scattered stray beads.
12. Gold Spacer Rhythm
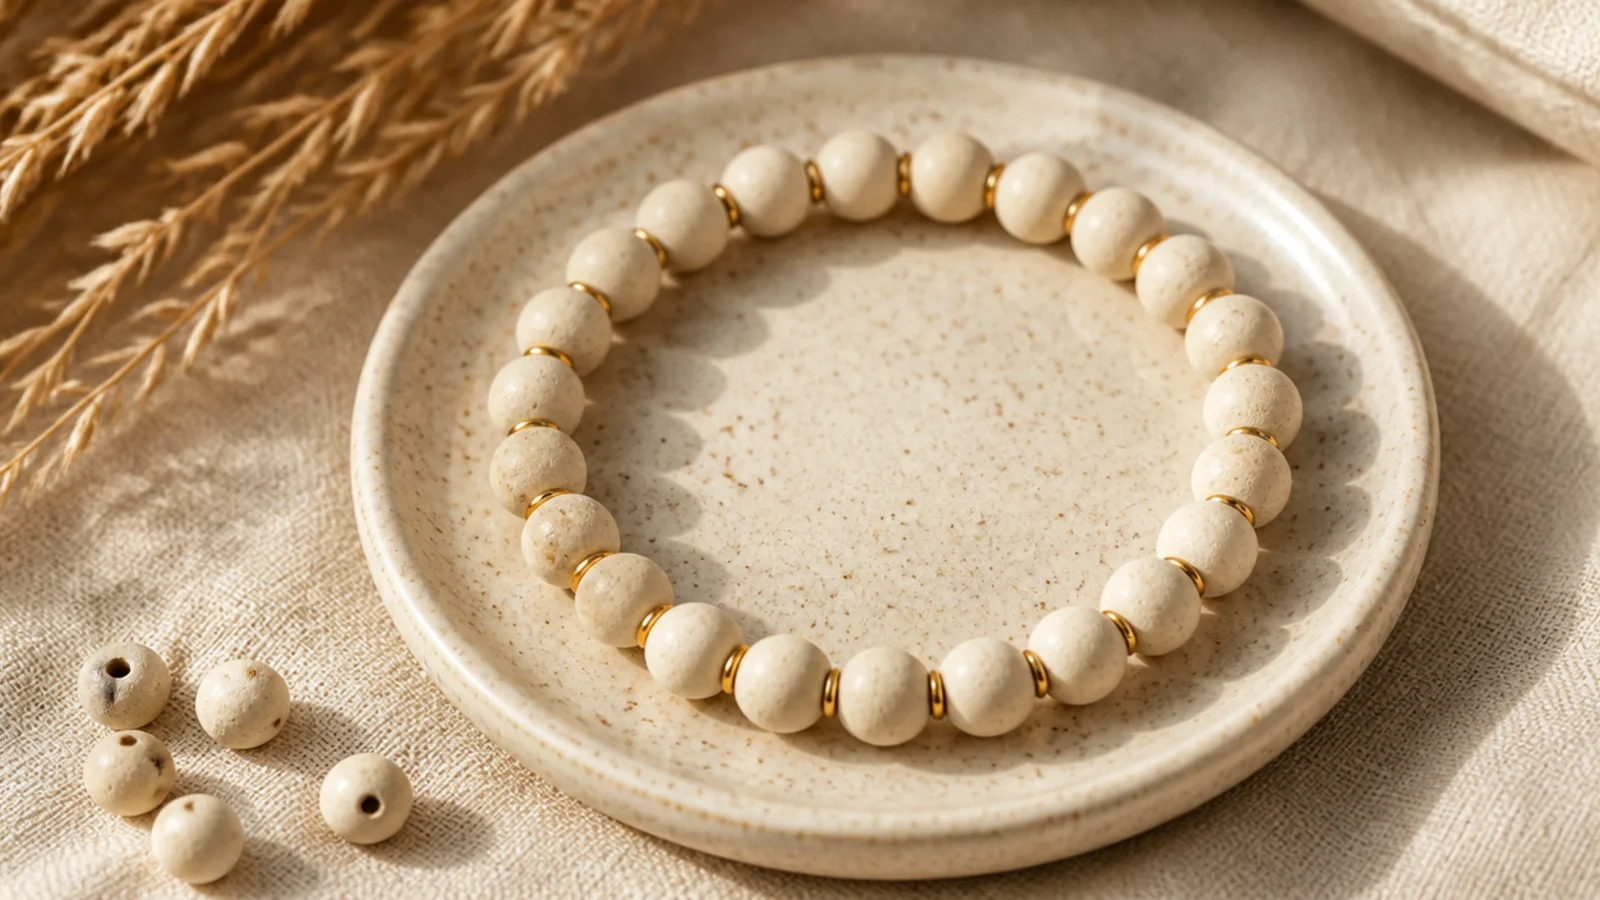
Regular gold spacers create a rhythmic pattern with a touch of shine. The even metallic breaks are the whole design. It reads refined and jewelry-like. A minimal pattern that looks expensive.
String a cream base and insert a small gold rondelle spacer every fourth bead, keeping the count consistent. The thin spacers tuck between the discs. String to your wrist size so the rhythm stays even, then tie a surgeon’s knot, seal with glue, and hide the knot inside a cream bead.
Keep the gap between spacers identical all the way around — the even metallic rhythm is the pattern itself.
Don’t use chunky spacers that stick out; oversized metal breaks the smooth rhythm and the clean line.
13. Candy Stripe
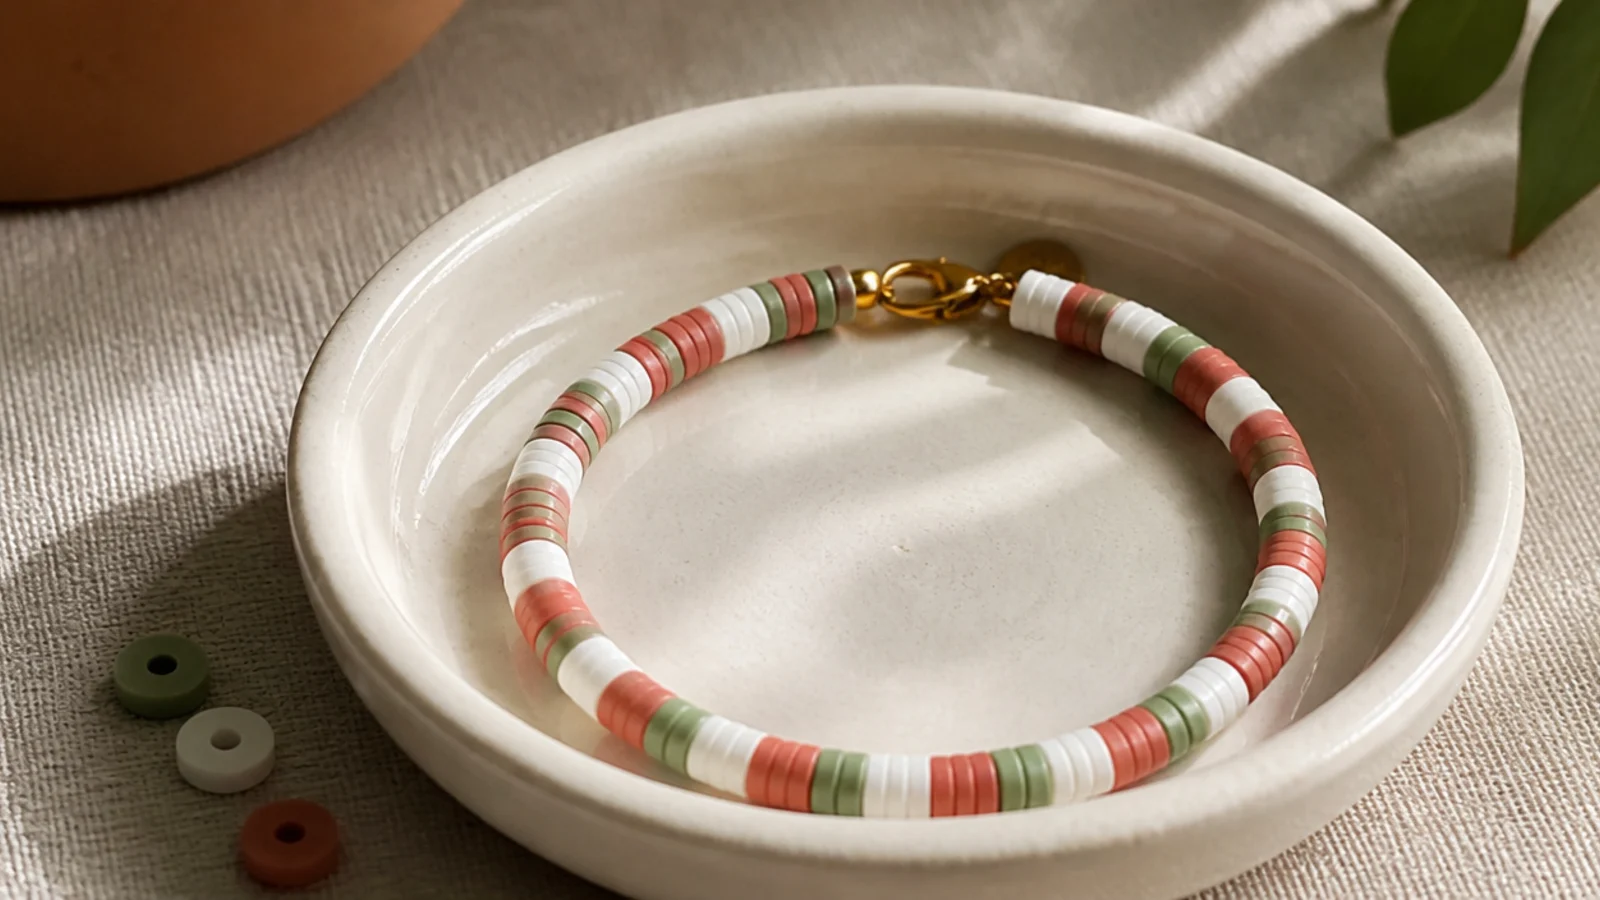
A three-color candy stripe — red, white, and a color — repeats for a cheerful striped effect. The white between colors makes each stripe pop. It’s lively and orderly. A fun, classic repeat.
Editor's noteAlways put the white between the two colors — the white spacer is what makes each candy stripe read clearly.
Pull red, white, and a third color into your dish in order. String the three-color sequence repeating around the band on 0.8mm cord, keeping the order the same. A total divisible by three closes cleanly. String to your wrist size, then tie a surgeon’s knot, seal, and hide the knot at a sequence end.
Skip thisDon’t drop the white; without it the two colors blur together and the candy-stripe effect disappears.
14. Rainbow Repeat
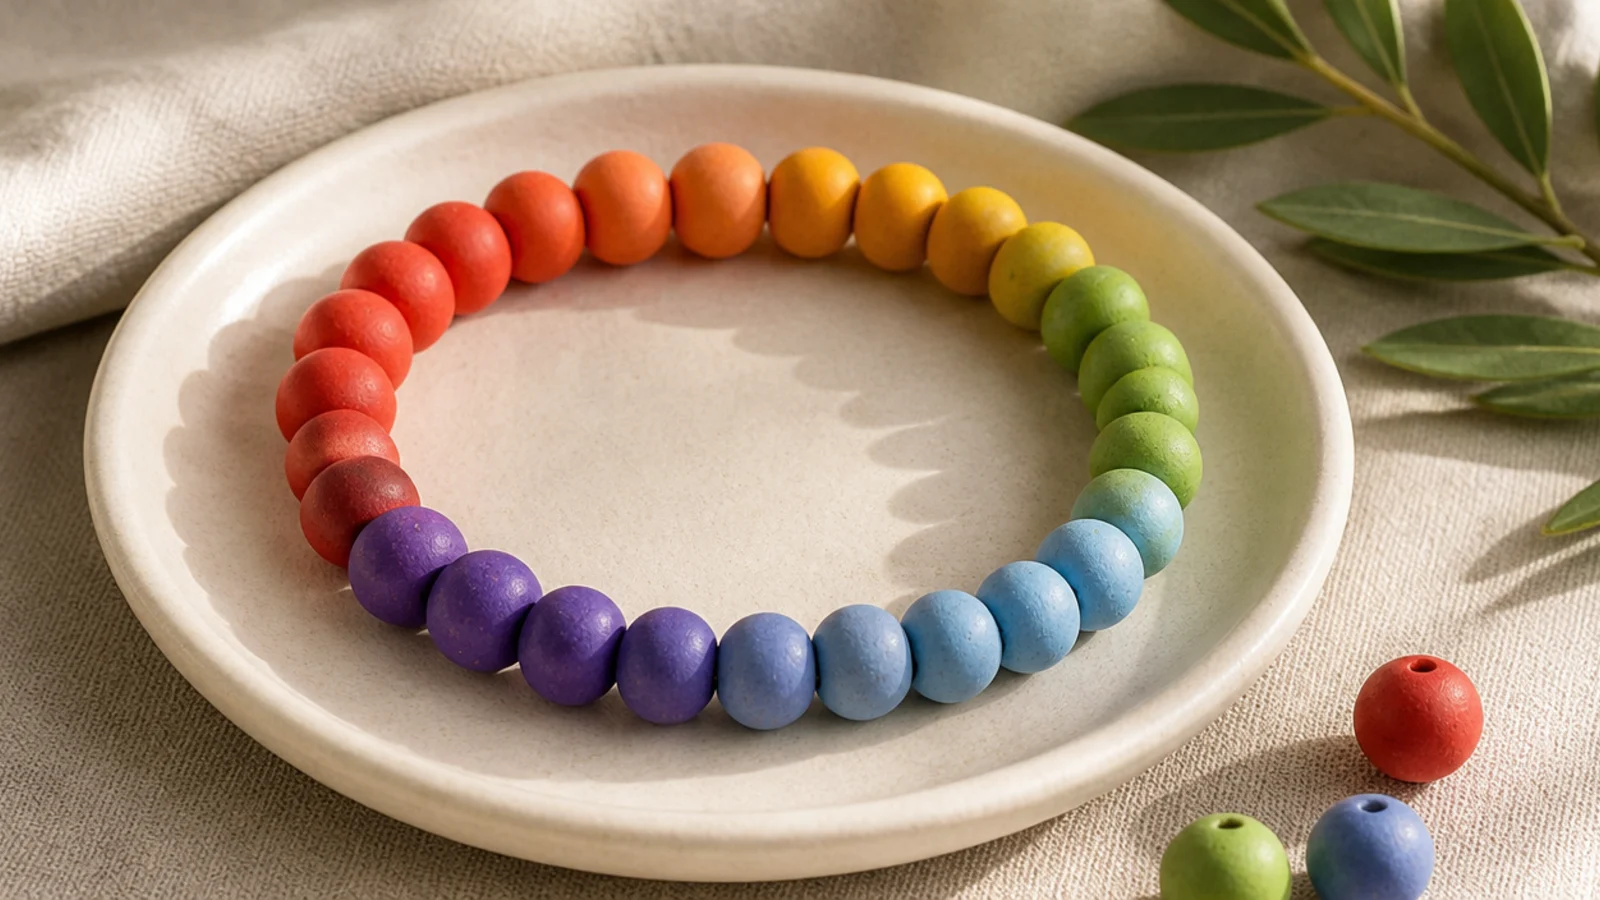
A classic rainbow repeat cycles six colors in order, again and again. The set sequence keeps the color organized. Muted or bright, it’s a satisfying, orderly pattern. The most familiar pattern of all, done cleanly.
Set six colors in rainbow order in your dish. String one of each, repeating the six-bead sequence around the band. A total divisible by six closes cleanly. String to your wrist size, then tie a surgeon’s knot, seal with glue, and hide the knot at the end of a full rainbow sequence.
Lay the six-color repeat out once as a master line and copy it — it keeps every rainbow cycle identical.
Don’t shuffle the color order between repeats; a consistent rainbow sequence is what makes it read as a pattern.
15. Ascending Count Pattern
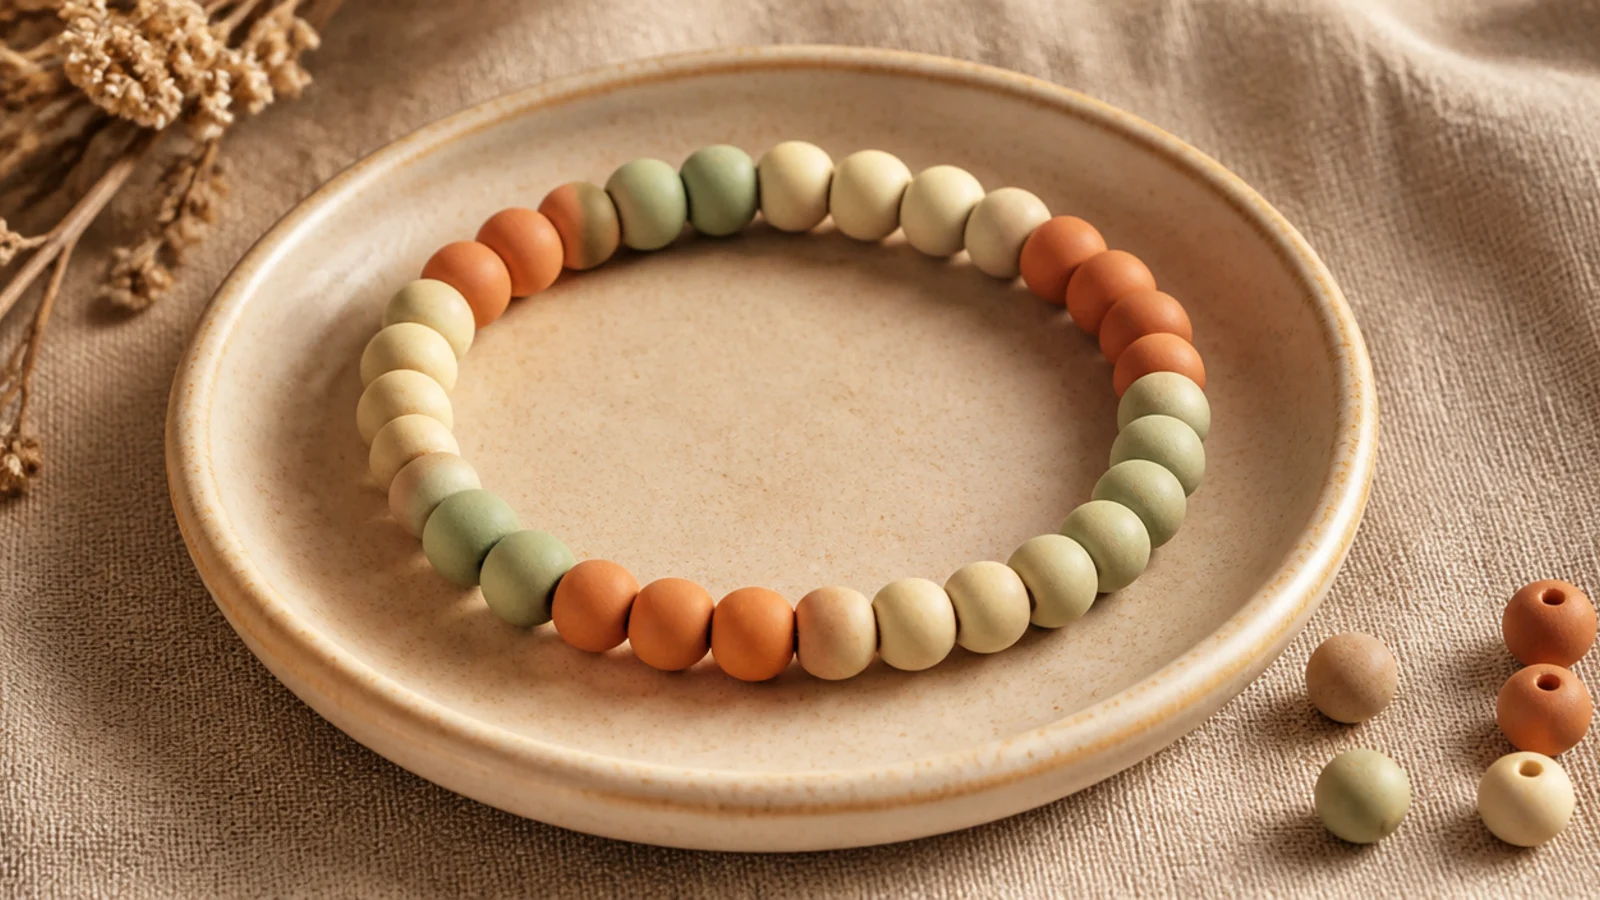
A counted pattern where blocks grow — one bead, then two, then three — creates a subtle rhythmic effect. The changing block sizes add movement while staying orderly. It’s a clever, mathematical-looking pattern. Impressive but just careful counting.
Choose two colors. String one bead of color A, then two of color B, then three of A, then two of B, then one of A, and repeat the count. The rising-and-falling counts create rhythm. String to your wrist size ending on a full count, then knot, seal, and hide the knot inside a bead.
Say the counts out loud as you string — one, two, three — so the rising-and-falling rhythm stays exact.
Don’t lose track of the count; a single wrong-length block breaks the whole ascending rhythm.
16. Complementary Pairs
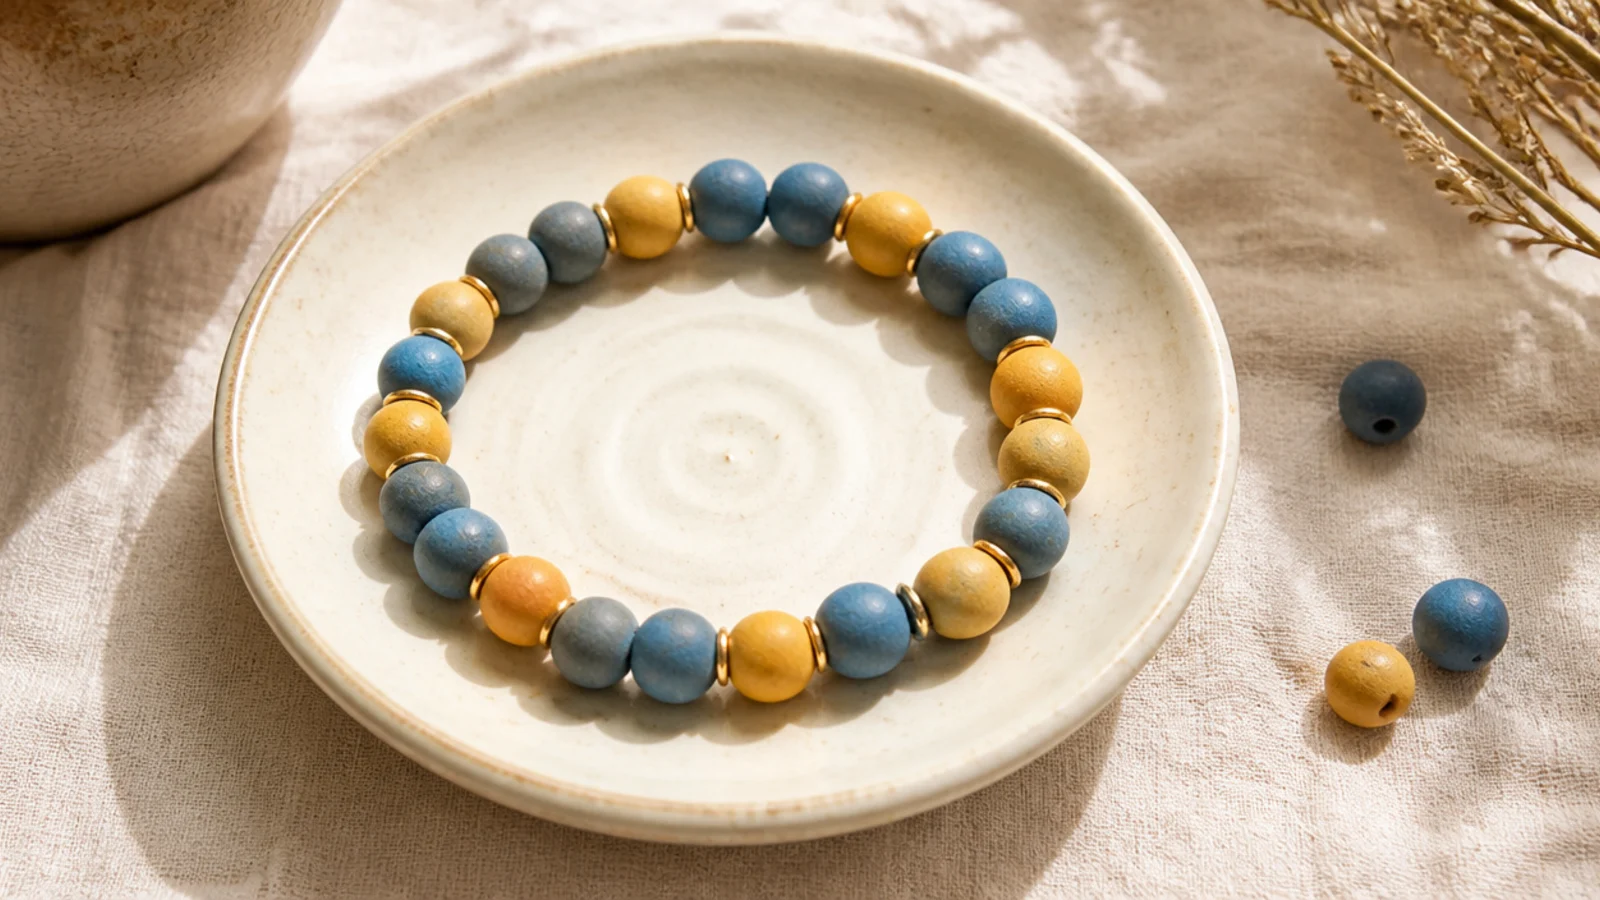
Alternating pairs of two complementary colors makes the pattern vibrate pleasantly. Blue and mustard, or purple and yellow, energize each other. The paired blocks keep it orderly. A color-theory-smart pattern.
Pick two complementary colors and pull them into your dish. String two of each, alternating around the band, so the pairs sit next to their opposite. Keep pairs consistent. String to your wrist size with a total divisible by four, then tie a surgeon’s knot, seal, and hide the knot inside a bead.
Choose true complements — blue and orange, purple and yellow — so the paired colors make each other look brighter.
Don’t pick two colors that are close on the color wheel; they’ll blend dully instead of energizing each other.
17. Segmented Rainbow Blocks
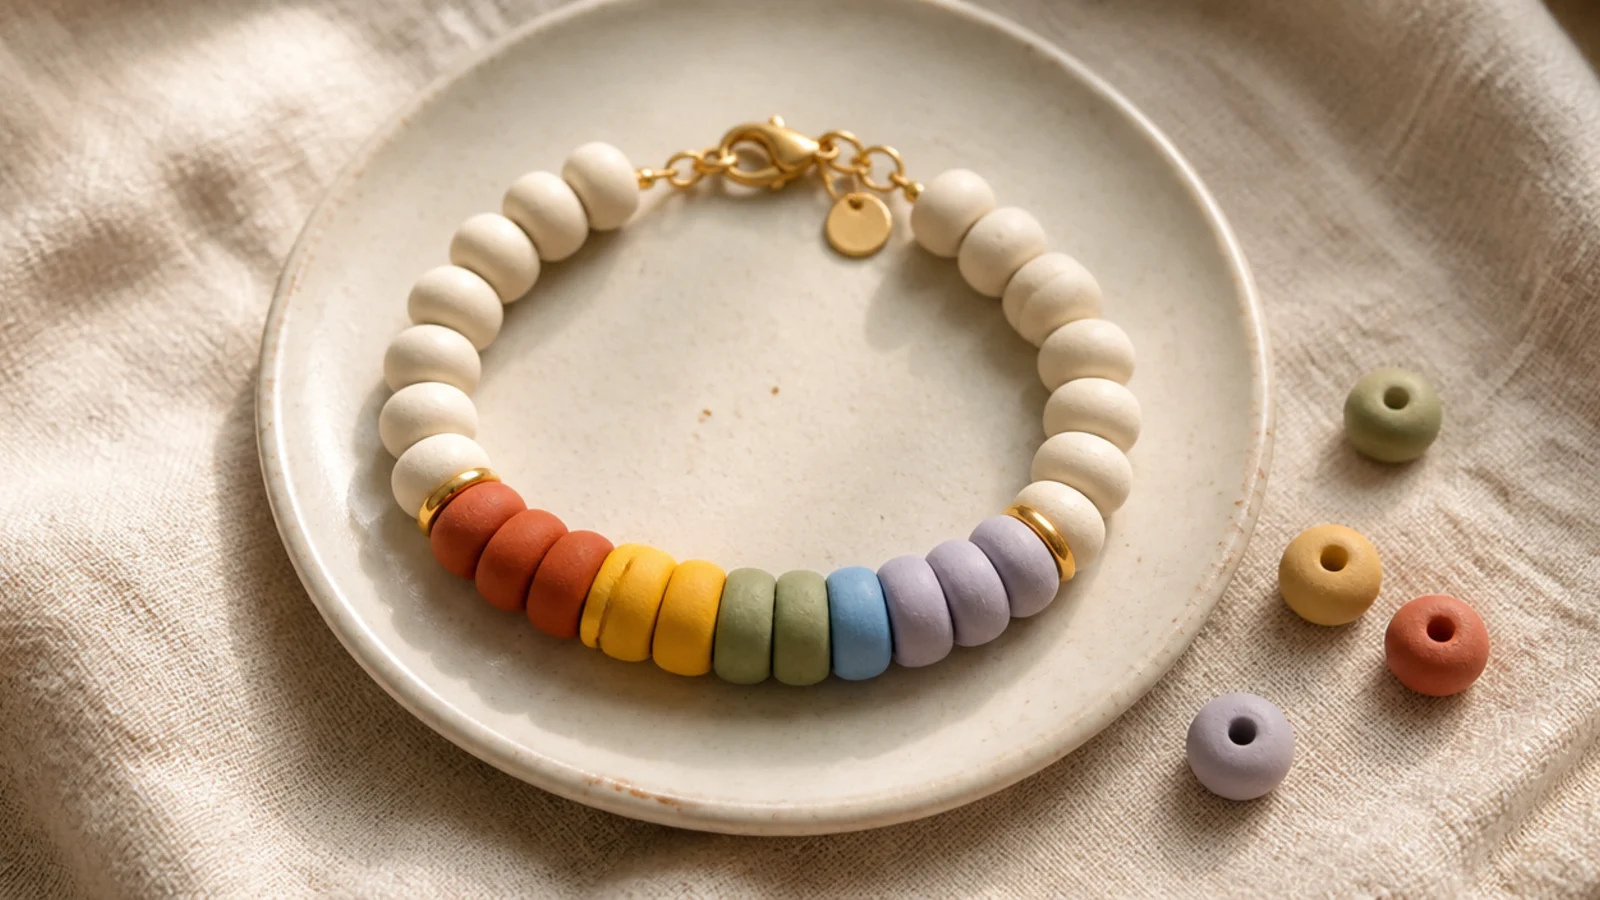
A rainbow shown as solid blocks (not single beads) is bold and graphic. Each color gets an equal segment around the band. It’s cleaner and more grown-up than a single-bead rainbow. A striking take on the classic.
Editor's noteDivide your total by six for equal blocks — even segments are what make the block rainbow look designed.
Choose six colors in rainbow order. Divide your total by six and string each color as an equal block around the band. Keep the segments the same length. String to your wrist size, then tie a surgeon’s knot, seal with glue, and hide the knot at a block join.
Skip thisDon’t make the segments uneven; blocks of different lengths turn a clean rainbow into a jumble.
18. Ombré Rainbow
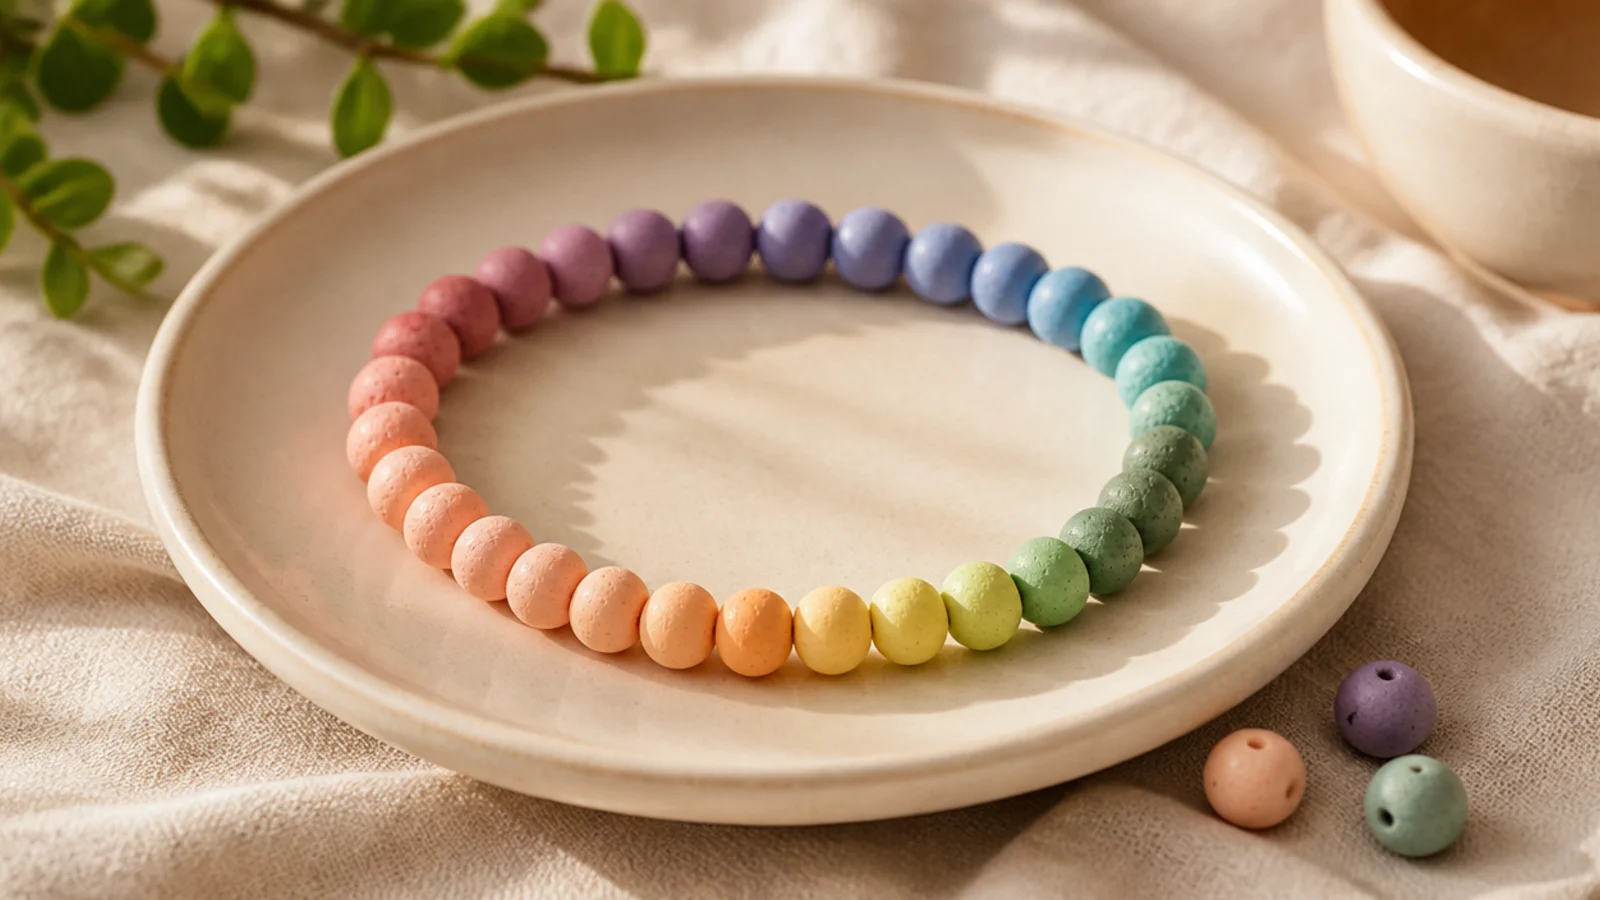
An ombré rainbow flows through the spectrum with each color blending into the next. It combines a gradient with a rainbow for a lush effect. It’s the most eye-catching pattern here. Sorting is the only skill needed.
Sort your beads into rainbow order with a couple of transitional shades between each color. String them in order so red eases into orange, orange into yellow, and so on around the band. Keep the runs even. String to your wrist size, then knot, seal, and hide the knot inside a bead.
Add a transitional shade between each color — a coral between red and orange — so the rainbow flows instead of jumping.
Don’t jump straight between pure colors; without transition beads it becomes blocks, not a flowing ombre.
19. Cluster Pattern
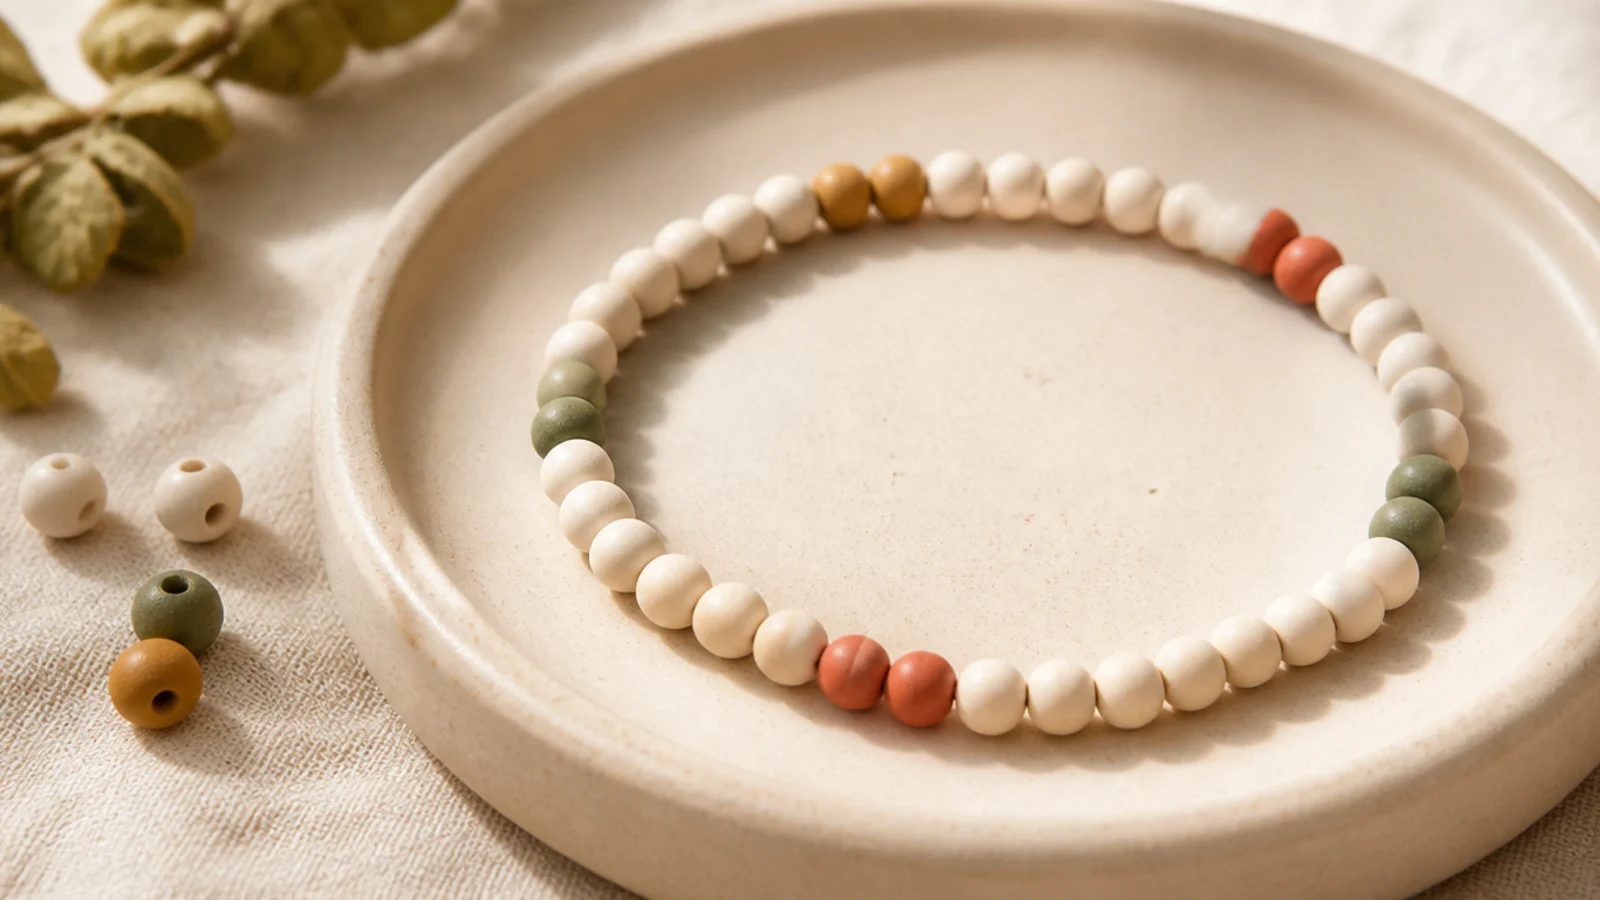
Small clusters of accent color spaced along a plain base read like a rhythmic pattern. Each little cluster is a mini event, evenly repeated. The spacing keeps it orderly. A subtle, textured pattern.
String a cream base and place a cluster of three accent beads every eighth bead, keeping the spacing even. Count the base beads between clusters so they space consistently. String to your wrist size, then tie a surgeon’s knot, seal, and hide the knot inside a cream bead.
Keep the same base-bead count between clusters so the little groups repeat at even intervals.
Don’t space the clusters unevenly; irregular gaps make them look like random splotches rather than a pattern.
20. Controlled Confetti
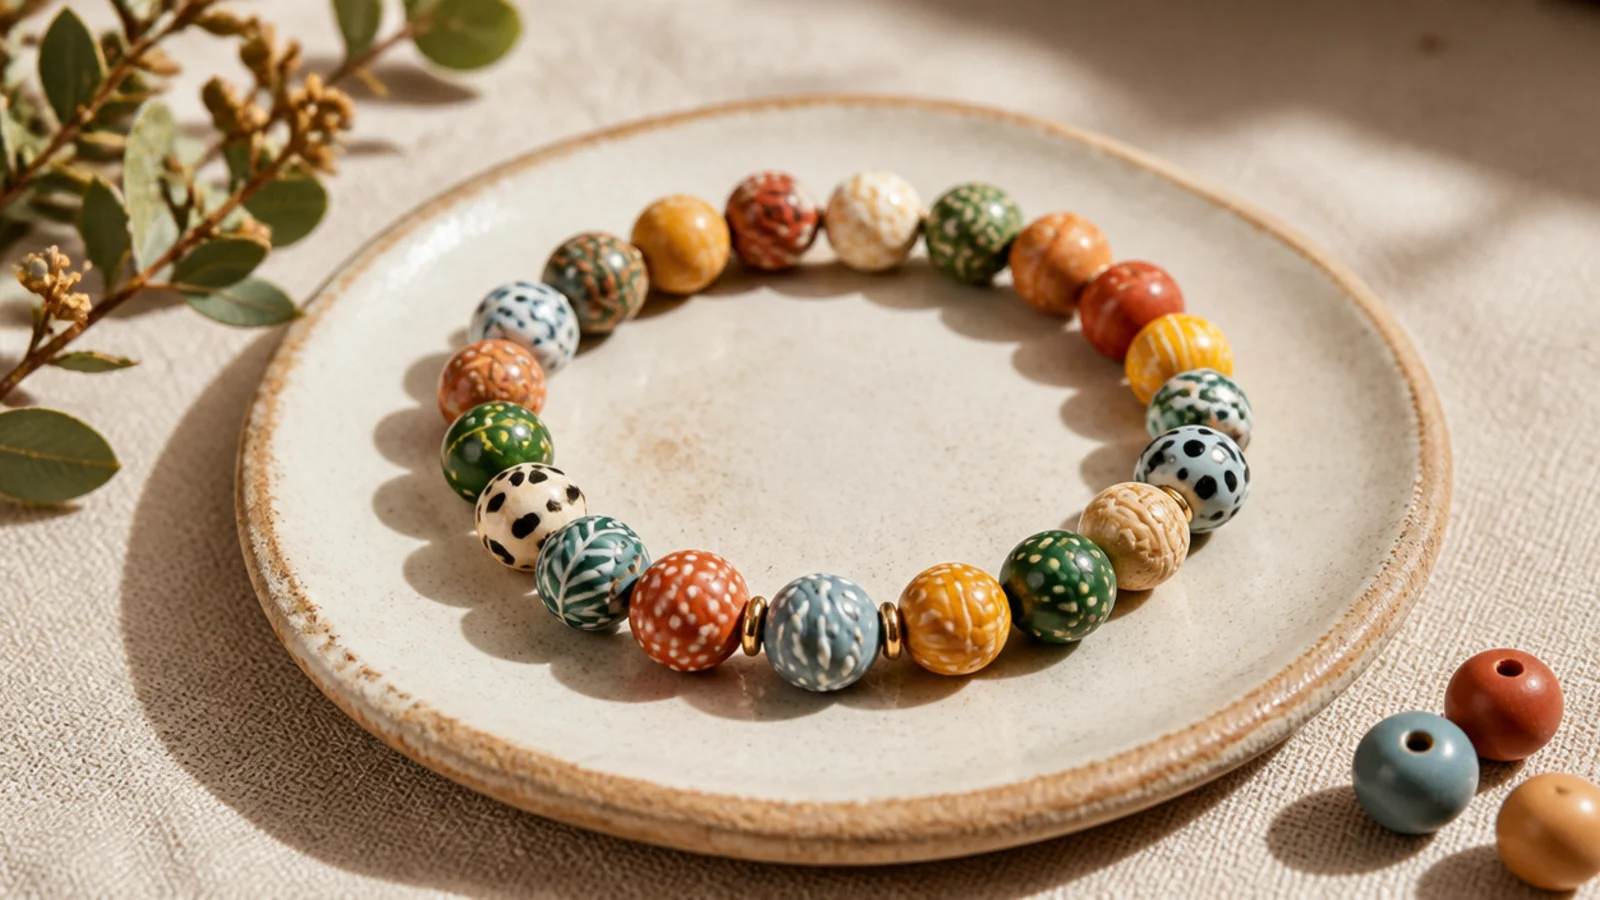
A multicolor confetti mix becomes a pattern when you add one rule: no two of the same color touch. That single constraint keeps the randomness balanced and even. It’s the most forgiving 'pattern' because there’s no sequence to hit. Joyful and easy.
Editor's noteThe one rule — no two same colors touching — is what turns a random mix into a balanced, patterned look.
Tip a wide color mix into your dish. String by grabbing beads, but never let the same color sit next to itself — swap one out if it happens. This keeps the mix evenly distributed. String to your wrist size, then tie a surgeon’s knot, seal with glue, and hide the knot inside any bead.
Skip thisDon’t let colors clump; three of one shade in a row turns confetti into a blotch and breaks the even spread.



