
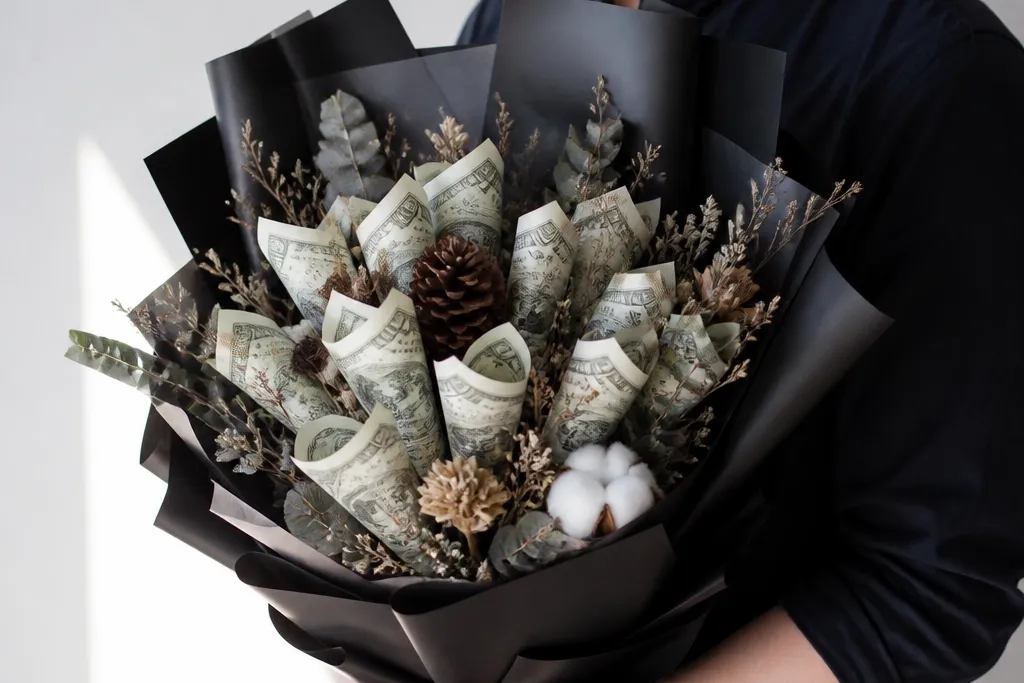

1. Black-Gold Money Rose Bouquet
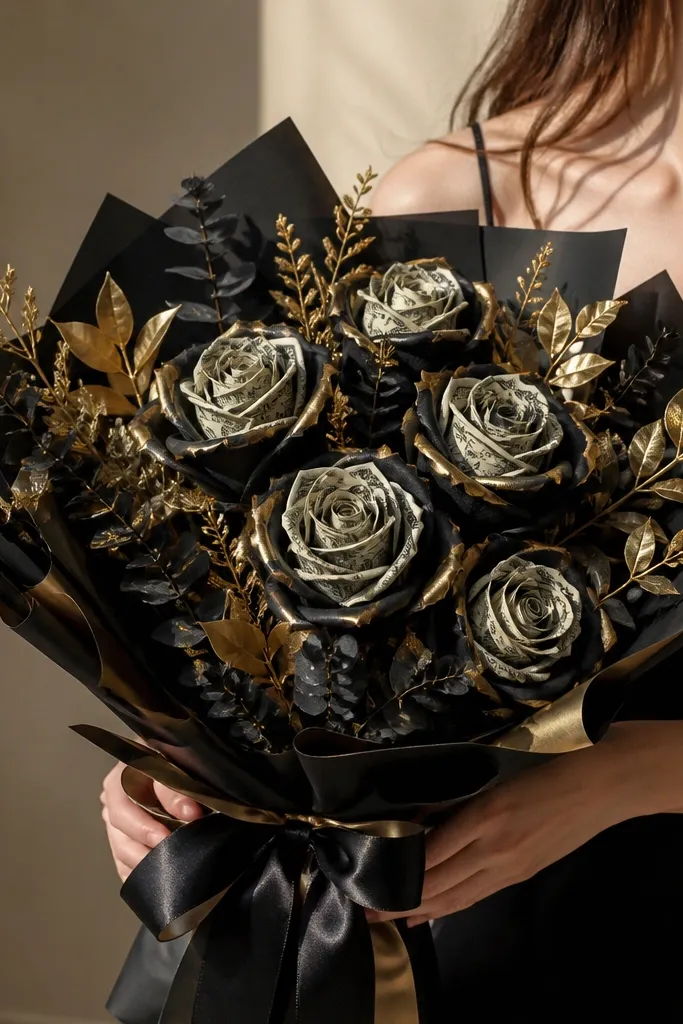
This one looks expensive because the money pieces act like real rose petals. You fold each bill into a tight spiral, then layer spirals into a rose shape so the front face stays flat and readable. Black wrapping paper frames the bouquet, and gold accents keep it from looking like a Halloween craft. It’s a solid year-round pick for men because the palette reads clean and modern, not “girly” or overly themed.
Start by cutting a handful of 3x10 inch strips of black satin ribbon and set them aside for later ties. Fold each bill into a narrow accordion strip, then roll it into a spiral rose; secure the back with a tiny hot glue dot. Build 8-12 roses on short floral picks, varying sizes for depth. Finish by inserting picks into a foam block inside a small black vase, then tuck faux gold eucalyptus around the edges.
Editor's noteUse matte black wrapping paper and keep the money faces angled slightly toward the front for better photo readability.
Skip thisDon’t glue money on the front — it smears shine and ruins the crisp look.
2. Navy-Denim Money Dahlia Set
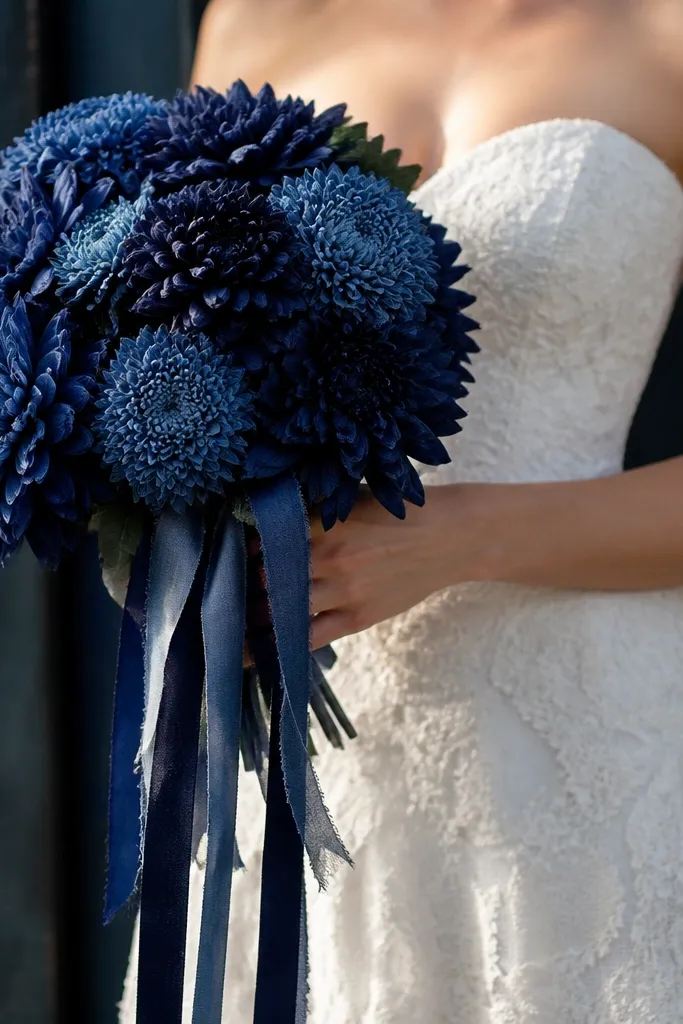
Dahlias look full even when you use only a handful of “petals,” so this design stays photogenic without needing 30 stems. Money becomes the petals: you fold bills into thin fan strips and glue them to a circular base cut from cardstock. The denim-blue ribbon adds texture and makes the money look less flat. This is a great year-round option because navy + denim reads calm and masculine in every season.
Cut 6 circles from thick cardstock, each 2.5 to 4 inches wide, and stack them as the dahlia base layers. Fold each bill into a long accordion strip, then fan the folds and glue the bottom edge to the cardstock circle. Build two dahlias with different circle sizes for a layered look, then attach each to a floral pick using hot glue. Insert picks into a weighted pail lined with plastic so the foam block stays stable.
Editor's noteAdd one thin silver wire loop at the top of each pick so you can lift and angle the bloom for photos.
Skip thisSkip flimsy paper bases — they warp and make the “petals” collapse.
3. Mocha Felt Money Rosette Bouquet
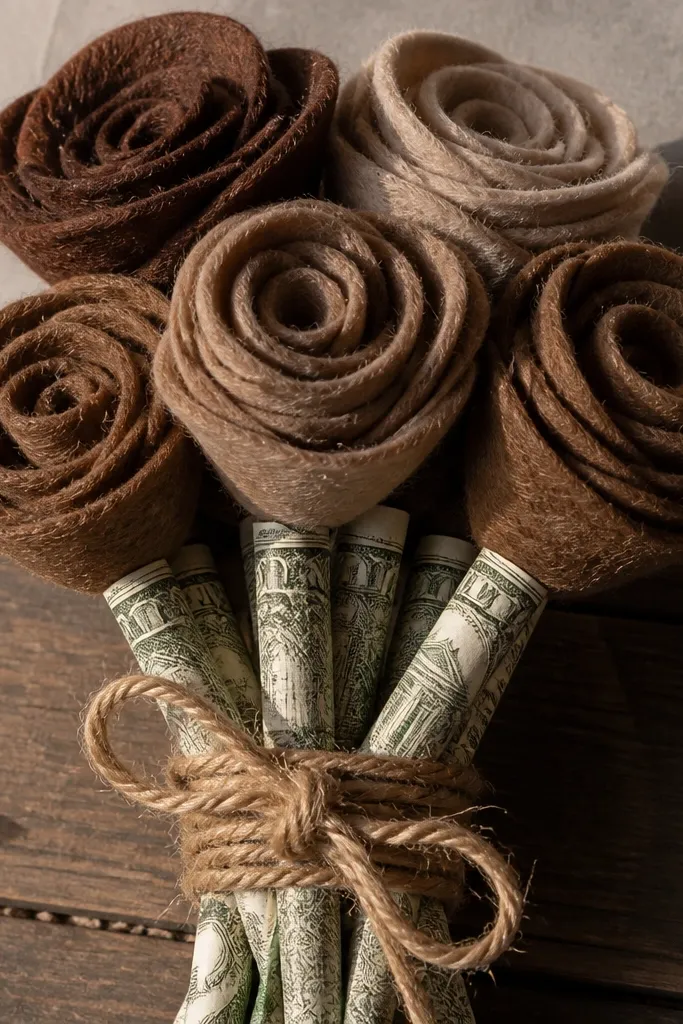
Felt rosettes give you a cozy texture that makes money look like part of the decor instead of the main gimmick. You hide the bill ends inside the rosette folds, so the front shows only neat, controlled shapes. The mocha palette works in winter and falls, but it still looks good in spring because felt doesn’t scream seasonal. It’s also forgiving for beginners because felt holds structure better than ribbon flowers.
Cut felt circles in three sizes (3 inches, 2.5 inches, 2 inches) and stack them for each rosette. Roll a folded bill into a tight cylinder and glue the end behind the felt layer. Stitch or glue the felt stack into a rosette shape by pinching the center and securing the back with hot glue. Place rosettes on picks, then arrange them in a foam block inside a small kraft-wrapped basket; finish with twine loops and a few faux leaves.
Editor's noteUse a glue gun with a low-temp setting if your felt is thin so you don’t soak through.
Skip thisDon’t make rosettes too large — big felt circles make the money look lost.
4. Silver Money Origami Crane Bouquet
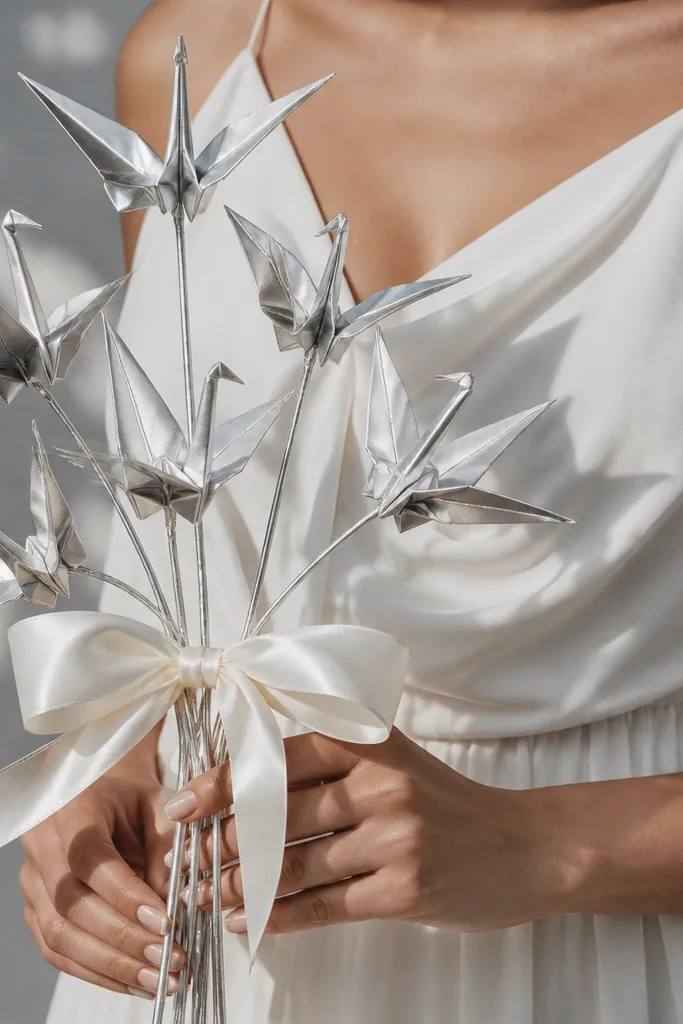
Paper cranes look playful, but when you use money as the body and keep the palette silver/white, they read stylish instead of childish. Each crane has a crisp silhouette that pops in photos, and you can mix crane sizes for a lively cluster. This design is perfect if you want something different from roses and carnations. It also works year-round because the look depends on clean monochrome, not seasonal colors.
Choose bills that fold neatly; crisp bills work better than soft ones. Fold each bill into a crane using a simple origami sequence, then reinforce the last fold with a tiny drop of clear-dry glue on the back. Attach a thin floral wire to the crane’s underside with glue and wrap the wire with silver tape. Insert cranes into a foam block in a white ceramic pot, then add white satin ribbon tails around the rim.
Press the folds under a heavy book for 10 minutes so the crane edges stay sharp.
Don’t over-glue — glue blobs show through and ruin the clean crane lines.
5. Terracotta Money Sunflower Bouquet
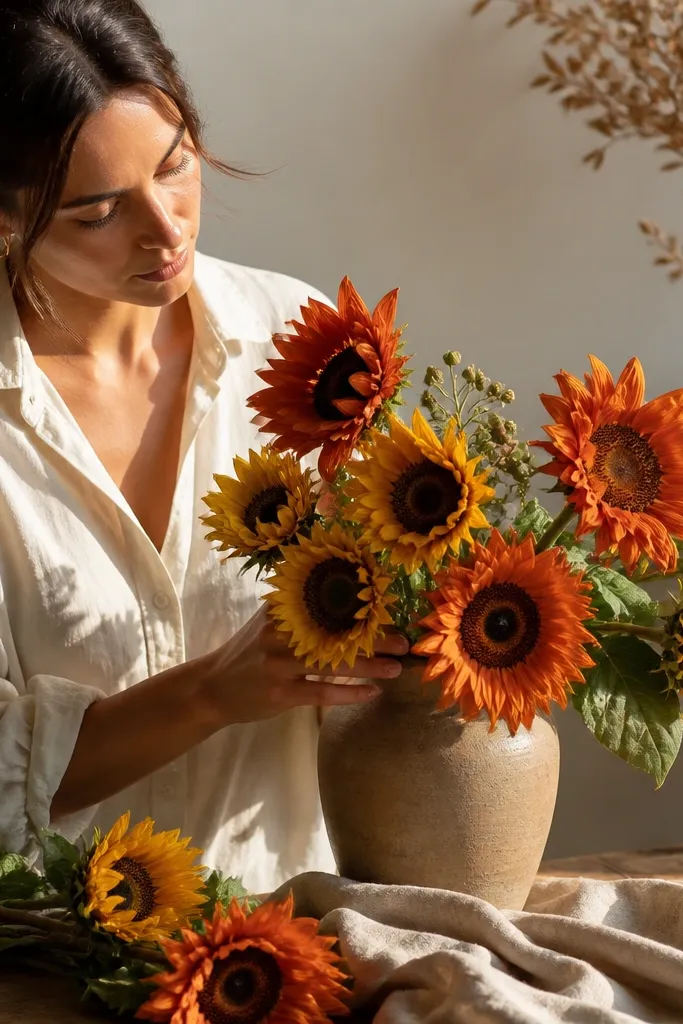
Sunflowers photograph like sunshine, and money petals make them look bold without adding extra craft bulk. The key is to keep the center tight and the petals consistent, so the bloom reads as a sunflower from a distance. Terracotta and mustard feel warm in fall and summer, but they still look good in spring because the palette is earthy rather than holiday-specific. This is a strong choice if the recipient likes outdoorsy, earthy style.
Cut a 4-inch circle of dark brown cardstock for the center and poke a small hole in the middle for a wire stem. Fold bills into flat strips about 1/4 inch wide, then glue each strip around the center to form petals. Add 18-22 petals per sunflower for fullness. Cover the base with green floral tape on a wire stem and insert into a foam block inside a terracotta pot; tuck faux greenery between blooms.
Use matte mustard tissue paper behind the money petals to add warmth without making the bouquet bulky.
Don’t use glossy centers — they reflect light and hide the money’s face.
6. Red Plaid Money Bow Bouquet

This one reads stylish because it looks like gift wrap turned into a bouquet. You build large ribbon bows, then add rolled money “buds” as the center details. The red plaid ribbon gives structure and texture, while the money rolls add a premium touch. It’s especially good for winter and holiday-adjacent gifts, but you can swap plaid for solid ribbon to keep it year-round.
Cut plaid ribbon into four lengths: two 14 inches and two 10 inches, then stack and tie in the center to form a big bow. Roll each bill into a tight cylinder, glue the back end, and attach each roll to a short floral pick. Hot glue the money picks into the bow center so they sit like bud clusters. Mount the bow on a foam base in a small tin bucket and add evergreen sprigs around the sides.
Cut ribbon tails at a slight angle and seal the edges with clear tape so they don’t fray in photos.
Skip thin ribbon — flimsy plaid collapses and makes the bow look flat.
7. Cream Minimal Money Blossom Bouquet
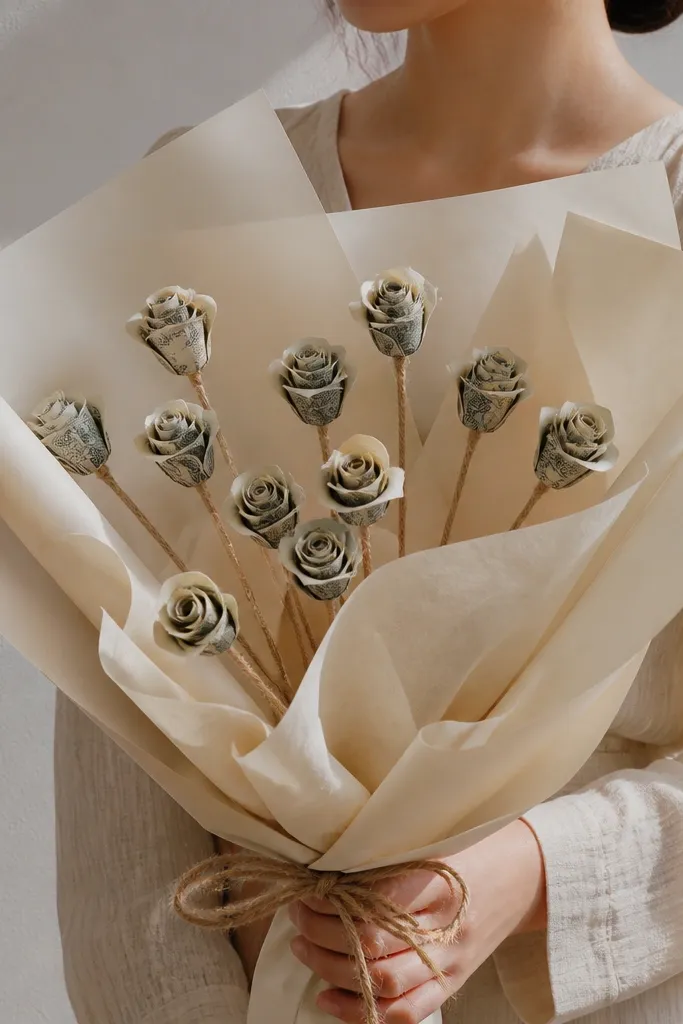
If you want a clean, modern look, this minimal bouquet is the move. You use small rolled money blossoms spaced neatly, with lots of negative space so the design looks intentional. Cream paper and thin twine keep it from looking like a crowded craft. This works year-round because the palette is neutral and the shape language is simple.
Roll bills into small cones by folding each bill into thirds, then rolling tightly and securing with double-sided tape on the back. Shape 10-14 cones and attach each to a thin wooden skewer with tape. Wrap the skewer with twine (or ribbon) from top to bottom for a finished stem look. Place skewers into a foam block wrapped in cream paper, then tie a ribbon around the outside for clean framing.
Keep cone sizes consistent — variation makes it look handmade in a messy way instead of chic.
Don’t pack the foam too tightly — negative space is what makes it look stylish.
8. Green Eucalyptus Money Stem Bouquet

This is the easiest “looks expensive” option because eucalyptus gives height and structure, and money is just the accent. Clip-fold bills into simple rectangles, then attach them to the eucalyptus stems with small binder clips or clothespins. The result looks like a styled market bouquet, not a craft project. It’s year-round because greenery reads fresh in any season and the money pieces are neutral and readable.
Choose a faux eucalyptus bundle and trim stems to about 14-18 inches for height. Fold each bill in half, then in half again so you get a clean rectangle; secure the fold with a small strip of clear tape on the back. Clip each rectangle to a leaf stem using mini clothespins. Wrap the stems with brown kraft paper and tie with twine, then arrange the bundle into a tall vase with floral foam.
Editor's noteAngle the clipped bills so they face forward; flat-to-camera placement hides the money folds.
Skip thisDon’t use too much tape on the front — it turns the bills shiny and messy.
9. Gold Foil Money Accordion Bouquet
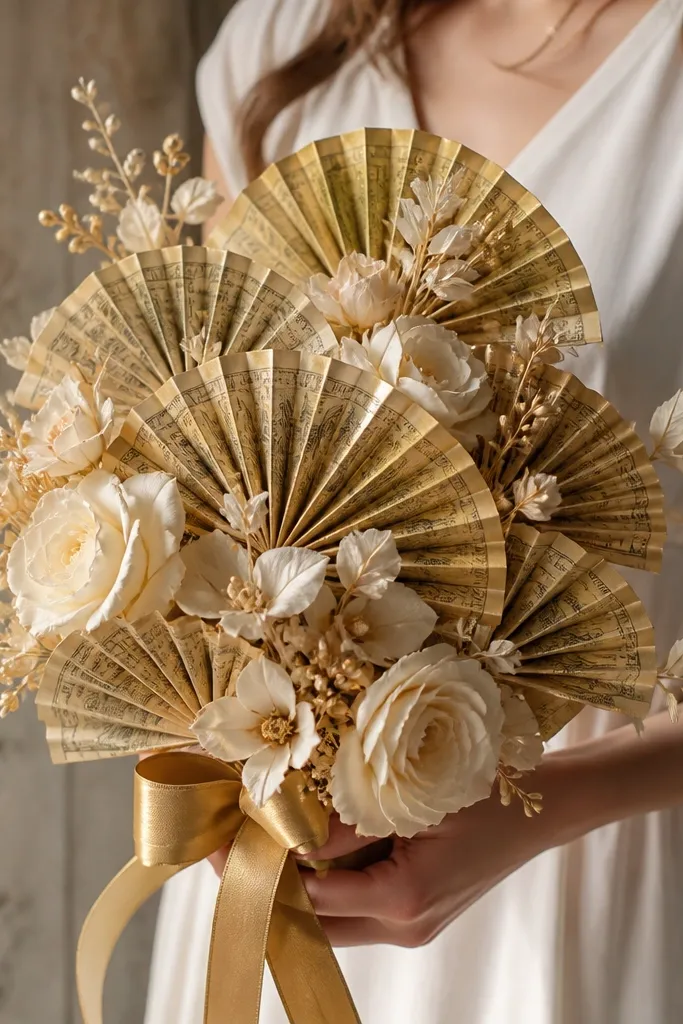
Accordion fans make money look like decorative lanterns, and gold foil ribbon ties the whole thing together. This design is photogenic because the fan edges catch light and create motion even in a still photo. It’s also fast: once you get the folding rhythm, you can make multiple fans quickly. Keep the rest of the bouquet neutral so the money fans stay the star.
Fold each bill into an accordion strip with folds about 1/4 inch wide. Fan the strip into a semicircle and glue the ends together to form a fan; add a tiny ribbon loop at the back to hang it on a stem. Attach each fan to a floral pick with hot glue on the back. Arrange 10-12 fans in a foam block, then add 3-5 neutral faux flowers around them to frame the fans.
Use thin gold ribbon for the back tie so it disappears behind the fan edges.
Don’t make accordion folds uneven — uneven folds make the fan look lumpy.
10. Black Leather-Look Money Rose Bouquet

This one uses faux leather ribbon to give a bold, modern texture. The money pieces look sharper because the ribbon is matte and dark, so you get contrast without bright colors. It’s a good choice for men who like “clean and tough” style — think black-on-black with a hint of gold. The bouquet stays year-round because it isn’t tied to a season color.
Cut faux leather ribbon into 1-inch wide strips and wrap each strip around a rolled bill cylinder to create a “petal band.” Secure the back with hot glue. Form 10-12 money rose heads by layering petal bands around a small cardstock circle. Attach each head to a floral pick, then insert into a foam block inside a matte black container. Add a few gold spray picks for tiny highlights at the top.
Editor's noteBurnish the leather ribbon edges with your fingertip after gluing so it looks smooth, not wrinkled.
Skip thisSkip shiny ribbon — it reflects light and competes with the money face.
11. Burgundy Money Carnation Bundle
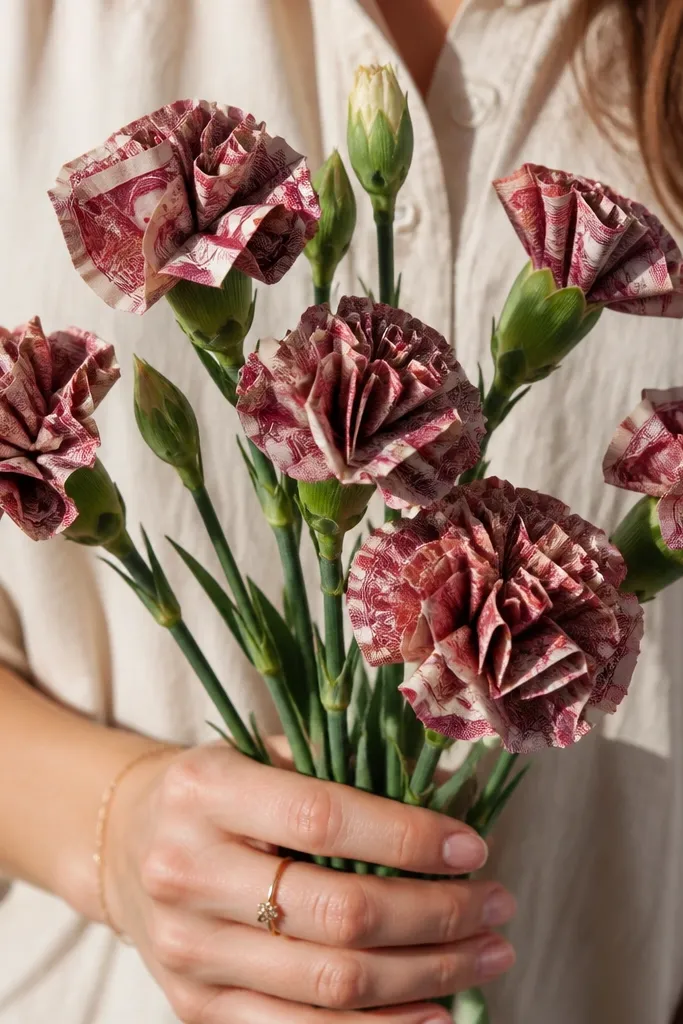
Carnations look full and slightly vintage, and money can imitate the layered petals. You build small rolled money clusters and wrap them with burgundy tissue or fabric petals so the bouquet looks like flowers, not just money. Burgundy stays classy in fall and winter, but it still looks good in spring when you add a lighter cream wrap. It’s great for birthdays and formal events because it reads polished.
Cut burgundy tissue paper into 4x6 inch rectangles and layer 3-4 pieces per flower. Fold a bill into a narrow strip, roll it, and place the roll at the center of the tissue stack. Twist the tissue around the money roll and secure with floral tape under the “flower head.” Make 9-12 carnations, then arrange into a foam block inside a burgundy paper-wrapped cylinder vase.
Use two shades of burgundy tissue so the petals show depth in photos.
Don’t make tissue too tight — it turns the petals into one flat wad.
12. White and Silver Money Orchid Spray
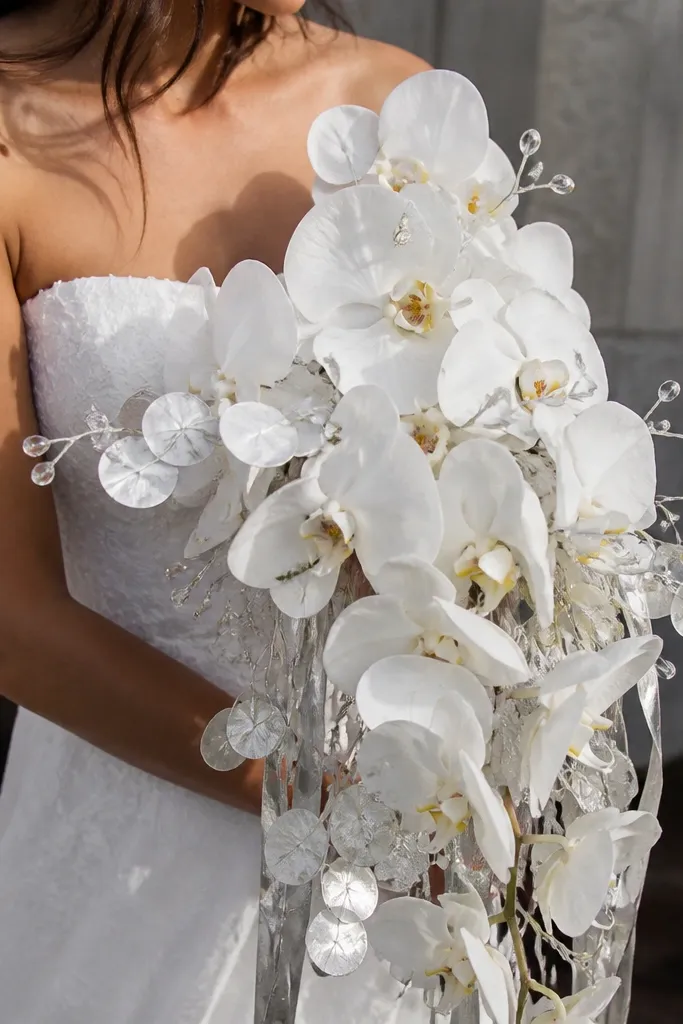
Orchids look sleek, and this money version keeps the lines clean. You fold bills into flat strip petals and attach them to a small center using clear tape so the front stays crisp. White and silver gives a year-round “fresh” look without needing seasonal props. This works best when you want something that looks more like a design object than a craft bouquet.
Cut a small white foam or cardstock center disk about 1.5 inches wide. Fold bills into thin flat strips (about 1/2 inch) and attach 6-8 strips around the center with clear tape on the back. Add a small silver ribbon loop in the center to mimic an orchid throat. Tape the orchid head to a long floral pick and repeat for 6-8 heads. Insert picks into a vase filled with floral foam and cover foam with white filler paper.
Editor's noteKeep petals uniform width; orchid shapes collapse when strips vary a lot.
Skip thisDon’t use bulky glue on the back — it creates bumps that show through.
13. Pastel Spring Money Blossom Trio
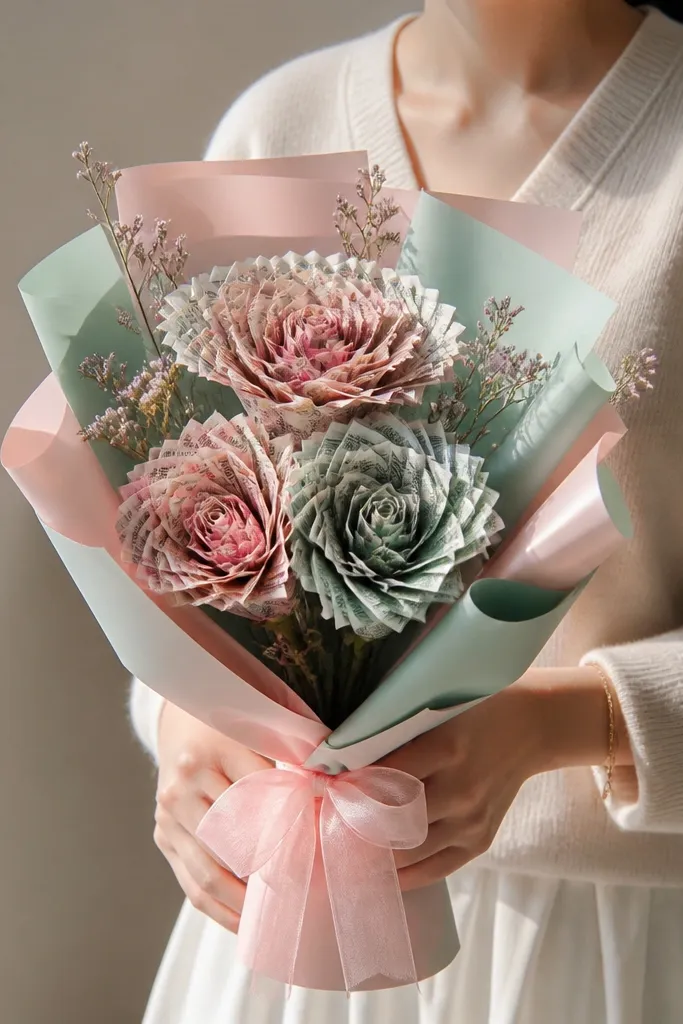
Pastel blossoms look right in spring, but the trick here is to keep the money construction consistent and the colors controlled. Use three blossom types across the bouquet: one mint, one pink, one pale yellow, each with money “centers” that are rolled tight. The bouquet reads styled because it’s color-coordinated rather than theme-heavy. It stays year-round if you swap pastels for neutrals for winter.
Make three sets of rolled money centers using bills rolled into 1-inch cylinders and secured with tape. Cut felt circles in mint, pink, and pale yellow, then pinch each circle into a bloom shape around the money center. Attach each bloom to a pick, keeping the heights staggered by trimming stems to 10, 12, and 14 inches. Arrange three clusters in a small box or basket lined with plastic and filled with foam.
Choose one background color for the wrapping (cream or gray) so pastels look intentional.
Don’t add too many extra decorations — the money centers need to stay visible.
14. Olive Green Money Wreath-Style Bouquet
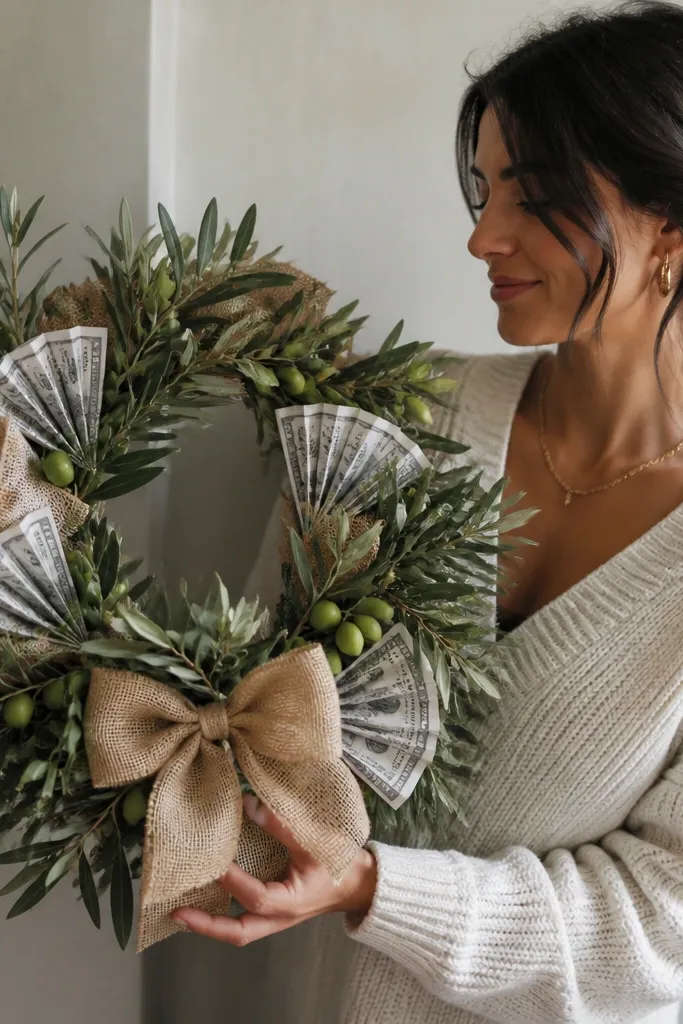
Wreath-style bouquets look stylish because they frame the money pieces instead of scattering them. The money fans sit along the ring and create a repeating pattern, which looks good in photos even from straight on. Olive green is year-round because it reads outdoorsy and grounded. If you want something that feels masculine and not “flower shop,” this is a strong direction.
Cut a foam ring about 9-10 inches across and wrap it with burlap or olive fabric. Fold bills into accordion fans and glue each fan to the ring at a slight upward angle. Insert faux greenery bundles through the ring at 6-8 points to add texture and hide foam edges. Finish with a small ribbon bow at the top and a handle or base stabilizer if you’re displaying it upright.
Keep the money fans all facing the same direction for a clean photo line.
Don’t use heavy glitter greenery — it distracts from the money pattern.
15. Cognac Brown Money Calla Lily Bouquet
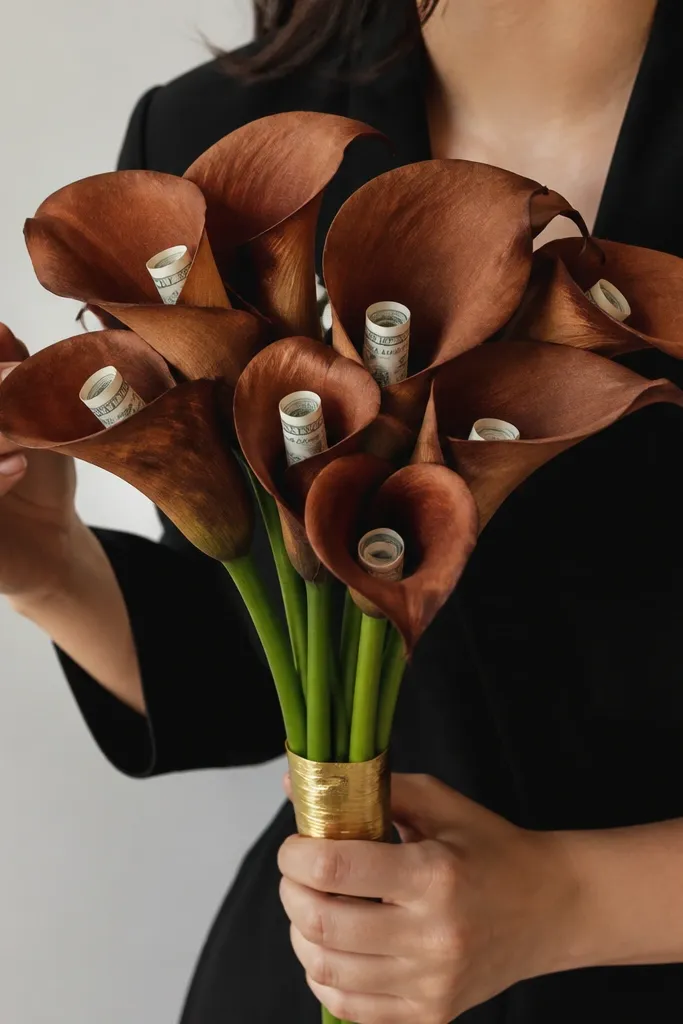
Calla lilies have a clean, sculptural shape, and money fits inside that form beautifully. You roll bills into a tight center and wrap them with brown fabric or felt petals that curve forward like a real calla. The cognac palette looks rich in winter and still fresh in summer when you pair it with white paper. This is a great choice when the recipient likes minimalist, modern decor.
Cut calla petal templates from felt or thin fabric: about 6 inches long with a tapered tip. Roll the bill into a cylinder and place it on the petal base, then wrap the petal around the cylinder and secure with a stitch or hot glue at the back. Add a gold floral tape wrap to the stem so it looks neat. Insert 7-9 callas into a foam block in a tall vase and add a few white filler leaves around the perimeter.
Editor's noteUse fabric glue for the petal seam so it stays flexible and doesn’t crack.
Skip thisAvoid thick felt petals — they make the lily look bulky and block the money center.
16. Grey Concrete Look Money Bouquet

This design is about contrast: crisp money rectangles against a modern concrete-style container. You fold each bill into a rectangle card and clip it to short stems, so the look stays sharp and structured. Grey + white makes it year-round and very “adult,” which works well for men’s birthdays and housewarming gifts. Keep the flowers minimal so the money stays readable.
Wrap a small planter or tin with grey paper or concrete-texture contact paper. Fold bills into 1.5x3 inch rectangles and secure the fold with clear tape on the back. Attach each rectangle to a short wooden skewer with a small binder clip or tape. Insert skewers into foam inside the container, then wrap the rim with a thin grey ribbon for a clean border.
Editor's noteUse black-and-white wrapping paper strips behind the skewer stems to add depth in photos.
Skip thisDon’t use bright multi-color ribbon — it fights the concrete look.
17. Gold Champagne Money Cupcake Bouquet
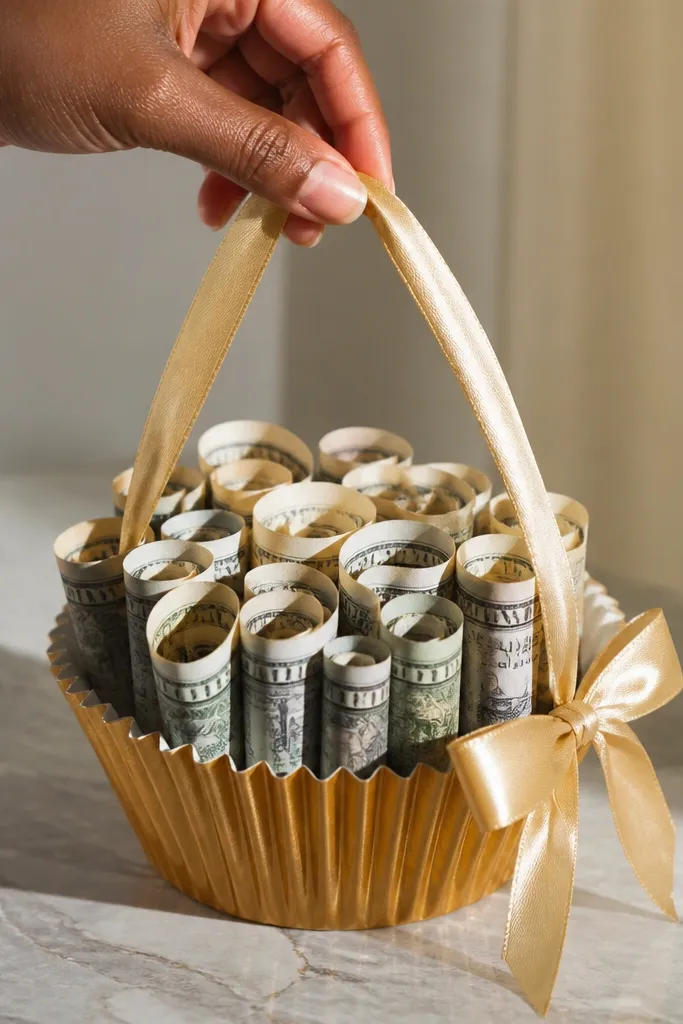
Cupcake-liner bouquets look playful but still stylish when you use metallic liners and keep the colors tight. Each money piece sits in a “cup” shape, so it looks like a set of mini gifts. This is a fun year-round option for men who like quirky decor, and it’s also easy to assemble because cupcake liners are already shaped. You can scale it up or down depending on how many money pieces you want to include.
Choose metallic gold or champagne cupcake liners and stack two liners per money cup for sturdiness. Roll each bill into a tight cone and glue the back end, then place the cone into the liner. Pierce a floral pick through the bottom of the liner and secure with hot glue. Arrange 10-14 cups in a foam block inside a wrapped box, then add a satin ribbon handle across the top.
Editor's noteUse a toothpick to place glue only at the base so the money face stays clean.
Skip thisSkip standard paper liners — they collapse and make the cups look wrinkled.
18. Emerald Money Leaf Money Bouquet

Leafy designs read masculine because they feel botanical and architectural. This one uses green faux leaves as the base, then you attach money fans to leaf stems so each bill looks like a leaf highlight. Emerald green is bold without being seasonal, and gold ribbon makes it look “gift-ready” for any time of year. It’s also a good option if the recipient dislikes classic flowers.
Trim faux green leaves to 10-14 inch stems and group them into clusters of 3-4 leaves each. Fold bills into accordion fans, then glue the fan back to the leaf stem using a small dot. Add a thin gold ribbon wrap at the leaf cluster base so everything looks tied together. Insert clusters into a foam block in a deep green or gold container and tuck extra leaves around the edges.
Editor's noteKeep fan widths consistent so the money pattern looks intentional, not random.
Skip thisDon’t overload each leaf with multiple bills — one fan per leaf cluster looks cleaner.
19. Tan Burlap Money Bundle Bouquet

Burlap makes money look grounded and masculine because it has texture and a matte finish. This bouquet uses rolled money bundles tied like mini packages, then arranged in a tight cluster. It’s photogenic because twine knots and burlap fibers show texture even in low light. Use this when you want a rustic look year-round — it works for birthdays, graduations, and housewarming gifts.
Roll bills into 1-inch bundles and secure each with a small strip of clear tape on the back. Wrap each bundle with a tiny strip of burlap and tie with twine, leaving a short twine tail. Attach each bundle to a pick with hot glue at the back. Bundle 12-16 picks in a foam block inside a kraft-burlap sleeve, then tie a larger twine bow around the outside.
Editor's noteUse natural twine in a slightly darker shade than the burlap so knots show up clearly.
Skip thisDon’t use glossy ribbon with burlap — it looks out of place.
20. Red and Black Money Rose Corsage Bouquet

Compact corsage-style bouquets look stylish because they fit the “wearable” silhouette. You build a small cluster of money roses in red and black tones, then wrap it into a tight arrangement that looks like a designer accessory. This is great for men because the size feels intentional and not like a kid’s craft. Keep the base dark and the money faces angled so the roses read clearly in photos.
Fold and roll bills into mini rose shapes, then secure the back with hot glue. Cut small red felt circles and use them like petals around each money rose center, keeping the felt only at the edges. Attach each rose to a short pick and arrange 7-9 roses in a foam pad inside a small black box frame. Wrap the frame with black ribbon and add a short satin tail on one side.
Editor's noteUse a foam pad instead of a tall block so the bouquet stays compact and crisp.
Skip thisDon’t spread roses too far apart — the corsage look needs density.
21. Sky Blue Money Ribbon Fan Bouquet
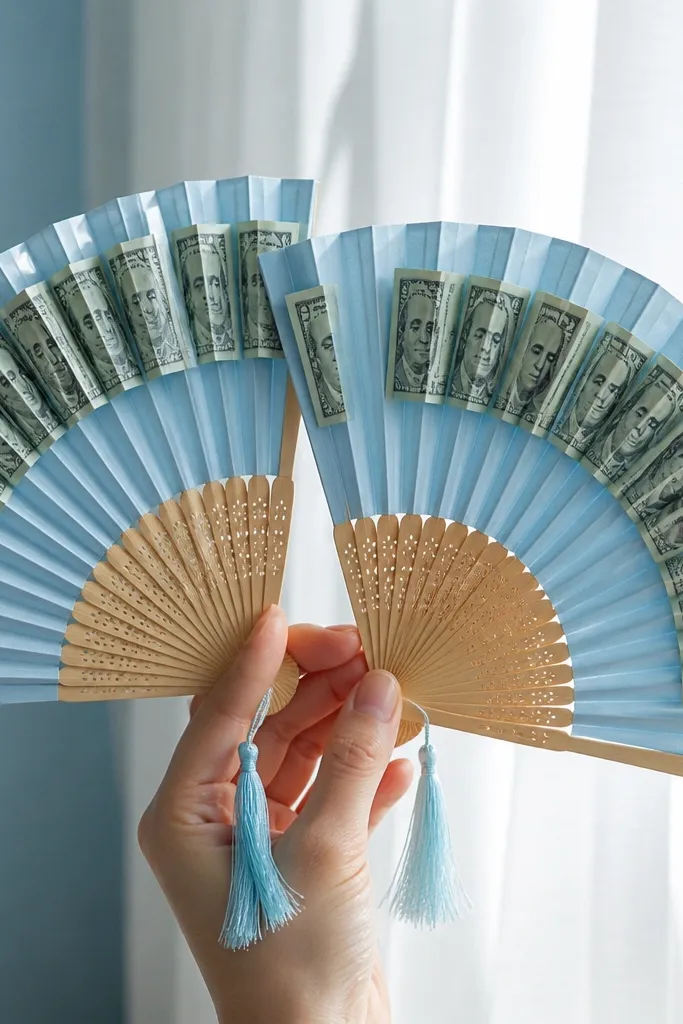
Ribbon fan bouquets look airy and clean, and money rectangles add a crisp, graphic element. The sky-blue palette keeps it fresh for spring and summer, but the structure is year-round because fans read as a shape, not a season theme. This design is also good for people who want their bouquet to look like decor, not a pile of crafts. It’s photogenic because the fans create a repeating V-shape.
Cut sky-blue ribbon into 10 inch strips and fold each strip into a fan shape, then stitch or glue the base. Fold bills into neat rectangles and tape each rectangle to the back of a ribbon fan so the money face points forward. Attach fans to floral picks and trim stems to 12-16 inches. Arrange into a foam block wrapped in white paper and add a few clear bead picks at the top for sparkle.
Editor's noteAnchor each fan by gluing only the center back so the edges stay crisp.
Skip thisSkip thick glue — it makes ribbon stiff and kills the fan shape.
22. Olive + Cream Money Twig Bouquet
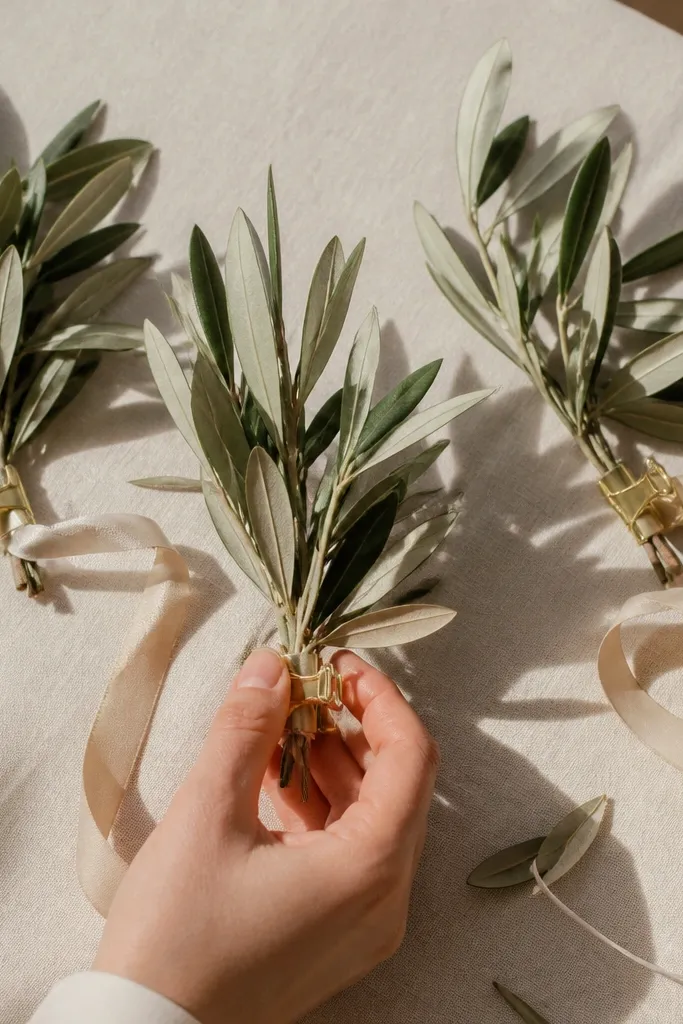
Twig-based bouquets look stylish because the stems create natural lines and the money clips act like ornaments. This is a year-round design that feels modern, not rustic-overdone, especially with a cream ribbon wrap. The money is visible but controlled: each clip is placed at a consistent height so the overall look stays neat. If you want something that doesn’t look like traditional flowers, this delivers.
Bundle faux twig stems and trim to 16-20 inches, then place them into a foam block in a narrow vase. Clip folded bills into simple rectangles using mini binder clips, and keep each clip at the same height along the twigs. Wrap the vase with cream ribbon and cover the foam with shredded paper or small faux moss. Add 3-5 olive leaf sprigs to fill gaps and keep the silhouette full.
Editor's noteUse a ruler to mark clip heights on the twigs so the money pattern looks intentional.
Skip thisDon’t vary clip heights wildly — it reads messy in photos.
23. Maroon Money Bowtie Bouquet
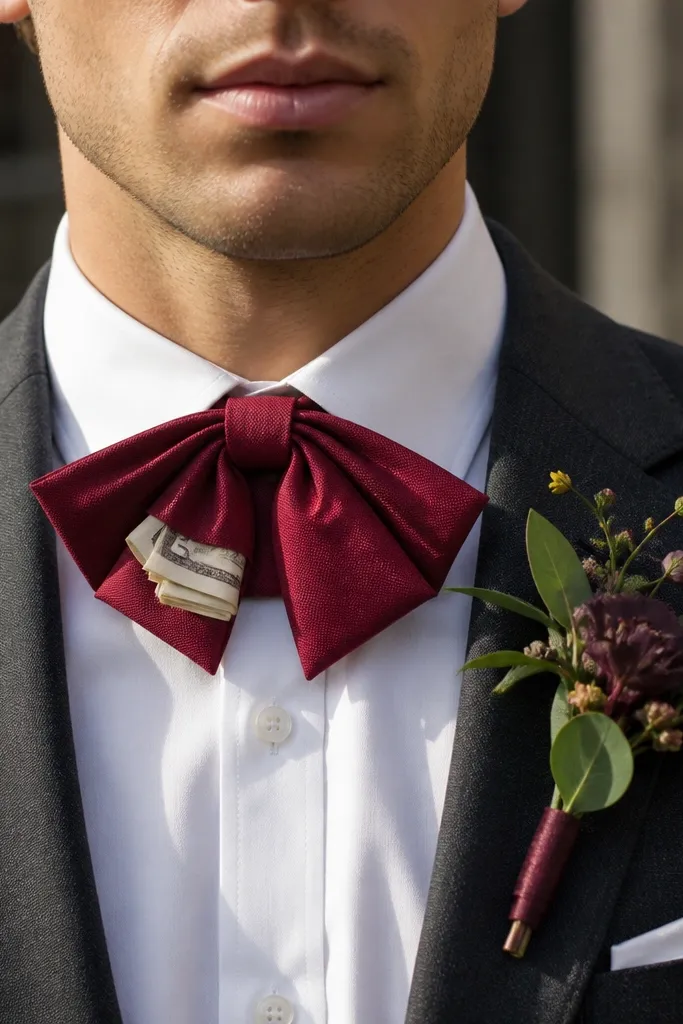
Bowties are a strong visual cue for men, and turning them into a bouquet center makes the gift feel personal without being cheesy. Money pieces are folded into small “tie tips” and tucked into the bow knot so the money looks like part of the bow structure. Maroon is classy and year-round, and the bow shape gives you a clean focal point for photos. Build this when you want the bouquet to look like a themed accessory.
Cut maroon fabric or ribbon strips and form a bow shape using two long ends and a shorter center knot piece. Fold bills into thin triangles and glue the back sides to the bow knot so they sit like tie ends. Attach the bow to a foam block inside a small box or tall container, then add 6-8 simple stem picks around it using neutral greenery. Finish with a thin gold ribbon around the base for a clean frame.
Editor's noteUse stiff ribbon for the bow so the knot holds its shape during transport.
Skip thisDon’t use soft satin — bow corners droop and the money tips look crooked.
24. Mustard Money Paper Flower Cube Bouquet
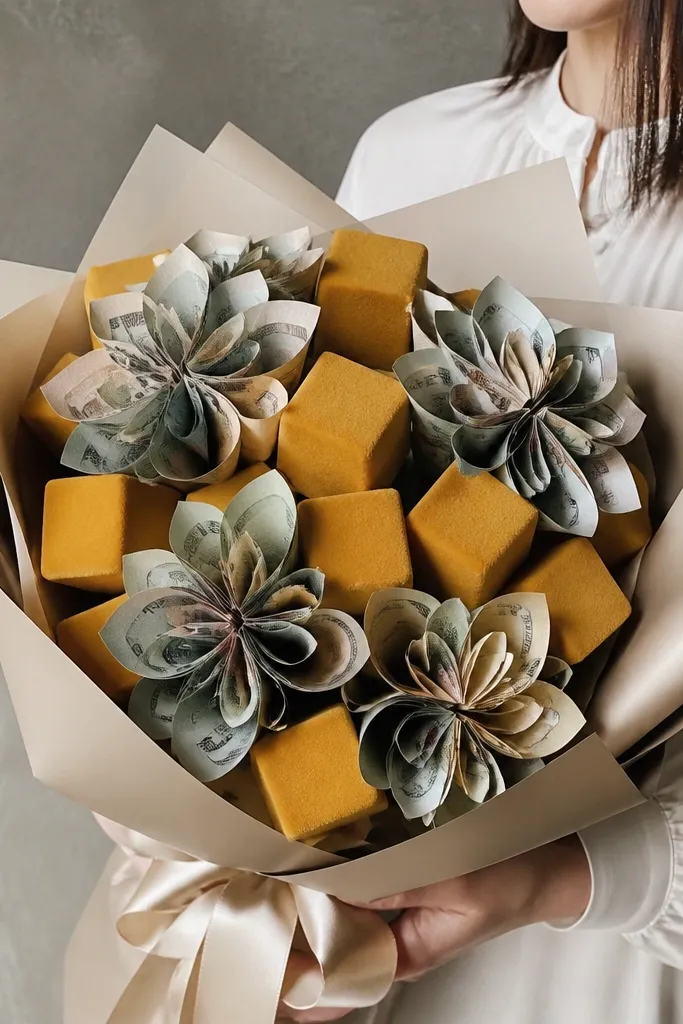
A cube bouquet looks like modern decor, not a traditional bouquet, and that makes it feel stylish for men. You build money paper flowers on short skewers and insert them into a cube foam base so each bloom sits at a clean angle. Mustard looks warm and masculine, and the cube shape keeps everything centered for photos. This is a great option if you want a gift that can sit on a desk or shelf afterward.
Cut foam into a cube about 6x6 inches, then cover with neutral wrapping paper so the foam edges hide. Fold bills into layered paper flower petals by accordion-folding strips and gluing them around a small center circle. Attach each bloom to a short skewer and insert into the cube at varied angles. Wrap the cube with a thin band ribbon and add a top ribbon tie so it looks finished from every angle.
Keep blooms clustered on the top half of the cube so the front looks full in photos.
Don’t place blooms too low — the cube edges block the money faces.
25. Teal Money Hydrangea Cluster
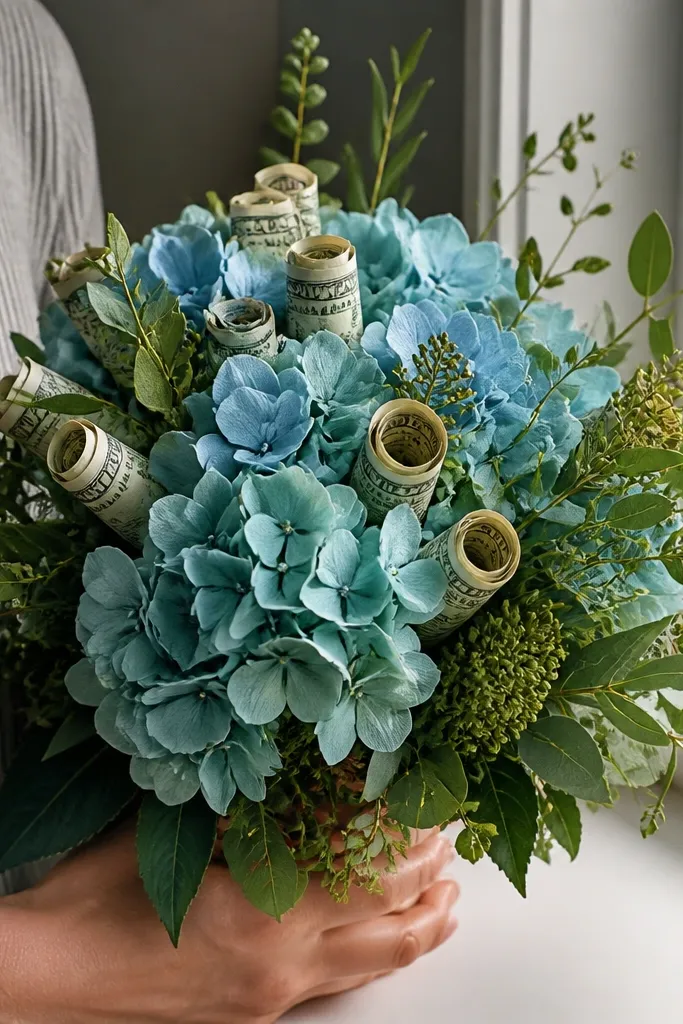
Hydrangea-style clusters look lush, and you can get that fullness using small money “balls” instead of big flowers. Roll bills into tiny spheres (secure the back fold), then glue them onto a teal fabric or felt petal grid. The teal palette is fresh and year-round, and the cluster density makes it photogenic even with a small number of stems. This is a good pick when the recipient likes bold color but still wants a clean look.
Roll bills into small spheres about 3/4 inch wide and tape the back seam. Cut teal felt squares and pinch them into tiny petal shapes. Glue money spheres onto the centers of the petal shapes, then attach each to floral picks. Arrange the cluster into a foam dome or a rounded foam base in a small vase, then tuck greenery around the sides.
Editor's noteUse a foam dome if you can — it naturally creates the hydrangea “ball” silhouette.
Skip thisDon’t use too much greenery — it hides the teal cluster.



