
1. Strawberry Milkshake Squishy Cup
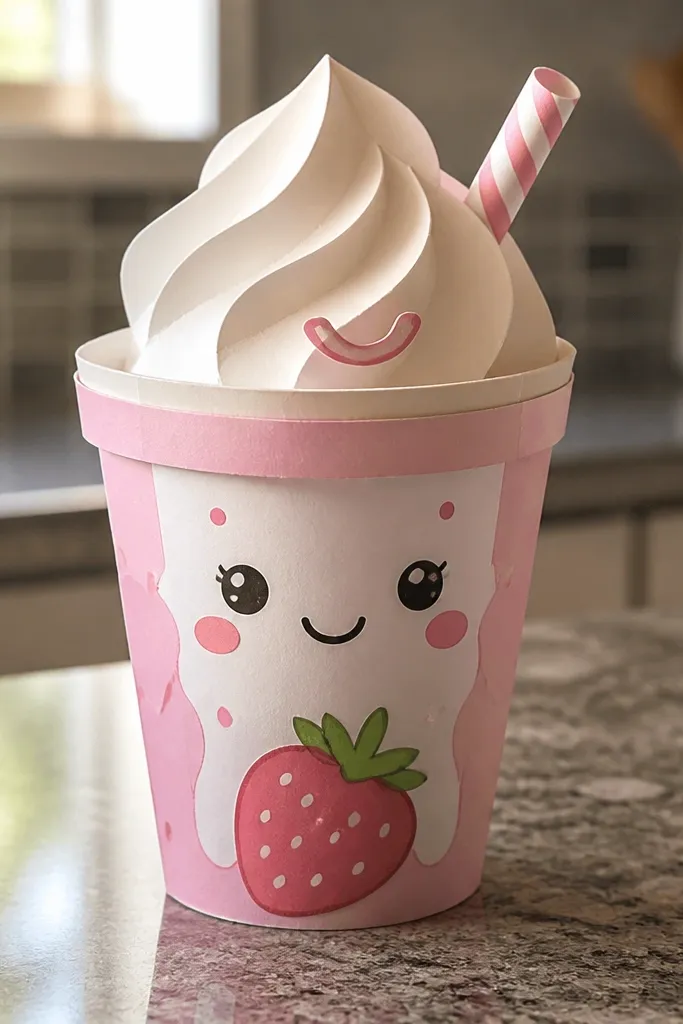
This one looks like a treat instead of a craft, which is exactly why it works for themed Paper Squishy. Build a cup shape with two outer layers so it holds its curve, then add a raised whipped-cream dome on top using folded paper or foam-backed cardstock. The face is optional, but a tiny straw smile makes it feel like a character without covering the texture. Use bright strawberry pink plus white highlights so the “frosting” reads even in harsh indoor light.
Start by cutting two identical cup panels from medium-weight pink cardstock. Glue around the edges, leave a 2 cm opening at the top, then insert a thin foam strip that matches the cup height. Close the opening with a narrow inner paper strip. Cut a separate whipped-cream top from white cardstock, layer it with a thin foam sheet, and glue it on after the cup is sealed.
Editor's noteShade the cup with a light pink pencil on the edges so the curve shows up in photos.
Skip thisAvoid using thin printer paper for the cup walls; it collapses after a few squeezes.
2. Rainbow Cloud Mascot Squishy
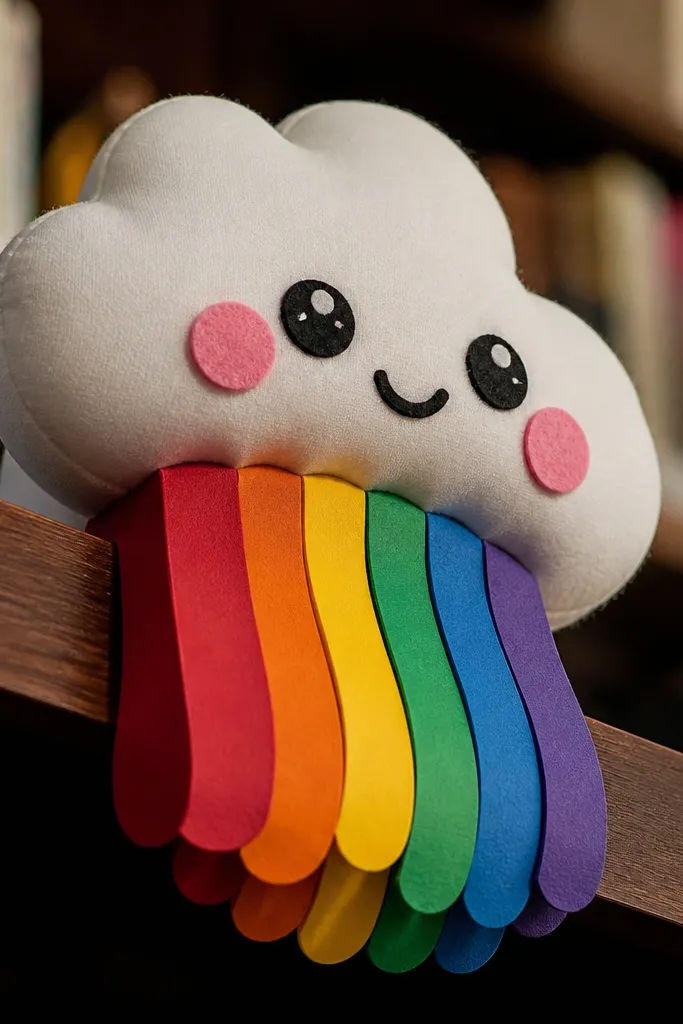
Cloud mascots are photogenic because your eye reads the face first, then the color. This themed Paper Squishy uses a rounded cloud base that stays puffy, plus a rainbow “rain” made from layered strips. The rainbow edges catch light, so even simple coloring looks crisp. Make the cheeks raised with small felt pads or folded cardstock circles, then keep the outline thick in black for a clean look.
Cut two cloud outlines from thick blue cardstock and glue them together with a small opening at the bottom. Insert a folded foam rectangle sized to the cloud interior, then seal the bottom opening with an inner strip. Cut rainbow strips from paper or thin foam sheets, stack them in order, and glue them under the cloud like rain. Add a small mouth and eyes on top with a black marker, then glue on cheek circles.
Editor's noteUse a glue stick for the rainbow strips so you get less warping than liquid glue.
Skip thisDon’t place the rainbow strips inside the seam; they’ll get crushed when you squeeze.
3. Slice of Pizza with Puffed Toppings
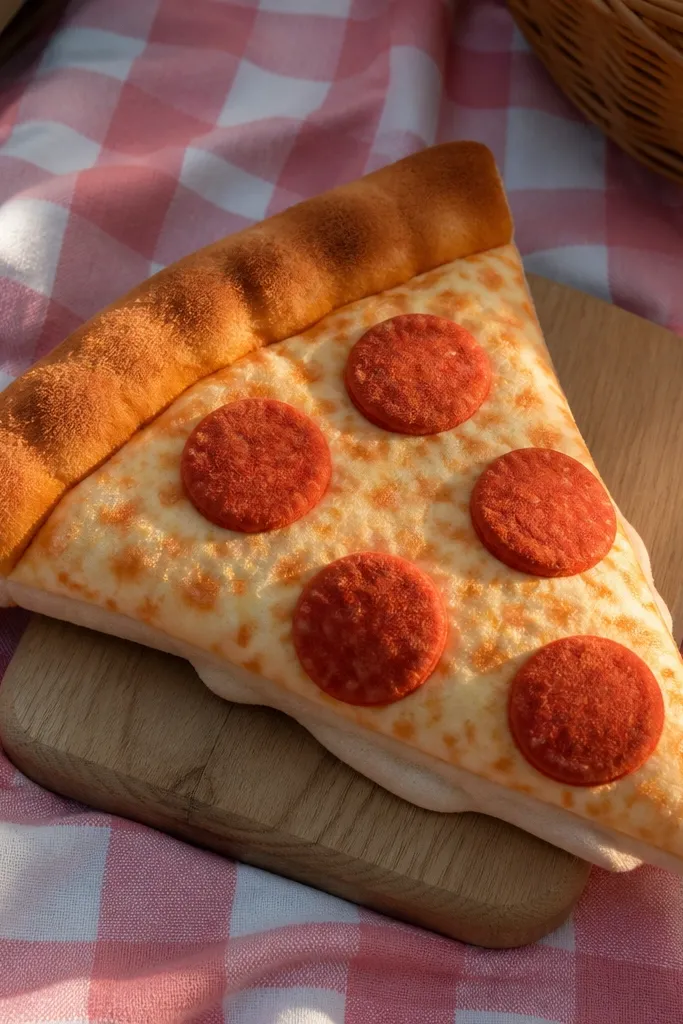
Pizza squishies look great because they’re instantly recognizable and you can build thickness with layers. The key is to make toppings raised so they cast tiny shadows — that’s what makes photos look “real.” Build a triangle slice with a browned crust edge, then add a cheese layer that wraps slightly over the base. Pepperoni dots and green herb flecks should sit on top, not flat, so the squeeze feels like a treat.
Cut two pizza slice shapes from tan cardstock for the base, then glue them together and leave a 2 cm gap. Insert a thin foam layer so the slice stays firm, then seal the gap with an inner cardboard strip. Cut a yellow cheese layer slightly larger than the base and glue it centered. Add pepperoni circles and herb bits using small paper cutouts glued on after the cheese is set.
Lightly crinkle the cheese paper before gluing so it looks textured without extra drawing.
Skip glitter glue for toppings; it sheds and makes a messy seam.
4. Cute Hamburger with Folded Bun Layers
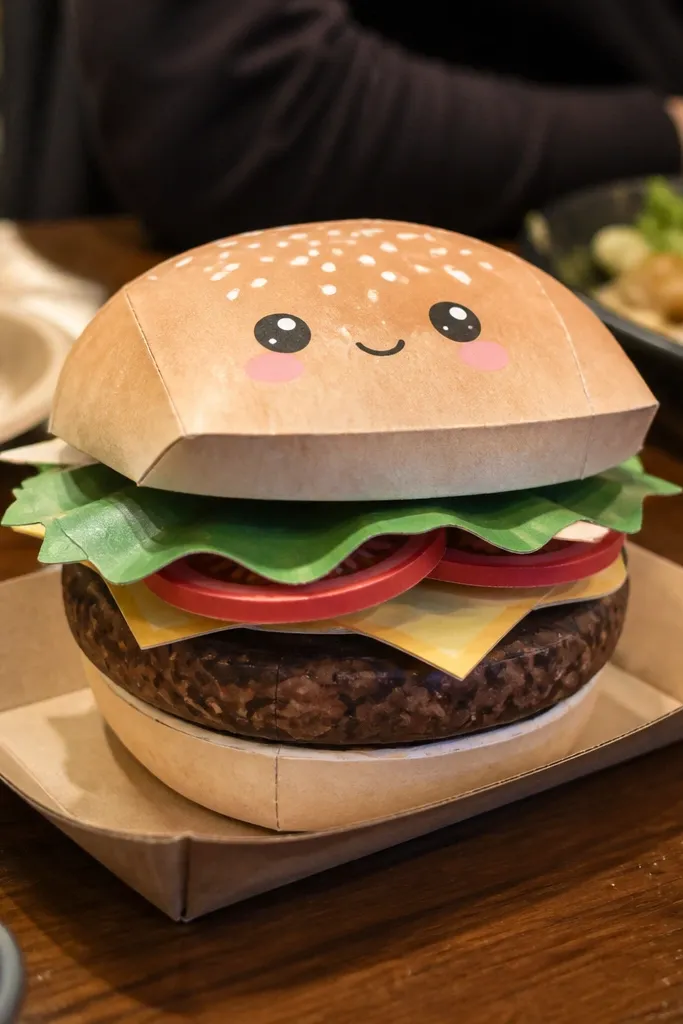
A hamburger is a slam-dunk themed Paper Squishy because it’s stacked and easy to make dimensional. Use a two-part bun: a top bun with a slightly curved fold and a bottom bun that anchors the stuffing. The squish comes from a foam center layer, while the “food layers” come from paper pieces that sit on top. A simple face on the lettuce makes it kid-friendly without covering the whole design.
Cut two bun-and-patty silhouette panels from sturdy cardstock and glue edges, leaving an opening on the side. Insert a foam rectangle so the burger compresses evenly, then seal the opening inside with a strip. Cut separate lettuce and tomato layers from green and red paper and glue them on after the base is sealed. Add sesame seeds by drawing dots with a fine marker or gluing tiny paper circles.
Editor's noteFor cleaner edges, press the seam with a ruler after sealing so it dries flat.
Skip thisDon’t overfill the foam; too much padding makes the bun layers buckle.
5. Octopus with Squishy Tentacle Pads
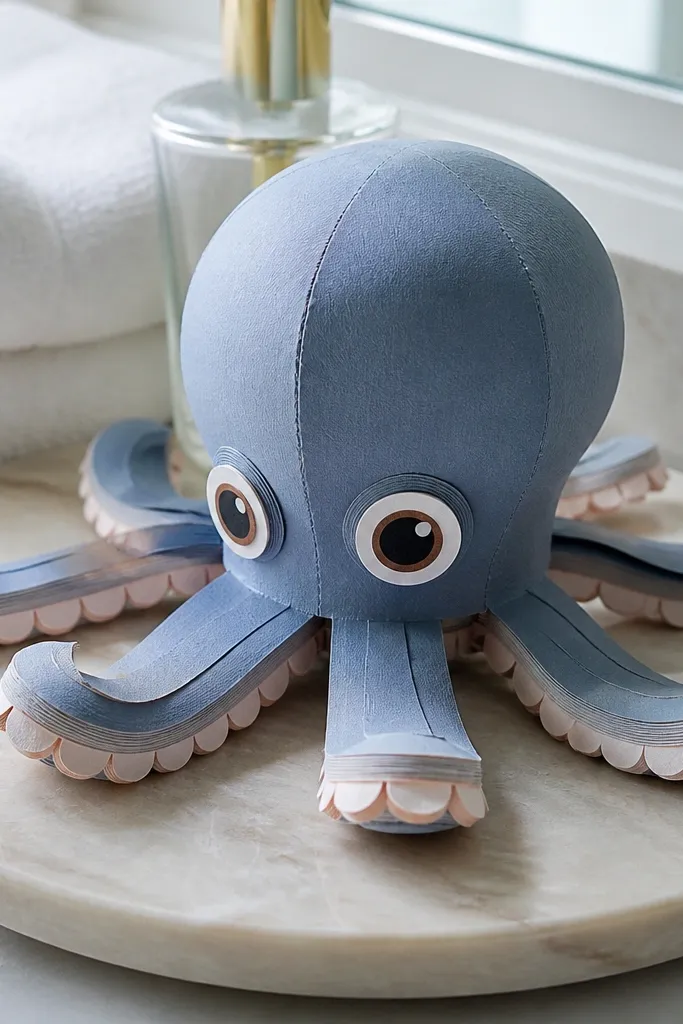
Octopus squishies look playful and weird in the best way. The trick is to build the tentacles as thick, soft pads instead of flat strips — that’s what makes the squeeze satisfying. Use a rounded body from two cardstock layers and add tentacles made from layered paper strips with a thin foam core. Keep the eyes large and white so the character reads from across the room.
Cut two octopus bodies and glue them together, leaving space at the bottom for tentacles. Create tentacle stacks by cutting multiple strip layers from cardstock, then glue a thin foam strip between layers for thickness. Attach tentacles to the inside before you fully seal the body. Finish by adding big eyes and a mouth on the front panel.
Use a black marker to thicken the outlines after assembly; it hides small edge gaps.
Avoid long, thin tentacles with no foam core; they flop and ruin the squish look.
6. Unicorn Horn and Puffy Mane Squishy
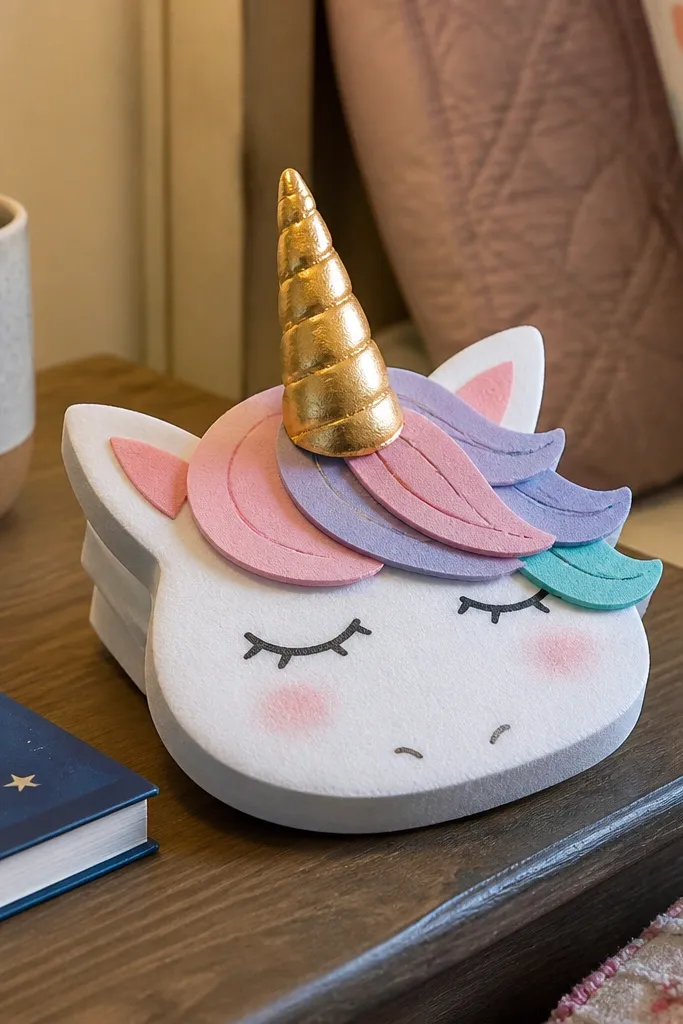
Unicorn themed Paper Squishy is a guaranteed crowd-pleaser, but it only looks good when the horn and mane have real height. Build the body like a soft pillow from two cardstock layers plus a foam center. Make the mane from layered paper strips that sit on top like bangs, not wrapped around the sides. Add a gold horn using textured paper or metallic cardstock so it catches light.
Cut two unicorn body outlines from thick white cardstock and glue around the edges with a bottom opening. Insert a foam pad sized to the body, then seal the opening with an inner strip. Cut mane strips from pastel paper, stack them in a fan shape, and glue them across the top of the body. Assemble the horn from a cone shape, glue it on, then add eyes and a simple blush using pink pencil.
Use a foam sheet for blush cheeks — even a tiny one makes the face look alive.
Don’t use metallic paint on the horn; it flakes and gets onto hands.
7. Space Rocket with Glow Window
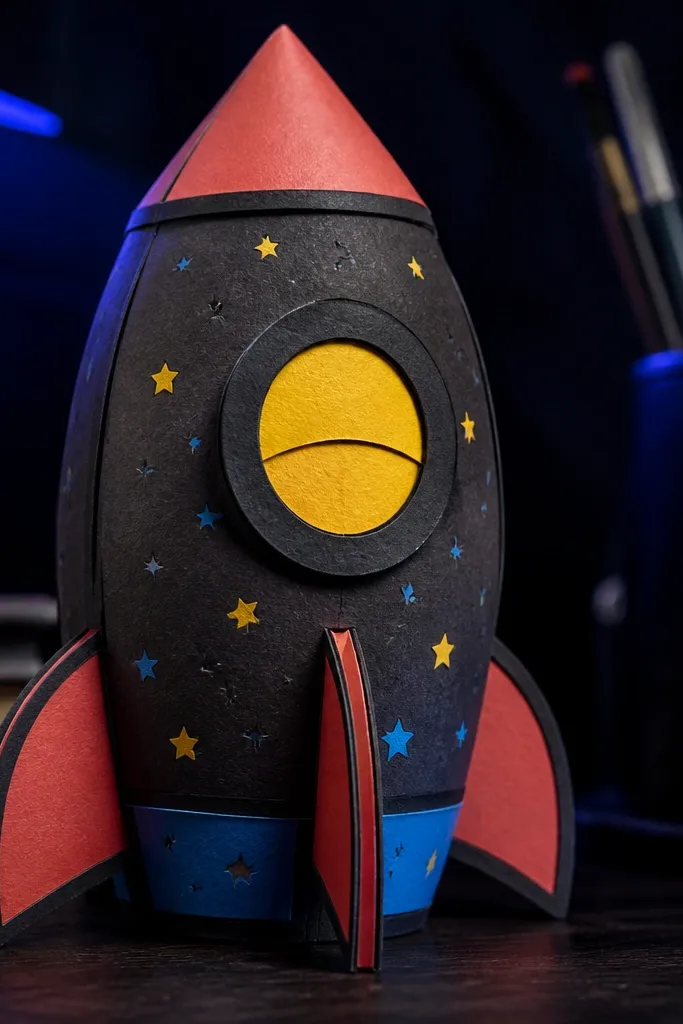
Space themes photograph well because you can control contrast — black outlines plus bright accents. This squishy rocket has a round “window” that looks dimensional, and the stars add texture without needing heavy drawing. Build a rocket body with layered panels so the silhouette stays crisp when squeezed. Keep the window slightly raised with a foam circle so it looks like it’s glowing.
Cut two rocket body pieces from dark cardstock and glue edges, leaving a small opening. Insert a foam cylinder or folded foam rectangle for the squish, then seal the opening. Cut a round window from shiny paper or yellow cardstock and glue it over a smaller foam circle. Add stars by punching tiny star shapes or cutting points, then glue them across the rocket sides.
Editor's noteOutline the rocket with a white gel pen after assembly so stars don’t look muddy.
Skip thisSkip thin star stickers; they peel and look flat next to a puffy squishy.
8. Taco Truck with Rolling Wheels
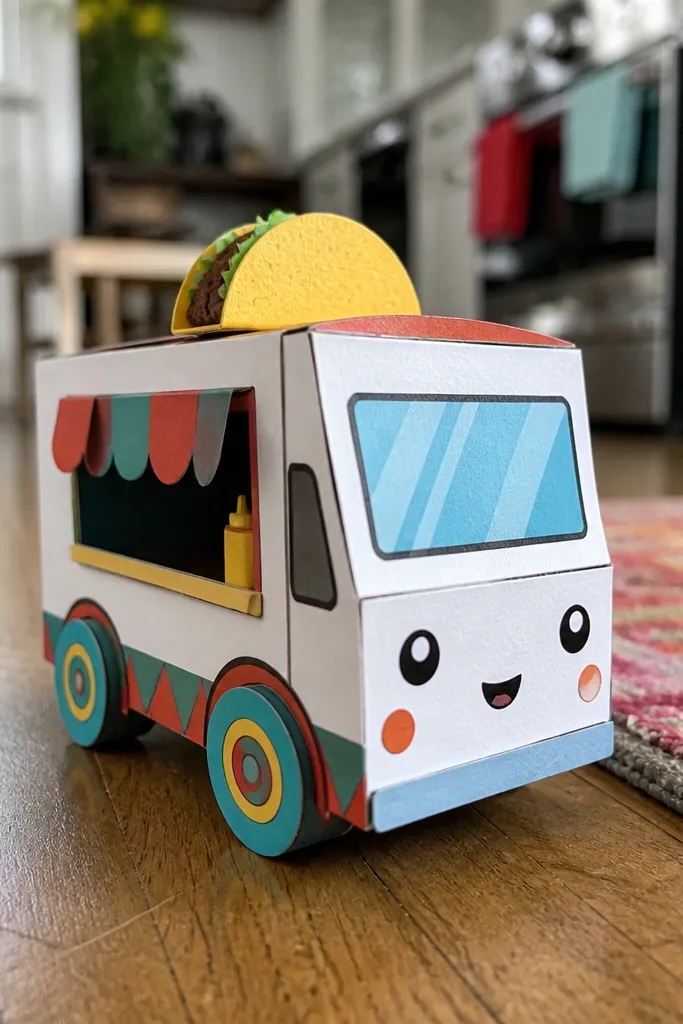
This is a themed Paper Squishy that looks like a mini diorama. The truck shape gives you straight lines, and the wheels give you a clear focal point. Make wheels as layered rings so they pop off the surface when squeezed. Add a little “window” panel and a smiling front so the truck feels friendly, not just cute.
Cut two truck body panels from sturdy cardstock and glue edges, leaving an opening on the bottom. Insert a flat foam pad that matches the truck base, then seal the bottom opening with an inner strip. Build wheels from three circles stacked with a foam ring between layers, then glue them onto the sides. Add a taco icon on the front using layered paper and a simple mouth with marker.
Editor's noteDraw wheel spokes on the top wheel layer before gluing; it keeps lines crisp.
Skip thisDon’t glue wheels directly to the seam; they’ll lift when the truck compresses.
9. Lemon Slice with Glitter-Free Zest Texture
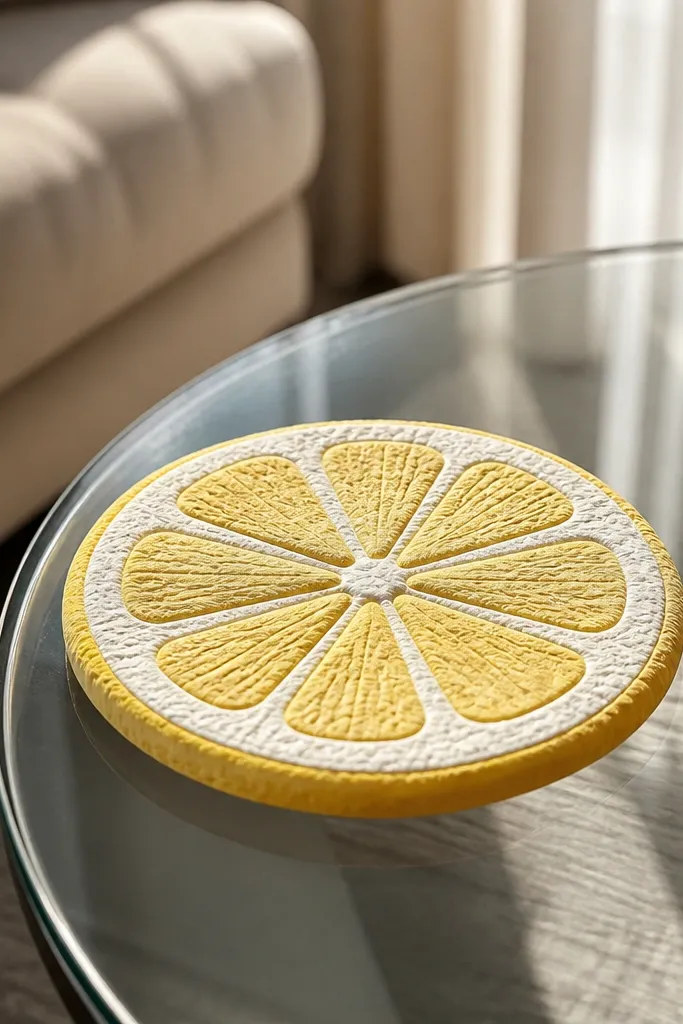
Citrus squishies look clean and modern because the color is simple and the texture does the work. Build a lemon slice with a raised white pith pattern so the center looks juicy. Skip glitter — it makes a mess and ruins the neat look. Use a slightly darker yellow edge ring to create depth when the squishy compresses and springs back.
Cut two lemon slice outlines from yellow cardstock and glue them together with a hidden opening. Insert a thin foam circle so the slice stays round and squishy. Cut pith segments from white paper and glue them into a radial pattern on the top surface. Add a darker yellow ring at the outer edge and draw tiny dot pores with a fine pen.
Use a toothpick to press shallow pith lines into paper for a subtle texture.
Avoid foam that’s thicker than 1 cm; it makes the lemon look like a blob.
10. Chocolate Chip Cookie with Crinkled Edges
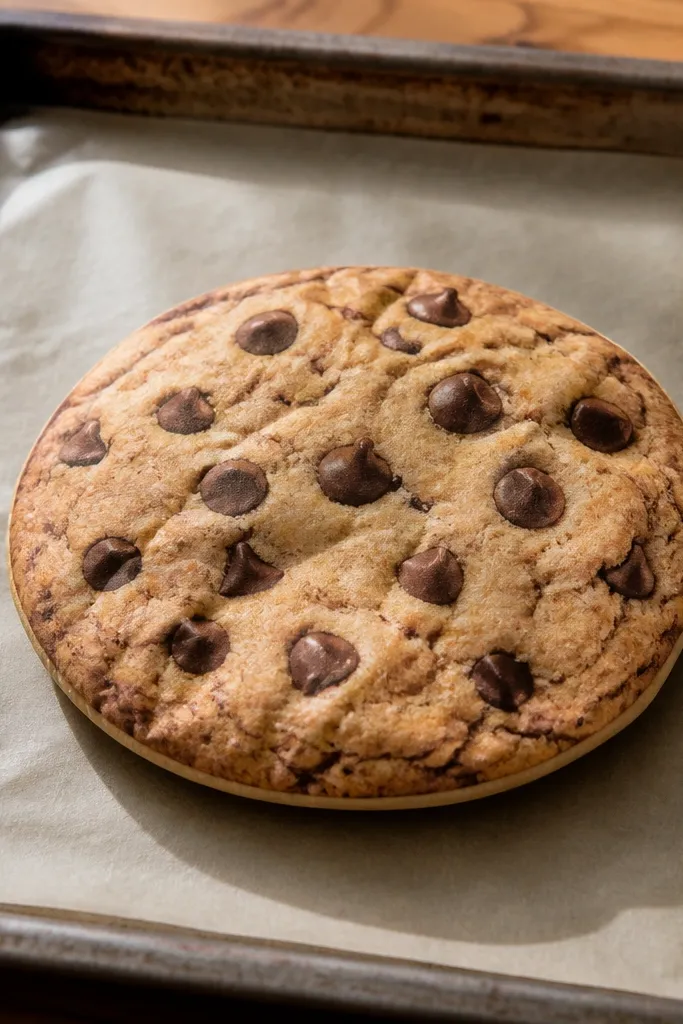
A cookie squishy reads instantly and looks cozy on photos. The best part is texture. Crinkle the top cookie paper lightly so it catches light in little waves, then add raised chocolate chips that sit on top. Use two outer layers so the circle keeps its shape when squeezed. The final piece looks like a snack toy, not a flat craft.
Cut two identical cookie circles from medium-thick brown cardstock and glue them together, leaving a small opening. Insert a foam circle or folded felt pad for squish, then seal with an inner strip. Cut small chocolate chip circles from darker brown paper, stack each with a tiny foam square, and glue them onto the top. Add a lighter brown outline ring to define the edge and make it pop.
Crinkle the paper with your fingers before assembling so you don’t distort the seam.
Don’t skip the foam/ felt center; a flat cookie crushes and loses the “squishy” look.
11. Berry Shortcake with Layered Whipped Top
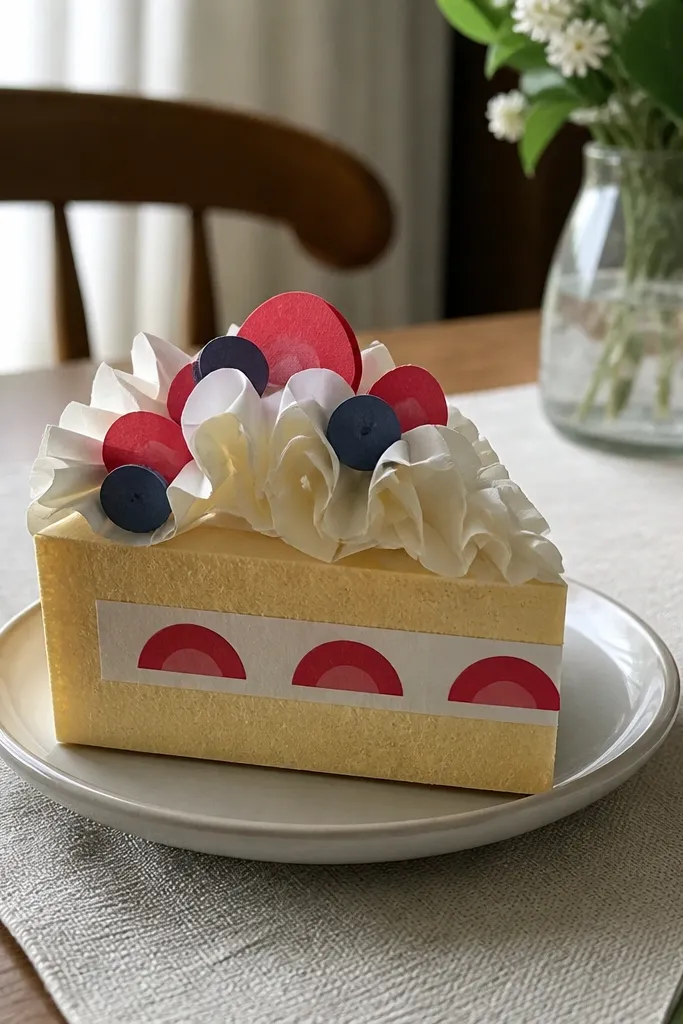
Shortcake looks amazing because it has clear layers and soft curves. This themed Paper Squishy uses a base slice with a foam center for squish, then builds a whipped top with multiple paper folds so it looks airy. Add berry dots made from layered paper circles that look like they’re sitting in the cream. Keep the color palette tight: creamy white, pale pink, and deep berry red.
Cut two shortcake slice panels from tan or pale brown cardstock and glue edges, leaving an opening. Insert a thin foam pad sized to the slice and seal with an inner strip. Make whipped layers by cutting two or three white paper pieces that slightly overlap, then add a thin foam layer between the top two. Glue berry dots on last, using a tiny foam square under each dot for height.
Use matte paper for the cream so shadows look soft instead of shiny.
Don’t glue berries directly to the foam; they’ll sink and look flat.
12. Cute Robot with Button Belly
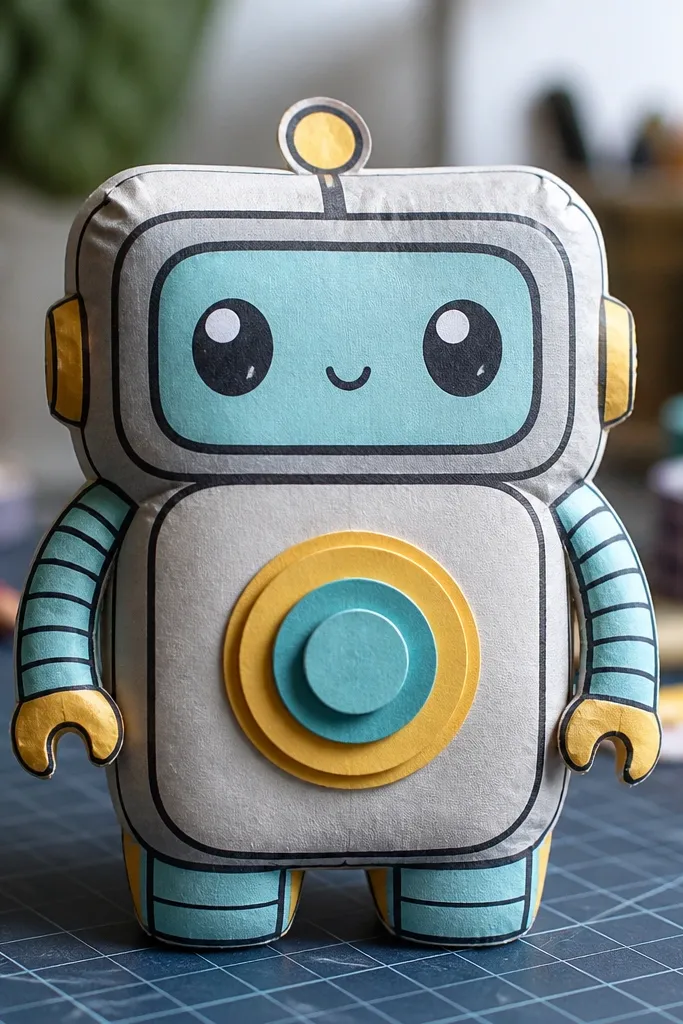
Robots are great for themed Paper Squishy because the shapes are graphic and easy to repeat across a set. The button belly gives you a raised centerpiece that’s fun to press. Build the body like a rounded rectangle pillow, then add a front panel with a few “buttons” made from stacked circles. Use thick outlines and a limited color scheme for a clean, photogenic look.
Cut two robot body shapes from sturdy cardstock and glue edges with a bottom opening. Insert a foam rectangle and seal the opening inside with a paper strip. Cut a slightly smaller front panel from a contrasting color and glue it on. Stack button circles with thin foam squares behind them and place them in rows on the belly.
Editor's noteFor symmetry, mark the button grid with a pencil before gluing anything.
Skip thisAvoid too many colors; the raised buttons already create visual noise.
13. Haunted House with Spooky Window Pops
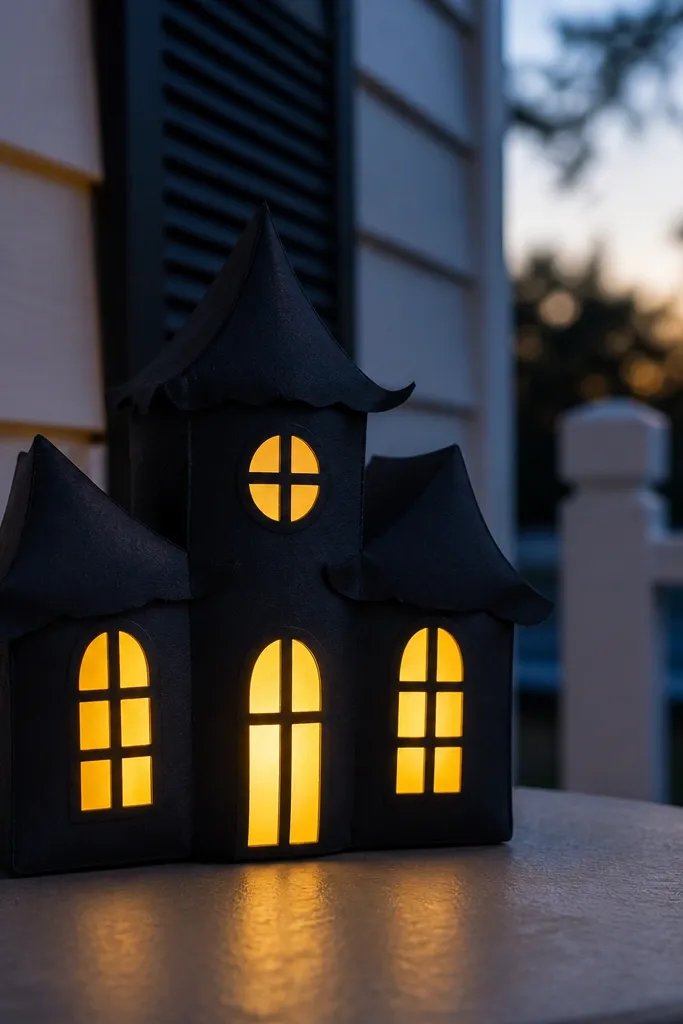
This is a Halloween-themed Paper Squishy that stays cute instead of messy. The house silhouette is simple, and the windows give you a controlled “glow” look. Build the body with a foam center, then add window frames that sit above the surface. For the glow, use yellow paper behind a darker frame, and keep the window shapes consistent so photos look sharp.
Cut two haunted house panels from dark cardstock and glue edges, leaving a bottom opening. Insert a foam pad and seal with an inner strip. Cut window frames from black paper, then glue a yellow rectangle inside each frame. Add the door with layered rectangles and glue it on last so it doesn’t get crushed by the seam.
Use a ruler to keep the roof angle straight; skewed roofs look sloppy in photos.
Don’t use tissue paper for the glow; it wrinkles and tears when pressed.
14. Flower Pot with Raised Petals
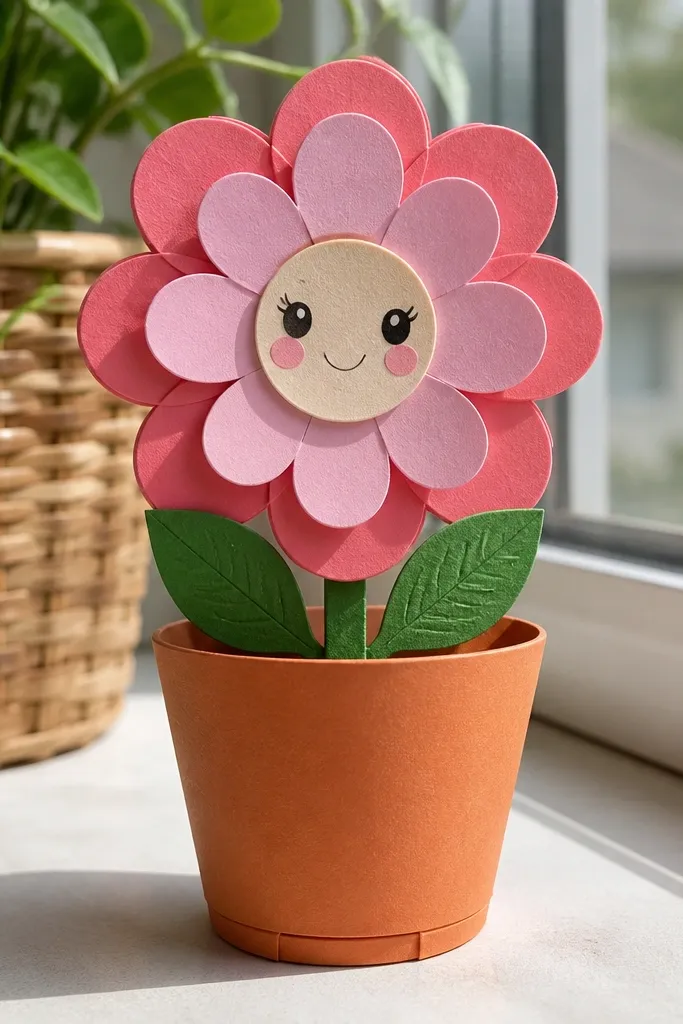
A flower pot themed Paper Squishy looks bright, but it only looks good if the petals have height. Make the petals as layered paper shapes with a thin foam backing so they look like they’re popping out. The pot itself should be firm enough to stand, so use cardstock and keep the bottom seam tight. Add a small face on the pot front so it reads as a character even from a distance.
Cut two pot shapes from sturdy green or terracotta cardstock and glue edges with a narrow opening at the base. Insert a flat foam pad and seal the opening with an inner strip. Cut multiple petal layers from colored paper, stack them with thin foam between layers, and glue them around a center circle. Attach the petals to the top of the pot, then add a face with marker and tiny leaf cutouts.
Make the pot slightly wider at the base so it stands without leaning.
Avoid flimsy paper for petals; thin sheets collapse and the flower looks flat.
15. Ocean Shell with Spiral Texture
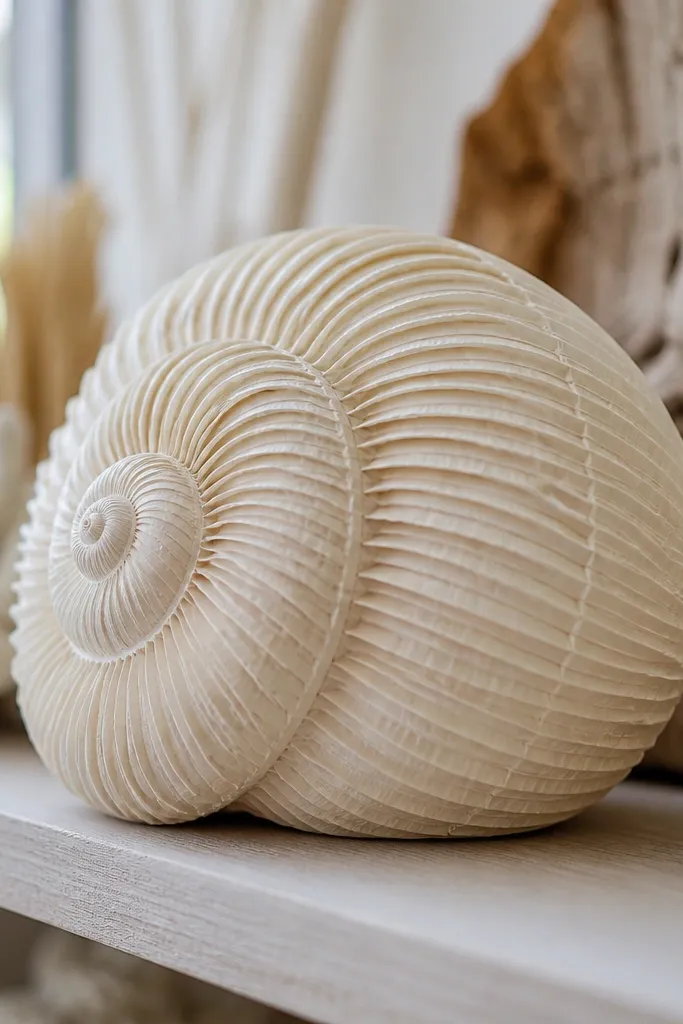
Shells look elegant in photos because the spiral gives you a natural focal point. This themed Paper Squishy uses a spiral ridge pattern made from paper strips so it looks textured without needing expensive materials. Build it as a rounded squishy pillow with a foam insert, then add the spiral ridge on top in cream and light brown. Small dot accents make it feel detailed but still clean.
Cut two shell outlines from cream cardstock and glue edges, leaving a side opening. Insert a foam pad and seal with an inner strip so the spiral top stays smooth. Cut spiral strips from light brown paper and glue them starting at the center, working outward. Add tiny dot accents by punching circles or cutting small beads from darker paper.
Editor's noteUse a slightly darker brown for the spiral edges so the ridges show up when squeezed.
Skip thisSkip thick glue under the spiral strips; it makes lumps that show through.
16. Cat Whisker Squishy with Bow Tie
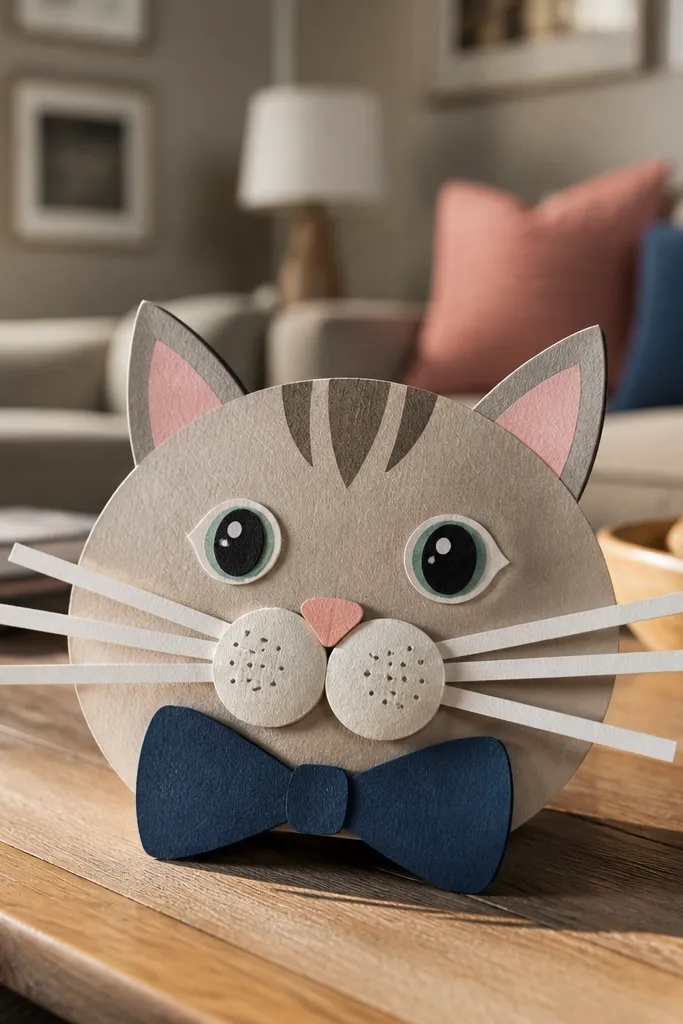
Cats are a safe choice for themed Paper Squishy, but the look depends on the whiskers and ears. Make whiskers with paper strips glued at angles so they don’t sag, and add a bow tie that gives a clear style signal. Build a firm cat face base with two cardstock layers and a foam insert so the cheeks and nose area stay puffy. Use a simple nose triangle and a curved mouth for a clean, readable face.
Cut two cat face bodies from gray cardstock and glue edges with a small opening on the back. Insert a thin foam pad and seal with an inner strip. Add ears by cutting two triangular pieces and gluing them on top, then attach whisker strips on both sides of the face. Finish with a bow tie made from two small paper loops and a center knot, then draw nose and mouth.
Editor's noteCut whiskers slightly longer than you think, then trim after gluing so symmetry is easier.
Skip thisAvoid fuzzy yarn whiskers; they shed and fuzz up the photo.
17. Sports Ball Mini Squishy Set
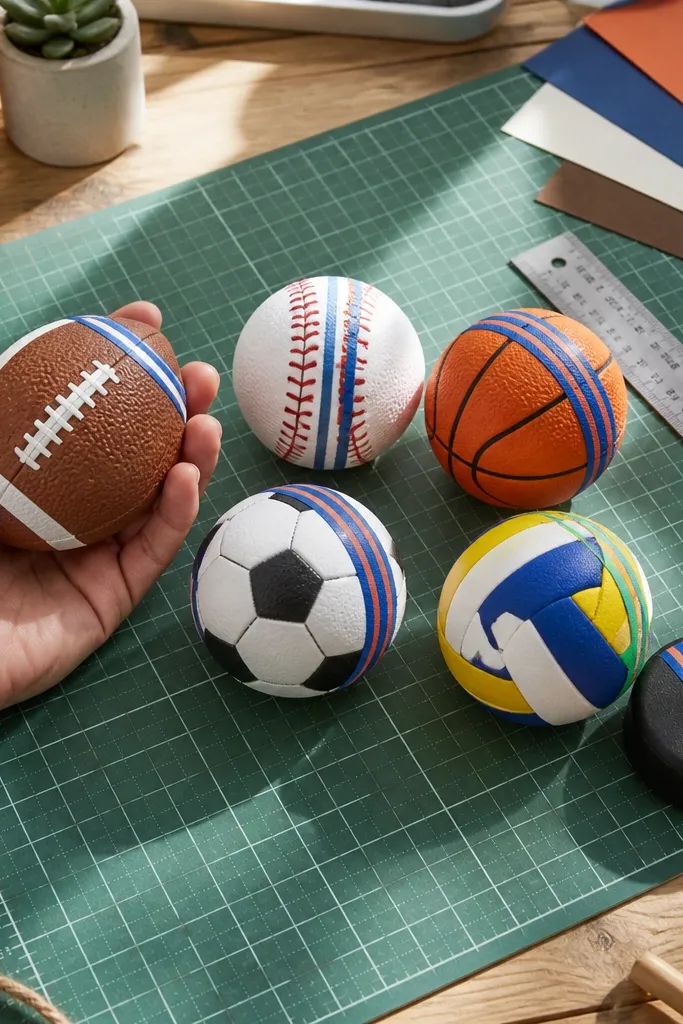
A themed set beats a single squishy when you want photos that look like a coordinated craft table. Sports balls are perfect because each one uses repeating shapes: seams, panels, and team-color stripes. Build each ball with a foam insert so it compresses and springs back, then draw or glue seam lines for definition. Keep the sizes consistent for a tidy look and easy stacking.
Cut two circle panels for each ball from cardstock and glue edges, leaving a small gap. Insert a small foam ball piece or folded felt pad, then seal the gap with an inner strip. Add seam lines by drawing with a black marker or gluing thin paper strips shaped into arcs. Finish with panel shapes in team colors and keep the lines thick enough to read in photos.
Editor's noteUse the same marker for all balls so the seam line thickness matches across the set.
Skip thisDon’t make the seam lines too thin; they disappear when the ball compresses.
18. Candy Heart Squishy with Raised Message Panel
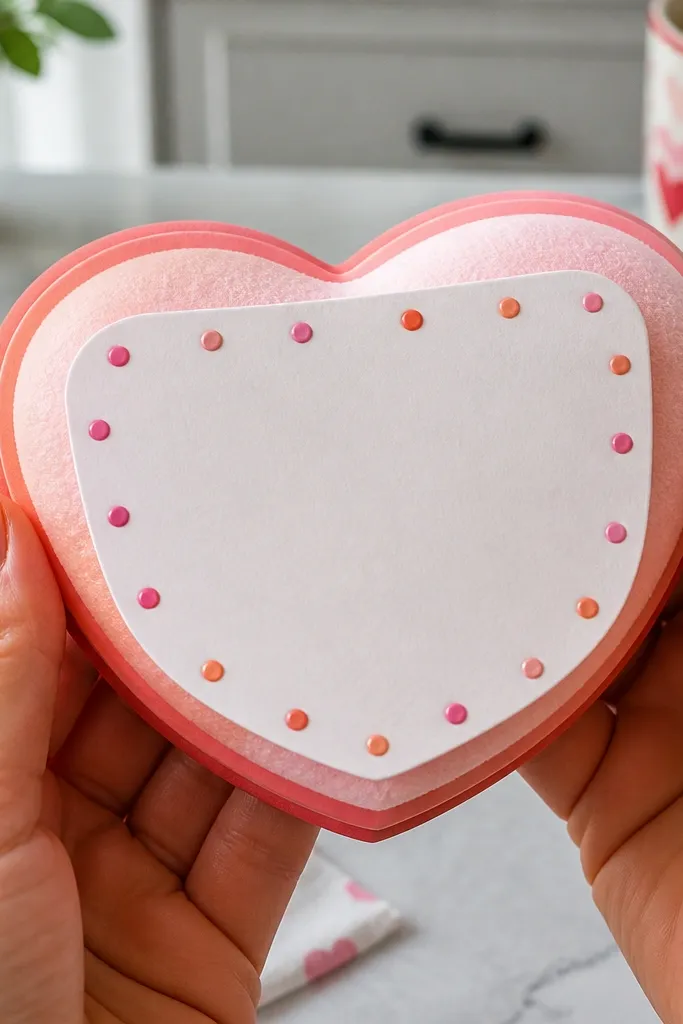
Candy heart themed Paper Squishy looks sweet without needing full characters. The magic is the raised message panel: it adds depth and gives you a clean place for a short phrase or name. Build a heart pillow with a foam insert, then glue a white label rectangle on top with rounded corners. Add tiny dot accents in a contrasting color to make the heart look festive in every photo.
Cut two heart shapes from pink cardstock and glue edges with a bottom opening. Insert a foam pad and seal the opening with an inner strip. Cut a white label from cardstock and glue it on the front so it sits flat and centered. Add dot accents by gluing small circles around the label, then write the message with a fine marker.
Editor's noteUse rounded-corner label cutouts; sharp corners catch on clothing and look rough over time.
Skip thisAvoid writing directly on the foam; it smears and dents when squeezed.
19. Butterfly Wing Squishy with Layered Veins
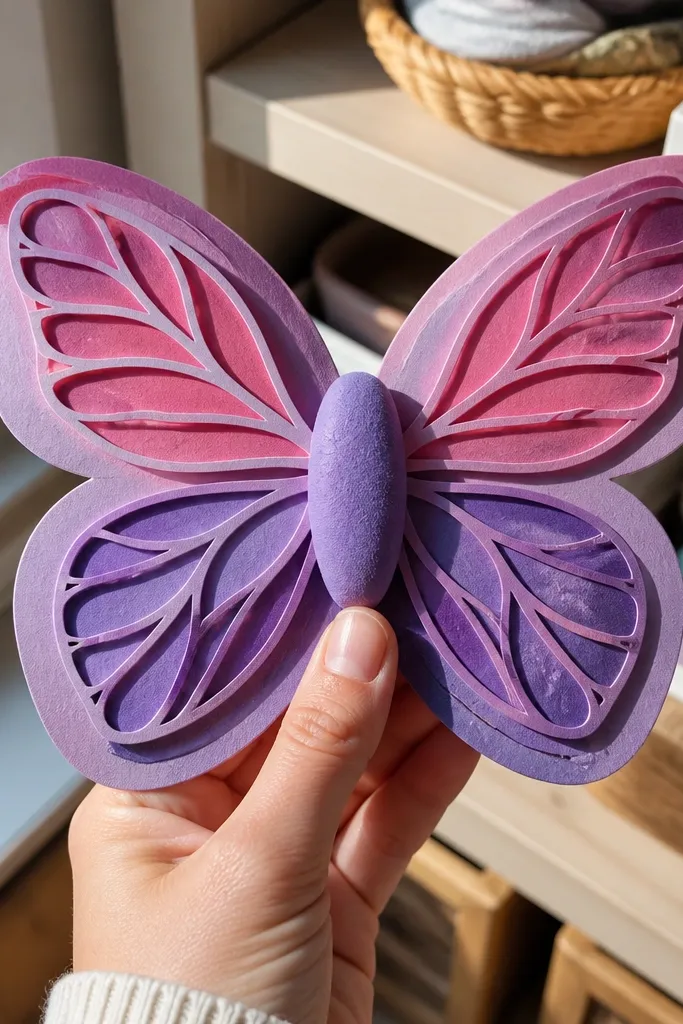
Butterflies photograph like mini art pieces because their wings are naturally symmetrical and colorful. This themed Paper Squishy builds wing layers with paper veins so the surface has structure, not just color. Make the body a small foam-centered rectangle or oval, then attach wing panels with a slight gap so the wings look lifted. Outline the wings with a darker marker so the veins stay readable.
Cut two matching wing panels from colorful cardstock and add vein strips by gluing thin paper lines across each wing. Build the body from two oval panels and glue edges, leaving an opening for a small foam insert. Seal the body and glue the wing panels to the sides of the body, leaving the wings slightly raised. Add antennae using thin paper strips folded into arcs and glue them on last.
Press the veins down with a bone folder so they lie flat and don’t curl.
Don’t glue wings directly into the seam area; squeezing will warp them.
20. Monstera Leaf Squishy Plant Friend
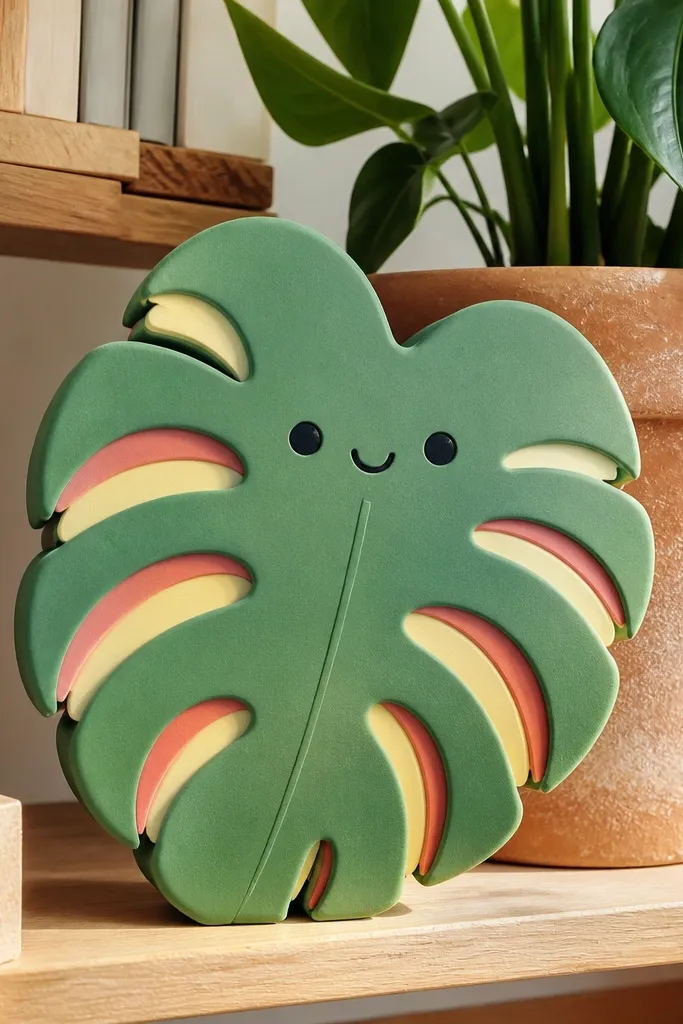
Plant-themed Paper Squishy looks modern and calm, and it’s also one of the easiest to make look “designed.” Monstera leaves already have cutouts, so you can turn those into a layered look with foam-backed inner shapes. Keep the leaf centered and use a simple face near the top so it reads as a character. The foam insert helps the leaf hold its curves instead of flattening.
Cut two monstera leaf silhouettes from thick green cardstock and glue edges with a hidden opening along the stem. Insert a thin foam sheet sized for the leaf body and seal with an inner strip. Cut leaf hole shapes from darker green paper and glue them on top with small foam pieces behind so they pop. Add a tiny face using black marker and glue on a short stem strip at the bottom.
Use two shades of green for the cutouts so the holes look layered in photos.
Avoid super-thin green paper; it wrinkles around the foam insert.



