
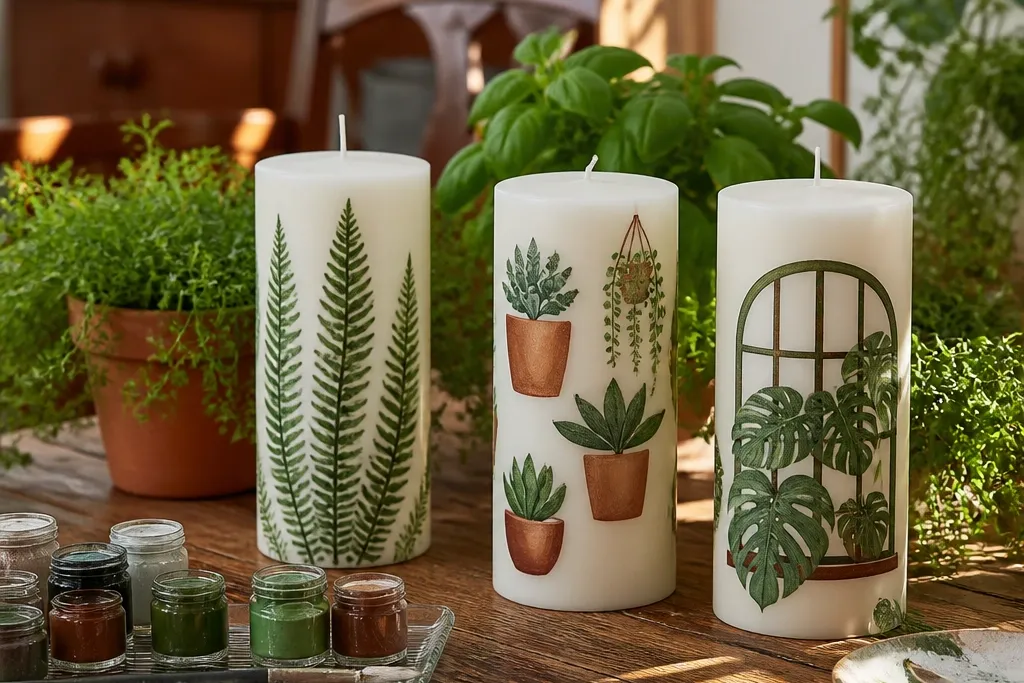
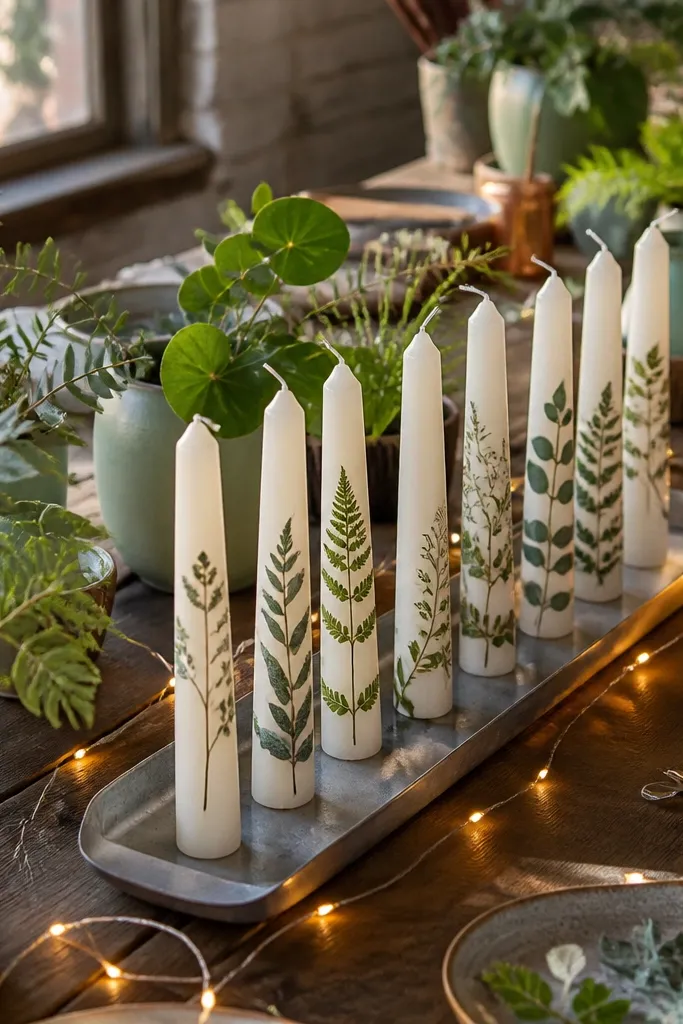
1. Forest Fern Panel Candle
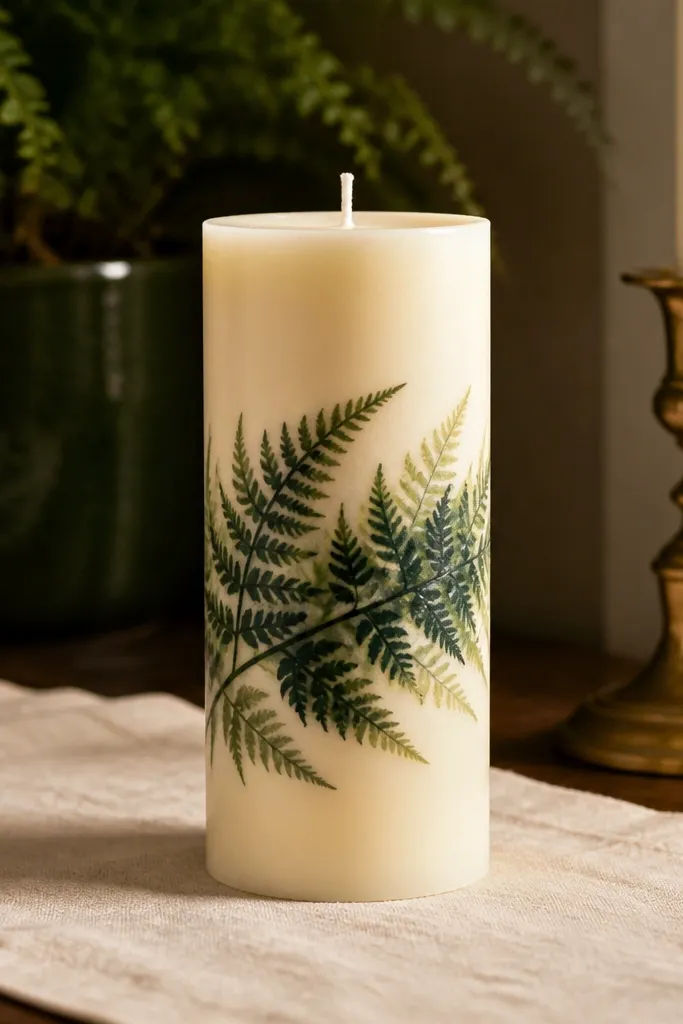
This one looks like pressed botanicals, but it’s faster than it sounds. Paint a single fern frond cluster across the middle of a cream candle, then add lighter “air” strokes along the edges so it reads as leafy, not scribbly. Use three greens — deep forest, olive, and sage — so the fronds have depth under warm light. It suits moodier spaces like a reading corner, entryway, or a fall plant party where you want drama without neon colors.
Start by sketching a simple center stem with 5-7 angled leaflets on each side. Block in the fern with deep forest green, then stamp or swipe sage along the top edges to create highlights. Finish by adding 2-3 thin olive lines on the leaflet centers using a fine liner brush. Let dry fully, then seal with a clear matte topcoat so the paint doesn’t smear when touched.
Editor's noteUse a stiff bristle brush for the fern frond edges; it makes leaf texture without you drawing every vein.
Skip thisSkip painting tiny leaf veins all the way to the tips — it turns into a blur in party photos.
2. Terracotta Pot Succulent Trio
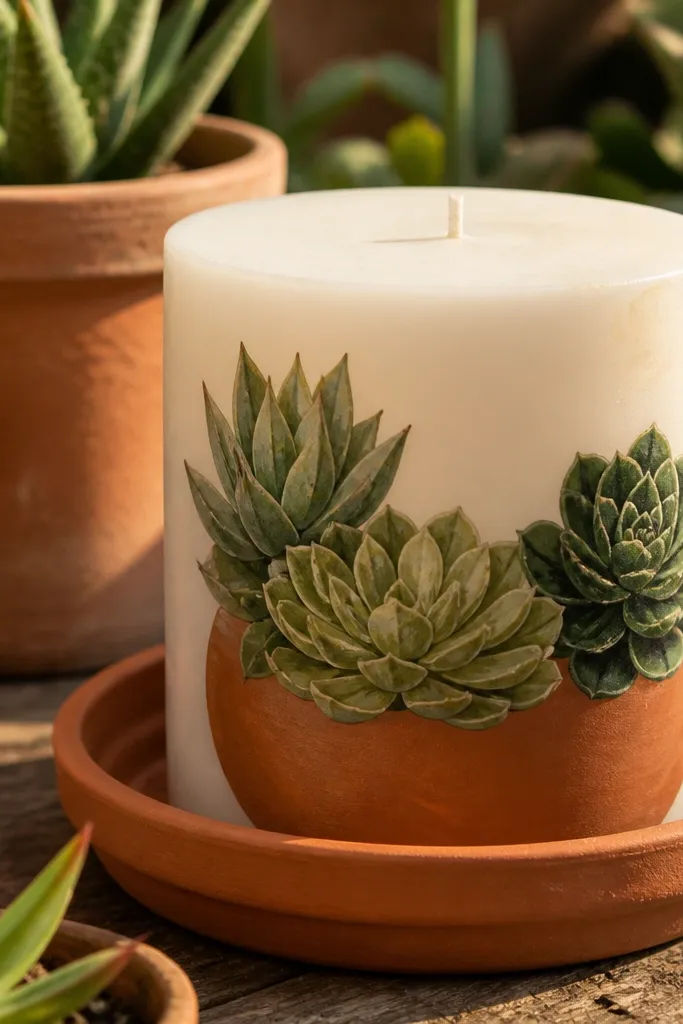
Succulents photograph clean and graphic, and the terracotta base makes the whole design feel intentional. Paint a rounded pot shape at the bottom third, then place three rosette succulents above it — one tall, one flat, one slightly tilted. The contrast between warm terracotta and cool greens makes your candle look like a mini garden centerpiece. It’s a great fit for spring birthdays, bridal showers, or any party where you want cute, not spooky.
Paint the pot first: a terracotta rectangle with curved corners at the bottom third, then add a darker terracotta band for depth. Block in the succulents with olive and sage using a rounded brush for the rosette petals. Add cream highlights on the outer petals and a tiny dark center for each succulent. Seal with matte topcoat after the paint dries.
Editor's noteKeep your succulent rosettes about 1 inch tall each; smaller shapes get lost on a taper candle.
Skip thisDon’t use too many green shades — four is plenty or the rosettes look muddy.
3. Vine Wrap Around Candle
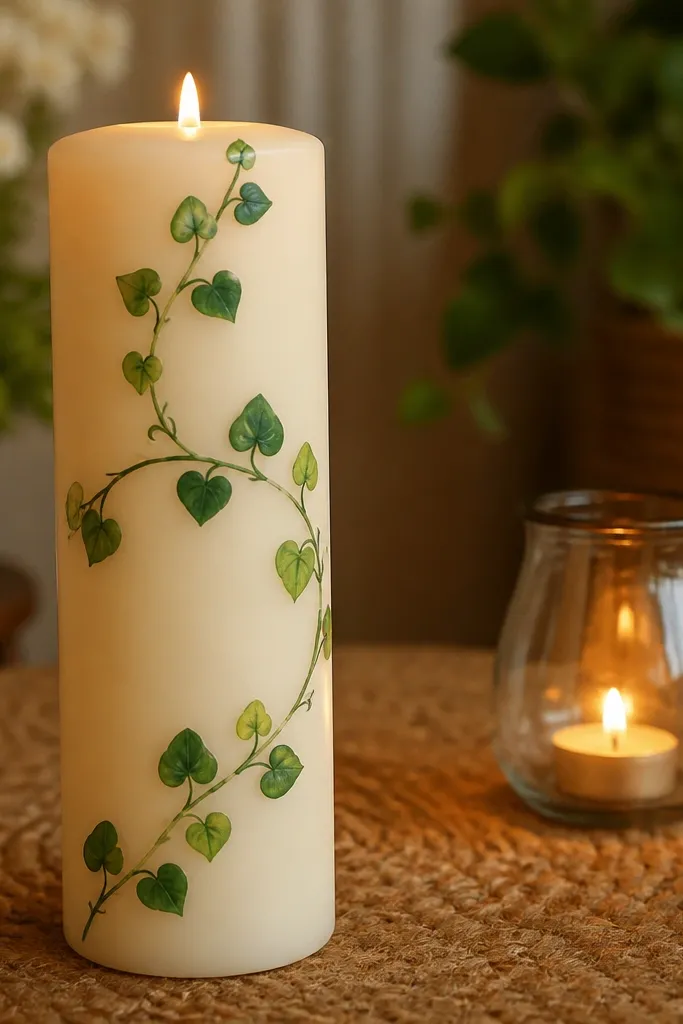
A wrap-around vine looks dynamic because it follows the candle’s vertical motion. Paint a looping vine that starts near the top, dips across the middle, then rises again toward the bottom. Add small heart-shaped leaves along the vine in pairs so the design looks balanced even if guests freestyle. This works especially well on tall tapers and slim pillars because the line movement shows up in photos from multiple angles.
Start by drawing a long curved guideline down the candle — light pencil or a thin paint line. Paint the vine stem in olive, then add leaf pairs as simple teardrops or hearts spaced about 1 inch apart. Finish with sage highlights on the leaf tops and a small shadow line under each leaf for separation. Let dry, then seal matte.
Use a ruler or painter’s tape to mark a straight “start and end” point so the vine lines up on the candle’s panel.
Avoid overloading the vine with leaves — the design gets crowded and the wrap effect disappears.
4. Monstera Window Frame Candle
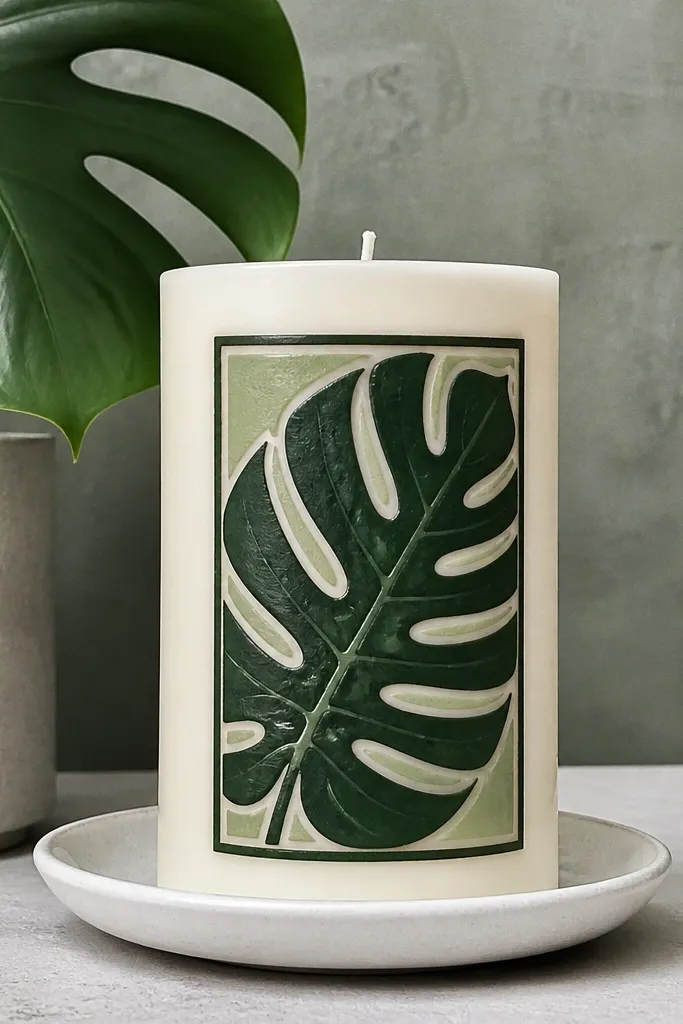
Monstera leaves are bold, and the cut-out shapes make a candle look modern and graphic. Build a thin “window frame” around the leaf so the design reads like a poster. Paint the main monstera in deep green, then fill the cut-out spaces with candle color or a light sage glaze. The framed look makes photos cleaner and keeps the party theme cohesive.
Draw a rectangular frame around the center panel using a fine brush or thin painter’s tape as a guide. Paint one large monstera leaf that fills most of the frame, leaving the cut-out areas open. Add internal “cuts” by painting thin outlines and then lightly shading the edges with sage. Seal matte once dry.
Editor's noteIf cut-out shapes are hard, tape small paper circles as masks while the base green dries, then peel and paint the outline.
Skip thisDon’t shade the cut-outs too dark; it makes the leaf look like a sticker instead of a leaf.
5. Eucalyptus Branch Minimal Candle
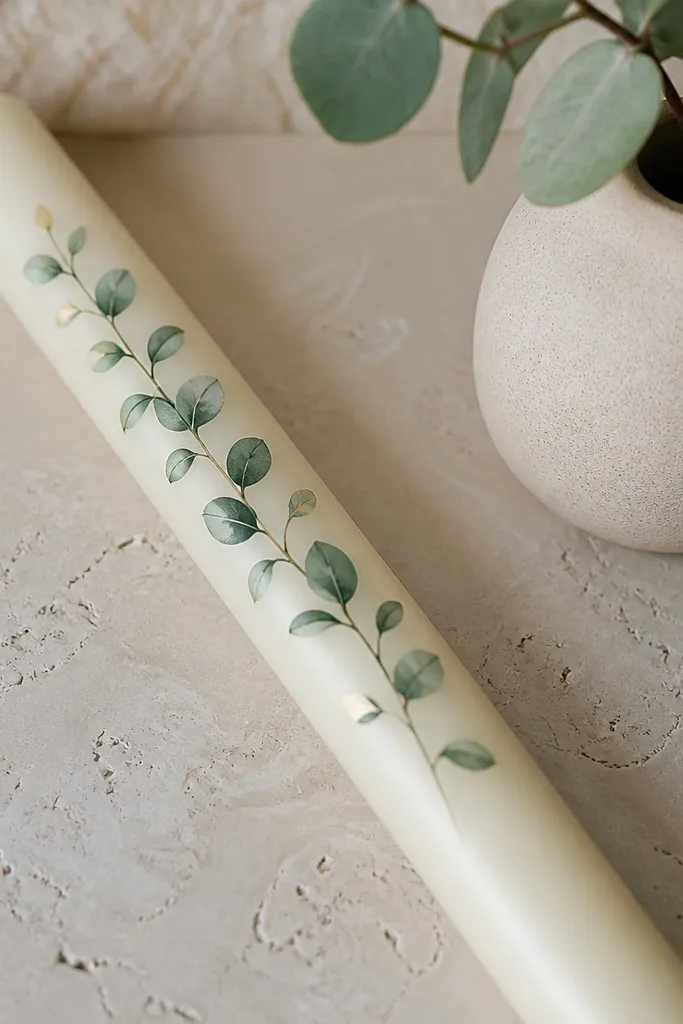
Minimal eucalyptus looks classy without being fragile. Paint one branch diagonally across the candle with small oval leaves and a few curled tips. The palette is forgiving: gray-green, sage, and a tiny bit of warm cream for highlights. This is ideal for upscale decor photos, and it’s also the easiest for guests who get nervous about drawing.
Paint the branch line first in olive or gray-green, then add oval leaves on both sides. Use a dry-brush technique: load sage on your brush, wipe most off, then lightly drag over the leaf shapes for texture. Add a thin darker edge line to a few leaves so the branch looks dimensional. Seal matte after drying.
Dry-brush works best with a flat or filbert brush — it keeps leaf edges soft.
Skip heavy outlines around every leaf; it makes the design cartoonish.
6. Palm Frond Sunset Glow Candle
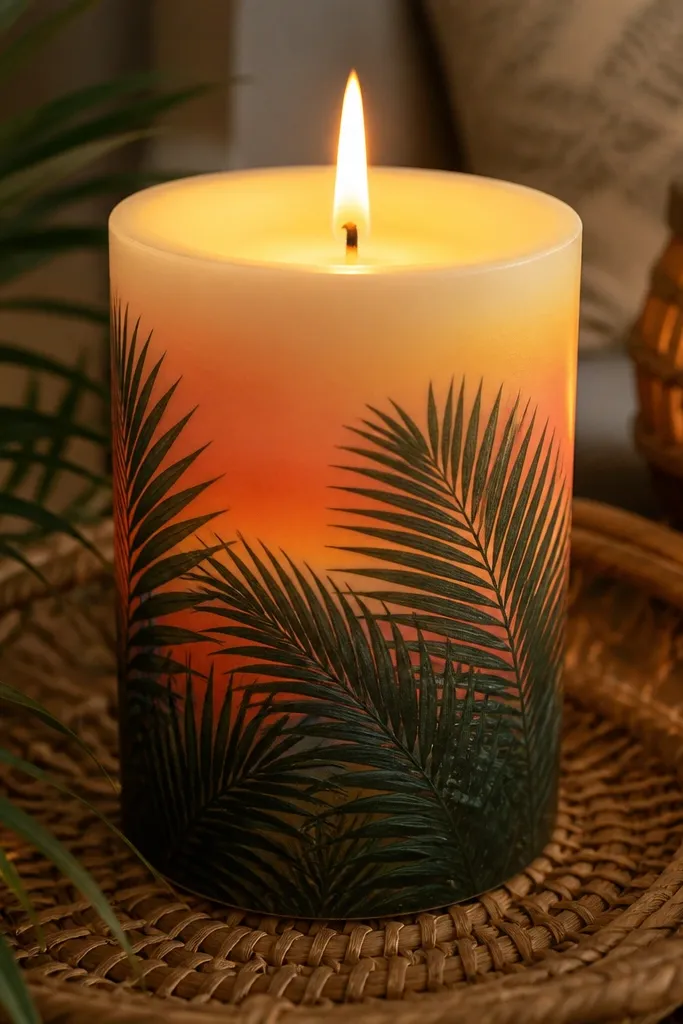
This one reads like a tropical postcard. Paint a warm gradient background behind the palm fronds, then layer dark green fronds on top so they pop. The contrast makes the candle look bright in photos even in dim party lighting. It suits summer parties and beach-themed events, and it’s more forgiving than it looks because the fronds are just sweeping strokes.
Blend a sunset gradient across the middle panel: start with warm yellow at the top, then add orange, then a touch of terracotta near the bottom. Let it dry enough to not smear, then paint palm fronds in deep green with long curved strokes. Add thin sage highlights on the frond edges and a few small frond tips. Seal matte to lock it in.
Use a sponge for the gradient — it avoids streaky brush marks that show up under flash.
Don’t paint fronds before the gradient sets; the colors will bleed together.
7. Herb Garden Labels Candle Set
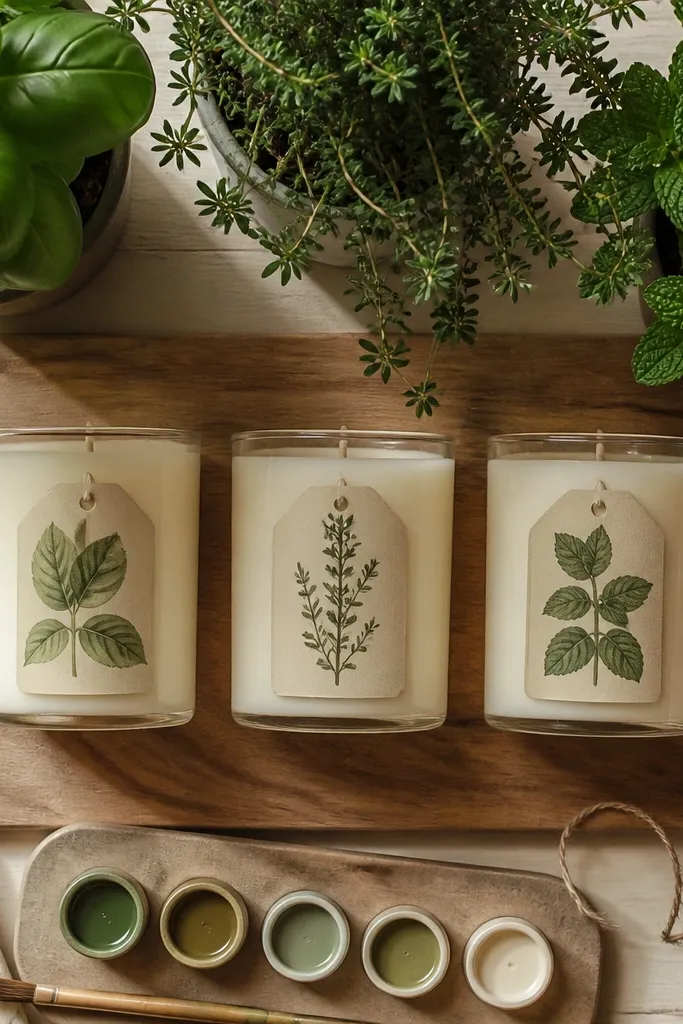
This is a party-friendly design because it’s consistent and easy to repeat across a set. Each candle gets a little label like “Basil,” “Thyme,” or “Mint,” plus a small painted sprig. The label format makes your photos look coordinated even if each guest chooses a different herb. It also feels useful, which helps guests see the point of the project beyond “just paint.”
Paint a label rectangle on the candle’s center using warm cream or light gray. Add a simple herb icon above or beside the label: basil is tiny leaves on stems, thyme is small clustered dots, mint is paired leaves. Write the herb name with a fine brush — keep letters about 1/8 inch tall. Seal matte once everything is dry.
Editor's notePractice lettering on paper first and use the same brush for all labels so guests get similar line thickness.
Skip thisDon’t go too small with text; 1/8 inch tall is the limit for readable photos.
8. Crown of Leaves Topcap Candle
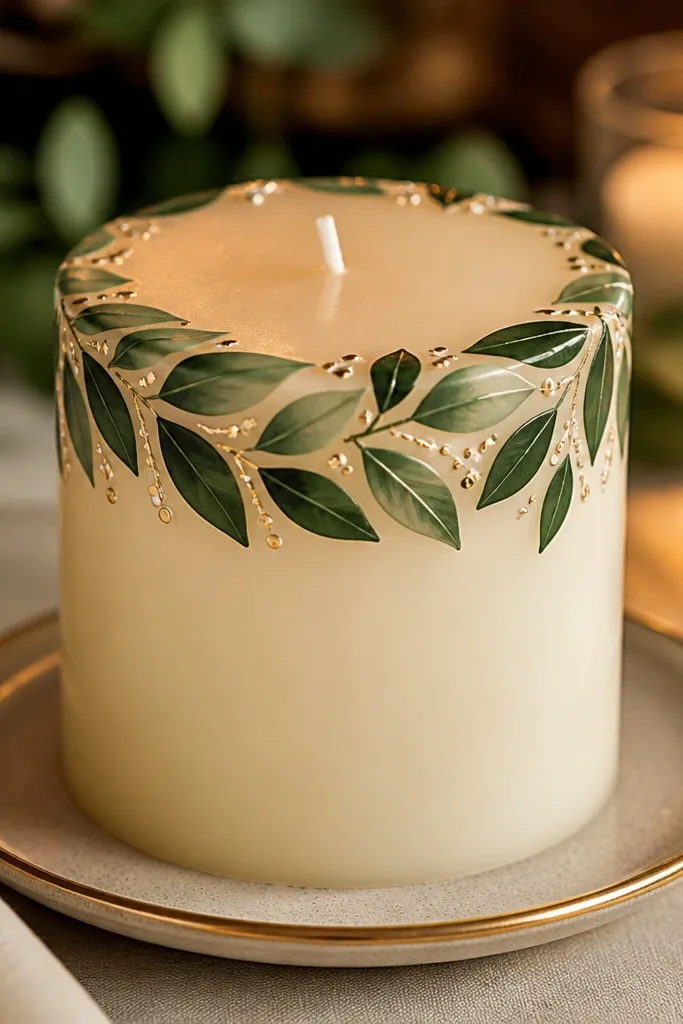
Painting near the top makes this candle look like decor even without lighting. Create a semicircle “crown” of leaves around the top third, then add a tiny gold line or dot accents for sparkle. It’s photogenic because the top area catches light and frames the flame. This idea works best on pillars and thick tapers where the top surface is stable for painting.
Mark a semicircle guide around the top third using light pencil. Paint leaf shapes along the arc in deep green, then add sage highlights on the upper edges. Add 5-7 tiny gold dots or short gold dashes between leaves to mimic light catching. Seal matte carefully so the gold doesn’t smear.
Editor's noteUse gold acrylic paint sparingly — a few dots look intentional, heavy gold looks flat.
Skip thisSkip painting right up to the wick area; leave a clear margin so wax handling stays clean.
9. Rainforest Layered Leaves Candle
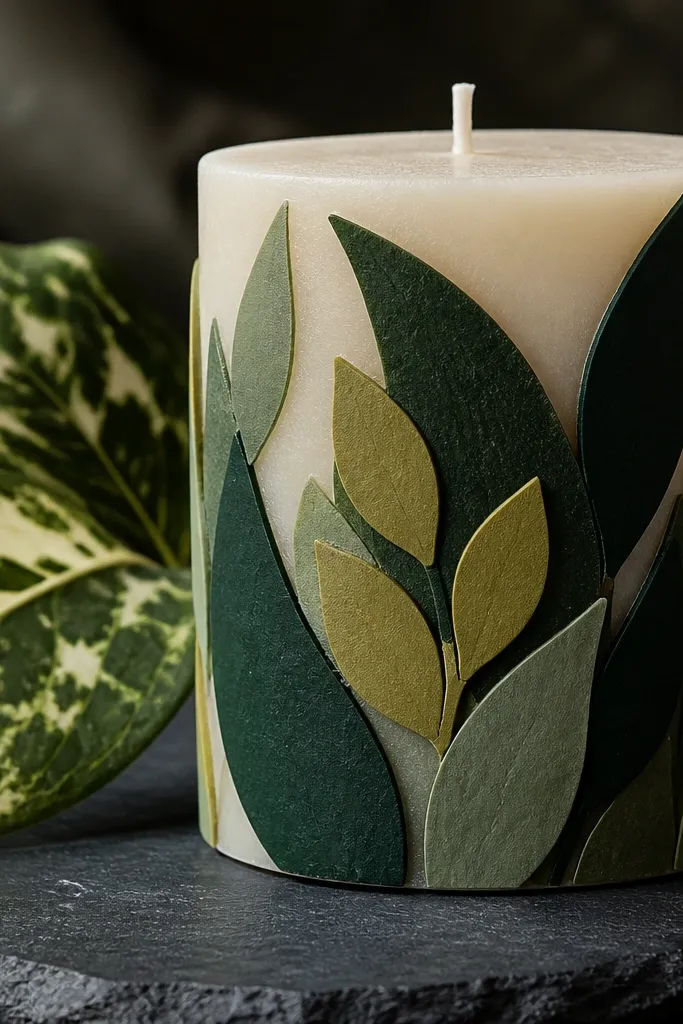
Layered leaves make depth without requiring advanced drawing. Paint one large leaf silhouette in deep green, then overlay smaller leaf shapes in olive and sage so they sit like layers in a collage. Add a thin shadow line between layers so it looks cut-and-paste. This gives you a lush, full look that still finishes fast — perfect if you want a strong party aesthetic without complex steps.
Start with a base leaf silhouette centered on the candle in deep green. Add two smaller leaf silhouettes on top using olive, then add sage highlights as partial fills or edge strokes. Use a fine brush to trace a thin darker outline where layers overlap. Let dry fully, then seal matte.
Keep leaf silhouettes simple — big shapes read better than detailed leaves for a group project.
Avoid using watered-down paint for layers; it causes muddy edges when sealed.
10. Botanical Border Checker Candle
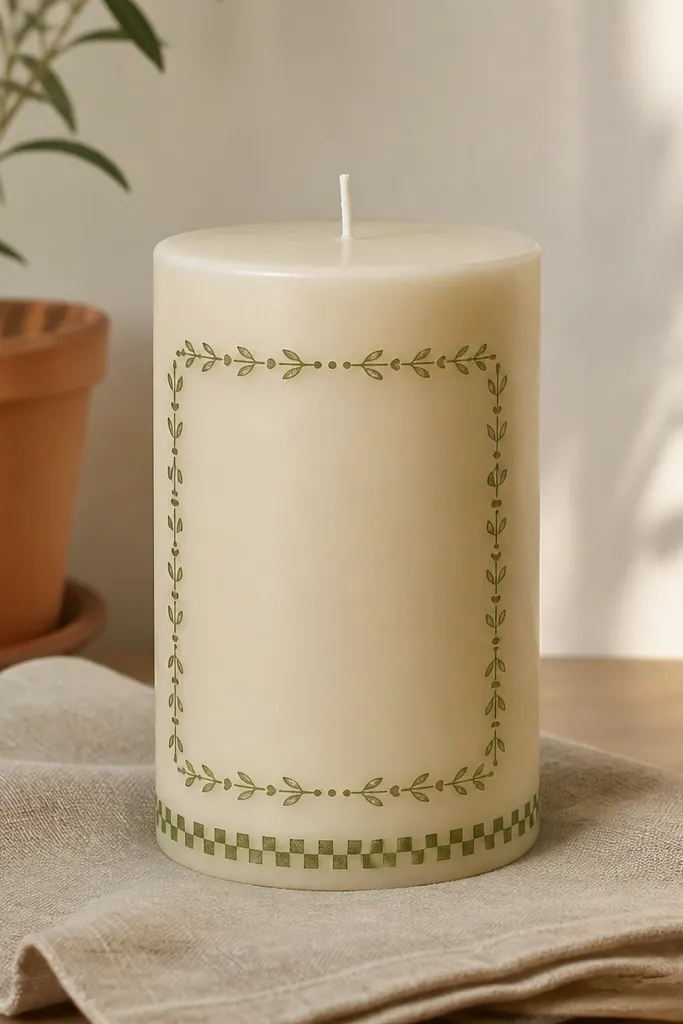
A border makes the candle look designed, not accidental. Paint a thin leafy border around the edges of the candle’s center panel — think small alternating leaves and tiny dots. Pair it with a checker strip in one green shade to create rhythm. The result looks crisp in photos and gives guests a framework when they’re unsure what to paint.
Paint a narrow border rectangle on the candle with painter’s tape as guides. Inside, alternate small leaf shapes and dot accents along the border. Add a simple checker strip band in sage or olive across the middle panel. Seal matte after drying.
Editor's noteTaping edges first saves you from wobbly borders that show in close-up photos.
Skip thisDon’t paint a full background wash behind the border; it steals focus from the leaves.
11. Cactus Glow Night Candle
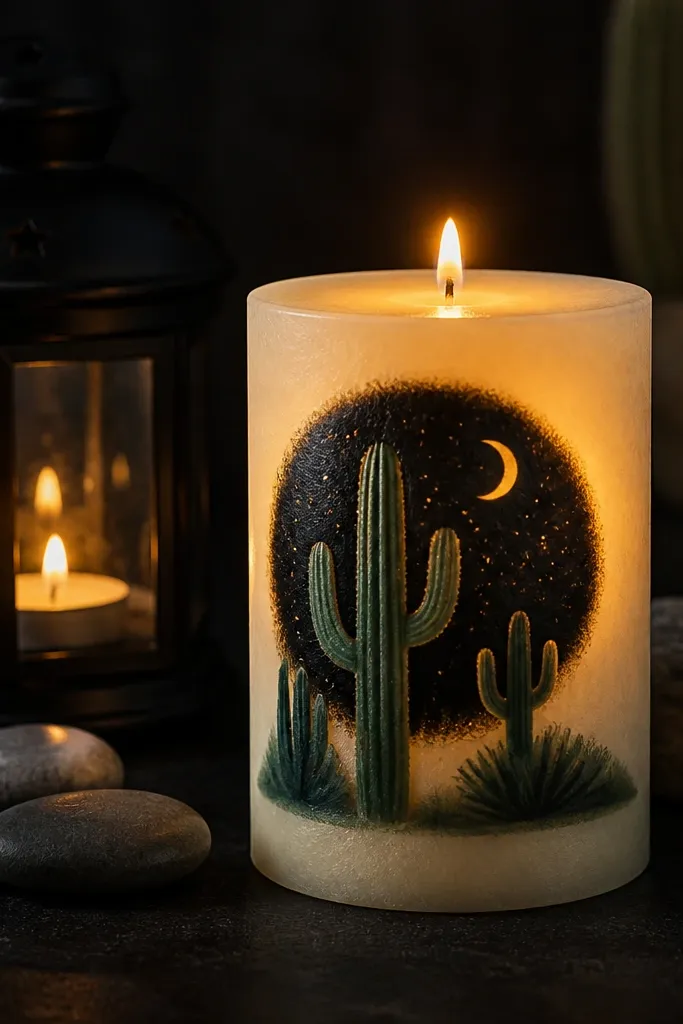
Cactus designs look striking because they have strong shapes and limited colors. Paint a dark night background circle behind the cactus, then add two or three cactus arms in deep green with sage highlights. Add a warm cream “glow” halo around the circle so the candle looks like it’s lit even when it’s not. This fits desert themes, Halloween-adjacent parties, or any night event where you want moody photos.
Paint a circular halo background in warm cream on the center panel. Layer a darker ring behind it using olive or deep green, then paint cactus bodies on top in deep green. Add sage highlights along cactus ribs with short vertical strokes. Seal matte once dry.
Use a stencil circle or a jar lid to trace the halo so the glow reads clean.
Don’t outline the cactus in black; it looks harsh and kills the soft glow effect.
12. Bamboo Tall Strokes Candle
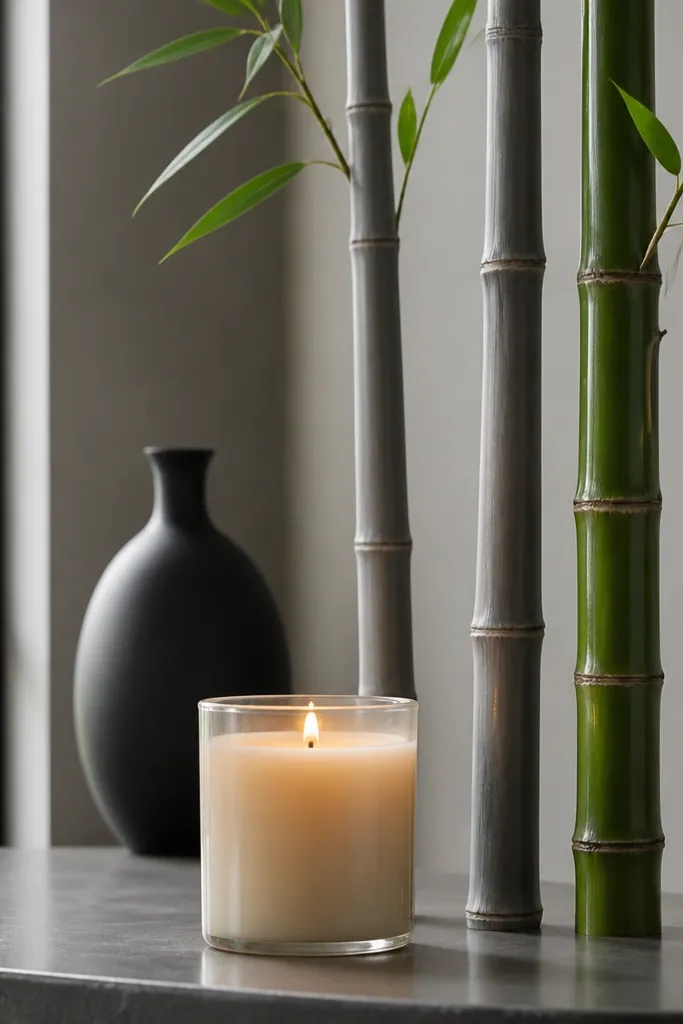
Bamboo is easy to make look elegant because the shape is simple and repeats well. Paint two or three vertical stalks with node rings, then add a few angled leaves at the top. Keep it mostly monochrome with one highlight green — it reads modern and clean. This is a strong choice for minimalist decor rooms or when you want a calm vibe.
Paint 2-3 vertical bamboo stalk lines in deep green across the center panel. Add node rings by painting short horizontal bands across each stalk in olive. Paint small angled leaf clusters at the top using sage and short brush flicks. Finish with a few tiny leaf shadows and seal matte.
A liner brush makes node rings look even; a wide brush makes them look smeared.
Skip too many leaves at the top; three clusters is enough.
13. Daisy and Clover Garden Mix Candle
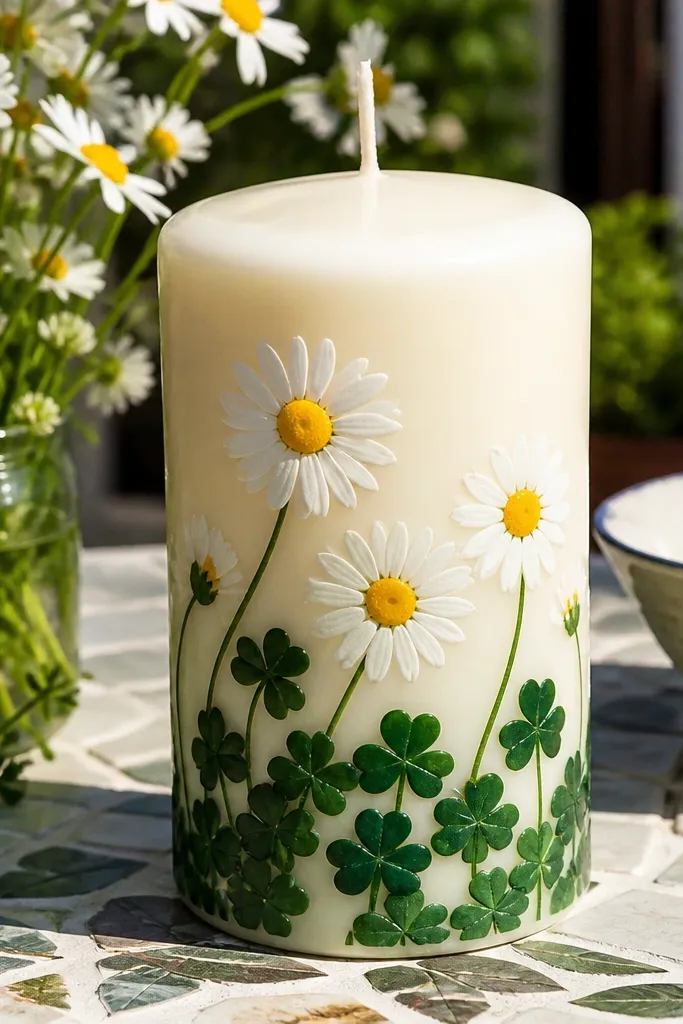
This design mixes plants in a way that still stays cohesive: daisies give the bright focal point, clover fills the bottom. Paint daisies with white petals and a warm yellow center, then add clover leaves as three-lobed shapes. The look is cheerful and bright in photos, and it helps guests who want something “garden-y” without doing only leaves. It’s perfect for spring parties and baby showers.
Start with stems in olive running up from the bottom third. Paint clover leaves as three small ovals branching from a tiny stem. Add daisies in the top half: paint five white petals around a warm yellow center, then add a thin green outline to separate petals from the candle. Seal matte after drying.
Editor's noteUse a toothpick to place tiny yellow centers cleanly without dragging paint.
Skip thisDon’t overwork the daisy petals; five petals with crisp edges reads better than many messy strokes.
14. Wheat and Wild Grass Candle
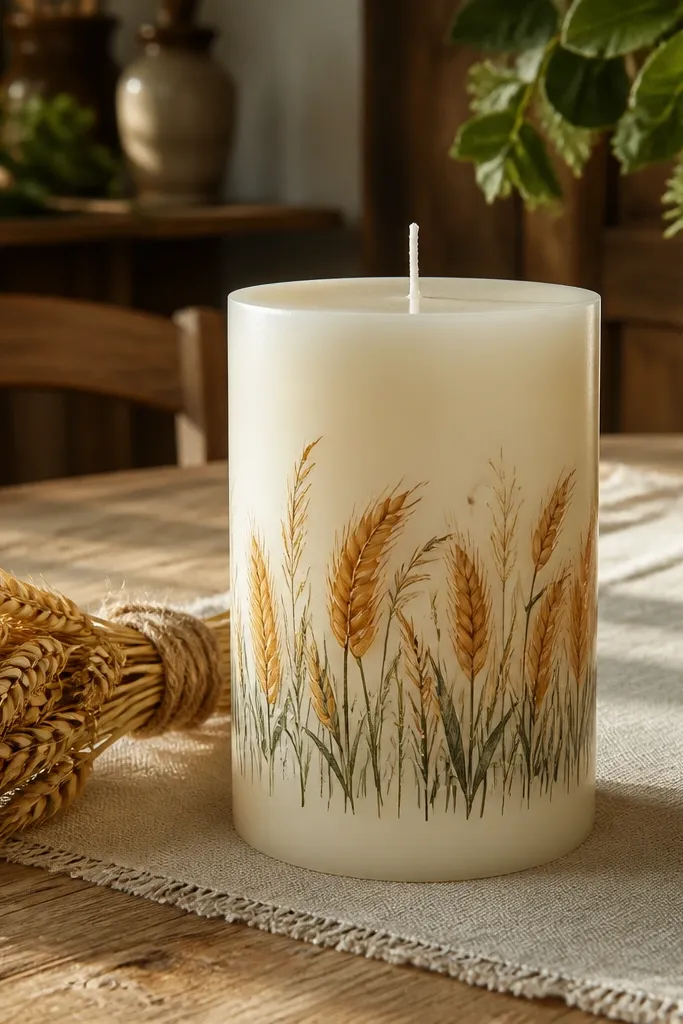
If you want “natural” without looking like a beginner project, wheat and wild grass is the move. Use a warm gold or mustard for the grain heads and deep green for stems. Add a few wild grass blades as thin lines — just enough to make it feel airy. This looks great on off-white candles and pairs well with rustic tables and dried flower decor.
Paint a cluster of wheat stalks from the bottom third using deep green vertical lines. Add wheat grain heads near the top using short horizontal strokes in mustard and warm gold. Finish with a handful of thin wild grass blades using sage — keep them lighter and fewer. Seal matte once everything dries.
Let mustard dry before adding gold highlights so highlights stay crisp.
Skip a full background color; grass and wheat need contrast to pop.
15. Basil Leaf Stamp Pattern Candle
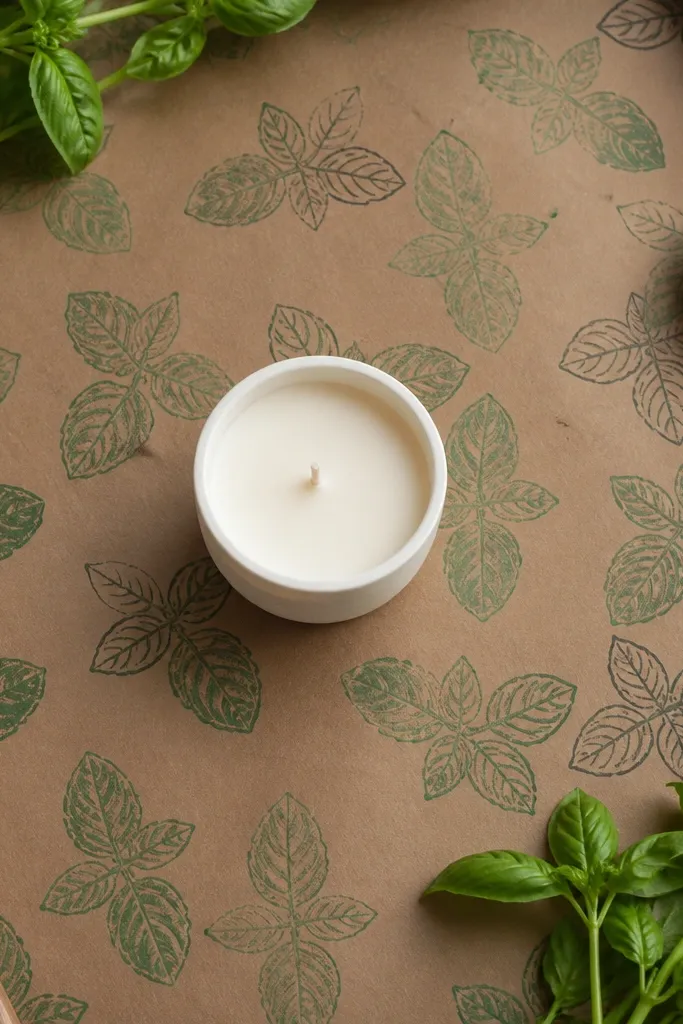
This is the fastest way to make candles look designed without relying on perfect drawing. Use a leaf-shaped craft stamp or a homemade stamp from a cut sponge to create repeating basil leaf shapes across the candle. Then add a few darker leaf outlines for structure. The repeating pattern looks modern and clean, and it’s ideal for big groups because everyone can keep painting while you manage the table.
Test your stamp on paper first to check paint thickness. Stamp leaf shapes in sage across the candle’s center panel, leaving small gaps. Add a second pass with deep green on only every other leaf to create a rhythm. Finish by sealing matte after drying.
Editor's noteThin acrylic slightly with water for stamping, but don’t make it run — you want crisp edges.
Skip thisDon’t stamp too close together; overlapping makes the pattern look like a blob.
16. Plant Shadow Silhouette Candle
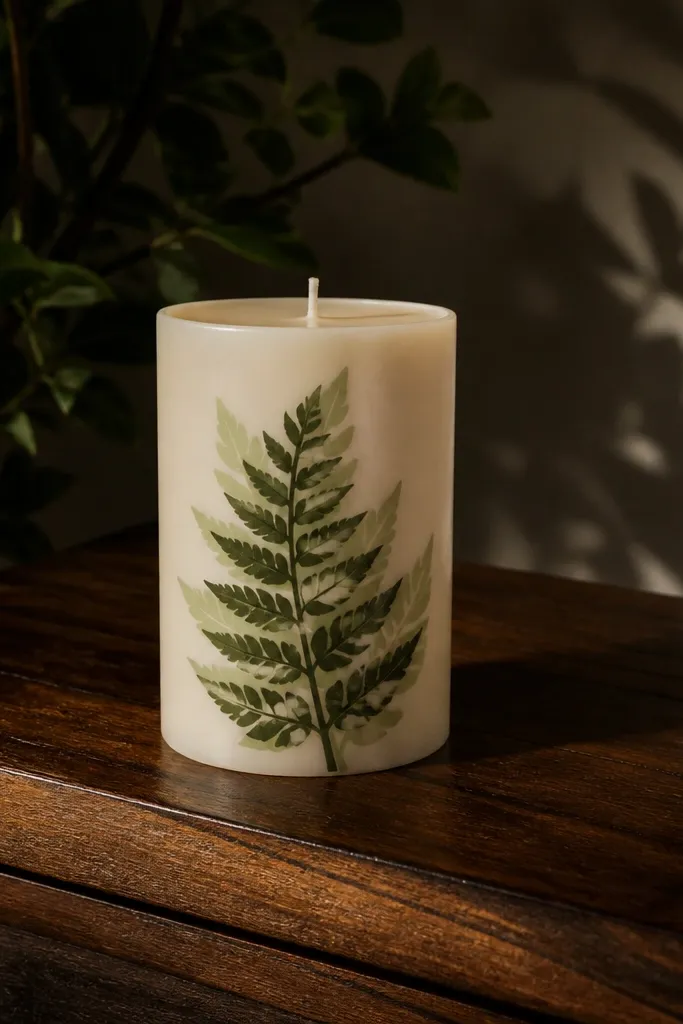
Shadow silhouettes look like high-end decor because they use contrast instead of detail. Paint a leaf silhouette in deep green, then create a softer “shadow” around it using sage diluted slightly. The effect gives depth and makes the candle look like it has layers. This is great for guests who want something dramatic but don’t want to draw veins and textures.
Sketch a simple leaf shape on the candle’s center panel. Fill the silhouette with deep green in one solid layer. Mix sage with a little water to create a soft wash, then lightly dab around the silhouette edges to form a shadow halo. Let dry completely and seal matte.
Editor's noteUse a sponge for the shadow — dabbing makes it look soft instead of streaky.
Skip thisDon’t overdo the shadow; a thin halo looks intentional, a wide wash looks dirty.
17. Herb Frame and Tiny Cross-Stitch Look Candle
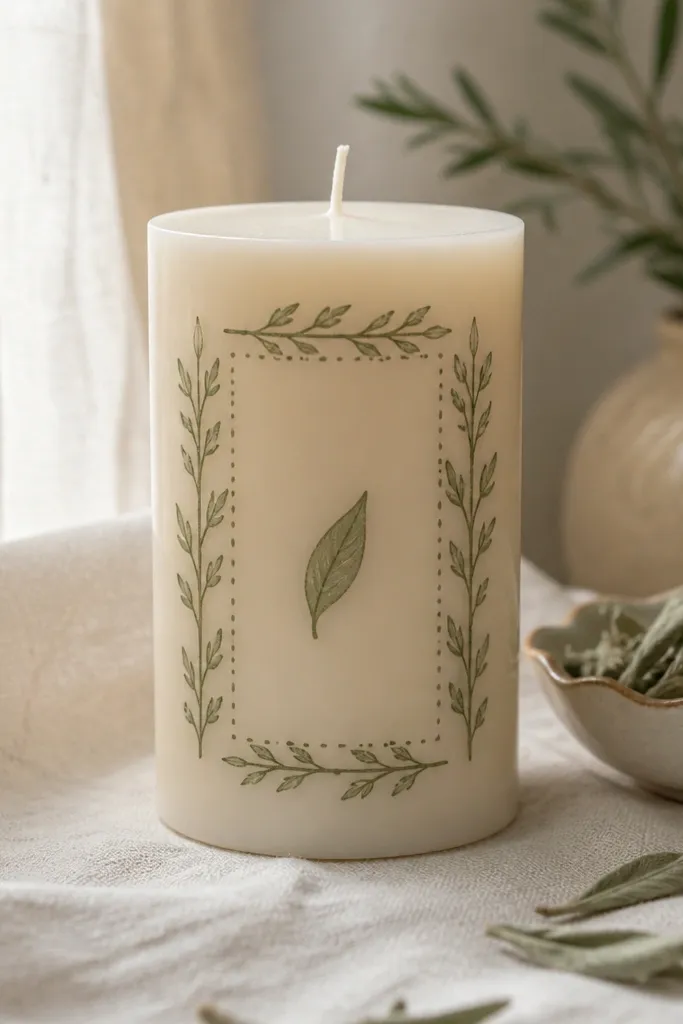
This one gives a handcrafted textile vibe without needing embroidery. Paint a simple herb frame in sage, then add tiny dot “stitches” along the border. Put a single leaf in the center so the design stays readable and not busy. It’s photogenic because dot work creates texture that shows even from a distance.
Draw a rectangular frame on the candle’s center panel using a fine brush. Paint a single leaf inside the frame in deep green with sage highlights. Add tiny dot stitches along the frame edges using warm cream — place dots evenly. Seal matte after drying so dots don’t smear.
Editor's noteUse a dotting tool or the tip of a fine brush held straight down for consistent stitch spacing.
Skip thisSkip freehand dot spacing; uneven dots make the whole candle look rushed.
18. Terrarium Glass Jar Candle Painting
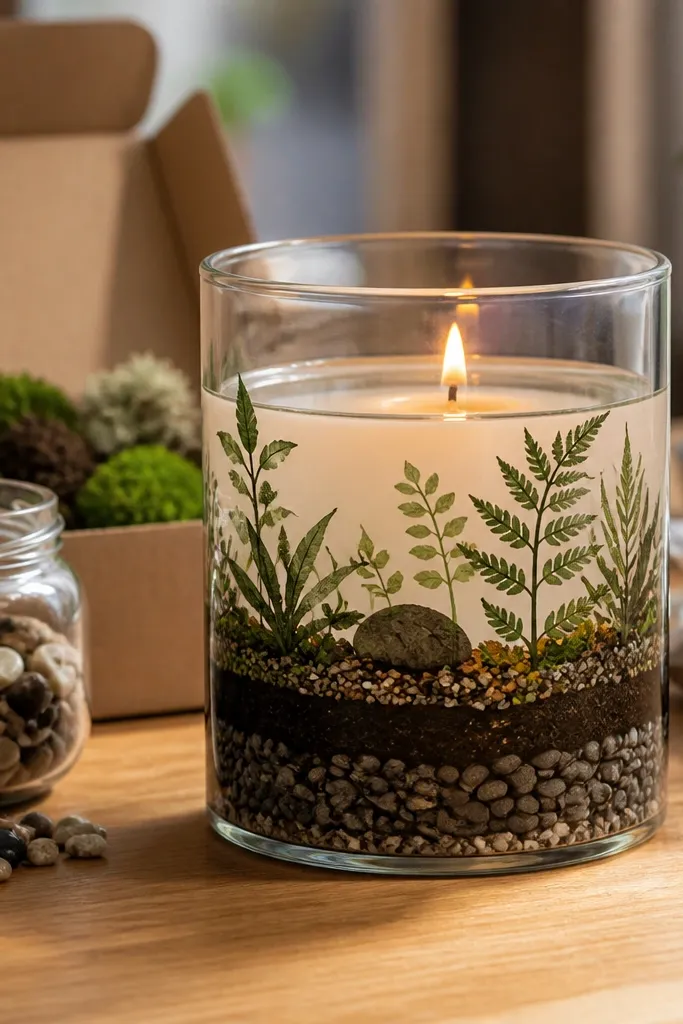
Painting on a glass jar gives you a built-in “terrarium” look because the glass creates natural separation. Layer a soil base, pebble texture, and plant silhouettes inside the jar shape, then add a few tiny highlights to mimic glass reflections. It looks like a mini ecosystem and photographs really well on tables. This is ideal if you want a candle centerpiece that doesn’t rely on flame for the design to show.
Use painter’s tape to mark a “soil line” across the jar and paint the base in warm brown or terracotta. Add pebble texture by stippling small dots in gray and beige. Paint plant shapes on top in deep green and sage, keeping them simple silhouettes. Seal the painted areas with a clear matte topcoat designed for glass or crafts.
Editor's noteSqueeze a small amount of paint onto a palette and keep it thick; thin paint on glass can look streaky.
Skip thisDon’t paint the entire jar solid dark; leave glass showing for the terrarium depth.
19. Plant Name Tag Place Candle
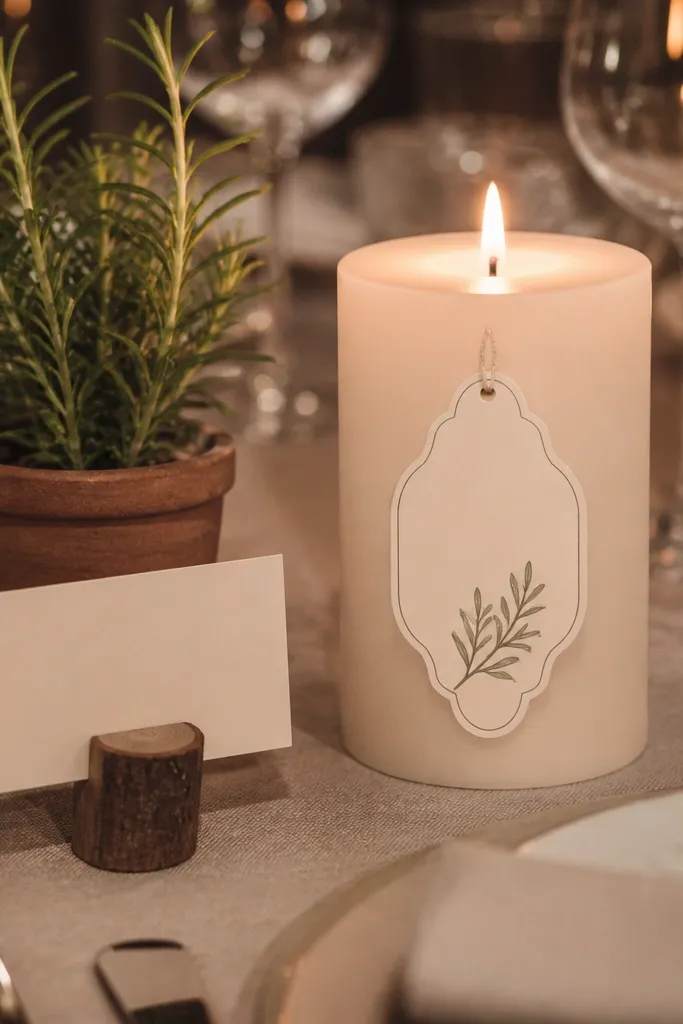
This design does double duty: it’s decor and it helps guests keep track of their candle. Paint a small hanging name tag shape on the front panel, then add a matching sprig icon in green. The tag makes the photo composition cleaner and gives you an easy way to coordinate sets. It’s also a smart choice if you’re hosting a mixed-skill group and need a structure everyone can follow.
Paint a small tag shape in warm cream or light gray on the center panel. Add a plant sprig icon above the text using deep green and sage highlights. Write a short name like “Mint” or “Rosemary” with a fine brush; keep letters bold and simple. Seal matte when dry, then add a thin line where the “tag string” would be.
Editor's noteUse the same font style for every candle so the set looks intentional in group photos.
Skip thisAvoid long names; anything longer than 8 letters looks cramped on a candle.
20. Ivy Frame Corner Candle
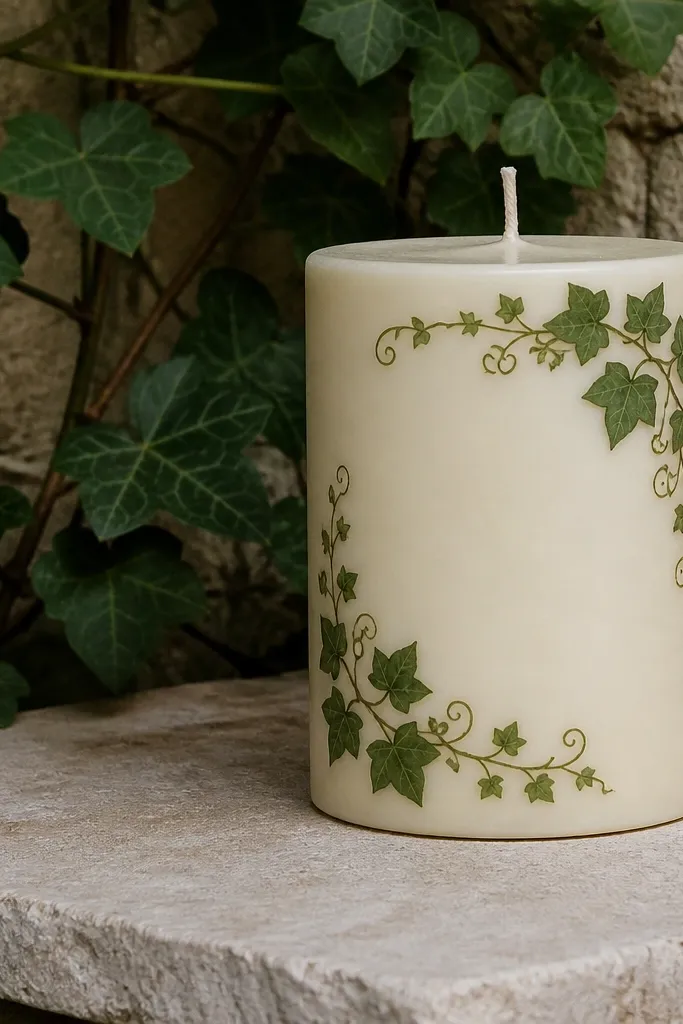
Corner ivy looks elegant because it uses negative space. Paint ivy vines in two corners of the candle’s center panel so it frames the middle area without covering the whole surface. Add small leaves and a few tendrils that curl inward. The open space makes the candle look airy and modern, and it’s a strong choice if your party theme is clean and neutral.
Draw light guide lines for two vertical vine paths on opposite corners. Paint vines in olive, then add small leaf pairs and a few curled tendrils using sage. Leave the center panel mostly unpainted so the framing effect stays clear. Seal matte after drying.
Editor's noteIf you want symmetry, trace one corner vine onto paper first, then replicate the shape on the other side.
Skip thisDon’t fill the center with extra leaves — it cancels the airy frame look.



