
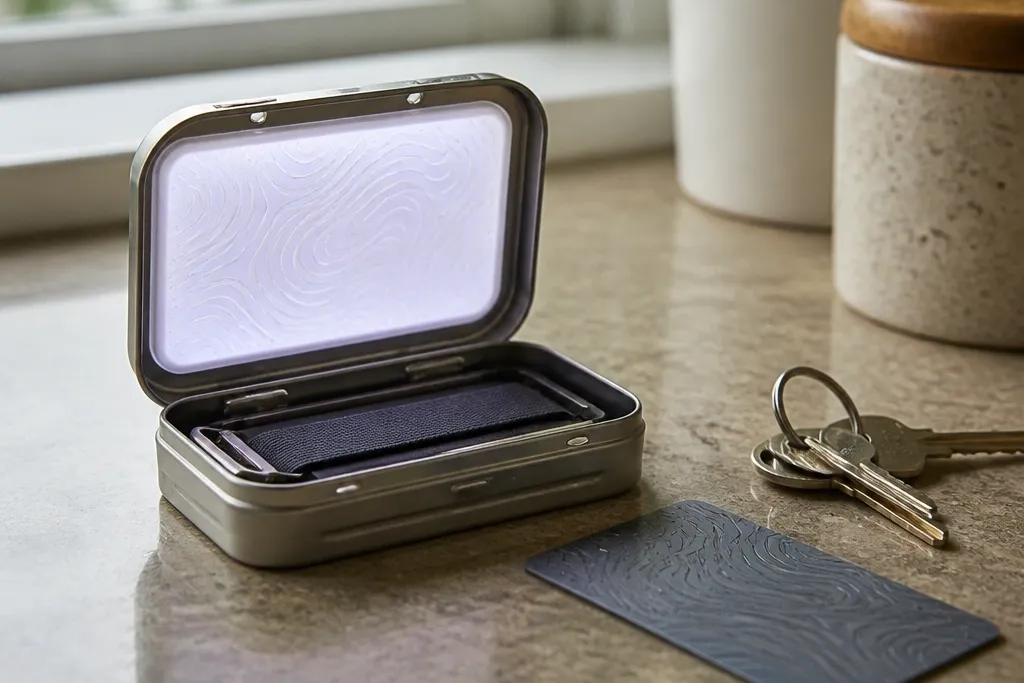

1. Neon Arcade Sign Tin Wallet
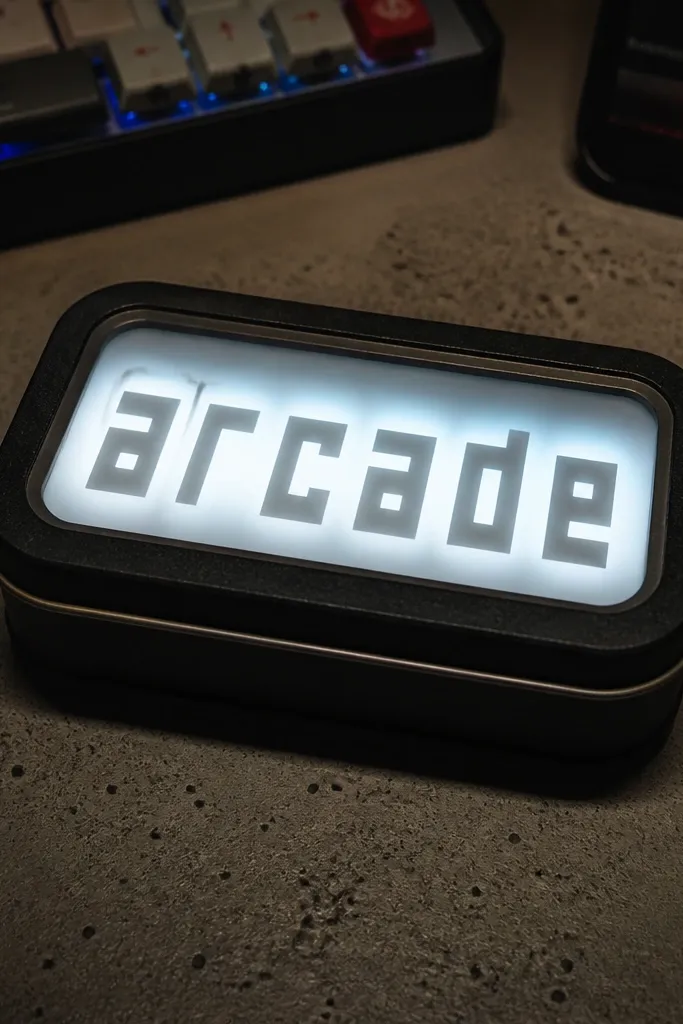
This theme looks like a tiny game cabinet even when it’s closed, because the glow comes from a word cut into the lid and softened with a diffuser. Use a cold white LED strip or a row of LEDs behind frosted plastic so the letters look evenly lit instead of spotty. The wallet stays photogenic because the glow sits high on the lid where it catches light, and the rest of the tin can be covered in black vinyl for contrast. It’s a great pick if you want a bold, modern look and you don’t mind a little cutting. Skill level is medium because you’ll cut a clean letter shape and make it align with the LED behind it.
1) Cover the inside of the lid with thin black vinyl or matte paint, then trace a simple word (like “COIN” or “INSERT”) onto frosted plastic and cut the letter openings. 2) Mount the frosted plastic back onto the lid with craft glue, leaving a small gap so LEDs can shine through, then attach a short LED strip behind the letters with hot glue and add a strain-relief tie-down for the wires. 3) Put a small slide switch on the tin base side so the lid still closes, then route wires along the outer edge and test before you fully seal everything.
Rough-cut the plastic first, then sand the letter edges lightly so the glow looks smooth and not jagged.
Don’t glue LEDs directly onto a curved lid without a spacer — the strip lifts and the glow turns uneven.
2. Starlit Constellation Sky Wallet
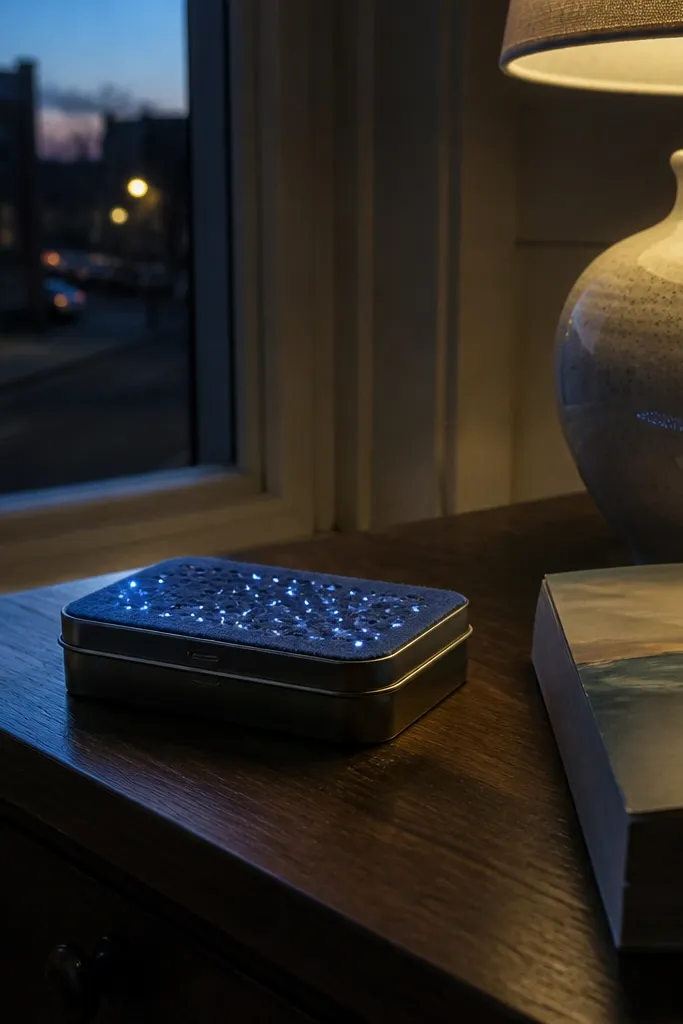
A constellation wallet is photogenic because the light points look like stars, not a glowing rectangle. Felt is your friend here: it hides wiring and gives you a soft, matte background that makes tiny LEDs pop. Cut small holes in craft foam or felt, poke LEDs through, and aim them upward so each “star” reads as a point. This design works especially well with warm white LEDs because they mimic candlelight in photos. It’s also forgiving — if one LED looks off, you can hide it among the “stars.”
1) Line the inside of the lid with black or deep navy felt, then sketch 8-12 constellation points and mark where each LED will sit. 2) Cut pin-size holes, poke the LED leads through, and hot-glue around each LED base so it stays fixed at the same angle. 3) Add a small battery holder to the base and route wires with masking tape along the edges, then close-test with the felt still loose before you glue it down fully.
Use a toothpick to position each LED before gluing so the “star” points align the same direction.
Don’t use glossy fabric — reflections make the lid look wet instead of starry.
3. Lantern Glow Mason Jar Wallet
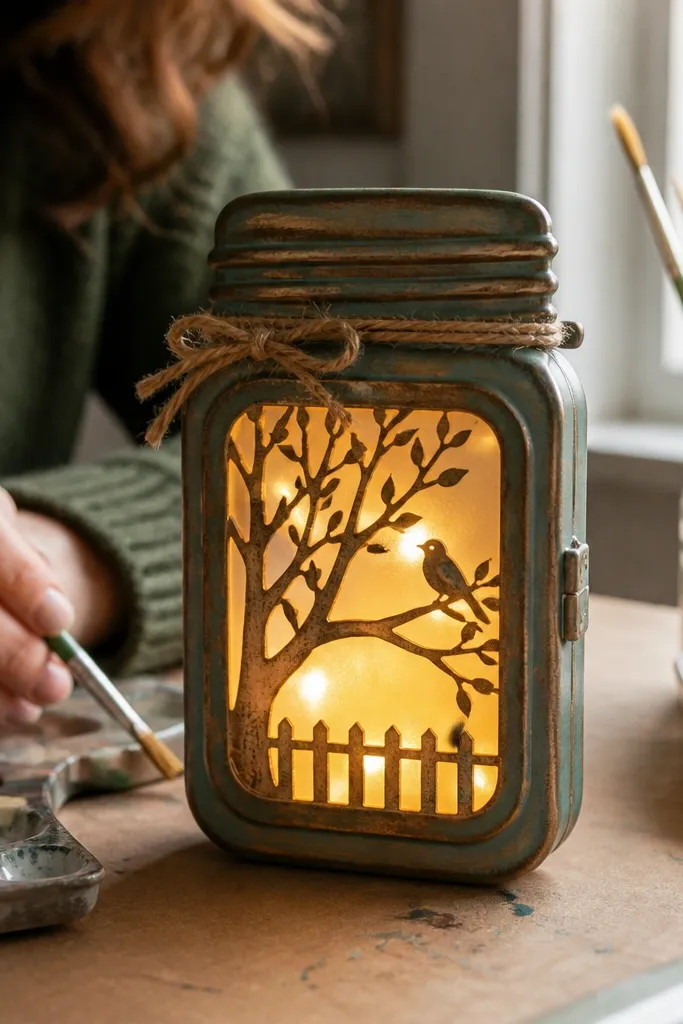
This looks like a miniature lantern and reads instantly in a photo because it has a defined “window” where the light comes from. The key is a frosted panel behind a cut-out frame, so the glow is warm and diffused. Use warm white LEDs or a small LED strip and place it behind the center panel, then decorate the tin with a faux jar frame using thin craft foam strips. It’s cozy, not neon, and it fits bedrooms, bags, and desks. Build is easy to medium since the core work is cutting a rectangle window and mounting a frame cleanly.
1) Cut a rectangular window in the lid cover panel (craft foam or thin plastic), then glue a frosted sheet behind it using a thin border so the light can spread. 2) Mount warm white LEDs behind the frosted panel on small foam spacers, keeping the wiring along the outer rim. 3) Add a push-button switch on the base side and secure the battery holder with double-sided foam tape so it doesn’t rattle when you close the tin.
Paint the inside frame matte gold or aged brass so the warm glow looks like it’s behind metal.
Avoid clear plastic without frosty treatment — it makes the LED hotspots obvious.
4. Cyberpunk Circuit Trace Wallet
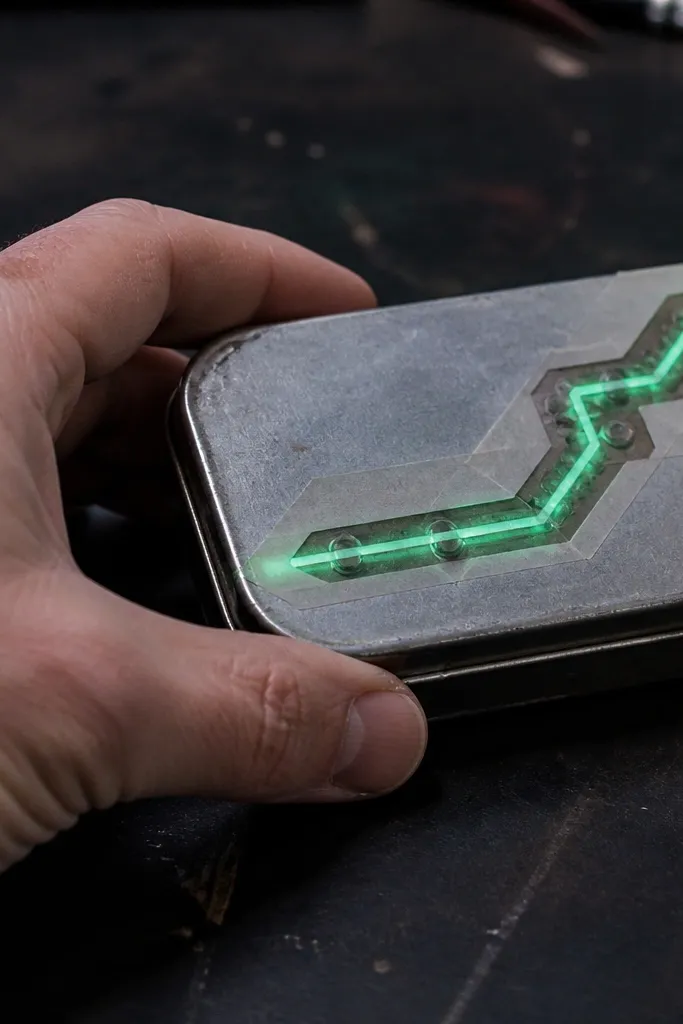
This one looks technical and sharp because the light follows a circuit path. You get that effect by using a circuit stencil, painting it in a reflective or white base, and then backlighting it with green LEDs behind thin translucent tape or vellum. The result is a glowing “trace” line instead of a big blob of light. It’s a strong aesthetic for anyone who likes clean geometry. The build takes some patience because you need straight lines and careful wiring, but the payoff is a very photogenic lid.
1) Use a printed circuit template, tape it to the lid, and paint the lines in white or pale gray so they reflect green light. 2) Cover the painted lines with a layer of translucent vellum or frosted tape, then place green LEDs behind the path with hot glue, spacing them so gaps don’t show. 3) Route wires to the base corner and mount a slide switch outside the card area so the lid closes without pressure on the switch.
Editor's noteBefore gluing everything, shine the LEDs through the vellum and adjust LED spacing until the trace looks continuous.
Skip thisDon’t paint the lines directly on dark felt without a light base — the glow won’t read as “trace.”
5. Glow-In-The-Dark Photo Frame Wallet
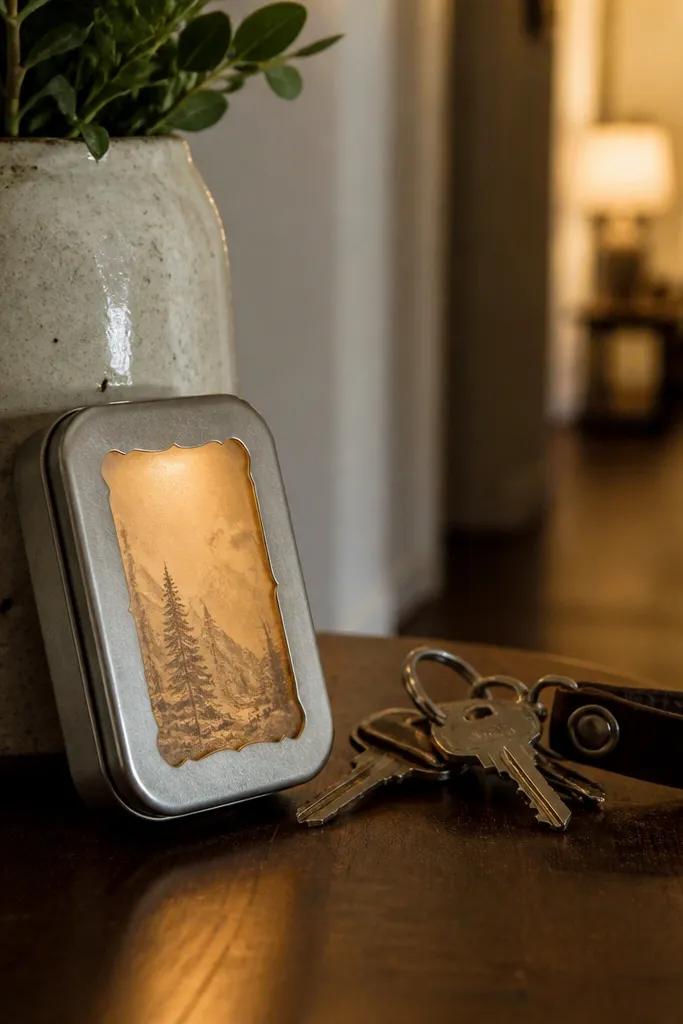
This is a “decor” themed wallet that looks like a tiny illuminated photo frame. You cut a border window in the lid, then mount a frosted panel behind it; the LED glow makes the center area look like an art piece even without a real photo. Add a printed graphic layer under the frosted panel if you want character — like a moon, cat silhouette, or mountain line art. It’s great for gifting because it feels finished and intentional. Skill level is beginner-friendly because the frame cut is simple and the rest is glue and placement.
1) Create a frame border from thin craft foam strips, then glue it onto the inside of the lid around a central opening. 2) Cut a frosted panel to fit the opening, sandwich it between the frame and a backing layer, and mount warm white LEDs behind it with spacers. 3) Put battery and switch in the base, route wires along the outer edge, and test the glow before you add any decorative top layer.
Editor's noteUse matte black foam for the frame — it hides wire shadows and keeps the glow clean.
Skip thisDon’t use thick foam for the window border — it makes the lid bulge and pinches when closed.
6. Mermaid Shell Bubble Light Wallet
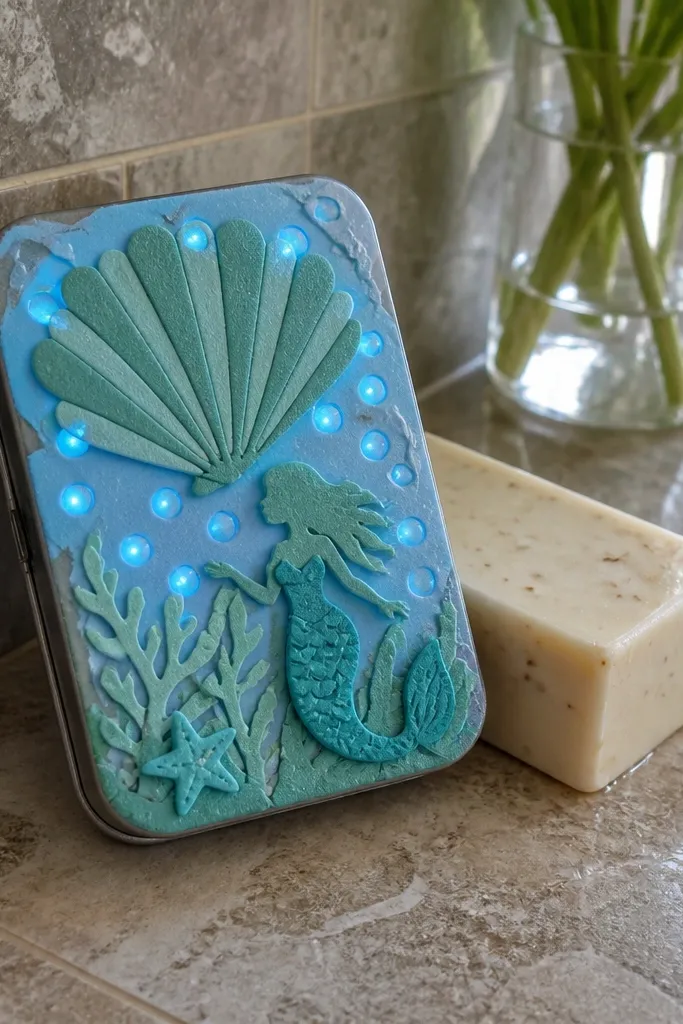
A mermaid shell design looks magical because the light appears to come from tiny “bubble” dots, not one window. Make the shell with layered craft foam, then poke bubble-sized holes and backlight them with blue LEDs. Use a diffuser layer so the bubbles look rounded and soft, like light refracting through water. This theme is photogenic in bathroom lighting and around mirrors. It’s medium build because foam layering needs a steady hand, but it’s still very doable with craft foam and hot glue.
1) Cut a shell silhouette from craft foam, layer it with slightly offset pieces, and glue it onto the lid so it forms a raised surface. 2) Drill or poke small holes in the “bubble” areas, then tape or glue a translucent backing panel behind them and place blue LEDs behind the backing. 3) Add a battery holder to the base and mount a small switch where it won’t press against the shell when you close the lid.
Dust the shell with a tiny bit of pearly paint on the raised ridges so the blue glow looks deeper.
Avoid direct contact between LEDs and foam — hot spots can warp thin foam.
7. Vintage Compass Rose Wallet
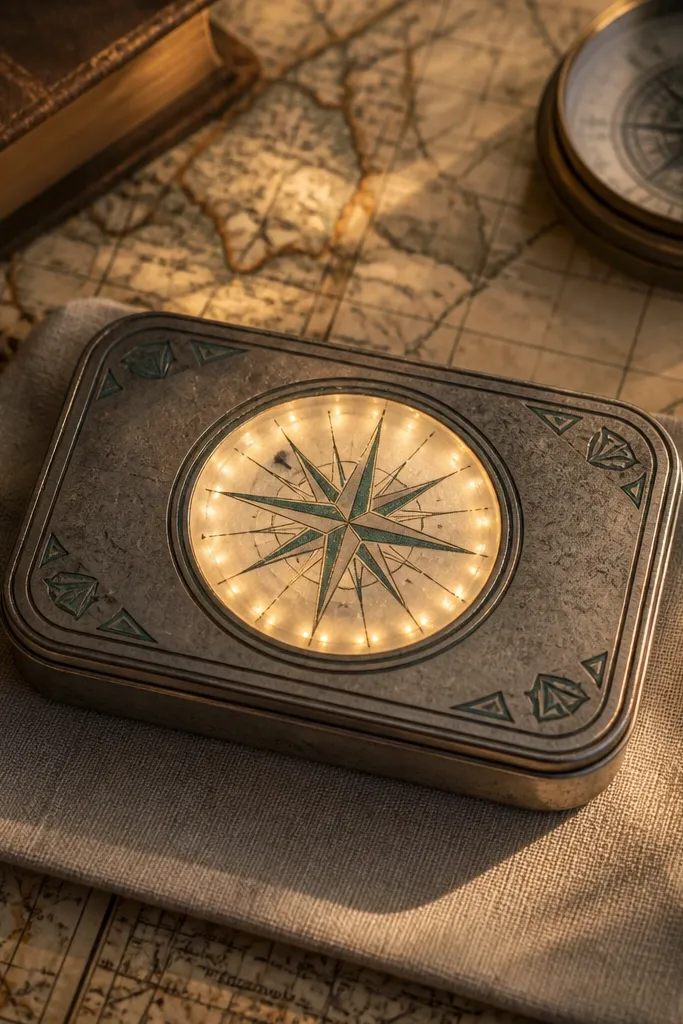
This one reads instantly because the compass rose has a clear center and symmetry. The light goes behind a circular frosted disc so the glow feels like a lantern behind a “map window.” Use sepia or muted teal paint for the compass lines, then add warm white LEDs around the disc edge for a ring glow. It’s a classy aesthetic without trying to look expensive. Skill level is medium because you need to get the circle centered and keep the wiring hidden behind the disc.
1) Paint or print a compass rose onto cardstock, then cut a circular opening in the lid cover and glue the compass layer behind it. 2) Cut a frosted circle to sit over the compass opening, mount warm white LEDs around the underside of the frosted circle, and keep wires pressed to the rim. 3) Install a small slide switch on the base side and attach the battery holder with foam tape so it doesn’t rattle.
Mark the center with a ruler before you cut — compass symmetry is what makes photos look good.
Don’t place LEDs directly in the center — the glow looks like a spotlight, not a ring.
8. Halloween Pumpkin Jack-O-Lantern Wallet
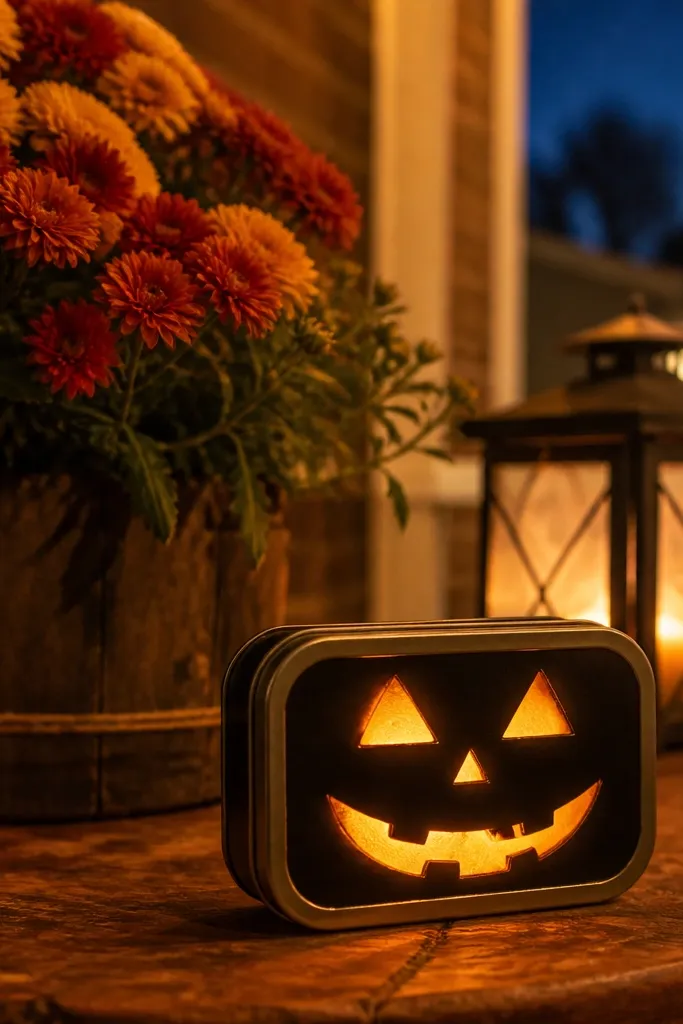
This is the easiest themed Altoids wallet that still looks great in photos because the face has obvious “light moments.” Cut a pumpkin face into the lid so light shines only through eyes, nose, and mouth, then back it with warm orange LEDs and a thin diffuser layer to soften edges. Add a black interior border to make the orange glow pop. This fits party bags, trick-or-treat season, and anyone who likes bold seasonal decor. Build is beginner-friendly: it’s mostly stencil work and careful wiring placement.
1) Paint the inside of the lid orange (or cover with orange vinyl), then stencil and cut the jack-o-lantern face shapes with a craft knife. 2) Add a thin frosted sheet behind the cut areas, then mount warm orange LEDs behind the mouth and eyes so the glow reads as “carved.” 3) Put the battery holder in the base and mount a hidden switch on the side seam so the tin still closes smoothly.
Use a slightly smaller cut than you think — LED edges look cleaner when the opening is crisp and not too wide.
Avoid clear plastic over the cutouts — the glow turns harsh and hotspotty.
9. Forest Night Tree Silhouette Wallet
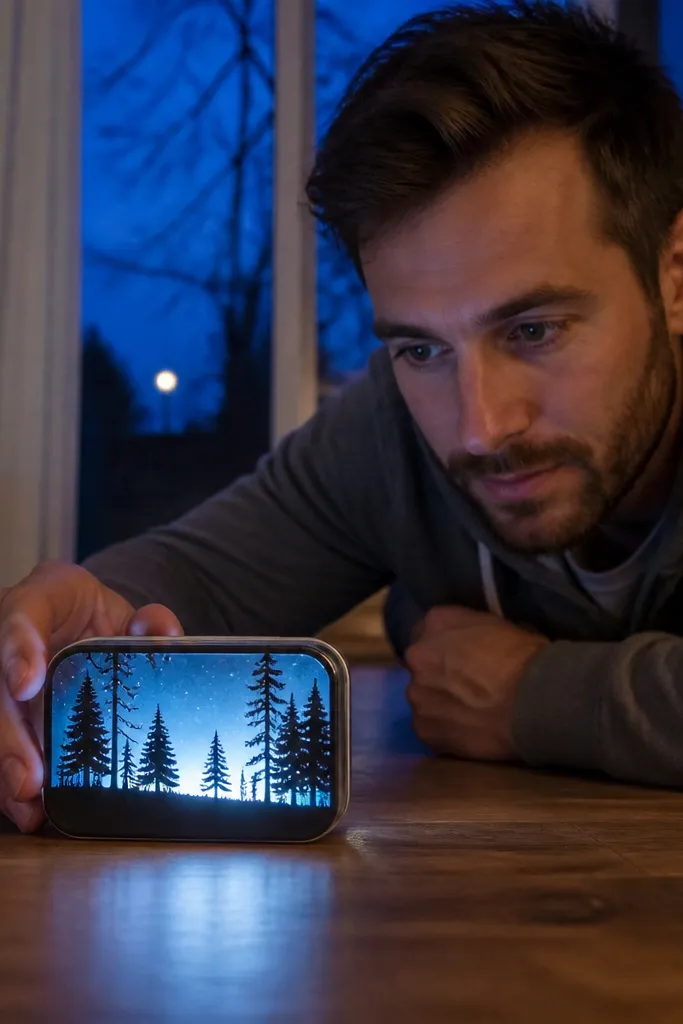
This design looks like a silhouette scene at dusk. You cut or print tree shapes and place them between a backlight (cool white LEDs) and a frosted panel, so the trees stay dark while the background glows. The contrast is what makes it photogenic — the lid reads like a little diorama. Cool white gives a moonlit feel; warm white gives a campfire vibe. The build is medium because you’ll layer cardstock or vinyl silhouettes without wrinkles.
1) Line the inside of the lid with black felt or matte vinyl, then glue a frosted panel over a center window. 2) Place a tree silhouette layer between the frosted panel and the LEDs, then mount cool white LEDs behind the frosted area with small spacers. 3) Install a switch on the base side and route wires along the perimeter, then test glow through the frosted panel before sealing the silhouette layer.
Editor's noteSeal printed silhouettes with a thin matte coat so they don’t warp when glue touches them.
Skip thisDon’t use glossy photo paper — reflections ruin the silhouette look.
10. Winter Snowflake Glow Wallet
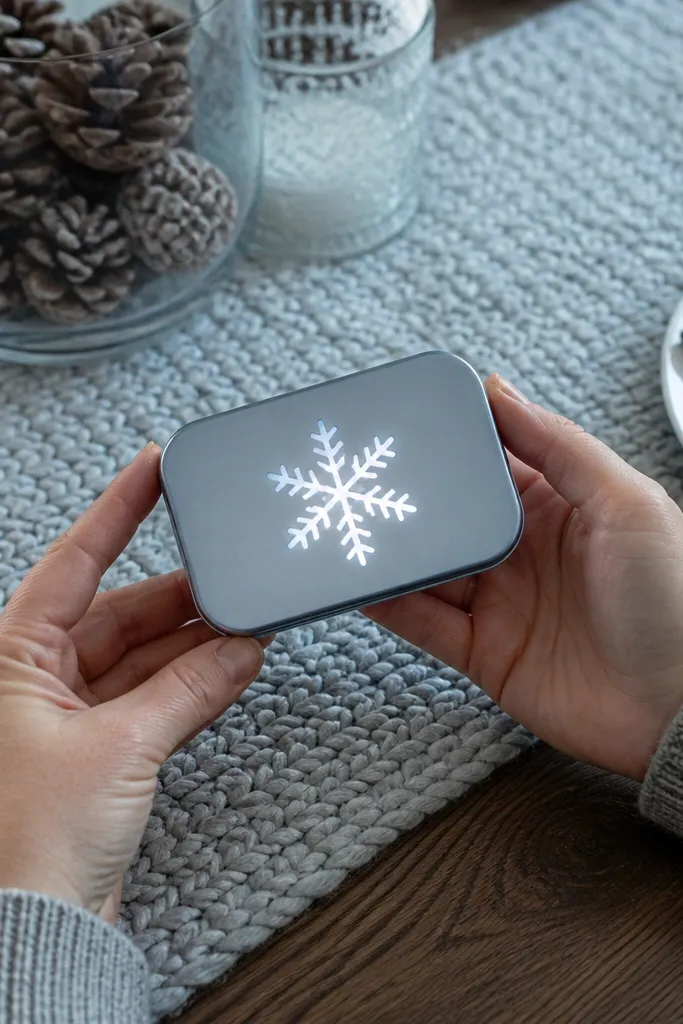
Snowflakes look great because they create lots of tiny negative spaces that catch light. You cut a snowflake pattern into a thin panel, then backlight it so the glow spreads through each arm. Use cool white LEDs for crisp winter photos, and add a frosted layer behind the snowflake to prevent LED dots from showing. This is a clean, graphic look that works year-round in winter decor. It’s beginner-friendly if you use a printed snowflake template.
1) Trace a snowflake template onto thin plastic or foam, cut the design, and fit it into the lid with a matte backing. 2) Glue a frosted panel behind the snowflake, then mount cool white LEDs behind the frosted panel so the snowflake glows evenly. 3) Add a battery holder in the base and a small slide switch on the side, then hide wiring in the corners with hot glue.
Editor's noteIf your snowflake arms are thin, reinforce the back with a thin clear tape layer so they don’t snap when you open the tin.
Skip thisSkip thick layers behind the snowflake — the glow spreads too much and the arms blur.
11. Chocolate Bar Cocoa Warmth Wallet
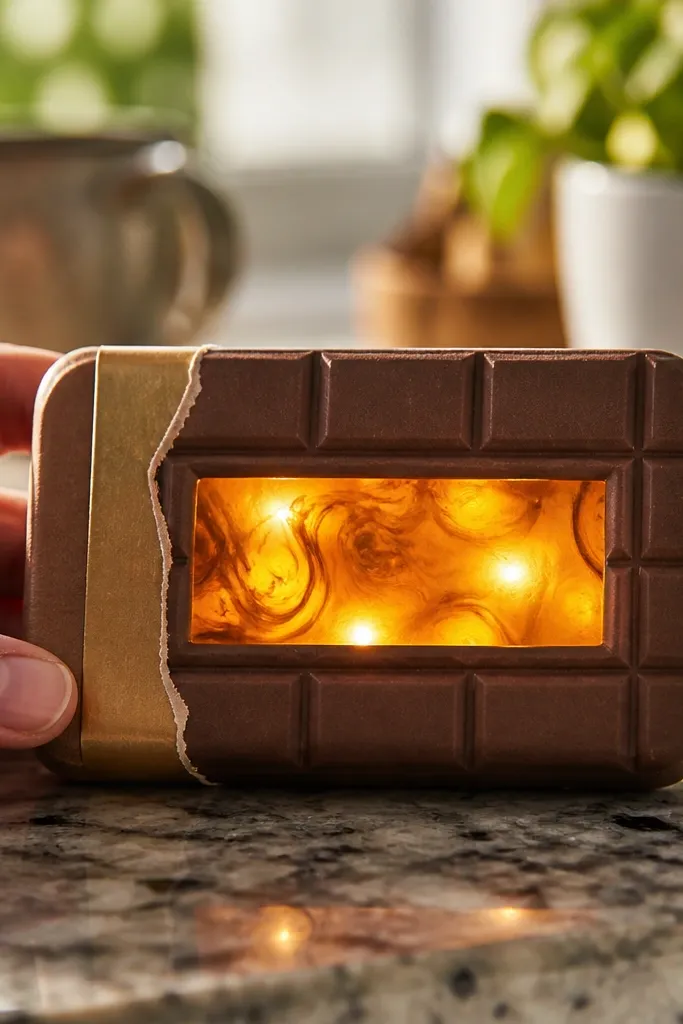
This theme is cozy and “treat-like,” and it photographs well because the brown wrapper makes the amber glow feel like melted chocolate. Create a wrapper look with brown cardstock and small label details, then cut a small window on the lid and backlight it with warm amber LEDs. Add a thin frosted film behind the window so the glow is smooth and not pixelated. It’s a fun build for anyone who likes cute, edible-looking decor without being childish. Skill level is beginner because the window is small and the wiring is simple.
1) Cover the lid with brown cardstock or faux leather, then mark a small rectangle window where the glow will show. 2) Glue a frosted film behind the window, mount amber LEDs behind the film, and secure wires along the lid edges with hot glue. 3) Put the switch on the base side, attach the battery holder with foam tape, and test the glow before you add wrapper labels.
Editor's noteUse a slightly off-center window placement — perfectly centered looks like a vending machine display.
Skip thisDon’t choose red LEDs — the glow reads like a warning light against brown.
12. Space Helmet HUD Wallet
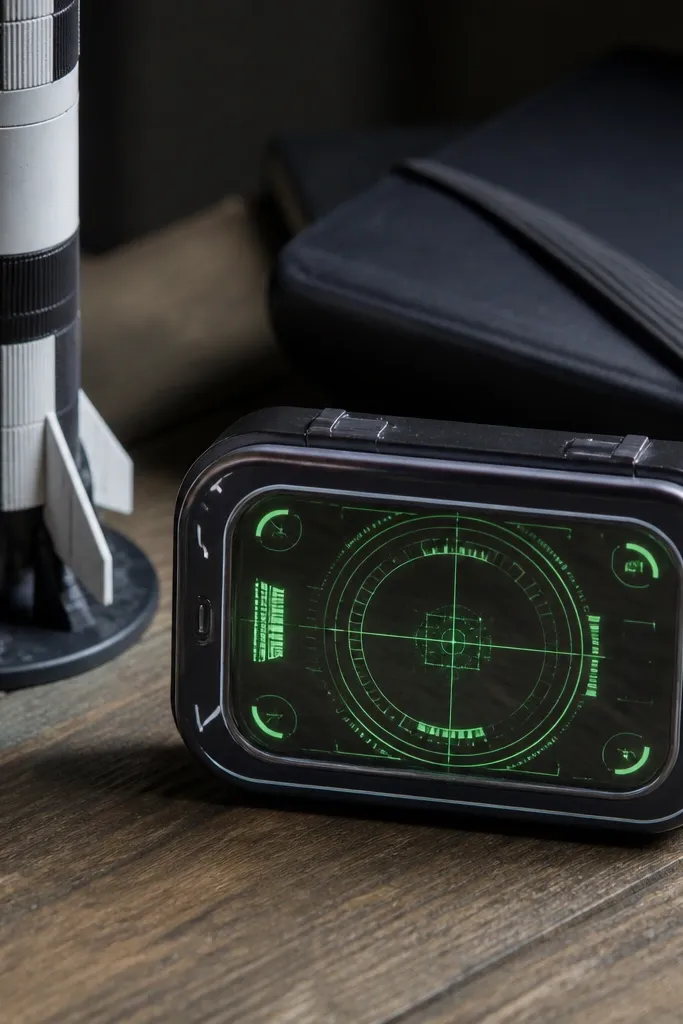
A HUD wallet looks like a sci-fi display because it has crisp lines and a controlled glow. The “secret” is using a clear or lightly frosted acrylic window over a printed HUD graphic, then placing green LEDs behind the graphic so the lines glow but stay sharp. You can make it feel futuristic without being messy by keeping the glow area limited to a central panel. This is great for techy aesthetics and dark-themed rooms. Build is medium because acrylic needs careful handling and you need to keep the window aligned.
1) Print a HUD graphic on matte paper, then glue it to the inside of the lid around a cut acrylic window. 2) Mount green LEDs behind the graphic with spacers, and add a thin translucent diffuser sheet between LEDs and the graphic if the dots show through. 3) Install a switch on the base edge and route wires around the perimeter so the acrylic window doesn’t get pushed.
Editor's noteUse a foam gasket around the acrylic window so it sits flat and doesn’t rattle.
Skip thisDon’t skip the diffuser if your LED spacing is wide — you’ll see dot patterns instead of glowing lines.
13. Regal Stained Glass Wallet
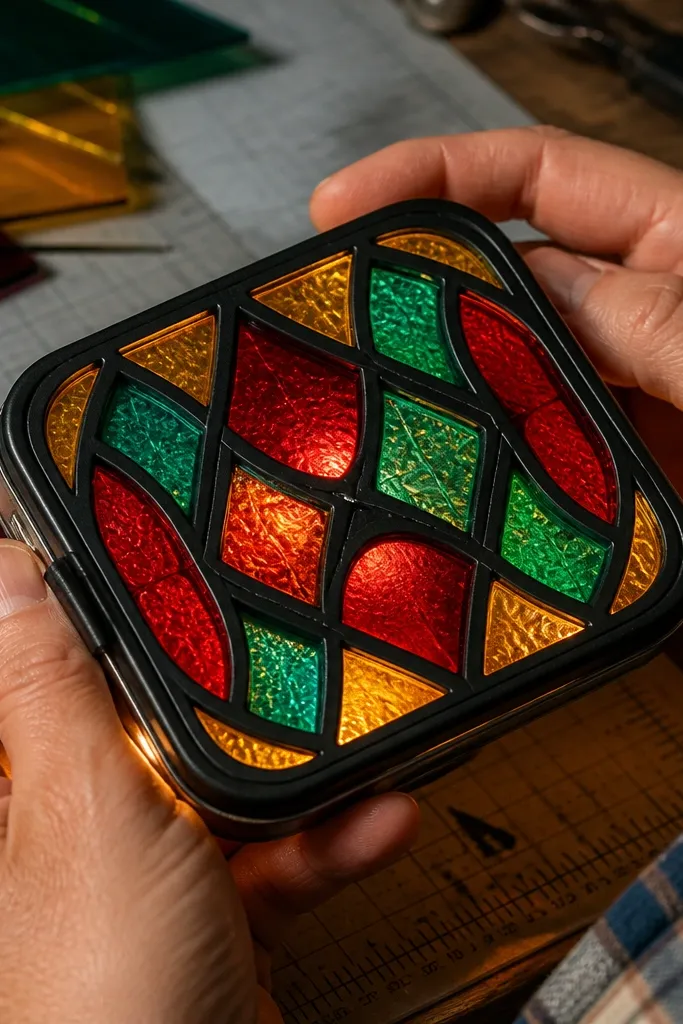
Stained glass looks premium in a tin because the glow makes the color blocks feel layered. Use transparent craft vinyl or tissue-like colored sheets behind a frosted back panel so the colors shine without harsh hotspots. Outline shapes with black craft foam strips or black paint so the “lead lines” read clearly. Warm white LEDs make the colors look like they’re lit from inside a church window. It’s medium build because you’re layering materials, but it’s very photogenic and worth the time.
1) Create stained glass pieces using colored vellum or transparent craft film, then cut shapes and outline them with thin strips of black foam. 2) Mount the stained glass layer over a frosted panel, then place warm white LEDs behind the frosted panel so the whole pattern glows evenly. 3) Wire to a battery holder in the base, add a side switch, and secure everything with thin glue so the lid still closes.
Keep the foil-like edges matte — glossy edges reflect and flatten the stained-glass look.
Avoid thick foam between layers — thickness makes the tin lid not close flush.
14. Candy Heart Love Letter Wallet
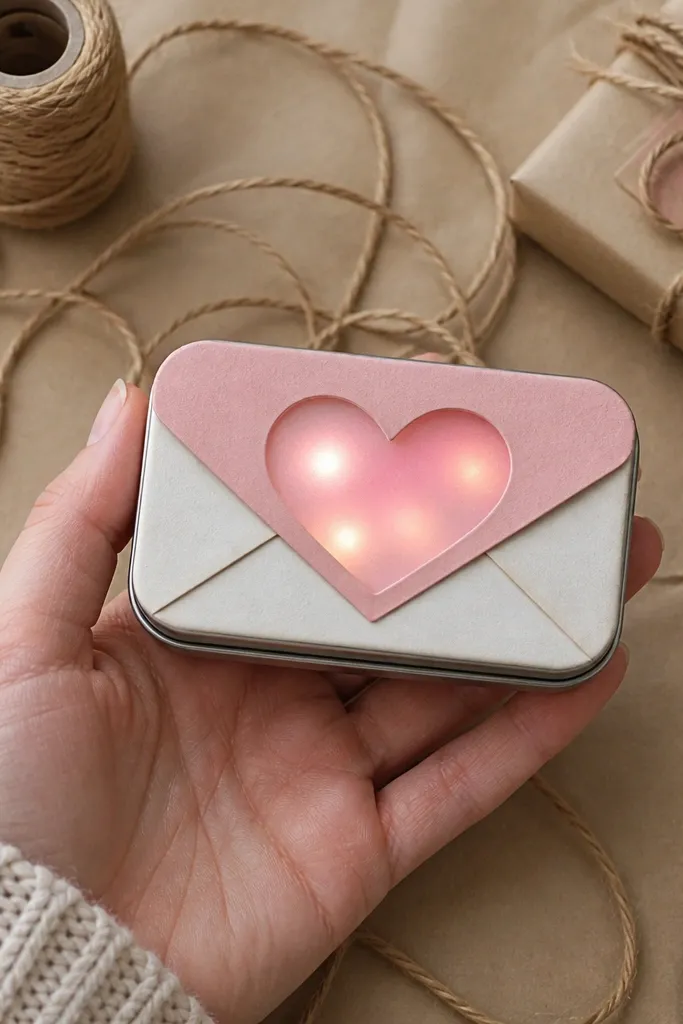
This is a sweet, giftable theme that still looks adult if you keep the palette tight. Cut a heart window in the lid, add a frosted panel behind it, and backlight with warm pink or warm white LEDs. Decorate the rest of the lid like a small envelope using matte pink and white paper, with tiny “to/from” text printed on cardstock. It’s photogenic because the heart glow is centered and the surrounding design frames it. Build is beginner-friendly since the light area is small and the materials are cheap.
1) Cover the lid with matte pink cardstock, then cut a heart-shaped opening and glue a frosted panel behind it. 2) Place warm white LEDs behind the frosted panel, then add a thin pink translucent layer over the frosted if you want extra pink tint. 3) Install a tiny slide switch on the base side, route the wires along the outer edge, and test the heart glow before you glue the envelope details.
Use matte paper for the envelope — glossy paper reflects the LED and looks cheap.
Don’t put the switch where the wallet seam sits — it gets crushed and fails faster.
15. Desert Neon Cactus Wallet
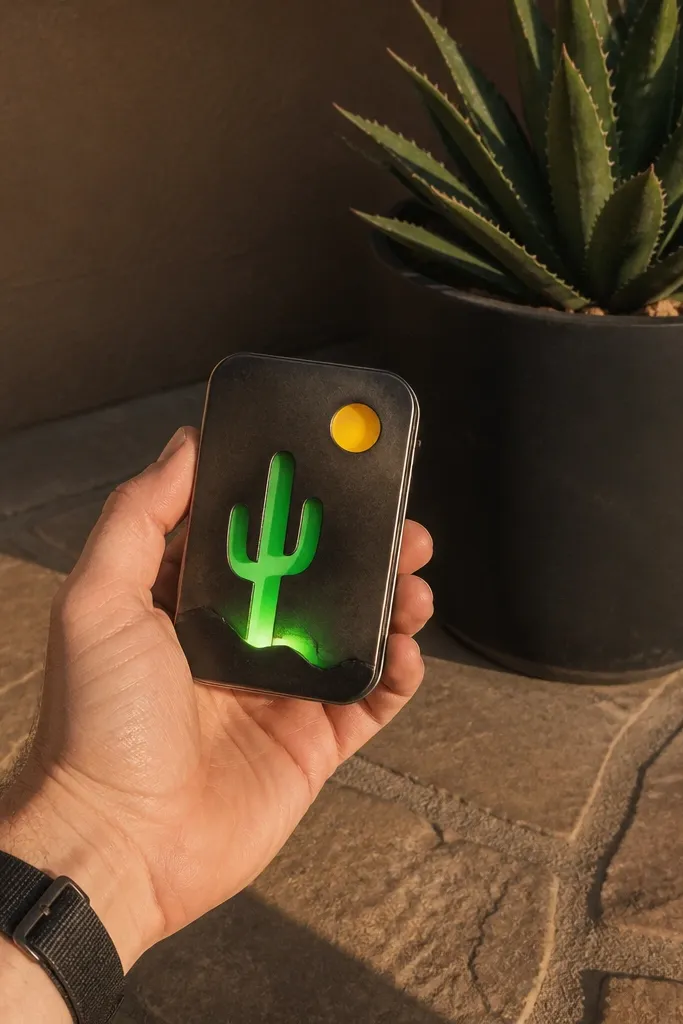
Cactus silhouettes look like a neon sign when you backlight them with green. The look works because the cactus shape creates negative space and the light only shows where you cut. Use a dark backing layer and then a frosted diffuser behind the cactus so the glow is even. Add a small “sun” circle on the lid with amber light for extra pop in photos. This is a fun summer theme that also looks great at night. Build is medium because you’ll cut a layered cactus shape and manage multiple light zones.
1) Cut a cactus silhouette from black craft foam and glue it to the lid, leaving cutouts where the neon glow should show. 2) Mount green LEDs behind the cutouts, add a frosted diffuser layer so the glow spreads, then place amber LEDs behind a small sun circle cut on the lid. 3) Place the battery holder in the base and wire both zones with a single switch if you want one-button control, or separate switches for extra effects.
Editor's noteKeep LED wiring behind the cactus base — it hides wires and makes the glow look like it floats.
Skip thisAvoid using bright green LEDs without a diffuser — the dots show and look like a cheap string light.
16. Cozy Fireplace Ember Wallet
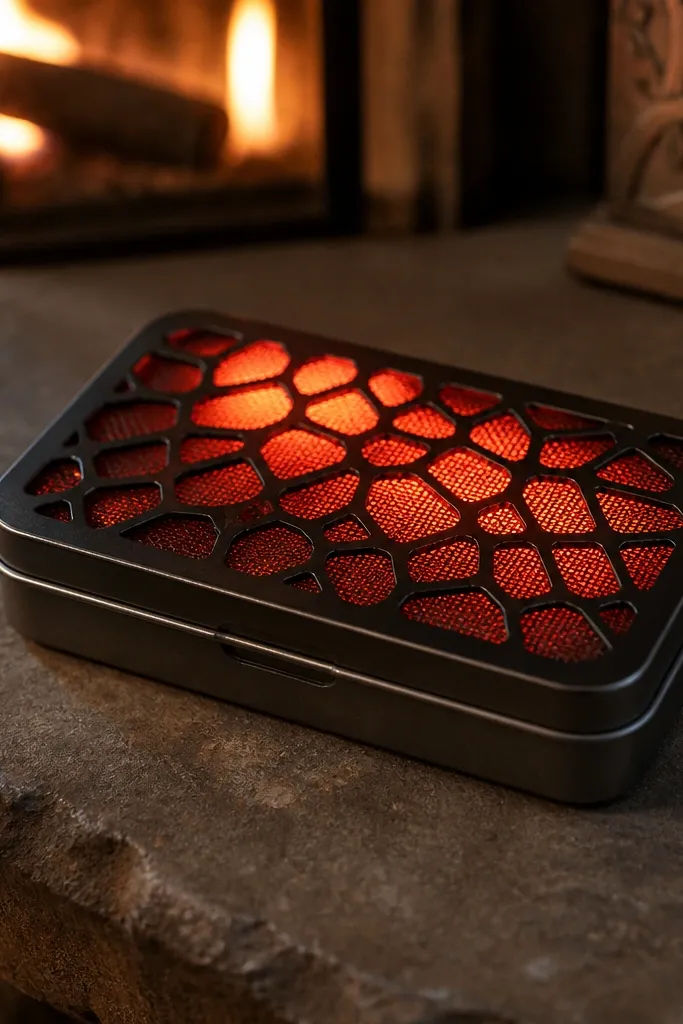
Ember lighting looks warm and cinematic because it comes from irregular openings, not a rectangle. Make a fireplace grate pattern on the lid, then cut small ember shapes and backlight them with warm orange LEDs behind a frosted layer. Add a thin black mesh look using cardstock texture so the glow sits behind bars. This theme is perfect for winter and desk decor. Build is medium because you’ll cut multiple small shapes, but it’s straightforward with templates.
1) Cover the lid with matte black cardstock, then trace a simple fireplace grate and cut a cluster of ember openings. 2) Glue a frosted film behind the ember area, mount warm orange LEDs behind the film, and secure wires to the side edges with glue. 3) Put the battery holder in the base, add a slide switch, and test the ember glow before you glue on any grate “frame” overlay.
Editor's noteUse an uneven ember pattern on purpose — symmetry makes it look like a stencil, not fire.
Skip thisDon’t skip matte black backing — reflections make the grate look shiny and cheap.
17. Minimal Marble Glow Wallet
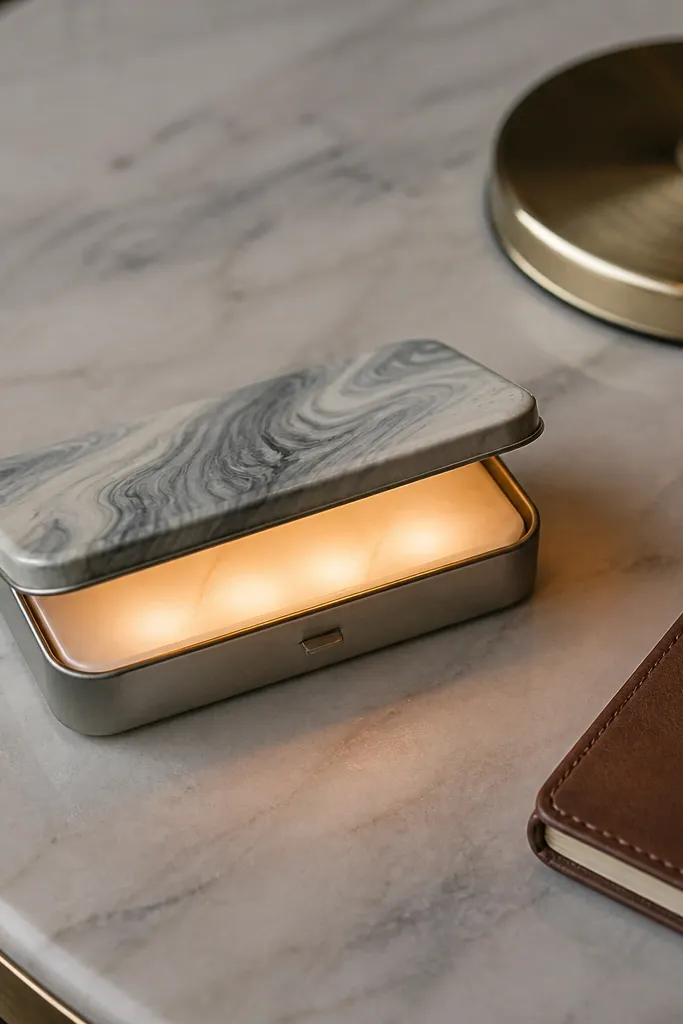
If you want aesthetic without characters, marble glow is the clean look. You do it by painting marbling on the lid exterior and placing a single backlit panel inside, so the glow looks like it’s trapped under glass. Use warm white LEDs behind frosted vellum or thin acrylic, then keep the rest of the design plain. This one photographs well on light backgrounds because the marble pattern and glow read together. Build is beginner-friendly if you use a simple marbling technique with sponge and diluted paint.
1) Create a marble pattern on the lid using white base paint, gray streaks, and a damp sponge to blend, then seal it with matte varnish. 2) Cut a simple rectangle window in the inner lid panel, glue frosted vellum behind it, and mount warm white LEDs behind the vellum. 3) Wire to a base battery holder and install a hidden switch on the side seam, then test the glow through the window before closing everything.
Seal the marble with matte varnish before you add glow layers so glue doesn’t smear the pattern.
Avoid glossy topcoat — it creates glare that washes out the marble in photos.
18. Botanical Leaf Vein Light Wallet
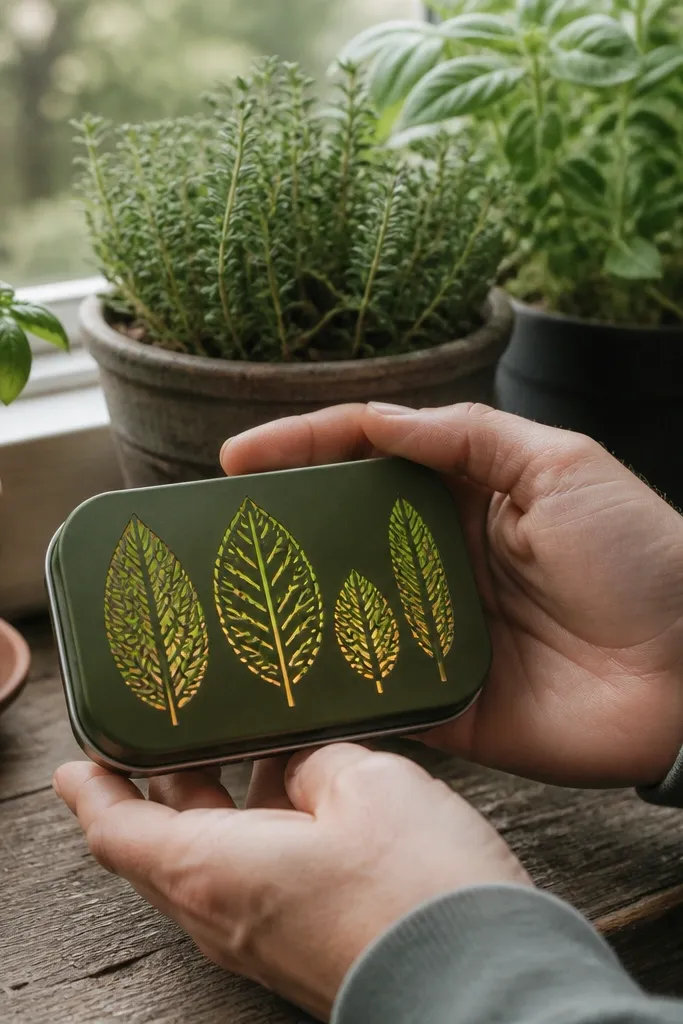
Leaf veins look gorgeous when the light travels through them. Cut leaf shapes and vein lines into thin craft foam or cardstock, then backlight with warm white or cool white LEDs depending on whether you want golden or icy greens. The easiest way to get a clean glow is to use a frosted panel behind the leaf layer so LEDs don’t show as dots. This design suits kitchens, bathrooms, and anyone who likes nature decor. Build is medium because you’re cutting fine vein details, but you can keep it simple with fewer leaves.
1) Cut 3-5 leaf shapes from thin craft foam and lightly score vein lines, then glue the leaf layer onto the inside of the lid over a central window. 2) Add a frosted diffuser behind the leaf layer, mount LEDs behind the diffuser, and keep wiring in the lid corners. 3) Install a switch on the base side and attach the battery holder with foam tape, then test glow and adjust LED placement so the veins light evenly.
Use warm white LEDs for more realistic “leaf light” — cool white can look harsh on greens.
Don’t make the leaf veins too deep — thick cuts block the light.
19. Retro Ticket Booth Wallet
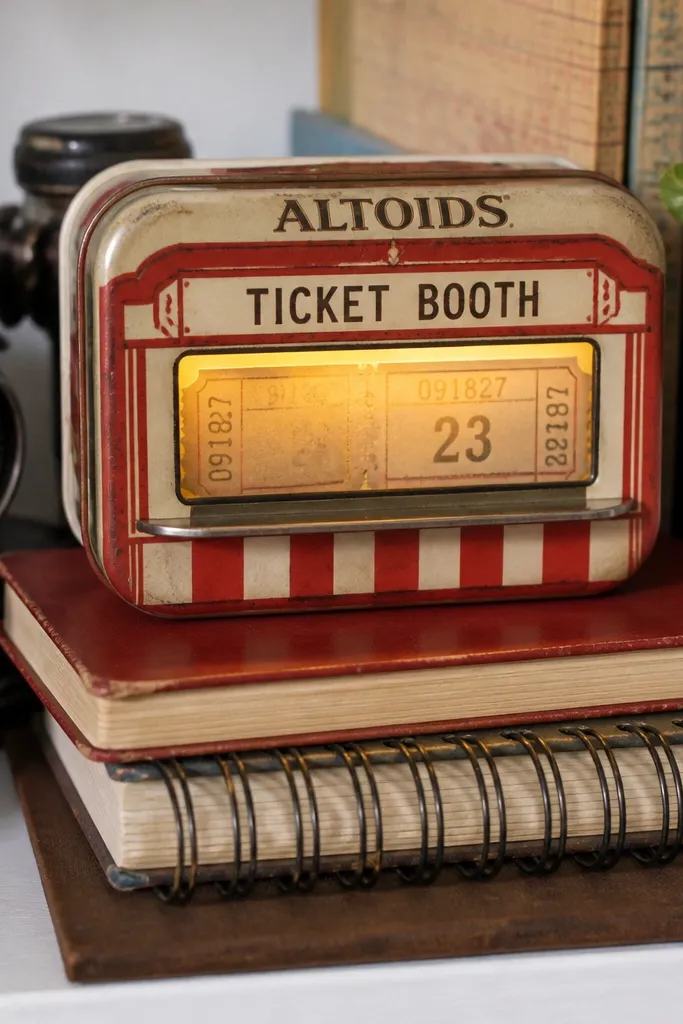
A ticket booth theme looks fun and graphic because it’s all about lines, numbers, and a lit window. You cut a narrow “ticket window” on the lid, then backlight it with warm LEDs so the ticket strip feels like it’s being displayed behind glass. Add printed ticket details like “ADMIT ONE” and a faux serial number, then layer it under frosted plastic. This is a great build if you want something that looks like a prop from a movie set. Skill level is easy to medium because it’s mostly cutting a window and mounting a strip.
1) Print or draw a ticket strip on cardstock, then glue it behind a frosted window cut into the lid. 2) Mount warm white LEDs behind the frosted window, using small foam spacers so the LEDs don’t touch the paper. 3) Put the switch on the base side, route wires along the edge, and secure the battery holder so it stays centered when the tin opens.
Editor's noteUse a slightly translucent frosted sheet instead of thick paper so the ticket lines stay readable under glow.
Skip thisAvoid tiny LEDs without enough spacing — the window will look patchy.
20. Olympic Rings Style Glow Wallet
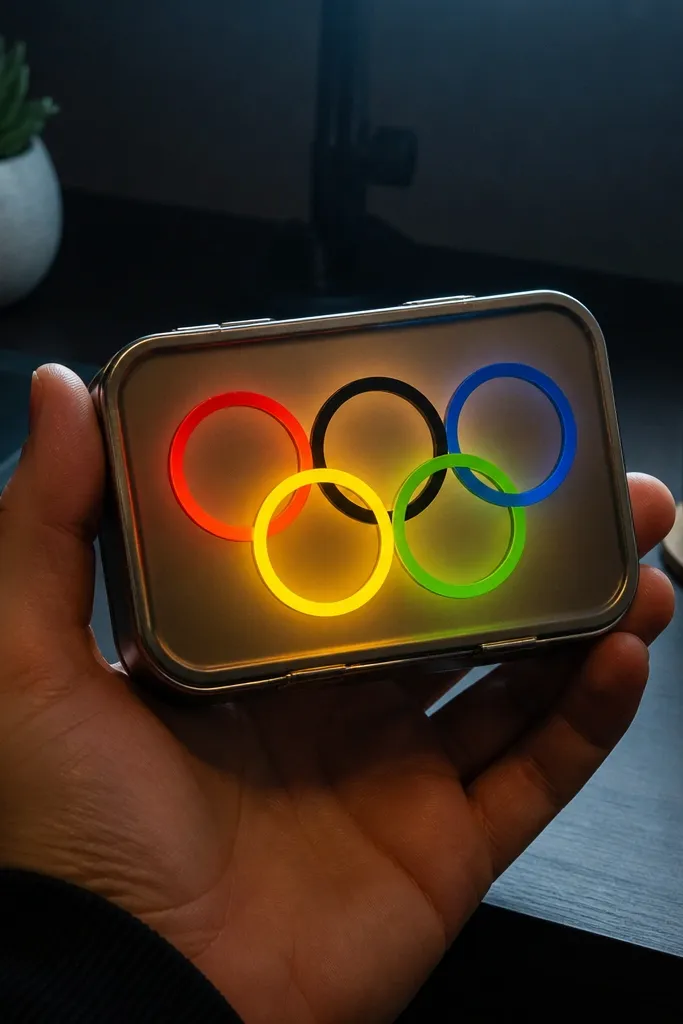
This theme is bold and instantly recognizable in photos because the ring shapes create a clean graphic target for light. You build it by cutting or layering colored ring shapes and backlighting them behind a frosted panel so each ring glows evenly. Keep the background dark so the colored light pops. It’s a fun “graphic poster” look that fits desks and bags. Build is medium because you’ll align five rings and manage color layers, but it’s worth it for the strong visual symmetry.
1) Create five ring shapes from colored craft foam or vinyl and set them on the inside of the lid over a circular or rectangular frosted window. 2) Mount LEDs behind the frosted panel so the rings glow through, then add a thin black backing behind the rings to prevent light bleed. 3) Wire to the base battery holder and place a switch on the side seam, then test glow and adjust ring spacing for even illumination.
Use matte colored materials — glossy rings reflect and look flat under LED light.
Don’t let rings overlap too much — overlapping layers trap light and muddy the colors.



