
1. Beige Canvas + Black Stitch Card Wallet
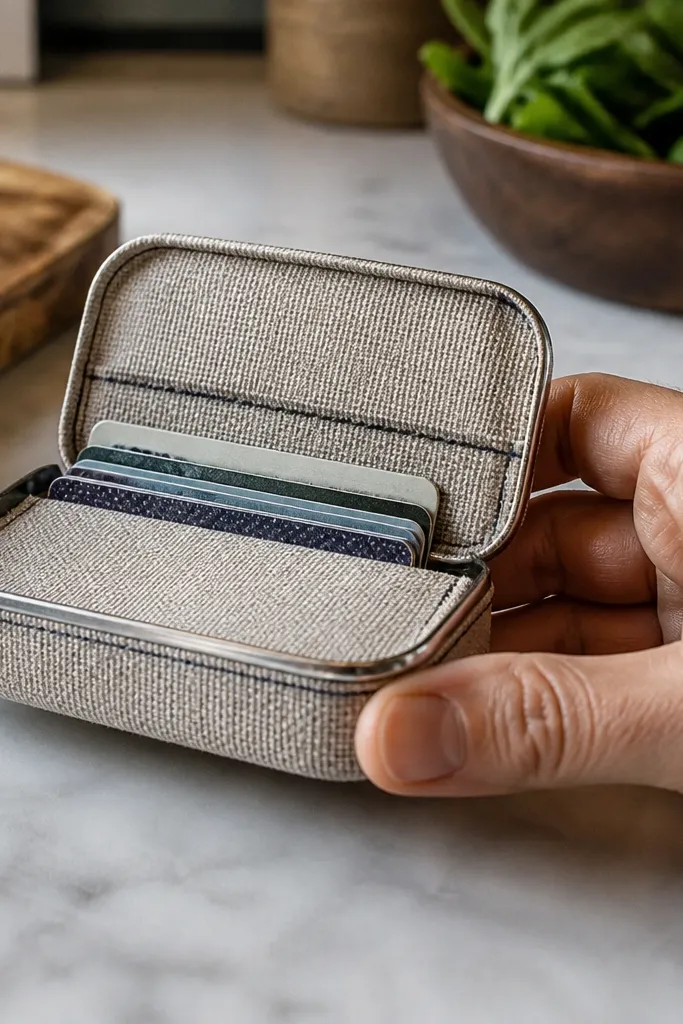
Cut two inner card panels from canvas — one for the front card stack and one for the side pocket. Mark three slot lines per panel with a ruler, then sew straight seams or glue-and-stitch the slot openings. Wrap the tin lid with the beige outer fabric, pulling tight at the corners, then tack the edges so it stays flat. Add a black snap to the front flap and stitch around the snap area for a crisp frame.
This one looks calm and expensive because the fabric grain stays consistent and the stitching line is the star. You’re turning the tin cover into a flat card pocket area, so cards sit flush instead of bulging out. Use a beige canvas outer and black thread for high contrast that reads well in photos. It’s ideal for a small-space Altoids Wallet when you want “everyday carry” without a bulky look. Skill-wise, it’s a straightforward sewing or glue-and-sew hybrid build that most people can finish in an afternoon.
Skip thisDon’t skip test-fitting cards before final stitching — slot width is where most wallets get ugly.
Editor's notePress your fabric with a warm iron through a thin cloth before cutting so slot edges stay sharp.
2. Denim Pocket Wallet with Copper Buttons
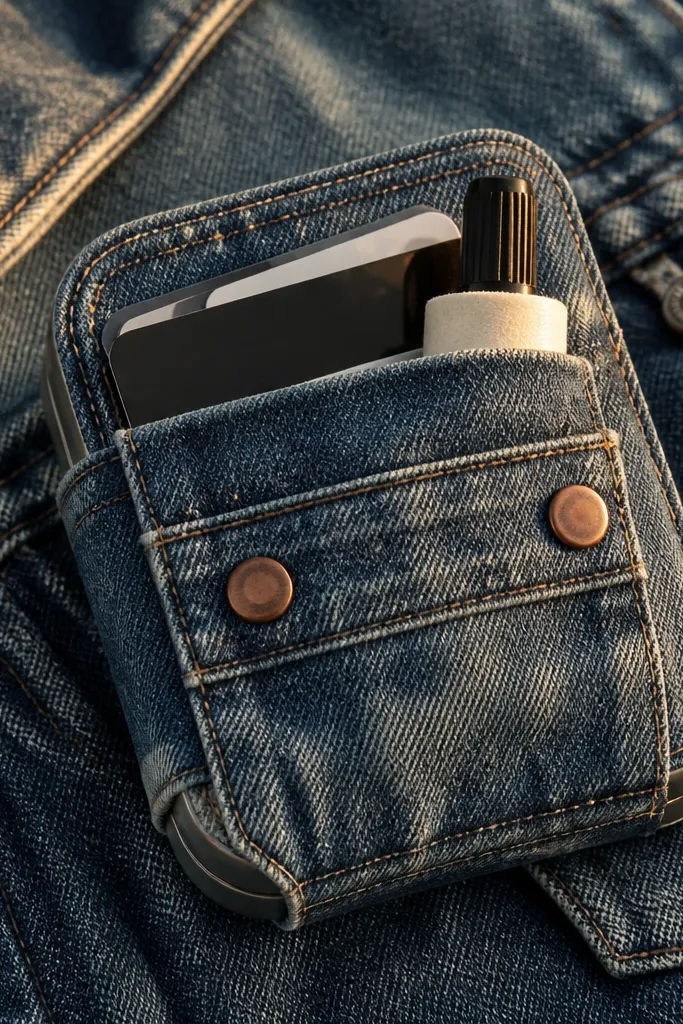
Cut a denim rectangle to wrap the tin lid, and keep the seam direction straight for a tidy look. Add a front pocket by stitching two denim layers — leave the top open and reinforce with a small bar tack at the corners. Mount the pocket layer so it lines up with the tin front edge. Install two copper shank buttons on the flap and lid base for a sturdy snap-fast closure.
Denim gives you that instant “real accessory” look, especially when you add copper buttons. The pocket front makes the build photogenic because it has texture, visible seams, and a clear focal point. This is a great small-space Altoids Wallet idea for carrying a few cards plus a tiny roll item like a mini lint roller refill. Denim also hides minor glue lines better than smooth fabrics, so you get a cleaner result even if you’re still learning.
Skip thisDon’t use slippery fabric for the pocket — it makes the opening gape and ruins the silhouette.
Editor's noteUse a denim needle (size 90/14 or 100/16) if you’re sewing — it keeps stitches clean.
3. Black Faux Leather Minimal Card Case
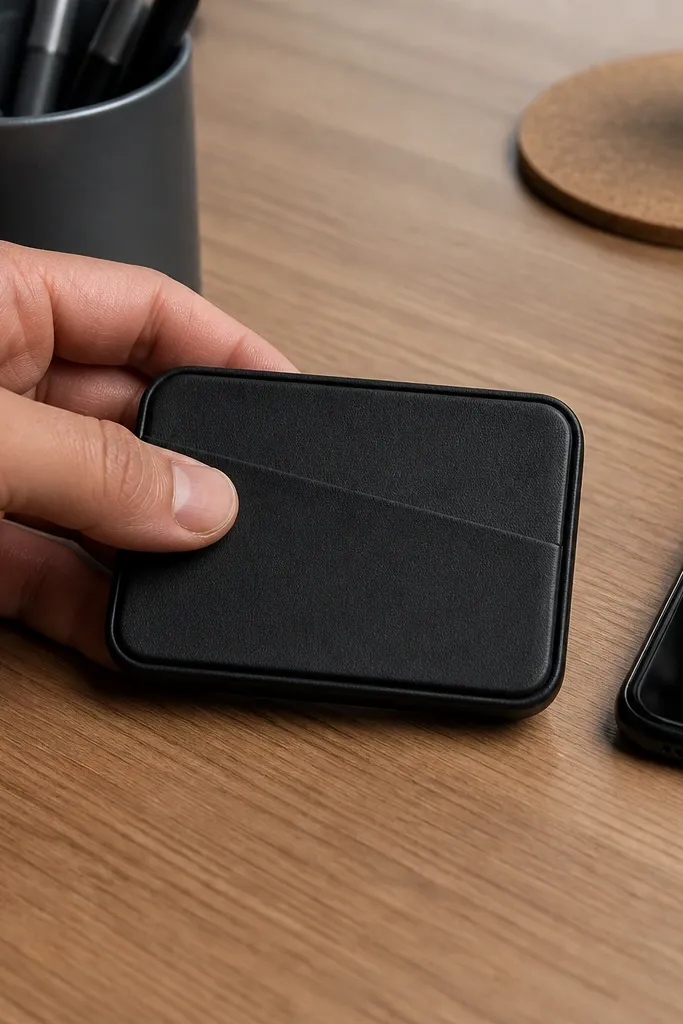
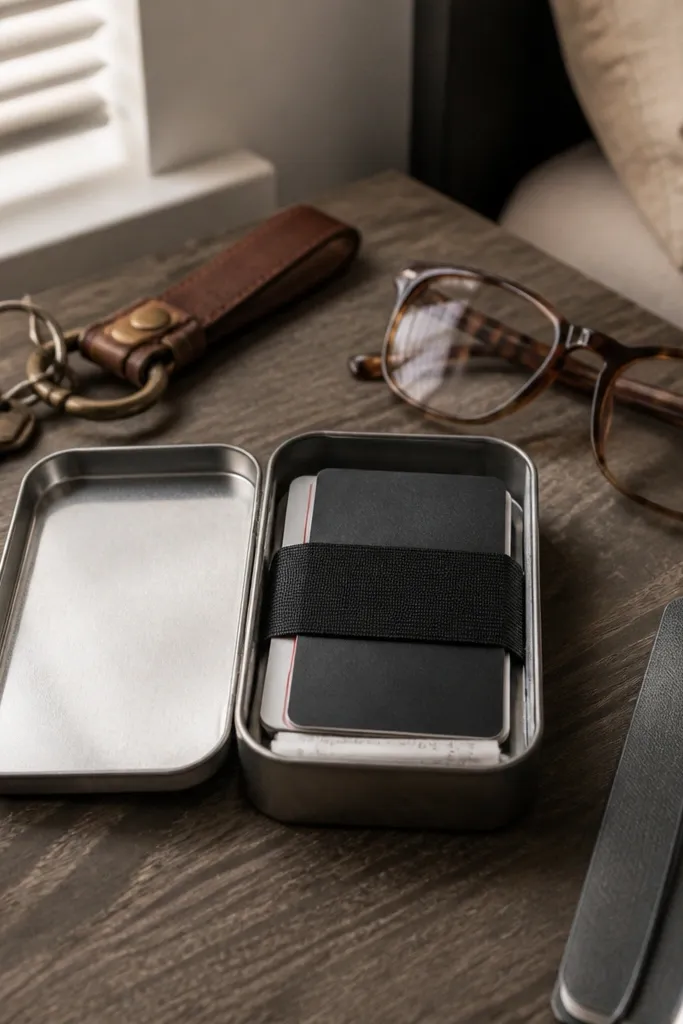
If you want the sleekest look, go black faux leather and keep the design to one clean seam line. This build makes cards look organized because the leather surface doesn’t show creases like cotton does. It’s also easy to wipe clean, so the wallet keeps looking “put together” even after daily use. For a small-space Altoids Wallet, minimal means fewer bulk points and a front that stays flat.
Cut faux leather panels for the lid wrap and the inner card lining. Use a thin craft foam layer (about 2-3 mm) between faux leather and lining so the lid doesn’t look floppy. Create two card slots by stitching vertical seams on the inside lining panel. Attach a magnetic snap to the lid base and reinforce with a small patch of leather scrap to prevent tearing.
Lightly sand the faux leather edges after trimming — it makes glue adhesion more reliable.
Don’t over-puff with thick foam — it makes the tin look warped when closed.
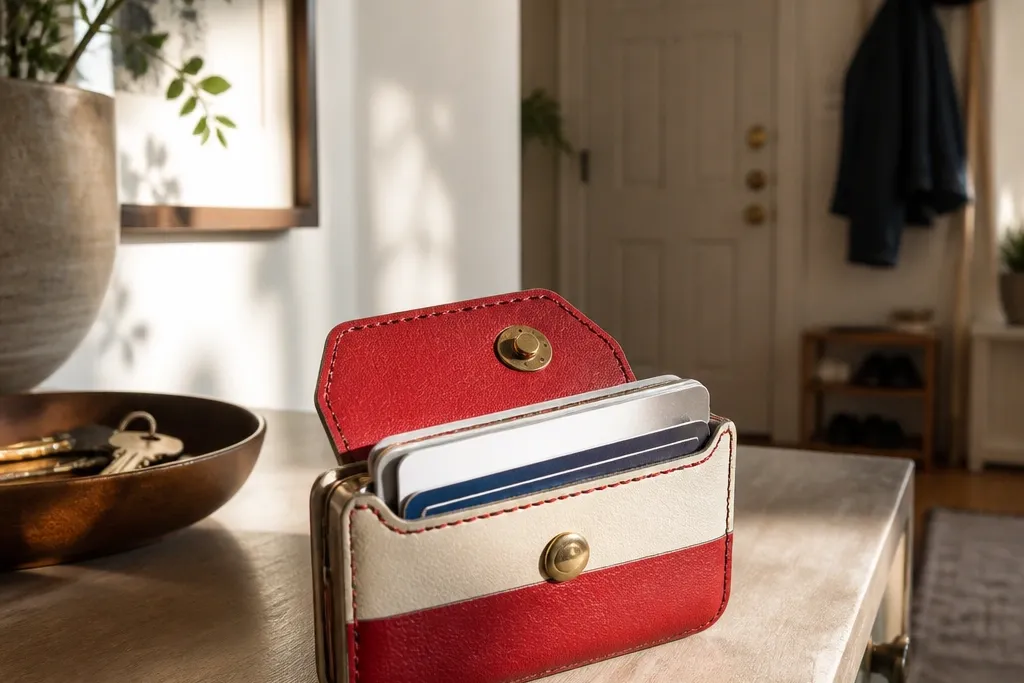
4. Red and Cream Color-Block Wallet
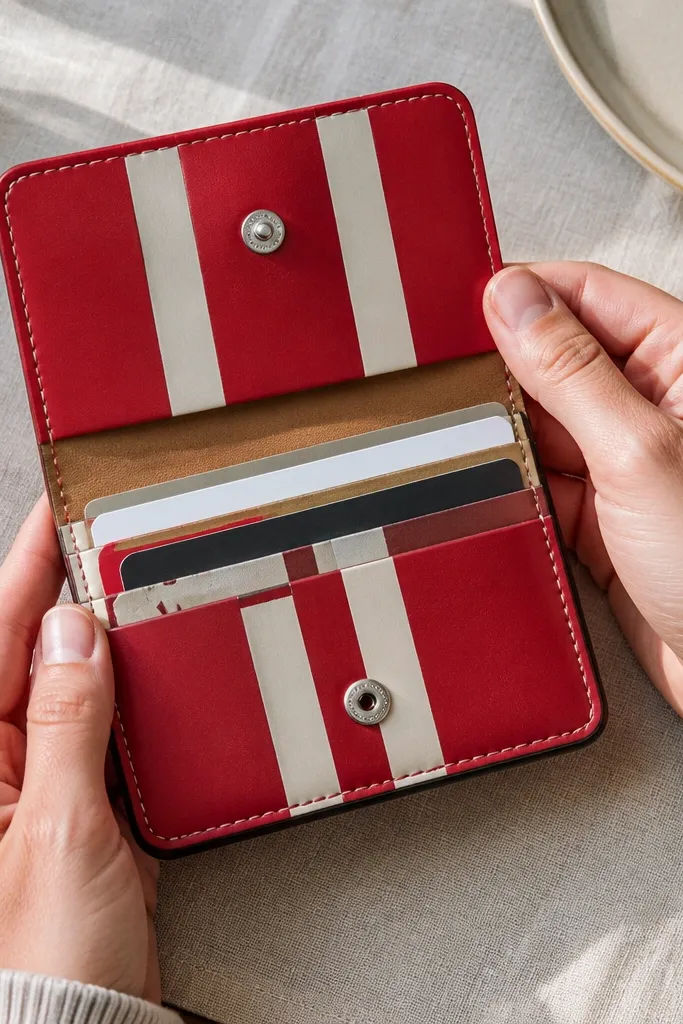
Color-blocking is the fastest way to make a small-space Altoids Wallet look designed instead of handmade. Red and cream gives a strong contrast that reads well in photos and feels cheerful without being messy. The trick is clean edge binding and consistent widths, so the color lines look intentional. This is a solid carry option for a couple cards and a small folded note, with the tin acting like a compact organizer.
Cut two outer panels for the lid: cream for one half and red for the other, keeping the dividing line perfectly straight. Add bias tape or faux-leather binding to cover the raw edges where colors meet. Create a single inner slip pocket by stitching the lining panel to one side of the tin base. Install a magnetic snap and keep it centered so the front stays symmetrical.
Use painter’s tape as a straightedge guide while gluing — it prevents crooked seams.
Don’t eyeball the color split — crooked lines make the whole wallet look sloppy.
5. Pastel Floral Window Wallet
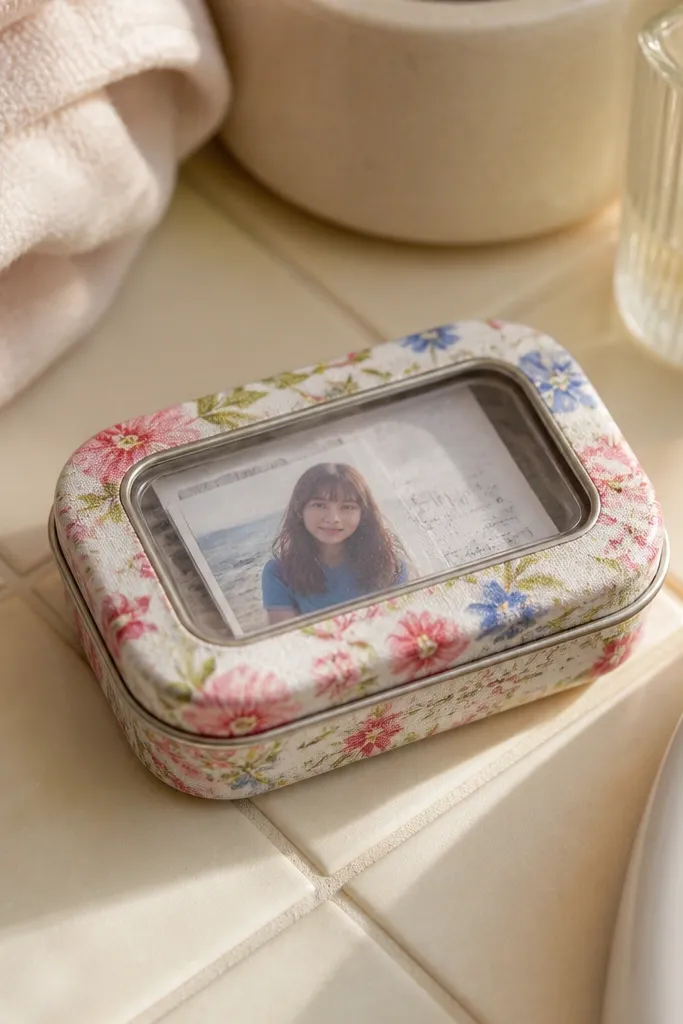
Choose a patterned fabric for the lid wrap and cut a window opening on the front panel. Glue clear vinyl or acetate behind the opening, then stitch or bind around the window edge so it stays crisp. Add an inner slip pocket behind the window so the item sits flat. Finish with a magnetic snap so the front stays clean and the window doesn’t get crushed.
A window gives you that “what’s inside” look without opening the tin, and it photographs beautifully. Pastel floral fabric on the outside makes the wallet feel soft and cute, while the clear window keeps it practical. This build works great for holding a folded receipt, a tiny photo, or a small card you want visible. It’s also a good option if you like decorative aesthetics but still want organization.
Skip thisDon’t place the window too close to the hinge — it warps when the lid opens.
Editor's noteUse a small craft hole punch to round the window corners — it keeps vinyl from peeling.
6. Cozy Knit Sleeve Wallet
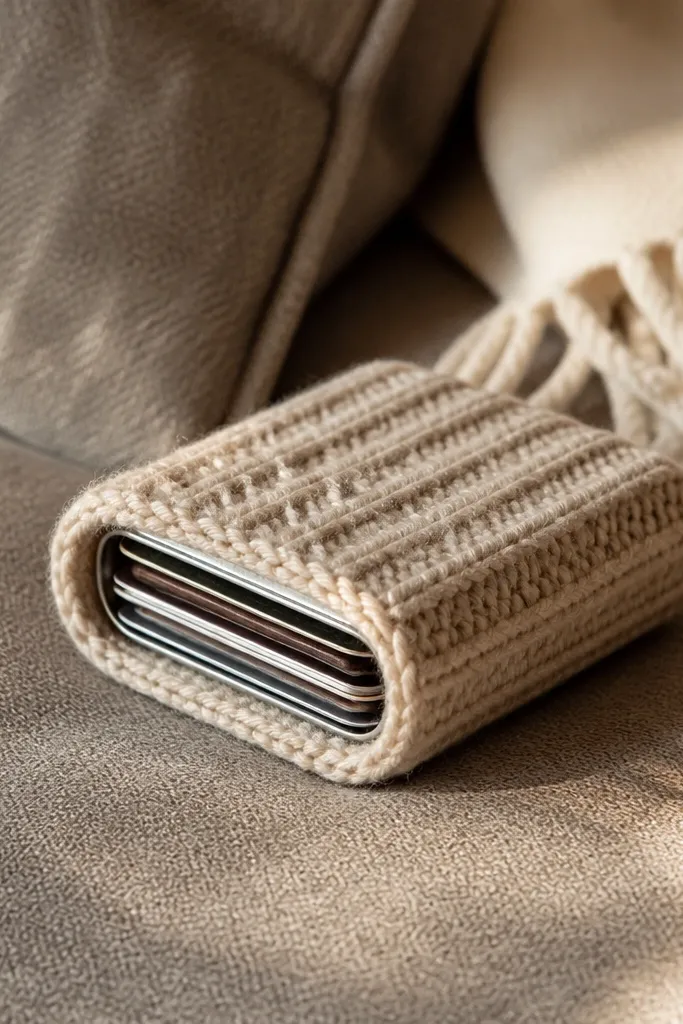
A knit sleeve makes the wallet look handmade in a cozy way, and it adds a soft protective layer over the tin. The sleeve design also hides minor imperfections in your fabric edges, which is a big win for beginners. For a small-space Altoids Wallet, knit works best when you keep the interior structured with a lining so cards don’t sag. The result is comfy, cute, and photo-friendly on a couch or desk.
Cut knit panels slightly larger than the tin lid and base, then line them with cotton canvas so the sleeve holds shape. Sew or glue the knit to the lining, leaving an opening for the closure area. Add an elastic cord or small fabric strap to hold the wallet shut, and stitch it securely to the base panel. Insert a thin cardboard or foam sheet inside the lining so the knit doesn’t collapse around cards.
Use a lint roller pass on knit before assembly — it photographs smoother.
Don’t skip the lining — raw knit stretches and the wallet ends up baggy.
7. Gold Foil Faux Leather Lining Wallet
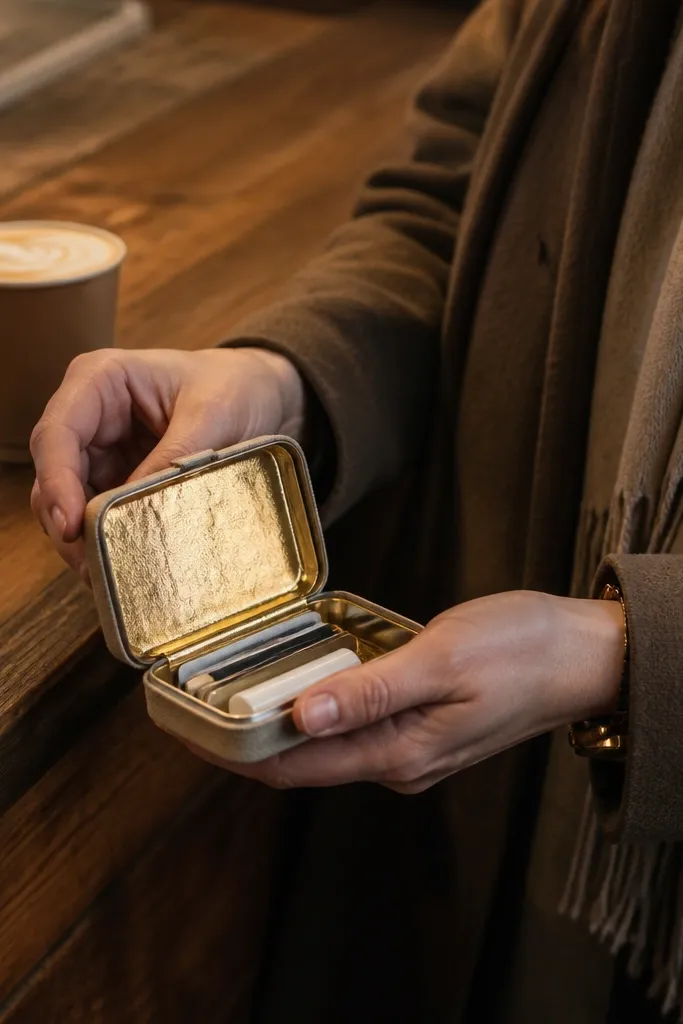
Wrap the tin lid with neutral fabric or matte faux leather. Cut a gold foil faux leather lining panel and attach it to the inside lid area with double-sided craft tape first, then glue around the edges. Build one horizontal pocket for cards and one vertical pocket for a small item. Add a magnetic snap and cover the snap edges with a small gold patch so it looks intentional.
The look here is “luxury surprise” — neutral outside, gold inside. When you open the small-space Altoids Wallet, the gold catches light and makes the build feel special without adding bulk. This works especially well for carrying a mini lip balm, a couple cards, and a small charm-like key. You get a wallet that looks good closed on a shelf and even better when opened.
Skip thisDon’t glue directly onto foil with thick glue blobs — they show as bumps.
Editor's notePress gold lining with a low-heat iron through parchment — it reduces wrinkles.
8. Chalkboard Label Wallet with Tiny Icons
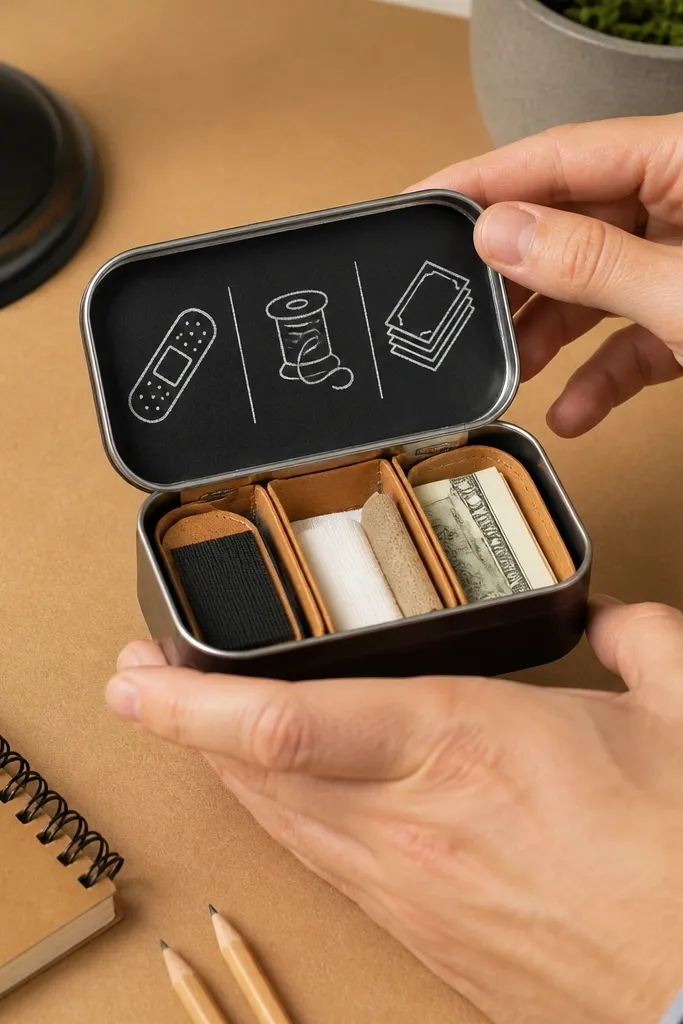
Cover the tin lid with chalkboard paint or chalkboard contact paper, then seal it with a matte clear coat after it dries. Use a ruler to draw straight label lines and add simple icons with a white chalk marker. Create a two-pocket interior: one for cards and one for small supplies, separated by a thin divider. Add a snap closure and keep the label area centered so it looks balanced.
This build makes the wallet look organized even when it’s empty because you’re adding labels. A chalkboard-style front with tiny icons gives a clean, graphic look that’s perfect for photos. It’s also practical: you can swap labels with chalk for different items like band-aids, floss, or emergency cash. For a small-space Altoids Wallet, labels keep the interior from feeling chaotic.
Skip thisDon’t use glossy clear coat — it reflects light and makes label photos look washed out.
Editor's noteSeal contact-paper edges with a thin layer of Mod Podge to stop peeling.
9. Map Print Adventure Wallet
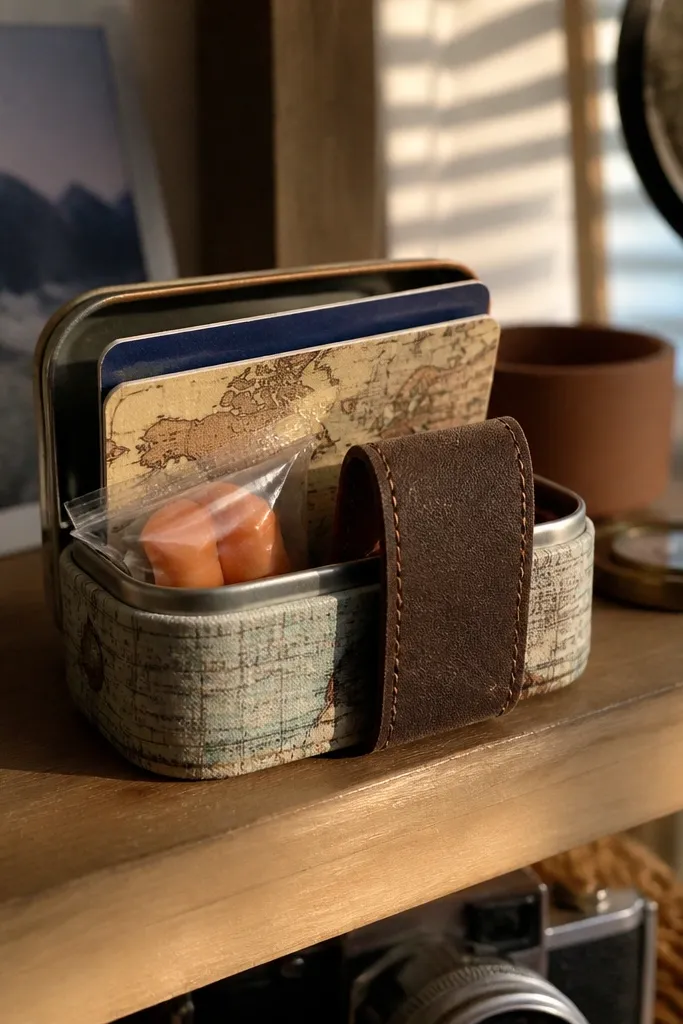
Map prints look great because they have lots of visual detail without needing extra embellishment. This version uses a brown strap closure so the wallet feels like travel gear. It’s a good small-space Altoids Wallet if you want to carry a couple cards plus a tiny kit like mini earplugs or a travel stain pen. The brown strap and map print combo makes it photogenic and cohesive.
Wrap the tin lid with map print paper-backed fabric or decoupage-ready paper on canvas. Seal the map surface with Mod Podge matte so it doesn’t scuff. Add a brown faux leather strap across the front — punch two holes and attach strap ends to the base panel. Build an interior slip pocket and a small divider so items don’t slide around.
Use matte sealant, not glossy — it keeps map text readable in photos.
Don’t overfill with bulky items; map print looks best when the wallet stays flat.
10. Monogram Lettering Wallet
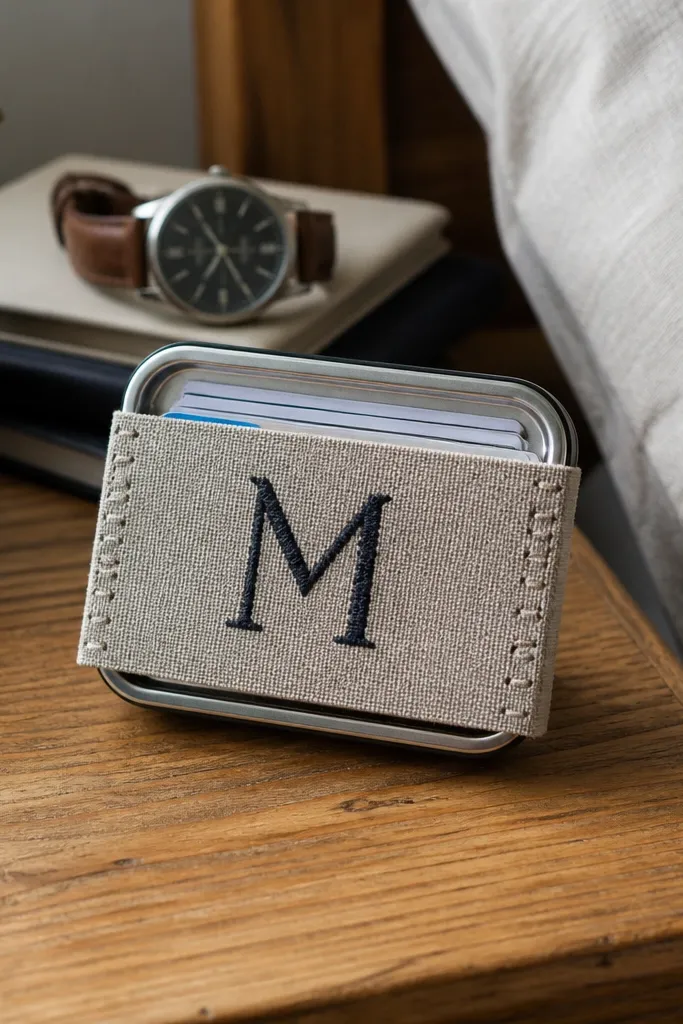
A single big monogram turns a small-space Altoids Wallet into something personal and clean. The look is graphic and modern when you use stitched letters instead of glue-on decals. It also hides small edge flaws because the letter becomes the focal point. This build is ideal for carrying a card stack and a small folded note, with the interior kept simple and flat.
Choose a fabric outer in one color — navy, forest green, or black. Cut a monogram letter from felt or faux leather and stitch it onto the front lid panel using a contrasting thread. Build two card slots inside with stitched seams, then attach a magnetic snap centered under the monogram. Seal raw edges of the felt letter with a thin fabric glue line so it won’t fray.
Use a back-and-forth stitch pattern for the letter so it looks even from a distance.
Don’t pick a letter font with lots of tiny cutouts — small shapes peel and look messy.
11. Clear Lid Insert for Mini Photo
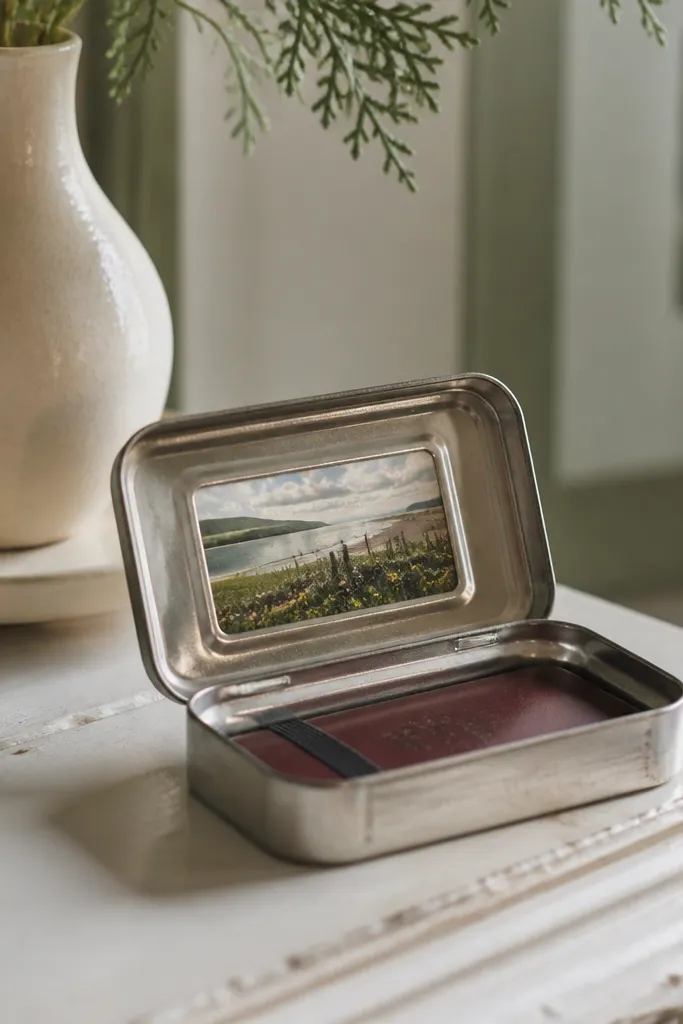
This one makes the wallet feel like a tiny keepsake without adding clutter. A clear insert on the lid lets you swap a mini photo, a pressed leaf, or a little card, and it looks great when the light hits. For a small-space Altoids Wallet, the clear part gives a focal point while the interior stays minimal. It’s a fun build for gifts, too, because the photo becomes the personalization.
Cut a window-sized opening in the lid panel and install clear vinyl or acetate behind it. Place your photo or paper insert on a backing card, then secure it so it can be swapped — use a thin pocket edge or removable tape strip. Build a simple interior slip pocket for cards. Add a snap closure and bind around the clear insert edge so it doesn’t lift.
Trim your insert 1-2 mm smaller than the window so it doesn’t scrape the acetate.
Don’t use thick paper — it makes the lid bulge and the snap won’t close cleanly.
12. Cork Outer Wallet with Leather Strap
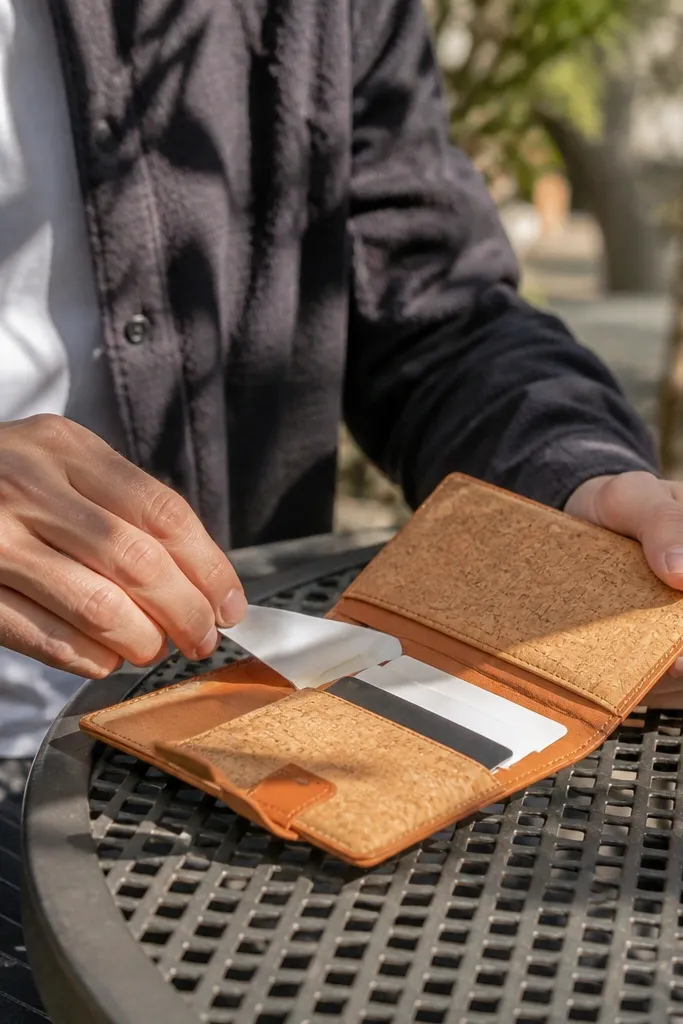
Cut cork sheets for the lid and base wraps, then apply contact cement thinly and evenly. Line the inside with cotton canvas so cards slide without catching. Add a leather strap closure by punching holes and stitching strap ends to the base. Build one side pocket divider so cards don’t mix with a tiny item pocket.
Cork looks warm and high-end, and it hides fingerprints better than smooth leather. Pair it with a tan leather strap for an outdoorsy, artisan vibe. The cork outer also gives you a natural texture that photographs well. For a small-space Altoids Wallet, cork works best with a structured lining so the tin cover doesn’t sag.
Skip thisDon’t skip lining — cork can shed particles and it can snag paper edges.
Editor's noteCut cork with a sharp utility blade and straightedge — cork tears if the blade is dull.
13. Rainbow Fringe Charm Wallet
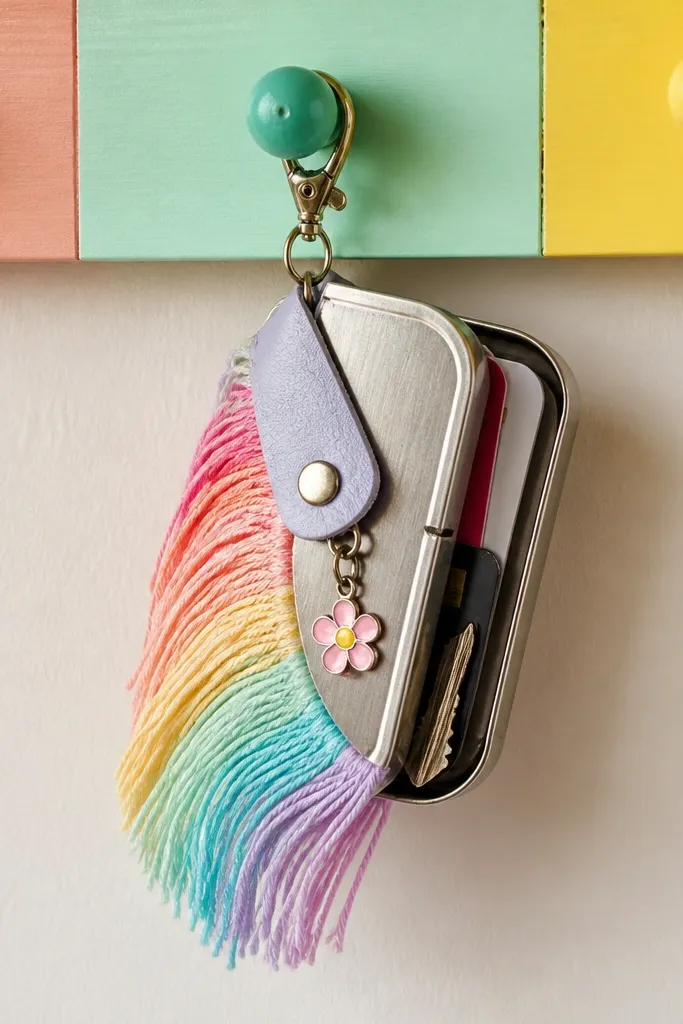
Trim fringe to the exact height of your lid wrap, then stitch it onto the outer edge panel before assembling the wallet. Add a small charm loop by attaching it to the snap flap seam area. For the interior, sew a simple card slot panel and a small pocket for a slim item. Install a magnetic snap or small button closure and keep it centered so the fringe stays even.
Fringe turns a small-space Altoids Wallet from “functional” into “cute accessory.” The trick is limiting the fringe to one edge so it doesn’t overwhelm the tin size. Add a tiny charm on the snap flap so it looks playful and moves slightly when you open it. This build is great for carrying a couple cards and a mini key or lip balm. It’s also very photo-friendly because fringe catches light and creates texture.
Skip thisDon’t add fringe on both sides — it makes the wallet look lopsided when closed.
Editor's noteUse fabric glue only on the fringe base edge — avoid getting glue on strands.
14. Olive Canvas + Paracord Lanyard Wallet
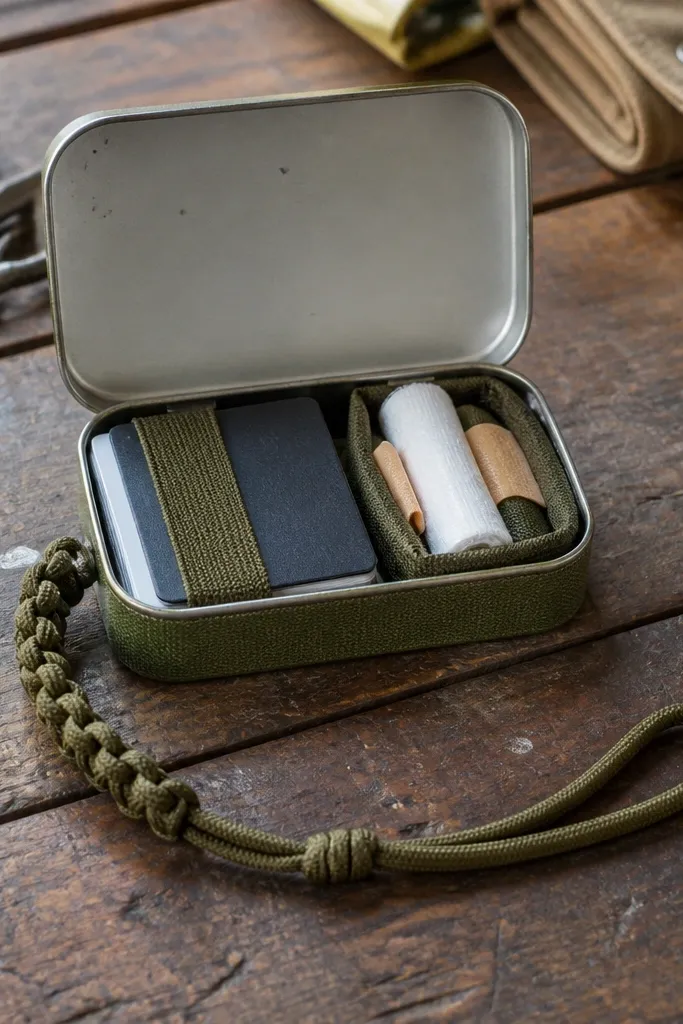
Paracord makes the wallet look like gear, not craft. Olive canvas keeps the vibe grounded and hides wear. A lanyard also solves a real small-space problem: you can keep the wallet from disappearing in a bag. This build works well for carrying a card stack plus a small first-aid item set. The look is rugged and clean because the outer fabric stays matte and the paracord reads as one strong line.
Wrap the tin lid with olive canvas and reinforce edges with stitched tacks. Create a paracord loop by melting the cord ends slightly, then stitch the loop ends to the base panel seams. Build two interior sections: one card slot panel and one slim zip-top pocket if you want security. Add a magnetic snap closure so the lanyard doesn’t interfere with opening.
Measure the lanyard length against your wrist — aim for a loop that sits around mid-knuckle.
Don’t use thick paracord — it crowds the lid and keeps the snap from seating.
15. Mini Zipper Wallet for Cash + Cards
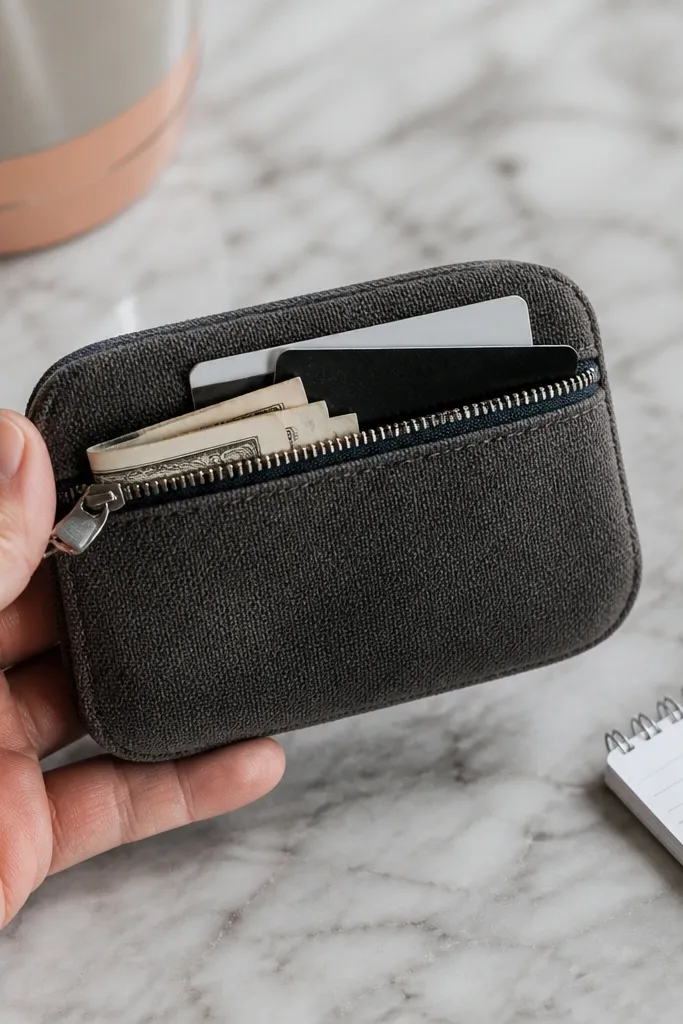
A mini zipper is the cleanest way to carry cash without it slipping out. It also makes the wallet look intentional because the zipper line is a strong design element. This is the best small-space Altoids Wallet option when you want everything secured — no rattle, no open flap. Keep the outside simple and let the zipper do the talking. It’s more work than a snap, but the end result looks very “store-bought.”
Use a thin zipper track that matches the tin lid width, and cut fabric backing strips to support the zipper teeth. Glue the zipper tape to the edge of the lid panel first, then stitch along the zipper tape edge once aligned. Build a cash pocket by creating a folded pocket layer inside the lid. Add a card slot panel beneath and finish the zipper ends with fabric caps so they don’t fray.
Pin the zipper with sewing pins through the tape backing, not through the teeth — it prevents tooth dents.
Don’t glue the zipper in place before dry-fitting the lid — zipper skew ruins the whole line.
16. Washi Tape Border Wallet
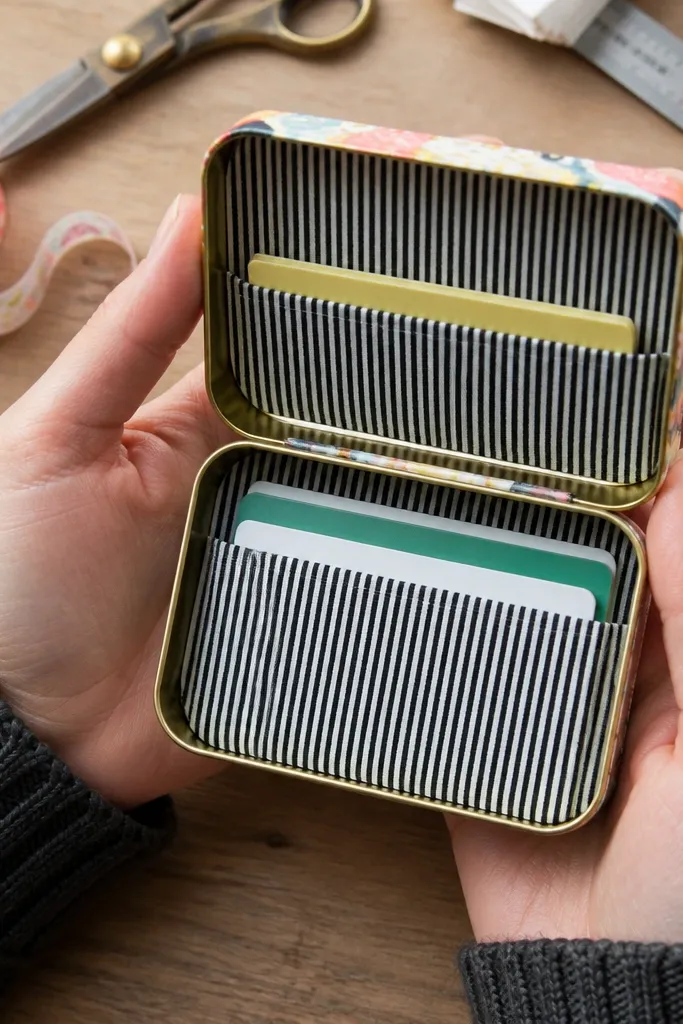
Washi tape is the fastest way to make a small-space Altoids Wallet look styled without bulk. Use it as a border around the lid — not as random patchwork — so the wallet stays crisp and photo-ready. This build is great for seasonal color changes because you can swap tape patterns quickly. The interior stays structured with fabric lining so cards sit flat while the outside gets the fun look.
Cover the lid with plain fabric or paper, then apply washi tape strips along the edges using a straight ruler. Seal the tape with a thin matte clear coat so it won’t lift. Add a simple card slot panel with two or three stitched pockets. Finish with a magnetic snap so the tape border stays protected when closed.
Use thin washi tape for the border — thick tape makes the tin lid feel uneven.
Don’t cover the snap area with tape — it can stop magnets from seating.
17. Satin Ribbon Tie Wallet
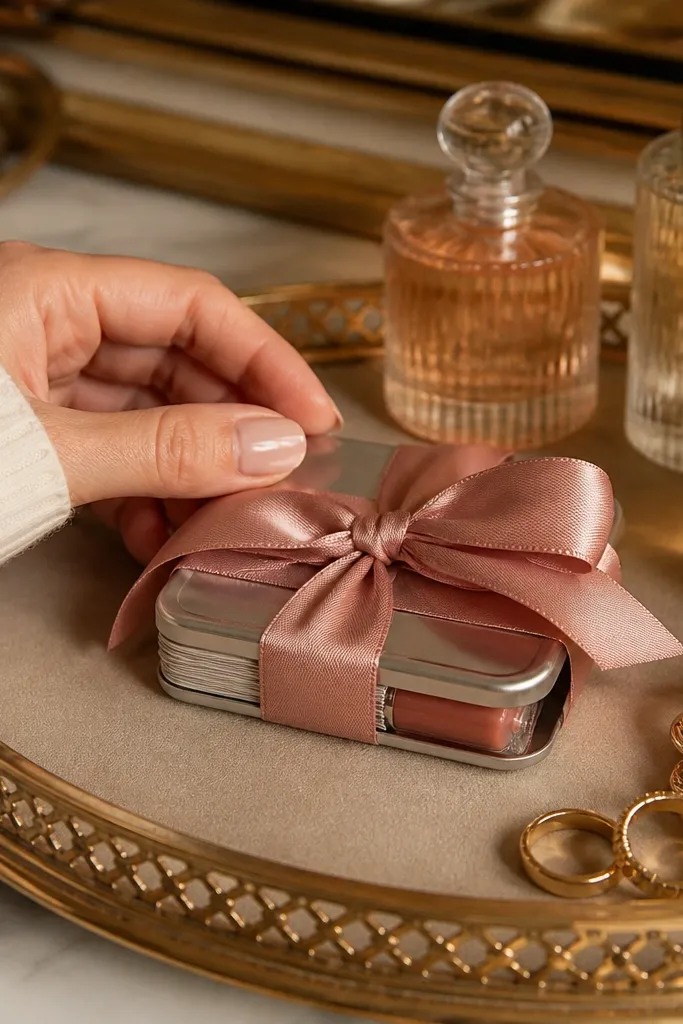
A satin ribbon tie looks romantic and clean, and it gives you an adjustable closure that stays flat. The shine is controlled if you pick a matte-satin ribbon, so it doesn’t glare in photos. This build works well for a small-space Altoids Wallet that holds a card stack and a small lip product. It’s also a good gift idea because the ribbon color becomes the personalization.
Wrap the tin lid with matte satin fabric and line the inside with cotton canvas to prevent slipping. Stitch card slots to the lining panel and add one small slip pocket for a slim item. Attach ribbon ties by stitching ribbon ends to the base panel edges, leaving the ribbon long enough to tie in a bow. Add a soft magnetic or snap assist if you want it to stay closed when untied.
Cut ribbon ends at a slight angle and seal with fray-check to keep the bow neat.
Don’t use slippery lining without tack — cards slide and the wallet looks messy when opened.
18. Quilted Fabric Wallet with Topstitching
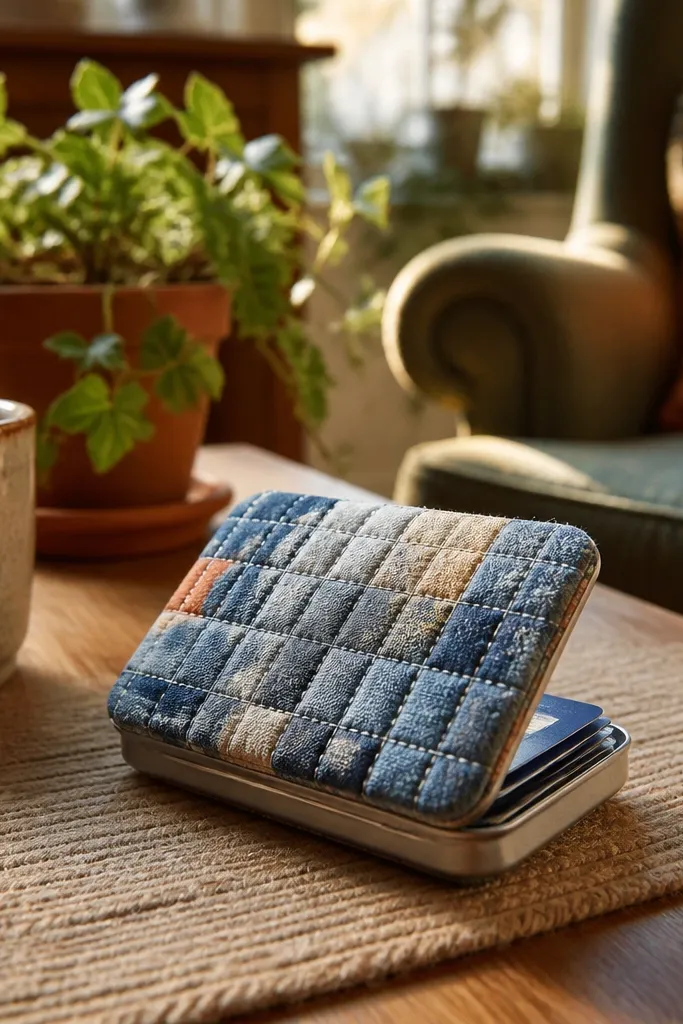
Cut a quilted outer panel by layering two fabric pieces and a thin batting sheet, then stitch straight lines 1 inch apart. Wrap the quilted panel around the lid and secure with glue or stitching at the corners. Build interior card slots by sewing to a canvas lining panel. Install a snap closure and edge-stitch around the lid seam for a finished look.
Quilting makes the wallet look cozy and dimensional, and it hides slight unevenness in your fabric wrap. Topstitch lines create a clear, photogenic grid that reads instantly as “crafted.” For a small-space Altoids Wallet, quilting works best on the outer lid only — keep the interior flatter so card slots sit cleanly. This is a solid choice if you want a warm, homey aesthetic without adding lots of decorative pieces.
Skip thisDon’t quilt too thick — thick batting makes the tin lid bulge and the snap won’t close.
Editor's noteUse a walking foot if you have one — it prevents puckering on layered fabric.
19. Embossed Leather Look Wallet
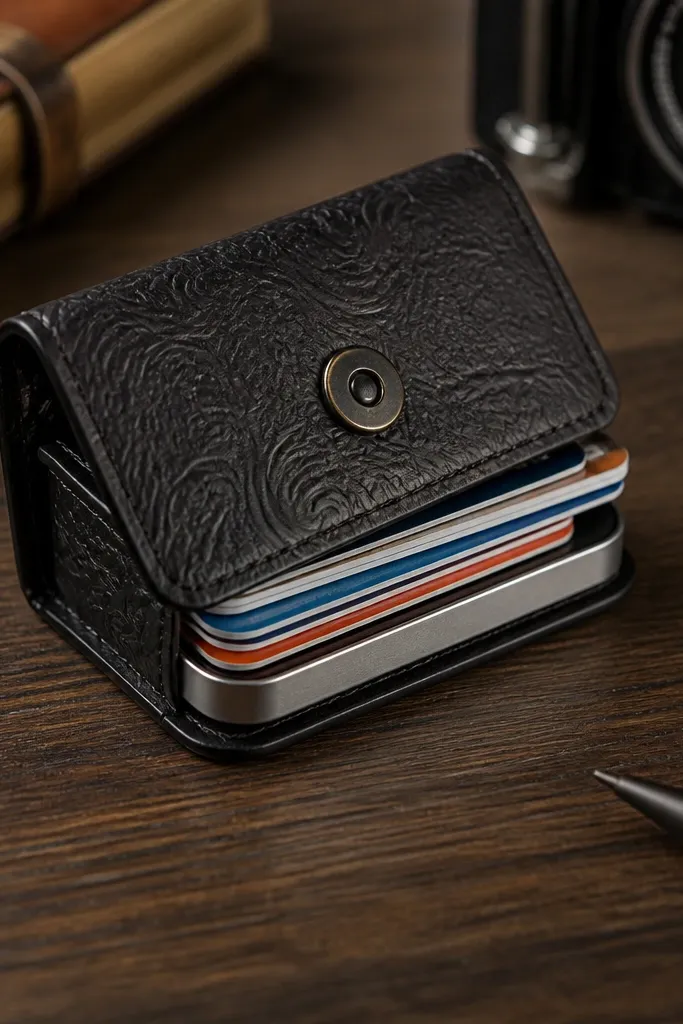
Choose embossed faux leather and cut lid and base wraps with a straightedge. Glue the embossed outer to a thin canvas backing so it doesn’t stretch. Add interior card slots with a lining fabric that won’t snag. Place a magnetic snap centered on the front and reinforce with a small backing patch to keep the snap from pulling through.
Embossed leather-look fabric adds texture without extra pieces, which is why it looks polished. It also photographs well because the pattern catches light from different angles. This build is best for a small-space Altoids Wallet that stays mostly neutral with a single detail like a centered snap or small label. It’s also forgiving: embossed materials hide tiny glue marks better than smooth ones.
Skip thisDon’t stretch embossed fabric while gluing — the emboss pattern warps.
Editor's notePress embossed fabric with light heat — heavy heat flattens the embossing pattern.
20. Woodgrain Contact Paper Wallet with Clear Front
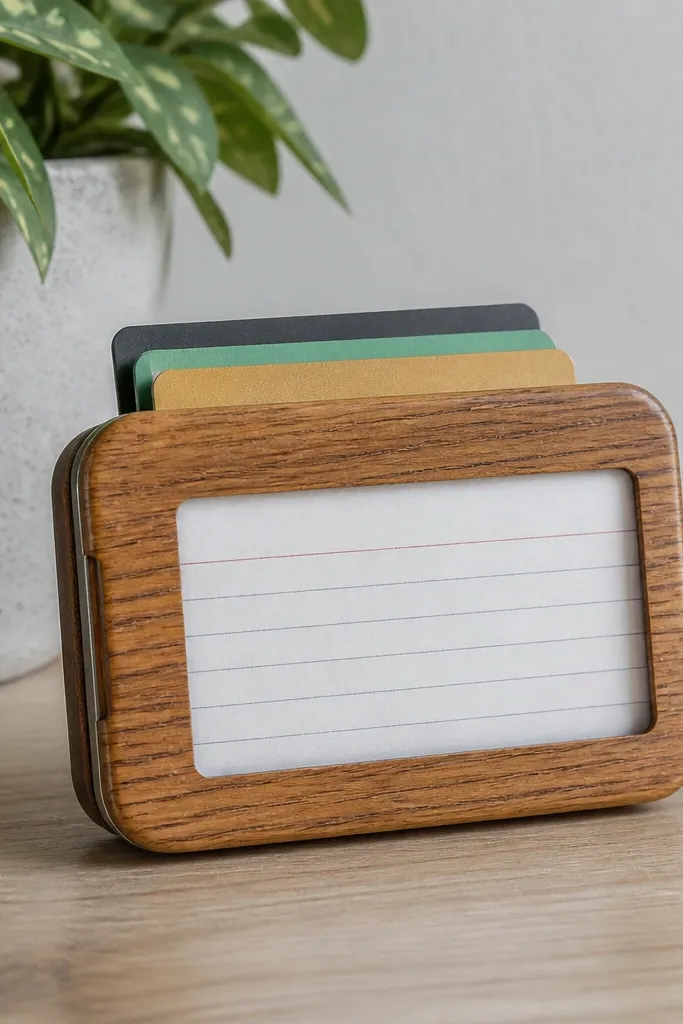
Woodgrain contact paper gives a modern “mini desk accessory” vibe, and it looks great on neutral outfits and desks. Add a clear front panel so you can swap a small note or mini tag. This is a strong small-space Altoids Wallet option if you want a clean, graphic look without sewing a bunch of seams. The contact paper also makes assembly quick because it’s smooth and consistent.
Cover the lid with woodgrain contact paper, trimming edges with a sharp blade and sealing corners with clear tape or thin glue. Cut a smaller window in the front and apply clear vinyl behind it. Add an interior slip pocket for the note so it sits flat. Use a magnetic snap closure and keep the snap area free of wrinkles in the contact paper.
Apply contact paper slowly and use a plastic scraper to push out bubbles.
Don’t use shiny woodgrain — it reflects light and makes photos look washed out.
21. Pressed Flower Resin-Style Window Wallet
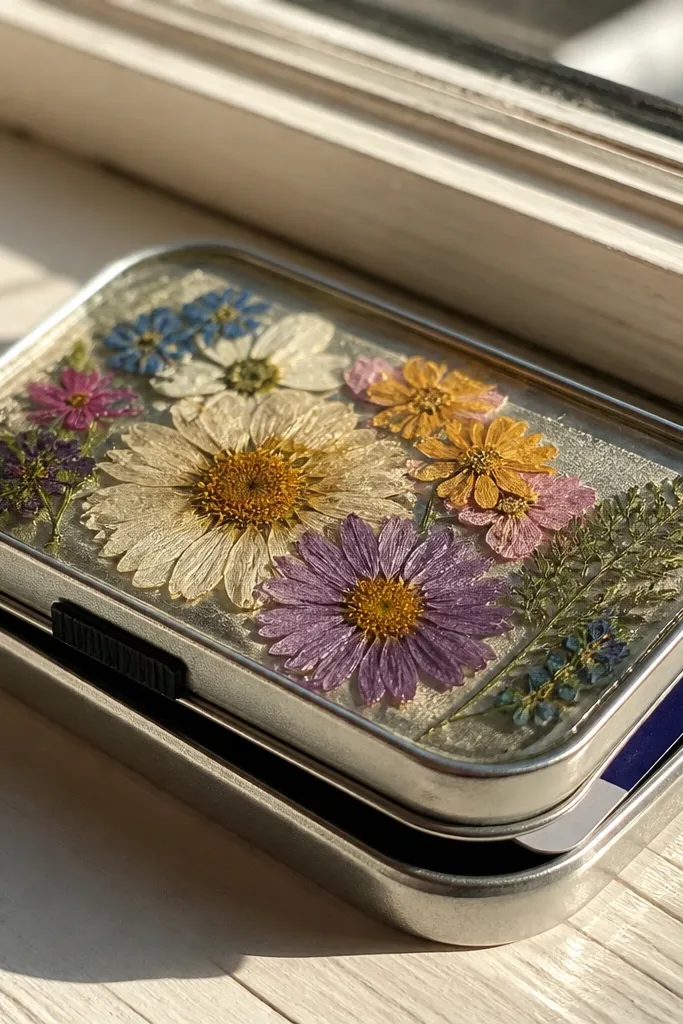
Cut a window opening in the lid front and cover it with clear vinyl or a thin clear laminate. Arrange pressed flowers inside a sealed pocket layer behind the clear panel so they don’t shift. Add a thin backing card to keep the flowers flat. Install a magnetic snap and stitch or bind around the window edge to keep the clear layer secure.
A pressed flower window makes the wallet feel like a tiny art piece, and the colors pop when light hits the clear layer. This build is photogenic because the window shows the texture of petals, not just a flat card. For a small-space Altoids Wallet, keep the interior minimal so the window is the main feature. It’s a great idea for gifting because it looks personal without needing a lot of text.
Skip thisDon’t pack flowers too thick — they create bumps that make the lid not close.
Editor's noteDry flowers longer than you think — wet petals cloud the clear layer.
22. Star Map Lining Wallet with Hidden Pocket
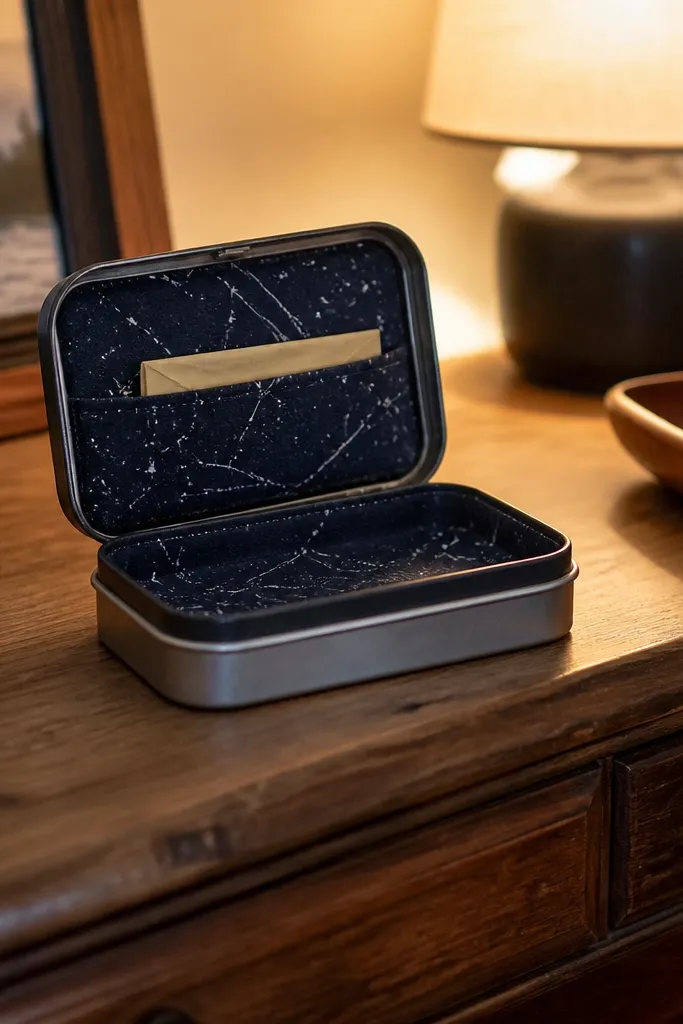
Wrap the outside lid with a solid fabric and line the inside lid with star map print fabric. Sew a card slot panel, then attach a second pocket behind it using fabric strips so it’s hidden from the front view. Add a divider so cards don’t slip into the hidden pocket. Install a magnetic snap and keep the hidden pocket opening aligned with the tin base edge.
This one is about surprise. The outer can stay plain, but the inside lining uses star map print, and the hidden pocket lets you carry a small folded note or tiny photo. The look is photogenic because when you open the wallet, the lining pops. For a small-space Altoids Wallet, a hidden pocket keeps the front uncluttered while still letting you carry more.
Skip thisDon’t make the hidden pocket opening too narrow — you’ll fight it every time.
Editor's noteUse a contrasting thread for the hidden pocket seam — it makes the interior look intentional in photos.
23. Monochrome Stripe Wallet with Side Pocket
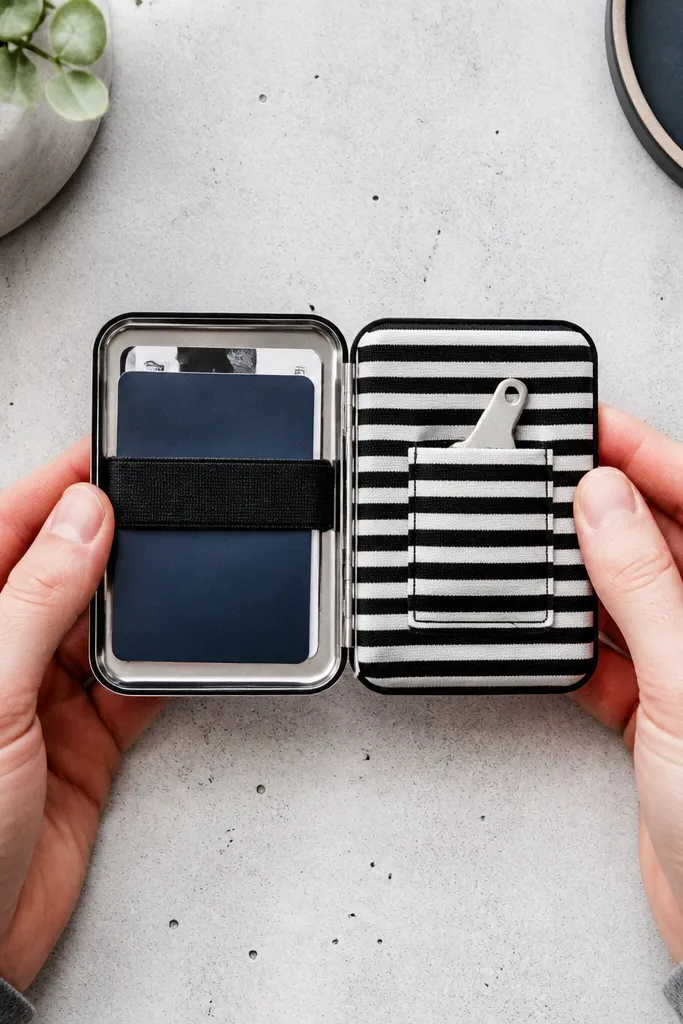
Pick a black-and-white striped fabric and cut panels so stripes run straight on the lid. Wrap the lid and base, then add a side slip pocket by stitching fabric to the inside lining panel. Install a magnetic snap centered on the front and add a top edge stitch to frame it. Slide-test your cards and adjust pocket height so the pocket doesn’t show bulges when closed.
Monochrome stripes look crisp and modern, and they make the wallet look designed even with minimal hardware. A side pocket adds function without breaking the clean lines. This build works well for a small-space Altoids Wallet because stripes visually guide the eye to the pocket area, so it looks organized. It’s also easy to match with outfits since it stays neutral and graphic.
Skip thisDon’t mix stripe scales — it looks chaotic on such a small surface.
Editor's noteMatch stripe direction across the lid seam so the pattern doesn’t look interrupted.
24. Flannel Cozy Wallet with Button Tabs
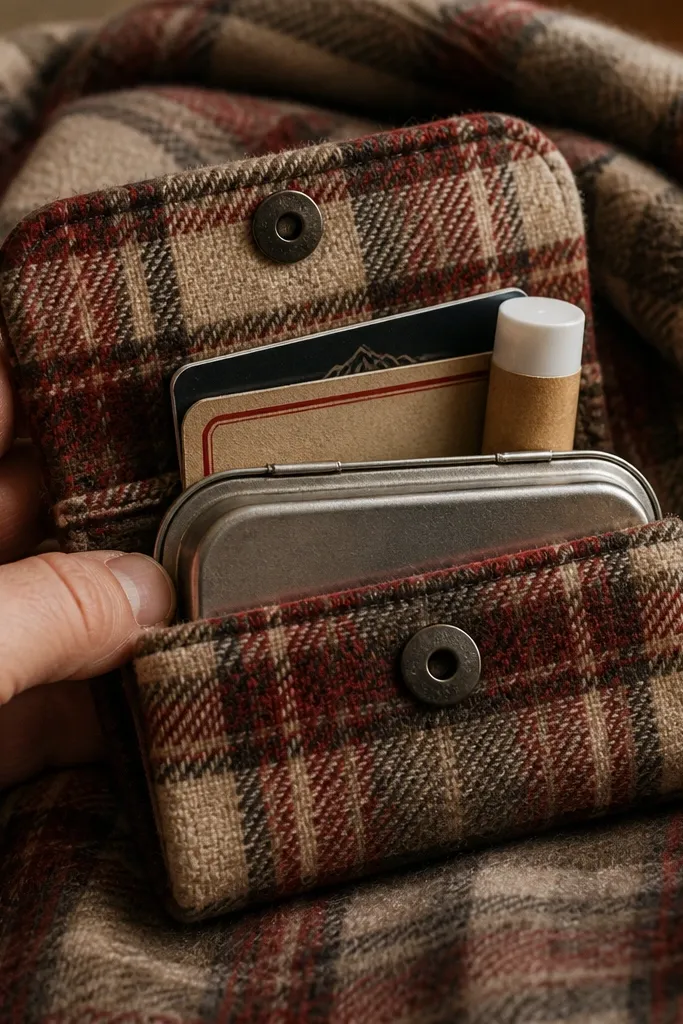
Flannel gives a soft, cozy look that photographs beautifully in warm light. Button tabs add a classic detail and keep the closure from looking bulky. This build is a good small-space Altoids Wallet choice for winter carry: a couple cards and a small lip balm sit nicely against the flannel texture. The tab closure also makes the front look tidy and structured.
Wrap the tin lid with flannel and line with cotton canvas to prevent stretch. Sew a card slot panel on the inside lining and add a small pocket for a slim item. Create two button tabs by cutting small flannel strips, folding them, and stitching them to the base. Attach corresponding button holes on the lid flap and close with the tabs.
Use a slightly thicker flannel for structure so the tabs don’t flop.
Don’t choose very thin flannel — it wrinkles and makes the wallet look uneven.
25. Vegan Leather + Studded Corner Wallet
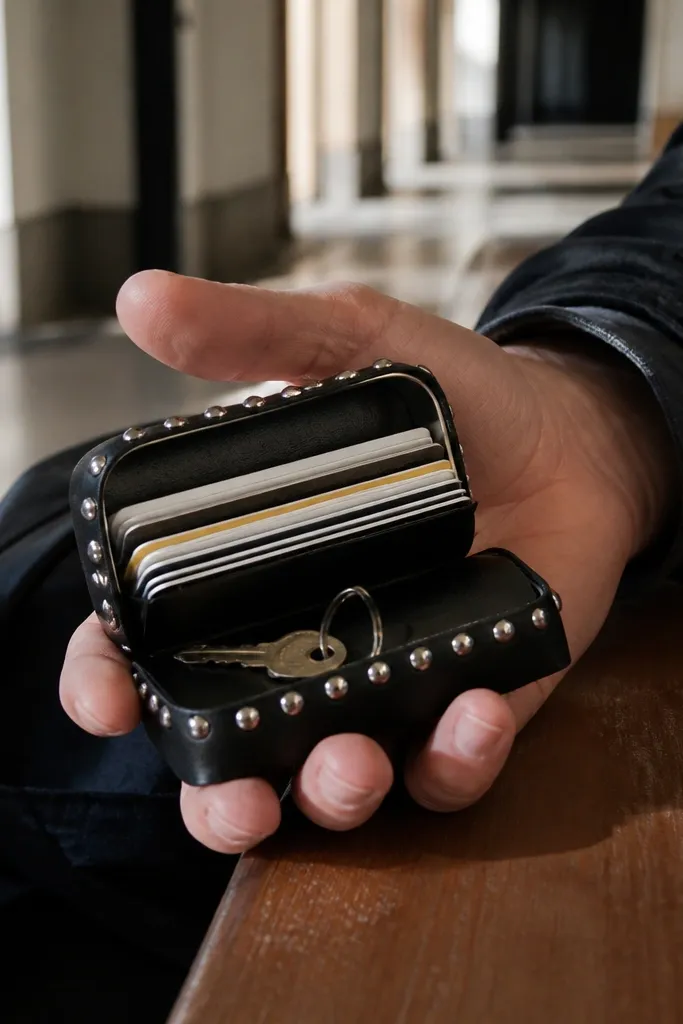
Studs at the corners make a small-space Altoids Wallet look edgy and intentional without covering the whole surface. It’s a clean design trick because the studs frame the tin shape and add shine where light hits. This build carries well for cards and a tiny key, and the vegan leather surface wipes clean. It’s also quick: the studs do the heavy lifting visually.
Cut vegan leather wraps and apply to a thin canvas backing for stability. Mark two corner positions on the lid and base, then install metal studs using the stud kit tool. Build interior card slots with sturdy lining fabric so the studs don’t tear through the outer layer. Add a magnetic snap centered so the lid closes flat and doesn’t pull around stud points.
Place studs slightly in from the edges so the leather doesn’t split when you tighten them.
Don’t over-tighten studs — it crushes the faux leather and creates cracks.
26. Tote-Tag Keychain Wallet with Clip
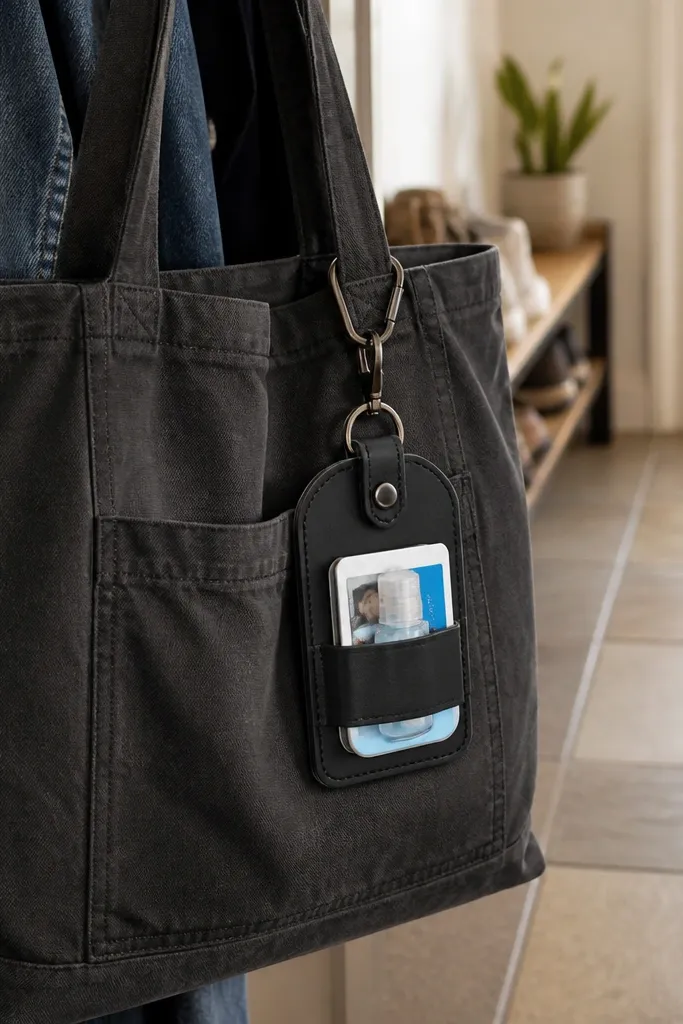
A keychain clip turns your small-space Altoids Wallet into something you can grab fast, and the tag-style cover makes it look like a branded accessory. This build is great for carrying an ID card, emergency cash, and one small item like a mini hand sanitizer. The look is photogenic because you can photograph it hanging off a tote or belt loop. Keep the cover simple and let the clip and tag shape define the style.
Wrap the tin lid with fabric and line it with canvas. Add a tag-like extension on one side by stitching a fabric strip to the base panel, then install a metal keychain clip to the tag end. Build a single card pocket and a small slip pocket for a slim item. Close with a magnetic snap so the tag doesn’t block the lid seam.
Choose a clip with a wide gate so it doesn’t snag fabric threads.
Don’t attach the clip to the lid — it makes the wallet sit crooked and looks messy.
27. Garden Green Velvet Wallet with Contrast Pocket
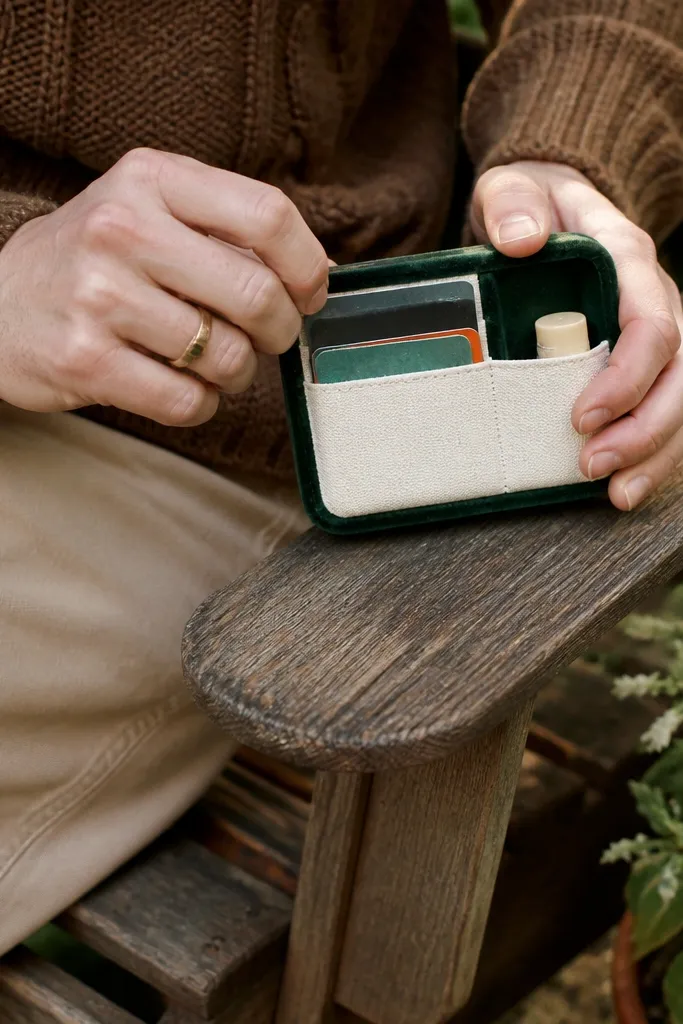
Wrap the lid with green velvet fabric and back it with cotton canvas so it holds shape. Cut a contrasting pocket panel from a sturdy fabric like black cotton twill. Stitch the pocket to the lining panel and install a magnetic snap on the front. Add one divider seam so the pocket and card slots stay separated when closed.
Velvet makes everything look plush, and green velvet feels like a garden accessory. The contrast pocket panel is what keeps it from looking too heavy — it adds structure and clear organization. For a small-space Altoids Wallet, velvet works best when the interior lining is smooth cotton so cards don’t catch. This build is perfect for carrying a small card set plus a lip balm or mini lotion sample.
Skip thisDon’t use too much glue on velvet — it leaves shiny spots.
Editor's noteUse a lint brush on velvet before photos — it removes fuzz that ruins the look.
28. Gray Felt Wallet with Felt Letter Tabs
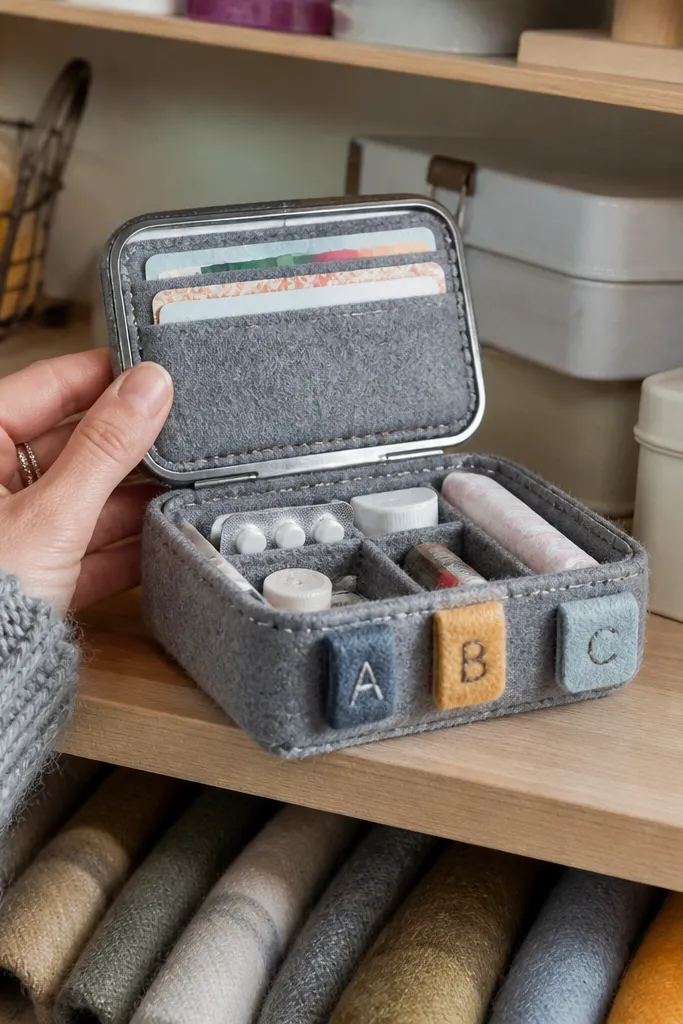
Cut a gray felt outer panel for the lid and back it with thin canvas so it stays crisp. Make letter tabs by cutting small felt rectangles and sewing a letter label onto each. Stitch or glue tabs onto the inner pocket edges so they point to each compartment. Add card slots and a small supply pocket, then install a magnetic snap and edge stitch around the lid seam.
Felt tabs are a smart design move because they make the wallet readable at a glance. Gray felt keeps it modern, while letter tabs add a playful, organized vibe. This is an excellent small-space Altoids Wallet build if you’re carrying different categories like cards, band-aids, or floss — the tabs make it easy to put things back. It also photographs well because felt has a soft matte finish that doesn’t glare.
Skip thisDon’t overlap tabs — overlapping makes compartments hard to identify.
Editor's noteUse fabric marker for letters only after you test on scrap — felt can bleed.
29. Beaded Edge Wallet with Tiny Seed Beads
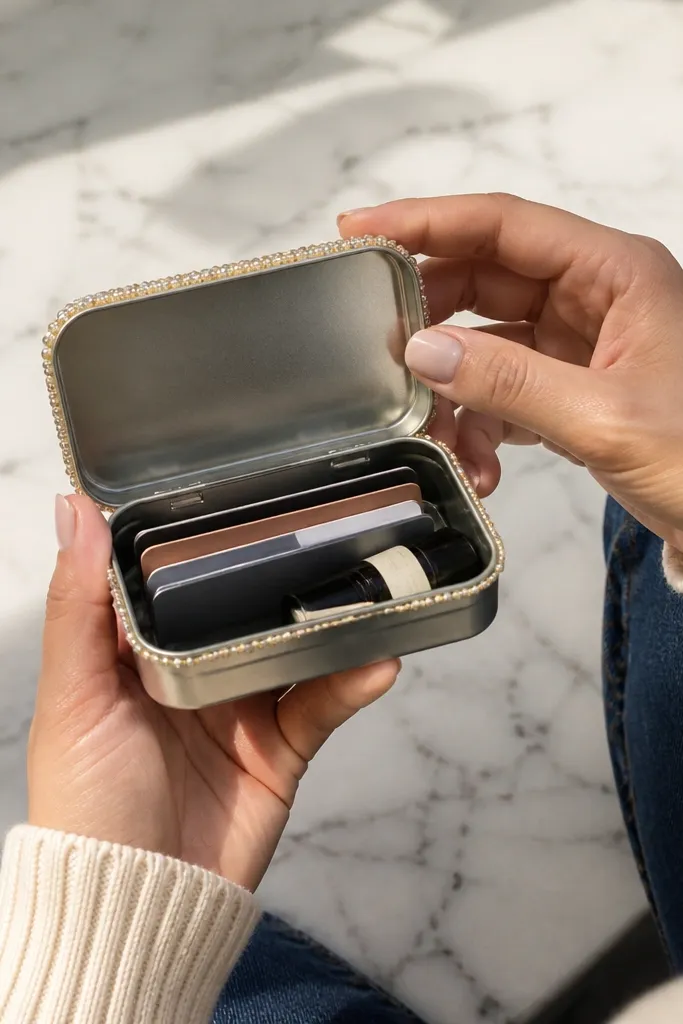
Beaded trim is one of the most photogenic upgrades you can add to a small-space Altoids Wallet because it catches light at the edges. Keep the beads only along one border line, and the wallet stays classy instead of busy. This build is best for carrying a few cards and one small item — the beads add visual weight, so the interior needs to stay minimal. It’s also a good “statement” wallet for a small desk or bag.
Apply a thin seam of glue or stitch a fabric trim strip around the lid edge first. Sew seed beads onto the trim strip with a fine needle and strong thread, keeping beads evenly spaced. Line the interior with a smooth fabric to protect thread ends. Install a magnetic snap and cover the snap base with a small fabric patch so the beads don’t interfere with closure.
Use a bead board or tape guide to keep your bead line straight.
Don’t bead over thick seams — it creates lumps that stop the lid from closing.
30. Fabric Rolled-Cable Organizer Wallet
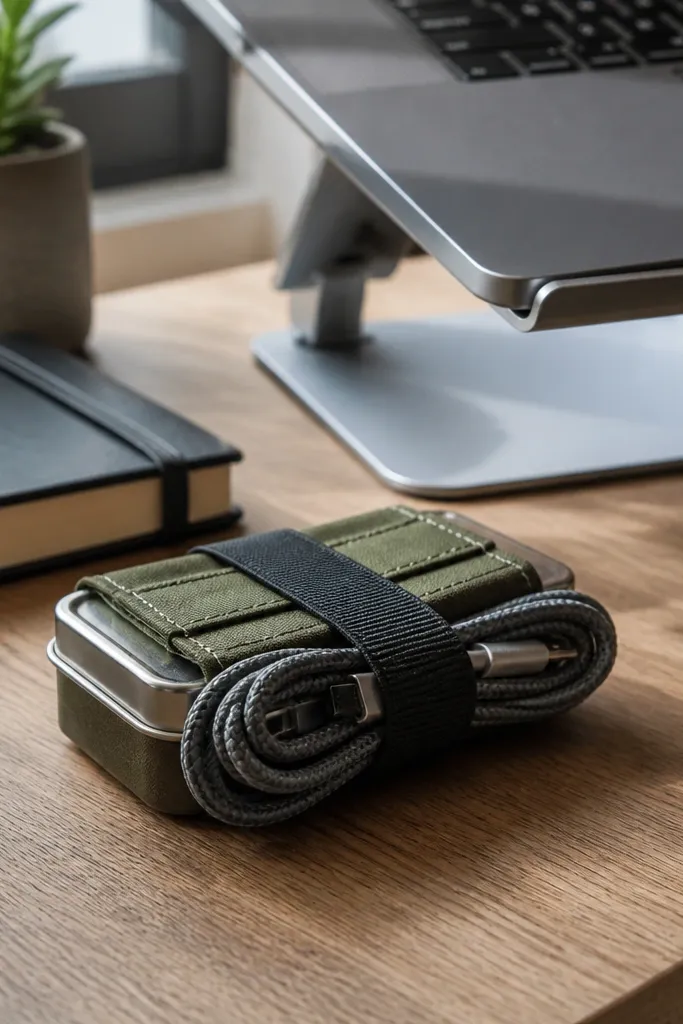
Make a thin rolled insert from fabric and a stiff interfacing layer, sized so it fits inside the tin base without forcing the lid. Add a strap or elastic band across the insert to keep the roll tight. Build a front card pocket and a side pocket for accessories like a tiny adapter. Close with a magnetic snap and reinforce the elastic attachment points with extra stitching.
This build is for people who want their small-space Altoids Wallet to handle tech-adjacent carry without looking like a gadget case. A rolled-cable slot keeps a charging cable or headphone wire from tangling, and the fabric cover makes it look like a stylish accessory. The key is a flat rolled insert and a tight strap so the cable doesn’t spring out. It’s a practical, photogenic idea because you can show a neat roll through a pocket opening.
Skip thisDon’t use elastic without stitching reinforcements — it tears out on small fabric panels.
Editor's noteRoll the cable around a cardboard strip once, then measure the final diameter — that prevents an oversized insert.



