
1. Kraft Wrap Money Rose Bouquet
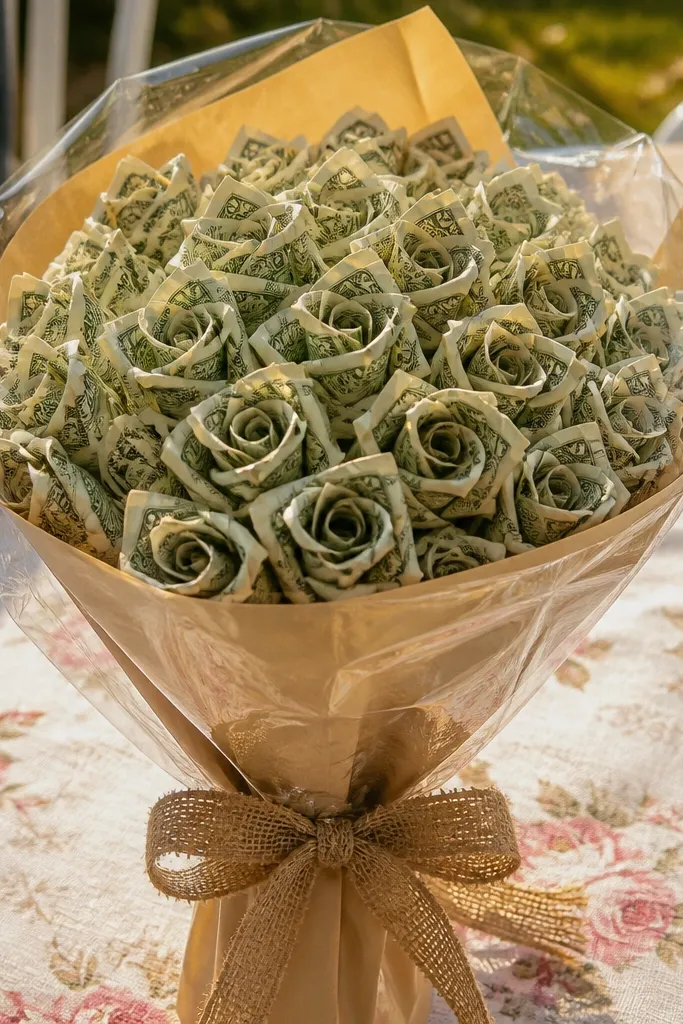
This one looks expensive because the bouquet has a clear shell: kraft paper wrap + ribbon + a repeating rose shape made from bills. The money “roses” give you texture even if you only use a small stack of bills, and the kraft color makes everything feel warm and gift-like. It’s a good fit for birthdays and casual thank-yous because it doesn’t scream “event prop.” Skill level is easy — you’re doing repeated folds, not complex crafting, and you can finish in about 45-70 minutes.
Start by wrapping a foam block or a small cardboard cone in kraft paper, then tape the seam so it stays tight. Fold bills into simple rose shapes by making a tight spiral with a crease along the long edge, then secure the bottom with a tiny piece of double-sided tape. Insert the money roses into the foam in a tight cluster, then fill gaps with 3-5 affordable faux stems (use store-bought greenery or crepe paper leaves). Finish by tying a wide satin or grosgrain ribbon around the wrap and letting two tails hang down the front.
Use double-sided tape on the bottom edge of each money rose so the spirals don’t loosen when you handle the bouquet.
Don’t leave the kraft wrap wrinkled — smooth it with your palm before taping.
2. Black Lace + Dollar Bills Centerpiece Bouquet
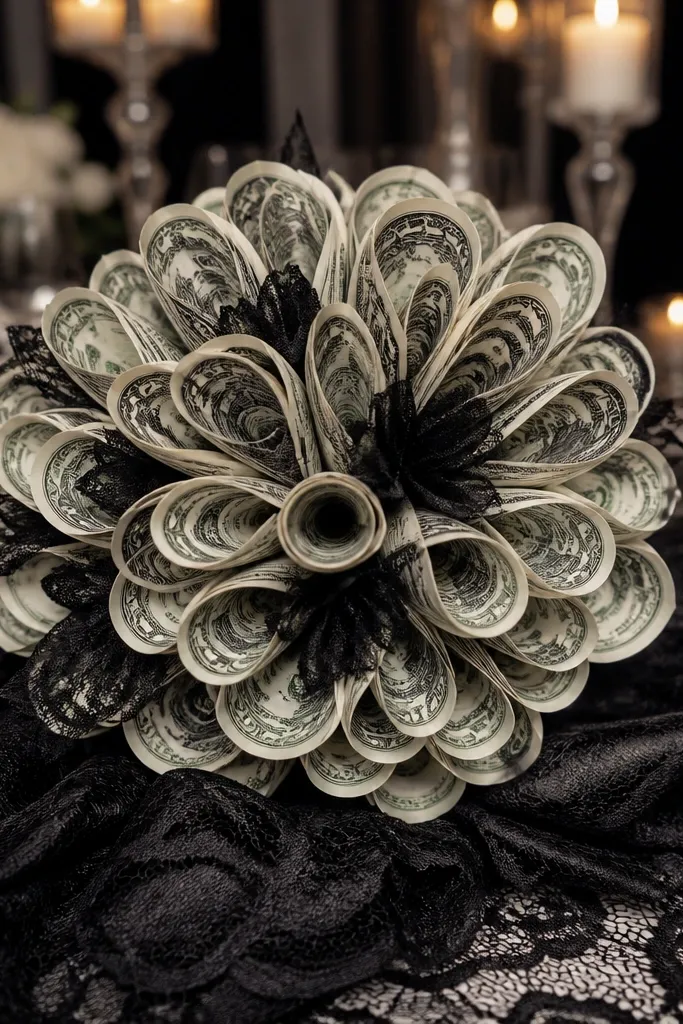
If you want a money bouquet that looks like it came from a boutique, use black lace as the frame. Lace instantly adds contrast, and the bills look sharp when they’re staged as loops instead of flat stacks. This is perfect for weddings, anniversaries, or “fancy but budget” gifts because the black-and-white palette reads classy in photos. The build is straightforward: you’re wrapping and tying, with minimal cutting and no fragile flowers.
Wrap a small candle holder, paint cup, or jar with black lace using hot glue in small sections so the lace doesn’t sag. Tie 1-2 inch loops from folded bills with thin black ribbon, then glue or tape the knot area to a short wooden skewer. Stick the skewers into the container’s foam base, then add a few simple filler stems (white faux flowers or black crepe paper leaves). Tie a final ribbon bow around the container rim and trim the tails to match the height of the bills.
Cut lace strips slightly longer than you think you need; stretching it while gluing makes puckers show in photos.
Avoid clear tape on top of the lace — it catches light and looks messy.
3. Red Velvet Ribbon Money Bouquet in a Thrift Vase
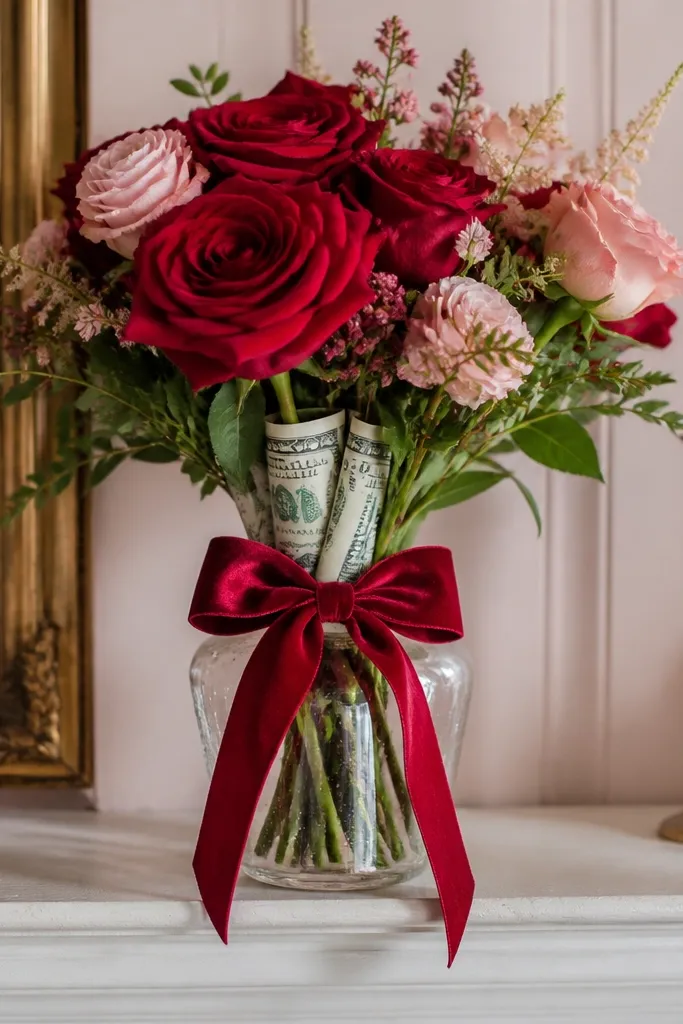
This idea works because the container and ribbon do most of the heavy lifting. A thrifted small vase plus a bold red velvet ribbon makes even simple money folds look intentional. The look is romantic without needing expensive flowers, and the money stays visible because you’re wrapping stems rather than hiding bills in paper. It’s a great choice if you already have a vase and want something that feels “ready to gift” in under an hour.
Choose a small vase and add a foam plug or floral foam disc inside so it holds stems upright. Wrap a few thin wooden skewers or floral picks with red ribbon, then attach a folded bill to each pick using hot glue at the base. Arrange the money stems in a tight circle, leaving a small gap in the center for a single taller pick. Finish by tying a wide velvet ribbon around the vase neck and adding two short ribbon streamers down the front.
Editor's noteUse a matte red ribbon, not shiny — shiny ribbon can create glare that hides the money folds in pictures.
Skip thisDon’t make the money stems too tall — keep the top ends within 1-2 inches of each other.
4. Sage Green Mini Money Bouquet with Felt Leaves
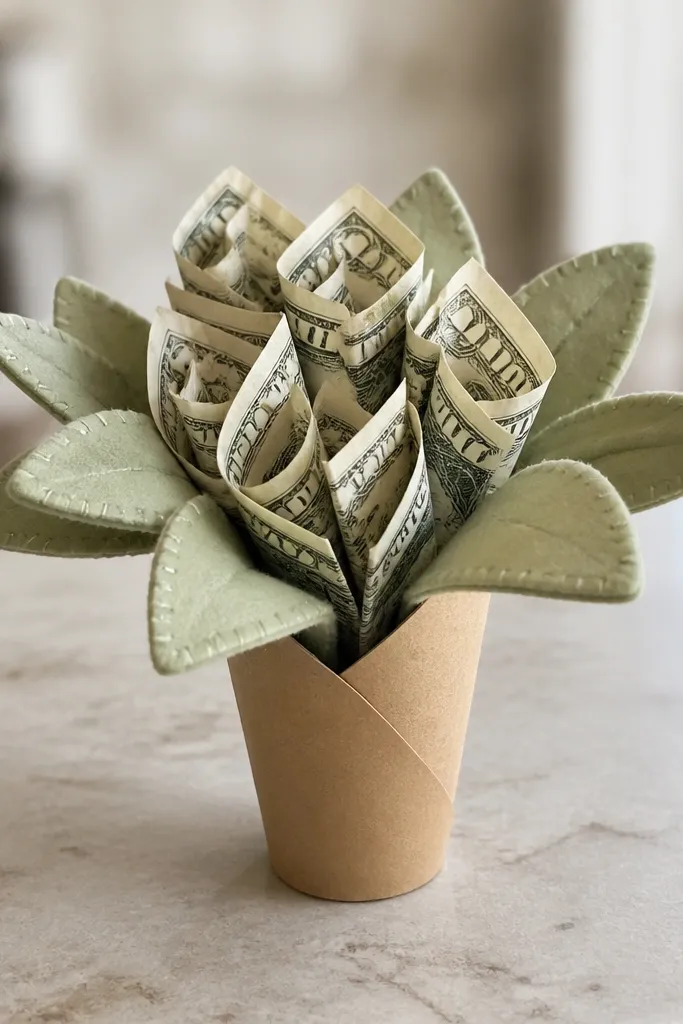
Sage and kraft looks clean and modern, and felt leaves make it feel handmade even when you use a tiny amount of cash. This is one of the best “tight budget” layouts because the felt provides volume while the money provides the focal point. The result reads calm and thoughtful, perfect for housewarmings, small milestones, or graduation money gifts. Skill level is moderate only because you cut felt leaves, but the cutting is simple and fast.
Cut felt leaves in two sizes (about 2 inches and 1 inch long) and glue them to short floral picks. Make small money clusters by folding a bill in half, then rolling the edges toward the center and sealing with a dot of glue. Insert the money clusters into foam inside a small mason jar or yogurt cup wrapped in kraft paper. Add felt picks around the money cluster like a frame, then tie a thin twine bow around the jar for a neat finish.
Lightly score the felt leaves with a butter knife before gluing to create a natural center fold.
Avoid shiny craft felt — it looks plastic next to paper and ribbon.
5. Mason Jar Money Bouquet with Crepe Paper Confetti Flowers
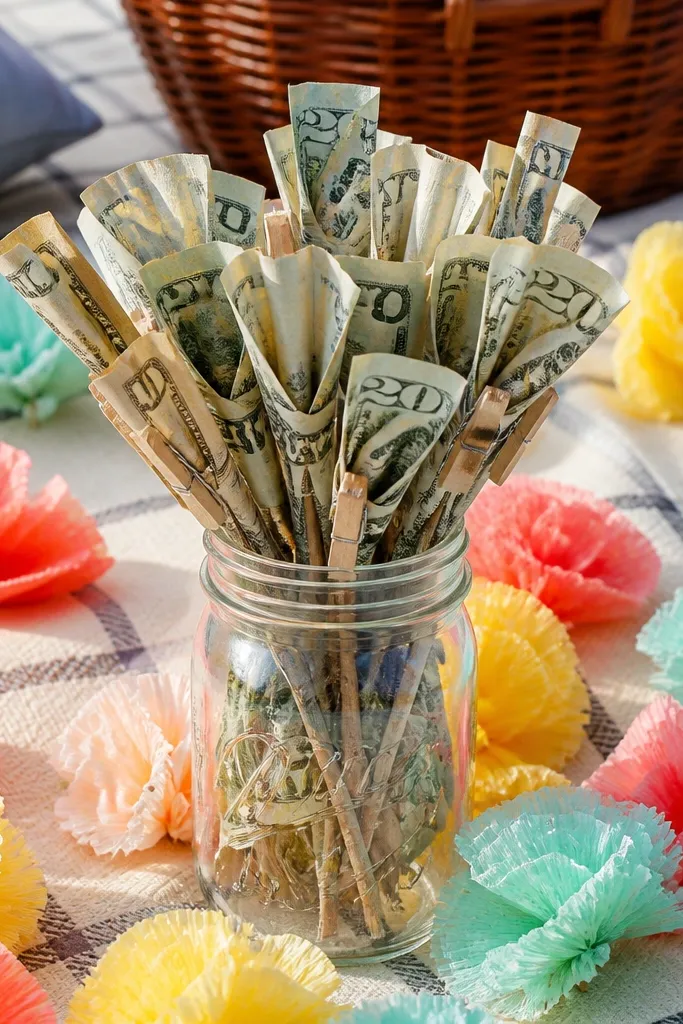
This one looks fun and bright because the crepe paper confetti flowers create lots of movement around the money. The jar shape makes it easy to keep everything compact, which helps when you’re working with small bills and limited cash. It’s great for parties, bachelorette gifts, or any celebration where you want color without spending on real blooms. Build time is about 60-90 minutes depending on how many crepe flowers you make.
Wrap the jar rim with ribbon, then fill the bottom with a foam disc or crumpled paper wrapped in foil for stability. Roll each bill into a loose curl and secure the end with double-sided tape, then poke it onto a skewer. Make crepe confetti flowers by cutting crepe squares, scrunching them, and gluing a small circle center to each one. Insert money skewers first, then surround them with crepe flower skewers so the jar looks full from the front.
Use three crepe colors max, and repeat them on the money curls with small ribbon ties for a cohesive look.
Don’t pack the jar too tight — leave small gaps so the crepe texture shows.
6. Origami Money Fan Bouquet on a Cardboard Backboard
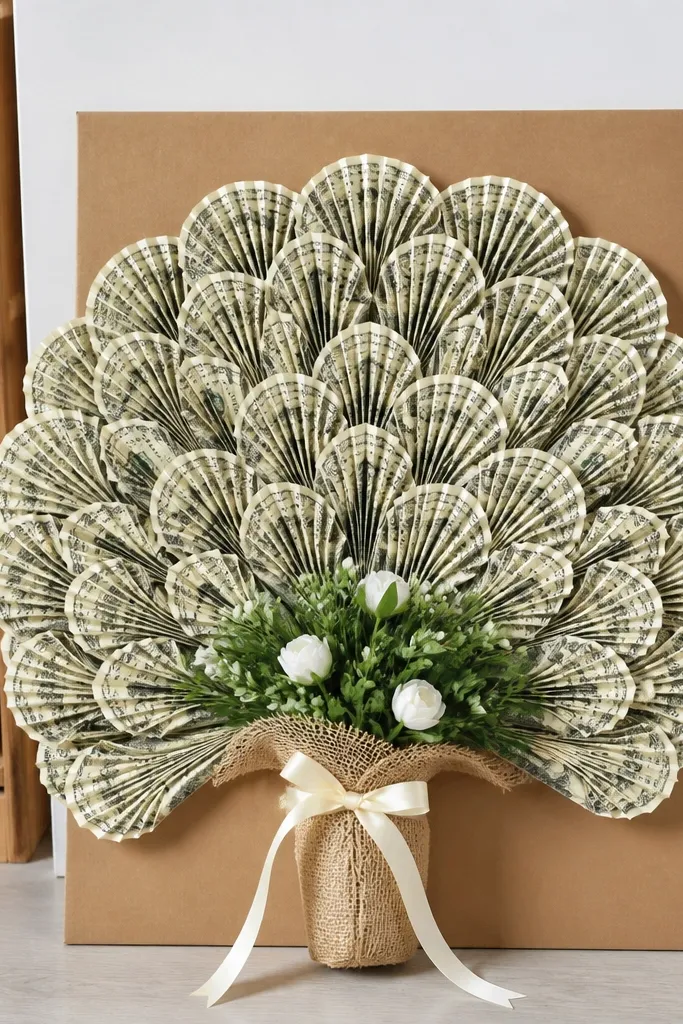
Fans are photogenic because they create a clean, repeating shape that reads instantly even from a distance. This project uses a backboard so you don’t need many bills to look full — the fans do the work. It’s a smart choice for people who want a bouquet that sits flat on a table or hangs on a wall after the gift. Skill level is moderate because origami folds take attention, but the materials are cheap and forgiving.
Cut a sturdy cardboard rectangle, then wrap it in decorative paper or kraft. Create a money fan by folding the bill into narrow accordion pleats and securing the base with tape, then glue the pleated fan to a ribbon strip. Repeat to make 6-10 fans, alternating slightly different angles for a layered look. Attach the fans to the backboard, then add faux greenery cut from cardstock or crepe paper along the bottom edge. Finish with a ribbon bow at the top and a simple stand made from folded cardboard.
Editor's noteKeep all pleats the same width (about 1/4 inch) so the fans look crisp, not lumpy.
Skip thisAvoid thick glue smears on the pleats — use tiny dots at the base only.
7. Blue Denim Wrap Money Bouquet with Rope Tie
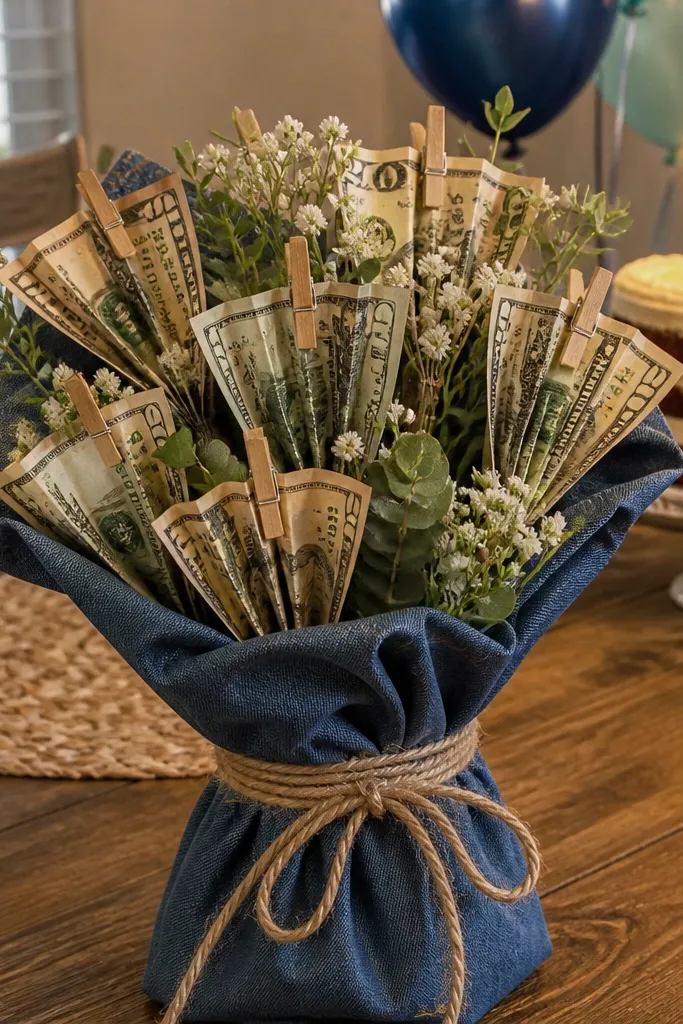
Denim texture makes budget materials look premium. This idea hides the foam base with a denim wrap and uses rope as the finishing line, so the whole bouquet looks cohesive. Money is folded into simple accordion shapes and clipped onto stems, which keeps it visible without bulk. This works especially well for birthdays, Father’s Day, or any gift where you want a casual, masculine vibe. You can assemble it in about an hour with basic tools.
Wrap a foam block or small cone with denim fabric, then secure with hot glue along the seam. Cut or fold bills into accordion shapes and wrap a small strip of paper or thin ribbon around the base of each accordion to keep it tight. Attach each money accordion to a wooden skewer using hot glue at the bottom edge. Insert skewers into the foam, then wrap twine around the denim near the middle and tie a bow. Add one or two faux stems at different heights to avoid a flat look.
Sand the denim seam lightly with fine sandpaper so the fabric lies flatter before gluing.
Don’t use too much twine — one wrap and a bow looks clean; extra knots look cluttered.
8. White Ruffle Paper Money Bouquet in a Tiny Bucket
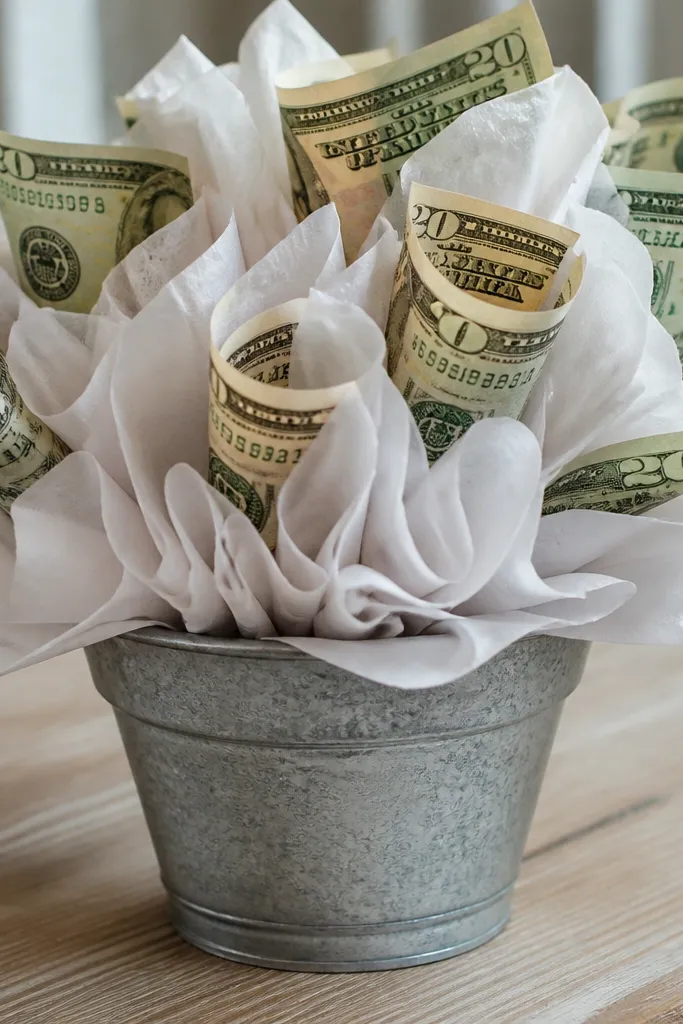
Ruffle paper gives you volume on the cheap, and it frames the money like a skirt. The trick is to keep the money pieces curled and visible, while the ruffles create a soft, photo-friendly background. This style is perfect for baby showers, bridal events, or any gift where you want “pretty” without paying for flowers. Skill level is easy if you can cut strips and glue them in rows.
Wrap a small metal or plastic bucket with white cardstock or craft paper. Cut long strips of white paper, fringe the edges slightly, then glue them around the bucket in overlapping rows to create a ruffle effect. Make bill curls by rolling each bill tight, then taping the end so it stays curved. Attach curls to skewers and insert into foam placed inside the bucket. Add a few simple faux greenery picks around the money to keep the bouquet from looking like only cash.
Editor's noteUse a glue stick on paper strips first, then add hot glue at the ends — it keeps ruffles from soaking up glue.
Skip thisDon’t skip foam — if you rely on just skewers in paper, everything tilts.
9. Sunflower Theme Small Money Bouquet with Yellow Paper Centers
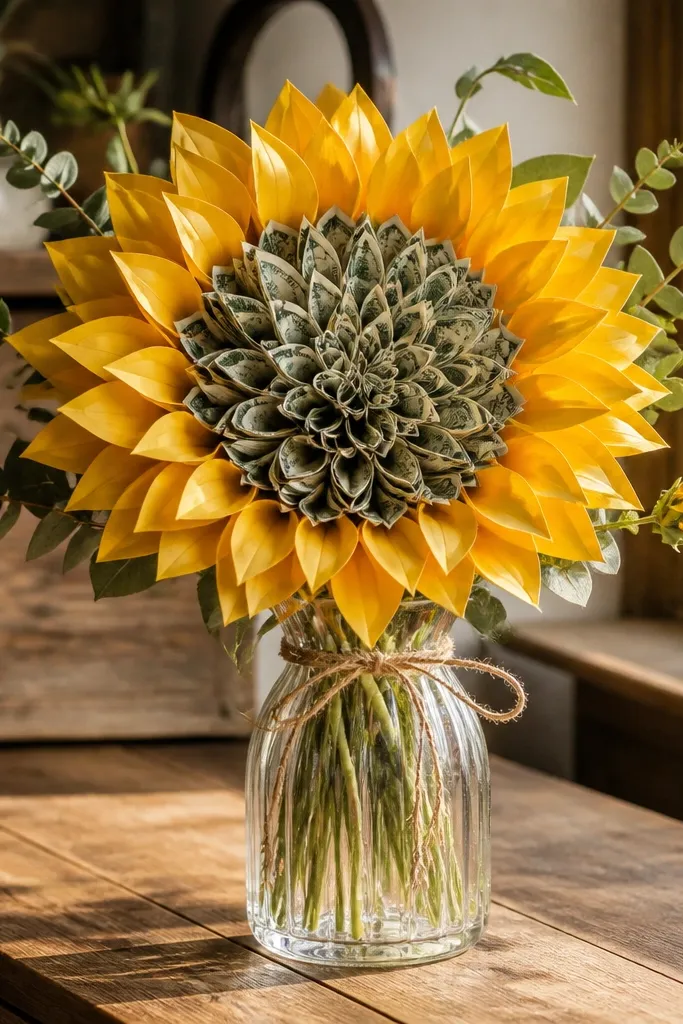
Sunflowers look joyful, and you can fake the petals with paper while using money as the center focal point. The bouquet reads bright even with a small cash amount because the yellow centers and layered petals create the volume. This is a strong choice for summer birthdays, graduation, or anyone who loves farm-style decor. It takes a bit of cutting, but the shapes are simple and repeatable.
Cut 10-14 sunflower petals from yellow cardstock, then glue them around a small circle base. Use a folded bill as the center by rolling it into a tight ring and securing with tape, then glue the ring to the sunflower center circle. Attach each sunflower to a skewer and insert into foam inside a small pot or cup. Add green crepe paper leaves or cardstock leaf cutouts around the base. Tie a ribbon around the pot in a matching green or brown tone.
Editor's noteMake one “taller” sunflower by using a longer skewer so the bouquet has height and depth.
Skip thisAvoid using only one sunflower — clusters of 3-5 look full and intentional.
10. Black and Gold Money Bouquet with Candle Holder Base

This is the cleanest way to make small money look like a luxe gift: black container, gold accents, and money folded into uniform rectangles. Candle holders are perfect because they add shape and height for photos, even when your bouquet is small. The look is sleek for birthdays, anniversaries, and corporate-friendly gifts. Build time is about 45-75 minutes because you’re repeating the same fold and placement.
Pick a black candle holder or small black vase and add a foam disc at the bottom. Fold bills into uniform rectangles by trimming nothing — just fold the edges inward to match width, then tape the back to keep the shape. Wrap each folded bill with a thin strip of gold ribbon and glue the ribbon ends to the back so the front stays flat. Insert the bill rectangles into the foam in a ring, then add 3-4 faux gold stems or black crepe paper leaves. Finish by tying a gold ribbon around the holder and trimming ends to the same length.
Editor's noteUse gold ribbon that is matte, not metallic foil — it looks cleaner in daylight and flash.
Skip thisDon’t mix bill orientations — keep all fronts facing outward.
11. Pink Candy Wrap Money Bouquet with Lollipop Ribbons
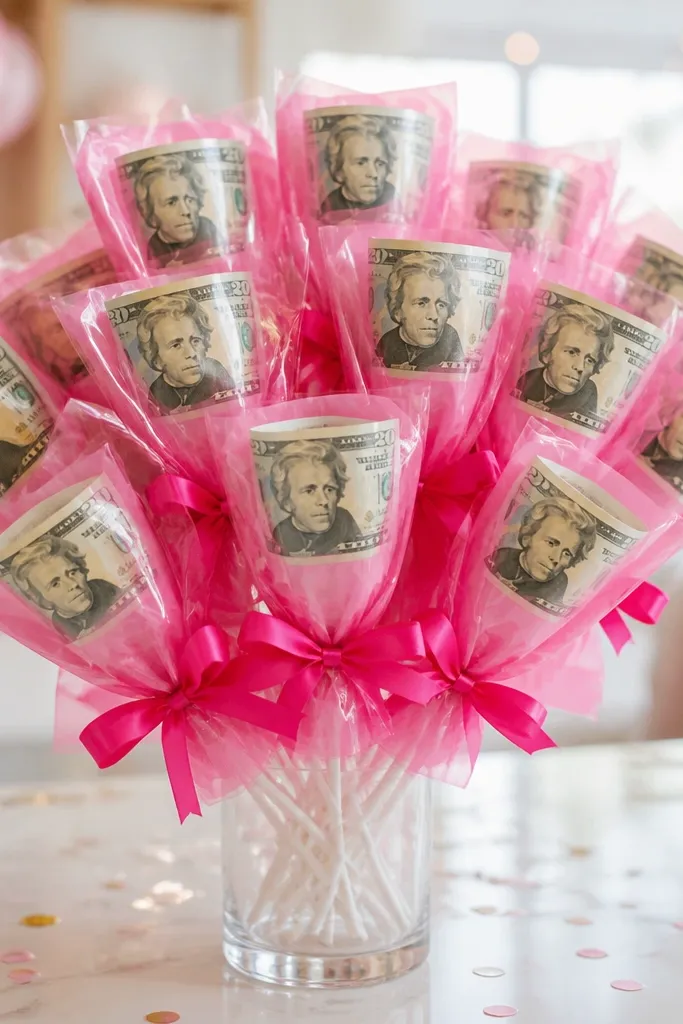
Candy wrap looks playful, and money wrapped like little lollipops reads cute instead of serious. This is ideal for teens, bachelorette parties, and small “just because” gifts. The bouquet stays photogenic because the pink wrap and ribbon bows create a strong color block behind the cash. It’s easy to build in about an hour, and you can scale it up or down depending on how many bills you have.
Wrap a foam block or cone in pink tissue paper, then cover the tissue with a final layer of clear cellophane or glossy craft wrap taped tightly. Cut small ribbon strips and tie them into mini bows around the top of each skewer. Fold bills into thirds, then wrap the folded bill around the skewer like a lollipop and secure with tape behind the bill. Insert the lollipop stems into the foam, then add a few faux flowers or crepe paper “sprinkles” around the edges. Tie one larger bow at the front so the bouquet has a clear focal point.
Tuck tissue edges under the base wrap so you don’t see frayed paper from the front.
Avoid thin ribbon that twists — choose ribbon that holds shape.
12. Emerald Felt Pocket Money Bouquet with Mini Florals
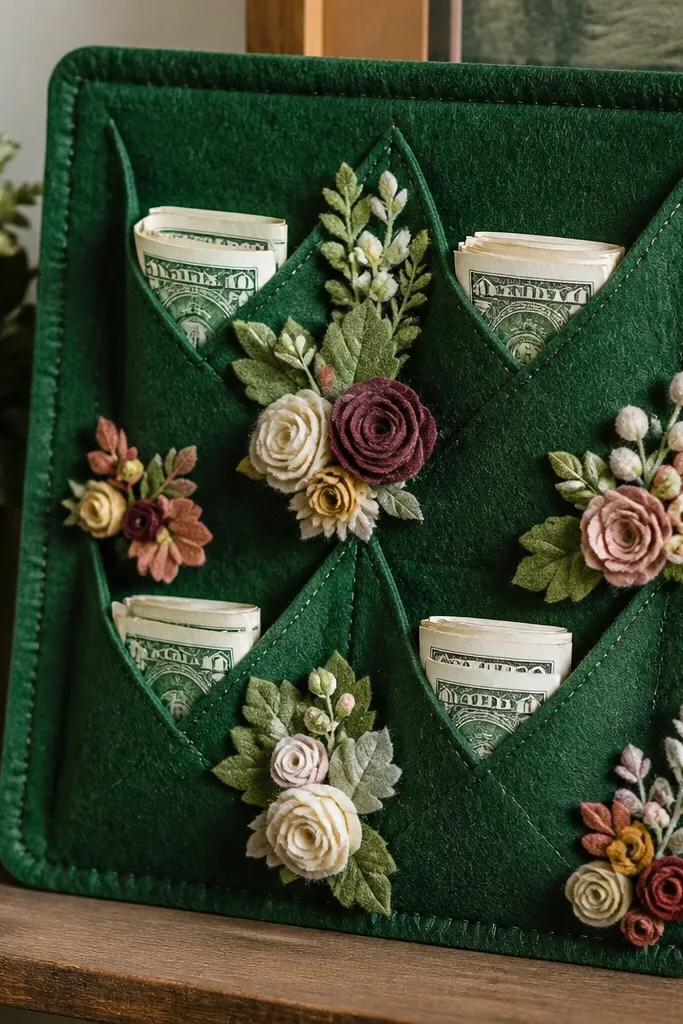
Felt pockets make money look intentional because the bills slide into a defined holder instead of floating. The emerald green reads rich in photos, and the pockets hide the messy parts of attaching bills to stems. This is a great option when you want your bouquet to look like a decor object, not a pile of cash. It’s moderately easy: you cut felt rectangles and glue them to picks, then slide bills in.
Cut felt rectangles about 3x4 inches, then fold each into a pocket shape and glue the sides with the top left open. Glue each pocket to the front of a short floral pick, then slide a folded bill into the pocket. Insert the pocket picks into foam inside a small container wrapped in brown paper. Add mini florals or felt leaves around the pockets so the bouquet looks full even with limited money. Finish by tying a ribbon band around the container and adding two small leaf accents at the sides.
Editor's noteUse a slightly thicker felt so the pocket holds its shape when you insert and remove bills.
Skip thisDon’t make pockets too small — bills should slide in smoothly without forcing.
13. Mini Money Bouquet with Paper Flower Frames (No Foam)
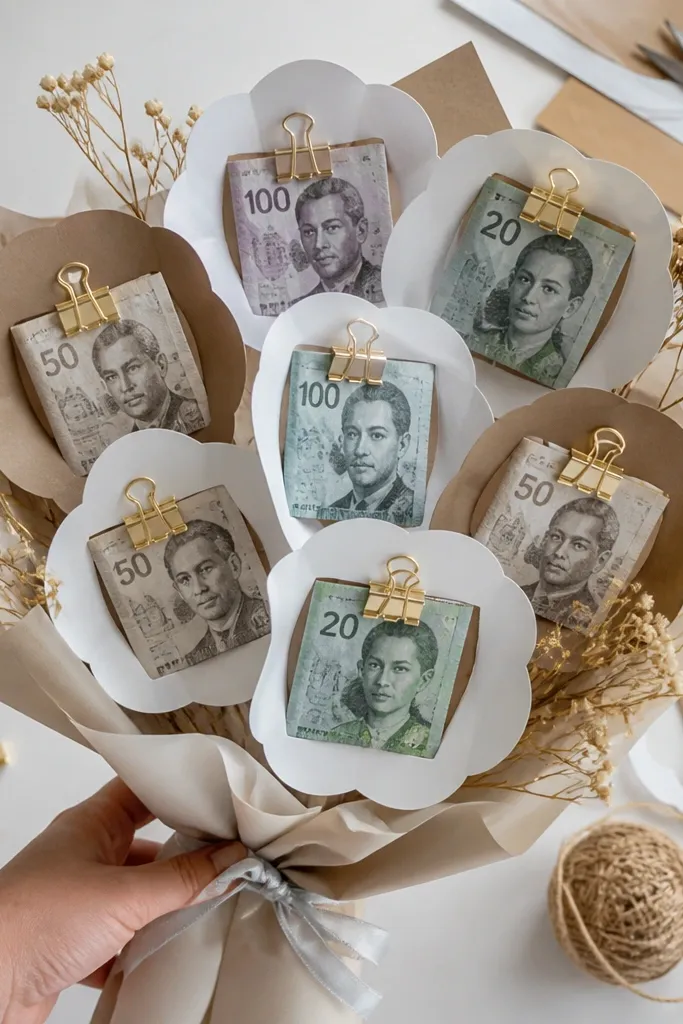
This is for when you don’t want foam mess or you’re short on supplies. Paper flower frames hold the cash visually, and clips keep the money removable, which is nice for gifts. The look is airy and modern because the paper frames create negative space around the bills. It’s also budget-friendly because you can make multiple frames from a single sheet of patterned paper. Build time is about 60 minutes.
Cut 6-10 paper flower frames using a simple layered circle design (outer ring + inner ring), and glue them to cardstock stems. Fold bills into narrow rectangles, then clip each to a stem using mini binder clips or clothespins painted to match. Place the stems in a small container filled with tightly packed floral foam-free material like crumpled paper wrapped in foil or a weighted jar bottom. Arrange the frames so the money sits at different heights, then add a thin ribbon around the container. Make sure the front faces all point outward for a clean photo look.
Editor's notePaint binder clips with craft acrylic and let them dry fully — shiny metal clips ruin the aesthetic.
Skip thisAvoid flimsy paper — thin craft paper collapses and makes the frames look cheap.
14. Brown Paper Wrapped Money Bundle Bouquet with Twine Bows

This looks like rustic gift styling: clean paper wrap, twine bows, and neat money bundles. The bundles read as intentional “stacks” instead of scattered cash, so it works even when your budget is tiny. It’s perfect for farmhouse-style decor, housewarming gifts, and anyone who likes simple, warm aesthetics. Skill level is easy because you’re wrapping and tying. Total time is about 30-50 minutes.
Wrap small portions of bills into tight bundles using brown paper strips, then tape the back so the shape stays square. Tie each bundle with twine and leave a short tail for texture. Attach bundles to skewers with hot glue at the back of the paper wrap. Insert into a foam block hidden under a brown paper sleeve around the base. Add one or two sprigs of greenery (real or faux) and tie a bigger twine bow around the base for a finished look.
Editor's noteKeep bundle sizes consistent — mix two sizes max so it looks designed, not random.
Skip thisDon’t over-tighten twine — it can wrinkle bills and make the texture messy.
15. Silver Foil Star Money Bouquet with Paper Bunting

Metallic accents make small money look like a celebration. This bouquet uses silver star shapes as the background and folds bills into pointed, gift-tag-like pieces that pop against the glittery backdrop. It’s great for New Year, birthdays, and party favors where you want “sparkle” without spending on flowers. The build is quick if you use pre-cut star shapes or cut them from craft foam sheets. Time: about 50-80 minutes.
Cut or use pre-made silver stars and glue them onto a foam base inside a small box or shallow container. Fold bills into pointed shapes by folding in half, then folding corners inward to create a triangle-like face; tape the back edge. Attach each money point to a skewer and insert into the foam so stars show behind. Add paper bunting strips along the rim (cut triangles from patterned paper and glue them in a line). Finish with a ribbon around the container and trim all tails even.
Choose one glitter finish only — either silver stars or metallic ribbon, not both.
Avoid heavy glue on glitter foam — it dulls the glitter spotty.
16. Monochrome Gray Money Bouquet with Origami Cranes

Monochrome looks high-end when every piece matches. Gray bouquets with folded money cranes create movement and a delicate look, even if you use only a few bills. This style works for anniversaries and calm, modern homes because it doesn’t rely on bright colors. It also photographs cleanly because the shapes repeat and the background stays neutral. Skill level is moderate due to crane folding, but you can make 4-6 cranes and still get a full look.
Wrap a foam block or cone in gray cardstock or wrapping paper, then tape the seam. Fold each bill into a crane using a simple two-fold base and corner folds, then secure the final shape with a tiny dot of tape. Attach each crane to a skewer with tape at the back. Insert cranes into the foam in a cluster, then add a few gray faux stems or paper leaves. Wrap the base with a narrow satin ribbon and tie a bow so it looks intentional from every angle.
Use crisp bills and press folds with a ruler so the crane edges stay sharp.
Don’t mix too many gray shades — stick to one light and one dark gray.
17. Teal Ombre Paper Wrap Money Bouquet with Bubble Skewers

This looks modern because of the ombre wrap and the “bubble” texture from clear craft beads or foam balls on picks. The money is clipped or taped to the skewers so it stays visible and doesn’t sag. Teal is a flattering gift color for birthdays, baby showers, and housewarmings. It’s budget-friendly because you’re using paper wrap and inexpensive craft supplies instead of flowers. Build time is about 60 minutes.
Create an ombre wrap by layering two or three shades of teal tissue or cardstock around a foam base, then tape the overlap. Thread small clear beads or glue foam balls onto the top of skewers to create a bubble effect. Fold bills into narrow strips, then wrap them around the skewer base and secure with tape behind. Insert the money skewers into the ombre foam base so beads sit above the money. Tie a matching ribbon around the base and add a few simple faux stems to fill gaps.
Seal tissue wrap with a light spray of craft adhesive so it doesn’t shift when you move the bouquet.
Avoid large beads — they look heavy and hide the money in photos.
18. Chocolate Brown Paper Flower Bouquet with Money Petals
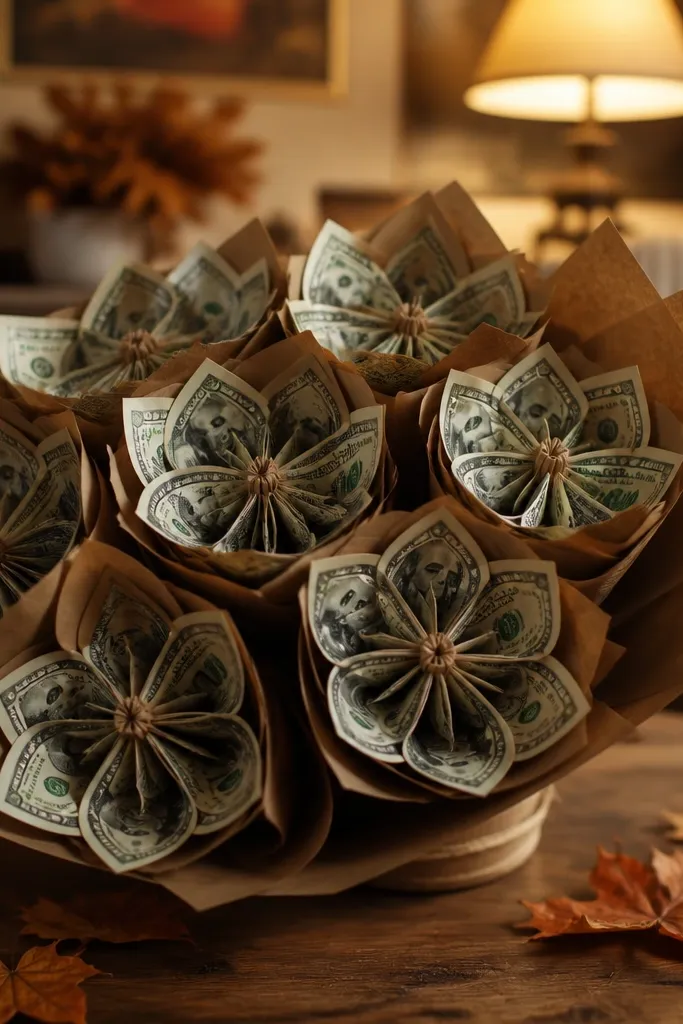
This bouquet looks like a gift and a craft project at the same time. Money petals give you a repeating pattern, and brown paper makes the whole thing feel warm, not flashy. It’s great for fall birthdays, sympathy gifts, and anyone who likes earthy decor. You’re using paper flowers as a structure and cash as the surface texture, so you don’t need many bills to fill the frame. Skill level is easy to moderate depending on how many paper petals you cut.
Cut brown cardstock petals in two sizes and glue them around a small circle center to form 3-5 paper flowers. Turn each bill into a petal by folding it into a curved shape and taping the back so it holds the curve. Glue one money petal onto each paper flower center or along the inner ring, then attach flowers to skewers. Insert into foam inside a wrapped container, then add a few green crepe paper leaves around the edges. Finish with a ribbon band in tan or cream to keep the palette clean.
Editor's noteUse matte brown cardstock so the money edges stand out instead of blending in.
Skip thisDon’t glue money flat — curved money petals look dimensional and photogenic.
19. Mini Money Bouquet in a Gift Box with Ribbon Pull-Out Bills
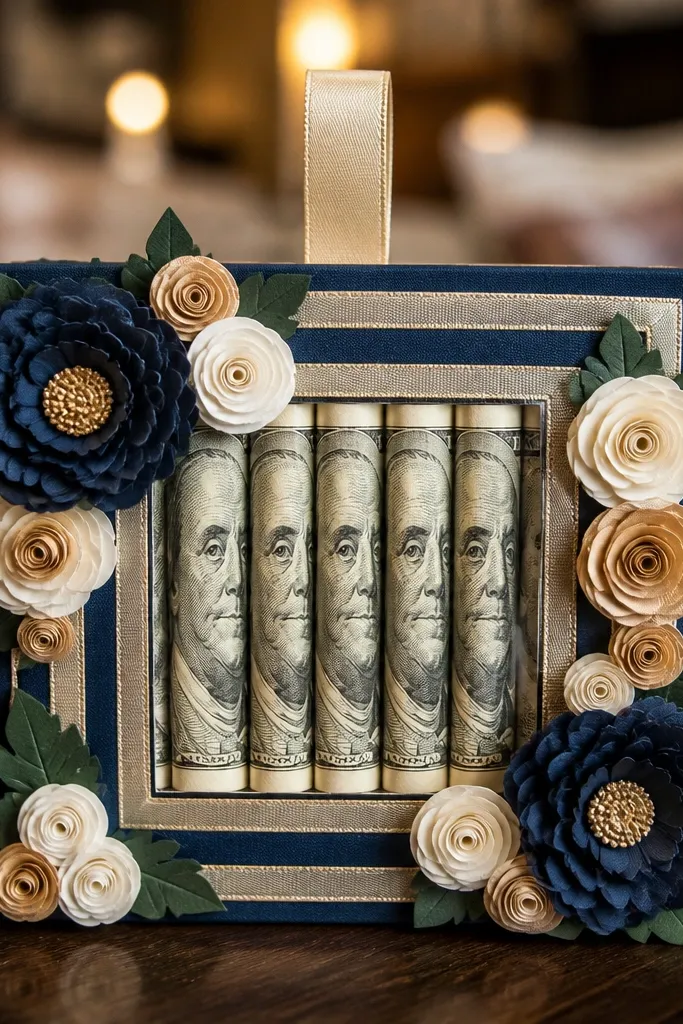
This is a money bouquet that doubles as a gift box, which makes it feel thoughtful even with a small amount of cash. The bills are visible through a front window made from ribbon and layered paper, so it photographs cleanly. You can also pull the bills out after the gift, which is a practical upgrade over money glued flat. It suits birthdays, holidays, and anyone who likes surprises. Skill level is moderate because you build the box insert.
Cut a small gift box insert from cardboard, then cover it with patterned paper. Create a window front by gluing two vertical ribbon strips and adding layered paper behind them so the money peeks through. Fold bills into thirds and attach them to ribbon tabs using tape at the back, then tuck the tabs behind the front layer so they sit upright. Add faux greenery or paper leaves around the money so the box looks like a mini bouquet. Tie a bow on the front and make sure the ribbon tabs pull out smoothly.
Use stiff ribbon for the tabs so the bills stay upright and don’t collapse.
Avoid soft satin ribbon for the pull-out tabs — it droops fast.
20. Terracotta Ribbon Money Bouquet with Rolled Paper Bills and Mini Succulents
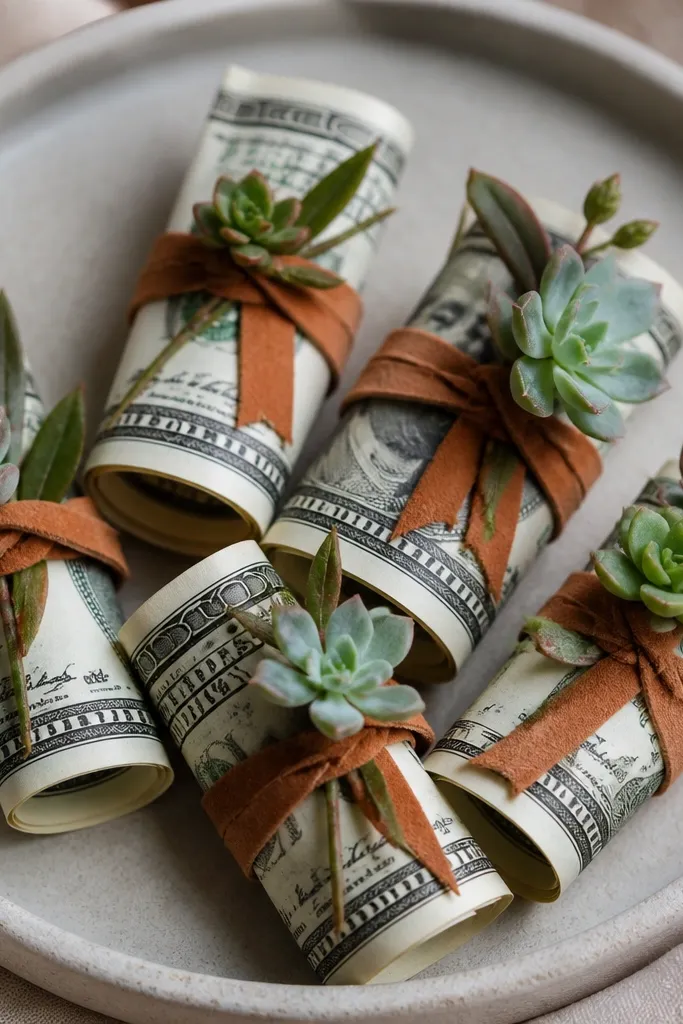
This one looks expensive because the bill curls mimic small rose buds, and the terracotta ribbon frames everything like a gift you’d buy at a boutique. It fixes the usual problem with money bouquets — the bills flop, crumple, and look messy — by turning each bill into a tight roll with a clean edge. You get a warm, earthy bouquet that photographs well against kraft paper, terracotta planters, or neutral walls. It is beginner-friendly and quick: you’re basically rolling, taping, and arranging. It suits desk decor, housewarming gifts, and anyone who wants something small-money that still looks styled.
Cut a 10 x 6 inch piece of kraft paper, then wrap it into a tight cone and tape the seam. Fold the top edge down 1/2 inch to make a stiff rim, then glue a thin strip of terracotta satin ribbon around the rim so it hides the tape line.,Roll each dollar bill tightly into a cylinder, starting from one short edge. Use a tiny dot of double-sided tape or glue at the last 1/4 inch so the roll stays closed, then lightly pinch the center to make it look like a bud. Hot-glue each rolled bill to short 6-inch floral picks or wooden skewers, spacing them in a fan so the rolls overlap instead of stacking straight.,Trim two to three faux succulents so the stems are about 1 to 1.5 inches long, then glue them into the kraft cone rim. Tie 2 yards of terracotta ribbon into a loose bow at the side and tuck the ends behind the bills so you don’t see raw ribbon edges.
Use double-sided tape on the bill ends instead of glue — it dries fast and keeps the paper from warping. If your cone feels wobbly, add one more layer of kraft paper before you tape the seam.
Don’t roll the bills loosely or you’ll end up with flat curls that look like paper trash instead of flower buds.



