
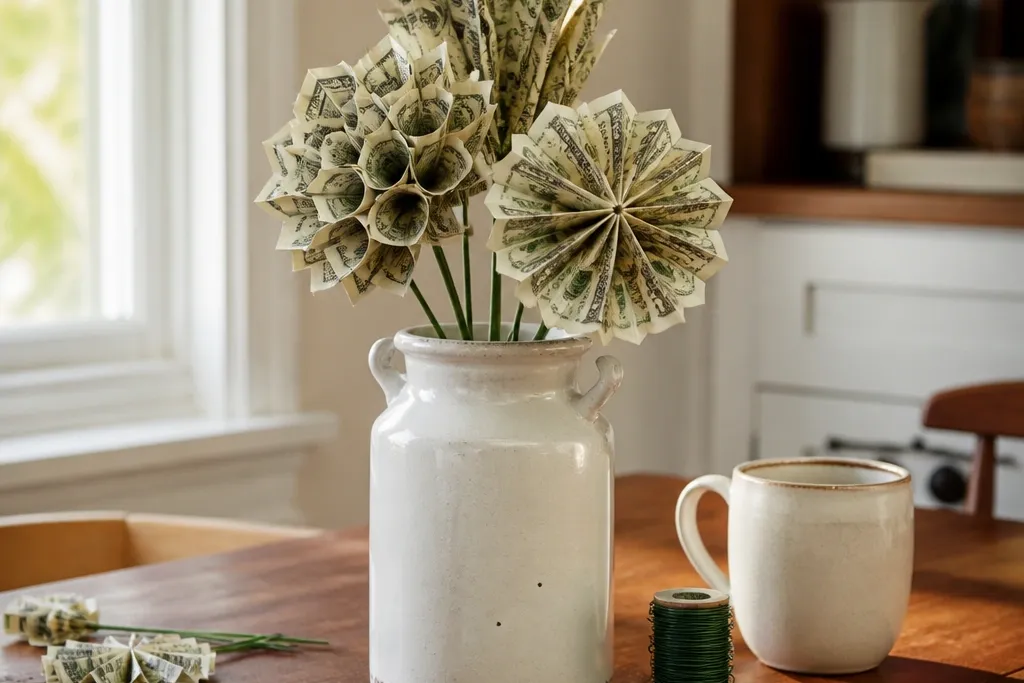

1. Rose Rosette Money Buds (Paper Petals + Bill Center)
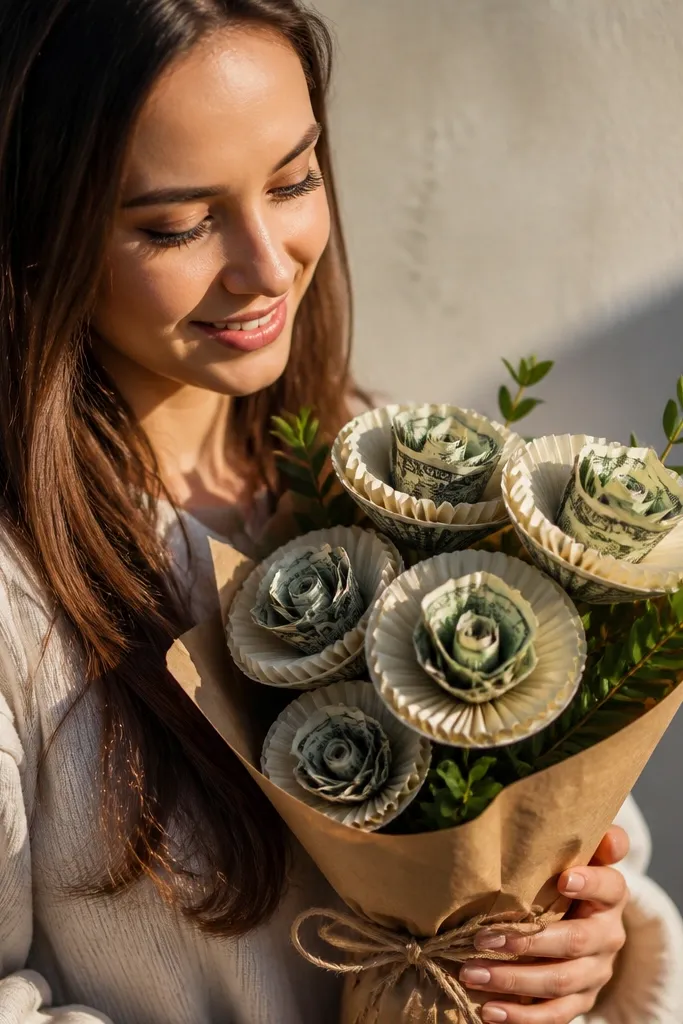
This is the money bouquet look that reads like a real bouquet right away because the rosette already has layered petals. You fold the bill into a tight center piece, then glue it inside a paper rosette so the money looks intentional instead of taped on. It’s beginner-friendly because the shapes are forgiving — even if your petals aren’t perfect, the rosette hides it. Keep the stems wrapped in matching green paper so the whole thing looks cohesive in photos. This one works great for birthdays and thank-you gifts where you want it to look sweet, not “construction-y.”
Start by cutting 6-8 rosette petals per bloom from craft paper or thin cardstock. Fold each strip slightly, then roll into a circle and glue the edges to form a rosette cup. Fold a bill into a small rectangle center, then tuck it into the rosette and glue only the edges where it won’t show. Finally, attach the rosette to a craft stick or floral wire stem, wrap the stem with green paper tape, and tie a simple ribbon at the base.
Use a thin layer of glue around the bill edges only — it keeps the rosette flat and photo-ready.
Don’t glue the bill flat across the rosette — it makes a thick ridge that catches light.
2. Twist-Tuck Money Tulips (Folded Bills Like Petals)
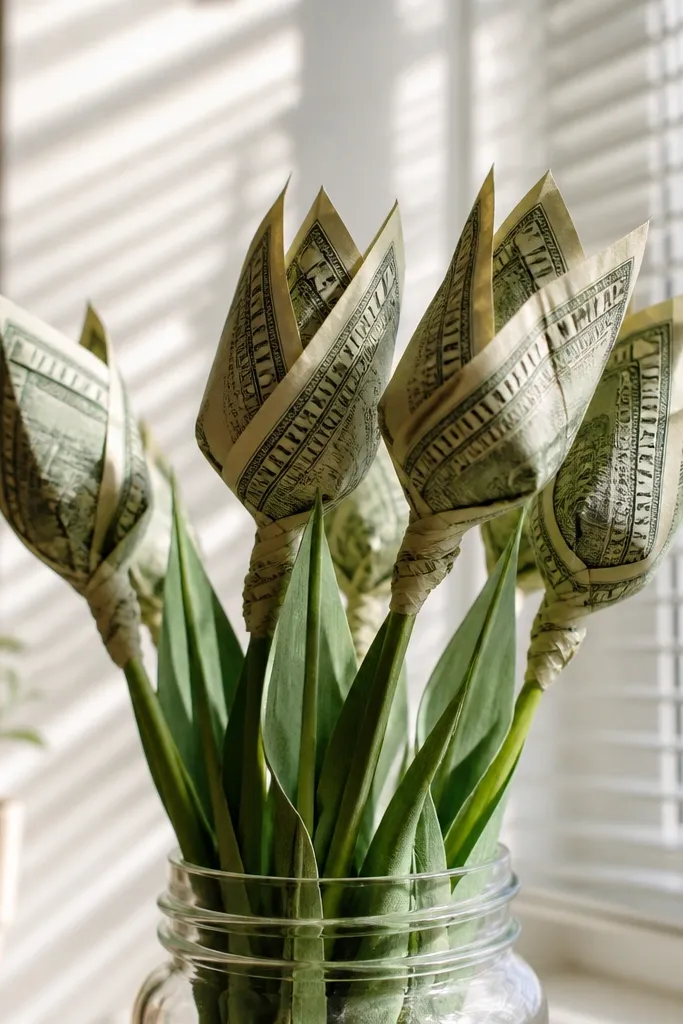
Fold each bill into a narrow rectangle, then crease a slight V shape near the top so it opens like a tulip bud. Twist the bottom edge once and glue it to a small circle of cardstock so the bill holds its “petal” shape. Insert a floral wire stem into the base circle, then wrap the stem with green paper tape. Add a leaf cut from cardstock and glue it behind the bloom so it looks natural.
Tulips are one of the easiest “money flowers” to make look polished because the shape is tall and clean. You fold the bill into a petal-like panel, then twist the base so it stands up. The result looks airy and modern, not bulky. It also makes the money feel like part of the flower, which is what people want when they’re buying something that looks expensive. This setup is best when you’re making a small bouquet of 5-7 blooms for a tabletop or gift bag.
Skip thisSkip thick glue at the twist — it stiffens the top and makes the tulip look crooked.
Editor's noteMake a small cardstock “base circle” for every tulip — it keeps the bill from drooping.
3. Accordion Fan Money Bouquet (Bills as Flower Fans)
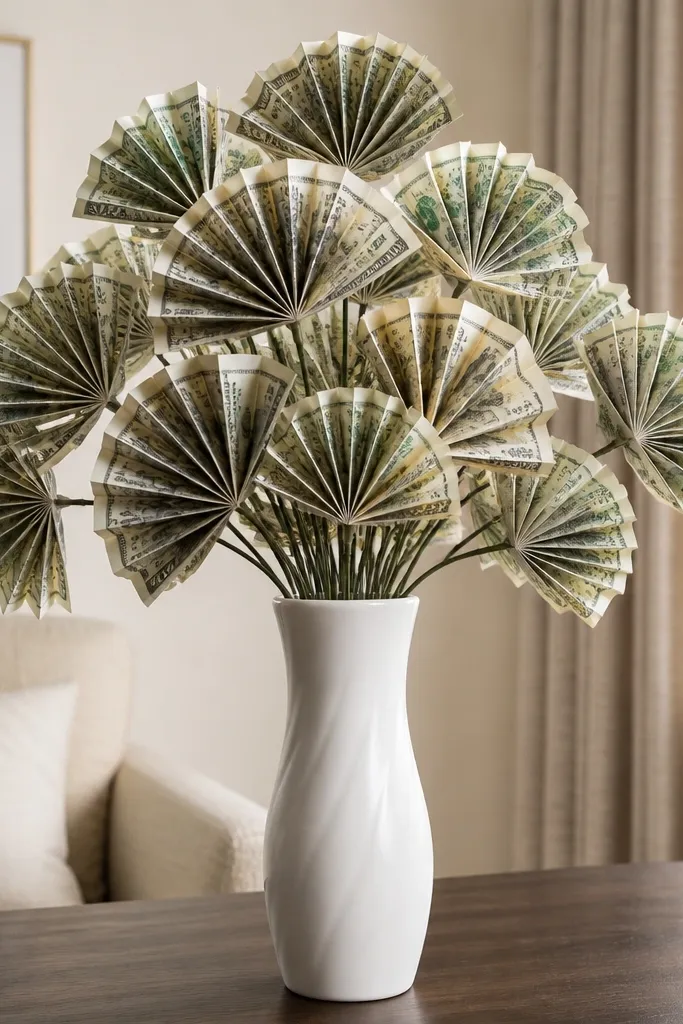
Accordion-fold a bill from end to end using 1/4-inch creases. Bring the folded bill together into a fan shape and secure the center with a small strip of double-sided tape or a dot of hot glue. Attach the fan to a floral wire stem by gluing a small cardstock circle behind the center. Wrap the wire with paper tape, then add a simple ribbon tie under the fan.
Accordion fans look dramatic with almost no extra decoration. When you fold a bill into evenly spaced pleats, it naturally creates a flower-like spread that reads well from a distance. This is fast because you repeat one folding pattern and don’t need to cut intricate petals. The look is airy and bright, perfect for weddings, graduations, or any “big moment” gift. If you want a bouquet that doesn’t look like craft foam flowers, this is the one.
Skip thisDon’t skip the center tie — loose fans collapse and ruin the flower silhouette.
Editor's notePress each crease with a ruler edge so the pleats stay crisp and won’t look wrinkled in photos.
4. Dollar Bill Dangle Blossoms (Fringe + Ribbon Wrap)
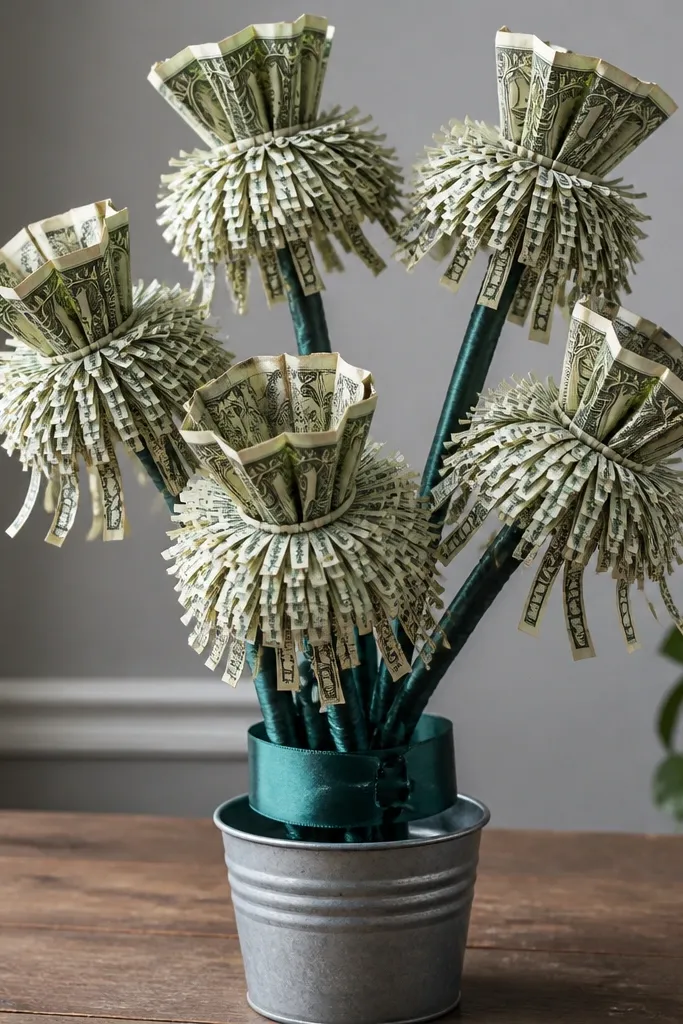
These blossoms look playful and motion-friendly because the bill edges create a light fringe effect. You cut or fold the bill into a top layer, then add thin strips for dangling movement. The money still stays readable, but the shape looks like a flower, not a flat wad. This is great for beginners who want a fun look that still photographs cleanly. Use a limited ribbon color so the dangles don’t look messy in the final photo.
Fold each bill into a shallow cone or rectangle, then glue it to a small cardstock circle. Cut 6-10 thin strips from coordinating paper or thin ribbon and glue them around the top edge as dangles. Wrap the stem with ribbon paper tape and glue the cardstock base to the stem. Finish with a small bow that hides the stem attachment point.
Cut dangle strips of equal width, around 1/8 inch, for a uniform “flower fringe” look.
Don’t make the dangles too long — they tangle when you move the bouquet.
5. Money Rose Rolls (Tight Spiral With Bill Strips)
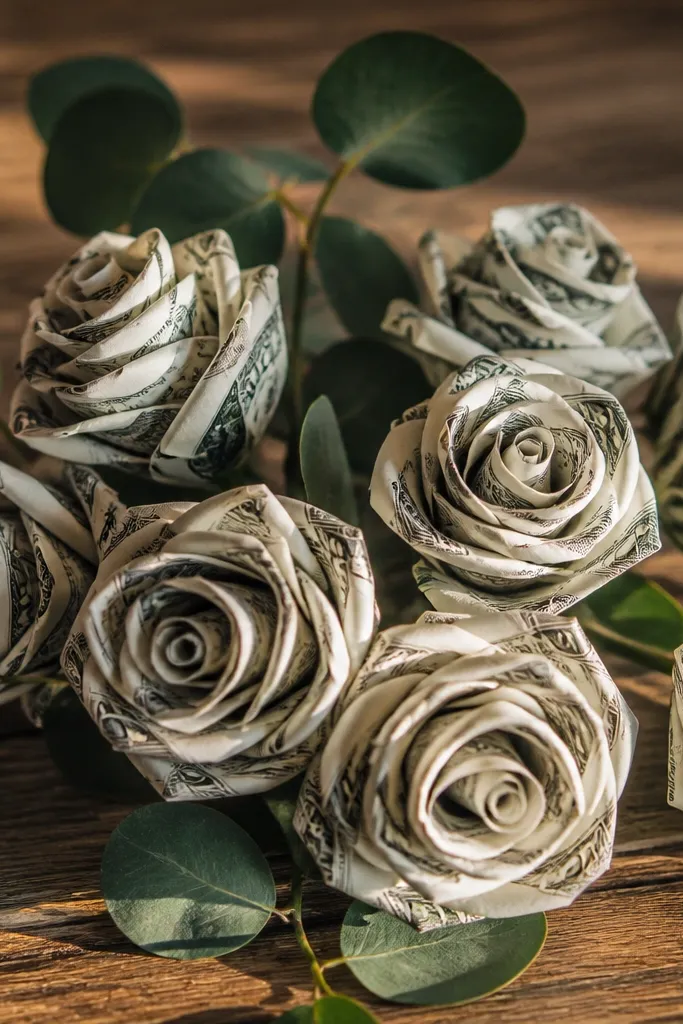
Rolled roses look premium because a spiral shape is naturally eye-catching. You’re turning the bill into a strip that rolls into a tight center, then you build the rose layer by layer. It’s beginner-friendly because you can stop at a simple 2-layer roll and still get the rose look. This style also makes it easy to keep the money safe — you can glue the strip edges discreetly and leave a pocket backside if you want removal.
Cut a bill into a long strip, about 1 inch wide, keeping the design intact. Roll one end tightly into a small center and glue the outer edge lightly as you wrap. Add a second longer strip around the center, overlapping slightly, then glue at two or three spots to lock it. Mount the rose on a floral wire stem, wrap the stem with green tape, and add one paper leaf behind the bloom.
Use a thicker strip (around 1 inch) so the rose holds its shape instead of collapsing.
Don’t glue the whole strip length — it flattens the spiral and kills the rose look.
6. Tissue-Paper Petal Money Flowers (Bill in the Center)
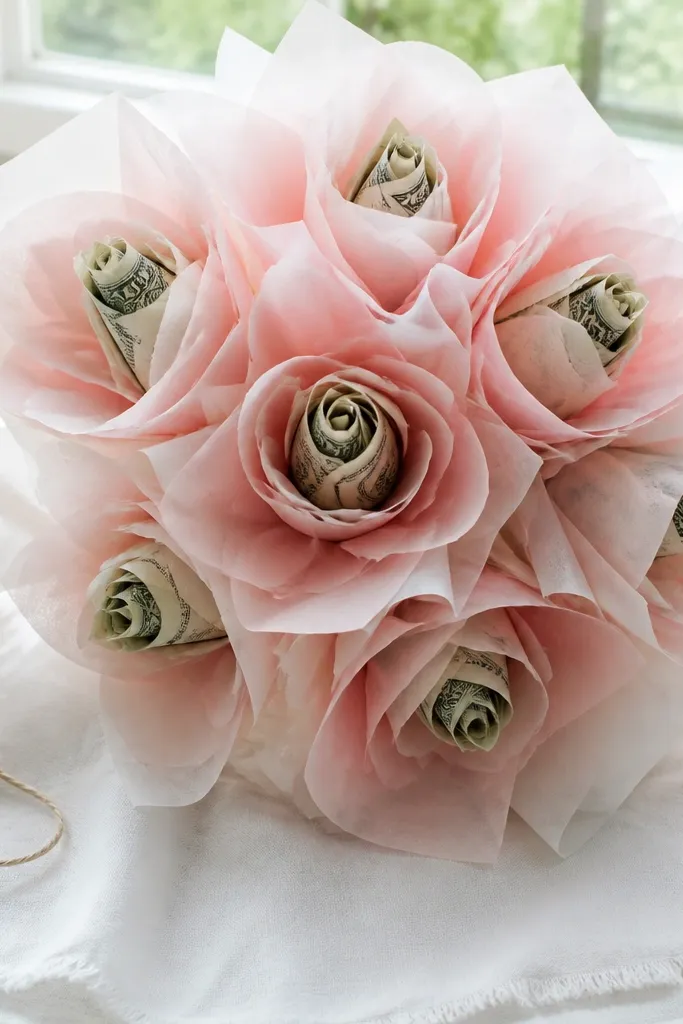
Cut tissue paper into petal-ish squares, then pinch the center of each square and glue it to a small circle base. Fold a bill into a neat rectangle and glue it into the middle circle as the “center.” Attach the circle to a stem, then wrap the stem with green paper tape to hide glue marks. Fluff each tissue petal outward so the bloom looks round.
This is the “soft and pretty” money bouquet look that still feels clean. Tissue paper petals create volume without needing fancy cuts, and the bill center gives it the money focus. It photographs well because tissue has texture and movement, even when everything is still. Beginners like this because you can make blooms quickly and fix uneven petals by fluffing. Use plain tissue colors like white, blush, or light pink so the bills stand out.
Skip thisDon’t use too-dark tissue — it can swallow the bill and make the bouquet look dull.
Editor's notePinch tissue petals with the same pressure each time — uniform petal shape looks more expensive.
7. Bill Buckle Carnations (Paper Petal Loops)
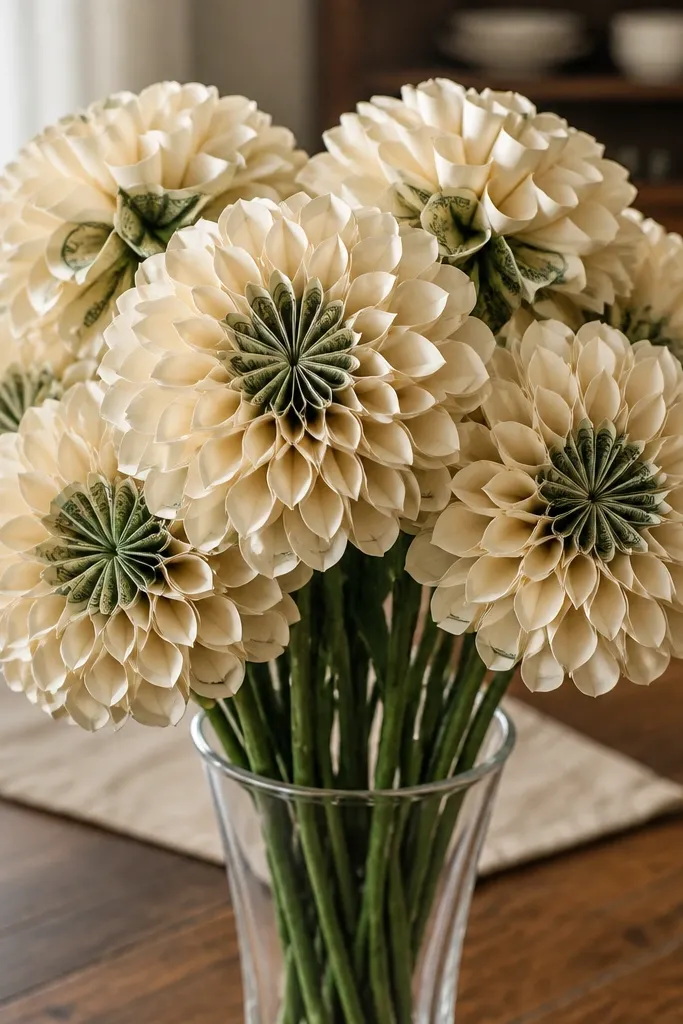
Carnations have a dense, textured look, and you can mimic that without complicated templates. You make small paper loops, then glue them around a folded bill center. The “buckle” effect comes from bending each loop slightly so it sits at different angles. This gives a full bouquet look even with fewer stems. It’s a good option when you want something that looks lush but still quick for beginners.
Cut strips of paper about 1 inch wide and 3-4 inches long. Fold each strip into a loop and glue the ends to make a petal ring, then bend slightly with your fingers. Glue the loops around a cardstock circle, then place a folded bill in the center and glue the edges. Mount the circle on a stem and wrap with green tape, then add one leaf cut from cardstock.
Use a small round punch or trace a bottle cap for your center circle — it keeps every bloom consistent.
Skip leaving gaps between loops — gaps make it look sparse instead of full.
8. Chocolate-Box Money Bouquet (Mini Sleeve Wrap + Bow)
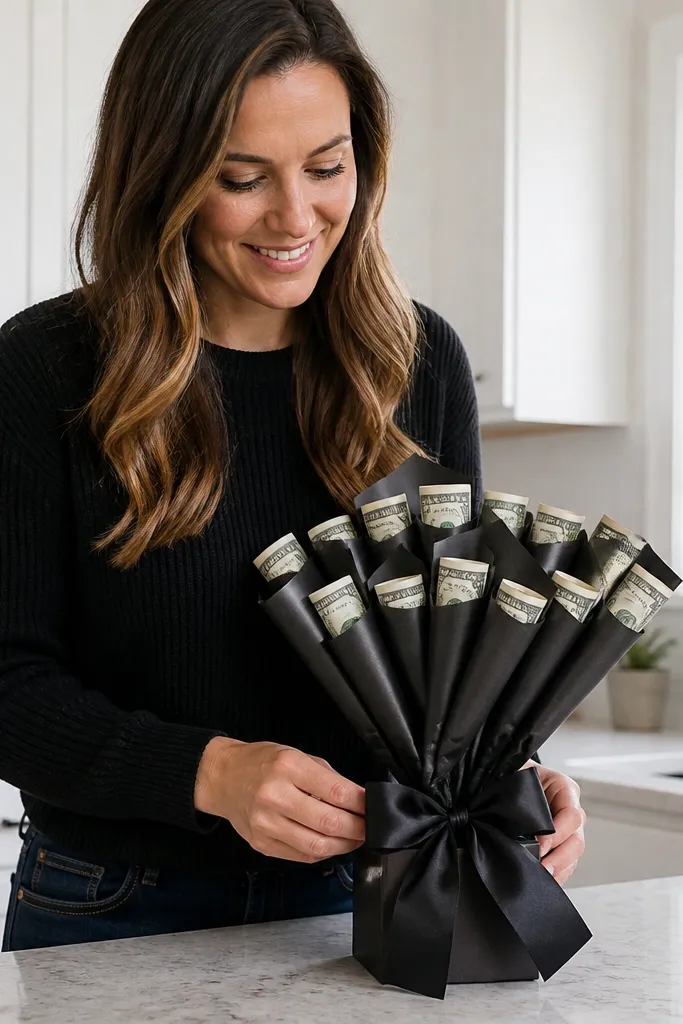
If you hate the idea of gluing money directly where it’s hard to remove, this one is cleaner. You slide each bill into a mini paper sleeve shaped like a small gift, then cap it with a bow. The look is tidy and gift-like, and the money stays protected from glue mess. This style is also great for beginners because it’s forgiving: even if your sleeve corners aren’t perfect, the bow hides it. It’s best for small bouquets and gift boxes.
Cut cardstock rectangles about 3.5 x 5 inches and fold into sleeves, leaving one side open. Slide a bill into each sleeve so it sits flat, then fold the top edge inward to close. Glue or tape the sleeve closed only at the sides, not over the front. Attach each sleeve to a stick or floral wire stem, wrap with paper tape, and add a ribbon bow near the top.
Use double-sided tape on the sleeve sides instead of hot glue for a flatter, neater look.
Don’t seal the sleeve at the front — you’ll make it harder to remove the money.
9. Crisp Origami Money Petals (One-Fold Flip Style)
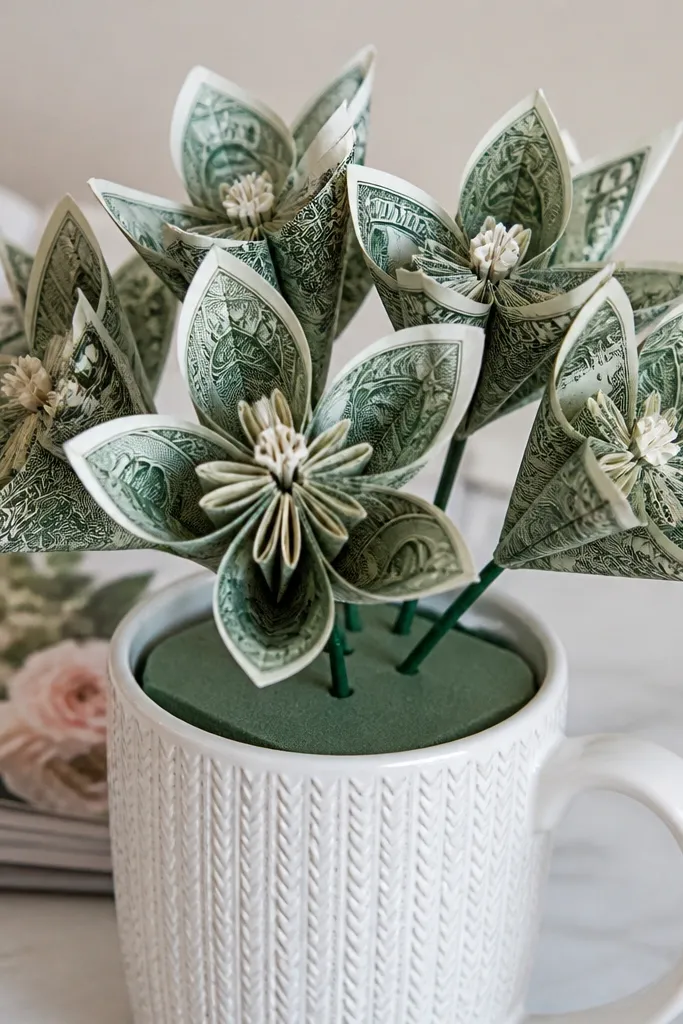
Origami-style money petals look sharp and modern, and they photograph super well because the folds create crisp lines. The secret for beginners is using a simple flip fold that makes a petal shape fast, then repeating it. You build a center from two petals stacked, then add more around for a full flower. This looks best in a monochrome ribbon palette like black and gold or white and silver. It’s a strong choice when you want the bouquet to look more “designed” than craft-store.
Fold each bill into a square by trimming if needed, then crease lightly. Create a petal by folding one corner to the center and flipping the edge back, then glue only the tiny contact points. Arrange 5-7 petals around a small cardstock circle, stacking the bottom edges slightly. Glue the circle onto a stem, wrap the stem, and add one ribbon loop leaf.
Make a paper template for the petal size, then trace onto each bill so every flower matches.
Don’t over-glue at the fold — thick glue makes the petal look lumpy.
10. Paper Flower Rings With Money Medallions
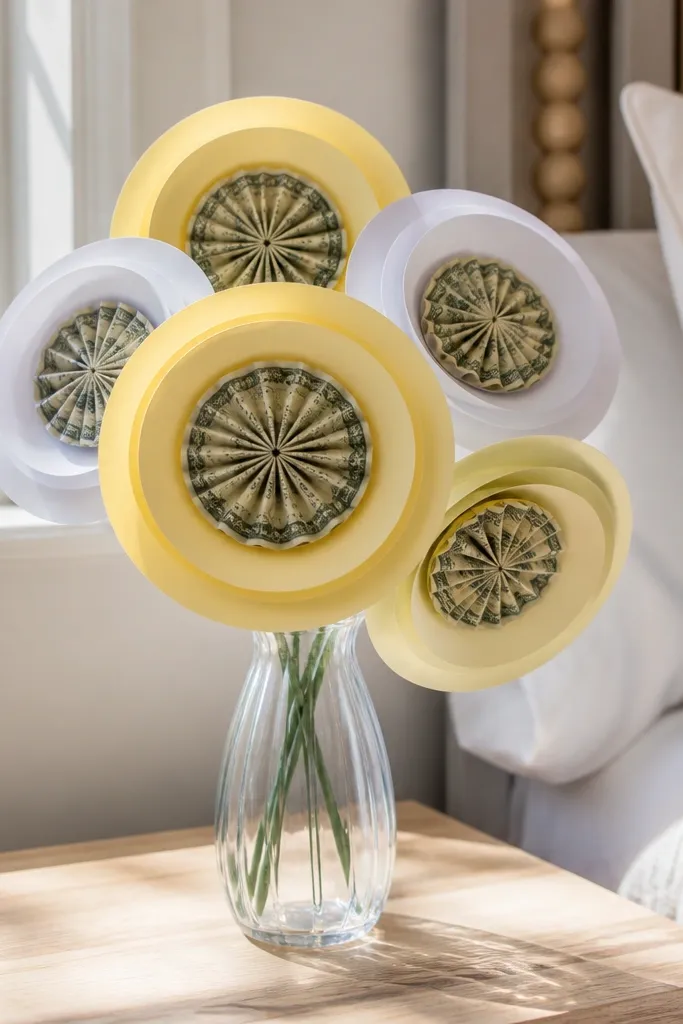
This is a clean, beginner-friendly way to get a full bouquet look without tiny petals. You build each bloom from two or three paper rings, then glue a folded bill medallion in the middle. Rings create a sturdy silhouette, so the flower doesn’t collapse when you adjust it. It’s also easy to keep the money readable because you control how much of the bill shows. Use bright ring colors like teal, coral, or lavender so the bouquet has contrast in photos.
Cut ring circles from cardstock in sizes like 2.5, 3.5, and 4.5 inches outer diameter (keep an inner hole). Cut a slit, overlap edges, and glue to form a ring shape. Fold a bill into a medallion rectangle and glue it to a small center circle. Stack rings from smallest to largest, glue them together, then mount on a stem and wrap the stem with paper tape.
Stick to two ring colors per bouquet so it looks intentional, not busy.
Don’t make rings too flimsy — thin rings bend and make the bloom look uneven.
11. Fan-Fold Money Pinwheels on Stems
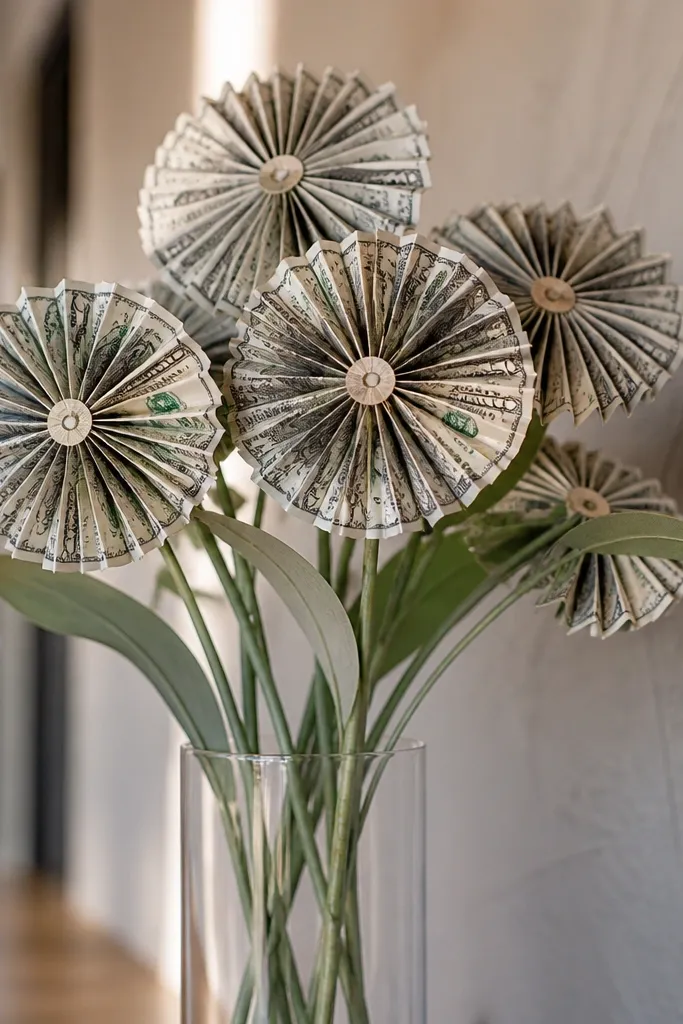
Pinwheels give you that fun, bright bouquet look that still feels like a serious gift. You fold bills into fans, connect them at the center, and mount them on stems so they look like flowers that could spin. It’s fast because the pattern repeats, and it’s easy to keep the pinwheel flat for photos. This works best with 7-9 stems in a tight bouquet so the pinwheels fill the space. Add ribbon tails at the base for extra movement in pictures.
Accordion-fold each bill into pleats, then fold into a half-fan. Glue two half-fans together at the edges to form a full pinwheel shape, then secure the center with a small circle. Punch a hole through the center circle and slide a floral wire through, securing it with a small bead or tape. Wrap the wire stem and glue ribbon tails behind the pinwheel center.
Use a small foam circle under the pinwheel center so it doesn’t sag.
Skip the center stabilizer — without it, the pinwheel looks floppy.
12. Money Bouquet With Fabric-Loop Petals

Fabric-loop petals make a money bouquet look soft and expensive, even when you’re using simple materials. You’re not relying on perfect paper cuts; you’re creating a petal from loops that naturally look full. The folded bill sits in the middle like a centerpiece. This is a smart beginner choice if you’re trying to avoid messy paper edges. Use felt strips or ribbon scrap, and keep the loops consistent so the bloom looks symmetrical.
Cut felt or fabric strips about 1 inch wide and 4-6 inches long. Glue each strip looped into a small circle around a cardstock base, overlapping slightly. Fold a bill into a small rectangle and glue it at the center. Mount the base on a stem, then wrap the stem with matching ribbon or paper tape and add one leaf piece behind the bloom.
Cut loop lengths from one strip first, then measure from that — consistency makes it look designed.
Don’t use slippery satin — it shifts and makes loops uneven.
13. Rolled-Bill Butterfly Blooms (Asymmetrical Flower Shape)
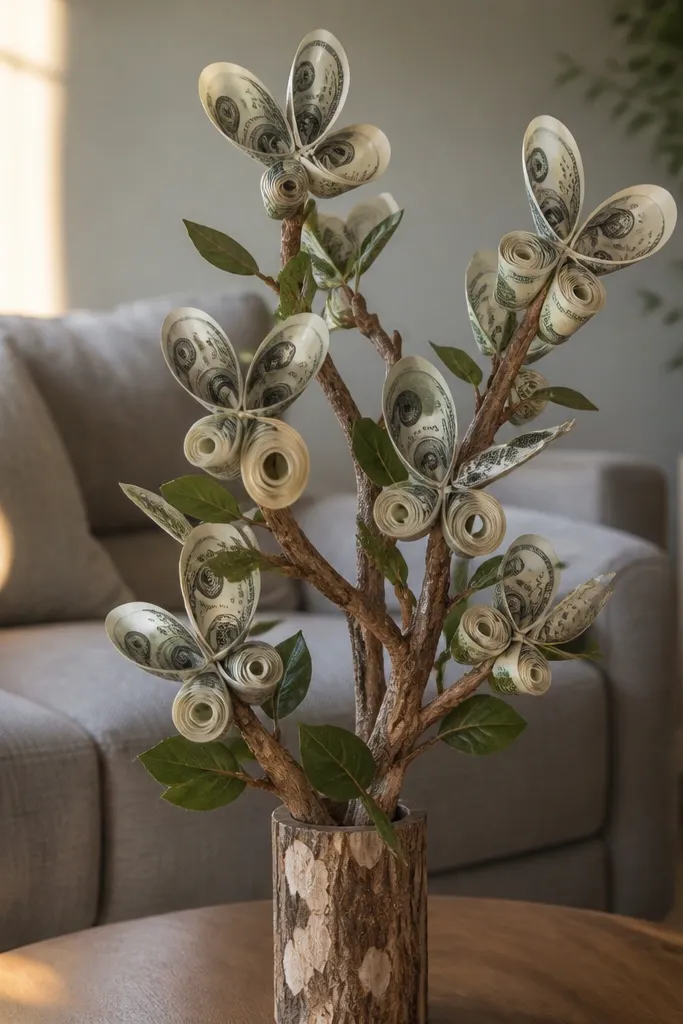
Cut bills into two long strips for wings and one smaller strip for the center. Roll each strip into a tight teardrop shape and glue the tail end. Glue the two wings on opposite sides of a small cardstock leaf base, then add the center roll. Attach the leaf base to a stem, wrap the stem, and add a second leaf behind for balance.
If you want something that looks quirky and photo-worthy, butterfly blooms do it. You roll two bill pieces into teardrop wings and one smaller center roll, then glue them to a leaf-like base. It reads as a flower-butterfly hybrid, which is why it looks different from the usual tulips and roses. Beginners can nail it because the shapes are forgiving and don’t require perfect petals. This works great for spring-themed gifts and colorful gift wrapping.
Skip thisDon’t glue wings flush — leave a tiny gap so they separate in photos.
Editor's noteMake one wing slightly larger — asymmetry looks intentional and more “designed.”
14. Bill Petal Wreath Blooms (Mini Floral Ring on a Stick)
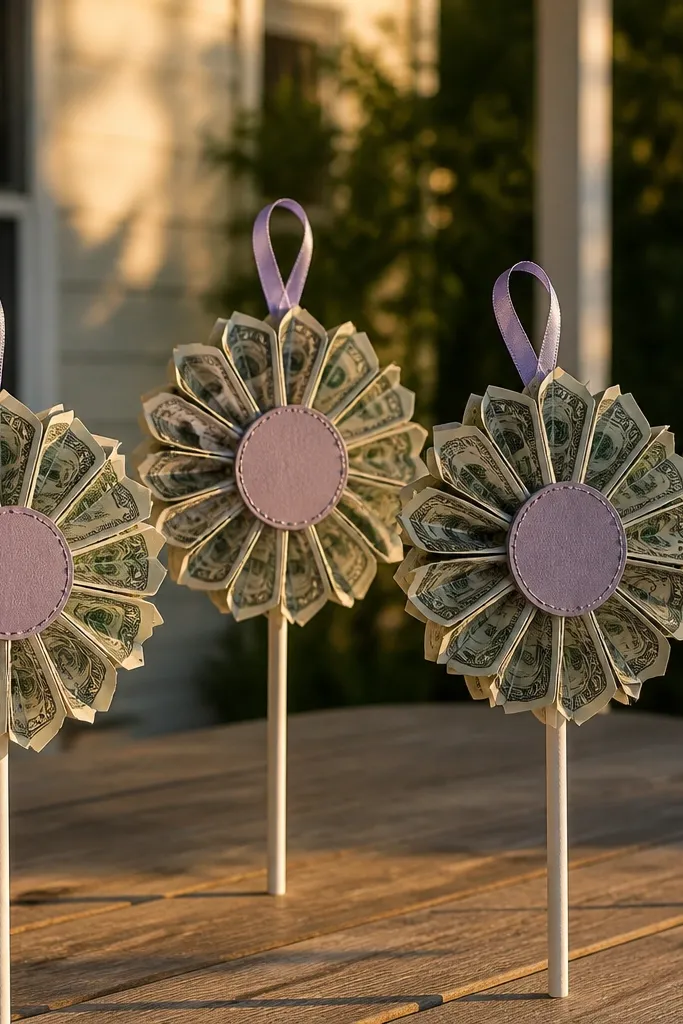
Fold bill sections into short petal shapes, about 1 inch wide at the base. Glue petals around a small cardstock circle, working in a full ring. Add a second ring of smaller petals if you want more fullness. Mount the circle on a stem, wrap the stem with paper tape, and glue a ribbon loop on the front for a clean finishing touch.
These are compact blooms that look like mini wreaths. The ring shape is naturally stable, so beginners get a bouquet that stays upright. You fold the bill into petal segments and glue them around a center, creating a full circle that looks like a flower from the front. Add a ribbon loop at the top of each bloom to make it look like a gift topper. This style works well when you’re making a bouquet with a lot of stems but want each bloom to be quick and consistent.
Skip thisDon’t leave the center empty — a blank center makes the bloom look unfinished.
Editor's noteUse the same petal fold every time by marking a 1-inch guide on your table with tape.
15. Money Bouquet Crinkle-Petal Stars (Folded Bills + Crinkle Paper)
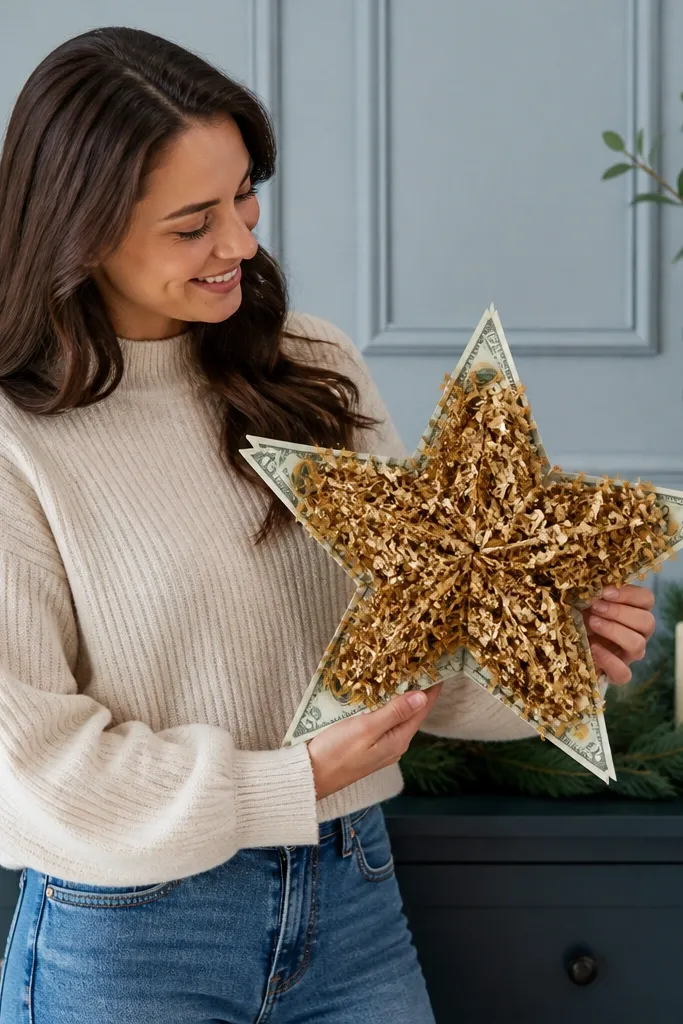
Star-shaped money bouquets look bold and photogenic because the silhouette is unmistakable. You combine crinkle paper petals with bill tips so the money shows up at the edges, not just in the center. This gives the bouquet a “spark” look without needing complicated craft supplies. It’s best for graduation, holiday money gifts, or anyone who likes eye-catching decor. Beginners benefit from this because the crinkle texture hides minor imperfections in petal shape.
Cut star points from cardstock as a guide, then cut crinkle paper strips to match each point. Glue one crinkle paper point behind each star point outline, then fold small bill pieces into wedges and glue them onto the tips. Assemble the star by layering the pieces on a base cardstock star. Attach the finished star to a stem and wrap the stem, then add a small ribbon at the base.
Make the star base cardstock slightly thicker so the points stay crisp and don’t sag.
Don’t use flimsy paper for the star outline — it collapses and blurs the shape.
16. Envelope Pocket Money Blooms (Bill Slides Out Cleanly)
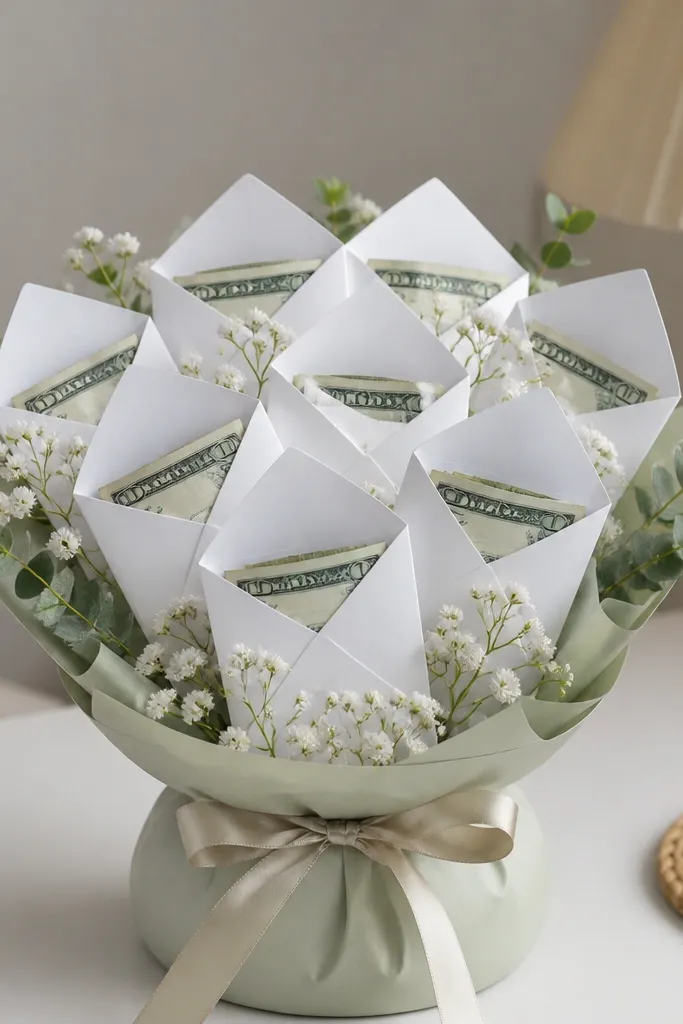
This is the most “giftable” beginner option because the money slides out cleanly. Each bloom is an envelope pocket shaped like a petal or tiny flower, so you don’t have to glue the bill in place where it’s hard to remove. The look is tidy and intentional, with sharp edges and a neat opening flap. It’s great for baby showers, birthdays, and events where you want the recipient to open it immediately without struggling.
Cut flower-shaped pocket pieces from cardstock and fold an inner pocket flap so it creates a pocket depth of about 1/2 inch. Slide a folded bill into the pocket and close the top flap with a small strip of tape on the back only. Glue the pocket flower to a stem, then wrap the stem with paper tape. Add a small ribbon bow at the top flap to cover the closure.
Use 1/2-inch pocket depth so bills slide out without catching on the flap edges.
Don’t tape the front edges — it ruins the clean look and blocks the slide-out.
17. Knot Bow Money Blossoms (Ribbon Bow + Folded Bill Center)
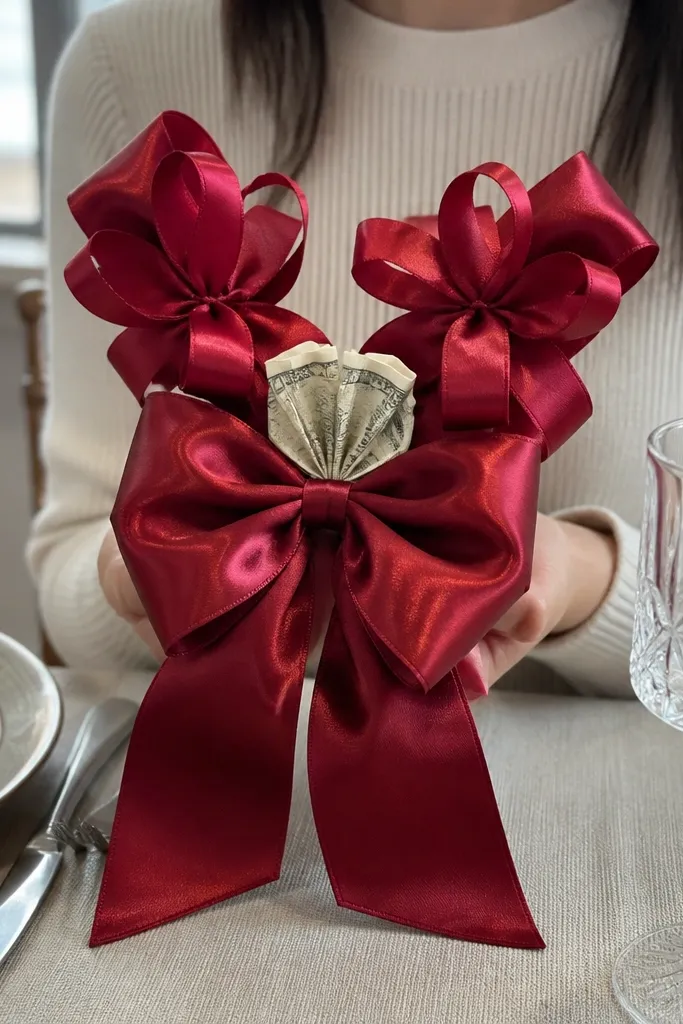
Knot bow blossoms look polished because the ribbon does the heavy lifting for shape. You fold the bill into a small center knot-like rectangle, then mount it behind a ribbon bow so the money reads like the center of a flower. This is a great beginner project because you can reuse the same ribbon bow technique across all stems. Keep ribbon tails short so the bouquet stays tidy in a photo. This style works well for neutral color schemes and elegant birthday gifts.
Fold each bill into a small rectangle, then glue it to a small cardstock circle. Tie a ribbon bow and secure it with a thin wire or hot glue at the center back. Glue the bow to the cardstock circle so the bill sits behind it. Attach the circle to a stem, wrap the stem in matching paper tape, and add one small leaf cut from cardstock.
Trim ribbon tails to 2-3 inches for a clean silhouette.
Don’t use too-long tails — they tangle and make the bouquet look messy.
18. Mini Bouquet in a Money-Wrapped Pot (Stems + Wrapped Base)
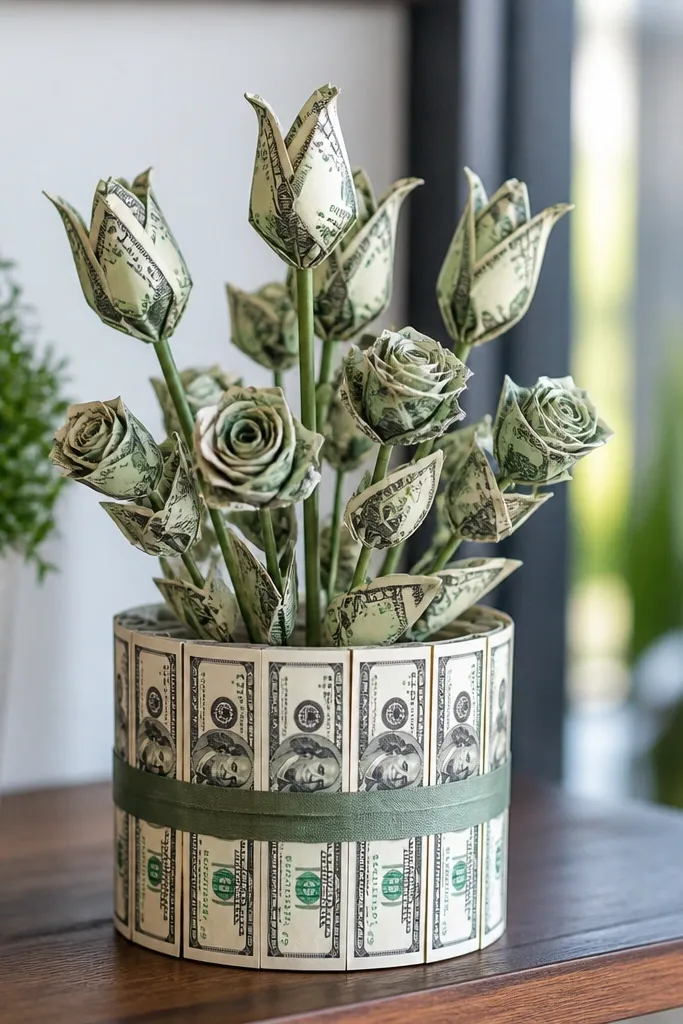
This idea makes the whole gift look complete, not just the flowers. You build simple money stems (any of the flower styles here) and then wrap a small container with bills so the base looks intentional. The pot becomes a visual anchor, which helps beginners because they don’t have to perfect every bloom. It’s also more photogenic because the money color shows even at the bottom of the bouquet. Use a small planter, a tin, or a foam cup and keep the wrap tight with tape underneath.
Wrap a small container with folded bills using double-sided tape or thin glue on the back sides only. Leave a clean opening at the top so you can insert stems. Cut foam or cardboard into a base insert, then poke stems through for spacing. Tie ribbon around the container seam and place your money flowers into the insert so the bloom tops sit evenly.
Use foam for the base — it locks stem angles so the bouquet looks neat in photos.
Don’t leave gaps at the container seam — they show tape and make the base look unfinished.
19. Twinkle Money Confetti Flowers (Bill Squares + Star Sprinkles)
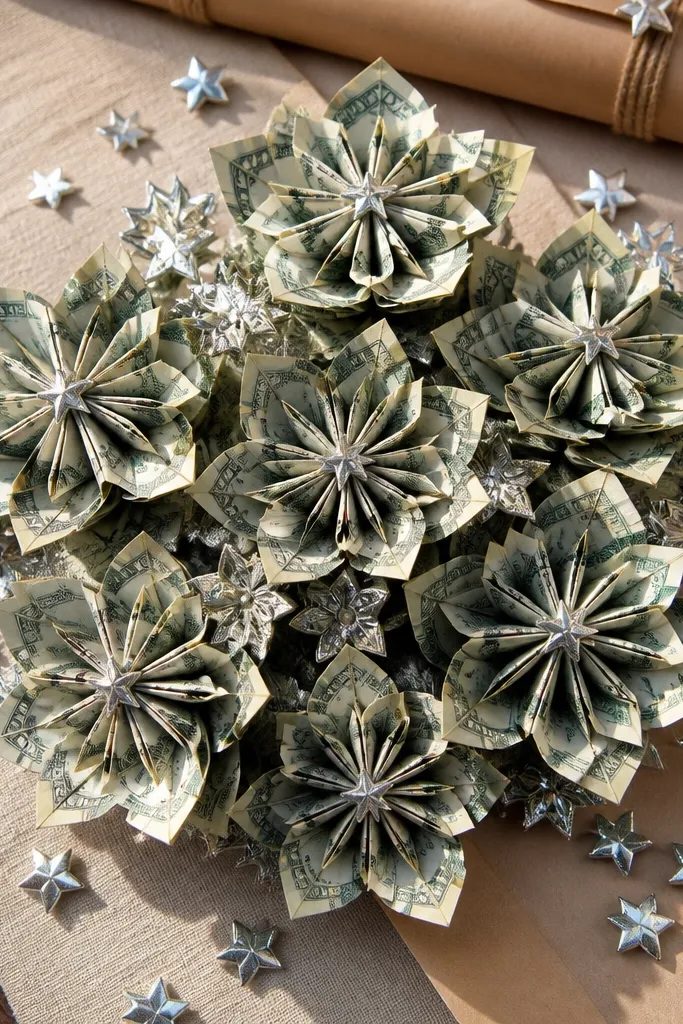
This is a cute, beginner-friendly option when you want the bouquet to look celebratory. You fold bills into small square petals and stack them into a flower shape, then add tiny star accents around the edges. The money is visible, but the overall look is playful and bright. It’s good for kids' parties, bridal showers, and any gift that needs color and fun. Keep the star accents in one color family so the bouquet stays focused instead of chaotic.
Cut bills into square petals or fold them into small squares if you want no cutting. Stack 6-8 squares around a center circle and glue the bottom edges. Add tiny star confetti (paper or craft foam) around the outer petals. Mount the flower on a stem, wrap with paper tape, and place multiple blooms into a small bouquet holder.
Use the same square size for every bloom so the spacing looks even across the bouquet.
Don’t mix too many accent colors — it makes the photo look cluttered.
20. Money Hydrangea Clusters (Tight Groups of Small Bills)
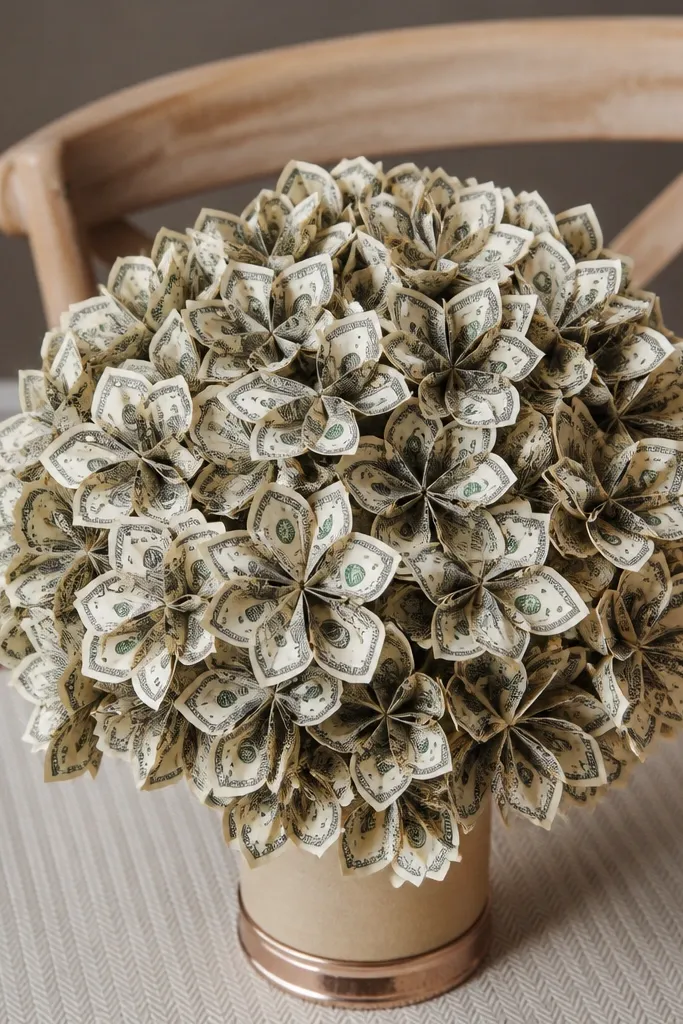
Make 12-18 small bill buds using simple folded rectangles on short stems or toothpicks. Arrange them around a foam ball or a cardboard dome so the tips form a rounded head. Glue only at the foam contact points to avoid lumps on the front. Add a ribbon wrap around the stem bundle so the base looks clean.
Hydrangea-style clusters look expensive because they’re full, rounded, and layered. You make a bunch of small bill blooms and group them tightly so the bouquet reads as one fluffy shape. Beginners love this because you don’t need perfect individual flowers — the cluster hides unevenness. It’s also a solid method when you have mixed bill sizes and want them all to fit. This works best for a compact bouquet where the cluster is the focal point.
Skip thisDon’t space the buds too far apart — hydrangea needs density to look right.
Editor's noteUse a foam ball or dome — it’s the easiest way to control the hydrangea shape.



