
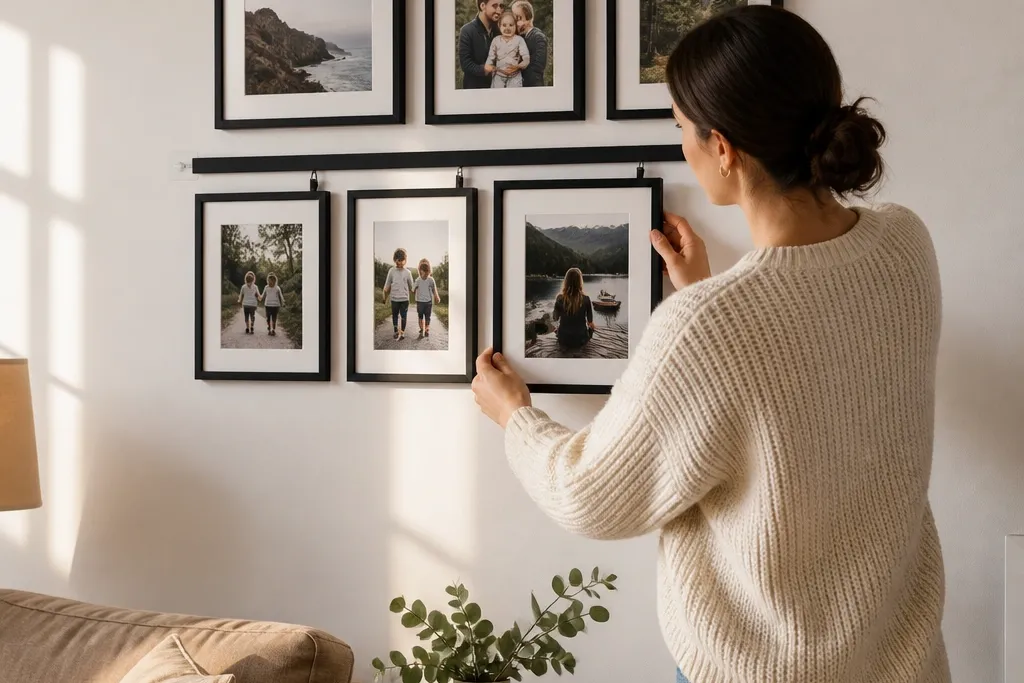

1. 3x5 Polaroid-Style Grid with Clip-Top Rail
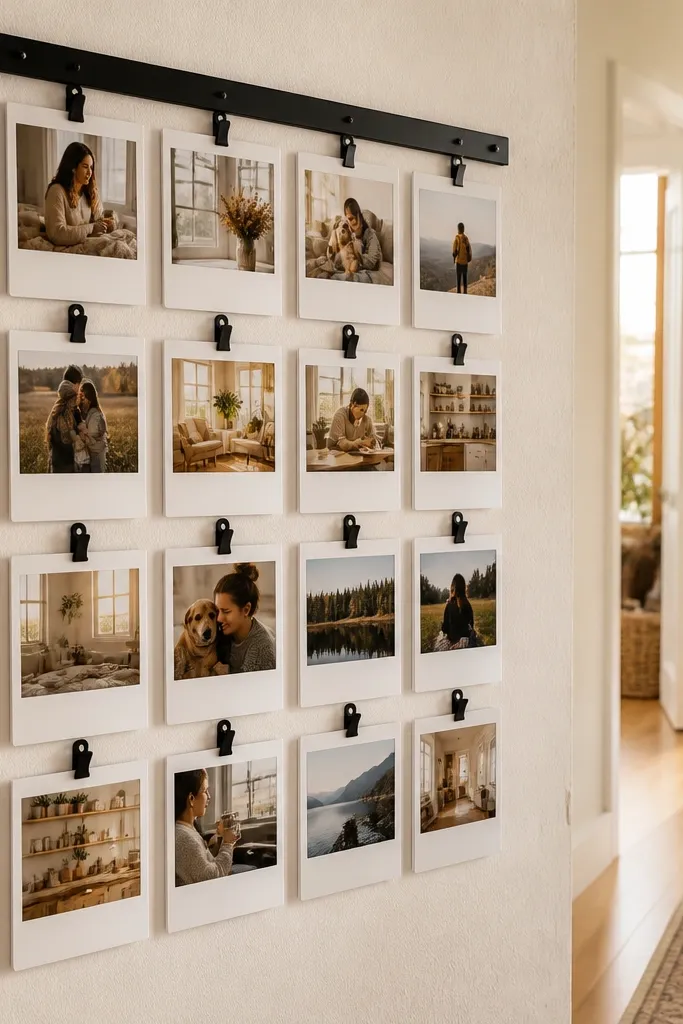
This layout looks styled because it treats every photo like a matching print, not a different “size problem.” The white borders create a uniform visual rhythm, and the clip-top rail keeps the collage easy to rearrange when you add a new family photo. Use photos with similar color temperature — warm indoor shots together, bright outdoor shots together — so the grid reads cohesive. It’s a great renter-friendly family photo collage option for people who want to swap images without pulling frames down. You’ll spend more time choosing borders and spacing than hanging, which is exactly what makes it look intentional.
Mount a picture-clip rail horizontally at eye level, then tape a 3x5 rectangle on the wall with 2-inch gaps between photo centers.,Print photos with a consistent border size (about 1.5 inches white margin), then clip each print into the rail spacing you taped.,Step back and adjust the rail position so the whole grid sits centered over furniture or the hallway runner.
Print two test photos first and measure how your border lands; some home printers shift margins by a few millimeters.
Don’t mix border thicknesses — the grid stops looking curated fast.
2. Oversized Center Photo with Two Side Columns
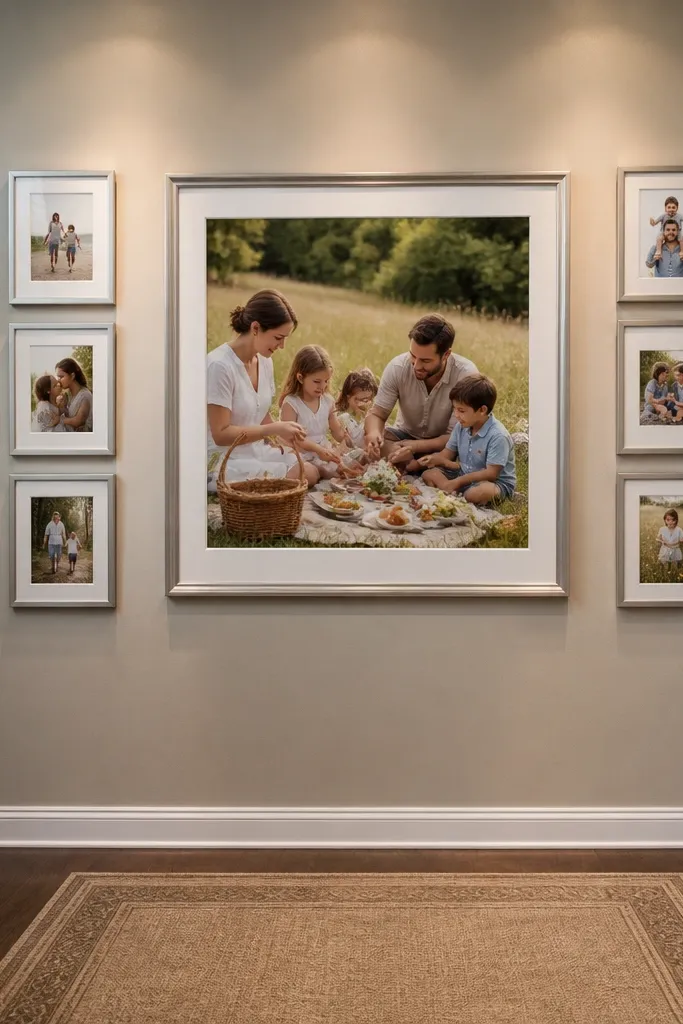
This is the collage layout that always looks like you planned it, even when you didn’t. The oversized center photo acts like the headline, while two narrower columns on each side keep the rest of the wall from feeling empty. For a renter-friendly family photo collage, this works best with lightweight frames or gallery strips so the center weight doesn’t stress the wall. Choose one photo with strong contrast — faces in shade, a crisp holiday tree, or a clear beach horizon — so it “reads” from across the room. The side photos should support the story with similar tones, not random brightness.
Pick an oversized size first, like a 16x20 center frame, then decide on two side columns of 8x10 frames.,Tape a center vertical line, place the center frame, then measure equal spacing to the left and right columns with 2.5 inches between frames.,Hang the side frames using removable strips rated for the frame weight, keeping everything level before you pull the tape.
Use the same mat color for every frame, even if some frames are different sizes.
Don’t choose a center photo with low contrast; the whole layout looks flat.
3. Stair-Step Gallery Strip for a Hallway Moment
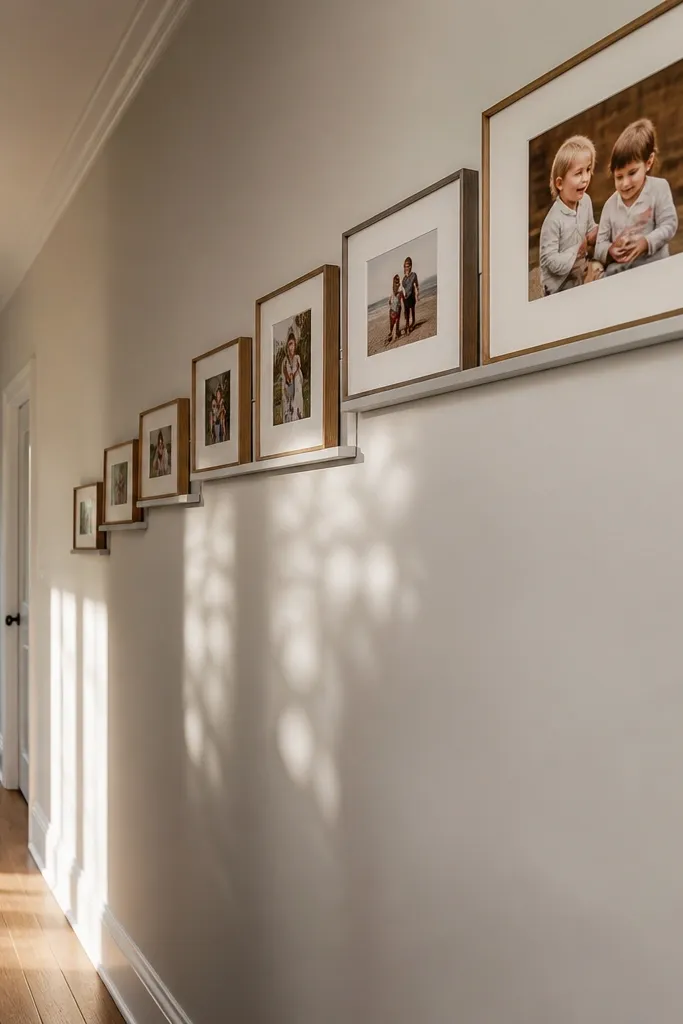
Stair-step collages look dynamic because the eye moves up the wall instead of bouncing around. It’s perfect for hallways where you can’t fit a big square grid, and it’s very renter-friendly because you can hang a light strip system without drilling. This layout also makes rearranging easy: you can swap any photo block without changing the step pattern. Use photos that match in format — all 4x6 or all 5x7 — so each “step” stays visually even. The look is clean, modern, and photogenic because every frame catches light at a slightly different angle.
Measure the hallway wall length and choose a strip width that fits 7-9 frames without crowding, like 1.25-inch gaps between frames.,Tape a diagonal ladder using painter’s tape, where each next frame is shifted up about 3 inches and over about 2 inches.,Hang frames from a single removable rail or individual strips, then check alignment using a level on the bottom frame and the top frame.
Editor's noteUse frames with glass or acrylic that reduces glare; hallway lighting can wash out glossy prints.
Skip thisDon’t stack frames too tightly on the steps or the whole line turns into a blob.
4. Gallery Wall in Two Rows with a Broken Grid
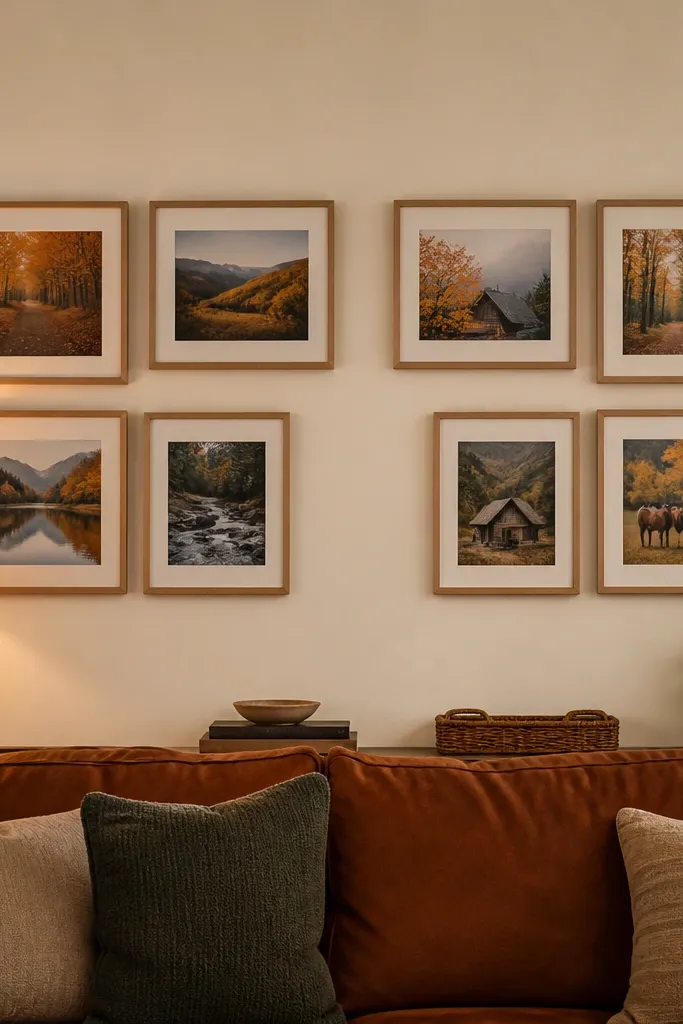
A broken grid gives you structure without feeling rigid. Two rows keep it balanced, and the intentional “gap” in the center makes the collage look designed instead of filled. For renters, this is smart because you can use smaller frames that weigh less and still get an impressive look. Stick to two photo sizes — like 8x10 and 5x7 — so swapping stays simple. The center gap is where you can add a seasonal print later without rebuilding the entire wall.
Pick your main photo size for row one, like 8x10, and choose a secondary size for row two, like 5x7, with consistent spacing gaps of 2 inches between frames.,Tape an outline for two horizontal rows and leave a 10-12 inch empty space in the center.,Hang frames starting with the center gap edges, then fill outward so the spacing stays symmetrical.
Choose frames in one finish only, and keep the mat color the same so the broken grid reads as one piece.
Don’t add third sizes; that’s what makes broken grids look chaotic.
5. Color-Blocked Frames with a Single Theme Palette
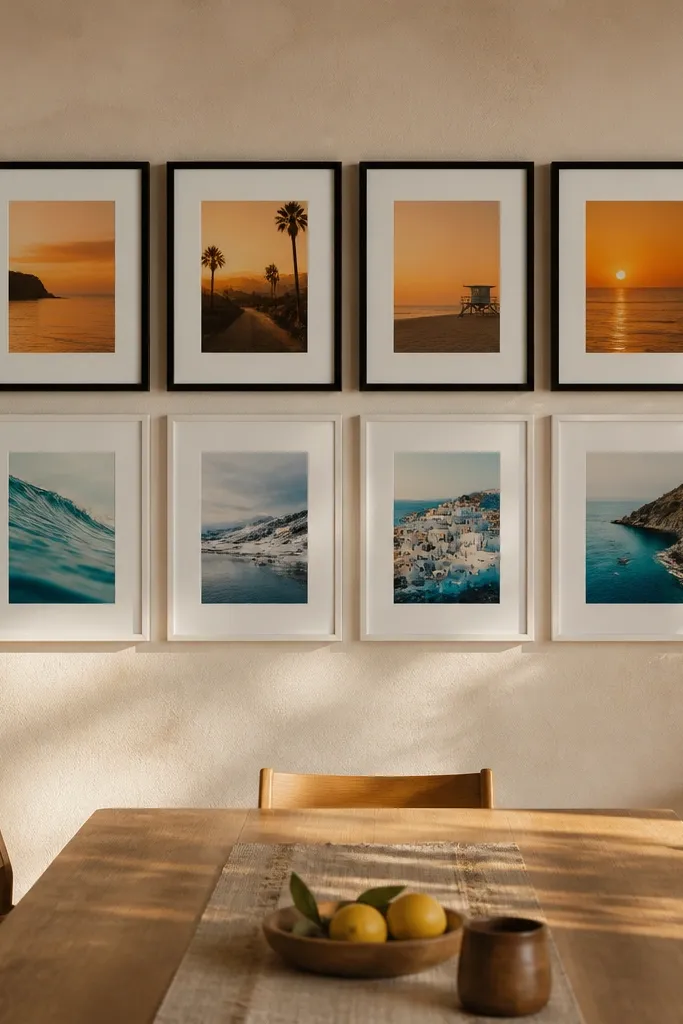
This collage looks good because the wall has a plan, not because every photo is perfect. Group photos by palette — for example, “sunset warm” and “ocean cool” — and keep frame color consistent within each block. You’ll get a renter-friendly family photo collage that looks like decor, not a pile of pictures. Use matting to unify the look: off-white mats for warm photos, light gray mats for cooler photos, all in the same frame style. It’s especially effective for families who have lots of vacations and holiday photos with very different lighting.
Choose 12 photos and sort them into two palette groups, then decide on two side-by-side blocks like 6 frames left and 6 frames right.,Use the same frame size for every photo in a block, and keep the gaps at 1.5-2 inches.,Hang the blocks first as two rectangles, then fine-tune by shifting individual frames to keep the top edges level.
Print with a consistent white border so skin tones don’t look mismatched between prints.
Don’t rely on different borderless photo sizes; the color blocks need uniform edges.
6. Black Frame + White Mat "Museum Strip"
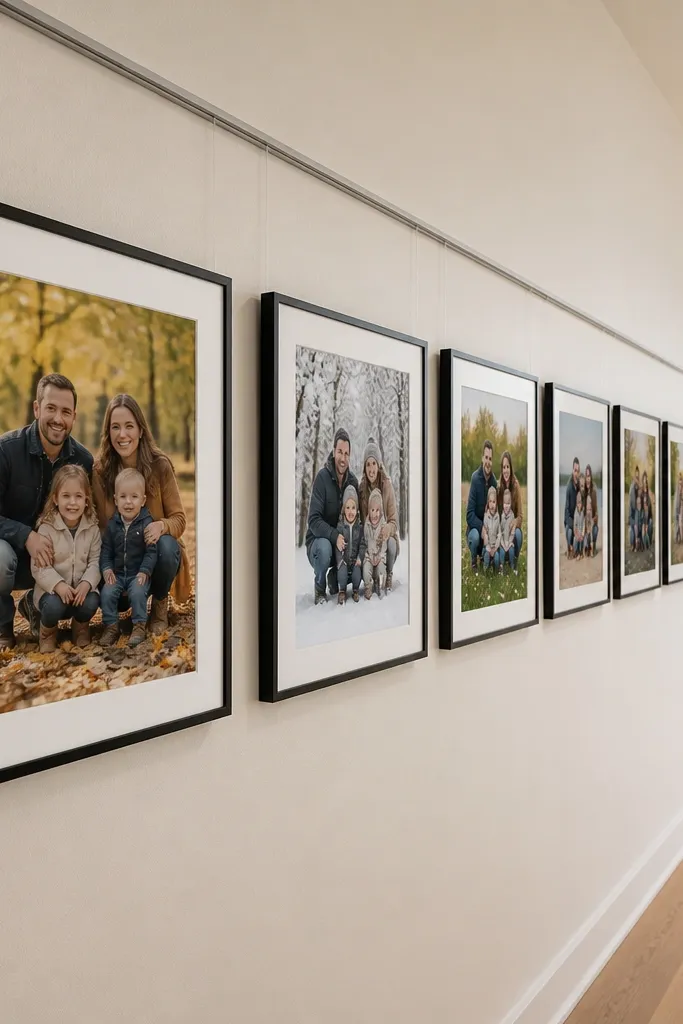
This is the cleanest style when you want your family photos to look like intentional wall art. Narrow black frames plus white mats create a gallery feel without the bulk. It works great for rentals because you can hang a long, lightweight line using removable hooks or a single rail. The museum strip is also easy to rearrange: you swap photos in the same frames and keep the spacing constant. Pick photos with clear subjects — faces centered, hands visible, or a strong scene — because the white mat makes details pop.
Choose a frame size like 8x10 with a white mat and keep all frames identical.,Tape a straight guide line at eye level and mark the frame centers every 3 inches.,Hang frames from the center outward, then check that the top edges form a straight line before removing tape.
Editor's noteUse the same orientation for most frames, then flip one or two for a subtle rhythm.
Skip thisDon’t mix wide and narrow frames in the same strip; it ruins the museum alignment.
7. Woven Rope Photo Clips in a Rectangular Grid
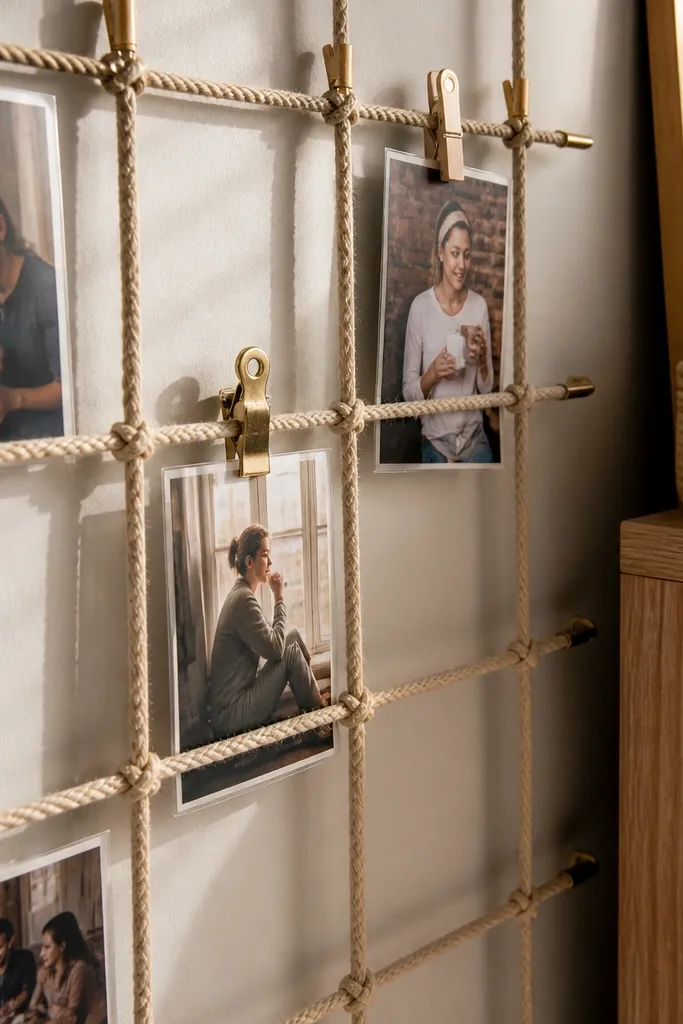
Rope clips look cozy and intentional, and they’re one of the best renter-friendly family photo collage options because you’re not drilling into the wall. The rectangle grid keeps it from looking messy like a “string of photos.” Use a thick cotton rope and matching wood or metal clips so the hardware looks like part of the decor. This style is forgiving if your photos vary slightly in size, since you can clip them at consistent heights and adjust spacing. It also makes rearranging fast because you can unclip and swap without taking the whole setup down.
Install two removable wall anchors for the top and bottom rope lines, spacing them to fit your desired rectangle width.,Tie rope segments horizontally between the anchors, then add vertical rope lines using the same spacing you taped on the wall.,Clip photos into place, then pull each photo edge to align the top border before tightening knots.
Editor's notePre-cut a paper template with your photo sizes so every clip sits at the same height.
Skip thisDon’t use thin, stretchy rope; it sags and makes the grid look uneven.
8. Hexagon Photo Honeycomb with Removable Frames
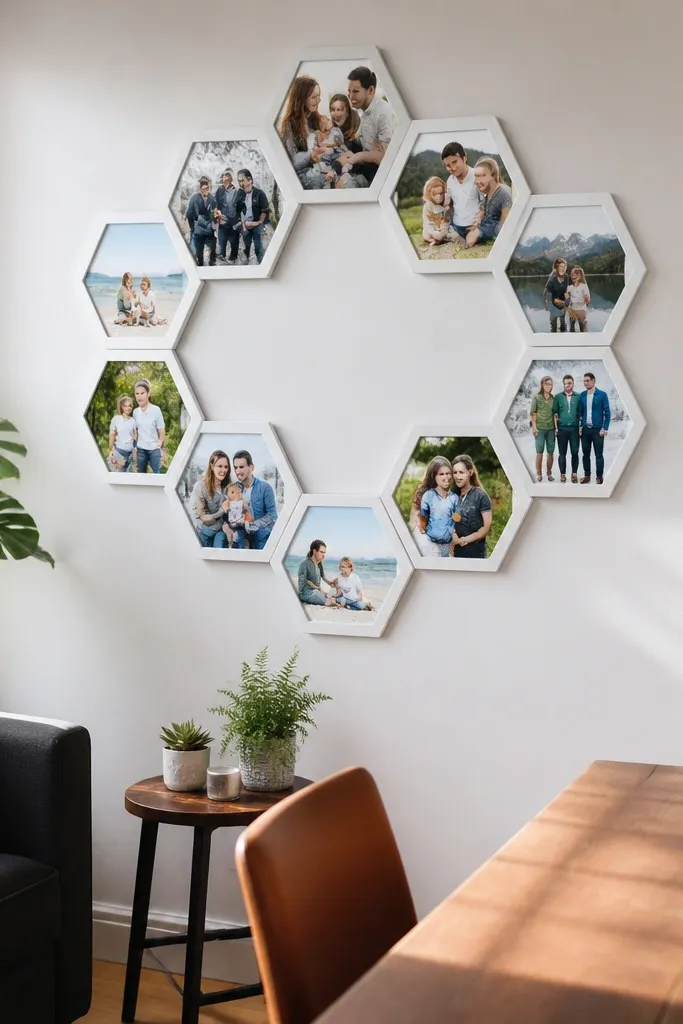
Hexagons bring instant visual interest without needing a huge space. The honeycomb pattern makes your family photos look like a designed set, and it’s easy to rearrange because each cell is self-contained. For renters, use lightweight hex frames and hang them with removable strips or command-style hooks rated for the frame weight. Choose photos with similar contrast so the shapes don’t make some images feel washed out. This collage is especially photogenic in bright rooms because the angled shapes catch light differently.
Pick one hex frame size, like 6-inch flats (check your frame dimensions), and decide on a layout of 13-19 hexes.,Tape the honeycomb grid on the wall using hex templates made from cardboard, marking each cell center.,Hang frames starting from the center hex, then work outward so the pattern stays symmetrical.
Editor's noteUse a matte finish on prints to reduce glare inside the angles.
Skip thisDon’t mix hex sizes; it kills the clean pattern.
9. Two-Color Mat Stack with Vertical Center Column
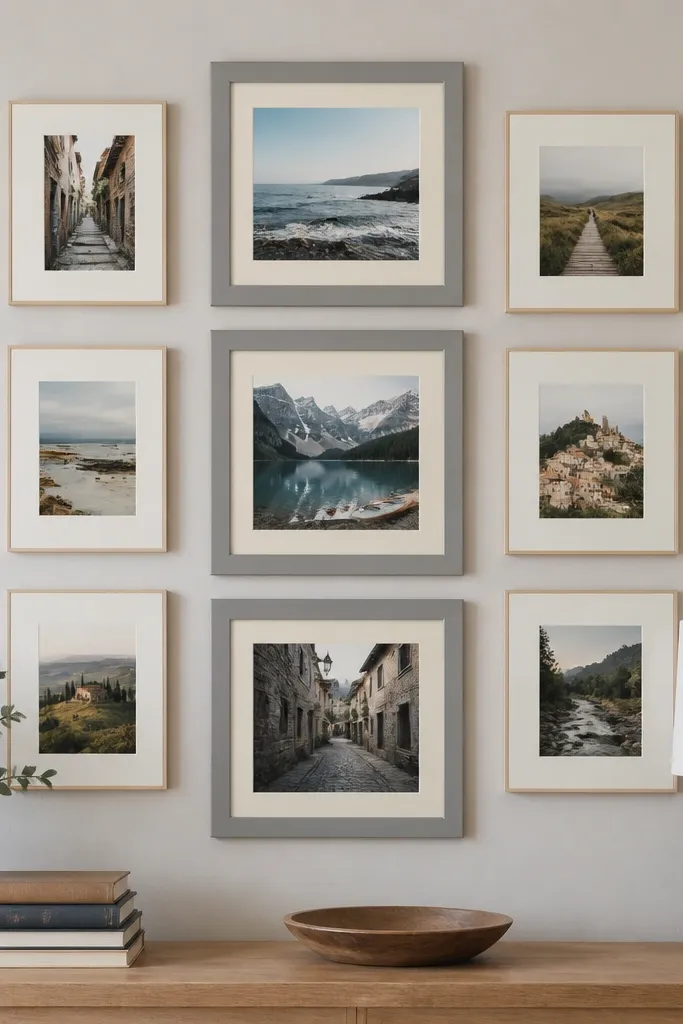
This layout is for people who want a renter-friendly family photo collage that looks styled even with fewer photos. A vertical center column creates a clear focal point, and two-color mats add interest without changing the frame hardware. It also makes rearranging easy because you can swap photos in the center column and keep the side frames as supporting cast. Use a consistent frame size for the column and a slightly smaller frame size on the sides. The result looks like a gallery installation rather than a crowded wall.
Choose a center frame size like 11x14 and build a vertical column of 5 frames with 2-inch gaps.,Add two side frames on left and right aligned to the middle of the column, using a smaller size like 8x10 and 2 inches from the column frames.,Tape and level the center column first, then hang side frames to match the vertical center line.
Editor's noteUse one mat color for photos with warm tones and the other for cool tones, but keep both mat colors consistent across the wall.
Skip thisDon’t rotate frames randomly; keep them straight so the column reads cleanly.
10. Floating Frame Squares with Thick Picture-Ledge Feel
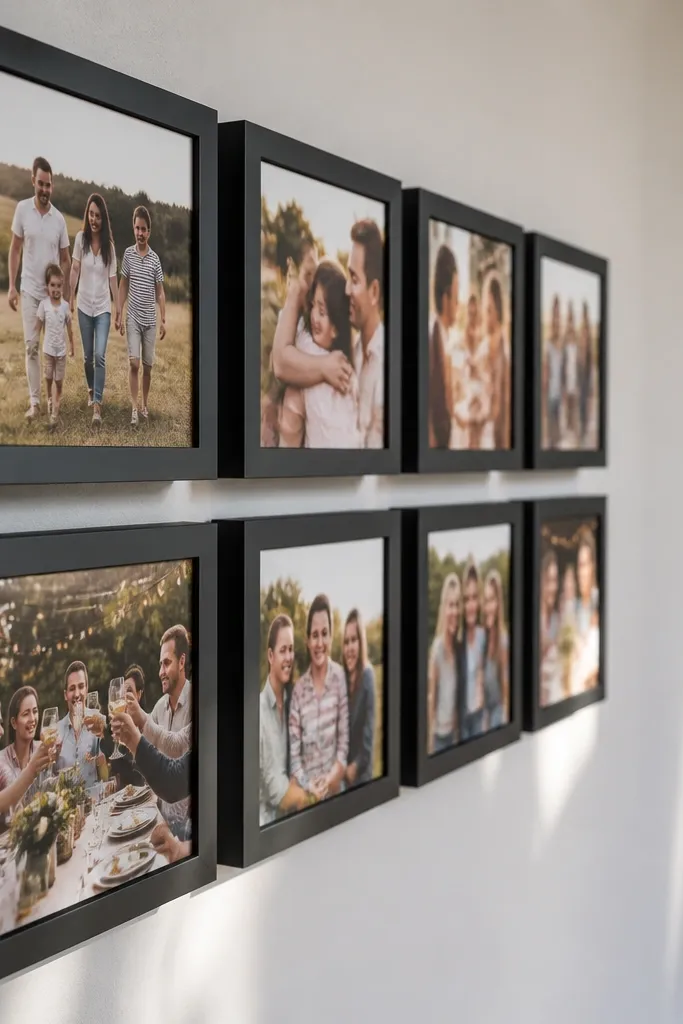
Floating frames give you that “thick gallery wall” look without building a ledge. The key is leaving a consistent shadow gap between frames and wall, which makes the collage feel dimensional and expensive. For renters, this is still doable with removable mounting strips, as long as you keep frame weight down. Use square frames like 10x10 or 12x12 so the grid stays simple to rearrange. This idea is photogenic because the slight depth casts tiny shadows that separate images from the wall.
Pick square frames with a built-in spacer or a design that creates a visible gap, then choose a grid size like 12 frames in a 3x4 layout.,Tape the grid outline with exact 2-inch center-to-center spacing and mark each frame corner position.,Mount frames using removable strips, pressing firmly for the time listed on the adhesive label.
Let adhesive strips cure before you hang heavier frames if the label says to wait.
Don’t use super light frames with glossy backing; they reflect light and flatten the floating effect.
11. Polaroid Stack Frames in a Single Vertical Line
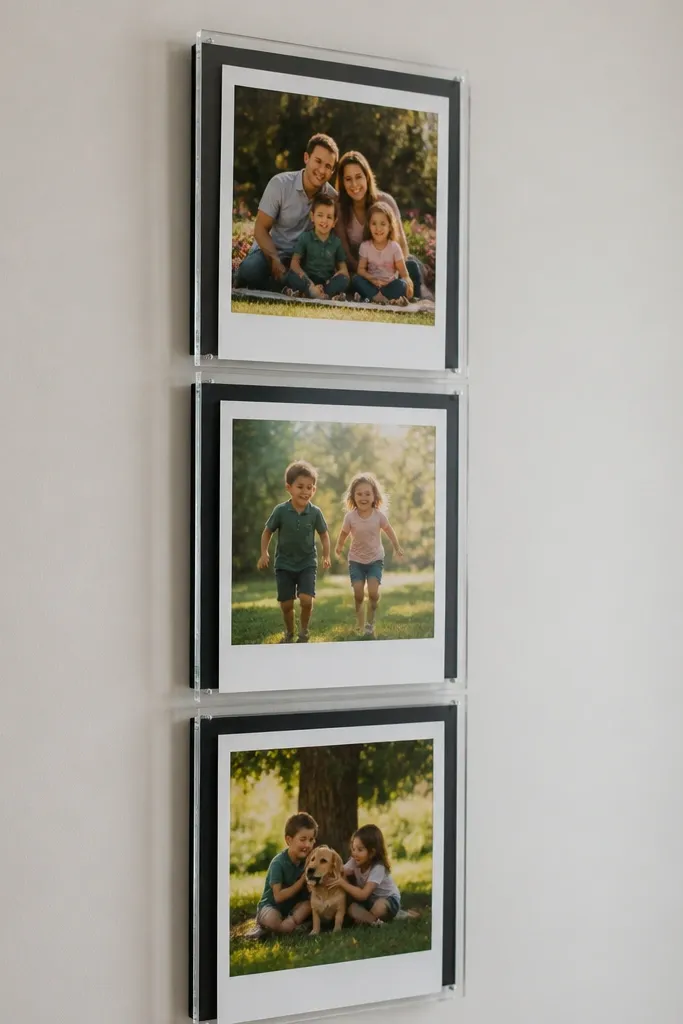
This is a renter-friendly family photo collage layout that looks like a desk moment moved to your wall. The trick is to keep the “stack height” consistent — every polaroid print should align at the bottom edge. Use frames or clip systems that hold the prints at a slight tilt or consistent stacked look. The vertical line works in small spaces like apartments, entryways, or above a console table. Rearranging is quick because you can swap one print at a time while keeping the stack spacing the same.
Choose 7-10 photos and print them to a consistent polaroid-style size, like 4x6 with a 2-inch white border.,Tape a vertical reference line and mark the bottom edges of each print with 2 inches between them.,Mount using removable photo clips or a slim rail with clip spacing that matches your taped marks.
Pick one photo with a strong subject for the top slot so the column feels intentional.
Don’t stagger every print differently; keep the tilt consistent or it looks accidental.
12. Corner-to-Center L-Shaped Layout for Small Apartments
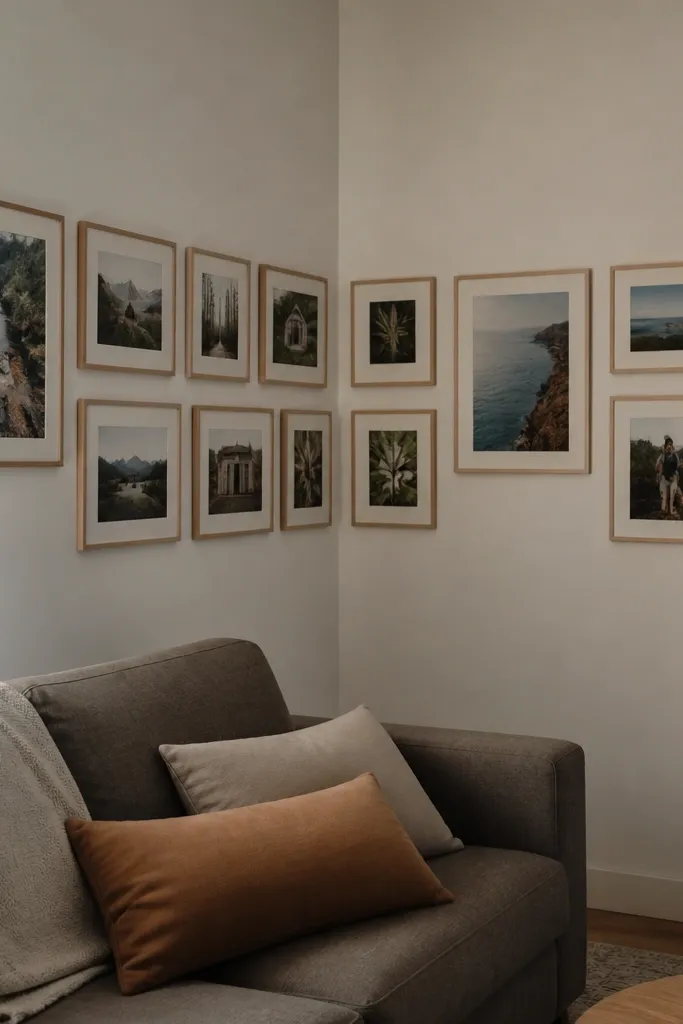
If your wall is small or your furniture blocks part of the wall, an L-shaped collage solves the layout problem. It wraps from the corner toward the center, making the photo wall feel bigger without adding more frames. For renters, use removable frames and keep each side line uniform — same frame size, same spacing. This layout is photogenic because it creates two visible edges that catch light as you walk by. Rearranging works because you can swap the photos on each leg without changing the overall shape.
Pick a frame size like 8x10 and decide on how many frames per leg, like 4 frames on one side and 5 on the other.,Tape two perpendicular lines from the corner, then mark frame centers along each line with 2-inch gaps.,Hang frames first on the shorter leg, then place the longer leg so the corner frame edges align.
Use a consistent mat color so the corner junction doesn’t look like two separate projects.
Don’t let one leg drift upward; check level on both legs before you hang.
13. Round Frame Cluster with One Big Circle Anchor
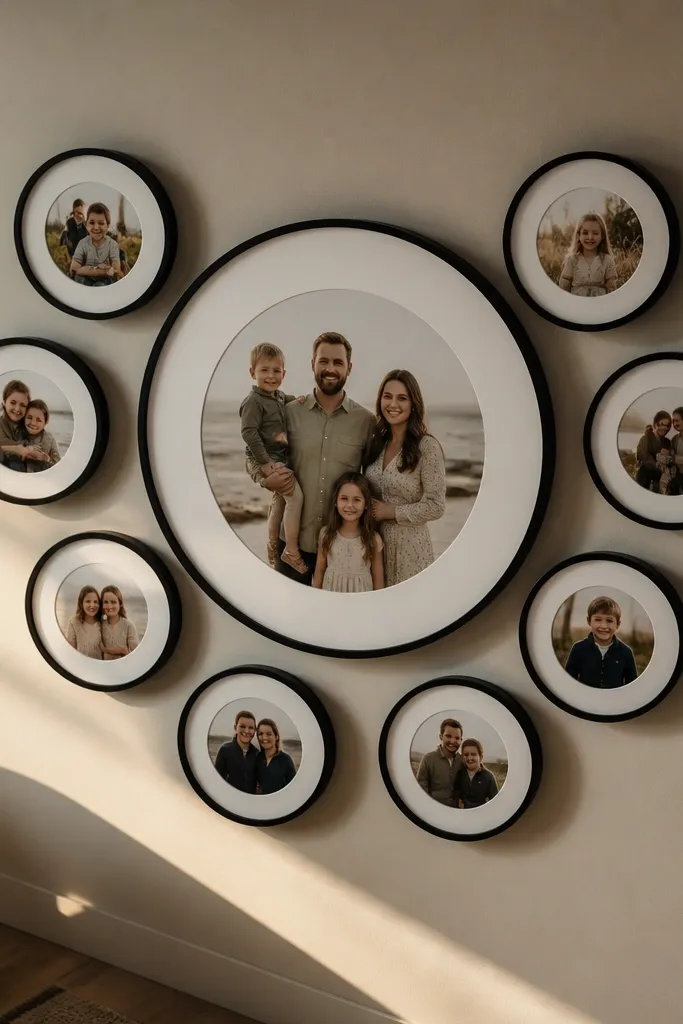
Circular frames break the “grid fatigue” that happens when families add more and more photos over time. A big circle anchor in the middle makes this renter-friendly family photo collage read as decor, not clutter. The surrounding smaller circles fill the space without making straight lines feel too strict. Use thin black or natural wood round frames so the circles look intentional. This layout is photogenic because it creates a soft focal shape that stands out from rectangular furniture and wall art.
Choose one large round frame, like 12-inch diameter, and four to six smaller round frames around it.,Tape a center circle outline, place the large frame, then mark the smaller frame centers around it with 1.5-2 inch gaps.,Hang from the center outward using removable strips, and adjust spacing until the circles look evenly distributed.
Pick photos with faces centered for the big circle; it’s the first thing people see.
Don’t overcrowd the circles; leave real breathing space between frames.
14. Vertical Row of Oversized Prints with Minimal Frames
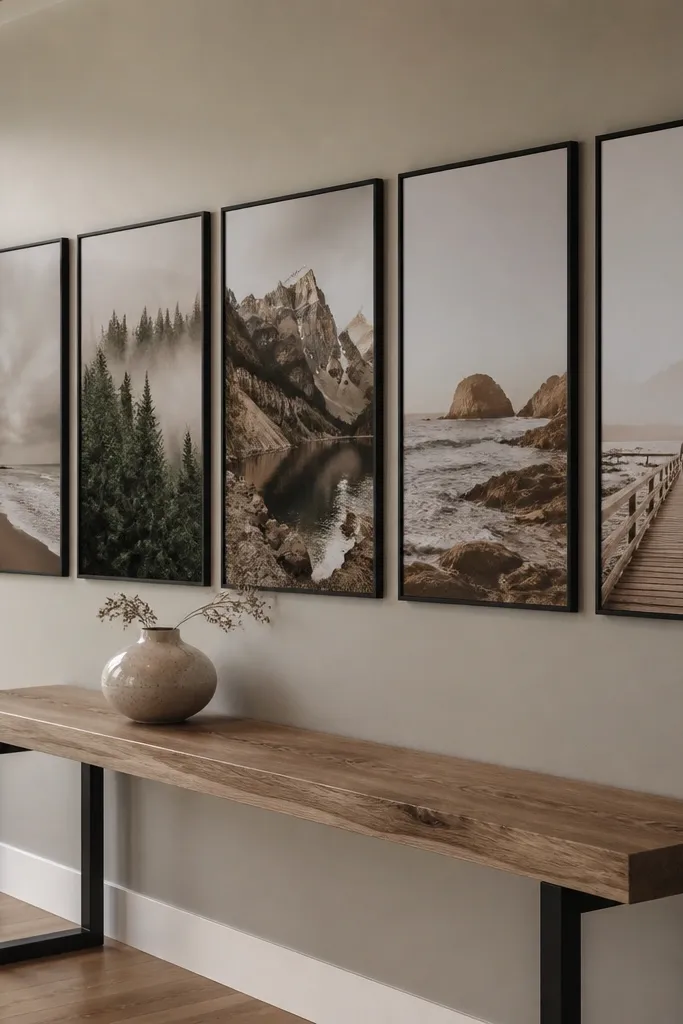
Oversized prints make the collage look like artwork, not a small photo wall. This layout is ideal for renters who want a renter-friendly family photo collage with fewer mounting points — one vertical row can look complete with 5-6 frames. Use minimal frames in matte black or light wood so the photos do the talking. Stick to one orientation for the row, and crop photos so the subject sits near the top third for a flattering composition. Rearranging is simple: swap prints in the same frame sizes and keep the vertical rhythm.
Choose five frames in one size, like 11x14 or 12x16, and decide on even spacing of 2.5 inches between frames.,Tape a vertical guide line and measure the total height so the bottom frame lands above furniture or at a comfortable eye-level point.,Hang the center frame first, then align the rest using a level and the spacing marks.
Editor's noteIf you have mixed photo orientations, standardize by cropping to a consistent ratio before printing.
Skip thisDon’t use frames that are too glossy; glare kills the oversized look.
15. Chevron Photo Strips with Removable Frame Clips
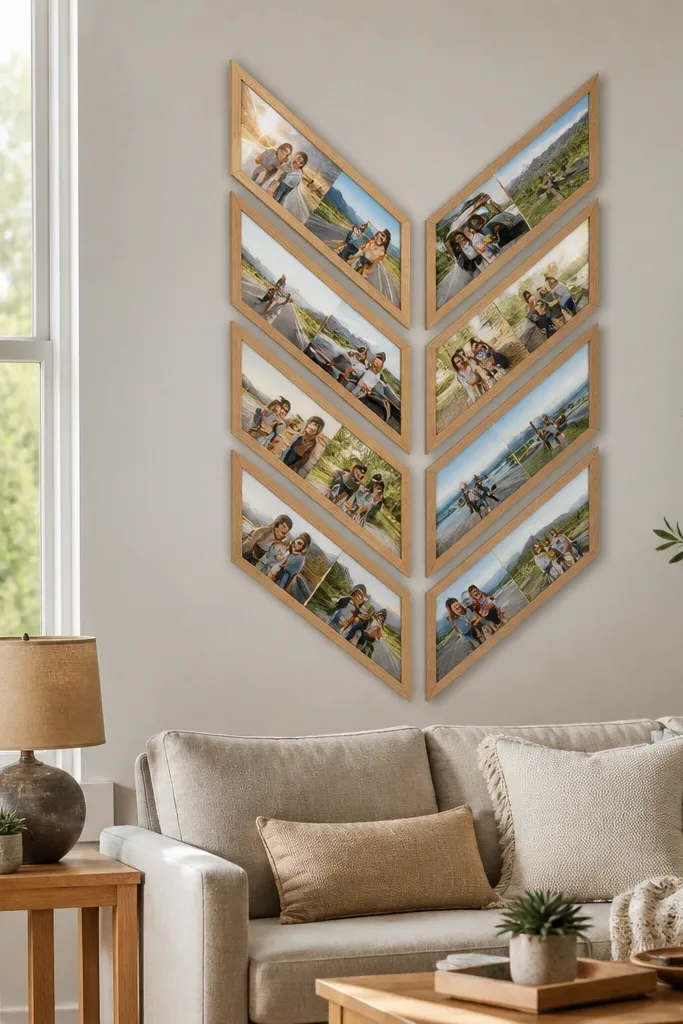
Chevron patterns look energetic and intentional, and they make a renter-friendly family photo collage feel like decor with movement. Use frame clips or small frames on a backing board so each photo sits at a crisp angle. Keep the chevron symmetrical so it doesn’t become visually messy when you swap photos. This layout is best for families who have photos with landscapes, outdoor scenes, or group shots where direction and line matter. When it’s done right, it looks like a stylish gallery even in a rental where you can’t drill heavy mounts.
Choose a frame size like 5x7 and decide on a chevron run of 10-14 frames.,Tape a chevron template on the wall with equal angles, then mark frame center points every 3 inches along the pattern.,Hang frames starting from the center point, then work left and right so the angles match.
Editor's noteUse a matte white border on each print so the chevron lines stay crisp.
Skip thisDon’t mix frame angles — keep every frame rotated the same degree.
16. Photo Wall Collage with Interchangeable Binder Clips on a Wood Slat
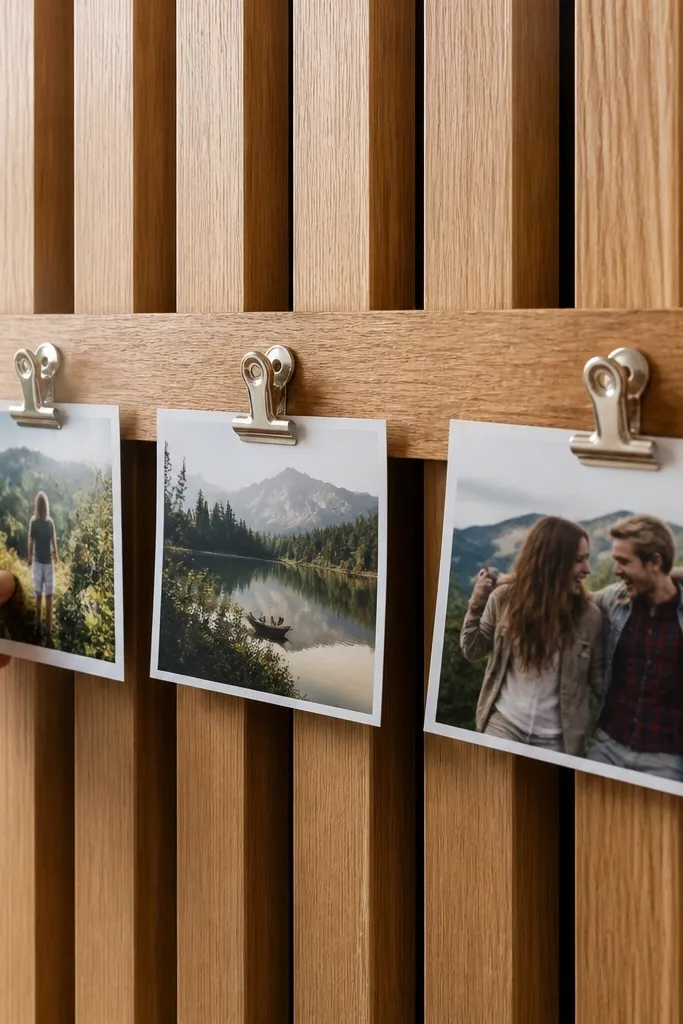
This makes rearranging three times feel easy because the photos attach like pages in a binder. A wood slat gives the wall texture and warmth while still looking clean. You get a renter-friendly family photo collage that’s stable, because you mount one slat and then clip photos anywhere along it. The look is photogenic because the photos hang flat and aligned, and the slat creates a consistent visual line. It’s a good option for families who want to rotate seasons — summer vacation prints in July, winter holiday photos in December — without changing the wall hardware.
Mount a single narrow wood slat horizontally using removable hooks or picture strips rated for the slat weight.,Place binder clips along the slat at marked intervals based on your grid, like 3 inches apart.,Clip photos in consistent top alignment, then adjust each clip so the bottom edges line up before you step back.
Sand the slat edges lightly and seal with matte clear coat so clips slide smoothly and dust doesn’t catch.
Don’t use heavy frames with binder clips; clips are for prints or lightweight photo cards.
17. Two-Level Shelf Frame Row with Leaning Art Look
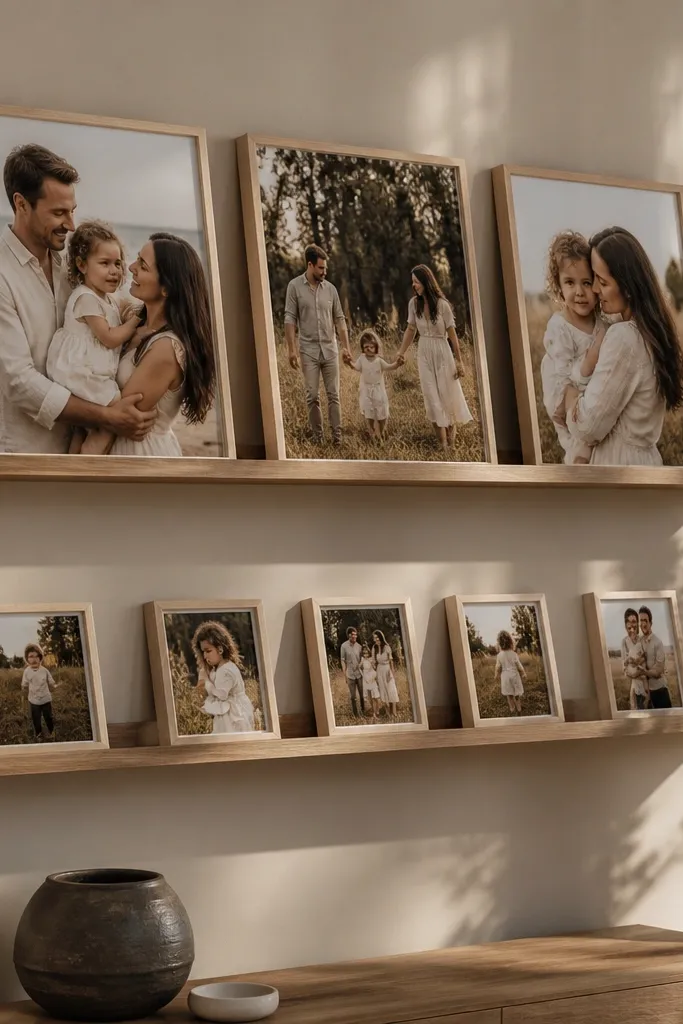
A two-level shelf effect makes your family photos look layered, like you styled them on purpose. The top level holds the most eye-catching photos, while the lower level supports the rest. For a renter-friendly family photo collage, you can use a lightweight ledge-style shelf or a wall-mounted picture ledge system that uses removable anchors. This layout is photogenic because it adds depth — the top frames sit slightly forward and cast small shadows. Rearranging is straightforward: swap photos by level without changing the overall shape.
Install a narrow ledge or picture rail system at two heights, spacing the levels about 6-8 inches apart.,Place frames on each level in a single row with consistent gaps like 2 inches between frame edges.,Align the rows by measuring from a straight line on the wall, then secure using removable mounts rated for shelf weight.
Use thin spacers or frame backs with built-in stands so photos sit flat and don’t tip.
Don’t overload the top level; too much weight makes the ledge look bowed.
18. Grid of Thin Frames with One "Color Pop" Photo
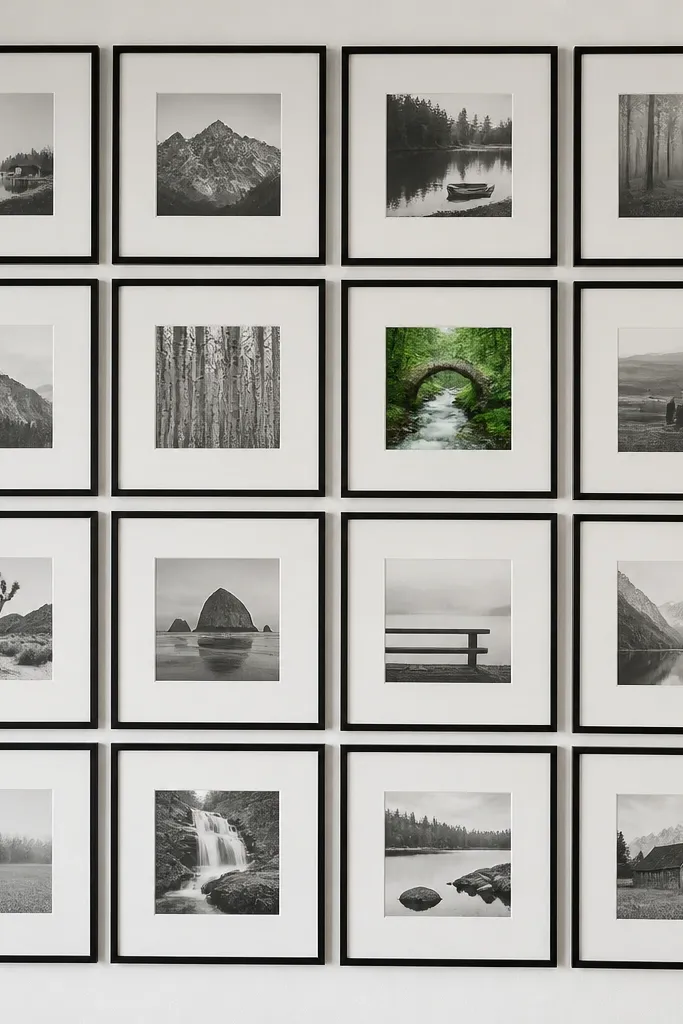
This is the layout I recommend when you want a renter-friendly family photo collage to feel modern and not like a school project. Thin frames keep the wall looking light, and the one color-pop photo gives you a focal point. Use a grid like 4x4 with consistent frame dimensions, then choose one photo that’s noticeably brighter or has a different background color. The rest should be calmer — neutrals, soft tones, or similar lighting — so the accent photo actually pops. It’s photogenic because the eye lands on the accent and then travels across the grid.
Choose a thin frame size and make a grid plan, like 16 frames in a 4x4 layout with 1.5-2 inch gaps.,Tape the grid outline on the wall and mark each frame center before hanging anything.,Hang all frames except the accent first, then place the color-pop photo last so you can adjust its exact position.
Keep the accent photo centered in the grid so it reads as intentional, not random.
Don’t add a second “pop” photo; two accents make the wall look busy.
19. Curtain-Rod Photo Wall with Mini Clips
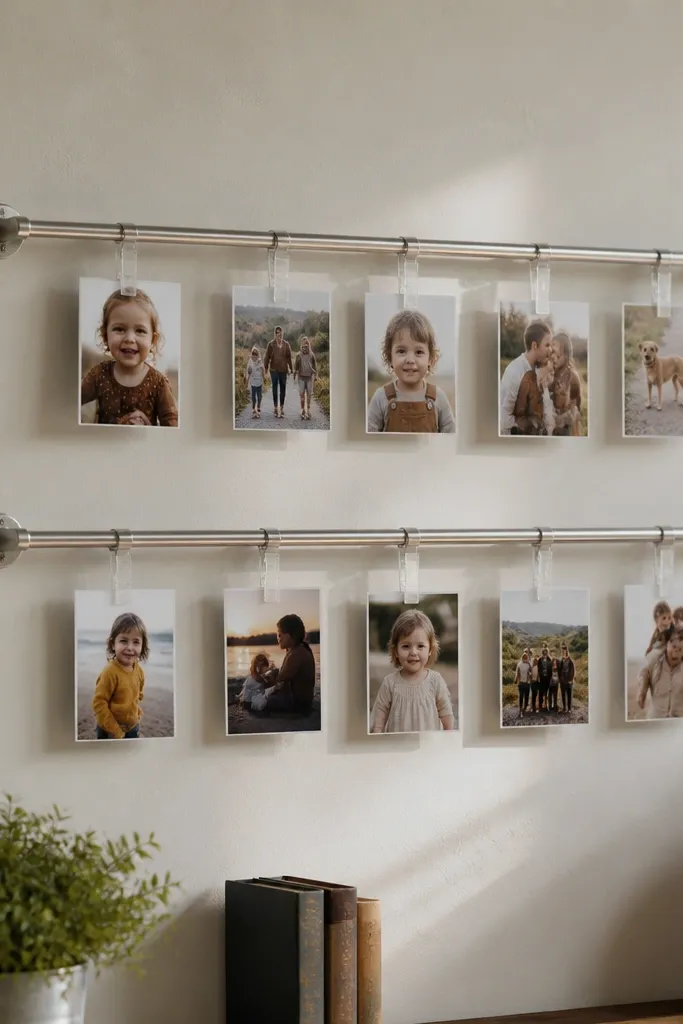
Two short rods create a clean, airy photo collage with a strong vertical rhythm. The mini clips make it easy to rearrange without removing hardware, which is exactly what you want when you’re changing the lineup multiple times. It’s renter-friendly because you mount a small rod using removable hardware rather than hanging lots of separate frames. This style is especially photogenic for families with lots of smaller prints because it makes them look like a curated set. Keep the clips evenly spaced and use photos with similar border sizes so the wall stays tidy.
Mount two parallel mini rods on the wall using removable picture hardware, spaced about 10-14 inches apart.,Clip photos onto the rods in two rows, keeping consistent gaps between photos like 2 inches.,Adjust the clip positions so all photo edges align, then step back and re-center the whole arrangement.
Use lightweight cardstock backing behind each photo so clips grip cleanly and the edges look straight.
Don’t hang heavy photo prints on mini clips; use lighter prints for this setup.
20. Photo Wall Collage with Magnet Board Behind Frames
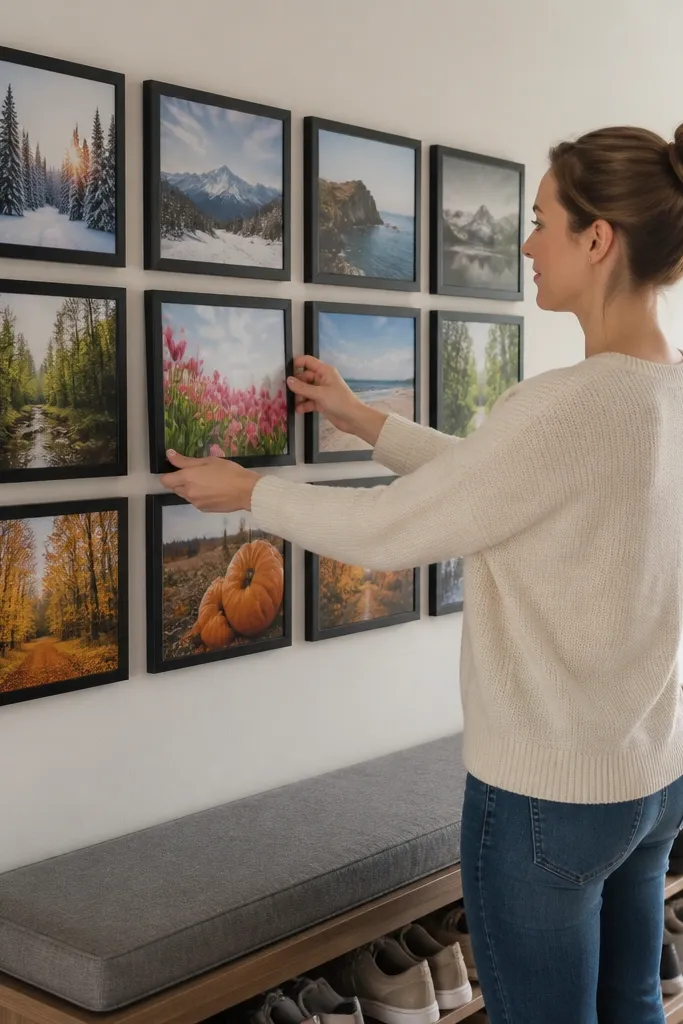
If you want rearranging to feel almost frictionless, this setup is smart. A magnet board behind frames lets you swap photos without taking everything down, which makes it ideal for a renter-friendly family photo collage that changes with the seasons. The frames keep the look polished and consistent, while the magnetic backing keeps photos perfectly flat. Choose a single frame style and mat color so the board disappears visually. This collage is great for families who print often and want a reliable way to update without measuring again and again.
Create or buy a magnetic board sized to your collage area, then secure it to the wall using removable anchors.,Place frames over the board area and insert photos onto magnetic sheets behind each frame opening.,Use painter’s tape to mark photo placement inside each frame so swaps land in the same spot every time.
Editor's noteUse thin magnetic photo sheets so the photo sits flat and doesn’t curl at the edges.
Skip thisDon’t skip marking placement; magnets are forgiving, but you’ll lose alignment after the first swap.



