
1. Cloud Pocket Squishy with Puffy Paper Fringe
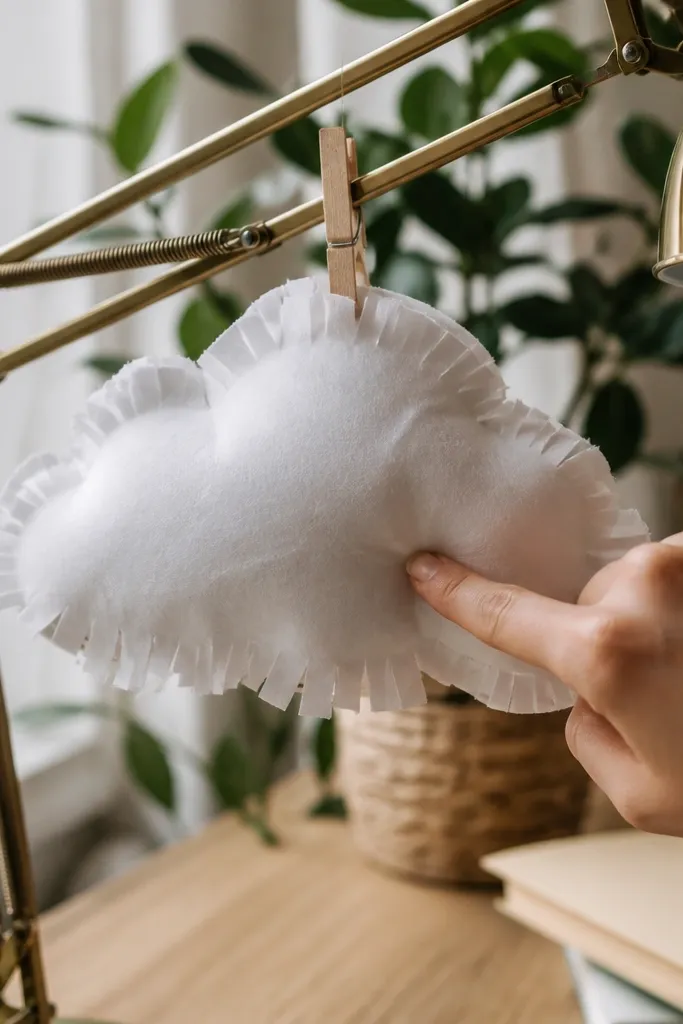
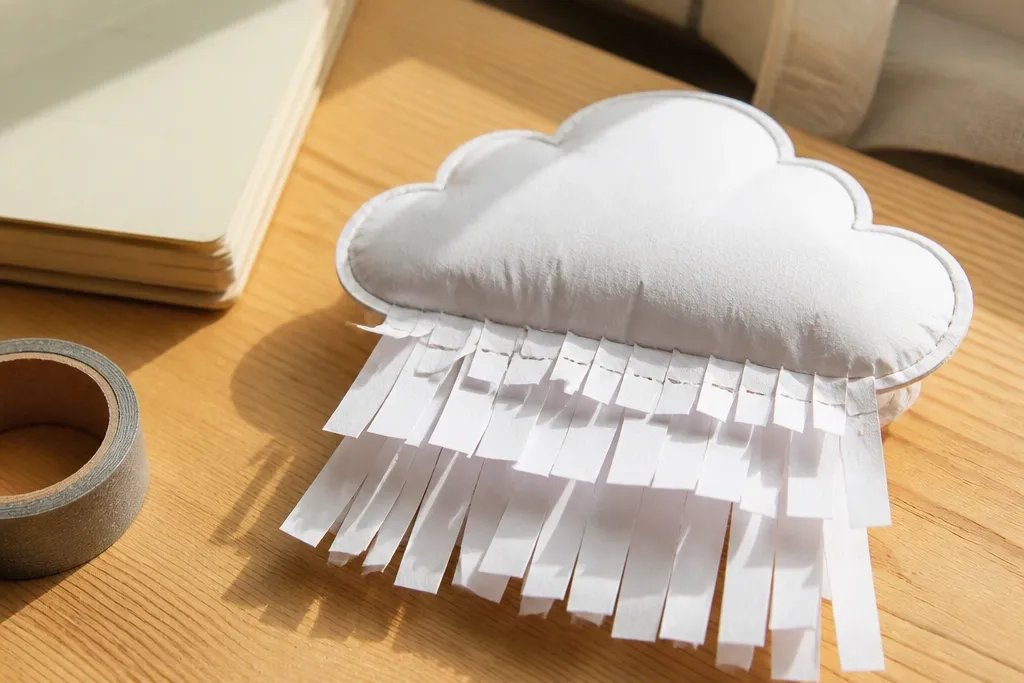
Cut two identical cloud outlines from 180-200 gsm cardstock. Tape a thin strip of double-sided tape around the back edge, leaving a small gap at the top for stuffing. Add fiberfill through the gap, then close the gap with tape and a small paper patch. Finish by snipping tiny fringe slits along the outer edge on the front layer only.
This one looks like a plush cloud hanging off your desk. The trick is a pocket build: you trap the stuffing inside a sealed outline so the cloud stays round when you press it. The paper fringe at the edges reads as “fluff” in photos without needing foam sheets. Use bright white cardstock so the fringe looks crisp, not gray. It is beginner-friendly and works great for shelves, nightstands, and cozy corners.
Skip thisAvoid overstuffing; it makes the seams pop open.
Editor's noteMake the cloud slightly wider than you think — paper squishies look flatter when photographed.
2. Strawberry Jam Squishy with Glossy Paper Seeds
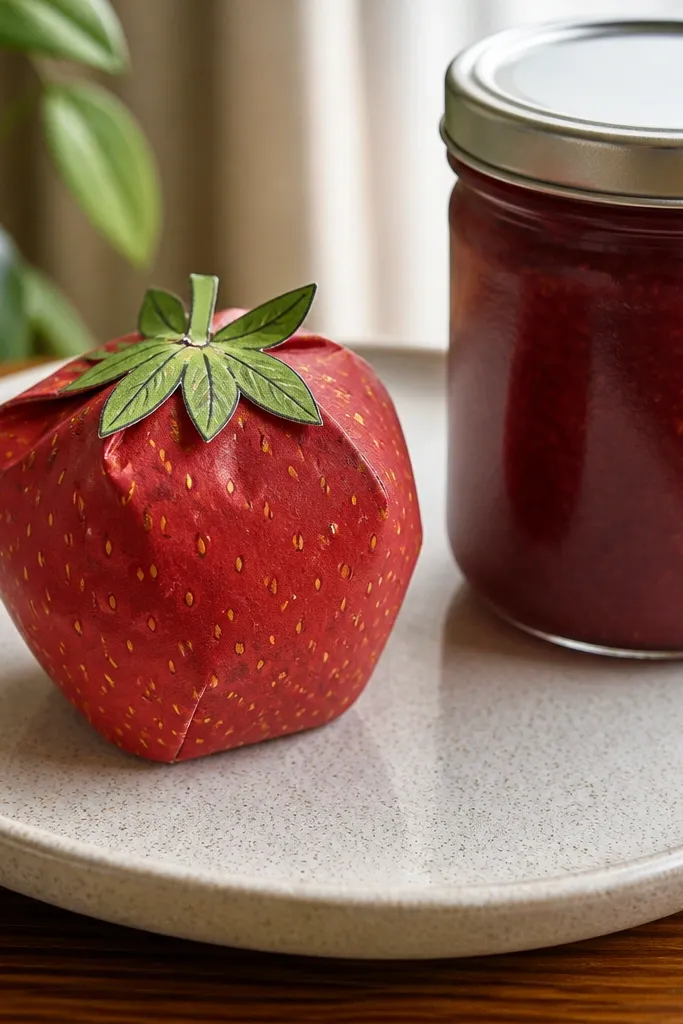
Draw and cut a strawberry outline from red cardstock (make two matching pieces). Cut a thin circle of wax paper and place it between layers where the seeds will go so glue doesn’t soak through. Add a layer of fiberfill, then seal the edges with tape and a narrow strip of cardstock as a back patch. Cut tiny seed ovals from black paper, then coat them with clear gel pen or clear craft gloss before gluing.
This squishy reads as “food” instantly because the jam-red outer skin is bold and the seed dots are tiny and high-contrast. The inside stays soft, so it feels satisfying rather than stiff. You’re building a sealed strawberry shell with a slightly rounded top so it looks like a cute fruit sticker turned real. The glossy seed effect makes it photogenic under daylight. It works well on a desk tray or as a small gift topper.
Skip thisSkip liquid glue on the front; it can dull the red and warp the shape.
Editor's noteUse a gel pen for seeds; it dries shiny and looks more “wet” than paint.
3. Mint Green Macaron Squishy Set (Single Build, Two Colors)
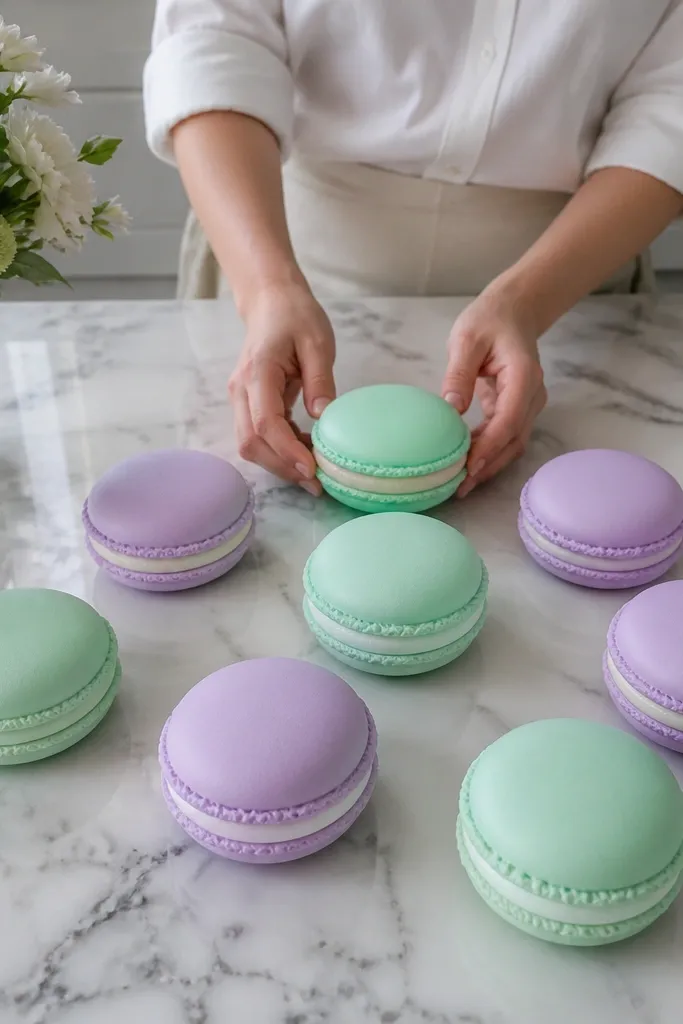
Cut two circles for each macaron shell from 180-200 gsm cardstock, sized about 3.5-4 inches wide. Create a thin “filling strip” by rolling a strip of tissue paper and securing it with tape, then place it between the shells. Seal the shells with tape around the edge, leaving a small gap for stuffing, then close. Color the filling with light pastel marker and add a scalloped paper ring for the shell outline.
Macarons look clean and aesthetic because they are symmetrical. This build uses one base technique, then you make two shells in different pastel colors so you get a coordinated set. The “filling” comes from a thicker inner layer, which gives the squish a layered look even when the outer shell is paper. If you want renter-friendly decor that looks expensive, macarons are your best bet. Place them in pairs on a bookshelf or in front of a plant for a sweet pop of color.
Skip thisDon’t use flimsy paper for the shells; it collapses and makes the edges look messy.
Editor's noteScore a gentle circle groove with a dull knife before assembling; it helps the macaron look stacked.
4. Cute Sushi Nigiri Squishy with Paper Nori Band
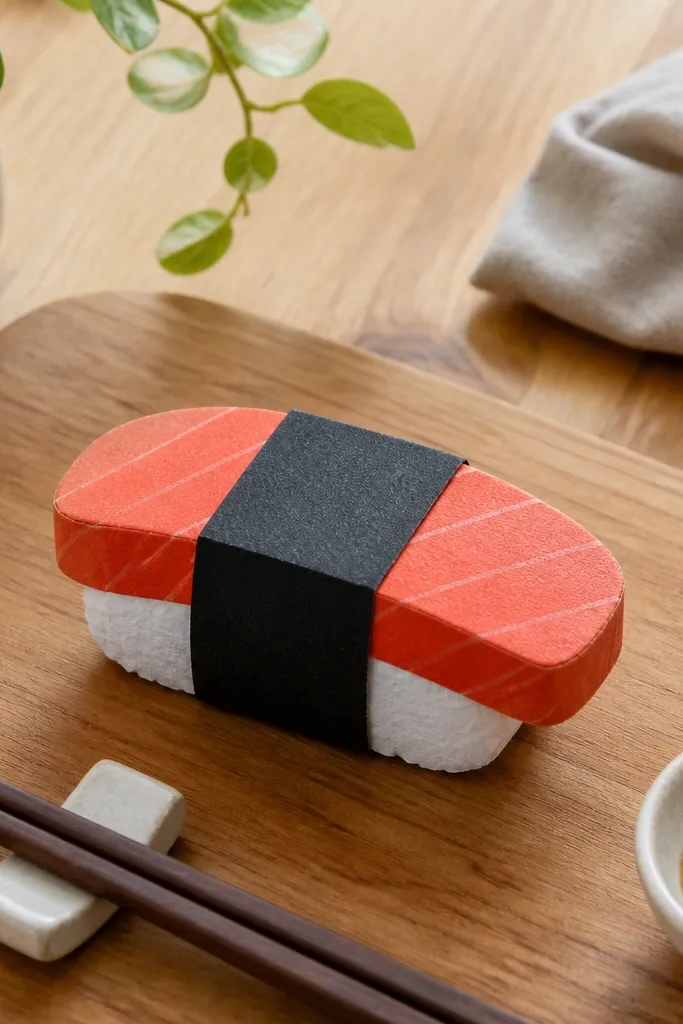
Cut two identical nigiri rectangles (about 4 x 2 inches) with rounded corners from white cardstock. Add a thin layer of wax paper inside each layer where the nori will sit. Seal edges with tape, stuff lightly with fiberfill, then close the gap with a paper patch. Wrap a dark green paper strip around the middle and glue it down as the nori band; add tiny top details with marker.
This is photogenic because the color blocks are simple: white rice, dark nori, and a tiny salmon or tuna top. The squishy shape is a firm rectangle with rounded ends, so it reads as a real nigiri. You get a soft press feel without needing foam molds. This one is also great for beginners because it hides uneven edges behind the nori band. Put it on a desk as a novelty or make a small row for a “food shelf.”
Skip thisAvoid stretching the paper strip; it will look wrinkled on camera.
Editor's noteUse a ruler to keep the nori band straight; photos punish slanted bands.
5. Pastel Heart Squishy with Tissue Paper Marbling
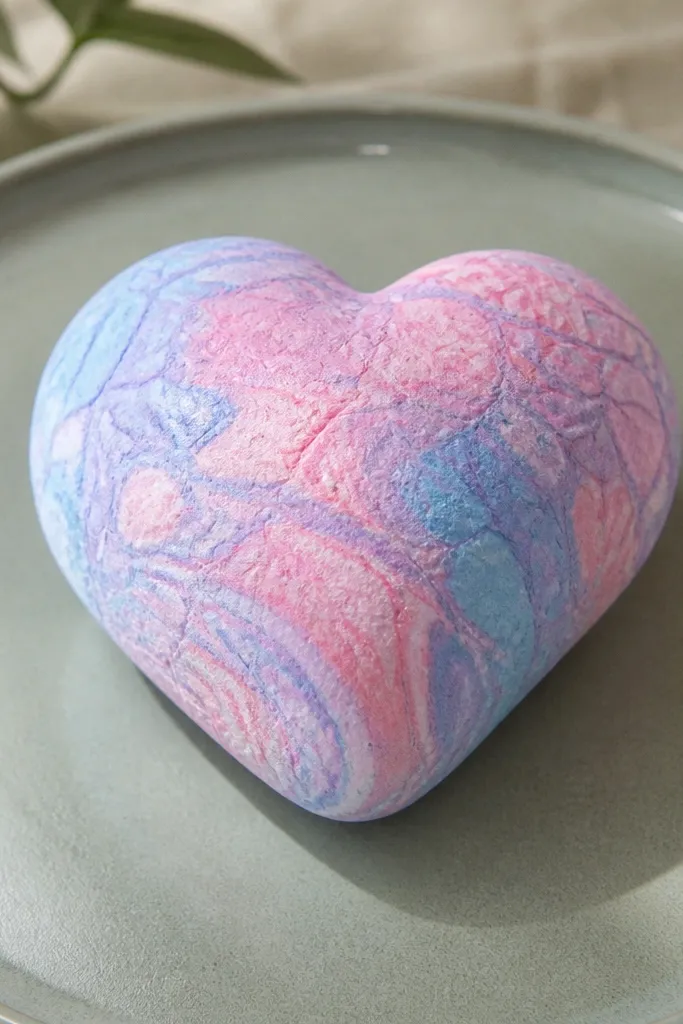
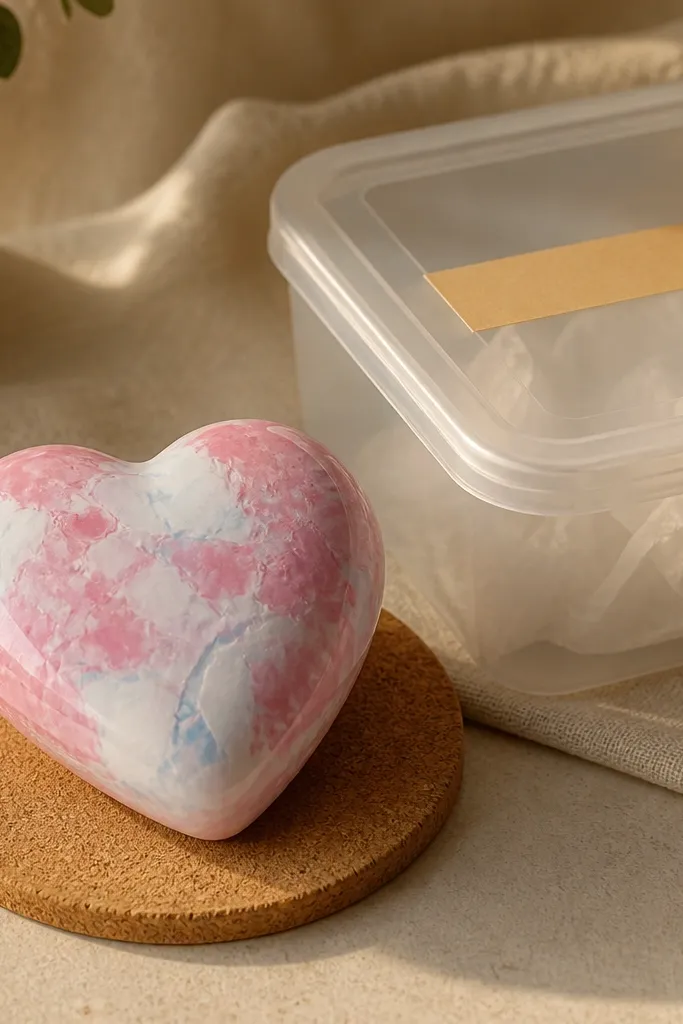
Cut two heart outlines from 180-200 gsm cardstock. Layer small tissue paper pieces in pastel shades inside one heart layer, then cover the tissue with a thin layer of wax paper so glue doesn’t soak in. Seal the two heart halves with tape around the edge, stuff lightly, then close the gap with tape and a patch. Optional: add a thin outline border by tracing the heart with a matching color marker.
A heart squishy looks sweet and graphic, and the marbling makes it look more complex than the build is. The marbled look comes from layering tissue paper scraps under a thin outer skin, so it stays soft and doesn’t require painting. You get a clean silhouette and a gentle squish that looks like a mini plush. This is perfect for Valentine decor, dorm rooms, and small shelf styling. It also works well if you want a “rainbow but calm” palette.
Skip thisDon’t glue tissue directly to cardstock; it makes stains and hard spots.
Editor's noteUse tissues that are already creased; the creases create natural marbling lines.
6. Mini Rainbow Sprinkle Cupcake Squishy
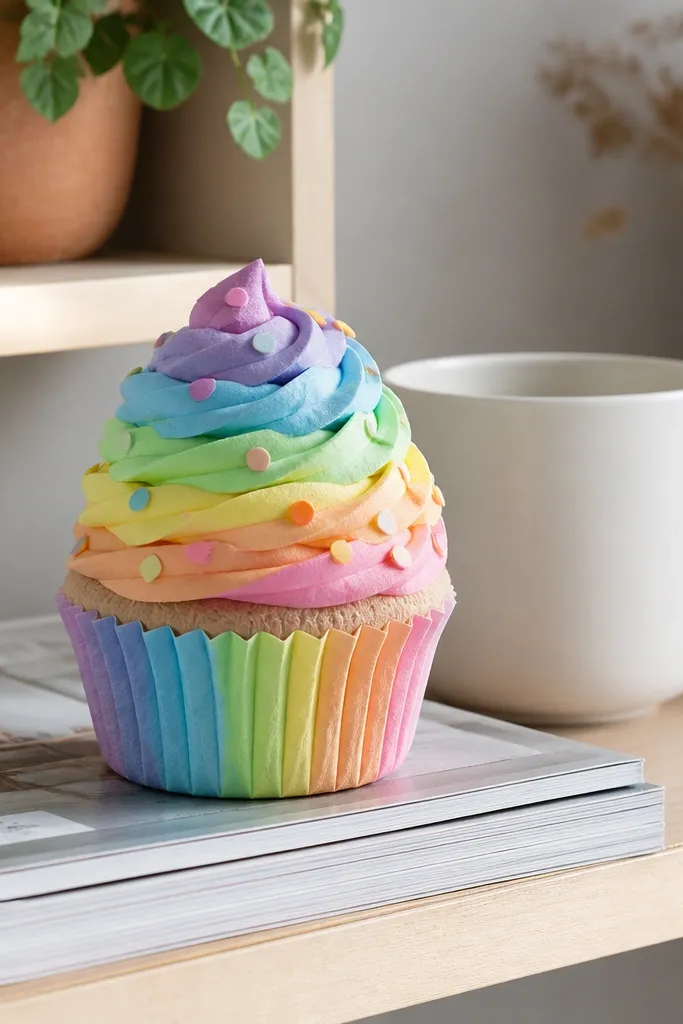
Cut two cupcake bases from pastel cardstock using a simple dome-top template (about 3 inches tall). Create the frosting top by cutting a ring shape and curling the edges slightly with your fingernail. Seal the base halves with tape, stuff lightly, and close the gap. Glue the frosting ring on top and cover it with tiny sprinkle dots cut from colored paper.
Cupcakes photograph well because the top area is a natural focal point. This build uses layered paper for the frosting swirl look and sprinkle dots for instant color. It’s renter-friendly because it’s fully self-contained and doesn’t require adhesives on walls. The squish is controlled with a sealed top pocket so the cupcake keeps its dome shape when you press it. Make one for your desk and it instantly upgrades the vibe of your workspace.
Skip thisAvoid big sprinkle pieces; they lift and catch light weirdly in photos.
Editor's noteUse a matte glue stick for frosting paper so it doesn’t shine unevenly.
7. Brown Sugar Cinnamon Roll Squishy with Paper Swirl
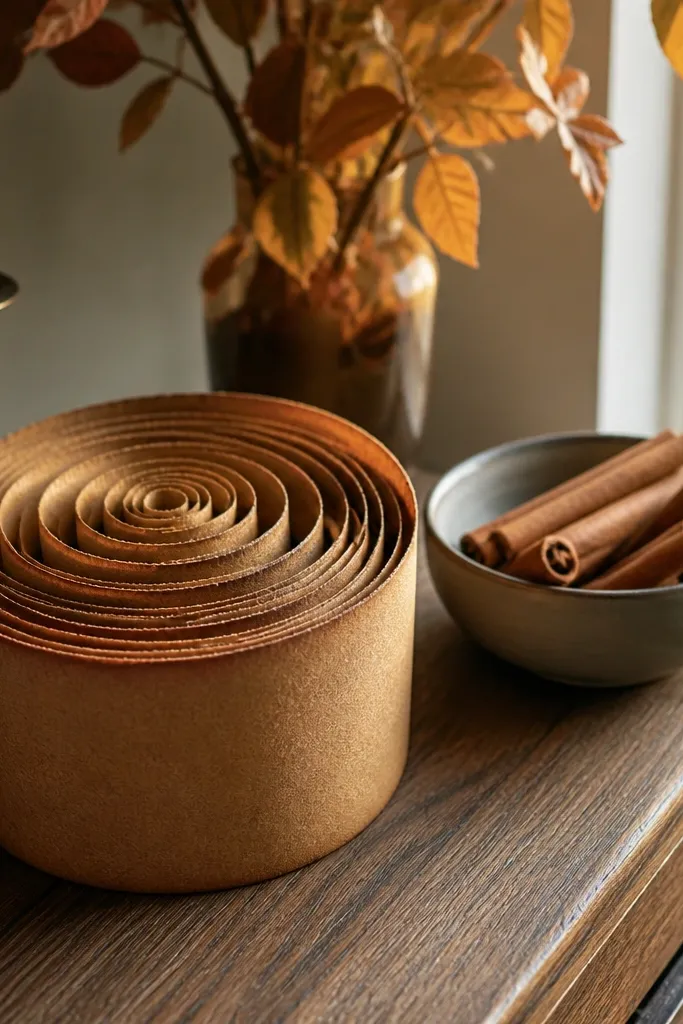
If you like cozy aesthetics, a cinnamon roll squishy hits that warm, neutral vibe fast. The spiral is what makes it look real, and you can create it with paper strips instead of foam. The squish still matters — the roll stays soft because the outer shell is sealed and lightly stuffed. This is a strong choice for fall decor, coffee corners, or a kitchen-themed shelf. It also hides small cutting mistakes because the swirl pattern covers them.
Cut two matching roll outlines from tan cardstock (about 4 x 3 inches). Cut a long thin strip of darker brown cardstock and roll it into a spiral shape, then glue the spiral to the front layer only. Place wax paper over the back to keep glue from bleeding into the shell edges. Seal the two halves with tape, stuff lightly, then close with a cardstock patch strip.
Make the spiral slightly off-center; perfect symmetry looks flat on paper.
Don’t stuff too heavy; the spiral loses its definition when compressed.
8. Pearl White Bunny Butt Squishy with 3D Tail Pop
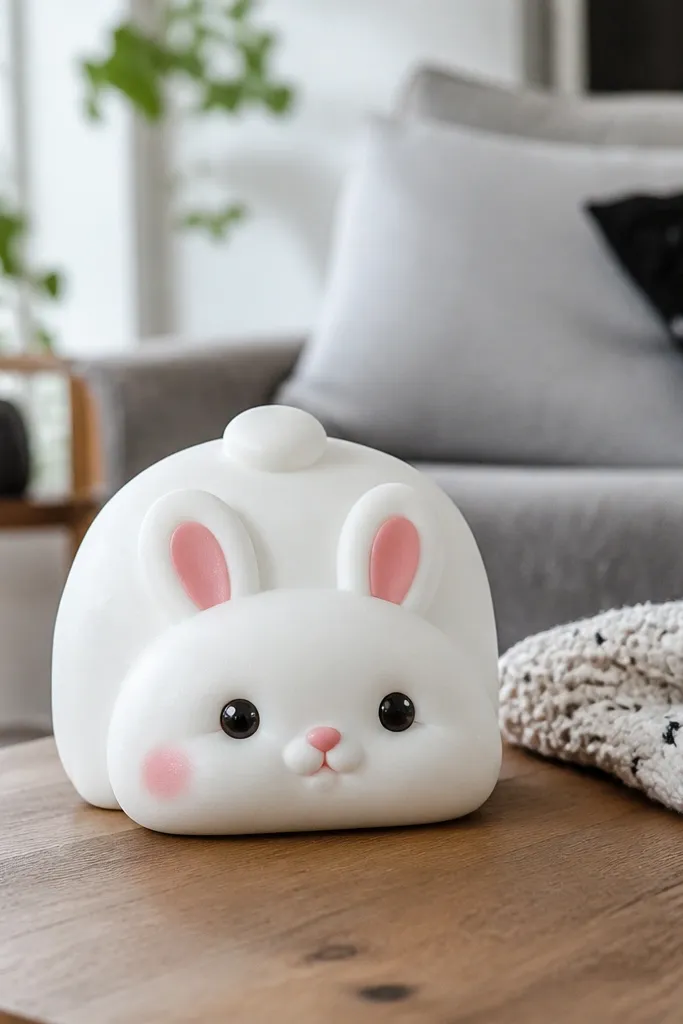
Cut two oval “butt” shapes from white cardstock and a small tail circle from white felt or thick paper. Seal the butt halves with tape, leaving a small gap. Stuff with fiberfill, close the gap, and reinforce the seam with a thin strip of tape on the inside. Add tail on top with glue, then draw simple eyes and a tiny nose with black and pink markers.
This one is funny and cute, and it photographs well because the tail gives it a real 3D highlight. The build uses a rounded “butt” shell with a separate tail piece glued on top after assembly, so the tail doesn’t crush. You get a soft squish from the inner fill, but the face details stay crisp because you place them on the front shell only. It’s great for desks, gaming setups, and kid-friendly corners. Keep it monochrome for a classy look.
Skip thisSkip heavy paint for features; it cracks when you press the squishy.
Editor's noteUse felt for the tail; it looks soft under light and hides glue lines.
9. Black Cat Potion Bottle Squishy (Tiny Glass Look)
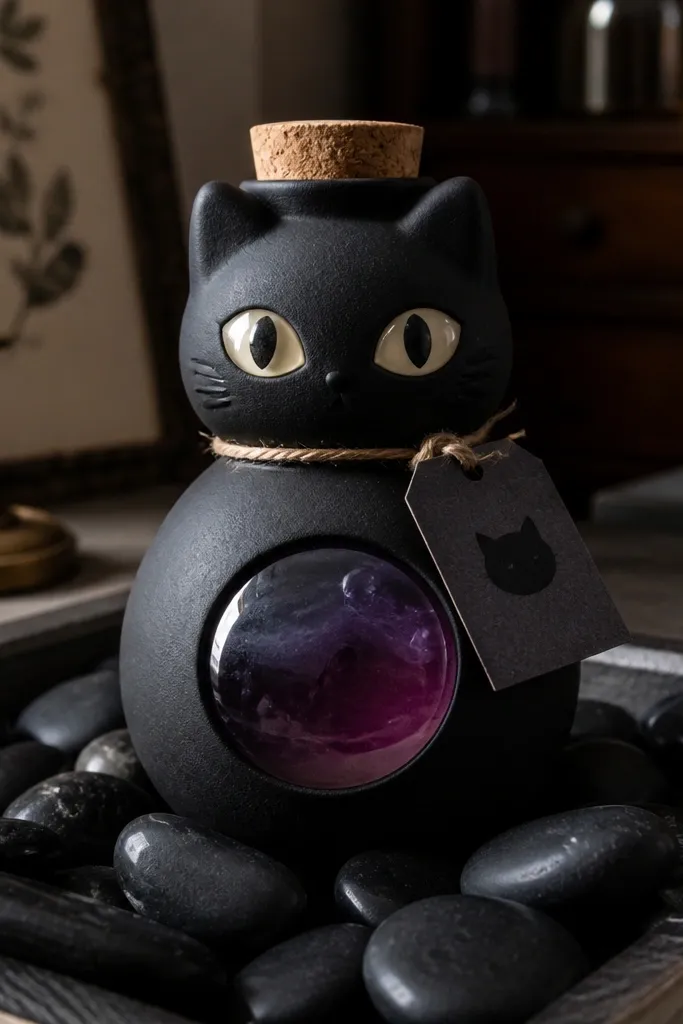
Cut two potion bottle outlines from black cardstock. Cut a label rectangle from cream cardstock and add a cat face drawing; for a glass look, cover the label with a thin layer of clear tape. Seal the bottle halves with tape around the edge, stuff lightly, and close the gap with a patch strip. Glue the label to the front and add a small paper cap band at the top.
This is dark-cute without being messy. The bottle silhouette looks like a mini prop, and the label is where you put the cat face. The squish is controlled by a sealed outer shell and light fill so the bottle doesn’t slump. You’ll get a clean “glass” vibe by using a semi-transparent paper layer or clear tape window for the label area. Great for Halloween decor, but the black-and-cream palette stays wearable year-round.
Skip thisDon’t use wet paint on black cardstock; it can bleed and look grainy.
Editor's noteUse a white gel pen for the cat eyes; it pops on black in photos.
10. Watermelon Slice Squishy with White Paper Rind
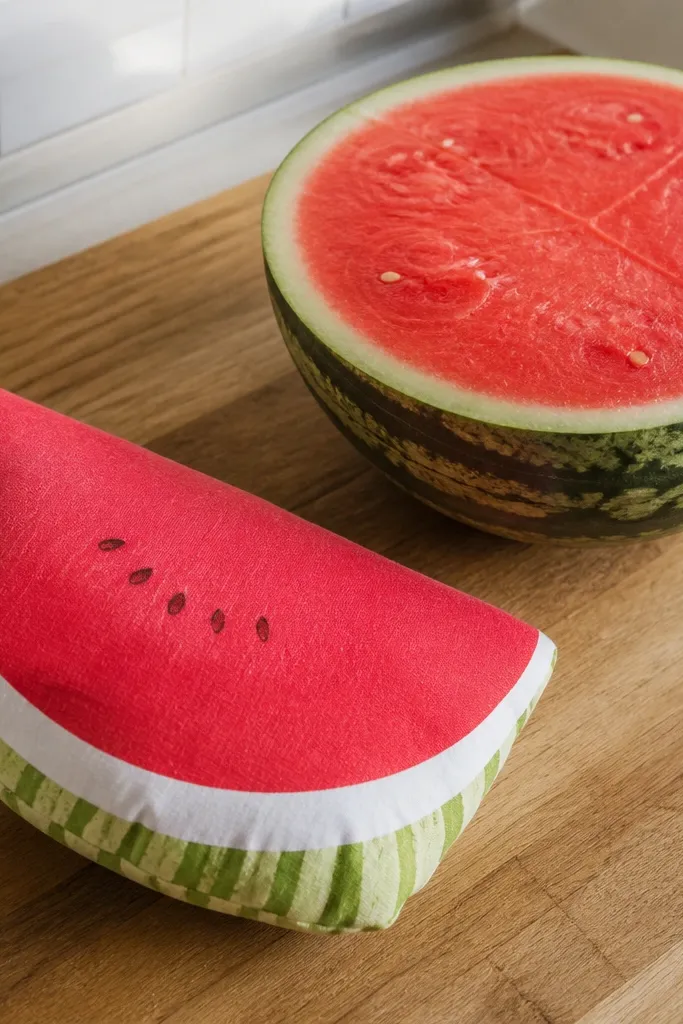
Watermelon slice shapes are instantly recognizable, so you spend less time making it “read” correctly. The rind layer gives you a crisp border, and the red center is stuffed just enough to look juicy. This is also a smart renter-friendly project because it stays small and doesn’t need hooks or mounting. The stripe effect is easy: you layer paper bands and glue them before sealing the pocket. It looks great on a windowsill or as a summer desk accent.
Cut two watermelon slice outlines from green and red cardstock using a template. Create the rind by adding a white paper layer on the front half before you assemble the pocket. Seal the two halves with tape, stuff lightly, then close the gap with a patch strip. Add black seed dots cut from black paper on the red area.
Cut seed dots slightly irregular; perfect circles look printed instead of handmade.
Avoid stacking too many paper layers; thick edges make the squish look lumpy.
11. Peachy Flamingo Mini Squishy with Pink Paper Feathers
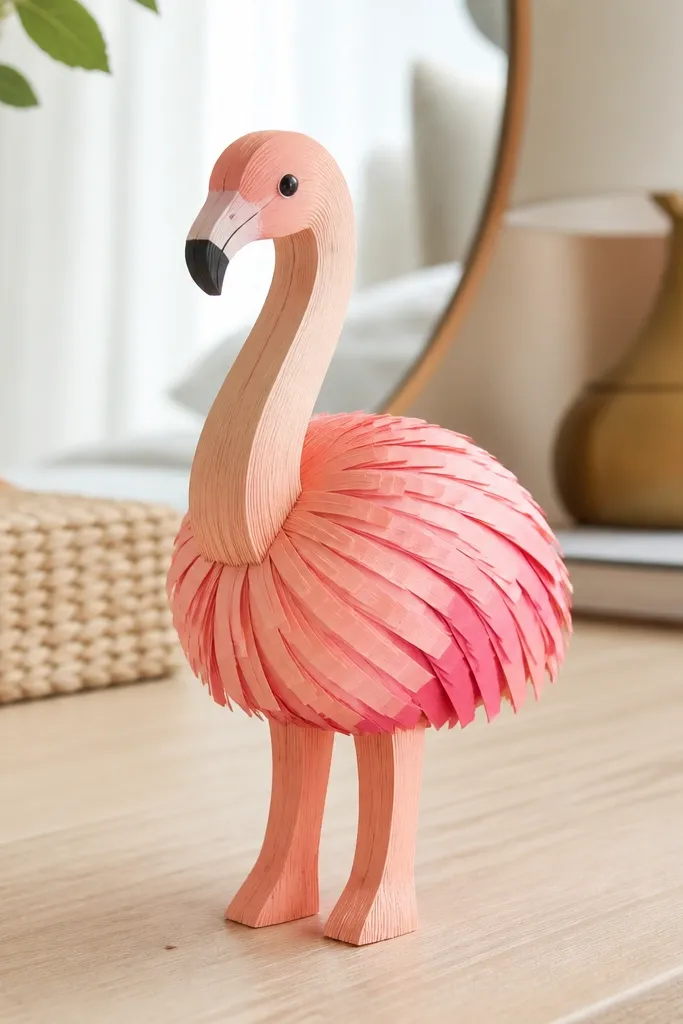
Cut a flamingo body outline and a neck outline separately from pink cardstock. Assemble and stuff only the body pocket with tape and light fiberfill, then close it with a patch. Cut small feather fringe slits on the front body piece after assembly. Glue the neck piece onto the body, then add a beak and eye with marker.
A flamingo silhouette is pure aesthetic — long neck, simple beak, and a soft body. This project keeps it beginner-friendly by focusing on one bold shape and adding feather texture with paper slits. The squish is built in the body only, so you don’t have to stuff thin neck pieces. The result looks like a cute plush figurine, even though it’s paper. It’s perfect for a pink-themed shelf or bathroom decor.
Skip thisDon’t stuff the neck; it collapses and ruins the silhouette.
Editor's noteUse two-tone pink paper for feathers; it makes the body look more dimensional.
12. Chocolate Truffle Squishy with Foil Speckle Wrap
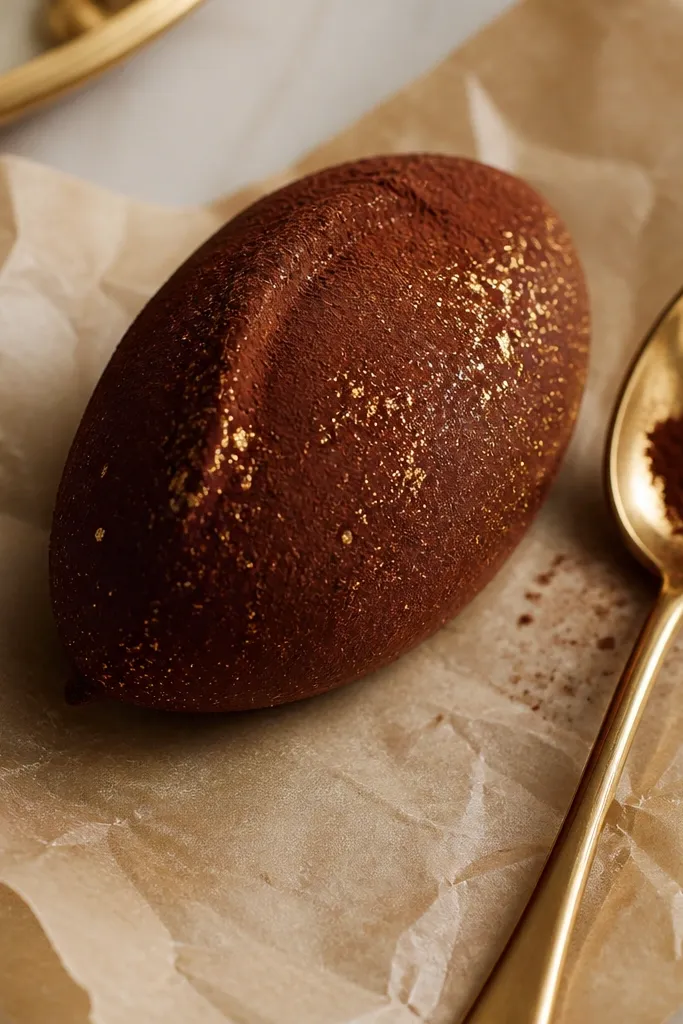
Cut two oval truffle shells from dark brown cardstock. Cover the front half with a thin layer of glue in small areas, then dab tiny pieces of gold foil or shiny paper on top. Seal the shells with tape around the edge, stuff lightly, and close the gap. Add a short seam line using a brown marker to mimic truffle folds.
Truffles look expensive when you add speckle texture, and paper can do it fast. The squishy is a simple rounded oval, which is perfect for beginners. The “foil speckle” makes it look like cocoa dust and shine at the same time. You can keep it warm brown with a small gold accent so it looks good in neutral rooms. Place it next to candles or in a snack-themed corner.
Skip thisAvoid full-coverage foil; it flattens the texture in photos.
Editor's noteTear gold paper by hand; torn edges look more natural than cut dots.
13. Blue Ocean Wave Squishy with Layered Paper Ridges
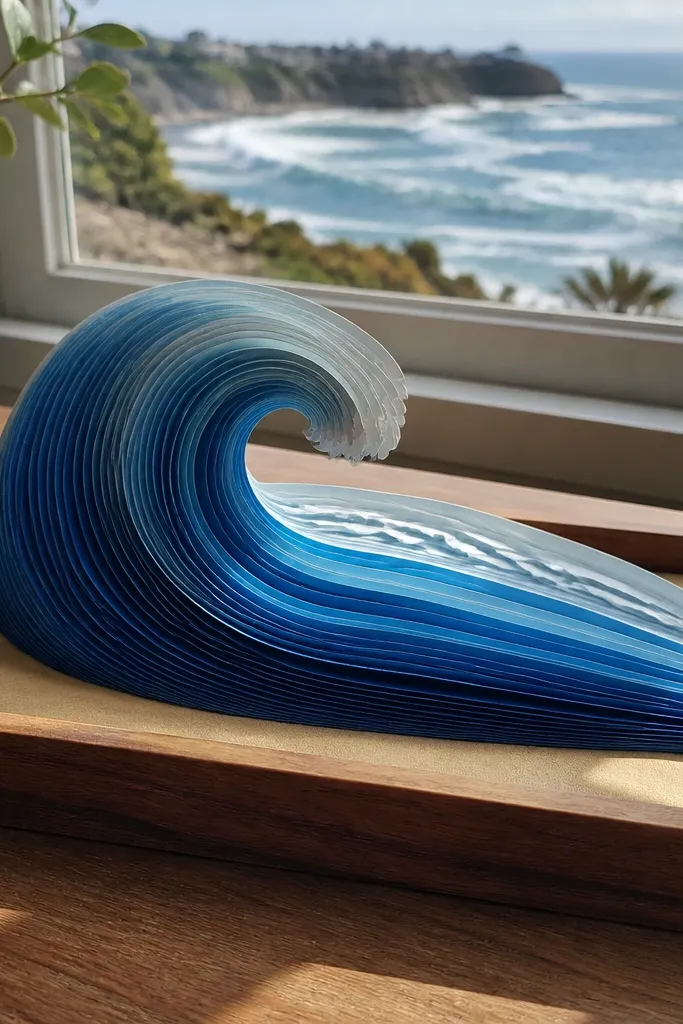
Waves look great because the layers catch light and give depth. This build creates a squishy wave body with ridges made from paper bands, so it looks like foam without needing paint. It’s forgiving because the seam sits on the underside. You get a soft squish and a clean silhouette that looks good on a desk tray or wall shelf. Use a gradient palette for the ocean effect and keep the foam highlights bright white.
Cut two matching wave outlines from light blue cardstock. On the front layer, glue 3-4 curved strips of slightly different blue shades to form ridges. Seal the pocket with tape, stuff lightly, and close the gap with a patch strip. Add white foam highlights by cutting thin irregular squiggles from white paper and gluing them on top.
Use a bone folder to curve the ridge strips so they sit like real wave crests.
Don’t over-glue the ridges; thick glue makes stiff bumps.
14. Sunflower Seed Head Squishy with Textured Paper Center
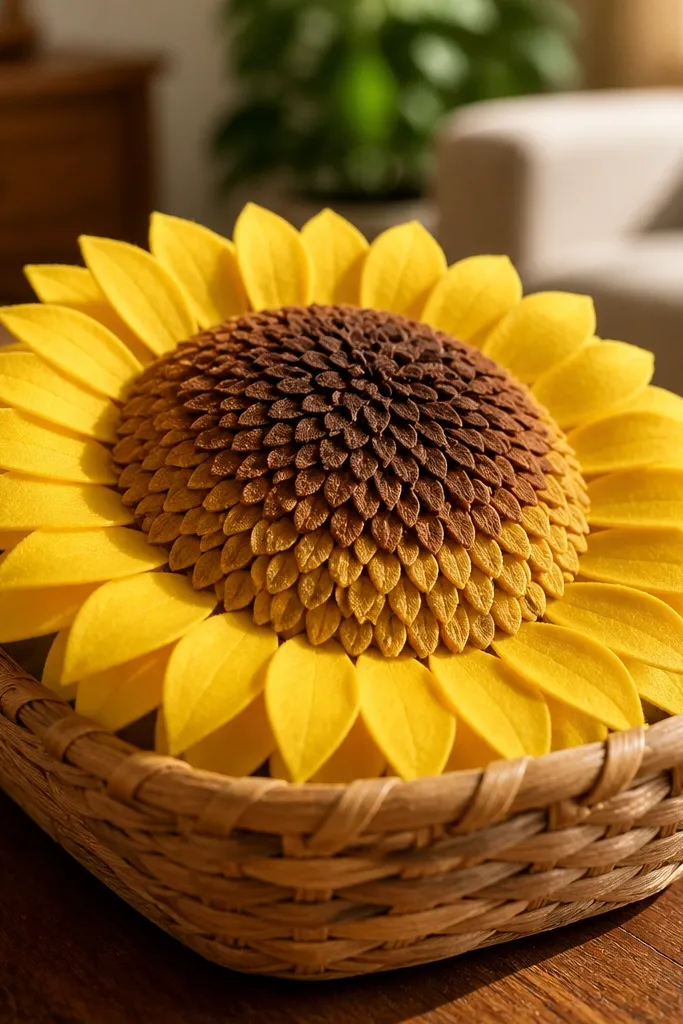
Cut two sunflower head circles from 180-200 gsm cardstock. Create the petals by cutting narrow teardrops from yellow paper and gluing them to the front circle. For the center, cut tiny seed shapes from dark brown paper and glue them in a spiral pattern. Assemble the pocket by sealing the two circles with tape, stuff lightly, and close the gap with a patch.
Sunflowers are photogenic because petals create a clear shape from any angle. The textured center is the secret: you build it with small paper seed shapes so it reads as “seeds” instead of a flat circle. The squish stays controlled with a sealed pocket so the head doesn’t collapse. This is a great decor pick for living rooms, kitchens, and entryways. Keep the colors saturated but not neon for a more realistic look.
Skip thisAvoid tiny seeds that are too small; they detach when you press the squishy.
Editor's noteVary seed size slightly; it makes the center look naturally packed.
15. Mini Cat Paw Slippers Squishy (Toe Beans Included)
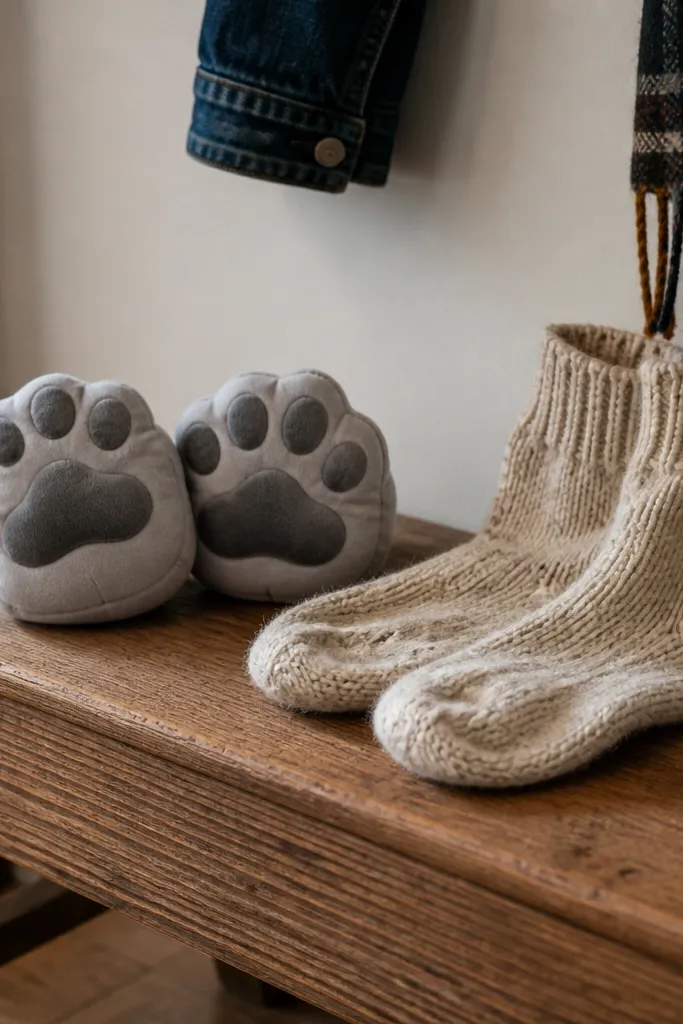
Cut two paw pad outlines from beige cardstock (about 3 inches wide). Cut three toe-bean circles from darker beige and glue them onto the front pad before sealing. Seal the paw pocket with tape, stuff lightly, and close the gap with a patch strip. Draw paw line details and a small nose-like dot pattern using a fine marker.
Cat paws look adorable and they’re easy to read in photos because the toes are distinct. This squishy has a rounded pad and separate toe-bean shapes that give it a plush look without complicated stuffing. The build is renter-friendly because it’s fully freestanding and small. You’ll get a satisfying press feel in the pad, and the toe beans stay raised because they sit on the outer layer. Great for desks, game rooms, and cozy shelves.
Skip thisDon’t stuff so much that the toe beans flatten.
Editor's noteGlue toe beans only at the edges; leaving the center unglued keeps the raised look.
16. Pastel Ice Cream Cone Squishy with Waffle Paper Pattern
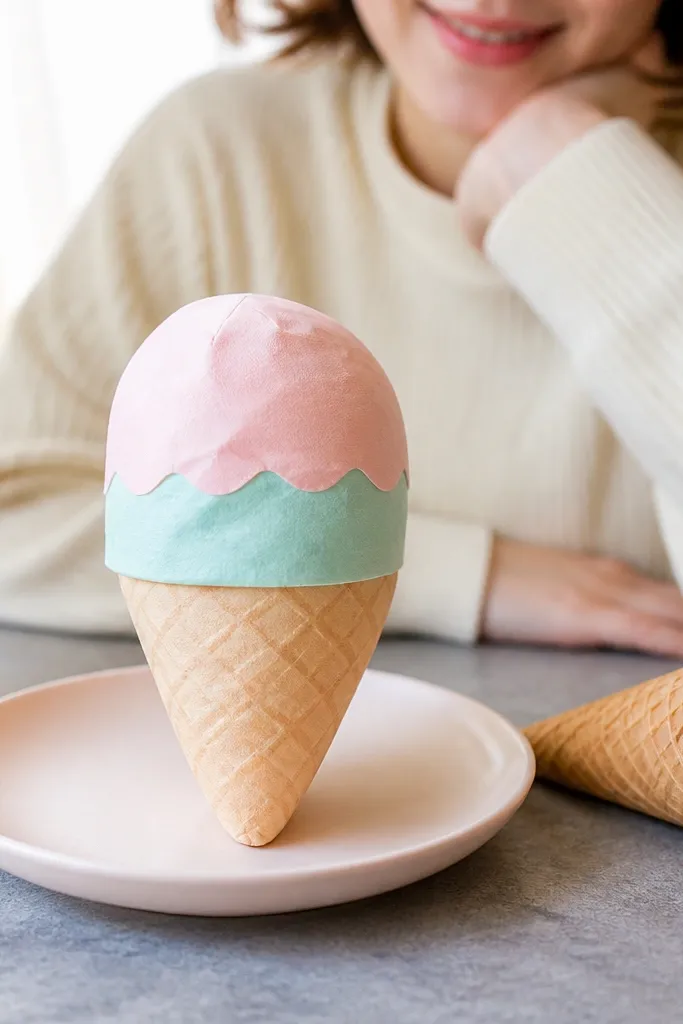
Cut two cone shells from tan cardstock and tape them into a cone shape with a seam overlap. Cut two scoop outlines from pastel cardstock, seal with tape, stuff lightly, and close with a patch. Attach the scoop to the top of the cone with a small internal tape hinge. For the waffle pattern, draw grid lines with a brown marker and add small diagonal marks for extra texture.
Ice cream cones work because the cone shape creates instant structure and the scoop gives you that soft squish focus. This version uses a paper waffle pattern on the cone so it looks textured without paint. The scoop is a sealed pocket with light stuffing, keeping it round for photos. It’s beginner-friendly because the cone can hide uneven edges under a patterned strip. Place it on a shelf or a desk corner for an instant “sweet” aesthetic.
Skip thisAvoid gluing the scoop directly with heavy glue; it can soak and warp the scoop.
Editor's noteUse a thicker marker for the waffle lines; thin lines disappear in low light.
17. Jelly Donut Squishy with Sprinkles and Gel Shine
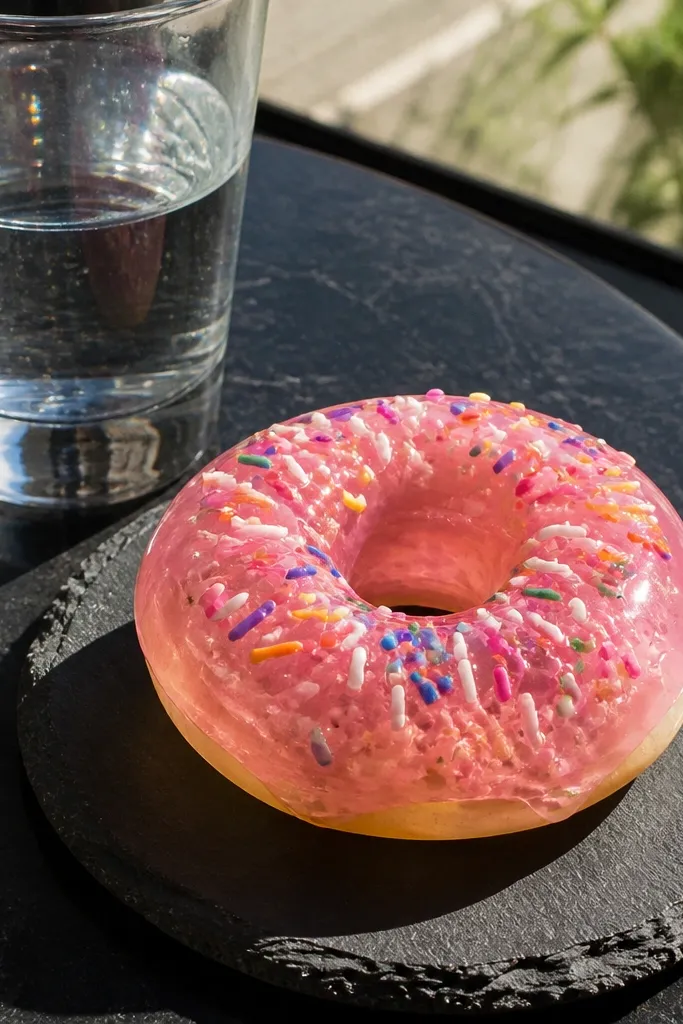
Cut two donut rings from 180-200 gsm cardstock with an outer diameter about 4 inches and an inner hole about 1.2 inches. Seal the ring pocket with tape around the edge, leaving a gap, then stuff lightly and close with a patch strip. Cut a separate icing ring from colored paper and glue it on the front only. Add sprinkles by cutting tiny rectangles, then coat the icing surface with clear gel for a glossy look.
Donut squishies look fun and polished when the icing ring is smooth and the sprinkles are evenly placed. This build gives you a donut silhouette with a soft center pocket that doesn’t collapse. The icing shine is created with clear gel pen or craft gloss over the front icing layer. It’s visually loud in a good way, and it fits desks, party decor, and snack-themed shelves. Beginners like this because the shape is simple and repetitive.
Skip thisDon’t overload sprinkles with glue; they lift and cast weird shadows.
Editor's noteSprinkle spacing matters; keep them closer to the outer edge where light hits first.
18. Space Galaxy Planet Squishy with Foil Craters
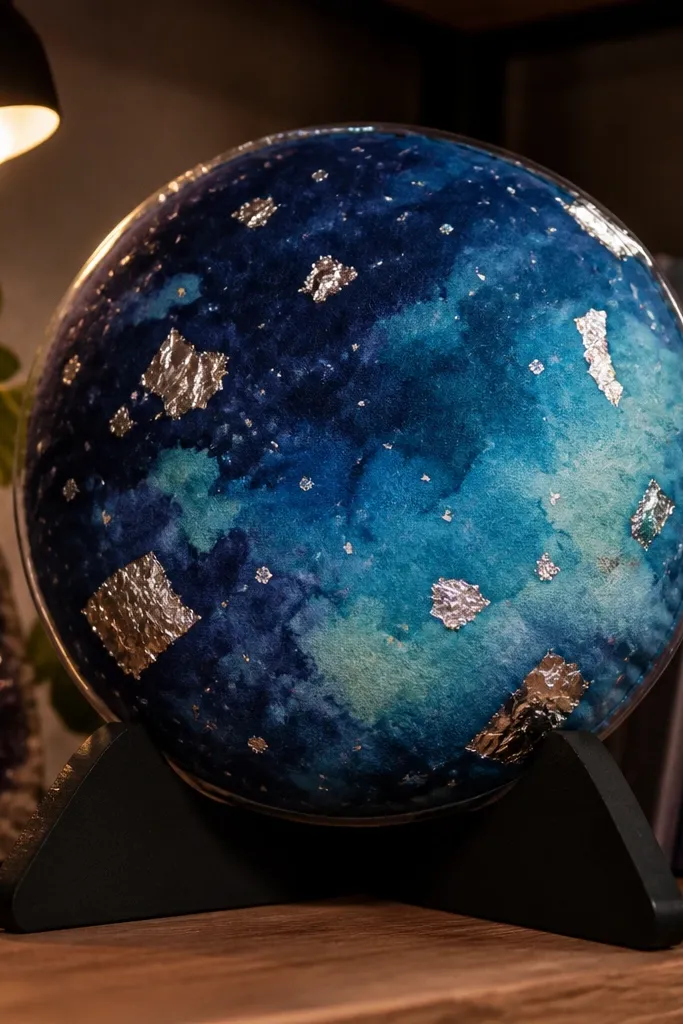
Cut two planet circles from dark cardstock (about 3.5 inches wide). Create the galaxy pattern by layering torn tissue in purple, blue, and black on the front layer, then cover with a thin wax paper barrier before sealing. Seal the pocket with tape, stuff lightly, and close the gap with a patch. Add crater dots by tapping small pieces of gold or silver foil onto glue spots on the front.
A planet squishy is pure “aesthetic” because it has a clear circular silhouette and a high-contrast color pattern. You get a galaxy look by layering colored tissue or marker-blended paper under a protective outer skin. Foil craters add instant visual depth — they catch light even when the planet is small. The squish is controlled with a sealed pocket so it stays round. This is great for a teen room, gaming setup, or a bookshelf vignette.
Skip thisAvoid heavy glue over the galaxy layer; it kills the soft marbled look.
Editor's noteUse torn tissue edges; straight edges look like crafts instead of “space.”
19. Pink Rosebud Squishy with Rolled Petal Strips
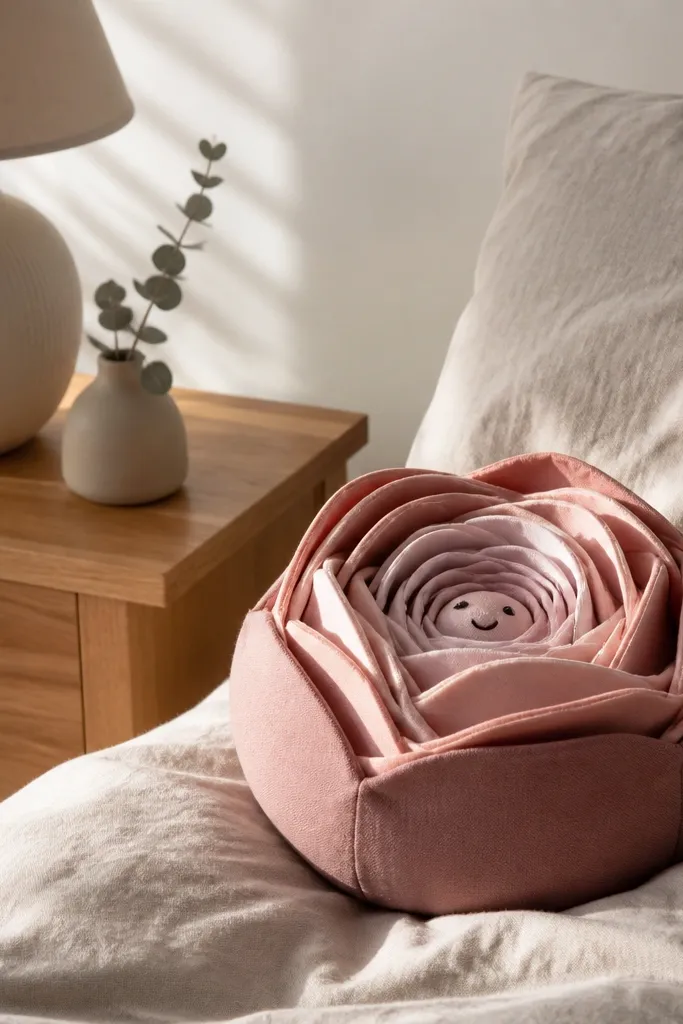
Cut two rounded bud outlines from light pink cardstock, seal into a pocket with tape, stuff lightly, and close with a patch strip. Cut several thin petal strips from slightly darker pink paper and roll each strip tightly, then glue the roll ends to the front in a spiral. Add a small green leaf piece at the base by gluing it between the petals and the seam. Finish with a tiny center dot using a gold marker or yellow paper.
A rosebud squishy looks delicate but it’s actually very doable for beginners. You build a simple pocket base, then add rolled petal strips on the front so it reads as a flower bud. The squish stays safe because the petals are light paper pieces that sit on top, not structural stuffing. This one looks beautiful on a bedside table, in a bathroom shelf, or as a gift tag add-on. Choose muted pinks and add a tiny green leaf detail for realism.
Skip thisDon’t glue every petal flat; leaving slight gaps makes it look like a bud, not a blob.
Editor's noteRoll petals with the edge of a ruler for tighter, cleaner curves.
20. Ramen Bowl Squishy with Noodle Loop Paper Detail
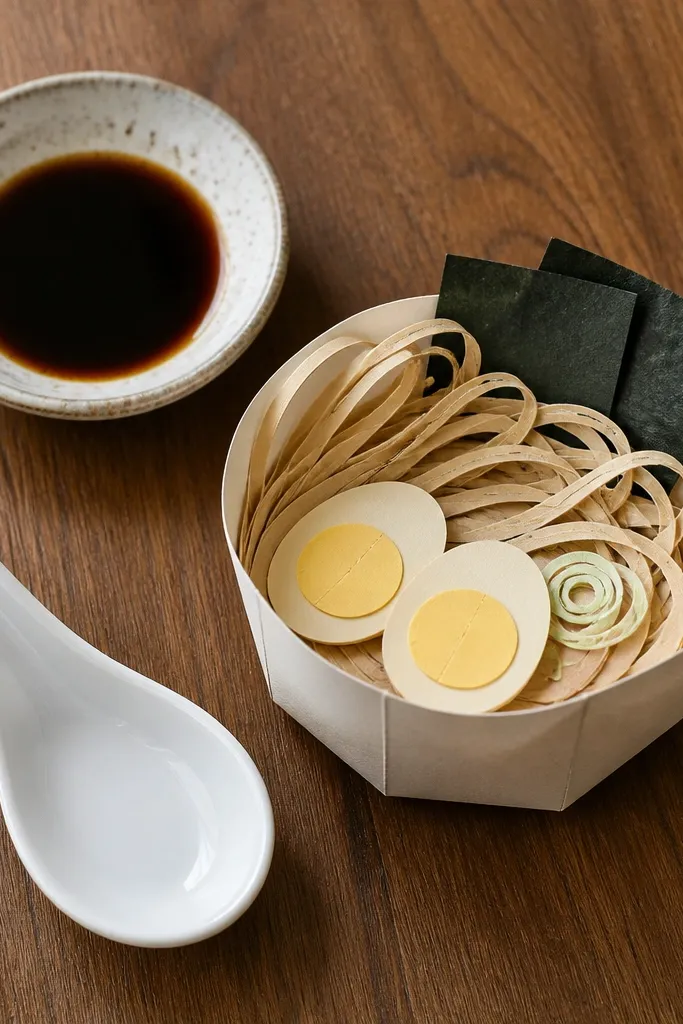
Cut two bowl outlines from cream cardstock with a slightly flared rim (about 3.5 inches wide). Seal the bowl pocket with tape, stuff lightly, and close the gap using a patch strip on the underside. For noodles, cut thin strips of pale yellow paper and glue them in loops across the top. Add an egg by gluing two half circles and draw tiny seasoning specks with a fine marker.
Ramen looks great because it has a bowl shape and noodles that you can make with simple loops. The squishy base is a sealed pocket shaped like a shallow bowl, so it presses nicely without collapsing. Noodles are made from thin paper loops glued on top, which reads as texture in photos. Add two egg halves as small circles for instant cuteness. This fits kitchen decor and food-themed shelves.
Skip thisAvoid thick noodle strips; they make the top bulge and reduce the squish.
Editor's noteKeep noodle loops uneven in size; it looks more like real ramen.
21. Gummy Bear Squishy with Color-Blocked Belly Shine
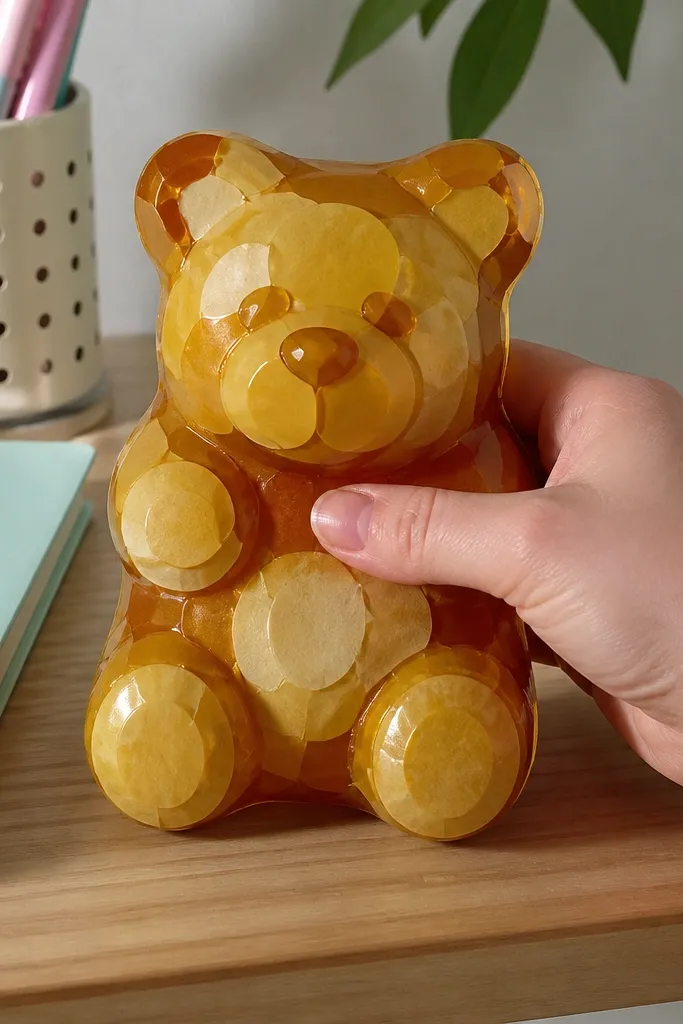
Find a simple bear outline template and cut two matching bear shapes from colored cardstock. Cut a lighter belly patch from pale pink or pale yellow paper and glue it onto the front layer. Seal the two bear halves with tape, stuff lightly, and close the gap with a patch strip. Add a tiny highlight stripe using a white gel pen across the belly patch and one arm.
This one looks like a real gummy bear because you get that translucent vibe using layered paper and a lighter belly patch. The squish comes from a sealed inner pocket so it holds the bear shape. The “shine” is created with a lighter color overlay on the front, not paint, which keeps it clean for photos. Beginners can pull this off because gummy bear shapes hide minor uneven cuts. It’s cute for desks, dorms, and candy-themed corners.
Skip thisDon’t over-gloss the whole bear; highlights only look believable in small spots.
Editor's noteUse a translucent vellum layer for the highlight if you have it; it looks extra glossy.
22. Brown Paper Teddy Bear Squishy with Bow Tie
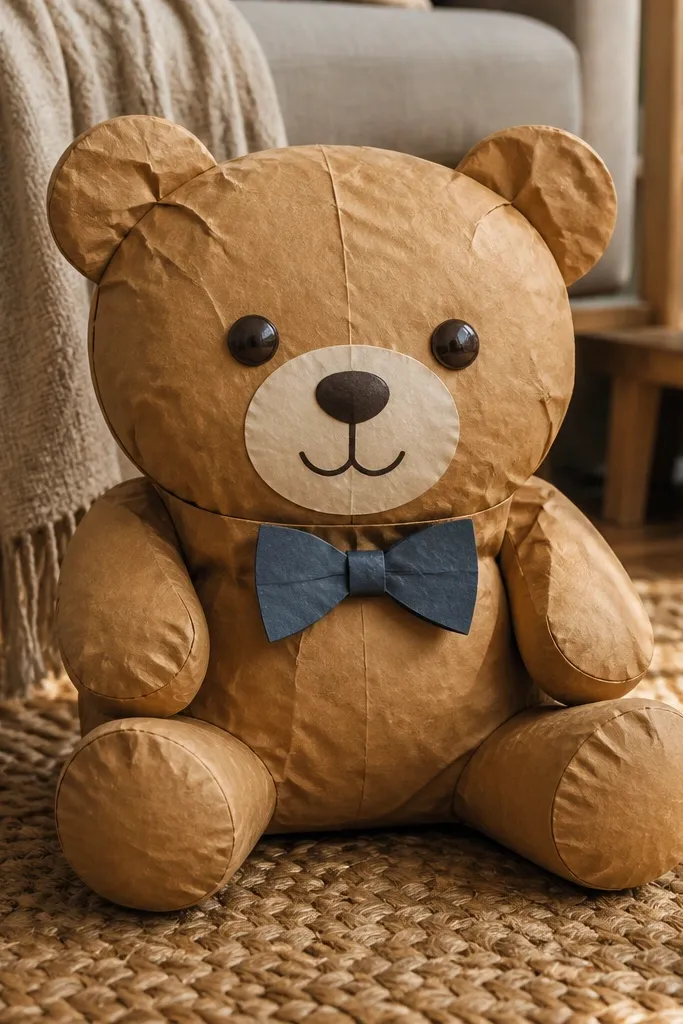
Teddy bears are a safe aesthetic win because the silhouette is instantly recognizable. This project adds a bow tie to look styled instead of plain, and it uses simple seam placement so the bear stays neat. The squish is controlled by a pocket build that keeps stuffing centered. It’s a great renter-friendly decor piece because it’s small, stable, and doesn’t need wall mounting. Put it on a desk or next to a lamp for a warm look.
Cut two teddy bear outlines from brown cardstock and two small ear pieces if your template is separate. Assemble a pocket by taping the edges, leaving a gap, then stuff lightly with fiberfill and close with a patch strip. Glue the bow tie by cutting a simple bow shape from darker brown or black paper. Add minimal face details with a fine marker and a tiny nose dot for contrast.
Use a stiff cardstock for the bow tie so it sits flat in photos.
Avoid bulky stuffing in the head; it makes the face look stretched.
23. Mini Potted Plant Squishy with Paper Leaf Fan
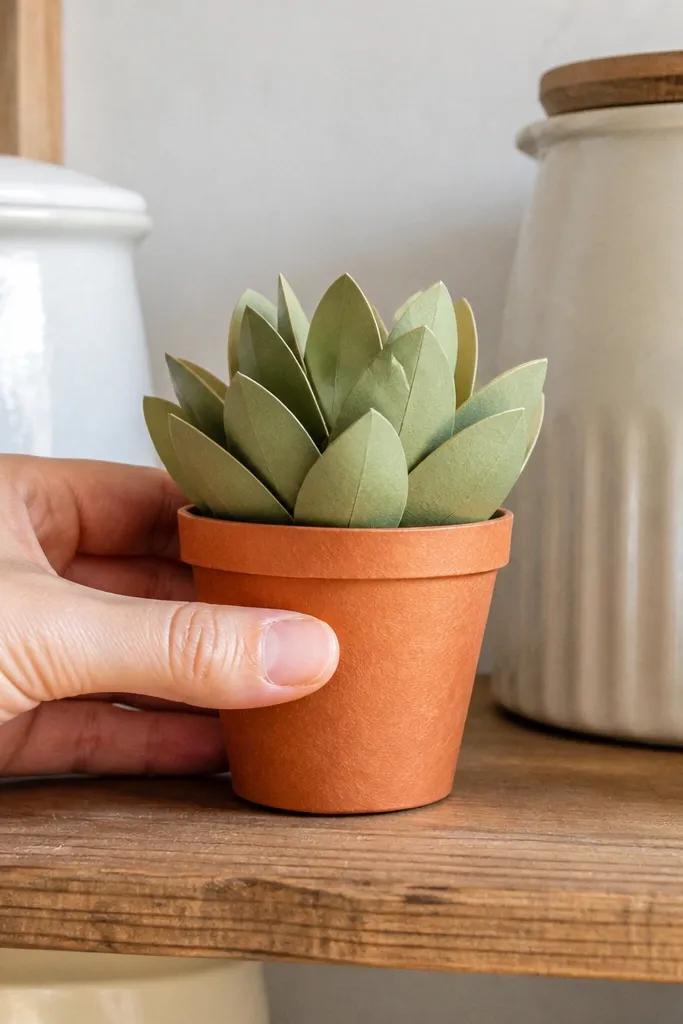
A mini potted plant squishy looks fresh and soft, and it’s a good choice if you want decor that doesn’t scream “seasonal.” The plant part is built from paper leaf fans that create texture without needing foam. The squishy body is only the pot, so it presses in a satisfying way while the leaves stay intact. It’s renter-friendly because it’s freestanding and small enough for most desks. This also pairs well with other paper squishies on a tray.
Cut two pot outlines from terracotta or dark brown cardstock and seal them into a pocket with tape. Stuff lightly and close the gap with a patch strip on the underside. Create leaves by cutting 6-10 leaf strips from green paper and gluing their bases together into a fan. Attach the leaf fan to the top of the pot using a small internal tape tab.
Fold each leaf strip slightly so the fan looks layered when you press the pot.
Don’t glue leaves directly onto the seam; press will pop the glue.
24. Ice Blue Snowman Squishy with Button Confetti
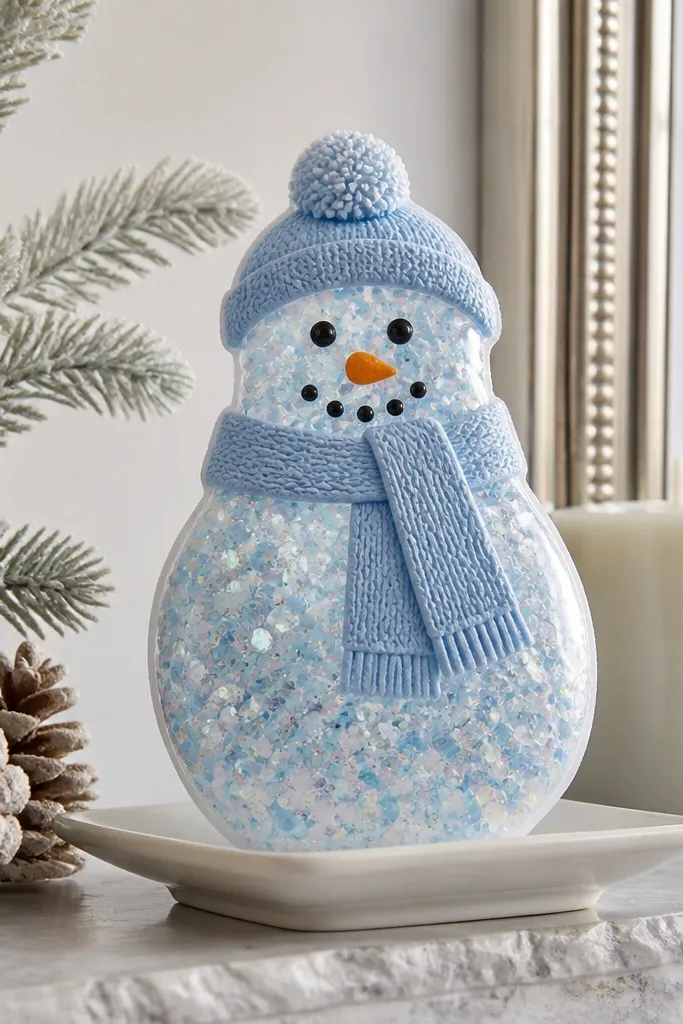
Cut two matching snowman body circles (or rounded blob shapes) from ice blue cardstock and seal into a pocket with tape. Stuff lightly and close with a patch strip. Add a white scarf by cutting a strip and wrapping it around the front; glue only the ends. Draw the face and add buttons by gluing small paper circles in a vertical line.
This snowman is cute without being bulky. The ice blue palette looks modern, and the button confetti makes it feel playful in a photo. You build it as one rounded body pocket, then add the scarf and face details on top so they stay crisp. The stuffing level is light so it stays squishy but doesn’t bulge into lumpy edges. It’s perfect for winter decor and desk styling.
Skip thisAvoid thick scarf layers; thick paper makes the center seam show.
Editor's noteUse slightly darker blue for the scarf outline; it sharpens the silhouette.
25. Lemon Slice Squishy with White Pith Paper Layer
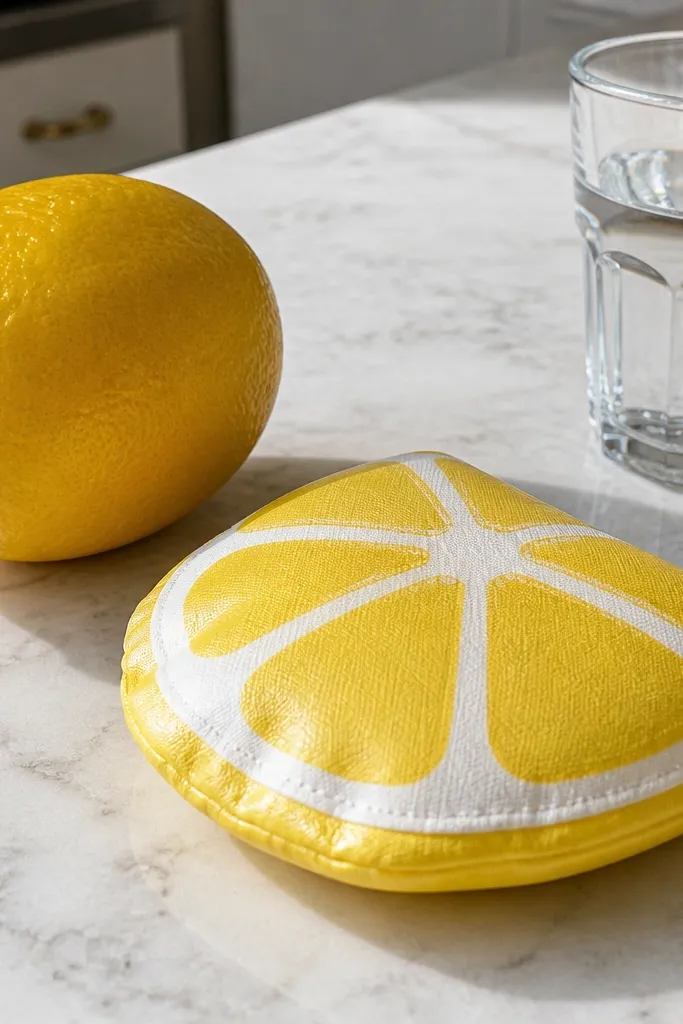
Cut two lemon slice outlines from yellow cardstock. Glue a white pith ring on the front layer by tracing and cutting a smaller circle and centering it. Seal the slice pocket with tape around the edge, stuff lightly, and close the gap with a patch. Cut thin wedge lines with a marker or add segment strips cut from lighter yellow paper.
Lemon slices are bright and clean, so they photograph well even when your room lighting is mediocre. The white pith layer makes the slice look like it has depth. This build uses a sealed pocket so the slice stays firm and round when you press it. You’ll cut wedge segments and glue them before assembly, which keeps the pattern crisp. Great for kitchens, bathrooms, and summer desks.
Skip thisDon’t use glossy paper for the whole slice; glare makes the pith look messy.
Editor's noteAdd tiny dimples with a pinprick through thin paper layers for a realistic texture look.
26. Peach Mochi Squishy with Soft Cloud-Layer Backing
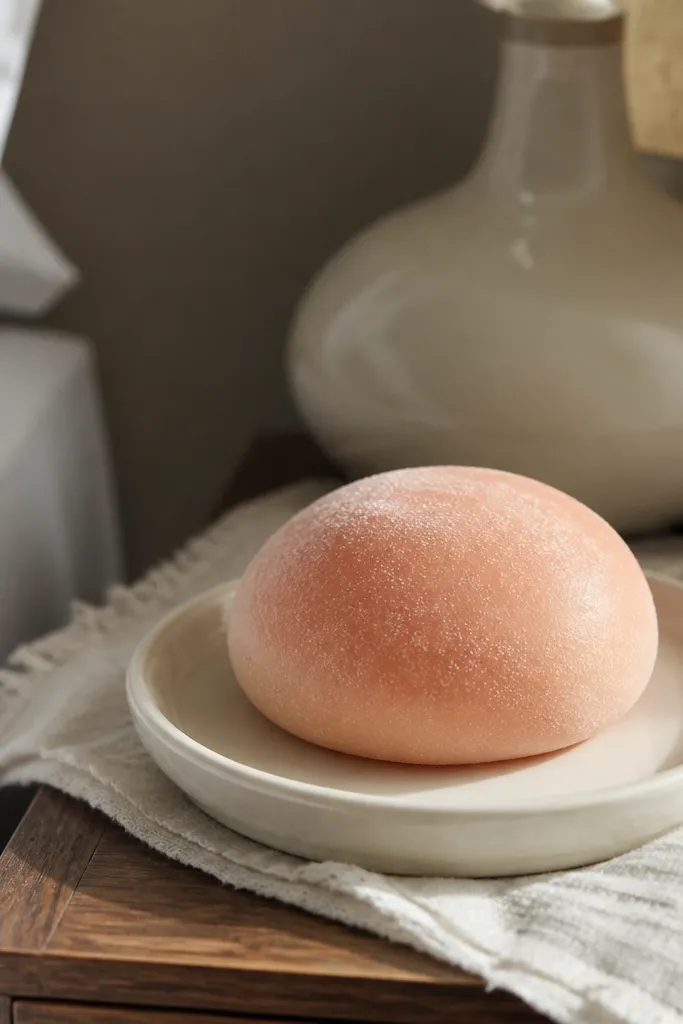
Cut two mochi ovals from 180-200 gsm peach cardstock. Create a backing texture by cutting a few small irregular cloud pieces from lighter peach paper and gluing them to the front layer. Seal the pocket with tape, stuff lightly, and close the gap with a patch strip. Smooth the outer surface by pressing gently along the seam with a ruler edge.
Mochi squishies look extra cozy because they have a soft, rounded surface. This version uses a cloud-layer backing under the outer skin so the texture reads as “chewy” instead of flat paper. The squish is still a sealed pocket, so you get press satisfaction without stuffing escaping. This is a good pick for beginners because the shape is forgiving and details are minimal. Put it on a shelf with warm lighting for the best look.
Skip thisAvoid shiny tape on the surface; it catches light and looks like hardware.
Editor's noteUse a matte finish paper if you have it; it looks softer and more mochi-like in photos.
27. Pastel Rainbow Cloud Stack Squishy (Three-Layer Dome)
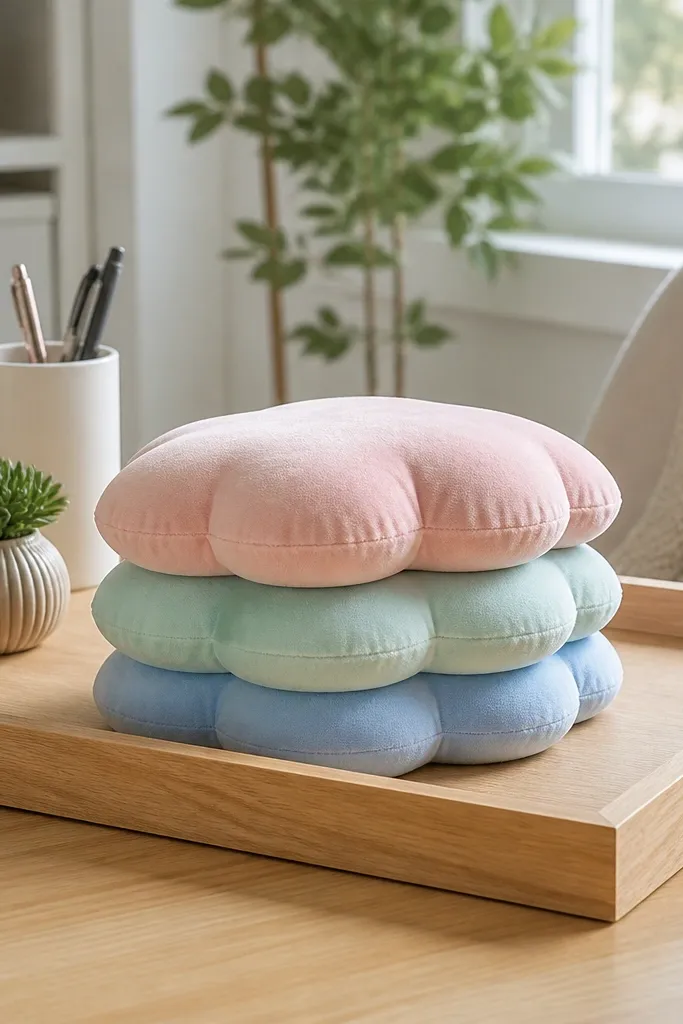
Cut three cloud pocket outlines in descending sizes from pastel cardstock. For each pocket, seal the edges with tape, stuff lightly, then close with a patch strip. Glue the smallest cloud dome to the front center of the next size, then add the largest dome on top. Reinforce the stack with a small internal tape cross so the layers don’t slide.
This looks like a layered cloud sculpture, and it photographs beautifully because each dome color shows clearly. The build uses three sealed pockets stacked inside each other so the squish stays rounded, not flattened. You get that “stacked plush” look without complicated molds. It’s renter-friendly and stable on a desk, and it makes a strong statement even at small size. Choose soft pastels so it fits any room.
Skip thisDon’t overstuff the smallest dome; it will push the stack out of shape.
Editor's noteKeep seam lines hidden on the underside; flip the stack before you glue the top dome.
28. Geometric Hexagon Squishy with Paper Facet Highlights
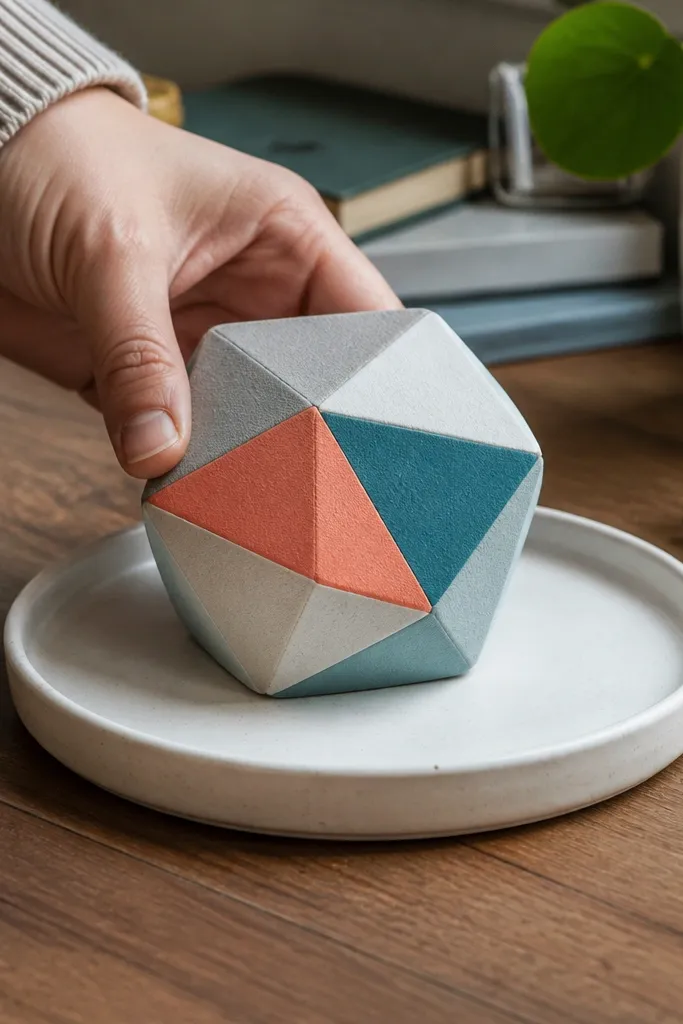
Cut two hexagon outlines from 180-200 gsm cardstock with flat sides (about 3 inches across). On the front layer, glue 6-8 small triangular facets cut from lighter/darker shades. Seal the pocket with tape, stuff lightly, and close with a patch strip. Add a thin outline border around the front using a fine marker to sharpen edges.
Hexagons look modern and clean, which makes them a solid choice if you want aesthetic decor that doesn’t feel childish. The trick is paper facets: you glue small colored triangles on the front to mimic a faceted surface. The squish is a sealed pocket with minimal seam visibility, so it stays tidy. This one works well for bedrooms, desks, and minimalist shelves. Use two or three muted colors for a grown-up look.
Skip thisAvoid too many colors; the facets blur together on camera.
Editor's noteMake facets slightly smaller than the hex outline; it keeps the border clean.
29. Pearl White Seashell Squishy with Shimmer Stripes
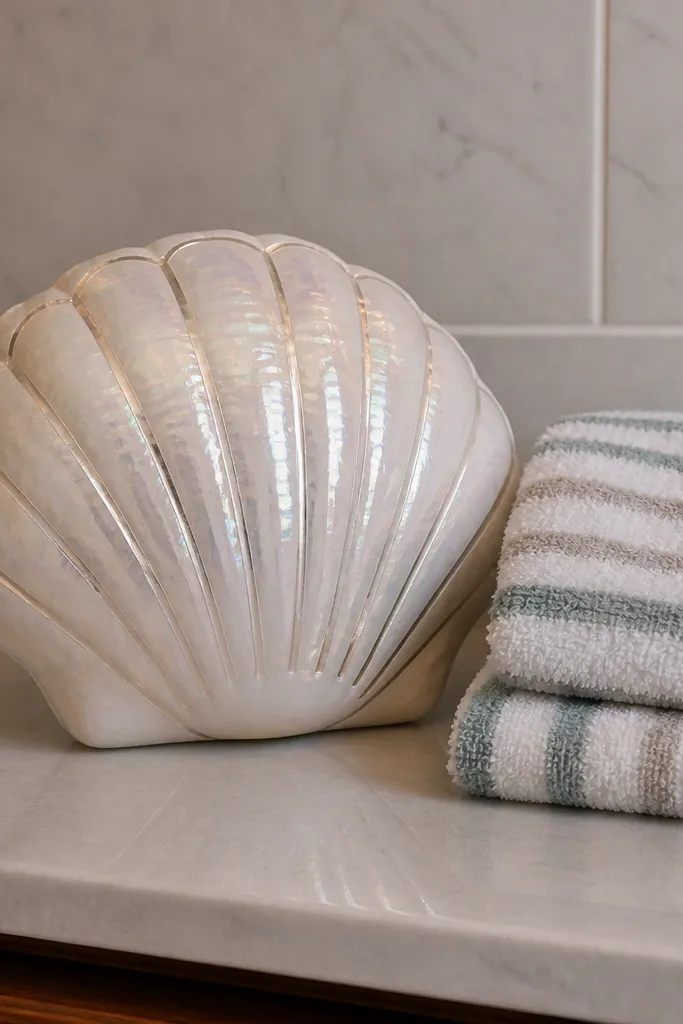
Cut two seashell outlines from pearl white cardstock. On the front layer, glue 5-7 curved strips of metallic gold paper following the shell ridge direction. Seal the shell pocket with tape, stuff lightly, and close the gap with a patch strip. Add a tiny hinge-like fold detail at the bottom using a marker line for realism.
A seashell squishy looks classy because the shell lines create natural texture. This build uses shimmer stripes cut from metallic paper and glued in gentle curves on the front. The inner pocket is sealed so the shell keeps its shape, even with repeated presses. It’s great for coastal decor, bath shelves, or a summer corner. Keep colors pearl white and soft gold so it looks expensive rather than glittery.
Skip thisDon’t use glitter glue on the whole shell; it looks messy and sheds in photos.
Editor's noteUse metallic paper strips with straight edges; curve them by gluing and letting them dry on the shell shape.
30. Cherry Blossom Mini Branch Squishy with Petal Confetti
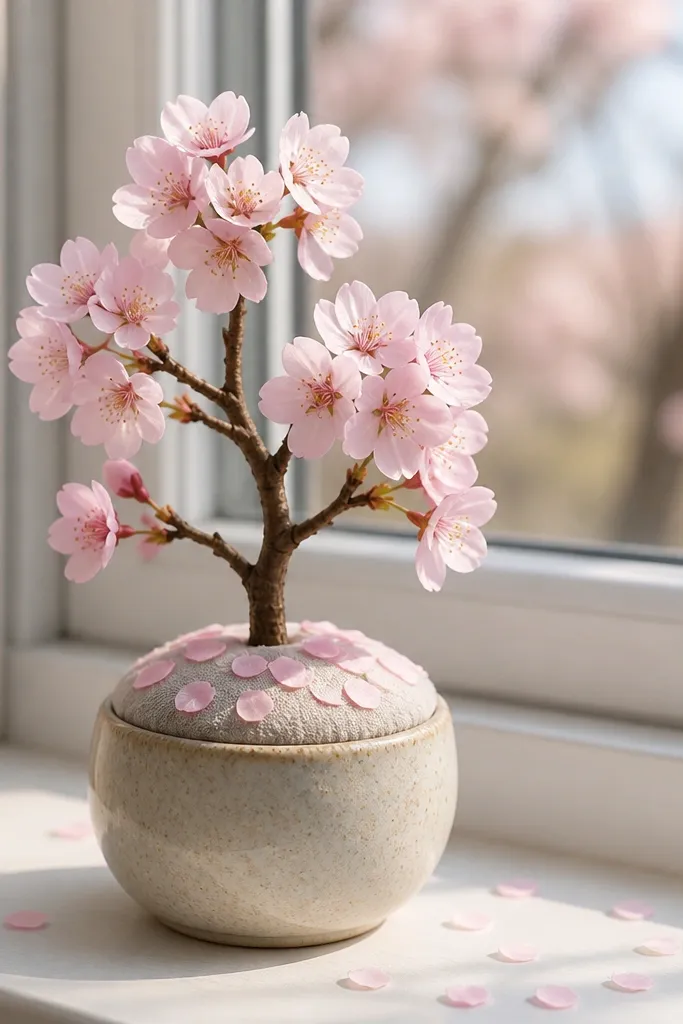
Cut two small branch-shaped pockets from brown cardstock and seal with tape. Stuff lightly and close with a patch strip on the underside. Glue small pink petal shapes across the upper branch area in clusters. Add a few tiny white dots for highlight and draw a few branch lines with a fine marker.
This one turns a tiny decor idea into something that looks like a styled scene. You build a squishy mini branch pocket, then add petal confetti that fills the “spring” look. The squishy presses at the base, while petals sit on top and stay intact. It’s renter-friendly because it’s light and freestanding. Great for spring shelves, window ledges, and photo backdrops.
Skip thisAvoid putting petals on the seam area; pressing will peel them.
Editor's noteKeep petal clusters uneven; natural-looking clusters read better than evenly spaced ones.



