
1. Strawberry Milkshake Pocket Squishy
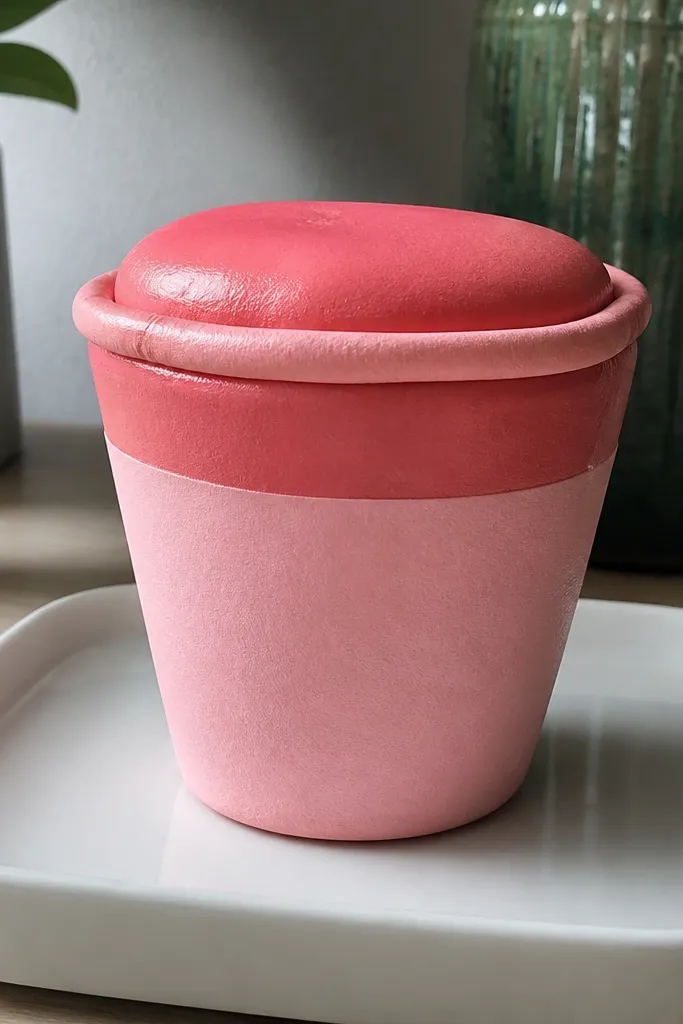
Start by cutting two identical cup panels from 200 gsm cardstock using a simple trapezoid-with-a-flat-base shape. Fold along the sides, then glue the side edges to make a pocket, leaving the top open. Add a thin layer of cotton batting or 2 mm foam scraps, then close the top with a cardstock cap and glue all around. Finally, draw a white spiral with a gel pen or add paper cutout swirls, and add tiny seed dots with a black marker.
This one reads instantly as a dessert because the cup shape is clear and the color blocking is bold. The shell is a folded cup with a flat base so it sits on a desk without wobbling, and the “milkshake” top stays smooth because you seal the edges before adding stuffing. Use light pink plus a deeper strawberry red for the swirl so it looks dimensional in photos. It’s quick because you’re making one repeatable form: cut, fold, stuff, seal, decorate.
Skip thisDon’t leave the top edge unsealed or the stuffing will creep out after a few squeezes.
Editor's notePack stuffing to the same thickness from edge to edge — uneven filling makes the swirl look lopsided.
2. Mini Cat Paw Squishy Keychain
Cat paws look cute from any angle, and the squishy effect makes them feel extra toy-like. This design works well because the toe pads are separate shapes you can color individually, so the paw looks crisp even after stuffing. Make the paw thick enough that pressing it doesn’t crease the outline. It’s ideal for quick gifting because you can attach a keychain loop in under a minute.
Cut a paw outline twice from 200 gsm cardstock. Layer small toe-pad pieces on the front face using pink paper, then glue the front face to the back piece like a sandwich. Stuff lightly with foam squares or a small wad of batting, then seal the perimeter with a strip of tape or glue. Punch a hole near the top, thread a keyring cord or jump ring, and glue it in place.
Use foam scraps inside the toe area so the toes keep their rounded look when squeezed.
Skip overstuffing — it turns the paw into a wrinkled blob instead of a smooth toy shape.
3. Smiling Peach Slice Squishy
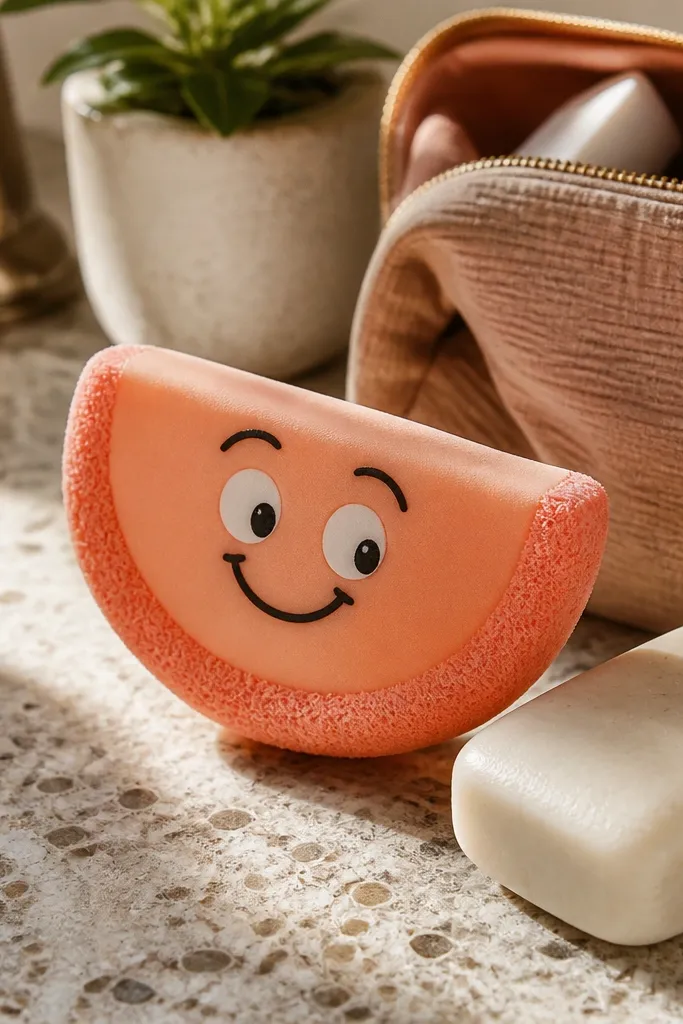
Cut two identical curved slice shapes from cardstock, with a thicker outer rim line. Glue a thin ring of textured orange paper or lightly crumpled tissue along the outer edge on the front panel. Glue the two slice halves together, leaving a small opening at the back rim. Add a thin foam strip or batting, then close the opening with a final glue line. Draw a simple smile and two small eyes with a black marker.
Peach slices photograph well because they already look like slices, and the face adds instant personality. The trick is making the “fuzzy edge” with textured paper or colored tissue strips, so it reads soft even if the squish is firm. You also get a nice curved shape that doesn’t collapse when you press the center. This is a solid tonight project because it’s basically one curved panel folded into a thick slice.
Skip thisDon’t put the face details on the fold line or they’ll distort when you squeeze.
Editor's noteCrumple tissue lightly, then smooth it with your fingers before gluing — it keeps texture without looking messy.
4. Rainbow Donut Ring Squishy
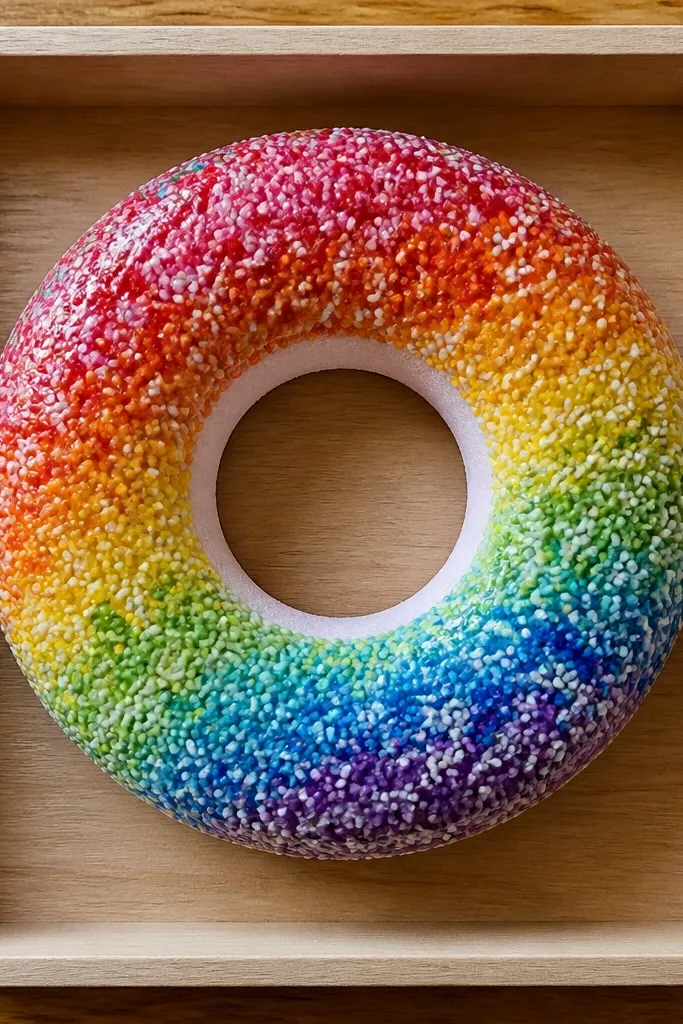
A donut ring is one of the most photogenic quick squishy shapes because the circle reads clearly and the sprinkles give texture. Keep the center hole so the donut doesn’t look like a flat coaster. The squish comes from a thin foam ring, which preserves the donut silhouette under pressure. Add a glossy “glaze” effect with clear tape or gel medium so it catches light.
Draw and cut a donut ring from 200 gsm cardstock (outer diameter about 7 cm, inner hole about 3 cm). Cut two rings and glue them together with the seam on the back. For stuffing, cut a foam ring slightly smaller than the outer edge and insert it into the donut center. Seal the outer edge with glue, then decorate sprinkles using small paper strips or sticker dots. Finish with a thin layer of clear tape over the top glaze area.
Sprinkles look best when you vary lengths — cut a few short, a few medium, and a couple longer for a natural mess.
Skip thick glue blobs on the front or you’ll see bumps in photos.
5. Puffy Croissant With Butter Fold
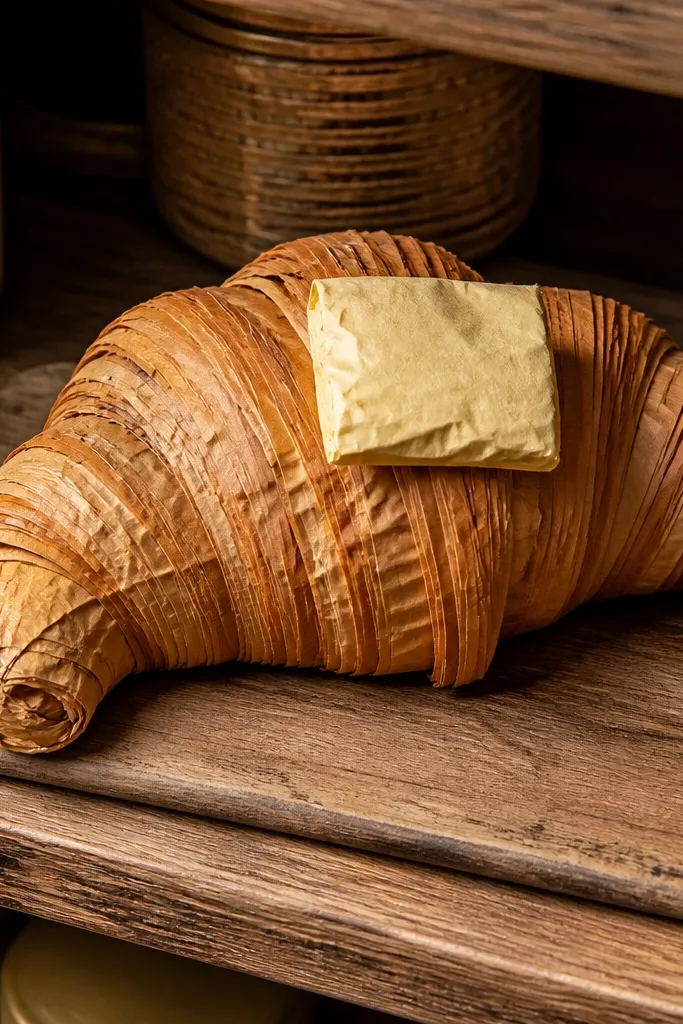
Croissants look fancy even when you make them fast, and the paper squishy adds a satisfying “toy” feel. The flaky layers are the visual hook, and you can create them with simple fringe cuts that fold outward slightly. The butter patch gives contrast so the squishy reads warm and buttery. This one is great for a shelf photo because it stands up with a slight curve.
Cut two matching croissant silhouettes from cardstock. On the front piece, create flaky layers by cutting thin slits along the curved edge and folding each strip outward. Add a butter patch by cutting a small teardrop shape from yellow paper and gluing it near the wide end. Glue the two layers together, insert a small foam pad along the center, and seal the edges. Color the “browned” sections with light brown marker lines.
Use a bone folder on the croissant curve so the shell stays smooth instead of wavy.
Don’t cut the slits all the way through or the shell loses stiffness and collapses.
6. Cloud With Raindrop Squeeze Charm
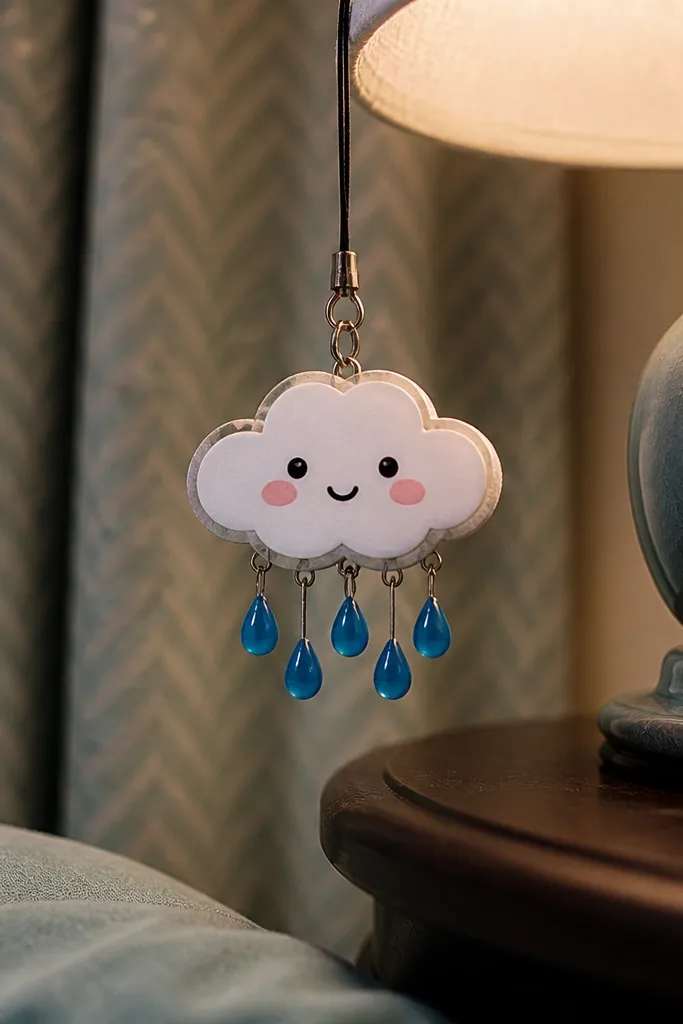
This design is clean, cute, and easy to photograph because the cloud outline is simple and the raindrops pop in blue. Make the cloud slightly domed with foam so it stays puffy and doesn’t crease when squeezed. The raindrops look like small jewels, especially if you use glossy tape or laminated paper. It’s a quick charm idea that feels playful without needing complex assembly.
Cut a cloud outline twice from 200 gsm cardstock. Glue the two cloud halves together, but leave a small opening at the bottom. Stuff with a thin foam sheet cut to the cloud shape, then seal the opening. Cut three raindrops from blue paper, glue them to the front, and add tiny highlights with a white gel pen. Punch a hole at the top of the cloud and attach a cord loop.
Use laminated paper for the raindrops if you want that glassy shine in photos.
Skip glitter glue — it smears and makes the cloud look messy.
7. Sushi Roll With Nori Border Squishy
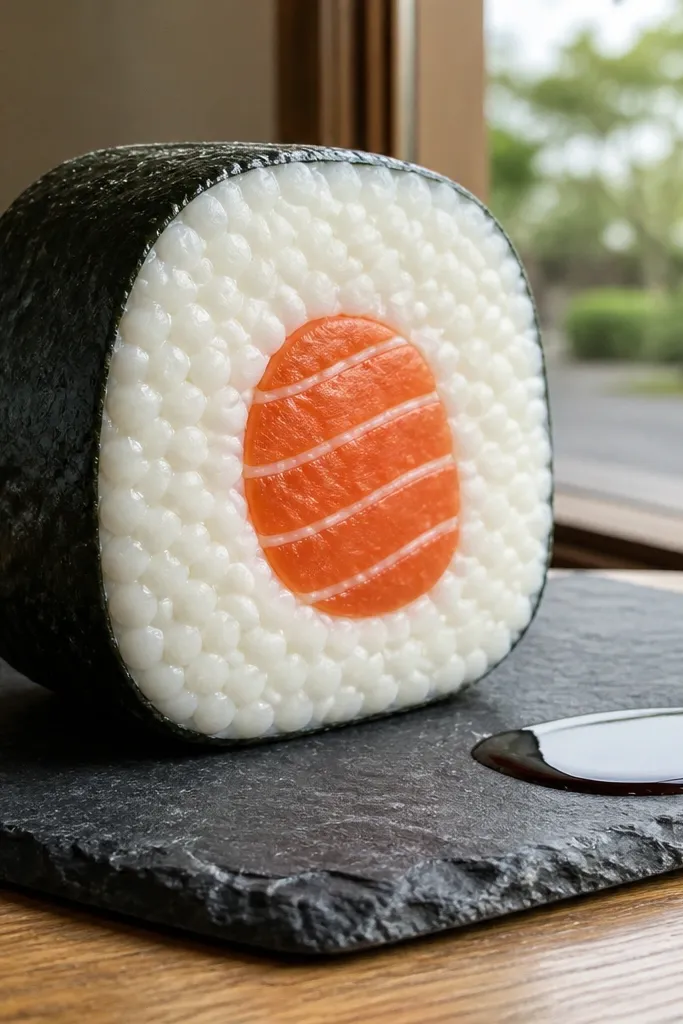
Sushi squishies look oddly satisfying because you already have a natural “slice” pattern to follow. This one stays aesthetic by keeping the nori border crisp and the rice texture subtle, not chaotic. Use small paper dots for rice and a clean red/orange strip for fish so it reads as sushi even from a distance. The shell is a simple tube-like fold, making it fast to build and easy to decorate.
Cut two identical rectangles from cardstock, about 18 cm by 6 cm, then round the corners slightly. Color one side with rice dots using a white gel pen on light paper, and add a dark nori band near one edge. Roll each rectangle into a cylinder shape and glue the seam, then sandwich the two cylinders together with the seam aligned. Add a thin foam strip inside before fully sealing. Cut a small end-cap circle and glue it on top for a finished look.
Draw the nori band first with a ruler so the border stays straight and photogenic.
Don’t over-detail with lots of tiny lines — it makes the sushi look busy on a small squishy.
8. Cute Heart Gelato Scoop Squishy
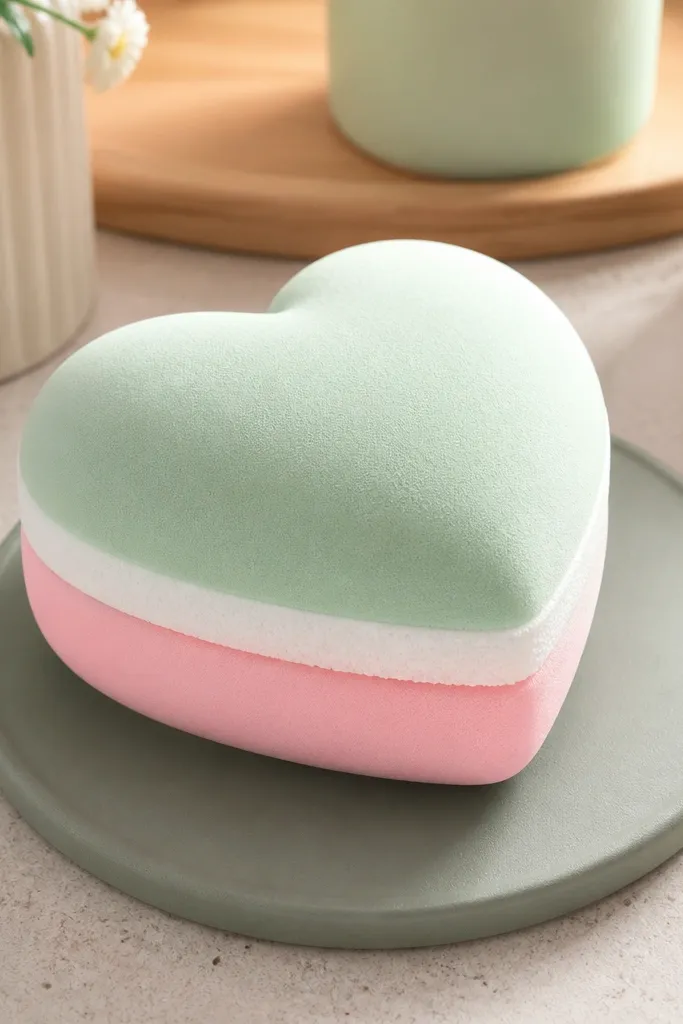
Heart shapes are instantly readable, and gelato color layers make it look “designed” even with quick construction. You get a smooth squeeze by using two heart shells with a thin foam insert. The pastel mint and pink layers add color contrast that looks great against neutral backgrounds. This is a fast build because you’re repeating one heart template with two color layers.
Cut two heart outlines from 200 gsm cardstock. Cut a second set of heart layers in mint and pink paper, then glue the mint layer first and the pink layer on top to form the scoop look. Glue the heart front to a back heart, leaving a small opening at the bottom. Insert a foam heart or a cut foam wedge, then seal the opening and smooth the seam with your fingers. Add a tiny “sparkle” highlight using a white gel pen.
Keep the foam insert slightly smaller than the shell outline so the edges stay smooth when squeezed.
Don’t press the foam flat while gluing — it creates thin spots that collapse.
9. Blueberry Muffin Top Squishy
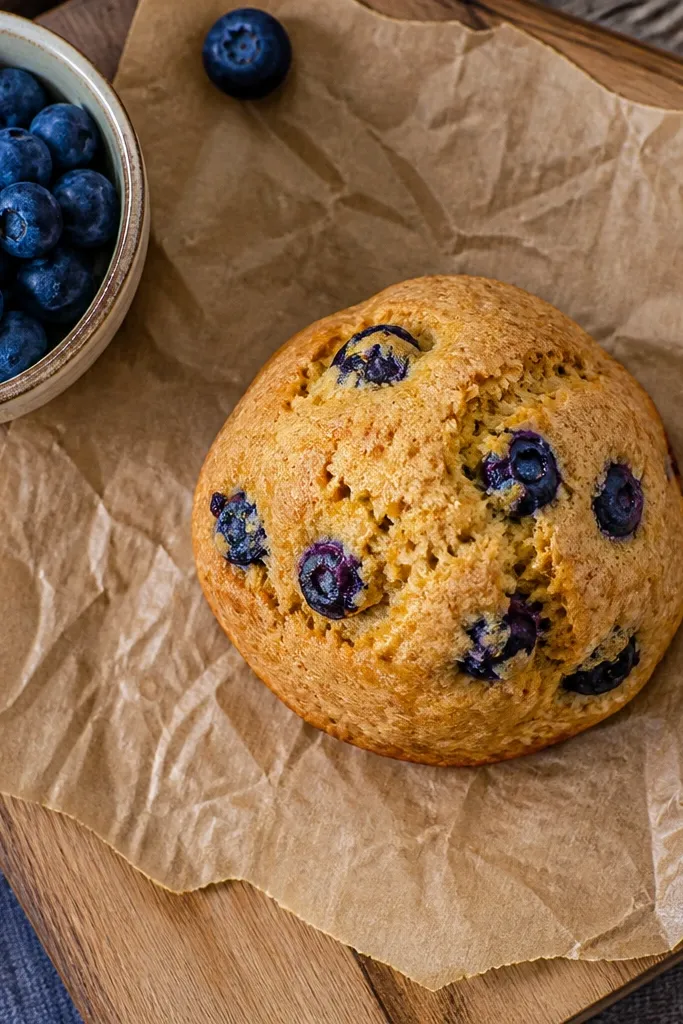
Muffin tops are a great quick Paper Squishy because they’re rounded and forgiving. The photo appeal comes from the blueberry dots and the warm brown “crumb” texture. You can create crumb texture with crumpled brown tissue pressed lightly under a thin glue layer, so it looks soft. The squishy insert is small and centered, which keeps the top from collapsing into a flat disc.
Cut two circles about 8 cm across from cardstock, then trim into a slightly flattened dome shape by cutting a shallow wedge off one side before gluing. Create a crumb texture on the front by dabbing glue in small patches and pressing crumpled tissue lightly. Add blueberry “berries” by punching small circles from dark blue paper and gluing them in clusters. Glue the front and back together, add a small foam pad in the center, and seal the edge. Finish with a few darker brown marker specks.
Glue blueberries in layers — some on top, some slightly tucked — to create depth without extra work.
Skip glossy paint on the berries; it reflects too harshly and kills the cozy look.
10. Lemon Slice With Sugar Crystals
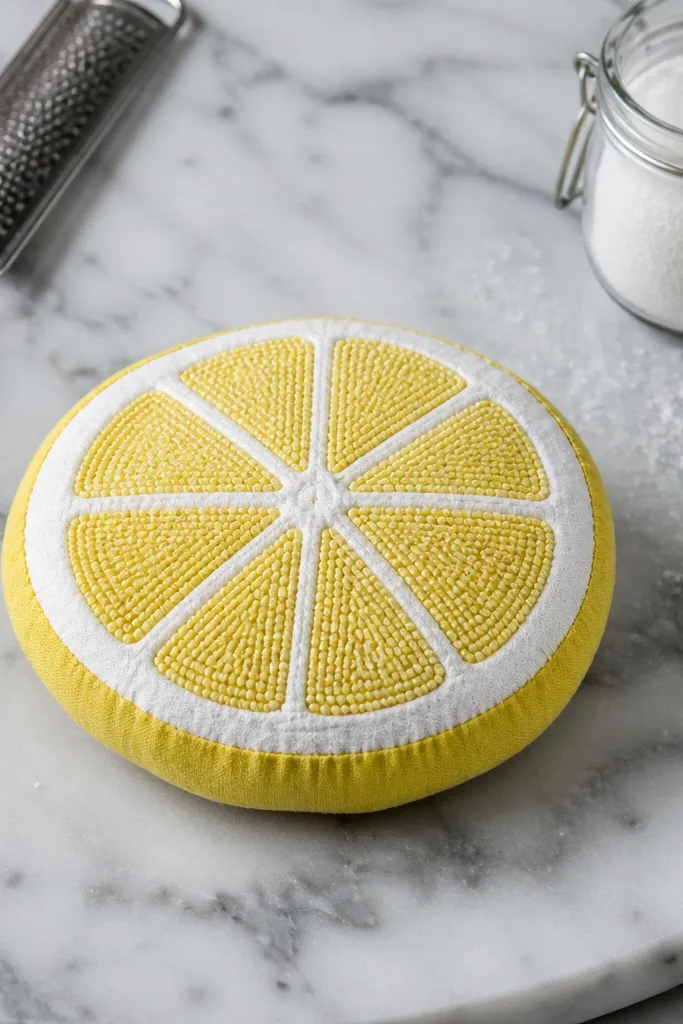
Cut two lemon slice shapes from 200 gsm cardstock, with an inner rind cut-out line so the slice looks layered. Color the outer ring with a deeper yellow marker and the inner section with lighter yellow. Glue the two halves together and insert a thin foam strip shaped like a ring. Seal the opening and then add sugar crystals using a white gel pen or cut micro-dots from white paper. Add a few tiny brown dots at the rind for realism.
A lemon slice looks bright and clean, and sugar dots make it look tactile even in a still photo. The squishy stays pretty because the shell has a consistent thickness and the stuffing sits in the center, not at the rind edges. Use yellow paper plus a lighter inner ring so the slice looks real. This is a strong “tonight” choice because it’s mostly cutting and dotting.
Skip thisDon’t use heavy glitter; it sheds and makes the lemon look dirty fast.
Editor's noteMake sugar dots uneven — clusters look more natural than perfectly spaced dots.
11. Tiny Taco Stand Squishy
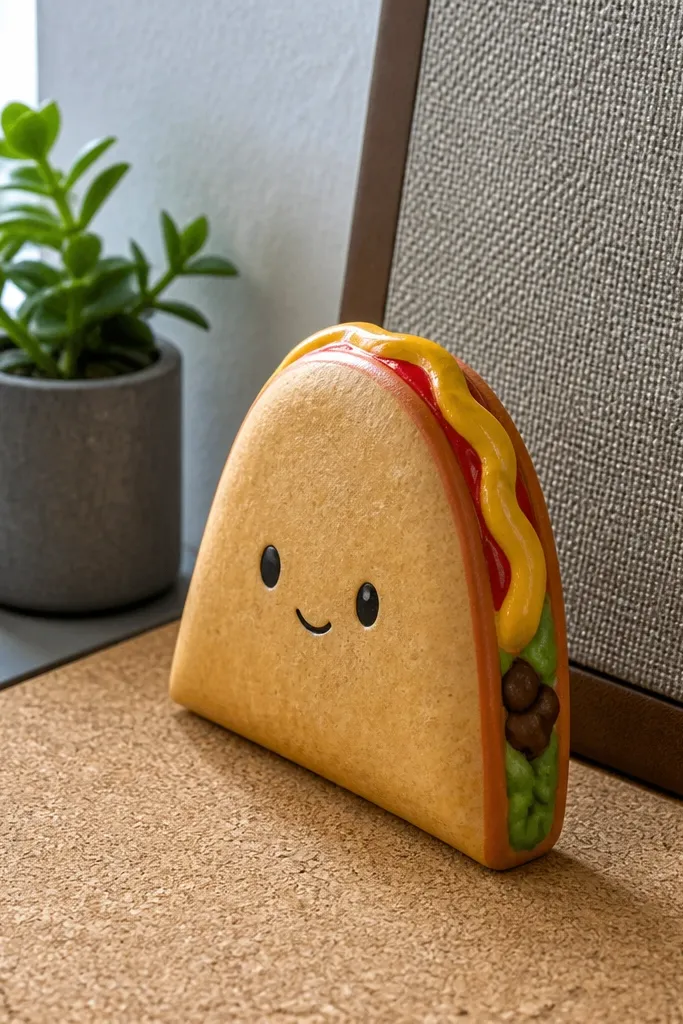
Cut a taco shell shape twice from cardstock and glue the seam so it forms a curved cone. On the front panel, add lettuce strips from green paper and “meat” crumbles from small red/orange paper bits. Build a back base by cutting a rectangle and rounding it into a taco-friendly support, then glue the taco cone to the base. Insert a small foam wedge into the cone, then seal the back with the base panel. Add a tiny cheese strip and outline the taco edge with a darker marker.
This taco design is photogenic because it has clear layers and a silhouette that reads in one second. The stand-up look comes from building a flat base panel behind the taco shell. You get a squeeze without losing the taco shape by using a thin foam wedge inside the shell. It’s ideal for a desk decor moment because it sits like a mini sculpture.
Skip thisDon’t overfill the cone or the taco folds and the layers separate.
Editor's noteTrim the foam wedge so it stops 5-8 mm before the open edge — you get a smooth top instead of bulging.
12. Pearl Bow Slime Squishy
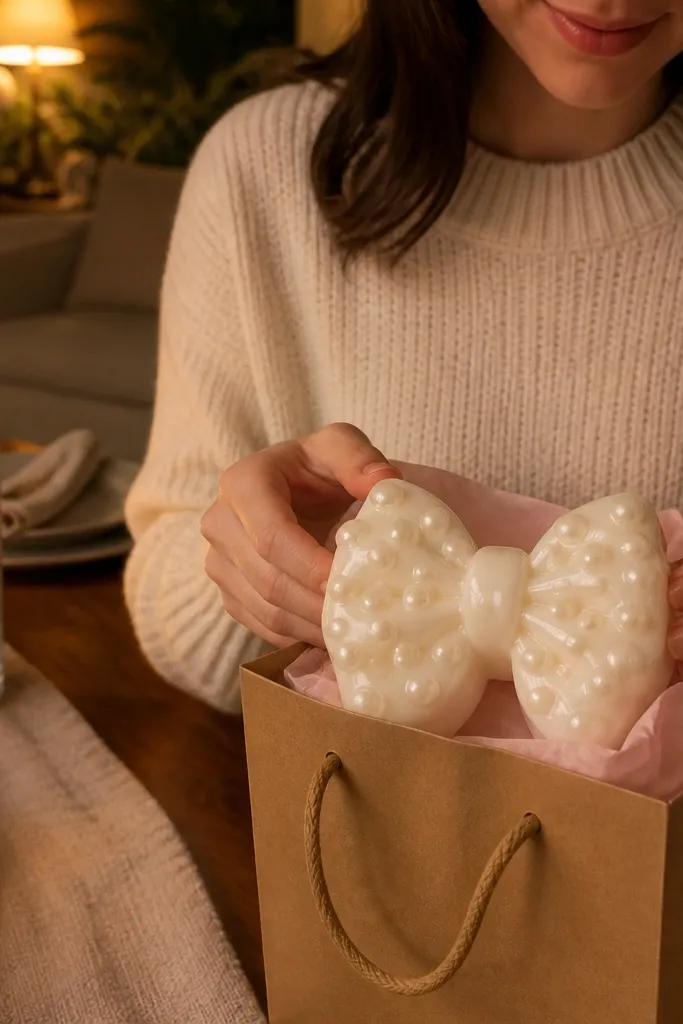
Cut a bow outline from 200 gsm cardstock and duplicate it for the back. Glue the two bow halves together, leaving a small opening at the center back. Stuff lightly with a thin foam sheet so the bow stays smooth. Close the opening and cover the front with a layer of clear tape or glossy lamination film to create shine. Add “pearls” by gluing small white paper dots or sticker pearls in a scattered pattern.
This one looks like a cute slime charm because of the glossy surface and pearl-like dots. The bow silhouette gives you a strong shape, while the glossy finish makes it pop in photos. Build it with a smooth foam insert so the surface stays even when squeezed. It’s perfect for adding to a gift bag or turning into a phone charm because it’s small and high-impact.
Skip thisDon’t use thick glue under the glossy layer or it will show as bumps.
Editor's noteIf you use clear tape, press it from the center outward to avoid bubbles.
13. Space Planet With Starry Speckle Squishy
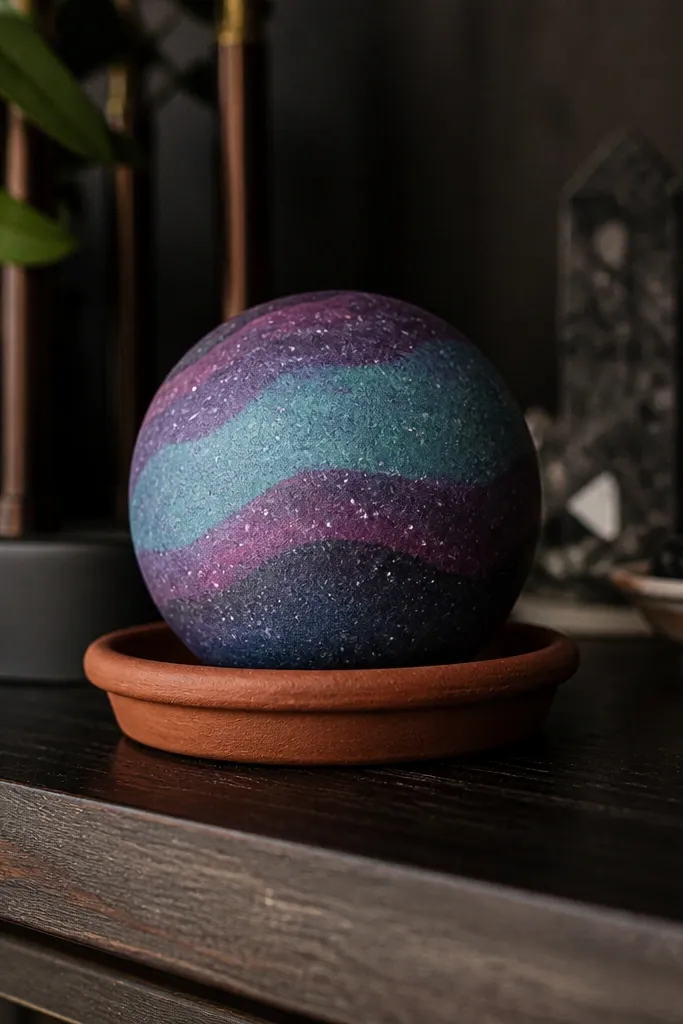
Planets are easy to make look “wow” because you can create depth with two or three color bands. The squishy part keeps it tactile, and the star speckles make it feel layered without much work. Keep the planet perfectly round by using a circle cutter or tracing a consistent template. This is a fast build because it’s mostly cut circles and a simple stuffing seal.
Cut two circles from 200 gsm cardstock, about 7-8 cm across. Color the front with blue and purple marker bands, then add star speckles with a white gel pen. Glue the two circles together around the edge, leaving a small gap for stuffing. Insert a thin foam circle or small batting wad, then glue the gap closed. Attach a loop behind the planet with a small strip of tape and cord, if you want it as a charm.
Use a light touch on speckles so you don’t tear the paper when you squeeze it.
Skip watery paint — it warps paper and makes the planet uneven.
14. Pink Sprinkle Cupcake Squishy Stand
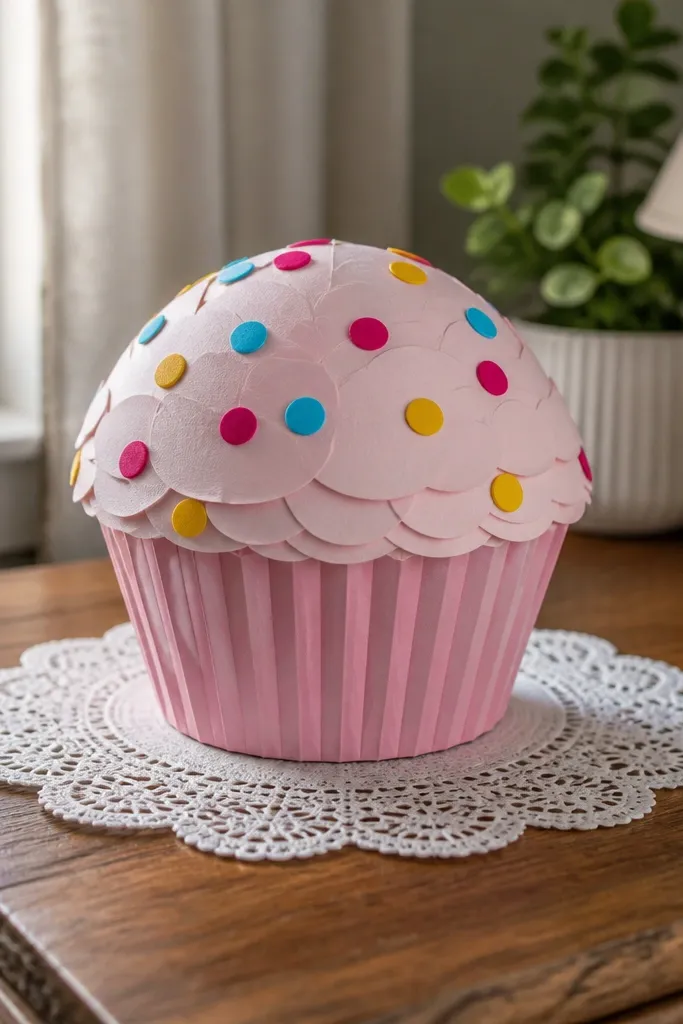
Cupcakes look great standing up, and a stand design makes it more than a flat craft. The frosting top reads as fluffy because you can build it with layered paper scallops and a thin foam dome. Sprinkles add sparkle and texture, so the project looks alive in photos. It’s a strong tonight choice because the base keeps it stable while you assemble the top.
Cut a cupcake wrapper shape twice from cardstock and glue the seam to make a cylinder. Cut a flat circle base from cardstock, then glue the wrapper to the base so it stands. Build the frosting top by cutting a scalloped circle from pink paper and gluing a foam dome under it. Seal the frosting dome onto the wrapper top, then glue sprinkles made from tiny paper strips or sticker confetti across the front. Outline the wrapper edge with a darker pink marker.
Sprinkle placement looks best when it curves with the frosting edge — follow the scallops.
Don’t glue sprinkles only on the front; add a light dusting on the sides so it still looks cute when angled.
15. Rainbow Kawaii Cloud Tag Squishy
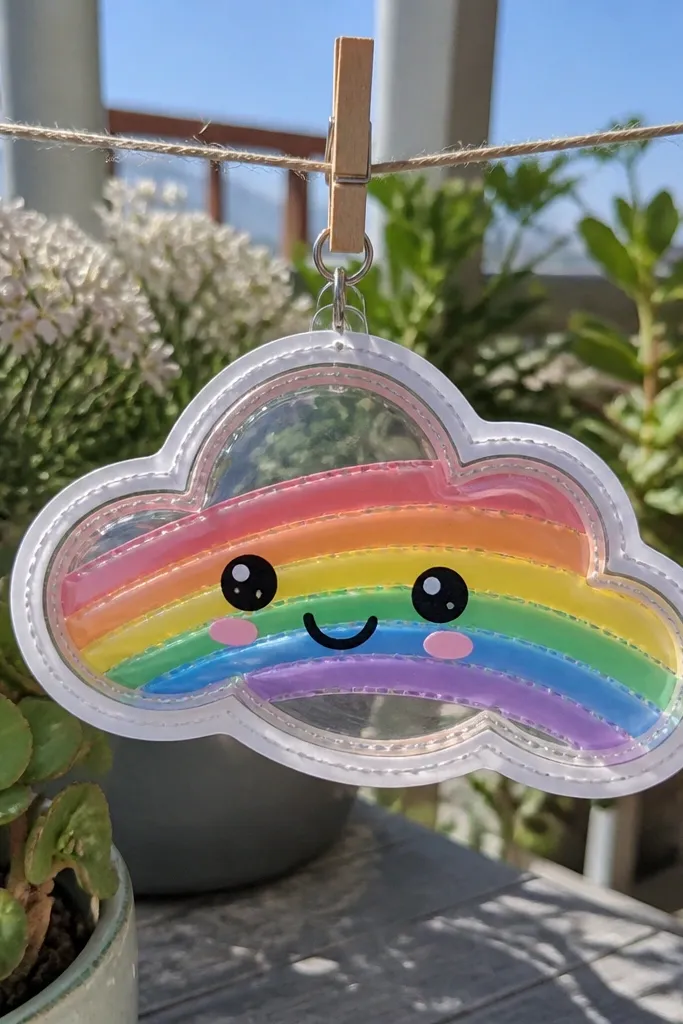
A tag-shaped squishy looks intentional because you get a hanging silhouette and a clear center design. The rainbow stripe inside gives instant color without cluttering the outside. You also get a clean photo because the tag shape frames your background. This is quick because you can cut the tag and cloud outline in one go using a template you trace.
Cut a cloud-shaped tag from 200 gsm cardstock, then cut a matching back piece. On the front, glue a rainbow stripe band made from three or four paper strips, then add tiny face lines or a simple smile with marker. Glue front to back, leaving the bottom edge slightly open. Stuff lightly with a thin foam piece so the tag stays firm, then close the edge with glue and a narrow tape strip. Punch a hole at the top and attach a ribbon or string.
Keep your rainbow strips the same width so the stripe looks neat on camera.
Skip big face features — tiny marker lines look better at small sizes.
16. Matcha Green Tea Whisk Squishy
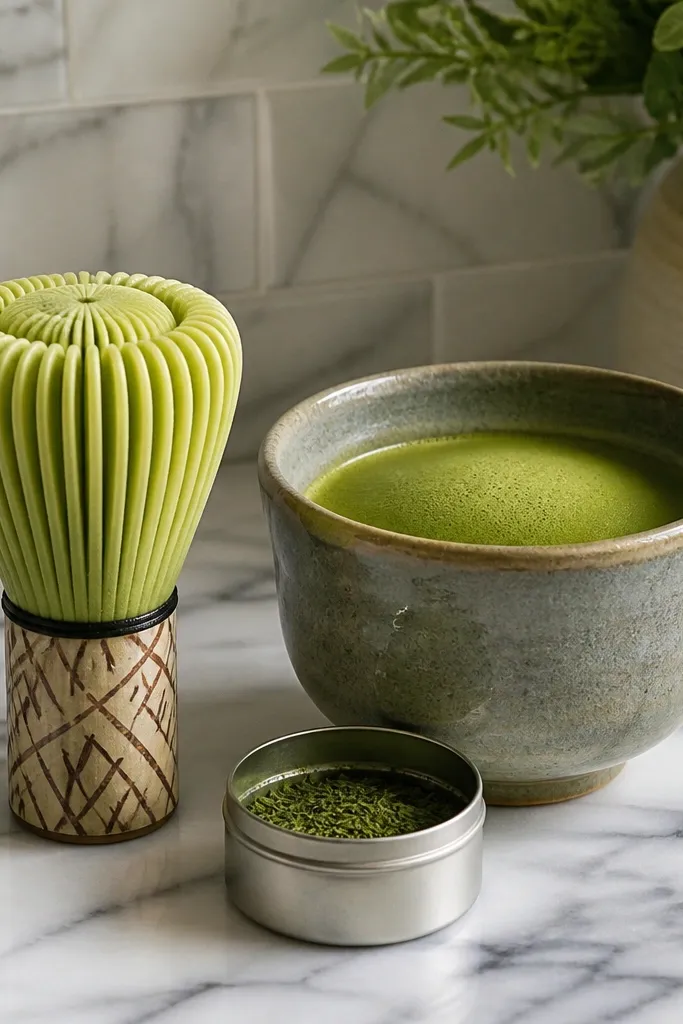
Cut two cup shapes from 200 gsm cardstock, each with a slight taper. Glue the cup seam to form a pocket, then glue a thin foam circle into the bottom. Add the tea surface by cutting a circle of light green paper and gluing it as a top layer, then draw a swirl with a darker green marker. Seal the cup top edge, then attach a whisk handle by cutting two thin bamboo-colored strips and gluing one across the top. Finish with tiny tea specks using a darker green marker dot.
Matcha color is calming and the whisk handle adds a clear “food” cue. Build it as a small cup with a domed tea surface so squeezing looks like foam or cream. The whisk detail is a simple stick-and-cross pattern that’s easy to cut and looks crisp. It’s a good desk decor squishy because it stays upright and doesn’t need a lot of embellishments.
Skip thisDon’t wrap the cup with thin paper — it wrinkles and the seam shows.
Editor's noteUse foam only under the tea surface; too much inside makes the cup crease.
17. Chocolate Chip Cookie With Overbite Bite
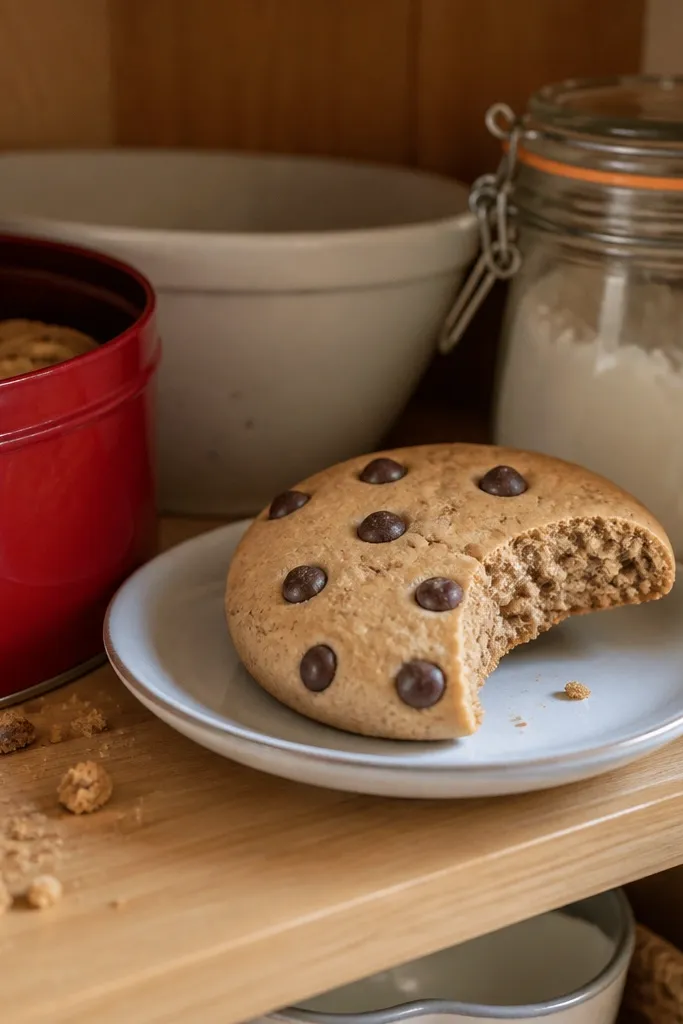
This cookie shape is instantly charming because the missing bite corner makes it look playful. The squishy works here because the shell edges are curved and thick, so the bite area stays stable. Chocolate chips give you lots of visual texture without needing extra layers. It’s quick because you can cut one cookie template and replicate it twice.
Cut two cookie outlines from 200 gsm cardstock, including the bite notch shape. Color the base with warm brown marker, then add chocolate chips by gluing small dark brown circles or drawing them with a marker. Glue the cookie halves together, leaving a small opening at the back edge of the bite notch. Stuff lightly with foam or batting, then seal with glue and a narrow strip of tape. Add a tiny highlight line on the top edge to mimic shine.
Make chips different sizes — three small, two medium, one large looks better than perfect dots.
Don’t put stuffing right into the bite notch or the notch will deform.
18. Mini Book Stack Bookmark Squishy
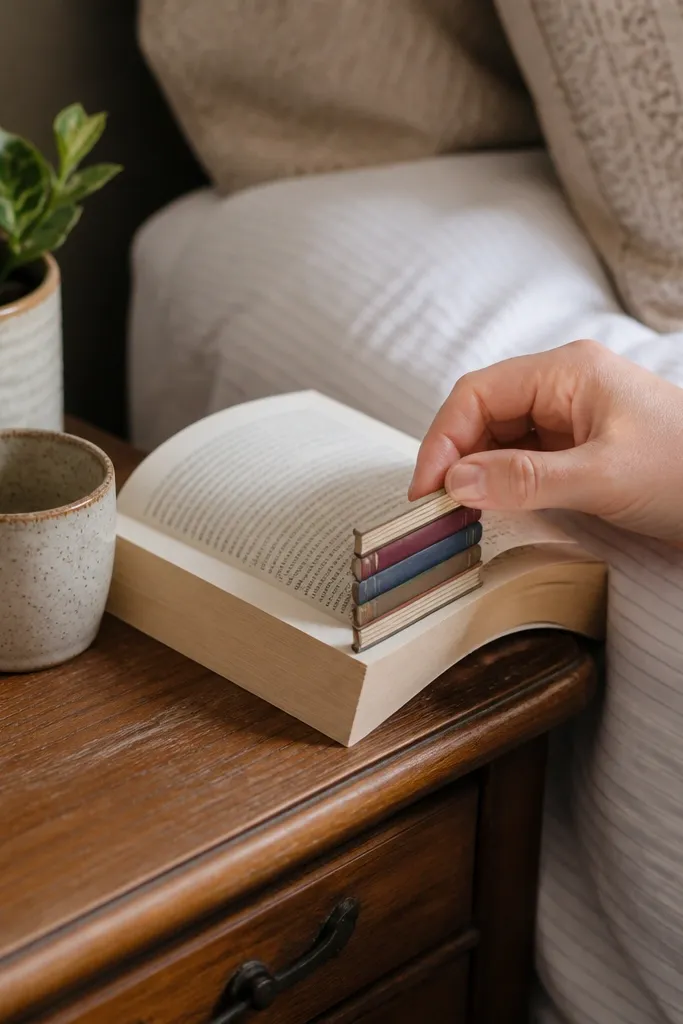
A bookmark squishy is practical and pretty, and it looks cute even when it’s not being squeezed. The trick is using a slim foam insert so it feels soft but stays flat enough to slide into a book. Build the books as layered rectangles with visible spine colors, then seal the edges for durability. This is a great tonight project if you want decor that also gets used.
Cut two identical bookmark rectangles from 200 gsm cardstock, about 18 cm by 4 cm. On the front, glue three stacked “book” strips by cutting smaller rectangles in pastel colors and adding simple spine lines with a fine marker. Glue the two bookmark pieces together around the edges, leaving the top edge slightly open. Insert a thin foam strip (about 3-4 mm thick), then glue the opening closed. Add a tassel loop from string at the top if you want a finished look.
Use a craft knife to cut clean edges so the bookmark slides smoothly into pages.
Skip thick stuffing — it makes the bookmark bulge and it catches on pages.
19. Kawaii Hamburger Bun Squishy
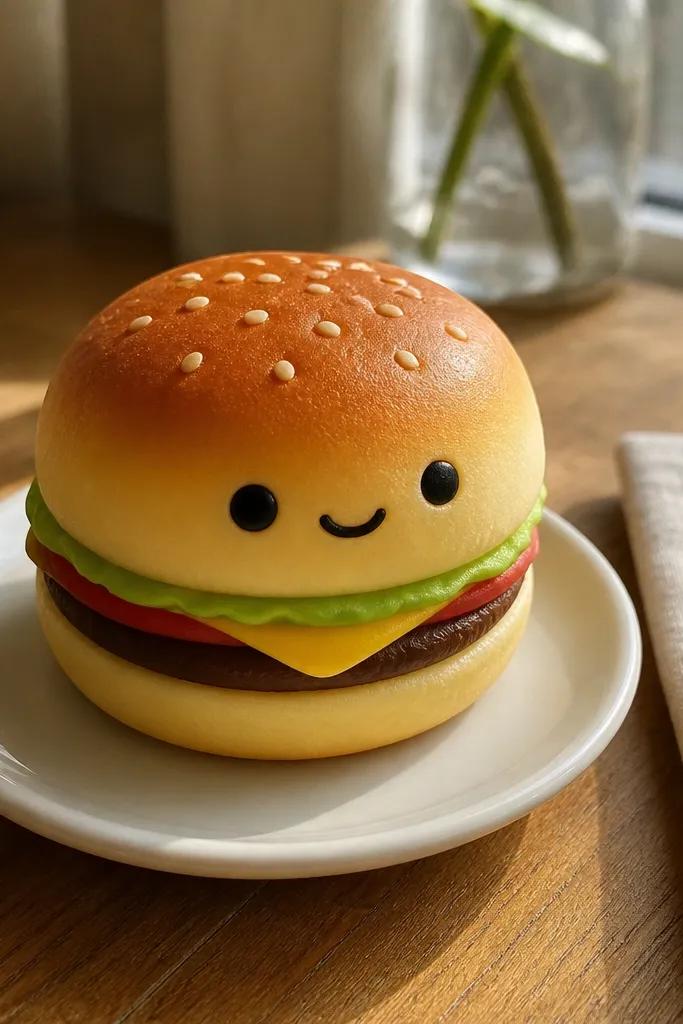
Hamburgers are photogenic because the layers are obvious, and the squishy makes the bun look pillowy. The bun top gets attention through sesame dots and a soft gradient coloring. Keep the filling layers thin so the sandwich stays smooth when squeezed. This is a fast project because it’s essentially a layered sandwich shell with one stuffing step.
Cut two hamburger “front” shapes from 200 gsm cardstock, each shaped like a rounded rectangle with a slightly wider top. Color the top bun with light-to-dark yellow marker and add sesame seeds as tiny dots. Glue thin layers of lettuce green and tomato red paper on the front panel. Glue front and back together, insert a thin foam pad in the center, and seal the edges. Add a simple face with two eyes and a small smile on the bun.
Press the seam flat after gluing so the squeeze doesn’t create a ridge.
Don’t stack thick paper layers — the sandwich becomes hard to squeeze cleanly.
20. Soft Rose Petal Squishy Flower
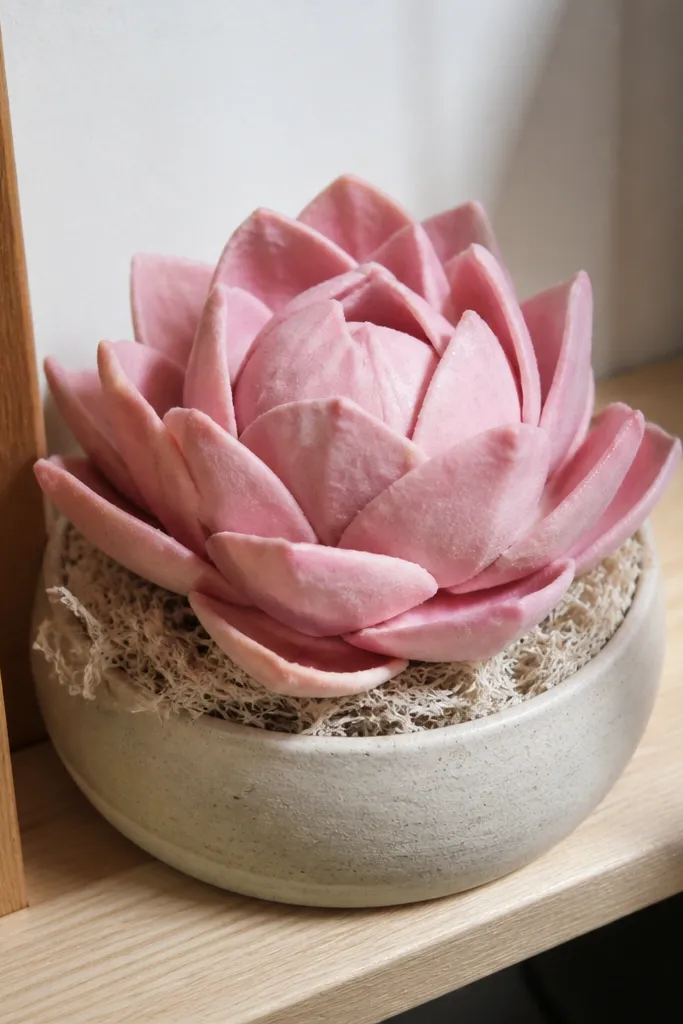
A rose squishy looks delicate but still has a satisfying squeeze, and it’s gorgeous on a shelf or as a gift topper. The layered petals give depth, and the foam insert keeps the center from flattening. This project looks best when your petals overlap with clear edges, not fuzzy glue blobs. It’s worth making because it turns a basic flower template into an actual squishy object.
Cut a petal template and trace it onto cardstock for two complete sets of petals. Color petals in light pink and deep pink, then curl the edges slightly using a pencil. Glue petals into a rosette shape on one base circle, then cover with the second base circle to trap the structure. Insert a small foam ball or foam wedge in the center before fully sealing. Add a small paper circle center and glue it on top for a finished look.
Curl petals the same direction around the circle for a cleaner rose silhouette.
Don’t over-glue inside the petals or you’ll see glue lumps through the layers.
21. Ocean Wave Shell Squishy
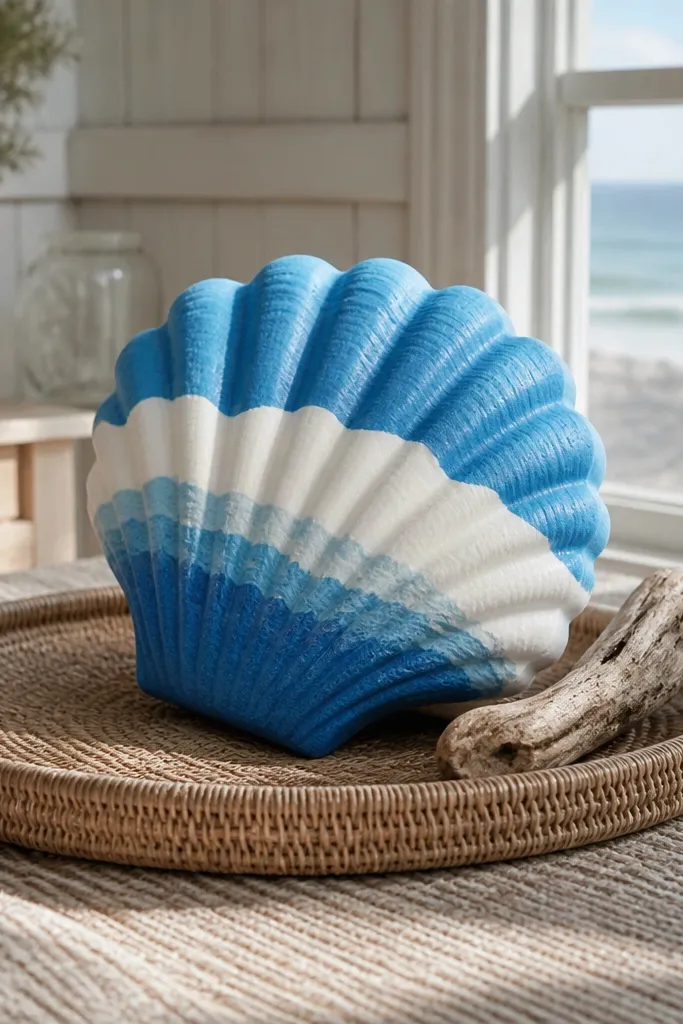
Cut two shell outlines from 200 gsm cardstock, about 9 cm long. On the front, glue or draw wave stripes: alternate dark blue and light blue paper strips across the shell, then add a thin white edge. Glue the two shells together, leaving a small opening at the back. Insert a thin foam piece cut to the shell shape and seal the opening. Add a small highlight line with a white gel pen near the top ridge.
Shell shapes look great in photos because they have natural curves, and wave stripes make them feel like beach decor. The squishy part needs a firm insert so the ridges don’t collapse. Use layered stripes in two blues and one white for that “clean ocean” look. This is a quick build because it’s a repeatable cut-and-seal shell with stripes applied before stuffing.
Skip thisSkip fuzzy markers on stripes; they bleed and ruin the crisp wave look.
Editor's noteUse a ruler to keep stripe edges aligned — the shell looks instantly more polished.
22. Chocolate Truffle Roll Squishy
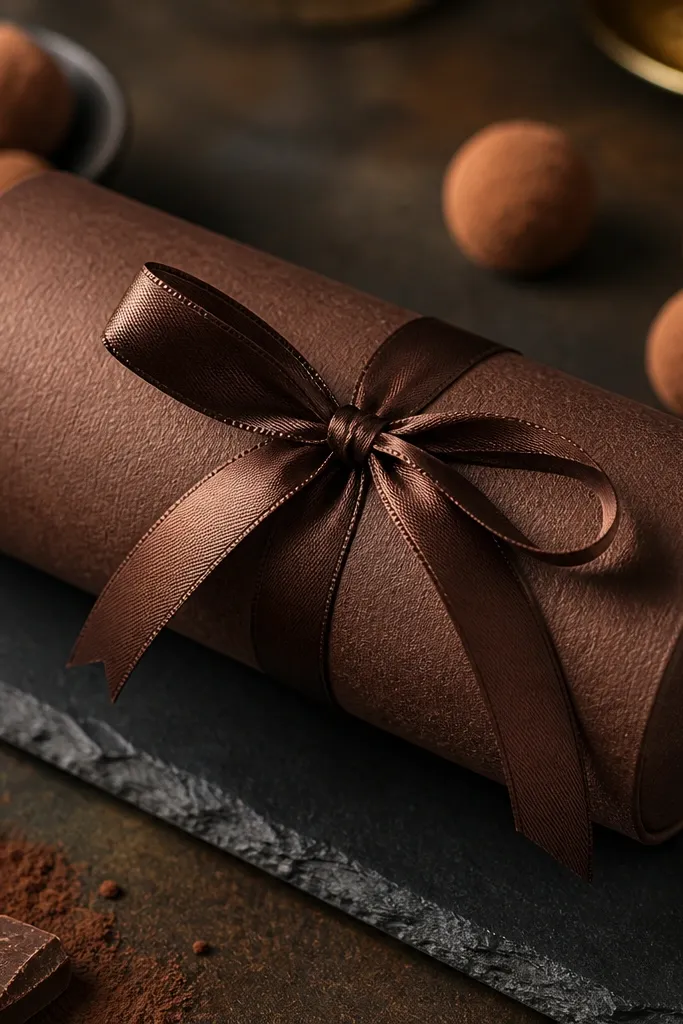
Cut two rectangles from 200 gsm cardstock, about 16 cm by 5 cm, then roll tightly into a cylinder and glue the seam. Cut two small circles for end caps and glue them onto the ends. Stuff with a foam cylinder insert that fits snugly inside, then seal the ends fully. Create cocoa speckle by dabbing a small sponge lightly with dark brown marker onto the outside surface. Tie a thin ribbon around the middle and glue it in place.
Truffle rolls look fancy because the surface texture reads like cocoa, and the ribbon tie adds a gift-ready vibe. You keep it quick by making a simple tube or roll shape with two end caps. The squish feels right when you use a foam cylinder insert instead of loose batting. This is a good “tonight decor” project because it looks like something you could actually buy.
Skip thisDon’t use wet paint for cocoa speckle — it warps and makes the roll look uneven.
Editor's noteUse a foam insert that’s slightly shorter than the cylinder so the end caps stay flush.
23. Pastel Macaron Trio Squishy
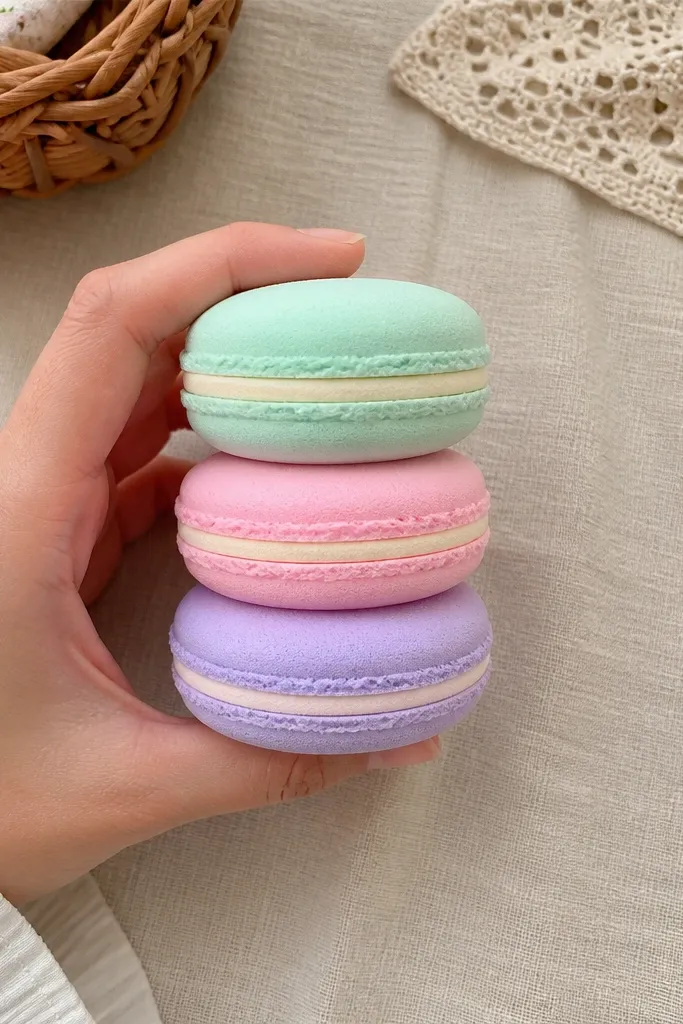
Cut six circles from 200 gsm cardstock, all the same diameter (about 5 cm). Pair them into three macarons, and decorate each top shell with a pastel marker ring plus a slightly darker edge. Add “filling” by cutting a thin inner circle from white or cream paper and gluing it to the top. Glue each macaron top to a bottom circle, leaving a small gap, then insert a thin foam disc and seal. Arrange the three macarons side by side on a small backing card if you want them to sit flat together.
Macarons photograph like candy and they’re easy to keep adorable because each shell is a circle with a clear outline. This trio looks cohesive because you repeat the same size and just change colors. The squishy effect comes from a thin foam layer between front and back so the shells stay puffed. It’s quick because you cut three circles and assemble them as a set.
Skip thisSkip fluffy batting between shells; it makes the macaron look lumpy.
Editor's noteKeep the filling circle centered — off-center filling makes the set look messy fast.
24. Sunflower Petal Squishy With Yellow Center
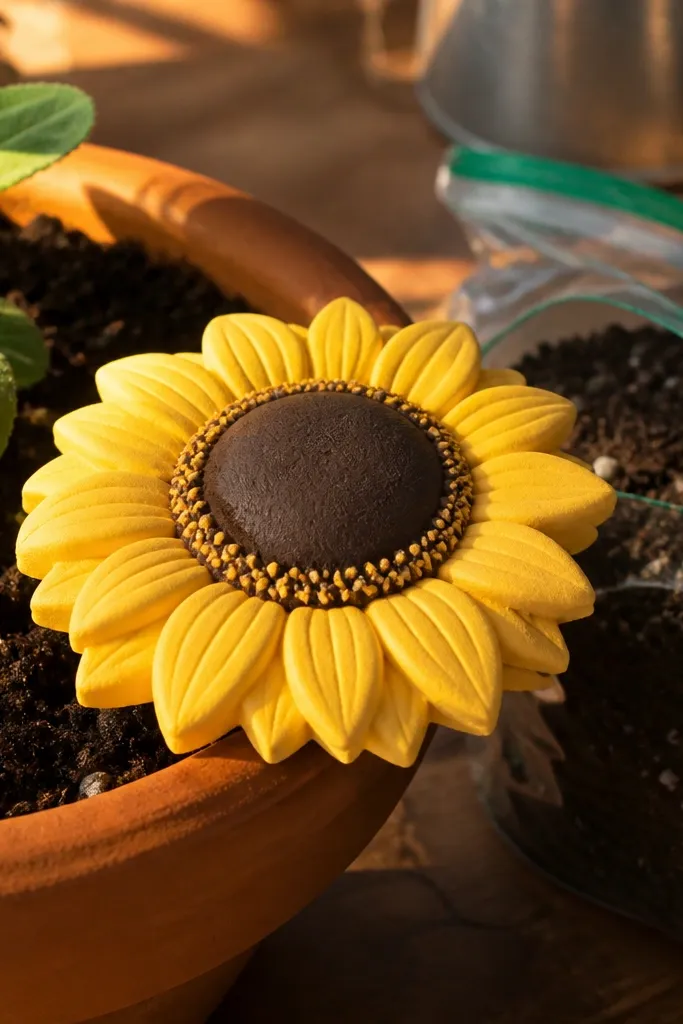
Sunflowers are bright and instantly recognizable, and the squishy makes them feel like a plush toy. The shape is forgiving, and the petals can be cut in batches. You get a strong “photo pop” by using a dark brown center with tiny yellow highlights and keeping the petals clearly layered. This is a quick build because the petals are repeated shapes glued around one base.
Cut two large circles from 200 gsm cardstock for the back and front base. Cut 12-16 petal shapes from yellow paper, then glue them around the front base in a ring, overlapping each petal slightly. Create the seed center by cutting a smaller circle from dark brown paper and adding tiny yellow dots with a marker. Glue the front base to the back base, leaving a small opening at the edge. Insert a thin foam pad and seal the opening. Add a final ring of petals if the center looks too flat.
Make petals slightly different shades of yellow so the flower looks dimensional.
Don’t glue petals only on one layer — thin petals lift and look uneven when squeezed.
25. Green Frog Face Squishy
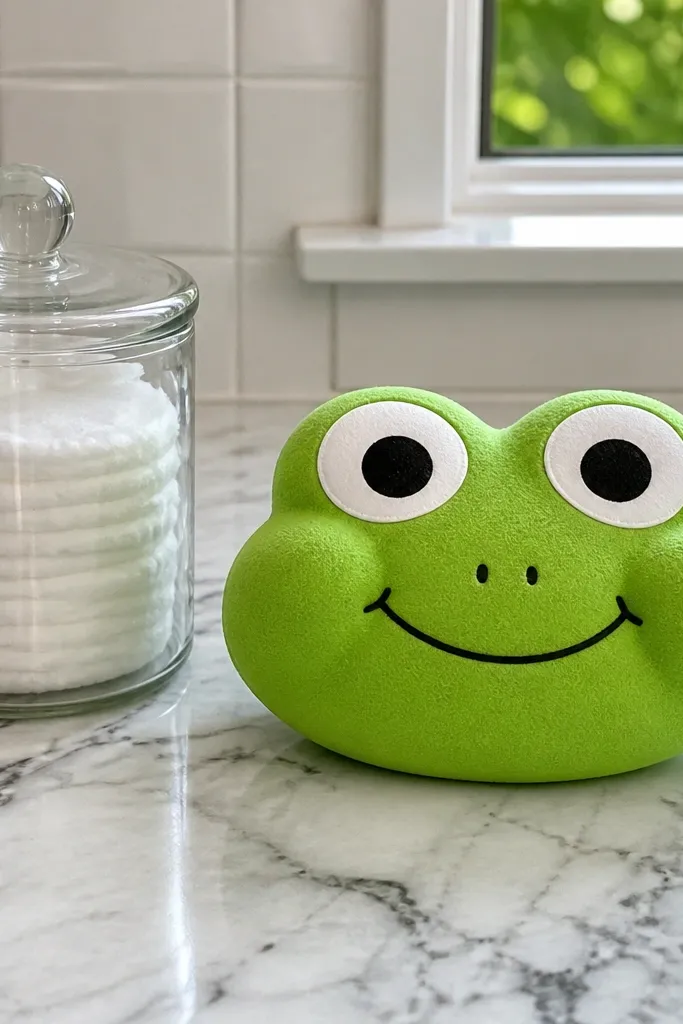
A frog face squishy is a quick win because the face is the whole point and it reads well on camera. The design works because you can build a flat shell with a small foam insert so the cheeks look round without distorting the eyes. Use bright green for the body and white paper for the eyes so it contrasts sharply with your background. It’s fast because you’re making one shape with simple cutouts.
Cut two identical frog head shapes from 200 gsm cardstock. Glue white eye circles onto the front, then add smaller dark green or black pupils in the center. Cut a tiny smile mouth from red or pink paper and glue it in place. Glue the front to the back, leaving a small opening at the bottom. Insert a thin foam pad into the cheeks area and seal the opening with glue and tape. Outline the head with a darker green marker for crisp edges.
Place the eyes slightly higher than you think — it makes the frog look cute instead of sleepy.
Skip tiny glue strings around the eyes; they show as messy lines.
26. Boba Tea Cup Squishy With Straw
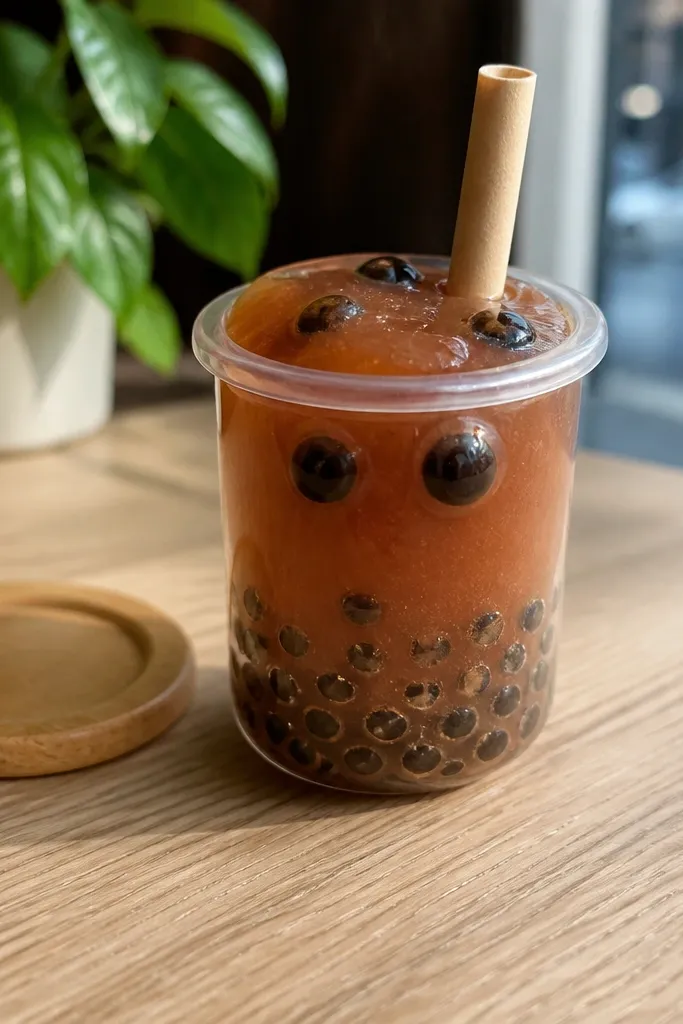
Cut two cup panels from 200 gsm cardstock with a flat base, then fold and glue side seams to create a pocket. Add a tea layer by gluing a semi-oval of light brown or beige paper onto the front panel. Cut tiny circles from dark brown paper for boba pearls and glue them on top of the tea layer. Stuff lightly with a thin foam sheet, then close the top with a cardstock cap. Attach a straw by gluing a thin paper strip at an angle and drawing a straw highlight line.
Boba cups are photogenic because you get a clear cup silhouette and visible pearls. Keep it quick by building a simple cup pocket and using foam as the tea surface so the pearls stay embedded without falling. The straw detail makes it look instantly like boba, even if the rest is simple. This is a great “tonight” project because it’s mostly cutting and a few decorations.
Skip thisDon’t use heavy glitter on pearls; it sheds and looks messy.
Editor's noteMake pearls a little irregular — perfect dots look like confetti in photos.
27. Starry Night Cat Bed Squishy
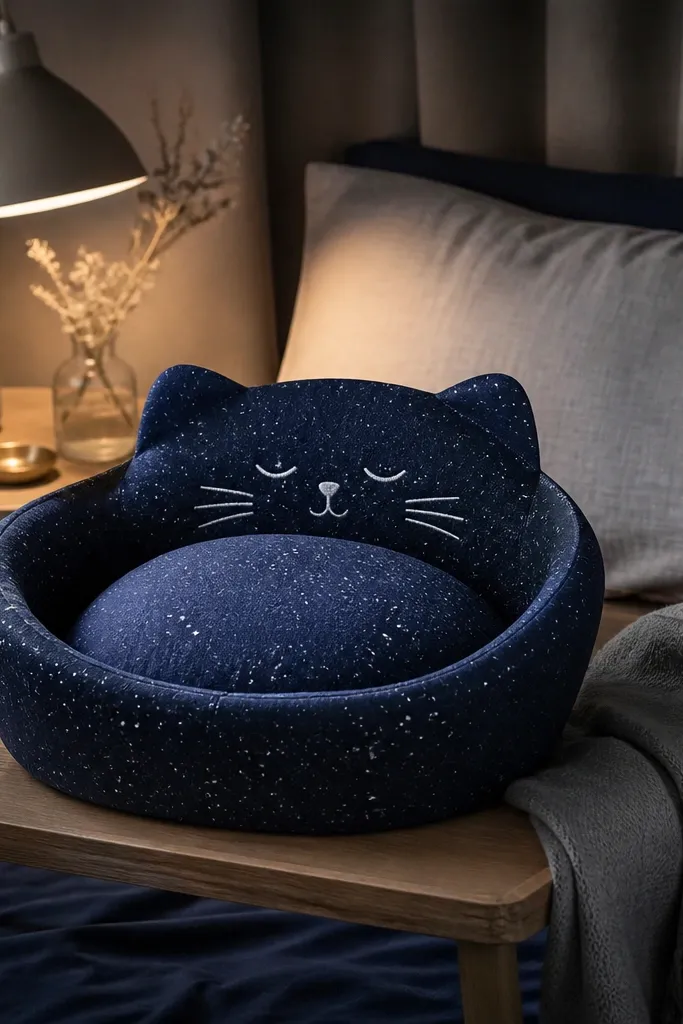
This one looks like a mini decor scene, and it’s photogenic because the bed shape frames the cat face. The star pattern gives texture without needing lots of color, and the squishy makes the “bed” look soft. Build it with a shallow foam insert so it keeps a cushion shape. It’s a quick project because it’s basically two bed panels plus a few cutout details.
Cut two cat-bed outlines from 200 gsm cardstock. Decorate the front panel with a star pattern by stamping or drawing small stars using a white gel pen. Cut a simple cat face from paper (ears, eyes, nose, mouth) and glue it onto the center. Glue the front and back together, leaving a small opening on the side. Insert a shallow foam pad, then seal the opening. Add a thin outline with a marker to make the bed edge crisp.
Use a foam pad that matches the bed depth so the sides don’t bulge.
Skip thick stuffing — it turns the bed into a lumpy ball.
28. Cherry Blossom Fan Squishy
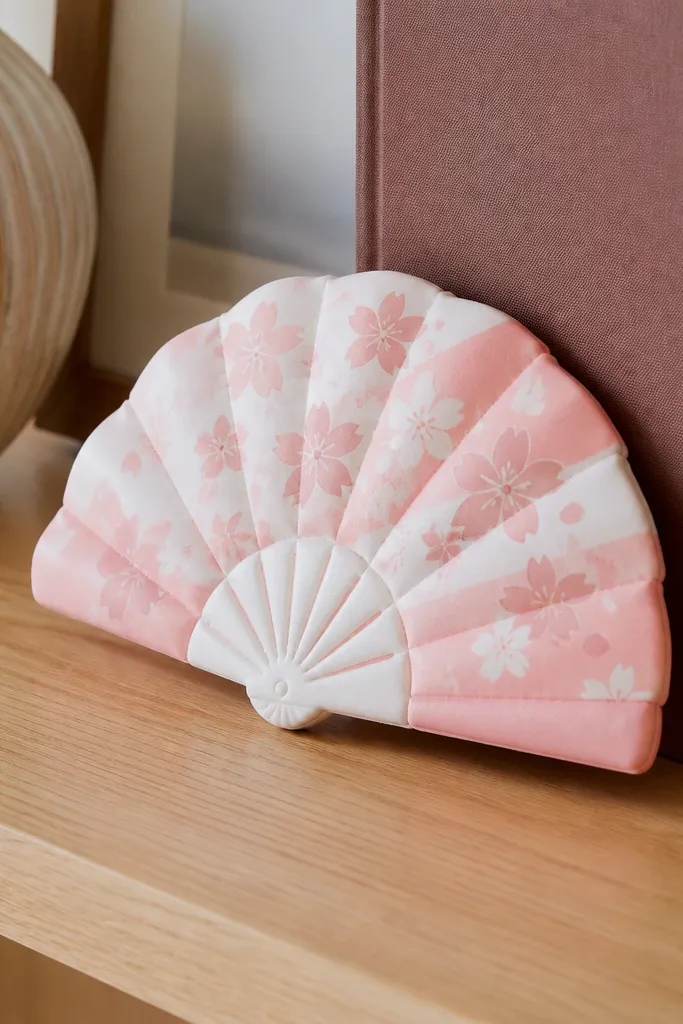
Cut a fan base from cardstock and fold it accordion-style with 1 cm spacing. Cut 10-14 petal shapes from pink paper and glue them along the top edge of the folded fan. Add a small center circle in pale yellow for the blossom. Glue a second folded fan base behind the first to trap a thin foam insert inside. Seal the edges, then draw branch lines with a fine brown marker.
A fan-shaped squishy looks delicate and pretty, and it’s a great change from the usual food/cute animal designs. The petal pattern gives you a clean aesthetic, and the squish makes it feel like a plush accessory. Build it with a flexible fold structure and a thin foam layer so it doesn’t tear when you squeeze. This is a fast build because you can cut petals in a repeat and glue them to the fan ribs.
Skip thisDon’t use very flimsy paper for the fan base or it buckles under stuffing.
Editor's noteFold ribs with a bone folder so the fan holds its shape when you press it.
29. Mini Ice Cream Cone With Waffle Texture
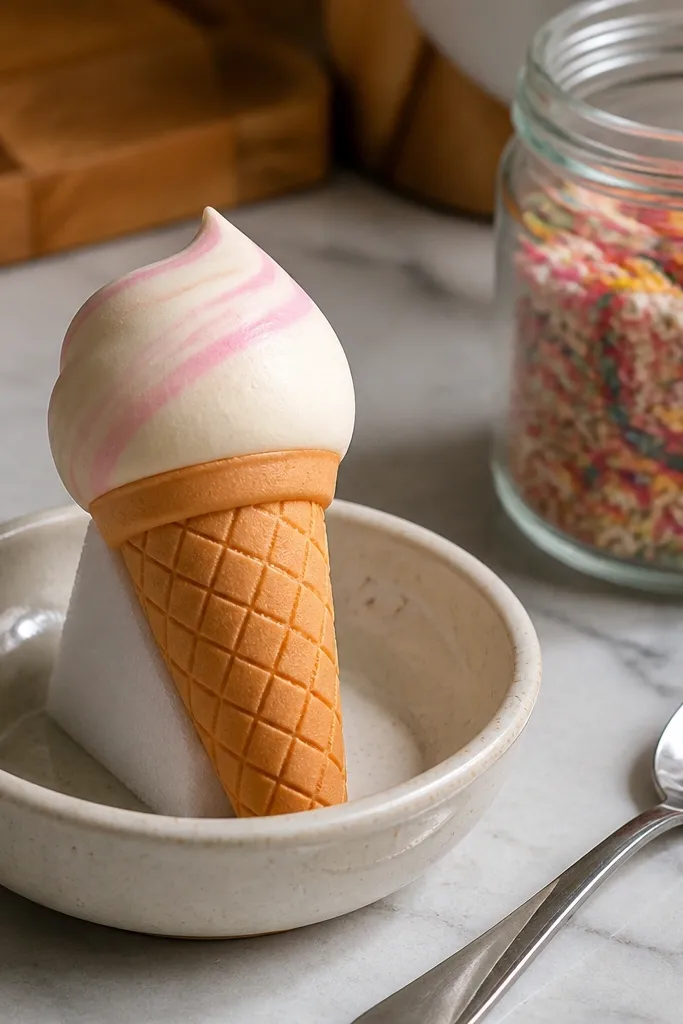
Cut two cone shells from cardstock and glue into a cone pocket. Create waffle texture by drawing diagonal lines and cross-hatching with a brown marker on the inside front panel before assembly. Add the scoop by gluing two overlapping circles of pastel paper on the front, then insert a thin foam wedge behind them. Seal the cone seam edges fully and add a small “drip” line with a darker color marker. Outline the scoop edge with a fine pen.
Ice cream cones are the easiest way to get “cute and photogenic” with minimal detail. The waffle cone texture is the look-maker, and you can fake it fast with marker grid lines. The scoop stays smooth when you use a foam wedge, and the cone shape remains recognizable even when squeezed. This is a good tonight project because you build a shell pocket and finish with a few lines.
Skip thisSkip overcomplicated scoop designs; two-tone looks better at small sizes.
Editor's noteUse a lighter brown for the base and dark brown only for grid lines — it reads like texture, not mud.
30. Kawaii Watermelon Slice Squishy
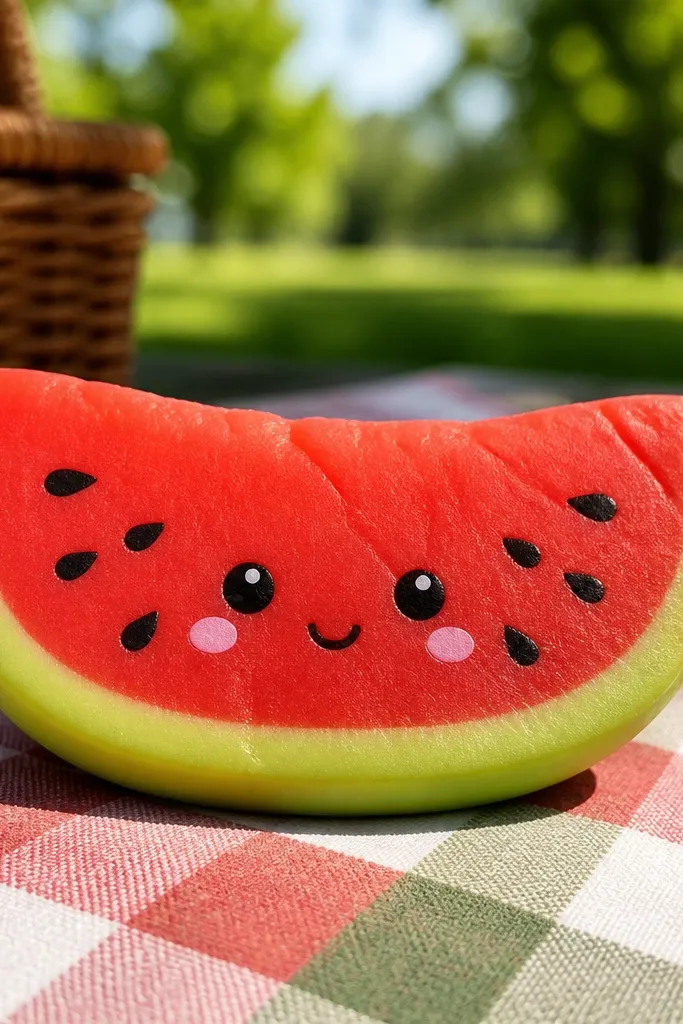
Cut two watermelon slice shapes from 200 gsm cardstock. On the front panel, glue a green rind strip along the outer edge, then add a red flesh layer in the center and a lighter pink highlight strip. Glue the two halves together, leaving a small opening at the back. Insert a thin foam wedge in the center and seal the opening. Draw a simple face with black marker and add tiny white seed dots using white gel pen.
Watermelon is bright, and the rind/flesh contrast makes it instantly recognizable in photos. The squishy stays cute if you build the slice with a thicker rind edge and a thin stuffing center. Add a face on the red flesh for personality without clutter. This is a fast build because the slice shape is simple and you can layer three paper tones.
Skip thisDon’t flood the seeds with glue; they pop off and look messy.
Editor's noteMake rind thickness consistent around the edge so the slice looks even.



