
1. Cream Grid With 3D Photo Stickers
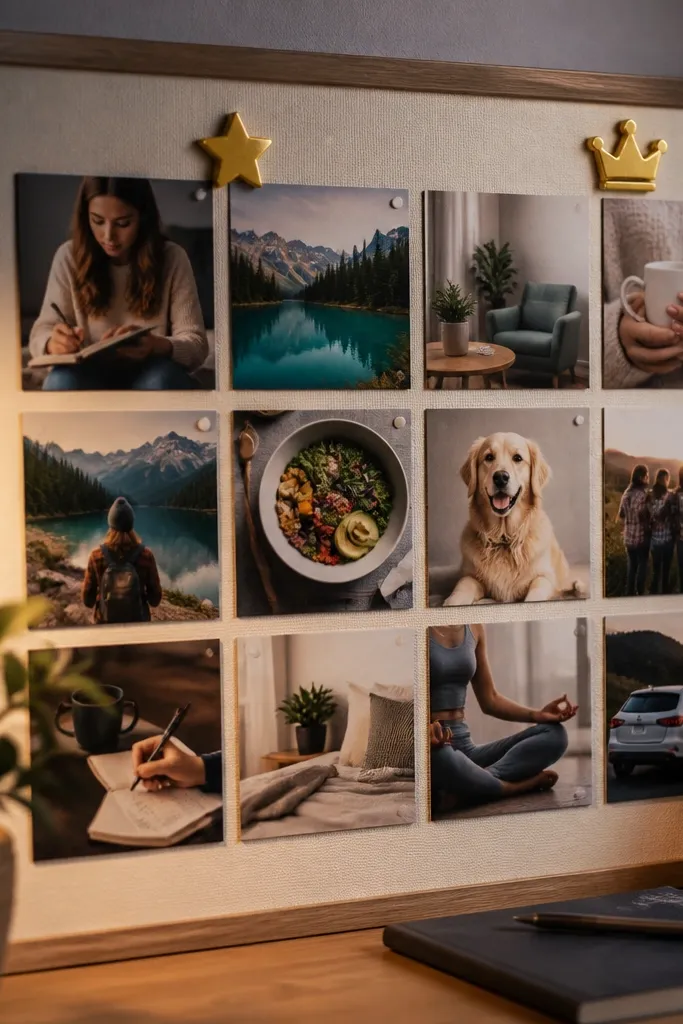
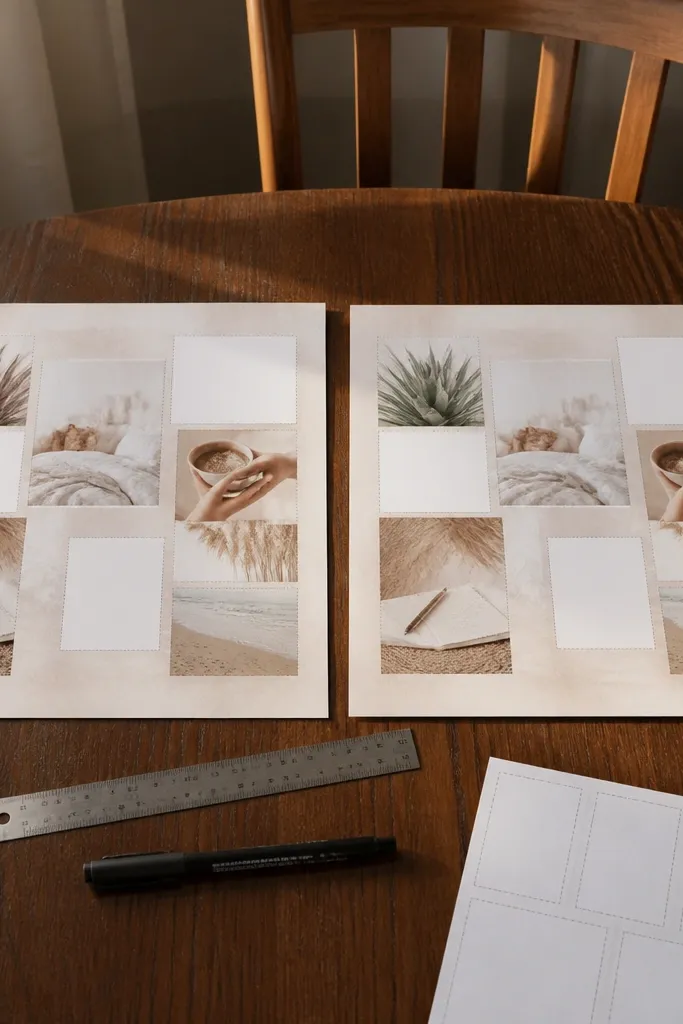
This layout is clean and camera-friendly because every photo sits on the same visual plane. The cream base softens bright colors, so your friends' goals look calmer and more “gallery” than “paper craft.” Add a few raised stickers or foam dots under icons like a star, a crown, or a location pin to create depth that reads well in pictures. It’s also fast: you’re basically printing a grid and placing a handful of dimensional accents.
Start by designing a 3x3 grid on one 8.5x11 page using a cream background. Print the grid on matte photo paper, then trim the edges with a straight paper trimmer for crisp borders. Next, add foam dots under only 3-5 elements (not every photo) so the raised parts show up in photos without making the page bulky. Finish by pressing the whole sheet flat under a book for 10 minutes before mounting.
Use foam dots that are 1-2 mm thick; too tall looks uneven in close-up photos.
Don’t mix glossy and matte prints on the same board — the shine difference makes the layout look off.
2. Dusty Rose Theme With Ribbon Photo Corners
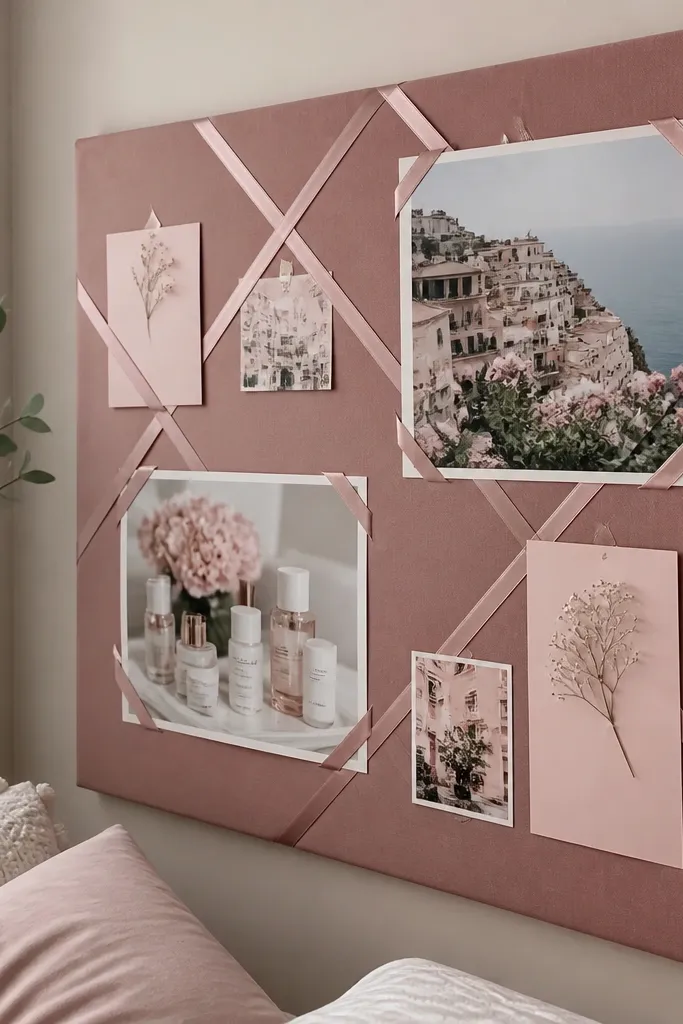
Dusty rose makes vision boards feel soft and romantic without turning childish. This look is photogenic because the ribbon corners create a repeating pattern — your eye knows where to land. It’s great for friends who like “pretty but practical” goals like travel plans, skincare routines, or relationship affirmations. You get a gentle frame effect around each photo, which makes the whole board look intentional even when you’re printing quickly.
Print your photo collage on 8.5x11 with a dusty rose background and generous white margins around each image. Cut a simple border mat from white cardstock that’s about 1 inch larger than your print, then center the print onto the mat. Cut thin ribbon strips (about 1/4 inch wide) and tape them underneath each corner of 4-6 photos using double-sided tape. Finally, mount the mat onto a corkboard or foam board using spray adhesive or tape strips.
Editor's noteUse ribbon in one color only (blush, not mixed tones) so the pattern stays consistent.
Skip thisSkip hot glue for the corners; it can warp paper and shows uneven texture in photos.
3. Charcoal Minimal Board With White Label Blocks
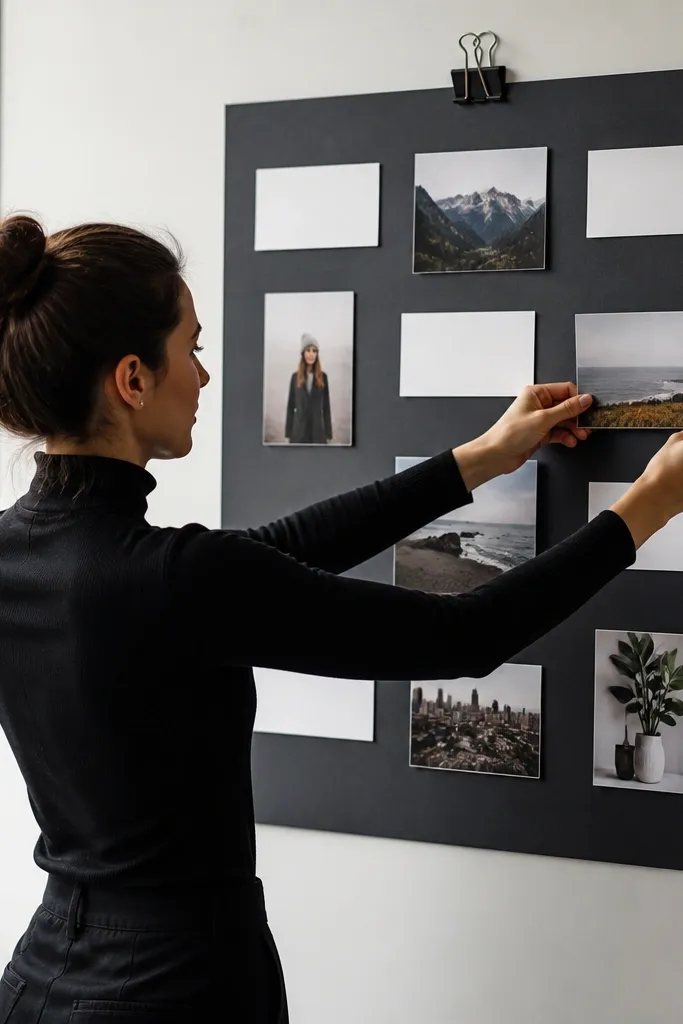
If your friends like a clean, modern vibe, charcoal with white label blocks is the easiest win. The contrast makes your images and text readable, which matters because vision boards often get photographed in dim rooms. This layout also helps you avoid visual clutter: you’re using blocks to organize goals instead of stacking random cutouts. It’s quick because you’re printing a simple design and adding only a few images.
Design one 8.5x11 page with a charcoal background and 6-8 white rounded rectangles. Put one short goal per rectangle (max 2 lines), then add 3-4 larger images spaced between the blocks. Print on matte photo paper, let it dry flat, then trim with a paper trimmer. Mount the print on black foam board or a thick cardstock backing, and seal the edges with a thin tape strip so it lies flat.
Editor's noteKeep font sizes bold: large enough to read from 3 feet away when someone takes a photo.
Skip thisDon’t use thin, light-gray text on charcoal; it disappears in phone camera exposure.
4. Sky Blue Travel Board With Ticket Stub Borders
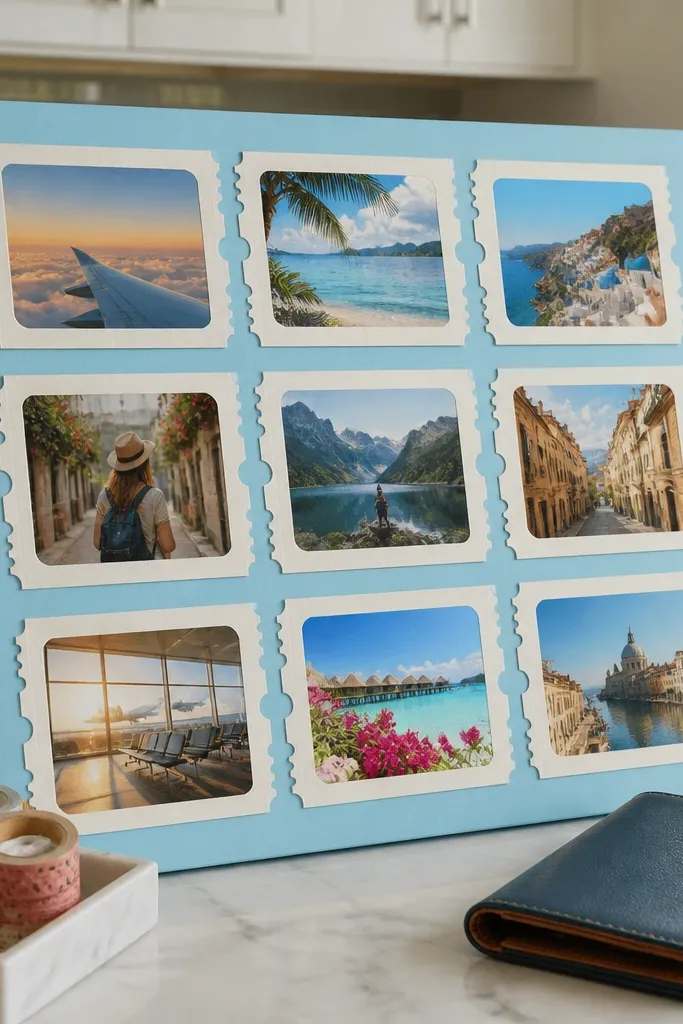
This one looks like a vacation scrapbook without the messy cutting. Ticket stub borders give you a fun, recognizable frame, and sky blue instantly makes travel goals feel airy. It’s perfect for friends planning trips, learning a language, or building a “weekend routine” they actually stick to. Because the border repeats, the board photographs well even if the images vary.
Create a travel collage layout on 8.5x11 with a sky blue background. Add 4 ticket-stub shaped frames around key images, leaving space for a short destination label under each. Print on matte photo paper, then cut out only the ticket borders (leave the main collage intact). Back it with white cardstock and add a thin strip of washi tape along one edge like a “tucked” ticket.
Editor's noteUse two fonts only: one for destinations and one for a short tagline so it looks designed.
Skip thisDon’t cut tiny ticket notches too small; they tear and look jagged in photos.
5. Sunny Yellow Collage With Rounded Photo Frames
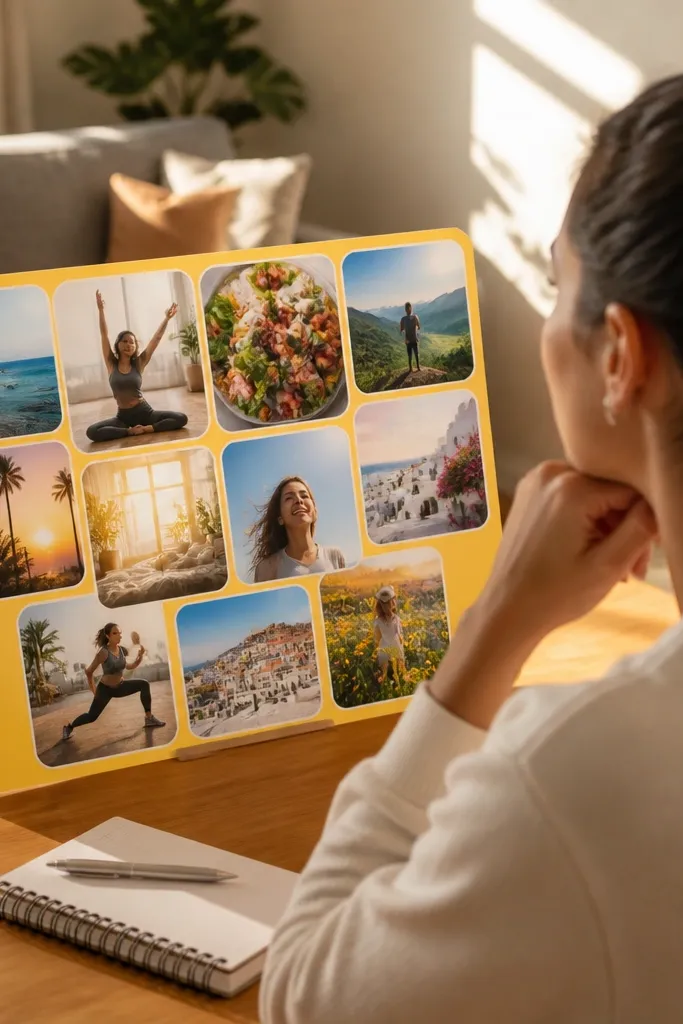
Sunny yellow makes vision boards feel upbeat, and rounded photo frames keep it soft instead of harsh. This look is especially good for friends who want energy goals: fitness milestones, hobby progress, or “more calls with friends” prompts. The rounded corners also hide slight printing imperfections because the shape reads stronger than the edges. It’s quick because you’re repeating the same frame style across the page.
Pick a sunny yellow background close to #F7D44A style tones (not pale cream). Design an 8.5x11 page with 5-7 rounded rectangle frames and place one photo or icon inside each. Print on matte photo paper, then trim straight and mount on a kraft paper backing for contrast. Add 2-3 small doodle icons (a sun, a lightning bolt, a leaf) printed on the same paper and placed with glue sticks.
Editor's noteUse kraft backing if your yellow looks too bright; it tones it down instantly.
Skip thisSkip glossy laminating if you plan to photograph it indoors; glare ruins the colors.
6. Emerald Ribbon Board With Vertical Photo Strips
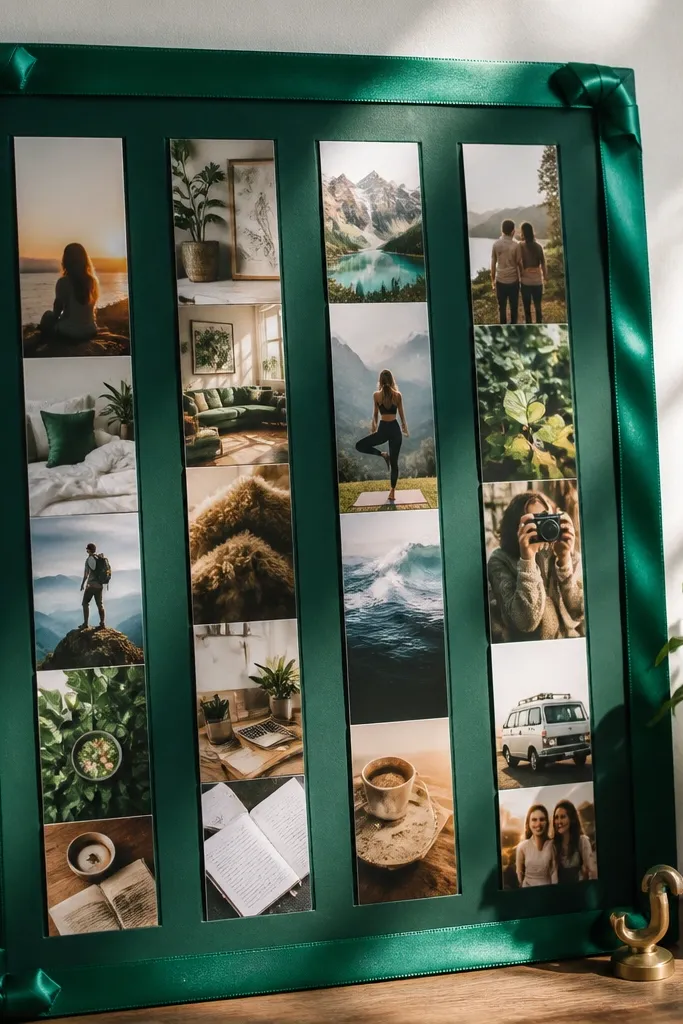
Emerald green gives a “premium” look without extra supplies. Vertical photo strips create a tall rhythm that looks great in phone screenshots and wall photos. This layout works well for friends who want a single theme: home decor goals, career steps, or a “one room, one month” plan. The ribbon border makes it feel wrapped and styled, even when the collage is simple.
Print a vertical-strip collage on 8.5x11 with an off-white background. Use 4-6 tall photo strips, each with a thin white border inside the design. After printing on matte photo paper, trim and mount to a backing board. Cut a ribbon border strip (about 1 inch wide folded) and tape it around the edges using double-sided tape so it stays flat.
Editor's noteFold the ribbon edges neatly and tape the fold — it reads cleaner than raw ribbon ends.
Skip thisDon’t cover the corners with ribbon too thick; it makes the board wobble when hung.
7. Black-and-White Photo Board With One Red Goal Stamp
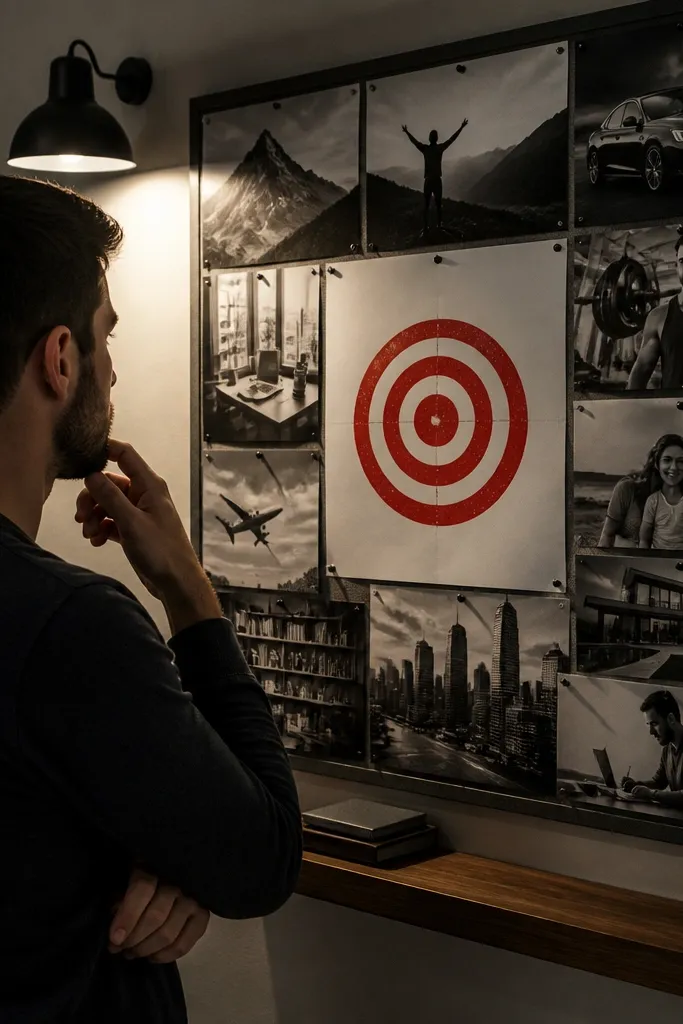
This is the fastest “wow” layout because it uses a strict color rule. Everything is black and white except one red goal stamp, which makes your board look graphic and intentional. It’s perfect for friends who like bold statements: new job, health reset, or “start the project” goals. If you want quick and easy vision board ideas pictures that look high-end, this is the move.
Choose 6-8 photos and convert them to black and white in your design tool before layout. Create an 8.5x11 page with a white background and place the photos in a tight grid. Add one red stamp-shaped label (circle or oval) with a single word goal like “FOCUS” or “MOVE.” Print on matte photo paper, then mount on white cardstock and seal with a thin clear tape edge.
Editor's notePick one red shade and stick to it; keep it closer to #D62828 than bright neon.
Skip thisDon’t sprinkle red all over; the layout loses the graphic punch.
8. Pastel Rainbow Corner Frames
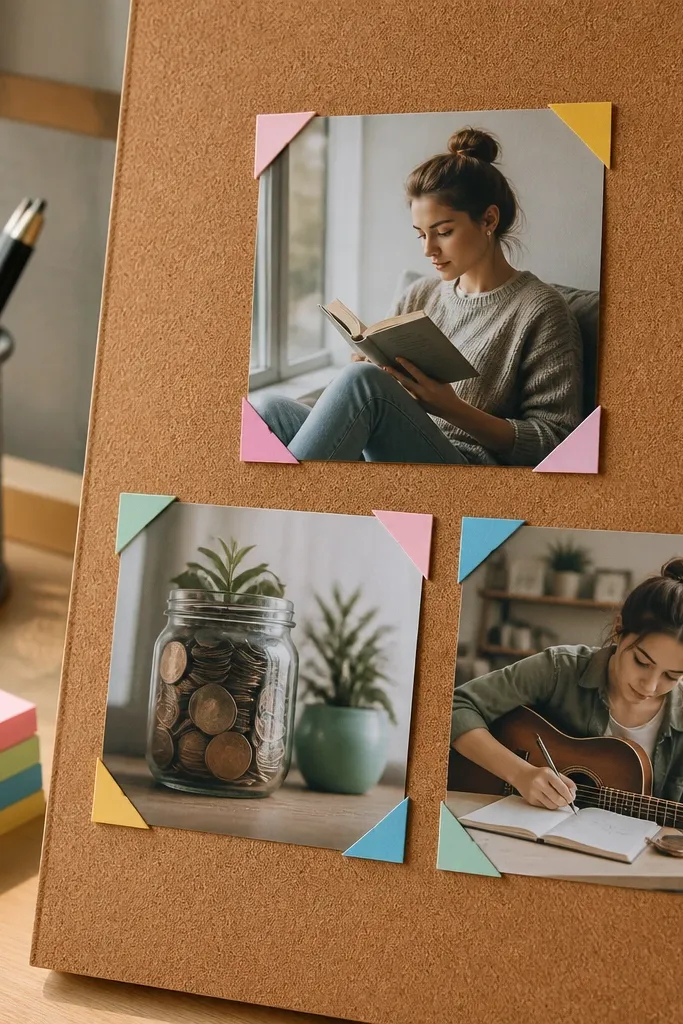
Rainbow corner frames look playful and photogenic because the color sits where the eye already focuses — the corners. This layout is ideal for friends who want a fun, low-pressure board for goals like reading more, saving money, or learning a skill. You get a strong design structure while still letting each photo feel personal. It’s quick because you print one consistent template and swap in different images.
Design an 8.5x11 board with a clean white background and 4 corner frames in pastel colors (soft pink, mint, lavender, pale yellow). Put one small goal icon or photo in each corner frame and leave the center open for a main photo. Print on matte photo paper, then trim and mount on a light gray backing. Add a thin strip of washi tape along the bottom edge for a “finished scrapbook” look.
Use consistent icon size in all four corners so the board looks balanced.
Avoid too many icons; corners should feel curated, not crowded.
9. Photo Strip Timeline With Month Labels
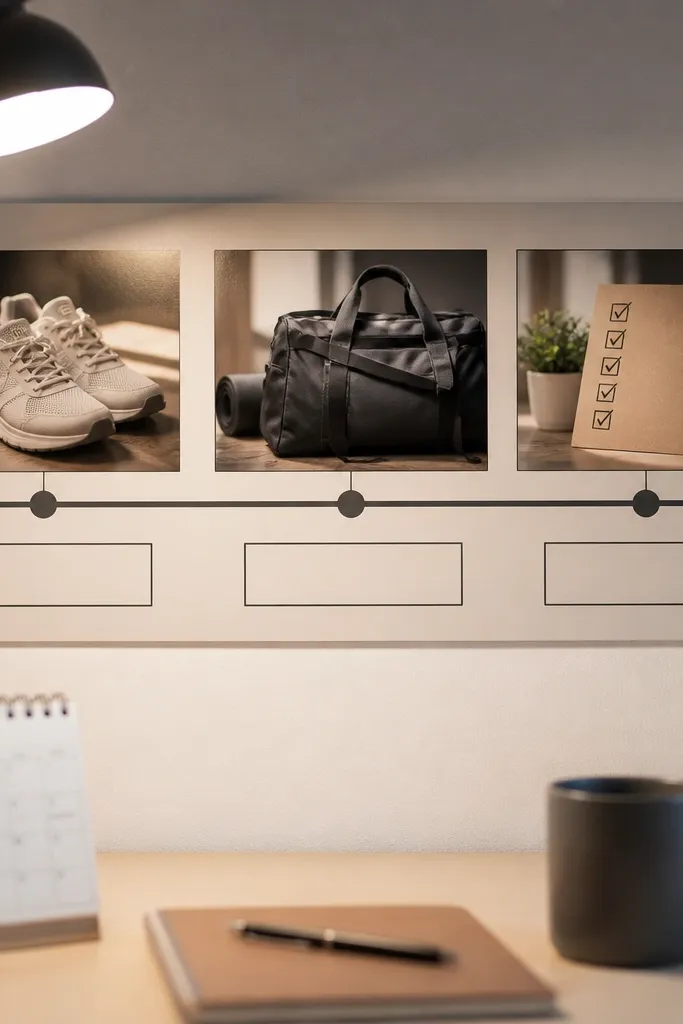
A timeline board looks smart in photos because it has a clear structure. This layout is perfect for friends planning a 3-month or 6-month goal arc: fitness milestones, learning progress, or a “save for a trip” plan. Month labels make the board feel actionable, not just decorative. It’s quick because you’re printing a simple strip design and adding only a few photo swaps.
Create a horizontal 8.5x11 template with 3 or 4 photo strips across the page. Add month labels under each strip (example: Jan, Feb, Mar, Apr) and keep the text small but bold. Print on matte photo paper, then cut out the timeline strips only if you want raised sections using foam tape. Mount to a corkboard and pin the printed strip sections with two binder clips for a stylish “timeline” look.
Editor's noteUse foam tape under only the labels, not the photos, for a cleaner photo read.
Skip thisDon’t make the month labels tiny; phone cameras struggle with small text.
10. Wall Frame Look With White Mat and Photo Clusters
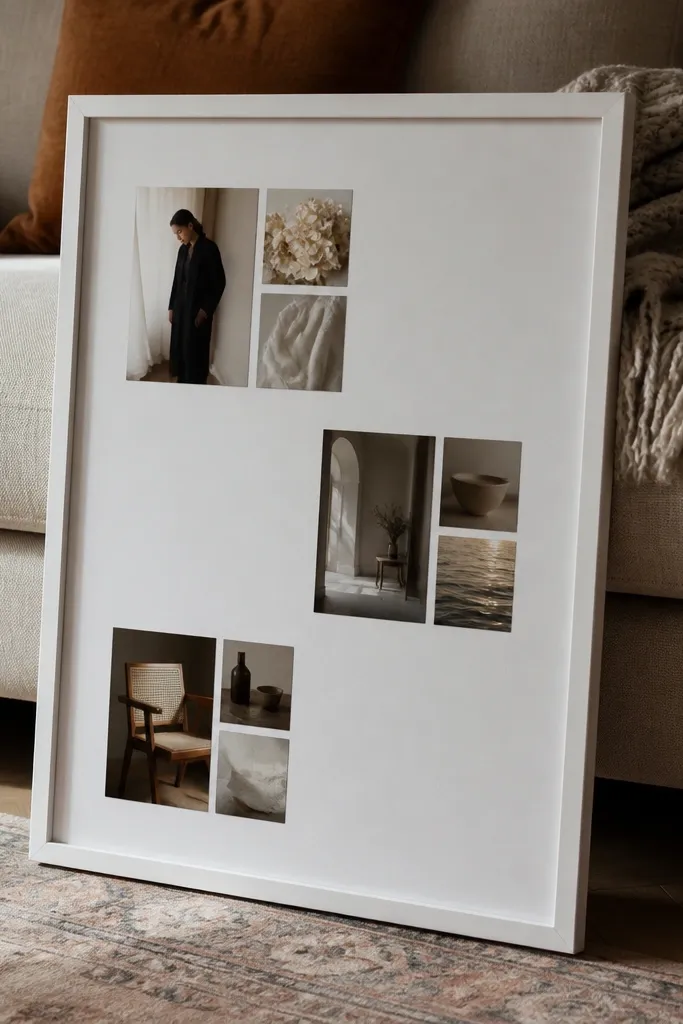
If your friends want their vision board to look like decor, this is the layout. The white mat makes it look like a real framed piece, even if you’re using a print and a board. Photo clusters add personality without chaos: you group 2-3 images together and leave space around them. This look is great for living rooms, hallways, and dorms where the board should blend in.
Print a collage on 8.5x11 with transparent-feeling margins (leave at least 3/4 inch around the edges in your design). Cut a white cardstock mat that’s about 1 inch larger than the print on each side. Center the print inside the mat and tape it down with double-sided tape. Add two small clusters of 2-3 images within the collage layout, and finish by mounting the whole mat to foam board or a thin frame backing.
Editor's noteUse a mat window that’s slightly smaller than you think; it looks sharper in photos.
Skip thisSkip flimsy paper backing; it warps and makes corners curl when photographed.
11. Corkboard Pins With Printed Photo Tags
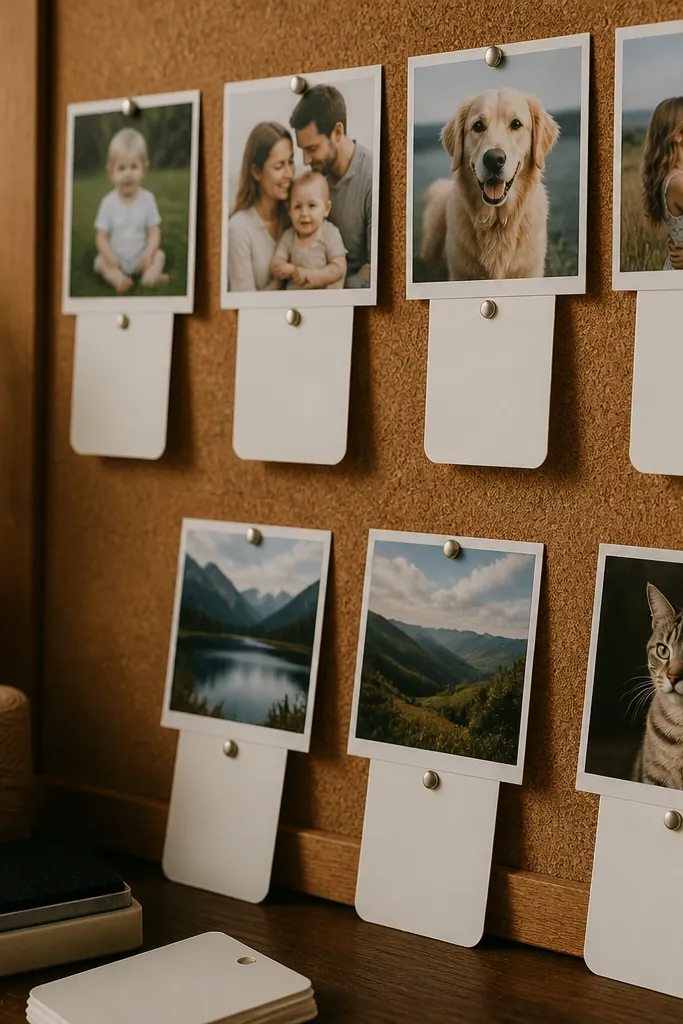
Corkboard pin boards are photogenic because they look “real” — like you’re building it in the moment. Instead of gluing everything flat, you print tags and photos, then pin them for a layered look. This works best for friends who like change: swap photos as goals evolve without redoing the whole board. It also hides minor print imperfections because the pins and tag layers add texture.
Print 10-12 small photo tags on matte photo paper at about 2x3 inches each. Cut them out with a straight edge and round the corners with a corner punch. On a corkboard, place a simple grid with light pencil marks, then pin the tags with straight push pins. Add 1-2 longer quote strips printed at 1x6 inches and pin them vertically for a stronger composition.
Write the same style captions on all tags using one pen color; consistency makes it look designed.
Don’t overload pins near the top; it makes the board look top-heavy on camera.
12. Acrylic-Feel Look With Clear Tape Borders
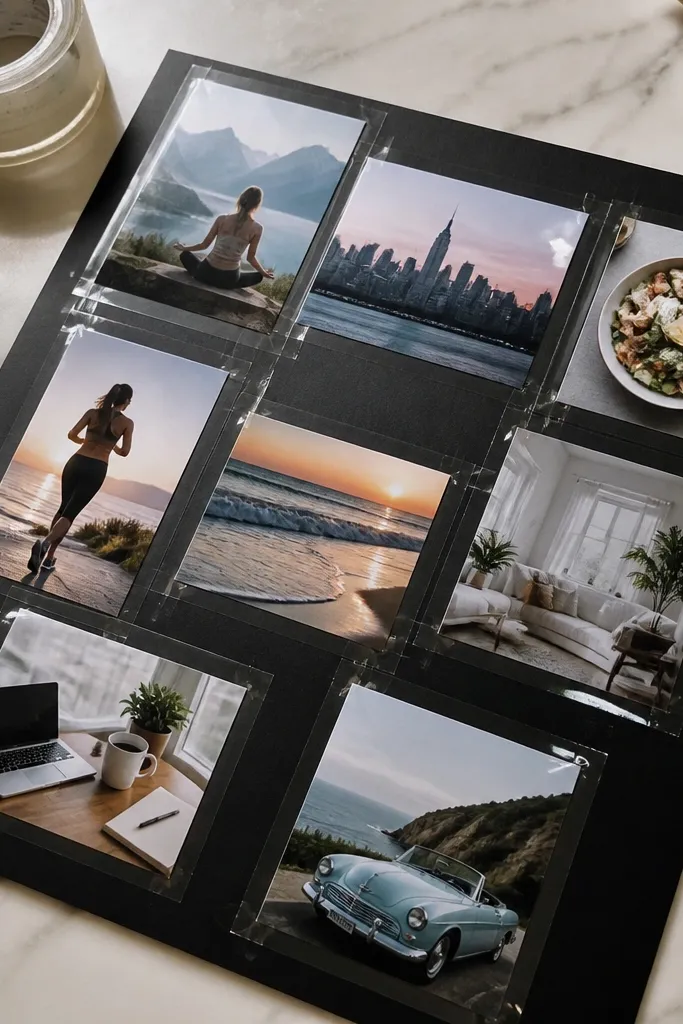
This creates a “glass” border vibe without actual acrylic. Clear tape borders add shine that reads well in bright light, and it makes the printed photos look protected and polished. It’s a good option for friends who want a sleek board that doesn’t look handmade-crafty. The trick is to use one tape style and border width so the result stays clean.
Print an 8.5x11 collage with a white or light background and leave a consistent margin around the edges. Mount the print to a rigid backing like foam board. Cut clear tape strips in equal widths (about 1/2 inch) and apply them as a border and as thin dividers between 2-3 photo sections. Press firmly with a ruler to avoid bubbles, then trim tape ends with a craft knife.
Editor's noteApply tape when the print is fully dry and flat; heat from handling can cause minor curling.
Skip thisAvoid layering tape too many times in one spot; it creates thick ridges that show in photos.
13. Handwritten-Style Quote Blocks With Photo Backdrop
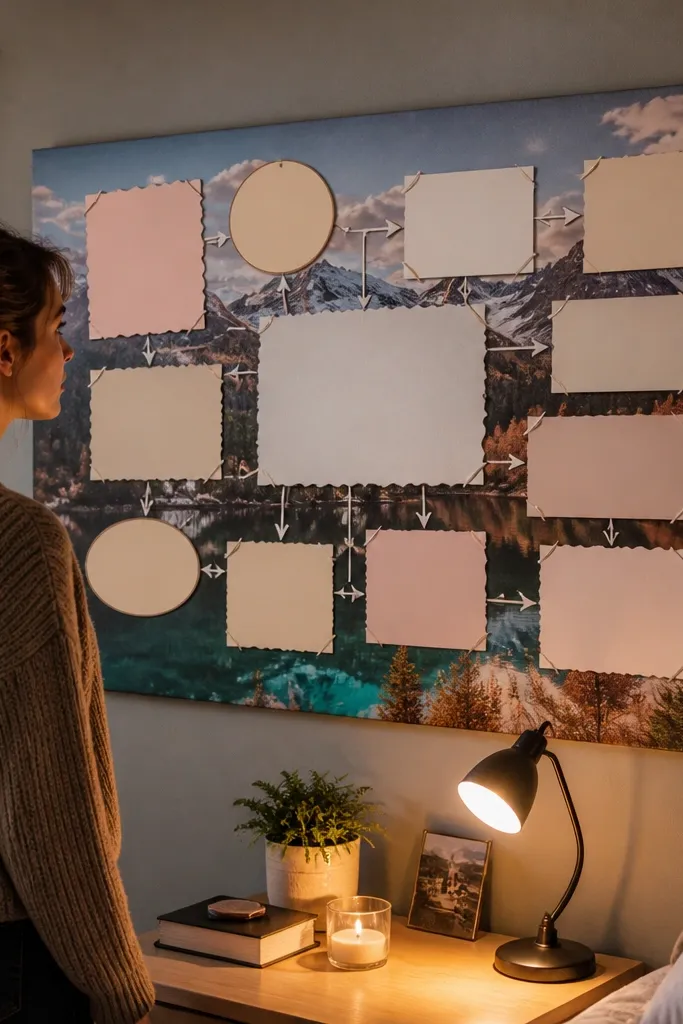
This layout looks personal because quote blocks feel like notes, but it stays structured. A large photo backdrop anchors the board, while the quote blocks give the eye a clear path. It’s great for friends who want encouragement goals: confidence, routines, or “start small” reminders. You get quick and easy vision board ideas pictures that still feel meaningful because the text is laid out cleanly.
Pick one hero image for the background and place it full-width across the center of an 8.5x11 page. Add 4-6 white rectangles around it, each with a short quote line using a handwritten-style font. Print on matte photo paper, then trim the rectangles carefully if your design tool leaves them as separate shapes. Mount to a backing board and place two rectangles slightly overlapping the hero photo for a layered look.
Keep each quote to 3-6 words so it stays readable in phone photos.
Don’t use long paragraphs; they turn into visual noise fast.
14. Polaroid Stack Look With White Margins
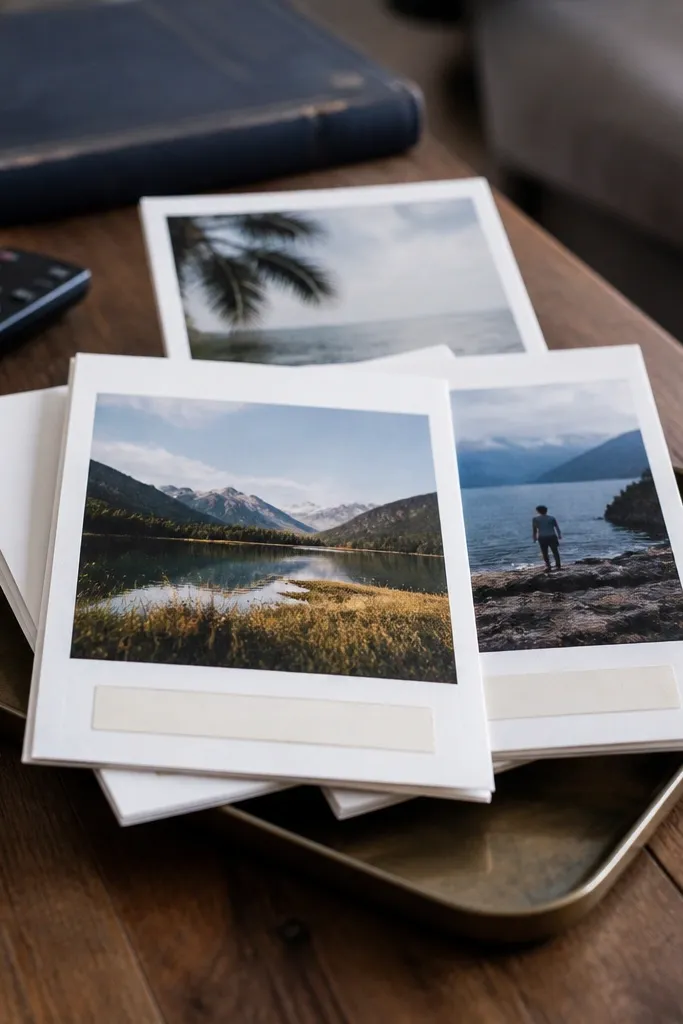
Polaroid stacks are pure photogenic charm, and they’re also simple to print because the template is repeatable. Thick white margins make the photos feel tactile, and small captions under each “photo” keep it organized. This works for friends who love memories with goals attached: weekend plans, hobby progress, or “document the journey” prompts. It’s quick because you’re printing multiple identical photo frames and swapping pictures.
Design an 8.5x11 page with 6 Polaroid-style frames sized about 3x4 inches each, with thick white margins. Add one short caption line under each frame using the same font size. Print on matte photo paper, then cut out each frame with a clean blade. Stack them on a backing board with craft foam or thin paper slips under two of the frames for a slight lift.
Vary the rotation by 2-5 degrees only; big angles look messy instead of intentional.
Don’t use glossy paper for Polaroid stacks; the glare fights the white margins.
15. Monochrome Shapes With One Gold Foil Star
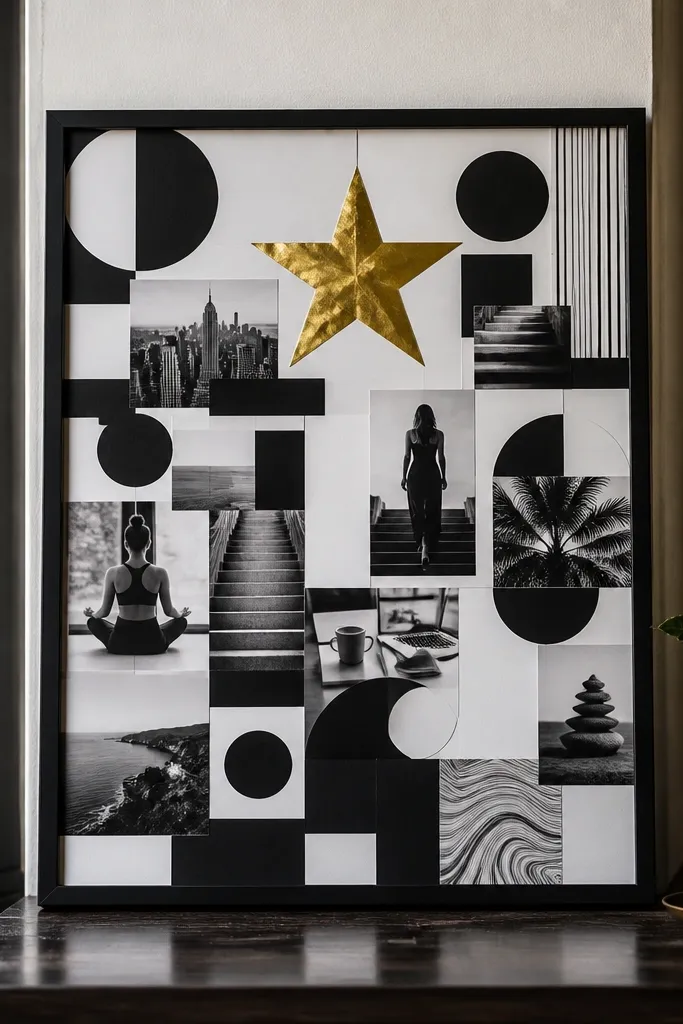
This is a graphic, stylish board that looks like it belongs in a frame. Monochrome shapes keep everything calm, and one gold star gives you a focal point that pops in photos. It’s ideal for friends who want a “focus” board: one main objective, a few supporting goals, and a clean visual system. You’re also using a single accent material, so the board stays cohesive even when the images change.
Create a monochrome layout on 8.5x11 using black, white, and gray shapes around 4-6 photos. Leave a large empty area so the gold star can stand out. Print the monochrome layout on matte photo paper, then cut out the star area or leave a blank spot. Add a gold foil star sticker or cut a small star from gold cardstock and place it on top with craft glue for crisp edges.
Editor's noteChoose one gold tone and keep it small; a tiny star looks more premium than a big one.
Skip thisDon’t add multiple metallic accents; it turns the board into a craft project.



