
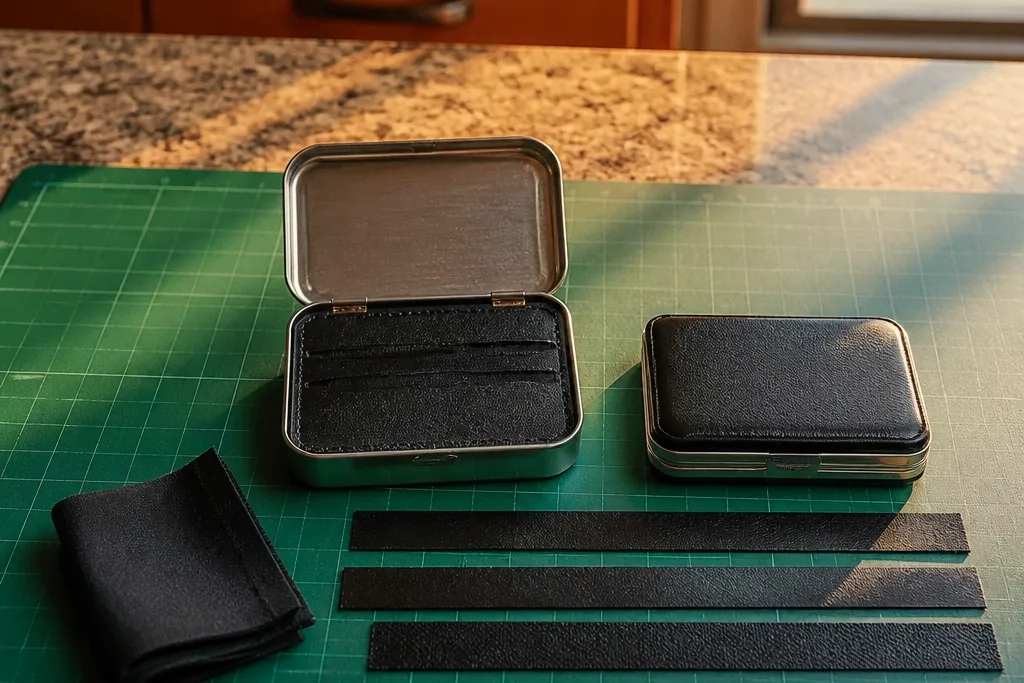
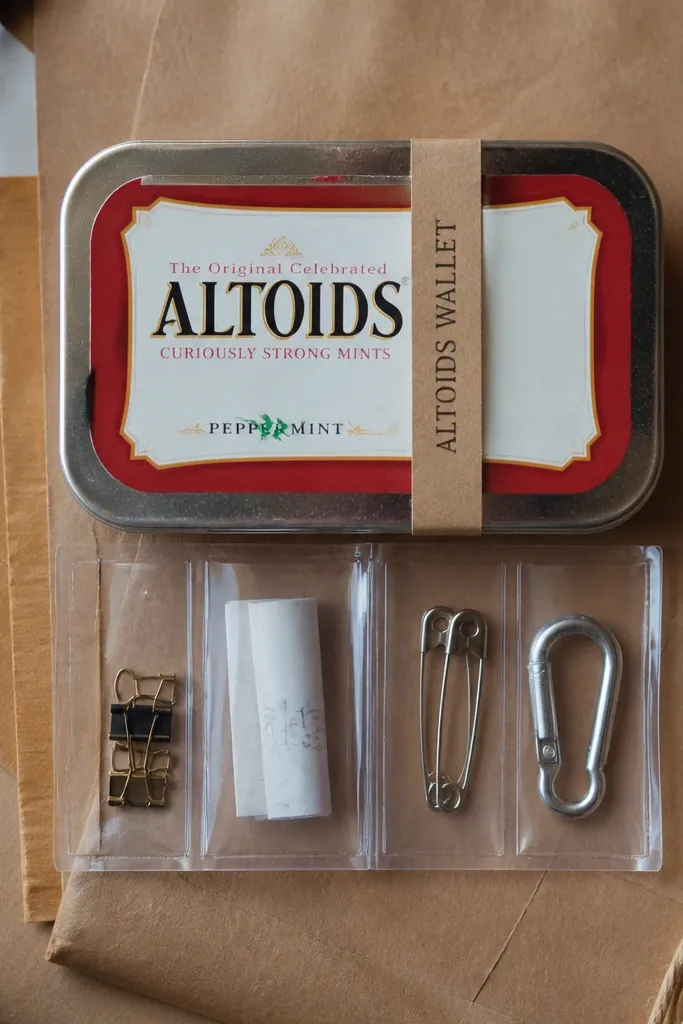
1. Black Vinyl Frame With Red Stitch Look
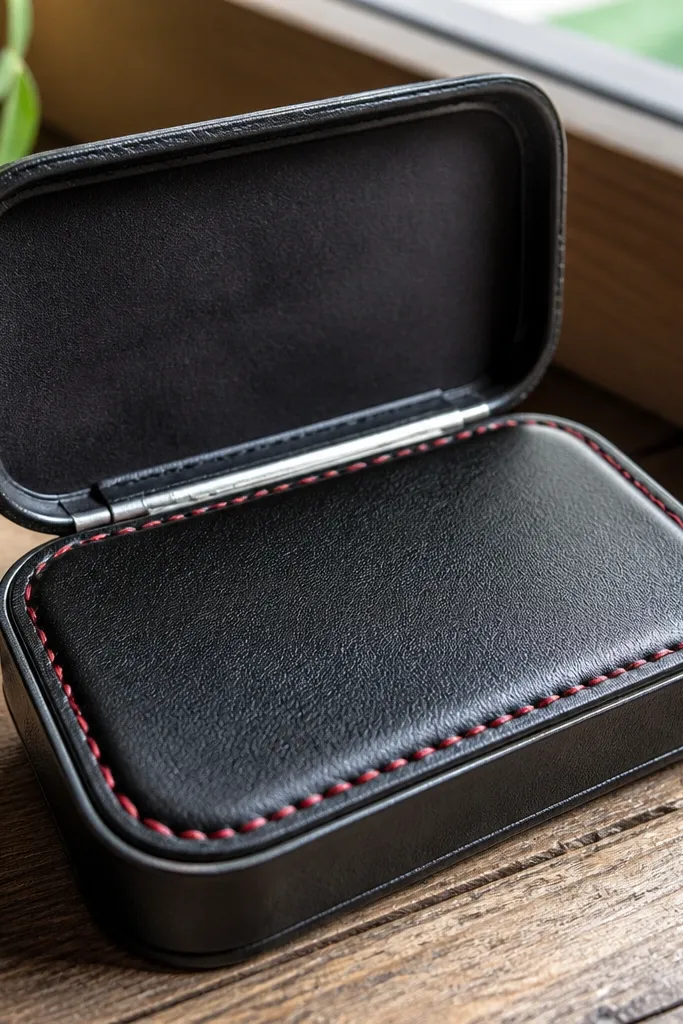
This one is for the clean, graphic look. Black vinyl gives you a smooth, even surface that photographs well because it reflects light without looking shiny or cheap. The red “stitch” line is what makes it feel designed instead of plain — you’re adding a controlled accent, not decoration everywhere. Inside, you keep the lining simple so the front stays the star. Skill level is beginner-friendly, and the build time is quick because vinyl cuts clean and doesn’t fray.
Start by tracing the tin lid and base onto black vinyl, then cut two matching panels with a 2-3 mm margin for edge wrapping. Spread a thin layer of contact cement on the tin and the vinyl, let it tack, then press the vinyl down starting at one corner and smoothing outward. Add the red stitch look by using red fabric paint or a fine-tip acrylic liner to draw two straight parallel lines 4-6 mm apart around the frame area. Finally, line the inside with a thin black felt sheet so cards don’t slide and the edges stay soft.
Press with a flat ruler wrapped in cloth for 30-60 seconds per panel to stop bubbles.
Don’t use thick glue blobs on the front panel — they telegraph through vinyl as bumps.
2. Chocolate Brown Faux Leather Wrap Wallet
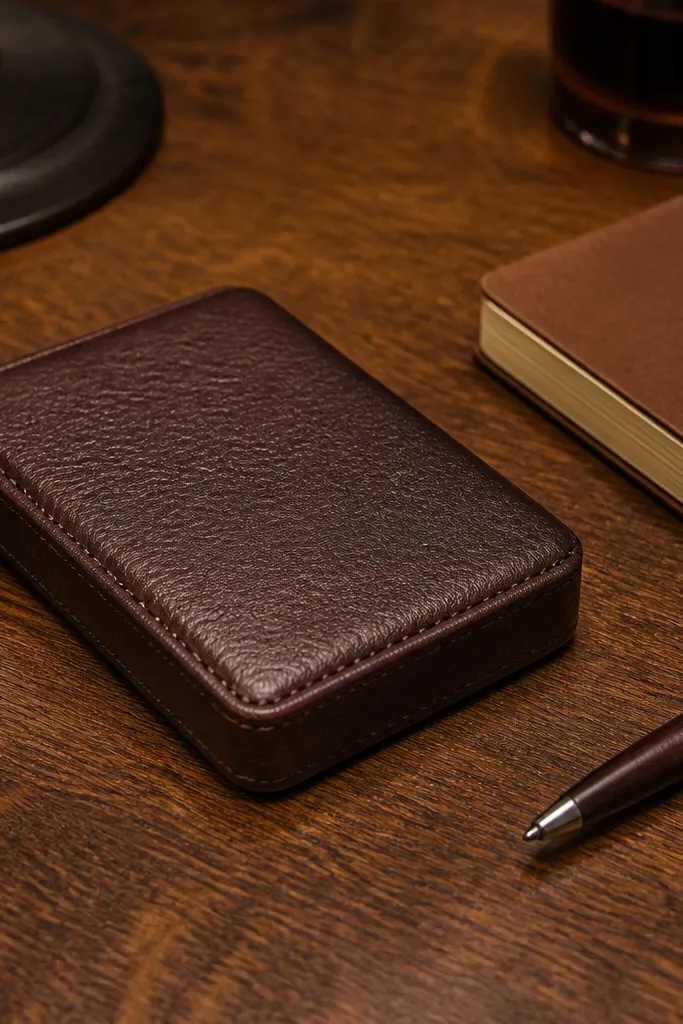
Faux leather makes an Altoids Wallet look way more expensive because it has grain and depth. Chocolate brown is forgiving — it hides tiny cutting imperfections and looks warm under indoor light. This style also helps you fix a common problem: the tin edges show through when your lining is too thin. By wrapping the outer layer over the edges, you create a continuous surface that reads neat in photos. It’s a solid pick for everyday carry because it feels sturdy and holds its shape.
Editor's noteUse a craft knife with a fresh blade and cut on a cutting mat to keep faux leather edges sharp.
Cut your faux leather outer panel to cover the lid front and wrap over the edges by 5-7 mm. Glue the center first, then work around the corners with small snips so it lays flat without big wrinkles. Line the inside with tan cotton canvas or bookbinding cloth so it doesn’t stretch — cut to the base and lid shapes separately. Add a single card slot by gluing one folded strip of lining fabric to the interior panel, leaving a 2-3 mm gap at the top for easy card pull.
Skip thisSkip heavy stitching thread unless you’re confident — crooked lines are harder to hide than a simple painted edge.
3. Olive Felt Organizer With Contrast Pocket
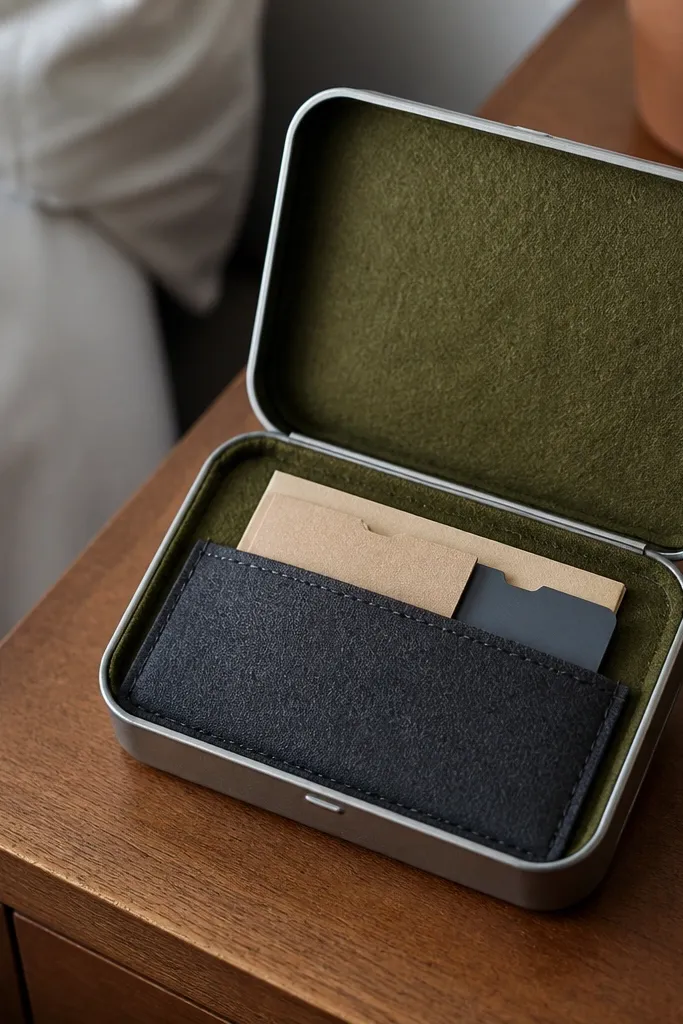
Felt looks cozy and clean, and olive is a color that always looks good in photos. The trick is to keep felt from sagging and to control the pocket shape inside. This build gives you one tidy interior pocket — perfect for receipts, a small note, or a spare keycard. Contrast pocket fabric makes it pop without clutter. It’s quick because felt is easy to cut and doesn’t fray, and it’s also beginner-safe if your measurements are careful.
Cut an olive felt panel for the lid interior and base interior, each matching the tin pieces exactly. Glue felt to the tin using thin hot glue along the perimeter, then press flat with a weight for 10 minutes. Cut a contrast pocket from thicker felt or sturdy cotton webbing and sew a simple top edge with a straight stitch if you have a machine; hand-sewing works too. Glue the pocket to the base panel only, leaving the lid area open so the wallet closes flat. Finish the front by adding a 1 cm felt border strip around the lid opening.
If you don’t have a sewing machine, use fabric glue and clamp the pocket top for 2 hours.
Don’t use thin craft felt alone — it collapses and makes the pocket look messy.
4. Navy Denim Patchwork Front
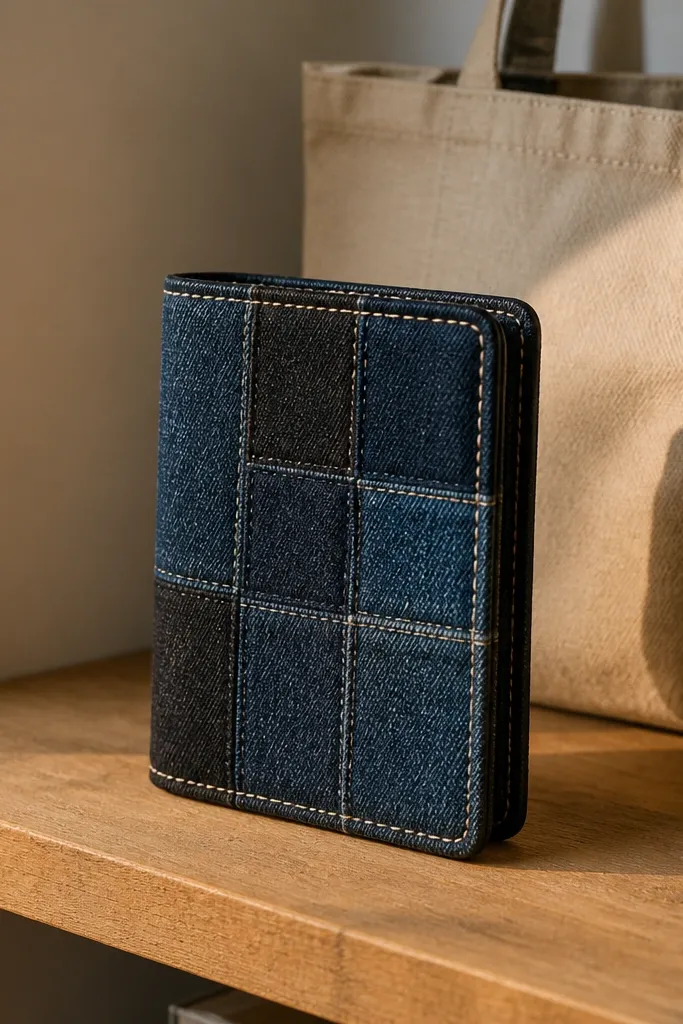
Denim adds texture you can see even in low light. The patchwork front makes the wallet feel intentional without adding bulk. Navy denim also hides fraying because you’ll seal the edges, so it stays neat. This style is best if you want the front to look like a small accessory piece, not just a covered tin. It’s medium-easy: denim is forgiving to cut, but you need to seal edges so it looks crisp.
Cut two denim patch shapes for the lid: one slightly larger background patch and one smaller accent patch, leaving a 6-10 mm overlap line. Seal raw edges with fabric glue or fray-check and let dry fully. Glue the patches onto the tin lid panel, then reinforce the perimeter with a thin line of matching thread using a running stitch or topstitch-style paint. Line the base with a smooth fabric like cotton drill so cards slide. Add one elastic band loop inside by gluing elastic to two anchor points on the base panel.
Use a denim needle if you sew — it keeps stitches even and prevents puckering.
Don’t stack too many layers on the lid — patchwork that’s too thick makes the tin fight to close.
5. Map Print Lining With Black Edge Binding
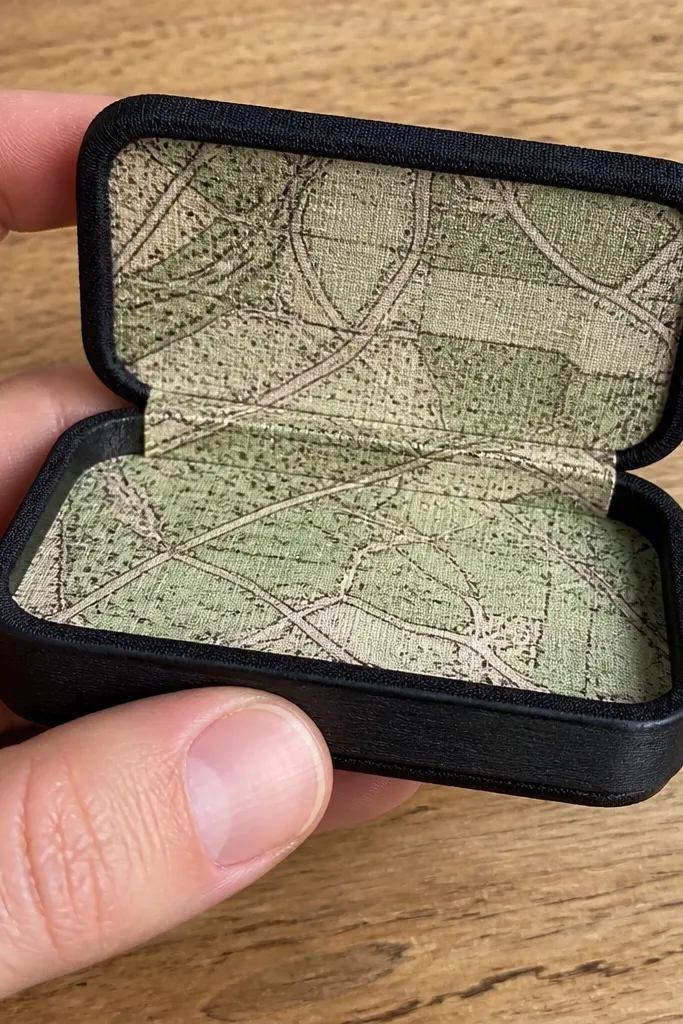
Map print looks instantly styled because it has patterns, but it can also look chaotic if you don’t frame it. Black edge binding gives you that clean border that makes the print feel designed. This is the best option if you want a photogenic inside view too, since the lining is what people notice when the lid opens. It’s quick because you’re mostly cutting and binding, not building complex pockets. You’ll get a “travel journal” vibe without turning the wallet into a scrapbook.
Editor's notePress bias tape edges with a warm iron through a cloth — it makes the corners behave.
Cut map print fabric panels for the lid interior and base interior, matching the tin shapes. Apply black bias tape as edge binding on the fabric panels before gluing to the tin so the edges stay tidy. Glue the bound panels to the tin with thin contact cement or low-blob hot glue around the perimeter. Add a simple card slot using black webbing: fold a 1 cm wide strip into a pocket and glue the bottom and sides, leaving the top open. Finish the lid front by adding a black vinyl or felt border strip around the seam line.
Skip thisDon’t glue map print directly to the tin edge without binding — it frays and looks unfinished fast.
6. Marble White Resin Look With Gold Foil Accent
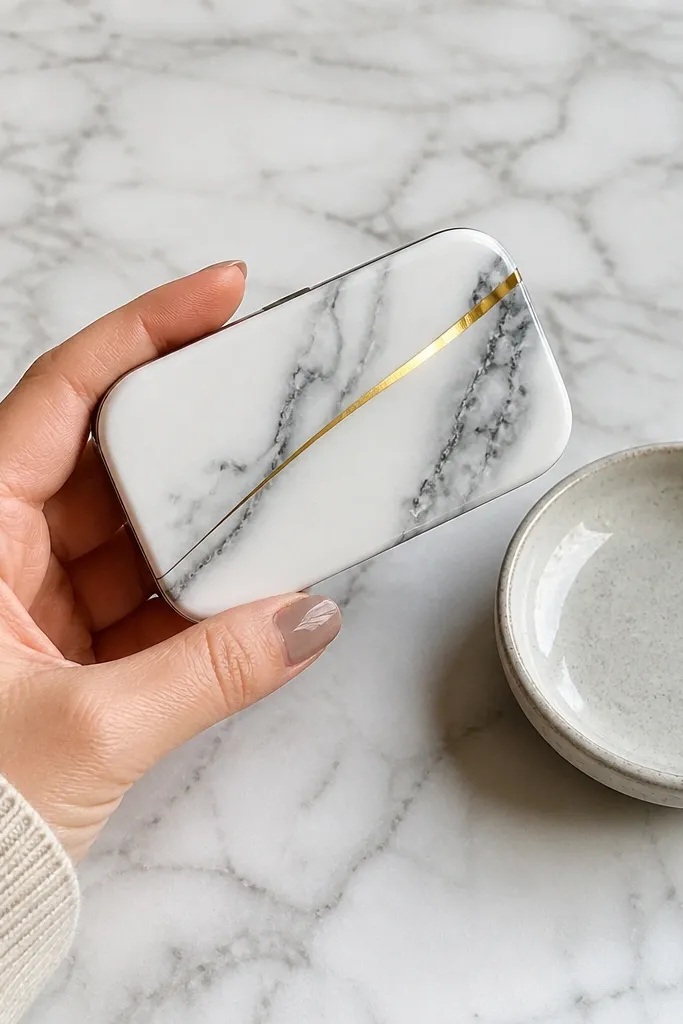
If you want a luxury look, this is the easiest path: white marble effect plus a single gold accent. It photographs like a small designer object because the surface has movement, and the gold line gives you a clean highlight. You’re not trying to pour a thick resin slab; you’re using a thin surface layer so it stays quick and doesn’t interfere with lid closure. This is a mid skill build because resin needs careful handling, but the results are worth it for a glossy, modern front.
Editor's noteWork under bright side light and rotate the tin while curing so you can spot dust or bubbles early.
Sand the tin lid lightly with 400-grit and wipe with rubbing alcohol. Tape off the edges so resin stays on the surface, then mix a small amount of clear resin and tint it with white pigment until it looks milky. Add marble by dropping a tiny amount of gray or black pigment, then swirl with a toothpick for thin veining. After curing, apply gold foil tape as a thin strip where you want the accent line. Line the inside with matte black felt to avoid glare.
Skip thisDon’t skip sanding — resin won’t grip metal consistently and you’ll get peeling.
7. Black and Gray Geometric Paper Veneer
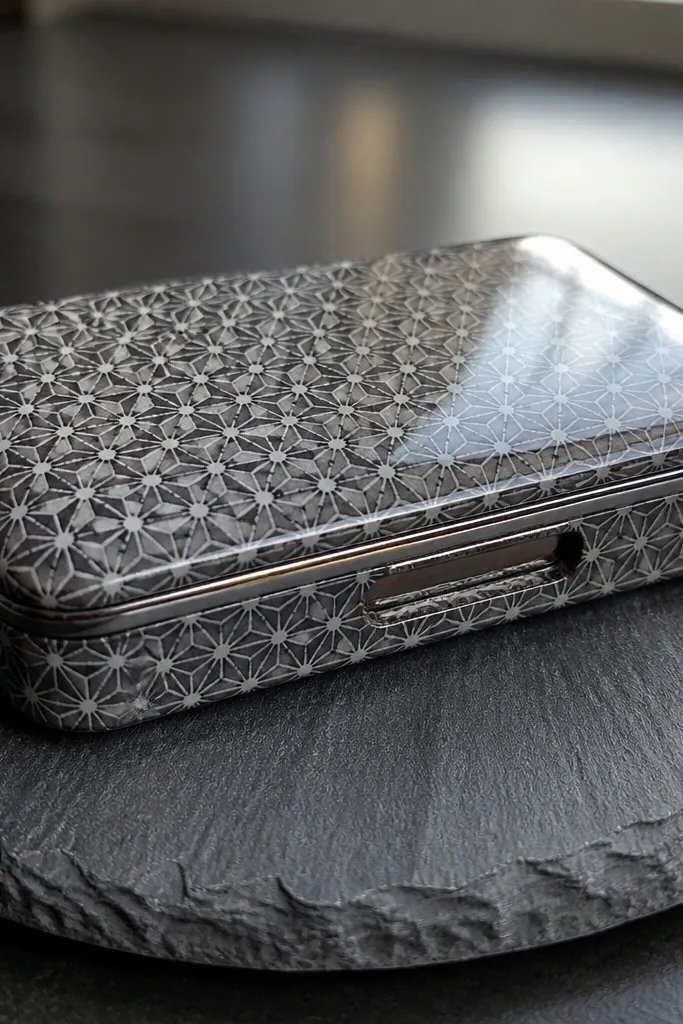
Paper veneer gives you crisp graphics without bulky material. The geometric pattern is what keeps it from looking like a random decoupage job. Use a topcoat so it has a smooth, glassy feel — that’s what makes it look “designed” instead of handmade craft. This build is fast because you’re doing cut-and-glue, then sealing. It’s also great for people who want a flat, closure-friendly wallet with minimal thickness.
Editor's noteUse a craft blade and change it after a couple passes — paper veneer edges look bad when the cut tears.
Cut geometric patterned paper to the lid front and base front panels, leaving a 3 mm trim margin. Seal the paper with 2 thin coats of matte Mod Podge or acrylic sealer, letting each coat dry 20-30 minutes. Glue the sealed panels to the tin using thin contact cement so you don’t soak the paper. For a clean edge, trim excess with a sharp knife after the sealer dries. Add a single interior pocket from thin felt or faux suede and glue it to the base panel, leaving the lid area flat.
Skip thisDon’t skip sealing before gluing — the paper wrinkles and the pattern distorts.
8. Pastel Woven Ribbon Front With Button Closure
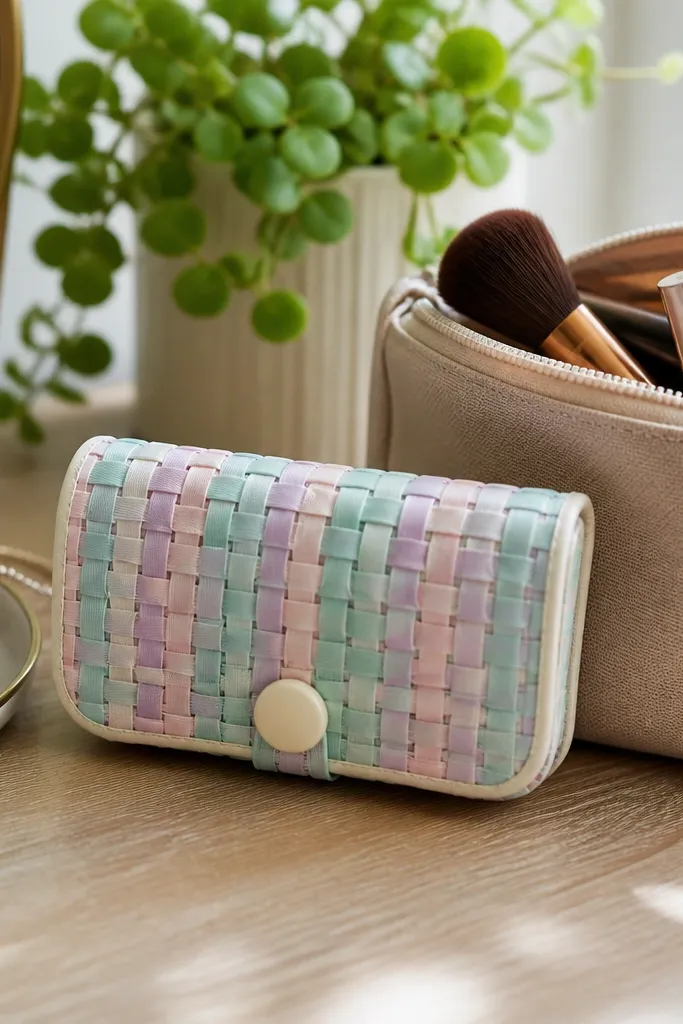
This one is for softness and color without clutter. Woven ribbon has a natural texture, and a small button closure makes the wallet feel intentional and secure. The look is photogenic because the ribbon pattern catches light differently across the surface. It’s also practical: the button keeps the lid from popping open when it’s in a bag. It’s quick because ribbon wraps are easy and the closure is just placement and a couple stitches.
Cut ribbon strips wide enough to cover the lid front panel area with slight overlap, usually 1.5-2 cm each. Arrange strips in a tight grid, then tack the ends with fabric glue before fully bonding. Glue the ribbon to the lid, then trim the edges flush after drying. Sew or glue a small button on the lid edge area where it lines up with a loop. Make the loop from a folded strip of ribbon or thin elastic and glue or stitch it to the base panel so the lid clicks shut.
Test the button alignment by closing the tin slowly — adjust the loop position before you commit fully.
Don’t use slippery satin ribbon — it shifts under glue and the pattern ends up skewed.
9. Cork Sheet Exterior With Skinny Leather Strap
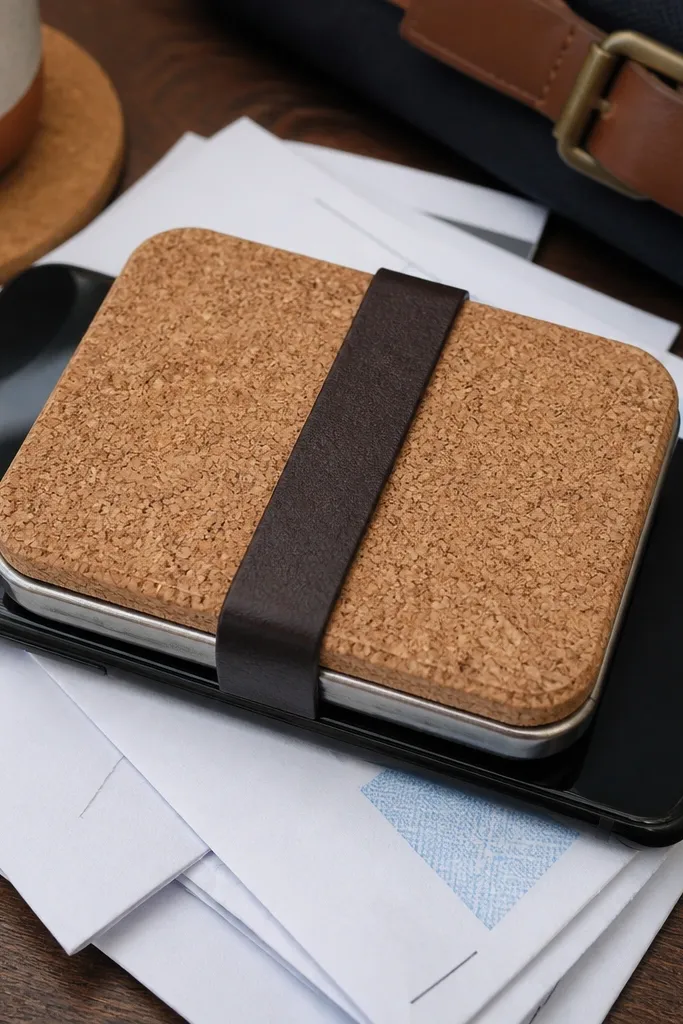
Cork is one of the fastest ways to make an Altoids Wallet look high-end. It has a matte texture that hides tiny bumps, and it stays lightweight so the tin closes normally. A skinny leather strap adds a clean, modern line and also helps hold the lid closed. This style is great for desk carry because it looks good even when it’s sitting out. Skill level is beginner-friendly, since cork cuts predictably with a sharp blade.
Cut cork sheet panels for the lid front and wrap area, keeping thickness in mind so you don’t fight the lid. Seal cork edges with matte acrylic sealer so they don’t fuzz. Glue the cork to the tin with contact cement, starting at the center and smoothing outward. Cut a leather strap strip 6-10 mm wide and long enough to cross the lid front, then punch two small holes for a keeper if you want a strap-through look. If you want button closure, glue a small snap or button point on the base and strap end on the lid.
Lightly sand the cork surface with 600-grit for a smoother photo finish.
Don’t soak cork with glue — it darkens and gets patchy.
10. Clear Vinyl Window Wallet With Printed Label
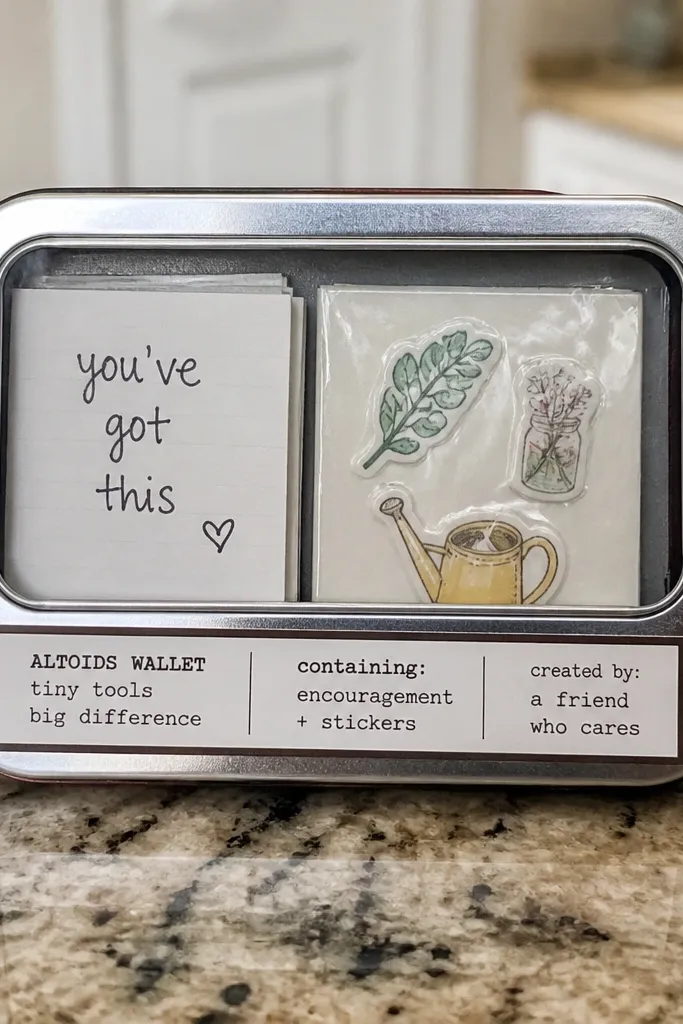
This is the most “functional cute” style on the list. A clear vinyl window lets you see what’s inside without opening the tin, and the printed label makes the whole thing look like a tiny organizer. It’s also great for storing a small photo, a mini note, or a wrapped set of stickers. The look is clean because the window creates a defined rectangle. Time is short because vinyl cuts fast and you’re not building complicated compartments.
Editor's noteUse a ruler and cut the vinyl on a hard surface — soft cutting boards cause wavy edges.
Cut a window frame shape from vinyl-backed fabric or cardstock to fit the lid interior opening area. Glue the frame to the tin lid panel, then cut a slightly larger clear vinyl sheet and glue it behind the frame for a smooth window. Add a printed label panel on the inside of the window area using matte paper sealed with acrylic so it doesn’t smear. For durability, topcoat the label with one thin layer of clear acrylic after it’s fully dry. Build one interior tuck pocket on the base panel using felt or non-fraying fabric.
Skip thisSkip thick clear vinyl — it makes the lid bulge and the window looks warped.
11. Quilted Look With Heat-Bond Batting Panels
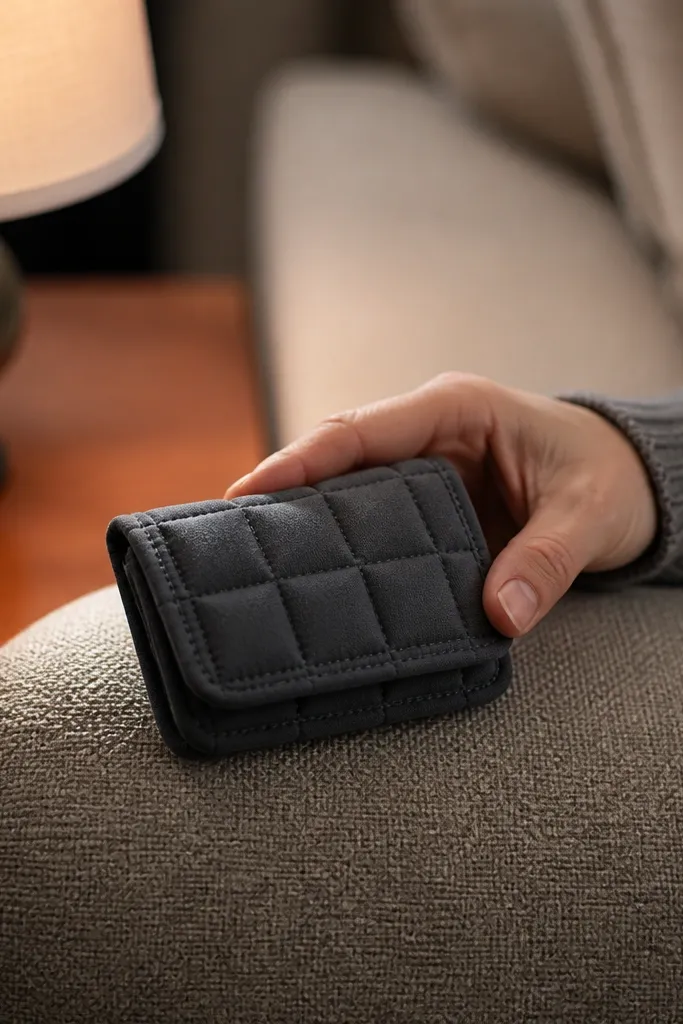
Quilted texture makes an Altoids Wallet feel soft and high-end, even when it’s quick. This style uses heat-bond batting so you get the puffed look without complicated quilting. The lid looks plush, and the edges stay controlled because the batting is layered to the exact panel size. It’s perfect if you like cozy aesthetics but hate messy seams. Expect a short build if you already have an iron and a glue stick or fabric glue.
Cut a quilted panel stack: outer fabric (cotton or canvas), heat-bond batting, and a thin backing fabric. Iron the heat-bond to the backing following the package directions so it holds the layers together. Mark a simple grid or diagonal lines with washable marker, then stitch along the lines with a straight stitch (hand stitching works too). Glue the finished quilted lid panel to the tin lid, keeping the glue only on the perimeter so the center stays flexible. Line the inside with smooth cotton drill and add one small elastic band for a pen or card.
Use a walking foot if you have a machine — it stops the layers from shifting mid-stitch.
Don’t choose bulky batting — it makes the tin close tight and the quilting puckers.
12. Monochrome Stamped Front With Faux Patina Ink
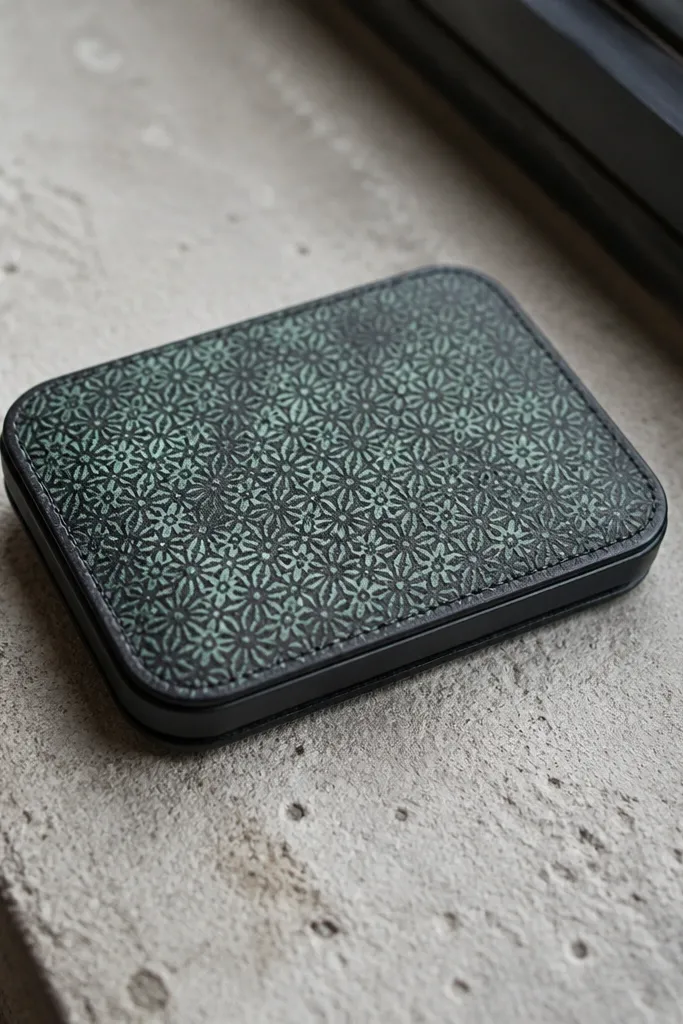
A stamped pattern on a monochrome surface looks graphic and intentional. The faux patina ink effect adds depth without bright colors fighting each other. This is the best pick if you want an artsy look that still reads clean in photos. You’re controlling everything: one base color, one stamp pattern, one ink finish. It’s medium-easy — you need a stamp and steady hand, but the build is still quick because you’re not layering lots of materials.
Editor's noteDo a test stamp on scrap fabric — fabric stretch changes how crisp the stamp edges look.
Cover the tin lid front with matte black or charcoal fabric using thin contact cement. Let it dry fully, then press a stencil or stamp onto the fabric with a stamping ink that matches the patina look (gray-green or sepia-green). Add depth by lightly dragging a soft brush with watered-down ink over raised stamp areas, then wipe excess with a damp cloth. Seal the front with matte acrylic spray so the ink doesn’t smear. For inside structure, glue a thin felt liner and add a single card slot from folded fabric strip.
Skip thisDon’t use glossy ink on fabric — it looks shiny and cheap once sealed.
13. Rainbow Edge Painting With Solid Center
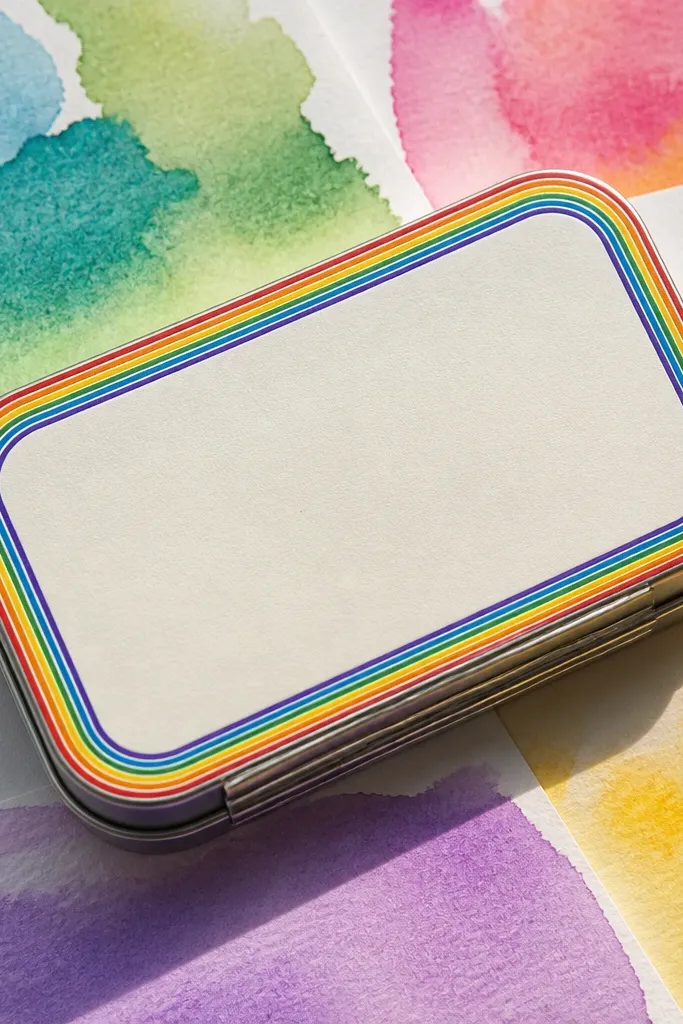
This style makes the tin look custom in seconds because it uses color only where your eye expects it: the edges. A solid center keeps it clean, while the rainbow edge lines add a playful pop that still looks grown-up. It’s one of the fastest builds here because painting edges is faster than cutting and sewing. It also hides small alignment issues because the edge color draws attention to the border instead of the seam. Perfect for gifting too.
Cover the lid exterior with matte cardstock or fabric in a solid color like cream, light gray, or dusty blue. Seal it with one thin coat of acrylic medium so the surface doesn’t drink paint. Mask a narrow strip along the edge with painter’s tape, then paint five thin rainbow bands using small craft brushes. Remove tape while paint is still slightly wet for crisp edges. Line the inside with matching solid felt so the inside doesn’t look mismatched, and add a simple tuck pocket on the base panel.
Use tape that’s labeled low-tack — high-tack tape can peel fabric glue seams.
Don’t paint over unsealed fabric — the colors bleed and the edge looks blurry.
14. Two-Tone Leatherette With Hidden Magnet Closure
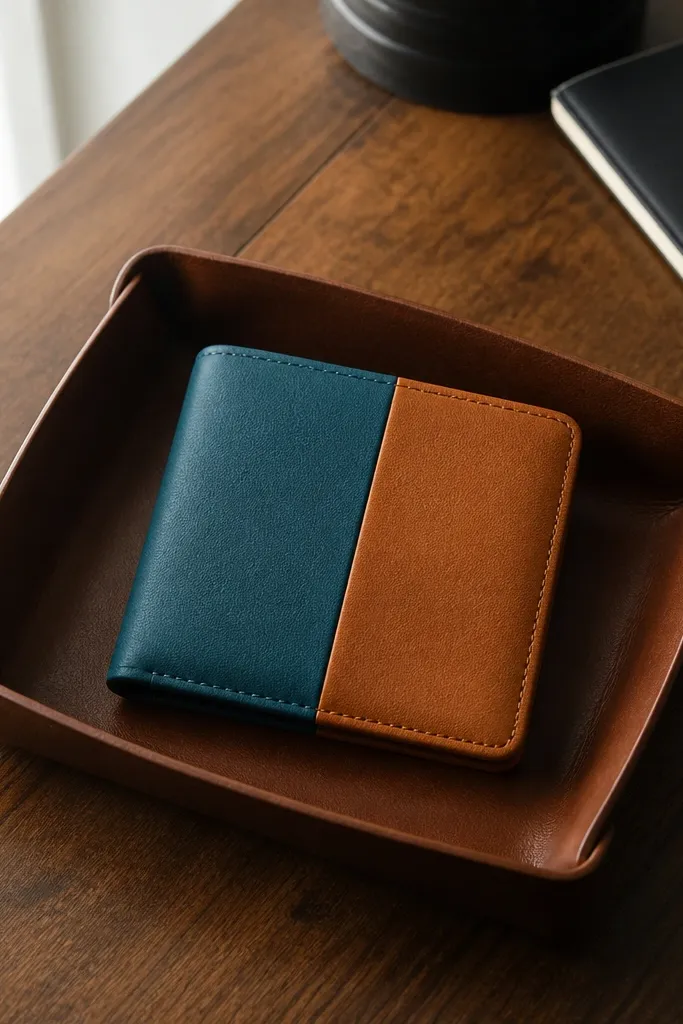
Two-tone leatherette is the fastest way to make it look like a real accessory. The hidden magnet closure gives you a satisfying snap and keeps the front line clean — no visible button hardware. This style is also practical because the magnet holds the lid shut even with cards inside. The look is crisp: one color for the main panel, another for the spine or edge. Skill level is medium because magnets need careful placement, but the result is very clean.
Editor's noteKeep magnets aligned by using a strip of masking tape over the tin while you position the second magnet.
Cut two leatherette panels for the lid front: one main panel and one thin accent strip for the border or spine. Glue panels to the lid with contact cement and press firmly so edges sit flat. Mark magnet spots on the base panel by closing the tin and tracing where the lid naturally meets. Glue small neodymium magnets in shallow recesses made with a drill bit or craft knife so they sit flush. Add a thin fabric liner and a card slot using folded faux suede strips.
Skip thisDon’t glue magnets on top of thick fabric — the lid won’t close flush and the magnet will look off-center.
15. Stenciled Stars On Powder Blue Felt
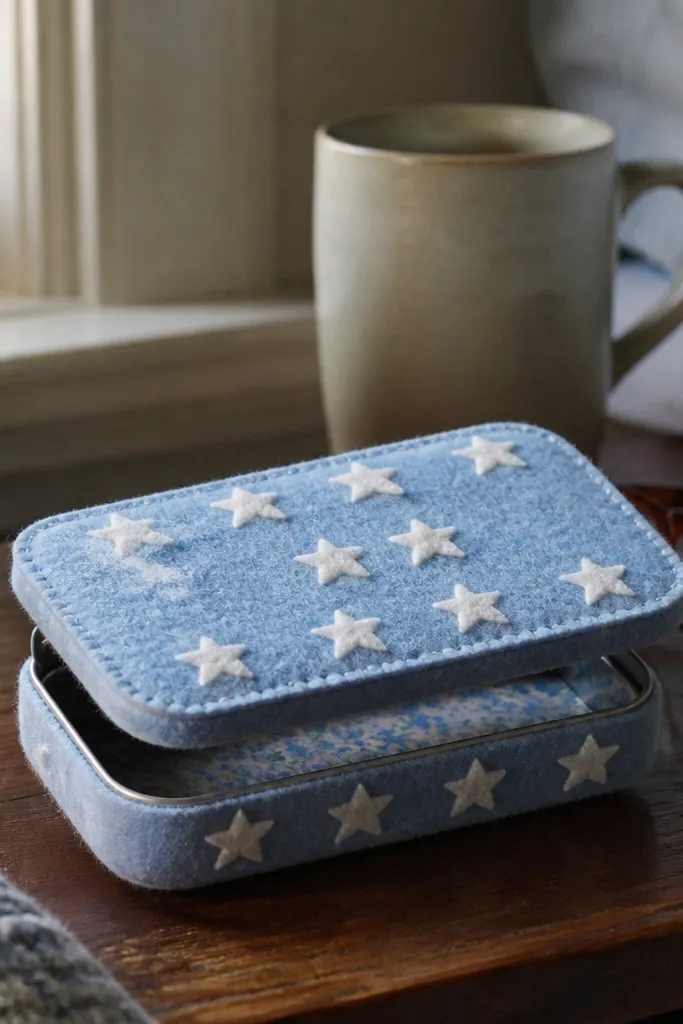
Powder blue felt with white star stencils looks sweet and modern, and it hides wear better than smooth finishes. The stencil pattern is small and controlled, so it reads “decor” instead of “craft mess.” This style is great for anyone who wants a quick and easy Altoids Wallet that still looks intentional when the lid opens. It also stays quiet and clean because felt covers seams and glue lines. Build time is short because felt doesn’t fray and stenciling is fast.
Cover the lid exterior with powder blue felt, gluing only the perimeter so the center stays flexible. Use a star stencil and white fabric paint, applying with a sponge brush in light taps so you don’t flood the felt. Let dry flat, then heat set if your paint label allows it. Line the inside with a thin matching felt or cotton drill to keep cards from snagging. Add one interior pocket made from felt cut into a rectangle with a 1 cm top fold, glued only on the sides and bottom.
Use painter’s tape to hold the stencil — it prevents paint creep on fuzzy felt.
Don’t over-saturate felt with paint — it leaves darker patches and dulls the color.



