
1. Victorian Tea Dress with Layered Bodice + Skirt Panels
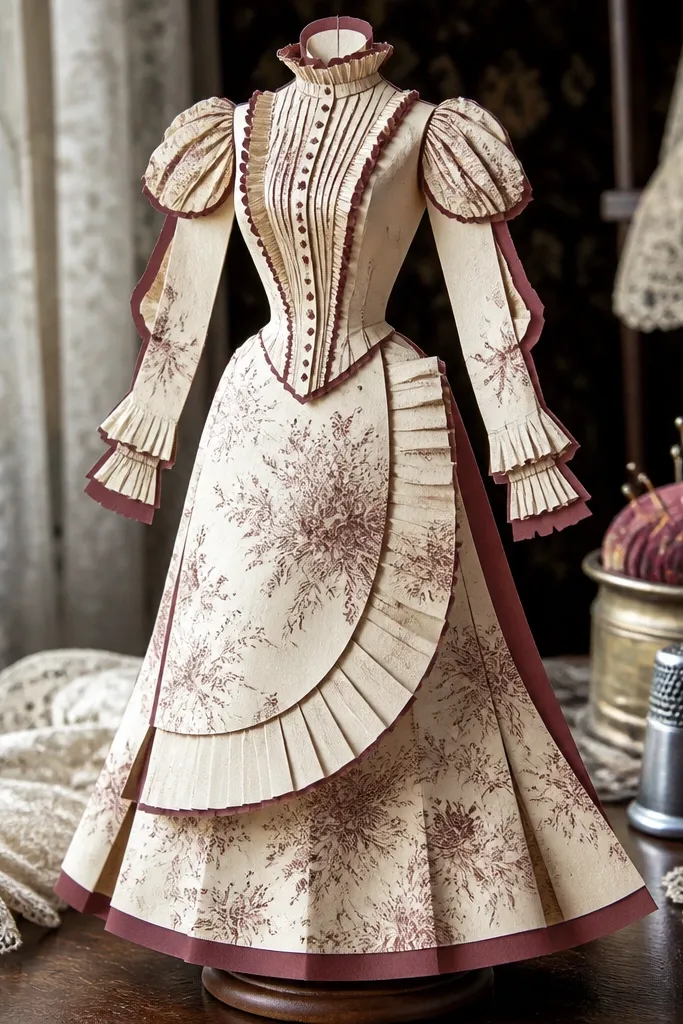
This template teaches the fastest way to get “dress-looking” depth: separate bodice, skirt, and sleeve pieces that overlap instead of sitting flat. The Victorian shapes also hide small cutting errors because the seams and ruffles create natural visual breaks. You get a photogenic silhouette even with simple color — try matching the bodice to a darker tone and the skirt to a lighter one. It’s best for decor photos, calm color palettes, and anyone who wants outfits to look tailored without painting tiny details.
Start by printing the bodice and skirt panels onto 110 lb cardstock so the ruffles don’t curl. Cut the bodice first, then glue it to the doll torso using small dots along the inside edge. Next, attach the skirt panels so the top seam overlaps the bodice by about 3-5mm. Finish by adding sleeve pieces last, aligning cuffs so they don’t twist when you stand the doll.
Use a glue stick for the big areas, then a tiny dot of liquid glue only on edges that need to hold overlap.
Don’t glue the skirt all the way around — leave the sides slightly free so it doesn’t buckle.
2. Modern Denim Jacket with Snap Tabs and Separate Collar
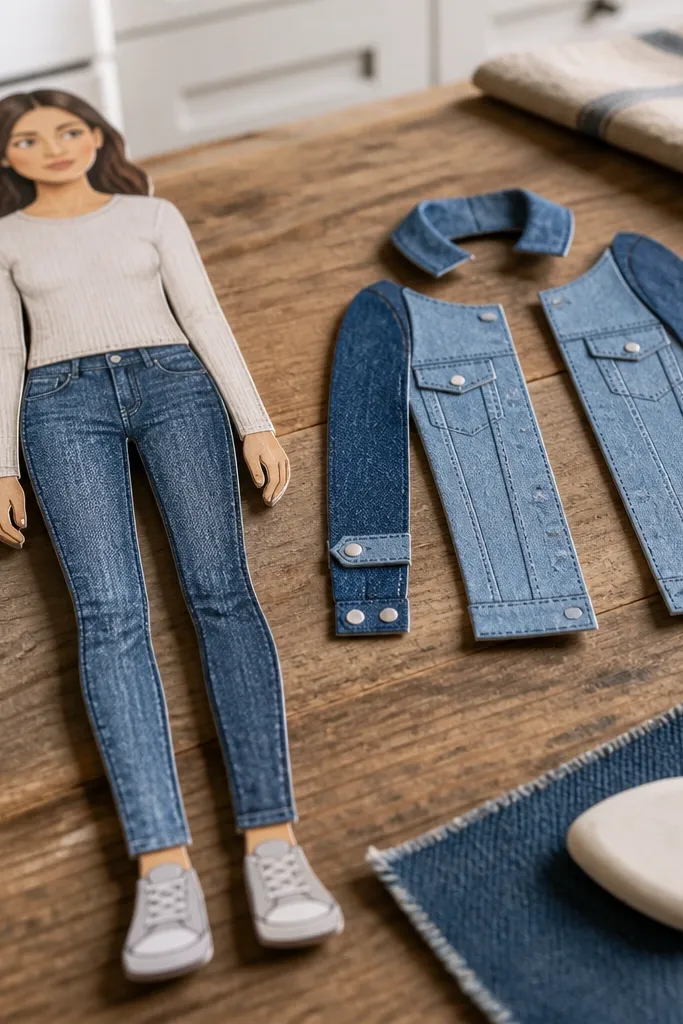
This is a strong template for learning how to build realistic clothing construction on paper. Separate collar and front panels let you create crisp lines that read like real stitching, especially when you use two shades of blue. The snap tabs add visual interest without needing tiny buttons — you can cut them cleanly and glue them in a repeatable way. It’s great for beginners because the shapes are forgiving and the outfit looks good even with limited coloring.
Print the jacket parts on 80 lb cardstock for flexibility. Cut the collar piece and glue it to the neck opening with a thin line so it sits flat. Then assemble the front panels so the overlap hides the raw edge by about 3mm. Finally, attach the snap tabs at the corners first, then press the rest of the panel down so the jacket stays smooth.
Color the jacket panels before cutting if your printer ink smears — cardstock absorbs pigment differently than plain paper.
Avoid thick glue blobs on the collar; they cause a visible bump in photos.
3. School Uniform Skirt with Pleat-Ready Strips
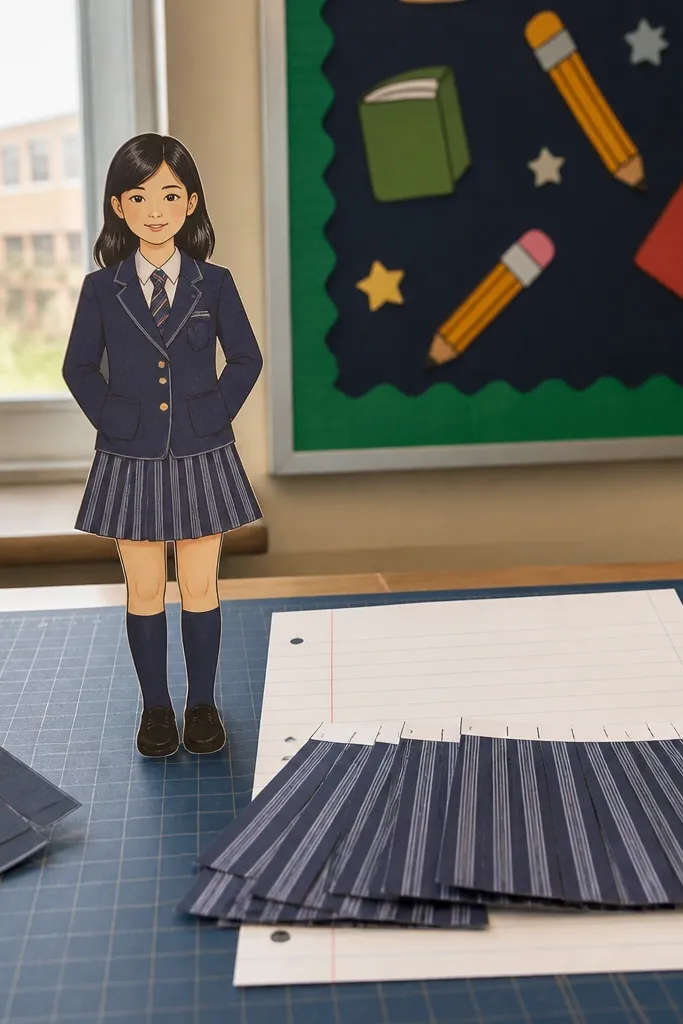
If you want a template that trains your cutting accuracy, this one does it without making you miserable. The skirt is built from pleat strips that create movement and texture when overlapped. You learn how to line up repeating sections so the stripes or pattern stays consistent across the whole skirt. It looks especially good in side-view photos because the pleats catch light and form a clear silhouette.
Print the skirt strip pieces on 110 lb cardstock so the pleats don’t crease. Cut all strips, then dry-fit them around the waist before gluing. Start gluing from the center front, then work left and right so the pleat spacing stays even. Overlap each strip by about 2-4mm, then trim any tiny overhang at the hem with a craft knife and ruler.
Editor's noteUse a metal ruler and a fresh blade for the pleat strip cuts — dull blades tear cardstock and ruin the clean edges.
Skip thisDon’t glue every strip at once; if one section shifts, the spacing will look wrong across the entire skirt.
4. Ballet Outfit with Tulle-Look Layers and Ribbon Ties
This template turns paper into “soft fabric” by using layered skirt pieces and ribbon ties that create a delicate silhouette. The tulle-like layers overlap in a way that reads as sheer fabric even though it’s cardstock. You get a refined look without needing shading — just pick two close tones for the layers and one contrasting tone for ribbons. It’s perfect for pastel rooms, gift tags, and any doll set you want to photograph against a light background.
Print the layered skirt pieces on 65-80 lb cardstock for a bit of flexibility. Cut the ribbon ties last so you don’t accidentally cut them too short. Glue the bottom layer first, then stack upper layers so each one sits 2-3mm higher than the previous. Finish by attaching ribbon ties at the waist and the cuffs, keeping them slightly angled so they look like they’re tied, not stuck flat.
Editor's noteColor the ribbon pieces with a darker marker edge so they separate from the skirt in photos.
Skip thisSkip heavy glue on ribbons; it makes them stick straight and lose the “tied” look.
5. Goth Witch Dress with Pointed Hem + Separate Sleeves
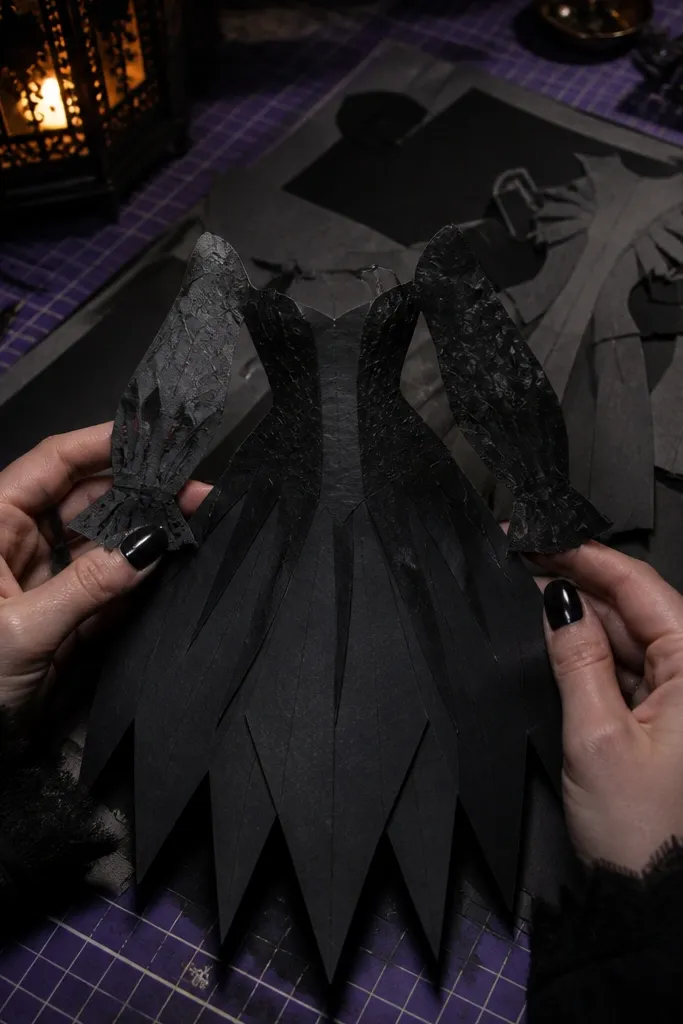
This is the template I’d pick when you want instant drama. The pointed hem gives a strong shape, and separate sleeves let you angle them so the outfit looks intentional instead of flat. You can go monochrome with black and charcoal, or use a deep green and purple palette for a more modern gothic vibe. It’s also a great learning set for how to assemble asymmetry cleanly — the pieces overlap in a way that hides minor trimming mistakes.
Print the dress body and sleeve pieces on 80 lb cardstock. Cut the pointed hem segments carefully, then glue the dress body first. Attach sleeves so the top seam overlaps the shoulder edge by about 3mm. Add the hem layers next, aligning the points so they mirror left and right. Let everything dry flat under a book for 10 minutes before standing the doll.
Editor's noteIf your points curl, score the fold lines lightly with an empty pen tip before gluing.
Skip thisDon’t wrap glue across the entire hem edge; it turns the points into thick, rounded blobs.
6. Cozy Sweater + Scarf Set with Cuffs That Actually Line Up
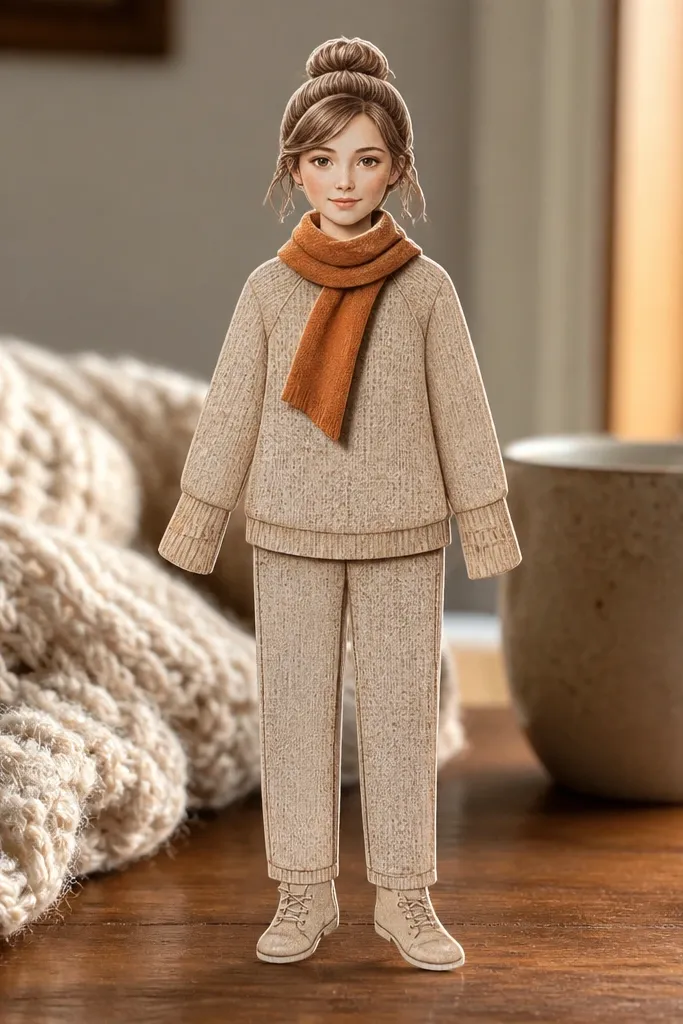
Sweaters are where paper dolls either look charming or look sloppy. This template teaches the right technique: cuffs and sleeve openings are separate so you get clean alignment where the eye checks first. The scarf pieces add movement, but they’re designed to anchor at the neck so they don’t slide in photos. Use warm neutrals like cream, oatmeal, and muted brown for an easy aesthetic that reads cozy without needing super detailed coloring.
Print sweater and scarf pieces on 80 lb cardstock. Cut cuffs and glue them to sleeve ends before attaching sleeves to the torso. Then glue the sweater front and back pieces, aligning the neckline so the scarf fits without gaps. Add scarf layers last, tucking the ends behind the neck opening by 3-5mm for a secure look.
Use colored pencil for sweater shading — it blends softly and doesn’t smear like marker ink on cardstock.
Avoid gluing sleeves directly over the cuff seam; you’ll hide the alignment and lose the neat look.
7. Summer Dress with Overskirt Overlay and Separate Belt Loop
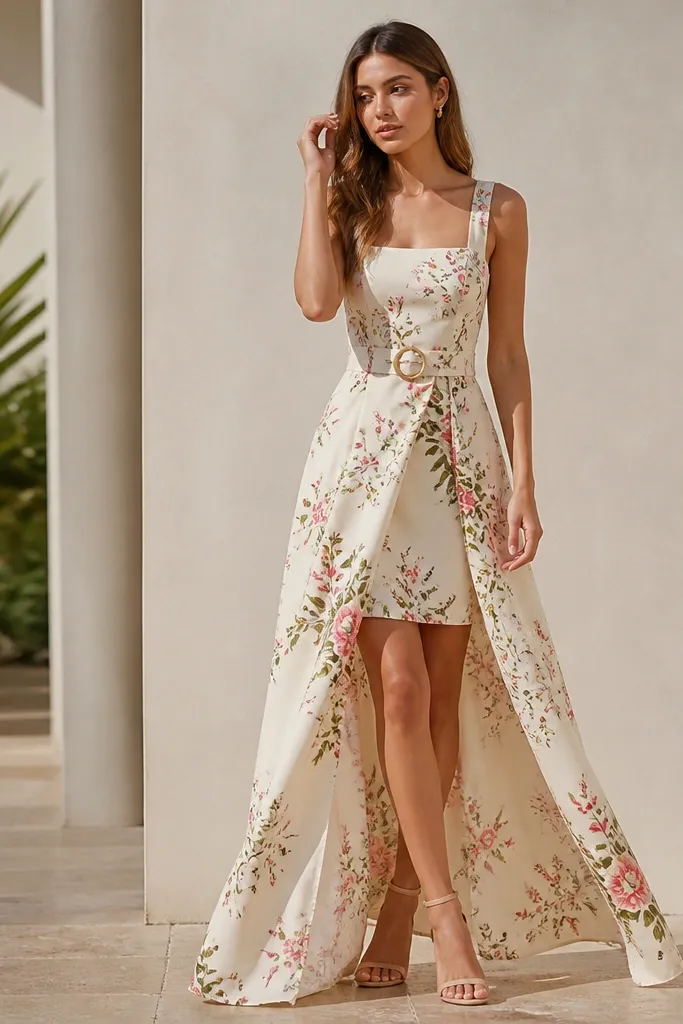
This template is built for photogenic outfits because the overskirt overlay creates a clear foreground layer. The separate belt loop teaches a small but high-impact detail: anchoring the belt so it looks like it’s attached, not floating. Choose a patterned overskirt and a solid base dress for instant contrast. It’s a great “decor” set because you can mix prints without turning the outfit into a visual mess.
Print the base dress and overskirt on 65-80 lb cardstock. Cut and glue the base dress to the doll, then place the belt loop on the waist first so you know where it needs to sit. Next, attach the overskirt so it overlaps the waist seam by about 4mm. Finally, thread or glue the belt piece through the loop opening, then press flat for 5 minutes.
If your overskirt overlaps look uneven, trim only the top edge — keep the hem line intact for symmetry.
Don’t skip the belt loop — gluing the belt directly to the dress looks flat and cheap.
8. Space Astronaut Suit with Visor Layer and Glove Fingers
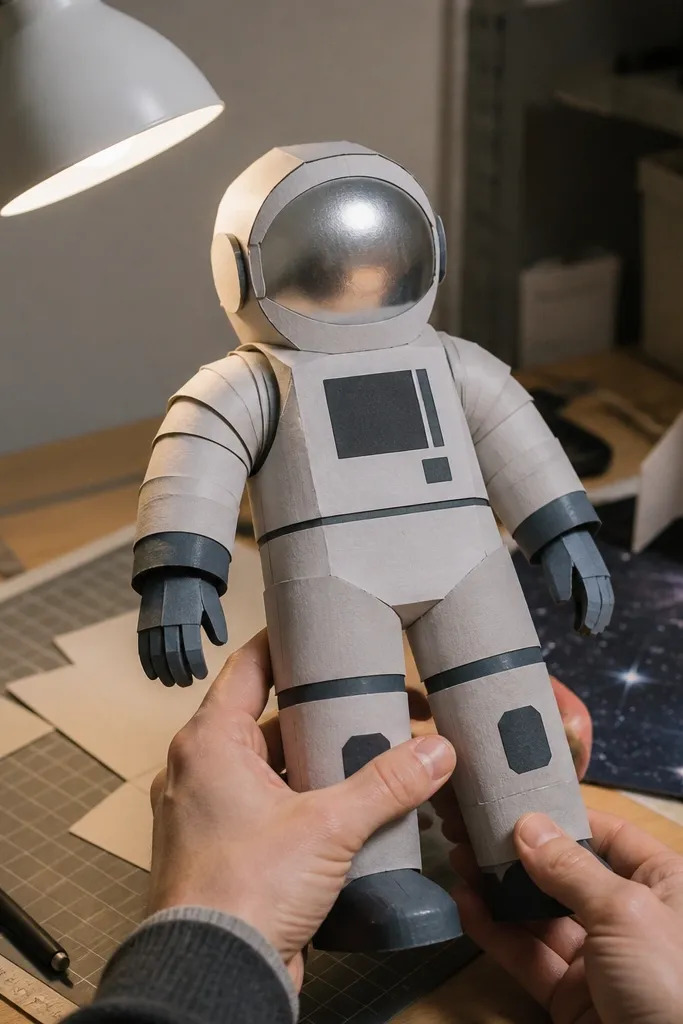
This template makes learning “techy” assembly feel satisfying because the visor is a separate layer and the gloves have distinct finger shapes. Those details create a clean silhouette even when the rest of the suit is simple. It’s also a good set to practice precision because small parts like glove fingers teach you to use minimal glue and correct placement. For color, go with pale gray suit pieces and a darker visor tone so the face area pops.
Print suit and visor parts on 110 lb cardstock for structure. Cut the visor layer carefully and glue it over the face opening using a thin line only at the edges. Then assemble the gloves, gluing finger sections one at a time so each finger sits aligned. Finish by attaching the arms to the torso and checking that the wrists line up with the suit cuffs.
Editor's noteUse a fine-tip glue bottle and keep glue away from the visor center so it doesn’t dull the printed shine.
Skip thisAvoid over-gluing gloves; the extra thickness makes fingers look like blobs.
9. Floral Kimono with Wrap Panels and Obi Tie
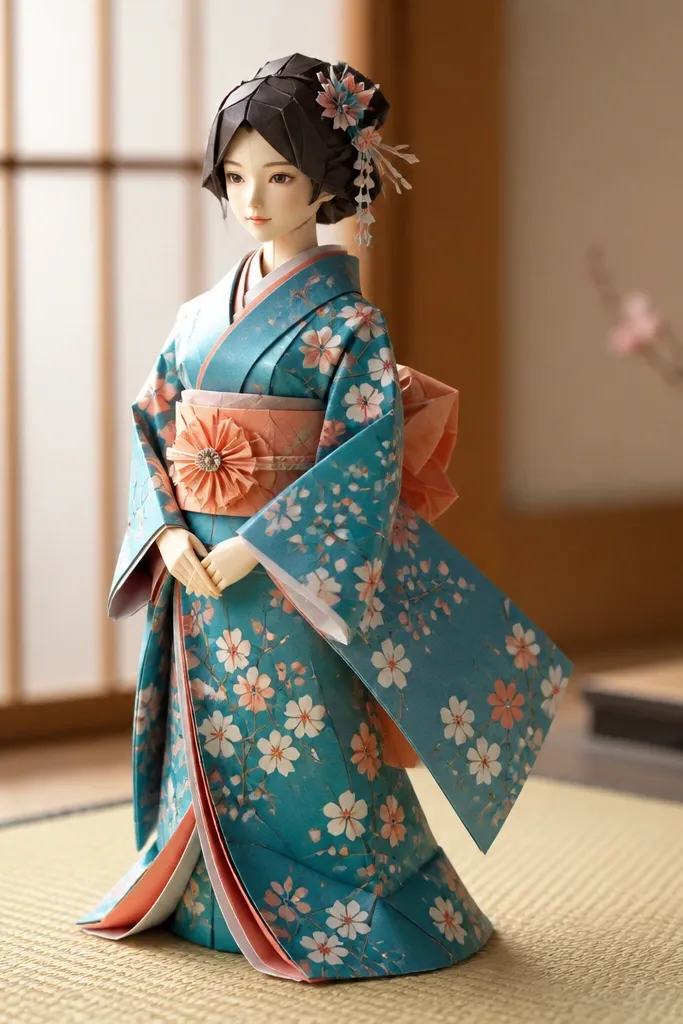
Kimono templates are where layering really pays off visually. Wrap panels create natural overlap zones, and the obi tie gives you a focal point near the waist. The result reads like fabric drape instead of a flat print because the panels stack with intentional edges. If you want a bright, photogenic look without messy coloring, use printed-style florals and keep the background simple.
Print kimono wrap panels and obi on 80 lb cardstock. Cut the wrap panels first, then glue the under-panel to the doll torso so the overlap area is visible. Add the outer wrap panel on top, aligning the collar edges. Tie or glue the obi to the waist, then add small tie ends so they angle down the side.
Color the collar area with a slightly darker tone than the main fabric so the neck line stays crisp.
Don’t glue the wrap panels flush — leave a visible overlap edge so it looks like real fabric layers.
10. Raincoat with Hood Up and Zipper Track Line
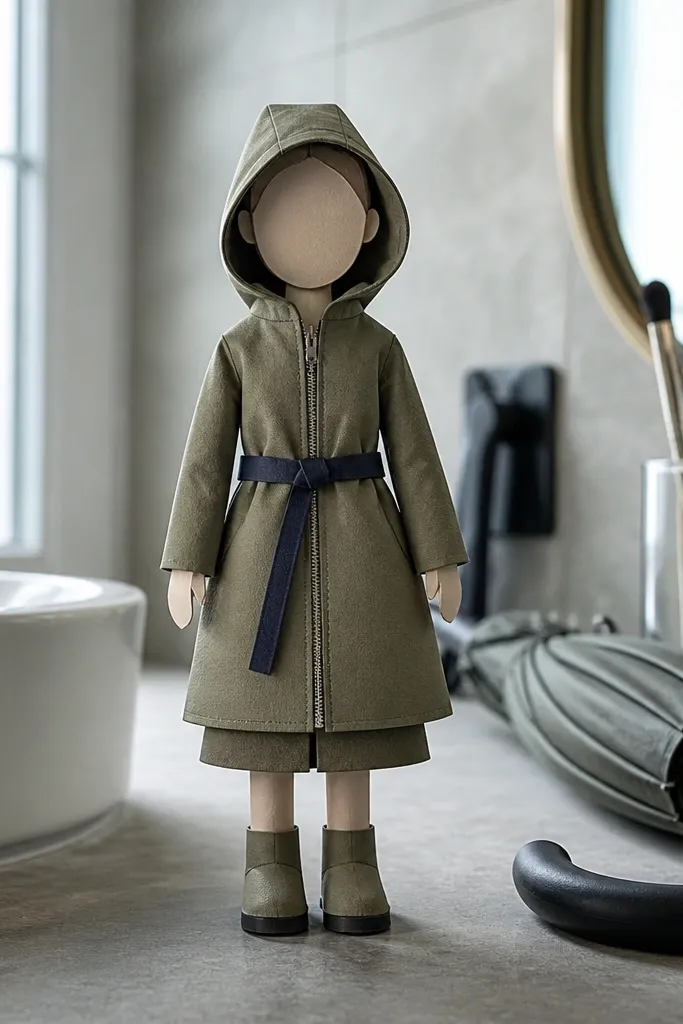
This template is a clean win for modern, aesthetic outfits because it includes structured details: hood shape and a zipper track line. The hood frames the face area, which makes photos look styled even when the doll is standing straight. Use muted colors like olive, navy, or soft gray and add a contrasting belt strip to make the silhouette pop. It also teaches you how to glue curved shapes without bubbles.
Print raincoat pieces on 80 lb cardstock. Cut the hood and glue it first, centering it so it doesn’t cover the eyes. Assemble the coat front and back, then glue the zipper track panel so the line stays straight. Attach sleeves next, then add the belt strip at the waist last for clean alignment.
Glue curved edges in small sections — press 10-15 seconds per section to prevent puckers.
Avoid gluing the hood edge too thick; it creates a ridge that shows in every photo.
11. Royal Cape with Layered Lining and Brooch Piece
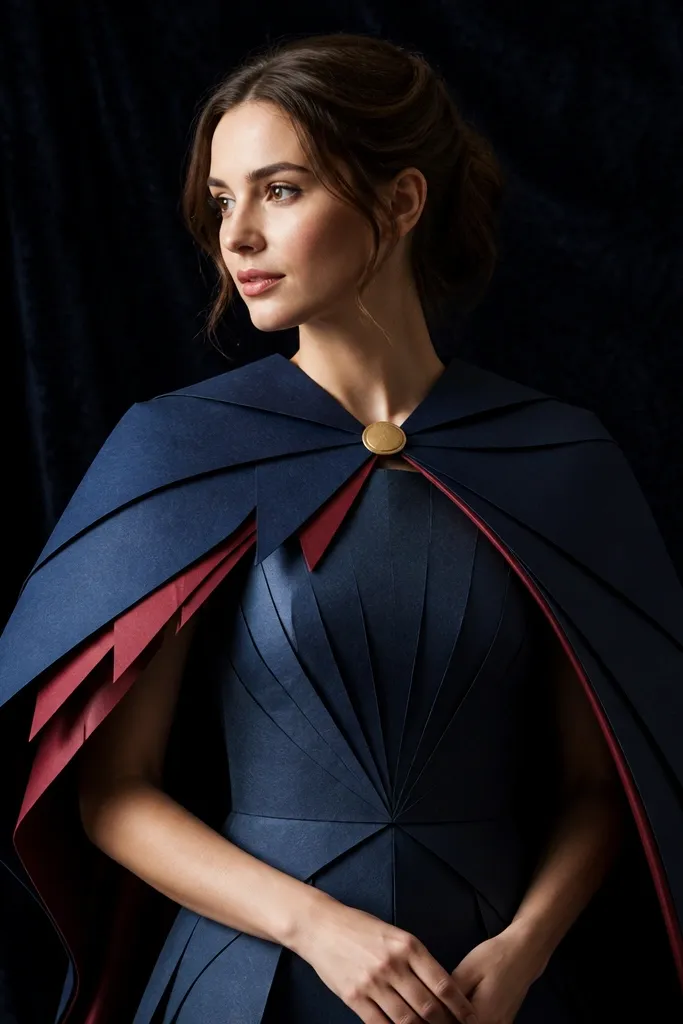
Capes look good on paper dolls when you add a lining layer and a brooch point. This template gives you both, so the cape reads as a garment, not a flat rectangle glued behind the doll. The brooch anchors attention at the chest, which makes the whole outfit look intentional. Go with deep red, navy, or black and add a lighter lining tone for contrast.
Print cape outer and lining on 110 lb cardstock so the cape hangs without drooping. Cut cape pieces, then glue the lining to the inside edge of the outer cape, leaving the outer silhouette intact. Attach the cape to the doll back so it starts at the shoulders and curves slightly outward. Finally, glue the brooch at the front overlap point, then press flat under a book for 10 minutes.
Add a tiny fold at the cape shoulders before gluing so it sits like it’s draped.
Don’t glue the cape all the way to the neck — leave a small gap so the face area stays clear.
12. Athleisure Set with Crop Top, Leggings, and Side Stripe Panels
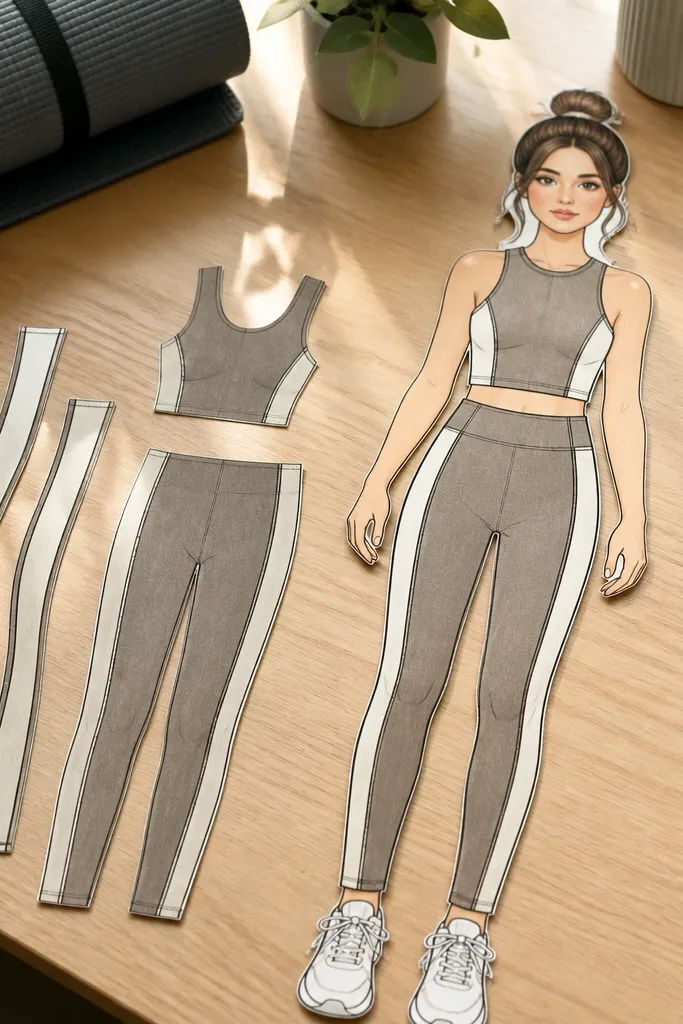
This template is built for modern, clean photos because the outfit uses strong shapes and stripe panels. Separate side stripe pieces make the legs look longer and more graphic. It’s also forgiving for beginners since the outfit doesn’t rely on tiny seams; you get a polished look by focusing on alignment. Use a neutral base like black leggings and a bright stripe color to create a crisp, Instagram-friendly contrast.
Print crop top and leggings on 80 lb cardstock. Cut side stripe panels and glue them onto the leggings first, aligning the stripe edges with the leg seams. Then glue the leggings to the doll and attach the crop top so the hem overlaps the waistband by 3mm. Finish by adding any belt or wrist accessory pieces last, keeping them centered.
Color stripe edges with a fine black marker so they look printed, not hand-drawn.
Avoid stretching stripe panels while gluing; warped stripes ruin the clean graphic look.
13. Traditional Hanbok with Jeogori Top and Skirt Band Layers
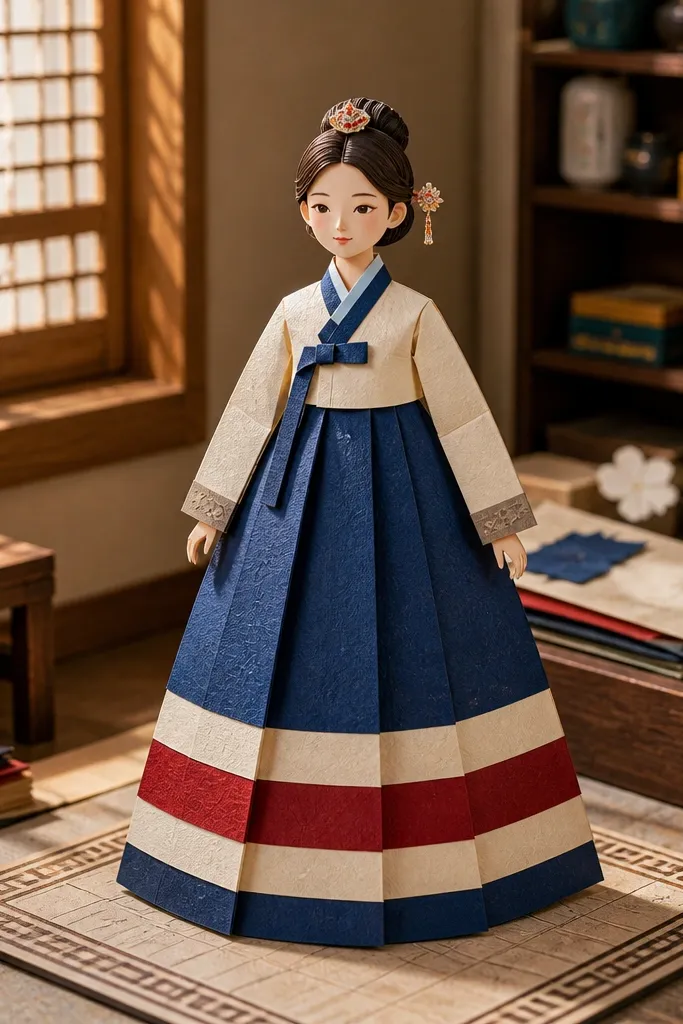
Hanbok templates look stunning because the design has clear color blocks and overlapping bands. This one teaches you to handle bands correctly: the skirt band sits under the top so the outfit reads layered and structured. Even with simple coloring, the color-block layout makes the doll look like it’s wearing real traditional clothing. It’s a great choice for anyone who wants an aesthetic that feels cultural without turning into a cluttered craft project.
Print jeogori top pieces and skirt band layers on 110 lb cardstock. Cut and glue the skirt band first to the doll hips, then add the skirt layer on top so the band stays visible. Assemble the jeogori top by gluing inner panels before outer panels, then attach it so the collar line stays aligned. Finish by adding the trim pieces along the edges using small dots of glue.
Use two shades for trim: one for the main edge and a slightly darker tone for the inner line so it looks dimensional.
Don’t glue the top trim directly to the skirt; keep trim inside the top so the band remains readable.
14. Camping Outfit with Jacket, Beanie, and Backpack Straps
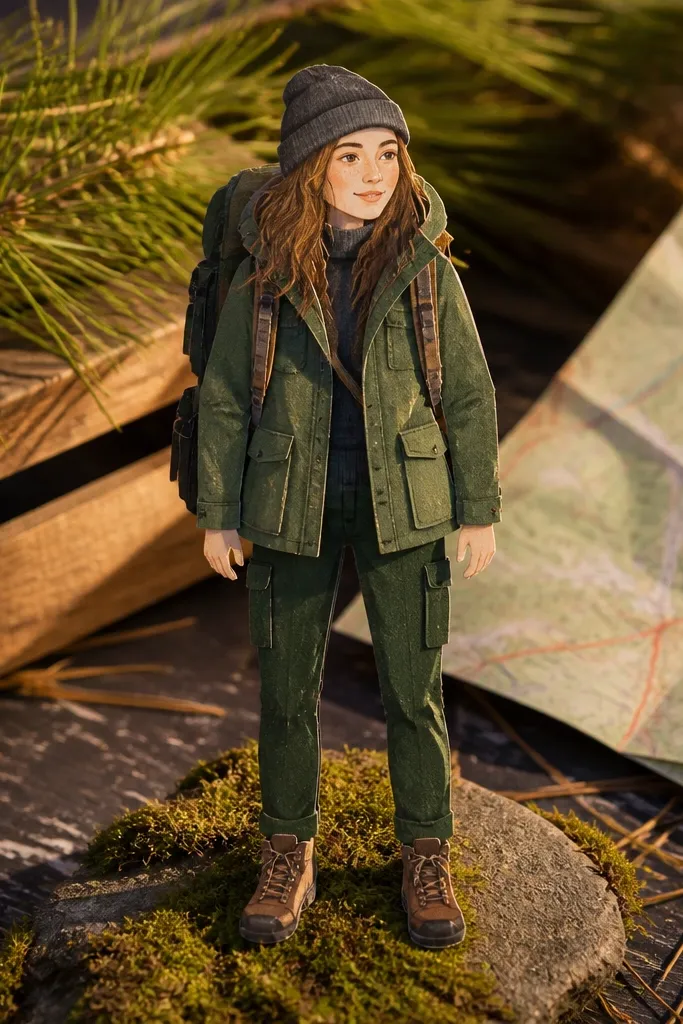
This template makes your doll look like a scene without needing a full diorama. Separate backpack straps and a beanie create depth around the head and shoulders, which is where photos usually feel flat. The jacket pieces are simple shapes so you can focus on color and clean edges. It’s perfect for building a themed set — pair it with a separate accessory page later.
Print jacket, beanie, and backpack pieces on 80 lb cardstock. Glue the backpack straps onto the doll back first, then place the jacket front so it overlaps the strap attachment points. Add the beanie last so it frames the face and doesn’t get covered by the jacket collar. Assemble the backpack body only after the straps are dry, so the positioning stays accurate.
Editor's noteIf straps look crooked, tape them in place while the glue sets so they don’t drift.
Skip thisAvoid gluing the backpack directly to the doll torso; attach it to the jacket overlap area for a cleaner fit.
15. Formal Suit with Bow Tie and Pocket Square Separate Inserts
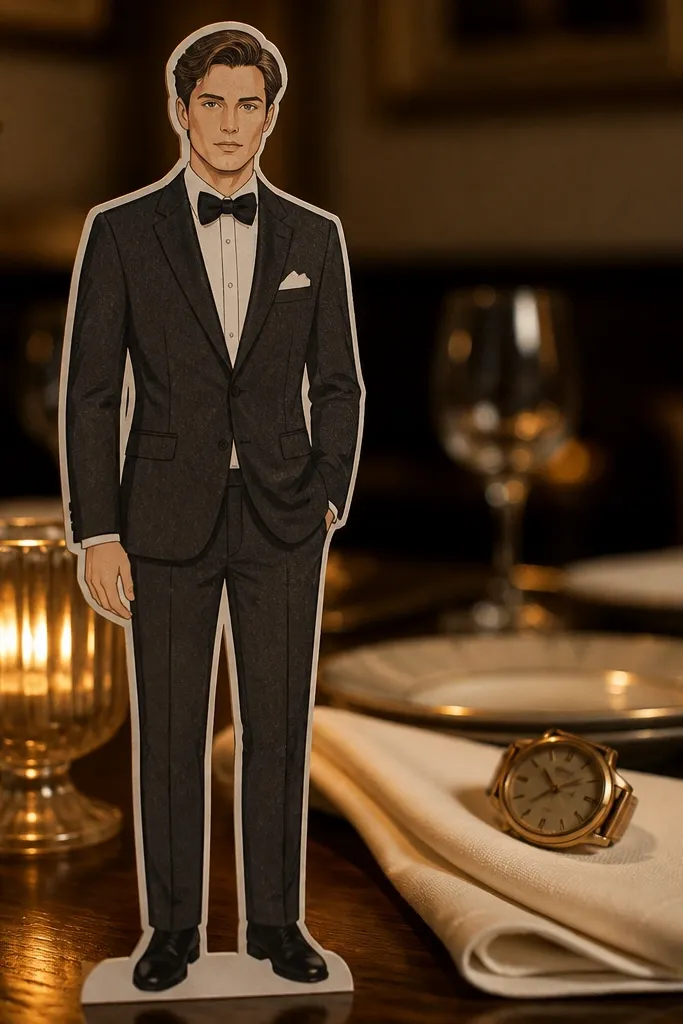
This template is for people who want crisp, grown-up styling. Separate bow tie and pocket square pieces give you high-impact finishing details that read instantly in photos. The suit jacket shape also teaches how to glue curved lapels without warping the collar area. Use a matte black or charcoal for the suit, then add a bright pocket square color like burgundy or teal for contrast.
Print suit jacket and pants on 110 lb cardstock so the lapels stay crisp. Cut the bow tie and pocket square inserts, then glue them after the jacket is attached to the doll. Attach the jacket so the collar line stays centered, then add lapel edges with thin glue lines. Finally, glue the pocket square inside the jacket pocket opening so it sits slightly above the pocket base.
For pocket squares, color the underside slightly darker so it looks layered even under flat light.
Don’t glue bow tie across the whole back — glue only the center and let the ends sit flat.
16. Monochrome Streetwear with Oversized Hoodie + Drawstring Pieces
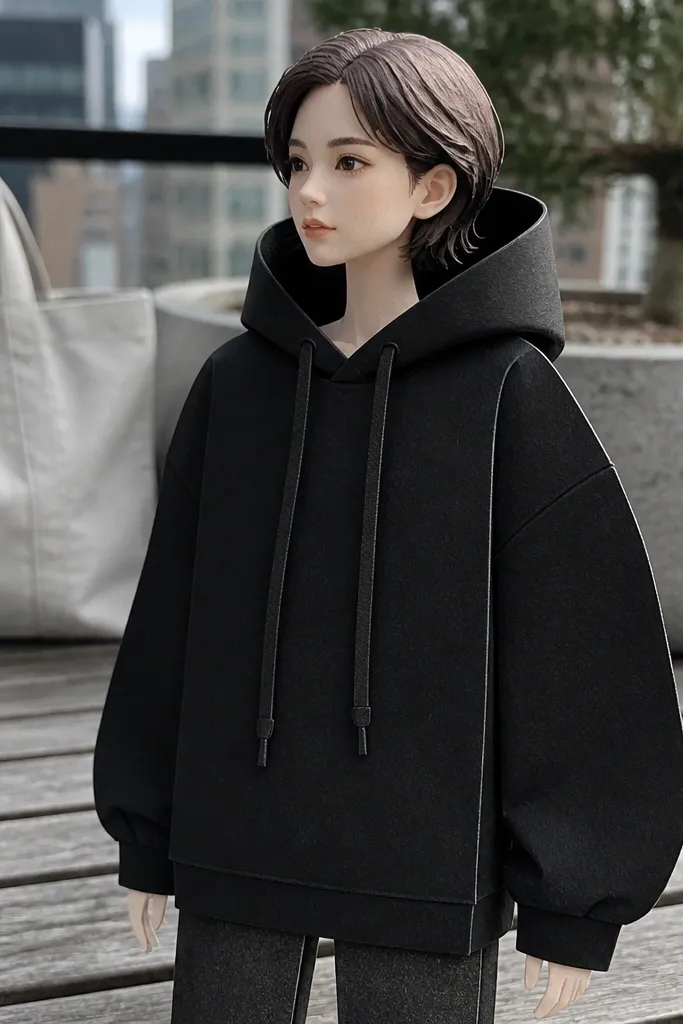
Oversized hoodies look amazing when the drawstrings are separate and the hood has a defined edge. This template teaches you to build volume without thick bulk: the hoodie layers overlap and the drawstrings add a little motion. Keep it monochrome for maximum aesthetic — black hoodie, charcoal pants, and a light gray drawstring. It’s a clean style for learning because the shapes are big and the details are limited but effective.
Print hoodie parts and drawstrings on 80 lb cardstock. Cut the hood outline carefully, then glue the hood to the top of the torso first. Attach the hoodie body panels so the front overlap is consistent, then add sleeves. Finally, glue drawstrings into the small attachment points so they hang down the center.
Use a ruler to press the hoodie seams flat so the overlap line stays straight in photos.
Avoid thin, flimsy paper here; hoodie edges curl and ruin the oversized silhouette.
17. Under-the-Sea Mermaid Tail with Scales Overlay and Fluke Layers
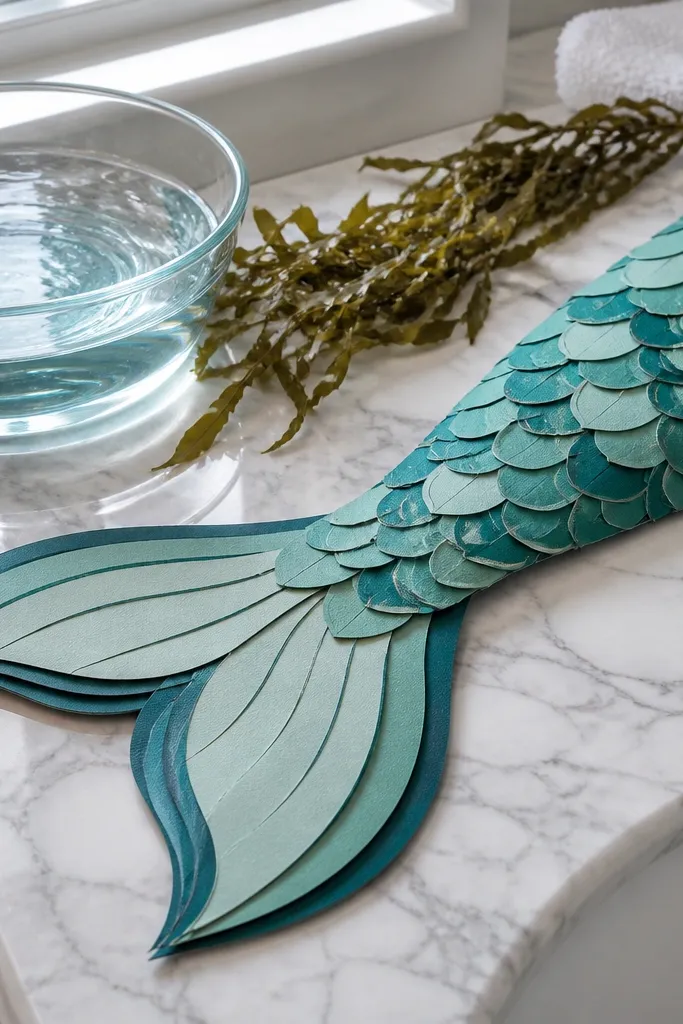
Scale overlays are what make mermaid dolls look expensive. This template uses separate tail layers so you get visible scale edges and a layered fin shape. You also learn how to align repeating scale patterns so they don’t drift across the tail. For color, try teal and seafoam with a darker outline tone — it reads like texture instead of flat coloring. Great for themed decor photos and gift sets.
Print the base tail and scale overlay on 110 lb cardstock for crisp edges. Cut the scale overlay pieces and dry-fit them so the pattern aligns before any glue. Glue the base tail to the doll legs, then attach the scale overlay starting at the top and working down. Finish by adding the fluke layers at the bottom, pressing flat for 10 minutes to prevent curling.
If your overlay lifts at the edges, lightly score the back of the cardstock along the fold line before gluing.
Don’t glue the entire overlay flat — leave tiny edge gaps so scale edges stay visible.
18. Holiday Knit Sweater with Snowflake Cuff Bands
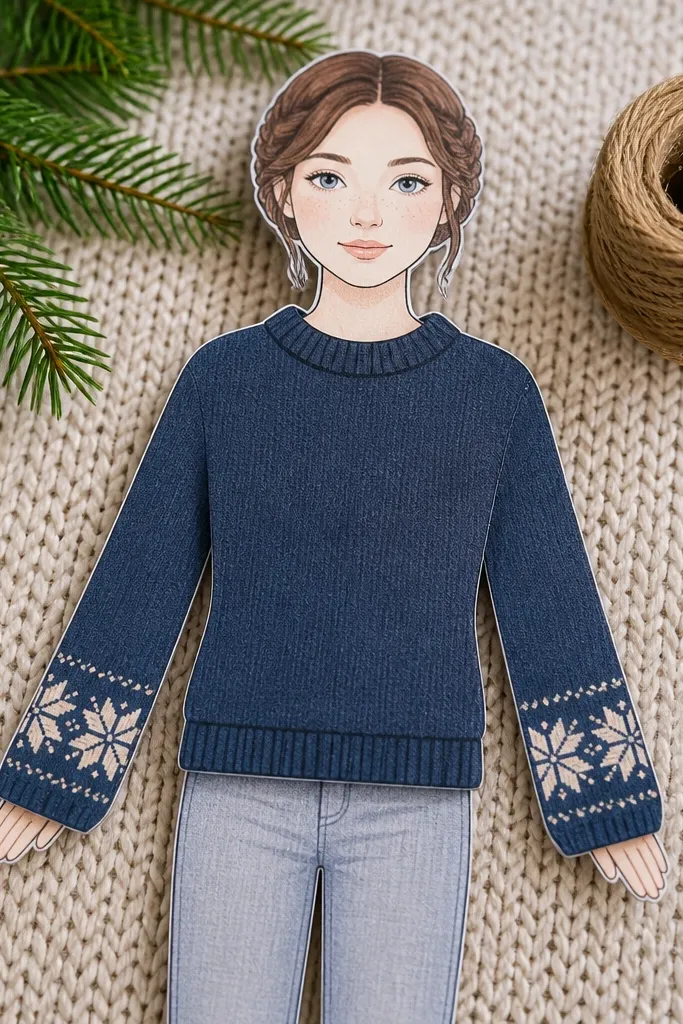
This template delivers a holiday look without relying on heavy shading. Snowflake cuff bands create a clear focal point at the hands, and the sweater body shape keeps the silhouette tidy. It’s also a good practice set for band alignment because cuffs must match left and right. Use a muted sweater color like navy or heather gray and let the snowflake band stand out in white or light silver tones.
Print sweater body and cuff bands on 80 lb cardstock. Cut cuffs and glue them to sleeve ends first, aligning the snowflake pattern so it doesn’t rotate. Then assemble the sweater front and back pieces and attach sleeves to the torso. Finally, add any neckline trim pieces and press flat under a book for 10 minutes before display.
Use a white gel pen on the snowflake band edges to make them pop under warm indoor light.
Avoid rushing cuff placement — rotated cuffs make the whole outfit look off.
19. Flapper Dress with Beaded Fringe Strips and Headband
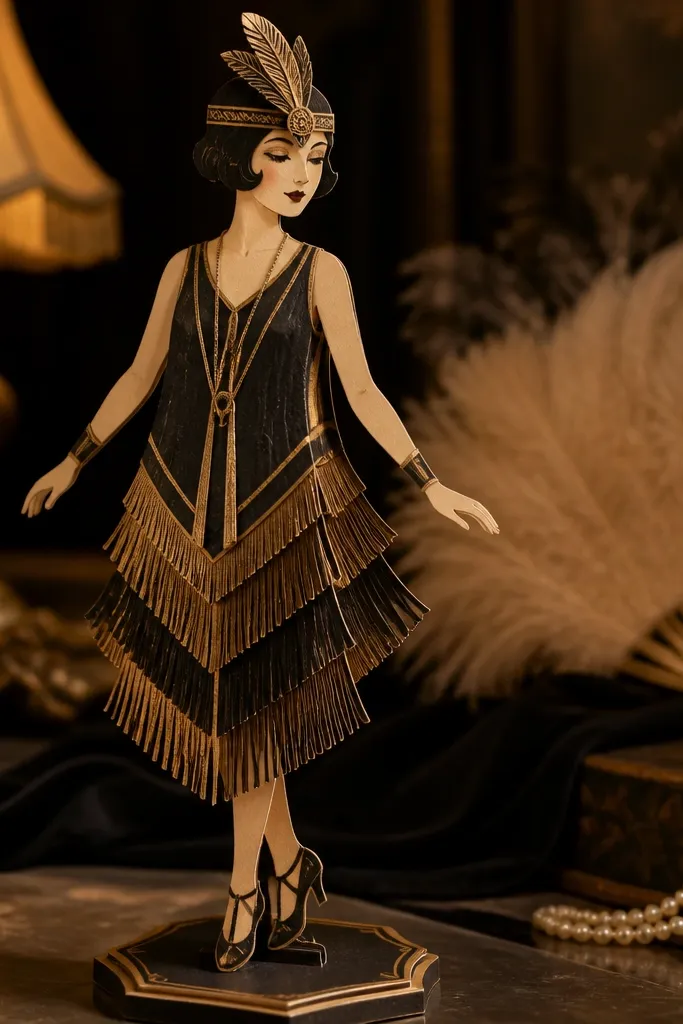
Fringe is where paper dolls can look surprisingly lifelike. This template uses fringe strips on the dress so you get motion in still photos — the edges create a shimmering look even without glitter. The headband adds a clean vertical accent that frames the face and makes the outfit feel complete. Pick a classic palette like black with gold accents, or do a softer look with dusty rose and cream fringe.
Print dress base and fringe strips on 110 lb cardstock so the fringe stays straight. Cut the fringe strips carefully, then glue them to the dress hem starting at the center and working outward. Attach the dress to the doll and then add the headband last so it sits above the neckline. Press flat for a short dry time, then gently flex the fringe edges so they catch light.
Glue fringe only at the top edge; if you glue down the full strip, it turns into a solid line.
Don’t use watery glue on fringe — it soaks cardstock and makes edges look fuzzy.
20. Office Blouse with Collar Tabs and Pencil Skirt Slits
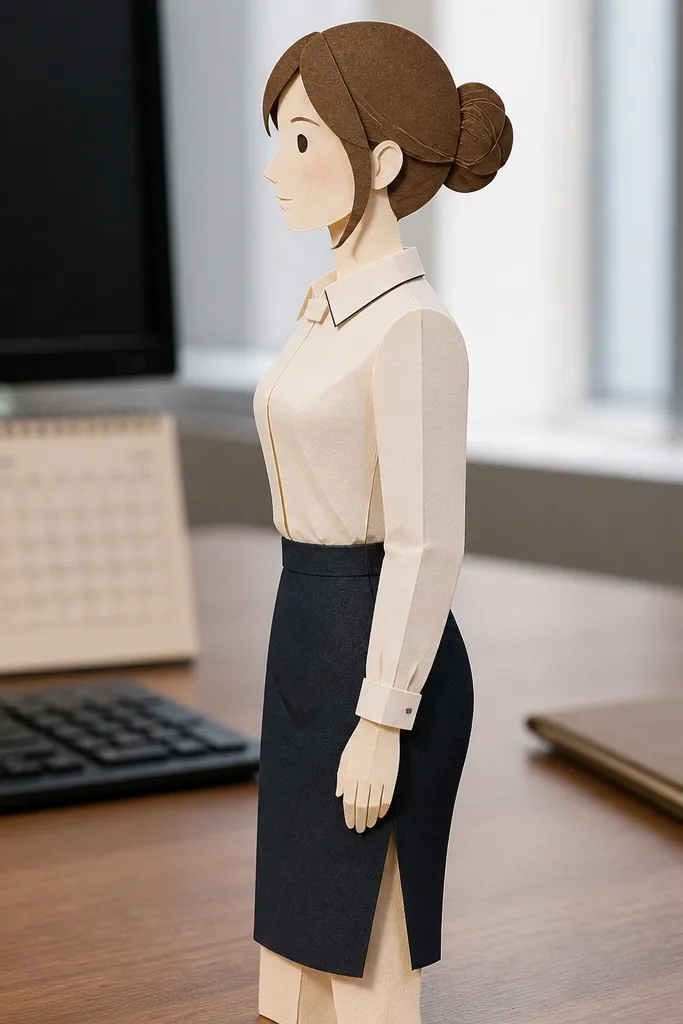
This template is for people who want “adult” and clean, not cute and childish. Collar tabs give structure, and skirt slits add realism that reads well in side shots. It’s a good set to learn how to keep edges crisp while still moving parts slightly. Use a solid blouse color like cream or pale blue and a deeper skirt color like navy or charcoal to create a polished contrast.
Print blouse pieces and skirt pieces on 110 lb cardstock for sharp collar and slit edges. Cut collar tabs and glue them to the neckline opening first. Assemble the blouse front and attach it to the doll torso, then glue the pencil skirt so the slit opening lines up front-facing. Finish by adding any sleeve cuffs and smoothing with a flat tool like a bone folder.
Use a bone folder on cardstock seams; it presses clean edges without tearing like a plastic spatula can.
Skip curling the slit edges with glue; it makes the slit look like a mistake instead of a design detail.



