
1. Blush Grid Collage With White Margins
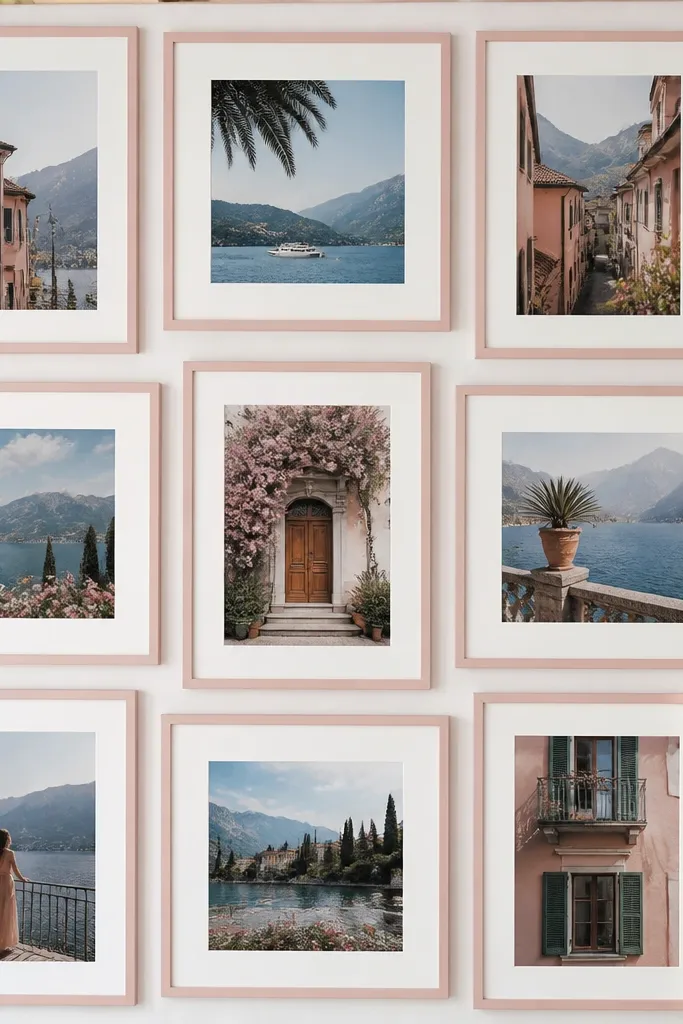
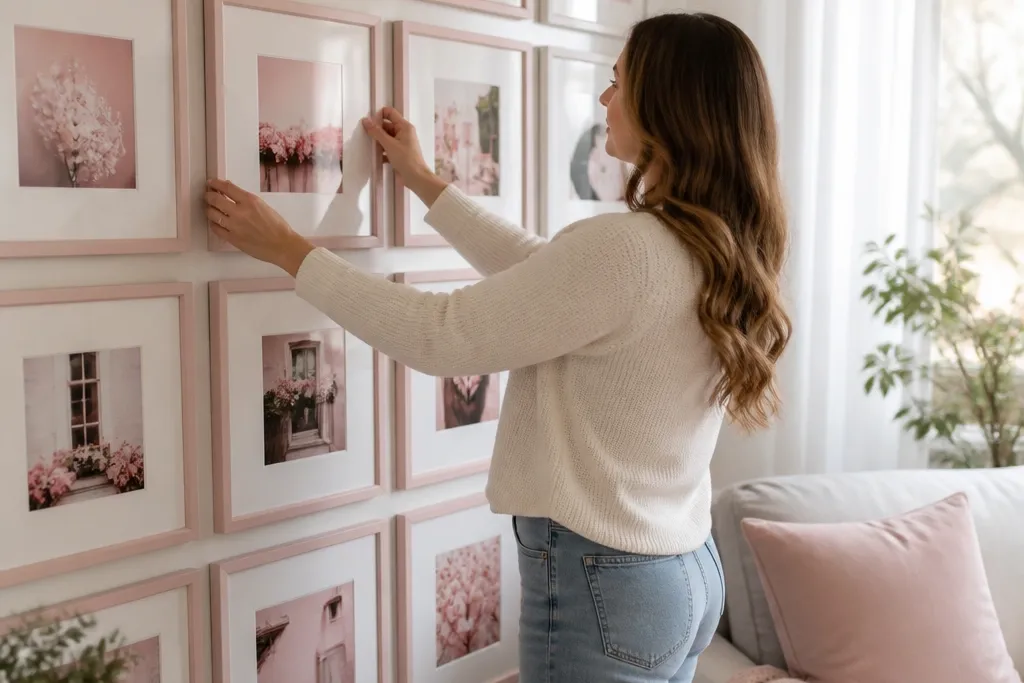
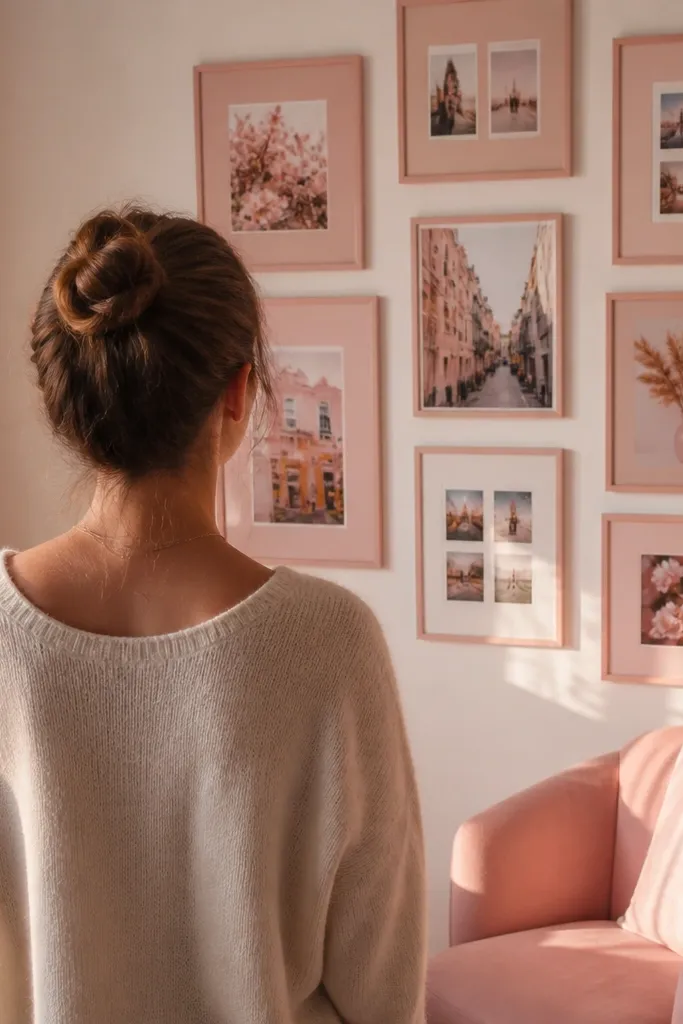
This is the easiest way to get a dreamy pink aesthetic photo wall collage without it looking chaotic. The look works because every photo has the same breathing room, so your eye reads the wall as one designed piece. Use mostly portrait and square photos, but keep the borders identical so mixed photo sizes don’t fight each other. White margins brighten pink tones and stop the wall color from dulling the images, especially under warm indoor lighting. It suits hallways, bedrooms, and any wall where you want “cute organized” instead of “random gallery.”
Start by measuring the wall space and drawing a simple grid on paper: pick one anchor rectangle and set a 2-inch margin around it. Print a set of photos with white borders — or add white mat cards — so every piece has the same outer size. Lay everything out on the floor using the grid, then transfer with painter’s tape and a level before you hang. After hanging, keep the frame finishes consistent and adjust only the anchor photo’s position, not the spacing.
Print one extra copy of your anchor photo so you can swap it if the colors look off after lighting hits the wall.
Don’t mix different border widths — it makes the whole wall feel busy.
2. Hot Pink Statement Anchor With Mini Surround
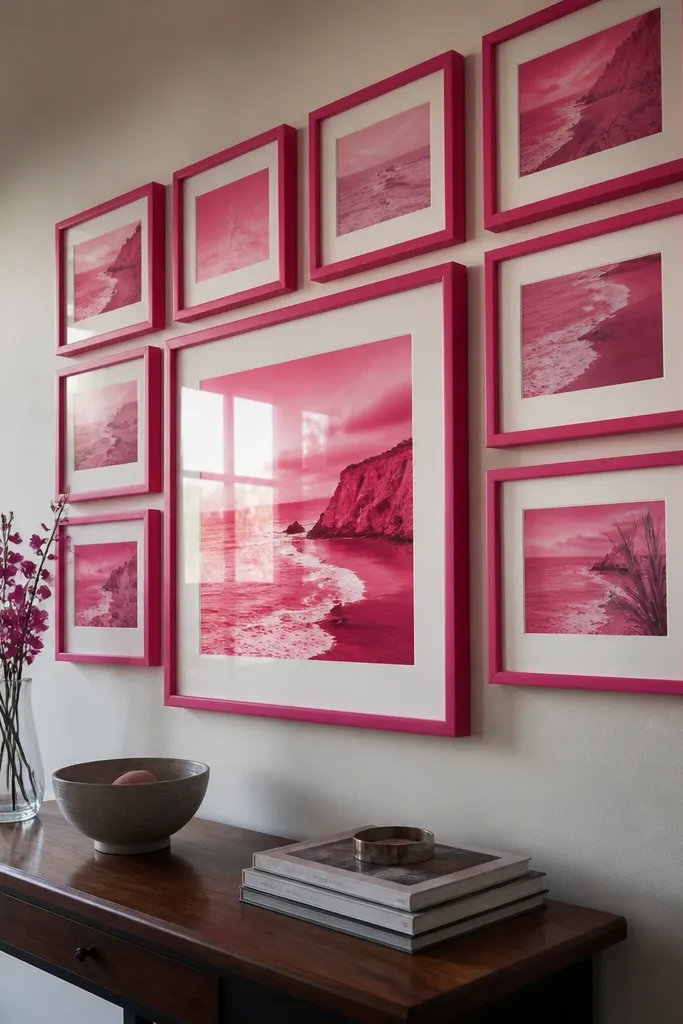
This layout gives you that “dreamy but bold” vibe by using one large anchor as the visual magnet. The surrounding mini photos make the collage feel full without turning messy because they’re all the same size. Choose a hot pink frame or a photo with strong pink tones for the anchor, then surround it with smaller frames in white or pale blush. The contrast between one big piece and many small ones reads intentional on camera and in real life. It’s great for living rooms where you want a focal point, not a wall that blends into the background.
Pick one anchor photo and size it larger than everything else — aim for about 18x24 inches or close to it. Print 8-12 smaller photos at a single size, like 4x6 or 5x7, with matching white borders. Arrange the mini frames in a loose ring around the anchor, keeping 2 inches between frames and 3-4 inches around the anchor edges. Mark the anchor first, hang it level, then fill in the smaller frames using your tape layout so nothing drifts.
Use matte white frames for the minis; glossy surfaces reflect light and can make pink look uneven.
Don’t make the anchor the same size as the rest — the “statement” effect disappears.
3. Blush Paper Cut Collage Frames
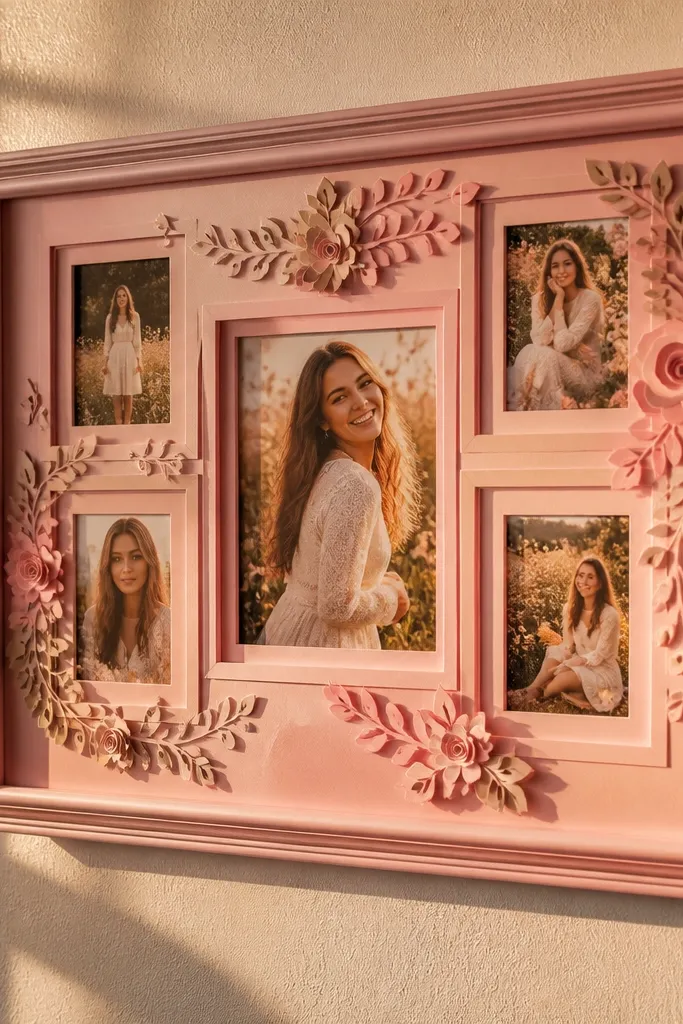
If you want dreamy instead of flat, this uses layered paper mats to create a soft, dimensional look. The photos sit on blush paper cut frames, so pink tones feel cohesive even if the photos vary. It also hides tiny alignment issues because the layered edges create a forgiving outline. This is a good choice for a pink aesthetic photo wall collage when you want it to look handmade and artsy without needing painting skills. It works well in nurseries, cozy corners, and small walls where texture shows up on camera.
Cut blush cardstock mats with an inner window sized to your print, leaving a 1-inch border around each photo. Layer a second thinner frame behind it using foam tape so the top mat casts a soft shadow. Start by placing all photos on a flat surface, then align each mat window over the print and tape the back. Hang using picture-hanging strips so the foam depth stays consistent and the frames sit flat.
Lightly sand the cardstock edges for a softer look and fewer visible cut lines in photos.
Don’t use thick glitter paper — it looks messy and catches dust.
4. Rose Gallery Ledge With Clips
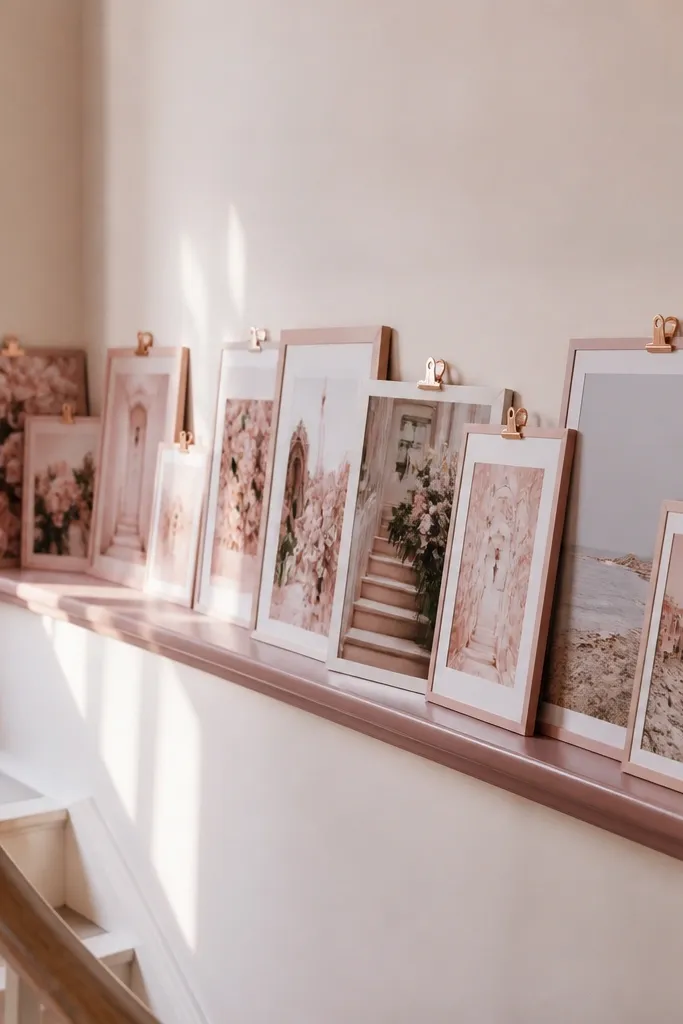
This is for people who like change. A ledge with clips lets you swap photos while keeping the pink aesthetic consistent through frame color and matting. It looks dreamy because you get slight overlap and a relaxed, styled mess that still reads curated. Use blush frames or white frames with pink-tinted mats, and keep the clip line at one height for structure. Great for renters because it’s easier to move than nailed frames, and it photographs well since the arrangement has depth.
Install a shallow wall ledge at eye level, then hang a simple wire or use small picture clips mounted to the ledge. Print photos in consistent sizes, then mount each into a frame or cardstock mat with a backing board. Clip the frames in a staggered pattern, keeping 1.5-2 inches between pieces. Finish by aligning the top edges roughly — you’re aiming for a neat wave, not chaos.
Editor's noteChoose clip hardware in brushed nickel or matte black; it won’t fight pink tones.
Skip thisDon’t mix frame sizes wildly on a ledge — it becomes uneven fast.
5. Pink Polaroid Wall With Realistic Tape Borders
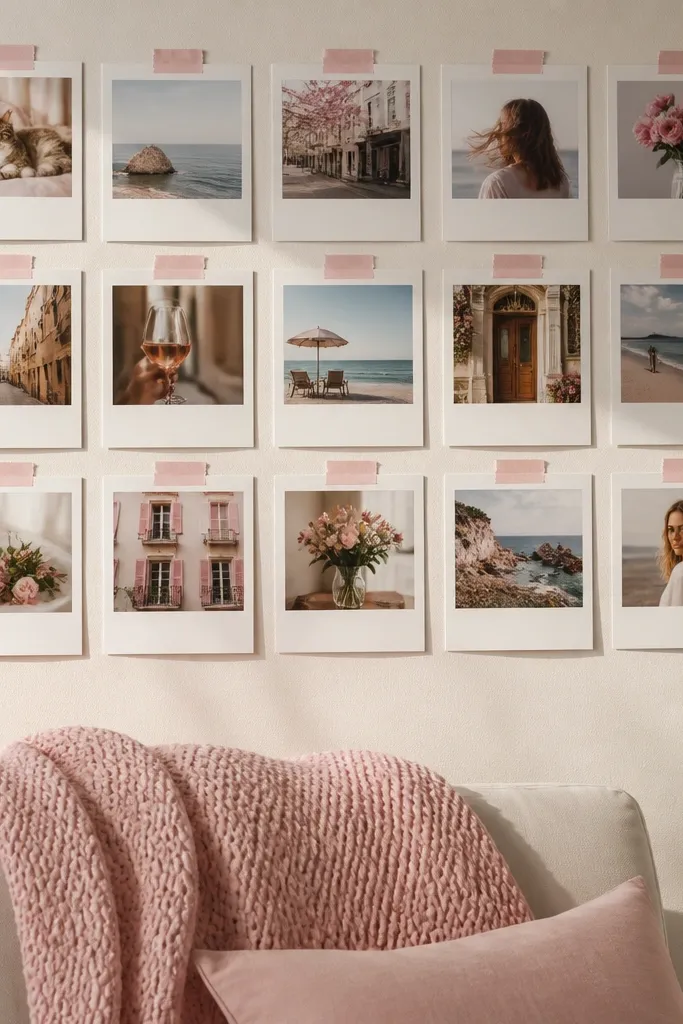
Polaroid-style prints make any pink aesthetic photo wall collage feel instantly dreamy because the white border is built-in. The trick is to keep the spacing and the “tape” look consistent, so it reads like a deliberate photo wall, not a craft pile. Use photos with soft lighting or pink-toned subjects, and add a subtle blush tint by using blush photo paper or a pink overlay filter. This layout suits dorm rooms, bedrooms, and entryways where you want a casual, airy feel that still looks styled on camera.
Print your photos in a polaroid format: choose an 8x10 photo paper size and crop so the image area stays consistent across all prints. Add a white border area and leave a small margin at the top for tape. Place everything on the floor first, then use painter’s tape pieces at the corners to simulate the polaroid tape look. Hang with removable hooks so the paper doesn’t bend or sag.
Use the same tape color and width for every piece — it’s the small visual consistency that sells the look.
Don’t mix glossy and matte prints — reflections make the wall look uneven.
6. Blush Ombre Mat Stack Collage
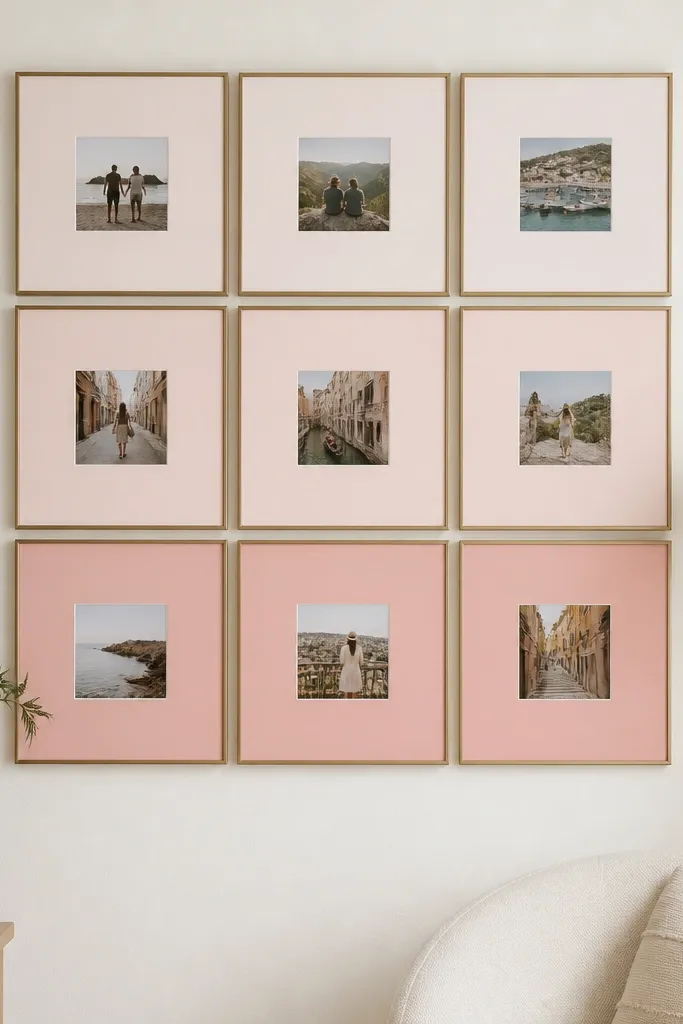
This creates a dreamy gradient effect on your photo wall collage without needing any digital design. You build the pink aesthetic physically: each frame gets a mat in a slightly different blush shade, stepping from light to deeper rose. The result feels curated because the wall has a single color story, even if your photos include different scenes. It’s especially pretty in vertical arrangements like above a dresser or bed. Skill level is low, and the payoff is high because the gradient reads clearly in photos.
Pick 10-14 photos and decide a vertical flow — top is light blush, bottom is deeper rose. Print all photos with the same image size, then cut mats in matching shades from blush cardstock packs. Layer each mat with a consistent 1/4-inch offset so the ombre bands show. Hang using the same height spacing between frames, and keep the mats centered on the photo so the gradient stays smooth.
Make a quick color strip on scrap paper first so your blush shades step in a believable order.
Don’t choose mats that are too close in shade — the gradient disappears.
7. Pink Frame + Mirror Combo Collage
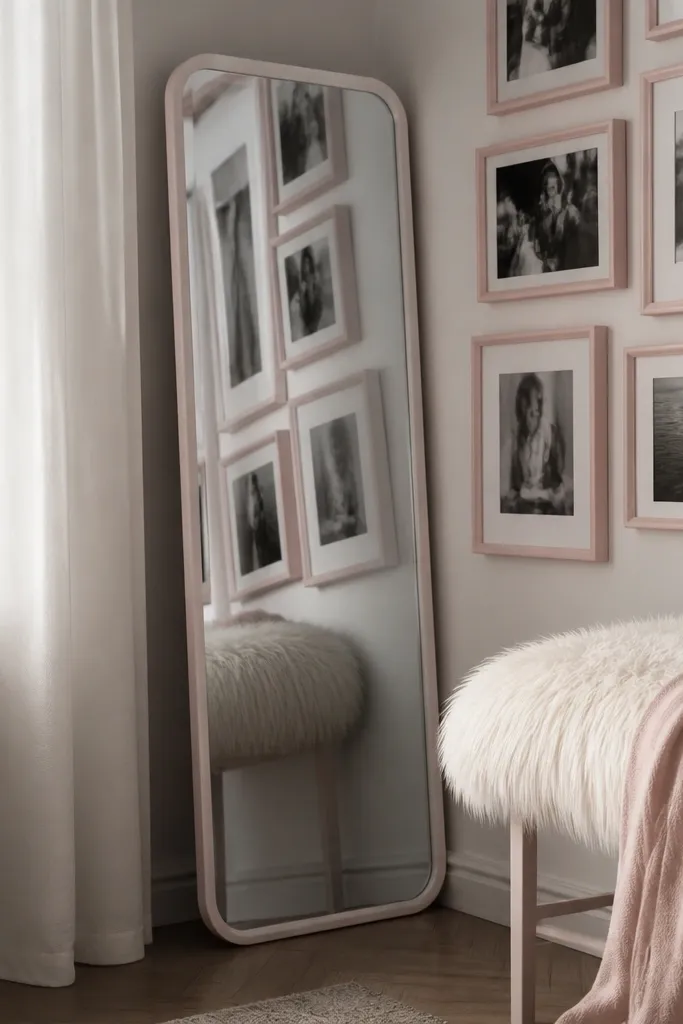
A mirror next to your pink photo wall collage makes the whole thing feel airier and more dreamy because it bounces light back into the frames. Keep the mirror small, and treat it like the anchor, surrounded by photos in matching pink-tinted frames. This is a strong choice for rooms with limited daylight since the reflected light makes pink tones look softer. It also adds depth, so the wall looks good from more than one angle. Use this when you want your collage to feel styled and photogenic without adding more clutter.
Choose a mirror about 12-18 inches wide with a thin frame in white, brushed nickel, or pale pink. Print 8-10 photos in consistent sizes and mount them in frames with the same finish. Arrange the mirror slightly off-center, then place photos in a tight cluster around it with 2-inch spacing. Hang the mirror first, then use painter’s tape to align the frame edges so everything looks intentional.
Position the mirror so it reflects a light source, not a dark corner — that’s what keeps pink from looking dull.
Don’t place a large mirror — it can overpower the collage.
8. Rosy Wreath of Photos Around a Heart Sign
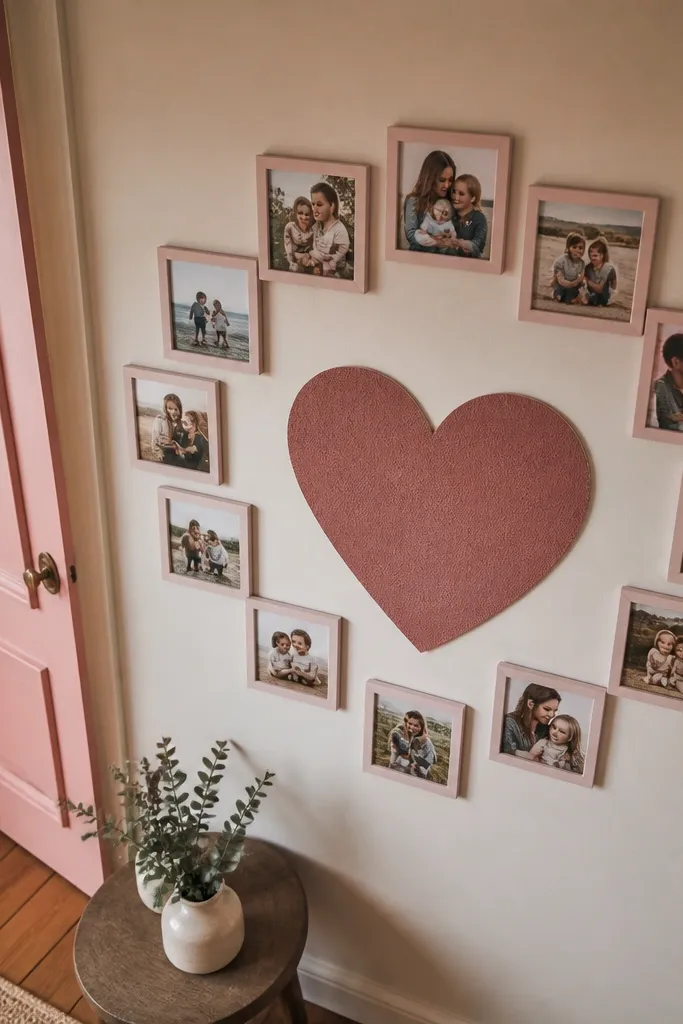
This makes a pink aesthetic photo wall collage feel like a themed moment without turning into party decor. The circular wreath pattern gives you a dreamy shape that reads clearly in photos, and the heart sign anchors the meaning. Use pink frames or white frames with blush mats so the circle looks cohesive. The heart can be a simple painted wood cutout, a printed sign, or a felt shape, but keep it flat so it doesn’t look bulky. It fits Valentine season, anniversaries, and any time you want a soft romantic vibe on a wall.
Pick a heart sign size around 10-14 inches wide and center it at eye level. Print 14-18 photos in one size, like 4x6, and frame them in matching blush or white frames. Lay them in a circle on the floor and adjust until the circle looks even, then transfer the top edges to painter’s tape on the wall. Mount the heart first, then hang the frames around it, keeping 1.5-2 inches between each frame so the circle stays clean.
Use paper templates for each frame so the circle doesn’t drift as you hang.
Don’t vary photo sizes inside the circle — the wreath will look lopsided.
9. Pink Ribbon String Photo Wall
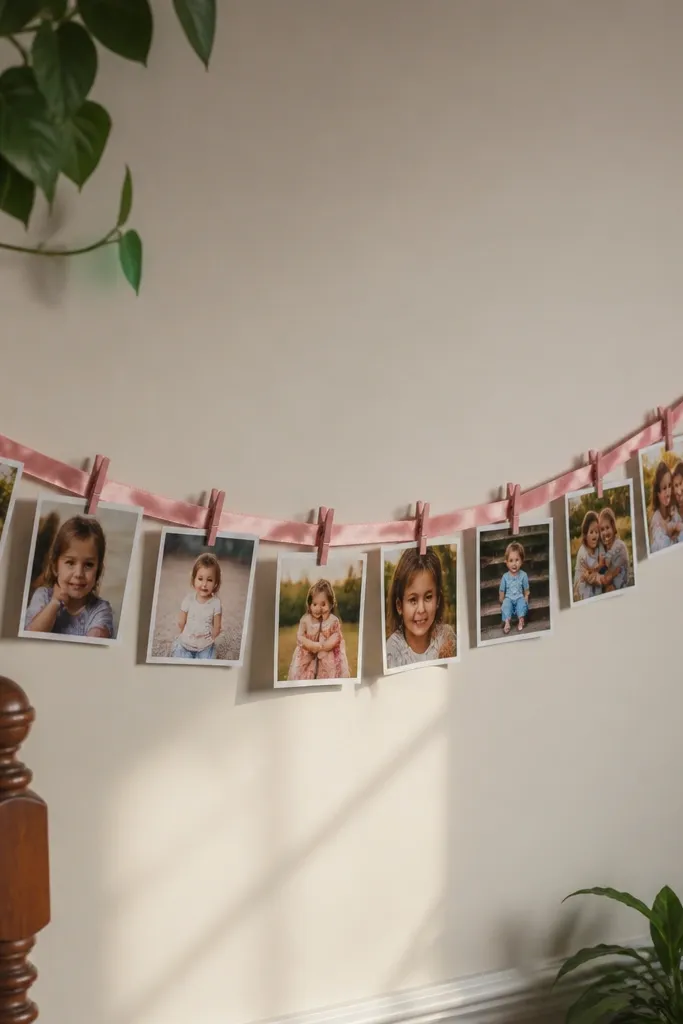
A ribbon string photo wall gives you motion and softness, which is exactly what makes a pink aesthetic photo wall collage feel dreamy. The ribbon creates gentle curves and the clips add a handmade rhythm. This works best with small square photos and a consistent mat color so the pink story stays coherent. It’s also practical: you can re-arrange photos as moods change. Great for a bedroom wall where you want a cozy, airy look instead of rigid frames.
Mount two small hooks or nails at the ends of your layout, then stretch a thin satin ribbon across the wall in a slight arc. Print small photos, like 3x3 or 4x4, with white borders, then mount them on cardstock backing. Use mini clothespins or binder-style clips in a matching metal finish. Clip the photos along the ribbon in a staggered pattern, keeping spacing consistent so it looks intentional.
Iron the ribbon flat before installing so it hangs smoothly and doesn’t twist the pink tones.
Don’t use too many different clip styles; it breaks the dreamy uniform look.
10. Blush Chevron Photo Strip
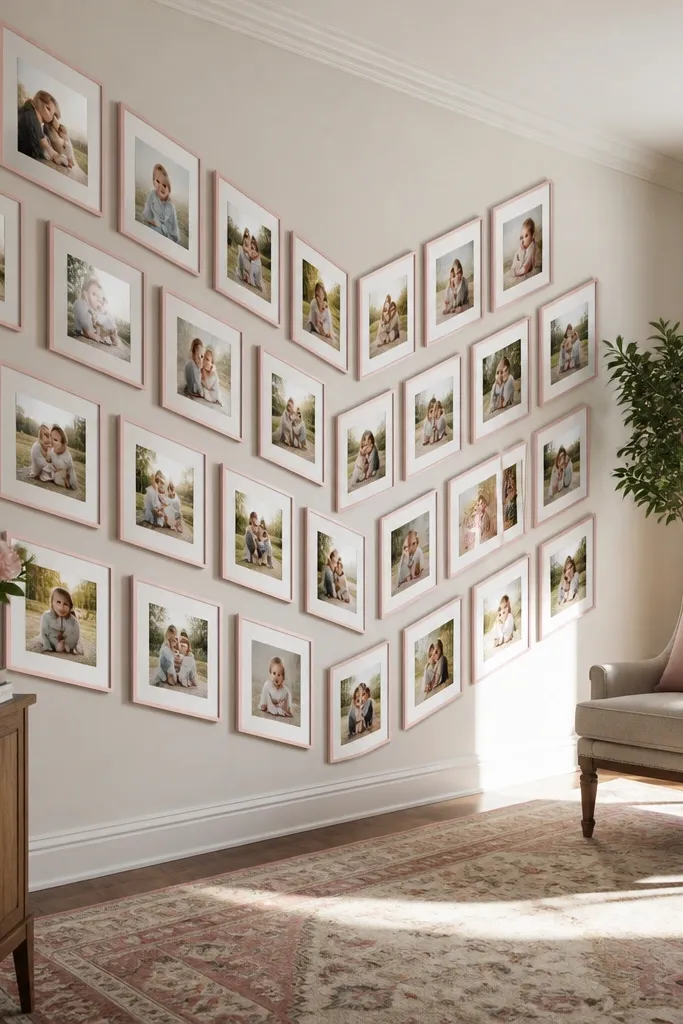
Chevron is one of the few patterns that still looks sweet instead of loud when you keep it disciplined. This collage places photos in angled rows that step down the wall, creating a playful motion that looks great in wide photos. The pink aesthetic stays dreamy when you use a limited palette: blush frames, white mats, and one accent photo in deeper rose. It’s a smart choice for a narrow wall section where you want the collage to pull the eye along. It also hides uneven wall space because the pattern directs attention.
Choose a vertical strip area about 24-36 inches wide and decide on three chevron rows. Print photos in two sizes — for example, 4x6 for the angled row and 5x7 for the center row — but keep the border size identical. Mark a center line on the wall, then measure equal diagonal steps (about 6 inches) to place each frame. Hang rows starting from the top center, then fill outward so the chevron stays sharp.
Use a laser level or a small angle ruler to keep diagonals consistent; crooked chevrons look sloppy fast.
Don’t mix frame thicknesses — the chevron edges will look uneven.
11. Pink Tissue Paper Background Collage Frame
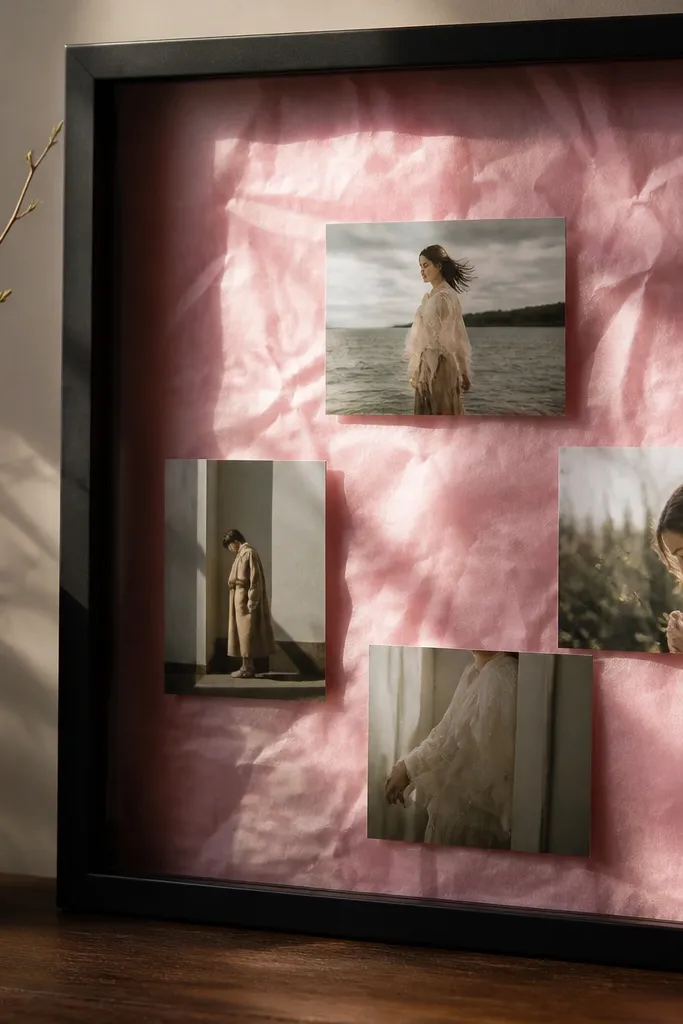
This is a dreamy trick: tissue paper behind your photos makes pink look softer and more atmospheric, like light through fabric. You mount photos on top of a pink tissue layer inside a large frame or shadow box, so the wall piece reads as one artwork. It’s ideal when your photos are mostly light-colored and you want the collage to feel ethereal. Skill is moderate because you’re building layers, but the materials are cheap and the result looks gallery-level. Works beautifully in bedrooms and reading corners.
Buy a large shadow box frame with a depth of at least 1 inch so tissue doesn’t crush. Cut pink tissue paper to cover the back panel and gently scrunch it so it creates soft texture. Mount each photo on white cardstock, then place them on the tissue using small dots of double-sided tape. Close the frame carefully and secure the back; hang with proper hooks rated for the weight.
Editor's noteUse two tissue shades: one pale blush for the base and one deeper rose for subtle patches so the texture has dimension.
Skip thisDon’t press the tissue flat — it turns glossy and looks cheap.
12. Blush Photo + Fabric Pennant Banner
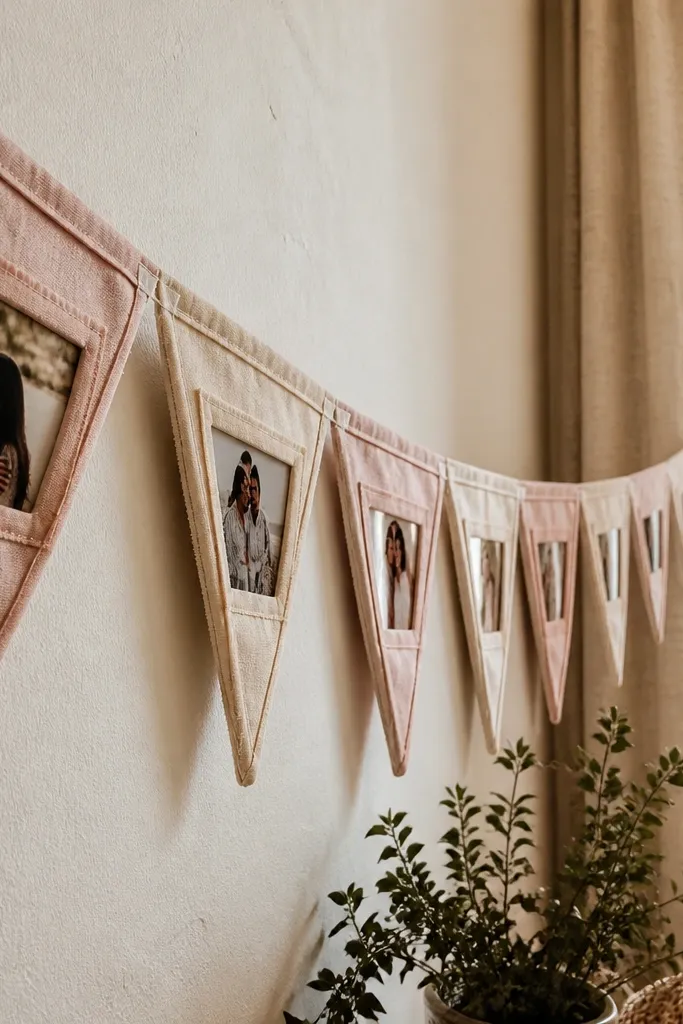
A fabric pennant banner gives your pink aesthetic photo wall collage a soft, handmade feel with movement. Instead of rigid rectangles, you’re using triangles of fabric that frame the photos, which reads dreamy and playful. Keep the fabric in blush tones or white with faint pink print so it doesn’t fight your images. This is great above a desk, near a reading nook, or in a nursery because it feels warm and cozy. It also photographs well because the banner creates a diagonal line across the frame.
Cut fabric pennants in a consistent size, like 6 inches wide at the base and 8 inches tall, and stitch or glue the seams so they don’t fray. Print photos small, like 2x3 or 3x3, and mount them on thin cardstock so they stay flat. Attach each photo to a pennant using fabric-safe adhesive or double-sided tape around the edges. Hang the banner by sewing a top channel or using clips on a string line anchored at both ends.
Use iron-on interfacing on the pennants so the fabric stays crisp in photos.
Don’t use heavy cardstock behind tiny photos — it makes the banner bulge.
13. Pink Ombre Polaroid Strip Above Bed
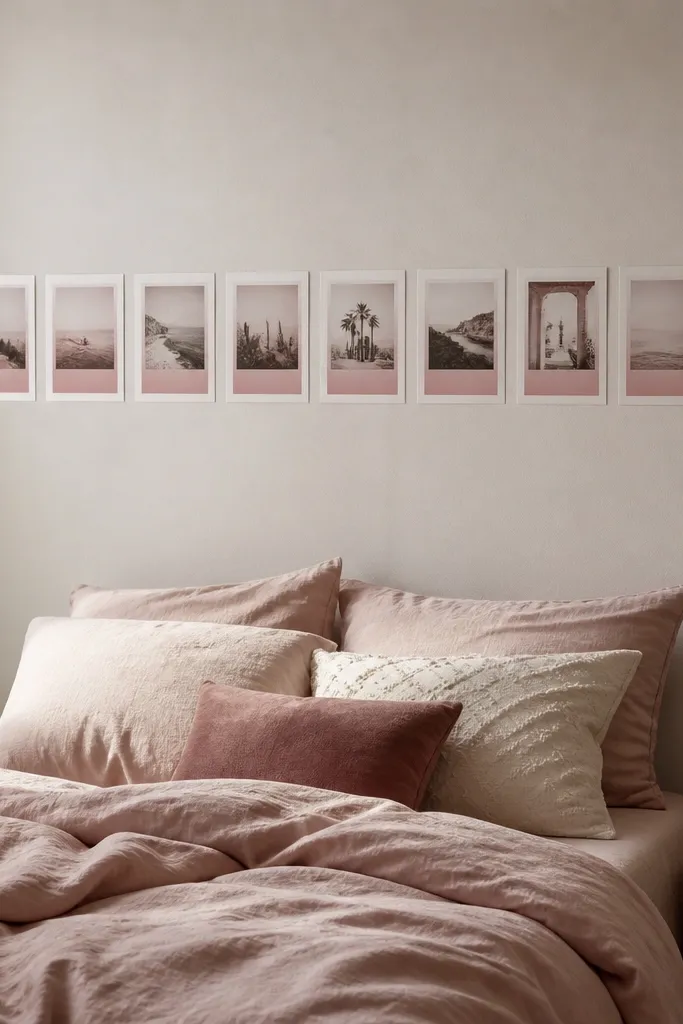
This is a clean way to get the dreamy pink aesthetic without filling an entire wall. The strip works because it creates a horizontal rhythm, and the ombre borders keep it cohesive. Use polaroid-style prints so the white frames feel consistent, then tint the bottom of each border slightly deeper rose as you go. It makes your bed area look styled even if you have minimal decor. Great for renters because you can use removable tape and swap photos easily.
Measure your bed width and plan a strip that spans most of it, leaving 4-8 inches on each side. Print polaroid-style photos with consistent image size, then create ombre borders by using blush-to-rose cardstock for the border or by printing tinted borders. Arrange from light at one end to deeper rose at the other, keeping 2 inches between each polaroid. Tape a level line on the wall, then hang using removable hooks or tape corners.
Editor's noteUse matte paper for the polaroid border so pink doesn’t glare under overhead lights.
Skip thisDon’t add extra random singles outside the strip — it breaks the ombre flow.
14. Blush Frame Collage With Mirrored Corner Cluster
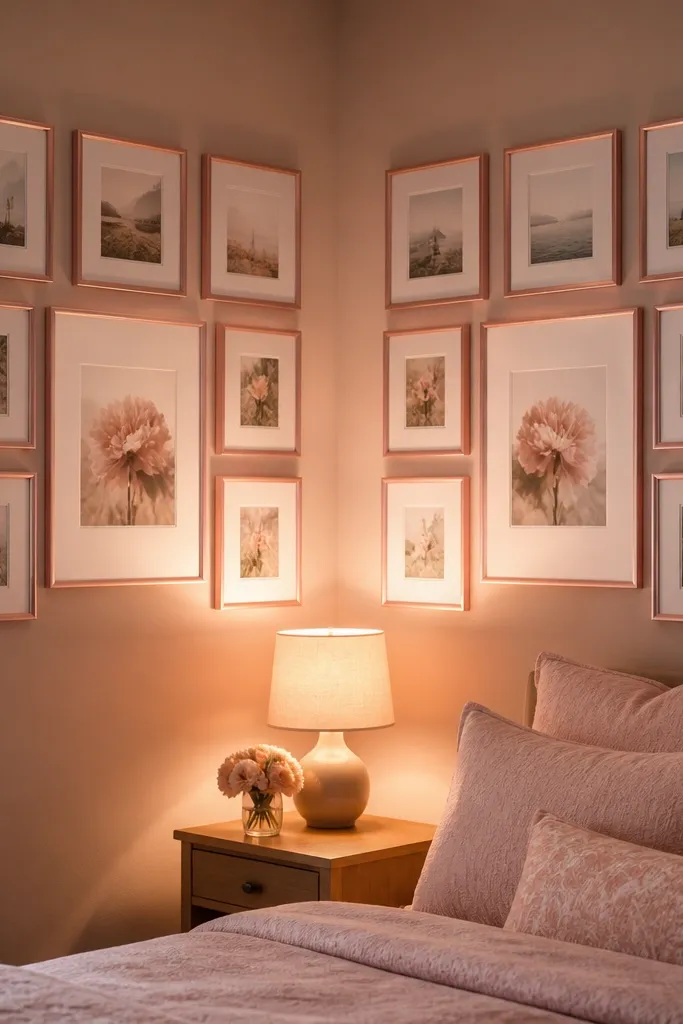
Corner walls are tricky because straight-line layouts look awkward. This idea solves it by building mirrored clusters — the same pattern on both sides — so the corner reads intentional and dreamy. Use blush frames and white mats, then repeat the same sizes in each cluster. The mirrored structure also makes the collage look good from angles, which matters if you photograph the room from the bed or doorway. It works in small spaces where you want the wall to feel designed without covering every inch.
Choose a corner and decide your cluster size, like 20-24 inches wide on each wall. Pick 10-12 photos total, and split them into two groups with matching sizes. Lay out one cluster on the floor first, then copy its arrangement for the second side. Use painter’s tape to mark frame positions and hang from the outer edges inward so the corner stays balanced.
Keep all frames the same depth so the corner doesn’t create a messy 3D silhouette.
Don’t mix frame finishes between the two sides — the mirror effect dies.
15. Pink Minimal Frames With One Paper Lantern Card
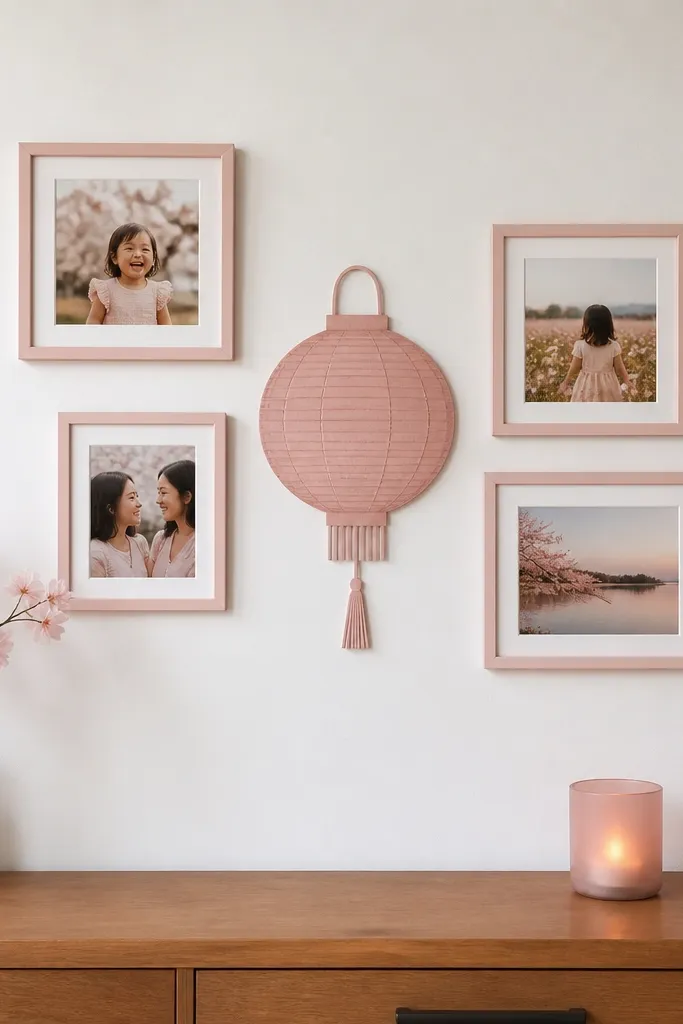
This is for a pink aesthetic photo wall collage that still looks clean. Most people go too busy. Instead, you use a small number of minimal frames and one standout card shaped like a lantern or paper ornament. The standout piece gives dreaminess through shape, not clutter, and it keeps the wall from feeling like a photo storage unit. Use soft blush tones and white mats so the frames feel airy. Perfect for modern apartments where you want pink but not chaos.
Pick 5-7 photos and frame them in thin white frames with identical mats. Create one central card shape from blush cardstock — a simple lantern outline or teardrop ornament — and attach it above or beside the central frame. Hang the layout as a loose column with 2-3 inches between pieces so it breathes. If you want extra softness, add a small strip of sheer pink ribbon behind the lantern card for a subtle glow effect.
Editor's noteUse a single frame size for all photos; the spacing becomes the design, not the variety.
Skip thisDon’t add more than one shaped element — two standout pieces compete.
16. Blush Photo Frames With Floating Shelf Base
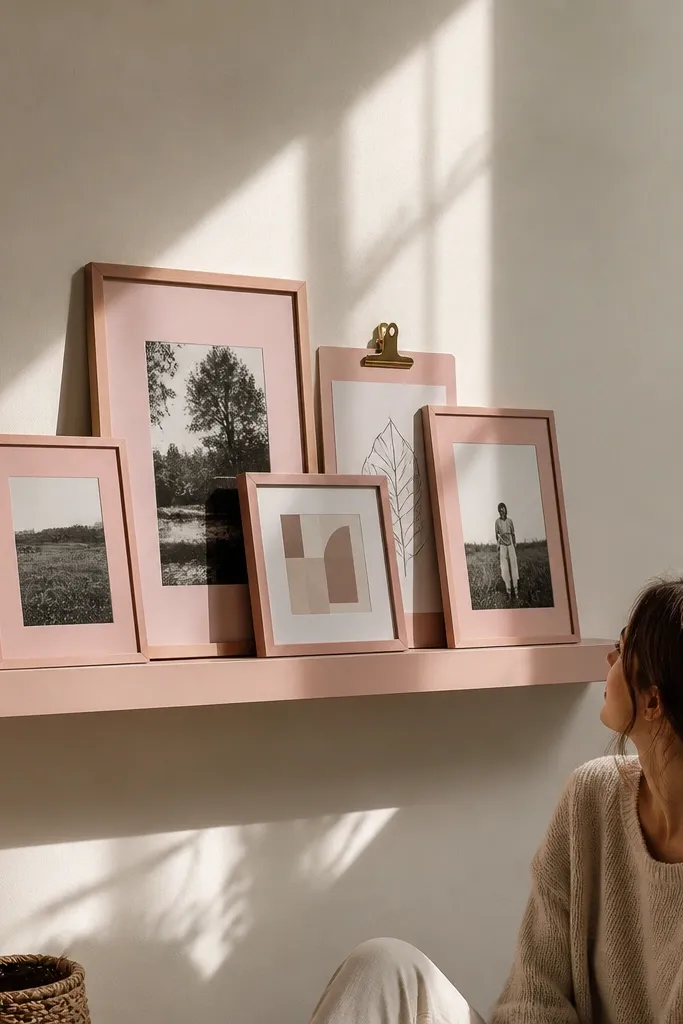
A floating shelf base gives your pink aesthetic photo wall collage a grounded look. You can lean a few small frames on the shelf while hanging the rest, creating a layered composition that feels styled without looking cluttered. The pink aesthetic stays dreamy when you use a consistent frame color and keep the shelf decor minimal: one vase, one candle, one small blush object. This layout is great for walls behind desks, consoles, or dressers where you want decor and photos to work together. It also photographs better because the shelf adds a horizontal line for balance.
Install a floating shelf about 6-10 inches below where you want the collage to sit. Frame your photos in a single size — like 8x10 — and mount the top half of the frames to the wall above the shelf. Lean 3-4 smaller frames on the shelf using small frame stands or folded cardstock wedges. Adjust the wall-hung frames so their bottom edges line up with the shelf-top line, then secure all hanging hardware.
Use blush-toned decor that matches the frames, not the photos — it keeps the whole wall palette consistent.
Don’t overload the shelf; too many objects make the collage look like a mess.
17. Pink Frame Cluster Triangle Layout
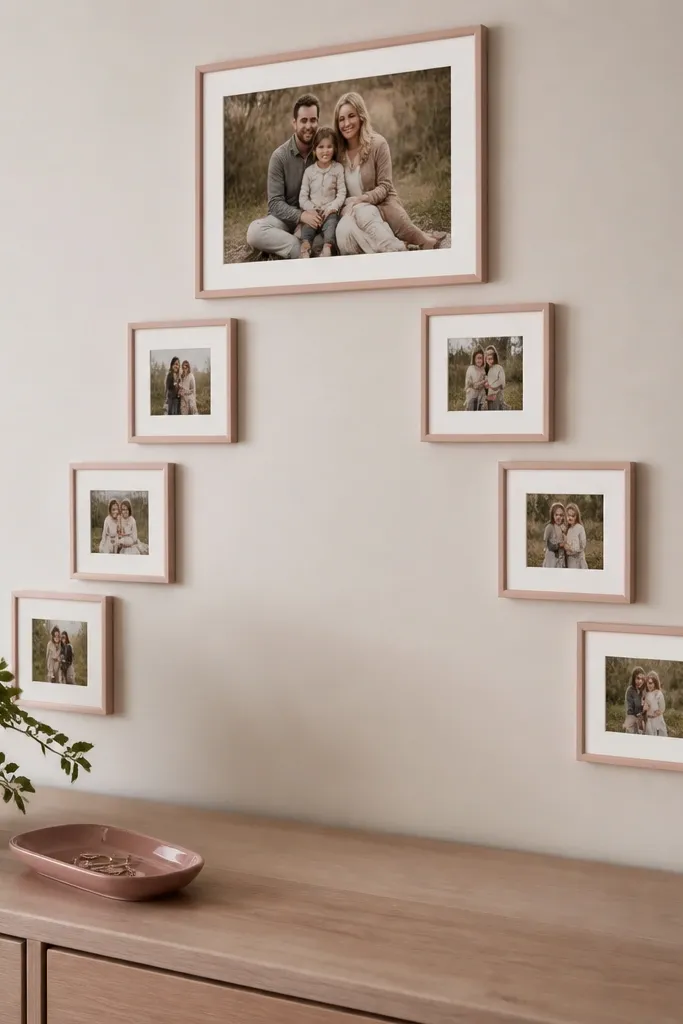
Triangle layouts create instant structure, and structure reads dreamy because it looks intentional. This collage places the biggest photo at the top point, then fans smaller frames down in two angled lines. Use blush frames and white mats so the pink stays soft and cohesive. It works especially well over a dresser or mantel where you can use the vertical wall space. The triangle also helps if your wall is slightly uneven, since the shape pulls the eye upward.
Choose a top anchor photo around 11x14 or 12x16 and place it centered at eye level. Print 8-10 smaller photos at one size, like 4x6, and frame them in matching blush or white. Arrange them in two rows that form a triangle: keep 2 inches between frames and align the outer edges of each row. Mark positions with painter’s tape, hang the top anchor first, then place the bottom frames last so you can fine-tune the triangle point.
Editor's noteUse a spirit level for the anchor only; the rest can be slightly staggered as long as the outer edges form a clean triangle.
Skip thisDon’t rotate frames randomly; keep them straight for the triangle to read clean.
18. Blush Tissue Backer + Photo Strips For A Soft Cloud Look
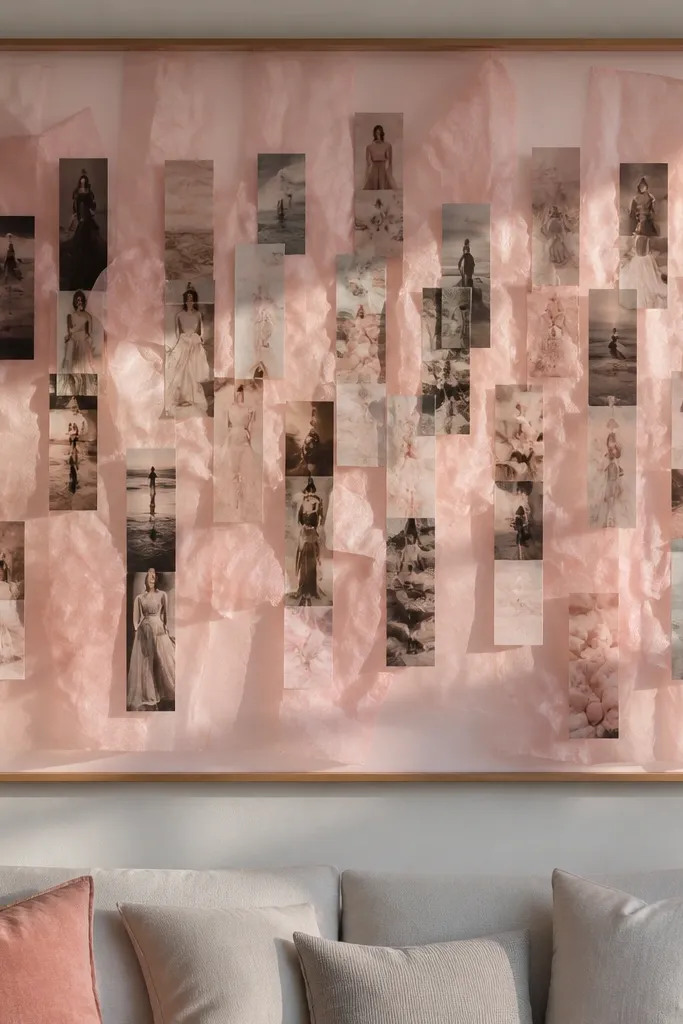
This one feels airy. You build a cloud effect by layering photo strips over blush tissue paper in a large frame, so the pink looks like soft light instead of flat color. It’s dreamy because tissue creates uneven texture, and the photos float on top. Use it when you want the collage to look more like decor than a grid of pictures. It’s also a great solution for mixed photo sizes because you can crop and align by strip, not by exact frame edges. Ideal for living rooms and bedrooms where you want a statement without sharp geometry.
Use a deep picture frame or shadow box with at least 1 inch depth. Cover the back panel with blush tissue paper — scrunch lightly and smooth only where you want the cleanest glow. Cut your photos into strips with consistent heights, then mount each strip on thin cardstock backing. Layer the strips onto the tissue in a drifting arrangement, keeping overlaps around 1 inch, then seal the back and hang securely.
Add one deeper rose tissue patch behind the densest photo cluster so the “cloud” has contrast.
Don’t use too much tissue thickness — it can warp the back and make the frame not close.
19. Pink Collage With Washi Tape Borders On Printed Photos
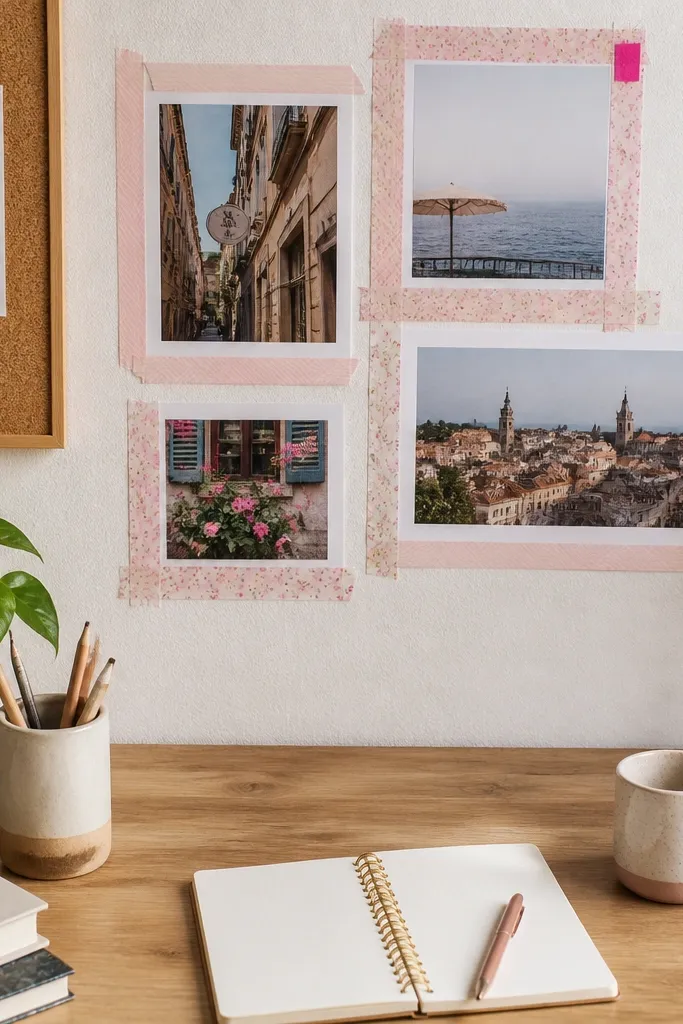
Washi tape borders keep the pink aesthetic photo wall collage feeling light and playful while still looking intentional. You don’t need fancy frames, just consistent border placement and clean tape edges. Use white cardstock prints with a pink wash tape palette: blush florals, pale pink stripes, and one small hot pink tape accent. This approach is great when you want a collage that looks handmade but photographs crisp. It also works in small spaces because tape frames take up less wall space than bulky frames.
Print photos on white cardstock or thick photo paper, sized to a consistent width like 4x6. Cut washi tape strips and build a border around each photo, leaving a 1/8 inch gap between tape and image edge so the photo stays clear. Mount each piece on a backing board (thin foam board or cardstock) for stability. Arrange on the wall with a 2-inch spacing rule and secure with removable adhesive strips at the corners.
Editor's noteUse tape only on the outer border — don’t cover faces or bright highlights; it makes images look smeared in photos.
Skip thisDon’t mix too many tape patterns on one piece — keep it to two designs max.
20. Blush Photo Wall Collage On A Single Long Ribbon Line
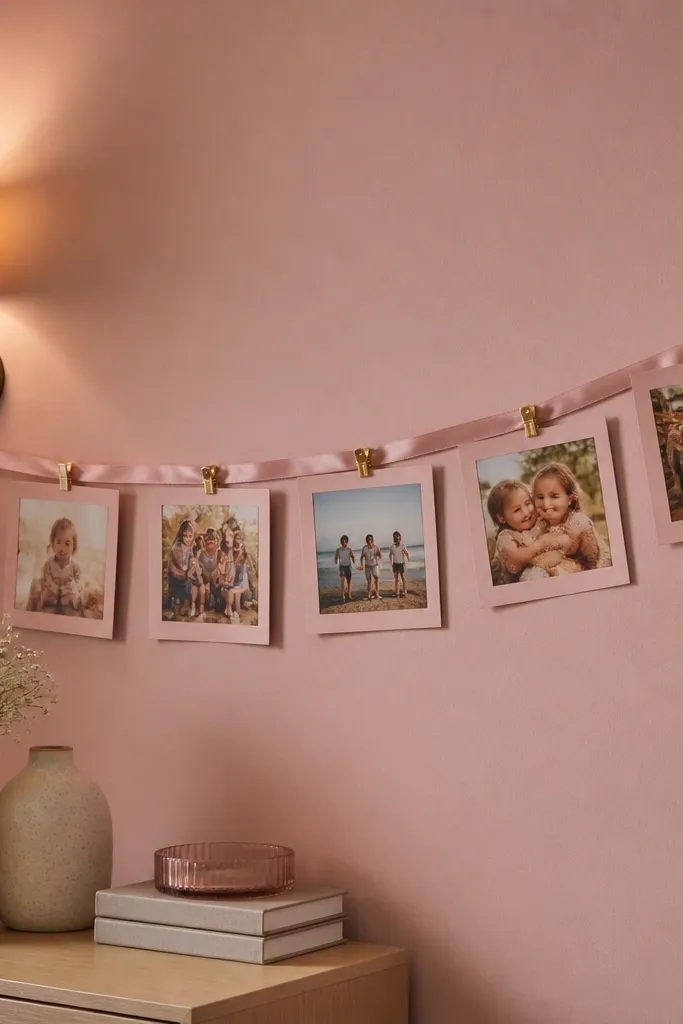
This is a clean, modern take on a pink aesthetic photo wall collage. One long ribbon line acts like a baseline, so every photo feels aligned even when you vary sizes slightly. The dreamy part comes from the gentle curve of the ribbon and the consistent color palette. Use mostly square photos for a tidy look, then add one larger rectangle as the anchor. This suits entryways and above desks because the line is visually efficient and doesn’t overwhelm the room.
Mount two hooks at the ends of your layout and stretch a long satin ribbon between them, leaving a slight sag. Print square photos like 4x4 and mount them on white cardstock so they hold shape. Clip photos along the ribbon with small metal or blush clothespins, keeping the top edges roughly in the same plane. Hang the larger anchor photo at the center point first, then distribute the rest evenly on both sides.
Choose a ribbon width around 3/4 inch so it looks intentional and doesn’t look like craft string.
Don’t clip photos too close together; leave at least 2 inches between pieces.



